1
Datum/Date
2004-10-22
Utgåva/Issue
1
Sida/Page
1(14)
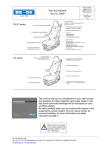
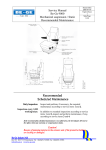
Illustrated seat
Be-Ge 86-52
incl Rotolift 3
Service Manual
Be-Ge 8652
Recommended Maintenance
Recommended
Scheduled Maintenance
Daily Inspection:
Inspections every 1,000
working hours:
Inspect and perform, if necessary, the required
maintenance according to service items 1 and 2.
In addition to extended inspections according to service
items 1 and 2, inspect and perform maintenance, if any,
according to service items 3 and 4.
If the recommended scheduled maintenance is not adhered to, Be-Ge Industri AB
reserve the right to limit any warranty or compensation claims.
Be-Ge Industri AB
Box 912 S-572 29 Oskarshamn. Tel. +46(0)491-761800. Fax +46(0)491-81900.
[email protected] www.be-ge.com
Datum/Date
2004-10-22
Utgåva/Issue
1
Sida/Page
2(14)
Service Manual
Be-Ge 8652
Recommended Maintenance
Contents
Instruction
Page
Foreign Objects
Height adjustment Rotolift
Rotation Rotolift
Lengthways adjustment
Frame Fastening
Seatback Adjuster
Seat Cushion Adjuster
Armrest
Change of rotation barrier
3
3
3
4
4
5
6
7
7
Appendix 1
Operating instruction 8652, Rotolift 3
8
Appendix 2;
Assembly instruction 8652, Rotolift 3
9
Appendix 3;
Dismantling of Seatback and
Seat cushion
10
Appendix 4
Replacement instruction to slide rails
11
Appendix 5
Mounting instruction of 2-point belt
12
Appendix 6
Service instruction Rotolift 3
13
Appendix 7
Troubleshooting Chart 8652, Rotolift 3 14
Be-Ge Industri AB
Box 912 S-572 29 Oskarshamn. Tel. +46(0)491-761800. Fax +46(0)491-81900.
[email protected] www.be-ge.com
Service Manual
Be-Ge 8652
Recommended Maintenance
Inspection
1.
Check that the seat adjustment
controls work normally and
that foreign objects do not jam
them.
Service Instruction
Datum/Date
2004-10-22
Utgåva/Issue
1
Sida/Page
3(14)
Illustration
Remove objects, if any.
If any adjustment control does not
work normally – See service items
3–8.
If the seat is fitted with safety
If any belt element is damaged, rebelt, check that all belt elements place the entire belt kit. See service
are undamaged.
appendix 5.
If the seat is very dirty then it can be
cleaned/sprayed with normal textile
cleaning. The textile cleaning and
protection kit can be supplied by
Be-Ge Industri AB.
Instructions on the package.
2.
Check that the seat retains its
adjusted height and that the
Rotolifts action is of
satisfaction.
If the function does not work
satisfactory, i.e. if the seats Rotolift
cannot be lowered or raised or does
not rotate.
See service item 8 and service
appendix 6.
If the rotation pedals allowance is
more than 2 mm, then the catch plate’s
needs to be changed.
Se service item 8 and service appendix
6.
An annual maintenance and relubricating is to be done according to
service appendix 6.
Be-Ge Industri AB
Box 912 S-572 29 Oskarshamn. Tel. +46(0)491-761800. Fax +46(0)491-81900.
[email protected] www.be-ge.com
Heightadjustment
Rotationbrake
Service control
Service Manual
Be-Ge 8652
Recommended Maintenance
Inspection
3.
Check lengthways adjustment.
Service Instruction
Datum/Date
2004-10-22
Utgåva/Issue
1
Sida/Page
4(14)
Illustration
Lubricate the slide rails of the seat
runner thinly with grease (Texando 20
or the equivalent).
Move the seat to its end positions in
order to lubricate the rails in between.
Before lubricating, clean the slide rails
with a lint-free cloth.
Replace the slide rails, if the
allowance (sideways or lengthways)
of the slide rails exceeds 1 mm.
Replacement of slide railsSee service appendix 4
Appliances:
Lint-free cloth
Grease (Texando 20 or the equivalent)
Brush
Box wrench 13 mm
4.
Check the bolts and frame
fastening of the seat.
An annual maintenance and regreasing of the seatback and seat
cushion slide surfaces is to be done.
NB. Make sure of that no grease is
added onto the back adjustment
locking. Recommended grease is
Kernite, Skidoo, or equivalent.
Check for loose bolts.
Check the seat fastening to the floorand / or the frame (1).
To dismantle/assemble driverseat and
rotolift- See service appendix 2
Appliances:
Box wrenches 13mm
(x 4)
1
(x 4)
Be-Ge Industri AB
Box 912 S-572 29 Oskarshamn. Tel. +46(0)491-761800. Fax +46(0)491-81900.
[email protected] www.be-ge.com
Datum/Date
2004-10-22
Utgåva/Issue
1
Sida/Page
5(14)
Service Manual
Be-Ge 8652
Recommended Maintenance
Inspection
5.
Check the seatback adjuster
and the seatback high
adjustment function.
Service Instruction
Illustration
If the seatback does not keep position
and does not keep the positioned
angle, then the seatbacks angle
adjustment gasspring needs to be
changed.
Remove the seat cushion (1).
See service appendix 3
Loosen the gassprings front locking
(2).
Strike out the tension peg at the rear
attachment (3) on the frame back
section alternatively unscrew the
gascylinders body from the rear
attachments of the fork attachement
Change the gasspring.
Appliances:
Slotted chisel
Box wrench 17 mm
Riveting Punch 7 mm
Striking tool
Grease solvent cleaner
(CRC™ Bräkleen, or equivalent)
Grease
(Recommended grease is of type
Kernite, Skidoo, or equivalent)
NB.
No grease
1
If the seatback does not keep position
and does not keep the positioned
height then dirt/grease or similar
might have got in the locking surface
for the height adjustment locking
eccentric.
This calls for cleaning of the frames
tube profile, back frames inner tube
profile and eccentric locking parts.
Recommended cleaning is CRC™
Bräkleen or equivalent.
An annual maintenance and relubricating of the seatback and seat
cushion slide surfaces is to be done.
NB. Make sure of that no grease is
added onto the back adjustment
locking. Recommended grease is
Kernite, Skidoo, or equivalent.
Be-Ge Industri AB
Box 912 S-572 29 Oskarshamn. Tel. +46(0)491-761800. Fax +46(0)491-81900.
[email protected] www.be-ge.com
3
2
Datum/Date
2004-10-22
Utgåva/Issue
1
Sida/Page
6(14)
Service Manual
Be-Ge 8652
Recommended Maintenance
Inspection
6.
Check the seat adjuster and the
seats lengthways adjustment.
Service Instruction
Illustration
If the seat cushion adjuster does not
keep position and does not keep the
positioned angle, then the seat angle
adjustment gasspring needs to be
changed.
Dismantle the seat from the Rotolift
and turn the seat upside down,
alternatively remove the seat cushion
(1). See service appendix 3
Appliances:
Box wrench 13 mm
Slotted chisel
Riveting Punch 7 mm
Striking tool
Loosen the gassprings rear locking
(2).
Strike out the tension peg at the front
attachment (3) on the frame back
section alternatively unscrew the
gascylinders body from the rear
attachments of the fork attachment
4
1
Change the gasspring.
If the seat cushions does not keep it’s
lengthways position then the latch rod
needs to be replaced (4). The latch
rod is placed underneath the seat
cushion and is dismantled/mounted
easily, without tools, by pulling the
rod sideways out of its fastening
points.
2
3
Be-Ge Industri AB
Box 912 S-572 29 Oskarshamn. Tel. +46(0)491-761800. Fax +46(0)491-81900.
[email protected] www.be-ge.com
Service Manual
Be-Ge 8652
Recommended Maintenance
Inspection
7.
Check of the armrests fastening
points and folding.
Appliances:
Slotted chisel
Box wrench 17 mm
Allen wrench 6 mm
Service Instruction
Datum/Date
2004-10-22
Utgåva/Issue
1
Sida/Page
7(14)
Illustration
If the armrest does not lock in the
fastening point in the seat cushion
then the lock screw underneath the
seat cushion (1) needs to be tightened.
(Allen wrench 6 mm).
If the folding of the armrest does not
work satisfactorily then adjust the nut
lock (2).
Recommended dynamometric for the
inner nut is approx. 10Nm and for the
outer nut the approx. minimum
dynamometric is 24Nm (max 47Nm).
1
If the slide washer (3) is worn out it
should be replaced.
3
2
8.
Change of catch plate on
Rotolifts.
Appliances:
Slotted chisel
Box wrench 13 mm
If the rotation barriers function
allowance exceeds 2mm, then the
catch plate’s needs to be replaced.
The catch plates are changed by
dividing the Rotolift with help of the
service barrier (1).
Loosen the lock handle (2) and springs
(3). Change the catch plates (4) and
re-mount the lock handle and springs.
See service appendix 6
Note.
The inner of the Rotolift is sensitive
against dirt and great precaution is
to be taken when the Rotolift is
apart for service.
Be-Ge Industri AB
Box 912 S-572 29 Oskarshamn. Tel. +46(0)491-761800. Fax +46(0)491-81900.
[email protected] www.be-ge.com
3
2
4
1
Service Manual
Be-Ge 8652
Recommended Maintenance
Datum/Date
2004-10-22
Utgåva/Issue
1
Sida/Page
8(14)
Appendix 1
Operating instruction 8652 with Rotolift 3
Infinite adjustment of
lumbar-support
Turn the tangent forward to
increase the lumbar support
Height adjustment
backrest, 120mm
Turn the tangent backwards and
adjust the height
Lenght adjustment seat
cushion, 100mm
Pull the tangents on each
side upwards
Tilt backrest, 35°
Pull the loop upwards
Lenght adjustment on slide
rails,200mm
Pull the loop upwards
Tilt of seat, 12,5°
Pull the lever
Infinite height adjustment 100mm
Pull the lever
Turning
Push the pedal down
to turn the seat
Separation lock for service
Push the pedal to lift the seat from
the base
Be-Ge Industri AB
Box 912 S-572 29 Oskarshamn. Tel. +46(0)491-761800. Fax +46(0)491-81900.
[email protected] www.be-ge.com
Service Manual
Be-Ge 8652
Recommended Maintenance
Datum/Date
2004-10-22
Utgåva/Issue
1
Sida/Page
9(14)
Appendix 2
Assembly instruction 8652 with Rotolift 3
1.
Assemble the seat to rotolift by locking the bolt
(M8x20 x4) and nuts (M8 lockn. x4) (1)
Note the washers!
Screw kit 820070;
422040 Bolt M8x20 M6S FZB SMS 2165
440027 Washer BRB 8,4x16x1,5 FZB
430015 Locking nut M8 low FZB K6
Use a spanner, box wrench or a socket wrench 13 mm.
Dynamometric approx. 24 Nm.
Be-Ge Industri AB
Box 912 S-572 29 Oskarshamn. Tel. +46(0)491-761800. Fax +46(0)491-81900.
[email protected] www.be-ge.com
(1)
Service Manual
Be-Ge 8652
Recommended Maintenance
Datum/Date
2004-10-22
Utgåva/Issue
1
Sida/Page
10(14)
Appendix 3
Dismantling instruction of seatback and seat cushion8652
Dismantling seatback
1.
Disconnect the wire control for the seatback (1)
(1)
Disconnect electrical contacts that are between the back
and seat, if any.
2.
Disconnect the rubber band stop in the backrest
trim (2) that is connected on the lengthways
level in the seat cushion.
(2)
Release the backrest locking level (3) and pull
upwards in order to take away the backrest
from the back frame.
Dismantling seatcushion
3.
Disconnect the seat cushions locking screw. (4)
(3)
(4)
Disconnect the rubberband stop in the backrest
trim (2) that is connected on the lengthways
level in the seat cushion.
Release the seatcushions lenghtways level (5)
(two levels, one on each side of the
seatcushion) and slide the cushion forwards in
order to get it of the seat frame.
Reassemble
4.
Reassemble the seatback and seatcushion in
reverse order.
Be-Ge Industri AB
Box 912 S-572 29 Oskarshamn. Tel. +46(0)491-761800. Fax +46(0)491-81900.
[email protected] www.be-ge.com
(5)
Service Manual
Be-Ge 8652
Recommended Maintenance
Datum/Date
2004-10-22
Utgåva/Issue
1
Sida/Page
11(14)
Appendix 4
Exchange instruction slide rails 8652
1.
Dismantle the seat from rotolift by loosen the
bolts (M8x20 x4) and nuts (M8 lockn. x4) (1)
NB The washers!
Use a spanner, box wrench or a socket wrench 13 mm.
(1)
2.
Dismantle the slide rails by loosen the nuts (M8
lockn. x4) (2)
Move the seat to its front position to reach the
rear bolts and to its rear position to reach the
front bolts.
(2)
Use a spanner, box wrench or a socket wrench 13 mm.
3.
Reassemble according to item 1 and item 2
in reversed order.
NB the washers!
The slide rails loop (3) is attached in pins on
the inside of each rail and locked by the tension
in springs.
(3)
Be-Ge Industri AB
Box 912 S-572 29 Oskarshamn. Tel. +46(0)491-761800. Fax +46(0)491-81900.
[email protected] www.be-ge.com
Service Manual
Be-Ge 8652
Recommended Maintenance
Datum/Date
2004-10-22
Utgåva/Issue
1
Sida/Page
12(14)
Appendix 5
Monteringsinstruktion 2-punktsbälte 86-52 (instr nr 627715)
Eftermontering av 2-punktsbälte på Be-Ge 8652 sker genom att använda sig av befintliga skruvhål i sittramen.
Bältesrullen (1) monteras på stolens vänstra sida och bälteslåset (2) på höger sida.
Mounting of 2-point belt on Be-Ge 8652 is done by using existing holes in the seat frame.
The belt roller (1) is mounted on the left side of the seat and the belt locking device (2) on the right side.
Bältessatsen 621641innehåller följande detaljer/ The belt-kit621641 consists of the following details :
Pos. 1
Höftrullbälte fast låsdel med beslag / 2-point belt fixed locking device
with bracket
1st/1pcs
Bälteslås med beslag / belt locking device with bracket
1st/1pcs
Tapp (3) / Bolt (3)
2st/2pcs
Mutter 7/16” UNF (4) / Nut 7/16” UNF (4)
2st/2pcs
Bricka (5) / Washer (5)
4st/4pcs
Pos. 2
Pos. 3
Pos. 4
Pos. 5
2
1
3
4
5
Skruva bort skruv som håller ryggen med stativet och montera
bältesrullen här med Tapp (3), bricka (5) och mutter (4).
Dismount the screw that holds the backrest to the base frame and
mount the roller belt here with bolt (3), washer (5) and nut (4).
Montera bälteslåset (2) på andra sidan i motsvarande hål med tapp (3),
bricka (5) och mutter (4).
Mount the belt locking device (2) on the oppsite side in corresponding
hole with bolt (3), washer (5) and nut (4).
OBS! Bältesrullen är vinkelkänslig ±2° och måste monteras med dess
beslag 0° i förhållande till horisontalplan. (se bild)
Beslagets undersida 0° i förhållande
tillhorisontallinje
Bracket of the belt roller 0° in comparison with
horizontal plane
NOTE! The belt roller will not function properly if the angle of its
bracket exceeds ±2° in comparison with its horizontal plane.
Be-Ge Industri AB
Box 912 S-572 29 Oskarshamn. Tel. +46(0)491-761800. Fax +46(0)491-81900.
[email protected] www.be-ge.com
Service Manual
Be-Ge 8652
Recommended Maintenance
Appendix 6
Serviceinstruction Rotolift 3
Be-Ge Industri AB
Box 912 S-572 29 Oskarshamn. Tel. +46(0)491-761800. Fax +46(0)491-81900.
[email protected] www.be-ge.com
Datum/Date
2004-10-22
Utgåva/Issue
1
Sida/Page
13(14)
Service Manual
Be-Ge 8652
Recommended Maintenance
Datum/Date
2004-10-22
Utgåva/Issue
1
Sida/Page
14(14)
Appendix 7
Troubleshooting chart Be-Ge 8652 with Rotolift
Problem
Be-Ge 8652 with Rotolift 3
Possible reason
Solution/Action
Burnt weld in the headrests tubes inside
The headrest can not be assembled of the backframe.
2-way headrest does not stay in
requested position.
The headrest pegs has the wrong angle.
Drill in the tube with a drill of diam. 10
approx. 200mm
Bend slightly the headrest pegs.
The plastic headrest grommet has the wrong
4-way headrest does not stay in dimension
Change the plastic headrest grommet
requested position
The seats back seams to have to
much allowance and does not work The gasspring is defected or has got
correctly
disconnected from its fastening point/s.
Change the gasspring or re-connect the
fastening points.
Heightadjustment barrier does not lock due to Clean the frametubes, backseats frame and
dirt/grease or similar
eccenter with CRC™ Bräkleen or equivalent
Heightadjustment barrier does not lock due toChange backseat cushion
defect eccentric lock
The seats cushion seams to have to
much allowance and does not work The gasspring is defect alternately
correctly
disconnected from is fastening point/s
Change the gasspring alternately re-connect
the fastening points
The armrest seams to have to
much allowance and does not work
correctly
Need of after adjustment of the nut locking
The slide washer is worn out
Slide rails of the seat appear to
have too much allowance
Defective bearing balls in the rails
Adjust the nut locking
Change the slide washer
Slide rails of the seat appear to be
slow
Rails are not clear of the frame
Check for distance washers between seat and
rotolift
Rotolift’s heightadjustment does
not work or does not work
correctly,
Replace the slide rails
Soiled rails
Clean and re-lubricate the slides
The gasspring is defect
Change gasspring
Dirt or similar is inside of the Rotolift
Rotolift rotation does not work or
does not work correctly
Catch plates or/and springs are defected
Dirt or similar is inside of the Rotolift
Clean and re-lubricate the Rotolift
Change the catch plates and/or springs
Clean and re-lubricate the Rotolift
Be-Ge Industri AB
Box 912 S-572 29 Oskarshamn. Tel. +46(0)491-761800. Fax +46(0)491-81900.
[email protected] www.be-ge.com