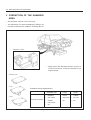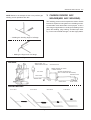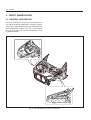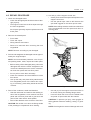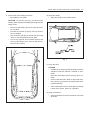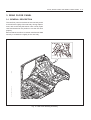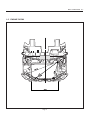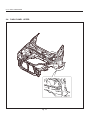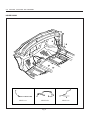
1
BODY REPAIR MANUAL
TACUMA
SECTION INDEX
BODY REPAIR
MANUAL
GENERAL INFORMATION
1
PREPARATIONS OF
BODYWORK
2
WELDING AND TOOLS
3
FRONT
4
ROOF, BACK PANEL AND
REAR FLOOR PANEL
5
FRAME DOOR OPENING, DOOR
AND SIDE PANEL OUTER
6
FENDER, HOOD AND
TRUNK LID
7
BODY DIMENSION
8
SEALING, CAULKING AND
DEADNER
9
RUST PREVENTION
10
BODY-FRAME REPAIR
EQUIPMENT
11
TACUMA
FOREWORD
This manual includes procedure for maintenance,
adjustment, service operation and removal and installation of components.
All information, illustrations and specifications contained in this manual are based on the latest product information available at the time of manual
approval.
The right is reserved to make changes at any time
without notice.
DAEWOO MOTOR CO., LTD.
INCHON, KOREA
SERVICE NOTICE
HOW TO USE THIS MANUAL
SPECIAL INFORMATION
This manual covers the repairs of TACUMA/REZZO automobile which has been involved in accidents, and it describes the work related to the replacement of damaged
body parts.
Please read through these instructions and familiarize
yourself with them before actually using this manual.
WARNING: Indicates a strong possibility of personal injury or equipment damage if instructions are not followed.
NOTE: REFER TO TACUMA/REZZO
SERVICE MANUAL FOR SPECIFICATIONS, WIRE HARNESS LOCATIONS, SAFETY STAND SUPPORT
POINTS, ETC.
NOTE: Gives helpful information.
CAUTION: Detailed descriptions of standard workshop
procedures, safety principles and service operations are
not included. Please note that this manual does contain
warnings and cautions against some specific service
methods which could cause PERSONAL INJURY, or
could damage a vehicle or make it unsafe. Please understand that these warnings cannot cover all conceivable ways in which service, whether or not recommended by DAEWOO might be done or of the possible
hazardous consequences of each conceivable way, not
could DAEWOO investigate all such ways. Anyone using service procedures or tools, whether or not recommended by DAEWOO, must satisfy himself thoroughly
that neither personal safety or tools, whether or not recommended by DAEWOO, must satisfy himself thoroughly that neither personal safety or vehicle safety will
be jeopardized.
All information contained in this manual is based on the
latest product information available at the time of printing. We reserve the right to make changes at any time
without notice. No part of this publication may be reproduced, stored in retrieval system, or transmitted, in any
form by any means, electronic, mechanical, photocopying, recording, or otherwise, without the prior written
permission of the publisher. This includes text, figures
and tables.
DAEWOO MOTOR CO., LTD.
INCHON, KOREA
SERVICE NOTICE
SUPPLEMENTAL RESTRAINT SYSTEM (SRS)
NOTICE: The following precautions should be observed
when performing sheet metal work, paint work and repair work around the locations of the SRS parts.
3. Do not apply heat of more than 80°C(176°F) when
drying painted surfaces anywhere around the locations of SRS parts.
1. SDM(Sensing and Diagnosis Module) are located
under the console ass'y. Avoid strong impact with
ass'y hammer or other tools when repairing the front
side frame and the lower part of the dashboard. Do
not apply heat to these areas with a gas burner, etc.
4. If strong impact or high temperature needs to be
applied to the areas around the locations of SRS
parts, remove the part before performing repair work.
2. SRS harness is located under the lower part of the
dashboard below the dashboard panel. (SRS harness
is covered with a yellow corrugated tube.) Care
should be taken not to damage the harness when
repairing this area.
DRIVE SIDE
AIRBAG MODULE
5. If any of the SRS related parts is damaged or deformed, be sure to replace it.
NOTE: Refer to the Service Manual(Supplemental Restraint System) for removal and replacement of SRS
related parts.
STEERING WHEEL
CONTACT COIL
PASSENGER SIDE
AIRBAGMODULE
AIRBAGMODULE
(SDM)
GENERAL INFORMATION 1–1
SECTION 1
GENERAL INFORMATION
CONTENTS
GENERAL INSTRUCTION .................................................................................................................... 1-2
IMPORTANT SAFETY NOTICE .......................................................................................................... 1-2
BODY SAFETY ...................................................................................................................................... 1-3
LOADS ON BODY PARTS .................................................................................................................. 1-3
USE OF NEW HIGH-QUALITY MATERIALS ..................................................................................... 1-3
CORROSION PROTECTION............................................................................................................... 1-3
SUMMARY ............................................................................................................................................. 1-3
ZINC TREATED STEEL PLATE REPAIR ........................................................................................... 1-4
TECHNICAL ILLUSTRATION .............................................................................................................. 1-6
BODY REPAIR PROCEDURES ........................................................................................................ 1-14
1–2 GENERAL INFORMATION
1. GENERAL INSTRUCTION
2. IMPORTANT SAFETY NOTICE
This publication is designed to help you the body repair
technician with your specialized work. Vehicle bodywork
has changed a great deal over the years. As vehicles
have developed technically, vehicle bodywork has also
had to meet new requirements with design, changes to
reconcile apparently conflicting demands to name just
a few examples:
2-1. BEFORE BEGINNING WORK
•
•
•
•
Disconnect the battery to reduce the possibility of
fire caused by electrical shorts.
•
Check for fuel leaks and repair as necessary.
•
Remove the fuel tank and/or fuel lines if welding
equipment is to be used near the fuel system.
•
Before welding, sanding or cutting, protect carpets
and seats with fire-proof covers.
•
Follow standard safety practices when using toxic
or flammable liquids.
The durability and ease of repair of the bodywork also
plays an important part.
•
Nowadays, the use of highly automated production
equipment makes it possible to maintain the tightest
tolerances and thus ensure a high level of quality.
Use standard safety equipment when spraying paint,
welding, cutting, sanding or grinding. Standard safety
equipment includes.
•
Respirator and filter masks: Designed to filter out
toxic fumes, mist, dust or other airborn particles. Use
a respirator or filter mask designed to protect you
from the hazards of the particular job; some respirators, for example, are designed to filter out only dust
and airborn particles, not toxic fumes.
•
Safety goggles or glasses: Designed to protect your
eyes from projectiles, dust particles or splashing liquid.
•
Gloves: Rubber gloves protect against corrosive
chemicals. Welding gloves protect against burns and
abrasions caused by welding, sanding or grinding.
•
Safety shoes: Non-slip soles protect against slipping.
Metal toe inserts protect against falling objects.
•
Ear plugs: Protect eardrums from harmful noise levels.
strength and safety
spaciousness
high quality
;
;
;
low weight
good aerodynamics
low price
When bodywork is damaged, the customer rightly expects it to be expertly repaired to the same quality standards.
At the same time, for his safety, the customer expects
you to have comprehensive knowledge of materials,
measuring and straightening methods, possible distortion, optimum corrosion prevention and much more
besides.
This publication is designed to help you update your
knowledge and give you an idea of what you require to
rectify moderate or severe accident damage, for your
own safety and for the satisfaction of your customers.
2-2. DURING WORK
•
Do not smoke while working near the fuel system.
•
Deposit gas or solvent-soaked shop towels in an
approved container.
•
Brake lining contains asbestos, which can cause
cancer. Do not use an air hose to blow off brake
assemblies: use only an approved vacuum cleaner,
and wear an approved filter mask or respirator.
•
Always attach a safety cable when using a hydraulic ram or a frame straightening table: do not stand
in direct line with the chains used on such equipment.
GENERAL INFORMATION 1–3
3. BODY SAFETY
Modern stressed-skin bodies are designed so as to have
a sturdy passenger cell protected by front and rear
crumple zones.
•
In an accident the crumple zones are designed to
convert impact energy into deformation work.
•
The shape, material and metal thickness must all be
precisely matched.
5. USE OF NEW HIGH-QUALITY
MATERIALS
•
The requirement for reduced body weight has lead to
a reduction in the amount of steel used, e.g. through
the use of thinner sheet steels.
This has been achieved with HIGH STRENGTH
SHEET STEELS, in spite of the need to meet higher
body strength requirements at the same time.
High strength steels have a tensile strength and a
yield strength as much as 30% higher than conventional steel. These properties must not be destroyed
when carrying out repairs, e.g. by using excessive
heat.
6. CORROSION PROTECTION
•
The durability of the bodywork, its associated longterm safety and retention of value largely depend on
the corrosion protection given to the sheet metal.
Here, DAEWOO takes a great deal of care in production.
Many years of experience, refined computational
methods and expensive series of crash tests mean
that DAEWOO now builds bodies giving optimum deformation in the crumple zones in frontal or rear impacts.
•
Therefore, this corrosion protection must be preserved or restored when repairs are carried out.
When repairing body damage, it is therefore imperative
to restore the original structure and strength in order to
guarantee the safety of the occupants.
•
All DAEWOO vehicles are built to the highest standards in terms of styling and material properties.
•
These high quality standards must be maintained
when accident repairs are carried out.
4. LOADS ON BODY PARTS
•
Mistakes made when carrying out repair operations
such as straightening, welding sheet-metal parts, etc.
not only produce visible defects, but may also compromise the safety of the vehicle.
•
Mistakes made when restoring the corrosion protection compromise durability.
Fig. 1 Body Shell
•
•
The earlier practice of making a distinction between
load bearing and non-loading bearing parts of vehicles
with a chassis and body is no longer justified now.
Every part, even the windows, contributes to the overall strength of the vehicle.
THEREFORE, WITH MODERN DAEWOO BODIES,
ONE TALKS OF HIGHLY STRESSED AND LESS
HIGHLY STRESSED PARTS.
7. SUMMARY
1–4 GENERAL INFORMATION
8. ZINC TREATED STEEL PLATE
REPAIR
The zinc plated steel plate used in some panels of the
LANOS requires different repair techniques than ordinary
steel plate.
ZINC PLATING(45microns)
Steel plate
Fig. 2
1. Before spot welding the zinc plated steel plate, remove the paint from both sides of the flange to be
welded. Apply sealer to the flange after welding.
CAUTION: To prevent eye injury, wear goggles or
safety glasses whenever sanding, cutting or grinding.
NOTE: Seal the sanded surfaces thoroughly to prevent rust.
2. The electric continuity properties of zinc plated steel
plate is different from ordinary steel plate. When spot
welding, increase the current by 10-20%, or increase
the resistance welding time.
Increase the number of weld spots by 10-20% also.
NOTE: The MIG welding procedures for zinc plated
steel plate are the same as for ordinary steel plate.
CAUTION: To prevent eye injury and burns when
welding, wear an approved welding helmet, gloves and
safety shoes.
3. Before applying putty or body filler to the zinc plated
steel plate, sand the zinc plating thoroughly to promote adhesion and prevent blistering.
NOTE: Use only epoxy-based putties and fillers on
zinc plated steel plate.
GENERAL INFORMATION 1–5
BLANK
1–6 GENERAL INFORMATION
9. TECHNICAL ILLUSTRATION
Fig. 3
GENERAL INFORMATION 1–7
1. Panel Side Outer
15.Reinforce "D" Filler Rear
2. Panel Side Lower
16.Reinforce "C" Filler
3. Cap Fuel Filler
17.Reinforce Retract Rear
4. Panel Tail Lamp Housing Lower
18.Rear Seat Belt Upper
5. Panel Tail Lamp Housing Center
19.Patch Wheel House Inner
6. Panel Tail Lamp Housing Upper
20.Patch Wheel House Inner
7. Door Striker
21.Front Door Hinge
8. Front Filler Lower
22.Front Door Hinge Upper
9. Reinforce Rocker
23.Front Filler Upper
10.Center Filler Inner
24.Rocker Front
11.Rail Roof Side
25.Seat Belt Front
12.Extension Side Inner Front
26.Rear Door Hinge
13.Panel Side Inner Rear
27.Patch Center Filler
14.Bracket Trim Mounting Rear Upper
28.Reinforce Center Filler
1–8 GENERAL INFORMATION
Fig. 4
GENERAL INFORMATION 1–9
1. Front Panel Upper
32.Extension Front Longitudinal
2. Support Front Panel Center
33.Brace Front Longitudinal
3. Crossmember Radiator Rear
34.Longitudinal Front Inner
4. Crossmember Radiator Front
35.Reinf Front Longitudinal Inner
5. Support Front Panel Side Inner
36.Support Crossmember Radiator Inner
6. Support Front Panel Side Outer
37.Longitudinal Front Inner
7. Reinf Front Panel Side
38.Reinf Stay Front Bumper
8. Brace Wheel House
39.Support Crossmember Radiator Outer
9. Rocator S/Absorber
40.Cap Brake Booster
10.Extension Wheel House Front
41.Panel Dash Lower Inner
11.Bracket Fender
42.Panel Dash Lower
12.Wheel House Front
43.Crossmember Dash Inner Lower Center
13.Wheel House Rear
44.Crossmember Dash Inner Lower Side
14.Pannel Dash Upper Side
45.Crossmember Dash Outer Lower Center
15.Stiffener Torque
46.Reinf Wiper Motor
16.Bracket Torque
47.Crossmember Dash Outer Lower Side
17.Bracket Aircleaner
48.Panel Front Filler Inner Center
18.Bracket Engine Upper
49.Panel Front Filler Inner Lower
19.Bracket Engine Rear
50.Bracket Steering Column Lower
20.Bracket Power Steering Reserver
51.Bracket Steering Column Rear
21.Support Tray Battery Inner
52.Bracket Steering Column Upper
22.Tray Battery
53.Crossmember Dash Upper
23.Bracket Fuse Box Lower
54.Head Dash Upper
24.Bracket Fuse Box Upper
55.Panel Dash Upper
25.Reinf Tray Battery
56.Panel Dash Top
26.Bracket T/M
57.Bracket Surgetank
27.Bar Towing Front
58.Reinf Hinge Hood
28.Support Wheel Carrier Front
59.Reinf Wiper Center
29.Reinf Front Longitudinal Outer Rear
60.Patch Dash Lower Center
30.Patch Reinf Longitudinal Outer
61.Reinf Tunnel Upper Front
31.Reinf W/Carrier Rear
1–10 GENERAL INFORMATION
Fig. 5
GENERAL INFORMATION 1–11
1. Panel Front Floor
20.Reinf Rear Longitudinal Rear
2. Reinf Tunnel
21.Hanger Extension Pipe Rear Inner
3. Tunnel Front
22.Hanger Extension Pipe Rear Inner
4. Reinf Tunnel Upper Rear
23.Crossmember Rear Floor Center Side
5. Panel Second Floor Rear
24.Reinf Rear Longitudinal
6. Reinf Second Floor Rear Inner
25.Crossmember Rear Floor Rear
7. Reinf Second Floor Rear Outer
26.Crossmember Rear Floor Rear Side
8. Longitudinal Floor Rear
27.Panel Rear Floor Rear Side
9. Crossmember Front Seat Rear
28.Crossmember Rear Floor Front
10.Crossmember Front Seat Front
29.Support Rear Seat Rear
11.Support Front Seat Inner
30.Seat Upper Spring
12.Support Front Seat Outer
31.Crossmember Rear Seat Front
13.Tunnel Rear
32.Crossmember Rear Seat Rear
14.Support Retracter
33.Panel Rear Floor Rear
15.Reinf Floor Side
34.Reinf Striker
16.Bracket Rear Axle Outer
35.Reinf Back Panel Lower Center
17.Crossmember Rear Floor Center
36.Reinf Back Panel Lower Side
18.Panel Floor Side Rear
37.Panel Back Lower
19.Longitudinal Rear
1–12 GENERAL INFORMATION
Fig. 6
GENERAL INFORMATION 1–13
1. Front Panel
11.Rear Door
2. Front Wheel House
12.Floor Panel Side
3. Bracket Engine
13.Rear Frame
4. Dash Panel Lower
14.Front Floor
5. Front Longitudinal
15.Rear Floor
6. Brace Wheel House
16.Back Panel Lower
7. Fender
17.Tail Gate
8. Reinf Front Filler Lower
18.Roof
9. Side Body
19.Engine Hood
10.Front Door
20.Dash Panel Upper
1–14 GENERAL INFORMATION
10. BODY REPAIR PROCEDURES
No.
Operation
Procedure
1
Inspection
Inspect the damaged parts and the extent of damage and make
plans for the repair.
2
Preparation
Prepare the new parts, special repair tools and others.
3
Removal
Remove the related parts for repair.
4
Pull out
Roughly pull out and straighten the damaged areas.
5
Cut and pry off
Cut off the damaged areas and drills on the spot weld nuggets
and pry off the remaining spot weld flanges.
6
Peel off
Peel off the undercoat and sealer.
7
Molding
Mold damaged areas and even out the welding flanges and fill
any holes.
8
Set the new parts
Grind both sides of the welding section and set the new parts and
tack welds for temporary installation.
9
Inspection
Inspect the dimensions for correct position and preinstall the exterior parts and check the clearances and level differences.
10
Welding
Perform a trial welding and the main welding.
11
Finish
Finish the welding areas and even out the flanges for a close fit.
12
Sealing
Apply the sealer to the matching and over lapped surface.
13
Undercoating
Apply the undercoat to the required areas.
14
Painting
Apply the paint.
15
Deadner
Apply the deadner to the designated areas.
16
Anti-rust agents
Coating the anti-rust agents to the designated areas.
17
Installation
Install the related parts and rub in grease to the moving parts and
replenish the cooling liquid, oil, aircon gas and others.
18
Check and adjust
Check all operations, wheel alignments, leaks, head lamp aim and
others with the specified check sheet.
Remarks
PREPARATIONS OF BODYWORK 2–1
SECTION 2
PREPARATIONS OF BODYWORK
CONTENTS
GENERAL DESCRIPTION .................................................................................................................... 2-2
CHECKPOINTS ..................................................................................................................................... 2-3
CORRECTION OF THE DAMAGED AREA ........................................................................................ 2-4
MEASURING SYSTEMS (WITHOUT SMALL DAMAGE).................................................................. 2-5
2–2 PREPARATIONS OF BODYWORK
1. GENERAL DESCRIPTION
•
Most monocoque bodies are composed as a single
unit by welding together pressed parts made of steel
plates which come in a variety of different shapes
and sizes. Each part is responsible for displaying a
certain strength and durability in order that it may
play its role in meeting the functions of the body as
a whole.
Damage to the exterior of the body can be inspected
visually, but where there has been an external impact,
it is necessary to inspect the extent of the damage. In
some cases, the deformation has spread beyond the
actual areas which were in the collision and so this has
to be inspected closely.
Unit: mm
Front wheel alignment:
Camber
Manual steering
Caster
Power steering
Toe-in ( 2-person load )
Rear wheel alignment:
-25' ± 45'
1°30' ± 1°
2°45' ± 1°
0° ± 10'
Camber
Toe-in
(2-person load)
Fig. 1
-1°40'±30'
-10' to 40'
PREPARATIONS OF BODYWORK 2–3
2. CHECKPOINTS
•
Accurate Inspection of Damaged Parts(Visual)
Seat Belts
Always replace the seat belt if:
1. The belt material is cut, punctured, burned or in any
way damaged.
2. The buckle or retractor does not work properly.
3. They were being worn at the time of a collision(also
check for damage at the seat belt anchor points).
4. Their condition is questionable.
Front Section:
1. Is there any bending, splitting, denting or other damage to the suspension and its related parts?
2. Is there any deformation of the front panel or radiator crossmember? Have any of the connected sections come apart?
3. Are there any creases or distortion in the front wheelhouse or side frame? Have any of the connected
sections come apart?
Rear Section:
1. Is there any twisting, bulging or denting of the rear
floor any rear bolsters? Have any of the connected
sections come apart?
2. Is there any irregular bulging or denting in the rear
fender?
3. Is there any distortion in the rear inner panel? Is there
any bending and denting in the vicinity of the rear
pillar?
4. Is there any distortion or creasing is the rear wheelhouse and arch sections? Have any of the connected
sections come apart?
5. Is there anything irregular in the rear glass seal clearance?
6. Is there any twisting or misalignment of the clearance of the trunk lid opening section?
7. Is there any bending, splitting, denting or other damage to the suspension and its related parts?
8. Is there any deformation of the rear floor
crossmember, trunk floor panel and back panel?
Have any of the connected sections come apart?
4. Is there any bending or twisting of the whole front
area?
Impact Beam :
5. Is there any deformation like creases, bulges, or
dents in the front pillar, dash panel, floor, etc.?
1. The external force makes the impact beam of door
inner deform.
6. Is there any vertical twisting or misaligned clearance
in the door?
Always replace impact beam if:
7. Is the windshield seal broken?
8. Is there any deformation in the vicinity of the top part
of the roof panel's center pillar?
9. Is there any damage inside the automobile(is there
any twisting of the dash panel, or anything irregular
with the clearances or sheet-mounting parts)?
10.Is there any damage to the steering wheel? Is there
any deformation in the column and the columnmounted parts?
11.Is there any oil or water leakage and damage to the
engine, transmission or brakes?
12.Is there any irregular noise in the gear changing
operation, engine and transmission rotation?
13.Are there any traces of contact between the engine
block and the center crossmember?
14.Is there any damage to brake or fuel lines, or wire
harnesses?
Always replace the door assembly if:
2. The external force makes the impact beam of front
bumper and rear bumper deform.
2–4 PREPARATIONS OF BODYWORK
3. CORRECTION OF THE DAMAGED
AREA
•
Set the frame corrector on the car body.
•
The side frame is to allow reshaping by pulling it out.
•
Use the horizontal pinch welds for anchoring the car.
UNDERBODY CLAMPS
•
Apply load to the damaged section and pull it
out until the section is almost restored to the
original shape.
STANDARD TYPE:
C-TYPE:
Underbody Clamp Specifications
Standard type
U-TYPE:
Frame correctors
U-type
C-type
•
Dataliner
•
Korek
•
U-Base
•
Car-o-liner
•
Auto pole
•
Pro-Tec
•
Celette
•
etc.
•
etc.
•
Flex-o-liner
•
etc.
Fig. 2
PREPARATIONS OF BODYWORK 2–5
4. MEASURING SYSTEMS
(WITHOUT SMALL DAMAGE)
•
Whenever possible, make judgements and conclusions based on measurement. Measure the wheel
alignment(see pages 2-2, 2-3) so as to prevent any
future trouble like unsymmetrical wear of the tires or
catching of the steering wheel.
•
If there are any deviations, use a tram tracking gauge
and measure parts of the body.(Below Fig. 4-1)
•
If there is any twisting to the body, measure using a
frame centering gauge.(Below Fig. 4-2)
•
When measuring body dimensions, use a universal
tram gauge.(Below Fig. 4-3)
POINTER C HOLDER
EXPANDING/CONTRACTING SCALE
REFERENCE SCALE
POINTER B
ADJUST SCREW A
ADJ
POINTER A
U
CR
ST S
REW
B
EW UST SC
J
AD
C
c.
el dis
POINTER C
whe bile.
e
h
t
o
r of
utom
mete
the a
e dia this to
h
t
is to Adjust
st th
Adju
Fig. 4-1
POINTER B– short pointer(height adjustment 15-290mm/0.59-11.42in.)
– long pointer(height adjustment 185-450mm/7.28-17.72in.)
SET RING
A
CLIP
POINTER 4
FRAME
HEIGHT
SET SCREW
FRAME
Move within a range of
250–1,570mm.
Fig. 4-2
Fig. 4-3
Fig. 3
WELDING AND TOOLS 3–1
SECTION 3
WELDING AND TOOLS
CONTENTS
SPOT WELDING .................................................................................................................................... 3-2
• General description ...................................................................................................................... 3-2
• Welding conditions ....................................................................................................................... 3-2
• Welding strength test ................................................................................................................... 3-3
GAS WELDING ...................................................................................................................................... 3-4
CARBON DIOXIDE ARC WELDER ..................................................................................................... 3-5
(MIG ARC WELDING)
REPAIR TOOLS..................................................................................................................................... 3-6
3–2 WELDING AND TOOLS
1. SPOT WELDING
1-1. GENERAL DESCRIPTION
Spot welding is also known as resistance spot welding
and it is the most suitable method of welding for automobiles. It has three main features: the welding can be
performed instantaneously, it exercises very little effect
on the mother material, and it reduces the generation
of distortion to the absolute minimum. However, please
remember to remove all paint and other impurities from
the surface of the material you intend to weld for reliable results.
1-2. WELDING CONDITIONS
When performing spot welding, make absolutely sure
that you conform to the conditions governed by the
current, conductivity time, welding pressure, holding
time, and shutdown time recommended for the spot
welder.
Please bear in mind the following points when welding:
•
Plate thickness and minimum welding pitch
Intervals
NOTE: When the welding intervals are too small, this
leads to branching, making it impossible to maintain
the desired soldering state.
(Unit : mm)
Plate thickness
0.6
0.9
1.2
1.6
Minimum intervals
11
16
20
24
Fig. 2
Transformer
Spot welder
Timer
Fig. 1 Welders
WELDING AND TOOLS 3–3
•
1-3. WELDING STRENGTH TEST
Plate thickness and tip diameter
(Unit : mm)
Plate thickness
0.6
0.9
1.2
1.6
Tip diamter
ø4.5
ø5.0
ø5.5
ø6.0
Even if you perform the welding in accordance with the
conditions, the strength of the welded sections may fluctuate widely with drops in the voltage and other factors.
The quality of the welding cannot be evaluated unless
the welded sections are destroyed.
Provide yourself with a steel plate of the same thickness and conduct a destruction test.
Tip diameter
•
If holes appear in the steel plates, this means that
the welding is standard strength.
•
Drive a wedge between two panels near the nugget. If the welded parts do not come apart and the
diameter of the nugget appears more than 3 mm,
the welding should be satisfactory.
Fig. 3
WEDGE
6~
9m
m/
30mm
Stop inserting the wedge when
the full size of the nugget appears.
Fig. 4
3–4 WELDING AND TOOLS
NOTE:
2. GAS WELDING
It is difficult to perform spot welding in the following circumstances.
•
When it is not possible to remove any rust or paint
attached to the welding surfaces.
•
When the tip of the spot welder cannot be inserted
into the welding section.
•
When the welding surfaces can be seen from the
outside and welding will impair the exterior appearance.
Gas welding is indispensable for body repair because
of the broad range of its applications from joining the
body panels, cutting the materials that construct the
body and applying heat to reform panels, and also because it is easy to get hold of the tools.
However, this method requires experience.
In all these cases, it is recommended that the gas welding method be employed. However, if it is not possible
to perform spot welding because of space restrictions,
plug welding based on the arc welding method may be
performed instead. Here the welding sections must be
close together.
WELDERS:
GAS ADJUSTER
GAS ADJUSTER
CUTTER
WELDER
OXYGEN/ACETYLENE TANKS
WELDING METHODS:
BUTT WELDING
FILLET WELDING OR SOLDERING
Fig. 5
DRILLING AND PLUG WELDING
WELDING AND TOOLS 3–5
NOTE: Below is an example of how not to perform gas
welding, avoid operations like this.
3. CARBON DIOXIDE ARC
WELDER(MIG ARC WELDING)
This welding process uses inexpensive carbon dioxide
instead of expensive inert gases as a shielding means.
Consumable metal electrodes are employed. It has a
wide range of applications, including butt welding of thin
plate, fillet welding, plug welding, and MIG spot welding. In terms of the weld strength, it is also highly stable.
• Welding the bending angle of a flange
• Melting the finger end of a flange
Fig. 6
WELDERS:
SINGLE-PHASE 110V
THREE-PHASES 200~240V
GAS REGULATOR
CARBON DIOXIDE OR ARGON
+ CARBON DIOXIDE
WELDING POWER SUPPLY
(BUILT-IN WIRE FEED MECHANISM)
WELDING TORCH
GAS HOSE
INPUT CABLE
GROUND WIRE
WORK CABLE
WELDING METHODS:
BUTT WELD
FILLET WELD
SPOT WELD
Fig. 7
PLUG WELD
WORK PIECE
3–6 WELDING AND TOOLS
4. REPAIR TOOLS
Item
Protective tools
Work
Operator
Tools. equipment used
1.
2.
3.
4.
5.
6.
Protective goggles
Cap
Ear plug
Shield for eyes
Overalls with long sleeves
Dust-proof mask
7. Protective apron
8. Welding gloves
9. Foot protectors
10.Safety shoes
11.Work gloves
12.Spattering guard
1
2
3
4
5
6
7
9
Vehicle body
12
Processing tools
Plug hole
8
10
11
Heat-resistant protective cover
DRILLING BLADE, DRILL, SPOT CUTTER
drilling
PUNCH
PRESSURE
DRILL
WELDING AND TOOLS 3–7
Item
Fixing tools
Work
Base metal fixing
Tools. equipment used
VISE GRIPS
SCREW CLAMP
SQUILL VISE
Shaping tools
Skin panel shaping
HAMMERS
DOLLIES
SPOONS
FILE/FILE HOLDER
SNIPS/SHEARS
Body, frame shaping
WELDER
BODY JACK
SLIDER HAMMER
3–8 WELDING AND TOOLS
Item
Measuring tools
Work
Tools. equipment used
Measuring
RULES
CONVEX RULES
Flange tools
Edge preparation
Cutting tools
AIR JIGSAW
AIR IMPACT CUTTER
HAND NIBBLER
HANDSAW
CHISEL
Sanding tools
Cleaning
DISC SANDER
Air type:
Electric type:
BELT SANDER
FRONT 4–1
SECTION 4
FRONT
CONTENTS
1. FRONT PANEL ................................................................................................................................ 4-2
• General description ........................................................................................................................ 4-2
• Repair procedure ........................................................................................................................... 4-3
2.
FRONT WHEELHOUSE ................................................................................................................. 4-6
• General description ........................................................................................................................ 4-6
• Repair procedure ........................................................................................................................... 4-7
3.
FRONT LONGITUDINAL .............................................................................................................. 4-11
• General description ...................................................................................................................... 4-11
• Repair procedure ......................................................................................................................... 4-11
4.
SUPPORT CONTROL ARM ........................................................................................................ 4-14
• General description ...................................................................................................................... 4-14
• Repair procedure ......................................................................................................................... 4-15
5. FRONT PILLAR ............................................................................................................................. 4-18
• General description ...................................................................................................................... 4-18
• Repair procedure ......................................................................................................................... 4-20
4–2 FRONT
1. FRONT PANEL
1-1. GENERAL DESCRIPTION
The front panel is joined to the front wheelhouse and
front longitudinal. It forms the base for the headlamps
and other parts and maintains the rigidity of the front
section of the body. Pay particular attention to twists
and parallelism and check mounting of related parts
when welding.
Fig. 1 Front Welding Assembly
FRONT 4–3
1-2. REPAIR PROCEDURE
1. Remove the related parts.
• Hood, radiator grill and front bumper.
4. Cut and pry off the front panel.
•
Center punch around the spot weld imprints.
•
Use the special spot cutter to drill holes at the
spot weld nuggets on the front wheel house and
longitudinal.
• Head lamps and fender.
• Engine, radiator and related parts.
• Aircon condenser and related parts.
• Others.
NOTE: When drilling holes be careful not to drill down
to the front wheelhouse and longitudinal themselves.
•
Cut off the front panel with an air chisel, leaving
the welding flanges intact.
•
Level and finish the burrs from the pried off spot
welds with disc sander.
CAUTION: To prevent eye injury, wear goggles or
safety glasses whenever sanding, cutting, or grinding.
Fig. 2
2. Roughly pull out and straighten the damaged area.
• Check the damage to the front wheelhouse and
front longitudinal before removing the front panel.
Use the frame straightener to roughly pull out and
repair the damaged front panel before removing
the front panel.
NOTE: Check the fit of the door, taking care not to
pull the damaged area out more than necessary.
• Use the horizontal pinch weld clamps and attach
the car to the frame straightener at the clamping
points securely.
3. Keep the body, level.
• Jack up the body, and place safety stands at the
four designated places of the frame door opening.
Fig. 3
5. Mold damaged related parts.
•
Use a hammer and dolly to mold damaged areas
of the front wheelhouse and longitudinal.
•
Even out the welding flanges with a hammer and
dolly.
•
Fill any holes drilled by welding.
4–4 FRONT
NOTE: Make sure that the right and left front panels
are in line with each others.
7. Measure the front compartment diagonally.
•
Measure the front compartment diagonally with a
tracking gauge or convex rule as shown to check
it for twisting or bending.
•
Temporarily assemble the fender, head lamps
and hood, then check the clearances and level
differences.
Fig. 4
6. Set the front panel.
• Grind both sides of the welding section of the front
panel with a sander to remove the paint and expose the steel plate.
CAUTION: To prevent eye injury, wear goggles or
safety glasses whenever sanding, cutting, or grinding.
• Clamp both the right and left sides with the vise
grips as shown.
Fig. 6
• Weld the clamped sections for temporary installation.
CAUTION: To prevent eye injury and burns when
welding, wear an approved welding helmet, gloves
and safety shoes.
Fig. 5
8. Perform the main welding.
•
Spot weld the front panel as shown.
CAUTION: To prevent eye injury and burns when
welding, wear an approved welding helmet, gloves
and safety shoes.
•
Perform a trial welding first, and check the welding condition.
•
Increase the number of spot by 20% for areas to
be spot welded.
FRONT 4–5
12.Coating the anti-rust agents.
•
Coating the anti-rust agents to the end of front
panel side and the door hinge areas.
Fig. 8
13.Install the related parts.
Fig. 7
9. Finish the welding areas.
• Use a hammer and dolly to even out the front
wheelhouse and longitudinal flanges for a close
fit with the surface of the front panel.
10.Apply the undercoat.
• Undercoat to the damaged areas of front wheelhouse and longitudinal if necessary.
11.Apply the paint.
•
Engine, radiator and related parts.
•
Aircon condenser and related parts.
•
Head lamps and fenders.
•
Hood, radiator grill, and bumper.
•
Others.
•
Install in the reverse order in which they were removed.
NOTE: After install the all related parts, rub in grease
to the moving parts and replenish cooling liquid,
break oil, aircon gas and others.
14.Check and adjust
•
Check clearances and level differences.
•
Check the hood locking and unlocking condition.
•
Adjust the head lamp aim.
CAUTION
•
Check all operation.
• Ventilate when spraying paint. Most paint contains
substances that are harmful if inhaled or swallowed.
•
Check for gas, oil and liquid leaks.
Rear the paint label before opening paint container.
• Avoid contact with skin. Wear an approved respirator, gloves, eye protection and appropriate
clothing when painting.
• Paint is flammable. Store in a safe place, and
keep it away from sparks, flames or cigarettes.
NOTE: Use specified check sheet for operation
check properly.
4–6 FRONT
2. FRONT WHEELHOUSE
2-1. GENERAL DESCRIPTION
The front wheelhouse component is constructed as a
unit with the locator shockabsorber. Therefore, replacement of the component affects the front wheel alignment.
When assembling it, either use a jig or follow dimensions on the body repair chart for positioning. It must
be welded carefully.
Fig. 9 Front Wheelhouse Welding Assembly
FRONT 4–7
2-2. REPAIR PROCEDURE
1. Remove the related parts.
CAUTION: To prevent eye injury, wear goggles or
safety glasses whenever sanding, cutting, or grinding.
• Parts to be removed when removing the front
panel.
• Parts on passenger side of dash panel lower
which are especially flammable.
• Instrument panel, wiring harness, related parts
and others.
2. Roughly pull out and straighten the damaged area
to approximately the original shape.
• Attach the car to the frame straightener by tightening the underbody clamps at the horizontal
pinch weld points.
• Before cutting off the damaged sections, pull them
out so that they are restored to the original shape.
• Do not pull out more than necessary.
• Pull out and straighten the damaged areas of the
rear wheelhouse and dash panel lower, front filar and other parts.
NOTE: Check the condition of the door and hinges.
Fig. 11
•
Using a chisel, pry off the welded flange from the
front body puller and wheelhouse.
4. Peel off the undercoat and sealer.
•
Heat the undercoat and sealer at the welding
areas of the wheelhouse and longitudinal with a
gas torch and peel off the undercoat and sealer
with a steel spatula.
5. Cut and pry off the front wheelhouse.
•
Center punch around the spot weld imprints on
the longitudinal and rear wheelhouse.
•
Use the special spot cutter to drill holes at the
spot weld nuggets on the center punched areas.
•
Cut off the front wheelhouse with an air chisel,
leaving the welding flanges intact.
•
Level and finish the burrs from the pried off spot
welds with disc sander.
Fig. 10
3. Remove the brace wheelhouse.
• Center punch around the spot weld imprints.
• Use the special spot cutter to drill holes at the
spot weld nuggets on the brace wheelhouse.
• Remove the MIG weld areas with a disc sander.
CAUTION: To prevent eye injury, wear goggles or
safety glasses whenever sanding, cutting, or grinding.
4–8 FRONT
•
Use a hammer and dolly to mold damaged areas
of the front longitudinal, rear wheelhouse and
other panels.
•
Even out the welding flanges with a hammer and
dolly.
7. Set the new front wheelhouse panel.
•
Grind both sides of the welding section of the
front, rear wheelhouse and front longitudinal with
a disc sander to remove the paint and expose
the steel plate.
CAUTION: To prevent eye injury, wear goggles or
safety glasses whenever sanding, cutting, or grinding.
•
Clamp to the front longitudinal with vise grips and
squill vises.
•
Clamp the front panel with vise grips.
NOTE: Use of jigs is recommended.
•
Weld the clamped sections for temporary installation.
Fig. 12
NOTE:
• If damage has occurred only front side, cut the
damaged section of the front wheelhouse, trim
the new panel to fit the remaining section, then
butt weld both parts at the inner ends.
CAUTION: To prevent eye injury and burns when
welding, wear an approved welding helmet, gloves
and safety shoes.
8. Measure the front compartment diagonally.
•
Measure the front compartment diagonally with a
tracking gauge or convex rule to check it for twisting or bending.
•
Temporarily assemble the fender and hood, then
check the clearances and level differences.
9. Perform the main welding.
•
Weld as much as possible with the jig still
mounted.
•
Perform a trial welding first, and check the welding condition.
•
Perform the welding.
Fig. 13
6. Mold damaged related parts.
• Fill any holes drilled by welding.
FRONT 4–9
SEALER TAPE
7
2
4
6
6
2
2
6
1
2
3
2
2
5
7
3
7
Fig. 15
11
3
3
5
12
1
11
1
5
2
6
11.Weld the brace wheelhouse.
•
Spot weld the brace wheelhouse as shown.
•
Make MIG or gas welds at the door hinge areas.
7
3
1
5
5
3
12
2
3
1
11
3
6
WHEN REPLACING THE
FRONT SIDE ONLY.
Fig. 14
CAUTION : To prevent eye injury and burns when
welding, wear an approved welding helmet, gloves
and safety shoes.
• Increase the number of spot by 20% for areas to
be spot welded.
10.Apply the sealer tape.
• Apply the sealer tape to the hinge and brace
wheelhouse matching area as shown.
Fig. 16
12.Finish the welding areas.
•
Use a hammer and dolly to even out the rear
wheelhouse and front longitudinal flanges for a
close fit with the surface of the front wheelhouse.
4–10 FRONT
13.Apply the sealer
• Apply the sealer to the matching and overlapped
surface.
14.Apply the undercoat.
• Undercoat to the inside of the front, rear wheelhouse and longitudinal.
15.Apply the paint.
CAUTION
• Ventilate when spraying paint. Most paint contains
substances that are harmful if inhaled or swallowed.
Read the paint label before opening paint container.
• Avoid contact with skin. Wear an approved respirator, gloves, eye protection and appropriate
clothing when panting.
• Paint is flammable. Store in a safe place, and
keep it away from sparks, flames or cigarettes.
16.Coating the anti-rust agents.
• Coating the anti-rust agents to the end of front
panel side and the door hinge areas.
17.Install the related parts.
• Wiring harness, instrument panel and related
parts.
• Parts of the passenger compartment.
• Parts to be installed when install the front panel.
• Others.
• Install in the reverse order in which they were removed.
NOTE: After install the all related parts, rub in grease
to the moving parts and replenish cooling liquid,
break oil, aircon gas and others.
18.Check and adjust
•
Measure the front wheel alignment.
•
Check clearances and level differences.
•
Check the hood locking and unlocking condition.
•
Adjust the head lamp aim.
•
Check all operation.
•
Check for gas, oil and liquid leaks.
NOTE: Use specified check sheet for operation check
properly.
FRONT 4–11
3. FRONT LONGITUDINAL
3-1. GENERAL DESCRIPTION
The front longitudinal is joined to the wheelhouse and
front panel, it forms the base for the front suspension,
engine, transmission and others. Therefore, replacement of the component affects the front wheel alignment
and maintains the rigidity of the front section. When
assembling it, either use a jig or follow dimensions on
the body repair chart for positioning. It must be welded
carefully.
4. Cut and pry off the front longitudinal.
NOTE: It's not necessary to separate the wheelhouse
from the front longitudinal if the wheelhouse is to be
replaced also.
•
Center punch around the spot weld imprints on the
wheelhouse and other related parts.
•
Use the special spot cutter to drill holes at the
spot weld nuggets on the center punched areas.
•
Cut off the front longitudinal with an air chisel, leaving the welding flanges intact.
•
Level and finish the burrs from the pried off spot
welds with a disc sander.
3-2. REPAIR PROCEDURE
1. Remove the related parts.
• Parts to be removed when removing the front panel
and front wheelhouse.
CAUTION: To prevent eye injury, wear goggles or
safety glasses whenever sanding, cutting, or grinding.
• Parts on passenger side of dash panel lower which
are especially flammable.
• Instrument panel, wiring harness, related parts and
others.
NOTE: Remove according to part damaged.
• Attach the car to the frame straightener by tightening the underbody clamps at the horizontal pinch
weld points.
• Do not pull out more than necessary.
NOTE: Check the condition of the door and hinges.
3. Peel off the undercoat and sealer.
• Heat the undercoat and sealer at the welding areas of the damaged parts with a gas torch and
peel off the undercoat and sealer with a steel
spatula.
CAUTION: Be careful not to burn the fittings inside
the passenger compartment when heating.
7
3
1
5
5
12
3
2
3
1
• Before cutting off the damaged sections, pull them
out so that they are restored to the original shape.
• Roughly cut off the front longitudinal according to
the extent of damage before roughly pulling out the
damage makes repair of the related parts difficult.
5
2
2. Roughly pull out and straighten the damaged area to
approximately the original shape.
11
3
6
Fig. 17
5. Mold damaged related parts.
•
Fill any holes drilled by welding.
CAUTION: To prevent eye injury and burns when
welding, wear an approved welding helmet, gloves
and safety shoes.
•
Reshape the wheelhouse and other damaged
parts and even out the welding flanges with a
hammer and dolly.
4–12 FRONT
3
2
2
5
7
3
7
11
3
3
5
1
12
11
FRONT WHEELHOUSE
1
Fig. 18
6. Cut the new front longitudinal to align it with body,
then set the wheelhouse and front panel.
• Cut the new front longitudinal with a hand saw
and it will be butt welded.
• Grind both sides of the welding section of the front
longitudinal and wheelhouse with a disc sander
to remove the paint and expose the steel plate.
CAUTION : To prevent eye injury, wear goggles or
safety glasses whenever sanding, cutting, or grinding.
6
Fig. 19
•
Spot weld the wheelhouse with the front longitudinal flange areas and front panel.
CAUTION: To prevent eye injury and burns when
welding, wear an approved welding helmet, gloves
and safety shoes.
•
Perform a trial welding first, and check the welding condition.
•
Increase the number of spot by 20% for areas to
be spot welded.
• Tighten the new front longitudinal against remaining parts with the vise grips and pliers.
• Place a jack under the front longitudinal end and
support it, and measure the positions for correct
setting.
3
2
2
5
• Set and clamp the front panel in place with the
vise grips.
11
5
1
11
6
Fig. 20
•
Level the weld beads at the longitudinal butt joints
area with disc sander.
•
Make the stiffener(Thickness: 2.8 mm Min., Width:
80 mm) according to the form of longitudinal butt
joint areas and weld the stiffener at the longitudinal butt joint areas with MIG welder.
7. Perform the main welding.
• Make MIG or gas welds at the butt joints at the
front longitudinal, carefully.
3
12
1
• Tack weld the clamped section for temporary installation.
• Weld as much as possible with the jig still
mounted.
3
7
3
NOTE: Use of jigs is recommended for correct positions and check that the both front longitudinal and
wheelhouse are parallel.
7
FRONT 4–13
13.Install the related parts.
3
2
2
5
7
11
5
3
12
1
11
1
Clean the passenger compartment.
•
Wiring harness, instrument panel and related
parts.
•
Parts of the passenger compartment.
•
Chassis components.
•
Engine, radiator and related parts.
•
Aircon condenser and related parts.
•
Head lamps and fenders.
•
Heed, radiator grill, and bumper.
•
Others.
•
Install in the reverse order in which they were removed.
3
7
3
•
6
Fig. 21
8. Finish the welding areas.
• Level the gas or MIG welded areas with disc
sander.
• Use a hammer and dolly to even out the wheelhouse and longitudinal flanges for a close fit.
NOTE: After install the all related parts, rub in grease
to the moving parts and replenish cooling liquid,
break oil, aircon gas and others.
14.Check and adjust
9. Apply the sealer.
• Apply the sealer to the joint areas of the dash
panel lower and floor panel areas.
10.Apply the undercoat.
• Undercoat to the joint and overlapped areas of
the front floor, longitudinal under side and the
inside of front, rear wheelhouse.
11.Apply the paint.
CAUTION:
• Ventilate when spraying paint. Most paint contains
substances that are harmful if inhaled or swallowed.
Read the paint label before opening paint container.
• Avoid contact with skin. Wear an approved respirator, gloves, eye protection and appropriate
clothing when painting.
• Paint is flammable. Store in a safe place, and
keep it away from sparks, flames or cigarettes.
12.Coating the anti-rust agents.
• Coating the anti-rust agents to the end of front
panel side and the front door hinge areas.
•
Check clearances and level differences.
•
Check the hood locking and unlocking condition.
•
Adjust the head lamp aim.
•
Check all operation.
•
Check for gas, oil and liquid leaks.
•
Check for water leaks in the passenger compartment.
NOTE: Use specified check sheet for operation
check properly.
4–14 FRONT
4. SUPPORT CONTROL ARM
4-1. GENERAL DESCRIPTION
The support control arm is joined to the front longitudinal and crossmember front floor panel. It forms the base
for the front suspension and is maintaining the rigidity
of the front parts. Pay particular attention to the position and dimensions of the weld joints and weld carefully.
3
2
4
2
2
12
2
2
15
12
14
15
12
Fig. 22 Support Control Arm Welding Assembly
FRONT 4–15
4-2. REPAIR PROCEDURE
1. Check the damaged areas.
• Check the damaged parts and the extent of damage properly.
• The support control arm receives impact through
the front longitudinal.
Such impact generally requires replacement of all
these parts.
5. Cut and pry off the support control arm.
•
Center punch around the spot weld imprints on the
support control arm.
•
Use the special spot cutter to drill holes at the
spot weld nuggets on the center punch areas.
NOTE: When drilling holes be careful not to drill down
to the crossmember front floor panel and other remaining parts.
2. Remove the related parts.
• Front seats.
• Trims and carpet.
• Wiring harness and others.
• Parts to be removed when removing the front
longitudinal.
NOTE: Remove according to part damaged.
12
2
3. Pull out and straighten the damaged area to approximately the original shape.
2
15
12
NOTE: Use heat-resistant protective cover for protect painting areas, seats, carpets and other parts.
• Before cutting off the damaged parts, pull out the
damaged area with the frame straightener and
correct the related parts such as the crossmember front floor panel and front floor panel.
14
15
• Do not pull out more than necessary.
• Check the clearance and level difference of the
front doors.
12
• Jack up the body and place safety stands at the
four designated places of the frame door opening. If necessary, place safety stands at the rear
of frame.
4. Peel off the undercoat, sealer and deadner.
• Heat the undercoat and sealer at the welding areas of the longitudinal, cross member front floor
panel and front floor panel with a gas torch and
peel off the under with a steel spatula.
• Peel off the deabner at the surface or front floor.
CAUTION: Be careful not to burn the fittings inside
of the passenger compartment when heating.
Fig. 23
•
Cut and pry off the support control arm with an
air chisel, leaving the welding flanges intact.
•
Level and finish the burrs from the drilled holes
and pried off spot welds with disc sander.
CAUTION: To prevent eye injury, wear goggles or
safety glasses whenever sanding, cutting, or grinding.
NOTE: Check again the extent of damage and crack.
4–16 FRONT
6. Mold damaged related parts.
• Reshape the dash panel lower, crossmember
front floor panel and other related parts with a
hammer and dolly.
CAUTION: To prevent eye injury, wear goggles or
safety glasses whenever sanding, cutting, or grinding.
•
• Even out the welding areas with a hammer and
dolly.
• Fill any holes drilled by welding.
7. Set the new support control arm.
• Preset the new support control arm at the position and marked welding position and will be
welded by MIG plug welding.
• Increase the number of plug welding by 20%.
• Drill holes through the marked position with a 5
mm drill for MIG plug welding.
Set the support control arm in place using a jack
and clamp with the vise grips.
NOTE: Use of jigs is recommended for correct positions.
•
Check the clearance and even out the flanges for
with a hammer and dolly.
8. Perform the main welding.
•
Plug weld the holes of support control arm with a
MIG welder.
CAUTION: To prevent eye injury and burns when
welding, wear an approved welding helmet, gloves
and safety shoes.
9. Finish the welding areas.
•
Level the plug welded areas with a disc sander.
10.Apply the sealer.
•
Apply the sealer to the inside of passenger compartment joint areas.
11.Apply the undercoat.
•
12
Undercoat to the surface of front floor,
crossmember front floor, support control arm and
others.
2
2
15
12.Apply the paint.
12
CAUTION
•
Read the paint label before opening paint container.
Fig. 24
• Grind both sides of the welding section of the support control arm and the matching surface of parts
with a disk sander to remove the paint and expose the steel plate.
Ventilate when spraying paint. Most paint contains
substances that are harmful if inhaled or swallowed.
•
Avoid contact with skin. Wear an approved respirator, gloves, eye protection and appropriate
clothing when painting.
•
Paint is flammable. Store in a safe place, and
keep it away from sparks, flames or cigarettes.
FRONT 4–17
13.Apply the deadner.
14.Install the related parts.
• Clean the passenger compartment.
•
Clean the passenger compartment.
• Apply the deadner to the surface of floor panel.
•
Wiring harness and related parts.
•
Parts of the passenger compartment.
•
Chassis components.
•
Parts of the front compartment.
•
Hood, radiator grill, and bumper.
•
Other.
•
Install in the reverse order in which they were removed.
NOTE: After install the all related parts, rub in grease
to the moving parts and replenish cooling liquid,
break oil, aircon gas and others.
LEFT SIDE ONLY
Fig. 25
15.Check and adjust
•
Measure the front wheel alignment.
•
Check clearances and level differences.
•
Check the hood locking and unlocking condition.
•
Adjust the head lamp aim.
•
Check all operation.
•
Check for gas, oil and liquid leaks.
•
Check for water leaks in the passenger compartment.
NOTE: Use specified check sheet for operation
check properly.
4–18 FRONT
5. FRONT PILLAR
5-1. GENERAL DESCRIPTION
The front pillar area is part of the frame door opening
panel. It's connected to the roof, windshield, door hinges
and floor frame and is important as a support for the
front side of the cabin. Connection of the front pillar
determines the position of the windshield and front door.
Align the fender, door and windshield while the front
pillar is temporary mounted, and check the clearances
and level differences.
Fig. 26 Front Pillar Welding Assembly
FRONT 4–19
5-2. REPAIR PROCEDURE
1. Remove the related parts.
CAUTION: To prevent eye injury, wear goggles or
safety glasses whenever sanding, cutting, or grinding.
• Hood, radiator grill and front bumper.
•
• Door and fender.
• Wiper, cowl and windshield.
Using a chisel, pry off the welded flange from the
front body pillar and wheelhouse.
• Weatherstrip and pillar trims.
• Instrument panel and wiring harness.
• Carpet and others.
2. Roughly pull out and straighten the damaged area.
• Check the damage to the wheelhouse and roof
before removing the brace wheelhouse and front
pillar and determine the extent of the damage.
• Use the frame straightener to roughly pull out and
repair the damaged front pillar before removing
the brace wheelhouse and front panel.
NOTE: Pull out until the pillar is lined up with the
surface of the windshield and do not pull out more
than necessary.
Fig. 28
4. Peel off the undercoat and sealer.
•
Heat the undercoat and sealer at the welding
areas of the wheelhouse and longitudinal with a
gas torch and peel off the undercoat and sealer
with a steel spatula.
5. Cut and pry off the front pillar.
•
Fig. 27
3. Remove the brace wheelhouse.
• Center punch around the spot weld imprints.
• Use the special spot cutter to drill holes at the
spot weld nuggets on the brace wheelhouse.
• Remove the MIG weld areas with a disc sander.
Cut off the front pillar along the bold lines as
shown in the figure below with a handsaw and
snips carefully.
NOTE: Be careful not to cut the inner section.
4–20 FRONT
it with a hand saw.
•
Cut the floor panel side joint area so it will overlap by 30mm(1.18in.) in the floor panel side with
a hand saw.
•
Grind both sides of the welding section with a disk
sander to remove the paint and expose the steel
plate.
•
Clamp the new panel in place with the vise grips.
•
Tack weld the clamped section for temporary installation.
Fig. 29
• Center punch around the spot weld imprints with
the rear wheelhouse, front body pillar inner, reinforcement front body pillar inner and floor panel
side.
• Use the special spot cutter to drill holes at the
spot weld nuggets on the front pillar.
NOTE: When drilling holes be careful not to drill down
to the front body pillar inner, reinforcement front body
pillar inner and floor panel side themselves.
30mm(1.18in.)
• Pry off the remaining flanges from the body with
an air chisel and leaving the welding flanges.
• Level and finish the burrs from the pried off spot
welds with a hammer, dolly and disc sander.
Fig. 30
CAUTION: To prevent eye injury, wear goggles or
safety glasses whenever sanding, cutting, or grinding.
6. Mold damaged related parts.
• Fill any holes drilled by welding.
CAUTION: To prevent eye injury and burns when
welding, wear an approved welding helmet, gloves
and safety shoes.
• Use a hammer and dolly to mold damaged areas
of the remaining inner panel and even out the
welding flanges.
7. Set the new front pillar.
• Align the new part with the top section, then cut
Fig. 31
FRONT 4–21
CAUTION: To prevent eye injury and burns when
welding, wear an approved welding helmet, gloves and
safety shoes.
• Remove the vise grips and temporarily install the
fender and doors, then check the clearances, level
differences and outer appearance.
•
Use a hammer and dolly to even out the spot welded
flanges for a close fit with the surface of the inner
panel.
•
Fill in deformations and level differences of the welded
areas with solder or putty, then finish.
10.Apply the sealer tape.
•
8. Perform the main welding.
• Weld the frame door opening area and pillar at
the butt joints with a gas or MIG welder.
Apply the sealer tape to the hinge and brace
wheelhouse matching area as shown.
SEALER TAPE
• Spot weld the flanges of the front pillar as shown.
CAUTION: To prevent eye injury and burns when
welding, wear an approved welding helmet, gloves and
safety shoes.
• Perform a trial welding first, and check the welding condition.
• Increase the number of spot by 20% for areas to
be spot welded.
Fig. 33
11.Weld the brace wheelhouse.
•
Spot weld the brace wheelhouse as shown.
•
Make MIG or gas welds at the door hinge areas.
Fig. 32
9. Finish the welding areas.
•
Level the gas or MIG welded areas with a disc sander,
then even out high areas with a hammer being careful not to deform them.
CAUTION: To prevent eye injury, wear goggles or
safety glasses whenever sanding cutting or grinding.
Fig. 34
4–22 FRONT
12.Finish the welding areas.
• Use a hammer and dolly to even out the brace
wheelhouse for a close fit with the surface of the
wheelhouse.
18.Check and adjust.
• Check the door for proper installation and operation.
• Check clearances and level differences.
• Check the hood locking and unlocking condition.
13.Apply the sealer.
• Apply the sealer to the matching and overlapped
surface.
14.Apply the undercoat.
• Undercoat to the inside of the front, rear wheelhouse and longitudinal.
15.Apply the paint.
CAUTION
• Ventilate when spraying paint. Most paint contains
substances that are harmful if inhaled or swallowed.
Read the paint label before opening paint container.
• Avoid contact with skin. Wear an approved respirator, gloves, eye protection and appropriate
clothing when painting.
• Paint is flammable. Store in a safe place, and
keep it away from sparks, flames or cigarettes.
16.Coating the anti-rust agents.
• Coating the anti-rust agents to the end of front
panel side and the door hinge areas.
17.Install the related parts.
• Clean the passenger compartment.
• Windshield, cowl and wiper.
• Wiring harness, instrument panel and related
parts.
• Carpet, trims and weatherstrip.
• Door.
• Fender and hood.
• Radiator grill, bumper and others.
• Install in the reverse order in which they were removed.
• Check all operation.
• Check for water leaks in the passenger compartment.
NOTE: Use specified check sheet for operation
check properly.
ROOF, BACK PANEL AND REAR FLOOR PANEL 5–1
SECTION 5
ROOF, BACK PANEL AND
REAR FLOOR PANEL
CONTENTS
1. ROOF ................................................................................................................................................ 5-2
• General description ....................................................................................................................... 5-2
• Repair procedure ........................................................................................................................... 5-3
2. BACK PANEL .................................................................................................................................. 5-7
• General description ....................................................................................................................... 5-7
• Repair procedure ........................................................................................................................... 5-8
3. REAR FLOOR PANEL .................................................................................................................. 5-11
• General description ..................................................................................................................... 5-11
• Repair procedure ......................................................................................................................... 5-12
5–2 ROOF, BACK PANEL AND REAR FLOOR PANEL
1. ROOF
1-1. GENERAL DESCRIPTION
Deformation of the roof panel is highly noticeable in
terms of the vehicle's outer appearance. Before replacing the roof, make sure that the body is horizontal.
Before welding the roof panel, adjust the frame door
opening flanges so that they contact the roof panel. Pay
particular attention to twists and parallelism.
Fig. 1 Roof Welding Diagram
ROOF, BACK PANEL AND REAR FLOOR PANEL 5–3
1-2. REPAIR PROCEDURE
1. Remove the related parts.
• Room lamp, door weatherstrip and pillar trims.
• Headlining and wiring harness.
• Wiper, cowl and windshield.
• Rear glass and others.
2. Pull out and straighten the damaged area to approximately the original shape.
CAUTION: To prevent eye injury, wear goggles or
safety glasses whenever sanding, cutting, or grinding.
5. Peel off the sealer.
•
Peel off the sealer with a steel spatula at the welding areas of the frame door opening.
6. Mold damaged related parts.
•
Use a hammer and dolly to mold damaged areas
of the front, rear body pillar inner and frame door
opening.
• Attach the car to the frame straightener by tightening the underbody clamps at the horizontal
pinch welds.
•
Even out the welding flanges with a hammer and
dolly for close fit with the roof panel welding
flange.
• Before cutting off the roof panel, pull them out so
that they are restored to the original shape.
•
Fill any holes drilled by welding.
NOTE: Use heat-resistant protective cover for protect painting areas, seats, carpets and other parts.
• Do not pull out more than necessary.
• Pull out and straighten the related damaged parts
to approximately their original shape.
NOTE: Make sure that the right and left pillars are
parallel with the windshield surface. Check the door
for proper opening and closing.
3. Keep the body, level.
• Jack up the body, and place safety stands at the
four designated places of the frame door opening.
4. Cut off the shaded areas of the roof panel.
7. Set the new panels.
•
Grind both sides of the welding section of the rail
windshield header, support roof panel, frame rear
roof panel and roof panel with a disc sander to
remove the paint and expose the steel plate.
CAUTION: To prevent eye injury, wear goggles or
safety glasses whenever sanding, cutting, or grinding.
•
Temporarily set the new three frames and roof
panel and clamp with the vise grips.
NOTE: Check that the flange surface fit closely. Be
careful not to twist or deform the roof panel.
• Cut the roof weld flanges with a hand saw and
snips at the roof panel and roof frames.
• Using a chisel, pry off the roof panel along the bold
lines as shown.
• Center punch around the spot weld imprints of the
roof welded flange.
• Drill holes using the spot cutter.
• Using a chisel and a disc sander, pry off the
welded flange from the front, rear body pillar and
roof panel.
• Level and finish the burrs of welded flanges with
a disc sander.
Fig. 2
5–4 ROOF, BACK PANEL AND REAR FLOOR PANEL
• Measure the dimensions diagonally at the windshield area and rear glass area with a tracking
gauge or convex rule as shown to check it for
twisting or bending.
Fig. 4
•
Set the new roof panel and clamp again.
•
Temporarily set the windshield and rear glass, and
check the roof panel for proper installation.
•
Install the roof molding and check the clearance
and outer appearance.
8. Apply the sealer to the roof frames.
•
Dismantle the new roof panel again.
•
Apply the sealer to one groove of the rail windshield header, two grooves of the support roof
panel and one groove of the frame rear roof panel.
•
Set and tack weld the roof panel.
Fig. 3
• Dismantle the new roof panel.
• Weld the clamped sections of the roof frames and
front, rear body pillar inner for temporary installation.
Fig. 5
ROOF, BACK PANEL AND REAR FLOOR PANEL 5–5
9. Perform the main welding and finish.
• Spot weld the roof panel.
10.Apply the sealer.
•
Apply the sealer to the welded areas.
CAUTION: To prevent eye injury and burns when
welding, wear an approved welding helmet, gloves and
safety shoes.
• Perform a trial welding first, and check the welding condition.
• Increase the number of spot by 20% for areas to
be spot welded.
• Use a hammer and dolly to smooth the spot weld
areas on the windshield and rear glass.
• Cut off the irregular and unuseful flanges and
even out the flanges for a close fit with the surface of the roof panel.
Fig. 7
11.Apply the paint.
CAUTION
•
Ventilate when spraying paint. Most paint contains
substances that are harmful if inhaled or swallowed.
Read the paint label before opening paint container.
•
Avoid contact with skin. Wear an approved respirator, gloves, eye protection and appropriate clothing when painting.
•
Paint is flammable. Store in a safe place, and keep
it away from sparks, flames or cigarettes.
12.Apply the deadner.
•
Fig. 6
Apply the deadner to the front inside of roof panel
as shown.
5–6 ROOF, BACK PANEL AND REAR FLOOR PANEL
13.Install the related parts.
• Windshield and rear glass.
• Cowl, wiper and related parts.
• Wiring harness and headlining.
• Pillar trims, door weatherstrip and others.
• Install in the reverse order in which they were removed.
14.Check and adjust.
• Clean the passenger compartment.
• Check the windshield and rear glass for water
leaks.
• Check the room lamp and other all operation.
ROOF, BACK PANEL AND REAR FLOOR PANEL 5–7
2. BACK PANEL
2-1. GENERAL DESCRIPTION
The back panel is joined to the side panel outer, rear
extension longitudinal and extension rear floor. It
forms the base for the rear combination lamps and
other parts and maintains the rigidity of the rear body.
Pay particular attention to twists and parallelism and
check mounting of related parts when welding.
Fig. 8 Back Panel Welding Assembly
5–8 ROOF, BACK PANEL AND REAR FLOOR PANEL
2-2. REPAIR PROCEDURE
•
1. Remove the related parts.
• Rear and trunk trims.
• Trunk lid lock and related parts.
• Rear combination lamps and wiring harness.
• Rear bumper and related parts.
Level and finish the burrs from the fried off spot
welds with disc sander and repair all cracks, holes
or other defects by welding also repair the floor
panel if necessary.
CAUTION: To prevent eye injury, wear goggles or
safety glasses whenever sanding, cutting, or grinding.
• Other related parts.
Fig. 10
Fig. 9
NOTE:
2. Roughly pull out and straighten the damaged area.
• Check the damage and roughly pull out and repair the related side panel inner, rear floor, rear
longitudinal and other damaged parts with the
frame straightener before removing the back
panel.
• Attach the car to the frame straightener by tightening the underbody clamps located at the jack
up designated points on the bottom of the frame
door opening.
•
If damage has occurred only on one side, cut the
damaged section of the rear panel, trim the new
panel to fit the remaining section, then butt weld
both parts at the inner ends.
•
Where damage has not extended into the rear
side outer panel, cut the rear panel from the body
on either panel.
3. Cut and pry off the rear panel.
• Center punch around the spot weld imprints with
the rear side outer and extension rear floor panel.
• Use the special spot cutter to drill holes at the
spot weld nuggets on the rear side outer and
extension rear floor panel.
NOTE: When drilling holes be careful not to drill down
to the side outer and extension rear floor panel themselves.
• Cut off the rear panel with an air chisel, leaving
the welding flanges intact.
Fig. 11
ROOF, BACK PANEL AND REAR FLOOR PANEL 5–9
4. Peel off the undercoat and sealer.
• Heat the undercoat and sealer at the welding
areas of the rear side outer panel and extension
rear floor with a gas torch and peel off the undercoat and sealer with a steel spatula.
7. Measure and check.
•
Measure the trunk compartment diagonally to
check it for twisting or bending and its correct
position with the rear bumper installed.
•
Temporarily assemble the rear combination lamps
and trunk, then check the clearances and level
differences.
5. Mold damaged related parts.
• Use a hammer and dolly to mold damaged areas
of the rear side outer and extension rear floor
panel.
• Even out the welding flanges with a hammer and
dolly.
• Fill any holes drilled by welding.
8. Perform the main welding.
•
Make MIG or gas welds at the butt joints.
•
Spot weld the back panel as shown.
CAUTION: To prevent eye injury and burns when
welding, wear an approved welding helmet, gloves
and safety shoes.
6. Set the new rear panel.
• Grind both sides of the welding section of the rear
panel with a sander to remove the paint and expose the steel plate.
•
Perform a trial welding first, and check the welding condition.
•
Increase the number of spot by 20% for areas to
be spot welded.
CAUTION: To prevent eye injury, wear goggles or
safety glasses whenever sanding, cutting, or grinding.
• Clamp both the right and left sides with the vise
grips as shown.
• Weld the clamped sections for temporary installation.
CAUTION: To prevent eye injury and burns when
welding, wear an approved welding helmet, gloves
and safety shoes.
Fig. 13
9. Finish the welding areas.
Fig. 12
•
Level the gas or MIG welded areas with disc
sander, then even out high areas with a hammer
being careful not to deform them.
•
Use a hammer and dolly to even out the rear side
outer and extension rear floor panel flanges for a
close fit with the surface of the rear panel.
5–10 ROOF, BACK PANEL AND REAR FLOOR PANEL
10.Apply the sealer.
• Apply the sealer to the rear side outer joint and
around the rear lamps areas of the rear panel.
• Apply the sealer to the extension rear floor panel
and rear panel joint.
11.Apply the undercoat.
• Undercoat to the joint and overlapped areas of
the rear floor under side.
12.Apply the paint.
CAUTION
• Ventilate when spraying paint. Most paint contains
substances that are harmful if inhaled or swallowed.
Read the paint label before opening paint container.
• Avoid contact with skin. Wear an approved respirator, gloves, eye protection and appropriate
clothing when painting.
• Paint is flammable. Store in a safe place, and
keep it away from sparks, flames or cigarettes.
13.Install the related parts.
• Clean the trunk compartment.
• Install in the reverse order in which they were removed.
14.Check and adjust.
• Check clearances and level differences.
• Check the trunk locking and unlocking condition.
• Check all operation.
• Check for water leaks in the trunk compartment.
NOTE: Use specified check sheet for operation
check properly.
ROOF, BACK PANEL AND REAR FLOOR PANEL 5–11
3. REAR FLOOR PANEL
3-1. GENERAL DESCRIPTION
The rear floor panel is the base of the rear body and it
is critical for the rigidity of the rear body. During replacement, refer to the body dimension chart or body repair
chart and determine the position to set the rear floor
properly.
Be sure that the rear floor is not bent or deformed. Weld
securely to maintain the rigidity of the rear body.
Fig. 14 Rear Floor Welding Assembly
5–12 ROOF, BACK PANEL AND REAR FLOOR PANEL
3-2. REPAIR PROCEDURE
1. Remove the related parts.
• Parts to be removed when removing the back
panel.
• Rear seat belt and rear seat.
• Muffler, fuel tank and related parts.
• Chassis parts.
• Other related parts.
CAUTION: Do not smoke while working near the fuel
system. Keep open flame away from the fuel system. If necessary, remove the fuel tank and off lines.
2. Roughly pull out and straighten the damaged area.
• Check the damage and roughly pull out and repair the related back panel, side panel, wheelhouse inner, rear longitudinal and other damaged
parts with the frame straightener before removing the extension rear floor panel, rear floor panel
and back panel.
Fig. 15
15 mm
(0.59in.)
REAR FLOOR
• Attach the car to the frame straightener by tightening the underbody clamps located at the jack
up designated points on the bottom of the frame
door opening.
FORWARD
NOTE: Measure in reference to the dimensions on
the body repair chart.
CROSS MEMBER REAR SEAT
3. Cut and pry off the back panel.
• The back panel to be cut and pried off when removing the back panel.
4. Cut and pry off the rear floor and extension rear floor
panel.
• Cut off the rear floor and extension rear floor with
a gas torch or air chisel leaving the spot welded
flanges of the rear longitudinal along the bold line
in the figure below.
NOTE: Cut the rear floor 15mm(0.59in.) from welded
flange of the cross member rear seat.
• Center punch around the spot weld imprints with
the rear longitudinal, extension rear longitudinal
and web plate.
• Use the special spot cutter to drill holes at the
spot weld nuggets on the center punched areas.
Fig. 16
NOTE: When drilling holes be careful not to drill down
to the rear longitudinal, extension rear longitudinal
and web plate themselves.
•
Cut and pry off the remaining rear floor and extension rear floor panel with an air chisel, leaving
the welding flanges intact.
•
Level and finish the burrs from the pried off spot
welds with disc sander and repair all cracks, holes
or other defects by welding also repair the rear
longitudinal and extension rear longitudinal if necessary.
CAUTION: To prevent eye injury, wear goggles or
safety glasses whenever sanding, cutting, or grinding.
ROOF, BACK PANEL AND REAR FLOOR PANEL 5–13
7. Cut the new rear floor to align it with the body, then
set the new rear floor and extension rear floor.
•
Cut the new part so it overlaps the cross member
rear seat by approximately 40mm.
NEW REAR FLOOR
40mm
REAR FLOOR
FORWARD
CROSS MEMBER REAR SEAT
Fig. 18
•
Fig. 17
5. Peel off the undercoat and sealer.
• Heat the undercoat and sealer at the welding
areas with a gas torch and peel off the undercoat
and sealer with a steel spatula.
6. Mold damaged related parts.
• Use a hammer and dolly to mold damaged areas
of the rear longitudinal and extension rear longitudinal.
• Even out the welding flanges with a hammer and
dolly.
• Fill any holes drilled by welding.
CAUTION: To prevent eye injury and burns when
welding, wear an approved welding helmet, gloves
and safety shoes.
• Level and finish the burrs from the pried off spot
welds with disc sander.
• Sand off the paint and undercoat from both sides
of the flange to be welded.
Grind both sides of the welding section of the rear
floor and extension rear floor with a disk sander
to remove the paint and expose the steel plate.
CAUTION: To prevent eye injury, wear goggles or
safety glasses whenever sanding, cutting, or grinding.
•
Set and clamp the new panel in place with the vise
grips.
NOTE: Use of jigs is recommended for correct positions and check that the both rear logitudinal is parallel.
•
Tack weld the clamped section for temporary installation.
CAUTION: To prevent eye injury and burns when
welding, wear an approved welding helmet, gloves
and safety shoes.
•
Remove the vise grips and temporarily install the
rear panel, then check the alignment, level differences and outer appearance.
5–14 ROOF, BACK PANEL AND REAR FLOOR PANEL
8. Remove the main welding.
• Weld the rear floor and cross member rear seat
with a MIG welder fillet weldings as shown.
NEW REAR FLOOR
REAR FLOOR
FORWARD
CROSS MEMBER REAR SEAT
Fig. 20
Fig. 19
• Spot weld the rear floor and extension rear floor
with rear longitudinal flange areas and web plate
flanges as shown.
CAUTION: To prevent eye injury and burns when
welding, wear an approved welding helmet, gloves
and safety shoes.
•
11.Apply the sealer.
•
• Perform a trial welding first, and check the welding condition.
• Increase the number of spot by 20% for areas to
be spot welded.
•
10.Finish the welding area.
• Level the MIG welded areas with a disc sander,
then even out high areas with a hammer being
careful not to deform them.
CAUTION: To prevent eye injury, wear goggles or
safety glasses whenever standing, cutting, or grinding.
Apply the sealer at the overlapped areas of the
rear floor and extension rear floor, and welded
surfaces of the matching panel and all sealing
gaps completely.
12.Apply the undercoat.
9. Weld the back panel
• The back panel to be welded when replacement
the back panel.
Use a hammer and dolly to even out the spot
welded areas for a close fill the flange surface
together.
Undercoat to the rear wheelhouse and designated
rear floor.
13.Apply the paint
CAUTION
•
Ventilate when spraying paint. Most paint contains
substances that are harmful if inhaled or swallowed.
Read the paint label before opening paint container.
ROOF, BACK PANEL AND REAR FLOOR PANEL 5–15
• Avoid contact with skin. Wear an approved respirator, gloves, eye protection and appropriate clothing when painting.
• Paint is flammable. Store in a safe place, and keep
it away from sparks, flames or cigarettes.
14.Apply the deadner.
• Clean the passenger and trunk compartment.
• Apply the deadner to the surface of rear floor and
extension rear floor.
15.Install the related parts.
•
Install in the reverse order in which they were removed.
16.Check and adjust
•
Check clearances and level differences.
•
Check the trunk locking and unlocking condition.
•
Check all operation.
•
Check for water leaks in the trunk compartment.
NOTE: Use specified check sheet for operation
check properly.
Fig. 21
FRAME DOOR OPENING, DOOR AND SIDE PANEL OUTER 6–1
SECTION 6
FRAME DOOR OPENING, DOOR AND
SIDE PANEL OUTER
CONTENTS
1. FRAME DOOR OPENING ............................................................................................................... 6-2
• General description ....................................................................................................................... 6-2
• Repair procedure ........................................................................................................................... 6-3
2. DOOR ............................................................................................................................................... 6-6
• Repair procedure ........................................................................................................................... 6-6
3. SIDE PANEL OUTER ...................................................................................................................... 6-8
• General description ....................................................................................................................... 6-8
• Repair procedure ........................................................................................................................... 6-9
6–2 FRAME DOOR OPENING, DOOR AND SIDE PANEL OUTER
1. FRAME DOOR OPENING
1-1. GENERAL DESCRIPTION
The frame door opening consist of frame door area and
side outer area. It forms the base for the front, rear doors
and other parts and maintains the rigidity of the doors
and roof. The frame door opening area should, depending on the degree of damage, be repaired as much as
possible rather than repalced.(Repair by pulling out)
Fig. 1 Frame Door Opening Welding Assembly
FRAME DOOR OPENING, DOOR AND SIDE PANEL OUTER 6–3
1-2. REPAIR PROCEDURE
1. Remove the related parts.
•
If the damage involves part of the center pillar, cut
them as shown.
• Doors.
• Weather strips, pillar trims and related parts.
• Carpet.
• Seat belt assembly
• Door switch and wiring harness.
• Fuel pipe and brake oil pipe.
• Other related parts.
NOTE: Remove according to part damaged.
2. Pull out and straighten the damaged area to approximately the original shape.
• Damage may extend to the inner roof frame, the
inner frame door opening and the floor. Determine
the extent of the damage first, so the frame can
be pulled out properly.
Fig. 3
•
Center punch around the spot weld imprints on the
welded flange.
•
Use the special spot cutter to drill holes at the
spot weld nuggets.
NOTE: Use heat-resistant protective cover for protect painting areas, seats, carpets and other parts.
• Pull out and straighten the damaged areas.
• Do not pull out more than necessary.
NOTE: When drilling holes be careful not to drill down
to the inner panel.
•
Pry off the frame door opening panel with an air
chisel, leaving the welding flanges intact.
3. Cut and pry off the frame door opening.
• Check the damage on the frame door opening, then
cut the new frame door opening so it will overlap
by 30mm in the pillar, front and rear.
• Cut the damaged area with a hand saw along the
bold line as shown.
NOTE: Be careful not to cut the inner panel. This
could result in extensive repair.
Fig. 2
CAUTION: To prevent eye injury, wear goggles or
safety glasses whenever sanding, cutting, or grinding.
4. Mold damaged related parts.
•
Fill any holes drilled by welding.
CAUTION: To prevent eye injury and burns when
welding, wear an approved welding helmet, gloves
and safety shoes.
•
Use a hammer and dolly to mold damaged areas
of the remaining inner panel and even out the
welding flanges.
•
Level and finish the burrs from the pried off spot
welds with disc sander.
•
Sand off the paint and undercoat from both sides
of the flange to be welded.
6–4 FRAME DOOR OPENING, DOOR AND SIDE PANEL OUTER
5. Set the new frame door opening.
• Grind both sides of the welding section of the prepared frame door opening part with a disk sander
to remove the paint and expose the steel plate.
•
Perform a trial welding first, and check the welding condition.
•
Increase the number of spot by 20% for areas to
be spot welded.
• Clamp the new panel in place with the vise grips.
• Tack weld the clamped section for temporary installation.
CAUTION: To prevent eye injury and burns when
welding, wear an approved welding helmet, gloves
and safety shoes.
Fig. 5
7. Finish the welding areas.
Fig. 4
• Remove the vise grips and temporarily install the
fender and doors, then check the clearances, level
differences and outer appearance.
6. Perform the main welding.
• Weld the front, rear frame door opening and center pillar at the butt joints with a gas or MIG
welder.
•
CAUTION: To prevent eye injury, wear goggles or
safety glasses whenever sanding, cutting, or grinding.
•
Use a hammer and dolly to even out the spot
welded flanges for a close fit with the surface of
the frame door opening panel.
•
Fill in deformations and level differences of the
welded areas with solder or putty, then finish.
• Spot weld the frame door opening and center
pillar as shown.
CAUTION: To prevent eye injury and burns when
welding, wear an approved welding helmet, gloves
and safety shoes.
Level the gas or MIG welded areas with a disc
sander, then even out high areas with a hammer
being careful not to deform them.
8. Apply the sealer.
•
Apply the sealer to the matching surfaces of the
floor and frame door opening.
FRAME DOOR OPENING, DOOR AND SIDE PANEL OUTER 6–5
9. Apply the undercoat.
12.Install the related parts.
• Undercoat to the front floor.
10.Apply the paint.
CAUTION
• Ventilate when spraying paint. Most paint contains
substances that are harmful if inhaled or swallowed.
Read the paint label before opening paint container.
• Avoid contact with skin. Wear an approved respirator, gloves, eye protection and appropriate
clothing when painting.
• Paint is flammable. Store in a safe place, and
keep it away from sparks, flames or cigarettes.
11.Coating the anti-rust agents.
• Coating the anti-rust agents to the inside of frame
door opening areas sufficiently.
WHOLE AREA OF
SIDE TUNNEL
INSERT THE SPRAY GUN NOZZLE THROUGH
THIS HOLES FOR COATING
Fig. 6
•
Clean the passenger compartment.
•
Wiring harness and related parts.
•
Seat belt assembly and carpet.
•
Trims and weather strips.
•
Door and others.
•
Install in the reverse order in which they were removed.
13.Check and adjust.
•
Check clearances and level differences.
•
Check the door locking and unlocking condition.
•
Check for water leaks in the passenger compartment.
6–6 FRAME DOOR OPENING, DOOR AND SIDE PANEL OUTER
2. DOOR
•
Check and adjust the clearances and level differences of doors, fender, pillar, roof and side panel
outers.
•
Check any deformation.
2-1. REPAIR PROCEDURE
1. Remove the related parts.
• Door trim and related parts.
• Wiring harness and solenoid valve.
• Glass and window lifter.
5. Remove the new door.
•
Remove the four bolts from door assembly.
• Linkage, lock set and handle.
• Others.
6. Apply the paint.
NOTE: Inspection and choose the usable parts.
CAUTION
•
2. Remove the door.
• Remove the bolt from door check hinge(1) and remove the four bolts from door assembly(2).
Ventilate when spraying paint. Most paint contains
substances that are harmful if inhaled or swallowed.
Read the paint label before opening paint container.
•
Avoid contact with skin. Wear an approved respirator, gloves, eye protection and appropriate clothing when painting.
•
Paint is flammable. Store in a safe place, and keep
it away from sparks, flames or cigarettes.
8. Coating the anti-rust agents.
•
Coating the anti-rust agents to the inside of bottom areas.
Fig. 7
3. Preparation of the new door.
• Preparation of the new door and check damaged
areas.
Fig. 8
4. Preinstall the door.
• Fix the four bolts.
FRAME DOOR OPENING, DOOR AND SIDE PANEL OUTER 6–7
9. Install the door.
• Install the door with four bolts.
• Install the door check link set in the door and fix
the bolt.
• Check clearances and level differences.
10.Install the related parts.
• Handle, linkage and lock set.
• Glass and window lifter.
• Solenoid valve and wiring harness.
• Install door trim and others.
NOTE: Before install the door trim and related parts,
rub in grease to the moving parts and check all operation.
11.Check and adjust.
• Check clearance and level differences.
• Check the door locking and unlocking condition.
• Check for water leaks in the passenger compartment.
6–8 FRAME DOOR OPENING, DOOR AND SIDE PANEL OUTER
3. SIDE PANEL OUTER
3-1. GENERAL DESCRIPTION
The side panel outer consists of side outer area and
frame door area. The side outer area is a conspicuous
part of the outer appearance of the vehicle. It is especially important for the body line continuing from door.
Therefore, pay particular attention to it when conducting
work. This part must be aligned with the rear door, trunk
lid, rear glass and other parts.
Fig. 9 Side Panel Outer Welding Assembly
FRAME DOOR OPENING, DOOR AND SIDE PANEL OUTER 6–9
3-2. REPAIR PROCEDURE
1. Remove the related parts.
• Rear and trunk trims.
• Rear combination lamps and wiring harness.
• Rear bumper and related parts.
• Rear seat and rear seat belt.
• Chassis and fuel parts.
• Other related parts.
CAUTION: Do not smoke while working near the fuel
system. Keep open flame away from the fuel system.
If necessary, remove the fuel tank and off lines.
2. Pull out and straighten the damaged area to approximately the original shape.
• Attach the car to the frame straightener by tightening the underbody clamps at the four designated
support points.
• Before cutting off the damaged sections, pull them
out so that they are restored to the original shape.
• Do not pull out more than necessary.
• Pull out and straighten the damaged areas of the
rear side outer panel, side inner panel and wheelhouse inner.
NOTE: Check the rear door locking and unlocking
condition.
3. Cut and pry off the side panel outer.
• Cut at the rear pillar and side outer(rear side of
frame door opening) along the bold lines as shown
with a handsaw and snips carefully.
Fig. 10
4. Mold damaged related parts.
•
Fill any holes drilled by welding.
CAUTION: To prevent eye injury and burns when
welding, wear an approved welding helmet, gloves
and safety shoes.
•
Use a hammer and dolly to mold damaged areas
of the remaining inner panel and even out the
welding flanges.
•
Sand off the paint and undercoat from both sides
of the flange to be welded.
5. Set the new side panel outer.
•
Cut the new side panel outer so it will overlap by
30mm in the frame door opening area with a hand
saw.
• Center punch around the spot weld imprints with
the rear panel, side panel inner and arch area.
• Use the special spot cutter to drill holes at the
spot weld nuggets on the rear side outer panel.
NOTE: When drilling holes be careful not to drill down
to the side panel inner and rear panel themselves.
• Cut the panel from the body with an air chisel,
leaving the welding flanges at the side inner panel,
wheelhouse inner and back panel intact.
• Level and finish the burrs from the pried off spot
welds with a hammer, dolly and disc sander.
CAUTION: To prevent eye injury, wear goggles or
safety glasses whenever sanding, cutting, or grinding.
Fig. 11
6–10 FRAME DOOR OPENING, DOOR AND SIDE PANEL OUTER
• Grind both sides of the welding section of the prepared side panel outer with a disk sander to remove the paint and expose the steel plate.
7. Finish the welding areas.
•
• Clamp the new panel in place with the vise grips.
• Tack weld the clamped section for temporary installation.
CAUTION: To prevent eye injury and burns when
welding, wear an approved welding helmet, gloves
and safety shoes.
• Remove the vise grips and temporarily install the
trunk lid and doors, then check the clearances,
level differences and outer appearance.
CAUTION: To prevent eye injury, wear goggles or
safety glasses whenever sanding, cutting, or grinding.
•
Use a hammer and dolly to even out the spot
welded flanges for a close fit with the surface of
the side panel outer.
•
Fill in deformations and level differences of the
welded areas with solder or putty, then finish.
6. Perform the main welding.
• Weld the frame door opening area and pillar at the
butt joints with a gas or MIG welder.
• Spot weld the flanges and wheel arch of the side
panel outer as shown.
CAUTION: To prevent eye injury and burns when
welding, wear an approved welding helmet, gloves
and safety shoes.
8. Apply the sealer.
•
Apply the sealer to the matching surfaces of the
web plate, back panel lower, rear combination
lamp area and side panel outer.
9. Apply the undercoat.
•
• Perform a trial welding first, and check the welding condition.
• Increase the number of spot by 20% for areas to
be spot welded.
Level the gas or MIG welded areas with a disc
sander, then even out high areas with a hammer
being careful not to deform them.
Undercoat to the rear wheelhouse and designated
rear floor.
10.Apply the paint.
CAUTION
•
Ventilate when spraying paint. Most paint contains
substances that are harmful if inhaled or swallowed.
Read the paint label before opening paint container.
•
Avoid contact with skin. Wear an approved respirator, gloves, eye protection and appropriate
clothing when painting.
•
Paint is flammable. Store in a safe place, and
keep it away from sparks, flames or cigarettes.
11.Coating the anti-rust agents.
Fig. 12
•
Coating the anti-rust agents to the inside of frame
door opening areas sufficiently.
12.Apply the deadner.
•
Apply the deadner to the inside of side panel outer
center.(Left side only)
FRAME DOOR OPENING, DOOR AND SIDE PANEL OUTER 6–11
Fig. 13
13.Install the related parts.
• Clean the passengers compartment.
• Wiring harness and related parts.
• Seat belt assembly and carpet.
• Trims and weather strips.
• Door and others.
• Install in the reverse order in which they were removed.
14.Check and adjust.
• Check clearances and level differences.
• Check the door locking and unlocking condition.
• Check for water leaks in the passenger compartment.
FENDER, HOOD AND TRUNK LID 7–1
SECTION 7
FENDER, HOOD AND TRUNK LID
CONTENTS
1. FENDER ........................................................................................................................................... 7-2
• Repair procedure ........................................................................................................................... 7-2
2. HOOD ............................................................................................................................................... 7-4
• Repair procedure ........................................................................................................................... 7-4
3. TRUNK LID ...................................................................................................................................... 7-6
• Repair procedure ........................................................................................................................... 7-6
7–2 FENDER, HOOD AND TRUNK LID
5. Coating the anti-rust agents.
1. FENDER
•
Coating the anti-rust agents to door hinge areas.
1-1. REPAIR PROCEDURE
1. Remove the related parts.
• Radiator grill and front bumper.
• Mud guard and fender liner.
2. Remove the fender
3. Preparation of the new fender.
• Preparation of the new fender and check damaged areas.
4. Apply the paint.
CAUTION
• Ventilate when spraying paint. Most paint contains
substances that are harmful if inhaled or swallowed. Read the paint label before opening paint
container.
• Avoid contact with skin. Wear an approved respirator, gloves, eye protection and appropriate
clothing when painting.
• Paint is flammable. Store in a safe place, and
keep it away from sparks, flames or cigarettes.
Fig. 2
Fig. 1
FENDER, HOOD AND TRUNK LID 7–3
6. Apply the mastic sealer.
7. Preinstall the fender.
• Apply the mastic sealer to the mounting bolts.
•
NOTE: Before apply the new sealer, check the current sealer status.
Fasten to the wheelhouse at two places with bolts.
Close the hood and check the front and rear clearances and level differences of the hood and door.
Fig. 4
SECT AA
8. Tighten fully.
FENDER
•
After checking and adjusting the mounting position, tighten all bolts fully.
DASH-TOP
9. Install the related parts.
REINF-HOOD, HINGE
•
Install in the reverse order in which they were removed.
BRACE-W/HOUSE
10.Check clearance
•
SECT BB
BRACKET-FENDER
FENDER
SECT CC
REINF-FRT PILLAR LWR
FENDER
Fig. 3
Check clearance of front bumper.
7–4 FENDER, HOOD AND TRUNK LID
4. Apply the paint.
2. HOOD
2-1. REPAIR PROCEDURE
CAUTION
•
1. Remove the related parts.
• Washer hose and nozzles.
• Wiring harness and others.
2. Remove the hood.
Ventilate when spraying paint. Most paint contains
substances that are harmful if inhaled or swallowed.
Read the paint label before opening paint container.
•
Avoid contact with skin. Wear an approved respirator, gloves, eye protection and appropriate
clothing when painting.
•
Paint is flammable. Store in a safe place, and
keep it away from sparks, flames or cigarettes.
• Remove the hood mounting bolts from two hinge
bows.
5. Preinstall the hood.
•
Fasten to the hood hinges bows at two places
with four bolts, carefully.
Fig. 5
3. Preparation of the new hood.
• Preparation of the new hood and check damaged
areas.
Fig. 6
FENDER, HOOD AND TRUNK LID 7–5
• Close the hood and check the front and rear clearances and level difference of hood, fender and
head lamps.
7. Install the related parts.
•
Washer hose and nozzles.
•
Install in the reverse order in which they were removed.
8. Check and adjust.
Fig. 7
6. Tighten fully.
• After checking and adjusting the mounting position, tighten all bolts fully.
•
Check clearances and level differences.
•
Check the hood locking and unlocking condition.
•
Check spray conditions of washer liquid and adjust washer spray nozzles on the hood panel.
7–6 FENDER, HOOD AND TRUNK LID
4. Apply the paint.
3. TRUNK LID
3-1. REPAIR PROCEDURE
CAUTION
•
Ventilate when spraying paint. Most paint contains
substances that are harmful if inhaled or swallowed.
1. Remove the related parts.
• Wiring harness and solenoid valve.
• Lock set, latch set and others.
2. Remove the trunk lid.
Read the paint label before opening paint container.
•
Avoid contact with skin. Wear an approved respirator, gloves, eye protection and appropriate
clothing when painting.
•
Paint is flammable. Store in a safe place, and
keep it away from sparks, flames or cigarettes.
• Remove the trunk lid mounting bolts from two
hinge bows.
5. Preinstall the trunk lid.
•
Fasten to the trunk lid hinges bows at two places
with four bolts, carefully.
•
Install bumper.
BUMPER
Fig. 8
(1,2)
3. Preparation of the new trunk lid.
• Preparation of the new trunk lid and check damaged areas.
(3,4)
3
4
2
1
Fig. 9
FENDER, HOOD AND TRUNK LID 7–7
• Close the trunk lid and check the clearances and
level difference of trunk lid, side panel outers and
rear combination lamps.
6. Tighten fully.
•
After checking and adjusting the mounting position, tighten all bolts fully.
7. Install the related parts.
•
Wiring harness and solenoid valve.
•
Lock set, latches and linkages.
•
Install in the reverse order in which they were removed.
8. Check and adjust.
Fig. 10
•
Clean the trunk compartment.
•
Check clearances and level differences.
•
Check the trunk lid locking and unlocking condition.
•
Check for water leaks in the trunk compartment.
BODY DIMENSION 8–1
SECTION 8
BODY DIMENSION
CONTENTS
1. BODY DRAWING ............................................................................................................................ 8-2
• Under Body .................................................................................................................................... 8-3
• Front Frame ................................................................................................................................... 8-4
• Rear Frame ................................................................................................................................... 8-5
• Front Panel .................................................................................................................................... 8-6
• Engine Room ................................................................................................................................. 8-7
• Side Outer ................................................................................................................................... 8-10
2. BODY WELDING DIAGRAM ........................................................................................................ 8-11
• Front Panel Upper ....................................................................................................................... 8-11
• Front Wheel House ..................................................................................................................... 8-12
• Brace Wheel House .................................................................................................................... 8-13
• Dash Panel Upper ....................................................................................................................... 8-14
• Dash Panel Lower ....................................................................................................................... 8-15
• Roof .............................................................................................................................................. 8-17
• Body Side and Wheel House Inner ............................................................................................ 8-18
• Rear Frame ................................................................................................................................. 8-19
• Tail Gate ....................................................................................................................................... 8-20
3. GAP CHART .................................................................................................................................. 8-21
8–2 BODY DIMENSION
1. BODY DRAWING
Front wheel alignment
Rear wheel alignment
Camber
-20´ ± 45´
Camber
-1°45´ ± 30
Caster
3°
Toe-in(2-person load)
5´ ± 30´
Toe-in(2-person load)
0 ± 10´
Fig. 1
BODY DIMENSION 8–3
1-1. UNDER BODY
Fig. 2
8–4 BODY DIMENSION
1-2. FRONT FRAME
Fig. 3
BODY DIMENSION 8–5
1-3. REAR FRAME
Fig. 4
8–6 BODY DIMENSION
1-4. FRONT PANEL
Fig. 5
BODY DIMENSION 8–7
1-5. ENGINE ROOM
Fig. 6
8–8 BODY DIMENSION
ENGINE ROOM(Continued)
Fig. 7
BODY DIMENSION 8–9
ENGINE ROOM(Continued)
Fig. 8
8–10 BODY DIMENSION
1-6. SIDE OUTER
Fig. 9
BODY DIMENSION 8–11
2. BODY WELDING DIAGRAM
2-1. FRONT PANEL UPPER
Fig. 10
8–12 BODY DIMENSION
2-2. FRONT WHEEL HOUSE
Fig. 11
BODY DIMENSION 8–13
2-3. BRACE WHEEL HOUSE
22
5
3
17
2
3
8
2 4
1
7
1 16
7
7
6
4
3
3
1
1
3
3
5 1
7
1
1
5
5
5
4
8
1
6
2
Fig. 12
3
2 2
6
8–14 BODY DIMENSION
2-4. DASH PANEL UPPER
Fig. 13
BODY DIMENSION 8–15
2-5. DASH PANEL LOWER
7
7
10
10
5
8
2
3
11
4
8
16
10
4
11
4
4
4
8
3
4
5
5
5
5
8
3
5
19
19
Fig. 14
5
5
5
8–16 BODY DIMENSION
DASH PANEL LOWER (Continued)
1
2
1
2
2
2
Arc welding
Arc welding
4
5
Fig. 15
BODY DIMENSION 8–17
2-6. ROOF
Fig. 16
8–18 BODY DIMENSION
2-7. BODY SIDE AND WHEEL HOUSE INNER
Fig. 17
BODY DIMENSION 8–19
2-8. REAR FRAME
Fig. 18
8–20 BODY DIMENSION
2-9. TAIL GATE
Fig. 19
Fig. 20
Hood x
Head Lamp
B
5+2
A
5+2
Location
Gap (mm)
3±1
C
Fender
Hood x
2±1
D
3±1
E
3+1
F
Trunk Lid
1.9
G
Tail lamp
Head Lamp x Side Outer x Side Outer x
Head Lamp Front Bumper
Fender x
3.5 ± 1
H
Tail Lamp
Trunk Lid x
Tail Lamp x
5+2
I
4±1
J
Rear Bumper Rear Bumper
Trunk Lid x
Check for water leaks in the passenger and trunk compartment
•
Hood x
Check clearance and level differences of main body, exterior panels, lamps and bumper
•
Front Bumper
Description
Check proper installation
•
BODY DIMENSION 8–21
3. GAP CHART
Fig. 21
G
5±1
Location
Gap (mm)
Door
Rocker Panel x
A pillar x
5±1
C
Front Door
I
4+1
H
4+1
Front Door x Rear Door
2±1
3±1
Gap (mm)
Description
B
Fender
A
Fender x
Head Lamp
Hood x
Location
Description
3.5+1
J
Side Outer
Rear Door x
5±1
D
Roof
Rear Door x
3+1
K
Side Outer
Trunk Lid x
5±1
E
C Pillar
Rear Door x
Fender x
1.9
L
Tail Lamp
Side Outer x
3.5+1
F
Front Door
8–22 BODY DIMENSION
SEALING, CAULKING AND DEADNER 9–1
SECTION 9
SEALING, CAULKING AND DEADNER
CONTENTS
1. SEALING & CAULKING ................................................................................................................. 9-2
Sealing............................................................................................................................................... 9-2
• Engine room .................................................................................................................................. 9-2
• Roof ................................................................................................................................................ 9-5
• Inside Room .................................................................................................................................. 9-6
• Floor & Trunk Room ..................................................................................................................... 9-7
• Hood ............................................................................................................................................... 9-8
• Trunk Lid ........................................................................................................................................ 9-9
• Front/Rear Door ......................................................................................................................... 9-10
Caulking .......................................................................................................................................... 9-11
• Engine room ................................................................................................................................ 9-11
• Under Body .................................................................................................................................. 9-12
• Back Panel .................................................................................................................................. 9-13
2. DEADER ......................................................................................................................................... 9-14
• General description ...................................................................................................................... 9-14
• Repair procedure ......................................................................................................................... 9-14
• Under Body .................................................................................................................................. 9-16
• Roof, Door ................................................................................................................................... 9-17
9–2 SEALING, CAULKING AND DEADNER
1. SEALING & CAULKING
NOTE: Seal the following areas to prevent air leaks water leaks, and rust.
1.1. SEALING
ENGINE ROOM
SECT A–A
SECT B–B
SECT C–C
Fig. 1 Engine Room
SECT D–D
SEALING, CAULKING AND DEADNER 9–3
ENGINE ROOM(Continued)
A
C
B
C
A
B
SECT A–A
SECT B–B
Fig. 2
SECT C–C
9–4 SEALING, CAULKING AND DEADNER
ENGINE ROOM (Continued)
C
B
A
VIEW B
VIEW C
VIEW A
Fig. 3
SEALING, CAULKING AND DEADNER 9–5
ROOF
A
A
RUB AFTER SEALING
SECT A–A
Fig. 4
9–6 SEALING, CAULKING AND DEADNER
INSIDE ROOM
B
B
C
A
C
A
SECT A–A
SECT B–B
Fig. 5
SECT C–C
SEALING, CAULKING AND DEADNER 9–7
FLOOR & TRUNK ROOM
RUB AFTER SEALING
SECT A–A
SECT B–B
SECT C–C
Fig. 6
SECT D–D
SECT E–E
9–8 SEALING, CAULKING AND DEADNER
HOOD
VIEW A
A
RUB AFTER
SEALING
A
A
SECT A–A
Fig. 7
SEALING, CAULKING AND DEADNER 9–9
TRUNK LID
A
VIEW A
RUB AFTER SEALING
A
RUB AFTER SEALING
RUB AFTER SEALING
SECT A–A
Fig. 8
A
9–10 SEALING, CAULKING AND DEADNER
FRONT / REAR DOOR
VIEW C
VIEW D
D
C
A
B
VIEW E
VIEW B
RUB AFTER SEALING
F
E
A
RUB AFTER
SEALING
EXCEPT SEALING
(3POINTS)
DOOR
DOOR
INNER
OUTER
SECT A–A
Fig. 9
VIEW F
EXCEPT SEALING RUB AFTER
(3POINTS)
SEALING
SEALING, CAULKING AND DEADNER 9–11
1-2. CAULKING
ENGINE ROOM
Fig. 10
9–12 SEALING, CAULKING AND DEADNER
UNDER BODY
Fig. 11
SEALING, CAULKING AND DEADNER 9–13
BACK PANEL
Fig. 12
9–14 SEALING, CAULKING AND DEADNER
2. DEADNER
2-1. GENERAL DESCRIPTION
Deadner is properly designed and applied for reduce the
vibration and noise. Also, it plays in maintaining the structural rigidity of the panel.
2-2. REPAIR PROCEDURE
1. Remove the related parts.
• Seats, carpet.
• Trims, others.
2. Removal of the damaged deadner.
• Peel off the damaged deadner with a steel spatula,
carefully.
3. Clean and dry.
• Before applying the deadner, thoroughly clean and
dry the areas to be applied.
Fig. 13
6. Install the related parts.
4. Prelocation the new deadner.
• Prelocation the new deadner on the panels to be
applied.
•
Install in the reverse order in which they were removed.
NOTE: Avoid the parts mounting holes and service
holes.
5. Adhension of deadner.
• Heat the surface of deadner with a torch or heating gun until it adheres itself.
• Push and adhere to the panel with a rubber
spatula.
NOTE: In order to take full advantage of the deadner,
its face must adhere and contact the panels perfectly.
CAUTION: Be careful not to burn the composite parts
when beating.
Fig. 14
SEALING, CAULKING AND DEADNER 9–15
11,12
3
9,10
7,8
13,14
2
6
5
1
15
4
Fig. 15 Deadner Chart
DEADNER CHART
NO
Unit : mm
DESCRIPTION
THICKNESS
MAX AREA
1
DEADNER - FLOOR PANEL FRT, LH
4.0
778x428(30.63x16.85)
2
DEADNER - FLOOR PANEL FRT, RH
4.0
778x428
3
DEADNER - FLOOR PANEL FRT, TUNNEL
4.0
740x360
4
DEADNER - FLOOR PANEL RR, LH
2.2
620x520
5
DEADNER - FLOOR PANEL RR, RH
2.2
620x520
6
DEADNER - FLOOR PANEL RR, TUNNEL
4.0
625x340
7
DEADNER - A PILLAR LH
1.5
140x80
8
DEADNER - A PILLAR RH
1.5
140x80
9
DEADNER - A PILLAR UPPER LH
1.5
70x50
10
DEADNER - A PILLAR UPPER RH
1.5
70x50
11
DEADNER - FRT WHEEL HOUSING LH
3.2
264x165
12
DEADNER - FRT WHEEL HOUSING RH
3.2
264x165
13
DEADNER - A PILLAR LH
1.5
140x80
14
DEADNER - A PILLAR RH
1.5
140x80
15
DEADNER - TRUNK SIDE, LH
3.2
300x200
REMARKS
RECTANGULAR
9–16 SEALING, CAULKING AND DEADNER
UNDER BODY
Fig. 16
SEALING, CAULKING AND DEADNER 9–17
ROOF, DOOR
Fig. 17
BODY REPAIR MANUAL (TACUMA/REZZO)
ISSUED BY
OVERSEAS SERVICE DIVISION
DAEWOO MOTOR CO., LTD.
409-7 CHONG CHON-DONG, PU PYONG-KU,
INCHON, KOREA
TELEPHONE : 82-32-509-7320~7326, 7350
FACSIMILE : 82-32-509-7205, 7206