1
LSX-500 Laser Ablation
System Operator’s Manual
Product Warranty Statement
SD Acquisition, Inc., DBA CETAC Technologies (“CETAC”), warrants any CETAC
unit manufactured or supplied by CETAC for a period beginning on the date of
shipment and ending on the sooner to occur of: (a) the date that is twelve (12)
months from the date of installation, or (b) the date that is thirteen (13) months from
the date of shipment. Units found in the reasonable judgement of CETAC to be
defective in material or workmanship will be repaired or replaced by CETAC without
charge for parts and labor. CETAC reserves the right to change or improve the
design of any unit without assuming any obligation to modify any unit previously
manufactured.
This warranty does not cover any unit that has been subject to misuse, neglect,
negligence, or accident. The warranty does not apply to any damage to the unit
that is the result of improper installation or maintenance, or to any unit that has
been operated or maintained in any way contrary to the instructions specified in the
CETAC instruction and operation manual. Operation of the CETAC unit inside a
laboratory fume hood is contra-indicated and will void the warranty. Any attempt to
repair or alter any CETAC unit by anyone other than by CETAC authorized
personnel or agents will void this warranty. If any non-CETAC component is
installed in the CETAC manufactured unit without the approval of CETAC, the
warranty will be voided. In addition, this warranty does not extend to repairs made
necessary by the use of parts, accessories or fluids which are either incompatible
with the unit or adversely affect its operation, performance or durability. CETAC’S
obligation under this warranty is strictly and exclusively limited to repair or
replacement of defective CETAC parts, and no claim of breach of warranty shall be
cause for cancellation or recission of the contract of sale of any unit.
The foregoing express warranty is in lieu of all other warranties, expressed or
implied, including warranties of merchantability and fitness for a particular purpose.
CETAC shall not be bound by any representations or statements on the part of its
employees or agents whether oral or in writing and including any made in
catalogues and other promotional material including technical details and
specifications except where such representations and statements are expressly made
part of this contract.
CETAC assumes no responsibility for incidental,
consequential or other damages, even if advised of such a possibility, including but
not limited to loss or damage of property, loss of revenue, loss of use of the unit,
loss of time, or inconvenience. CETAC’s liability
on any claim for loss or damage arising out of the sale, resale or use of any of its
products shall in no event exceed the selling price of the unit.
Purchaser shall indemnify CETAC against any claim or liability which may be
asserted as relates to the following: (i) the use to which any product supplied
hereunder is put infringes the patent, copyright or other intellectual property rights
of any third party; or (ii) any liability resulting from the failure by Purchaser to
observe the terms of this Warranty.
Returned Product Procedures
Claims for shipment damage (evident or concealed) must be filed with the carrier by
the buyer. CETAC must be notified within ninety (90) days of shipment of incorrect
materials. No product may be returned, whether in warranty or out of warranty,
without first obtaining approval from CETAC. No replacements will be provided nor
repairs made for products returned without such approval. Any returned product
must be accompanied by a return authorization number. The expense of returning
the unit to CETAC for service will be paid by the buyer. The status of any product
returned later than thirty (30) days after issuance of a return authorization number
will be subject to review. Shipment of repaired products will generally be made
forty-eight (48) hours after the receipt.
Products may not be returned which are contaminated by radioactive materials,
infectious agents, or other materials constituting health hazards to CETAC
employees.
Returned Product Warranty Determination
After CETAC’S examination, warranty or out of warranty status will be determined.
If a warranted defect exists, the product will be repaired at no charge and shipped
prepaid back to the buyer. If the buyer desires an air freight return, the product will
be shipped collect. Warranty repairs do not extend the original warranty period.
If an out of warranty defect exists, the buyer shall be notified of the repair cost. At
such time the buyer must issue a valid purchase order to cover the cost of repair
and freight, or authorize the products to be shipped back as is, at the buyer’s
expense. Failure to obtain a purchase order number approval within fifteen (15)
days of notification will result in the products being returned as is, at the buyers
expense.
COPYRIGHT
Copyright SD Acquisition, Inc., DBA
CETAC Technologies
480119 Version 1.01, October 2006
REPRODUCTION
All rights reserved. Reproduction or
transmission of this document in whole
or in part, and by any means without the
express written consent of the copyright
owner or authorized agent is prohibited.
Requests for additional copies of this, or
any other CETAC publication, can be
filled by contacting an authorized
distributor or
CETAC Technologies
Customer Service & Support
14306 Industrial Road
Omaha, Nebraska 68144, USA
Phone (800) 369-2822 (USA only)
Phone (402) 733-2829
Fax
(402) 733-1932
E-mail [email protected]
DISCLOSURE
This
document
contains
CETAC
proprietary data and is provided solely to
its customers for their express benefit of
safe,
efficient
operation
and
maintenance of the product described
herein. Use or disclosure of CETAC
proprietary data for the purpose of
manufacture or reproduction of the item
described herein, or any similar item, is
prohibited, and delivery of this document
shall not constitute any license or implied
authorization to do so.
REVISIONS
CETAC Technologies strives to provide
the scientific community with an
unparalleled combination of effective
technology
and
continuing
value.
Modular
upgrades
for
existing
instruments will continue to be a prime
consideration as designs progress.
CETAC Technologies reserves the right
to revise this document and/or improve
products described herein at any time
without notice or obligation. Warranty
registration entitles the named owner
exclusively to manual change pages/new
editions as they are published.
SAFETY
Instruments, accessories, components or
other associated materials may not be
returned to CETAC Technologies if
contaminated
with
biohazard
or
radioactive materials, infectious agents,
or any other materials and/or conditions
that could constitute a health or injury
hazard to CETAC employees.
Call
Customer Service and Support if there is
any question or doubt relative to
decontamination
requirements.
CAUTION and WARNING statements,
as applied in this document, shall be
interpreted consistent with the following
context:
CAUTION applies only to
potential property damage conditions;
WARNING applies to potential personal
injury conditions, in combination with or
exclusive of potential property damage.
WARNING
The
handling
of
organomercurial
concentrates which may be used in the
preparation
of
process
standards
presents a substantial (potentially lethal)
safety hazard. Only an experienced,
professionally trained organo-metallic
chemist, knowledgeable and skilled
specifically in the safe handling of
organomercurials
(using
approved
apparatus and approved protection
measures in an approved facility) should
attempt
to
prepare
diluted
organomercurial process standards from
concentrates.
NOTE
ORIGINAL PACKAGING
SD Acquisition, Inc., DBA CETAC
Technologies assumes no liability for the
handling
of
organomercurial
concentrates
or
the
preparation,
handling,
or
use
of
diluted
organomercurial process standards.
Retain original factory packaging for
moves and factory return shipments.
Shipping in anything other than the
original fitted foam and container can
result in incidental damage from which
the purchaser will not be protected
under warranty.
All user-serviceable components are
specifically identified in this document as
such; the balance shall be assumed to
require the expertise of a factory service
technician/engineer
for
adjustment,
repair, replacement, modification, etc.
Others not so qualified and performing
these actions shall do so at their own
risk. Furthermore, never operate the
instrument without first reading and
understanding the LSX-500 Laser
Ablation System Operator’s Manual and
ensuring that it is operated safely and
properly.
WARNING
Under all conditions the user must observe safe laboratory
procedures during the operation of this product.
Notices and Compliance Declarations
FEDERAL COMMUNICATIONS COMMISSION (FCC) NOTICE
This equipment has been tested and found to comply with the limits for a
Class A digital device, pursuant to Part 15 of the FCC Rules. These limits
are designed to provide reasonable protection against harmful interference
in a commercial installation.
This equipment generates, uses, and can radiate radio frequency energy
and, if not installed and used in accordance with the instructions, may
cause harmful interference to radio communications. Operation of this
equipment in a residential environment is likely to cause harmful
interference, in which case the user will be required to correct the
interference at his own expense.
MODIFICATIONS
The FCC requires the user to be notified that any changes or modifications
made to this device that are not expressly approved by CETAC
Technologies, Inc. may void the user's authority to operate the equipment.
CABLES
Connections to this device must be made with shielded cables with metallic
RFI/EMI connector hoods to maintain compliance with FCC Rules and
Regulations.
Notices and Compliance Declarations
CANADIAN NOTICE
This digital apparatus does not exceed the Class A limits for radio noise
emissions from digital apparatus as set out in the interference-causing
equipment standard entitled "Digital Apparatus." ICES-001 of the
Department of Communications.
AVIS CANADIEN
Cet appareil numerique respecte les limites de bruits radioelectriques
applicables aux appareils numeriques de Classe A prescrites dans la norme
sur le materiel brouilleur: "Appareils Numeriques," NMB-001 edictee par
le ministre des Communications.
Notices and Compliance Declarations
POWER CORD SET REQUIREMENTS
The power cord set supplied with your instrument meets the requirements
of the country where you purchased the instrument.
If you use the instrument in another country, you must use a power cord
set that meets the requirements of that country.
WARNING
CAUTION
This equipment is designed for connection to a grounded
(earthed) outlet. The grounding type plug is an important safety
feature. To reduce the risk of electrical shock or damage to the
instrument, do not disable this feature.
To reduce the risk of fire hazard and electrical shock, do not expose the
unit to rain or humidity. To reduce the risk of electrical shock, do not
open the cabinet. All maintenance is to be performed by an Authorized
CETAC Service Provider.
Protection provided by the equipment may be impaired if the equipment is
used in a manner not specified by the manufacturer.
CLEANING INSTRUCTIONS
To clean the exterior surfaces of the instrument, complete the following
steps:
WARNING
1 Shut down and unplug the
instrument.
3 Repeat step 2, using a towel
dampened with clear water.
2 Wipe the instrument exterior
surfaces only using a towel
dampened with a lab-grade cleaning
agent.
4 Dry the instrument exterior
using a dry towel.
Do not allow any liquid to enter the instrument cabinet, or come
into contact with any electrical components. The instrument
must be thoroughly dry before you reconnect power, or turn the
instrument on.
Notices and Compliance Declarations
COOLING FAN OBSTRUCTION
The instrument cooling fan(s) shall remain unobstructed at all times. Do
not operate the instrument if the cooling fan(s) are blocked or obstructed in
any manner.
ENVIRONMENTAL
Operating Temperature:
Relative Humidity
10° to 30°C
0% to 95%
Notices and Compliance Declarations
FOR
CONTINUED
PROTECTION AGAINST
RISK OF FIRE, REPLACE
ONLY WITH FUSES OF
THE SPECIFIED TYPE
AND CURRENT RATTING
AVERTISSEMENT
AVERTISSEMENT
POUR UNE PROTECTION CONTINUÉ
CONTRE LES RISQUES D’INCENDIE,
REMPLACER UNIQUEMENT PAR DES
FUSIBLES DE MÊME TYPE ET
AMPÈRAGE.
TOUT CONTACT AVEC LES HAUTES
TENSIONS PEUT ENTRAINER LA MORT
OU DES BLESSURES SÉVÈRES. CE
PANNEAU NE DOIT ÊTRE ENLEVE QUE
PAR UN RÉPARATEUR QUALIFIÉ.
AVERTISSEMENT
NE PAS GLISSER LA MAIN SOUS OU DERIERE LES
ECRANS THERMIQUES DU FOUR. GARDER LA
PORTE D'ACCES AU DEVANT DU BOITIER BIEN
FERMEE POUR ASSURER LA PROTECTION CONTRE LES
BRULURES
AVERTISSEMENT
TOUT CONTACT AVEC LES HAUTES
TENSIONS PEUT ENTRAINER LA MORT
OU DES BLESSURES SÉVÈRES. CE
PANNEAU NE DOIT ÊTRE ENLEVE QUE
PAR UN RÉPARATEUR QUALIFIÉ.
AVERTISSEMENT
TOUT CONTACT AVEC LES HAUTES
TENSIONS PEUT ENTRAINER LA MORT
OU DES BLESSURES SÉVÈRES. CE
PANNEAU NE DOIT ÊTRE ENLEVE QUE
PAR UN RÉPARATEUR QUALIFIÉ.
Notices and Compliance Declarations
TOUCHER LA VERRERIE OU TOUTE
SURFACE MÉTALLIQUE INTÉRIEURE.
On (Supply)
Off (Supply)
AVERTISSEMENT
TOUT CONTACT AVEC LES HAUTES
TENSIONS PEUT ENTRAINER LA MORT
OU DES BLESSURES SÉVÈRES. CE
PANNEAU NE DOIT ÊTRE ENLEVE QUE
PAR UN RÉPARATEUR QUALIFIÉ.
Caution (refer to accompanying
documents)
AVERTISSEMENT
AVERTISSEMENT
SURFACES CHAUDES, LAISSER LE
COUVERCLE HERMÉTIQUEMENT FERMÉ.
POUR ACCÉDER, METTRE LA
TEMPÉRATURE DU FOUR À ZÉRO,
OUVRIR LE COUVERCLE ET LAISSER
REFROIDIR 5 MINUTES AVANT DE
POUR LA PROTECTION PERMANENTE
CONTRE UN CHOC ÉLECTRIQUE, UNE
BRÛLURE DES YEUX (RADIATION UV)
OU DE LA PEAU, LAISSER LE
COUVERCLE HERMÉTIQUEMENT FERMÉ
LORSQUE L’APPAREIL EST SOUS
TENSION.
LAISSER REFROIDIR 5 MINUTES
(APPAREIL ÉTEINT) AVANT D’ENLEVER
LE COUVERCLE.
Notices and Compliance Declarations
U.S. REGULATIONS – CLASS 1 LASER
PRODUCT
This instrument is certified to
comply with laser product
performance standards set by the
U.S. Department of Health and
Human Services as a Class 1
laser product.
This means that this is a class of
laser product that does not emit
hazardous laser radiation; this is
possible only
WARNING
because the laser beam is totally
enclosed during all modes of
customer operation.
The laser produces a beam that,
if looked into, could cause eye
damage.
Service procedures
must be followed exactly as
written without change.
Use of controls, adjustment or performance of procedures other
than those specified in this manual may result in hazardous
radiation exposure.
LASER SAFETY
CDRH REGULATIONS
This instrument complies with
appropriate safety standards. With
specific regard to the laser, the
equipment complies with laser
product performance standards set
by government agencies as a Class
1 laser product. It does not emit
hazardous light; the beam is totally
enclosed during all modes of
customer
operation
and
maintenance.
The Center for Devices and
Radiological Health (CDRH) of the
U.S.
Food
and
Drug
Administration
implemented
regulations for laser products on
August 2, 1976. Compliance is
mandatory for products marketed
in the United States.
Notices and Compliance Declarations
WARNING
Because the internal laser
beam may cause eye damage,
do not open the cabinet.
Wearing glasses and contact
lenses, etc., increases the
hazard. All maintenance is to
be
performed
by
an
Authorized CETAC Service
Provider.
Notices and Compliance Declarations
AVERTISSEMENT
RAYONNEMENT LASER —
ÉVITER TOUTE EXPOSITION DES YEUX ET DE LA PEAU
AU RAYONNEMENT DIRECT OU DIFFRACTE.
AVERTISSEMENT
LE SYSTÉME DE REFROIDISSEMENT EST
REMPLI D’EAU DISTILLÉE. EVITER LE GEL,
OU L’APPAREIL SERA DÉFINITIVEMENT DÉTÉRIORÉ
The cooling system, located in the laser power supply, is filled with
DISTILLED WATER.
DO NOT fill with any other type of fluid!
The cooling system should contain a sufficient amount of distilled water. The fault
light will come on if the coolant is in interlock mode.
COOLING FAN OBSTRUCTION
The Laser Power supply cooling fan should remain unobstructed at all times.
Do not operate the instrument if the cooling fan is blocked or obstructed in any
manner.
Notices and Compliance Declarations
Contents
`
Contents
Preface
xii
Who Should Read This Book
xii
How to Use This Book
xii
Conventions Used in This Book
xiii
Instructions
Menu Items
Terminology
Notes
Cautions
Warnings
xiii
xiv
xv
xvii
xvii
xvii
Where to Go for More Information
1 Introduction
xviii
1-2
Principles of Operation
1-4
Laser Ablation Processes
System Overview
1-4
1-5
Laser Ablation System
1-6
Laser Technical Specifications
Laser Specifications
Viewing Optics and Video System
Sampling System
Computer Hardware and Software
System
Options
Laser and High Voltage Safety Features
Laser Ablation System Components
1-8
1-8
1-9
1-9
1-10
1-11
1-11
1-12
1-12
LSX-500 Laser Ablation System Service Manual
Contents
2 Preparing for Installation
2
Choosing a Location
2-2
Space Requirements
Electrical Power Requirements
Fuses
Power Cord Set Requirements
Physical Isolation Requirements
2-2
2-3
2-3
2-4
2-4
Unpacking the LSX-500 System
2-6
Laser Ablation System Packaging
2-6
3 Using the Laser Ablation System
3-2
Establishing Optimal Operating Conditions
3-2
Creating the Lab Environment
Replacing Laser Ablation System Components
Purchasing Supplies
3-3
3-4
3-4
Using the Laser Ablation System
3-5
Front Panel Indicators
3-5
Starting the Laser Ablation System
3-6
Methods of Analyses
3-8
Optimization
Bulk Analysis
Elemental or Spatial Mapping
Depth Profiling
Sample Preparation
Sample Size
Surface Conditions
Powder Samples
Shutting Down the Laser Ablation System
3-9
3-10
3-11
3-12
3-13
3-14
3-14
3-15
3-16
vii
LSX-500 Laser Ablation System Service Manual
Contents
4 DigiLazTM-II Operating Software for the LSX-500 System
4-2
What’s New
4-2
DigiLazTM -II Operating Software
4-3
DigiLazTM -II Software Menu
4-4
File Menu
Acquisition Menu
Instrument Menu
Tools Menu
Help Menu
4-4
4-5
4-5
4-8
4-9
DigiLazTM -II Software Functional Toolbars
4-9
Main Toolbar
Method Toolbar
Laser Control Toolbar
DigiLazTM -II Software Main Screen
Sample Translation Control
Laser Ablation Method Parameters
Video Image
Sample Coordinates
Sample Map
Crosshair and Legend
Status Bar
Laser Ablation Methods
Single Line Scan Method
Single Line Raster Method
Segmented Line Scan Method
Depth Profile Method
Single Point Method
Scanning Method
viii
4-9
4-11
4-11
4-14
4-14
4-14
4-15
4-15
4-15
4-16
4-16
4-17
4-18
4-20
4-23
4-25
4-28
4-31
LSX-500 Laser Ablation System Service Manual
Contents
Rastering Method
4-34
Parameters
4-37
Colors
4-38
Sample Map Developer
4-39
Position Storage
4-40
Measurement Tool
4-42
Image Annotation
4-42
System Diagnostic
4-50
Maintenance Log
Service and Service Log
5 Maintaining the Laser Ablation System
4-50
4-51
5-2
Safety Systems
5-2
Safety System Inspection
5-3
Cooling System Maintenance
5-4
Periodic Checks of the Cooling System
Changing Coolant
Draining the Cooling System for Transport
5-5
5-5
5-7
Filling the Cooling System
5-8
Replacing the Sample Illuminator Lamps
5-9
Internal Tubing Replacement
5-11
ix
LSX-500 Laser Ablation System Service Manual
Contents
6 Troubleshooting the Laser Ablation System
6-2
Power System Problems
6-3
Fuses
6-4
Laser Power Supply
6-5
Interface Problems
6-5
RS-232 Cable Problems
Stepper Interface Cable Problems
Software Configuration Problems
6-5
6-6
6-6
Safety Interlock Problems
6-7
Laser module interlocks
Laser Controller Interlocks
6-7
6-8
Laser Problems
6-8
No Laser Output
Low Laser Efficiency
6-9
6-10
Laser Cooler
6-11
Carrier Gas System
6-11
x
Preface
LSX-500 Laser Ablation System Operator’s Manual
Preface
Preface
The LSX-500 Plus Laser Ablation System Operator’s Manual provides a
detailed description of the ablation system and explains the procedures for
using the CETAC LSX-500 System.
Who Should Read This Book
The primary audience for the LSX-500 Laser Ablation System Operator’s
Manual consists of analytical chemists and lab technicians. To use this
manual effectively, at least a beginning level of electrical/ electronic
equipment operation and maintenance, personal computer experience and
a working knowledge of ICP-MS or ICP-OES are required.
How to Use This Book
The LSX-500 Laser Ablation System Operator’s Manual contains eight
chapters. You should read the chapters sequentially the first time.
Thereafter, refer to the chapters separately as needed. The first chapter
provides an introduction to the Laser Ablation System. Subsequent
chapters detail the primary tasks associated with using the LSX-500
System.
xii
LSX-500 Laser Ablation System Operator’s Manual
Preface
The LSX-500 Laser Ablation System Operator’s Manual contains the
following chapters:
Chapter 1, “Introduction,” provides you with an overview of the
LSX-500 Laser Ablation System’s design, features and function.
Chapter 2, “Preparing for Installation,” discusses space, power and
other requirements that must be met before the LSX-500 is installed. It
also provides instructions for unpacking the Laser Ablation System.
Chapter 3, “Using the LSX-500,” describes the tasks you perform
during routine operation of the LSX-500.
Chapter 4, “DigiLaz™-II Operating Software for the LSX-500,”
explains how to use the software of the LSX-500.
Chapter 5, “Maintaining the LSX-500,” describes routine maintenance.
Chapter 6, “Troubleshooting the LSX-500,” describes basic
troubleshooting of the LSX-500.
Conventions Used in This Book
This book uses certain conventions to distinguish different types of
information easily. This section describes these conventions.
Instructions
All step-by-step instructions are numbered and in bold, as in the following
example.
1 Connect the control cable from the laser power supply to the
laser module.
Many numbered instructions are followed by more detailed explanations.
xiii
LSX-500 Laser Ablation System Operator’s Manual
Preface
Menu Items
This book uses the following format for referring to menu items:
Settings »Communication
The text before the arrow symbol is the name of the menu; the text after
the arrow symbol is the menu choice. This example refers to the
Communications
menu
choice
in
the
Settings
menu.
xiv
LSX-500 Laser Ablation System Operator’s Manual
Preface
Terminology
This book frequently uses the following terms:
Aperture
Spot size control system automated within the
DigiLaz™-II LSX-500 Software, producing crater sizes
ranging from 10 - 200 µm.
CCD
Charge coupled device.
resolution.
Control
Computer
The computer that controls the operation of the
LSX-500 Laser Ablation system.
DigiLaz™-II
Operating software for the LSX-500 system.
Defocus
The distance (in µm) that the Z-Stage moves in an
upward motion.
Depth Profile
Software controlled method for spatial profiling utility
that can move the Z-Stage up at a specified rate.
Flat Top
Energy Profile
Beam profile of the UV Nd:YAG laser at 266 nm
producing superior pit morphology.
Hz
Hertz, often expressed as shots/second; refers to the
frequency that the laser is pulsed.
ICP-OES
An inductively
spectrometer.
ICP-MS
An inductively coupled plasma mass spectrometer.
LASER
Acronym: Light Amplification by Stimulated Emission
of Radiation.
Laser Head
Component that generates the laser beam.
coupled
680x484 pixels, 470 Lines
plasma
optical
emission
xv
LSX-500 Laser Ablation System Operator’s Manual
Preface
LED
Light-Emitting Diode.
LSX-500
The CETAC LSX-500 Laser Ablation System.
Nd:YAG
Acronym: Neodymium: Yttrium Aluminum Garnet.
Pulse
Repetition
Rate
The number of laser pulses per second expressed as Hz.
In the LSX-500 it is controlled by the Q-switch in the
laser power supply. It results in stable transient
signals. Same as Frequency.
Raster
Moving the X-Y-Z stage to allow a defined action or
laser interaction with the sample. It is expressed as
distance between spots in µm.
Sample cell
Component that contains the sample for laser ablation.
Scan
Moving the X-Y-Z stage to affect a defined action of the
laser; refers to continuous ablation over a line or area
VDC
Volts Direct Current.
X-Axis
The left-and-right axis of the X-Y-Z translation stage.
Y-Axis
The fore-and-aft axis of the X-Y-Z translation stage.
Z-Axis
The up-and-down axis of the X-Y-Z translation stage.
xvi
LSX-500 Laser Ablation System Operator’s Manual
Preface
Notes
Notes contain a reminder about the effect of particular actions. They are
indicated as follows:
Note:
This example shows how a note is displayed.
Cautions
Cautions indicate situations that require immediate attention to prevent
harm to the laser ablation system. Cautions are indicated as follows:
CAUTION
This example shows how a caution is displayed.
Warnings
Warnings indicate situations that could cause bodily harm. Warnings are
indicated as follows:
WARNING
This example shows how a warning is displayed.
xvii
LSX-500 Laser Ablation System Operator’s Manual
Preface
Where to Go for More Information
In addition to the LSX-500 Laser Ablation System Operator’s Manual, you
can refer to the following resources for citation material or for further
information:
•
“Safe Use of Lasers" (Z136.1)
American National Standards Institute (ANSI)
11th West 42nd Street
New York, NY 10036
Phone: (212) 642-4900
www.ANSI.org
•
"A Guide for Control of Laser Hazards" (Publication 0165)
American Conference of Governmental and Industrial Hygienists
(ACGIH)
6500 Glenway Avenue, Bldg. D-7
Cincinnati, OH 45211
Phone: (513) 661-7881
www.ACGIH.org
•
Occupational Safety and Health Administration (OSHA)
U.S. Department of Labor
200 Constitution Avenue NW
Washington, DC 20210
Phone: (202) 523-8148
www.OSHA.gov
•
"Performance Standards for Laser Products"
United States Code of Federal Regulations
21 CFR 1040.10(d) and 1040.11.
•
The LSX-500 Laser Ablation System Service Manual.
•
CETAC Technologies Customer Service and Support:
Phone:
1 (800) 369-2822 (USA only)
1 (402) 733-2829
Fax:
1 (402) 733-1932
E-mail:
[email protected]
xviii
1 Introduction
Introduction
The CETAC LSX-500 Laser Ablation System is the next generation UV laser ablation
system from CETAC Technologies. The LSX-500 System features a high-energy
266nm laser, with improved viewing optics and an improved version of the operating
software, DigiLaz™-II.
The LSX-500 System (Figure 1-1) is a self-contained solid sampling accesory that
can be installed on any ICP or ICP-MS.
Figure 1-1. The LSX-500 Laser Ablation System.
The LSX-500 Laser Ablation System generates particle aerosols from a
solid material by pulsing a laser beam onto a target surface. Adjusting
LSX-500 Laser Ablation System Operator’s Manual
Introduction
laser energy, spot size and frequency using the DigiLaz™-II Software optimizes
signal intensity and stability.
Ablated material is then swept into the ICP-MS or ICP-OES by the argon nebulizer
gas. Many types of samples can be analyzed using laser ablation sample
introduction including glasses, coatings, refractories, powders, ceramics, geological
materials, process materials and polymers.
Some of the capabilities of the LSX-500 Laser Ablation System include:
•
Ultraviolet laser, >9 mJ at 266 nm with a pulse width of < 6 nsec
•
Low ppb detection limits possible with ICP-MS
•
Ultra-stable laser system, < 3% RMS
•
Q-switched control of laser frequency
•
Digitally based software package, DigiLaz™-II Software
•
Microstepping translation stage, 0.25 µm step size
•
Improved sampling flexibility
•
Improved thin-section holder
•
Sample tracing mode or manual drawing mode
•
Enhanced method management system
1–3
LSX-500 Laser Ablation System Operator’s Manual
Introduction
•
Fast auto-ramping sample navigation
•
Sample image save, retrieval and export
•
GeoPro TM data handling software (optional)
The LSX-500 System provides a means of rapid, direct analysis of solid
samples without dissolution and with minimal sample preparation.
Ablation may be performed on samples of electrically conductive or nonconductive materials.
Note:
Please contact CETAC Technologies at 800-369-2822 or 402-733-2829 for
more information on LSX-500 applications and technical notes.
Principles of Operation
Laser Ablation Processes
Laser ablation ICP-MS, as an analytical technique in itself, has been
described in books and review articles in detail; it is an ablation process in
which a laser is used as the primary energy source. When a laser beam of
sufficient power density strikes a solid material, it generates particle
aerosols into the gas phase. This ablation process is caused by the
interaction of laser photons with the solid material.
•
1–4
Typically, a solid sample is placed inside an enclosed chamber, called
the ablation cell and a laser beam is focused on the surface of the
sample or in some other location as in sample defocus mode. When the
laser is fired, a cloud of particles is produced. These particles are
removed from the sampling cell by an Argon carrier gas, and are
swept into the ICP plasma for atomization and ionization and
subsequent analysis.
LSX-500 Laser Ablation System Operator’s Manual
Introduction
System Overview
The LSX-500 Laser Ablation System is a stand-alone unit. Special features
of the LSX-500 includes a high-resolution (680 x 484) CCD camera with a
continuously variable built-in magnification zoom and an on-line laser
energy measurement system. A block diagram of the LSX-500 System is
given in Figure 1-2.
LSX-500 Laser Ablation System
High resolution
motorized zoom lens
Control PC/host ICP
Color CCD
camera
Prism
Aperture
system
Rotating
upper
polarizer
LASER
High-speed
Nd:YAG 266 nm
>9 mJ Flat-Beam profile
<3% Stability (RMS)
Energy
meter
shutter
Objective lens
Upper illuminator
Sample cell
Aerosol out
to ICP
Carrier gas (Ar, He)
Lower
illuminator
Removable
lower
polarizer
Figure 1-2. Schematic Diagram of the LSX-500 System.
The LSX-500 is shipped fully operational and is easily installed.
Hardware interlock and safety features are included in the laser and power
supply modules. These interlocks monitor the status of the entire ablation
1–5
LSX-500 Laser Ablation System Operator’s Manual
Introduction
system and will ensure that all safety contacts are closed and the hookups
are correct before the laser can be operated.
Laser Ablation System
The LSX-500 employs a specially designed Nd:YAG laser, frequency
quadrupled to the ultraviolet wavelength of 266 nm. These features provide
the most uniform beam available with spot sizes ranging 10 µm to 230 µm
and superior pit morphology at the sample. The aperture system uses a
ceramic aperture that features six different spot size choices that are
accessed within the laser software.
The laser can be operated at a high repetition rate of 20 Hz for increased
sampling efficiency, and thus provide better ICP-MS sensitivity and
importantly, the pulse repetition rate is controlled via the laser Q-switch.
The pulse repetition rate varies from 1 - 20 Hz.
The LSX-500 sampling cell is mounted on an X-Y-Z translation stage, with
a step size of 0.25 µm. The translation stage provides X-Y positioning
control for laser targeting on the sample and is under computer control.
The Z-Axis of the translation stage is used to focus the laser via the CCD
camera viewing system. The sample image is viewed directly in the
DigiLaz™-II Software. The interface achieves superior optical viewing of
the digital image created by the sample. (See Figure 1-3)
Since air is unavoidably admitted into the sampling cell when changing
samples, removing the air from the carrier gas flow path prior to
switching back to the ICP-MS is required to prevent plasma collapse.
To purge the sample cell and prevent plasma collapse, the LSX-500 is
equipped with three-way electrically actuated valves to direct the carrier
gas flow to either the ICP-MS, to a purge position or to a bypass position.
The CCD camera microscope system provides a means of visual
identification of the sample areas of interest and also for laser focusing. A
digital crosshair is an integral part of the digital image and can be
adjusted depending on the visual aspect of the samples. This crosshair
provides a targeting mechanism for the sample positioning at the point of
laser impact.
1–6
LSX-500 Laser Ablation System Operator’s Manual
Introduction
Figure 1-3. Sample Viewing within the DigiLaz™-II Software.
1–7
LSX-500 Laser Ablation System Operator’s Manual
Introduction
Laser Technical Specifications
The laser head is located in the upper chamber of the laser module.
It is a compact, rigid and stable-structured unit with a folded resonator
geometry. The opto-mechanical design of the Compact Folded Resonator
(CFR) has evolved over many generations of iterative refinements based on
usage and experience.
All of the optical elements are kept in precise relative alignment through
precision mounting techniques onto a stiff, stable optical bed structure,
constructed of anodized aluminum. The laser system used for the LSX-500
System is the only system available with thermostatted harmonics and
nitrogen purged flashlamp. This results in unsurpassed laser stability
and reliability.
Laser Specifications
•
Frequency quadrupled, Q-switched Nd:YAG laser, 266 nm
•
Spot size range: 10 - 230 µm (focussed), >500 µm (defocussed)
•
9mJ/pulse laser energy, 1% RSD, 1% RMS, computer controlled
•
Flat-top laser beam energy profile
•
Laser pulse width: < 6 nsec
•
Repetition rate: 1-20 Hz
1–8
LSX-500 Laser Ablation System Operator’s Manual
Introduction
•
Q-switch controlled laser frequency selection
•
Built in laser energy measurement system
•
5X, 40 mm focal length UV achromatic lens
Viewing Optics and Video System
•
Reflected and/or transmitted light illumination
•
Computer controlled focusing
•
Dual polarizers, computer controlled above the sample cell
•
Universal thin-section holder
•
Real-time image acquisition at 1152 x 864 pixel resolution
Sampling System
•
52 mm diameter X 52 mm high sample cell
•
Quick release sample stage for easy sample installation
•
Motorized X-Y-Z translation stage, 52 mm travel axis
•
Computer controlled linked stepper motor interface
•
0.25 µm step size, 0.09 µm resolution
•
Three-stage motor drivers with manual override, auto-ramping up to
two cm/sec
•
Adaptable volume, Teflon ® and Viton ® construction
•
Automated purge, by-pass or to ICP gas control
•
Ablation cell with removable quartz window for easy cleaning or
replacement
1–9
LSX-500 Laser Ablation System Operator’s Manual
Introduction
•
Flexible sample cell design and additional cell available (Contact
CETAC Technologies for accessories and spare part information)
Computer Hardware and Software
•
Integrated digitally based software control using DigiLaz™-II software
platform with host ICP or ICP-MS computer.
•
Windows XP, 2000 and NT based software.
•
On screen display of safety interlocks and laser status including laser
firing, door open, binocular, coolant temperature and flow interlocks.
•
Universal communication protocol for synchronization of ICP-MS and
laser systems for auto-triggering of ICP-MS data acquisition.
•
Seven built-in laser ablation methods with many diverse features
including scan control with point to point, traverse, raster and
dynamic Z focus. Segmented line scanning and advanced depth
profiling is also featured.
•
Method saving, export and loading with sample image capture and
export. Method file management and text (*.txt) file management
access.
•
Spot size and feature measurement programs.
•
Automated output energy indicator.
•
Single shot or automated repetition (burst or continuous mode).
•
Computer adjustable spot size using digital aperture system.
•
Automated video zoom and sample motion control.
1–10
LSX-500 Laser Ablation System Operator’s Manual
Introduction
System
•
Dimensions: laser module 69 x 46 x 51 cm
•
Weight: approximately 57 kg (125 pounds)
•
Power supply 20 x 30 x 37 cm
•
Power requirement: 100-250 VAC +/- 10%
•
Class 1 enclosure with safety interlocks
•
Independent programmable laser power supply module
•
Closed loop water-air cooling system
Options
•
GeoPro™ data handling software for geological analysis and transient
data collection
•
Custom designed sampling cells, pharmaceutical cell, oversize cell and
cassette loading cell
•
Complete Computer system (optional)
1–11
LSX-500 Laser Ablation System Operator’s Manual
Introduction
Laser and High Voltage Safety Features
•
The LSX-500 System has built in safety interlocks to disable the laser
in the event the cover is opened or the front door is opened during
operation. Another interlock on the laser power supply deactivates the
laser if its cover is opened during operation. The binocular is
interlocked as well.
•
The laser power supply is controlled by a key switch, and the key can
be removed only when the switch is in the OFF position, to prevent
unintended operation.
Laser Ablation System Components
The LSX-500 Laser Ablation System is composed of the following
components.
LSX-500 Module: The laser module contains the laser head, steering
optics, shutters, CCD camera with powered-zoom lens and microscope, the
sample cell and X-Y-Z translation stage.
Power Supply: The LSX-500 power supply and integrated laser head
cooling unit contains all electronics for interfacing with the LSX-500
System and safety interlocks for the laser head.
Host Computer Monitor: The sample image produced by the color CCD
camera and microscope is integrated with a targeting image from the
crosshair generator for display directly in the DigiLaz™-II Software. It is a
real-time acquisition and is active during laser firing.
Host Computer: The control computer executes the LSX-500 DigiLaz™-II
Software. The user-programmable software issues commands that control
LSX-500 functions, such as X-Y-Z sample positioning, laser firing mode,
laser power, CCD camera digital zoom, sample cell illumination level, and
sample cell purge/ICP Argon flow control. System safety and laser firing
status are also monitored and displayed.
1–12
LSX-500 Laser Ablation System Operator’s Manual
Introduction
Note:
Please contact CETAC Technologies (800-369-2822, 402-733-2829) if you
need additional accessories not listed, need added features to integrate
the LSX-500 Laser Ablation system into your analytical system, or have
unique requirements. Research and development of new features and
accessories for the LSX-500 Laser Ablation System, often inspired by
customer requests, is a continuing activity of CETAC Technologies.
1–13
LSX-500 Laser Ablation System Operator’s Manual
Introduction
1–14
2 Preparing for Installation
LSX-500 Laser Ablation System Operator’s Manual
Preparing for Installation
Preparing for Installation
Minimal site preparation is required prior to installing the LSX-500
System. Normally, the system is installed in the laboratory next to the
host instrument without special lockout procedures and isolation. Before
beginning installation, evaluate the physical arrangement of the
laboratory to choose a suitable location. Once a suitable location has been
selected and prepared, installation can begin.
This chapter discusses what requirements must be met when you choose a
location for the laser ablation system. It also describes how to unpack the
LSX-500 prior to installation.
WARNING
Do not power-up the laser ablation system before thoroughly
reading and understanding operating and safety procedures. Use
of controls, adjustments, or performing procedures other than
those specified may result in hazardous laser radiation exposure
and personal injury, laser system damage and void the warranty.
Choosing a Location
Choosing a location for the LSX-500 System involves evaluating the
laboratory environment for the availability of space, electrical power and
physical isolation. For the LSX-500 System to function properly, the
location you select must meet specific requirements associated with each of
these items. The following sections discuss space, electrical power and
physical isolation.
Space Requirements
Many analytical applications benefit from the shortest sample flow path.
Therefore, you should place the laser ablation system as close to the
analytical instrument as practical.
2–2
LSX-500 Laser Ablation System Operator’s Manual
Preparing for Installation
The laser module should not be located more than two meter
(approximately six feet) from the ICP torch interface. The laser module
must be within two meters of the host ICP control computer (or other
computer) so that cable installation can be achieved between the computer
and the laser system.
The recommended minimum footprint for countertop installation of the
LSX-500 laser module is 30d x 20w x 30h inches (77 x 51 x 77 cm).
Electrical Power Requirements
Place the LSX-500 System within two meters of a power outlet. The laser
ablation system’s power input requirements are as follows:
Main Cabinet: 85-264 VAC, 250 W max 50/60 Hz.
Laser Power Supply: 220 VAC, 5A or 115 VAC, 3A, 50/60 Hz.
Fuses
The fuse requirements for the LSX-500 are:
•
LSX-500 Main Cabinet: 5A , 250V Type T (user serviceable)
•
LSX-500 Main Cabinet Power Supply: 6.3 A, 250V Littlefuse*
•
Laser Power Supply 5 A. Type 3AG Slowblo
Note:
*This fuse is not user serviceable.
WARNING
Replace fuses with specified type(s) and rating(s) only.
2-3
2–3
LSX-500 Laser Ablation System Operator’s Manual
Preparing for Installation
WARNING
DANGER - HIGH VOLTAGE. Both the laser head and laser
electronics unit contains electrical circuits operating at lethal
voltage and current levels. Always unplug and wait at least one
(1) minute to allow capacitors to bleed down before servicing any
part of the laser system.
Modification of the furnished power supply or deactivation of
safety interlocks is not recommended and is done solely at the
user’s risk. Call CETAC Technologies Customer Service if power
system-related problems occur.
Power Cord Set Requirements
The power cord set supplied with the LSX-500 System meets the
requirements of the country where you purchased the instrument. If you
use the instrument in another country, you must use a power cord set that
meets the requirements of that country.
WARNING
This equipment is designed for connection to a grounded (earthen
ground) outlet. The grounding type plug is an important safety
feature. To reduce the risk of electrical shock or damage to the
instrument, do not disable this feature.
Physical Isolation Requirements
The LSX-500 System, as a Class I laser product, does not emit hazardous
radiation during normal operation and may, therefore, be installed and
operated in any typical laboratory. However, provision for physical
isolation must be made to perform routine maintenance, repair or
alignment. Isolation is an essential safety precaution to operate an
unprotected Class IV laser and protect personnel from injury during
equipment maintenance, repair or alignment procedures.
The isolation area may be the actual laboratory point-of-use, or at a
separate location since the LSX-500 System can be easily moved about.
2–4
LSX-500 Laser Ablation System Operator’s Manual
Preparing for Installation
Recommended isolation area guidelines:
WARNING
•
Establish a controlled-access area for laser operation where entry can
be limited to individuals trained in laser safety practices.
•
The isolation area should be surrounded by solid (no uncovered
windows) walls and ceiling, and well lit.
•
Lockable entry/exit doors.
•
Post prominent “Danger - Laser in Operation” warning signs near all
approaches outside of the laser operation area.
•
Use ANSI/OSHA-approved UV laser-protective eyewear at all times.
•
Install a laser-energy absorber to capture stray laser beam emissions
and to prevent reflections and light scattering.
It should be
immediately available for use during maintenance and adjustment.
DANGER - INVISIBLE LASER RADIATION. The LSX-500 uses a
Class IV Nd:YAG laser. The output beam is, by definition, a
safety and fire hazard. Precautions must be taken during use
and maintenance to prevent accidental exposure to direct or
reflected radiation from the laser beam.
For complete information and regulatory requirements, refer to the ANSI,
ACGIH and OSHA standards listed in the Preface, “Where to Go for More
Information.”
Unpacking the LSX-500 System
The LSX-500 System has been carefully packaged for shipment in one
crate. The crate contains the LSX-500 System, laser power supply and
installation accessories. A utility cart is strapped to the lid of the crate.
The utility cart is used to hold the LSX-500 System. This allows easy
movement within your laboratory space and it is useful if the system will
be installed on multiple ICP systems.
2-5
2–5
LSX-500 Laser Ablation System Operator’s Manual
Preparing for Installation
Carefully inspect external packaging immediately upon receipt for holes,
tears, smashed corners, or any other outward signs of damage from rough
handling or abuse during shipment.
If any damage is evident, immediately file a claim against the carrier and
notify CETAC Technologies. Examine all items during unpacking with a
factory-authorized representative, and notify the carrier immediately of
any concealed damage.
If the LSX-500 System is shipped or removed from storage during
cold weather, allow the packaged equipment to attain room
temperature before opening and exposing to warm, humid air. It
is usually sufficient to provide four to eight hours for this
purpose.
WARNING
If condensation forms on or inside the laser ablation system,
allow it to dry thoroughly before connecting it to an AC power
source and operating it. Failure to do so may cause personal
injury or equipment damage.
Laser Ablation System Packaging
The shipping crate contains:
•
LSX-500 Laser Ablation System
•
Laser Power Supply
•
Cables and Connectors
•
Completion Kit and Accessories
•
PC with 19” monitor (optional)
Remove the packing list from the container and check-off items against it
as they are removed. Leave the cables and other accessories in their
container until you and the CETAC service representative are ready to
install them on the laser ablation system and the host ICP or ICP-MS.
2–6
LSX-500 Laser Ablation System Operator’s Manual
Preparing for Installation
Contact CETAC Technologies immediately if any shortages or packing list
discrepancies are found.
A factory-authorized Service Engineer will perform the LSX-500
Laser Ablation System’s original installation.
Note:
Do not throw away the factory packaging. Keep it for possible future use.
This is one of the warranty conditions.
2-7
2–7
3 Using the LSX-500 Laser
Ablation System
Using the Laser Ablation System
The LSX-500 System is both reliable and easy to use. Before using the
LSX-500 System, however, ensure that your lab environment provides
operating conditions that will prolong the life of the LSX-500 System. Once
the proper operating conditions are met, you can load samples and perform
analysis with the laser ablation system.
This chapter explains how to create the proper operating conditions for
using the LSX-500 System. It also explains laser safety precautions, how to
prepare and load the samples, start and shut down the laser ablation
system, analysis procedures and initial operating parameters.
Establishing Optimal Operating Conditions
The LSX-500 System operates reliably even under less than ideal conditions.
It is not, however, indestructible. Malfunction or damage can occur if
specific operating conditions are not met. Meeting these conditions requires
that you create the proper lab environment, replace laser ablation system
components that wear out under normal use and purchase the appropriate
supplies for use with the laser ablation system. The following sections
explain how to meet these conditions.
Note:
Damage or malfunction that results from unsatisfactory operating conditions
may constitute misuse and abuse and be excluded from warranty coverage.
LSX-500 Laser Ablation System Operator’s Manual
Using the Laser Ablation System
Creating the Lab Environment
To create satisfactory operating conditions in your lab environment, follow
these guidelines:
CAUTION
•
Operate the LSX-500 System in a conventional lab environment where
the temperature is 50–95 °F (10–35 °C); the humidity is 20–70%
non-condensing; and the unit is not exposed to excessive flammable or
corrosive materials.
•
Avoid rough handling of the LSX-500 System. Do not expose the laser
ablation system to vibration or shock.
•
Protect the LSX-500 System from long-term exposure to condensation,
corrosive materials, solvent vapor, standing liquids, liquid spills into the
electrical equipment or operation inside an acid hood or glove box.
Exposures of this type can degrade the optics, corrode and damage
mechanical drive mechanisms, as well as the electronics.
•
Observe the same general electrostatic discharge precautions as with
any other integrated circuit electronic devices. Low humidity
environments, especially when combined with static-generating
materials, require maximum care.
Discharge static buildup and ground to the laser ablation system base or
LSX-500 System cabinet before performing any maintenance. Do not touch
or short-circuit bare contacts of any communications ports.
•
Avoid exposing the LSX-500 System to high levels of electromagnetic or
radio frequency interference (EMI/RFI), or radioactivity. EMI/RFI can
cause erratic operation, high levels of radioactivity may cause electronic
component failure, and will prohibit factory repair if so contaminated.
Contact CETAC Technologies for assistance if the LSX-500 System will be
required to operate in a hostile environment.
3–3
LSX-500 Laser Ablation System Operator’s Manual
Using the Laser Ablation System
Replacing Laser Ablation System Components
The following LSX-500 System components wear out, or become
contaminated under normal use, and must be replaced periodically.
•
•
Coolant
System Tubing
•
•
Laser flashlamp
Illumination lamps
If you fail to replace these components when they deteriorate, the laser
ablation system will not function properly.
Purchasing Supplies
Because the usage rate of consumable materials and the life span of
expendable components will vary, you should maintain an adequate supply
of spares. When you need to purchase additional supplies, it is important
that you choose the appropriate components and materials. A one-year
consumables kit is available from CETAC.
When you purchase replacement parts or consumable supplies, make sure
they meet the following requirements:
CAUTION
•
Use only distilled water (not ultra-pure deionized water, distilled
water is very different from deionized water) when changing
coolant. Tap water or glycol anti-freeze containing anti-leak additives
will leave deposits in the cooling system, damage the cooling unit or
laser head, or cause other malfunctions.
•
Do not attempt to use a substitute laser flashlamp; otherwise, leakage
and laser head damage will result. Service only with an exact
replacement.
Only a factory trained service engineer should do laser flashlamp
replacement. Contact CETAC Technologies at 800-369-2822 or 402-733-2829
for more information, or a certified laser system technician.
3–4
LSX-500 Laser Ablation System Operator’s Manual
Using the Laser Ablation System
WARNING
WARNING
Replace the illumination lamp bulb with an exact replacement
only. Use of higher wattage or non-equivalent substitutes is not
recommended and may damage the sample illuminator, or
constitute a fire hazard.
Use of unsuitable coolants, consumable supplies or inferior
replacement parts may result in laser ablation system
malfunctions, ICP malfunctions, invalid analysis results or
hazardous conditions. Be sure all replacements meet the specified
requirements.
To order additional supplies, contact the CETAC Technologies Customer
Service department.
Using the Laser Ablation System
Front Panel Indicators
Status Indicator: LED located on upper front left of the LSX-500 System.
Informs the operator of the current machine conditions as follows:
•
LED Lamp Off: Interlocks are NOT enabled; it is NOT safe to fire the
laser at this time. Also, the FAULT lamp located on the laser power
supply is illuminated. For example, the laser system is not powered up.
•
Green LED Lamp: Interlocks are all enabled, the translation stage is
static or is moving, the laser system is ready to begin and it is safe to
fire the laser at this time.
•
Red LED Lamp: System interlocks are enabled, translation stage is
either static or is moving and the laser is firing.
3–5
LSX-500 Laser Ablation System Operator’s Manual
Using the Laser Ablation System
Starting the Laser Ablation System
After the sample is loaded, laser operation and sample positioning
parameters defined, the LSX-500 System is ready to begin operation under
computer control until the programmed sampling procedure is completed.
WARNING
Do not start the LSX-500 System unless the following conditions
are met: The front door and top cover of the LSX-500 System are
completely closed. All LSX-500 System covers and safety interlocks
are in place and operating.
To start the laser ablation aystem, complete the following steps:
1 Turn the main power on.
The main power switch is located on the back panel of the LSX-500 System.
2 Turn the LSX-500 System laser power supply on.
The power keyswitch is located on the front of the laser power supply. The
cooling system is thus initiated as well.
3 Turn the LSX-500 System host computer on and start the
DigiLaz™ II Software.
4 Turn on the sample cell illumination lamp.
Select top or bottom illumination and adjust the sample beam intensity.
5 Open the LSX-500 System door and slide out the translation stage.
Open the LSX-500 System door fully, slide the translation stage out and
smoothly pull forward to slide the translation stage out of the LSX-500
system.
6 Load the sample into the sample cell.
Release the top of the sample cell. Place the sample (NIST 612 glass
standard or equivalent for system optimization) on the Teflon ® sample
holder. Replace the sample cell top and ensure that is secure and air-tight.
3–6
LSX-500 Laser Ablation System Operator’s Manual
Using the Laser Ablation System
7 Slide the translation stage back to the home position and close the
LSX-500 system door.
The translation stage will latch in place when returned to the home
position, as will the LSX-500 System door. Failure to fully return the
translation stage, or close the LSX-500 System door, will cause interlock
faults and prevent proper system operation.
The DigiLaz™-II Software selection and gas management allow the user to
enter the time in seconds for purging with Argon. This removes entrained
air from the cell prior starting the plasma. Typically, the purge time is set
to 30-60 seconds.
8 Start an ablation using the DigiLaz™-II Software using the icon or
the program menu of the host computer.
Define and start the sampling procedure (See Chapter 4 of this manual for
more information about setting the laser’s operating parameters).
The LSX-500 System will operate under computer control until it reaches
the end of the sampling procedure, or it is interrupted. Repeat steps 5
through 8 for subsequent samples.
WARNING
DANGER - INVISIBLE LASER RADIATION. The LSX-500 System
uses a Class IV Nd:YAG laser. The output beam is, by definition, a
safety and fire hazard. Precautions must be taken during use and
maintenance to prevent accidental exposure to direct or reflected
radiation from the laser beam.
Methods of Analyses
The LSX-500 System performs bulk analysis, feature analysis, surface
mapping, and depth profile analysis. Many other applications can be
developed to encompass user specific goals. Often, one or more methods
together to generate data that can only be obtained by using laser sampling.
For example, analysis of features and inclusions in geological material.
3–7
LSX-500 Laser Ablation System Operator’s Manual
Using the Laser Ablation System
Typical detection limits of 1-10 ng/g can be expected for most elements using
the LSX-500 System coupled to an ICP-MS. Detection limits for ICP-OES
systems are generally higher, in the range 0.1-.5 ppm. Detection limits are
based on sample matrix and sensitivity of the host ICP or ICP-MS. Seven
laser ablation methods are provided in the DigiLaz™-II Software and
controlled by the LSX-500 System (See Chapter 4 of this manual) can be
used in a variety of modes of analysis.
Note:
An extensive help database is provided with the DigiLaz ™-II Software. This
resource gives detailed explanation of toolbar usage and method
development schemes.
The following is a brief description of the LSX-500 application types and a
general statement of the use of the LSX-500 System with ICP or ICP-MS.
Optimization
The host ICP or ICP-MS is optimized in concert with each laser ablation program. The
LSX-500 Laser Ablation System parameters can be optimized using the following
general procedures.
1 Place a homogeneous reference material (for example, NIST 612 or
NIST 610 glass) in the ablation cell. Other suitable reference
materials can also be used.
2 Using the Single Line Scan Laser Ablation Method (either sample
tracing mode or manual drawing mode), setup a point to point
scan line across the sample surface using laser parameters that
are similar to the types of analysis that you are performing. For
example, if you will scan at a rate of 10 µm/sec, use this same rate
for analyzing samples and optimization of the host instrument.
All other laser parameters should remain the same between
samples and tuning. This includes spot size, energy and pulse rate.
Optimize the ICP-MS system using typical hardware settings such
as lens voltages, nebulizer gas and torch/interface parameters.
3–8
LSX-500 Laser Ablation System Operator’s Manual
Using the Laser Ablation System
3The LSX-500 System and host ICP-MS are now ready for analysis.
Optimizing the laser system for ICP-OES analysis requires that different
procedures be used. For example, specific matrices are analyzed for a major
element and the ICP system can be “tuned” to provide desired data quality.
Typically, this is done in single line scanning mode in a similar fashion to
ICP-MS optimization.
Note:
The steps noted above vary greatly depending upon the type of ICP-MS or
ICP-OES. Consult the appropriate operating manual for details on tuning
and optimizing the instrument. .
Bulk Analysis
Bulk quantitative analysis is a common application that is well suited to laser ablation
sample introduction. Bulk analysis can be performed on ICP-OES or ICP-MS systems
and is largely dependent on the desired level of sensitivity of particular application.
The following general scheme can be used to perform accurate and precise
quantitative analysis
1 Select a set of homogeneous reference materials to be used for
calibration standards and quality control check samples. The
standards should match the samples as close as possible in terms
of matrix using an internal standard when possible. The internal
standard improves the precision of the analysis by accounting for
possible matrix variations and effects that occur during ablation.
2 Create a suitable quantitative analysis method on the ICP or ICPMS system. For example, use integration times or dwell times that
will collect data for one-two minutes of sample ablation.
3 Set up the LSX-500 in one of the methods that sample a large area
(either grid of spots, scanning area or line scan).
3–9
LSX-500 Laser Ablation System Operator’s Manual
Using the Laser Ablation System
4 Optimize laser energy, pulse rate, spot size and scanning rate to
achieve the desired sensitivity and stability.
Note:
Other LSX-500 methods can be used for bulk analysis however, setup time
is increased and precision and accuracy often becomes more dependent
on sample homogeneity and matrix conditions. Often, several iterations of
method development are required to produce precise and accurate results.
The LSX-500 should be optimized in concert with the host ICP system to
make certain that the best laser method has been developed.
Elemental or Spatial Mapping
Laser ablation sampling can be used effectively to provide spatial information within
and on the surface of the sample matrix. It is easy to setup these types of laser
methods and the DigiLaz™-II Software has been developed to make this task very
simple. Most frequently, the rastering and single point ablation methods are used for
introducing sample aerosols generated by a specific number of laser shots. Data is
collected in time resolved fashion and spatial or elemental maps can be created to
show trace and major elemental variations as a function of matrix. However, the
scanning or rastering methods can be used quite effectively.
1 Select the appropriate laser ablation method.
2 Optimize the ICP or ICP-MS system to produce desired mapping
elements in the format of time resolved mode.
3 Adjust laser parameters pulse rate, spot size and energy to suit
the application and desired data quality.
Depth Profiling
Using the LSX-500 System for measuring matrix analyte concentration as a
function of depth into the sample is termed depth profiling. Laser sampling
coupled with ICP-MS has found many new applications areas in
3–10
LSX-500 Laser Ablation System Operator’s Manual
Using the Laser Ablation System
semiconductor, pharmaceutical and materials research. Depth resolution is
expected to be as low as 0.5-0.7 micrometers. Applications that benefit the
most from using this laser method are those that have the ICP-MS detection
ability to gather many data points very quickly (e.g. TOF ICP-MS). The
LSX-500 System can be setup to perform large spot sizes at low repetition
rates in order to facilitate analyte measurement with fine spatial resolution.
The depth profiling method is designed to provide the operator with
maximum sampling flexibility using a step-wise method that can vary the
spot size and Z-Stage movement in an orderly fashion. We have coined this
procedure gradient depth profiling. Gradient profiling allows the operator to
selectively ablate contaminants from the sample surface followed by
concentrated power density drilling into a feature or inclusion. The following
general steps can be used to setup a depth profiling application.
Using the depth profile methods, select a point or several points to ablate by
clicking directly on the sample image or by manually setting the points
individually.
Program the desired number of profile steps, z-stage movement rate (lower
limit 0.25 micrometer), spot size and desired time for each step. The
program will begin with the first step and cycle through the entire sequence
changing the spot size on the fly. This is one method to create cascading
craters using the uniformity of the flat-top beam profile.
Typically, profiling applications are performed on ICP-MS systems however;
some simultaneous ICP-OES systems have the ability to collect data using
fast integration times. The ICP-MS should be set to collect a number of
elements using short integration times in time resolved mode. Data can
then be manipulated to provide informational graphs of signal versus depth
and so on. Spatial maps can also provide useful representations as well.
3–11
LSX-500 Laser Ablation System Operator’s Manual
Using the Laser Ablation System
Note:
The key laser parameters for effective depth profiling are laser spot size and
frequency. One optimization goal is to thoroughly investigate the effect of
changing these parameters based on matrix type. In this manner, thin films
and coatings tend to behave better at low frequencies (4-5 Hz) while thicker
coatings can be profiled at higher repetition rates.
Sample Preparation
With the LSX-500 System, sample preparation is minimal and typically no
wet chemistry is involved. Only the factors of large sample size, extremely
poor surface conditions, and powder samples need special treatment.
CAUTION
Incorrectly preparing the sample for laser ablation can result in poor sample
ablation, sample fragmentation or fractionation and poor analytical results.
3–12
LSX-500 Laser Ablation System Operator’s Manual
Using the Laser Ablation System
Sample Size
Sample sizes are limited only by the sample cell design, which has been
calculated to be large enough for practically all potential applications for the
LSX-500 System. Sample sizes ranging from a fraction of an inch to two
inches (52 mm) in diameter can be placed directly into the sampling cell
without further preparation.
Size reduction can be used to decrease sample size so that they will fit into
the standard ablation cell. Nominally, this dimension is approximately to
two inches (52 mm) across.
Note:
If your application requires analysis of samples larger than 2 inches (50
mm) in diameter, see the “Optional Accessories” section of Chapter 1 for
information about a larger sample cell for oversize samples. CETAC offers a
full-line of ablation cells including the oversize cell, the cassette cell and an
improved universal thin-section holder.
Surface Conditions
For most samples, surface preparation is not necessary or recommended.
Most sample surface preparations such as grinding, cutting, and polishing
may introduce contamination. Only those samples with extremely uneven
surfaces and intended for bulk analysis should be cut and ground.
Pre-ablation can be used effectively for samples with grossly contaminated
or corroded surfaces. Pre-ablation is performed by using the scanning or
raster-mode programs, just as if the sample were being analyzed.
3–13
LSX-500 Laser Ablation System Operator’s Manual
Using the Laser Ablation System
Powder Samples
Powder samples must be prepared to prevent large quanitites of dust from
“blowing” around the sample cell. Many powders will press adequately
without the use of a binder material. Avoiding the use of the binder prevents
contamination and simplifies sample preparation. Powder samples are
normally compacted into a solid pellet usually a a pellet press. Similar to
XRF pellets, the compacted pellet may then be analyzed, just as other type
of solid material.
To avoid problems when making powder sample pellets:
CAUTION
•
Select a pellet press capable of producing at least 10,000 PSI (70,000
Kpa) compaction pressure. Loosely compacted pellets will break down
and be sputtered out of the sample cell, and provide poor or invalid
analytical results. Select a die for the press that is adequate for the
application. 13mm or 31mm stainless dies are most commonly used.
•
For best results the powder should be ground as finely as possible.
Grain sizes of less than 1-5 µm provide the best results for pressed
pellets.
Do not compress volatile or dangerous powders. Please read the MSDS sheet
prior to compressing unknown powders and other solid materials.
3–14
LSX-500 Laser Ablation System Operator’s Manual
Using the Laser Ablation System
Note:
In the event the ablation cell windows becomes cloudy with sampling
material it needs to be cleaned or replaced. Replacement is only required if
the window is damaged. Release the ablation cell from the cell base and lift
off. Remove the window by pressing the top of the window gently downward.
Carefully lift out the window and clean using clean water (DI preferred) and
rinse with alcohol. Blow or wipe dry with a clean wipe. Wipe out the inside
of the cell body and blow out any line.
Be sure there is no stray material on the o-ring seal. Reassemble the cell
by placing the small o-ring and then window in place. Be sure the small oring is properly seated in the small groove. Place the large o-ring against
the window and press until the o-ring is compressed to form an airtight
seal. Always test with a known test sample to certify that an airtight seal is
made. If only slight contamination is detected on the window, a simple wipe
clean with a lint free cloth and blow away may be sufficient to clean the
window.
Shutting Down the Laser Ablation System
To shut down the laser ablation system, complete the following steps:
1 If a laser method is running or if the laser is firing, click on the
appropriate stop command.
When a computer-controlled firing sequence is completed, the laser is
automatically turned off. Turn the laser off with the STOP button.
2 Turn the illumination lamp off.
Set the lamp brightness to zero with the lamp control “OFF” button.
3–15
LSX-500 Laser Ablation System Operator’s Manual
Using the Laser Ablation System
3 Exit from the DigiLaz™-II Software and either shutdown the
computer or leave it running.
“Alt-F4” and “Enter” to shut down the DigiLaz™-II Software.
4 Turn the laser power supply off.
The power keyswitch is located on the front panel of the laser power supply.
5 Turn the main power off.
The switch is located on the back of the LSX-500 System.
Note:
Keeping the system power (main power and power supply) on for longer
periods of time does not hurt the system. Infact by continuosly pumping
water through the laser cavity, problems of contamination of the cooling
water may be reduced. It is still recommended that the cooling water be
changed every thirty (30) days regardless of use. If the system is left on
overnight or for longer periods on time be sure to turn off the illumination
lamp.
3–16
LSX-500 Laser Ablation System Operator’s Manual
Using the Laser Ablation System
3–17
4 DigiLaz™-II Operating
Software
LSX-500 Laser Ablation System Operator’s Manual
DigiLazTM II Operating Software
DigiLaz™-II Operating Software
for the LSX-500 System
The purpose of this chapter is to provide the user a detailed description
regarding the functional aspects and control mechanisms of the DigiLaz™-II
Operating Software for the LSX-500 Laser Ablation System. The software
package is descriptive and easy-to-use. The illustrations provided in this
document are images that have been taken from the DigiLaz™-II Program.
This document is meant to be used as a resource for learning more about
laser ablation with the ultimate goal of improving analytical productivity
and increasing the number of laser ablation applications in your laboratory.
What’s New
Previous versions of the DigiLaz™ Software brought the user an entirely new
way of navigating the sample, creating methods and performing sample
analyses.
The DigiLaz™-II Software was developed to enhance the
functionality, the flexibility and the user experience of performing laser
ablation analyses.
New DigiLaz™-II Software features include:
-
All functionality and control accessible from the main screen.
-
Method parameter preferences stored for future use.
-
Position storage of commonly used sample coordinates.
-
Sample map developer to facilitate visual sample navigation.
-
Image annotation tool to enable the mark up of laser ablated sample
images for publications and presentations.
4–2
LSX-500 Laser Ablation System Operator’s Manual
DigiLazTM- II Operating Software
DigiLaz™-II
Operating Software
The DigiLaz™-II Software has seven different types of method operation and
several features for manual control of the laser system. These methods
include single line scan, single line raster, single point, segmented line scan,
rastering, scanning and depth profile. Laser parameter control and modes of
operation are accessed by "point and click" usage. The platform is designed
for maximum method flexibility using either a manual mode of selecting
method ablation coordinates or a drawing mode of displaying a method
pattern on the screen.
Figure 1. DigiLaz™-II Software main screen.
Figure 1 depicts the main screen of the DigiLaz™-II Software. Upon loading
the application, the application will verify that proper communication has
been established between the computer and the LSX-500 Laser Ablation
System. In this screen, the operator has manual control of the laser system.
It should be noted that upon loading the software, the LSX-500 System will
automatically initialize.
This includes homing the translation stage,
homing laser hardware and verifying system interlocks. At the bottom of the
4-3
LSX-500 Laser Ablation System Operator’s Manual
DigiLazTM-II Operating Software
screen there is a status bar. The user should verify that the status
condition is ready and safe before performing any ablations.
DigiLaz™-II Software Menu
This section describes the DigiLaz™-II Software menus accessible from
the main screen.
File Menu
Clicking on the File menu will pull-down the menu selection for the
method management system as shown in Figure 2.
Figure 2. DigiLaz™-II Software Method Management Menu.
Open LA Method: Allows the user to open and load a saved laser
ablation method. The shortcut keys are Ctrl-O. Each saved method has
a different file extension, given as follows:
.DTH - Depth Profile Method
.RAS - Rastering Method
.SCN - Scanning Method
.SPT - Single Point Method
.SLS - Single Line Scan Method
4-4
LSX-500 Laser Ablation System Operator’s Manual
DigiLazTM- II Operating Software
.SLR - Single Line Raster Method
.SGL – Segmented Line Scan Method
Save LA Method As: Allows the user to save the current method
parameters and laser conditions to a specified location (e.g.,
a:\NIST612.SLS). The shortcut keys are Ctrl-S.
Print LA Method: Enables a hard copy printout of the current
method parameters. The shortcut keys are Ctrl-P.
Save Sample Image: Allows the user to save the currently displayed
video image as a Tiff file.
Exit: Closes the DigiLaz™-II Software.
Acquisition Menu
The Acquisition menu (Figure 2-3) allows the user to start or stop video
acquisition.
Figure 3. DigiLaz™-II Software Acquisition Menu.
Instrument Menu
The Instrument menu (Figure 4) includes the following: system
initialization, host ICP control (or external triggering), gas
management, and system diagnostic.
4-5
LSX-500 Laser Ablation System Operator’s Manual
DigiLazTM-II Operating Software
Figure 4. DigiLaz™-II Software Instrument Menu.
System Initialization
The LSX-500 Laser Ablation System is initialized upon launching the
software. This function includes homing of the translation stage, the
aperture system, the video optics and verifying that the system
interlocks are engaged. The system can be re-initialized at any time by
selecting the Initialize System menu item.
Host ICP Control
The selection of Automatic (Figure 5) allows the LSX-500 System to
send an external trigger to the host ICP system. It is used for starting
the data acquisition of the host system using a delay programmed into
the DigiLaz™-II Software.
Figure 5. DigiLaz™-II Software Host ICP Control.
When Single Trigger is selected, the system will send a signal to the
host ICP system at the beginning of an analysis. When Multiple
Triggers are selected, the system will send a signal to the ICP host at
designated intervals. This option may be used for methods where there
are several ablation points of interest. This option is valid for the
following methods: Single point method, single line raster method, and
rastering method. For example, when using the single point method, a
signal would be sent to the host ICP system before every ablation point.
4-6
LSX-500 Laser Ablation System Operator’s Manual
DigiLazTM- II Operating Software
The Manual selection may be used to verify communication between
the laser ablation system and the host ICP system.
Note:
The host ICP control is valid only for certain ICP systems.
Gas Management
This menu item provides the manual selection that directs the argon
flow from the host ICP system (Figure 6).
Figure 6. DigiLaz™-II Software Gas Management Menu.
Purge: Argon gas flow purges the entrained air in the sample cell and
associated tubing and exits through the vent.
Bypass: Argon gas flow will bypass the sample cell and vent at the
back of the LSX-500 Laser Ablation System.
Online: Argon gas flow is directed to the host instrument.
Options: The time, in seconds, to complete a system purge and return
to the on-line mode. Engaging the system interlocks will also activate
this timing sequence.
4-7
LSX-500 Laser Ablation System Operator’s Manual
DigiLazTM-II Operating Software
System Diagnostic
The System Diagnostic menu (Figure 7) enables
maintenance tracking of the laser ablation system.
service
and
Figure 7. DigiLaz™-II Software System Diagnostic Menu.
Maintenance Log: The Maintenance Log selection allows the user to
enter maintenance data into a database.
Service and Service Log: These items are reserved for service
engineers.
Tools Menu
The Tools menu (Figure 8) item provides a selection of tools to facilitate
analyses.
Figure 8. DigiLaz™-II Software Tools Menu.
These tools include a sample map developer, a measurement tool, the
facility to store commonly used sample coordinates, an image
annotation tool, the facility to store method parameter preferences, and
the ability to select colors for displaying patterns on the video screen.
4-8
LSX-500 Laser Ablation System Operator’s Manual
DigiLazTM- II Operating Software
Help Menu
The Help menu (Figure 9) allows access to the online help provided
with the software.
Figure 9. DigiLaz™-II Software Help Menu.
DigiLaz™-II Software Functional Toolbars
On the main screen (Figure 1) there are three toolbars that provide
easy access to all the functionality of the software. The following
section describes the three toolbars: The main toolbar, the method
toolbar, and the laser control toolbar.
Main Toolbar
Figure 10. DigiLaz™-II Software Main Toolbar.
The main toolbar (Figure 10) provides access to the commonly used features
of the software. The functionality of each button is described in Table 1.
Table 1. Main Toolbar Button Functionality
Button
Function
4-9
LSX-500 Laser Ablation System Operator’s Manual
DigiLazTM-II Operating Software
Image Acquisition: This feature will start and stop image
acquisition. The image is gathered in real time allowing live
sample images to be displayed. In normal operation, the
high-resolution laser-sampling event will be shown on the
image during analysis.
Crosshair Display: This button controls the digital
targeting crosshair. When this button is pressed, the
crosshair and the legend are visible. The crosshair indicates
the region on the sample image where the ablation event will
occur. The digital crosshair is precisely aligned with the
beam delivery path.
Color Palette: This button provides a selectable color
palette for the digital crosshair and in Drawing mode of
analysis, colors can be changed for each trace that is done on
the sample image. This function is useful for selecting an
appropriate color that will be clearly visible when viewing
the sample.
Image Annotation: This feature will
manipulation and annotation of Tiff images.
allow
the
Method Mode: This button will toggle between Drawing
and Manual modes of method operation.
Method: This button enables the use of the various methods
to ablate the sample.
Sample Map Developer:
development of a sample map.
This
tool
will
allow
the
Measurement Tool: This tool enables the user to measure
features on the sample.
Position
positions.
4-10
Storage:
This
tool
stores
commonly
used
LSX-500 Laser Ablation System Operator’s Manual
DigiLazTM- II Operating Software
Gas Purge: This button directs the gas flow to the host ICP
instrument and is indicated by a green cylinder. A yellow
cylinder indicates that the sample cell is being purged.
Method Toolbar
The method toolbar enables access to the controls that facilitate automatic laser
ablation analyses. The functionality of each button is described in Table 2.
Table 2. Method Toolbar Button Functionality.
Button
Function
Go: This button begins the method ablation.
Stop: This button stops the method ablation.
Dry run: When this button is pressed the laser will fire
and ablate the sample. Otherwise, no firing will occur.
Method selection: This field allows for the selection of the
method that will be used to ablate the sample.
Laser Control Toolbar
The laser control toolbar allows manual adjustment of the laser
parameters and is useful for performing parameter optimization
experiments. The functionality of each button is described in Table 3.
Table 3. Laser Control Toolbar Button Functionality
Button
Function
Fire Laser: This button activates the laser firing sequence.
4-11
LSX-500 Laser Ablation System Operator’s Manual
DigiLazTM-II Operating Software
Stop Laser: This button terminates the laser firing
sequence.
Energy: The laser output energy is variable and can be set
from 5% - 100% in increments of 5%. Most applications are
performed at higher laser energies to obtain optimal
sensitivity.
Frequency: The pulse repetition rate is variable and can be
adjusted from 1-20 Hz and is expressed as laser shots per
second. The user-selected values are 1, 2, 4, 5, 10 and 20
shots/second.
Laser mode: The laser mode can be set to either
continuous or burst mode. This unique feature allows the
user to select burst mode and select the number of shots on
the sample that will occur using the pulse repetition rate.
Burst Shots: This field determines the number of shots
the laser fires and is only enabled when burst mode is
selected.
Spot Size: The spot size can be adjusted to the following
settings, 10, 25, 50, 100, 150, and 200 micrometers.
Shutter Delay: This field indicates the amount of time, in
seconds, that the laser fires (warms up) before the shutter
opens and ablation begins.
Polarizers: High transmittance polarizers are located
above and below the sample cell. These polarizers provide
the capability of filtering the transmitted light when the
thin-section mount is employed. Most commonly, this
feature is used when analyzing geological thin-sections,
mineral mounts or prepared melt inclusions. The bottom
polarizer moves in 10-degree increments. The left arrow
controls the polarizer in the counter clockwise direction and
the right arrow controls the polarizer in the clockwise
direction.
Lamp: This field allows for the selection of the lamp that
4-12
LSX-500 Laser Ablation System Operator’s Manual
DigiLazTM- II Operating Software
will be used to illuminate the sample.
Sample Illumination: Sample Illumination is adjusted by
using the control buttons to either increase or decrease
lamp intensity. The button with the yellow light bulb
increases the illumination in large increments. The button
with the "+" symbol uses small increments to illuminate the
sample. The button with the "-" symbol decreases the lamp
intensity in small increments. The button with the gray
light bulb turns off the lamp.
Sample Magnification: Sample magnification can be
adjusted using these buttons. The button with the positive
magnifying glass increases the magnification in large
increments. The button with the "+" symbol uses small
increments to zoom in on the sample. The button with the
"-" symbol zooms out in small increments. The button with
the positive magnifying glass zooms out in large
increments. The working range of the optical zoom is 1-10x.
This function is most useful for optically challenging
samples and micro-feature analysis of geological materials.
It should be noted that working at high magnification
settings reduces the field of view accordingly.
DigiLaz™-II
Software Main Screen
Sample Translation Control
The sample translation control (Figure 11) is located on the right side of
the main screen (Figure 1). It provides control of the high precision
sampling stage in three directions, x, y, and z for sample focusing. The
stage can be moved in the x, y or z direction by simply pressing down on
4-13
LSX-500 Laser Ablation System Operator’s Manual
DigiLazTM-II Operating Software
the arrows. It can also move in precise distances by entering the
distance in micrometers in the text field and clicking on the appropriate
arrow once. Sample focusing is accomplished by moving the translation
stage in the Z-Direction. The Z-Stage can be move in very small
increments by simply selecting a distance in micrometers in the user
field and clicking once on the appropriate arrow.
Figure 11. Sample Translation Control.
Laser Ablation Method Parameters
The laser ablation method parameters are located on the right side of the
main screen (Figure 1). The parameters can be viewed when the Method
button (Table 1) on the main toolbar (Figure 10) has been selected.
There are two method modes: Drawing mode and Manual mode. These
modes can be toggled using the Method Mode button (Table 1) on the
main toolbar (Figure 10). When the button is pressed, the software is in
the Manual mode. Otherwise, the software is in the Drawing mode.
There are seven different methods in the software and they can be
selected from the method toolbar (Figure 1). Once a method and a
method mode have been selected, the appropriate method parameters will
be visible.
4-14
LSX-500 Laser Ablation System Operator’s Manual
DigiLazTM- II Operating Software
Video Image
The video image is a real-time video display of the sample and is located
in the center of the main screen (Figure 1). Clicking on the video image
will result in the system moving the sample such that the position that
was clicked will be at the center of the video image.
Sample Coordinates
The sample position coordinates are located below the main toolbar and
above the video image on the main screen (Figure 1). These sample
coordinates correspond to the current position of the translation stage
and are depicted on the video image by the center position of the
crosshairs.
Sample Map
On the bottom left of the main screen (Figure 1), a sample image map
may be displayed. This image is generated using the Sample Map
Developer tool and is only visible upon running the Sample Map
Developer tool. A colored box will appear on the image indicating the
current position on the sample. This box will change in size when the
magnification is altered. Clicking on the image will move the translation
stage so that the position that was clicked will be located at the center of
the video image. Right clicking on the image will bring up a menu with
the option to clear the sample image map.
Crosshair and Legend
When the crosshairs are displayed using the Crosshair button (Table 1)
on the main toolbar (Figure 10), a legend is also displayed. The legend
lists the corresponding scale of the crosshair marks in micrometers at
the focused position of the sample. This scale is updated when the
magnification is changed.
4-15
LSX-500 Laser Ablation System Operator’s Manual
DigiLazTM-II Operating Software
Status Bar
A status bar is located at the bottom of the main screen (Figure 1). This
status bar consists of four sections.
System Status: The first section indicates the status of the system. If
the system is in the process of performing commands, a "Busy" will be
displayed. If the system is ready to accept commands, a "Ready" will be
displayed. When an "Interlock Open" message is present, this indicates
that either the cover of the LSX-500 is not secured or that the front door
is open. During an "Interlock Open" condition, the laser will not fire for
safety reasons.
Laser Status: The second section of the status bar displays the status of
the laser. The two conditions are "Safe" which means that a sample can
be safely removed from or placed into the sample holder, and "Firing"
which indicates that the laser is firing.
Method and Other System Status: The third section is used for
multiple purposes. The main purpose is to display the status of methods
that are being run. This section also displays the gas purging status and
the system initialization status.
Energy Reading: The fourth section displays the energy reading in mJ
taken from the energy meter on the LSX-500 Laser Ablation System.
Laser Ablation Methods
The DigiLaz™-II operating software for the LSX-500 System includes
seven different types of methods. Methods can be created, edited, saved,
loaded and printed using the software. DigiLaz™-II Software provides
two modes of method execution and ablation.
Drawing Mode: The drawing mode uses point and click sampling
designation on the image that is currently displayed and is integrated
with all laser methods. The sample is moved to the area of interest
4-16
LSX-500 Laser Ablation System Operator’s Manual
DigiLazTM- II Operating Software
and the user can select the Drawing Mode for point, click and drag
method programming. This automatic function allows the user to
select an area of the sample using point, click and drag operations to
select the points, patterns and areas for the laser ablation methods.
Ablation patterns are selected and traced directly on the image. Each
ablation experiment can then be executed and viewed on the image.
This function is not possible when using the manual mode of laser
operation.
Manual Mode: The manual mode of laser operation is used to perform
free-hand laser methods at any location in the ablation cell. This
method of operation is useful for ablation experiments that can use the
entire line of CETAC Ablation Cells including the thin-section holder,
oversize sample cell and standard ablation cell. Cell navigation can be
done very quickly without the viewing limitations of the Drawing mode
of analysis. The manual mode allows method programming over large
areas of interest and has great utility for mapping an entire sample.
In creating a new laser ablation method, the user must first determine
which ablation method is to be used. Each new method is developed to
suit a particular application requirement. Often, multiple methods can
be used to describe the same type of analytical information. For
example, depth profiling can provide the same useful information as
simply firing the laser in a single spot without moving the Z-Stage.
This section describes the seven different ablation methods, their
functionality, and the parameters for both modes of operation.
Single Line Scan Method
The single line scan method ablates a single line where the line can be in
any direction. The line can be scanned multiple times and timing can be
set based on the linear distance. This method (Figure 12) is commonly
used for tuning or optimizing the host ICP and for bulk analysis. In the
drawing mode, hold the left mouse button down to set the start of the
line, drag the cursor to any point on the image and release the button.
The parameters for this method in both modes are described in Table 4.
4-17
LSX-500 Laser Ablation System Operator’s Manual
DigiLazTM-II Operating Software
Figure 12. Single Line Scan Method in Drawing mode (left) and
Manual mode (right).
Table 4. Single Scan Method Parameters.
Parameter/Button
Load point
These buttons load the starting or the ending
point, the scan line will then be executed
between the two points.
Go to button
These buttons move the sample cell to the
single scan start location or to the stop
location.
Distance X Y
4-18
Function
The physical distance that the XY stage will
LSX-500 Laser Ablation System Operator’s Manual
DigiLazTM- II Operating Software
move, in micrometers.
Distance X
The distance
micrometers.
in
the
X
direction,
in
Distance Y
The distance
micrometers.
in
the
Y
direction,
in
Distance Z
The distance, in micrometers, between the two
scan points in the Z-Direction. Most of the
time they are same, except for uneven
samples.
Time per scan
The required time, in minutes, to perform the
single line scan.
Scan rate
The rate at which sample stage will be
translated, expressed in micrometers/second.
Number of times to
scan
The number of times for successive ablations
over the same coordinates.
Delay between scans
The time, in seconds, between each successive
scan.
Gas Blank
An optional field used to trigger data
acquisition on the host instrument after the
ablation has begun. This time period is set to
ensure adequate time elapses prior to the
initiation of ablation. In some quantification
schemes, the gas blank is useful before every
analysis.
Defocus
The distance, in micrometers, that the sample
cell will move up before firing the laser.
Energy
The laser energy used during the ablation
experiment.
Pulse rate
The number of shots/second (frequency) of
laser pulses used during the ablation
experiment.
Spot size
The spot size of the laser crater used during
4-19
LSX-500 Laser Ablation System Operator’s Manual
DigiLazTM-II Operating Software
the ablation experiment.
This value is
variable from 10-200 micrometers.
Single Line Raster Method
The single line raster method is similar to the single line scan except
that it is a line of spots. This method (Figure 13) is used for spatial
mapping and elemental variation studies. The line of spots can be
created at any angle or direction. It is useful for tracking grain
boundaries or surface defects. In the Drawing mode, hold the left
mouse button once and drag to any spot on the image and release the
button. The parameters for this method in both modes are described in
Table 5.
4-20
LSX-500 Laser Ablation System Operator’s Manual
DigiLazTM- II Operating Software
Figure 13. Single Line Raster Method in Drawing mode (left) and
Manual mode (right).
Table 5. Single Line Raster Method Parameters.
Parameter/Button
Load point
Go to button
Function
These buttons load the starting or ending
coordinates for the single line raster method.
These buttons move the sample cell to the
4-21
LSX-500 Laser Ablation System Operator’s Manual
DigiLazTM-II Operating Software
indicated coordinates.
Number of spots
The total number of ablation sites that will
occur in the single line raster.
Raster distance
X and Y computation to provide the area in
micrometers of the programmed ablation.
Distance between
spots
The distance, in micrometers, between each
successive ablation.
Defocus
The distance that the sample cell will move up
prior to firing the laser.
Delay between spots
The amount of time, after the laser has
completed firing, that the system delays before
moving to the next spot.
Repeat
The number of times the rastering sequence
will be repeated after the initial sequence.
Energy
The laser energy used during the ablation
experiment.
Frequency
The number of shots/second (frequency) of
laser pulses used during the ablation
experiment.
Spot size
The spot size of the laser crater used during
the ablation experiment. This value is variable
from 10-200 micrometers.
Burst
The number of shots to be executed at each
raster coordinate.
Gas Blank
An optional field used to trigger data
acquisition on the host instrument after the
ablation has begun. This time period is set to
ensure adequate time elapses prior to the
initiation of ablation. In some quantification
schemes, the gas blank is useful before every
analysis.
4-22
LSX-500 Laser Ablation System Operator’s Manual
DigiLazTM- II Operating Software
Segmented Line Scan Method
The segmented line scan is similar to the single line scan method
(Figure 14) except that in the segmented line scan there is one ablation
line with many segments joined together.
Figure 14. Segmented Line Scan Method in Drawing mode (left) and
Manual mode (right).
In the Drawing mode, click on points on the sample image and lines
will join these points. A trace on the sample image will display
precisely where the segmented line scan will occur. The line segments
can be at any angle or direction. All segments are joined and the laser
will continuously fire over the entire series of line segments. This
4-23
LSX-500 Laser Ablation System Operator’s Manual
DigiLazTM-II Operating Software
method is particularly useful for creating odd shaped lines in random
patterns. For example, scanning mollusks and coral specimens. The
parameters for this method in both modes are described in Table 6.
Table 6. Segmented Line Scan Method Parameters.
Parameter/Button
Function
Load point
These buttons load the current coordinates for
the line segment.
Go to button
These buttons move the sample cell to the
specified point (defined in the point field) in the
table.
Erase point
This button will erase any given point (defined
in the point field) loaded on the image. The
other points will be adjusted accordingly.
Erase all
This button will erase all points on the image.
Point
This field indicates the point that corresponds
to the ablation coordinates that were loaded for
a given line segment.
X Y distance
The calculated distance, in micrometers, of
the entire ablation pattern.
Scan time
The total time, in minutes:seconds, that is
required to execute the segmented line.
Scan rate
The rate at which sample will be translated,
expressed in micrometers/second.
Pause time between
points
This parameter provides a delay time, in
seconds, between each scanned segment.
Gas Blank
An optional field used to trigger data
acquisition on the host instrument after the
ablation has begun. This time period is set to
ensure adequate time elapses prior to the
4-24
LSX-500 Laser Ablation System Operator’s Manual
DigiLazTM- II Operating Software
initiation of ablation. In some quantification
schemes, the gas blank is useful before every
analysis.
Defocus
The distance that the sample cell will move up
prior to firing the laser.
Energy
The laser energy used during the ablation
experiment.
Frequency
The number of shots/second (frequency) of
laser pulses used during the ablation
experiment.
Spot size
The spot size of the laser crater used during
the ablation experiment. This value is variable
from 10-200 micrometers.
Depth Profile Method
The depth profile method (Figure 15) "drills a hole" into the sample matrix.
Depth profiling (Z-Drilling) takes advantage of the flat-top laser beam. The
sample cell moves upwards as the laser is firing. Key parameters are the Z-Stage
rate and pulse repetition rate. Spatial resolution of 0.5 µm is possible since the
Z-Stage on the LSX-500 is microstepping down to 0.25 µm. This method
performs ablations as gradients. It can be used for creating a proto-crater in the
sample matrix followed by high energy density drilling. The parameters for
this method in both modes are described in Table 7.
4-25
LSX-500 Laser Ablation System Operator’s Manual
DigiLazTM-II Operating Software
Figure 15. Depth Profile Method in Drawing mode (left) and Manual
mode (right).
Table 7. Depth Profile Method Parameters.
Parameter/Button
4-26
Function
Load point
These buttons load the current coordinates for
drilling sites, up to a maximum of 1000
points.
Go to button
These buttons move the sample cell to the
specified point in the table.
LSX-500 Laser Ablation System Operator’s Manual
DigiLazTM- II Operating Software
Erase point
Erase all
This button will erase any given point (defined
in the point field) loaded on the image. The
other points will be adjusted accordingly.
This button will erase all points on the image.
Point
This field indicates the point that corresponds
to the ablation coordinates that were loaded for
a given drilling site.
Frequency
The number of shots/second (frequency) of
laser pulses used during the ablation
experiment. Optimization of this parameter is
key for depth profiling.
Z-Rate
The user-defined rate the Z-Stage will move up
in micrometers/second. The minimum rate
allowed is 0.25 micrometers/second.
Number of steps
Each ablation gradient can be divided in up to
five steps. This field indicates the number of
steps that will be used for each drilling site in
the ablation experiment.
Energy
The laser energy used during the ablation
experiment.
Time
The time, in seconds, that each profile step
will take to execute.
Spot size
The spot size of the laser crater used during
the ablation experiment. This value is variable
from 10-200 micrometers.
Pause time between
steps
The delay time, in seconds, between each
profile step.
Gas Blank
An optional field used to trigger data
acquisition on the host instrument after the
ablation has begun. This time period is set to
ensure adequate time elapses prior to the
initiation of ablation. In some quantification
schemes, the gas blank is useful before every
4-27
LSX-500 Laser Ablation System Operator’s Manual
DigiLazTM-II Operating Software
analysis.
Single Point Method
The Single Point method (Figure 16) allows the user to define a
number of different ablation points for analysis. In the Drawing mode,
click on any point within the sample image and a numbered point will
appear. Continue to set point ablations in this fashion. The sample
will be moved to the first spot and after the burst of laser shots, the
sample will be moved to the next point location in the sequence and the
laser will fire a burst of laser shots. This process continues until all
the defined points on the sample have been ablated.
4-28
LSX-500 Laser Ablation System Operator’s Manual
DigiLazTM- II Operating Software
Figure 16. Single Point Method in Drawing mode (left) and Manual
mode (right).
This method is useful for performing analyses at multiple points
however, each point can be characterized by having the same or
different control parameters. This method can be used for elemental
zonation studies and drilling studies in geological samples. The
parameters for this method in both modes are described in Table 8.
4-29
LSX-500 Laser Ablation System Operator’s Manual
DigiLazTM-II Operating Software
Table 8. Single Point Method Parameters.
Parameter/Button
Function
Load point
These buttons load the current coordinates
into the table.
Go to button
These buttons move the sample cell to the
specified point (defined in the point field) in the
table.
Erase point
This button will erase any given point (defined
in the point field) loaded on the image. The
other points will be adjusted accordingly.
Erase all
This button will erase all points on the image.
Point
This field indicates the point that corresponds to
the ablation coordinates that were loaded for a
given ablation site.
X Pos., Y Pos., Z Pos.
The X, Y, and Z sample coordinates loaded for
each point in the table.
Energy
The laser energy used during the ablation
experiment.
Burst or Shots
The number of laser shots executed at each
point during the ablation experiment.
Frequency
The number of shots/second (frequency) of
laser pulses used during the ablation
experiment.
Spot size
The spot size of the laser crater used during
the ablation experiment.
This value is
variable from 10-200 micrometers.
Pause
The delay time, in seconds, before the system
will move to the next point.
Gas Blank
An optional field used to trigger data
acquisition on the host instrument after the
ablation has begun. This time period is set to
4-30
LSX-500 Laser Ablation System Operator’s Manual
DigiLazTM- II Operating Software
ensure adequate time elapses prior to the
initiation of ablation. In some quantification
schemes, the gas blank is useful before every
analysis.
Defocus
The distance, in micrometers, that the sample
cell will move up before firing the laser.
Scanning Method
During ablation of a scanning method (Figure 17), the sample cell is
moving horizontally at a constant speed. The laser is continuously
firing and a "box of lines" pattern or region is ablated. This method is
commonly used for bulk analysis over large areas. In the Drawing
mode, hold the left mouse button down and drag the desired shape.
This is a classical laser pattern that is easy to use for pre-ablations of
the sample surface prior to analyses.
The parameters for this method in both modes are described in Table 9.
4-31
LSX-500 Laser Ablation System Operator’s Manual
DigiLazTM-II Operating Software
Figure 17. Scanning Method in Drawing mode (left) and Manual mode
(right).
4-32
LSX-500 Laser Ablation System Operator’s Manual
DigiLazTM- II Operating Software
Table 9. Scanning Method Parameters.
Parameter/Button
Function
Load point
These buttons load the starting or ending
coordinates for the rectangular pattern formed by
the scanning method.
Go to button
These buttons move the sample cell to the
indicated coordinates.
Number of scan lines
Based on the coordinates of the starting and
ending point of the ablation, the number of
scan lines will be computed and displayed in
this field. This method uses the distance
between each line, center of crater to center of
crater for maximum flexibility.
Scan area
The area is calculated, in micrometers, and
displayed in this field.
Distance between lines
Distance, in micrometers, between two
parallel scan lines from center of crater to
center of crater.
Scan rate
The rate at which the sample will be
translated, expressed in micrometers/second.
Delay between scans
This parameter provides a delay time between
each scanning sequence if more than one pass
over the target is desired. This field is useful
for pre-ablation experiments.
Gas Blank
An optional field used to trigger data
acquisition on the host instrument after the
ablation has begun. This time period is set to
ensure adequate time elapses prior to the
initiation of ablation. In some quantification
schemes, the gas blank is useful before every
analysis.
Repeat
The number of times the scanning sequence
will be repeated after the initial ablation
4-33
LSX-500 Laser Ablation System Operator’s Manual
DigiLazTM-II Operating Software
sequence.
Energy
The laser energy used during the ablation
experiment.
Frequency
The number of shots/second (frequency) of
laser pulses used during the ablation
experiment.
Spot size
The spot size of the laser crater used during
the ablation experiment. This value is variable
from 10-200 micrometers.
Change scan origin
button
When this button is pressed, the current
position becomes the start coordinates and the
end coordinates are updated such that the
total area that is to be scanned remains the
same.
Time
The time, in seconds, that the scanning
method will require to execute.
Rastering Method
The Rastering Method (Figure 18) forms a grid of spots where the
sample will be moved a specified distance (as defined by the user), then
a burst of laser shots will be fired for each spot in the grid. In the
Drawing mode, hold the left mouse button down and drag the desired
shape. This is a classical laser pattern that can be used for preablations of the sample surface prior to analyses. This method is used
for unattended operation where information regarding the sample
composition over multiple points is desired, for example, mapping
elemental concentrations in steel and alloys. The parameters for this
method in both modes are described in Table 10.
4-34
LSX-500 Laser Ablation System Operator’s Manual
DigiLazTM- II Operating Software
Figure 18. Rastering Method in Drawing mode (left) and Manual mode
(right).
4-35
LSX-500 Laser Ablation System Operator’s Manual
DigiLazTM-II Operating Software
Table 10. Rastering Method Parameters.
Parameter/Button
Function
Load point
These buttons load the starting or ending
coordinates for the rectangular pattern formed by
the rastering method.
Go to button
These buttons move the sample cell to the
indicated coordinates.
Number of spots
The total number of ablation sites that will
occur in a given rastering area.
Raster area
The area is calculated, in micrometers, and
displayed in this field.
Distance between
spots
The distance, in micrometers, between each
successive ablation.
Defocus
The distance that the sample cell will move up
prior to firing the laser.
Delay between spots
The amount of time, after the laser has
completed firing, to delay before moving to the
next spot.
Repeat
The number of times the rastering sequence
will be repeated after the initial ablation
sequence.
Energy
The laser energy used during the ablation
experiment.
Frequency
The number of shots/second (frequency) of
laser pulses used during the ablation
experiment.
Spot size
The spot size of the laser crater used during
the ablation experiment. This value is variable
from 10-200 micrometers.
Burst
The number of shots to be executed at each
raster coordinate.
4-36
LSX-500 Laser Ablation System Operator’s Manual
DigiLazTM- II Operating Software
Gas Blank
An optional field used to trigger data
acquisition on the host instrument after the
ablation has begun. This time period is set to
ensure adequate time elapses prior to the
initiation of ablation. In some quantification
schemes, the gas blank is useful before every
analysis.
Parameters
The Parameters feature (Figure 19) enables the storing of default
method parameter preferences. The values for the parameters in all
the methods are permanently stored. Each time the software is loaded,
the parameters in the methods will be initialized to these default
values.
4-37
LSX-500 Laser Ablation System Operator’s Manual
DigiLazTM-II Operating Software
Figure 19. Parameter Screen.
Colors
The Color Selection screen (Figure 20) provides a selectable color
palette for the digital crosshair and in the drawing mode of analysis,
colors can be changed for each trace that is displayed on the sample
image. This function is useful for selecting an appropriate color that
will be clearly visible when viewing the sample.
4-38
LSX-500 Laser Ablation System Operator’s Manual
DigiLazTM- II Operating Software
Figure 20. Color Selection Screen.
Sample Map Developer
The Sample Map Developer tool (Figure 21) creates a map of the
sample surface. This map facilitates navigation of the sample, as it is
a visual representation of the sample in the sample cell with the laser
illumination and magnification.
To create a sample map, select the center location. The center location
can either be the center of the sample cell or the present position of the
sample. Next, select the width and height in terms of images. Keep in
mind that half the images will be to either side of the center position.
For example, if the width is specified as 10 images, then five images
will be to the left of the current position and five will be to the right.
Once the width and height have been specified then press the Create
button. The total time the system uses to develop the map is
dependent on the total number of images. The larger the specified
number of images, the longer it will take.
4-39
LSX-500 Laser Ablation System Operator’s Manual
DigiLazTM-II Operating Software
Once the map has been developed, it can be saved for future use. The
map is saved as two files: filename.map and filename.tif. The sample
map can also be printed. In addition, the sample image can be
annotated using the Image Annotation tool. Upon opening or creating
a map, a miniature sample map will be displayed on the main screen
(Figure 1).
Figure 21. Sample Map Developer Screen.
Position Storage
The Position Storage tool (Figure 22) stores commonly used positions.
These positions are permanently stored and can be used to navigate
around samples with similar features. The buttons on this screen are
described in Table 11. Once a point has been loaded, its coordinates
will be listed in the table. A description of the point can be entered in
the column labeled Comment.
4-40
LSX-500 Laser Ablation System Operator’s Manual
DigiLazTM- II Operating Software
Figure 22. Position Storage Screen.
Table 11. Position Storage Button Description.
Button
Function
Load button: This button will load the current coordinates
into the table.
Go to button: This button will move the sample to the
indicated coordinates for the specified point.
Delete button: This button will delete the coordinates in
the table for the specified point. The coordinates for the
first point are default coordinates and cannot be deleted.
4-41
LSX-500 Laser Ablation System Operator’s Manual
DigiLazTM-II Operating Software
Measurement Tool
The Measurement tool (Figure 23) enables the measurement of features
on the sample. To measure a feature, move the sample (using the
translation stage control) to one end of the desired feature and press the
top button with the arrow on it to load the coordinates. Repeat this
procedure for the other end of the feature. Once both sets of
coordinates have been loaded, the distances will be computed. The total
distance is the Euclidean distance of the x, y, and z distances.
Figure 23. Measurement Tool Screen.
Image Annotation
The Image Annotation tool allows the manipulation and annotation of
laser ablated sample images for publications and presentations. To use
the tool an image must first be opened. The toolbar can then be used to
add various objects to the image. The image can then be saved or
printed. The following section describes the options available on the
toolbar.
4-42
LSX-500 Laser Ablation System Operator’s Manual
DigiLazTM- II Operating Software
Figure 24. Image Annotation Screen.
Open
The Open button, as well as the Open Image menu item, opens a tif
image file. This file is displayed in the center of the screen.
Save
The Save button, as well as the Save Image menu item, saves the
images to a Tiff image file. Any objects on the image will be merged
with the image (i.e., when an image is re-opened the objects on the
image cannot be selected).
4-43
LSX-500 Laser Ablation System Operator’s Manual
DigiLazTM-II Operating Software
Print
The Print button, as well as the Print Image menu item, prints the
image.
Pointer
The default tool is the pointer. This tool enables the selection of object
on the image. Once an object is selected, the object can be moved to a
desired location by simply clicking on it and dragging it. An object can
also be resized by clicking on the small boxes that are displayed when
an object is selected and dragging them to the desired size. Right
clicking on an object will bring up a menu with options pertaining to
the selected object.
Line
When this button has been pressed, a line can be drawn on the image.
To draw a line, simply click on the image and drag until the desired
length has been reached. When this object is selected, right clicking it
brings up a menu. An available menu option is Line Properties, which
allows for the manipulation of the properties of the line.
Arrow
When this button has been pressed, an arrow can be drawn on the
image. To draw an arrow, simply click on the image and drag until
the desired length has been reached. When this object is selected, right
clicking it brings up a menu. An available menu option is Pointer
Properties, which allows for the manipulation of the properties of the
arrow.
4-44
LSX-500 Laser Ablation System Operator’s Manual
DigiLazTM- II Operating Software
Rectangle
When this button has been pressed, a rectangle can be drawn on the
image. To draw a rectangle, simply click on the image and drag until
the desired size has been reached. When this object is selected, right
clicking it brings up a menu. An available menu option is Rectangle
Properties, which allows for the manipulation of the properties of the
rectangle.
Ellipse
When this button has been pressed, an ellipse can be drawn on the
image. To draw an ellipse, simply click on the image and drag until
the desired size has been reached. When this object is selected, right
clicking it brings up a menu. An available menu option is Ellipse
Properties, which allows for the manipulation of the properties of the
ellipse.
Highlight
When this button has been pressed, a highlighted section can be drawn
on the image. To draw a highlighted section, simply click on the image
and drag until the desired size has been reached. When this object is
selected, right clicking it brings up a menu. An available menu option
is Hilite Properties, which allows for the manipulation of the properties
of the highlighted section.
Polygon
When this button has been pressed, a polygon can be drawn on the
image. To draw a polygon, click on the image, move the mouse and
click to end the first line. Repeat this process for the desired number of
lines. To end the process, right click on the image. The last line will
4-45
LSX-500 Laser Ablation System Operator’s Manual
DigiLazTM-II Operating Software
be joined with the first line to complete the polygon. When this object
is selected, right clicking it brings up a menu. An available menu
option is Edit Shape, which allows for the manipulation of the nodes
(where two lines join) of the polygon. Another available menu option is
Polygon Properties, which allows for the manipulation of the properties
of the polygon.
Polyline
When this button has been pressed, a polyline can be drawn on the
image. This object is very similar to the polygon except it does not join
the last line to the first. To draw a polyline, click on the image, move
the mouse and click to end the first line. Repeat this process for the
desired number of lines. To end the process, right click on the image.
When this object is selected, right clicking it brings up a menu. An
available menu option is Edit Shape, which allows for the manipulation
of the nodes (where two lines join) of the polyline. Another available
menu option is Polyline Properties, which allows for the manipulation
of the properties of the polyline.
Transparent label
When this button has been pressed, a transparent label can be drawn
on the image. To draw a transparent label, simply click on the image
and drag until the desired size has been reached. When this object is
selected, right clicking it brings up a menu. An available menu option
is Transparent Label Properties, which allows for the manipulation of
the properties of the label such as the text to display.
Label
When this button has been pressed, a label can be drawn on the image.
To draw a label, simply click on the image and drag until the desired
size has been reached. When this object is selected, right clicking it
4-46
LSX-500 Laser Ablation System Operator’s Manual
DigiLazTM- II Operating Software
brings up a menu. An available menu option is Label Properties,
which allows for the manipulation of the properties of the label such as
the text to display.
Note
When this button has been pressed, a note (or memo) can be drawn on
the image. To draw a note, simply click on the image and drag until
the desired size has been reached. When this object is selected, right
clicking it brings up a menu. An available menu option is Note
Properties, which allows for the manipulation of the properties of the
note such as the text to display.
Stamp
When this button has been pressed, a stamp can be used to put text on
the image. To use the stamp, simply click on the image. A window
will be displayed. A stamp must be selected before pressing the Ok
button. If no stamps are available, a stamp must be created using the
Create Text button or the Create Image button and the selected. When
this object is selected, right clicking it brings up a menu. An available
menu option is Change Stamp, which allows for a different stamp to be
displayed.
Freehand
When this button has been pressed, a freehand drawing can be
displayed on the image. To draw a freehand object, simply click on the
image and drag to draw the desired object. When this object is
selected, right clicking it brings up a menu. An available menu option
is Edit Shape, which allows for the manipulation of the nodes (where
two lines join) of the freehand object. Another available menu option is
Freehand Properties, which allows for the manipulation of the
properties of the freehand object.
4-47
LSX-500 Laser Ablation System Operator’s Manual
DigiLazTM-II Operating Software
Image
This button will allow for the insertion of another image file into the
current image. To insert an image, click and drag a rectangle on the
image. An Open dialog box will be displayed for the image file
selection.
Font
This button will display a Font dialog box. This window allows for the
manipulation of font characteristics used when displaying text. An
object must be selected before using this field.
Foreground color
This button will display a Color dialog box for selection of the
foreground color of an object. An object must be selected before using
this field.
Background color
This button will display a Color dialog box for selection of the
background color of an object. An object must be selected before using
this field.
Left
This field specifies the horizontal coordinate, in pixels, of the left edge of
an object relative to the image. A value of zero aligns the left edge of
an object with the left edge of the image. An object must be selected
before using this field.
4-48
LSX-500 Laser Ablation System Operator’s Manual
DigiLazTM- II Operating Software
Top
This field specifies the vertical coordinate, in pixels, of the top left
corner of an object relative to the image. A value of zero aligns the top
left corner of an object with the top edge of the image. An object must
be selected before using this field.
Width
This field specifies the horizontal size of an object in pixels. An object
must be selected before using this field.
Height
This field specifies the vertical size of an object in pixels. An object
must be selected before using this field.
Pen width
This field specifies the width of the pen when drawing lines. An object
must be selected before using this field.
Fill Mode
This field specifies whether an object should be a solid color or
transparent. An object must be selected before using this field.
Annotation text
This field can be used to enter text that should appear in a label or a
note. An object must be selected before using this field.
4-49
LSX-500 Laser Ablation System Operator’s Manual
DigiLazTM-II Operating Software
System Diagnostic
The System Diagnostic provides access to three primary functions.
Two maintenance logs, one for normal system maintenance and one for
service engineers. The service engineers log and the service option are
password protected and are not user accessible
Maintenance Log
The Maintenance Log should be used frequently for entering and
storing routine maintenance items. The list of stored items includes
water changes, tubing changes, fuse replacements and other choices
(Figure 25).
Figure 25. Maintenance Log for the LSX-500 System.
The user should their name, the date, the action performed and any
necessary comments. To add the information to the log, press the Add
button. To remove an entry, select the entry by clicking on its row in
4-50
LSX-500 Laser Ablation System Operator’s Manual
DigiLazTM- II Operating Software
the table. Then press the Remove button. The maintenance log can be
printed.
Service and Service Log
These items are reserved for service engineers.
4-51
LSX-500 Laser Ablation System Operator’s Manual
DigiLazTM-II Operating Software
4-52
5 Maintaining the LSX-500
Laser Ablation System
Maintaining the Laser Ablation
System
Routine maintenance of the LSX-500 Laser Ablation System consists of
verifying safety systems performance and maintaining the cooling system.
Additional periodic maintenance tasks are required, including replacement
of the following laser ablation system components:
•
Coolant
•
Sample Illumination Lamp
•
Tubing Replacement
•
Sample Cell Window Cleaner
This manual explains how to verify safety systems performance, maintain
the cooling system, replace the tubing and sample illumination lamp, and
nitrogen purge the laser head.
Safety Systems
The LSX-500 Laser Ablation System is designed, as a Class I laser
product, to contain all hazardous laser radiation during normal operation,
as required by the U.S. Department of Health and Human Services.
Normal operation of the LSX-500 shall not be allowed unless all safety
systems are operational.
Periodic safety systems inspection and performance testing are mandatory
to insure continuous laser radiation containment. Verify the operation of
all safety systems, at least semi-annually, or whenever the LSX-500 has,
or may have been transported, subjected to damage, or any other adverse
conditions that could have affected safety systems operation.
LSX-500 Laser Ablation System Operator’s Manual
Maintaining the Laser Ablation System
Safety System Inspection
WARNING
Before proceeding, read the entire WARNING (title pages,
“Safety”) about tampering with or deactivating safety systems
and/or interlocks, and the resulting personal injury that could
occur.
1 Verify that removing the remote interlock connector disables the
laser power supply.
The remote interlock connector is located within the laser power supply
communication cable on the back panel of the laser module, connected to
the laser power supply port (Figure 5-1). Replace any malfunctioning
components.
2 Verify that the laser will operate only with the laser power
keyswitch in the ON position.
Verify that the key can be removed only when the keyswitch is in the OFF
position.
Return the laser control unit for factory service if it
malfunctions.
5-3
LSX-500 Laser Ablation System Operator’s Manual
Maintaining the Laser Ablation System
Fuse Holder
Figure 5-1. Rear View of the LSX-500.
Cooling System Maintenance
Changing the laser cooling system coolant is the primary maintenance
tasks that will be performed. Other items should also be checked
periodically to maintain the cooling system properly. In addition, the
cooling system has to be drained before transportation.
CAUTION
The cooling unit reservoir must only be filled with distilled water .
5-4
LSX-500 Laser Ablation System Operator’s Manual
Maintaining the Laser Ablation System
Periodic Checks of the Cooling System
1 Circulate coolant through the system for at least 30 minutes
every month when the laser is not in use.
Turning the laser power supply keyswitch ON will turn on the coolant
pump motor, and circulate the coolant.
2 Inspect the coolant level in the reservoir every week.
Look through the inspection slot on the back of the cooling unit to see the
fluid level. Keep the coolant level in the reservoir approximately halfway
between the MIN and MAX markers at all times.
Changing Coolant
Replace coolant at least once every three months, and check coolant at
least once every three months for organic contamination. To replace the
coolant, complete the following steps:
CAUTION
Make sure you have a catch basin ready and in place to collect the coolant.
1 Disconnect the red, then the blue coolant lines from the laser
head.
The coolant lines have a quick disconnect which automatically seals to
prevent coolant loss. Water will start to immediately drain out of the head.
2 Drain the laser head of all coolant.
Drain the laser head completely and drain the water into a catch basin by
running air to flush out all of the water.
5-5
LSX-500 Laser Ablation System Operator’s Manual
Maintaining the Laser Ablation System
Steps 1 & 2
Step 5
Steps 3 & 4
Figure 5-2. Front View of the LSX-500.
3 Drain the cooling unit of all coolant.
To drain the cooler, attach the purge connectors found in the coolant
change kit in place of the cooling line fittings. Turn the laser power supply
key Switch ON, and run the coolant pump to empty the coolant reservoir.
Allow the pump to run only as long as coolant continues to flow into a
catch basin, and do not run the pump dry, this will cause permanent
damage.
4 Inspect the coolant in the drain basin for organic or particle
contaminants (i.e. algae or black particles). If contaminants are
found, contact CETAC Technologies immediately, and do not use
the laser system.
5 Refill the cooling system.
If the coolant is free of contaminants, follow the steps listed in “Filling the
Cooling System,” found in the next section.
5-6
LSX-500 Laser Ablation System Operator’s Manual
Maintaining the Laser Ablation System
Draining the Cooling System for Transport
Your cooling system must be completely drained and purged before
transport, especially flight transport, since the water will freeze and
damage the laser head and cooling unit.
To drain and purge the cooling system for transport, complete the
following steps:
CAUTION
Make sure you have a catch basin ready and in place to collect the coolant.
1 Disconnect both coolant lines on the laser head.
The coolant lines have a quick disconnect which automatically seals to
prevent coolant loss. Water will start to immediately drain out of the head.
2 Drain the laser head of all coolant.
Drain the laser head completely by draining the water into a catch basin.
3 Remove residual coolant from the laser head.
Blow dry nitrogen at 20 psi (135 kPa) through either connector to remove
any residual coolant, and inspect the coolant for contamination before
discarding.
4 Drain the cooling unit of all coolant.
To drain the cooler, attach the purge connectors found in the coolant
change kit in place of the cooling line fittings. Turn the laser power supply
key Switch ON, and run the coolant pump to empty the coolant reservoir.
Allow the pump to run only as long as coolant continues to flow into a
catch basin.
Do not run the pump dry! This will cause permanent damage.
5-7
LSX-500 Laser Ablation System Operator’s Manual
Maintaining the Laser Ablation System
CAUTION
5 Remove residual coolant from the cooling unit.
Blow dry nitrogen at 20 psi (135 kPa) into the Coolant In (red connector) to
remove residual water from the heat exchanger. A small amount of water
in the bottom of the reservoir container is not a concern, however, since
coolant expansion is now possible.
6 Using the fittings in the service pack, drain all water from the
coolant lines.
Filling the Cooling System
CAUTION
The cooling unit reservoir must only be filled with distilled water.
The laser cooling unit is incorporated in the laser power supply. The
cooling unit reservoir must only be filled with distilled water. Finally all
air must be purged from the cooling loop prior to operating the laser.
1 Unplug the LSX-500 laser power supply and wait one minute.
2 Remove plastic cover from top of water bottle.
3 Reservoir access
Open the reservoir cap located on the top of the power supply module.
4 Fill the reservoir 1/2- 3/4 full with coolant.
An initial fill of approximately 32 ounces (1/2 liter) will bring the liquid
level in the reservoir sight-glass to between 3/4 and completely full. DO
NOT overfill, or allow any liquid to splash into the cooler chassis. Clean-up
all spills immediately. Tilt the power supply to the left approximately 45
degrees to help prime the pump with water.
5-8
LSX-500 Laser Ablation System Operator’s Manual
Maintaining the Laser Ablation System
CAUTION
Never expose the LSX-500 Laser Ablation System to freezing temperatures
(below 32°F/0°C). Frozen coolant will destroy the laser head, cause severe
cooling unit damage, and void the warranty.
5Plug the LSX-500 Laser Power supply into the AC power source.
6 Turn the laser power supply power key switch ON.
The cooling unit pump will turn on automatically after power-up, and the
coolant reservoir level will drop while air is purged from the lines and laser
cavity.
Add more coolant as needed, up to an additional 32 ounces (1/2 liter), until
the reservoir level stabilizes between 1/2 and 3/4 full while the circulating
pump is running. Do not allow the pump to run dry.
7 Once stable, turn the pump off and allow trapped air to escape.
Turn the laser power supply key switch OFF to stop the coolant
circulating pump, wait 30-60 seconds and turn the key switch ON again.
Watch for air bubbles in the coolant lines, or a decrease in the coolant
reservoir level. Add make-up coolant as required to maintain the reservoir
level at 1/2-3/4 full.
Repeat this procedure three to five times, or until all air has been purged
from the laser cooling system, indicated by the absence of air bubbles in
the coolant lines and a stable coolant reservoir level. This may take as long
as 20 minutes.
Note:
This procedure must be repeated before using the laser whenever the
coolant lines have been disconnected.
8Replace the coolant reservoir cap and plastic cover.
5-9
LSX-500 Laser Ablation System Operator’s Manual
Maintaining the Laser Ablation System
Replacing the Sample Illuminator Lamps
The lamps are located inside the rear door assembly on the right. To
replace a sample illuminator lamp, complete the following steps:
Figure 5-3. LSX-500 Rear View with Door Assembly open.
WARNING
Discharge static buildup and ground to the LSX-500 before
performing any maintenance. Do not touch or short-circuit bare
contacts of communications ports.
1 Turn off electrical power to the LSX-500, and disconnect all
electrical cables and coolant lines from the laser module.
Allow the lamp housing to cool for at least five minutes before changing
the bulb.
5-10
LSX-500 Laser Ablation System Operator’s Manual
Maintaining the Laser Ablation System
2 Open the rear door assembly of the laser module (Figure 5-3).
3 Remove the old bulb (Figure 5-3).
Hold the lamp in place and gently push the extraction lever located next to
the lamp. The lamp will slowly slide towards you from it from its holder.
4 Install the new bulb.
Obtain a replacement projection lamp, and carefully unpack the new lamp.
Slide the new lamp into place. Avoid touching the inside of the reflector.
5 Close and Secure the Rear Door assembly.
Internal Tubing Replacement
In the event the sample gas/valve assembly tubing becomes contaminated,
it must be replaced. A spare parts kit can be obtained from CETAC. In
lieu of purchasing the kit, the tubing can be changed with stock Tygon ®
tubing. See Figures 3-4 and 3-5 for help in locating the tubing position. All
the Tygon ® tubing is 1/4” o.d. and 1/8” i.d.
Symptoms that the tubing needs to be replaced can include the following:
•
Argon blank contamination
•
Poor stability and poor long-term precision
•
Visible coating of ablated material in the transfer line
5-11
LSX-500 Laser Ablation System Operator’s Manual
Maintaining the Laser Ablation System
The following tubing is used (See Figure 3-4):
Ablation cell to valve #1
Valve #1 to tee
Valve #2 to tee
Replace With The Same Lengths
Cell base to Valve #2
That Are In The Laser Unit.
Valve #1 to carrier gas in
Tee to sample gas out
Valve #2 to vent
When changing the tubing, care must be taken when disconnecting it
from the nuts. There are two ferrules that provide the sealing pressure.
Loss of the ferrules may cause leakage in the tubing assembly. After
changing the tubing, test the laser with a known good sample to certify
that there is no air leakage.
Figure 5-4. Tubing Diagram of the LSX-500.
5-12
LSX-500 Laser Ablation System Operator’s Manual
Maintaining the Laser Ablation System
Figure 5-5. Side View of LSX-500 with Panel Removed.
5-13
LSX-500 Laser Ablation System Operator’s Manual
Maintaining the Laser Ablation System
5-14
6 Troubleshooting the LSX500 Laser Ablation System
Troubleshooting the
Laser Ablation System
The laser controller has been designed to control the laser, and warn the
user of problems if they occur. The microprocessor-based system monitors
the laser ablation system, and automatically shuts down the laser if a
fault occurs. Software limits have been factory selected to protect the laser
system against electrical and optical damage.
When the laser ablation system does not function properly, isolate the
problem to determine if it originates in the analytical instrument, the
computer, or the laser ablation system. If you determine the problem is in
the LSX-500, check the AC power, the communications interface, the
safety interlocks, or the laser head to find the cause of the problem and
resolve it.
This chapter explains how to troubleshoot minor LSX-500 problems. If you
cannot solve a problem using the steps given in this chapter, contact
CETAC Technologies Customer Service and Support (1-800-369-2822) or an
authorized Service Representative.
Note:
This chapter explains how to troubleshoot LSX-500 problems. This
manual will guide a service engineer, technician or authorized operator to
find where the LSX-500 has failed. If you cannot solve a problem using the
steps given in this chapter, contact CETAC Technologies Customer
Service and Support (1-800-369-2822) or an authorized Service
Representative.
When the laser ablation system does not function properly, first isolate
the problem to determine if it originates in the analytical instrument (ICP),
the computer, or the laser ablation system.
LSX-500 Laser Ablation System Service Manual
Troubleshooting the Laser Ablation System
If you determine the problem is in the LSX-500, start by checking the AC
power, the communications and control interfaces, the safety interlocks,
and the laser head.
Power System Problems
A possible cause of LSX-500 malfunction is a problem in the power system.
If the laser ablation system is dead, there may be no power getting to the
LSX-500. If this is the case, the READY indicator (green LED) on the
front of the laser module is off and all of the LEDs inside the rear door are
off. To troubleshoot this problem, complete the following steps:
WARNING
DANGER - HIGH VOLTAGE. The power supply housed in the
laser electronics power supply contains lethal current and
voltage levels. Do not attempt any service beyond described
troubleshooting procedures.
1 Ensure the AC line cord is connected to the AC outlet, and the AC
power switch is turned on.
Connect the cord if it is not already plugged in to the AC outlet, and turn
the power switch on. If the cord is connected and the rear power switch is
turned on, and the laser ablation system front panel display is not
operational, continue troubleshooting with step two.
2 Check the wall outlet.
Move the AC line cord to a known good outlet. Have a qualified electrician
check the AC power outlet.
WARNING
Tampering with the laser ablation system power supply while
troubleshooting power problems may result in personal injury
or death, and void the warranty.
3 Turn off AC power and unplug. Then check the fuses at the back
of the laser module.
6–3
LSX-500 Laser Ablation System Service Manual
Troubleshooting the Laser Ablation System
The fuse holders are located on the rear of the laser electronics chassis
(Figure 3-1). If a fuse is blown, replace only with and identical fuse (as
listed on the rear panel).
4 Verify that the laser is NOT connected to a G.F.I. [ground fault
interrupt] circuit.
WARNING
If the AC power input is within specifications and the laser
ablation system will not operate, call CETAC Customer Service
and Support, or an authorized Service Representative.
Fuses
The fuse requirements for the LSX-500 are:
LSX-500 Main Cabinet: 5A , 250V Type T (user serviceable)
Laser Power Supply 5A. Type 3AG Slowblo
WARNING
Replace fuses with specified type(s) and rating(s) only.
If the AC power is within specifications and the laser ablation
system will not operate, call CETAC Customer Service and
Support, or an authorized Service Representative.
6–4
LSX-500 Laser Ablation System Service Manual
Troubleshooting the Laser Ablation System
Laser Power Supply
The only service to the laser power supply is to determine if the fuses are
intact in event of failure. Contact CETAC Customer Service (1-800-3692822) for repair or replacement of the power supply. Also verify that the
supply is not on a G.F.I. circuit.
Interface Problems
The control computer directs operation of the LSX-500. A malfunction of
the laser ablation system can indicate a problem with the cables, or with
the software configuration of the computer. The following sections explain
how to troubleshoot these problems.
RS-232 Cable Problems
The first step in troubleshooting suspected interface problems is to check
the RS-232 cable. To do so, complete the following steps:
1 Check the READY indicator (green LED) on the front of the laser
module to ensure the power is on.
2 Check the RS-232 cable to ensure it is plugged in to the
COMPUTER port of the laser module.
If the cable is plugged in, ensure that the connector is properly oriented,
fully seated, and the thumbscrews are fully and evenly tightened.
3 Check the host computer to ensure that the RS-232 cable is
connected to the COM1 port.
If the RS-232 cable is plugged in, ensure that it is tightened properly.
6–5
LSX-500 Laser Ablation System Service Manual
Troubleshooting the Laser Ablation System
Stepper Interface Cable Problems
The first step in troubleshooting suspected interface problems is to check
the SCSI interface cable. To do so, complete the following steps:
1 Check the READY indicator (green LED) on the front of the laser
module to ensure the power is on.
2 Check the SCSI cable to ensure it is plugged in to its port of the
laser module.
If the cable is plugged in, ensure that the connector is properly oriented,
and fully seated.
3 Check the host computer to ensure that the SCSI cable is
connected to the stepper control board.
If the SCSI cable is plugged in, ensure that it is tightened properly.
Software Configuration Problems
If the cables are connected properly and the laser ablation system is still
not communicating with the control computer, ensure that the software is
configured correctly. To do so, complete the following steps:
1 Run the LSX-500 software, or a diagnostic program, and ensure
that the computer is functioning properly.
2 Check the software configuration for the correct COM port
selection and communications parameters (9600, N, 8, 1).
If the laser ablation system is connected to a port other than the one
defined, or the baud rate (9600), parity (N), number of data bits (8) or
number of stop bits (1) selected is different, correct the configuration and
save the changes.
If you are not sure which COM port the Laser Ablation System is
physically connected to, you can easily test the computer by following the
procedure for testing the communications interface.
6–6
LSX-500 Laser Ablation System Service Manual
Troubleshooting the Laser Ablation System
Safety Interlock Problems
There are seven safety interlocks in the LSX-500 Laser Ablation System to
protect personnel from accidental UV laser beam and high voltage
exposure, and to protect the laser from overheating.
The laser module contains two interlocks to protect personnel from
accidental UV laser beam exposure. If the top cover or the front door of the
laser module is opened during laser firing, the system will shut down and
prevent further operation until the faults are corrected.
WARNING
Do not deactivate or tamper with safety interlocks. Deactivation
of safety interlocks is done solely at the user’s risk. Call CETAC
Technologies Customer Service and Support if safety interlockrelated problems occur.
The laser controller contains four interlocks to protect personnel from high
voltage exposure, and to protect the laser from overheating. If the laser
controller cover is opened, or the remote interlock has a problem, the
cooling system overheats, or the coolant flow is interrupted, the system
will shut down and prevent further laser operation until the faults are
corrected.
Laser module interlocks
Top cover. The laser module top cover interlock is located inside the
upper compartment of the laser module. A switch opens whenever the
spin lock is moved from the closed and locked position, ensuring that the
laser cannot be operated with the laser module top cover opened.
Front door. The laser module front door interlock is located inside the
lower compartment of the laser module. A switch opens whenever the
front door is moved from the closed position, ensuring that the laser cannot
be operated with the laser module front door opened.
6–7
LSX-500 Laser Ablation System Service Manual
Troubleshooting the Laser Ablation System
Laser Controller Interlocks
Coolant flow. The coolant flow interlock ensures that coolant is flowing
through the laser head. The coolant flow is monitored by a magnetic
switch that is located in the coolant loop.
If a coolant flow fault occurs, the coolant flow has been stopped by an
obstruction in the cooling loop or coolant hoses, or the circulating pump
has stopped due to a pump motor failure or blown fuses.
To test, check for turbulence in the coolant reservoir. If the coolant in the
reservoir is not moving, there is a blockage in the cooling loop that must
be cleared; drain the cooling system as described in “Cooling System
Maintenance,” Chapter 5.
If there are air bubbles in the coolant lines, there could be a coolant flow
fault. A laser fault will appear on the power supply and a coolant fault will
appear in the software. To correct the problem, turn the power supply key
on for a few minutes and then turn it off. Repeat this a couple of times
until no air bubbles exist. The fault indicators should disappear.
Remote Interlock. If the remote interlock connection is broken by a bad
cable or a fault in the interlock loop, the laser cannot be operated.
Coolant temperature. The coolant temperature interlock ensures that
the coolant temperature does not exceed an acceptable level. The coolant
temperature sensor is located on the heat exchanger inside the cooling unit
o
o
and will open if water temperature exceeds 150 F (65 C).
Laser Problems
A malfunction of the LSX-500 laser can indicate a problem with the laser
electronics unit, laser-pumping energy, the cooling system, or with the
laser flashlamp. The following sections explain how to troubleshoot these
problems.
6–8
LSX-500 Laser Ablation System Service Manual
Troubleshooting the Laser Ablation System
WARNING
DANGER - INVISIBLE LASER RADIATION. The LSX-500 uses a
Class IV Nd:YAG laser. The output beam is, by definition, a
safety and fire hazard. Precautions must be taken during use
and maintenance to prevent accidental exposure to direct or
reflected radiation from the laser beam.
No Laser Output
No AC power, low laser pumping energy, or improperly connected control
cables can result in no laser output. To troubleshoot this problem,
complete the following steps:
1 With the AC power off and the power cord unplugged, check all
the electrical connections between the laser module and laser
electronics unit.
Make sure all connections are secure, that the cables are installed
correctly, and not causing the system to malfunction.
If the cables are connected correctly, continue troubleshooting with step
two.
WARNING
DANGER - HIGH VOLTAGE. Both the laser head and laser
electronics unit contains electrical circuits operating at lethal
voltage and current levels. Always unplug and wait at least one
(1) minute to allow capacitors to bleed down before servicing any
part of the laser system.
2 Check the Q-switch.
The Q switch, when on, allows the laser beam to exit the laser module.
The Q switch should be on. If not, correct by toggling the Q-switch button
to ON. If the Q switch is already on, continue troubleshooting with step 3.
3 Check, in the software, the laser pump energy setting.
Set the laser energy to 100%.
6–9
LSX-500 Laser Ablation System Service Manual
Troubleshooting the Laser Ablation System
WARNING
Modification of the furnished laser power supply is done solely
at the user’s risk. Call CETAC Technologies Customer Service
and Support if power system-related problems occur.
Low Laser Efficiency
Laser output energy below nominal may suggest only gradual lamp and/or
cooling system degradation. These characteristics are normal over time,
and with large laser shot accumulations (>30 million). Contaminated
coolant, a laser flashlamp that needs to be replaced, or a resonator in need
of adjustment can all result in low laser efficiency.
To troubleshoot this problem, complete the following steps:
1 Inspect the coolant for contamination.
The coolant should be clear, and free from contaminants; there should not
be any visible particulates or organic contaminants in the coolant. Black
particulates are a sign of pump wear, and green or black slime is an
indication of organic substances (algae) growing in the cooling system.
If the coolant, and cooling system, is not contaminated, continue
troubleshooting with step two.
Note:
If contaminated coolant is suspected, the cooling system must be
completely purged and properly cleaned prior to operating the laser.
Contact CETAC Technologies (1-800-369-2822) for instructions on how to
clean your laser cooling system if you find organically contaminated
coolant.
2 Check the laser flashlamp age.
Replace the laser flashlamp if over 30 million shots. Contact CETAC
Technologies (1-800-369-2822) for service on replacing the flashlamp.
6–10
LSX-500 Laser Ablation System Service Manual
Troubleshooting the Laser Ablation System
3 Check the Laser Power Meter.
The laser power meter is used to monitor the laser power level. An
operator can keep a log of the laser output for the numbered power level on
the control versus the actual output. The log will give a history of the
laser and be an excellent maintenance and service guide.
4 Replace the Flashlamp.
The only periodic maintenance action required on the laser head is
flashlamp replacement. For optimal performance, the flashlamp should be
replaced approximately every 30 million shots.
Contact CETAC Technologies (1-800-369-2822) for any repair actions
necessary beyond those described in this manual. Attempts to adjust,
repair, or replace optics may cause additional problems and void
warranties.
Laser Cooler
The laser will not operate if there is no coolant flow or the coolant
temperature is too high. Check to determine if the fuse is blown (5A 250V
[3AG] slowblo). The fuse holder is located on the back of the power supply.
Make sure the coolant level is correct.
Carrier Gas System
The carrier gas, controlled by the computer, is the medium that delivers
the sample to the ICP-MS. The carrier gas tubing diagram for the LSX500 is shown below. The tubing outlets can be configured on either side of
the laser module. A rule is to use the shortest lengths of tubing to connect
to the ICP-MS system.
6–11
LSX-500 Laser Ablation System Service Manual
Troubleshooting the Laser Ablation System
Cross contamination can occur if many different sample types are used. A
complete tubing change may be required if the LSX-500 is being used
continuously and with different samples. The operator must be aware of
the background materials to prevent any cross-contamination from
occurring.
6–12
LSX-500 Laser Ablation System Service Manual
Troubleshooting the Laser Ablation System
6–13
CETAC Technologies
14306 Industrial Road
Omaha, Nebraska 68144 USA
Phone: 402-733-2829
Toll Free: 800-369-2822
www.cetac.com


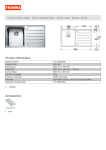

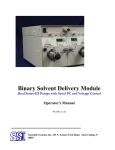
![[Product Name] Service Manual](http://vs1.manualzilla.com/store/data/006035113_1-0289c4c9f962713aa5c1b10dc8f42975-150x150.png)