1
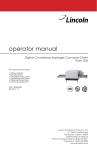
operator manual
FRESH-O-MATIC®
Model 4000
This document includes:
• Specifications
• Operating Instructions
• Cooking Options
• Cleaning Instructions
• Troubleshooting
Revision: A
P/N: 20000096
ACCEPTED FOR
USE
CITY OF NEW YORK
DEPT. OF BUILDINGS
MEA 328-83 – E VOL ii
Lincoln Foodservice Products, LLC
1111 North Hadley Road
Fort Wayne, Indiana 46804
United States of America
Technical Support Hotline: (800) 678-9511
Telephone: (260) 459-8200
www.lincolnfp.com
WARRANTY
Lincoln Foodservice Products, Inc. warrants to the original purchaser for use of each new Fresh-O-Matic manufactured by Lincoln as follows:
any original part which proves to be defective in material or workmanship within the warranty period will, subject to the terms of this warranty, be
repaired, or replaced with a new or remanufactured part, whichever Lincoln elects, free of charge, provided that in the event of any such defects
the Fresh-O-Matic shall be returned within the warranty period to the nearest authorized service station, transportation prepaid. If found to
contain defective original parts within the limits of this warranty, such parts will be repaired or replaced as provided in this warranty and the
Fresh-O-Matic will be returned, transportation prepaid.
The warranty period shall be a period of one year from the date of original purchase for use or shall be limited to the fifteen-month period from
the date of manufacture.
This warranty applies only to original parts, and only where the Fresh-O-Matic has been subject to normal and proper use. This warranty does
not apply if the Fresh-O-Matic is transported outside of the United States or if the Fresh-O-Matic or any part thereof is subjected to accident,
casualty, alteration, misuse or abuse or if the date of manufacture is altered or removed.
The obligation of Lincoln is limited to the repair or replacement of defective original parts and except as expressly stated herein. LINCOLN
MAKES NO GUARANTEE OR WARRANTY, EXPRESS OR IMPLIED, INCLUDING WITHOUT LIMITATION WARRANTIES OF FITNESS OR
MERCHANTABILITY with respect to Fresh-O-Matics or parts thereof and Lincoln has no other liability with respect thereto including without
limitation liability for indirect, special, consequential or resultant damages.
WHAT YOUR FRESH-O-MATIC WILL DO FOR YOU
■ Enables you to serve pre-cooked convenience foods, baked goods, meats, vegetables, etc. Fresh, hot and delicious in seconds!
■ Serves as an auxiliary hot food table during slack periods – quickly heats refrigerated foods to serving temperature.
■ Eliminates waste… refrigerated or pre-cooked foods can be proportioned for perfect control and then heated as needed.
AS EASY AS 1… 2… 3 TO OPERATE!
1 – Raise cover – place food on tray.
2 – Close cover – press steam button.
3 – Raise cover – food is ready to serve.
SPECIFICATIONS
1
5
2
Number
1
2
3
4
5
Not Shown
Approved By:
Part Description
Cover
Food Tray Casting
Power Button
Steam Button
Non-stick Coated Aluminum Food Tray
Replacement Water Filter
UL
UL Sanitation
UL Canada
City of New York
This machine is rated at 1500 watts.
Four disposable foil trays are provided for heating foods.
3
Model #
4000 (U.S. & Canada)
4002 (International)
2
4
Volts
120
220/240
Amps
12.5
5.7/6.3
Watts
1500
1260/1500
Hz
60
50/60
Phase
1
1
Plug Length & Type
6 ft. NEMA 5-15P
6 ft. NEMA 5-15P
4000 Series Operator Manual
OPERATION
1.
Plug Fresh-O-Matic into electric outlet. Use on appropriate 120VAC or 240VAC current only.
2.
Press Power Button. The power light, water level light(s) and heating light will illuminate at the same time.
3.
Lift “snap cap.”
4.
Fill water tank with water to “FULL” level shown on water level light (approximately 4½ quarts). Refill as necessary – being sure to stop
when green light is illuminated. DO NOT OVERFILL. A funnel may be used, with care.
5.
There is approximately ½ quart of water in the tank when the “Low Level (Red) Light” is on. The steam button may be used while the red
light is on. The “Low Level (Red) Light” will blink when the tank is empty and must be filled.
6.
Fresh-O-Matic is ready for use when heating light goes off first time. Light will go on and off periodically, indicating operating temperature
is being maintained.
7.
Lift cover; place food to be served in the Fresh-O-Matic.
8.
Close cover; press Steam Button two (2) times approximately every 30 seconds. Note: Each push of the steam button releases
approximately 10 cc’s (⅓ ounce) of steam/water. See following pages for complete instructions.
9.
When first filling the Fresh-O-Matic, the steam button may need to be pressed and held approximately 5-10 seconds (once or twice) in
order to prime the water pump.
10. Open cover; food is hot, ready to serve.
NOTE:
!
It is important to keep Fresh-O-Matic cover closed between uses so that proper temperature is maintained for
maximum efficiency. The cover must be closed to visually see steam and hold steam. Pressing and holding the
Steam Button will rapidly cool the heating plate causing lengthy reheating time.
COOKING OPTIONS
MAIN DISHES
Fresh-O-Matic serves hundreds of steaming-hot convenience foods, from beef to lobster dinners. And a Lincoln Fresh-O-Matic is more than a
single-portion speed-merchant. It heats two to four servings just as fast – with the same tasty results.
Canned Entrees
Refrigerated or Thawed Entrees
Rice
Spaghetti
Buttered Noodles
3-4 minutes
4-5 minutes (stir at 2 ½ minutes)
From Room Temperature
45 seconds
90 seconds
90 seconds
HEATING TIME
From Refrigerated State
60-90 seconds
2 minutes
2 minutes
The following charts are a guide to heating various foods in your Fresh-O-Matic. Place food on disposable aluminum foil plate or tray. Press
Steam Button twice and repeat every 30 seconds according to time indicated below.
PRE-COOKED MEATS, FISH, POULTRY: REFRIGERATED
*Bacon
Boiled Shrimp
Diced Crabmeat
*Roast Meats: Very thin sliced
Thin sliced
Thick sliced
Diced Chicken or Turkey
Crab Legs
**Hamburger Patties, Cube Steaks, Salisbury’s
Lobster Tails
Weiner’s
Sloppy Joe
Meat Loaf
HEATING TIME
From Refrigerated State
60 to 75 seconds
1 to 1½ minutes
1 to 1½ minutes
45 to 60 seconds
1 to 1½ minutes
2 to 2½ minutes
2 minutes
2½ to 3 minutes
2 to 3½ minutes
3 to 4 minutes
3½ minutes
3½ minutes
3½ minutes
* Warm or Room Temperature will take less time.
** For cheeseburger, add slice of cheese for the last 30 seconds.
4000 Series Operator Manual
3
COOKING OPTIONS (CONT’D)
BAKED GOODS – FRESH, ROOM TEMPERATURE (Longer time for refrigerated)
*Open Hamburger and Weiner Buns
*Coffee Cake
*Pancakes
Fruit and Nut Breads, sliced
*Corn bread
*Dinner Rolls
*Muffins
*Biscuits
Sweet Rolls
Pizza
**Fruit Pie, wedges
HEATING TIME
From Room Temperature
15 seconds
15 to 30 seconds
15 to 30 seconds
20 to 45 seconds
30 to 45 seconds
30 to 60 seconds
30 to 60 seconds
45 to 90 seconds
1 to 2½ minutes
1½ to 2 minutes
2 minutes
* Place directly on perforated aluminum tray.
** Press Steam Button twice right away; at 30 seconds press Steam Button twice more; do not give any more steam for the remainder
of the time.
HORS D’OEUVRES
To freshen the bread in cold prepared hors d’oeuvres, place in Fresh-O-Matic for 15 seconds.
SANDWICHES
Heat meat and buns as directed and then assemble sandwich.
The following charts are a guide to heat various foods in your Fresh-O-Matic. Place food on disposable aluminum foil plate or tray. Press
Steam Button twice and repeat every 30 seconds according to time indicated below.
PRE-COOKED FRUITS AND VEGETABLES (CANNED OR ROOM TEMPERATURE)
*Water Packed Vegetables
*Creamed Vegetables
Glazed Pineapple Ring
Glazed Peach Half
Applesauce
HEATING TIME
From Canned or Room Temperature
2 minutes
3 to 3½ minutes
1½ minutes
2 to 2½ minutes
2½ to 3 minutes
* Refrigerated cooked vegetables will take about 30 seconds longer.
GRAVY AND SAUCES
Maple Syrup
**Hot Cocktail or Chili Sauce
**Hot Fudge Sauce
Refrigerated Gravy
HEATING TIME
From Canned or Room Temperature
50 to 90 seconds
1½ minutes
2 minutes
2½ to 4 minutes
** Hot Fudge and Chili Sauce may be heated in paper soufflé cups but will take longer.
EGGS
Poached
60 to 75 seconds
Break egg into lightly greased individual foil dish; place in Fresh-O-Matic and press Steam Button two (2) times; at 30 seconds press the Steam
Button twice more. For eggs with soft whites, do not give any more steam. For firm egg whites, give two more presses of steam at 60 seconds.
Both types may take the full 75 seconds.
Scrambled
60 to 75 seconds
Pour scrambled egg mixture into lightly greased disposable foil tray; place in Fresh-O-Matic and give two presses of steam; at 30 seconds give
two more presses of steam; at 45 seconds stir gently. For very moist eggs do not give any more steam. For dry eggs give two more presses of
steam at 60 seconds. Both types of eggs may take longer than 60 seconds.
4
4000 Series Operator Manual
MAINTENANCE & CLEANING
PRESS POWER BUTTON OFF
1.
2.
Lift out removable aluminum food tray. Clean thoroughly.
Brush out crumbs in food tray compartment.
AFTER FRESH-O-MATIC HAS BECOME COOL
1.
2.
3.
4.
5.
6.
Remove cover. Clean thoroughly.
Wipe food tray casting with damp cloth.
If necessary, scour food tray casting with a nylon soap pad. Wipe casting clean.
Open all steam vent holes with cleaning tool #4040.
Wipe exterior with damp cloth. Do not use scouring powders or abrasive cleaners on Switch Pad.
Put cover back on.
Before using for first time each day, pre-heat the Fresh-O-Matic and press and hold Steam Button 3-5 seconds to
free any particles that may be in the steam vent holes; wipe away the particles and the Fresh-O-Matic is ready for
use.
NOTE:
!
OCCASSIONAL CLEANING
!
1.
2.
3.
4.
5.
6.
7.
While cleaning the unit, care should be given to avoid water contact with the control pad. Water should never be
allowed to enter the electronic controls compartment of this equipment. If you believe this has happened with your
unit, call your local authorized service agent for repair. Never attempt to use or repair if it has become
contaminated with water.
CAUTION:
Unplug the unit and allow it to cool completely.
Move the unit to the edge of a sink, with the back of the unit slightly over the edge of the sink.
Remove the hose clamp and drain cap.
Allow the water to drain from the tank and filter. Tip the unit slightly to remove the most water.
Replace the drain plug.
Refill the tank, flush and drain again, if necessary.
Replace the drain plug and hose clamp.
TROUBLESHOOTING
PROBLEM
REASON
SOLUTION
No Steam
▪ Air in line
▪ Power not on.
▪ Water level low.
▪ Heat unit, press Steam Button and hold 5-10 seconds (two or
three times).
▪ Turn power on.
▪ Fill unit with water.
Green Heat Light
constantly on
▪ Unit overused. Heated plate has cooled by
holding the Steam Button or unit has been used
too often.
▪ Allow unit more time to recover.
Water Under Unit
▪ Overfilling or tipping the unit.
▪ Condensation from under the cover.
▪ Do not overfill or tip the unit.
▪ Check hose connections and secure, if necessary.
Water On Plate
▪ Pressing Steam Button too often or holding
down the Steam Button.
▪ Allow 30-seconds between each demand for steam.
No Steam
▪ Unit has cooled by holding the Steam Button
or unit has been used too often.
▪ Water level too low.
▪ Holes have become “plugged”
▪ Allow for reheat – green Heat light off.
4000 Series Operator Manual
NOTE: Light will stay lit during start-up (20 minutes).
▪ Fill unit with water.
▪ Clean and use perforated tray only.
5
WATER FILTER REPLACEMENT INSTRUCTIONS
NOTE: IT IS RECOMMENDED THAT THE WATER FILTER (PART #4042) BE REPLACED EVERY SIX (6) MONTHS TO ENSURE OPTIMAL
PERFORMANCE OF YOUR FRESH-O-MATIC.
1.
Remove the Filter Fill Tube from the Water Filter by pressing in the Collet Ring. With the Collet Ring depressed, pull tube out from water
filter.
With Collet Ring
pushed in, remove tube
by pulling out of filter
Collet Ring
2.
Follow the instructions listed in step 1 with the opposite end of the filter.
3.
Remove Filter Guard from back panel by unscrewing the four screws used in fastening the guard to the back panel.
Location of
Screws
Location of
Screws
4.
Insert new filter inside the Filter Guard. Reattach Filter Guard to back panel.
!
5.
6.
7.
6
CAUTION:
The filter includes directional arrows noting the proper direction of “water flow” when installing the filter. The arrows
noting the “water flow” should be pointing in a right-to-left direction when the filter is installed. It is critical to the
operation of this unit that the water filter be installed correctly!
Insert the Filter Exit Tube firmly into the water filter until it stops. Do not push in Collet Ring.
Insert the Filter Fill Tube firmly into the water filter until it stops. Do not push in Collet Ring.
Filter replacement is now complete.
4000 Series Operator Manual
This page intentionally left blank.
4000 Series Operator Manual
7
8
4000 Series Operator Manual