1
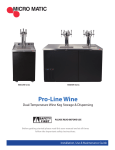
PRO-LINE BAR EQUIPMENT OPERATION & SERVICE MANUAL
PRO-LINE BAR EQUIPMENT:
DIRECT DRAW BEER DISPENSERS
BACK BAR STORAGE
Installation, Use and Maintenance
For customer service call: 1-866-327-4159
www.micromatic.com
1
PRO-LINE BAR EQUIPMENT OPERATION & SERVICE MANUAL
TABLE OF CONTENTS
1
2
2.1
3
3.1
3.2
RECEIVING AND INSPECTING
SPECIFICATIONS
DIMENSIONS
INSTALLATION
UNCRATING
CLEANING OF CABINET
03
04
06
11
11
11
3.3
3.3
3.4
4
5
6
7
8
9
LOCATION
DATA PLATE
ELECTRICAL CONNECTIONS
OPERATION
TROUBLESHOOTING
MAINTENANCE
WIRING DIAGRAMS
PARTS LISTING
WARRANTY
12
12
12
13
13
14
16
18
26
For customer service call: 1-866-327-4159
www.micromatic.com
2
PRO-LINE BAR EQUIPMENT OPERATION & SERVICE MANUAL
1 RECEIVING AND INSPECTING
Upon receiving your new Micro Matic Pro-Line Bar Equipment,
check the package and the unit for any damages that may have
occurred during transportation. Visually inspect the exterior of the
package. If damaged, open and inspect the contents with the
carrier. Any damage should be noted and reported on the delivering
carrier’s receipt.
In the event that the exterior is not damaged, yet upon opening,
there is concealed damage to the equipment notify the carrier
immediately. Notification should be made verbally as well as in
written form. Request an inspection by the shipping company of the
damaged equipment. Retain all crating material until inspection has
been made. Finally, contact Micro Matic.
Open the compressor compartment housing and visually inspect
package. Be sure lines are secure and base is intact.
For customer service call: 1-866-327-4159
www.micromatic.com
3
PRO-LINE BAR EQUIPMENT OPERATION & SERVICE MANUAL
2 SPECIFICATIONS
DIRECT DRAW
For customer service call: 1-866-327-4159
www.micromatic.com
4
PRO-LINE BAR EQUIPMENT OPERATION & SERVICE MANUAL
For customer service call: 1-866-327-4159
www.micromatic.com
5
PRO-LINE BAR EQUIPMENT OPERATION & SERVICE MANUAL
2.1 DIMENSIONS
For customer service call: 1-866-327-4159
www.micromatic.com
6
PRO-LINE BAR EQUIPMENT OPERATION & SERVICE MANUAL
For customer service call: 1-866-327-4159
www.micromatic.com
7
PRO-LINE BAR EQUIPMENT OPERATION & SERVICE MANUAL
For customer service call: 1-866-327-4159
www.micromatic.com
8
PRO-LINE BAR EQUIPMENT OPERATION & SERVICE MANUAL
For customer service call: 1-866-327-4159
www.micromatic.com
9
PRO-LINE BAR EQUIPMENT OPERATION & SERVICE MANUAL
For customer service call: 1-866-327-4159
www.micromatic.com
10
PRO-LINE BAR EQUIPMENT OPERATION & SERVICE MANUAL
3 INSTALLATION
3.1 UNCRATING
Cut and remove the outer packaging. Cut the (4) clamps that
hold the refrigerator to the skid. Lift the unit off the skid. If
machine was laid down during this operation leave the cabinet
upright for 24 hours before plugging into power source. To
install draft arm, first place rubber washer over draft arm
mounting holes in cabinet top and put beer line connector
down through hole. Next secure draft arm with four bolts
provided. To retain complete mobility of the cooler, the
accessory CO2 tank (up to five pounds in size) must be
placed inside the cabinet.
WHEN SANITATION CODES REQUIRE SEALING TO
FLOOR THIS METHOD MAY BE USED
1. Tip cabinet and apply a bead of silicone seal on bottom
edge of the base.
2. Return cabinet to upright position and using proper
equipment, lift cabinet into location.
For customer service call: 1-866-327-4159
www.micromatic.com
ELECTRICAL SUPPLY
Plug unit into a 115 volts 60 Hz. Grounded outlet. Low line
voltage is often the cause of service complaints. Check to see
the line voltage is 110 volts or more with the unit running.
Heavy appliances should not be used on the same circuit with
the cooler. When working on the inside of the cooler,
disconnect from electrical circuit for safety reasons.
CAUTION: If an extension cord is necessary, use only a three
wire grounding type of wire, size 16 AWG or heavier; do not
exceed 20 feet in length. The use of ungrounded cords or
overloaded circuit voids compressor warranty.
3.2 CLEANING OF CABINET
The exterior of the cabinet is painted and should be cleaned
only with lukewarm water, taking care not to scratch the paint.
Mild detergents are also recommended. The interior can be
cleaned in a similar manner.
THE CONDENSER MUST BE CLEANED AT REGULAR
INTERVALS. FAILURE TO DO SO CAN CAUSE
COMPRESSOR
MALFUNCTION
AND
WILL
VOID
WARRANTY. Clean approximately every six months,
depending upon usage, dust, etc. Pull cabinet away from wall
and thoroughly vacuum the condenser and surrounding
surfaces.
11
PRO-LINE BAR EQUIPMENT OPERATION & SERVICE MANUAL
NOTICE
This cooler is designed to maintain your beer keg temperature
within the most desirable range of 35° to 40°F. You can expect this
temperature with the proper temperature control setting and in a
normal environment. It is important to understand that when the keg
of beer is purchased, it must be installed inside the cooler as soon
as possible to avoid excessive warm-up of the beer. If this happens,
it may take many hours for the temperature to be reduced to the
desirable range. No provision is made for rapid cooling of a keg
which has become too warm. When purchasing your keg of beer,
you can wrap the keg in a blanket or other insulation to help it cool
prior to installing in the cooler.
3.3 LOCATION
Units represented in this manual are intended for indoor use only.
Be sure the location chosen has a floor strong enough to support
the total weight of the unit and contents. For the most efficient
operation, be sure to provide good air circulation inside and outside
of the unit.
Inside cabinet:
The first cleaning must be made when you unpack the unit and
before switching it on. Clean it with water and a mild detergent.
Outside cabinet:
Be sure the unit has good air circulation around it. Avoid hot corners
and locations near stoves and ovens. It is recommended the unit be
installed no closer than 2” from any wall. The place where the
refrigerator is placed must be open and free of dust and debris.
For customer service call: 1-866-327-4159
www.micromatic.com
3.4 DATA PLATE
The data plate in located inside the unit, near the top front left
corner. Under no circumstances should the data plate be removed
from the unit. The data plate is essential to identify the particular
features of your unit and is of great benefit to installers, operators
and maintenance personnel. It is recommended that, in the event
the data plate is removed, you copy down the essential information
in this manual for reference before installation.
3.5 ELECTRICAL CONNECTIONS
Refer to the amperage data in this manual or on data plate and your
local code or the National Electrical Code to be sure unit is
connected to the proper power source. Verify correct incoming
voltage according to the Data Plate information.
A protected circuit of the correct voltage and amperage must be run
for connection of the supply cord. Unit must be grounded and
connected in accordance with NEC Article 422 Appliances.
DANGER: Power must be turned off
and disconnected from the power source
whenever performing maintenance, repair or
cleaning the condensing unit. If unit still
running when power is off, disconnect power
at the circuit breaker before unplugging the
unit.
WARNING: Unit and compressor
warranties are void if failure is due to improper
electrical installation.
12
PRO-LINE BAR EQUIPMENT OPERATION & SERVICE MANUAL
4 OPERATION
5 TROUBLESHOOTING
Verify thermostat is in the OFF position prior to connecting the unit
to its power source. Failure to do so could lead to electrical failures.
Keep in mind the evaporator fans and lights will still have power
while the thermostat in the OFF position. Connect unit to power
supply.
Sometimes, working failures are due to simple causes which can be
solved by the user. Before asking for the help of a qualified
technician, you have to do some verifications. These failures are not
covered by the warranty:
1. Refrigeration doesn’t work
a. Check the unit is still connected to power supply.
Temperature controller (inside the cabinet) goes from 0 (OFF
Position) to 7 (Coolest Position). Set control at position 5 for
temperature average of 35ºF.
Glass Rinse Operation: The water line for the Glass Rinse need to
be supplied to 35 PSI as Max Pressure.
DEFROSTING
The unit will not require defrosting if the door is only opened for a
minimum time. Defrosting should be done when the keg is changed.
To do this unplug the unit and leave the door open for fifteen
minutes. Defrost water will accumulate in a pan under the
evaporator and will drain to a plastic container in the storage area
under the beer keg shelf.
2. Refrigerator doesn’t reach temperature.
a. Check the thermostat is not in OFF position.
b. Check the thermostat is at position 5 or higher.
c. Check the unit is not on defrost cycle.
d. Check gasket is in good condition and door is sealed.
e. Check fan is moving. Open the door press and hold door switch
for verification.
f. Don’t put any food inside until unit is at temperature.
g. Be sure castors or legs were installed.
3. There is water under the refrigerator.
a. Check the drain pipe is over the pan.
b. Check cabinet is level.
Do not use a pick, knife, etc., to pry ice from evaporator as this
could puncture evaporator or damage the finish.
For customer service call: 1-866-327-4159
www.micromatic.com
13
PRO-LINE BAR EQUIPMENT OPERATION & SERVICE MANUAL
6 MAINTENANCE
If the build up on the coil consists of only light dust and debris the
condenser coil can be cleaned with a simple brush. Heavier dust
build up may require a vacuum or even compressed air to blow
though the condenser coil.
Stainless Steel Care and Cleaning
Proper cleaning of stainless steel requires soft cloths, never use
steel pads, wire brushes or scrapers!
Cleaning solutions need to be alkaline or non-chloride cleaners. Any
cleaner containing chlorides will damage the protective film of the
stainless steel. Chlorides are also commonly found in hard water,
salts, household and industrial cleaners. If cleaner containing
chlorides is used be sure to rinse repeatedly and dry thoroughly
upon completion.
Routine cleaning of stainless steel can
water. Extreme stains or grease should
abrasive cleaner and plastic scrub pad.
steel cleaners available which can restore
the steel's protective layer.
be done with soap and
be cleaned with a nonThere are also stainless
and preserve the finish of
Never use an acid based cleaning solution! Many food products
have an acidic content which can deteriorate the finish. Be sure to
clean ALL food products from any stainless steel's surface.
Common items include peppers, tomatoes and other vegetables.
Cleaning the Condenser Coil
DANGER: Power must be turned off
and disconnected from the power source
whenever performing maintenance, repair or
cleaning the condensing unit.
Disconnect unit from power supply. Remove front bottom panel and
carefully slide out the condensing unit. The condenser coil requires
regular cleaning; recommended is every 30-60 days, depending the
accumulation of dust and grease.
For customer service call: 1-866-327-4159
www.micromatic.com
If heavy grease is present there are de-greasing agents available
for refrigeration use and specifically for the condenser coils. The
condenser coil may require a spray with the de-greasing agent and
then blown through with compressed air. Be sure all electrical and
mechanical parts are dry before turning on the power.
Never use a high pressure water wash for this cleaning procedure
as water can damage the electrical components located near or at
the condenser coil! Do not place filter material in front of condenser
coil. This material blocks air-flow to the coil similar to having a dirty
coil!
If you keep the condenser clean you will minimize your service
expense and lower your electrical costs. Failure to maintain a clean
condenser coil can initially cause high temperatures and excessive
run times. Continuous operation with dirty or clogged condenser
coils can result in compressor failures.
Neglecting the condenser coil cleaning procedures WILL VOID
YOUR WARRANTY associated with the compressor or cost to
replace the compressor!
To put back the condensing unit in its place, slide in the unit
carefully. BE SURE DRAIN PIPE IS LOCATED OVER THE PAN.
Replace front bottom panel.
14
PRO-LINE BAR EQUIPMENT OPERATION & SERVICE MANUAL
Gasket Maintenance
Gaskets require regular cleaning to prevent mold and mildew build
up and also to keep the elasticity of the gasket. Gasket cleaning can
be done with the use of warm soapy water. Avoid full strength
cleaning products on gaskets as this can cause them to become
brittle and prevent proper seals. Also, never use sharp tools or
knives to scrape or clean the gasket which could possibly tear the
gasket and rip the bellows.
IF WATER IS COLLECTED UNDERNEATH THE UNIT you may
want to check the condensate evaporator drain tube to be sure it is
still located inside the drain pan. The leveling of the unit is important
as the units are designed to drain properly when on a level surface,
if your floor is not level this can also cause drain problems. Be sure
all drain lines are free of obstructions, typically food product is found
blocking drain lines causing water to back up and overflow the drain
pan.
Gaskets can easily be replaced and do not require the use of tools
or authorized service persons. The gaskets can be pulled out of the
grove in the door and new gaskets can be “pressed” back into
place.
Door Hinges
Over time and with heavy use door hinges may become loose. If it
is noticed that the door is beginning to sag, it may become
necessary to tighten the screws that mount the hinge brackets to
the frame of the unit. If the doors are loose or sagging this can
cause the hinge to pull out of the frame which may damage both the
doors and the door hinges. In some cases this can require qualified
service agents or maintenance personnel.
Drain Maintenance
Each unit has a drain located inside the unit which removes the
condensation from the evaporator coil and evaporates it at an
external condensate evaporator pan. Each drain can become loose
or disconnected from moving or bumping the drain. IF YOU
NOTICE EXCESSIVE WATER ACCUMULATION ON THE INSIDE
OF THE UNIT be sure the drain tube is connected from the
evaporator housing to the condensate evaporator drain pan.
For customer service call: 1-866-327-4159
www.micromatic.com
15
PRO-LINE BAR EQUIPMENT OPERATION & SERVICE MANUAL
7 WIRING DIAGRAMS
MDD23
For customer service call: 1-866-327-4159
www.micromatic.com
16
PRO-LINE BAR EQUIPMENT OPERATION & SERVICE MANUAL
MDD58, MDD68, MDD78, MDD94
MBB58, MBB68, MBB78, MBB94
For customer service call: 1-866-327-4159
www.micromatic.com
17
PRO-LINE BAR EQUIPMENT OPERATION & SERVICE MANUAL
8. PARTS LISTING
Part #
Description
MBB
Dates
Expiration
Effective
58"
68"
78"
MBB-S
94"
58"
68"
78"
MBB-G
94"
58"
68"
78"
MBB-SG
94"
58"
68"
78"
94"
MDD
23"
58"
68"
MDD-S
78"
94"
23"
58"
68"
78"
94"
Castors & Legs
603313M0016
603313M0017
Castor w/o brake D.3"
CMR1-13BPN
Castor with brake D.3"
CLP2-3BB
2
2
2
2
1
1
Compressors
602101M0018
Compressor NE6160Z
602101M0020
1
1
1
1
1
1
1
1
1
1
1
1
1
1
1
1
1
1
1
1
1
1
1
1
602101M0035
Compressor NE6187Z
Start Kit for compressor
NE6160Z
Start Kit for compressor
NE6187Z
1
1
1
1
1
1
1
1
1
1
1
1
1
1
1
1
1
1
1
1
1
1
1
1
604701M0001
Filter 40gr.
1
1
1
1
1
1
1
1
1
1
1
1
1
1
1
1
1
1
1
1
1
1
1
1
604701M0002
Filter 25gr.
1
1
1
1
2
2
2
2
1
1
1
1
602101M0033
6047010003
1
1
1
1
Filter
Condensers
6029020023
Condenser Coil
602902M0009
Condenser Coil
1
1
1
1
1
1
1
1
1
1
1
1
1
1
1
1
6021050020
Fan Condenser
2
2
2
2
2
2
2
2
2
2
2
2
2
2
2
2
1
1
1
1
1
1
1
1
1
1
1
1
1
1
1
1
1
1
1
1
1
2
2
2
2
1
1
1
1
1
Condensing Units
M17301M0023 Condensing Unit
M17301M0024 Condensing Unit
For customer service call: 1-866-327-4159
www.micromatic.com
1
1
18
PRO-LINE BAR EQUIPMENT OPERATION & SERVICE MANUAL
Part #
Description
MBB
Dates
Expiration
MBB-S
Effective
58"
68"
78"
94"
2
2
2
3
58"
68"
78"
MBB-G
94"
58"
68"
78"
MBB-SG
94"
58"
68"
78"
MDD
94"
MDD-S
23"
58"
68"
78"
94"
1
2
2
2
3
23"
58"
68"
78"
94"
1
2
2
2
3
Doors & Others
M16901M0091
Black Door Kit
Jun-09
M16901M0115
SS Door Kit
Jun-09
M16901M0071
Black Door Kit
M16901M0082
SS Door Kit
603107M0008
M16909M0006
SS Glass Door Kit
Glass Black Door
Kit
Glass Black Door
Kit
Glass SS Black
Door Kit
Glass Black Door
Kit
Left Lower Hinge
Kit
Right Lower Hinge
Kit
M10913M0194
Lower Hinge
M16901M0075
Black Door Kit
Abr-09
M16901M0074
SS Door Kit
Abr-09
M16901M0087
Black Door Kit
Abr-09
M16901M0089
Black Door Kit
Abr-09
M16901M0090
SS Door Kit
Abr-09
M16901M0076
SS Glass Door Kit
Abr-09
600717M0023
600717m0029
Door Short Spacer
Door Large
Spacer
603301M0056
Lock (Master Key)
M16300M0005
Lock (Master Key)
603107M0011
603107M0010
603107M0012
603107M0004
M16909M0007
2
2
2
3
1
1
1
1
2
Abr-09
2
Abr-09
2
2
2
2
3
2
1
Abr-09
1
Abr-09
Abr-09
2
2
3
Abr-09
1
1
1
1
1
1
1
1
1
1
1
1
Abr-09
1
1
2
2
1
1
2
2
1
1
2
2
1
1
1
1
1
1
1
1
1
1
1
1
1
2
2
1
1
2
2
1
1
2
2
1
2
2
2
3
1
2
2
2
2
1
2
2
3
3
2
2
2
1
2
2
2
3
1
2
2
3
3
3
1
1
2
2
2
2
3
Ago-09
Ago-09
For customer service call: 1-866-327-4159
www.micromatic.com
2
2
3
3
2
2
3
3
2
2
3
3
3
3
1
2
2
3
3
19
PRO-LINE BAR EQUIPMENT OPERATION & SERVICE MANUAL
Part #
Description
MBB
Dates
Expiration Effective
58"
68"
78"
MBB-S
94"
58"
68"
78"
MBB-G
94"
58"
68"
78"
MBB-SG
94"
58"
68"
78"
94"
MDD
23"
58"
68"
MDD-S
78"
94"
23"
58"
68"
78"
94"
1
1
1
1
1
1
1
1
1
1
1
1
1
1
1
1
1
1
1
1
1
1
1
1
1
1
1
1
Drains
1
M10301M0001 Drain Assembly
M10301M0002 Drain Assembly
1
1
1
1
1
1
1
1
1
1
1
1
1
1
1
1
6003010023
1
1
1
1
1
1
1
1
1
1
1
1
1
1
1
1
1
1
1
1
1
1
1
1
1
1
1
1
1
1
1
1
Drain Pan
1
1
1
1
1
1
1
1
1
1
1
1
1
1
1
Evaporators
602901M0005
Evaporator Coil
602901M0009
Evaporator Coil
602105M0001
Fan Evaporator
602105M0003
Fan Evaporator
602105M0015
Fan Evaporator 220V
6021050008
Fan Evaporator 220V
602105M0009
Fan Blade Evaporator
602105M0012
Fan Blade Evaporator
M17101M0034 Evaporator Coil
1
1
1
1
1
1
1
1
1
1
1
1
1
1
1
1
1
1
1
1
1
1
1
1
1
1
1
1
1
1
1
1
1
1
1
1
1
1
1
1
1
1
1
1
1
1
1
1
1
1
1
1
1
1
1
1
1
1
1
1
1
1
1
1
1
1
1
M17101M0038 Evaporator Coil
1
602713M0001
Grid Fan Evaporator
602713M0002
Grid Fan Evaporator
6003010035
Grid Fan Evaporator
1
1
600717M0022
Drain Bottle
1
1
1
1
1
1
1
1
1
1
1
1
1
1
1
1
1
1
1
1
1
1
Controllers
602109M0002
Thermostat
1
1
1
1
1
1
1
1
1
1
1
1
1
1
1
1
1
1
1
1
1
1
1
1
1
1
602135M0001
Thermometer Analog
1
1
1
1
1
1
1
1
1
1
1
1
1
1
1
1
1
1
1
1
1
1
1
1
1
1
Light
2
2
3
2
2
3
2
2
3
2
2
2
2
2
2
Lighting
602129M0016
For customer service call: 1-866-327-4159
www.micromatic.com
3
3
20
3
PRO-LINE BAR EQUIPMENT OPERATION & SERVICE MANUAL
Part #
Description
MBB
Dates
Expiration
Effective
MBB-S
58"
68"
78"
94"
1
1
1
1
58"
68"
78"
MBB-G
94"
MBB-SG
58"
68"
78"
94"
1
1
1
1
58"
68"
78"
94"
MDD
23"
MDD-S
58"
68"
78"
94"
1
1
1
1
23"
58"
68"
78"
94"
1
1
1
1
1
1
1
1
Panels
M10917M0113 Bottom panel
M10913M0180 Bottom panel
M10917M0133 Back Panel
1
1
1
1
1
1
1
1
1
1
1
1
1
1
1
1
1
1
1
1
M10913M0189 Back Panel
1
1
1
1
1
1
1
1
1
M10917M0164 Back Panel
1
M10913M0169 Back Panel
603305M0004
Handrail
603305M0005
Separator handrail
Conduction of air for
M10925M0193 tower
Terminal of conduction
M10925M0195 for tower
1
1
4
4
2
2
2
2
2
2
2
2
1
1
1
1
1
1
1
1
Racks
602701M0010
602701M0011
602701M0012
602701M0013
602701M0014
602701M0015
602701M0016
602701M0017
602701M0018
602701M0019
602701M0020
Rack 544X565
Rack with guides
544X565
Rack 671X565
Rack with guides
671X565
2
2
1
2
1
2
1
2
1
2
1
2
1
2
1
1
2
2
2
2
2
2
2
2
Rack 661X565
Rack with guides
660X565
Rack with guides
660X565
2
2
2
2
2
2
2
2
2
2
2
2
Rack 581X565
Rack with guides
581X566
1
1
1
1
1
1
1
1
Rack 467X567
Rack with guides
467X568
1
1
1
1
1
1
1
1
For customer service call: 1-866-327-4159
www.micromatic.com
21
PRO-LINE BAR EQUIPMENT OPERATION & SERVICE MANUAL
Part #
603301M0005
Description
Expiration Effective
Shelf Support Clip
M10713M0004 Shelf Support
M10905M0195 Protector bottom
MBB
Dates
78"
MBB-S
78"
MBB-G
78"
MBB-SG
58"
68"
94"
58"
68"
94"
58"
68"
94"
58"
68"
16
16
24
16
16
24
16
16
24
16
16
78"
94"
24
8
8
12
8
8
12
8
8
12
8
8
12
MDD
23"
58"
68"
MDD-S
78"
94"
Abr-09
Abr-09
78"
2
3
Abr-09
M10917M0288 Protector bottom
Abr-09
94"
1
2
M10917M0287 Protector bottom
For customer service call: 1-866-327-4159
www.micromatic.com
68"
2
1
M10905M0202 Protector bottom
M10905M0176 Protector bottom
58"
2
Abr-09
M10917M0237 Protector bottom
23"
2
2
1
3
3
3
2
2
2
1
22
3
3
2
PRO-LINE BAR EQUIPMENT OPERATION & SERVICE MANUAL
Part #
Description
MBB
Dates
Expiration Effective
58"
68"
78"
MBB-S
94"
58"
68"
78"
MBB-G
94"
58"
68"
78"
MBB-SG
94"
58"
68"
78"
94"
MDD
23"
58"
68"
78"
MDD-S
94"
23"
58"
68"
78"
94"
Tops Undercounters
1
M18101M0094 Top FDD/MDD 95-94
1
1
M18101M0124 Top FDD/MDD 69-68
1
1
M18101M0122 Top FDD/MDD 59-58
1
1
M18101M0120 Top FDD/MDD 23
1
M18101M0115 Top FBB/MBB 95-94
1
1
M18101M0127 Top FBB/MBB 69-68
1
M18101M0123 Top FBB/MBB 59-58
1
1
1
1
1
1
1
1
1
Towers
604313M0003
Tower 1 Faucet
604313M0004
Tower 2 Faucet
1
M10901M0195 Grid cover for drain
Oct-09
M10901M0183 Grid
Oct-09
1
1
1
1
1
2
1
Oct-09
M10901M0270 Grid
Oct-09
1
1
1
2
1
1
1
1
1
1
1
1
1
1
M10901M0309 Grid cover for drain
1
1
1
1
1
1
1
1
1
1
CO2 Gas Distributor
604313M0001
Air distributor 3 Way
604313M0002
Air distributor 4 Way
For customer service call: 1-866-327-4159
www.micromatic.com
1
1
1
1
23
PRO-LINE BAR EQUIPMENT OPERATION & SERVICE MANUAL
Part #
Description
MBB
Dates
Expiration Effective
MBB-S
58"
68"
78"
94"
2
2
3
3
58"
68"
78"
MBB-G
94"
58"
68"
78"
MBB-SG
94"
58"
68"
78"
94"
MDD
MDD-S
23"
58"
68"
78"
94"
1
2
2
3
3
23"
58"
68"
78"
94"
1
2
2
3
3
Handles
M10913M0195 Black Handle Door
2
M10913M0196 SS Handle Door
Handle for Black Glass
M10913M0197 Door
Handle for SS Glass
M10913M0198 Door
2
3
3
2
2
3
3
2
2
12
12
3
3
Hardware
602509M0018
Bolt Hex. M.4 DOMO
6
12
12
18
6
12
12
18
602505M0028
Bolt M6x45
4
8
8
8
4
8
8
8
602529M0004
Spring
1
602529M0006
Spring
602505M0027
Bolt HEX M4X16 black
8
8
12
1
1
2
1
603301M0030
603301M0032
12
18
12
12
18
12
12
18
18
1
1
8
8
12
8
8
12
8
8
12
8
8
12
Support Hinges
Abr-09
1
1
2
1
1
2
1
1
2
1
1
2
Support Hinges
Abr-09
1
1
1
1
1
1
1
1
1
1
1
1
604301M0002 Glass Rinser
604301M0004
12
Oct-09
Glass Rinser
For customer service call: 1-866-327-4159
www.micromatic.com
Oct-09
4
1
8
8
12
4
1
1
2
1
1
1
1
1
1
1
1
1
1
1
1
1
1
1
1
1
1
1
1
1
1
1
1
1
1
1
24
PRO-LINE BAR EQUIPMENT OPERATION & SERVICE MANUAL
For customer service call: 1-866-327-4159
www.micromatic.com
25
PRO-LINE BAR EQUIPMENT OPERATION & SERVICE MANUAL
9. WARRANTY
One Year Parts & Labor Warranty: Micro Matic warrants to the firstend-user purchaser (the “User”) that the Micro Matic brand
equipment sold hereunder, except for parts and accessories which
carry the warranty of a supplier (the “Equipment”) will be free from
defects in material and factory workmanship under normal
conditions of use and maintenance for a period of (1) one year from
the date of Installation (Warranty Commencement date), but in no
event to exceed (15) fifteen months from the date of shipment.
Warranty is Not Transferable
Warranty Coverage: If there is a defect in material or factory
workmanship covered by this Warranty reported to Micro Matic
during the period the applicable Warranty is in force and effect,
Micro Matic will repair or replace, at Micro Matic’s option, that part of
the Equipment that has become defective. Micro Matic will cover
labor cost within one year from the Warranty Commencement date
or 15 months from shipment date, whichever occurs first. Micro
Matic shall bear all labor costs in connection with the installation of
these replacement parts, provided that, the installation is conducted
by Micro Matic or its authorized representative. Charges for
warranty travel time to round trip total of (2) two hours or up to 100
miles total. Any charges exceeding those stated herein or overtime
rates must have prior authorization by Micro Matic.
Additional Four Year Compressor Part Warranty: In addition to the
warranty set above. Micro Matic warrants the compressor (part only)
for an additional four (4) years based on the installation date. This
warranty is for defects both in workmanship and material under the
normal and proper use and maintenance service. The four (4) year
extended warranty only applies to hermetically sealed parts of the
compressor and does not apply to any other part or component,
including, but not limited to cabinet, temperature control,
refrigerant, motor starting equipment, fan assembly, or any other
electrical or mechanical component.
For customer service call: 1-866-327-4159
www.micromatic.com
The original purchaser shall be responsible for returning the
defective compressor to Micro Matic prepaid. This warranty shall be
void if the compressor, in Micro Matic’s sole judgment, has been
subjected to misuse, neglect, alteration or accident, operated
contrary to the recommendations specified by the Unit
manufacturer, repaired or altered by anyone other than Micro Matic
in any way so as, in Micro Matic’s sole judgment, to affect its quality
or efficiency or if the serial number has been altered, defaced or
removed. This warranty does not apply to a compressor in any unit
that has been moved fro the location where it was originally
installed.
Parts Warranty Coverage: Micro Matic warrants all new machine
parts produced or authorized by Micro Matic to be free from defects
in material and workmanship for a period of 90 days from the
Warranty Commencement Date. If any defect in material and
workmanship is found to exist within the warranty period, Micro
Matic will replace the defective part without charge. Defective parts
become the property of Micro Matic.
Micro Matic will have no responsibility to honor claims received after
the date the applicable Warranty expires. Notwithstanding the
foregoing, any claim with reference to the Equipment or any parts
therefore for any cause shall be deemed waived unless submitted
by the User to Micro Matic within thirty (30) days after the date the
User discovered, or should have discovered, the claim.
In
connection with all claims under this Warranty, Micro Matic will have
the right, at its own expense, to have its representatives inspect the
Equipment at the User’s premises and to request all of User’s
records pertaining to the Equipment to determine whether a defect
exists, whether the conditions set forth in this Warranty have been
satisfied, and whether or not the applicable Warranty is in effect.
26
PRO-LINE BAR EQUIPMENT OPERATION & SERVICE MANUAL
Exclusions from and Conditions to Warranty Coverage: This
Warranty does not cover parts or accessories, which (a) carry the
warranty of a supplier or (b) are, abused. Application of this
Warranty is further conditioned upon the following:
Installation. The Equipment must be properly installed
accordance with Micro Matic’s installation procedures.
in
No Alteration. The Equipment must not have been modified or
altered from its condition at the date of original installation.
Use. Micro Matic equipment in not designed for personal, family or
household purposes, and its sale for such purposes is not intended.
in the event the equipment is so used, this warranty shall be null
and void, and the equipment shall be deemed to have been sold “as
is-where is” without any warranty of any kind, including without
limitation any warranty of title, non-infringement, merchant-ability or
fitness for a particular purpose.
The foregoing warranty is in lieu of and excludes all other warranties
not expressly set forth herein, whether express or implied by
operation of law or otherwise, including but not limited to any
representation of performance and any implied warranties of title,
non-infringement, merchantability or fitness for a particular purpose.
No other warranties are authorized on behalf of Micro Matic unless
specifically issued by Micro Matic. Micro Matic shall have no liability
for incidental or consequential losses, damages including without
limitation or expenses, loss of sales, spoiled food, profits or
goodwill, claims whether or not on account of refrigeration failure or
punitive or exemplary damages directly or indirectly arising from the
sale, handling or use of the Equipment or from any other cause
relating thereto, whether arising in contract, tort, warranty, strict
liability or otherwise. Micro Matic’s liability hereunder in any case is
expressly limited, at Micro Matic’s election, to repair or replacement
of Equipment or parts therefore or to the repayment of, or crediting
the user with, an amount equal to the purchase price of such goods.
Proper Maintenance and Operation. The Equipment must be
properly maintained and operated in accordance with Micro Matic’s
maintenance and operating procedures. All service, labor and parts
must be acquired from Micro Matic or its authorized service
representative for the User’s area.
This warranty is void if failure is a direct result of handling &/or
transportation, fire, water, accident, misuse, acts of god, attempted
repair by unauthorized persons, improper installation, if serial
number has been removed or altered, or if unit is used for purpose
other than it was originally intended.
Failure to comply with any of these conditions will void this
Warranty. In addition, this Warranty does not cover defects due to
apparent abuse, misuse or accident.
For customer service call: 1-866-327-4159
www.micromatic.com
27
PRO-LINE BAR EQUIPMENT OPERATION & SERVICE MANUAL
For customer service call: 1-866-327-4159
www.micromatic.com
28
For customer service call: 1-866-327-4159
www.micromatic.com