1
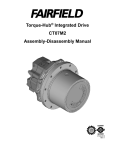
Torque-LOCK TM Static Input Brake
Service Manual
Models: TLH13….
Revised 8/18/2014
While every precaution has been taken in the preparation of this document, Fairfield Manufacturing Co. Inc.
assumes no liability with respect to the use of the documentation described herein, or for any act or omission
of Fairfield Manufacturing Co. Inc. concerning this documentation. Torque-Hub® is a registered trademark
of Fairfield Manufacturing Co. Inc.
Features and specifications are subject to change without notice.
2
TORQUE-LOCK TM Service Manual
Table of Contents
Introduction.................................................................................................................................................... 4
Brake Test ..................................................................................................................................................... 5
Tightening and Torquing Bolts ...................................................................................................................... 7
Lubrication Information.................................................................................................................................. 8
Main Disassembly ....................................................................................................................................... 10
Main Assembly ............................................................................................................................................ 14
Assembly Drawing ...................................................................................................................................... 16
Parts List ..................................................................................................................................................... 17
Service Parts ............................................................................................................................................... 18
Assembly Tools ........................................................................................................................................... 19
Contact Information ..................................................................................................................................... 29
3
Introduction
This manual is a step-by-step guide to the disassembly and assembly
of the specific Torque-Hub® family of units shown on the cover. It is
designed for the customer or mechanic who is repairing this particular
Torque-Lock TM model.
Users of this manual should note that each part mentioned is followed
by an identification number enclosed in parentheses. These part
numbers may be referred to in the Parts List and Assembly Drawing
sections of this manual.
Specialized tools used to assemble this unit are noted in the assembly
procedures and diagrammed in the Assembly Tools section.
Users should familiarize themselves with the procedures for brake
test, roll and leak test, as well as bolt tightening and torquing found on
the following nine pages before starting any repairs.
Standard safety practices should be followed during the disassembly
and assembly procedures described. Safety glasses and safety
shoes should be worn, and heavy, heat resistant gloves should be
used when handling heated components. Be especially alert when
you see the word CAUTION. This indicates that a particular operation
could cause personal injury if not performed properly or if certain
safety procedures are not followed. The word NOTE is used to bring
attention to certain procedures or helpful hints that will aid in the
disassembly and assembly process.
4
Brake Test
The Brake Test
1)
Connect an appropriate pressure supply to the brake port and
slowly increase the pressure to the prescribed pressure in the
brake chart to check for correct release pressure, by rotating the
brake input with a 13-tooth 16/32 spline shaft with 25 in.-lbs. of
torque.
2)
Continue increasing the pressure to 3000 psi [200bar] and check
that the brake rotates freely, by rotating the brake shaft.
3)
Note: Release pressure during bench testing should be limited to
2000 psi [138bar] unless fully installed to a gearbox.
4)
The brake should hold 3000 psi [200bar] without leakage.
LAST 3
NO. OF
SPRINGS
(24) / (23)
INITIAL
RELEASE
PRESSURE psi
FULL
RELEASE
PRESSURE psi
16W
12
154-188
188-206
15W
10/2
140-176
172-190
13W
10
129-158
156-172
12W
8/2
115-145
140-156
11W
8
104-127
125-138
09W
6/2
89-114
108-122
08W
6
78-96
93-104
07W
4/2
63-83
77-87
05W
4
52-65
62-70
DIGITS
5
The Leak Test
The purpose of a leak test is to make sure the unit is airtight. To
perform a leak test use the leak test fixture from the table below. If the
tool is not available, the gearbox must be sealed to perform the test.
This can be accomplished by replacing one of the oil plugs in the cover
with an air chuck. DO NOT EXCEED 10 PSI PRESSURE DURING
THE LEAK TEST. Higher pressure will create a false sealing effect in
assemblies with lip-seals. The unit has a leak if the pressure gauge
reading on your leak check fitting starts to fall after the gearbox has
been pressurized and allowed to equalize. Leaks will most likely occur
at the pipe plugs, the main seal or wherever O-rings or gaskets are
located. The exact location of a leak can usually be detected by
brushing a soap and water solution around the main seal and where
the O-rings or gaskets meet on the exterior of the unit and then
checking for air bubbles. If a leak is detected in a seal, O-ring, or
gasket, the part must be replaced and the unit rechecked. Leak test
at 10 psi for 20 minutes.
Model Code
Leak Test Tool
ALL
T220092
6
Tightening and Torquing Bolts
If an air impact wrench is used to tighten bolts, extreme care should
be taken to ensure the bolts are not tightened beyond their specified
torque. The following steps describe how to tighten and torque bolts
or socket head cap screws in a bolt circle.
1)
Tighten (but do not torque) bolt “A” until snug.
2)
Go to the opposite side of the bolt circle and tighten bolt “B” until
equally snug.
3)
Crisscross around the bolt circle and tighten the remaining bolts.
4)
Use a torque wrench to apply the specified torque to bolt “A”.
5)
Using the same sequence, crisscross around the bolt circle and
apply an equal torque to the remaining bolts.
7
Lubrication Information
General Properties
The lubricant used in Torque-Lock TM brakes should be ISO VG. 32
hydraulic fluid. Some applications require special considerations;
consult the machine manufacturer and Oerlikon Fairfield for more
additional information.
Maintenance
An initial oil change should be made after the first 50 hours of
operation. Subsequent oil changes should be made at 1,000 hour
intervals or annually, whichever comes first.
Oil temperatures should be not higher than 160° to 180°F for
continuous operation, and no higher than 200°F for intermittent
operation. For special applications, high horsepower, high speeds or
wide temperature changes, please consult Oerlikon Fairfield.
Oil Fill Level
When the Torque-Lock TM unit is mounted horizontally, unless
otherwise specified, the gearbox should be filled half-full of oil, or 2.4
fl.-oz. 4.9 cu-in [80cc].
Release volume is .7 cu-in [11.5cc].
Vertically mounted Torque-Hub® units may require special lubrication
procedures. Please contact Oerlikon Fairfield for vertically mounted
applications.
8
DISASSEMBLY
9
Main Disassembly
1)
Remove the NPT Plugs (21A) and drain the oil.
2)
Place the brake on the bench with the shaft down, supported on a fixture that does not allow the output
shaft to contact the bench.
3)
Remove Socket Head Cap Screws (13) and Lock Washers (14). Remove the cap screws as evenly
as possible and note that there is spring pressure pushing on the Piston Housing (2)
4)
Remove the O-ring plugs (20).
5)
Remove the Piston Housing (2) which will contain the Piston (9) and associated O-rings.
6)
To remove the Piston (9), replace one of the O-ring Plugs (20). Use air pressure in the other brake
port and push the Piston (9) out of the Piston Housing (2).
7)
Remove the O-rings and Back-up Rings (15), (16), (17) and (18).
8)
Remove the Gasket (7) from the Spring Housing (8).
9)
Remove the Brake Stators (6) and Brake Rotors (3) from the Spring Housing (2).
10
10) Remove the Pressure Plate (4) from the Spring Housing (2).
11) Remove the Springs (23) and or (24).
12) Remove the Dowel Pins (19) from the Spring Housing (2).
13)
Turn the brake over and support it such that the Brake Shaft (1) can be pushed out of the Spring
Housing (2) without contacting the bench.
14)
Using retaining ring pliers, carefully remove the Retaining Ring (11A) from the Brake Shaft (1)
15)
Press the Brake Shaft (1) out of the Ball Bearing (10) out of the Brake.
16)
Using retaining ring pliers, carefully remove the Retaining Ring (11) from the Spring Housing (2).
17)
Turn the brake over and press the Ball Bearing (10) from the Spring Housing (2)
18)
Drive the Seal (12) from the Spring Housing (2)
This concludes the Main Disassembly.
11
THIS PAGE LEFT BLANK INTENTIONALLY
12
ASSEMBLY
13
Main Assembly
1)
Press the Seal (12), with the spring down, into the Spring Housing (8) to the correct depth with the
seal tool. Oil the seal lip.
2)
Install the Ball Bearing (10) on the outer race into the Spring Housing (8). The bearing must be seated
against the bottom of the counter bore.
3)
Turn the Spring Housing (8) over, support the inner race of the bearing and allow sufficient clearance
for the Brake Shaft (1) to be pressed thru. Apply Loctite® 603 to the bearing bore. Press the Brake
Shaft (1) thru the bearing until the shaft shoulder is solid against the bearing inner race. Be sure to
support the inner race of the bearing.
4)
Turn the Spring Housing over and install the Retaining Ring (11A) onto the Brake Shaft (1). Install
Retaining Ring (11) into the bearing counter bore.
5)
Turn the Spring Housing (8) over and install Dowel Pins (19) into the Spring Housing.
6)
Install the correct number and combination of springs (23) and (24) into the counter bores of Spring
Housing (8). If Spring (23) is required, note the position in the diagram.
7)
Install Pressure Plate (4) onto the springs. Insure that the slots on the pressure plate are aligned with
the dowel pins.
8)
Install the Brake Rotors (3) and Brake Stators (6) in accordance to the above exploded view. The
rotors and stators must alternate as shown above.
14
9)
Grease and install O-ring (17) and Back-up ring (18) into the inner groove of the Piston (9). Insure the
back-up ring is in the correct location.
10) Grease and install O-ring (15) and Back-up ring (16) into the outer groove of the Piston (9). Insure the
back-up ring is in the correct location.
11) Install the Piston (9) with the O-rings into the Piston Housing (2), being sure to orient the piston relative
to the brake stators. The cast slots must be in line with the Dowel Pins (19). Be sure not to cut the Orings during installation of the piston.
12) Install Gasket (7) into Spring Housing (8).
13) Install Piston Housing subassembly onto Spring Housing, be sure to align the dowel pins. Also insure
that the CAST SLOTS in the Spring Housing (8) and Piston Housing (2) are aligned.
14) Install Lock Washers (14) and Socket Head Bolts (13) thru the Piston Housing (2) into the Spring
Housing (8). Tighten the socket-head bolts down evenly, compressing the springs. Once the piston
housing and the spring housing have come together, torque the Socket Head Bolts (13) to 55-60 ft.lbs. as shown on page 7.
15) Install one Oil Plug (20). Apply hydraulic pressure to the empty brake port and check the release
pressure per page 5.
SPRING ASSEMBLY CHART
This concludes the Main Assembly.
15
Assembly Drawing
16
Parts List
▲
▲
▲
▲○⌂
○
○
○
○
○
►
⌂
⌂
⌂
⌂
Item
1
Qty.
1
2
1
PISTON HOUSING
3
2
BRAKE ROTOR
4
1
PRESSURE PLATE
6
2
BRAKE STATOR
7
1
GASKET
8
1
SPRING HOUSING
9
1
BRAKE PISTON
10
1
BALL BEARING
11
1
RETAINING RING
11A
1
RETAINING RING
12
1
SEAL
13
6
SOCKET HEAD CAP SCREW
14
6
LOCK WASHER
15
1
O-RING
16
1
BACK-UP RING
17
1
O-RING
18
1
BACK-UP RING
19
2
DOWEL PIN
20
2
O-RING PLUG
21A
2
NPT PLUG
23/24
CHART
QTY ITEM 23
12
10
10
8
8
6
6
4
4
Description
BRAKE SHAFT
SPRING
QTY ITEM 24
0
2
0
2
0
2
0
2
0
BRAKE PART No.
TLH1333316W
TLH1333315W
TLH1333313W
TLH1333312W
TLH1333311W
TLH1333309W
TLH1333308W
TLH1333307W
TLH1333305W
17
Service Parts
▲ FRICTION DISC KIT AMTLH13WA
► SPRING KIT
AMTLH03B3
○ SEAL KIT
AMTLH03C1
⌂ BEARING KIT
AMTLH03D1
18
Assembly Tools
SUPPORT TOOL
19
20
SEAL TOOL
21
BEARING TOOL
22
SHAFT TOOL
23
SHAFT SUPPORT
TOOL
24
LEAK/ROLL-TEST
FIXTURE
25
26
27
28
Contact Information
Since 1919, Fairfield has been at the forefront of gear and drive
design. Fairfield has the people, knowledge and resources to provide
solutions for a wide range of application needs.
With manufacturing capabilities in the United States, India and China,
Fairfield offers custom gears with spur, helical or bevel forms from
20mm through 2M to AGMA Class 14 standards. We also design and
build custom drives for mobile equipment and stationary industrial
machinery with torque outputs from 800 Nm to over 4,000,000 Nm.
We provide Torque Hub® planetary drives, drop boxes, right angle
drives, transfer cases, specialty transmissions, differentials and
differential carrier assemblies, housing and custom drive assemblies.
We can provide integrated solutions for mechanical, hydraulic or
electrically driven systems.
Fairfield is part of Oerlikon AG, a global technology company with over
16,000 employees in 36 countries. Together with our sister firm,
Graziano Trasmissioni, Fairfield forms Oerlikon Drive Systems. Our
combined technologies enable us to provide fully integrated drive
systems from transmissions to final drives for both on- and off-highway
vehicles.
For more information, contact Oerlikon Fairfield today.
Mailing Address
Oerlikon Fairfield
U.S. 52 South / P.O. Box 7940
Lafayette, IN 47903-7940
Physical Address
2400 Sagamore Parkway South
Lafayette, IN 47905
Shipping Address
2309 Concord Rd.
Lafayette, IN 47909
Fax
Main:
Applications Engineering:
Sales and Service:
(765) 772-4001
(765) 772-4011
(765) 772-4010
E-mail
Applications Engineering:
Sales:
[email protected]
[email protected]
Fax
www.oerlikon.com/fairfield
29
Oerlikon Fairfield
U.S. 52 South / P.O. Box 7940
Lafayette, IN 47903 USA
(765) 772-4000
www.oerlikon.com/fairfield