1
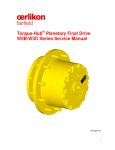
Torque-Hub® Planetary Final Drive
7000 Series Service Manual with
Brakes
Rev 12/03/12
1
While every precaution has been taken in the preparation of this document, Fairfield Manufacturing Co. Inc. assumes no
liability with respect to the use of the documentation described herein, or for any act or omission of Fairfield Manufacturing
Co. Inc. concerning this documentation. Torque-Hub® is a registered trademark of Fairfield Manufacturing Co. Inc.
Features and specifications are subject to change without notice.
2
Planetary Final Drive Service Manual
Content
Disassembly Instructions
Assembly Instructions
General Information
Introduction
Brake Test
Roll and Leak Test
Tightening and Torquing Bolts
Lubrication Information
Main Disassembly
Output Planet Gear Disassembly
Cover Disassembly
Housing-Spindle Disassembly
Input Brake Disassembly
Input Coupling Disassembly
Input Shaft Disassembly for 7HB
Input Carrier Disassembly
Cover Subassembly
Input Carrier Subassembly
Output Planet Gear Subassembly
Input Coupling Subassembly
Input Shaft Subassembly
Input Brake Subassembly for 7HP
Input Brake Subassembly for 7HB
Housing-Spindle Subassembly
Main Assembly
Assembly Drawing
Parts List
Assembly Tools
Contact Information
4
5
9
12
13
15
18
19
20
24
26
28
29
31
32
34
36
38
40
42
44
46
50
51
53
64
3
Planetary Final Drive Service Manual
Introduction
This manual is a step-by-step guide to the disassembly and
®
assembly of the 7HP and 7HB Torque-Hub units. It is designed for
the customer or mechanic who is repairing this particular Torque®
Hub model.
Users of this manual should note that each part mentioned is
followed by an identification number enclosed in parentheses.
These part numbers may be referred to in the Parts List and
Assembly Drawing sections of this manual.
Specialized tools used to assemble this unit are noted in the
assembly procedures and diagrammed in the Assembly Tools
section.
Users should familiarize themselves with the procedures for roll and
leak testing, as well as bolt tightening and torquing found on the
following three pages before starting any repairs.
Standard safety practices should be followed during the
disassembly and assembly procedures described. Safety glasses
and safety shoes should be worn, and heavy, heat resistant gloves
should be used when handling heated components. Be especially
alert when you see the word CAUTION. This indicates that a
particular operation could cause personal injury if not performed
properly or if certain safety procedures are not followed. The word
NOTE is used to bring attention to certain procedures or helpful
hints that will aid in the disassembly and assembly process.
4
Planetary Final Drive Service Manual
Brake Test
The Brake Test
To perform a brake check, use a M12x1.5 metric fitting. Install a
hydraulic hand pump with pressure gauge into brake port in spindle
(1A) using metric thread fitting.
Place ROLL TEST Tool (refer to table on page 9) into input
coupling.
Apply 25 in-lbs torque. While trying to rotate tool, pump the handle
on the hydraulic hand pump and increase the pressure until the
brake releases. The brake is released when you are able to rotate
the tool.
Record the release pressure. If the brake does not release within
limits shown in the brake chart on page 6, check to see if it has the
proper number of springs using the SPRING CHECKING
PROCEDURE. Increase to maximum pressure (refer to brake chart
on page 6) and hold at that pressure for one minute. If the brake
does not leak or lose pressure, the unit has passed the brake test. If
the brake loses pressure, attempt to repair the leak using the leak
repair procedure at end of this procedure.
While brake is still released, roll check the unit for one revolution of
the output member by rotating the tool. Bleed off pressure slowly
while rotating the ROLL TEST Tool.
Record the pressure at which the brake locks up. Using a clean rag,
wipe off excess fluid from around the brake port and install the pipe
plug.
Continued on Next Page
5
BRAKE REFERENCE CHART -7HP
th
4 DIGIT
IN
MODEL
CODE
(INPUT
BRAKE)
A
BRAKE
PART
NUMBER
NUMBER
OF
SPRINGS
RELEASE
PRESSURE
MIN (psi)
RELEASE
PRESSURE
MAX (psi)
FULL
RELEASE
PRESSURE
(psi)
MAXIMUM
PRESSURE
(psi)
BRAKE
TORQUE
(in-lbs)
AM902430F
14
133
193
270
3000
2155
E
AM902430X
8
77
111
154
3000
1230
F
AM902430X
14
139
199
270
3000
1399
G
AM902430F
12
120
171
232
3000
1201
X
No Brake
BRAKE REFERENCE CHART -7HB
th
4 DIGIT
IN
MODEL
CODE
(INPUT
BRAKE)
A
BRAKE
PART
NUMBER
NUMBER
OF
SPRINGS
RELEASE
PRESSURE
MIN (psi)
RELEASE
PRESSURE
MAX (psi)
FULL
RELEASE
PRESSURE
(psi)
MAXIMUM
PRESSURE
(psi)
BRAKE
TORQUE
(in-lbs)
AM902419A
14
153
227
332
3000
2032
B
AM902419B
12
132
195
284
3000
1743
C
AM902419C
10
111
164
237
3000
1452
D
AM902419D
9
100
148
213
3000
1306
E
AM902419E
8
89
131
189
3000
1159
X
No Brake
SPRING CHECKING PROCEDURE:
Install two bolts into holes in the brake piston. Tighten bolts in such
a way to ensure the brake piston remains straight while being
compressed into the brake cavity of the spindle.
Carefully remove the retaining ring from the spindle. Slowly remove
bolts from the input brake. Remove the cover plate from the end of
the input brake and count the number of springs in brake. If number
of springs matches the number in the BRAKE CHART, go to the
next step. If the number of springs does not match the number in
the BRAKE CHART above, install the correct number of springs.
Continued on Next Page
6
Install the Brake Cover Plate using two bolts. Tighten bolts in such a
way that to ensure the Brake Cover Plate remains straight while
being compressed into the brake cavity of the spindle.
Install the large retaining ring into the groove in spindle (1A),
making sure it is seated properly. Remove all remaining bolts from
the brake piston and discard.
NOTE: USE CAUTION WHEN REMOVING BOLTS AS THEY ARE
SUBJECT TO SPRING PRESSURE. MAKE SURE THE
RETAINING RING IS SECURED BEFORE REMOVING BOLTS.
Re-test the input brake. If release and/or lockup pressures still do
not match the brake chart, contact the Oerlikon Fairfield service
department.
7
BRAKE LEAK REPAIR PROCEDURE:
Install two bolts into holes in the Brake Piston. Tighten bolts in such
a way to ensure the Brake Cover Plate remains straight while being
compressed into brake cavity of Spindle.
Carefully remove the Retaining Ring from the Spindle. Using two
eyebolts threaded into opposite holes in the Brake Piston, remove
the Brake Piston from the Spindle.
Check O-rings, Backup Rings, and brake cavity in Spindle for
damage. If no damage is found, reinstall the Input Brake according
to the Input Brake Installation Procedure in the assembly
instructions chapter and perform pressure test again. If brake still
leaks, contact the Oerlikon Fairfield service department.
Reference: Sample Model 7HP/7HB X_ _ _ _ _ _. The ‘X’ is the
brake option (Model Code). Consult Oerlikon Fairfield for other
brake options.
NOTE: Failure to perform this test may result in damaged or
ineffective brake parts.
8
Planetary Final Drive Service Manual
Roll and Leak Test
®
Torque-Hub units should always be roll and leak tested before
disassembly (if possible) and after assembly to make sure the unit’s
gears, bearings and seals are working properly. The following
information briefly outlines what to look for when performing these
tests.
NOTE: The brake must be released before performing the roll test.
This can be accomplished by either pressurizing the brake using the
Brake Leak Test procedure below or by tightening the bolts into the
piston through the end plate (See Brake Disassembly Procedure).
NOTE: Bolts must be removed while performing brake release test.
The Roll Test
The purpose of the roll test is to determine if the unit’s gears are
rotating consistently, easily and properly. It should be able to rotate
the gears in the unit applying constant force to the roll checker. If
more drag is felt in the gears only at certain points, then the gears
are not rolling consistently and easily and should be examined for
improper installation or defects. Some gear packages roll with more
difficulty than others. Do not be concerned if the gears in the unit
seem to roll hard as long as they roll with consistency. Rotate the
gearbox both clockwise and counterclockwise the same number of
turns as the ratio of the unit. The gearbox ratio is the same number
as the last three numbers on the ID tag.
Continued on Next Page
9
7HP ROLL TEST
Model Code
Roll Test Tool
7HPx01xZZ3xxxx
T195650
7HPx01xZZ8xxxx
T211706
7HPx02xZZ3xxxx
T195650
7HPx02xZZ8xxxx
T211706
7HPx03xZZ3xxxx
T195650
7HPx03xZZ8xxxx
T211706
7HB ROLL TEST
Model Code
Roll Test Tool
7HBx01x0A3xxxx
T195650
7HBx01x0B2xxxx
T218542
7HBx01x0B3xxxx
T195650
7HBx01x0B8xxxx
T163056
7HBx03x0A3xxxx
T195650
7HBx03x0B2xxxx
T218542
7HBx03x0B3xxxx
T195650
7HBx03x0B8xxxx
T163056
7HBx04x0B8xxxx
T163056
7HBx04x0B8xxxx
T163056
7HBx04x0B8xxxx
T163056
7HBx04x0B8xxxx
T163056
7HBx06x0B8xxxx
T163056
7HBx06x0B8xxxx
T163056
7HBx06x0B8xxxx
T163056
7HBx06x0B8xxxx
T163056
10
The Leak Test
The purpose of a leak test is to make sure the unit is airtight.
The unit has a leak if the pressure gauge reading on your leak
check fitting starts to fall after the gearbox has been pressurized
and allowed to equalize. Leaks will most likely occur at the pipe
plugs, the main seal or wherever o-rings or gaskets are located.
The exact location of a leak can usually be detected by brushing a
soap and water solution around the main seal and where the o-rings
or gaskets meet on the exterior of the unit and then checking for air
bubbles. If a leak is detected in a seal, o-ring or gasket, the part
must be replaced and the unit rechecked. Leak test at 10 psi for 20
minutes.
7HP LEAK TEST
Model Code
Leak Test Tool
7HPx01xxxxxxxx
T210241
7HPx02xxxxxxxx
T210241
7HPx03xxxxxxxx
T210241
7HB LEAK TEST
Model Code
Leak Test Tool
7HBx01xxxxxxxx
T219786
7HBx03xxxxxxxx
T219786
7HBx04xxxxxxxx
T219786
7HBx06xxxxxxxx
T219786
11
Planetary Final Drive Service Manual
Tightening and Torquing Bolts
If an air impact wrench is used to tighten bolts, extreme care should
be taken to ensure the bolts are not tightened beyond their specified
torque. The following steps describe how to tighten and torque bolts
or socket head cap screws in a bolt circle.
1. Tighten (but do not torque) bolt “A” until snug.
2. Go to the opposite side of the bolt circle and tighten bolt “B” until
equally snug.
3. Crisscross around the bolt circle and tighten the remaining bolts.
4. Use a torque wrench to apply the specified torque to bolt “A.”
5. Using the same sequence, crisscross around the bolt circle and
apply an equal torque to the remaining bolts.
12
Planetary Final Drive Service Manual
Lubrication Information
®
General Properties
The lubricant used in most Torque-Hub drives should be
petroleum-based gear fluid containing anti-oxidation, anti-foaming
and extreme pressure additives. The lubricant should have a
minimum viscosity index of 95 cst and maintain a minimum viscosity
of 40 cst under normal operating conditions. Some applications
require special considerations; consult the machine manufacturer
and Oerlikon Fairfield for more additional information.
The table below lists the recommended viscosities for various
ambient operating temperatures. These recommendations are
based on temperature rise of 50° to 100°F at normal operating
conditions.
Differential Planetary
Simple Planetary
ISO Index
AGMA
Lubricant
Number
ISO Index
AGMA
Lubricant
Number
(1)
VG100
3EP
VG100
3EP
-5°to 40° F
VG150
4EP
VG100
3EP
VG220/VG320
5EP/6EP
VG150/VG220
4EP/5EP
VG460
7EP
VG320
6EP
Ambient
Temperature
-40° to -5° F
40° to105° F
105° to 150° F
(2)
Footnotes
1.
For operation in this ambient temperature range, synthetic oil is recommended with a pour point of
10°F lower than the minimum ambient temperature.
2. For operation in this ambient temperature range, synthetic oil is recommended for proper lubricant
life at elevated temperatures.
Maintenance
®
Oil amounts for each series of Torque-Hub drives are indicated in
the appropriate series literature. An initial oil change should be
made after the first 50 hours of operation. Subsequent oil changes
should be made at 1,000 hour intervals or annually, whichever
comes first.
Oil temperatures should be not higher than 160° to 180°F for
continuous operation, and no higher than 200°F for intermittent
operation. For special applications, high horsepower, high speeds
or wide temperature changes, please consult Oerlikon Fairfield.
Oil Fill Level
®
When the Torque-Hub unit is mounted horizontally, unless
otherwise specified, the gearbox should be filled half-full of oil.
Consult the appropriate series literature for approximate fill
®
volumes. Vertically mounted Torque-Hub units may require special
lubrication procedures. Please contact Oerlikon Fairfield for
vertically mounted applications.
13
DISASSEMBLY
14
Planetary Final Drive Service Manual
Main Disassembly
1.
Perform a roll check and leak check prior to disassembling the unit.
2.
Remove the two magnetic Pipe Plugs (6F) and drain the oil out of the gearbox.
NOTE: Record the condition and volume of the oil.
3.
Remove Retaining Ring (6G) from the Cover Subassembly.
4.
Lift the Cover Subassembly off the unit.
Continued on Next Page
15
Continued on Next Page
5.
Remove the Input Sun Gear (10) if applicable.
NOTE: On units with a ratio of greater than 36:1, there will be no Input Sun Gear (10). The
teeth will be integrated on the Input Shaft.
6.
Lift out the Input Carrier Subassembly from Hub-Spindle Subassembly.
NOTE: Skip step 7 for 7HP Disassembly.
7.
Remove the Input Shaft Subassembly out of the Hub-Spindle Subassembly.
CAUTION: Safety glasses must be worn during these next steps.
8.
Remove the Retaining Ring (20) from the Second Stage Sun Gear (11).
9.
Remove the Second Stage Sun Gear (11).
NOTE: On units with a ratio 48:1, the Sun Gear (11) and the Input Shaft (9) will need to be
removed together.
10.
Loosen and remove the three Flat Head Bolts (19) that retain the Ring Gear (1E) to the
Housing (1G).
11.
Lift the Ring Gear (1E) from Hub-Spindle Subassembly.
16
NOTE: Skip step below for 7HP Disassembly.
12.
Remove the Thrust Washer (4H) from the counter bore in the Hub-Spindle Subassembly.
NOTE: Discard the O-ring in the step below. Do not re-use it.
13.
Remove the O-ring (18) from between the Housing (1D) and the Ring Gear (1E).
14.
Using a 1/8” diameter punch, drive the Roll Pin (4G) into the Planet Shaft (4E) until it
bottoms against the Hub-Spindle Subassembly.
15.
Grasp the Roll Pin (4G) using needle nosed pliers or some sort of hooked tool, and pull the
Planet Shaft (4E) out of the Hub-Spindle Subassembly.
16.
Using a 1/8” diameter punch, drive the Roll Pin (4G) out of the Planet Shaft (4E).
NOTE: The Roll Pins (4G) should not be reused when reassembling the unit.
17.
Slide the Planet Gear Subassembly (4F) out of the Hub-Spindle Subassembly being careful
not to drop the Needle Bearings (4C) in the process.
18.
Remove the Input Brake Subassembly from the Hub-Spindle Subassembly (Refer to page
23 for Input Brake Disassembly).
19.
Remove the Input Coupling Subassembly from the Hub-Spindle Subassembly.
This concludes the Main Disassembly.
17
Planetary Final Drive Service Manual
Output Planet Gear Disassembly
1.
Remove 4 Thrust Washers (4B) from the Planet Gear (4F).
2.
Remove 28 Needle Rollers (4C) from the Planet Gear (4F).
3.
Remove the Thrust Spacer (4D) from the Planet Gear (4F).
4.
Repeat Steps 1 through 3 for the remaining two Planet Gears (4F).
This concludes the Output Planet Gear Disassembly.
18
Planetary Final Drive Service Manual
Cover Disassembly
1.
Remove the O-Ring (17) from groove in the Cover (6A) and discard O-Ring.
2.
Remove Thrust Washer (2) from pockets in the Cover (6A).
3.
Unscrew the Hex Head Bolts (6C) from the Disengage Cap (6B), if required.
4.
Remove the Disengage Cap (6B) from the Cover (6A).
5.
Pull the Disengage Rod (6D) out of the Cover (6A).
6.
Remove O-Ring (6E) from the Cover (6A) and discard.
This concludes the Cover Disassembly.
19
Planetary Final Drive Service Manual
Housing-Spindle Disassembly
Continued on Next Page
20
1.
Set the unit on a bench so that the Spindle (1A) flange is down.
2.
Using a small drill bit (typically 1/8”), drill from the top of the bearing nut to the bottom as
shown below.
3.
Using a larger drill bit (typically 5/16”), drill the bearing nut from the shoulder of the bearing
nut to the bottom as shown below.
Continued on Next Page
21
4.
Using a chisel, split open the bearing nut through the larger drilled bore as shown below.
NOTE: The holes in the Bearing Nut (1F) for the Set Screws (1G) were staked for retention
of the Set Screws (1G). The holes will need to be cleaned up prior to removing the Set
Screws.
5.
Turn the unit over and carefully place the unit on a support base until the Spindle (1A) rests
on it. Ensure there is enough gap to lower the Housing (1D) down.
Continued on Next Page
22
6.
Use a dead blow hammer on the Housing (1D) flange to drive the inboard Bearing Cone
(1C) off of the Spindle.
7.
Lift the Spindle (1A) out of the Housing (1D).
8.
If necessary, remove the Boot Seal (1Q).
9.
Remove Lip Seal (1B) from Housing (1D).
10.
Remove the Bearing Cone (1C) from Housing (1D).
11.
Using a hammer and punch drive the inboard Bearing Cup (1C) out of the Housing (1D). Be
careful not to damage the counter bore in the housing.
12.
Turn the Housing (1D) over and drive the outboard Bearing Cup (1C) out of the Housing. Be
careful not to damage the counter-bore in the housing.
This concludes the Housing-Spindle Disassembly.
23
Planetary Final Drive Service Manual
Input Brake Disassembly
Continued on Next Page
24
NOTE: Skip step 1 for 7HB unit.
1.
Remove Input coupling sub assembly from the unit.
2.
Place Spindle (1A) such that the flange side is up.
CAUTION: Safety glasses must be worn during these next steps.
3.
Install two Socket Head Cap Screws (22)/(30) through the Thrust Plate (8B) and into the
Brake Piston (8A) and tighten incrementally to compress the brake springs (8L) and take
pressure off of the Retaining Ring (8C).
4.
Remove the Retaining Ring (8C) from counter bore of the Spindle (1A).
5.
Remove two Socket Head Cap Screws (22)/(30) from the Brake Piston (8A) incrementally to
release the tension of the springs slowly.
6.
Remove the Brake Thrust Plate (8B).
NOTE: Skip step 7 for 7HP unit.
7.
Remove Input coupling sub assembly from the unit.
8.
Remove the Brake Springs (8L) from the Brake Piston (8A).
9.
Remove the Brake Piston (8A) out of the Spindle (1A).
10.
Remove the Backup Ring (8E) and the O-ring (8D) from grooves in the Brake Piston (8A).
11.
Remove the Backup Ring (8H) and the O-ring (8F) from grooves in the Spindle (1A).
12.
Remove the Stators (8J) and Rotors (8K) from the spindle counter bore.
13.
Remove Plastic Plug (12) & Pipe Plug (21) from Spindle (1A) if applicable.
This concludes the Input Brake Disassembly.
25
Planetary Final Drive Service Manual
Input Coupling Disassembly
Continued on Next Page
26
CAUTION: Safety glasses must be worn during these next steps.
NOTE: Skip steps 1 through 5 for 7HB Input Coupling Disassembly.
1.
Remove Retaining Ring (1K) from retaining ring groove of Coupling (7).
2.
Remove the Input Shaft (9) from Coupling (7).
3.
Remove the Spring (1L) from bore of Coupling (7).
4.
Remove the Spacer (1M) from bore of Coupling (7).
5.
Remove the Retaining Ring (5) from bore of Coupling (7).
NOTE: Skip steps 6 through 8 for 7HP Input Coupling Disassembly.
6.
Remove the Retaining Ring (1K) from retaining ring groove of Coupling (7).
7.
Remove the Thrust Washer (1M) from bore of Coupling (7).
8.
Remove the Spring (1L) from bore of Coupling (7).
This concludes the Input Coupling Disassembly.
27
Planetary Final Drive Service Manual
Input Shaft Disassembly for 7HB
CAUTION: Safety glasses must be worn during these next steps.
1.
Remove Retaining Ring (5) from the Input Shaft (9).
This concludes the Input Shaft Disassembly.
28
Planetary Final Drive Service Manual
Input Carrier Disassembly
1.
Drive the Planet Shaft (3E) out of the carrier pin holes; forcing the Roll Pin (4G) to shear off.
2.
Hold on to the Planet Gear (3F) and push the Planet Shaft (3E) out of the Carrier (3A).
The Thrust Washers (3B) will slide off the shaft as it is removed.
3.
Using a hammer and punch, drive the Roll Pin (4G) out of the Planet Shaft (3E) and Carrier.
4.
Remove the Needle Bearings (3C) from the inside of the Planet Gear (3F).
5.
Repeat steps 1-4 for the remaining two Planet Gears (3F).
This concludes the Input Carrier Disassembly.
29
ASSEMBLY
30
Planetary Final Drive Service Manual
Cover Subassembly
1.
Install two Pipe Plugs (6F) into the Cover (6A).
2.
Grease the O-ring (17) and place it in the groove in the Cover (6A).
3.
Grease the Thrust Washer (2) and place on the inner hub of the Cover (6A), keeping the two
tangs aligned with the cast slots in the Cover (6A).
4.
Grease the O-ring (6E) and install into the internal groove in the Cover (6A).
5.
Attach the Disengage Cap (6B) to the Cover (6A) using Hex Bolts (6C). Tighten the Bolts to
a torque of 70-80 in-lbs.
6.
Turn the Cover (6A) over and push Disengage Rod (6D) until Disengage Rod (6D) bottoms
out on the Disengage Cap (6B).
This concludes the Cover Subassembly.
31
Planetary Final Drive Service Manual
Input Carrier Subassembly
1.
Apply a liberal coat of grease to the bore of the Planet Gear (3F). This will enable the Needle
Rollers (3C) to be held in place during assembly.
2.
Install Needle Rollers (3C) into the bore of each of the three Planet Gears (3F).
NOTE: The last roller installed must be installed end wise. That is, the end of the last roller
must be placed in between the ends of the two rollers that form the space, and then slide
parallel to the other rollers into place.
3.
Place the Carrier (3A) into the tool fixture so that one of the roll pin holes is straight up.
4.
Start Planet Shaft (3E), with end opposite roll pin hole first, through the planet shaft hole in
Carrier (3A), making sure that the roll pin hole with the large chamfer in the planet shaft is
straight up.
5.
Using ample grease to hold them in position, slide two Thrust Washers (3B) onto the Planet
Shaft (3E).
6.
Place the Planet Gear (3F) into position and push the Planet Shaft (3E) through the planet
gear without going all the way through carrier.
Continued on Next Page
32
7.
Finish pushing the Planet Shaft (3E) into the Carrier (3F) until roll pin holes of Planet Shaft
and Carrier are aligned. Align roll pin holes using a 1/8” diameter punch.
NOTE: The chamfer on the Roll Pin hole should be towards the roll pin hole in the Carrier.
8.
Drive the Roll Pin (4G) into the roll pin hole in carrier and into the Planet Shaft (3E) until the
end of the roll pin is flush with the outside diameter of Carrier (3F).
9.
Repeat steps 4 to 8 for the remaining two Planet Gears (3F).
This concludes the Input Carrier Subassembly.
33
Planetary Final Drive Service Manual
Output Planet Gear Subassembly
1.
Apply a liberal coat of grease to the bore of the Planet Gear (4F). This will enable the Needle
Rollers (4C) to be held in place during assembly.
2.
Install one half of the inside of the Planet Gear (4F) with 14 Needle Rollers (4C).
NOTE: The last roller installed must be installed end wise. That is, the end of the last roller
must be placed in between the ends of the two rollers that form the space, and then slide
parallel to the other rollers into place.
3.
Place one Spacer (4D) on top of the Needle Rollers (4C) inside the Planet Gear (4F).
4.
Install the other half of the Planet Gear (4F) with 14 Needle Rollers (4C).
5.
Apply grease to hold two Thrust Washers (4B) together and onto Output Planet Gear (4F)
counter bore. Do the same to the other side.
6.
Repeat Steps 1-5 to finish the assembly of the two remaining Output Planet Gears (4F).
This concludes the Output Planet Gear Sub-Assembly.
34
THIS PAGE
INTENTIONALLY
LEFT BLANK
35
Planetary Final Drive Service Manual
Input Coupling Subassembly
Continued on Next Page
36
CAUTION: Safety glasses must be worn during this next step.
NOTE: Skip steps 1 through 6 for 7HB Input Coupling Subassembly.
1.
Install the Retaining Ring (5) into Coupling (7).
2.
Install the Spacer (1M) into Coupling (7).
3.
Install the Spring (1L) into the Input Coupling (7) bore.
4.
Slide the Retaining Ring (1K) onto Input Shaft (9).
5.
Install the Input Shaft (9) into the Input Coupling (7). Make sure that the splines are
engaged.
6.
Install the Retaining Ring (1K) into the retaining ring groove of Input Coupling (7) using
retaining ring installation tool.
NOTE: Skip steps 7 through 9 for 7HP Input Coupling Subassembly.
7.
Install the Spring (1L) into the Input Coupling (7) bore.
8.
Install the Thrust Washer (1M) into Coupling (7).
9.
Install the Retaining Ring (1K) into the retaining ring groove of Input Coupling (7) using
retaining ring installation tool.
This concludes the Input Coupling Subassembly.
37
Planetary Final Drive Service Manual
Input Shaft Subassembly for 7HB
CAUTION: Safety glasses must be worn during these next steps.
1.
Install Retaining Ring (5) into the Input Shaft (9).
This concludes the Input Shaft Subassembly.
38
THIS PAGE
INTENTIONALLY
LEFT BLANK
39
Planetary Final Drive Service Manual
Input Brake Subassembly for 7HP
NOTE: Use an air gun to clean up the brake port and make sure there are no chips inside.
1.
Place Spindle (1A) such that the flange side is up.
2.
Place Stator (8K) into the spindle (1A) scallop cuts.
3.
Place Rotor (8J) on top of Stator (8K).
4.
Repeat steps 2 and 3 until there are a total of 6 Stators (8K) and 5 Rotors (8J) installed.
NOTE: There should always be a stator on the top and bottom of the stack.
5.
Grease and install O-Ring (8F) into Spindle O-Ring groove.
6.
Gradually feed Back-up Ring (8H) underneath O-Ring (8F). Using a small pick, push one
end of the Back-up Ring (8H) to completely seat it in the groove. This ensures that the piston
will not cut the Back-up Ring (8H) during assembly.
7.
Install large Backup Ring (8E) in groove on Piston (8A).
8.
Grease and install large O-Ring (8D) in the large-diameter groove towards the small
Diameter end of Piston (8A) on top of the large Backup Ring (8E).
Continued on Next Page
40
9.
Press Piston (8A) into Spindle (1A) until the small end contacts the Stator (8K).
10.
Insert appropriate number of springs (8L) into Piston (8A). (Refer Brake Chart in page 6).
11.
Place Pressure Plate (8B) on top of springs (8L).
CAUTION: Safety glasses must be worn during these next steps.
12.
Install two M6 socket head cap screws (30) through the Pressure Plate (8B) into
Piston (8A). After springs (8L) have been compressed enough, install Retaining Ring
(8C) into Spindle (1A) groove. Remove the two M6 socket head cap screws.
NOTE: Remove 2 Screws from units when done, otherwise brake will not function.
13.
Using appropriate tool install Pressure Plug (12) into Spindle (1A).
14.
With the brake pressurized, flip Spindle-Motor Sub-assembly (1A) over.
15.
Insert 7HP Coupling Sub-Assembly (7) through Rotors (8J).
16.
Pressurize the brake cavity and check for leaks.
This concludes the Input Brake Subassembly for 7HP.
41
Planetary Final Drive Service Manual
Input Brake Subassembly for 7HB
1.
Place Spindle (1A) such that the flange side is up.
2.
Place Stator (8K) into the Spindle (1A) scallop cuts.
3.
Place Rotor (8J) on top of Stator (8K).
4.
Repeat steps 2 & 3 until there are a total of 9 Stators (8K) and 8 Rotors (8J) installed.
NOTE: There should always be a stator on the top and bottom of the stack.
5.
Place Piston (8A) such that the smaller O.D. end is facing upward. Grease the two O-Rings
and the two Backup Rings.
6.
Install large O-Ring (8D) in the large-diameter groove at the bottom of the Piston (8A), on
top of the large Backup Ring (8E).
7.
Install large Backup Ring (8E) in the large-diameter groove at the bottom of the Piston (8A).
8.
Install small O-Ring (8F) in the small-diameter groove near the top of the Piston (8A). Make
sure the O-Ring is seated on the bottom of the groove.
Continued on Next Page
42
9.
Install small Backup Ring (8H) in the small-diameter groove near the top of the Piston (8A),
on top of the small O-Ring (8F).
10.
Insert Piston (8A) into Spindle (1A) until it contacts the Stator (8K).
11.
Insert appropriate number of Springs (8L) into Piston (8A). (Refer Brake Chart in page 6).
12.
Insert 7HB Coupling sub-Assembly (7) through Rotors (8J).
13.
Place Pressure Plate (8B) on top of Springs (8L).
CAUTION: Safety glasses must be worn during these next steps.
14.
Use two 1/4 -20 x .625 flat head Cap Screws (22) by bolting the Pressure Plate (8B) and
Piston (8A) together or some other appropriate tools to install Retaining Ring on top of
Pressure Plate (8B) until Retaining Ring (8C) is seated.
NOTE: Remove 2 Screws from units when done, otherwise brake will not function.
15.
Install Pipe Plug (21) if applicable.
16.
Pressurize the brake cavity and check for leaks.
This concludes the Input Brake Subassembly for 7HB.
43
Planetary Final Drive Service Manual
Housing - Spindle Subassembly
Continued on Next Page
44
NOTE: Spray a light film of oil on all component parts during assembly. Spray a generous
amount of oil on bearings during installation.
1.
Press one Bearing Cup (1C) into bearing counter bore of spindle end of housing until seated
against shoulder in housing. Use Tool T158422.
2.
Turn Housing (1D) and press one Bearing Cup (1C) using Tool T158422 into bearing
counter bore of cover end of Housing (1D) making sure that it is fully seated against
shoulder in the housing.
3.
Place one Bearing Cone (1C) into the Housing (1D).
4.
Spray the housing seal bore with alcohol, then wipe with a clean rag. Ensure there is no
debris left in the bore.
NOTE: Generally seals should not be reused.
5.
Spray the O.D. of the Lip Seal (1B) with alcohol and wipe with a clean rag. Place and
visually align the Lip Seal (1B) with spring side down into the housing (1D) seal bore. Press
the seal into the housing using seal press Tool T160970. When the seal press tool makes
contact with the Housing (1G) the seal is fully seated.
6.
Spray the Spindle (1A) seal diameter with alcohol and wipe with a clean rag. Apply a coat of
grease to the Spindle (1A) seal diameter with brush.
7.
If necessary, install Boot Seal (1Q) onto Housing (1D).
8.
Install the Housing (1D) onto the spindle with seal side down.
9.
Place other Bearing Cone (1C) onto Spindle (1A) until it is seated in Bearing Cup (1C) in
Housing (1G) and spray with a light coat of oil.
10.
Apply Loctite 263 to the threads of Bearing nut (1F) and Spindle (1A).
11.
Install Bearing Nut (1F) onto Spindle (1A) and tighten using locknut wrench T206569.
Torque Bearing Nut (1F) to 150 ft-lbs, rotate Housing (1G) in both directions, and then
torque Bearing Nut to 150 ft-lbs. Rotate Housing (1G) in both directions again and torque
bearing nut to 150 ft-lbs. Repeat this until Bearing Nut (1F) does not move when 150 ft-lbs of
torque is applied.
12.
Apply Loctite 263 to Set Screws (1G) and install them into Bearing Nut threaded holes.
Make sure Set Screw is driven into the spindle thread. Tighten the set screws to damage the
thread and stake the edge of the nut around the Set Screws (1G) so the nut will not loosen.
This concludes the Housing-Spindle Subassembly.
45
Planetary Final Drive Service Manual
Main Assembly
Continued on Next Page
46
Continued on Next Page
47
NOTE: Spray component parts with a liberal amount of oil as they are being assembled.
1.
Place Hub-Spindle Subassembly, spindle flange side is down.
NOTE: On 7HP units with a ratio of greater than 36:1, install input coupling – input shaft and
output sungear subassembly before proceeding to step 2.
2.
Place output planet gear assembly (4F) into the windows of spindle (1A). The output planets
must have their part number facing up. Align the planet gear holes with planet shaft holes.
3.
Install Planet Shaft (4E) with pin hole side up into spindle. Make sure to align the pin hole in
the Planet Shaft (4E) with pin hole in Spindle (1A) while installation.
4.
Using a 1/8” diameter punch, drive the Roll Pin (4G) in the Planet Shaft (4E). Insure
everything is aligned and push the planet shaft (4E) into the Spindle (1A) until roll pin holes
are aligned. Use an alignment punch or similar tool to align roll pin holes on Spindle (1A)
and Planet Shaft (4E).
5.
Drive Roll Pin (4G) down into the aligned roll pin holes. Pin should be flush with OD of
spindle.
6.
Install O-Ring (18) onto groove of Housing (1G).
NOTE: Skip step below for 7HP Disassembly.
7.
Install the Thrust Washer (4H) from the counter bore in the Hub-Spindle Subassembly.
8.
Place Ring Gear (1E) onto Housing (1D). Align the three shipping Cap Screw Holes on Hub
(1D) and Ring Gear (1E).
9.
Install three shipping Cap Screws (19) into Ring Gear (1E) and Housing (1D). Torque them
to 15-20 ft-lbs.
NOTE: On 7HB units with a ratio of greater than 36:1, install output sun gear – input shaft
assembly and proceed to step 13.
CAUTION: Safety glasses must be worn during these next steps.
10.
Install the Retaining Ring (20) on to the Sun Gear (11).
11.
Install Sun gear (11) into output planet gear mesh with spline side up.
NOTE: Skip step 12 for 7HP Disassembly.
12.
Insert Input Shaft Subassembly into Coupling until seated.
13.
Install Input Carrier Subassembly into Ring Gear (1E), make sure that the splines of the Sun
Gear (10) aligned with the splines of the Input Carrier Subassembly.
14.
Install Input Sun Gear (10) onto input Shaft, if applicable.
Continued on Next Page
48
15.
Align pipe plugs (6F) to proper location per print and install Cover Subassembly (6A) to
Housing (1G) using Retaining Ring (6G).
16.
The Unit should be under go brake test as per instructions on page 5, 6, 7 and 8.
17.
After done with brake test the unit should now be leak and roll checked as per instructions
on page 9, 10, 11and 12. The motor can be reinstalled into the gearbox for the leak check to
seal it off, and the unit pressurized through a pipe plug hole on the cover.
This concludes the Main assembly.
49
Planetary Final Drive Service Manual
Assembly Drawing
50
Planetary Final Drive Repair Instructions
Parts List
Number
1A
Qty
1
Description
SPINDLE
1B
1
LIP SEAL
1C
2
TAPERED BEARING ASSEMBLY
1D
1
HOUSING
1E
1
RING GEAR
1F
1
BEARING NUT
1G
2
SOCKET HEAD SET SCREW (.250-28,.500)
1H
9
STUDS
1K
1
RETAINING RING – INT 1.250
1L
1
SPRING (1.225,1.500)
1M
1
THRUST WASHER
1Q
1
SEAL BOOT
2
1
THRUST SPACER
3A
1
CARRIER
3B
6
THRUST WASHER
3C
42
NEEDLE BEARING
3E
3
PLANET SHAFT
3F
3
PLANET GEAR
4B
12
THRUST WASHER
4C
84
NEEDLE BEARING
4D
3
THRUST SPACER
4E
3
PLANET SHAFT
4F
3
PLANET GEAR
4G
3
ROLL PIN
4H
1
THRUST WASHER
5
1
RETAINING RING – EXT .875
6A
1
COVER
6B
1
DISENGAGE CAP
6C
2
BOLT,HEX (.250-20 UNC,.500 GR5)
6D
1
DOWEL PIN
6E
1
O-RING
6F
2
PIPE PLUG
6G
1
RETAINING RING – INT 7.086
7
1
COUPLING
8A
1
BRAKE PISTON
8B
1
PRESSURE PLATE
8C
1
RETAINING RING – INT 4.000
8D
1
O-RING
51
Number
Qty
8E
1
Description
BACK-UP RING
8F
8H
8J
8K
8L
9
1
1
8
9
*
1
O-RING
BACK-UP RING
BRAKE ROTOR
BRAKE STATOR
SPRING, H.D.(.492,1.260)
INPUT SHAFT
10
11
12
17
18
19
1
1
1
1
1
3
SUN GEAR
SUN GEAR
O-RING PLUG or PLASTIC PLUG
O-RING
O-RING
BOLT, FLAT HEAD – HEX SKT (.375-16)
20
21
22
30
1
1
2
2
RETAINING RING – EXT 1.562
O-RING PLUG
SOCKET HEAD CAP SCREWS
SOCKET HEAD CAP SCREWS
NOTE: * For Spring (8L) quantity, refer to the Brake Chart under Brake Test on page 6.
52
Planetary Final Drive Repair Instructions
Assembly Tools
T158422–CUP PRESS TOOL
53
T146853– BEARING CUP PRESS TOOL
54
T160970–SEAL PRESS TOOL
55
T206569–LOCKNUT TOOL
56
T163057–ROLL CHECK TOOL
57
T210241–LEAK CHECK TOOL
58
T211706–BRAKE CHECK TOOL
59
T163056–ROLL CHECK TOOL
60
T195650–BRAKE CHECK TOOL
61
T218542–BRAKE CHECK TOOL
62
T219786–LEAK CHECK TOOL
63
Planetary Final Drive Repair Instructions
Contact Information
With more than 90 years of experience, Fairfield Manufacturing
Co. Inc. has become the largest U.S. non-captive producer of
gears, custom gear assemblies, planetary final drives and related
gear products. Fairfield Manufacturing Co. Inc., headquartered in
Lafayette, Indiana USA, is distinguished by our extensive design,
manufacturing and applications engineering capabilities.
Our 500,000 square foot plant is a modern, fully equipped
manufacturing facility that includes a full service heat treat
department.
Our philosophy of synchronous engineering is a partnership that
matches our best and brightest people with your people to evaluate
your unique requirements, and develop products and assemblies
that meet your needs.
For more information, contact Fairfield Manufacturing Co Inc. today.
Mailing Address
Fairfield Manufacturing Co. Inc.
U.S. 52 South / P.O. Box 7940
Lafayette IN 47903-7940
Shipping Address
2309 Concord Road
Lafayette, IN 47909
Fax
Main
Applications Engineering
Sales and Service
(765) 772-4001
(765) 772-4011
(765) 772-4010
E-mail
Applications Engineering
Sales
[email protected]
[email protected]
Website
www.oerlikon.com/fairfield
64
THIS PAGE
INTENTIONALLY
LEFT BLANK
65
Oerlikon Fairfield
U.S. 52 South / P.O. Box 7940
Lafayette, IN 47903 USA
765-772-4000
www.oerlikon.com/fairfield
66