1
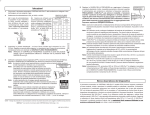
Pneumatic Wool Shear
Model RC33
INSTRUCTION MANUAL
Imported by:
Licensed distributor
Designation:
Model No:
Specifications:
Pneumatic Wool Shear
RC33
Type:
Length:
Height:
Width:
Weight:
1100
315mm
95mm
72mm
1.53Kg
Pneumatic Circuit:
Air Consumption
6.5-7.85Bar/90-110Psi
453Lm/[email protected]/90Psi
Oil
Shearing head: Mobil BP 85 or equivalent
Air motor: Mobil DT FM 32 or equivalent
Grease: Mobil grease FM 102 or equivalent
Serial No:
Checked Date:
Manufacture Date:
Manufactured By:
Argus Realcold Ltd
PO Box 12-519
9 Prescott Street, Penrose
Auckland, New Zealand
Ph
++64 9 526 5757
Fax ++64 9 526 5755
Supplied
TABLE OF CONTENTS
SAFETY INSTRUCTIONS
1
NOTICE TO OPERATORS
2
INSTRUCTIONS FOR COMMISSIONING
3
SERVICE SECTION
4
PRINCIPLE OF OPERATION:
Cutting Cycle:
SERVICING:
Hand tool Disassembly:
Shearing Head:
Disassembly:
Servicing:
Reassembly:
Air Motor:
General instructions:
Disassembly:
Servicing:
Reassembly:
Reassembly:
4
4
5
5
6
6
7
8
10
10
10
11
12
15
APPENDIX 1
16
Parts Diagram, RC33-1100
Parts Diagram, Shearing Head
Parts Diagram, Pneumatic Motor
Parts Diagram, Pneumatic Motor Subassembly
Order Form
17
18
19
20
21
APPENDIX 2
22
Maintenance:
Check Daily:
Check Weekly:
Routine Maintenance:
23
23
24
25
APPENDIX 3
26
Recommended Spare Parts
27
APPENDIX 4
28
Circuit Schematic:
29
Argus Realcold Ltd, PO Box 12-519, 9 Prescott Street, Penrose, Auckland, New Zealand
Phone +64-9-526 5757, Fax +64-9-526 5755, Email : [email protected] , www.argus.co.nz
Issue Date: 25-2-2005
Revision Number: 2.0
Revision Date: 3-5-2006
SAFETY INSTRUCTIONS FOR REALCOLD HAND TOOLS
As a designer, manufacturer, and supplier of plant and equipment Argus
Realcold Ltd has provided plant, equipment, and all relevant information to
ensure the safe use in accordance with the New Zealand Health and Safety in
employment Act 1992.
The “CE” marked machines provided by Argus Realcold Ltd also meet the EC
machinery directive 98/37/EC and any other relevant EC directive. It is the
responsibility of the owner to ensure that the machine is used safely in
accordance with the instructions and for the purpose that the machine was
designed for.
The hand tools that we supply, with the exception of the RC33, are designed for
two-handed operation and include the following:
RC20
Sheep Light Duty Scissor
RC21
Sheep Hock Cutter
(Various blade options available)
RC22
Hydraulic Sheep Hock/Horn/Neck Cutter
RC25
Hydraulic Heavy Duty Sheep/Goat/Deer Hock/Horn Cutter
RC30
Hydraulic Beef Hock/Horn Cutter, Hog Head Cutter
(Various blade options available)
RC31
Pneumatic Sheep & Lamb Brisket Opener
RC33
Pneumatic Wool Shear
RC35
Hydraulic Beef Loin/Head Cutter
(Various blade options)
RC45
Hydraulic Heavy Duty Beef Horn Cutter
RC50
Air/Oil Intensifier
Argus Realcold Ltd, PO Box 12-519, 9 Prescott Street, Penrose, Auckland, New Zealand
Phone +64-9-526 5757, Fax +64-9-526 5755, Email : [email protected] , www.argus.co.nz
1
NOTICE TO OPERATORS, MAINTENANCE,
AND CLEAN-UP PERSONNEL
OPERATORS
Stop using a defective or malfunctioning tool immediately. Report the
problem or defect immediately to your supervisor for removal of tool from
service.
Do not attempt to make repairs yourself; do not tamper with a defective or
malfunctioning tool.
Do not attempt to free a jammed or blocked tool yourself.
Remove power from the tool when the tool is left unattended or is not in use.
Never tie-down, bypass, or alter the triggers or safety switches of the tool.
Wear safety glasses when operating this tool.
Do not activate switches of the tool unless you intend to operate and use the
tool.
Do not allow unauthorised individuals to operate the tool.
Never place fingers, hands, or other parts of your body in the cutting path of the
tool.
Do not use this tool on people.
This tool is capable of causing severe injury if misused.
CLEAN-UP PERSONNEL
Shut off all power and disconnect all hydraulic and air hoses from the tool
before performing clean up.
Take extreme care near sharp blades.
MAINTENANCE PERSONNEL
Shut off all power and disconnect all hydraulic and air hoses from the tool
before making repairs, performing maintenance, and before replacing or
sharpening blades.
Do not use substitute parts or use other than genuine Argus Realcold brand
parts.
!
Use extreme care when testing or operating the tool.
Argus Realcold Ltd, PO Box 12-519, 9 Prescott Street, Penrose, Auckland, New Zealand
Phone +64-9-526 5757, Fax +64-9-526 5755, Email : [email protected] , www.argus.co.nz
2
RC33 PNEUMATIC WOOL SHEAR
INSTRUCTIONS FOR COMMISSIONING
1. Install a female compressed air connection near the
workstation, in an appropriate position to ensure ease of
operation for the tool.
A water trap with an auto drain should be installed along with
an automatic oiler to ensure long life of the air motor.
Note: Water in the air supply will cause severe motor
damage very quickly.
2. Install a male compressed air connection to the free end of the
hand tool self-store hose.
3. Connect the air hose to the coupler at the workstation.
4. Run the wool shear and adjust the blade tension as per the
instructions in the service section.
Apply oil to the blades at this time also.
5. Install a pressure gauge between the female compressed air
connection and the hand tool male connection.
Run the hand tool again and observe the air pressure on the
gauge.
You will see a pressure drop.
Air pressure with the hand tool not running should be between
6Bar (90Psi) and 7.4Bar (110Psi).
Pressure should not drop by more than 1Bar (15Psi) when the
hand tool is operated.
Note: A pressure drop of more than 1Bar (15Psi) indicates
that there is insufficient air supply volume.
This must be corrected to ensure satisfactory
operation of the wool shear.
6. Remove the pressure gauge from the coupling and reconnect
the wool shear.
Your RC33 Wool shear is now ready for service.
Argus Realcold Ltd, PO Box 12-519, 9 Prescott Street, Penrose, Auckland, New Zealand
Phone +64-9-526 5757, Fax +64-9-526 5755, Email : [email protected] , www.argus.co.nz
3
SERVICE SECTION
Before servicing this tool, it is important to understand how this tool operates.
While being very simple, understanding the principles of operation and their
interaction will assist you to maintain the tool to optimum working efficiency.
Fault diagnosis and repair will also be greatly simplified.
PRINCIPLE OF OPERATION:
Cutting Cycle:
Operating lever is depressed supplying air pressure to the air motor of the
RC33 wool shear.
•
The air pressure acts on the rotor vanes in the motor and causes the
rotor to rotate.
•
The rotation of the rotor is transmitted to the shearing head crank spindle
via a planetary gear set and coupler.
•
The rotation of the crank spindle causes the fork holder to move across
the shearing head and back again.
•
The moving blade is moved across the face of the fixed comb and cuts
any wool or hair in its path.
•
The operating lever is released and air pressure is removed from the air
motor causing it to stop rotating.
The operating cycle is now complete.
4
SERVICING:
Before any servicing is attempted on this tool, disconnect and unplug from air
supply. All air supply hoses must be disconnected to render the tool inoperative
according to Occupational Safety & Health requirement.
Hand tool Disassembly:
Before starting please make sure that the tool is clean and that you have a
suitable work area available. A container will help prevent small parts from
being lost or damaged.
1.
Place the tool on a bench.
2.
Unscrew the self store air hose from the inlet fitting on the motor. Use a
second spanner to hold the inlet fitting so that it is not loosened or
removed at this time.
Put it aside on the bench.
3.
Loosen and remove the two 4mm screws securing the shearing head to
the adapter. Put them into the parts container, and the shearing head to
one side on the bench.
Do not remove the adapter at this time as it is holding the motor
components secure.
Your RC33 wool shear is now disassembled ready for inspection and servicing.
5
Shearing Head:
Disassembly:
1.
Loosen the tension nut and remove it.
2.
Remove the moving blade and put it into the parts container.
3.
Loosen the two screws securing the fixed comb to the head and remove
it. Put it into the parts container along with the two screws.
4.
Loosen and remove the two screws securing the head cover. Put the
head cover into the parts container along with the two screws.
5.
Loosen and remove the fulcrum nut from the fulcrum post. Loosen and
remove the fulcrum post from the head body. Put it into the parts
container along with the fulcrum nut.
6.
Remove the tension nut spring and put it into the parts container.
7.
Push the fork holder upward to expose the tension nut sleeve. Grasp the
sleeve and pull it from the tension nut adapter.
Use an adjustable spanner to remove the tension nut adapter. Put them
into the parts container.
8.
Pull the fork holder downward again and forward to release the crank ball
from the spindle. The fork holder can now be rotated out of the shearing
head. Be careful to retain the crank ball as it can easily fall from the
holder and be lost.
9.
Loosen and remove the two screws securing the tension link spring to
the fork holder. The forks and fork support can now be removed.
6
Servicing:
1.
Rotate the crank spindle by hand. If the bearings feel rough then they
must be replaced.
To replace the bearings:
1.1.
Loosen the two grub screws securing the drive coupler to the spindle
and remove it.
1.2.
Carefully press the spindle from the housing.
1.3.
Press the spindle out of the bearing and the remaining bearing from
the housing.
1.4.
Clean the housing and the spindle thoroughly.
1.5.
Install new bearings into the housing. Use a press to push the
spindle through the new bearings.
1.6.
Mount the drive coupler onto the spindle and tighten the two grub
screws to secure.
Make sure that one of the grub screws engages against the flat side
of the spindle.
2.
Thoroughly clean all parts.
3.
Check the crank ball for rust or damage to the chrome surface.
If it is at all damaged then replace it.
4.
Check the fork holder for wear or damage. Look particularly in the bore
and at the tip of the conic section.
If it is worn or damaged then replace it.
5.
Check the tension link spring for cracks or other damage. Make sure that
the plastic bearing holder at the end is securely in place, and that the
tags at the front are not bent or deformed.
If it is damaged then replace it.
6.
Check the tension sleeve and the tension nut adapter for wear or
damage. If they are worn or damaged then replace them.
Clean off any surface rust with some fine (240grit or finer) wet or dry
sand paper. Clean the threads of the adapter thoroughly with solvent.
7.
Check the blades for sharpness or edge damage.
If any teeth are missing from the fixed comb then replace it.
Should they be dull or damaged then have them sharpened.
Note: Proper resharpening can only be performed on a special machine,
by a trained technician. Do not sharpen these blades yourself.
7
Reassembly:
1.
Apply a small amount of blue Loctite 243 to the threads of the tension nut
adapter and screw it into the head housing. Tighten with an adjustable
spanner.
2.
Take the fork holder and mount the fork support onto the pin. Insert the
forks into the fork support and into their locating holes.
Make sure that the conic pins are towards the outside of the holder.
Take the tension link spring and mount it to the bottom of the fork holder.
Make sure that the tags are seated into the locating grooves of the fork
support before tightening the screws.
3.
Take the crank ball and drop it into the fork holder.
Align the bore of the crank ball with the slot in the back of the fork holder.
4.
Insert the conic section of the fork holder into the tension nut adapter
from inside the head housing. Carefully rotate it until the tension link
spring is aligned with the fulcrum hole.
Push it back, sliding the crank ball onto the crank spindle as you do so.
5.
Screw the fulcrum post into the bottom of the head housing, through the
bearing on the tension link spring, until it is firmly seated.
Screw the fulcrum nut over the fulcrum post and tighten.
6.
Take the tension nut spring and install it onto the tension nut adapter.
Make sure that the spring runs clockwise toward its free end.
7.
Apply a little oil to the tension nut sleeve. Insert it into the tension nut
adapter, over the conic section of the fork holder.
8.
Screw the tension nut onto the adapter until it is within 1mm of the
tension nut spring.
9.
Turn the shearing head over and screw the comb screws into their holes.
Make sure that they are far enough out to be able to slide the fixed comb
into position.
10.
Ensure that the shearing blades are clean. Particular care should be
taken to ensure that the ground surfaces are free of dirt. If not, even
newly ground shearing blades will not shear satisfactorily.
Place the moving blade onto the forks conic pins and apply a few drops
of oil to the ground face. Push the new fixed comb between the loosened
screws. Now tighten the comb screws until you can just move the fixed
comb sideways by hand.
11.
Turn the shearing head over again so that the tension nut is uppermost.
Adjust the blades against each other so that the ground surface of the
fixed comb projects approx. 1.5 - 2.0 mm beyond the tips of the moving
blade.
Once the blades are adjusted, tighten the comb screws.
8
12.
Check that the moving blade is properly positioned on the forks conic
pins.
13.
Tighten the tension nut until the moving blade is pressed against the
fixed comb and a slight resistance is felt.
14.
Apply a few drops of oil to the crank ball and blades. Rotate the drive
coupler by hand to distribute the oil over the contacting surfaces.
15.
Refit the shearing head cover and secure with the two cover screws.
The shearing head is now ready to be returned to service.
Note that final tensioning of the blades will not be completed until after
final reassembly and running of the wool shear.
9
Air Motor:
General instructions:
1.
Do not disassemble the tool any further than necessary to replace or
repair damaged parts.
2.
Whenever grasping a tool or part in a vice, always use leather covered or
copper covered vice jaws to protect the surface of the part and help
prevent distortion.
This is particularly true of threaded parts and housings.
3.
Do not remove any part that is a press fit in or on a subassembly unless
removal of that part is necessary for repairs or replacement.
4.
Do not disassemble the tool unless you have a complete set of new
gaskets and O-rings for replacement.
Disassembly:
1.
Lightly clamp the motor body in a vice with the spindle end up.
Make sure to clamp the body near the throttle valve to prevent the
housing from rotating in the vice.
2.
Mount the shearing head to the adapter and tighten.
Using a large adjustable spanner across the flat sides of the housing,
loosen the adapter by unscrewing it counter clockwise.
Make sure that the motor spindle is facing upward as the adapter is all
that retains the planet gear assembly.
3.
Carefully withdraw the planet gear assembly from the housing and put it
into the parts container.
Except for the moderate press fit of the spindle bearing on the spindle, all
gearing parts are free fitting and will easily slide apart.
4.
Loosen the two grub screws securing the drive coupler to the spindle and
unscrew it counter clockwise.
Put it into the parts container.
5.
Carefully withdraw the motor assembly from the housing.
Remove the end plate gasket from the housing.
5.1.
Remove the bearing plate and put it into the parts container
5.2.
Remove the c-clip and the rear end cover.
5.3.
Remove the dowel, cylinder, and rotor vanes.
5.4.
Use a press to push the rotor from the front rotor bearing
6.
Loosen and remove the retainer screw from the throttle valve.
Withdraw the throttle mechanism from the housing.
6.1.
Before proceeding further, place an index mark on the throttle valve
body and throttle valve cover to assure their same relative position
when reassembling. It is possible to change the orientation 180 .
If this occurs, the tool will not run.
6.2.
Push the cover retaining pin from the throttle valve cover and
separate the cover from the throttle valve body.
Be careful not to lose the other throttle components.
6.3.
Withdraw the throttle valve seat from the valve body.
10
Servicing:
1.
Clean all parts thoroughly.
2.
Check all bearings for roughness. If rough then replace them.
Don’t forget to check the rear rotor bearing inside the housing.
Work grease thoroughly into every open bearing before reassembly.
Do not clean sealed bearings.
Check the seals or grease shields on sealed bearings for damage.
If the seal or shield is damaged then replace the bearing.
3.
Check the cylinder for scoring of the bore. If the cylinder is badly scored
then replace it.
Excessive scoring can indicate water in the air supply.
4.
Check the rotor vanes for wear.
A new vane measures 7.9mm wide.
Check the sides of the vane for wear also.
Worn grooves along the sides of the vane can cause the vane to stick in
the rotor preventing the motor from running properly.
5.
Check the gear shaft of the rotor for wear.
If it is worn then replace it, along with the planet gears.
6.
Check all O-rings, and the throttle valve seat for wear or damage.
If any wear or damage is present then replace them.
7.
Check the throttle valve ball for rust or damage to the chrome finish.
If it is damaged then replace it.
8.
Loosen and remove the inlet fitting.
Remove the silencer and muffler packing.
Wash the muffler packing out with a mild solvent and use compressed air
to blow it dry.
Reassemble the packing to the silencer and reinstall to the rear of the
motor body.
Apply a little thread sealant to the air inlet fitting and install it through the
silencer to secure.
9.
Apply a thin coating of air tool oil to all remaining parts before
reassembling the tool.
11
Reassembly:
1.
2.
Install new O-rings to the throttle valve body.
1.1.
Holding the valve body upside down, install the throttle valve seat
into the valve body.
Insert the throttle valve ball into the throttle valve body, followed by
the throttle valve spring.
Make sure that the small diameter end of the conic spring is against
the valve ball.
1.2.
Install the cover seal onto the throttle valve cover.
Apply a little O-ring lubricant to the seal.
Line up the index marks that you applied during disassembly and
push the throttle valve cover into place.
Align the retaining hole and push the cover retaining pin into place to
secure.
1.3.
Install the throttle valve plunger into the top of the throttle valve.
1.4.
Apply O-ring lubricant to the valve body O-rings.
1.5.
Push the throttle valve about two thirds of the way into the motor
body and then place the retaining plate carefully into its groove.
Make sure that the screw hole is aligned with the hole in the throttle
valve cover.
Push the valve the rest of the way into the motor body and secure it
with the retainer screw.
Take the rotor and install the rear end cover over the short rear shaft.
Make sure that the circular recess is facing the shaft side of the rotor.
Install the c-clip to retain.
Mount the rotor into the vice vertically by the short rear shaft.
Use soft jaws to prevent damage.
2.1.
Inject a couple of drops of air tool oil into each vane slot.
Insert a vane into each slot.
2.2.
Place the cylinder, front end up, over the rotor and onto the rear end
cover.
To determine which end of the cylinder is the front end, hold the
cylinder horizontally, facing one end.
Position the external groove for the dowel at the top.
If the air ports through the cylinder wall are in the lower right
quadrant, then you are facing the front of the cylinder.
Be sure to install the cylinder properly.
The motor will not operate properly if the cylinder is inverted.
2.3.
Slip the front cover over the rotor shaft with the circular recess facing
upward.
Work enough grease into the front rotor bearing to coat the balls and
races.
Press the front rotor bearing into the bearing carrier with the sealed
face of the bearing flush with one side of the housing.
Slide the bearing and housing, sealed side first, onto the shaft.
Now slide the bearing plate over the shaft.
12
3.
Lightly clamp the motor body in a vice with the spindle end up.
Make sure to clamp the body near the throttle valve to prevent the
housing from rotating in the vice.
4.
Push some grease into the rear rotor bearing.
Install the gasket into the motor body, positioning the gasket smoothly in
the bottom of the bore.
Make sure that the dowel notch in the gasket is aligned with the dowel
hole in the housing.
5.
Take a piece of 2.3mm diameter steel rod about 250mm long to use as
an assembly guide.
6.
Take the motor subassembly and align the dowel grooves in the rear end
cover, cylinder, and front cover with the dowel hole in the bearing carrier.
Insert the assembly guide dowel into the bearing carrier hole and lay it
into the dowel grooves of the other components.
7.
Insert the end of the assembly guide dowel into the dowel hole inside the
motor body.
Carefully slide the motor subassembly along the guide and into the
housing.
The motor subassembly is a sliding fit in the motor body. It will enter into
the motor body with only slight pressure being applied.
Do not drive or otherwise force the motor into place.
8.
Remove the assembly guide dowel and replace it with the cylinder dowel.
Make sure that the cylinder dowel is properly seated into the dowel hole.
When it is in the proper position, it will protrude about 2.3mm above the
face of the bearing carrier.
If it is not located properly, it will protrude about 5.5mm.
9.
Make sure that the bevelled ring is in place on the shaft of the spindle.
9.1.
Install the O-ring seal over the spindle shaft and against the bevelled
face.
Place the grease shield over the shaft and against the O-ring.
9.2.
Install the spindle bearing over the spindle shaft.
Firmly support the spindle and press the bearing into place.
Take care to keep the grease shield and O-ring seal in place and
properly aligned.
10.
Apply a coating of grease to the inside of the ring gear, the planet gears,
planet gear shafts, and to the bearing surfaces of the spindle.
11.
Slide the ring gear into the motor housing.
Make sure that the cylinder dowel enters the notch in the end face of the
ring gear.
12.
Slide a planet gear onto each of the spindles three gear shafts.
Slide the assembly into the ring gear and into engagement with the rotor
pinion.
Make sure that the bearing plate is in place before installing the spindle.
13.
Screw the drive coupler all the way onto the spindle and tighten the two
locking grub screws to secure.
13
14.
Screw the adapter onto the motor body and hand tighten.
Connect the motor to an air supply and test for smooth operation.
15.
Clamp the motor back into the vice and mount the shearing head.
Leave out the drive coupler bush at this stage, and tighten the cap
screws.
Use a large adjustable spanner across the flat sides of the shearing head
to tighten the adapter onto the motor.
Remove the shearing head when tight.
14
Reassembly:
1.
Lightly clamp the motor body in a vice with the spindle end up.
Make sure to clamp the body near the throttle valve to prevent the
housing from rotating in the vice.
2.
Install the drive coupler bush onto place onto one of the drive couplers.
3.
Take the shearing head and hold it above the motor.
Turn it until the drive coupler is aligned with the drive coupler bush and
push it into place against the adapter.
4.
Insert the two cap screws with their spring and flat washers in place
through the mounting holes and screw them into the adapter collar.
Do not tighten them fully yet.
5.
Rotate the shearing head until it is properly aligned with the motor.
This can be positioned according to operator preference.
Tighten the two cap screws fully now.
6.
Apply a little thread sealer to the fitting on the long end of the self store
hose and screw it into the air inlet fitting.
7.
Connect the tool to an air supply and run it.
Make sure that the blades and crank head have been oiled.
Adjust the blade tension as follows:
7.1.
With the machine turned off, check that the moving blade is properly
positioned on the forks conic pins.
7.2.
Tighten the tension nut until resistance is first noticeable, and then
tighten it a further ¼ turn.
7.3.
Operate the wool shear.
Slacken off the tension nut until the shearing blades exert almost no
more contact pressure.
You will notice the noise level rise.
7.4.
Now tighten the tension nut until the noise level becomes muffled
and some resistance is detectable as you tighten the tension nut.
The tension should now be correctly set.
If the wool shear does not cut properly then add a little more tension.
Note: Excessive tension will cause the link spring to fail
Check the parts container and bench for any missing parts now.
Your RC33 wool shear is now ready to be returned to service.
Reinstall as per installation instructions at the front of the manual and test for
correct operation.
15
Appendix 1
Appendix 1
Parts Diagram and Ordering Form
Argus Realcold Ltd, PO Box 12-519, 9 Prescott Street, Penrose, Auckland, New Zealand
Phone +64-9-526 5757, Fax +64-9-526 5755, Email : [email protected] , www.argus.co.nz
16
ITEM NO.
1
2
3
4
5
6
7
8
9
10
QTY.
1
1
1
1
1
1
1
2
2
2
6
PART N0.
180-319-562-1-A
180-319-562-2-A
180-748-156
190-339507-A
190-5LK
200-717-700
800-02U311000428
800-CSM425-304
800-FWM4-304
800-SWM4-304
8
10
7
9
1
3
DESCRIPTION
DRIVE COUPLER
DRIVE COUPLER, TAPPED
DRIVE COUPLER BUSH
ADAPTER
PNEUMATIC MOTOR
SHEARING HEAD COMPLETE
10mm SELF STORE HOSE
CAP SCREW M4x25 304
M4 FLAT WASHER
SPRING WASHER M4 304
4
2
5
RC33-1100 PNEUMATIC WOOL SHEAR
ITEM NO.
1
2
3
4
5
6
7
8
9
10
11
12
13
14
15
16
17
18
19
20
21
QTY.
1
1
1
1
1
1
1
1
1
1
1
1
1
2
1
1
1
1
2
2
2
PART N0.
210-714-010
210-714-020
210-717-701
210-717-706
210-717-707
210-717-708
210-717-709
210-717-713
210-717-715
210-717-716
210-717-717
210-717-718
210-717-719
210-717-720
210-717-721
210-717-722
210-717-723
210-717-724
210-717-725
210-717-726
210-717-727
1
5
4
DESCRIPTION
MOVING BLADE
FIXED COMB
FORK HOLDER
FORK, LEFT
FORK, RIGHT
SHEAR HEAD HOUSING
TENSION LINK SPRING
FORK SUPPORT
CRANK SPINDLE
CRANK BALL
TENSION NUT SPRING
TENSION NUT ADAPTOR
FULCRUM POST
COMB SCREWS METRIC
TENSION NUT
FULCRUM NUT
TENSION NUT SLEVE
SHEARING HEAD COVER
SPINDLE BEARING
HEAD COVER SCREW
LINK SPRING SCREW
8
3
18
2
21
9
12
7
11
10
17
15
20
14
16
6
13
19
200-717-700 SHEARING HEAD COMPLETE
ITEM NO.
1
2
3
4
5
6
7
8
9
10
11
12
13
14
15
16
17
18
19
20
21
22
23
24
25
26
27
QTY.
1
1
1
1
1
1
1
1
1
1
3
1
1
1
1
1
1
1
1
1
1
1
2
1
1
1
1
PART N0.
180-6358493-BND
190-182A53-610
190-5A-510
190-5AK-8
190-5L-323
190-5L-658
190-5R-24
190-5R-80
190-5R-701
190-5RA-A565
190-5RAK-10A
190-5RAK-406A
190-5RL-23
190-5RL-51
190-5RL-120
190-5RL-273
190-5RL-302
190-5RL-310
190-5RL-311
190-5RL-667
190-5RL-B329
190-5RLK-B40
190-85H-167
190-R1A-159
190-G601-65
190-R2N-152
190-WWA100-77
3
9
2
4
DESCRIPTION
GREASE FITTING
PLANET O-RING
PLANET BEARING
SPINDLE
THROTTLE VALVE SEAT
THROTTLE VALVE COVER
REAR MOTOR BEARING
BEARING PLATE
GREASE SHIELD
INLET FITTING
PLANET GEAR
RING GEAR
EXHAUST DEFLECTOR
THROTTLE VALVE SPRING
THROTTLE LEVER PIN
THROTTLE LEVER
THROTTLE VALVE PLUNGER
EXHAUST SILENCER
MUFFLER PACKING
RETAINING PLATE
THROTTLE VALVE BODY
MOTOR BODY
VALVE BODY O-RING
COVER SEAL
THROTTLE VALVE BALL
COVER RETAINING PIN
RETAINER SCREW
12
11
22
8
1
16
7
190-5LK PNEUMATIC MOTOR
27
6
26
20
24
14
25
5
21
23
17
15
18
19
13
10
ITEM NO.
1
2
3
4
5
6
7
8
9
10
10
QTY.
1
1
1
1
1
1
1
1
5
1
2
3
PART NO.
190-5LK-3
190-5R-13
190-5RLK-11
190-5RLK-12
190-5RLK-53
190-5RLK-118
190-5RLK-739
190-R0A1-98
190-R1401-42-5
190-WWA100-97
5
DESCRIPTION
CYLINDER
BEARING CARRIER
FRONT COVER
REAR END COVER
ROTOR
C-CLIP
GASKET
DOWEL
ROTOR VANE (PKT 5)
FRONT ROTOR BEARING
8
9
1
AIR MOTOR SUBASSEMBLY
4
7
6
?
9 Prescott Street
PO Box 12-519
Penrose, Auckland
New Zealand
Ph 09 526 5757
Fax 09 526 5755
[email protected]
Order Number
Date
Tool
Serial Number
Customer Order Form
Name
Address
Phone
Contact Person
Qty
Part Number
Description
Shipping Instructions:
Ship to Address
Attention
Level of Urgency
Normal
Urgent
21
Appendix 2
Appendix 2
Maintenance
Argus Realcold Ltd, PO Box 12-519, 9 Prescott Street, Penrose, Auckland, New Zealand
Phone +64-9-526 5757, Fax +64-9-526 5755, Email : [email protected] , www.argus.co.nz
22
Maintenance:
Please read this section thoroughly and make sure that these maintenance
checks are carried out routinely as specified.
Adherence to this maintenance schedule will ensure that you enjoy long and
trouble free service from your hand tool.
Before any servicing is attempted on this tool, disconnect and unplug from air
supply. All hydraulic hoses and air supply hoses must be disconnected to
render the tool inoperative according to Occupational Safety & Health
requirement.
Check Daily:
1. Clean the hand tool thoroughly before inspecting.
2. Visually inspect the hand tool for any obvious damage to components,
and for loose components.
Anything that you find at this stage must be remedied immediately.
The hand tool may need to be removed from service to affect remedy.
3. Unscrew the shearing head cover and remove any build up of wool and
hair that you find.
Look particularly for wool wrapped around the spindle as this can
damage the seal on the front crank spindle bearing.
4. Check the blades for sharpness or edge damage.
If any teeth are missing from the fixed comb then replace it.
Should they be dull or damaged then have them sharpened.
5. Loosen the tension nut and remove the moving blade.
Clean any wool or build up from the blades and the lubrication groove.
6. Apply oil to the blades and refit the moving blade.
Apply four or five drops of oil to the crank ball from above the fork holder.
Reinstall the shearing head cover.
7. Unless an airline oiler is used, inject 1.5cc of air tool oil into the air inlet of
the motor.
8. Reconnect the wool shear and check that all couplers and fittings are
tight.
9. Turn on the air supply and test for correct operation.
Set the blade tension as per the instructions in the reassembly section.
These checks are to be performed on a daily basis, or prior to the start of
each shift where more than one shift operates each day.
Important: During normal operation, oil must be applied to the
blades and the crank head at about fifteen minute intervals.
Apply two or three drops of oil to the blades, and two or three
drops of oil through the hole on the shearing head cover to the
crank head.
23
Check Weekly:
This maintenance is best performed in the workshop.
1. Visually inspect the hand tool for any obvious damage to components,
and for loose components.
Check all fasteners for tightness.
Anything that you find at this stage must be remedied immediately.
2. Disassemble the shearing head as per the instructions for disassembly.
3. Thoroughly clean the head housing, blades, fork holder, and forks.
Look particularly for wool wrapped around the spindle as this can
damage the seal on the front crank spindle bearing.
4. Check the spindle bearings for roughness.
If they are at all rough then replace them.
5. Check the blades for sharpness or edge damage.
If any teeth are missing from the fixed comb then replace it.
Should they be dull or damaged then have them sharpened.
6. Reassemble the shearing head, lubricate the blades, and crank ball.
See the service section for full instructions.
7. Remove the muffler packing and wash it.
8. Every second week inject no more than 2.0cc of grease into the grease
fitting.
Too much grease will reduce power and cause the gears to overheat.
9. Wipe off excess oil or grease before returning the hand tool to service.
10. Reconnect the hand tool and check that all couplers and fittings are tight.
11. Turn on the air supply and test for correct operation.
Set the blade tension as per the instructions in the reassembly section.
These checks are to be performed on a weekly basis, or approximately
every 40 hours of service where more than one shift operates each day.
24
Routine Maintenance:
Except where daily or weekly checks require replacement of wear items, the
hand tool should be fully stripped and serviced once every six months.
Wear items that should be replaced at this six month service are:
•
•
•
•
210-717-709
210-717-716
210-717-725
190-R1401-42-5
Tension link spring
Crank ball
Spindle bearing
Rotor vane (packet of 5)
All other components should be assessed for serviceability at this time and
replaced as necessary, as per the servicing instructions in the service section of
this manual.
Other factors which may necessitate a full service prior to this six month interval
include but are not limited to:
•
•
•
Excessive water in the air supply
Blades damaged
Other damage caused by dropping or striking of the tool
Following the discovery of any of these occurrences the hand tool must be
removed from service, stripped, and thoroughly assessed for damage.
25
Appendix 3
Appendix 3
Recommended Spare Parts
Argus Realcold Ltd, PO Box 12-519, 9 Prescott Street, Penrose, Auckland, New Zealand
Phone +64-9-526 5757, Fax +64-9-526 5755, Email : [email protected] , www.argus.co.nz
26
Recommended Spare Parts
The following is a list of spare parts that we recommend your engineering
department to keep in stock at all times.
Having these parts on hand will assist you to maintain your tool in good working
order, and ensure that you avoid down time while waiting for parts delivery
should your hand tool require repair.
This list is a minimum recommendation for parts to support one unit in the field.
Where more than one tool is in service, quantities held in stock should be
adjusted accordingly.
Qty
Part Number
Description
1
180-319-562-1-A
DRIVE COUPLER
1
180-319-562-2-A
DRIVE COUPLER, TAPPED
2
180-748-156
DRIVE COUPLER BUSH
1
190-5LK-3
CYLINDER
5
190-5RLK-118
C-CLIP
5
190-5RLK-739
GASKET
2
190-R1401-42-5
ROTOR VANE (PKT 5)
2
210-714-010
MOVING BLADE
2
210-714-020
FIXED COMB
2
210-717-709
TENSION LINK SPRING
2
210-717-716
CRANK BALL
5
210-717-717
TENSION NUT SPRING
10
210-717-720
COMB SCREWS METRIC
2
210-717-722
FULCRUM NUT
1
210-717-724
SHEARING HEAD COVER
4
210-717-725
SPINDLE BEARING
2
210-717-726
HEAD COVER SCREW
Argus Realcold Ltd, PO Box 12-519, 9 Prescott Street, Penrose, Auckland, New Zealand
Phone +64-9-526 5757, Fax +64-9-526 5755, Email : [email protected] , www.argus.co.nz
27
Appendix 4
Appendix 4
Circuit Diagram
Argus Realcold Ltd, PO Box 12-519, 9 Prescott Street, Penrose, Auckland, New Zealand
Phone +64-9-526 5757, Fax +64-9-526 5755, Email : [email protected] , www.argus.co.nz
28
ITEM
1
2
3
4
5
DESCRIPTION
FILTER/WATER TRAP
OILER
HOSE COUPLING
SELF STORE HOSE 10mm
PNEUMATIC MOTOR, ONE DIRECTION
PNEUMATIC SUPPLY
6.7Bar/100Psi
2
COPYRIGHT: THIS DOCUMENT IS THE
PROPERTY OF ARGUS REALCOLD LTD
IT MUST NOT BE COPIED OR THE CONTENTS
PASSED ON TO ANY THIRD PARTY WITHOUT
THE WRITTEN CONSENT OF THE COMPANY
10mm
1
5
CHK'D
Q.A
MFG
APPV'D
B EAST
M ROBINS
NAME
UNLESS OTHERWISE SPECIFIED:
DIMENSIONS ARE IN MILLIMETERS
SURFACE FINISH:
TOLERANCES:
LINEAR:
ANGULAR:
DRAWN
3
SIGNATURE
FINISH:
MATERIAL:
25-2-2005
25-2-2005
DATE
4
PART NO OLD
DEBUR AND
BREAK SHARP
EDGES
SCALE:1:1
PART NO.
TITLE:
REVISION A
SHEET 1 OF 1
RC33-CIRC
CIRCUIT DIAGRAM
RC33
DO NOT SCALE DRAWING
A3