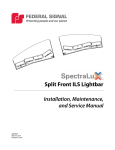
1
®
Installation, Operation, and Service Manual
For Legend LGD and Legend LPX Lightbars
2562365E
REV. E 812
Printed in U.S.A.
blank page
Contents
Chapter 1: Safety Messages..............................................................................................................................7
Safety Message to Installers and Service Personnel of...................................................................................7
Warning Light Equipment.................................................................................................................................7
Safety Message to Operators of Warning Light Equipment.............................................................................9
Chapter 2: Overview of the Legend Lightbar.................................................................................................11
Product Features........................................................................................................................................... 11
Applications....................................................................................................................................................12
Product Specifications...................................................................................................................................12
Approvals.......................................................................................................................................................13
Model LGD and LPX Flash Pattern Compliances..........................................................................................14
Model LPXD Light Activation..........................................................................................................................16
Model LPXD Flash Pattern Compliance........................................................................................................16
Chapter 3: Preparing the Legend for Installation..........................................................................................18
Unpacking the Lightbar..................................................................................................................................18
Testing and Reprogramming the Lightbar......................................................................................................18
Additional Mainbar Tests and Configurations.................................................................................................25
Chapter 4: Wiring the Legend in the Vehicle.................................................................................................30
Wiring the Lightbar in the Vehicle..................................................................................................................30
Mounting the Serial Interface Module............................................................................................................31
Wiring the Serial Interface Module.................................................................................................................32
Wiring the Stop/Turn/Tail Lights.....................................................................................................................38
Wiring the Takedown or Worklights (LGD24 Models Only)............................................................................39
Wiring for 12" Legends...................................................................................................................................39
Chapter 5: Maintaining and Servicing the Legend........................................................................................40
Servicing the Lightbar Domes........................................................................................................................40
Replacing the ROC Panel Assemblies...........................................................................................................42
Servicing the Lightbar Controller....................................................................................................................42
Replacing a Lightbar Base.............................................................................................................................45
Replacing an End Gasket..............................................................................................................................46
Replacing a Lip Seal......................................................................................................................................47
Adjusting the Aim of the HotFoot LED Assemblies (LGD45 and LGD53 Only)..............................................47
Cleaning the Domes......................................................................................................................................48
Cleaning the Reflectors..................................................................................................................................49
Replacement Parts........................................................................................................................................49
Troubleshooting the Lightbar.........................................................................................................................50
Chapter 6: Cloning Flash Patterns from Vehicle to Vehicle.........................................................................52
Installing the Programmer Software...............................................................................................................52
Connecting the Programmer..........................................................................................................................53
Cloning the Serial Interface Module...............................................................................................................54
Legend Lightbar
3
Contents
Appendix A: Wiring Schematics......................................................................................................................56
An Overview of the Discrete-Wired 24" Legend Lightbar...............................................................................56
Schematic A.1: Discrete-wired 24" Legend lightbar.......................................................................................56
Schematic A.2: Typical connections with a SignalMaster controller (External control)..................................57
Schematic A.3: Typical connections with a SW400SS Switch Module (Internal control)...............................58
Schematic A.4: Typical connections with a SmartSiren controller..................................................................59
Schematic A.5: Typical connections with a non-SignalMaster controller.......................................................60
Schematic A.6: Typical connections with a PA640 controller.........................................................................61
Schematic A.7: Typical connections for LPXD Discrete Legend....................................................................62
List of Figures
Figure 3.1: Electrical connections for testing and reprogramming...................................................................... 19
Figure 3.2: Serial Interface Module with cover attached..................................................................................... 21
Figure 3.3: DIP switch settings in Serial Interface Module.................................................................................. 22
Figure 3.4: Light options for Legend lightbars..................................................................................................... 25
Figure 3.5: SignalMaster flash sequence: six-head example.............................................................................. 29
Figure 4.1: Relay-isolating devices with large filter capacitors............................................................................ 32
Figure 4.2: Wiring block diagram......................................................................................................................... 32
Figure 4.3: SignalMaster 331105 controller (External) ....................................................................................... 35
Figure 4.4: SmartSiren SS2000SM Series controller (External)......................................................................... 35
Figure 4.5: SignalMaster control functions wired to ground for External (default) control .................................. 36
Figure 4.6: SignalMaster control functions wired to 12 Vdc for Internal control.................................................. 37
Figure 4.7: Stop/turn/tail wiring between lightbar and vehicle harness............................................................... 38
Figure 4.8: Worklight wiring between lightbar and switched +12 Vdc................................................................. 39
Figure 4.9: Internal/External flasher wiring for 12-inch Legends......................................................................... 39
Figure 5.1: Four barrel nuts in passenger-side end dome.................................................................................. 41
Figure 5.2: Controller and standoffs removed from ROC panel.......................................................................... 43
Figure 5.3: Fuses on lightbar controller PCB ..................................................................................................... 44
Figure 5.4: Base removed from aluminum extrusion........................................................................................... 45
Figure 5.5: End gasket in the end base cavity.................................................................................................... 46
Figure 5.6: Lip seal on edge of plastic dome....................................................................................................... 47
Figure 5.7: Adjusting the aim of the LED assembly............................................................................................. 47
Figure 6.1: Programmer Setup Wizard: click Next.............................................................................................. 52
Figure 6.2: EPIC programmer cable connections............................................................................................... 53
Figure 6.3: New Hardware Wizard: click Next.................................................................................................... 53
Figure 6.4: Legend PIC file.................................................................................................................................. 54
Figure 6.5: Download progress........................................................................................................................... 54
Figure 6.6: Download complete: click OK........................................................................................................... 54
Figure 6.7: Click the Program icon to clone........................................................................................................ 55
Figure 6.8: Programming progress...................................................................................................................... 55
Figure 6.9: Cloning complete: click OK............................................................................................................... 55
4
Legend Lightbar
Contents
List of Tables
Table 2.1: Flash pattern compliances to SAE J845 and CCR Title 13................................................................14
Table 2.2: Flash pattern compliances to NFPA....................................................................................................15
Table 2.3: Model LPXD control wires for light activation.....................................................................................16
Table 2.4: Model LPXD available flash patterns..................................................................................................16
Table 3.1: Control wires from the Serial Interface Module...................................................................................20
Table 3.2: SW-2 DIP Switch Settings..................................................................................................................23
Table 3.3: Switch settings for INTERSECTION operation...................................................................................25
Table 3.4: SignalMaster control wires: External operation..................................................................................28
Table 3.5: SignalMaster control wires and warning patterns: Internal operation ................................................28
Table 4.1: Cross reference for controller leads....................................................................................................35
Table 5.1: Domes and ROC panel assemblies for LGD/LPX models..................................................................40
Table 5.2: Legend replacement parts..................................................................................................................49
Table 5.3: Troubleshooting tips............................................................................................................................50
Legend Lightbar
5
Legend, SmartSiren, and Solaris are registered trademarks of Federal Signal Corporation
EPIC is a trademark of Microchip Technology Inc.
Ford and Crown Victoria® are registered trademarks of Ford Motor Company
Maxi Blade Fuse is a trademark of Littelfuse
Plastite is a registered trademark of SFS Unimarket.
Plexus is a registered trademark of BTI Chemical Company Inc.
Torx is a registered trademark of Camcar/Textron Inc.
Windows is a registered trademark of Microsoft Corporation in the United States and other countries.
6
Legend Lightbar
1
Safety Messages
For your safety, read this manual thoroughly before installing, operating, and servicing the Legend® lightbar.
The safety messages presented in this chapter and throughout the manual are reminders to exercise extreme
care at all times. To download copies of the manual, go to www.fedsig.com or call the Federal Signal Service
Department at 1-800-433-9132, 7 am to 5 pm, Monday through Friday (CT).
Safety Message to Installers and Service Personnel of
Warning Light Equipment
People’s lives depend on your proper installation and servicing of Federal Signal products. It is important
to read and follow all instructions shipped with this product. In addition, listed below are some other
important safety instructions and precautions you should follow:
Before Installation or Service
Qualifications
• To properly install or service this equipment, you must have a good understanding of automotive mechanical
and electrical procedures and systems along with proficiency in the installation and service of safety warning equipment. Always refer to the vehicle service manuals when performing equipment installations on a
vehicle.
Light Hazards
• To be an effective warning device, this product produces bright light that can be hazardous to your eyesight
when viewed at a close range. Do not stare directly into this lighting product at a close range or permanent
damage to your eyesight may occur.
• Do not install the light system in an area that would block, impair, or blind the driver’s vision. Ensure that
the light system is mounted in a position that is outside of the driver’s field of vision, so the driver can safely
operate the vehicle.
• Federal Signal power supplies and lightheads are designed to work together as a system. Combining lightheads and a power supply from different manufacturers may reduce the warning effectiveness of the lighting
system and may damage the components. You should verify or test your combination to ensure the system
works together and meets federal, state, and local standards or guidelines.
Electrical Hazards
• A light system is a high current system. In order for the system to function properly, a separate negative (–)
connection and positive (+) connection must be made. All negative connections should be connected to the
negative battery terminal and a suitable fuse should be installed on the positive battery terminal connection
as close to the battery as possible. Ensure that all wires and fuses are rated correctly to handle the device
and system amperage requirements.
•
Never attempt to install aftermarket equipment that connects to the vehicle wiring without reviewing a vehicle
wiring diagram available from the vehicle manufacturer. Ensure that your installation will not affect vehicle operation or mandated safety functions or circuits. Always check the vehicle for proper operation after installation.
• The lighting system components, especially light bulbs, strobe tubes, LEDs, and the outer housing, get hot
during operation. Be sure to disconnect power to the system and allow the system to cool down before handling any components of the system.
Legend Lightbar
7
Safety Messages
Warning Light Equipment
• Do not mount a radio antenna within 18 inches (45.7 cm) of the lighting system. Placing the antenna too
close to the lighting system could cause the lighting system to malfunction or be damaged by strong radio
fields. Mounting the antenna too close to the lighting system may also cause the radio noise emitted from
the lighting system to interfere with the reception of the radio transmitter and reduce radio reception.
•
Do not attempt to wash any unsealed electrical device while it is connected to its power source.
During Installation and Service
• DO NOT get metal shavings inside the product. Metal shavings in the product can cause the system to fail. If
drilling must be done near the unit, place an ESD-approved cover over the unit. Inspect the unit after mounting to be sure there are no shavings present in or near the unit.
• To avoid a battery explosion, always disconnect the negative battery cable first and reconnect it last. Avoid
causing a spark when connecting near or to the battery. The gases produced by a battery can caused a battery explosion that could result in vehicle damage and serious injury.
• DO NOT connect this system to the vehicle battery until ALL other electrical connections are made, mounting of all components is complete, and you have verified that no shorts exist. If the wiring is shorted to the
vehicle body or frame, high current conductors can cause hazardous sparks resulting in electrical fires or
flying molten metal.
• DO NOT install equipment or route wiring (or the plug in cord) in the deployment path of an airbag.
• If a vehicle seat is temporarily removed, verify with the vehicle manufacturer if the seat needs to be recalibrated for proper airbag deployment.
• Before mounting any components, check the manual to be sure that the component you are installing is suitable for use in that area of the vehicle. Many components are not suitable for use in the engine compartment
or other extreme environmental exposure areas.
• When drilling into a vehicle structure, be sure that both sides of the surface are clear of anything that could
be damaged. Remove all burrs from drilled holes. To prevent electrical shorts, grommet all drilled holes
through which wiring passes. Also, ensure that the mounting screws do not cause electrical or mechanical
damage to the vehicle.
• Refer to the manual packed with the lighting system for proper electrical connections, additional precautions, and information.
•
Because vehicle roof construction and driving conditions vary, do not drive a vehicle with a magnetically
mounted warning light installed. The light could fly off the vehicle causing injury or damage. Repair of damage incurred because of ignoring this warning shall be the sole responsibility of the user.
• To avoid denting the roof of the vehicle, place the lightbar mounting feet as close to the outer edge of the
roof as possible.
• Roof damage can occur if the hook adjustment bolts are over-tightened. On Legend lightbars torque each
hook adjustment bolt 6 ft-lb to 7 ft-lb. Install keeper plates,
• Locate the light system controls so the VEHICLE and CONTROLS can be operated safely under all driving
conditions.
8
Legend Lightbar
Safety Message to Operators of Warning Light Equipment
After Installation or Service
• Test all vehicle functions, including horn operation, vehicle safety functions, and vehicle light systems, to
ensure proper operation. Ensure that the installation has not affected the vehicle operation or changed any
vehicle safety function or circuit.
• Scratched or dull reflectors, mirrors, or lenses will reduce the effectiveness of the lighting system. Avoid
heavy pressure and use of caustic or petroleum based products when cleaning the lighting system. Replace
any optical components that may have been scratched or crazed during system installation.
• Do not attempt to activate or de-activate the light system control while driving in a hazardous situation.
• You should frequently inspect the light system to ensure that it is operating properly and that it is securely
attached to the vehicle.
• After installation and testing are complete, provide a copy of these instructions to instructional staff and all
operating personnel.
•
File these instructions in a safe place and refer to them when maintaining and/or re-installing the product.
Failure to follow all safety precautions and instructions may result in property damage, serious injury,
or death.
RETAIN AND REFER TO THIS MESSAGE
Safety Message to Operators of Warning Light Equipment
People’s lives depend on your safe use of our products. Listed below are some important safety
instructions and precautions you should follow:
• Do not attempt to activate or de-activate the light system control while driving in a hazardous situation.
• Although your warning system is operating properly, it may not be completely effective. People may not see
or heed your warning signal. You must recognize this fact and continue driving cautiously.
•
Also, situations may occur which obstruct your warning signal when natural and man-made objects are between
your vehicle and others, such as raising your hood or trunk lid. If these situations occur, be especially careful.
• All effective sirens and horns produce loud sounds that may cause, in certain situations, permanent hearing loss. You and your passengers should consider taking appropriate safety precautions, such as wearing
hearing protection.
• In order to be an effective warning device, this product produces bright light that can be hazardous to your
eyesight when viewed at a close range. Do not stare directly into this lighting product at a close range or
permanent damage to your eyesight may occur.
• It is important that you fully understand how to safely operate this warning system before use.
• You should only operate your vehicle and its light/sound system in accordance with your department’s Standard Operating Procedures.
• If a selected function does not perform properly or if any of the lamps remain illuminated when the control is
off, disconnect the power connector from the control unit and contact the nearest service center.
Legend Lightbar
9
Safety Messages
• After installation, test the light system to ensure that it is operating properly.
Safety Message to Operators of Warning Light Equipment
Safety Messages
• At the start of your shift, you should ensure that the entire warning light system and the siren system is securely attached and operating properly.
• Suction cup mounting is for temporary applications only. The unit should be removed from the window and
stored securely when not in use. Temperature changes and sunlight can cause suction cups to lose holding
power. Periodically check the unit to be sure the suction cups have a firm grip on the mounting surface. An
improperly secured light could fall off of the vehicle causing injury and damage.
• Holding power of magnetic mounting systems is dependent upon surface finish, surface flatness, and thickness of the steel mounting surface. Therefore, to promote proper magnetic mounting:
✔ Mounting surface and magnets must be kept clean, dry, and free of foreign particles that prevent
good surface contact.
✔ Ensure that mounting surface is flat.
✔ A magnet mounting system should not be used on vehicles with vinyl tops.
✔ To prevent sliding of light assembly on mounting surface, quick acceleration and hard stops should
be avoided.
Failure to follow these precautions may result in property damage, serious injury, or death.
RETAIN AND REFER TO THIS MESSAGE
10
Legend Lightbar
2
Overview of the Legend Lightbar
The Legend and Legend LPX lightbars are single-level LED lightbars with ROC™ (Reliable On-Board Circuitry)
and Solaris® LED technologies. ROC eliminates approximately 85 percent of potential failure points by
incorporating a printed circuit board (PCB) in one assembly to substantially reduce the number of electrical
connections. Solaris S2 LED modules use offset, complex reflector surfaces for accurate beam-shaping and the
highest optical efficiency. The reflectors' overlapping, 360-degree lighting eliminates weak spots and provides
off-axis warning around the lightbar.
The lightbar's internal microprocessor supplies three priority operational modes and a library of 26 flash patterns.
To increase the safety of officers, pedestrians, and motorists, the lightbar has standard front and rear cutoff,
dimming, and intersection warning. Bright white LED takedown lights, LED alley lights, and LED worklights are
available in the lightbar.
Flash patterns are controlled through the lightbar’s CAT5 serial communication cable. The cable connects to the
Federal Signal Serial Interface Module (Model Number 8583446), the Federal Signal Six-Button Serial Controller
(Model Number 8623133), the Federal Signal Three-Button Serial Controller (Model Number 8623141), or the
Six-Button Wireless Controller (8623137). With the Serial Interface Module, the Legend can be activated by
Federal Signal lightbar controllers, SignalMaster directional light controllers, or by individual low-current switch
boxes. (SignalMaster directional warning lights are not available with the Model LGD24, LGD12, LPX24, or any
of LPXD models. The programmable Six-Button Serial Controller and the Six-Button Wireless Controller have
six illuminated pushbuttons and a three-position slide switch with LED indicators for operating the lightbar. The
programmable Three-Button Serial Controller has three illuminated pushbuttons and LED indicators for operating
the lightbar.
The Legend is available in six lengths: 12 inches (Model LGD12) (sold as a set), 24 inches (Model LGD24), 45
inches (Model LGD45), 53 inches (Model LGD53), 61 inches (Model LGD61), and 70 inches (Model LGD70).
Also available is the Discrete-Wired 24" Model Legend, which has one flash pattern and does not connect to the
Serial Interface Module. The Legend LPX is available in five lengths: 24 inches (Model LPX24), 45 inches (Model
LPX45), 53 inches (Model LPX53), 61 inches ( Model LPX61, and 70 inches (Model LPX70).
Product Features
Additional features include:
• Design provides superior 360-degree intersection warning.
• Bright white LED takedowns are long life and significantly reduce power consumption.
• Lightbar housing is wind-tunnel tested to ensure durability at high speeds and maximum fuel efficiency.
• Available LED colors include amber, blue, red, green, and white.
• Built-in SignalMaster directional warning capability is standard on all Legend and Legend LPX models
except LGD24, LPX24, and the Discrete-Wired 24" Legend. SignalMaster flash patterns can be activated
with switched 12 Vdc, a SignalMaster controller, or 6-button controller.
• The SignalMaster option is not available in any LPXD model.
• Five-year warranty on LEDs.
• Easily repaired and reconfigured without taking the lightbar off the vehicle.
Legend Lightbar
11
Applications
Applications
• Police, Fire, and EMS Vehicles
• Heavy-Duty Towing and Recovery Vehicles
• Parking enforcement and community service vehicles
• Private security vehicles
Product Specifications
Operating and technical specifications for the Legend Model LGD and Legend Model LPX are listed in this
section by lighting option and model.
An Overview of the
Legend Lightbar
Warning Lights
Lighting Option
Current
Draw
Lamp
Technology
LED takedown lights/worklights
(Legend LGD)
1.0 A**
Six bright white LEDs
Offset, compound-curve, polished
spot beam reflector
LED takedown lights/worklights
(Legend LPX)
1.0 A**
Four bright white LEDs
Offset, compound-curve, polished
spot beam reflector
LED alley light
0.5 A*
Three bright white lights
Offset, compound-curve, polished
reflector
Solaris LED, Mainbar
(Legend LGD)
1.0 A**
Six high-brightness LEDs
Offset, compound-curve, polished
reflector
Solaris LED, Mainbar
(Legend LPX)
1.0 A**
Four high-brightness LEDs
Offset, compound-curve, polished
reflector
Reflector Style
*Amperage per pair with flashing takedown and alley lights
**Amperage in STEADY BURN mode
Lightbar Dimensions
Mainbar
12
Model
Length
Height
Width
Weight*
LGD24/
LPX24
24.25 in
(61.6 cm)
2.5 in
(6.4 cm)
11.2 in
(28.4 cm)
16.6 lb
(7.5 kg)
LGD45/
LPX45
44.5 in
(133.0 cm)
2.5 in
(6.4 cm)
11.2 in
(28.4 cm)
20.4 lb
(9.3 kg)
LGD53/
LPX53
52.7 in
(133.9 cm)
2.5 in
(6.4 cm)
11.2 in
(28.4 cm)
24.2 lb
(11.0 kg)
LGD61/
LPX61
60.9
(154.7 cm)
2.5 in
(6.4 cm)
11.2 in
(28.4 cm)
28.0 lb
(12.7 kg)
Legend Lightbar
Approvals
LGD70/
LPX70
69.1
(175.5 cm)
2.5 in
(6.4 cm)
11.2 in
(28.4 cm)
31.81 lb
(14.4 kg)
*With standard mounting feet
Technical Specifications
Electrical
Potential
Current Draw
with LED
Takedowns*
Operating
Temperature
LGD24/
LPX24
12.8 Vdc
9.5 A
–22 ºF to +149 ºF
(–30 ºC to +65 ºC)
LGD45/
LPX45
12.8 Vdc
11.5 A
–22 ºF to +149 ºF
(–30 ºC to +65 ºC)
LGD53/
LPX53
12.8 Vdc
13.5 A
–22 ºF to +149 ºF
(–30 ºC to +65 ºC)
LGD61/
LPX61
12.8 Vdc
15.5 A
–22 ºF to +149 ºF
(–30 ºC to +65 ºC)
LGD70/
LPX70
12.8 Vdc
17.5 A
–22 ºF to +149 ºF
(–30 ºC to +65 ºC)
An Overview of the
Legend Lightbar
Model
*Amperage for a typical loaded lightbar with all lights flashing at 50 percent duty cycle
Serial Interface Module
Model 8583446
Length
Height
Width
6.25 in
(15.9 cm)
2.88 in
(7.3 cm)
1.06 in
(2.7 cm)
Shipped with a 24-pin cable
harness (1751364A) that is 3 feet
long. The harness connects to the
module's J1 outlet.
Approvals
•
SAE J845 Light Output (select flash patterns, Table 2.1 on page 14)
•
CCR Title 13 (select flash patterns and LGD models, Table 2.1)
•
SAE 1113/41 RFI
•
FCC Part 15
•
NFPA (Table 2.2 on page 15)
Legend Lightbar
13
Model LGD and LPX Flash Pattern Compliances
Model LGD and LPX Flash Pattern Compliances
The patterns listed as “Yes” (Y) in Table 2.1 and in Table 2.2 on page 15 comply with the flash requirements and
light-output requirements of the lighting standard in the table header. Patterns listed as “No” (N) do not comply
with either the flash requirements or the light output of the standard. You should use a non-compliant pattern
only after the people you are trying to warn have been trained to recognize the pattern as a warning signal. End
users are responsible for choosing the light patterns that meet their jurisdiction’s requirements.
Table 2.1: Flash pattern compliances to SAE J845 and CCR Title 13
Pattern
P1
P2
P3
P4
P5
P6
An Overview of the
Legend Lightbar
P7
LGD24/*
LPX24
Y
Y
Y
Y
Y
Y
Y
P8
N
P10
Y
P9
P11
Y
SAE J845
LGD45/
LPX45
LGD53/
LPX53
LGD24@
Y
Y
Y
Y
Y
Y
Y
Y
Y
N
Y
P15
Y
P16
P17
P18
P19
P20
N
Y
Y
Y
N
N
N
Y
N
Y
Y
Y
Y
Y
Y
N
Y
Y
N
N
N
Y
N
N
N
Y
Y
Y
Y
Y
Y
Y
Y
Y
Y
N
N
Y
Y
Y
N
N
Y
Y
Y
N
Y
Y
Y
Y
Y
Y
Y
Y
N
N
Y
Y
N
N
Y
Y
Y
N
N
N
N
N
N
Y
N
N
N
N
N
N
N
Y
Y
Y
Y
Y
Y
Y
Y
N
N
N
N
N
Y
Y
Y
Y
Y
N
N
Y
N
N
N
N
N
Y
N
P26
Y
Y
P27 TEST
ONLY **
P28 TEST
ONLY ***
N
N
N
N
Y
N
Y
Y
Y
Y
Y
Y
Y
Y
N
Y
Y
Y
Y
Y
P25
Y
Y
Y
Y
P24
Y
Y
N
P23
N
Y
Y
N
Y
Y
Y
Y
Y
N
N
Y
Y
Y
N
N
Y
N
N
Y
N
Y
P21
P22
LGD53S
Y
N
Y
LGD45S
Y
Y
Y
LGD45@ LGD53@ LGD24S
Y
N
Y
CCR Title 13 (Amber) ****
Y
Y
Y
P13
P14
Y
N
N
Y
Y
Y
N
Y
P12
CCR Title 13
N
N
Y
Y
Y
Y
Y
Y
Y
Y
Y
Y
Y
Y
Y
Y
Y
Y
Y
Y
Y
Y
Y
Y
Y
Y
Y
N
N
N
N
N
N
N
N
N
N
N
N
N
N
N
N
N
N
N
N
Y
Y
Y
N
Y
Y
Y
* Serially-controlled 24" Legend LGD and Legend LPX
@Title 13 LPX is complaint in red only.
** Pattern 27: All LEDs lighthead turns on.
*** Pattern 28: Each LED lighthead sequentially turns on for 1 second.
**** For amber Title 13 compliant models: Selecting the Low Power option makes the flash patterns non-compliant.
It is the user's responsibility to verify the acceptability of Low Power in his or her jurisdiction before using this option.
14
Legend Lightbar
Model LGD and LPX Flash Pattern Compliances
Table 2.2: Flash pattern compliances to NFPA
Pattern
P1
P2
P3
P4
P5
P6
P7
P8
P9
P10
P11
P12
P13
P14
P16
P17
P18
P19
P20
P21
P22
P23
P24
P25
P26
P27 TEST
ONLY **
P28 TEST
ONLY ***
LPX-NFPA***
N
N
N
N
N
Y
Y
Y
Y
Y
Y
Y
Y
Y
N
N
N
N
N
N
Y
Y
Y
N
N
Y
Y
N
Y
N
Y
Y
Y
Y
Y
N
Y
Y
Y
Y
Y
N
Y
Y
Y
Y
Y
N
Y
Y
Y
N
N
N
N
An Overview of the
Legend Lightbar
P15
NFPA
LGD-NFPA***
N
* Pattern 27: All LEDs lighthead turns on.
** Pattern 28: Each LED lighthead sequentially turns on for 1 second.
*** The lightbar layout must also meet NFPA compliance. Contact Customer Support for verification at 1-800-682-8022.
Legend Lightbar
15
Model LPXD Light Activation
Model LPXD Light Activation
The operational mode of the Model LPXD Discrete-Wire Legend is dependent upon the variation of options
incorporated into the final model. Installation, wiring, and operation instructions are in the instructions supplies
with the Model LPXD. The functions defined in Table 2.3 are activated via +12 Vdc applied to any of the wires
shown in Table 2.3 except for the green pattern-selection wire, which is ground activated. There are eight flashing
patterns available, which are described in Table 2.4.
Follow the standard installation from the Legend (LGD) instructions. Federal Signal recommends fusing each
wired connection in Table 2.3 with the fuse shown in the table. See Schematic A.7 on page 62.
Table 2.3: Model LPXD control wires for light activation
Wire Color
Fuse
Light Activation
Yellow
20 A
Rear of lightbar, Mode 1 (for front cutoff, activate only the yellow wire)
Red
Blue
5A
Gray
5A
Brown
An Overview of the
Legend Lightbar
20 A
Brown/White
Orange
Green
5A
5A
5A
NA
Front of lightbar, Mode 1 (for rear cutoff, activate only the red wire)
Mode 2: Overrides Mode 1
Flash takedown/alley
Left alley
Right alley
Worklight/takedown
Pattern change ***THIS FUNCTION IS GROUND ACTIVATED***
Model LPXD Flash Pattern Compliance
The flash patterns listed as “Yes” (Y) in Table 2.4 comply with the SAE J845 flash requirements and light-output
requirements. Patterns listed as “No” (N) do not comply with these requirements. A non-compliant pattern should
only be used after the people you are trying to warn have been trained to recognize the pattern as a warning
signal. End users are responsible for choosing the flash patterns that meet their jurisdiction’s requirements.
Table 2.4: Model LPXD available flash patterns
Pattern
Number
P1
P2
P3
P4
P5
P6
P7
P8
16
Description
2@60 FPM QUAD FLASH Alternating, then
2@60 FPM DOUBLE FLASH Simultaneous
60 FPM 5-FLASH Alternating
60 FPM QUAD FLASH Alternating
75 FPM TRIPLE FLASH Alternating
85 FPM DOUBLE FLASH Alternating
115 FPM Alternating
152 FPM Alternating
1@60 FPM TRIPLE FLASH Alternating
2@60 FPM TRIPLE PULSE Simultaneous
Legend Lightbar
SAE J845
Compliant
N
Y
Y
Y
Y
Y
Y
N
Model LPXD Flash Pattern Compliance
Changing the Default MODE 1 Flash Pattern
To change the Mode 1 flash pattern to one of the patterns shown in Table 2.4:
1. Apply +12 Vdc power to the red and/or yellow MODE 1 wire(s).
2. Temporarily ground the green wire to advance to the next pattern. Repeat this step until the pattern you want
appears.
3. Remove power from the lightbar. The pattern is retained as the MODE 1 default.
Changing the Default MODE 2 Flash Pattern
To change the Mode 2 flash pattern to one of the patterns shown in Table 2.4 on page 16.
1. Apply +12 Vdc power to the red and/or yellow MODE 1 wire(s).
2. Apply +12 Vdc power to the blue MODE 2 wire.
3. Temporarily ground the green wire to advance to the next pattern. Repeat this step until the pattern you want
appears.
4. Remove power from the lightbar. The pattern is retained as the MODE 2 default.
An Overview of the
Legend Lightbar
Legend Lightbar
17
3
Preparing the Legend for Installation
Taking the preparatory steps in this chapter before mounting and wiring the lightbar to a vehicle will help ensure
that your installation is fast, easy, and error free. In addition to bench testing, this chapter has instructions for
changing default settings and flash patterns.
Unpacking the Lightbar
Carefully unpack the lightbar assembly and any other products included in the shipment. Inspect them for
damage that may have occurred during shipping. If a product has been damaged, do not install or operate it.
Immediately file a claim with the carrier describing the damage.
Carefully check all envelopes, shipping labels, and tags before removing or destroying them. If you are missing
any parts, contact Customer Support at 1-800-264-3578, 7 am to 5 pm, Monday through Friday (CT).
Testing and Reprogramming the Lightbar
Testing checks the lightbar for the reliability of its flash patterns and enables you to make any changes before
you install the lightbar and controller equipment.
Although the lightbar is configured and programmed at the factory, you may want change default settings and
flash patterns before installation. Before you begin, decide if you want to change these default settings:
• SignalMaster Operation: External (default) or Internal
You can change the setting from External to Internal. Internal operation uses the lightbar’s on-board
SignalMaster controller to generate directional warning patterns. With Internal operation, an external
SignalMaster controller is not needed. A standard low-current switch box can activate the internal
SignalMaster controller.
• MODE 1, 2, 3, and INTERSECTION
MODES 1 through 3 are most often selected by a progressive slide switch, which enables the driver to turn
on the lightbar without looking down. You can select a pattern for each mode from the lightbar’s library of
26 patterns.
The INTERSECTION flash pattern is typically a high activity pattern that attracts attention to the vehicle as
it approaches an intersection. You can select a pattern from the library and choose one of three ways to
turn on and off the pattern. The INTERSECTION flash pattern overrides the three priority modes.
NOTE: If the SignalMaster flash pattern is turned on, it overrides the current flash pattern.
• FRONT and REAR lights: CUTOFF (default) or ENABLE
You set these options after you change the default settings for MODE and INTERSECTION flash patterns.
CUTOFF turns OFF the front or rear LEDs when 12 Vdc is applied to the FRONT or REAR light control
wire. ENABLE turns ON the front or rear LEDs when 12 Vdc is applied.
18
Legend Lightbar
Testing and Reprogramming the Lightbar
19
Making Initial Electrical Connections
REVERSE POLARITY / MISWIRING
Reverse polarity or incorrect voltage may damage the lightbar. To avoid damage to the lightbar, ensure
that the battery voltage is the same as the voltage rating of the lightbar and that the lightbar’s red and
black power lines are connected to the battery lugs in the correct polarity.
The Legend does not require any internal wiring. Two 10 AWG power conductors (red and black) and a CAT5
cable exit the lightbar. The lightbar's basic light functions are communicated through the CAT5 cable, which
connects to the Serial Interface Module. (The Discrete-Wired 24" Legend does not connect to the Serial Interface
Module and has no CAT5 cable.) For wiring schematics, see the Appendix starting on page 56.
To make the electrical connections for bench testing and reprogramming the lightbar:
1. To supply power to the lightbar, use a fully-charged 12-volt automotive battery with terminal lugs.
2. Place the lightbar on a sturdy, flat surface.
3. Plug the CAT5 communication cable (1) from the lightbar into the Serial Interface Module (J1) (Figure 3.1).
4. Plug the 24-pin harness (2) into the Serial Interface Module.
5. Attach the lightbar’s black ground-power line (3) to the negative battery (–GND) lug.
6. Attach the lightbar’s red power line (4) through a 40 A Maxi™ fuse to the positive battery (+BAT) lug.
7. Attach the white wire (5) from the 24-pin harness through a 1 A fuse to the positive battery (+BAT) lug.
8. Attach the black wire and the black/white wire (6) from the 24-pin harness to the negative battery (–GND) lug.
Figure 3.1: Electrical connections for testing and reprogramming
PASSENGER
SIDE
DRIVER
SIDE
45" LEGEND (LGD45)
POWER LINE (RED)
4
5
+
12 Vdc
VEHICLE
BATTERY
FUSE
1A
3
–
Preparing the Legend
for Installation
FUSE
40 A MAXI
CAT5
COM.
CABLE
(GRAY)
GROUND POWER LINE (BLACK)
SERIAL
INTERFACE
MODULE
6
1
2
BLACK WIRE
BLACK / WHITE WIRE
WHITE WIRE
24-PIN HARNESS
Legend Lightbar
290A5957B
19
20 Testing and Reprogramming the Lightbar
Control Wires for Flash Patterns
This chapter describes how to program flash patterns during bench testing and programming by applying 12 Vdc
to the control wires in the Serial Interface Module's 24-pin harness. Table 3.1 shows the control wires and their
colors. The wire's first color is the predominant color and additional colors are stripes.
Table 3.1: Control wires from the Serial Interface Module
Lightbar Controls
Description
MODE 1
Blue
Lowest priority
MODE 3
Black/Red
Overrides MODES 1 and 2
MODE 2
STEADY BURN
(Legend lightbar
models only)
FRONT CUTOFF
FRONT ENABLE
REAR CUTOFF
REAR ENABLE
Preparing the Legend
for Installation
Wire Color
Blue/White
Red/White
Green/White
Orange/Black
INTERSECTION
Blue/Black
FLASH
TAKEDOWN/
ALLEY
Red/Black
LEFT ALLEY
Green/Black
RIGHT ALLEY
Orange/Red
TAKEDOWN
White/Black
LOW POWER
White/Black/
Red
LIGHTBAR TEST
PATTERN
Black/White/
Red
Overrides MODE 1
One or more LEDs steadily burn when 12 Vdc is
applied to the control wire for a MODE and the
control wire for STEADY BURN
Turns OFF the FRONT of the lightbar
Turns ON the FRONT of the lightbar
Turns OFF the REAR of the lightbar
Turns ON the REAR of the lightbar
Typically a high activity pattern. Overrides all
three priority modes.
Flashes the ALLEY and TAKEDOWN lights in
MODES 1, 2, or 3
Turns on LEFT ALLEY lights. Overrides the
FLASH TAKEDOWN/ALLEY lights
Turns on RIGHT ALLEY lights. Overrides the
FLASH TAKEDOWN/ALLEY lights.
Provides white light to the front. Overrides
FLASH TAKEDOWN/ALLEY lights and FRONT
CUTOFF.
Dims the lights approximately 50 percent to
prevent blinding approaching drivers. LOW
POWER is only available in MODES 1 and 2
and is disabled when switched to another flash
pattern, including MODE 3 and INTERSECTION.
Flashes the LEDs sequentially and then flashes
the TAKEDOWN and ALLEY lights
Switch Settings
The jumpers and switches to change default settings and reprogram flash patterns are on the PCB in the Serial
Interface Module. The switches are accessible through a window in the Interface Module. To access the Internal/
External SignalMaster jumper, remove the cover from the Interface Module (Figure 3.2 on page 21). Be sure to
reattach the cover when you are finished.
20
Legend Lightbar
Testing and Reprogramming the Lightbar
21
Figure 3.2: Serial Interface Module with cover attached
8/32 x 1/4"
HEX HEAD
SCREWS (4)
290A5958
Quick Testing Using the LIGHTBAR TEST
LIGHT HAZARDS
To be an effective warning device, this product produces bright light that can be hazardous to your
eyesight when viewed at a close range. Do not stare directly into this lighting product at a close range
or permanent damage to your eyesight may occur.
NOTE: The LIGHTBAR TEST does not test the optional STEADY BURN LEDs. To test and configure these LEDs,
see “Testing the STEADY BURN LEDs” on page 27.
Before programming and testing flash patterns, perform the LIGHTBAR TEST to ensure that all LEDs light
properly by following these steps:
1. Apply 12 Vdc (+BAT) to the LIGHTBAR TEST control wire (black/white/red) from the Serial Interface
Module.
2. After all LEDs flash in sequence, the TAKEDOWN and ALLEY lights flash.
3. Remove 12 Vdc from the LIGHTBAR TEST control wire.
Selecting Internal SignalMaster Control
1. Unplug the 24-pin harness from the Serial Interface Module.
3. On the Interface Module PCB, move JP 1 from EXT to INT (see Figure 3.3 on page 22).
4. Reinstall the cover on the Interface Module.
5. Move Switch 4 on SW-2 to the down (ON) position.
6. Plug the 24-pin harness into the Serial Interface Module.
Legend Lightbar
21
Preparing the Legend
for Installation
2. On the Interface Module, use a 1/4-inch driver to remove the four #8-32 x 1/4 hex-head screws and remove
the cover.
22 Testing and Reprogramming the Lightbar
Selecting External SignalMaster Control
To return to External SignalMaster control (factory default):
1. Unplug the 24-pin harness from the Serial Interface Module.
2. On the Serial Interface Module, use a 1/4-inch driver to remove the four 8-32 x 1/4 hex-head screws and
remove the cover.
3. On the Serial Interface Module PCB, move JP 1 from INT to EXT (Figure 3.3).
Figure 3.3: DIP switch settings in Serial Interface Module
BACK OF SERIAL INTERFACE MODULE
PUSH
BUTTON
(SW-1)
CAT5
SERIAL INTERFACE
MODULE PCB
SW-1
INTERNAL SIGNALMASTER
SW-2
SWITCHES 1
THROUGH 8
ON SW-2
EXTERNAL SIGNALMASTER
CONFIGURATION
4. Reinstall the CONFIGURATION
cover on the Interface Module.
290A5959
5. Move Switch 4 on SW-2 to the up (OFF) position.
Preparing the Legend
for Installation
6. Plug the 24-pin harness into the Serial Interface Module.
Entering Program Mode
To switch the module from Operation Mode to Program Mode:
1. Unplug the 24-pin harness from the Serial Interface Module.
2. On the Serial Interface Module, move Switch 6 on SW-2 to the down (ON) position (Figure 3.3).
3. Plug the 24-pin harness into the Serial Interface Module.
NOTE: When you press and release the SW-1 pushbutton on the Serial Interface Module to select a pattern,
the lightbar briefly turns off and then displays the next pattern. To cycle backwards to a previous pattern, move
Switch 5 to ON (up position) on SW-2.
22
Legend Lightbar
Testing and Reprogramming the Lightbar
23
SW-2 DIP Switch Settings in the Serial Interface Module
For the location of SW-2, see Figure 3.3 on page 22. Table 3.2 lists the DIP switch settings in the Serial
Interface Module for programming flash patterns.
Table 3.2: SW-2 DIP Switch Settings
SW-2
Switch
Number
1
Switch Setting
Up
(OFF)
Down
(ON)
✔
1
✔
Function
FRONT/REAR LEDs cut off (turn off) when 12 Vdc is
applied their control wires (Table 3.1 on page 20)
FRONT/REAR LEDs enable (turn on) when 12 Vdc is
applied to their control wires
2
✔
Keep in OFF position
3
✔
Keep in OFF position
4
✔
SignalMaster, External controller
4
5
✔
5
6
6
✔
SignalMaster, Internal controller
✔
Cycle forward through the selection of flash patterns
Cycle backward through the selection of flash patterns
✔
Operation Mode
Program Mode
✔
7
Switch for INTERSECTION operational settings (Table 3.3 on page 25)
8
Switch for INTERSECTION operational settings (Table 3.3)
Programming Priority MODES 1, 2, 3, and INTERSECTION
The three modes operate with MODE 3 having the highest priority: MODE 3 overrides MODE 2, and MODE
2 overrides MODE 1. When the lightbar operates in one of these modes, the SignalMaster modules keep
sequence with the flash pattern.
You can change default MODE flash patterns by programming each mode with one of 26 patterns in the
lightbar’s library. A typical setup would be:
MODE 1: REAR LEDs
•
MODE 2: FRONT/REAR LEDs
•
MODE 3: Siren (SmartSiren® or Federal Signal compatible), and FRONT/REAR LEDs and FLASH
TAKEDOWN/ALLEY LEDs on the mainbar
•
MODES 1 and 2: FRONT/REAR CUTOFF
NOTE: If the lightbar needs to be programmed after you connect a progressive slide switch, the programming sequence must be MODE 3, MODE 2, MODE 1, INTERSECTION.
Mode 3
1. Apply 12 Vdc (+BAT) to the MODE 3 control wire (black/red) from the Serial Interface Module to display the assigned pattern.
2. On the Serial Interface Module, press and release the SW-1 pushbutton until the pattern you want
appears on the lightbar.
Legend Lightbar
23
Preparing the Legend
for Installation
•
24 Testing and Reprogramming the Lightbar
3. Remove 12 Vdc from the MODE 3 control wire.
Mode 2
1. Apply 12 Vdc (+BAT) to the MODE 2 control wire (blue/white) from the Serial Interface Module to
display the assigned pattern.
2. On the Serial Interface Module, press and release the SW-1 pushbutton until the pattern you want
appears on the lightbar.
3. Remove 12 Vdc from the MODE 2 control wire.
Mode 1
1. Apply 12 Vdc (+BAT) to the MODE 1 control wire (blue) from the Serial Interface Module to display the
assigned pattern.
2. On the Serial Interface Module, press and release the SW-1 pushbutton until the pattern you want
appears on the lightbar.
3. Remove 12 Vdc from the MODE 1 control wire.
Intersection
The INTERSECTION flash pattern overrides all three priority modes when activated. To select a new pattern, you must apply 12 Vdc to the control wire for either MODE 1, 2, or 3 (Table 3.1 on page 20) and the
blue/black control wire for INTERSECTION.
NOTE: This procedure only programs the INTERSECTION pattern. It does not assign the pattern to a MODE.
1. Apply 12 Vdc (+BAT) to a control wire for either MODE 1, 2, or 3, and the control wire for INTERSECTION from the Serial Interface Module.
2. On the Serial Interface Module, press and release the SW-1 pushbutton until the pattern you want
appears on the lightbar.
3. Remove 12 Vdc from the MODE and INTERSECTION control wires.
Intersection Operational Settings
Preparing the Legend
for Installation
Select one of three options to turn on the INTERSECTION pattern:
•
HIGH with +BAT power maintained (default): the lightbar displays the INTERSECTION pattern
until power is removed.
•
TAP II (push-on/push-off): the INTERSECTION flash pattern is turned on and off by pressing
a momentary contact switch, such as a horn button. Momentary 12 Vdc turns on the pattern, a
second momentary 12 Vdc signal turns it off.
•
8-SECOND TIMEOUT activated by +BAT: momentary 12 Vdc turns on the INTERSECTION flash
pattern for eight seconds.
To change from HIGH to TAP II or 8-SECOND TIMEOUT.
24
1.
Unplug the 24-pin harness from the Serial Interface Module.
2.
On the Serial Interface Module, set Switch 7 and Switch 8 on SW-2 to select a method of operation (Figure 3.3 on page 22 and Table 3.3.) Each setting is independent of the other.
3.
Plug the 24-pin harness into the Serial Interface Module.
Legend Lightbar
Additional Mainbar Tests and Configurations
25
Table 3.3: Switch settings for INTERSECTION operation
Operational Settings
SW7
SW-2
SW8
HIGH (+BAT maintained)
OFF (up)
OFF (up)
8-SECOND TIMEOUT (activated by +BAT)
OFF (up)
ON (down)
TAP II (+BAT, push on/push off )
ON (down)
OFF (up)
FRONT/REAR ENABLE or CUTOFF
The operational setting for FRONT/REAR ENABLE or CUTOFF must be programmed after MODE and INTERSECTION. The default setting is for CUTOFF in which the FRONT or REAR LEDs turn off when 12 Vdc
(+BAT) is applied to their control wires. In contrast, FRONT/REAR ENABLE turns on these LED modules
when +BAT is applied to their control wires. Both FRONT and REAR share the same operational setting
and are not independent.
To program for FRONT/REAR ENABLE or CUTOFF:
1. Unplug the 24-pin harness from the Serial Interface Module.
2. On the Serial Interface Module, move Switch 1 on SW-2 to:
a) the down (on) position for Front/Rear Enable.
b) the up (off) position for Front/Rear Cutoff.
3. Plug the 24-pin harness into the Serial Interface Module.
NOTE: When set to ENABLE, 12 Vdc must be applied to a MODE control wire and the FRONT and/or REAR
ENABLE control wire for the lightbar to operate.
In a typical installation, if you want only the REAR LED modules to flash in MODE 1, set the operation for
ENABLE. Connect the green/white and blue/white control wires to the MODE 2 connection and the orange/
black and blue control wires to the MODE 1 connection.
Exiting Program Mode
When you are finished programming patterns, switch the Serial Interface Module from Operation Mode to
Program Mode.
1. Unplug the 24-pin harness from the Serial Interface Module.
3. Plug the 24-pin harness into the Serial Interface Module.
Additional Mainbar Tests and Configurations
After programming and testing the MODES 1, 2, and 3 and the INTERSECTION flash pattern, test the STEADY
BURN LEDs and FLASH TAKEDOWN/ALLEY lights to ensure they function properly. The test procedures are
described in the next sections.
Legend Lightbar
25
Preparing the Legend
for Installation
2. On the Serial Interface Module, move SW-2 Switch 6 to the up (OFF) position.
26 Additional Mainbar Tests and Configurations
Figure 3.4: Light options for Legend lightbars
LGD24/LPX24 (SERIALLY CONTROLLED)
1
DRIVER SIDE
L
8
2
TD
3
TD
WK
7
WK
6
4
L1
PASSENGER SIDE
5
LGD45/LPX45
1
2
3
TD
SB
4
TD
5
TD
6
TD
SB
7
ST
15
WK
14
WK
13
WK
12
WK
11
ST
10
L
16
8
L1
9
LGD53/LPX53
1
2
3
TD
SB
4
TD
ST
19
WK
18
WK
17
L
20
5
16
6
7
TD
8
TD
SB
9
15
WK
14
WK
13
ST
12
8
9
TD
10
TD
SB
11
17
WK
16
WK
15
ST
14
9
10
11
TD
12
TD
SB
13
19
WK
18
WK
17
ST
16
10
L1
11
LGD 61/LPX61
1
2
3
TD
SB
4
TD
ST
23
WK
22
WK
21
L
24
5
20
6
19
7
18
12
L1
13
LGD70/LPX70
1
2
3
TD
SB
4
TD
ST
27
WK
26
WK
25
L
28
5
24
6
23
7
22
8
21
Preparing the Legend
for Installation
TD = TAKEDOWN
SB = STEADY BURN (Legend only)
ST = STOP/TURN/TAIL
20
WK = WORK LIGHT
L, L1 = ALLEY LIGHT
14
L1
15
290A5960D
SIGNALMASTER LED POSITIONS
6-HEAD
8-HEAD
LGD45/LPX45: 10–15
LGD53/LPX53: 12–19 (WITHOUT STOP/TURN/TAIL LIGHTS)
LGD53/LPX53: 13–18 (WITH STOP/TURN TAIL LIGHTS IN
12 AND 19)
LGD61/LPX61: 15–22 (WITHOUT WORK LIGHTS)
LGD61/LPX61: 16–21 (WITH WORK LIGHTS IN 15 AND 22)
LGD70/LPX70: 18-25 (WITH WORKLIGHTS IN 17 AND 26)
LGD70/LPX70: 19–24
NOTES:
LED WARNING LIGHTS OF ANY COLOR CAN FUNCTION AS SIGNALMASTER DIRECTIONAL WARNING
LIGHTS, EXCEPT STOP/TURN/TAIL LEDS AND WORK LIGHTS.
STEADY-BURN OPTION IS ONLY AVAILABLE IN LEGEND LIGHTBAR MODELS.
26
Legend Lightbar
Additional Mainbar Tests and Configurations
27
Testing the STEADY BURN LEDs (Legend Lightbar Models Only)
The STEADY BURN LEDs are factory configured per the customer order for one of these options:
•
No STEADY BURN (the LEDs flash with the pattern)
•
Driver’s side STEADY BURN
•
Driver’s and passenger’s side STEADY BURN
1. Apply 12 Vdc (+BAT) to the red/white control wire for the STEADY BURN LEDs and a control wire for MODE 1,
2, or 3 (Table 3.1 on page 20). The LEDs light and stay on (default setting) (Figure 3.4 on page 26).
2. Remove 12 Vdc from the MODE and STEADY BURN control wires.
Testing the FLASH TAKEDOWN/ALLEY Lights
1. Apply 12 Vdc (+BAT) to the control wire for MODE 1, 2, or 3 (Table 3.1 on page 20).
2. Apply 12 Vdc (+BAT) to the red/black control wire for the FLASH TAKEDOWN/ALLEY lights to flash the
them.
3. Remove 12 Vdc from the MODE and FLASH TAKEDOWN/ALLEY control wires.
Testing the LEFT and RIGHT ALLEY Lights
1. Apply 12 Vdc (+BAT) to the control wire for either the LEFT or RIGHT ALLEY LED (Table 3.1 on page 20) to
turn it on.
2. Remove 12 Vdc from the control wire.
3. Repeat steps 1 and 2 for the other alley light.
Testing the TAKEDOWN LIGHTS/WORKLIGHTS
Apply 12 Vdc (+BAT) to the white/black control wire to turn on the TAKEDOWN LIGHTS/WORKLIGHTS.
Testing the LOW POWER Function
The LOW POWER function dims the mainbar LEDs approximately 50 percent to prevent blinding approaching
drivers.
NOTE: The LOW POWER function only operates in MODE 1 or MODE 2. It is disabled when the lightbar is
turned off or switched to another flash pattern, including MODE 3 or INTERSECTION.
To dim the LEDs:
1. Apply 12 Vdc (+BAT) to the control wire for MODE 1 or 2 (Table 3.1 on page 20.)
2. Apply 12 Vdc (+BAT) to the white/black/red control wire for the LOW POWER function.
Legend Lightbar
27
Preparing the Legend
for Installation
SAFE USE OF LOW POWER MODE
Enabling the Low Power Mode in the lightbar causes the light output of the lightbar to fall below current
light output standards and guidelines for emergency warning lights. Use extreme caution when using
this mode. Ensure that the ambient light conditions are low enough that you are seen and that the
reduction of glare from the lightbar is safer than full light output in the situation. Failure to heed this
warning may result in serious injury or death to you or others in your vicinity.
28 Additional Mainbar Tests and Configurations
3. Remove 12 Vdc from the MODE and LOW POWER control wires.
To apply LOW POWER again after you program a flash pattern, disconnect 12 Vdc (+BAT) from the LOW
POWER control wire and reapply it.
Testing the SignalMaster LEDs for External Operation
With the lightbar in External SignalMaster control (default) (Figure 3.3 on page 22), apply ground (–GND) to the
control wires listed in Table 3.4 to test the LEDs (Figure 3.4 on page 25).
Table 3.4: SignalMaster control wires: External operation
6-Head SignalMaster
8-Head SignalMaster
Green
Green
Orange/Green
Orange/Green
Green/Black/White
Orange
Blue/Red
Red/Green
Red
Green/Black/White
Orange
Blue/Red
Red/Green
White/Red
Testing the SignalMaster LED Modules for Internal Operation
If the Serial Interface Module is set to Internal SignalMaster operation, test the LEDs (Figure 3.4 on page 25) by
applying 12 Vdc to the control wires listed in Table 3.5.
Table 3.5: SignalMaster control wires and warning patterns: Internal operation
6-Head
SignalMaster Control Wires
Controls
Description
CENTER
Green
Rear LEDs flash from center out to both sides
Orange/Green
Outer LEDs alternate
LEFT
Preparing the Legend
for Installation
Rear LEDs flash from right to left
RIGHT
Green/Black/White Rear LEDs flash from left to right
WARN 2
Orange
WARN 1
WARN 3
28
Red
Two outer LEDs alternate
WARN 4
Blue/Red
Red/Green
Outer LEDs and two inner LEDs alternate
FAST
White/Red
Operates the selected pattern 50 percent faster
Outer LEDs and two inner LEDs flash, then the
LEDs between the inner and outer LEDs
Legend Lightbar
Additional Mainbar Tests and Configurations
29
Figure 3.5: SignalMaster flash sequence: six-head example
LGD45
PASSENGER SIDE
DRIVER SIDE
LEFT
6
5
4
3
2
1
2
3
5
6
CENTER
3
2
1
1
RIGHT
1
2
3
4
WARN 1
2
1
WARN 2
1
1
2
2
WARN 3
1
2
1
2
WARN 4
1
2
1
1
2
1
290A6060
Preparing the Legend
for Installation
Legend Lightbar
29
4
Wiring the Legend in the Vehicle
Before wiring the lightbar in the vehicle, mount the lightbar according to the instructions included with the
mounting kit.
The lightbar is completely wired at the factory and does not need any additional internal wiring. For typical
installations with common control systems, see the wiring schematics in the Appendix starting on page 56. The
basic light functions of the lightbar must be controlled by a user-supplied control panel.
Wiring the Lightbar in the Vehicle
AIRBAG DEPLOYMENT
Do not install equipment or route wiring in the deployment path of an airbag.
Failure to observe this warning will reduce the effectiveness of the airbag, or potentially dislodge the
equipment, causing serious injury or death.
SEAT REMOVAL PRECAUTION
If a vehicle seat is temporarily removed, verify with the vehicle manufacturer if the seat needs to be
recalibrated for proper airbag deployment.
Failure to follow this warning cause serious injury or death.
BATTERY EXPLOSION
To avoid a battery explosion, always disconnect the negative cable first and reconnect it last. Avoid
causing a spark when connecting near or to the battery. The gases produced by a battery can cause an
electrical explosion that could result in vehicle damage and serious injury.
1. Ensure that the lines are adequately fused as shown in the wiring schematics in the Appendix starting on
page 56. From the lightbar, route the CAT5 control cable into the vehicle’s cab or trunk near the eventual
location of the Serial Interface Module. An input cable is also provided with the Interface Module.
REVERSE POLARITY / MISWIRING
Reverse polarity or incorrect voltage may damage the light. To avoid damage to the light, ensure
that the battery voltage is the same as the voltage rating of the light and that the correct polarity is
observed. If you are connecting to a cigarette lighter plug, connect the positive wire to the center
terminal and connect the negative wire to the outer terminal.
2. Route and connect the lightbar’s black lead to the vehicle battery’s ground (–GND) terminal.
3. Route and connect the lightbar’s red lead through a 40 A Maxi™ fuse and fuse holder (or equivalent) at the
source, which is the positive battery terminal (+BAT).
30
Legend Lightbar
Mounting the Serial Interface Module
Mounting the Serial Interface Module
The Serial Interface Module communicates between a user-supplied lightbar/siren controller, a SignalMaster
controller, or a switch box and the Legend. To minimize the number of discrete wires to the lightbar, control lead
functions are wired to the Interface Module through a 3-foot long, 24-conductor cable harness (Table 3.1 on
page 20). The information is converted to a digital format and communicated to the lightbar through the CAT5
serial communication cable. (The Discrete-Wired 24" Legend does not connect to the Serial Interface Module.)
LOCATION OF LIGHT SYSTEM CONTROLS
Light system controls must be located so that VEHICLE and CONTROLS can be operated safely under
all driving conditions.
NOTE: If you are using the Internal SignalMaster option, you must configure the Serial Interface Module before
installation as described in “Selecting Internal SignalMaster Control” on page 21.
UNIT REQUIRES SHELTER FROM WEATHER
The Serial Interface Module is NOT waterproof. It must be mounted in a location that is sheltered from
rain, snow, standing water, etc.
IMPORTANT: The Serial Interface Module must be installed within 36 in (91 cm) of the lightbar controller.
1. Use the Serial Interface Module as a template and scribe four drill-position marks at the selected mounting
location. Mounting centers are 2 in x 5.95 in (5.08 cm x 15.11 cm).
DRILLING PRECAUTIONS
DO NOT drill holes in ANY part of the Serial Interface Module. Damage to the unit, serious injury or
death may result.
DRILLING PRECAUTIONS
Before drilling holes, check the area into which you plan to drill to ensure you do not damage
vehicle components while drilling. All drilled holes should be de-burred and all sharp edges should
be smoothed. All wires going through drilled holes should be protected by a grommet or convolute/
split-loom tubing.
2. Drill four mounting holes at the drill-position marks, sized for the recommended user-supplied #8 mounting
hardware.
3. Secure the Serial Interface Module to the mounting surface with user-supplied #8 mounting hardware.
4. Install the lightbar’s CAT5 serial cable to the J3 output jack of the Serial Interface Module.
5. Install the three-foot-long, 24-conductor cable to the J1 input connector of the Serial Interface Module.
Legend Lightbar
31
Wiring the Legend
in the Vehicle
UNIT REQUIRES VENTILATION
The Serial Interface Module needs to radiate heat. Do not install it in an area where it cannot dissipate
heat into the air. Do not mount it near a heater duct.
Wiring the Serial Interface Module
SHOCK HAZARD
Strobe and HID light systems generate high voltages. Disconnect power from the system and wait
at least 5 minutes before opening the unit. Do not apply power to the unit while the unit is open.
Failure to follow this warning could result in serious injury or death.
NOTE: Powering multiple devices with a common control wire may cause one or more devices to briefly
remain functional after signal power is removed. For example, due to the high input filter capacitance, a
strobe supply can briefly supply the current required to signal a lightbar function to remain ON. If necessary,
use a relay to isolate devices with large filter capacitors (Figure 4.1). All components/wires are user-supplied.
Figure 4.1: Relay-isolating devices with large filter capacitors
RELAY
STROBE SUPPLY
CONTROL LEAD
(12 Vdc SIGNAL ACTIVATED)
+12 Vdc
*FUSE AMPERAGE DEPENDS
ON AMPERAGE OF DEVICES
290A5976
NOTE: After installation, check the entire system to ensure the lights are flashing properly and all light
system functions are operating properly.
Wiring the Serial Interface Module
For the wiring block diagram, see Figure 4.2.
Figure 4.2: Wiring block diagram
FUSE
1A
IGNITION
BLACK
BLACK / WHITE
16 AWG
WHITE
Wiring the Legend
in the Vehicle
FUSE*
SERIAL INTERFACE
MODULE
PART #8583446
CAT5 CABLE
MAXI FUSE
40 A
- +
BATTERY
BLACK 10 AWG
RED 10 AWG
290A5977
FUSE ELECTRICAL SOURCES
Always fuse current/voltage sources with a fuse connected near the power source. Be sure that the fuse
is properly rated to protect the electrical load, the wiring and the connectors used in the circuit. Failure
to follow this notice could result in vehicle or equipment damage.
32
Legend Lightbar
Wiring the Serial Interface Module
For typical installations with common controllers and switch boxes, see the wiring schematics in the Appendix
starting on page 56.
For wiring the controller’s functions to the Serial Interface Module’s 24-pin cable harness, see Table 4.1 on
page 35 and the figures on pages 35 though 37. If additional wire is necessary for the harness (except ground),
22 AWG wire is adequate. The ground wires must be extended with 16 AWG or better wire.
This section is an overview of default settings that are activated when connecting LED and MODE control wires to
12 Vdc (+BAT). All programming and changes to default settings should be done after bench testing the lightbar
and before installation. Programming is covered in “Programming Priority MODES 1, 2, 3, and INTERSECTION”
on page 23. For a description of the control wires from the Serial Interface Module, see Table 3.1 on page 20.
MODES 1, 2 , and 3
To activate a mode, apply 12 Vdc (+BAT) to a mode control wire. MODE 3 overrides MODE 2, and MODE 2
overrides MODE 1. You can program one of the 26 flash patterns in the lightbar’s library to each mode input.
STEADY BURN (LGD Models Only)
When the lightbar is equipped with one or more STEADY BURN LED modules, applying 12 Vdc (+BAT) to the
STEADY BURN control wire (red/white) turns on the LEDs when any MODE input is selected.
When 12 Vdc (+BAT) is applied to the FRONT CUTOFF control wire, the selected MODE operation is deactivated
to the front of the lightbar. Only the rear LEDs function. Additionally, with FLASH TAKEDOWN/ALLEY active,
only the ALLEY lights turn on.
REAR CUTOFF
When 12 Vdc (+BAT) is applied to the REAR CUTOFF control wire, the selected MODE operation is deactivated
to the rear of the lightbar. Only the FRONT LEDs flash.
NOTE: The operational setting for FRONT and REAR CUTOFF are not independent. The default setting is for
12 Vdc (+BAT) to be applied for the lightbar’s front and rear lightheads to turn them off (CUTOFF). To change
the default setting to turn on these LEDs when 12 Vdc is applied (ENABLE), see “FRONT/REAR ENABLE or
CUTOFF” on page 25.
INTERSECTION
When 12 Vdc (+BAT) is applied to the INTERSECTION control wire and a MODE control wire, it turns on the
INTERSECTION pattern. When 12 Vdc is removed, the lightbar returns to its previous state.
FLASH TAKEDOWN/ALLEY
When 12 Vdc (+BAT) is applied to the FLASH TAKEDOWN/ALLEY control wire and a MODE control wire, the
TAKEDOWN and ALLEY lights flash.
LEFT and RIGHT ALLEY Lights
When 12 Vdc (+BAT) is applied to the LEFT or RIGHT ALLEY control wire, the appropriate ALLEY LEDs turn on.
The LEFT and RIGHT ALLEY lights override the FLASH TAKEDOWN/ALLEY lights.
TAKEDOWN Lights
When 12 Vdc (+BAT) is applied to the TAKEDOWN control wire, the TAKEDOWN LEDs turn on. TAKEDOWN
overrides FLASH TAKEDOWN/ALLEY and FRONT CUTOFF.
Legend Lightbar
33
Wiring the Legend
in the Vehicle
FRONT CUTOFF
Wiring the Serial Interface Module
WORKLIGHTS
When 12 Vdc (+BAT) is applied to the WORKLIGHT control wire, the WORKLIGHT LEDs turn on.
LOW POWER
USE LOW POWER FUNCTION PROPERLY
Enabling the LOW POWER function in the lightbar will cause the light output to fall below current
light output standards and guidelines for emergency warning lights. Use extreme caution when using
this function. Ensure that the ambient light conditions are low enough that you are seen and that the
reduction of glare from the lightbar is safer than full light output in the situation. Failure to heed this
warning may result in serious injury or death to you or others in your vicinity.
NOTE: Low power mode is disabled when the lightbar is in MODE 3 or displaying the INTERSECTION flash
pattern.
Wiring the Legend
in the Vehicle
When 12 Vdc (+BAT) is applied to the LOW POWER control wire, the LEDs are dimmed to approximately
50 percent of their full brightness. LOW POWER is only functional in MODE 1 or MODE 2. LOW POWER
is disabled when switching to another flash pattern, including INTERSECTION. To use LOW POWER again,
disconnect 12 Vdc from the LOW POWER control wire and reapply 12 Vdc to the LOW POWER control wire
after a change in flash pattern occurs.
IGNITION
Connect the white wire from the supplied J1 cable harness on the Interface Module to a 1 A fuse. Connect the
fuse end as close as possible to switched ignition power. Power should also be present in the cranking position.
Connect the black and black/white wire from the 24-pin cable harness on J1 from the Serial Interface Module to
battery ground (–GND). Use 16 AWG wire to extend the cable length.
SignalMaster Connections
If SignalMaster operation is not activated by a control head or external controller, the SignalMaster LED heads
flash with the selected priority mode (MODE 1, 2, or 3) of operation.
External SignalMaster
The Serial Interface Module is preset for the External SignalMaster option. External operation uses the Serial
Interface Module to drive each SignalMaster directional warning head independently through an external Federal Signal SignalMaster controller or SS2000SM series siren (Figures 4.3 and 4.4 on page 35). Either device
provides an independent ground signal to turn on each head. To cross reference external SignalMaster wiring
to a Federal Signal controller or the SM2000SM series siren, see Table 4.1 on page 35.
Internal SignalMaster
Internal operation uses the lightbar’s built-in SignalMaster controller to generate directional warning patterns. With internal operation, an external SignalMaster controller is not needed. A standard low-current
switch box can activate the lightbar’s internal SignalMaster controller.
For the jumper setting in the Serial Interface Module, see “Selecting Internal SignalMaster Control” on
page 21. To activate the lightbar’s internal SignalMaster controller, apply 12 Vdc (+BAT) to the SignalMaster
control wires.
34
Legend Lightbar
Wiring the Serial Interface Module
Table 4.1: Cross reference for controller leads
24-Pin Harness from
the Serial Interface
Module
SignalMaster* Wire
(Figure 4.3)
SS2000SM* Wire
(Figure 4.4)
Green
White
Brown
White (1)
Brown (2)
Orange/Green
Orange
Orange (4)
Blue/Red
Gray
Gray (6)
Red
Green/Black/White
Orange
Red/Green
Green
Green (3)
Purple
Purple (5)
Yellow
White/Red
Yellow (7)
Blue
Blue (8)
*Wire colors as described in the controller’s installation instructions.
Figure 4.3: SignalMaster 331105 controller (External)
Wiring the Legend
in the Vehicle
SIGNALMASTER CONTROLLER
331105 SHOWN
NOTE: FOLLOW THE
CONTROLLER’S INSTALLATION
INSTRUCTIONS FOR POWER,
GROUND, AND OTHER
POSSIBLE FUNCTIONS.
WHITE
BROWN
GREEN
ORANGE
VIOLET
GRAY
YELLOW
BLUE
RED
GREEN
GREEN/BLACK/WHITE
ORANGE/GREEN
ORANGE
BLUE/RED
RED/GREEN
WHITE/RED
TO J1 ON
INTERFACE MODULE
290A5978B
Figure 4.4: SmartSiren SS2000SM Series controller (External)
+B
LIG
A
Sig T
na
HT
FU lM
S
SE aste
AU
r 3
XO
UT
2
C
KE
YP
WHT (1)
BRN (2)
GRN (3)
ORN (4)
PRP (5)
GRA (6)
YEL (7)
BLU (8)
AD
TN
O
AB
MI
RED
GREEN
GRN/BLK/WHT
ORANGE/GREEN
ORANGE
BLUE/RED
RED/GREEN
WHITE/RED
PU
1
Sig
na
Sm
art
lM
Sir
en
C
D
NC
C
E
as
ter
SS
20
00
SM
BLK (11) 14 AWG – GND
RED (10) 14 AWG + BAT
TO J1 ON
INTERFACE MODULE
NOTE: FOLLOW THE SS2000SM SERIES INSTALLATION
Legend Lightbar
INSTRUCTIONS FOR OTHER WIRING.
FUSE
5 AMP
290A5979
35
Wiring the Serial Interface Module
Figure 4.5: SignalMaster control functions wired to ground for External (default) control
POWER (+12 Vdc)
1A
BLACK/RED
MODE 3
BLUE/WHITE
MODE 2
1A
BLUE
MODE 1
1A
RED/WHITE
STEADY BURN
1A
BLUE/BLACK
INTERSECTION
1A
RED/BLACK
FLASH TAKEDOWN/ALLEY
1A
ORANGE/RED
RIGHT ALLEY
1A
GREEN/BLACK
LEFT ALLEY
1A
WHITE/BLACK
TAKEDOWNS/WORKLIGHTS
1A
GREEN/WHITE
FRONT CUTOFF/ENABLE
1A
ORANGE/BLACK
REAR CUTOFF/ENABLE
1A
WHITE/BLACK/RED
LOW POWER
1A
BLACK/WHITE/RED
LIGHTBAR TEST
RED
1 (LEFT)
GREEN
2
GREEN/BLACK/WHITE
3
ORANGE/GREEN
4
ORANGE
5
BLUE/RED
6
RED/GREEN
7
WHITE/RED
8 (RIGHT)
Wiring the Legend
in the Vehicle
1A
MOMENTARY
SWITCHES 1–8
*
IGNITION
1A
WHITE
IGNITION POWER
BLACK
GROUND 1
BLACK/WHITE
GROUND 2
* IGNITION POWER INCLUDES POWER IN THE CRANKING POSITION
36
Legend Lightbar
J1 CABLE TO
SERIAL INTERFACE
MODULE
290A5980B
Wiring the Serial Interface Module
Figure 4.6: SignalMaster control functions wired to 12 Vdc for Internal control
POWER (+12 Vdc)
1A
MODE 3
BLUE/WHITE
MODE 2
BLUE
MODE 1
1A
RED/WHITE
STEADY BURN
1A
BLUE/BLACK
INTERSECTION
1A
RED/BLACK
FLASH TAKEDOWN/ALLEY
1A
ORANGE/RED
RIGHT ALLEY
GREEN/BLACK
LEFT ALLEY
WHITE/BLACK
TAKEDOWN/WORKLIGHTS
GREEN/WHITE
FRONT CUTOFF/ENABLE
ORANGE/BLACK
REAR CUTOFF/ENABLE
RED
LEFT
GREEN
CENTER
GREEN/BLACK/WHITE
RIGHT
ORANGE/GREEN
WARN 1
1A
ORANGE
WARN 2
1A
BLUE/RED
WARN 3
1A
RED/GREEN
WARN 4
1A
WHITE/RED
FAST
1A
WHITE/BLACK/RED
LOW POWER
1A
BLACK/WHITE/RED
LIGHTBAR TEST
1A
WHITE
IGNITION POWER
BLACK
GROUND 1
BLACK/WHITE
GROUND 2
1A
1A
1A
1A
1A
1A
1A
1A
1A
1A
*
IGNITION
Wiring the Legend
in the Vehicle
BLACK/RED
J1 CABLE TO
SERIAL INTERFACE
MODULE
* IGNITION POWER INCLUDES POWER IN THE CRANKING POSITION
290A5981E
Legend Lightbar
37
Wiring the Stop/Turn/Tail Lights
Wiring the Stop/Turn/Tail Lights
The lightbar’s stop/turn/tail lights are a factory-configured option. The lightbar is shipped with the option’s threeconductor cable ready for splicing into the vehicle harness. For the location of the lights, see Figure 3.4 on page 21.
QUALIFICATIONS
To properly connect a stop/tail/turn light, you must have a good understanding of automotive
mechanical and electrical procedures and systems along with proficiency in the installation and service
of safety warning equipment. Always refer to the vehicle’s service manuals when performing equipment
installations on a vehicle.
After mounting and wiring the lightbar to the vehicle, follow these steps to wire the lightbar’s stop/turn/tail lights:
BATTERY EXPLOSION
To avoid a battery explosion, always disconnect the negative battery cable first, and reconnect it last.
Avoid causing a spark when connecting near or to the battery. The gases produced by a battery can
cause a battery explosion that could result in vehicle damage and serious injuries.
Wiring the Legend
in the Vehicle
1. Disconnect the vehicle battery’s negative ground cable, then the positive cable.
2. Locate the three-conductor cable exiting the lightbar with red, black, and green wires.
NOTE: If installing the option in a vehicle that has its turn-signal lights separate from its brake
lights, you must purchase a tail light converter.
3. Splice the appropriate cables into the vehicle’s wiring (Figure 4.7). The input leads require a positive
(+) 12 Vdc signal to activate.
4. Reconnect the battery’s positive terminal, then the negative terminal.
5. Test to verify that the lightbar’s stop/turn/tail lights turn on and off with the vehicle’s stop/turn/tail lights.
Figure 4.7: Stop/turn/tail wiring between lightbar and vehicle harness
FROM LIGHTBAR
TYPICAL
CAR WIRING
YELLOW
RED
BLACK
GREEN
LEFT BRAKE LIGHT
TAIL LIGHT
BROWN
GREEN
RIGHT BRAKE LIGHT
290A5982
38
Legend Lightbar
Wiring the Takedown or Worklights (LGD24 Models Only)
Wiring the Takedown or Worklights (LGD24 Models Only)
The lightbar’s worklights are a factory-configured option. The lightbar is shipped with the option’s three-conductor
cable ready for splicing into the vehicle harness. For the location of the lights, see Figure 3.4 on page 23.
BATTERY EXPLOSION
To avoid a battery explosion, always disconnect the negative battery cable first, and reconnect it last.
Avoid causing a spark when connecting near or to the battery. The gases produced by a battery can
cause a battery explosion that could result in vehicle damage and serious injuries.
1. Disconnect the vehicle battery’s negative ground cable, then the positive cable.
2. Locate the three-conductor cable exiting the lightbar with red, black, and green wires.
3. Connect the wires to switched 12 Vdc positive signals to activate (Figure 4.8).
NOTE: High Power Mode overrides the Low Power Mode, i.e., if both lines are activated, the worklights
come on in High Power Mode. Low Power Mode dims the lightbar to 50 percent of full brightness.
4. Reconnect the battery’s positive terminal, then the negative terminal.
Wiring the Legend
in the Vehicle
5. Test the lightbar to verify that it operates properly.
Figure 4.8: Worklight wiring between lightbar and switched +12 Vdc
RED
FROM LIGHTBAR
GREEN
BLACK
HIGH-POWER WORK LIGHT +12 Vdc
LOW-POWER WORK LIGHT +12 Vdc
290A5983
Wiring for 12" Legends
The 12" Legend models are available with either an internal flasher that randomly flashes the two lightheads or
an external flasher that simultaneously flashes the two lightheads.
Figure 4.9: Internal/External flasher wiring for 12-inch Legends
INTERNAL FLASHER WIRING
FROM LIGHTBAR
RED
(+12 VDC) MODE 1
WHITE
PATTERN SELECT
BLACK
GROUND (−)
EXTERNAL FLASHER WIRING
RED
FROM LIGHTBAR
+12 VDC
GREEN CHANNEL A (FRONT OF LIGHTBAR)
WHITE CHANNEL B (REAR OF LIGHTBAR)
BLACK GROUND (−)
290A6853B
Legend Lightbar
39
5
Maintaining and Servicing the Legend
QUALIFICATIONS
To properly service a light assembly, you must have a good understanding of automotive electrical
procedures and systems along with proficiency in the installation and use of safety warning equipment.
Establishing a regular maintenance schedule for the Legend extends the life of the lightbar and ensures safety.
Periodically check that the lightbar operates properly and that all mounting hardware is securely fastened to the
vehicle. Also, inspect the domes and lenses for cracks, crazing (hairline cracks), discoloration, and other defects.
For service, support, or replacement parts, contact the Federal Signal Service Department at 1-800-433-9132,
7 am to 5 pm, Monday through Friday (CT).
BATTERY EXPLOSION
To avoid a battery explosion, always disconnect the negative cable first and reconnect it last. Avoid
causing a spark when connecting near or to the battery. The gases produced by a battery can cause an
electrical explosion that could result in vehicle damage and serious injury.
BURN HAZARD
After prolonged operation, the lightbar gets hot and can cause burns. Do not touch the lightbar while or
shortly after it has been operating. Always allow the lightbar to cool before handling.
Servicing the Lightbar Domes
Servicing the lightbar domes includes removing them and inspecting their seals and hardware to ensure that the
domes remain secure and watertight. Inspection also involves checking the domes for cracks, crazing (hairline
cracks) and other defects. For replacement parts, see Table 5.2 on page 49.
CRAZING/CHEMICALS
Crazed, cracked, or faded domes or reflectors reduce the light output and the effectiveness of the
lighting system. Domes or reflectors showing this type of aging must be replaced.
Failure to follow this warning may result in bodily injury or death to you or others.
STATIC SENSITIVE DEVICE
The lightbar’s circuitry can be damaged by an electrostatic discharge (ESD). Follow anti-static procedures
while installing the lightbar.
PROPERLY TIGHTEN SCREWS/NUTS
To prevent damage to the lightbar, do not overtighten the screws or nuts.
Table 5.1: Domes and ROC panel assemblies for LGD/LPX models
40
Legend Lightbar
Servicing the Lightbar Domes
Model
LGD24/LPX24
LGD45/LPX45
LGD53/LPX45
LGD61/LPX61
LGD70/LPX70
Domes
Driver Side
Passenger Side
ROC Panels
Two End
Driver Side
Passenger Side
Two End
Two Intermediate
Driver-Side
Center 1
Center 2
Passenger Side
Two End
Two Center
Two Intermediate
Driver Side
Center
Passenger Side
Driver-Side
Center 1
Center 2
Center 3
Passenger Side
Two End
One Center
Two Intermediate
Two End
Three Center
Two Intermediate
Removing and Inspecting the Domes
1. Remove the 1/4"-20 Phillips-head barrel nuts securing the dome, then carefully remove the dome to avoid
damaging the lip seal (Figure 5.1).
2. Verify that an O-ring is under the head of each barrel nut and not stuck to the dome. Use a wooden or plastic
pick to carefully remove the O-rings from the dome to prevent damaging them.
3. Inspect the O-rings and the lip seal for deformation, brittleness, cuts, or tears. To maintain watertightness,
replace a questionable O-ring or seal.
4. Inspect the dome for cracks, crazing (hairline cracks), discoloration, and other defects. Replace defective domes.
For replacement parts, see Table 5.2 on page 49.
Figure 5.1: Four barrel nuts in passenger-side end dome
Maintaining and
Servicing the Legend
290A5984
Legend Lightbar
41
Replacing the ROC Panel Assemblies
Reinstalling the Domes
1. Place the domes over the ROC panel, ensuring that it is properly seated in the lip seal.
PROPERLY TIGHTEN NUTS
To prevent damage to the lightbar, do not overtighten the nuts.
2. To prevent cross-threading, turn the barrel nuts counterclockwise until you hear a click, then tighten them.
Replacing the ROC Panel Assemblies
1. Remove the dome over the panel as described in “Removing and Inspecting the Domes” above.
2. Remove the 1/4" bolt and disconnect the black ground wire.
3. Invert the ROC panel, note and record the connections, then disconnect the wires and harnesses.
4. If required, remove the controller as described in “Removing the Controller” in the next section.
5. On the replacement ROC panel connect the wires and harnesses.
6. Reinstall the controller if necessary, as described in “Reinstalling the Controller” on page 44.
7. Turn the ROC panel over and connect the ground wire using the 1/4" hex bolt removed in step 2.
8. Reattach the dome as described in “Reinstalling the Domes” above.
Servicing the Lightbar Controller
The controller generates and receives the signals that control the lightbar’s flash patterns. If the lightbar fails, the
problem may be one or more blown fuses. To replace a fuse, you can remove the controller from the aluminum
extrusion without completely disconnecting it.
STATIC SENSITIVE DEVICE
The lightbar’s circuitry can be damaged by an electrostatic discharge (ESD). Follow anti-static procedures
while installing the lightbar.
Removing the Controller
Maintaining and
Servicing the Legend
1. Remove the passenger-side end dome as described in “Removing and Inspecting the Domes” on page 41.
2. Remove the 1/4" hex bolt and disconnect the black ground wire.
3. Invert the panel to expose the controller.
4. Note and record connections, then disconnect the wires and harnesses.
5. Compress the lock tab on the nylon standoffs and remove controller with its standoffs from ROC panel.
6. Compress the secondary lock tabs and remove the standoffs from controller.
42
Legend Lightbar
Servicing the Lightbar Controller
Figure 5.2: Controller and standoffs removed from ROC panel
NYLON STANDOFF (4)
CONTROLLER
PASSENGER-SIDE
END PCB
290A6861
Maintaining and
Servicing the Legend
Legend Lightbar
43
Servicing the Lightbar Controller
Replacing the Controller Fuses
1. The lightbar controller has four 15 A fuses and one 5 A fuse. To see if a fuse is bad, inspect the horseshoeshaped wire on its side to see if it has burned through and broken the circuit (Figure 5.4). For replacement
fuses, see Table 5.2 on page 49.
2. To remove a fuse, pull it straight out to avoid damaging the connector.
3. Gently press a new fuse of the same type and amperage into the connector. Ensure that all pins are properly
seated.
Figure 5.3: Fuses on lightbar controller PCB
GOOD FUSE:
WIRE INTACT
15 A 15 A
BAD FUSE:
WIRE BURNED
THROUGH
15 A 15 A 5 A
290A5987B
Reinstalling the Controller
1. Insert the four standoffs into the controller.
2. Gently push the controller’s standoffs into their holes on the ROC panel until they lock.
3. Reconnect all wires and harnesses.
4. Turn the PCB over and place it on the two standoffs with the holes in the PCB centered over the holes in the
standoffs. Ensure that the ground wire is not caught between the edges of the PCBs.
Maintaining and
Servicing the Legend
5. Gently push on the PCB until it clicks into place.
6. Turn the ROC panel over and connect the ground wire using the 1/4-inch hex bolt that you removed in step
2 in "Removing the Controller" on page 42.
7. Place the dome over the PCB, ensuring that it is properly seated in the lip seal.
8. To prevent cross-threading, turn the barrel nuts counterclockwise until you hear a click, then tighten them
(Figure 5.1 on page 41).
9. Test the lightbar to ensure that it operates properly.
44
Legend Lightbar
Replacing a Lightbar Base
Replacing a Lightbar Base
The lightbar’s bases secure and protect the LED circuit boards and controller. Regularly inspect them for loose
hardware, cracks and weather-tightness. For replacement parts, see Table 5.2 on page 49.
To replace a base:
1. Remove the domes and ground connection.
a.
Remove the lightbar’s domes as described in “Removing and Inspecting the Domes” on page 41.
b.
Invert the PCB and remove the 5/16" hex bolt and ground wire from the aluminum extrusion.
c.
Note and record the connections, then disconnect the wires and harnesses.
d.
Remove the base-retainer screw and the cable clamp on the cable-entry side.
2. Remove the base.
a.
If the lightbar is on the vehicle: Slide the base from the aluminum extrusion, catching the carriage
bolts as they are freed from the channels.
If the lightbar is off the vehicle: Invert the lightbar on soft rags or cardboard to protect the domes,
then slide the base from the aluminum extrusion. The carriage bolts can then be removed from base
Figure 5.4: Base removed from aluminum extrusion
INTERMEDIATE
PCB ASSEMBLY
PCB CONNECTOR
END PCB
ASSEMBLY
ALUMINUM
EXTRUSION
Maintaining and
Servicing the Legend
BASE RETAINER SCREW
LIP SEAL
BASE
END GASKET
CARRIAGE BOLT (4)
290A6863
Legend Lightbar
45
Replacing an End Gasket
b.
Remove the vent plugs and/or grommets from base(s), if applicable.
3. Reinstall the new base with the vent plugs and/or grommets from the previous base(s).
PROPERLY TIGHTEN NUTS/SCREWS
To prevent damage to the lightbar, do not overtighten nuts and screws.
a.
Be sure the new base has a new end gasket and lip seal. See “Replacing an End Gasket” on page 46
and “Replacing a Lip Seal” on page 47.
b.
If the lightbar is on the vehicle: Start the base onto extrusion, insert the first two long carriage bolts
into their wells, then hold the bolts up while sliding the base further onto the extrusion. Repeat this
procedure with the two remaining long carriage bolts. The top barrel nuts may be temporarily installed
to hold the bolts in position.
If the lightbar is off the vehicle: With the lightbar inverted, start the base onto extrusion, then drop the
carriage bolts into each of their wells.
4. Slide the base onto the extrusion. For a flush fit between the bases, apply pressure to the ends of the outer
bases and tighten the base retainer screw.
5. Reinstall the PCBs.
a.
Reconnect the cable clamp on the cable-entry side.
b. Reconnect the wires and harnesses and invert the PCB on the plastic standoffs. Ensure that the
ground wire is not caught between the edges of the PCBs.
c.
Reconnect the ground wire(s) to the aluminum extrusion using the 5/16" hex bolt(s) removed in step
1.b. on page 45. Do not overtighten the bolts.
6. Reinstall the domes as described in “Reinstalling the Domes” on page 42.
Replacing an End Gasket
The end gaskets cushion the aluminum extrusion against the end of the end bases for a snug fit. Check the end
gaskets for cracks, tears, or brittleness.
To replace the gasket:
Maintaining and
Servicing the Legend
1. Remove the old gasket from inside the end base.
2. Peel the paper backing from the new gasket.
3. Center the gasket in the end of the cavity in the end base.
4. Press the gasket along its length so that it adheres evenly.
Figure 5.5: End gasket in the end base cavity
END
GASKET
290A5989C
46
Legend Lightbar
Replacing a Lip Seal
Replacing a Lip Seal
Check the lip seals for cracks tears, or brittleness. To replace the seal:
1. Remove the lightbar’s domes as described in “Removing and Inspecting the Domes” on page 41.
2. Note the joint position of the seal, then remove the old lip seal.
3. Install the seal with the fins angled downward as shown in Figure 5.7, positioning the joint in the same position as original (slightly off-center along the straight surface where the bases mate). The edge of the seal
should be flush with the top surface.
Figure 5.6: Lip seal on edge of plastic dome
LIP SEAL FINS
BASE
290A5990B
Adjusting the Aim of the HotFoot LED Assemblies (LGD45 and LGD53 Only)
You can horizontally adjust the aim of the LED assemblies by positioning them straight, at 45 degrees, or at
90 degrees. Each position has ±10 degrees of adjustment. To adjust the aim:
Figure 5.7: Adjusting the aim of the LED assembly
Maintaining and
Servicing the Legend
PHILLIPS SCREW SECURES LED
MOUNTING PLATE TO FOOT
TWO PHILLIPS SCREWS SECURE LED
ASSEMBLY TO MOUNTING PLATE
290A6122-01
Legend Lightbar
47
Cleaning the Domes
1. Remove the Phillips Plastite screw that secures the LED mounting plate to the foot (Figure 5.10).
2. Lift and slide the LED assembly off the foot just far enough to invert the assembly.
3. Loosen (or remove for a major adjustment) both Phillips Plastite screws securing the LED assembly to the
mounting plate.
4. Rotate the LED assembly to the selected position.
DO NOT OVERTIGHTEN SCREWS
To avoid damage to the HotFoot assembly, do not over tighten the screws.
5. Tighten both Phillips Plastite screws securing the LED assembly to the mounting plate.
6. Secure the mounting plate to the foot by tightening the Plastite screw.
Cleaning the Domes
Periodically cleaning the domes using proper procedures and compatible cleaners will prolong their service life.
Unlike the reflectors, the domes do not have to be removed from the lightbar for cleaning.
CRAZING/CHEMICALS
Crazed, cracked or faded domes or reflectors reduce the light output and the effectiveness of the lighting
system. Tops or reflectors showing this type of aging must be replaced.
Failure to follow this warning may result in bodily injury or death to you or others.
CRAZING/CLEANING SOLUTIONS
The use of cleaning solutions, such as strong detergents, solvents, and petroleum products, can cause
crazing (cracking) of the domes and reflectors.
Failure to follow this warning can damage the domes and reflectors and may result in bodily injury or
death to you or others.
Maintaining and
Servicing the Legend
1. Rinse the domes with lukewarm water to loosen dirt and debris.
2. Use a mild soap, lukewarm water, and a soft cloth to gently clean the plastic surfaces. To avoid damaging
the reflectors, do not use heavy pressure or caustic, abrasive, or petroleum-based cleaners.
3. Rinse and dry the plastic surfaces with a soft cloth to prevent water spotting.
To remove fine scratches and haze, use a specialty plastic cleaner/polish such as Plexus® and a soft cloth. You
can also use a high quality automotive paste cleaner/wax that is non-abrasive.
The most effective product you can use for cleaning, protecting, and polishing clear and colored plastics is
Plexus. Over time, exposure to heat, sunlight, and smog causes plastic to fade, discolor, scratch, or become
brittle. Plexus seals the pores of the plastic, making the domes easier to clean, improving scratch resistance,
and increasing product longevity.
48
Legend Lightbar
Cleaning the Reflectors
Cleaning the Reflectors
Use a damp cloth to gently clean the plastic surfaces. To avoid damaging the reflectors, do not use heavy
pressure or caustic, abrasive, or petroleum-based cleaners.
Replacement Parts
This section contains a partial list of replacement parts. To order replacement parts, call the Federal Signal
Service Department at 800-433-9132, 7 a.m. to 5 p.m., Monday through Friday (Central Time) or contact your
nearest distributor.
Table 5.2: Legend replacement parts
Description
Part Number
PCB Assembly, Intermediate (Configured)
Contact Federal Signal
PCB Assembly, End (Configured)
Contact Federal Signal
PCB Assembly, Center (Configured)
Contact Federal Signal
PCB Assembly, Controller (Configured)
PCB Assembly, Controller, Steady Burn Red, Driver Side (CA)
PCB Assembly, Controller, Steady Burn Red, Driver and Passenger Side (CA)
Fuse, Mini, Controller, 32 V, 15 A
Fuse, Mini, 32 V, 5 A
Contact Federal Signal
Contact Federal Signal
Contact Federal Signal
148181-06
148181-03
Fuse Holder, Maxi
143137
Fuse, Maxi, 20 A
148182-02
Fuse, Maxi, 40 A
148182-01
Gasket, End
Seal, Lip, Clear (5.5 ft per end section; 3.5 ft per center section)
O-Ring, Top Nut, 5/16"
Standoff, Nylon
8653110
8583020-01
7067016
230315
Base, End, Clear
8653100
Top, End, Clear
8653101
Top, End, Amber
8653101-02
Top, End, Blue
8653101-03
Top, End, Red
8653101-04
8653102
Top, Center, Clear
Maintaining and
Servicing the Legend
Base, Center, Clear
8653103
Top, Center, Amber
8653103-02
Top, Center, Blue
8653103-03
Top, Center, Red
8653103-04
Top, End, 12", Clear (12" and 24" models)
653176
Top, End, 12", Amber (12" and 24" models)
8653176-02
Legend Lightbar
49
Troubleshooting the Lightbar
Troubleshooting the Lightbar
This section provides troubleshooting assistance for common problems. If you have any questions left
unanswered, call the Federal Signal Service Department at 1-800-433-9132, 7 am to 5 pm, Monday through
Friday (CT).
Table 5.3: Troubleshooting tips
Problem
The lightbar does not
light
Corrective Action
✔ Check that the lightbar's red power line (+BAT) and the black ground- power
line (–GND) are properly connected to a good, fully charged 12-volt battery.
✔ Ensure that the ground connection from the lightbar controller to the aluminum
extrusion is good.
✔ Check that the CAT5 cable is connected to the Serial Interface Module (J1) and
there are no damaged pins in the sockets.
✔ Try a new CAT5 cable.
✔ Check the connections on the Serial Interface Module:
1. the black wire and the black/white wire are connected to ground (–GND)
2. the white wire is connected to 12 Vdc
3. a MODE wire has 12 Vdc
✔ Check the position of Switch 1 on SW-2 in the Serial Interface Module. If Switch
1 is down (ON), ensure that the ENABLE control wires (green/white and orange/
black) have 12 Vdc applied.
✔ Check the positions of the DIP switches in the Serial Interface Module. See Fig-
ure 3.3 on page 22 and Table 3.2 on page 23.
✔ Check the fuses on the mainbar controller (Figure 5.3 on page 44).
An LED module does
not light
✔ Swap the LED board with good board to see if the board is bad.
✔ Check the connections of the cable that goes from the lightbar controller to the
LED ROC board.
Maintaining and
Servicing the Legend
✔ Ensure that STEADY BURN switches on the lightbar controller (SW3 PSR for the
passenger side and SW3 DSR on the driver side) are set correctly (Figure 5.3 on
page 44).
✔ If it is a rear module, check the SignalMaster connections.
Half of an LED module does not light
✔ Replace the ROC board that the LED is on.
The lightbar turns
off when the FLASH
TAKEDOWN/ALLEY
lights turn on
✔ Ensure that the vehicle battery is fully charged.
✔ Check that the lightbar’s red power line (+BAT) and black ground-power line (–
GND) are properly connected to a good, fully charged 12-volt battery.
✔ Check the red power line (+BAT) and the black ground-power line (–GND) con-
nections in the lightbar and vehicle.
continued on next page
50
Legend Lightbar
Troubleshooting the Lightbar
Table 5.3: Troubleshooting tips (continued from previous page)
Problem
Corrective Action
The lightbar has a
delayed response to
being shut off
✔ Ensure that the connections on the Serial Interface Module are kept separate
A FLASH
TAKEDOWN/ALLEY
light stays on with
ignition power applied
✔ Ensure there is no voltage on the corresponding control wire.
TAKEDOWN/ALLEY lights work, but
FLASH TAKEDOWN/
ALLEY lights do not
work
✔ Ensure that 12 Vdc is applied to the TAKEDOWN and ALLEY (red/black) control
Only one
TAKEDOWN light
turns on
✔ Check the connections from the lightbar controller to the ROC boards and ensure
HotFoot
TAKEDOWN/ALLEY lights flash
with MODE, independent of FLASH
TAKEDOWN/
ALLEY input
✔ Check that the TAKEDOWN and ALLEY switches (SW3 FA and FT) are set in the
SignalMaster LEDs
do not light
✔ Check the jumper and switch settings on the Serial Interface Module. Ensure
from strobe supplies.
✔ Check all the ground connections, especially on the Serial Interface Module.
✔ To see if the ROC board is bad, swap it with a similar board.
✔ Swap the cables on the lightbar controller outputs with a known good output. If
the problem moves to another takedown or alley light, send the lightbar controller
to Federal Signal for repair.
wire.
✔ Check the 12 Vdc power and negative ground connections to the lightbar to en-
sure there is enough current.
they are in the proper locations.
ON position on the lightbar controller (Figure 5.3 on page 44).
they are both set for the correct operation. See Figure 3.3 on page 22 and Table
3.2 on page 23.
✔ Ensure that Switch 4 on SW-2 is in the correct position for the selected operation
on the Serial Interface Module and ignition power was removed and reapplied.
SS2000SM, ensure that the connector has power and the ground is connected to
Pins 10 and 11 on the SignalMaster plug.
Legend Lightbar
51
Maintaining and
Servicing the Legend
✔ Check the connections at the SignalMaster controller. If the controller is a model
6
Cloning Flash Patterns from Vehicle to Vehicle
The Legend and RS485 system make it fast and easy to copy and upload (clone) flash patterns to other Legendequipped vehicles through the Serial Interface Module.
Cloning requires:
•
laptop or desktop computer with Windows® 98 or later
•
one free USB port
•
EPIC™ USB programmer with USB A-B cable, programming cable, and software CD (Federal Signal part
number ROCPR1, sold separately)
NOTE: Cloning only transfers the programmed flash patterns. If you have changed default jumper and switch
settings on the source Interface Module and lightbar controller and want the same settings for each vehicle, you
must manually set them.
To change the SignalMaster Internal/External control settings, see pages 21 and 22.
Installing the Programmer Software
1. Close all applications on your computer.
2. Insert the melabs Programmer CD into your CD-ROM drive.
3. When the Programmer Setup Wizard appears, click Next (Figure 6.1).
NOTE: If the Wizard does not appear, double-click My Computer, then double-click the icon for your
CD-ROM drive. Double-click the file setup.exe.
4. Follow the on-screen instructions to complete the installation.
Figure 6.1: Programmer Setup Wizard: click Next
52
Legend Lightbar
Connecting the Programmer
Connecting the Programmer
2. The first time you connect the programmer, the New Hardware Wizard appears. Click Next to install the
device driver (Figure 6.3).
IMPORTANT: When the programmer is ready, its LED glows green. Do not disconnect the programmer
when the LED glows red, which indicates that the programmer is connecting or cloning.
3. Connect the EPIC SIDE of the programming cable to the five inner pins on the programmer.
4. On the Serial Interface Module to be downloaded (source), use a 1/4-inch driver to remove the four 8-32 x
1/4 hex-head screws and remove the cover (Figure 3.2 on page 21).
5. Connect the programming cable to the source Serial Interface Module.
Figure 6.2: EPIC programmer cable connections
TO
COMPUTER
USB PORT
SERIAL
INTERFACE
MODULE
EPIC
PROGRAMMER
INNER PINS
Figure 6.3: New Hardware Wizard: click Next
Legend Lightbar
53
Cloning Flash Patterns
from Vehicle to Vehicle
1. Connect the EPIC programmer to a USB port on your computer with the USB A-B cable (Figure 6.2).
Cloning the Serial Interface Module
Cloning Flash Patterns
from Vehicle to Vehicle
Cloning the Serial Interface Module
1.Click Start > Programs > melabs Programmer > melabs Programmer.
2. In the drop-down list, select PIC16F877A for the Legend.
Figure 6.4: Legend PIC file
READ ICON
3. To download the file from the source Serial Interface Module, click the Read icon.
4. During downloading, the EPICWin software displays a Reading progress bar.
Figure 6.5: Download progress
5. When downloading is finished, click OK and disconnect the programming cable from the source Interface
Module.
Figure 6.6: Download complete: click OK
6. On the Serial Interface Module to be cloned (target), use a 1/4-inch driver to remove the four 8-32 x 1/4 hexhead screws and remove the cover.
7. Connect the programming cable to the target Serial Interface Module (Figure 6.2 on page 53).
54
Legend Lightbar
Cloning the Serial Interface Module
8. To start cloning, click the Program icon.
Cloning Flash Patterns
from Vehicle to Vehicle
Figure 6.7: Click the Program icon to clone.
PROGRAM ICON
9. During cloning, the EPICWin software displays a Programming progress bar.
Figure 6.8: Programming progress
10. When cloning is finished, click OK and disconnect the programming cable from the target Interface Module.
Figure 6.9: Cloning complete: click OK
11. Reinstall the covers on the source and target Interface Modules.
12. To clone another target Interface Module, repeat steps 6 through 10. Be sure to reinstall the cover when
finished.
13. After cloning, test the light system to ensure that it is operating properly.
NOTE: For troubleshooting help, visit http://www.melabs.com/support/epicfixs.htm or contact the Federal
Signal Service Department at 1-800-433-9132, 7 am to 5 pm, Monday through Friday (CT).
Legend Lightbar
55
Appendix A: Wiring Schematics
This chapter has schematics showing the Legend lightbar with typical connections to these controllers:
• SignalMaster controller (external control)
• SW400SS Switch Module (internal control)
• SmartSiren Model SS2000SM
• Non-SignalMaster
• PA640
An Overview of the Discrete-Wired 24" Legend Lightbar
The Discrete-Wired 24" Legend is a special model that is designed to flash only one flash pattern as long as
power is supplied to the lightbar. Because the lightbar does not connect to the Serial Interface Module, it has no
CAT5 cable; the 10 AWG red and black cables are the only connections. An installer supplied-switch is required
(Figure A.1).
Schematic A.1: Discrete-wired 24" Legend lightbar
BLK
RED
−
+
20 A
INSTALLER-SUPPLIED
SWITCH
12 V BATTERY
LEGEND LIGHTBAR
290A6306
56
Legend Lightbar
Legend Lightbar
+
12 V BATTERY
−
SIGNALMASTER CONTROLLER (REMAINING
CONNECTIONS PER DEVICE INSTRUCTIONS)
BLU
YEL
GRY
VIO
ORG
GRN
BRN
WHT
WHT/RED
RED/GRN
BLU/RED
ORG
ORG/GRN
GRN/BLK/WHT
GRN
RED
40 A
WHT/BLK (TD)
RED/BLK (FL HAL)
GRN/BLK (L. AL)
BLU/WHT (MODE 2)
BLK/RED (MODE 3)
RED
BLK
BLK/WHT
BLK
IGNITION +
SWITCH BOX (REMAINING CONNECTIONS
PER DEVICE INSTRUCTIONS BOX)
TYPICAL CONNECTIONS, EXTERNAL CONTROL SIGNALMASTER
ORG/RED (R. AL)
Wiring Schematics
BLU (MODE 1)
WHT
CAT5
LEGEND LIGHTBAR
1A
Schematic A.2: Typical connections with a SignalMaster controller (External control)
290A6002
SERIAL INTERFACE
Appendix A: Wiring Schematics
57
Legend Lightbar
WHT/RED (FAST)
+
12 V BATTERY
−
SWITCH PANEL (REMAINING
CONNECTIONS PER DEVICE INSTRUCTIONS)
40 A
BLU (MODE 1)
WHT/BLK (TD)
RED/BLK (FL HAL)
GRN/BLK (L. AL)
BLK/RED (MODE 3)
BLU/WHT (MODE 2)
ORG/GRN (WARN1)
GRN/BLK/WHT (RIGHT)
GRN (CENTER)
RED (LEFT)
RED
BLK
BLK/WHT
BLK
IGNITION +
SWITCH BOX (REMAINING CONNECTIONS
PER DEVICE INSTRUCTIONS BOX)
TYPICAL CONNECTIONS, INTERNAL CONTROL SIGNALMASTER
WHT
290A6003
SERIAL INTERFACE
MOVE SW2 DIP
SWITCH POS.4 TO
THE DOWN POSITION
MOVE JP1 TO “INT”
CAT5
LEGEND LIGHTBAR
1A
Schematic A.3: Typical connections with a SW400SS Switch Module (Internal control)
ORG/RED (R. AL)
58
ORG (WARN2)
+12V
Wiring Schematics
Appendix A: Wiring Schematics
KEYPAD
INPUT
3
Legend Lightbar
−
2
1
OUTPUTS
A B C D
AUX
BLU (MODE 1)
+
12 V BATTERY
SS2000SM
(REMAINING CONNECTIONS
PER DEVICE INSTRUCTIONS)
MIC
SIGNALMASTER
FUSE
+BAT
LIGHTS
BLU/WHT (MODE 2)
BLK/RED (MODE 3)
RED/BLK (FL HAL)
RED
GRN
GRN/BLK/WHT
ORG/GN)
ORG
BLU/RED
RED/GRN
WHT/RED
SS2000SM
E
NO NC C
40 A
WHT (1)
BRN (2)
GRN (3)
ORN (4)
PRP (5)
GRA (6)
YEL (7)
BLU (8)
NONE (9)
RED+ (10)
BLK- (11)
SIREN
ORG/RED (R. AL)
GRN/BLK (L. AL)
WHT/BLK (TD)
RED
BLK
BLK/WHT
BLK
Wiring Schematics
TYPICAL CONNECTIONS: SS2000SM
IGNITION +
Schematic A.4: Typical connections with a SmartSiren controller
WHT
CAT5
LEGEND LIGHTBAR
1A
290A6004
SERIAL INTERFACE
Appendix A: Wiring Schematics
59
Legend Lightbar
12 V BATTERY
−
+
40 A
WHT/BLK (TD)
RED/BLK (FL HAL)
GRN/BLK (L. AL)
BLK/RED (MODE 3)
BLU (MODE 1)
RED
BLK
BLK/WHT
BLK
IGNITION +
SWITCH BOX (REMAINING CONNECTIONS
PER DEVICE INSTRUCTIONS BOX)
TYPICAL CONNECTIONS: NON-SIGNALMASTER
ORG/RED (R. AL)
60
BLU/WHT (MODE 2)
WHT
CAT5
LEGEND LIGHTBAR
1A
Schematic A.5: Typical connections with a non-SignalMaster controller
Wiring Schematics
290A6005
SERIAL INTERFACE MODULE
Appendix A: Wiring Schematics
Legend Lightbar
RED/BLK (FL TKD/AL)
BLK/RED (MODE 3)
30 A (REDUCED FOR
SHOWN INSTALLATION.
ADD’L DEVICES WILL
REQUIRE HIGHER AMP
FUSE – 80 A MAX)
20 A
BLU (MODE 1)
BLU/WHT (MODE 2)
2A
+
12 V BATTERY
−
12 AWG RED
12 AWG BLK
18 AWG GRN
18 AWG BLK
8 AWG RED
1 A FUSE
7 PLACES
40 A
MAXI FUSE
IGNITION+ (HOT IN CRANK
AND RUN) 18 AWG RED
PA640 (640000)
(REMAINING CONNECTIONS
PER DEVICE INSTRUCTIONS.
SEE INST SHT 255366.)
10 AWG RED
10 AWG BLK
BLK/WHT
TYPICAL CONNECTIONS: PA64000
Wiring Schematics
WHT/BLK (TD)
GRN/BLK (L.AL)
ORG/RED (R.AL)
BLK
IGNITION +
(HOT IN CRANK
AND RUN)
Schematic A.6: Typical connections with a PA640 controller
WHT
LEGEND LIGHTBAR
1A
CAT5
290A6503
SERIAL INTERFACE
Appendix A: Wiring Schematics
61
62
+
12 V BATTERY
−
Legend Lightbar
b
a
SW 8
SW 7
SW 6
SW 5
SW 4
SW 3
SW 2
SW 1
FLASH PATTERN CHANGE
GREEN
GRAY
FLASH TAKEDOWN / ALLEY
RIGHT ALLEY
BROWN
LEFT ALLEY
BROWN / WHITE
ORANGE
WORKLIGHT / TAKEDOWN
BLUE
MODE 2
REAR OF BAR, MODE 1 b
YELLOW
RED
FRONT OF BAR, MODE 1 a
ACTIVATE MODE 1 ALONE FOR REAR CUTOFF
ACTIVATE MODE 1 ALONE FOR REAR CUTOFF
5A
5A
5A
5A
5A
20 A
20 A
LEGEND LPXD DISCRETE LIGHTBAR
Schematic A.7: Typical connections for LPXD Discrete Legend
Wiring Schematics
290A7002
Appendix A: Wiring Schematics
blank page
2645 Federal Signal Drive, University Park, IL 60484-3167
Tel.: (800) 264-3578 • Fax: (800) 682-8022
www.fedsig.com
© 2010 Federal Signal Corporation