1
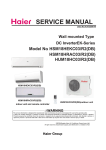
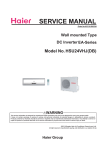
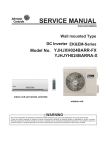
SERVICE MANUAL
Order No. AC1011S004V0
EK
HSU-09HEG03/R2(DB)
HSU09VHG(DB)
indoor unit and remote controller
2011
Haier Group
outdoor unit
1
6
7
9
14
5.1 Main functions and control specification of outdoor unit
14
5.2 The control system of outdoor unit
22
5.3
29
41
41
41
Service Diagnosis
49
65
8
69
9.1
Removal of Air Filter
69
9.2 Removal of Front panel
9.3 Removal of Horiaontal flap
71
………………………………
73
9.4
Drain pan ………………………………………………………… 74
9.5
Vertical Blades and Swing Motor ……………………………… 75
9.6
…………………………………………………… 76
9.7
………………………………………………… 77
9.8
……………………………………… 79
9.9
Removal of Outdoor panel …………………………………………………… 81
9.10 Removal of Electrical Box …………………………………………………… 84
9.11 Removal of Fan and Fan motor ………………………………………………85
9.12 Removal of fan motor bracket and partition ……………………………… 86
9.13 Removal of compressor and heat exchanger ……………………………… 87
10. Wiring Diagrams……………………………………………………………… 89
10.1 Indoor Unit
…………………………………………………………………… 89
10.2 Outdoor Unit …………………………………………………………………… 90
11. Circuit Diagrams
…………………………………………………………
91
12. Description of Coding rules of Unit Model …………………………… 94
Introduction
1. Introduction
1.1 Safety Cautions
Be sure to read the following safety cautions before conducting repair work.
The caution items are classified into “Warning” and “Caution”. The “Warning” items are especially important
since they can lead to death or serious injury if they are not followed closely. The “Caution” items can also lead
to serious accidents under some conditions if they are not followed. Therefore, be sure to observe all the safety
caution items described below.
About the pictograms
This symbol indicates an item for which caution must be exercised.
The pictogram shows the item to which attention must be paid.
This symbol indicates a prohibited action.
The prohibited item or action is shown inside or near the symbol.
This symbol indicates an action that must be taken, or an instruction.
The instruction is shown inside or near the symbol.
After the repair work is complete, be sure to conduct a test operation to ensure that the equipment operates
normally, and explain the cautions for operating the product to the customer.
1.1.1 Caution in Repair
Warning
Be sure to disconnect the power cable plug from the plug socket before disassembling the equipment for
a repair.
Working on the equipment that is connected to a power supply can cause an electrical shook.
If it is necessary to supply power to the equipment to conduct the repair or inspecting the circuits, do not
touch any electrically charged sections of the equipment.
If the refrigerant gas discharges during the repair work, do not touch the discharging refrigerant gas.The
refrigerant gas can cause frostbite.
When disconnecting the suction or discharge pipe of the compressor at the welded section, release the
refrigerant gas completely at a well-ventilated place first.
If there is a gas remaining inside the compressor, the refrigerant gas or refrigerating machine oil
discharges when the pipe is disconnected, and it can cause injury.
If the refrigerant gas leaks during the repair work, ventilate the area. The refrigerant gas can generate
toxic gases when it contacts flames.
The step-up capacitor supplies high-voltage electricity to the electrical components of the outdoor unit.
Be sure to discharge the capacitor completely before conducting repair work.A charged capacitor can
cause an electrical shock.
Do not start or stop the air conditioner operation by plugging or unplugging the power cable plug.
Plugging or unplugging the power cable plug to operate the equipment can cause an electrical shock or
fire.
1
Domestic Air Conditioner
Introduction
Warning
Do not repair the electrical components with wet hands. Working on the equipment with wet hands can
cause an electrical shock.
Do not clean the air conditioner by splashing water. Washing the unit with water can cause an electrical
shock.
Be sure to provide the grounding when repairing the equipment in a humid or wet place, to avoid electrical
shocks.
Be sure to turn off the power switch and unplug the power cable when cleaning the equipment. The
internal fan rotates at a high speed, and cause injury.
Do not tilt the unit when removing it. The water inside the unit can spill and wet the furniture and floor.
Be sure to check that the refrigerating cycle section has cooled down sufficiently before conducting repair
work. Working on the unit when the refrigerating cycle section is hot can cause burns.
Use the welder in a well-ventilated place. Using the welder in an enclosed room can cause oxygen
deficiency.
1.1.2 Cautions Regarding Products after Repair
Warning
Be sure to use parts listed in the service parts list of the applicable model and appropriate tools to
conduct repair work. Never attempt to modify the equipment. The use of inappropriate parts or tools can
cause an electrical shock, excessive heat generation or fire.
When relocating the equipment, make sure that the new installation site has sufficient strength to
withstand the weight of the equipment.
If the installation site does not have sufficient strength and if the installation work is not conducted
securely, the equipment can fall and cause injury.
Be sure to install the product correctly by using the provided standard installation frame.
For
Incorrect use of the installation frame and improper installation can cause the equipment to fall, resulting
in injury.
integral
units only
Be sure to install the product securely in the installation frame mounted on a window frame.
If the unit is not securely mounted, it can fall and cause injury.
For
integral
units only
2
Domestic Air Conditioner
Introduction
Warning
Be sure to use an exclusive power circuit for the equipment, and follow the technical standards related to
the electrical equipment, the internal wiring regulations and the instruction manual for installation when
conducting electrical work.
Insufficient power circuit capacity and improper electrical work can cause an electrical shock or fire.
Be sure to use the specified cable to connect between the indoor and outdoor units. Make the
connections securely and route the cable properly so that there is no force pulling the cable at the
connection terminals.
Improper connections can cause excessive heat generation or fire.
When connecting the cable between the indoor and outdoor units, make sure that the terminal cover does
not lift off or dismount because of the cable.
If the cover is not mounted properly, the terminal connection section can cause an electrical shock,
excessive heat generation or fire.
Do not damage or modify the power cable.
Damaged or modified power cable can cause an electrical shock or fire. Placing heavy items on the
power cable, and heating or pulling the power cable can damage the cable.
Do not mix air or gas other than the specified refrigerant (R-410A / R22) in the refrigerant system.
If air enters the refrigerating system, an excessively high pressure results, causing equipment damage
and injury.
If the refrigerant gas leaks, be sure to locate the leak and repair it before charging the refrigerant. After
charging refrigerant, make sure that there is no refrigerant leak.
If the leak cannot be located and the repair work must be stopped, be sure to perform pump-down and
close the service valve, to prevent the refrigerant gas from leaking into the room. The refrigerant gas itself
is harmless, but it can generate toxic gases when it contacts flames, such as fan and other heaters,
stoves and ranges.
When replacing the coin battery in the remote controller, be sure to disposed of the old battery to prevent
children from swallowing it.
If a child swallows the coin battery, see a doctor immediately.
3
Domestic Air Conditioner
Introduction
Caution
Installation of a leakage breaker is necessary in some cases depending on the conditions of the
installation site, to prevent electrical shocks.
Do not install the equipment in a place where there is a possibility of combustible gas leaks.
If a combustible gas leaks and remains around the unit, it can cause a fire.
Be sure to install the packing and seal on the installation frame properly. If the packing and seal are not
installed properly, water can enter the room and wet the furniture and floor.
For
integral
units only
1.1.3 Inspection after Repair
Warning
Check to make sure that the power cable plug is not dirty or loose, then insert the plug into a power outlet
all the way.
If the plug has dust or loose connection, it can cause an electrical shock or fire.
If the power cable and lead wires have scratches or deteriorated, be sure to replace them.
Damaged cable and wires can cause an electrical shock, excessive heat generation or fire.
Warning
Do not use a joined power cable or extension cable, or share the same power outlet with other electrical
appliances, since it can cause an electrical shock, excessive heat generation or fire.
4
Domestic Air Conditioner
Introduction
Caution
Check to see if the parts and wires are mounted and connected properly, and if the connections at the
soldered or crimped terminals are secure. Improper installation and connections can cause excessive
heat generation, fire or an electrical shock.
If the installation platform or frame has corroded, replace it. Corroded installation platform or frame can
cause the unit to fall, resulting in injury.
Check the grounding, and repair it if the equipment is not properly grounded. Improper grounding can
cause an electrical shock.
Be sure to measure the insulation resistance after the repair, and make sure that the resistance is 1 M
ohm or higher.
Faulty insulation can cause an electrical shock.
Be sure to check the drainage of the indoor unit after the repair.
Faulty drainage can cause the water to enter the room and wet the furniture and floor.
5
Domestic Air Conditioner
HSU09VHG(DB)
Functions
Category
Healthy negative ion make your room full of an abundance natural negative ions.
N
Child lock
Avoid the child's wrong operation on the remote controller
Y
3D air flow
The 3D airflow is able to deliver the airflow horizontally and vertically.
N
24Hour timer
Use the timer function to set on,or off,or from on to off,or from off to on
Y
Easy clean design The panel is easy to wash and the airflow vents can be detached easily
Y
With twin-blade technology ,the airflow can be adjusted not to blow directly
Y
Catches most small particles and remove unpleasant odors effectively.
Y
Sleep mode
The setting temprature and the indoor noise can be adjusted to a more comfortable
level when you set the "sleep mode"during night sleep
Y
4 Fan setting
Slect the fan speed LO,MED,HI,AUTO
Y
adjust the last fixed operation mode automatically.
Y
Quick cooling or heating
Y
lower noise operation condition
Y
Intelligent air
Anti-mold filter
Auto mode
Power mode
Soft mode
Constant temperature
Make dehumidifying in the room while keeping the constant temperature inside
dehumidification
Note: Y: Holding Functions
N : No Functions
6
N
HSU09VHG(DB)
2.49(1.15~3.2)
pints/hr
2.64(1.15~3.52)
8500(3920~10920)
9000(3920~12000)
2141(989~2752)
2270(989~3027)
2.11
3.6
4.0
650(190~1300)
700(220~1180)
85
84
3.83
3.77
inches
1/4
inches
3/8
inches
5/8
feet
49 3/16
feet
32 13/16
feet
22 15/16
0.018
OZ/inches
247.19
236.60
190.69
176.57
120.06
130.66
-
-
30
4
0.15
0.15
33
33
inches
31 5/16 x 10 7/16 x 7 3/8
inches
34 5/16 x 14 3/16 x 11 15/16
lbs
19.40
lbs
24.91
39/36/30
46
7
HSU09VHG(DB)
DA8X1C-20FZ
690
ESTER IL VG74
pints
0.65
R410a
oz
35.30
26.6
26
940
940
40
3.8
4.2
670
740
98
98
6
inches
30 11/16 x 9 5/8 x 21 1/4
inches
36 5/8 x 13 3/8 x 24 3/16
Ibs
70.99
Ibs
77.16
16 2/5 feet
8
53
53
63
63
Wiring Diagrams
4.Printed Circuit Board Connector Wiring Diagram
4.1 ˖Indoor unit Connectors
Connectors
PCB(1) (Control PCB) For HSU09VHG(DB)
1) CN26 Connector for fan motor
2) CN1 Connector for heat exchanger thermistor and Room temperature thermistor
3) CN11 Connector for UP&DOWN STEP motor
4) CON2 Connector for power N wire
5) CON1 Connector for power L
6) CN32 Connector for display board
7) C0N6,C0N8 Connector for ions generator
8) CON7 Connector for communicate between the indoor board and the outdoor board
9) CN27 Connector for fan motor’s PG back.
10) CN34 Connector for long-range control
11) CN20 Connector for room card
Note: Other designations
PCB(1) (Indoor Control PCB)
1) SW1 Connector for Forced operation ON / OFF switch
2) SW2 1 Select remote code A or B,2 Select 25 or 35 ,3 Select room card able or disable
3) SW4 Select 20 or other, if select 20,SW2 must select 25(ON)
4) RV1 Varistor
5) FUSE1 Fuse 3.15A/250VAC
9
Domestic Air Conditioner
Wiring Diagrams
PCB(1)
CN26
CN1
CN27
SW1
CN11
CN32
CN20
CON1
CON2
CON6
CN34
CON8
CON7
10
Domestic Air Conditioner
Wiring Diagrams
4.2: outdoor unit
Connectors
PCB(1) (Control PCB)
1) CN1,CN2 Connector for power N and L
2) CN3 Connector for ground
3) CN22 Connector for DC POWER 15Vand 5V to the module board
4) CN9,CN8 Connector for CN2,CN1 on the module board
5) CN21 Connector for fan motor
6) CN10 Connector for four way valve coil
7) CN17,CN18,CN19, CN20 Connector for thermistors
8)CN23 Connector for communicate between the control board and the module board
9) CN26,CN24 Connector to P and N of the module board
10) CN4 Connector for communicate between indoor and outdoor unit
11) CN16 Connector for electric expansion valves
Note:09K series needn’t connect with CN16 and CN18
PCB(2) (module PCB)
CN10 Connector for the DC power 5V and 15V form the control PCB
CN11 Connector for communicate between the control board and the module board
P( CN1), N(CN5) Connector for capacitance board
LI (CN7),LO(CN6) Connector for reactor
CN2ˈCN3ˈCN4 Connector for the U, V, W wire of the compressor
Note : Other Designations
PCB(1) (Control PCB)
1) FUSE 1, (25A,250VAC) FUSE 2(1A,250VAC)
2)LED 1 keep light representative normal ,if keep flash interval representative trouble Alarm
3)RV1,RV2,RV3 Varistor
11
Domestic Air Conditioner
Wiring Diagrams
PCB(1)
CN26 CN24
CN23 CN22
CN21
CN17
CN18
CN19
CN20
CN16
CN4
CN10
CN3
CN1
CN9
CN8
CN2
CN5
CN6
12
Domestic Air Conditioner
Wiring Diagrams
3&%
CN6
CN7
CN11
CN10
CN5
CN4
CN3
CN2
CN1
13
Domestic Air Conditioner
Wiring Diagrams
5.Funcitions and Control
5.1 Main functions and control specification of indoor unit
5.1.1 Automatic operation
When the running mode is turned to automation after starting the system, the system will first
determine the running mode according to the current room temperature and then will run according to
the determined mode. Tr in the following selection conditions means room temperature, Ts means
setting temperature, Tp means temperature of indoor coil pipe
Tr≥73°F
Tr
Choose Cooling Mode
Choose Heating Mode
73°F
After turning to the automation mode, the running mode can be switched between cooling mode,
fan mode and heating mode according to the change of the indoor ambient temperature. But the
automatic conversion between cooling mode and heating mode must be conducted after 15 minutes.
5.1.2 Cooling operation mode
Temperature control range: 61°F---86°F
Temperature difference: 34°F
* Control features: When Tr input airflow >Ts set temperature °F, the compressor will be opened,the
indoor fan will operate at the set speed and the mode signal will be sent to the outdoor system. When
Tr input airflow
Ts set temperature °F , the compressor will be opened,the indoor fan will operate
at the set speed and the mode signal will be sent to the outdoor system. The system will keep the
original status if Tr= Ts.
Airflow speed control: (temperature difference 34°F )
Automatic: When Tr≤Ts+37°F, high speed.
When Ts+34°F ≤Tr<Ts+37°F , medium speed
When Tr<Ts+34°F , low speed
When the sensor is off, low speed
When the airflow speed has no delay from the high to low switching, the speed should be delayed for
3 minutes (remain at high speed for 3 minutes.) before the next switch.
Manus: When the system is operating, you can set the high, medium or low speed manually. ( When
the sensor is on or off, the system will change the speed 2 seconds after receiving the signal.)
*Airgate location control: the location for the airgate can be set according to your needs.
*Defrosting function: preventing the frosting on the indoor heat exchanger (when cooling or
demoisture). When the compressor works continuously for 1/6 minutes (adaptable in EEPROM) and
the temperature of the indoor coils has been below zero centigrade for 10 seconds, the compressor
will be stopped and the malfunction will be recorded in the malfunction list. The indoor system will
continue to run. When the temperature of the indoor coil is raised to 45°F, the compressor will be
restarted again (the prerequirement of 3 minutes’ delay should be satisfied.)
* timing system on/off function.
* Dormant control function.
14
Domestic Air Conditioner
Wiring Diagrams
5.1.3
Demoisture mode.
* temperature control range: 61°F---86°F
* temperature difference:
34°F
Control feature: send the demoisture signal to the outdoor system.
When Tr>Ts+36°F, the compressor will be turned on, the indoor fan will operate at the set speed.
When Tr is between the Ts and Ts+36°F, the outdoor system will operate at the high demoisture
frequency for 10 minutes and then at the low demoisture mode for six minutes. The indoor fan will
operate at low speed.
When Tr< Ts, the outsystem will be stopped, the indoor fan will be stopped for 3 minutes and then
turned to the low speed option.
All the frequency converses have a
34°F difference.
* Wind speed control: Automatic:
When Tr≥ Ts+ 41°F , high speed.
When Ts+37°F Tr< Ts+41°F , medium speed.
When Ts+36°F Tr< Ts+37°F , low speed.
When Tr<Ts+36°F , light speed.
If the outdoor fan stopped, the indoor fan will be paused for 3 minutes.
If the outdoor fan stopped for more than 3 minutes and the outdoor system still operates, the system
will be changed into light speed mode.
When the airflow speed has no delay from the high to low switching, the speed should be delayed for
3 minutes (remain at high speed for 3 minutes.) before the next switch.
Manual: When the sensor is off or Tr< Ts+37°F, the manual operation can not be made. (obligatory
automatic operation.)
*Airgate location control: the location for the airgate can be set according to your needs.
*Defrosting function: preventing the frosting on the indoor heat exchanger (when cooling or
demoisture). When the compressor works continuously for 1/6 minutes (adaptable in EEPROM) and
the temperature of the indoor coils has been below zero centigrade for 10 seconds, the compressor
will be stopped and the malfunction will be recorded in the malfunction list. The indoor system will
continue to run. When the temperature of the indoor coil is raised to 45°F , the compressor will be
restarted again (the prerequirement of 3 minutes’ delay should be satisfied.)
* coil protection (synchronic overheating protection) are installed for the four directions latch
malfunctions when demoisturing.
* timing system on/off function.
* Dormant control function.
5.1.4
Heating operation mode.
* temperature control range: 61°F---86°F
34°F
* temperature difference:
* control feature: the temperature compensation is automatically added and the system will send the
heating signals to the outdoor system.
If Tr Ts, the outdoor compressor is turned on, the indoor fan will be at the cold air proof mode.
If Tr>Ts+, the outdoor system is turned off, the indoor fan will be at the heat residue sending mode.
If Tr<Ts+, the outdoor system will be turned on again, the indoor fan will be at the cold air proof mode.
15
Domestic Air Conditioner
Wiring Diagrams
*Indoor fan control
manual control: You can choose high, medium, low and automatic speed control.
Automatic: When Tr<Ts, high speed.
When Ts≤Tr≤Ts+36°F , medium speed.
When Tr> Ts+36°F, low speed.
When the airflow speed has no delay from the high to low switching, the speed should be delayed for
3 minutes (remain at high speed for 3 minutes.) before the next switch.
*Airgate location control: the location for the airgate can be set according to your needs.
Coldair proof operation
1. The indoor operation within 4 minutes after the start up is as the following diagram, the air speed
can be raised only after the speed has reached a certain level.
Set speed
Heat start temp 1
Low speed
Keep the high
Heat start temp 2
speed. The fan
Light speed
Heat start temp 3
Heat start temp 4
doesn’t stop
Fan/off
Fan/off
2. 4 minutes after the start up of the indoor fan, the light airflow and the low airflow will be turned to the
set speed airflow.
3. In the cold air proof operation, the fan won’t stop after the start up.
4. During the cold air proof operation, the indoor system will continuously send ‘indoor high speed’
signals to the outdoor system.
* Residue heat sending. The indoor fan will send the residue heat at a low speed for 12 seconds.
If other conditions are satisified, when the compressor stops, the indoor system will operate at a light
speed. The indoor fan will stop when the coil temperature is below the ‘heat start temp 4’.
* Defrosting. When the system receives the defrosting signal from outdoors, the indoor fan will stop
and the indoor temperature display won’t change. At the time, any indoor coil malfunctions will be
neglected. When the outdoor defrosting finishes, the coil malfunction will still be neglected until the
compressor has been started up for 30 seconds. The indoor temperature display will not change and
the system operates at the cold air proof mode.
* Automatic heating temperature compensation: when the system enters the heating mode, the
temperature compensation (4) will be added. When the status is switched off, the compensation will
be erased.
16
Domestic Air Conditioner
Wiring Diagrams
5.1.5
strength operation
a. the system enters the mode after receiving the ‘strength signal’.
Send strength operation signal to the outdoor system.
The mode change finishes the strength operation.
Entering ‘mute’, you can have normal operation or signal control such as timing to finish the strength
operation.
When the system is at the automatic option with the strength/ mute function, if the system enters the
cooling mode, the cooling strength/ mute function will be offered; if the system enters the heating
mode, then the heating strength/ mute function will be offered; if the system enters the airflow mode,
there will be no strength/ mute function.
5.1.6 Mute operation
the system enters the mode after receiving the ‘mute signal’.
a. Mute heating: the airflow speed is slight, the system sends the mute signal to the outdoor system.
b. mute cooling: the airflow speed is slight, the system sends the mute signal to the outdoor system.
When the compressor operates, the airflow speed is mute speed. EEPROM is adaptable.
Mute operation can not work under the demoisturing and airflow-sending operation.
5.1.7 Air refreshing
After receiving the signal from the remote control,(HV series: the background light of the ‘health’ logo
is green. HS series: the ‘health’ indicator will be lighted). If the fan operates, the negative ion
generator operates to realize the negative sending function.
If the indoor fan stops, the negative ion generator is turned off.
When the negative ion generator is turned off, if the air refreshing system is turned on, the negative
ion generator will be turned on when the fan operates.
5.1.8 Timing.
You can set 24 hours’ on/off timing accordingly. After the setting, the timing indicator will be lightened.
Also, the light will be turning off after the timing is finished. The followings are several timing methods.
1.system /on timing: The timing indicator will be lightened and the indoor system is under the waiting
mode. The light will be turned off when the timing is finished and the rest of the system will operate
under a normal condition. The timing starts since the last reception of the timing singal. You can have
the dormacy setting under the timing mode, the order of your settings will be operated according to
the timing settings.
2.system /off timing: When the system is turned on, the timing indicator is lightened, the rest of the
system will operated under a normal condition. When set time comes, the indicator light will be turned
off and the system will be turned off. If you have set the dormant functions, the order of your settings
will be operated according to the timing settings.
3 .system /on and off timing: The settings will be completed according to the orders.
17
Domestic Air Conditioner
Wiring Diagrams
5.1.9 Dormant operation
The dormant timing is an eight hours unadaptable one. The timing signs are shown on the V series
board. (RC series show the dormant signal, the timing light is lighted on the 6 lights board).
2.1 Under the cooling/ demoisture operation, after the setting of the dormant operation, the set
temperature will be raised for 1 centigrade after 1 hour’s operation and will be raised for 1 centigrade
1 hour later. The system will keep this status for 6 hours and then close.
2.2 Under the heating mode, after the setting of the dormant operation, the et temperature will fall 2
centigrades after 1 hour’s operation and will fall 2 centigrades 1 hours later. 3 hours after the
preceding operations, the set temperature will be raised for 1 centigrade and the system will keep this
status for 3 hours and then close down.
2.3 During the dormant time, except the change of the system mode or a new press on the dormant
setting keys, the timing of the 8 hours dormancy will take the first timing as the start time, any presses
on other keys will not affect the original timing.
2.4 Indoor fan control under the dormant operation.
If the indoor fan is at the high speed before the dormant operation setting, the speed will be turned to
medium after the setting. If the fan is at the medium speed before the dormant setting, the speed will
be turned to low after the setting. If the fan is at the low speed before the dormant setting, the speed
will not change.
18
Domestic Air Conditioner
Wiring Diagrams
5.1.10 Urgent on/off input
Press the urgency button the buzzer will ring. The system will enter the automatic mode if you don’t
press the button for more than 5 seconds.
Under the system off mode, if you press the urgency key for 5 to 10 seconds, the system will start the
test operation.
Under the system off mode, If you press the urgency key for 10 to 15 seconds, the display screen will
show the resume of the last malfunction.
If the system is under operation, the press on the urgency key will stop it.
Under the system off mode, the display screen will show automatic running sign.
Under the system off mode, the system will not receive the remote control signal if the press on the
urgency key doesn’t last for 15 seconds or if the key is loosened.
Urgency operation: If you press the urgency key for less than 5 seconds, the buzzer will ring when you
press the on/off key. The system will enter the urgency operation when the urgency key is loosened.
The urgency operation is fully automatic.
Test operation.
The inlet temperature sensor doesn’t work, the indoor fan and the indoor air direction board motor
works synchronically. High speed airflow, cooling, outdoor system on, etc, will send the ambient
temperature 30 centigrade and coil temperature 16 centigrade information to the outdoor system.
Test operation
The defrost protection of the evaporator doesn’t work.
The temperature control doesn’t work.
The test operation will be finished in 30 minutes.
The test operation can be stopped by the relative commands from the remote control.
5.1.11 Low load protection control
In order to prevent the frosting of the indoor heat interaction device, the outdoor system will be
stopped if the indoor heat interaction temperature is below zero centigrade for 5 minutes, but the fan
will continue to operate. The outdoor system will be started again when the heat interaction
temperature is above 7 centigrade and the system has been stopped for 3 minutes. The malfunction
will be stored in the malfunction resume and will not be revealed.
5.1.12 High load protection control
The outdoor system will be stopped if the coil temperature is above 149°F for 2 minutes. The indoor
fan will be controlled by the thermostat. The outdoor system can be restarted when the coil
temperature is below 108°F and the system has been stopped for 3 minutes. The malfunction will be
stored in the malfunction resume and will not be revealed.
19
Domestic Air Conditioner
Wiring Diagrams
5.1.13 abnormal operation of indoor system
When the outdoor system operates, if the indoor system operation differs from the outdoor system,
the abnormal operation malfunction will be reported. 10s after the report, the indoor system will be
closed.
Outdoor system mode
Indoor system mode
conflicts
cooling
heating
yes
cooling
cooling
no
cooling
airflow
no
heating
heating
no
heating
airflow
yes
heating
cooling
yes
5.1.14 Malfunction list resume.
Nothing is presented if there is no code list.
The malfunction display will automatically finish in 10 seconds.
The remote control only receives the sigals for stop. According to the signals, the malfunction resume
presentation finishes.
The resume restores after the power supply restores.
5.1.15 abnormality confirmation approaches.
1. indoor temperature sensor abnormality:
under the operation, the normal temperature ranges from 120 degree to -30 degree. When the
temperature goes beyond this range, the abnormality can be confirmed. If the temperature goes back
into the range, the system will automatically resume.
2 .indoor heat interaction sensor abnormality:
under the operation, the normal temperature ranges from 120 degree to -30 degree. When the
temperature goes beyond this range, the abnormality can be confirmed. If the temperature goes back
into the range, the system will automatically resume.
3 .indoor malfunction:
Out door malfunction: When the indoor system receives the outdoor malfunction codes, it will store
the code into E2 for the malfunction list resume. The indoor system will continue to operate according
to the original status, the malfunction code will not be revealed or processed.
4.transmission abnormality:
If the indoor system can’t receive the outdoor system for 8 minutes, the communication abnormality
can be confirmed and reported and the outdoor system will be stopped.
5.1.16 Single indoor system operation
* Enter condition: First, set the high speed airflow and 30 centigrade set temperature, then press the
dormant keys for 6 times within 7 seconds, the system will feedback with 6 rings.
20
Domestic Air Conditioner
Wiring Diagrams
* After the system enters the separate indoor system operation mode, the indoor system will operate
according to the set mode and neglect the communication signals of the outdoor system. However, it
has to send signals to the outdoor system.
* Quitting condition: This mode can be quitted after receiving the quitting signal from the remote
control or urgency system. The indoor system thus can quit the single operation mode.
5.1.17 Power cut compensation.
* Entering condition: Press dormant button 10 times within 7 second, the buzzer will ring 4 times and
the present system status will be stored into the EEPROM of the indoor system.
* After entering the power cut compensation mode, the processing of the indoor system should be as
the followings:
Remote control urgency singal: operate according to the remote control and the urgent conditions,
the present status will be stored into the EEPROM of the indoor system.
* Quitting conditions: Press dormant button 10 times within 7 seconds and the buzzer will ring twice.
5.1.18 Fixed frequency operation.
1. Fixed cooling: a. under G code condition: high speed cooling, set 16ć, press temperature ‘-‘ key
and the set key at the same time. The system will enter the fixed frequency operation after the buzzer
rings twice.
b. The proceeding programs are as the follows:
Entering the fixed frequency operation, you can set the fixed strength location 1 and send the coolng
signal to the outdoor system. Meanwhile, you can fix the indoor system at high speed mode, the
location of the airflow directin board can be switched to the maximal position.
c. Quitting condition: The fixed frequency cooling can be quitted after receiving the remote signal, and
the system will enter the remote setting status.
2. Fixed heating: a. under G code condition: high speed heating, set 30ć, press temperature ‘+‘ key
and the set key at the same time. The system will enter the fixed frequency operation after the buzzer
rings twice.
b. The proceeding programs are as the follows:
Entering the fixed frequency operation, you can set the fixed strength location 1 and send the heating
signal to the outdoor system. Meanwhile, you can fix the indoor system at high speed mode, the
location of the airflow directin board can be switched to the maximal position.
c. Quitting condition: The fixed frequency heating can be quitted after receiving the remote signal, and
the system will enter the remote setting status.
5.1.19 Test program
First, connect the test program terminal on the mainboard, then connect the system to the power
circuit. The test program will operate as follows.
HV series display: The buzzer rings for one time—the signal will be sent to outdoor system for 0.5
second— the violet is sent for 0.5-- the background light turns to white—the back ground light turns to
21
Domestic Air Conditioner
Wiring Diagrams
white—the background light turns to white—the background light is fully lighted for 0.5 second—LED
screen lights for 0.5 second— the step-in motor fully output for 0.5 second—then the motor doesn’t
output for 0.5 second—the motor fully output again for 0.5 second. The test program finishes.
5.1.20 Time cutting function:
connect the test program terminal on the mainboard after connecting the system to the power circuit.
The CPU of the main control will be 60 times faster.
5.2 The control system of outdoor unit
5.2.1˖The operation frequency of outdoor unit and its control
5.2.1.1˖The operation frequency control of compressor
The operation frequency scope of compressor˖
Mode
Minimun operation frequency
Maximun operation frequency
Heating
36Hz
90Hz
Refrigeration
36 Hz
80Hz
5.2.1.2˖The starting of compressor
When the compressor is started for the first time, it must be kept under the conditions of
58Hz,88Hz for one minute (the overheating protection of the outdoor unit air-blowing temperature,
immediately decrease the frequency when the compressor is overflowing and releasing the
pressure)ˈthen it can be operated towards the target frequency. When the machine runs normally,
there’s no such process. After starting the compressor for operation, the compressor should run
according to the calculated frequency, and every determined frequency for protection should be prior
to the calculated frequency.
5.2.1.3˖The speeds of increasing or decreasing the frequency of the compressor
The speed of increasing or decreasing the frequency rapidly 1 -----------1HZ/second
The speed of increasing or decreasing the frequency slowly 2 -----------1HZ/10seconds
5.2.1.4˖The calculation of the compressor’s frequency
1˅ǃThe minimum/maximum frequency limitation
AˊWhile refrigerating: ˢˉ˩˝˴ˉ̎ is the maximum operation frequency of the compressor;
ˢˉ˩INˉ̎ is the minimum operation frequency of the compressor.
BˊWhile heating: ˢˉ˩˝˴ˉ̀ is the maximum operation frequency of the compressor; ˢˉ
˩INˉ̀is the minimum operation frequency of the compressor.
1˅ǃThe frequency limitation which is affected by the environment temperature.
Heating mode:
Serial No.
Temperature scope
Frequency limitation
1
Wh_c<-12
Max_hz8
90 HZ
2
Wh_c<-8
Max_hz7
90HZ
3
Wh_c<-2
Max_hz4
90 HZ
4
Wh_c<5
Max_hz5
85HZ
22
Domestic Air Conditioner
Wiring Diagrams
5
Wh_c<12
Max_hz1
80HZ
6
Wh_c<17
Max_hz2
70 HZ
7
Wh_c<20
Max_hz2
55 HZ
8
Wh_c≥20
Max_hz6
45 HZ
Remarks: the above are the maximum frequency limitations of the complete appliance which are
affected by the environment, and they have nothing to do with the ability of the indoor unit.
Refrigeration/dehumidification mode::
Serial No.
Temperature scope
Frequency limitation
1
Wh_c<28
Max_hz1 45 HZ
2
Wh_c<32
Max_hz2 72 HZ
3
Wh_c<40
Max_hz3 80 HZ
4
Wh_c<48
Max_hz4 65 HZ
5
Wh_c≥48
Max_hz5 50 HZ
Remarks: the above are not only the maximum frequency limitations of the complete appliance which
are affected by the environment, but also the maximum ability limitation of the system. When the
starting ability is not the maximum, its maximum frequency limitation is calculated by the following
equations:
The frequency limitation which is affected by the temperature and under the condition of actual ability
˙the actural running system ability*the maximum frequency which is limited by the temperature and
under the condition of maximum ability/the maximum designing ability of the system
T=ě˄Ti*Pi˅/ěPi (Ti=|Tst_i-Tnh_i the indoor environment temperature| ;Pi˙i the ability of
the indoor unit)
Refrigeration/dehumidification:
<1
˙1
˙2
˙3
≥4
50%
70%
100%
120%
140%
T
<1
˙1
˙2
˙3
≥4
The percentage of the
50%
70%
100%
140%
160%
T
The percentage of the
rated frequency P
Heating mode˖
rated frequency P
K=ěKi/the number of running machines
The indoor set
Breeze
Low
Medium
High
Strong
Quiet
airflow speed
The percentage
of
the
Healthy
airflow
65ˁ
70%
90%
100%
180%
65%
70%
rated
frequency Ki
The calculation of the actual output frequency: when there is no healthy airflow: F =F-ED-*hPhK
When the healthy airflow has been set: F =F-ED-*hPhK˄airflow speed˅hK˄healthy airflow˅
When refrigerating, it is needed to satisfy ˢˉ˩INˉ̀< F<ˢˉ˩˝˴ˉ̀
When heating, it is needed to satisfy ˢˉ˩INˉr< F<ˢˉ˩˝˴ˉr
23
Domestic Air Conditioner
Wiring Diagrams
5.2.2
The outdoor fan control (exchange fan)
When the fan is changed among every airflow speed (including stop blowing), in order to avoid the
airflow speed from skipping frequently, it must be kept under each mode for over 30 seconds, and
then it can be changed to another mode (when refrigerating, the time is changed to 15 seconds).
5.2.2.1
The outdoor fan control when refrigerating or dehumidifying
After the compressor is started for 5 seconds, the outdoor fan is started at the medium speed at first,
after 30 seconds,it begins to control the airflow speed according to the temperature conditions of the
outdoor environment.
The temperature of the
The temperature of the outdoor
outdoor air
coil
5.2.2.2
Ta
Te
Ta≥86°F
——
High
79°F≤Ta<86°F
——
Keeping the speed
75°F≤Ta<79°F
——
Medium
73°F≤Ta<75°F
——
Keeping the speed
41°F≤Ta<73°F
——
Low
Ta<41°F
59°F≤Te
Low
59°F>Te
Stop
The outdoor fan control when heating
The temperature of the outdoor
air
5.2.3
Airflow speed
Airflow speed
Ta
Ta≥72°F
Low
66°F≤Ta<72°F
Keeping the speed
61°F≤Ta<72°F
Medium
57°F≤Ta<61°F
Keeping the speed
Ta<57°F
High
The control of the outdoor electronic expansion valve
When starting the compressor: the opening size of the valve must be guaranteed to have entered into
the standard opening size, and then the compressor can be started.
When refrigeration is in vain (the machine is shut down or is in the state of retrograde operation), the
opening size of the expansion valve of the indoor unit is 5 steps;
When heating is in vain, the opening size of the expansion valve of the indoor unit is 55 steps;
When the outdoor unit is shut down, the valve is opened completely for 2 minutes, and then begin
initialization.
The scope of refrigerationg valve
90-----480 steps
The scope of heating valve
80-----480 steps
The valves are adjusted according to the degree of superheat —SHa
24
SHa.
Domestic Air Conditioner
Wiring Diagrams
5.2.4
Four way control
For the details of defrosting four-way valve control, see the defrosting process.
Four way working in other ways:
Under the mode of heating, open the four-way valve, when the compressor is not started or changed
to non-heating mode, make sure the compressor is stoped for 2 minutes, and then close the four-way
valve.
5.2.5
Protection function
5.2.5.1
TTC high temperature-preventing protection
Once the machine is started, it can run TTC overheating protection of air-blowing, but air-blowing
sensor malfunction must alarm after 4 minutes during which the compressor is started (during the
course of self-detection, there’s no such limitation)
Sensor detection methods: 100 times (one cycle of procedure run is one time, and about 5ms,
detection method for each time: continuously sampling for 8 times, then order them and take the
mean value of the middle 2 values), take the mean value.
TTC (°F)
Abnormal stop
230
Decreasing the frequency rapidly
1HZ/second
212
Decreasing the frequency slowly (1HZ/10seconds)
208
The frequency doesn’t change.
199
Increasing the frequency (1HZ/10second)
194
Increasing the frequency
1HZ/1second
TTC>=230°F lasts for 20 seconds. Overheating protection of air-blowing, alarm malfunction to the
indoor, others don’t last.
25
Domestic Air Conditioner
Wiring Diagrams
5.2.5.2
TC high temperature-preventing control of the indoor heating unit
Tpg_indoor is the highest value of the effective indoor unit (start it and it is in accord with the running
state).
The indoor heat exchanger sensor tests the temperature of the indoor heat exchanger. If the
temperature is higher than 131°F, decrease the rotate speed of the compressor and do the high
temperature-preventing protection of the indoor heat exchanger; if the temperature of the indoor heat
exchanger is lower than 117°F , recover to the normal control.
TC
The compressor stops
Fgh_t1 149°F
N Decreasing the frequency rapidly
Fgh_t2 138°F
P Decreasing the frequency slowly
Fgh_t3
Fgh_t1 2
Fgh_t2 2
135°F
Fgh_t3 2
Fgh_t4—2
Q Prohibiting increasing the frequency Fgh_t4
124°F
R Increasing slowly
117°F
Fgh_t5
Fgh_t5—2
Normal
N Decreasing at the speed of 1HZ/1 second
P
Decreasing at the speed of 1Hz/10 seconds
Q
Continue to keep the last-time instruction cycle
R
Increasing at the speed of 1Hz/10seconds
Remarks: the outdoor unit
5.2.5.3 The control of preventing the overcurrent of the compressor
During the starting process of the compressor, if the curren of the compressor is greater than 17A
for 3 seconds, stop the compressor and alarm, after 3 minutes, start it again, if such state appears 3
times in 20 minutes, stop the compressor and alarm, and confirm the malfunction. Then continue to
run it only after the the power is off.
During the starting process of the compressor, if the AC current is greater than 12A, the frequency
of the compressor decreases at the speed of 1HZ/second.
During the starting process of the compressor, if the AC current is greater than 10A, the frequency
of the compressor decreases at the speed of 0.1HZ/second.
During the starting process of the compressor, if the AC current is greater than 9A, the frequency of
the compressor increases at the prohibited speed.
During the starting process of the compressor, if the AC current is greater than 8A, the frequency of
the compressor increases at the speed of no faster than 0.1HZ/second.
26
Domestic Air Conditioner
Wiring Diagrams
5.2.5.4 The protection function of AC current:
During the starting process of the compressor, if the AC current is greater than 15A, the frequency of
the compressor decreases at the speed of 1HZ/second.
During the starting process of the compressor, if the AC current is greater than 13A, the frequency of
the compressor decreases at the speed of 0.1HZ/second.
During the starting process of the compressor, if the AC current is greater than 11A, the frequency of
the compressor increases at the prohibited speed.
During the starting process of the compressor, if the AC current is greater than 10A, the frequency of
the compressor increases at the speed of no faster than 0.1HZ/second.
Remarks: when the outdoor temperature is high, there’s compensation for AC current protection.
When the outdoor environment temperature is higher than 104°F, AC current protection value
decreases by 10AD
When the outdoor environment temperature is higher than 115°F ,AC current protection value
decreases by 15AD
When the outdoor environment temperature is higher than 122°F,AC current protection value
decreases by 20AD
5.2.5.5 Antifreezing protection of the indoor heat exchanger
When refrigerating/heating, prevent freezing.
Tpg_indoor
is the minimum value of the effective indoor unit (start it and it is in accord with the
running state).
11 //ice_temp_3+5
ice_temp_3+3 48°F
Increasing slowly
ice_temp_3
43°F
46°F //ice_temp_3+2
Keeping the frequency
43°F
ice_temp_2
41°F
Decreasing slowly
ice_temp_1
37°F
Decreasing rapidly ice_temp_1
32°F
Stop
When Tpg_indoor
ice_temp_32°F , the frequency of the compressor decreases at the speed of
1HZ/1second.
When Tpg_indoor
ice_temp_36°F , the frequency of the compressor decreases at the speed of
1HZ/10seconds.
When Tpg_indoor begins to rise again, and ice_temp_36
Tpg_indoor
ice_temp_37°F, the frequency
of thecompressor doesn’t change.
When ice_temp_37 Tpg_indoor
ice_temp_37+3°F , the frequency of the compressor increases at the
speed of 1HZ/10seconds.
For example, Tpg_indoor
0
last for 2 minutes, and then the outdoor unit will stop, and report
underload malfunction, but don’t send malfunction report to the indoor.
The compressor stops for more than 3 minutes, Tpg_indoor> ice_temp_37+2°F , the compressor
recovers.
27
Domestic Air Conditioner
Wiring Diagrams
5.2.5.6 The frequency limitation of modification rate
In the field which is controlled by high frequency, if the modification rate is not high enough, the
control-driven chip will enter into weak magnetic control, this will help to relieve the problem of
modification rate. If during the course of weak magnetic control, the modification rate is still not high
enough, enter into the control of decreasing frequency until the alarm of modification rate is relieved.
5.2.5.7 Temperature protection of the outdoor refrigerating coil
When the defrosting temperature and the sensor’s temperature are higher than 149°F , the frequency of
the compressor decreases 1hz/10seconds. Keep the frequency until it decreases to the lowest
frequency. When the temperatures are lower than 149°F and higher than 140°F, keep the frequency of
the compressor. When the temperatures are lower than 140°F , relieve the defrosting temperature
protection.
5.2.5.8
Malfunction display and malfunction handling
a)
For the complete appliance’s malfunctions
If there’s malfunction with the outdoor unit, the light of the outdoor unit will flash and its frequency is
1HZ, the number of times is according to the table, when a round of flashing is finished, the light
shoud be off for 5 seconds.
b)
For the units’ malfunctins Annex 1
If there’s malfunction with the units, this will not affect the run of the complete appliance, but this can
be displayed by the malfunction light, the light flashing frequency is 0.5HZ, the number of times is
according to the malfunction table of the indoor units. When a round of flashing is finished, the light
shoud be off for 10 seconds. Then report according to the order : unit A unit B unit C unit D, that
is, if there’s malfunction with several units, then just report the indoor unit with the highest priority level.
Among the unit malfunctions, the priority level of the communication malfunction is the highest, for
others, that appears first will have the priority.
Remarks: in 3 minutes when the compressor stops, the units’ malfunctions are not displayed; the
complete appliance’s malfunctions are prior to the units’ malfunctions.
Annex 1
Malfunction codes of the whole unit
Remarks: under the mode of refrigeration, the malfunctions of each unit’s thin pipe temperature
sensor are not reported, under the mode of heating, the malfunctions of each unit’s thick pipe
temperature sensor are not reported.
Indoor
displaying
panel code
indication
Outdoor
(LED1 flash
times)
fault description
F12
1
Outdoor EEPROM error
F1
2
The protection of IPM
F22
3
Overcurrent protection of AC electricity for the outdoor model
F3
4
Communication fault between the IPM and outdoor PCB
F19
6
Power voltage is too high or low
F4
8
Overheat protection for exhaust temperature
F21
10
Frost-removing temperature sensor failure
F6
12
Ambient temperature sensor failure
F25
13
Exhaust temperature sensor failure
E7
15
Communication fault between indoor and outdoor units
F11
18
deviate from the normal for the compressor
28
Domestic Air Conditioner
Wiring Diagrams
----
19
Loop of the station detect error
E9
21
High work-intense protection
---
24
Overcurrent of the compressor
---
25
Overcurrent protection for single-phase of the compressor
----
36
The socket protect
5.3 Value of Thermistor
5.3.1 intdoor Unit
Room sensor and Pipe Sensor
R77 F =10K
3%
B77 F /122 F =3700K 3%
Temp.(℉)
Max.(KΩ)
Normal(KΩ)
Min.(KΩ)
Torlance(℉)
-22
165.2170
147.9497
132.3678
28.51
35.15
-20
155.5754
139.5600
125.0806
28.53
35.13
-18
146.5609
131.7022
118.2434
28.56
35.11
-17
138.1285
124.3392
111.8256
28.60
35.08
-15
130.2371
117.4366
105.7989
28.63
35.06
-13
122.8484
110.9627
100.1367
28.67
35.04
-11
115.9272
104.8882
94.8149
28.71
35.01
-9
109.4410
99.1858
89.8106
28.74
34.99
-8
103.3589
93.8306
85.1031
28.76
34.95
-6
97.6556
88.7989
80.6728
28.80
34.93
-4
92.3028
84.0695
76.5017
28.83
34.92
-2
87.2775
79.6222
72.5729
28.87
34.88
0
82.5577
75.4384
68.8710
28.90
34.81
1
78.1230
71.5010
65.3815
28.94
34.83
3
73.9543
67.7939
62.0907
28.98
34.79
5
70.0342
64.3023
58.9863
29.01
34.77
7
66.3463
61.0123
56.0565
29.05
34.74
9
62.8755
57.9110
53.2905
29.08
34.72
10
59.6076
54.9866
50.6781
29.12
34.68
12
56.5296
52.2278
48.2099
29.16
34.65
14
53.6294
49.6244
45.8771
29.19
34.63
29
Domestic Air Conditioner
Functions and Control
16
50.8956
47.1666
43.6714
29.23
34.59
18
48.3178
44.8454
41.5851
29.28
34.56
19
45.8860
42.6525
39.6112
29.32
34.52
21
43.5912
40.5800
37.7429
29.35
34.50
23
41.4249
38.6207
35.9739
29.39
34.47
25
39.3792
36.7676
34.2983
29.43
34.43
27
37.4465
35.0144
32.7108
29.46
34.39
28
35.6202
33.3552
31.2062
29.52
34.36
30
33.8936
31.7844
29.7796
29.55
34.32
32
32.2608
30.2988
28.4267
29.59
34.30
34
30.7162
28.8875
27.1431
29.62
34.27
36
29.2545
27.5519
25.9250
29.68
34.23
37
27 8708
27.8708
26 2858
26.2858
24 7686
24.7686
29 71
29.71
34 20
34.20
39
26.5605
25.0851
23.6704
29.75
34.16
41
25.3193
23.9462
22.6273
29.79
34.12
43
24.1432
22.8655
21.6361
29.84
34.09
45
23.0284
21.8398
20.6939
29.88
34.05
46
21.9714
20.8659
19.7982
29.93
34.02
48
20.9688
19.9409
18.9463
29.97
33.96
50
20.0176
19.0621
18.1358
30.00
33.93
52
19.1149
18.2270
17.3646
30.06
33.89
54
18.2580
17.4331
16.6305
30.09
33.85
55
17.4442
16.6782
15.9315
30.15
33.82
57
16.6711
15.9601
15.2657
30.18
33.78
59
15.9366
15.2770
14.6315
30.24
33.73
61
15.2385
14.6268
14.0171
30.27
33.69
63
14.5748
14.0079
13.4510
30.33
33.66
64
13.9436
13.4185
12.9017
30.36
33.62
66
13.3431
12.8572
12.3778
30.42
33.57
68
12.7718
12.3223
11.8780
30.45
33.53
70
12.2280
11.8126
11.4011
30.51
33.49
72
11.7102
11.3267
10.9459
30.54
33.44
73
11.2172
10.8634
10.5114
30.60
33.40
75
10.7475
10.4216
10.0964
30.65
33.35
77
10.3000
10.0000
9.7000
30.65
33.35
79
9.8975
9.5974
9.2980
30.63
33.37
81
9.5129
9.2132
8.9148
30.56
33.44
82
9.1454
8.8465
8.5496
30.49
33.49
84
8 7942
8.7942
8 4964
8.4964
8 2013
8.2013
30 43
30.43
33 55
33.55
86
8.4583
8.1621
7.8691
30.36
33.62
30
Domestic Air Conditioner
Functions and Control
88
8.1371
7.8428
7.5522
30.29
33.67
90
7.8299
7.5377
7.2498
30.24
33.75
91
7.5359
7.2461
6.9611
30.16
33.80
93
7.2546
6.9673
6.6854
30.09
33.87
95
6.9852
6.7008
6.4222
30.02
33.93
97
6.7273
6.4459
6.1707
29.97
34.00
99
6.4803
6.2021
5.9304
29.89
34.05
100
6.2437
5.9687
5.7007
29.82
34.12
102
6.0170
5.7454
5.4812
29.75
34.20
104
5.7997
5.5316
5.2712
29.68
34.25
106
5.5914
5.3269
5.0704
29.61
32.52
108
5.3916
5.1308
4.8783
29.53
34.39
109
5.2001
4.9430
4.6944
29.46
34.45
111
5.0163
4.7630
4.5185
29.39
34.52
113
4.8400
4.5905
4.3500
29.32
34.59
115
4.5708
4.4252
4.1887
29.25
34.65
117
4.5083
4.2666
4.0342
29.17
34.72
118
4.3524
4.1145
3.8862
29.10
34.79
120
4.2026
3.9698
3.7443
29.03
34.86
122
4.0588
3.8287
3.6084
28.94
34.92
124
3.9206
3.6943
3.4780
28.87
34.99
126
3 7878
3.7878
3 5654
3.5654
3 3531
3.3531
28 80
28.80
35 06
35.06
127
3.6601
3.4416
3.2332
28.72
35.13
129
3.5374
3.3227
3.1183
28.63
35.20
131
3.4195
3.2085
3.0079
28.56
35.28
133
3.3060
3.0989
2.9021
28.49
35.33
135
3.1969
2.9935
2.8005
28.40
35.40
136
3.0919
2.8922
2.7029
28.33
35.47
138
2.9909
2.7948
2.6092
28.26
35.55
140
2.8936
2.7012
2.5193
28.17
35.62
142
2 8000
2.8000
2 6112
2.6112
2 4328
2.4328
28 09
28.09
35 69
35.69
144
2.7099
2.5246
2.3498
28.00
35.76
145
2.6232
2.4413
2.2700
27.93
35.83
147
2.5396
2.3611
2.1932
27.84
35.91
149
2.4591
2.2840
2.1195
27.75
35.98
151
2.3815
2.2098
2.0486
27.68
36.05
153
2.3068
2.1383
1.9803
27.59
36.12
154
2.2347
2.0695
1.9147
27.52
36.21
156
2.1652
2.0032
1.8516
27.43
36.28
158
2 0983
2.0983
1 9393
1.9393
1 7908
1.7908
27 34
27.34
36 36
36.36
160
2.0337
1.8778
1.7324
27.27
36.43
162
1.9714
1.8186
1.6761
27.18
36.50
163
1.9113
1.7614
1.6219
27.09
36.57
165
1.8533
1.7014
1.5697
27.00
36.64
167
1.7974
1.6533
1.5197
26.91
36.73
169
1.7434
1.6021
1.4710
26.82
36.81
171
1.6913
1.5528
1.4243
26.74
36.88
172
1.6409
1.5051
1.3794
26.65
36.95
174
1.5923
1 5923
1
1.4592
4592
1.3360
1 3360
26
26.56
56
37.04
37 04
176
1.5454
1.4149
1.2942
26.47
37.11
178
1.5000
1.3721
0.2540
26.38
37.18
31
Domestic Air Conditioner
Functions and Control
180
1.4562
1.3308
1.2151
26.29
37.27
181
1.4139
1.2910
1.1776
26.20
37.35
183
1.3730
1.2525
1.1415
26.11
37.42
185
1.3335
1.2153
1.1066
26.02
37.51
187
1.2953
1.1794
1.0730
25.92
37.58
189
1.2583
1.1448
1.0405
25.83
37.67
190
1.2226
1.1113
1.0092
25.74
37.74
192
1.1880
1.0789
0.9789
25.65
37.83
194
1.1546
1.0476
0.9497
25.56
37.90
196
1.1223
1.0174
0.9215
25.45
37.99
198
1.0910
0.9882
0.8942
25.36
38.07
199
1.0607
0.9599
0.8679
25.27
38.16
201
1.0314
0.9526
0.8424
25.16
38.23
203
1.0030
0.9061
0.8179
25.07
38.32
205
0.9756
0.8806
0.7941
24.98
38.39
207
0.9490
0.8558
0.7711
24.87
38.48
208
0.9232
0.8319
0.7489
24.78
38.55
210
0.8983
0.8088
0.7275
31.87
38.64
212
0.8741
0.7863
0.7067
24.58
38.73
214
0.8507
0.7646
0.6867
24.48
38.80
216
0.8281
0.7436
0.6672
24.39
38.89
217
0.8061
0.7233
0.6484
24.28
38.98
219
0.7848
0.7036
0.6303
24.19
39.06
221
0.7641
0.6845
0.6127
24.08
39.15
223
0.7441
0.6661
0.5957
23.97
39.24
225
0.7247
0.6482
0.5792
23.88
39.33
226
0.7059
0.6308
0.5632
23.77
39.42
228
0.6877
0.6140
0.5478
23.67
39.49
230
0.6700
0.5977
0.5328
23.56
39.58
232
0.6528
0.5820
0.5183
23.47
39.67
234
0.6361
0.5667
0.5043
23.36
39.76
235
0.6200
0.5518
0.4907
23.25
39.85
237
0.6043
0.5374
0.4775
23.14
39.94
239
0.5891
0.5235
0.4648
23.04
40.01
241
0.5743
0.5100
0.4524
22.93
40.10
243
0.5600
0.4968
0.4404
22.82
40.19
244
0.5460
0.4841
0.4288
22.71
40.28
246
0.5325
0.4717
0.4175
22.60
40.37
248
0.5194
0.4597
0.4066
22.50
40.46
5.3.2 Outdoor Unit
Ambient Sensor, Defrosting Sensor, Pipe sensor
3% B77 F /122 F=3700K 3%
R77 F=10K
Temp.(
F)
Max.(KΩ)
Normal(KΩ)
Min.(KΩ)
Tolerance(
F)
32
Domestic Air Conditioner
Functions and Control
-22
165.2170
147.9497
132.3678
28.51
35.15
-20
155.5754
139.5600
125.0806
28.53
35.13
-18
146.5609
131.7022
118.2434
28.56
35.11
-17
138.1285
124.3392
111.8256
28.60
35.08
-15
130.2371
117.4366
105.7989
28.63
35.06
-13
122.8484
110.9627
100.1367
28.67
35.04
-11
115.9272
104.8882
94.8149
28.71
35.01
-9
109.4410
99.1858
89.8106
28.74
34.99
-8
103.3589
93.8306
85.1031
28.76
34.95
-6
97.6556
88.7989
80.6728
28.80
34.93
-4
92.3028
84.0695
76.5017
28.83
34.92
-2
87.2775
79.6222
72.5729
28.87
34.88
0
82.5577
75.4384
68.8710
28.90
34.81
1
78.1230
71.5010
65.3815
28.94
34.83
3
73.9543
67.7939
62.0907
28.98
34.79
5
70.0342
64.3023
58.9863
29.01
34.77
7
66.3463
61.0123
56.0565
29.05
34.74
9
62.8755
57.9110
53.2905
29.08
34.72
10
59.6076
54.9866
50.6781
29.12
34.68
12
56.5296
52.2278
48.2099
29.16
34.65
14
53.6294
49.6244
45.8771
29.19
34.63
16
50.8956
47.1666
43.6714
29.23
34.59
18
48.3178
44.8454
41.5851
29.28
34.56
19
45.8860
42.6525
39.6112
29.32
34.52
21
43.5912
40.5800
37.7429
29.35
34.50
23
41.4249
38.6207
35.9739
29.39
34.47
25
39.3792
36.7676
34.2983
29.43
34.43
27
37.4465
35.0144
32.7108
29.46
34.39
28
35 6202
35.6202
33 3552
33.3552
31 2062
31.2062
29 52
29.52
34 36
34.36
30
33.8936
31.7844
29.7796
29.55
34.32
32
32.2608
30.2988
28.4267
29.59
34.30
34
30.7162
28.8875
27.1431
29.62
34.27
36
29.2545
27.5519
25.9250
29.68
34.23
37
27.8708
26.2858
24.7686
29.71
34.20
39
26.5605
25.0851
23.6704
29.75
34.16
41
25.3193
23.9462
22.6273
29.79
34.12
43
24.1432
22.8655
21.6361
29.84
34.09
45
23.0284
21.8398
20.6939
29.88
34.05
46
21.9714
20.8659
19.7982
29.93
34.02
48
20.9688
19.9409
18.9463
29.97
33.96
50
20.0176
19.0621
18.1358
30.00
33.93
52
19.1149
18.2270
17.3646
30.06
33.89
54
18.2580
17.4331
16.6305
30.09
33.85
55
17.4442
16.6782
15.9315
30.15
33.82
57
16.6711
15.9601
15.2657
30.18
33.78
33
Domestic Air Conditioner
Functions and Control
59
15.9366
15.2770
14.6315
30.24
33.73
61
15.2385
14.6268
14.0171
30.27
33.69
63
14.5748
14.0079
13.4510
30.33
33.66
64
13.9436
13.4185
12.9017
30.36
33.62
66
13.3431
12.8572
12.3778
30.42
33.57
68
12.7718
12.3223
11.8780
30.45
33.53
70
12.2280
11.8126
11.4011
30.51
33.49
72
11.7102
11.3267
10.9459
30.54
33.44
73
11.2172
10.8634
10.5114
30.60
33.40
75
10.7475
10.4216
10.0964
30.65
33.35
77
10.3000
10.0000
9.7000
30.65
33.35
79
9.8975
9.5974
9.2980
30.63
33.37
81
9 5129
9.5129
9 2132
9.2132
8 9148
8.9148
30 56
30.56
33 44
33.44
82
9.1454
8.8465
8.5496
30.49
33.49
84
8.7942
8.4964
8.2013
30.43
33.55
86
8.4583
8.1621
7.8691
30.36
33.62
88
8.1371
7.8428
7.5522
30.29
33.67
90
7.8299
7.5377
7.2498
30.24
33.75
91
7.5359
7.2461
6.9611
30.16
33.80
93
7.2546
6.9673
6.6854
30.09
33.87
95
6.9852
6.7008
6.4222
30.02
33.93
97
6.7273
6.4459
6.1707
29.97
34.00
99
6.4803
6.2021
5.9304
29.89
34.05
100
6.2437
5.9687
5.7007
29.82
34.12
102
6.0170
5.7454
5.4812
29.75
34.20
104
5.7997
5.5316
5.2712
29.68
34.25
106
5.5914
5.3269
5.0704
29.61
32.52
108
5.3916
5.1308
4.8783
29.53
34.39
109
5.2001
4.9430
4.6944
29.46
34.45
111
5.0163
4.7630
4.5185
29.39
34.52
113
4.8400
4.5905
4.3500
29.32
34.59
115
4.5708
4.4252
4.1887
29.25
34.65
117
4.5083
4.2666
4.0342
29.17
34.72
118
4.3524
4.1145
3.8862
29.10
34.79
120
4.2026
3.9698
3.7443
29.03
34.86
122
4.0588
3.8287
3.6084
28.94
34.92
124
3.9206
3.6943
3.4780
28.87
34.99
126
3.7878
3.5654
3.3531
28.80
35.06
127
3.6601
3.4416
3.2332
28.72
35.13
129
3.5374
3.3227
3.1183
28.63
35.20
131
3.4195
3.2085
3.0079
28.56
35.28
133
3.3060
3.0989
2.9021
28.49
35.33
135
3.1969
2.9935
2.8005
28.40
35.40
136
3.0919
2.8922
2.7029
28.33
35.47
138
2.9909
2.7948
2.6092
28.26
35.55
34
Domestic Air Conditioner
Functions and Control
140
2.8936
2.7012
2.5193
28.17
35.62
142
2.8000
2.6112
2.4328
28.09
35.69
144
2.7099
2.5246
2.3498
28.00
35.76
145
2.6232
2.4413
2.2700
27.93
35.83
147
2.5396
2.3611
2.1932
27.84
35.91
149
2.4591
2.2840
2.1195
27.75
35.98
151
2.3815
2.2098
2.0486
27.68
36.05
153
2.3068
2.1383
1.9803
27.59
36.12
154
2.2347
2.0695
1.9147
27.52
36.21
156
2.1652
2.0032
1.8516
27.43
36.28
158
2.0983
1.9393
1.7908
27.34
36.36
160
2.0337
1.8778
1.7324
27.27
36.43
162
1.9714
1.8186
1.6761
27.18
36.50
163
1.9113
1.7614
1.6219
27.09
36.57
165
1.8533
1.7014
1.5697
27.00
36.64
167
1.7974
1.6533
1.5197
26.91
36.73
169
1.7434
1.6021
1.4710
26.82
36.81
171
1.6913
1.5528
1.4243
26.74
36.88
172
1.6409
1.5051
1.3794
26.65
36.95
174
1.5923
1.4592
1.3360
26.56
37.04
176
1.5454
1.4149
1.2942
26.47
37.11
178
1.5000
1.3721
0.2540
26.38
37.18
180
1.4562
1.3308
1.2151
26.29
37.27
181
1.4139
1.2910
1.1776
26.20
37.35
183
1.3730
1.2525
1.1415
26.11
37.42
185
1.3335
1.2153
1.1066
26.02
37.51
187
1.2953
1.1794
1.0730
25.92
37.58
189
1.2583
1.1448
1.0405
25.83
37.67
190
1.2226
1.1113
1.0092
25.74
37.74
192
1.1880
1.0789
0.9789
25.65
37.83
194
1.1546
1.0476
0.9497
25.56
37.90
196
1.1223
1.0174
0.9215
25.45
37.99
198
1.0910
0.9882
0.8942
25.36
38.07
199
1.0607
0.9599
0.8679
25.27
38.16
201
1.0314
0.9526
0.8424
25.16
38.23
203
1.0030
0.9061
0.8179
25.07
38.32
205
0.9756
0.8806
0.7941
24.98
38.39
207
0.9490
0.8558
0.7711
24.87
38.48
208
0.9232
0.8319
0.7489
24.78
38.55
210
0 8983
0.8983
0 8088
0.8088
0 7275
0.7275
31 87
31.87
38 64
38.64
212
0.8741
0.7863
0.7067
24.58
38.73
214
0.8507
0.7646
0.6867
24.48
38.80
216
0.8281
0.7436
0.6672
24.39
38.89
217
0.8061
0.7233
0.6484
24.28
38.98
219
0.7848
0.7036
0.6303
24.19
39.06
35
Domestic Air Conditioner
Functions and Control
221
0.7641
0.6845
0.6127
24.08
39.15
223
0.7441
0.6661
0.5957
23.97
39.24
225
0.7247
0.6482
0.5792
23.88
39.33
226
0.7059
0.6308
0.5632
23.77
39.42
228
0.6877
0.6140
0.5478
23.67
39.49
230
0.6700
0.5977
0.5328
23.56
39.58
232
0.6528
0.5820
0.5183
23.47
39.67
234
0.6361
0.5667
0.5043
23.36
39.76
235
0.6200
0.5518
0.4907
23.25
39.85
237
0.6043
0.5374
0.4775
23.14
39.94
239
0.5891
0.5235
0.4648
23.04
40.01
241
0.5743
0.5100
0.4524
22.93
40.10
243
0.5600
0.4968
0.4404
22.82
40.19
244
0.5460
0.4841
0.4288
22.71
40.28
246
0.5325
0.4717
0.4175
22.60
40.37
248
0.5194
0.4597
0.4066
22.50
40.46
Discharging Sensor
R176 F =50K
3%
B77/176 F =4450K 3%
Torlance(℉)
Temp.(℉)
Max.(KΩ)
Normal(KΩ)
Min.(KΩ)
-22
14646.0505
12061.7328
9924.4999
26.67
36.41
-20
13654.1707
11267.8730
9290.2526
26.69
36.39
-18
12735.8378
10531.3695
8700.6388
26.73
36.37
-17
11885.1336
9847.7240
8152.2338
26.74
36.36
-15
11096.6531
9212.8101
7641.8972
26.76
36.34
-13
10365.4565
8622.8101
7166.7474
26.78
36.32
-11
9687.0270
8074.3787
6724.1389
26.82
36.30
-9
9
9057
9057.2314
2314
7564.2244
7564 2244
6311.6413
6311 6413
26.83
26 83
36.28
36 28
-8
8472.2852
7089.4741
5927.0206
26.85
36.27
-6
7928.7217
6647.4547
5568.2222
26.89
36.25
-4
7423.3626
6235.7109
5233.3554
26.91
36.23
-2
6953.2930
5851.9864
4920.6791
26.92
36.21
0
6515.8375
5494.2064
4628.5894
26.96
36.19
1
6108 5393
6108.5393
5160 4621
5160.4621
4355 6078
4355.6078
26 98
26.98
36 18
36.18
3
5729.1413
4848.9963
4100.3708
27.01
36.16
5
5375.5683
4558.1906
3861.6201
27.03
36.14
7
5045.9114
4286.5535
3638.1938
27.05
36.12
9
4738.4141
4032.7098
3429.0191
27.09
36.10
10
4451.4586
3573.4260
3233.1039
27.10
36.09
12
4183.5548
3573.4260
3049.5312
27.14
36.07
14
3933.3289
3365.7336
2877.4527
27.16
36.05
16
3699.5139
3171.3148
2716.0828
27.19
36.03
18
3480.9407
2989.2460
2564.6945
27.21
36.01
19
3276.5302
2818.6731
2422.6139
27.25
36.00
36
Domestic Air Conditioner
Functions and Control
21
3085.2854
2658.8058
2289.2164
27.27
35.98
23
2906.2851
2508.9126
2163.9230
27.30
35.96
25
2738.6777
2368.3158
2046.1961
27.32
35.94
27
2581.6752
2236.3876
1935.5371
27.36
35.92
28
2434.5487
2112.5459
1831.4826
27.39
35.91
30
2296.6230
1996.2509
1733.6024
27.41
35.89
32
2167.2730
1887.0018
1641.4966
27.45
35.87
34
2045.9191
1784.3336
1554.7931
27.46
35.85
36
1932.0242
1687.8144
1473.1460
27.50
35.83
37
1825.0899
1597.0431
1396.2333
27.54
35.82
39
1724.6540
1511.6468
1323.7551
27.55
35.80
41
1630.2870
1431.2787
1255.4324
27.59
35.78
43
1541.5904
1355.6163
1191.0048
27.63
35.76
45
1458.1938
1284.3593
1130.2298
27.66
35.74
46
1379.7528
1217.2282
1072.8813
27.68
35.73
48
1305 9472
1305.9472
1153 9626
1153.9626
1018 7481
1018.7481
27 72
27.72
35 71
35.71
50
1236.4792
1094.3200
967.6334
27.75
35.69
52
1171.0715
1038.0743
919.3533
27.77
35.67
54
1109.4661
985.0146
873.7359
27.81
35.65
55
1051.4226
934.9440
830.6210
27.84
35.64
57
996.7169
887.6792
789.8583
27.88
35.62
59
945.1404
843.0486
751.3077
27.91
35.60
61
896.4981
800.8922
714.8380
27.93
35.58
63
850.6086
761.0603
680.3265
27.97
35.56
64
807.3024
723.4134
647.6580
28.00
35.55
66
766.4212
687.8205
616.7252
28.04
35.53
68
727.8172
654.1596
587.4271
28.08
35.51
70
691.3524
622.3161
559.6694
28.11
35.49
72
656.8979
592.1831
533.3634
28.15
35.47
73
624.3328
563.6604
508.4261
28.18
35.46
75
593.5446
536.6540
484.7796
28.22
35.44
77
564.4275
511.0760
462.3510
28.24
35.42
79
536.9865
486.9352
441.1516
28.27
35.40
81
511.0105
464.0500
421.0258
28.31
35.38
82
486 4151
486.4151
442 3499
442.3499
401 9146
401.9146
28 35
28.35
35 44
35.44
84
463.1208
421.7683
383.7626
28.38
35.40
86
441.0535
402.2430
366.5175
28.42
35.37
88
420.1431
383.7151
350.1301
28.45
35.33
90
400.3242
366.1295
334.5542
28.49
35.29
91
381.5350
349.4341
319.7460
28.53
35.26
93
363.7176
333.5801
305.6645
28.58
35.22
95
346.8176
318.5216
292.2709
28.62
35.19
97
330.7839
304.2151
279.5286
28.69
35.15
99
315.5682
290.6199
267.4031
28.72
35.11
100
301.1254
277.6976
255.8620
28.76
35.08
37
Domestic Air Conditioner
Functions and Control
102
287.4128
265.4119
244.8745
28.80
35.04
104
274.3905
253.7288
234.4118
28.83
35.01
106
262.0206
242.6161
224.4465
28.87
34.97
108
250.2676
232.0436
214.9529
28.92
34.93
109
239.0983
221.9825
205.9065
28.96
34.90
111
228.4809
212.4060
197.2844
28.99
34.86
113
218.3860
203.2887
189.0648
29.03
34.83
115
208.7855
194.6066
181.2273
29.07
34.79
117
199.6531
186.3369
173.7524
29.12
34.75
118
190.9639
178.4584
166.6217
29.16
34.72
120
182.6945
170.9508
159.8181
29.19
34.68
122
174.8228
163.7951
153.3249
29.25
34.65
124
167.3280
156.9733
147.2090
29.28
34.61
126
160.1904
150.4683
141.2090
29.32
34.57
127
153.3914
144.2641
135.5577
29.35
34.54
129
146.9136
138.3454
130.1598
29.41
34.50
131
140.7403
132.6980
125.0027
29.44
34.47
133
134.8559
127.3081
120.0746
29.48
34.43
135
129.2457
122.1630
115.3645
29.53
34.39
136
123.8956
117.2504
110.8618
29.57
34.36
138
118.7926
112.5589
106.5564
29.62
34.32
140
113 9241
113.9241
108 0776
108.0776
102 4388
102.4388
29 70
29.70
34 30
34.30
142
109.2784
103.7961
98.5000
29.75
34.27
144
104.8433
99.7046
94.7315
29.79
34.21
145
100.6112
95.7939
91.1253
29.84
34.18
147
96.5692
92.0553
87.6735
29.88
34.14
149
92.7088
88.4805
84.3690
29.93
34.11
151
89.0211
85.0614
81.2048
29.97
34.07
153
85.4976
81.7908
78.1744
30.02
34.03
154
82.1303
78.6615
75.2715
30.06
34.00
156
78.9116
75.6668
72.4902
30.11
33.96
158
75.8343
72.8004
69.8249
30.15
33.93
160
72.8916
70.0561
67.2703
30.20
33.89
162
70.0770
67.4283
64.8213
30.24
33.85
163
67.3844
64.9115
62.4731
30.29
33.82
165
64.8080
62.5006
60.2211
30.34
33.78
167
62.3423
60.1906
58.0609
30.38
33.75
169
59.9821
57.9770
55.9885
30.43
33.71
171
57.7223
55.8552
53.9998
30.47
33.66
172
55.5583
53.8210
52.0912
30.47
33.58
174
53.4856
53 4856
51
51.8706
8706
50
50.2591
2591
30
30.47
47
33
33.53
53
176
51.5000
50.0000
48.5000
30.40
33.51
178
49.7063
48.2057
46.7083
30.33
33.53
180
47.9835
46.4842
44.9911
30.27
33.60
181
46.3266
44.8323
43.3452
30.20
33.66
38
Domestic Air Conditioner
Functions and Control
183
44.7385
43.2468
41.7672
30.15
33.71
185
43.2105
41.7248
40.2540
30.07
33.78
187
41.7386
40.2604
38.7996
30.00
33.84
189
40.3241
38.8545
37.4048
29.95
33.91
190
38.9643
37.5045
36.0668
29.88
33.96
192
37.6569
36.2078
34.7831
29.80
34.03
194
36.3996
34.9622
33.5513
29.73
34.09
196
35.1903
33.7653
32.3689
29.66
34.16
198
34.0269
32.6151
31.2338
29.61
34.22
199
32.9075
31.5096
30.1438
29.53
34.28
201
31.8302
30.4467
29.0970
29.46
34.35
203
30.7933
29.4246
28.0915
29.39
34.41
205
29.7950
28.4417
27.1254
29.32
34.47
207
28.8337
27.4961
26.1970
29.25
34.54
208
27.9078
26.5864
25.3048
29.17
34.60
210
27.0160
25.7110
24.4470
29.10
34.66
212
26.1569
24.8685
23.6222
29.03
34.72
214
25.3290
24.0574
22.8291
28.96
34.79
216
24.5311
23.2765
22.0662
28.89
34.85
217
23.7620
22.5245
21.3323
28.81
34.91
219
23.0203
21.8002
20.6261
28.74
34.98
221
22.3055
22 3055
21
21.1025
1025
19
19.9465
9465
28
28.67
67
35
35.04
04
223
21.6159
20.4303
19.2924
28.65
35.10
225
20.9508
19.7825
18.6626
28.62
35.17
226
20.3091
19.1582
18.0563
28.60
35.23
228
19.6899
18.5564
17.4723
28.53
35.29
230
19.0924
17.9761
16.9098
28.44
35.35
232
18 5157
18.5157
17 4166
17.4166
16 3680
16.3680
28 36
28.36
35 42
35.42
234
17.9590
16.8769
15.8458
28.29
35.48
235
17.4214
16.3564
15.3427
28.06
35.54
237
16.9590
15.8542
14.8577
27.99
35.61
239
16.4010
15.3696
14.3902
27.82
35.67
241
15.9167
14.9020
13.9394
27.75
35.78
243
15.4489
14.4506
13.5047
27.66
35.91
244
14.9968
14.0149
13.0855
27.59
36.01
246
14.5599
13.5942
12.6811
27.50
36.07
248
14.1376
13.1879
12.2909
27.43
36.12
250
13.7294
12.7955
11.9144
27.36
36.18
252
13.3347
12.4165
11.5510
27.27
36.23
253
12.9531
12.0503
11.2003
27.18
36.28
255
12.5840
11.6965
10.8617
27.10
36.34
257
12.2270
11.3545
10.5348
27.01
36.39
259
11.8817
11.0240
10.2191
27.18
36.45
261
11.5475
10.7046
9.9142
27.18
36.50
262
11.2242
10.3957
9.6197
27.10
36.61
39
Domestic Air Conditioner
Functions and Control
264
10.9112
10.0970
9.3352
27.01
36.64
266
10.6084
9.8082
9.0602
26.94
36.68
268
10.3151
9.5288
8.7945
26.85
36.79
270
10.0312
9.2586
8.5378
26.76
36.86
271
9.7563
8.9971
8.2895
26.69
37.04
273
9.4901
8.7441
8.0495
26.60
37.11
275
9.2322
8.4993
7.8175
26.51
37.18
277
8.9824
8.2623
7.5931
26.44
37.26
279
8.7404
8.0329
7.3760
26.35
37.33
280
8.5059
7.8108
7.1660
26.17
37.40
282
8.2787
7.5958
6.9629
26.08
37.47
284
8.0584
7.3875
6.7664
26.01
37.56
40
Domestic Air Conditioner
41
System Configration
Parts and Functions
Remote controller
Indoor Unit
1
Air Purifying Filter
Inlet
6
2
(inside)
7
3
4
frant cover
5
8
9
Outlet
18
10
19
11
Vertical blade
Horizontal flap
(adjust up and
down air flow
Don’t adjust it
manually)
(adjust left and
right air flow)
Display Emergency
Switch
board
20
12
21
13
22
14
23
15
The unit pictured above is for reference only.
Your product may appear different.
24
16
25
17
1. Mode display
Display board
1
2
3
4
Operation mode
5
DRY
HEAT
FAN
2. Signal sending display
3. SWING display
4. FAN SPEED display
4 TIMER ON display
1 Signal receiver hole
TIMER OFF display
2 ON/OFF display
SLEEP display
3 Ambient temp.display Note to the Auto restart function:
When receiving the remote
control signal, display the set
temperature mill be shown in the
display. The room temperature is
displayed and this room
temperature is only for reference.
AUTO COOL
Remote controller
LO
MED
Display
circulated
AUTO
HI
5. LOCK display
6. TIMER OFF display
TIMER ON display
7.TEMP display
8.Additional functions display
press the sleep button ten times in five seconds
and enter the function after hearing four sounds.
And press the sleep button ten times within five
seconds and leave this function after hearing
two sounds.
Operation mode QUITE SLEEP HEALTH POWER
5 COOL\HEAT\DRY\ AUTO display
Remote controller
9. QUIET button
10. HEAT button
11. COOL button
12. AUTO button
13. FAN button
14. TIMER button
15. HEALTH button
16. LOCK button
Used to lock buttons and LCD display.
17. LIGHT button
Control the lightening and extinguishing
of the indoor LED display board.
18. POWER ON/OFF button
19. DRY button
20. TEMP button
21. SWING button
22. HOUR button
23. EXTRA FUNCTION button
Function:Fan Mode— Healthy
airflow upwarder — Healthy airflow
downwarder— Reset the healthy
airflow position — Right & left airflow
setting— A-B yard— 10℃ low
temperature heating— Sleep Mode—
Electrical Heating— Refresh Air—
Power — Fahrenheit/Celsius mode
shift on unit and remote
Remark:A-B yard, Right & left airflow
setting, 10℃ low temperature heating,
Electrical Heating, Refresh Air functions
are not available for this mini split series.
24.CANCEL/CONFIRM button
Function: Setting and cancel to the
timer and other additional functions.
25. RESET button
If the remote appears abnormal,
use a pen point or similar object to
depress the button to reset the remote
Healthy function is not available for some units.
Loading of the battery
Outdoor Unit
2
1
correct " + "/"-";
Load the battery,then put on the cover again.
3
4
4
OUTLET
INLET
1 Remove the battery cover;
2 Load the batteries as illustrated.
2 AAA batteries.
3 Be sure battery polarity is
Note:
The distance from the remote to the receiver should be less than
23 feet (7 meters) with no obstructions.
Fluorescent lights or cordless telephones will reduce the range
of the remote.
If the display is dim the remote batteries may need to be replaced.
Remote malfunctions can sometimes be corrected by removing
the batteries for a few minutes and then replacing them.
CONNECTING PIPING AND ELECTRICAL WIRING
4 DRAIN HOSE
The unit pictured above is for reference only.
Your product may appear different.
Hint:
Remove the batteries if the unit won't be in use for a long period. If
there is any display after taking-out the batteries, just press reset key.
42
Function and control
Operation
Base Operation
Emergency operation and test operation
Emergency Operation:
Remote controller
Use this operation only when the remote controller is defective
or lost, and with function of emergency running, air conditoner
can run automatically in few seconds.
When the emergency operation switch is pressed, the unit
beeps once, which the start of this operation.
When power switch is turned on for the first time and
emergency operation starts, the unit will run automatically in
the following modes:
Beep
1
2
3
4
3
Room
Designated Timer Fan Operation
temperature temperature mode speed mode
o
26 C
o
23 C
Above 23 C
Below 23 C
Press ON/OFF on the remote controller, unit starts.
2. Select operation mode
HEAT
o
temperature is below 16 C, do not use it in the
normal operation.
button
/
Every time the button is pressed, temp.setting
increase 1oC / 2 o F, if kept depressed, it will
increase rapidly
Every time the button is pressed, temp.setting
decrease 1oC / 2 o F, if kept depressed, it will
decrease rapidly
Select a desired temperature.
Air Flow Direction Adjustment
1.Status display of air flow
Press FAN button. For each press, fan speed
changes as follows:
Remote controller:
COOL/DRY:
A
U
T
O
HI
Beep-Beep
Continue to press the test operation
switch for more than 5 seconds.After
you hear two beeps, release your finger
from the switch: the cooling operation
starts with the air flow speed "Hi".
Under this operation mode,the fan motor of indoor
unit will run in high speed.
4.Fan speed selection
HEAT:
AUTO
Initial state
2.Left and right air flow adjustment(manual)
The air conditioner will be running at the speed shown
in the display.
When FAN is set to AUTO, the air conditioner
automatically adjusts the fan speed according to room
temperature.
AUTO
COOL
AUTO
Use this switch in the test operation when the room
Press
Remote
Controller
AUTO
Test ope ration switch is the same as emergency switch.
3.Select temp.setting
Operation
Mode
No
No
Test operation:
COOL button:Cooling mode
HEAT button: Heating mode
DRY button: Dehumidify mode
MED
o
During emergency operation it is impossible to change the
settings of temp. and fan speed,It is also not possible to
operate in timer or dry mode.
1. Unit start
LOW
o
Move the vertical blade by a knob on air conditioner
to adjust left and right direction to achieve
stereoscopic air flow as the figure below.
Note
Under the mode of auto operation, air conditioner will
automatically select Cool or Heat operation according to
room temperature. When FAN is set to AUTO the air
conditioner automatically adjusts the fan speed according
to room temperature.
Cautions:
COOL
DRY
In DRY mode , when room temperature is 2 o C/4 o F degrees
less than the temperature set point, the unit will run
intermittently at LOW speed regardless of FAN setting.
HEAT
In HEAT mode, warm air will blow out after a short
period of the time due to cold-draft prevention function.
When FAN is set to AUTO, the air conditioner automatically
adjusts the fan speed according to room temperature.
FAN
In FAN operation mode , the unit will not operate in COOL or
HEAT mode but only in FAN mode, AUTO is not available in
FAN mode. And temp. setting is disabled. In FAN mode,
sleep operation is not available.
43
stereoscopic air flow
When adjusting the flap by hand,turn off the unit.
When humidity is high,condensate water might occur
at air outlet if all vertical louvers are adjusted to left or
right.
It is advisable not to keep horizontal flap at downward
position for a long time in COOLor DRY mode ,
otherwise, condensate water might occur.
Note:
When restarting the unit after it has been turned off,
the unit will keep the swing position before it stops
working.
Domestic Air Conditioner
Function and control
Operation
Sleep Operation
3. In AUTO mode
If the unit is running cooling, the sleep mode will follow
the function as in cool mode, while follow as in heat mode.
Press
button to enter additional options, cycle
the display to
,
will flash. And then press
enter for sleep function.
4. In FAN mode
It has no SLEEP function.
5.Fan Speed in Sleep Mode
When the unit is set to sleep mode, the fan speed
will be set to low speed and it cannot be changed.
Note
Operation Mode
1. In COOL,DRY mode
1 hours after SLEEP mode starts,temp.will become 1OC/2 O F
higher than temp.setting.After another 1 hours,temp.rises
by 1OC / 2 O F futher. The unit will run for further 6 hours then
stops Temp. is higher than temp.setting so that room
temperature won’t be too low for your sleep.
When TIMER function is set, the sleep function can’t be
set up .After the sleep function is set up, if user resets
TIMER function, the sleep function will be cancelled; the
machine will be in the state of timing-on.
POWER/QUIET Operation
(1) POWER Operation
SLEEP operation starts
When you need rapid heating or cooling, you can use this function.
SLEEP operation stops
Approx.6hrs
Rises 1OC/ 2 OF
1 hr
1 hr
O
Unit stop
,
will flash,and then press
,enter to
(2) QUIET Operation
In COOL, DRY mode
You can use this function when silence is needed for rest or reading.
Press QUIET button, the remote controller will show
and then achieve to the quiet function. To cancel this
2. In HEAT mode
1 hours after SLEEP mode starts,temp will become 2OC /
4 O F lower than temp.setting.After another 1 hours,temp
decrease by 2 O C / 4 O F futher.After more another 3 hours,
temp. rises by 1 O C / 2 O F futher.The unit will run for further
3 hours then stops.Temp.is lower than temp. setting so
that room temperature won’t be too high for your sleep.
function, press the QUIET button again and it will be
canceled.
Note :
Running the unit in QUIET mode for a long period may
Temp.setting
Unit stop
cause the room temperature to not reach the set
temperature. If this occurs, cancel QUITE mode and set
Decreases 2 C/ 4 F
O
1 hr
display to
different option.
Temp.setting
1 hr
button to enter additional options, cycle the
power function. To cancel this function, please select a
Rises 1 C/ 2 F
O
Press
O
the fan speed to a higher setting.
Decreases 2OC/ 4 O F
3 hrs
3 hrs
SLEEP
operation starts
Rises 1 C/ 2 O F
O
SLEEP
operation stops
In HEAT mode
44
Domestic Air Conditioner
,
Function and control
Operation
Timer On/Off On-Off Operation
Healthy airflow Operation
1.After unit starts, select your desired operation mode.
1.Press
Setting for comfortable conditions.
2.Press TIMER button to change TIMER mode. Every
time the button is pressed, display changes as follows:
Remote controller:
2.The setting of healthy airflow function
Press
BLANK
0.5h
0.5h
TIMER ON TIMER OFF
0.5h
TIMER ON-OFF
/
button to enter additional options,Press this
button continuously, the louvers location will cycle between
0.5h
TIMER OFF-ON
in the following three locations, to choose the swing location
Then select your desired TIMER mode (TIMER ON or
TIMER OFF or TIMER ON-OFF). "
"or "
"will flash.
3.Press
to starting
what you needed,and then press
Healthy
airflow
upwarder
Healthy
airflow
downwarder
button to confirm.
Present
position
button to set time.
Press the button for each time, setting time in the first
12 hours increased by 0.5 hour every time, after 12
hours,increased by 1 hour every time.
Press the button for each time, settiing time in the first
12 hours decreased by 0.5 hour every time, after 12
hours,decreased by 1 hour every time.
It can be adjusted within 24 hours.
3.To cancel of the healthy airflow function
Press
button to enter additional options,Press this
button continuously, the louvers location will cycle between
the three locations again,and then press
button to
cancel.
4.Confirm timer setting
Notice: Do not direct the horizontal by hand. This may cause
After adjusting the time,press
button and confirm
the time the ON or OFF button will not flash any more.
the louver to run incorrectly and not match the display. If the
louver is not running correctly, stop the unit for a minute
and then restart and adjust remote controller.
5.Cancel timer setting
Press the timer button until the time display eliminated.
Note:
1.After setting the healthy airflow function, the position
louver is fixed.
Hints:
After replacing batteries or a power failure happens, time
setting should be reset.
According to the Time setting sequence of TIMER ON or
TIMER OFF, either Start-Stop or Stop-Start can be achieved.
2.In heating, it is better to select the
mode.
3.In cooling, it is better to select the
mode.
4.In cooling and dry, using the air conditioner for a long
time under the high air humidity, condensate water may
occur at the grille .
45
Domestic Air Conditioner
roduction
Maintenance
For Smart Use of The Air Conditioner
Setting of proper room
temperature
Remote Controller
Do not block the air inlet
or outlet
Indoor Body
Proper
temperature
wipe the air conditioner by using a
soft and dry cloth.For serious stains,
use a neutral detergent diluted with
water.Wring the water out of the
cloth before wiping,then wipe off the
detergent completely.
Do not usewater,wipe the controller
with a dry cloth.Do not use glass
cleaner or chemical cloth.
Do not use the following for cleaning
Use the timer effectively
Close doors and windows
during operation
Gasoline,benzine, thinner or cleanser
may damage the coating of the unit.
Hot water over 40 O C(104O F) may
cause discoloring or deformation.
Air Filter cleaning
During cooling operation
prevent the penetration
of direct sunlight with
curtain or blind
Open the inlet grille by pulling it upward.
Remove the filter.
Push up the filter's center tab slightly until it is
released from the stopper, and remove the filter downward.
Clean the filter.
Use the louvers effectively
If the unit is not to be used
for a long time, turn off the
power supply main switch.
Use a vacuum cleaner to remove dust, or wash the filter with
water.After washing, dry the filter completely in the shade.
Attach the filter.
Attach the filter correctly so that the "FRONT" indication
is facing to the front.Make sure that the filter is
completely fixed behind the stopper.If the right
and left filters are not attached correctly, that
may cause defects.
OFF
Once every
two weeks
Close the inlet grille.
Replacement of Air Purifying Filter
1.Open the lnlet Grille
4.Attach the standard air filter
Prop up the inlet grille by using a
small device named grille-support
which located in the right side of
the indoor unit.
(Necessary installation)
ATTENTION:
The white side of the photocatalyst air purifying filter
face outside,and the black side face the unit The green
side of the bacteria-killing medium air purifying filter face
outside,and the white side face the unit.
2.Detach the standard air filter
Slide the knob slightly upward to
release the filter, then withdraw it.
5.Close the Inlet Grille
Close the Grille surely
NOTE:
Detach old Air Purifying Filter
The photocatalyst air purifying filter will be solarized in fixed
time. In normal family, it will be solarized every 6 months.
The bacteria-killing medium air purifying filter will be used
for a long time,no need for replacement. But in the period
of using them ,you should remove the dust frequently by
using vacuum cleaner or flaping them lightly,otherwise ,
its performance will be affected.
3.Attach Air Purifying Filter
Put air purifying filter appliances into the
right and left filter frames.
Please keep the bacteria-killing medium air purifying filter in
the cool and dry conditions avoid long time directly sunshine
when you stop using it,or its ability of sterilization will be
reduced.
reduced.
46
6
Domestic air conditioner
Introduction
Cautions
WARNING
Please call Sales/Service Shop for the Installation.
Do not attempt to install the air conditioner by yourself because improper works
may cause electric shock, fire, water leakage.
WARNING
When abnormality such as burnt-small found,
immediately stop the operation button and
contact sales shop.
Check proper
installation of the
drainage securely
Use an exclusive
power source
with a circuit
breaker
STRICT
ENFORCEMENT
OFF
Connect power supply cord
to the outlet completely
STRICT
ENFORCEMENT
Use the proper voltage
STRICT
STRICT
ENFORCEMENT
ENFORCEMENT
Take care not to damage
Do not use power supply
the power supply cord.
cord in a bundle.
PROHIBITION
PROHIBITION
PROHIBITION
Do not start or stop the
operation by disconnecting
the power supply cord
and so on.
1.Do not use power supply cord extended
or connected in halfway
2.Do not install in the place where there is any
possibility of inflammable gas leakage around the unit.
3.Do not get the unit exposed
to vapor or oil steam.
PROHIBITION
Do not insert objects into the air
inlet or outlet.
Do not channel the air flow directly
at people, especially at infants or
the aged.
PROHIBITION
Do not try to repair or
reconstruct by yourself.
Connect the earth
cable.
earthing
PROHIBITION
CAUTION
Do not use for the purpose of storage of
food, art work, precise equipment,
breeding, or cultivation.
PROHIBITION
Do not install the unit near a fireplace
or other heating apparatus.
Take fresh air occasionally especially
when gas appliance is running at the
same time.
STRICT
ENFORCEMENT
Check good condition of the
installation stand
PROHIBITION
Do not place animals or plants in
the direct path of the air flow
Do not operate the switch with
wet hand.
PROHIBITION
Do not pour water onto the unit
for cleaning
PROHIBITION
PROHIBITION
Do not place any objects on or
climb on the unit.
PROHIBITION
PROHIBITION
Do not place flower vase or water
containers on the top of the unit.
PROHIBITION
47
Domestic air conditioner
Introduction
Trouble shooting
Cautions
Before asking for service, check the following
first.
Phenomenon
The system
does not restart
immediately.
Noise is heard
Normal
Performance
inspection
Smells are
generated.
Mist or steam are
blown out.
In dry mode, fan
speed can’t be
changed.
Do not obstruct or cover the ventilation grille of the air
conditoner.Do not put fingers or any other things into the
inlet/outlet and swing louver.
Cause or check points
When unit is stopped, it won't restart
immediately until 3 minutes have
elapsed to protect the system.
When the electric plug is pulled out
and reinserted, the protection circuit
will work for 3 minutes to protect the
air conditioner.
During unit operation or at stop,
a swishing or gurgling noise may
be heard.At first 2-3 minutes after
unit start, this noise is more noticeable.
(This noise is generated by
refrigerant flowing in the system.)
During unit operation, a cracking
noise may be heard.This noise is
generated by the casing expanding
or shrinking because of
temperature changes.
Should there be a big noise from
air flow in unit operation, air
filter may be too dirty.
This is because the system
circulates smells from the interior
air such as the smell of furniture,
paint, cigarettes.
Multiple
check
Specifications
The refrigerating circuit is a sealed system.
The machine is adaptive in following situation
1.Applicable ambient temperature range:
Indoor
Cooling
Maximum:D.B/W.B 115 /75
67 /57
Maximum:D.B
80.6
Minimum: D.B
32
Outdoor Minimum: D.B
Indoor
Heating
Maximum:D.B/W.B 89.6 /73.4
Minimum:D.B/W.B 67 /57
Outdoor
Maximum:D.B/W.B 75 /65
Minimum:D.B/W.B 19.4
Outdoor Maximum:D.B/W.B 75 /65
(INVERTER)
Minimum:D.B
5
2. If the power supply cord is damaged, it must be replaced by the
manufacturer or its service agent or a similar qualified person.
3.If the fuse of indoor unit on PC board is broken,please change
During COOL or DRY operation,
indoor unit may blow out mist.
This is due to the sudden cooling
of indoor air.
it with the type of T. 3.15A/ 250V. If the fuse of outdoor unit is
broken,change it with the type of T.25A/250V
4. The wiring method should be in line with the local wiring standard.
In DRY mode, when room temperature
becomes lower than temp.
setting+2 oC,unit will run
intermittently at LOW speed
regardless of FAN setting.
5. After installation, the power plug should be easily reached.
6. When replacing batteries, the batteries removed should be disposed
of properly.
Is power plug inserted?
Is there a power failure?
Is fuse blownout?
Poor cooling
Do not allow children to play with the air conditioner.In no
case should children be allowed to sit on the outdoor unit.
7. The appliance is not intended for use by young children without
supervision.
Is the air filter dirty?
Normally it should be cleaned
every 15 days.
Are there any obstacles before
inlet and outlet?
Is temperature set correctly?
Are there some doors or
windows left open?
Is there any direct sunlight
through the window during the
cooling operation?(Use curtain)
Are there too much heat sources
or too many people in the room
during cooling operation?
8. Young children should be supervised to ensure that they do not play
with the appliance.
9. Please employ the proper power plug, which fit into the power supply
cord.
10. The power plug and connecting cable must have acquired the local
attestation.
11.In order to protect the units,please turn off the A/C first, and at least
30 seconds later, cutting off the power.
48
Domestic air conditioner
Service Diagnosis
7.Service Diagnosis
7.1 Caution for Diagnosis
The operation lamp flashes when any of the following errors is detected.
1.When a protection device of the indoor or outdoor unit is activated or when the thermistor malfunctions,
disabling equipment operation.
2.When a signal transmission error occurs between the indoor and outdoor units.In either case, conduct the
diagnostic procedure described in the following pages.
7.2.Problem Symptoms and Measures
Symptom
Check Item
Details of Measure
None of the units
Check the power supply.
Check to make sure that the rated voltage is supplied.
operates
Check the indoor PCB
Check to make sure that the indoor PCB is broken
Operation
Check the power supply.
A power failure of 2 to 10 cycles can stop air conditioner
sometimes stops.
operation.
Check for faulty operation
Set the units to cooling operation, and compare the
of
the
electronic
Equipment
operates but does expansion valve.
not cool, or does
not heat (only for
heat pump)
temperatures of the liquid side connection pipes of the
Diagnosis by service port
connection section among rooms to check the opening and
closing operation of the electronic expansion valves of the
individual units.
Check for insufficient gas.
pressure and operating
current.
Large operating
noise and
vibrations
Check the installation
condition.
Check to make sure that the required spaces for
installation (specified in the Technical Guide, etc.) are
provided.
49
Domestic Air Conditioner
Service Diagnosis
7.4.Error Codes and Description indoor display
Code indication
Indoor
displaying
panel code
indication
Indoor
and
Outdoor
Indoor Malfunction
Reference
fault description
Page
(LED1 flash
times)
Communication fault between indoor and
E7
15
E1
--
Room temperature sensor failure
Page .51
E2
--
Heat-exchange sensor failure
Page .51
E4
--
Indoor EEPROM error
Page .52
E14
--
Indoor fan motor malfunction
Page .53
F12
1
Outdoor EEPROM error
Page .52
F1
2
The protection of IPM
Page .55
3
Overcurrent
Outdoor
Malfunction
Outdoor
F22
outdoor units
protection of
AC electricity
for the outdoor model
F3
4
F19
6
F
Communication fault between the IPM and
outdoor PCB
Page .60
Page .56
Page 57
Power voltage is too high or low
Page .58
Overheat protection for exhaust temperatu
Page .59
F21
10
Defrost temperature sensor failure
Page .51
F7
11
Suction temperature sensor failure
Page .51
F6
12
Ambient temperature sensor failure
Page .51
F25
13
Discharge temperature sensor failure
Page .51
F11
18
deviate from the normal for the compressor
Page .63
F28
19
Loop of the station detect error
Page .63
E2
24
Overcurrent of the compressor
Page .56
F23
25
Overcurrent protection for single-phase of the
compressor
Page .56
50
Domestic Air Conditioner
Service Diagnosis
7.4.1 Thermistor or Related Abnormality
Indoor Display
E1: Room temperature sensor failure
E2: Heat-exchange sensor failure
outdoor display
LED1 flash 10 times˖Defrost temperature sensor failure
LED1 flash 11 times˖Suction temperature sensor failure
LED1 flash 12 times˖Ambient temperature sensor failure
LED1 flash 13 times˖Discharge temperature sensor failure
Method of
Malfunction
Detection
Malfunction
Decision
Conditions
The temperatures detected by the thermistors are used to determine thermistor errors
when the thermistor input is more than 4.92V or less than 0.08V during compressor
operation.
z
Note: The values vary slightly in some models
Supposed
Causes
■ Faulty connector connection
■ Faulty thermistor
■ Faulty PCB
Troubleshooting
* Caution Be sure to turn off power switch before connect or disconnect connector,
or
else parts damage may be occurred.
Check the connector onnection.
NO
Correct the connection
Is it normal?
Yes
Thermistor resistance check
NO
Replace the thermistor
Is it normal?
Yes
Replace the indoor unit PCB
Thermistor resistance check method:
Remove the connector of the thermistor on the PCB, and measure the resistance of thermistor using tester.The
relationship between normal temperature and resistance is shown in the value of indoor thermistor.
51
Domestic Air Conditioner
Service Diagnosis
7.4.2 EEPROM abnormal
Indoor Display
E4:
indoor EEPROM error
Indoor display
F12:
Method of
The Data detected by the EEPROM are used to determine MCU
Outdoor EEPROM error ;Outdoor LED1 flash 1 times
Malfunction
Detection
Malfunction
when the data of EEPROM is error or the EEPROM is damaged
Decision
Conditions
Supposed
■
Faulty EEPROM data
Causes
■ Faulty EEPROM
■ Faulty PCB
Troubleshooting
* Caution Be sure to turn off power switch before connect or disconnect connector,
or
parts damage may be occurred.
Replace the indoor or outdoor mainboard
52
Domestic Air Conditioner
Service Diagnosis
7.4.3 Indoor AC fan motor malfunction
Indoor Display
Method of
Malfunction
Detection
Malfunction
Decision
Conditions
E14
The rotation speed detected by the Hall IC during fan motor operation is used to determine
abnormal fan motor operation
when the detected rotation feedback singal don’t receiced in 2 minutes
■ Operation halt due to breaking of wire inside the fan motor .
■ Fan motor overheat protection
■ Operation halt due to breaking of the fan motor lead wires
■ Detection error due to faulty indoor unit PCB
* Caution Be sure to turn off power switch before connect or disconnect connector,
Troubleshooting
Supposed
Causes
or
else parts damage may be occurred.
Pull out the terminals on the indoor
No
Check whether terminals
mainboard and reinsert them.
on indoor pcb is well ?
Yes
Electrify the machine again and turn it on in the cooling operation,
Measure voltage between the positions 1and 3 of Terminal CN5 on
the indoor PCB
the voltage is about 90-220vac
NO
Yes
Yes
Measure whether there is voltage pulse(0-5VDC)
check whether motor can run
between the positions middle wire and black wire
when turn on the unit
of Terminal CN2 on the indoor PCB
Is it ok?
NO
NO
Yes
the indoor motor is damaged and need replace
the indoor pcb is damaged and need replace
53
Domestic Air Conditioner
Service Diagnosis
7.4.4 Outdoor DC fan motor fault
Check whether Terminal on the outdoor
mainboard is well inserted.
NO
Reinsert the terminals
Is it normal?
Yes
Electrify the machine again and turn it
NO
on in the Cool state with the remote
controller. check whether motor can
run˛
Measure the voltage between 1 and 3 of the terminal of
fan motor on the mainboard about DC310V,Measure the
Yes
voltage between 3 and 4 of the terminal about DC15V.
Measure the voltage between 5 and 3 of the terminal
Measure the voltage between 3 and 6 of
about 1-6v.
the terminal about 0-5v.
Yes
Is it normal?
Is it normal?
Yes
N0
N0
the motor of the outdoor unit is damaged and
The mainboard of the outdoor unit is
needs replacing.
damaged and needs replacing
54
Domestic Air Conditioner
Service Diagnosis
7.4.5 IPM protection
Outdoor display
Method of
Malfunction
Detection
LED1 flash 2 times
IPM protection is detected by checking the compressor running condition and so on
Malfunction
Decision
Conditions
■ The system leads to IPM protection due to over current
■ The compressor faulty leads to IPM protection
■ circuit component of IPM is broken and led to IPM protection
Supposed
Causes
■ IPM protection dues to the compressor faulty
■ IPM protection dues to faulty PCB of IPM module
■ Compressor wiring disconnected
* Caution Be sure to turn off power switch before connect or disconnect connector,
Troubleshooting
or
else parts damage may be occurred.
Electrify the machine again and turn it on
YES
with the remote controller,If malfunctions
IPM Module is damaged and
are reported before or upon the compressor
needs replacing.
being started up,
Malfunction unsolved
NO
The
compressor
is
started
normally,
but
malfunctions are reported after it has run for some
time.
1ǃThe system may have been over or under charged with gas, which can be judged through the pressure of the
measuring system.
2ǃThe shaft of compressor is seized and the compressor needs replacing.
55
Domestic Air Conditioner
Service Diagnosis
7.4.6 Over-current of the compressor
Outdoor Display
LED1 flash 3 or 24 or 25 times
Method of
Malfunction
Detection
The current of the compressor is too high
Malfunction
Decision
Conditions
when the IPM Module is damaged
or the compressor is damaged
power supply. voltage is too low or too high
Supposed
Causes
Troubleshooting
■ Faulty IPM Module
■ Faulty compressor
■ Faulty power supply
* Caution Be sure to turn off power switch before connect or disconnect connector, or
parts damage may be occurred.
Electrify the machine again and turn it on
YES
with the remote controller,If malfunctions
IPM Module is damaged and
are reported before or upon the compressor
needs replacing.
being started up,
NO
The compressor is started normally, but
Yes
malfunctions are reported after it has
Repair the power supply
run for some time. Check the power
supply is too low or too high
NO
NO
the system may have been over or under charged
with gas, which can be judged through the
pressure of the measuring system.
56
Domestic Air Conditioner
Service Diagnosis
7.4.7 The communication fault between IPM and outdoor PCB
Outdoor display LED1 flash 4 times
Method of
Malfunction
Detection
Communication is detected by checking the IPM module and the outdoor PCB
Malfunction
Decision
Conditions
■ The outdoor PCB broken leads to communication fault
■ The IPM module broken leads to communication fault
Supposed
Causes
■ The outdoor PCB is broken
■ The IPM module is broken
■ Communication wiring disconnected
Troubleshooting
* Caution Be sure to turn off power switch before connect or disconnect connector,
else parts damage may be occurred.
or
1) Check whether Terminal CN23 and CN24 on the outdoor mainboard
CN10 and CN11 on IPM module
2) Check whether the connected wire between IPM and outdoor
NO
1) Pull out and reinsert the terminals.
2) Replace connected wire
Are they good?
Malfunction unsolved
YES
Electrify the machine again and turn it
on, Check whether the voltage between
YES
1 and 2 of Terminal CN23 is about DC5V,
Replace the outdoor IPM module
Check whether the voltage between2
with a new one.
and 3 of Terminal CN23 is about DC15V,
NO
Replace the outdoor mainboard with a new one
57
Domestic Air Conditioner
Service Diagnosis
7.4.8 Power Supply Over or under voltagve fault
outdoor display:
Method of
Malfunction
Detection
Malfunction
Decision
Conditions
LED1
flash 6 times
The power supply is over voltage
An abnormal voltage rise or fall is detected by checking the specified voltage detection circuit.
An voltage signal is fed from the voltage detection circuit to the microcomputer
Supposed
Causes
■ Supply voltage not as specified
■ the IPM module is broken
■ the outdoor PCB is broken
Troubleshooting
* Caution Be sure to turn off power switch before connect or disconnect connector, or else
parts damage may be occurred.
Electrify the machine again and turn it on with
the remote controller. Check whether the
compressor is started normally
Yes
Is it ok?
Maybe there is some disturbance
No
Yes
Test the outdoor power supply
Change the IPM module
(+310VDC) with a multimeter.
check whether the power is
>150 V or <390V?
NO
Yes
Change the IPM module
~230 is ok?
NO
This question may be caused by the power.Repair
the power supply.
58
Domestic Air Conditioner
Service Diagnosis
7.4.9 Overheat Protection For Exhaust Temperature
outdoor display
Method of
Malfunction
Detection
Malfunction
Decision
Conditions
Supposed
Causes
Troubleshooting
LED1
flash 8 times
The discharge temperature control is checked with the temperature being detected
by the exhaust pipe thermistor
when the compressor discharge temperature is above 110ć
■ Electronic expansion valve defective
■ Faulty thermistor
■ Faulty PCB
* Caution Be sure to turn off power switch before connect or disconnect connector,
or
else parts damage may be occurred.
Electrify the machine again and turn it on with the remote controller,
then measure the temperature at the exhaust temperature sensor of
the compressor on the outdoor unit
1) The cryogen may have been leaked during
the
temperature
110 ć
YES
exceeds
installation, or there may be leakage in the piping
system.
shortly after the
2) There may be other causes to make the exhaust
machine starts up?
temperature too high.
NO
Malfunctions occur after running for some time even
though the measured temperature is below 110ć. Pull
out the exhaust sensor and measure its resistance at
standard
temperatures
according
to
the
resistance-temperature table
YES
the
results
The sensor is damaged. Replace the sensor
deviate
with a new one.
much?
NO
The outdoor mainboard is damaged and needs be
replaced
59
Domestic Air Conditioner
Service Diagnosis
7.4.10 The communication fault between indoor and outdoor
Indoor display
outdoor display
E7
LED1 flash 15 times
Method of
Malfunction
Detection
Communication is detected by checking the indoor PCB and the outdoor PCB
Malfunction
Decision
Conditions
■ The outdoor PCB broken leads to communication fault
■ The indoor PCB broken leads to communication fault
Supposed
Causes
Troubleshooting
■
■
■
■
Communication wiring disconnected
The indoor PCB is broken
The outdoor PCB is broken
The Module PCB is broken
* Caution Be sure to turn off power switch before connect or disconnect connector,
or
else parts damage may be occurred.
60
Domestic Air Conditioner
Service Diagnosis
Restart the a/c and it
Yes
The outdoor mainboard needs
dehumidification.
becomes normally.
NO
If starting up normally, but
NO
The outdoor mainboard needs
malfunction occurs again after a
dedust.
while
YES
Check whether the linking cable
No
1. Reconnect the linking cable;
between the indoor and outdoor is well
2. Replace the linking cable with new
connected or whether its core wires are
one.
well insulated.
Yes
˄A˅
61
Domestic Air Conditioner
Service Diagnosis
˄A˅
Check the indoor mainboard.
Yes
measure the voltage between Jumpers 3 and
4 of IC1 on the indoor mainboard with a
No
multimeter.
Test the outdoor power supply (230VAC
and +310VDC) with a multimeter.
If the voltage is of a constant
value of 0V DCto5V DC
If 230VAC is available but 310DC not,
the power module is damaged, replace it
with a new one.
YES
If both 230VAC and 310DC are
NO
The indoor mainboard is damaged; replace
available,measure +12V(from7805)
NO
it with a new one.
is available.
The outdoor mainboard is damaged;
Replace them with a new one.
YES
measure the AC voltage between positions 1
and 3 on the terminal of outdoor unit with a
If the value is constant at about 30V, the
multimeter.
indoor mainboard is damaged, replace it with
a new one.
If the value varies between 0 and 80 VAC, the
The outdoor mainboard is damaged; replace
outdoor mainboard is damaged, replace it
it with a new one.
with a new one.
62
Domestic Air Conditioner
Service Diagnosis
7.4.11
Loss of synchronism detection
Inverter side current detection is abnoraml
Outdoor Display
Method of
Malfunction
Detection
Malfunction
Decision
Conditions
Supposed
Causes
Troubleshooting
LED1 flash 18 times
LED1 flash 19 times
The position of the compressor rotor can not detected normally
when the wiring of compressor is wrong or the connection is poor;
or the compressor is damaged
■ Faulty The wiring of compressor
■ Faulty compressor
■ Faulty PCB
* Caution Be sure to turn off power switch before connect or disconnect connector, or parts
damage may be occurred.
Within 3 minutes after the machine is
supplied with power and turned on with
the remote controller,check whether
the compressor can stard up
NO
1. The wiring of compressor is incorrect
or the connection is poor;
2. The compressor is damaged
YES
At frist, the compressor start up ,soon the
compressor stopped with the LED1 on the
outdoor PCB blinks˄1Hz˅19/18 times
YES
IPM Module is damaged and needs
replacing.
Malfunction unsolved
the
Maybe there is some disturbance
Malfunctions exist also, the
compressor is damaged replace a
new one
63
Domestic Air Conditioner
Service Diagnosis
7.4.12 High work-intense protection
Outdoor display
LED1 flash 21 times
Method of
Malfunction
Detection
High work-intense control is activated in the heating mode if the temperature
being sensed by the heat exchanger thermistor exceeds the limit.
Malfunction
Decision
Conditions
Activated when the temperature being sensed by the heat exchanger
rises above 65ć twices in 30 minutes.
Supposed
Causes
■
■
■
■
Troubleshooting
Faulty electronic expansion valve
Dirty heat exchanger
Faulty heat-exchange sensor
Insufficient gas
* Caution Be sure to turn off power switch before connect or disconnect connector,
else parts damage may be occurred.
Electrify the machine again and turn it on with the
remote controller, check whether the wind
temperature is below 65ć
YES
the malfunction is reported
after the machine has run
for some time?
1 ǃ Check room temperature and
pipe temperature sensor.
2ǃthe temperature monitoring circuit
of the indoor mainboard
NO
YES
the indoor unit blows poorly
due to blocked filters or poor
condition of the fan?
1) Clean the filters
2) Reinstall the fan.
NO
Use some tools to measure the pressure of systemˈ
64
Domestic Air Conditioner
or
Installation
8 Installation
Installation Manual of Room Air Conditioner
Preparation
Necessary Tools for Installation
Selection of Installation Place
Indoor Unit - Select a location that is
● Torque wrench
(17mm,22mm,26mm)
● Hammer
● Nipper
● Hacksaw
● Pipe cutter
● Hole core drill
● Flaring tool
● Spanner(17,19 and 26mm)
● Gas leakage detector or
● Knife
● Measuring tape
● Robust not causing vibration, where the unit can be supported s ufficiently.
● Not affected by heat or steam generated in the vicinity, and where the inlet and outlet of
the unit are not disturbed.
● Possible to drain easily, and where piping can be connected with the outdoor unit.
● Where conditioned air can be spread in a room evenly.
● Place where the distance of more than lm from televisions, radios, wireless apparat
● Reamer
soap-and-water solution
and fluorescent lamps 3 feet or approximately.
● In the case of fixing the remote controller on a wall, place where the indoor unit can
receive signals when the fluorescent lamps in the room are in use.
Power Source
Outdoor Unit - Select a location that is
● Less affected by rain or direct sunlight and is sufficiently ventilated.
● Strong enough to bear the unit, where vibration and noise are not increased.
● Not causing a nuisance to neighbors due to discharged air or noise.
● A distance marked is available as illustrated in the below figure.
● All wiring to the unit must be in accordance with the National Electric code
and local ordinances.
Drawing for the installation of indoor and outdoor units
The models adopt HFC free refrigerant R410A
Attention must be paid to
the pitch of drain hose
more than 5cm
(1 15/16 inches)
Optional parts for piping
A Non-adhesive tape
B Adhesive tape
C Saddle (L.S) with screws
Connecting electric cable
D
for indoor and outdoor
E Drain hose
G
more than
10cm
(3 15/16
inches)
F Insulating material
G Piping hole cover
Arrangement of piping
directions
more than 10cm
(3 15/16 inches)
Rear left
F
A
Rear
right
Left
Floor fixing dimensions of the outdoor unit
(Unit:mm / inch)
Z
X
Right
X
C
Below
Model
more than 10cm
more than 10cm
Y
(3 15/16 inches)
HSU09VHG(DB)-W
(3 15/16 inches)
HSU12VHG(DB)-W
● The marks from A to
G in the figure are the
name of the parts.
● The distance between
the indoor unit and the
floor should be more
than 2m or 6 feet.
HSU18VHG(DB)-W
HSU24VHG(DB)-W
x
y
z
140
500
256
(5 1/2)
(19 2/3)
140
500
(5 1/2)
113.5
(4 1/2)
113.5
(4 1/2)
(19 2/3)
583
(23)
633
(24 7/8)
(10 1/16)
256
(10 1/16)
319.5
(12 5/8)
340
(13 1/2)
Fixing of outdoor unit
● Fix the unit to concrete or block with bolts
D
E
(10mm) securely.
● When fitting the unit to wall surface, roof or
more than 60cm
(23 5/8 inches)
Dimensions(mm/inches)
●
rooftop, fix the unit securely in consideration
of earthquake and strong wind.
If vibration may affect the house, fix the unit
by attaching a vibration-proof mat.
more than15cm
(5 7/8 inches)
The above picture is for reference only. Your product may look different.
Read this manual before installation
Explain the operation of the unit to the user according to this manual
NO.0010538926
65
Domestic air conditioner
Installation
Accessory parts
2
● Make a hole of B mm / inches in diameter, slightly descending to outside the wall.
● Install piping hole cover and seal it off with putty after installation
Remote controller (1)
Drain hose (1)
AAA dry battery (2)
Cushion (4)
Mounting plate (1)
Drain-elbow (1)
Plastic cap (4)
Ø4X25 Screw (4)
Pitch downward for drainage
Wall hole
09k/12k : B= 60mm(2 3/8 inches)
18k/24k : B=70mm(2 3/4 inches)
ØBmm
Pipe supporting plate (1)
Indoor side
Selection of pipe
(Section of wall hole)
Liquid pipe (Ø)
Gas pipe (Ø)
HSU09VHG(DB)-W
6.35mm (1/4 ")
9.52mm (3/8 ")
HSU12VHG(DB)-W
6.35mm (1/4 ")
9.52mm (3/8 ")
Model
HSU18VHG(DB)-W
6.35mm (1/4 ")
12.7mm (1/2 ")
HSU24VHG(DB)-W
9.52mm (3/8 ")
15.88mm (5/8")
3
Thickness of wall
Outdoor side
G Piping hole pipe
Installation of the Indoor Unit
Drawing of pipe
[ Rear piping ]
NOTE:The thickness of the pipe must be 0.8mm(1/16”) at least.
● Draw pipes and the drain hose, then fasten them with the adhesive tape
Indoor unit
1
Making a Hole on the Wall and Fitting the Piping Hole Cover
[ Left・Left-rear piping ]
● In case of left side piping, cut away, with a nipper, the lid for left piping.
● In case of left-rear piping, bend the pipes according to the piping direction to
the mark of hole for left-rear piping which is marked on insulation materials.
Fitting of the Mounting Plate and Positioning of the wall Hole
1. Insert the drain hose into the carity of heat insulation materials of indoor unit.
2. Insert the indoor/outdoor electric cable from backside of indoor unit, and pull it
out on the front side, then connect them.
3. Coat the flaring seal face with refrigerant oil and connect pipes.
Cover the tubing connection with insulation materials closely, and with adhesive
tape.
When the mounting plate is first fixed
1. Carry out, based on the wall studs or lintels, a proper leveling for the plate
to be fixed against the wall, then temporarily fasten the plate with one nail.
2. Ensure the proper level of the plate, by hanging a thread with a
weight from the central top of the plate, then fasten the plate.
Indoor/outdoor electric cable
3. Find the wall hole location A using a measuring tape
Insulation
material
Lid for right
piping
09k
(2 3/8 inches)
30mm
(5 11/16 inches)
12k
● Indoor/outdoor electric cable and drain hose must be bound with refrigerant
piping with adhesive.
[ Other direction piping ]
● Cut away, with a nipper, the lid for piping according to the piping direction and
then bend the pipe according to theposition of wall hole. When bending, be
careful not to crush pipes.
B = Ø 60mm
● Make sure that the wires connecting the indoor and outdoor units are not covered
by the refrigeration piping insulation and are long enough to connect to the terminal
block on the indoor unit.
30mm
18k
(1 1/6 inches)
(2 3/8 inches)
A = 145mm
(5 11/16 inches)
Fixing the indoor unit body
● Hang the unit body onto the upper notches of the
mounting plate. Move the body from side to side to verify
its secure fixing.
● In order to fix the body onto the mounting plate,hold up
the body from the underside and then put it down
perpendicularly.
B= 70mm
(2 3/4 inches)
35mm
(1 3/8 inches)
A=150mm
(5 7/8 inches)
24k
Drain hose
Fix with adhesive tape
(1 1/6 inches)
A = 145mm
Lid for left piping
Lid for under piping pipe
B = Ø 60mm
Piping
Pipe supporting
plate
mounting plate
Unloading of indoor unit body
●When you unload the indoor unit,please use
35mm
(1 3/8 inches)
A=150mm
your hand to raise the body , then
lift the bottom of the body outward
slightly and lift the unit until
it leaves the mounting plate.
mm
(5 7/8 inches)
(2 3/4 inches)
agraffe
mounting plate
66
Domestic air conditioner
Installation
4
Outdoor unit
Connecting the indoor/outdoor Electric Cable
Installation of Outdoor Unit
1
Removing the wiring cover
Install according to the instructions on the 1st page of this manual
● Remove terminal cover at right bottom corner of indoor unit, then take off
wiring cover by removing its screws.
Connection of pipes
2
● When bending the interconnect tubing, ensure the radius is at least 1 1/4" to 1 3/4",
30mm to 40mm to ensure against crushing the tubing.
When connecting the cable after installing the indoor unit
● Connecting the pipe of gas side first makes working easier.
● Ensure the interconnecting tubing is approved for R410A.
1. Insert the cable from the outside into the unit through the same
hole that has the interconnecting tubing.
Half union
2. Pull out the cable on the front side, and connect the cable
making a loop.
Forced fastening without careful centering may
damage the threads and cause a leakage of gas.
Flare nut
When connecting the cable before installing the indoor unit
●
●
●
Pipe Diameter(ǿ)
Fastening torque
Liquid side6.35mm(1/4")
18N.m/13.3Ft.lbs
Liquid/Gas side9.52mm(3/8") 42 N.m/30.1Ft.lbs
Insert the cord from the back side of the unit, then pull it out on the front side.
Spanner
Fasten the unit wire harness to the conduit holder using the lock nut.
Position the conduit holder to its original state using screw.
Torque wrench
Gas side 12.7mm(1/2")
55N.m/40.6Ft.lbs
Gas side 15.88mm(5/8")
60 N.m/44.3Ft.lbs
Ensure that no dirt or debris enters the tubing. The standard tubing length is 15 ft., 5M.
If a different length is required, adjust the refrigerant amount by 1/4 oz/ft, 20 g/M for the
9k, 12k and 18k models. For the 24k model, adjust by 1/2 oz/ft, 40 g/M.Before opening
the service valves, evacuate the interconnecting tubing and indoor unit. Follow the
instruction in section 5 on page 4.
CAUTION
Note
When connecting the cable, confirm the terminal number of indoor and
outdoor units carefully. If wiring is not correct, the unit will not operate
properly and could cause a defect.
Outdoor unit
4wire 18AWG
(4G0.75mm 2 )
{
Power
Wiring
HSU09VHG(DB)-W
Outdoor unit
= 50ft / 15m (18k / 24k)
B
A
elevation A is more
• Inthancase15ftthe/ 5m,
oil trap shoud be
Oil trap
installed every 5~7m
Indoor unit
Length: Bmax
• Max.
= 50ft / 15m (09k / 12k)
= 80ft / 25m (18k / 24k)
2wire with ground 16AWG (4G0.75 mm2 )
Outdoor unit
Cutting and Flaring Work of Piping
1
Indoor unit
● Pipe cutting is carried out with a pipe cutter and burs must
● After inserting the flare nut, flaring work is carried out.
2
3(C)
A
2N
{
1L
HSU18VHG(DB)-W
HSU24VHG(DB)-W
Power
Wiring
( )
Control Wiring
be removed.
Flare tool for R410A
Conventional flare tool
Clutch-type
clutch-type(Rigid-type) Wing-nut type (Imperial-type)
0~0.5mm
0~1/51 inch
1.5~2.0mm
1/17 ~1/8 inch
1.0~1.5mm
3/76 ~1/17 inch
( )
4wire 18AWG
(4G0.75mm 2 )
Power cable:
Amax
• Max.Elevation:
= 32ft / 10m (09k / 12k)
Outdoor unit
HSU12VHG(DB)-W
Power cable:
Indoor unit
A
1(N) 2(L) 3(C)
Control Wiring
B
A
1(N) 2(L) 3(C)
Indoor unit
Indoor unit
B
Outdoor unit
1.Cut pipe
Flare tooling die
2.Remove burs
2wire with ground 12AWG (4G0.75 mm 2 )
3.Insert the flare nut
1. If the supply cord is damaged, it must be replaced by the manufacturer or its
service agent or a similar qualified person. The type of connecting wire is
H05RN-F or H07RN-F.
2. If the fuse on PC board is broken please change it with the type of
T.3.15A/250VAC (Indoor), T.25A/250VAC (Outdoor).
3. The wiring method should be in line with the local wiring standard.
4. Use an HVACR circuit breaker or time delay fuse.
Correct
Incorrect
Lean
67
4.Flare pipe
Damage of flare
Crack
Partial
Too outside
Domestic air conditioner
Installation
3
●
●
●
4
1
Connection
Loosen the screws on terminal block and insert the wires fully into terminal
block, then tighten the screws.
If wiring is not correct, the unit will not operate properly and it could cause a
defect in the unit.
Fix the cable with a clamp.
Power Source Installation
● The power source must be exclusively used for air conditioner.
● In the case of installing an air conditioner in a moist place, please install an earth leakage breaker.(GFCI)
● For installation in other places, use an HVACR circuit breaker of time delay fuse.
2
Attaching Drain-Elbow
On Drainage
● Please install the drain hose and ensure downward flow.
● Please don’t do the drainage as shown below.
● If the drain-elbow is used,
please attach as shown in figure.
(Note: Only for heat pump unit.)
5
1.
Less than
5cm
Purging Method:To use vacuum pump
It becomes The end is imm- It waves. The gap with the
There is the bad
high midway. ersed in water.
ground is too small. smell from a ditch
Detach the service port’s cap of 3-way valve, and the valve cap for 2-way valve
and 3-way valve. Connect the service port to the low side of the gauge manifold
and connect the vacuum pump to the center port of the manifold.
● Please pour water in the drain pan of the indoor unit, and confirm that drainage
is proper.
2. Open the handle on the low side of the gauge manifold and operate vacuum pump.
● In case that the attached drain hose is in a room, please
to the hose to prevent condensation.
3. Vacuum the tubing for at least 15 minutes. The vacuum level on the low side gauge
should be 29.9 in of Hg, 76 cm of Hg, 0.1 MPa. when vacuuming is complete, close
the valve on the manifold and turn off the vacuum pump. The vacuum level should
hold for 1-2 minutes. If the vacuum level does not hold, check the flared connections
and repeat this step.
4. Open the 2-way valve 1/4 turn. After 5-6 seconds, close the valve and inspect for
leaks with a leak detector or soap solution.
5. No gas leakage? Go to step 6.
In case of a leak, try tightening the flare connections to fix the leak. If the
leak stops, go to step 6. If the leak continues, check the flare connections
and repair as needed, then go back to step 3. then proceed step 6. If leak
continues, remove the refrigerant used for the leakage check and flare
tubes again. Repeat vacuum and leak and if no leakage, proceed to step 6.
Step 2.
2-way valve Liquid Side
3-way valve Gas Side
Open
Gaugemanifold(for R410A)
Gauge manifold
Tube(for R410A)
Step 4.
Step 3.
Close
Vacuum pump
Step 6.
2-way valve
3-way valve
R410A
1=
kg
2
2=
kg
1+2=
kg
A
B
C
D
E
This product contains fluorinated greenhouse gases covered by
the Kyoto Protocol. Do not vent into the atmosphere.
Refrigerant type:R410A
GWP* value:1975
GWP=global warming potential
Please fill in with indelible ink,
•1
the factory refrigerant charge of the product
•2
the additional refrigerant amount charged in the field and
• 1+2 the total refrigerant charge
on the refrigerant charge label supplied with the product.
The filled out label must be adhered in the proximity of the product
charging port (e.g. onto the inside of the stop value cover).
A contains fluorinated greenhouse gases covered by the Kyoto
Protocol
B factory refrigerant charge of the product: see unit name plate
C additional refrigerant amount charged in the field
D total refrigerant charge
E outdoor unit
F refrigerant cylinder and manifold for charging
leakage, replace the service port and valve caps.
8. After attaching the caps, check for leakage around the caps.
Step 1.
Contains fluorinated greenhouse gases
covered by the Kyoto Protocol
F
valve completely.
7. To prevent the gas
■ Refrigerant charge label
1
6. Detach the charge hose from the service port, open 2-way valve and 3-way
apply insulation to
2-way valve
3-way valve
O
Open 90
■ Check for Installation and Test Run
Step 7.
2-way valve 3-way valve
■ Please kindly explain to our customers how to operate
through the instruction manual.
2-way valve
3-way valve
Check Items for Test Run
in boxes
Gas leak from interconnecting tubing?
Installation is on the interconnecting tubing?
Are the connecting wirings of indoor and outdoor firmly
inserted to the terminal block?
Is the connecting wiring of indoor and outdoor firmly fixed?
Is drainage securely carried out?
Is the ground wire securely connected?
Is the indoor unit securely fixed?
Is power source voltage the local codes?
Is there any noise?
Are the lights near the unit working normally?
Are cooling and heating (when in heat pump) performing normally?
Is the operation of room temperature control normal?
Valve cap
Service port cap
Put check mark
Valve cap
CAUTION
● If the refrigerant of the air conditioner leaks, it is necessary to discharge all the
refrigerant. Repair the leak, vacuum the unit then charge the liquid refrigerant
into air conditioner according to the amount marked on the name plate.
● Please do not let other cooling medium, except specified one (R410A), or air
enter into the cooling circulation system. This could cause high pressure and
could cause a leak and lead to personal injuries.
68
Domestic air conditioner
Removal Procedure
9.1
69
Domestic air conditioner
Removal Procedure
2
Please embed the air
filters into the unit along
the grooves as installation.
Please embed the two
hooks on air filter
completely into the unit
during installation.
70
Domestic air conditioner
Removal Procedure
9.2 Removal of front panel
until it is on the
horizontal position,
and then release the
pivots on both sides of
the unit to remove the
front panel.
Please close the panels
before start the removal
procedure of front grille.
one side to another to
release each axis.
71
Domestic air conditioner
Removal of procedure
two
HOOKS
three
72
Domestic air conditioner
Removal of procedure
9.3
horizontal flap
flap
flap
flap
flap
73
Domestic air conditioner
Removal of procedure
9.4
74
Domestic Air Conditioner
Removal of procedure
9.5
75
Domestic Air Conditioner
Removal of Electrical Box
9.6
76
Domestic air conditioner
Removal of Heat Exchanger
9.7 Removal of Heat Exchanger
77
Domestic Air Conditioner
Removal of procedure
78
Domestic Air Conditioner
Removal of procedure
9.8 Removal of Fan Rotor and Fan Motor
79
Domestic Air Conditioner
Removal of procedure
80
Domestic Air Conditioner
Removal Procedure
9.9 Removal of Outdoor panel
81
Domestic Air Conditioner
Removal Procedure
82
Domestic Air Conditioner
Removal Procedure
4
83
Removal Procedure
9.10 Removal of Electrical Box
84
Removal Procedure
9.11 Removal of Fan and Fan Motor
85
Domestic Air Conditioner
Removal Procedure
9.12 Removal of fan motor bracket and partition
86
Removal Procedure
9.13 Removal of compressor and heat exchanger
87
Removal Procedure
88
Wiring Diagrams
10.Wiring Diagrams
10.1. INDOOR UNIT
89
Domestic Air Conditioner
Wiring Diagrams
10.2.Outdoor unit
287'225:,5,1*',$*5$0
:$51,1*
02'8/(%2$5'
&$87,21
CN6
CN9 CN8
'21
7728&+&$3$&,725(9(1$)7(5
3/8*2))'$1*(52)(/(&75,&6+2&.
AC-N AC-L
CN1
:
CN7
8
9
CN4CN3CN2
CN5
%/
WRGRXEOHZD\DLU
H[FKDQJHPRWRU
%
:
:
%
CN1
25
CN26
CN22
CN3
PE
CN2
CN24
TO INDOOR UNIT
CN23
'&)$102725
3)&5($&725
7KHFDSDFLWRUUHWDLQVKLJK
YROWDJHHYHQDIWHUWKHSOXJRII
)RU\RXUVDIHW\EHVXUHWRZDLW
DWOHDVWPLQXWHVDIWHUSOXJ
RIIDQGXVHDWHVWHUWRFRQILUP
WKHYROWDJHEHWZHHQFRQQHFWRU3
DQG1RQPRGXOHERDUGLVOHVV
WKDQ'&9EHIRUHVWDUW
VHUYLFLQJ
%
5 :
CN11 CN10
MAIN CONTROL BOARD
AC-N AC-L
CN8 CN9
(/(&75,&
(;3$16,219$/9(
32:(5
(OHFWULF
+HDWLQJ&DEOH
:˖:+,7(
$&)$102725
:$<9$/9(
<*˖<(//2:*5((1 Remark ˖the dotted parts are
optional for different unit.
25˖25$1*(
&2035(6625',6&+$5*(
BL BL
CN20 CN19 CN18 CN17
7(036(1625
CN16
&1
WRVLQJOHZD\
DLUH[FKDQJHPRWRU
%˖%/$&.
5˖5('
%/˖%/8(
CN13
7(036(1625
7(50,1$/
%/2&.
&1
CN15 CN14
'()5267
CN10
FUSE2
AMBIENT TEMP.SENSOR
$9$&
SUCTION TEMP.SENSOR
5
&1
CN4
'HVFULSWLRQ
/(')ODVK
7LPHV
2XWGRRU((3520HUURU
7KHSURWHFWLRQRI,30
2YHUFXUUHQWSURWHFWLRQ
RI$&HOHFWULFLW\
&RPPXQLFDWLRQIDXOW
EHWZHHQWKH,30DQG&%'
2YHUSUHVVXUHRU2YHUKHDW
SURWHFWLRQIRUWKHFRPSUHVVRU
3RZHUYROWDJHLVWRRKLJKRUORZ
2YHUKHDWSURWHFWLRQIRU
H[KDXVWWHPSHUDWXUH
)URVWUHPRYLQJWHPSHUDWXUH
VHQVRUIDLOXUH
$PELHQWWHPSHUDWXUHVHQVRUIDLOXUH
([KDXVWWHPSHUDWXUHVHQVRUIDLOXUH
'HYLDWHIURPWKHQRUPDO
IRUWKHFRPSUHVVRU
/RRSRIWKHVWDWLRQGHWHFWHUURU
2YHUFXUUHQWRIWKHFRPSUHVVRU
2YHUFXUUHQWSURWHFWLRQIRU
VLQJOHSKDVHRIWKHFRPSUHVVRU
90
Domestic Air Conditioner
Wiring Diagrams
11.Circuit
Diagrams
11.1.INDOOR UNIT
+5V
R45
10K
R46
1K
C25
R55
R59
R62
R63
1K
100
R65
R66
100
100
REV
SCK
RCK
SER
GND
+5V
COM2
COM3
100
100
0.1UF
+5V
R301
10K
R3
R2
C2
C10
10K
2K
IC1
R40
10K
P1
2SA1037AK
R1
10K
R61
10K
TXD
RXD
ZERO
+5V
C27
0.001uF
C5
2
1
IRQ
E5
+5V
CN5
TJC8-02
0.1UF
100uF-16V
R20
CN7
51K
3
2
1
R58
C16
1K
1
2
3
4
5
6
7
8
9
10
11
12
595 SER
13
595 RCK
14
595 SCK
15
GND
16
+5V
17
PG Feedback 18
PG output 19
20
21
22
0.001UF
+5V
+5V
+12V
N5
10K
25
1
2
R21
27
R23
B2B-XH-A
10K
R9
+5V
B
SW3
R18
XT1
JSS1270
R29 3.3K
A
R11
1M
N4
2SC2412
4.7K
R53
R110
10K
3
10K
FCR8.0MC5
1
TJC8-02
44
43
42
41
40
39
38
37
36
35
34
33
32
31
30
29
28
27
26
25
24
23
PTE4/OSC1
PTE3/OSC2
PTE2
VSSA
VDDA
PTA7/KBD7
PTA6/KBD6
PTA5/KBD5
PTA4/KBD4
PTA3/KBD3
PTA2/KBD2
PTA1/KBD1
PTA0/KBD0
VREFL
VREFH
PTB7/AD7
PTB6/AD6
PTB5/AD5
PTB4/AD4
PTB3/AD3
PTB2/AD2
PTB1/AD1
RESET
PTC0
PTC1
PTC2
PTC3
PTC4
PTC5
PTC6
PTE0/TXD
PTE1/RXD
IRQ
PTD0/SS
PTD1/MISO
PTD2/MOSI
PTD3/SPSCK
VSS
VDD
PTD4/T1CH0
PTD5/T1CH1
PTD6/T2CH0
PTD7/T2CH1
PTB0/AD0
OSC1
OSC2
GND
+5V
E2 SCL
E2 SDA
+5V
R30
R25
R26
10K 2
10K 3
1K4
R57
R56
5
1K6
1K7
8
IC4
DATA
ULN2003
16
15
14
13
12
11
10
9
C20
+5V
R28 1K
GND
+5V
+5V
B3P5-VH
R33
R32
R31
R34
10K
10K
10K
10K
+12v
0.1UF
R67
L0
C19
CBB61-1.2uf-450VAC
R64 120-1W
C22
3
2
1
TLP3526
10K
R36 1K
C12
0.1UF
IC8
L1
+5V
171uH-800mA-1KHZ -LHB1308-171
CN12
4.7uF-16V E2
E3 4.7uF-16V
1
2
CN8
R35
1K
1K
C13
R37
C14
0.01UF
0.01UF
TJC8-02
0.01uf-50V
680
+12V
MKP61-103-275V
+5V
R47
CN10
TJC8-02
5
4
3
2
1
+12V
N
CN2
CN9-1
S5B-PH
0.001UF
C23
10K
CN13
R22
0.01UF
2SC2412
JSS1270
R43 3.3K
560
2
1
10K
R19
35
SW2
10K
MC908GT16CFBE
C15
B3B-EH-A
R12
10K
E2
CN11
C18
0.1UF
XT1
0.1UF
8
7
6
5
2
2K
R4
A0
VCC
A1
TEST
A2
SCL
VSS
SDA
AT24C02B
B8B-PH
+5V
+5V
1
2
3
4
R68
C9
IC7
R10
8
7
6
5
4
3
2
1
+5V
R302
10K
0.01UF
0.1UF
CN6
SW1-1
JTP1288LA
R16 1K
C7
+5v
2
1
TSVC-1
1
SW1
4
3
2
1
R38
R27
4.7K 1% S4B-XH-A
4.7K 1%
R303
BUZZ1
BEEP-PKM13EPY-4002
N
L0
10K
+12v
CON2
D8
RLS4148
K2
892N-1AC-C
R60 4.7K
FLZ
(L_IN)
1
CON1
1
+12V
R24
R48 220
N7
2K
2SC2412
10K
R71
R108
47K-2W
R104
100K-1/4W
+5V
D101
R106
L
IC101
ZD101
1N4746A(18V-1W)
C102
0.047uF-50V
R101
TXD
1K
+5V
47K-2W
1N4007
PC851
N
E101
100uF-50V
R102
2K
IC102
CON6
C103
2.2nf-250VAC
1K
C101
0.001uF
R105
4.7K-1/4w
TLP421
N
CN3
1
2
3
1
S(N-W)
5289-2A
1
D102
R107
CON7
COM
2K-2W
1N4007
+5V
+5V
R17
R14
10K
4.7K
R39
N2
2SC2412
L
L0
FUSE1
T3.15A-250V AC
R201
R13
0.01UF
R202
4.7K
N3
2SC2412
4.7K
C3
CN4
N
MKP61-104-275V
3
2
1
B3B-XH-A
D5
+12V
IC3
D3
1N4007
D4
1N4007
+5V
3
1N4007
E4
D2
1N4007
D1
1N4007
MC7805CT
1
2
RV1
S14K350
N
1K
2K
C8
NERTB-1.5-2P
2
CON3
10K
2
1
1
1
R15
CN1
ZERO
R103
RXD
C1
E1
2200uF-35V
0.1UF
91
C4
470uF-16V
0.1UF
Domestic Air Conditioner
C17
0.001UF
Wiring Diagrams
11.2.OUTDOORUNIT
11.2.1Control Bard Circuit Diagrams
J24 J25 J26 J27
L1
CN7
2K/2W
COM
+5V
CY7
222/250VAC
1
2
3
4
GND
5V
RST
MODE
ⱑ
1
R98
10K
3 IC11
2
4
1
TLP851/PC851
J18
R4
2K
1 IC10
4
2
3
FLASH
TLP421/PS2561
R47
R50
1K
5.1K/1%
P1
2SA1037AK
C20
102/50V
CN33
2
White
1
R46
0
+5V
R97
R51
10K
10K
CN30
GND
1
PCJ35
2
HEAT
3
COOL
4
TEST/SS
5
1
1
5
4
3
2
1
CN13
1
2
CN12
1
2
1
1
3
2
1
1
CN10
9
8
7
6
5
4
3
2
1
K1
K2
K6
R88
+12V
TQ(White)
47K/1%
1K
1K
1K
1K
J17
Com with Module (Black)
CN32
TEST/SS
1
GND
2
K4
10K R87
4.7K
J34
D6
12V-5A-892H(N)-1AC-C
12V-5A-892-1CC-C
12V-5A-892H(N)-1AC-C
LL4148 CN17
12V-25A-891P-1A-C
12V-5A-892H(N)-1AC-C
12V-5A-892H(N)-1AC-C
+5V
3
+5V +5V
D5
D11
2
+12V+12V
J6
J33
2SC2412K
LL4148
P
2SC2412K LL4148
N5
1
J7
J15
E11
N3
N
+15V+15V
J23
J16
4.7U/16V
C23 C24 C25 C26
J13
J10
J4
CN18
J14
J8
J37
104/50V
R85
R84 104/50V
R89
J12
J3
J38
104/50V 104/50V
3
R92 0
10K 4.7K
10K
2
+5V
Comment: 2SC2412K
E12
0
+5V
1
R38
R93
N1
4.7U/16V
0
C10
62
51
1K
R83
R91
R94
VCC
TX
330
0
CN19
61
52
1K
R81
R99
VREF
XQ
10K
104/50V 59
53
1K
R79
R39
2
AVSS
CS
R40 5.1K/1%
13
54
J36
1K
R77
10K
1
DC-FANSPEED
HW
E13
36
46
DC FAN PG
Fre Adjust
4.7U/16V
J9 R41 1K
41
31
J5
C14
CN20
Indoor Com OUT Fault Light
38
55
R75 2K
Indoor
Com
IN
SW-1
102/50V
3
37
56
J22
PC COM
SW-2
4.7K
2
45
60
E14
NC
HEAT-2
R102
1
28
47
R86
4.7U/16V
Terminal Pro
Fan/E-Valve select
27
29
0
C19
MODULE COMOUT SDA
26
30
104/50V
MODULE COM IN
SCL
N6
J2
44
42
NC
H/L FAN SPEED
+5V Comment: 2SC2412K
J21
R100
J1
CN31
24
57
R42
TEST-EN
FAN
4.7K
50
58
1
VSS
4-WAY
330
23
63
2
COOL-EN
HEAT-1
R101
R43
22
64
+5V
3
HEAT-EN
PTC
4.7K
6
1
0
4
RESET
E-VALVE-D
9
2
R104
XIN
E-VALVE-C
7
4
XOUT
E-VALVE-B
0
8
5
R44
VSS
E-VALVE-A
J20
48
3
IC7 ULN2003
VSS
MODE
1K
49
43
C16
R103
VSS
NC
R66
1K 1
16
10
40
Comment: 102/50V
VCC
NC
R67
1K 2
4.7K
15
14
39
CN16
NC
NC
R68
1K
3
14
15
35
D
NC
NC
R69
1K 4
13
1
17
34
C
NC
NC
R70
1K 5
12
2
33
18
B
NC
NC
J39 R71
1K 6
11
3
19
32
A
NC
NC
J40 R72
IC5
1K 7
10
4
20
16
+5V
NC
NC
GND 12V
5
+5V
21
12
R5F212A8SNFA
NC
NC
R61
6
25
11
C13
NC
NC
R96
R95
2K
104/50V
R59
+12V
10K
10K
R62
2K
R63
10K
P2
IC6 AT24C02B
560
2SA1037AK
SW1
4
5
GND
SDA
R60
6
3
1
4
SCL
GND
10K
7
2
2
3
GND
GND
R64
1
R65 8
VCC
GND
10K
10K
R52
10K
R53
10K
R54
10K
R55
R56
R57
R58
+5V
R48
10K
R49
10K
J19
CN23
5V
3
COM
2
GND
1
K3
XQ(Red)
3
1N4007
J32
K5
C
C
2U/450V
C1
2SC2412K
N4
HW(Yellow) CS(White)
4
2
H
SW TEST(BLUE)
2
PC817A
1 IC9
PC817A
D1
CY10
222/250VAC
㑶
R3
L
E-valve(White)
1
R37 330
CN4
C COM
20K/1%
4 IC8
3
R35 1K
R36 1K
C
20K/1%
E9
47U/25V
H
20K/1%
R33
2.2K
L
R74 10K/1%
C22 102/50V
103/50V
C15
(ⱑ)
White BlackCOM
R80
+15V
R34 1K
ZD2
10V/0.5W
R13
330/1W
ZD3
5.1V/0.5W
CX7
104/275V
B
FUSE2
T1A/250V
R78
Ⳉ⌕亢ᴎ
CN21
310V
1
2
0V
3
15V
4
䇗䗳
5
ড作
6
W
R82
N
P
ST
R76
RA-362M
R12
100/1W CX4
103/275V
ERROR
LED1
PE
S14K350
COM
400N
R73 10K/1%
C21 102/50V
RV3
S14K350
CX3
225/275V
PTC1
Two-speed AC Fan CN14 CN15
Three-speed AC Fan
XT1
4M
RV2
SA1
CX2
225/275V
8MH/10A
J28 J29 J30 J31
CY6
472/250V/275V
CN3
CY2
472/250V/275V
CY1
472/250V/275V
AC-N
Yellow/Green 1
8MH/10A
CY5
472/250V/275V
CX1
225/275V
White 1
L2
R2
1M
COM heater
Four -Way Comment:
CN25 CN11 CN27 CN36
104/50V
C11
RV1
S14K350
R1
1M
CY3
103/250V/275V
T25A 250VAC
AC-L
CN1
AC-L OUT
CN9
1
1
FUSE1
Black 1
CY4
103/250V/275V
CN2
AC-N OUT
CN8
AC-L
AC-N
CN6
1
CN5
FUCTION TEST(White)
C12
104/50V
+5V
1
3
D7
6 MBR1100\SB1100
R24
5.1K/1%
R25
1
10K
FB
3
R29
E6
47 100U/16V
E5
470U/25V
7
7
NC
R18 47
C2
102/100V
6
NCP1200P100
R15
15
M1
222/250VAC
220 220
CN22
GND
+15V
1
2
3
5
R17
330/1W
C6
104/50V
E4
470U/25V
E3
22U/25V
4
IC2
ഫᵓ⬉⑤(㪱)
R32
5.1K/1%
IRFUC20
2/1W
CY9
D9
4 MUR115\MUR130\ER106
5
GNDDRV
10K
L3
20UH/1A
8
CS VCC
J11 4
R26
1K
R27
IC1
ADJ HV
2
R90 0
C4
103/50V
R16
+5VD
R21
ZD1
IN5948B
E8
C9
Comment: 100U/16V
104/50V
R20
CX5
104/275V
+5V
3
Vout
R28 5.1K/1%
3
D10
ER106
L7805CV
2
R14
100K/2W
1
CY8
472/1KV
47
C3
IC4
+12V
Comment: E22034
102/100V
1
Vin
T1
D8
10 MBR3100\ER302
E7
C8
R22
470U/25V
104/50V 1K/0.5W
9
C7
104/50V
P
N
R19
PC817A
3
1
2
92
R30
1K
R31
1K
C5
104/50V
IC3
TL431C
Domestic Air Conditioner
Wiring Diagrams
CN26
P
1
250 Connector
P
R23
220K/2W
E1
E2
CX6
105/275VAC
680U/400V/450V 680U/400V/450V
LED2
POWER
N
1
250 Connector
CN24
N
11.2.2 module board Circuit
Diagram
L
5.2MH/15A
CN7
2
LO
D207
FFA30U60DN
24
P
CN2
U
V 22
CN3
V
W 21
CN4
W
C208
104
C207
104
HA17393AF
15V
R230
2
8
IC6
R207
1
R209
3
4 HA1630D06
R211
1K
1K
6
IC6
7
5
5V
8
IC4
1
4 HA1630D06
R206
1K
R201
1K
6
R203
1K
5
R204 6.2K
PC2
IC4
7
330
PC817A
MMBT9013
TR3
C018
103
R012
R016
1K
PC1
R014
C017
223
330
R013
C016
472
PC817A
15V
CN10
C504
100U/25V
3
2
1
HA1630D06
4.7K
R015
3
2
1
IC3
24C04
VNO
VNC
CIN
FO
VN1
WN
VN
VNC
UN
VP1
8
7
6
5
C410
22U/25V
224
5V
C003
104
41
42
43
44
45
46
47
48
49
50
51
52
53
54
55
56
57
58
59
60
R006 100
C020
102
C019
103
R005 4.7K
C501
100U/16V
5V
5V
R019
4.7K
R018 4.7K
TR2
C014
MMBT9012
102
C011
104
R007 4.7K
CN12
5V
7
6
5
4
3
2
1
RES
FWP
TXD
RXD
MD1
5V
GND
C002
104
C006
474
C004
104
R009 4.7K
C028
103
R226130K
2
⬉⑤(㪱)
CN11
5V
R010
4.7K
3
C202
104
C411
22U/25V
R017 4.7K
R202
6.2K
R205
1K
R008
4.7K
5V
1
2
3
4
5V
D206
24V/1W
C023
C022
103
C412
22U/25V
HA1630D06
R210 6.8K
R227130K
C201
104
1K
R229 4.22K R228130K
R212
9.1K
WP
D203
US1M
C032
104
D202
US1M
C034
104
D201
US1M
C036
104
10
R208
6.8K
R011
4.7K
VP
R213 100
1
C203
104
5V
R224
4.7K
15V
C413
100U/25V
20
19
18
17
16
15
14
13
12
11 C001
10 104
9
8
7 C015
6 102
5
4
3
2
1
IC1
SH7046
D204
LL4148
C005
104
5V
IC2
T600D
C013
104
C008
474
7
4 HA17393AF
TR1
MMBT9013
9 10 11 12 13 14 15 16 17
X1 10M
4.7U/16V
C503
C009
471
IC5
8
IC5
C204 104
8
7
R004 4.7K
5
6
R002 4.7K
6
5
C205
223
R218 82
R220 82
4
C007
474
R001 4.7K
R221 140
3
40
39
38
37
36
35
34
33
32
31
30
29 R231 4.7K
28
27
26
25
24
23
22
21
R216
10
2
61
62
63
64
65
66
67
68
69
70
71
72
73
74
75
76
77
78
79
80
C502
100U/25V
R222,R225খ᭄⬅य़㓽ᴎ䗔⺕⬉⌕䅵ㅫ㗠ᅮ
R225 4.22K
5V
R222
330
3
2
C029
471
R003 4.7K
R219 1K
330
C012
104
5V
N
C030
471
R214
100
15V
8
IC7
6
TLP251
3
5
R217 1K
5V
2
R223
20
0.02/5W
UP
RS2
N
CN5
0.015/5W
VWFB
10K
RS1
C406
104/275V
VVF B
R215
680U/400V*2
VUF B
BG1
D25BX60B
IC8
C404
SGH40N60UF
474/630VDC
C405
104/275V
D205
LL4148
3
1
CN9
AC-N
䗮䆃
U 23
PM1
PS21964-AT/AST/PS219A4-ASTX
4
CN8
AC-L
CN1
P
CN6
LI
D208
LL4148
5V
330
93
Domestic Air Conditioner
Appendix
12. Description of coding rules of unit model
H
S
U
-
0
9
H
0
EG
3
R
(D
2
B)
DC Inverter
Refrigerant type:R2(R410A)
Applicable voltage:3(220~240V)
Applicable frequency:0(50HZ)
apparance of indoor unit is EK series
H-heat pump
Nominal cooling capacity (9000 BTU/h)
The structure code of indoor unit: S(wall-mounted)
H-Abbreviation of Haier
HSU-09HEG03/R2(DB) means 9000BTU.
94
Domestic Air Conditioner
The end
Sincere Forever
Haier Group
Shi Longfei
Yu Huali
Wang fei
86 532 88936935
Wu Hongjin