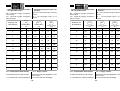
1
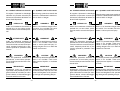
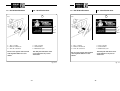
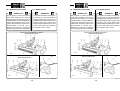
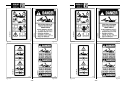
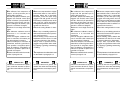
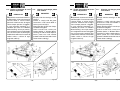
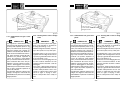
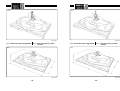
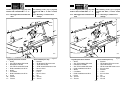
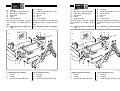
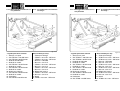
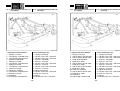
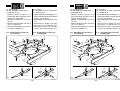
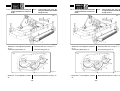
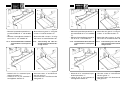
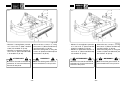
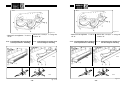
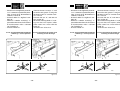
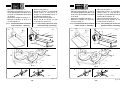
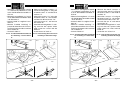
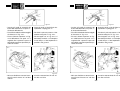
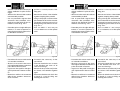
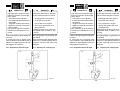
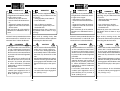
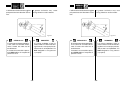
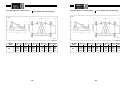
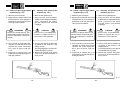
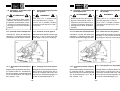
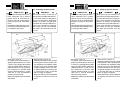
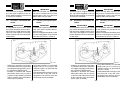
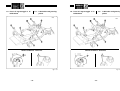
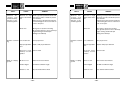
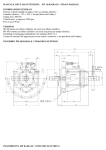
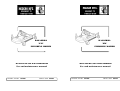
- Smontare il convogliatore posteriore “1” e montare la protezione posteriore “2” con le viti “3” di M 10x25 e le
rondelle “4” di Ø 10.
- Svitare il dado “5” e togliere la rondella “6”.
- Montare il coltello “mulching” “7”
prestando attenzione che il riscontro
di trascinamento vada a contatto
con il coltello “8”.
- Avvitare il dado “5”.
- Remove the rear conveyor “1”, and
mount the rear guard “2” using the
M 10x25 screws “3” and the washers “4” Ø 10.
- Unscrew the nut “5”, and remove
the washer “6”.
- Mount the mulching blade “7”, making sure that the capstan striker
plate comes into contact with the
blade “8”.
- Screw the nut “5” back on.
4.1.10 -Trasformazione del rasaerba da
“mulching” a scarico posteriore
4.1.10 -Transforming the mower from
mulching to rear discharge
4.1.10 -Trasformazione del rasaerba da
“mulching” a scarico posteriore
4.1.10 -Transforming the mower from
mulching to rear discharge
MR48
MR48
MR49
7
MR49
7
8
9
8
9
MR50
MR50
fig. 4.1.13
- 59 -
fig. 4.1.13
- 59 -