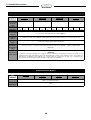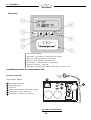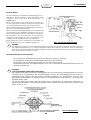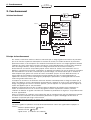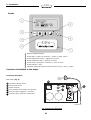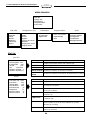
1
5040142601
MEGALINE RACK
GRUPPO DI CONTINUITA’
UNINTERRUPTIBLE POWER SUPPLY
UNTERBRECHUNGSFREIE STROMVERSORGUNGSEINHEIT
ONDULEUR
IT
EN
DE
FR
Manuale d’uso per l’utente
Instruction manual
Bedienungsanleitung
Mode d’emploi pour l’utilisateur
IT
Dichiarazione
Direttive del consiglio applicate:
Standard al quale si dichiara la conformità:
Costruttore:
Indirizzo:
Tipo di apparecchiatura:
Modelli:
Anno di apposizione del marchio:
di Conformità
73/23/CEE; modificata con le direttive 92/31/CEE
89/336/CEE; modificata con le direttive 92/31/CEE,93/68/CEE
EN 62040-1-1, EN 62040-2, EN 62040-3
MetaSystem S.p.A.
via Majakovskij, 10/b Reggio Emilia, Italia
Gruppo di Continuità
MEGALINE 1250 RACK - MEGALINE 2500 RACK
MEGALINE 3750 RACK - MEGALINE 5000 RACK
2004
L’apparecchiatura è stata provata nella configurazione tipica di installazione e con periferiche conformi alle direttive sopra elencate.
Io sottoscritto dichiaro che l’apparato sopra definito soddisfa i requisiti delle Direttive sopra specificate.
Reggio Emilia, 01/10/04
Ing. Cesare Lasagni
Direttore Tecnico
Le informazioni contenute nel presente manuale sono puramente indicative e, con l’obbiettivo di
migliorare il prodotto, possono essere soggette a variazioni senza preavviso.
Indice
Indice
1 - Introduzione
4
4
Avvertenze
2 - Funzionamento
Principio di Funzionamento
Funzionamento a rete
Funzionamento a batteria
Funzionamento a By-pass
Informazioni sul display
Segnalazioni ottiche e acustiche
3 - Installazione
Predisposizione all’installazione
Collocazione del Gruppo di Continuità
Pannello Frontale
Procedura d’installazione singolo cabinet
Predisposizione per espansione autonomia
Guida all’uso del software autodiagnostico
Procedure operative
4 - Personalizzazione delle modalità di funzionamento
Funzioni dei tasti
Funzione “Service Mode”
Accesso ai menu
Stato Ups
Configurazione Ups
Eventi
Programmazione
Strumenti
5 - Caratteristiche Tecniche
Specifiche costruttive
Specifiche ambientali
Caratteristiche elettriche d’ingresso
Forma d’onda d’uscita
Caratteristiche elettriche di uscita in funzionamento
a rete
Caratteristiche elettriche di uscita in funzionamento
a batteria
Funzionamento a batteria
Caratteristiche del By-pass
Normative di riferimento
6 - Soluzione ai problemi
5
5
6
6
6
6
7
8
8
8
9
9
11
11
11
12
12
12
12
13
15
19
20
20
21
21
21
22
22
23
24
25
25
26
27
3
Introduzione
Vi ringraziamo per l’acquisto di un prodotto MetaSystem. Obiettivo primario della nostra Azienda è di fornire sempre
prodotti all’avanguardia, frutto della ricerca e dell’applicazione delle tecnologie più innovative.
Le nostre apparecchiature sono coperte da numerosi brevetti internazionali, rappresentativi del carattere di
esclusività e continuo miglioramento dell’azienda MetaSystem.
I gruppi di continuità MetaSystem sono stati studiati per proteggere le apparecchiature elettroniche dai problemi
sulla rete elettrica, quali interruzioni, fluttuazioni e disturbi.
In particolare il prodotto da Voi acquistato prevede l’esclusivo “Algoritmo di calcolo State of charge” per ottenere
le migliori prestazioni di autonomia dell’UPS.
La conformità del nostro prodotto agli standard internazionali è ulteriore garanzia di qualità dei nostri prodotti.
Vi consigliamo di leggere attentamente il presente manuale e conservarlo per successive
consultazioni
Avvertenze
• Non collegare carichi superiori ai limiti indicati nella targhetta di identificazione e nella documentazione
a corredo
• Non smontare l’apparecchiatura. L’accesso all’interno del gruppo di continuità è riservato a personale
tecnico autorizzato.
• Non disconnettere la connessione alla tensione di rete con gruppo di continuità funzionante, questa
operazione elimina la protezione di terra per il gruppo di continuità e per i carichi ad esso collegati.
• Non introdurre cacciaviti o altri oggetti nei fori di aerazione o nella ventola.
• Installare l’apparecchiatura secondo quanto descritto nel presente manuale e rispettando i limiti previsti.
• Non versare liquidi sul gruppo di continuità.
• Utilizzare l’apparecchiatura esclusivamente per gli scopi indicati nel presente manuale.
• Il costruttore declina ogni responsabilità per danni causati dall’inosservanza di quanto indicato nel
presente manuale.
Le informazioni contenute nel presente manuale sono puramente indicative e, con
l’obbiettivo di migliorare il prodotto, possono essere soggette a variazioni senza preavviso.
4
2 - Funzionamento
2. Funzionamento
Schema a blocchi
USCITA
BY PASS
INGRESSO
~
=
~
=
REGOLATORE
DEL FATTORE
DI POTENZA
FILTRO
D’INGRESSO
FILTRO
DI USCITA
INVERTER
MODULO DI
POTENZA
=
=
SURVOLTORE
BATTERIE
CARICA
BATTERIE
MODULO DI POTENZA
BATTERIE
LOGICA
A MICROPROCESSORE
INTERFACCIA
RS 232
COMANDO
A
DISTANZA
Principio di funzionamento
In presenza di rete la tensione di ingresso viene filtrata e raddrizzata da uno speciale stadio di ingresso
(regolatore del fattore di potenza) in grado di ottimizzare l’assorbimento di corrente dalla rete, rendendo il
fattore di potenza pressochè unitario, e di compensare eventuali variazioni di tensione; tale stadio è in
grado di alimentare l’inverter di uscita anche con tensioni di rete molto basse.
Questa caratteristica si accentua con carichi molto bassi al punto che, con un carico attorno al 50% del
nominale, è possibile il funzionamento a rete fino a circa 100 V di linea senza assorbire energia dalle
batterie. Ciò consente una gestione “intelligente” del passaggio a batteria che punta a minimizzare
l’utilizzo degli accumulatori. La tensione, raddrizzata dal primo stadio, viene poi utilizzata da un inverter
ad alta frequenza per generare la tensione di uscita sinusoidale “pulita” e a bassissima distorsione; un
veloce circuito di By-pass sincronizzato interviene durante i picchi di assorbimento che vanno oltre la
capacità dell’inverter, quali l’accensione di particolari periferiche, la smagnetizzazione di monitor a colori
di grandi dimensioni, ecc.
L’assenza della tensione di linea o il suo eccessivo abbassamento attivano automaticamente uno stadio
survoltore in grado, tramite le batterie, di assicurare l’alimentazione senza interruzioni all’inverter di
uscita e, di conseguenza, al carico. La tipologia circuitale è del tipo a neutro passante, tale cioè da non
alterare il regime di neutro delle apparecchiature ad esso connesse.
Durante il normale funzionamento un sensore verifica la differenza di potenziale fra conduttore di neutro e
quello di terra e, nel caso risulti eccessiva, attiva la protezione d'ingresso e commuta il gruppo a batteria
segnalando l’anomalia; modificando i parametri del software é possibile invece averne solo la
segnalazione.
Tutte le funzioni del gruppo di continuità sono supervisionate da un microprocessore che è anche in grado
di tenere sotto controllo e di memorizzare particolari condizioni di funzionamento, nonché di gestire
l’interfacciamento dell’UPS con un computer tramite linea seriale RS 232.
È così possibile controllare in tempo reale i parametri di funzionamento e le eventuali anomalie.
Il gruppo di continuità segnala all’operatore lo stato di funzionamento mediante
segnalazioni ottiche e acustiche:
- display alfanumerico 1 Pag.10
- indicatore di stato 7 Pag.10
- segnalatore acustico (interno al gruppo di continuità)
5
2 - Funzionamento
La combinazione di queste segnalazioni rende rapida e intuitiva l’individuazione dello
stato di funzionamento e di eventuali problemi alla rete di alimentazione.
Sono possibili tre principali modi di funzionamento
- Funzionamento a rete
- Funzionamento a batteria
- Funzionamento in By-pass
Funzionamento a rete
E’ la condizione di normale funzionamento:
- la tensione di rete viene convertita dal regolatore del fattore di potenza (PFC) in tensione
continua
- l’inverter ricostruisce la tensione sinusoidale dalla tensione continua
- il filtro di uscita effettua una ulteriore “pulizia” della tensione di uscita
- le batterie vengono ricaricate
Funzionamento a batteria
Il gruppo di continuità in assenza della tensione di rete, commuta automaticamente nel modo di
funzionamento a batteria.
- la tensione delle batterie viene elevata dal circuito “survoltore”
- l’inverter ricostruisce la tensione sinusoidale dalla tensione continua
- il filtro di uscita garantisce la pulizia della tensione verso il carico
Funzionamento a By-pass
Il circuito di By-pass esclude il gruppo di continuità e collega direttamente l’uscita con l’ingresso. La
commutazione avviene in modo sincronizzato al fine di garantire sempre la corretta tensione di uscita,
evitando interruzioni o sovratensioni.
L’intervento del circuito di By-pass è personalizzabile attraverso un menu dedicato (Config. UPS,
By-pass) e prevede numerose opzioni (automatico, disabilitato, By-pass in attesa carico, etc..) in modo
da rispondere alle specifiche esigenze dell’applicazione.
Informazioni sul display
Vengono riportati i principali messaggi visualizzati sul display alfanumerico nelle tre modalità di
funzionamento.
UPS a Rete
IN
212V
OUT 230V/812W ( 31%)
Batt
32,2‘
a Rete
Indica lo stato di funzionamento normale, con tensione di rete presente.
a Batteria
Indica che la rete è assente e l’UPS sta fornendo l’alimentazione
attraverso le batterie.
a By-pass
Indica che è stato attivato il funzionamento a bypass, pertanto l’uscita del
gruppo di continuità è collegata direttamente alla rete.
IN
xxxV
Indica la tensione in ingresso all’UPS e la potenza RMS assorbita dalla
rete. Nel caso di funzionamento a batteria il messaggio non viene fornito.
OUT
xxxV/x,xKW (xx%)
Il valore della potenza è espresso anche in percentuale rispetto alla
potenza totale fornibile dal UPS.
Batt.
xx,x’
Indica in forma grafica lo stato di carica delle batterie e in forma numerica
il tempo di autonomia disponibile.
UPS
6
2 - Funzionamento
Segnalazioni ottiche e acustiche
INDICATORE
DI STATO
SEGNALATORE
ACUSTICO
MESSAGGI
A DISPLAY
Verde
---
UPS a Rete
IN xxxV/x.xkW
Verde
---
UPS a Rete
Rete non sincronizzata
xx.xHz
Intermittente
rapido
Giallo
Giallo
Intermittente
breve (ogni 20sec)
Intermittente
rapido
Funzionamento normale con rete
presente e carico entro i limiti
Il gruppo di continuità segnala che la
frequenza della tensione di uscita non è
sincronizzata con la tensione di ingresso. La
causa può essere:
- PLL disabilitato
- Frequenza della tensione di ingresso al di
fuori dei limiti previsti dal UPS
UPS a Batteria
RETE ASSENTE
Funzionamento a batteria
UPS a By-pass
Funzionamento in By-pass
---
Intermittente
rapido
Rosso
DESCRIZIONE
Modulo guasto
ATTENZIONE! SI CONSIGLIA DI SPEGNERE IL
GRUPPO DI CONTINUITA’ E CONTATTARE IL
CENTRO ASSISTENZA
Intermittente
breve e rapido
Sovraccarico
ATTENZIONE! SI CONSIGLIA DI SCOLLEGARE
ALCUNE UTENZE FINO A RIPORTARE
L’ASSORBIMENTO DEL CARICO ENTRO I
LIMITI PREVISTI
Rosso
UPS in errore o è stato rilevato un guasto
ATTENZIONE! SI CONSIGLIA DI SPEGNERE IL
GRUPPO DI CONTINUITA’ E CONTATTARE IL
CENTRO ASSISTENZA
Continuo
Rosso
--Superato il 90% del carico MAX
1 ogni 10 sec.
Rosso
Intermittente
alternato breve,
lungo
Rosso
Intermittente
breve con pausa
Intermittente
alternato breve,
lungo
RISERVA
AUTONOMIA!
Riserva di autonomia. In funzionamento a
batteria
Errato collegamento a batteria
Neutro
FUORI
RIDONDANZA!
L’assorbimento del carico è maggiore della
ridondanza impostata. In caso di guasto non
è garantita la ridondanza delle schede di
potenza
---
ESC
Nota: per tacitare il segnalatore acustico premere il tasto
pressione si avrà la tacitazione o l’abilitazione dello stesso.
7
; ad ogni successiva
3 - Installazione
3. Installazione
Predisposizione all’installazione
Verificare che l’imballo sia integro e che il prodotto non abbia subito danni durante il trasporto. In caso di
problemi contattare il vettore.
Verificare il contenuto della confezione:
• Nr.1 gruppo di continuità
• Nr.1 connettore per cablaggio in/out (versione singolo cabinet comprensivo di multipresa di uscita e cavo
d’ingresso)
• Manuale dell’utente
• Garanzia internazionale
Si consiglia di conservare l’imballo originale per eventuale riutilizzo o per rispedire il prodotto in caso di guasto.
Collocazione del Gruppo di continuità
Individuare una superficie piana e solida per il posizionamento del gruppo di continuità.
Attenersi alle seguenti condizioni di installazione (Fig. 1):
- il gruppo di continuità deve essere posizionato in ambienti chiusi: non è progettato per un uso all’esterno.
- Rispettare le condizioni ambientali riportate nel presente manuale.
- Evitare ambienti eccessivamente polverosi, umidi e sottoposti a irraggiamento diretto.
- Evitare ambienti con liquidi infiammabili e/o sostanze corrosive.
- Garantire l’aerazione posizionando l’apparecchiatura almeno 10 cm distante da altri apparati posti
nell’armadio rack.
- Non coprire le zone di aerazione anteriori, posteriori e superiori.
10cm
Fig.1 Collocamento gruppo di continuità
8
3 - Installazione
Pannello frontale
1
2
3
4
5
6
7
Display alfanumerico
Tasto ESC / uscita da funzioni / tacitazione segnalatore acustico
Tasto scorrimento precedente / aumenta valore
Tasto scorrimento successivo / diminuisci valore
Tasto invio / accettazione funzioni / accesso menu
Tasto di accensione / spegnimento
Indicatore stato di funzionamento multicolore (verde / giallo / rosso)
Procedura d’installazione
Connessioni elettriche
Alla rete di
distribuzione
elettrica
Singolo Cabinet (fig. 2):
8
9
10
11
12
13
Connettore Ingresso/Uscita
Spina Ingresso/Uscita
Fusibile d’Ingresso
Presa per Interfaccia seriale RS232 (9 P femm)
Prese a segnali Logici ( 9 P maschio)
Predisposizione per espansione autonomia
13
12
8
10
11
9
Agli utilizzatori
Fig. 2 Connessioni Elettriche
9
3 - Installazione
Singolo cabinet
1. Cablare il connettore di Ingresso-Uscita in dotazione come
indicato in figura 2, utilizzando un cavo inguainato con
conduttori interni aventi sezione di almeno 2,5 mm2.
2. Inserire il connettore nel coperchio in plastica fissandolo
con le apposite viti, quindi assicurare i cavi al coperchio
tramite il fermacavo (vedi fig. 3).
3. Rimuovere la copertura della spina [9] togliendo la vite di
fissaggio.
4. Collegare il connettore di Ingresso-Uscita alla spina [9]
presente sul retro dell’UPS, fissandolo al telaio con le
apposite viti (vedi fig. 2).
5. Collegare i carichi alla presa di uscita, verificando che gli
interruttori dei vari utilizzatori siano spenti.
6. Collegare la spina di alimentazione ad una presa di
corrente adeguata alla tensione e alla corrente richieste.
CONNETTORE DI INGRESSO-USCITA
Assemblaggio
CONNETTORE
Tacca di riferimento
COPERCHIO IN PLASTICA
FERMACAVO
Fig. 3 Coperchio morsettiera
AVVERTENZA
!
L’UPS é dotato di un circuito di protezione contro un eventuale errore di collegamento, segnalato all’accensione del
segnalatore visivo di colore rosso acceso fisso e dal suono continuo del buzzer interno. Nel caso si verificasse questa
segnalazione subito dopo l’accensione dell’UPS, spegnere l’apparecchiatura e disconnettere immediatamente la spina
di alimentazione.
Precauzioni per l’installazione
•
•
•
•
Si consiglia di far eseguire gli allacciamenti elettrici da personale specializzato
Non modificare i cablaggi elettrici forniti a corredo
Assicurarsi che la presa di rete sia fornita di un buon collegamento di terra
La connessione alla rete o il sezionatore di rete devono essere in prossimità del gruppo di continuità ed
essere facilmente accessibili
ATTENZIONE
(per i modelli 1250/2500/3750/5000)
I cavi in dotazione sono cablati con spina d’ingresso e prese d’uscita aventi una portata massima di 16A.
Si consiglia, pertanto, di utilizzare un cablaggio diretto dal quadro al connettore in dotazione (seguendo le
indicazioni per i collegamenti di Fig. 3 e 4 Pag. 11) nelle applicazioni dove la corrente presunta
d’ingresso all’ UPS superi i 16A (es. 5000 VA con Vinn=184V)
!
!
ATTENZIONE
(per i modelli 1250/2500/3750/5000)
Poichè le correnti di dispersione verso terra di tutti i carichi si sommano nel conduttore di protezione (filo
di terra) dell’UPS, per motivi di sicurezza, come da norma EN 50091-1-1, occorre assicurarsi che la somma
di queste correnti non superi il valore di 2.7 mA.
CONNETTORE DI INGRESSO-USCITA
Vista lato inserimento fili
Connessione di terra
Filo giallo-verde
Filo marrone
Filo blu
Filo giallo-verde
Filo blu
Filo marrone
Cavo di uscita
(al carico)
Morsetto n°1 USCITA FASE
Morsetto n°2 USCITA NEUTRO
Cavo di ingresso
(alla linea elettrica)
Morsetto n°4 INGRESSO NEUTRO
Morsetto n°5 INGRESSO FASE
10
Fig. 4 Morsettiera
3 - Installazione
Predisposizione per espansione Autonomia
L’UPS è dotato della predisposizione al collegamento di unità
batterie aggiuntive: per collegare uno o più cabinet aggiuntivi
all’unità singola procedere nel seguente modo:
1. Svitare le viti 1 e 2 in figura 5 .
2. Spostare il coperchio di protezione fino a scoprire completamente
i connettori posti all’interno della finestra.
3. Stringere nuovamente le viti per assicurare la protezione metallica.
4. Connettere con gli appositi cavi l’unità batterie all’UPS.
5. Assicurare un buon contatto di terra tramite l’apposita treccia.
!
2
1
ATTENZIONE
Tutti i collegamenti vanno effettuati con
l’apparecchiatura spenta e scollegata dalla rete di
alimentazione.
Fig. 5
Guida all’uso del Software autodiagnostico
Connessione
L’UPS è dotato di interfaccia standard RS232, grazie alla quale è possibile accedere, tramite un elaboratore, ad una
serie di dati relativi al funzionamento e alla storia dell’UPS. La funzione è utilizzabile tramite il programma di
interfacciamento per ambiente WINDOWS disponibile gratuitamente sul sito www.metasystem.it, connettendo una
porta seriale del PC alla presa di interfacciamento [11] presente sul retro dell’UPS, tramite un cavo RS232.
Procedure Operative
Spegnimento
Accensione
Durante il funzionamento (esempio)
Premere il tasto
UPS a Rete
IN
212V
OUT 230V/812W ( 31%)
Batt
32,2‘
Il display visualizza
UPS in accensione…..
L’indicatore di stato indica la sequenza di
accensione (rosso, giallo, verde)
Il display visualizza lo stato di funzionamento
(esempio)
Premere per alcuni secondi il tasto
UPS a Rete
IN
212V
OUT 230V/812W ( 31%)
Batt
32,2‘
I’avvisatore acustico emette alcuni brevi suoni
quindi il gruppo di continuità si spegne (5
secondi).
11
4 - Personalizzazione delle modalità di funzionamento
4. Personalizzazione delle modalità di funzionamento
Funzioni dei tasti
L’accesso ai menu del gruppo di continuità avviene mediante i tasti posti sul pannello frontale
TASTO
DESCRIZIONE
-
➡
ESC
- Selezionare la funzione precedente
- Aumentare un valore all’interno di una funzione
- Selezionare una nuova voce all’interno di una funzione (es. da DISABILITATO a ABILITATO)
➡
- Selezionare la funzione successiva
- Diminuire un valore all’interno di una funzione
- Selezionare una nuova voce all’interno di una funzione (es. da ABILITATO a DISABILITATO)
❙➡
ATTENZIONE: Alcuni menu contengono più di quattro righe: utilizzare i tasti
scorrere le voci di menu non visualizzate.
➡
- Confermare un valore
- Accedere ad una voce del menu
- Passaggio da un livello di menu superiore a uno inferiore
➡
!
Uscita da una funzione senza modificare
Passaggio da un livello di menu inferiore a uno superiore
Uscita dal menu principale e ritorno alla visualizzazione dello stato
Tacitazione del segnalatore acustico
per
Funzione “Service Mode”
➡
❙
L’UPS consente di effettuare tutti i settaggi e le programmazioni qui di seguito descritte, anche da spento:
premendo il tasto
l’UPS entrerà in modalità “SERVICE” dando la possibilità di accedere al menù Display. Per
uscire da questa modalità premere il tasto
, altrimenti dopo 1 min senza ricevere comandi manuali o seriali,
l’UPS uscirà automaticamente da questa funzione spegnendosi.
Accesso ai menu
Al termine della procedura di accensione il display visualizza
(esempio)
Premere il tasto
12
❙➡
UPS a Rete
IN
212V
OUT 230V/812W ( 31%)
Batt
32,2‘
per accedere al menu principale
4 - Personalizzazione delle modalità di funzionamento
MENU PRINCIPALE
Stato UPS
Config. UPS
Eventi
Programmazione
Strumenti
STATO UPS
Info UPS
Uscita
Ingresso
Batterie
Dati Storici
Misc.
Config. UPS
Uscita
Ingresso
Bypass
Sensore Neutro
Batterie
Regol. orologio
Panello Operatore
Eventi
Programmazione
Strumenti
Visualizzazione
Cancellazione
Calendario Progr.
Riaccensione
Spegnimento
Test Segnalazioni
Test Display LCD
Test Batterie
Calibrazione Batt.
STATO UPS
Info UPS
Mod Megaline xxxx
POut Max
xxxx
Ver.SW
xxxx
S/N
xxxxxxxxx
Moduli installati x
Moduli guasti
x
➧
Mod Megaline
Indica il modello dell’apparecchiatura
POut max
Ver. SW
S/N
Indica la potenza attiva massima erogabile (W)
Versione software
Numero di matricola
Moduli Installati Numero di moduli di potenza installati
Moduli guasti Numero di moduli di potenza eventualmente guasti
Uscita
Potenza
xxxxx
Pot.Appar.
xxxx
V eff.
xxxx
I eff
xxxx
Val. Picco I
xx
Frequenza
xx
Fatt.cresta I
xx
Fatt. Potenza
xx
➧
Potenza
Pot.Appar.
Indica il valore della potenza attiva erogata (W)
V eff.
Indica il valore della tensione efficace (V RMS) fornita in
uscita dal Gruppo di continuità
I eff
Indica il valore della corrente efficace (A RMS) fornita in
uscita dal gruppo di continuità
Val. Picco I
Indica il valore della corrente di picco fornita in uscita dal
gruppo di continuità (A)
Frequenza
Indica il valore della frequenza della tensione in uscita dal
gruppo di continuità (Hz)
Fatt.cresta I
Indica il valore del fattore di cresta, calcolato come
rapporto tra il valore di picco ed il valore efficace della
corrente assorbita dal carico
Indica il valore della potenza apparente erogata (VA)
Fatt. Potenza Indica il valore del fattore di potenza del carico connesso al
gruppo di continuità
13
4 - Personalizzazione delle modalità di funzionamento
Ingresso
Potenza
Pot.Appar.
V eff.
I eff
Val. Picco I
Frequenza
Fatt.cresta I
Fatt. Potenza
xxxx
xxxx
xxx
xxxx
x
x
x
x
➧
Potenza
Pot.Appar.
Indica il valore della potenza assorbita dalla rete (W)
Indica il valore della potenza apparente assorbita dalla rete (VA)
V eff.
Indica il valore della tensione efficace (V RMS) in ingresso
al gruppo di continuità
Ieff
Indica il valore della corrente efficace (A RMS) assorbita
dalla rete
Val. Picco I
Indica il valore della corrente di picco assorbita dalla rete (A)
Frequenza
Indica il valore della frequenza della tensione in ingresso al
gruppo di continuità (Hz)
Fatt.cresta I
Indica il valore del fattore di cresta, calcolato come
rapporto tra il valore di picco ed il valore efficace della
corrente assorbita dalla rete
Fatt. Potenza Indica il valore del fattore di potenza applicato alla rete
Batterie
Tensione
xx
Cap. residua
xxxx
N.scariche
xxxx
Utilizzo
xxxx
Cal.gg/mm/aahh:mm
Unità KB est.
xx
Caricab.est
xx
➧
Tensione
Indica la tensione rilevata ai capi del kit batterie (V)
Cap. residua Indica in percentuale lo stato di carica delle batterie
N.scariche
Indica il numero di cicli di scarica effettuati dalla batteria
Utilizzo
Cal.
Ore di funzionamento a batteria
Indica la data (giorno / mese / anno) e l’ora
(ore / minuti) dell’ultima calibrazione batterie
Unità KB est. Indica il numero di KB che sono installati esternamente
Caricab.est.
Indica il numero di carica batterie esterni (modello CB36
MetaSystem)
Dati Storici
Funzionam.UPS xxxxx
Funz.Booster
xxxx
Scariche tot.
xxxx
Int.Booster
xxxx
Interv.Bypass xxxx
Surriscald.
xxxx
Funzionam.UPS Indica il numero di ore di funzionamento totale del gruppo
di continuità
➧
Funz.Booster Indica il numero di ore di funzionamento del gruppo di
continuità nella modalità booster (funzionamento a batteria)
Scariche tot. Indica il numero di volte che il gruppo di continuità ha
esaurito completamente la carica delle batterie.
Int. Booster
Numero degli interventi nella modalità booster
(funzionamento a batteria)
Interv.Bypass Numero degli interventi di By-pass (vedi menu Config.UPS
/ Bypass)
Surriscald.
Numero degli interventi della protezione termica (dovuti ad
esempio a carico eccessivo)
14
4 - Personalizzazione delle modalità di funzionamento
Misc.
Temp.interna
Temp.esterna
Vel.ventole
xx
xx
xx
➧
Temp.interna Indica la temperatura interna al gruppo di continuità
espressa in gradi centigradi
Temp. esterna Indica la temperatura esterna al gruppo di continuità
espressa in gradi centigradi
Vel.Ventole
Indica la velocità delle ventole di raffreddamento del
gruppo di continuità espressa come valore percentuale
(100% = massima velocità).
Config. UPS
Uscita
Tensione
Frequenza
Ridondanza N+x
➧
Tensione
Impostazione della tensione di uscita del gruppo di
continuità (V)
Frequenza
Impostazione della frequenza di uscita del gruppo di
continuità (Hz)
Valore Nominale: consente di impostare un valore
numerico della frequenza di uscita (50 o 60)
Selez. Automatica:
Se abilitato, il gruppo di continuità rileva la frequenza della
tensione di ingresso e sincronizza l’uscita al medesimo
valore. Se disabilitato, il gruppo di continuità utilizza come
impostazione il Valore Nominale.
Ridondanza N+x Impostazione del numero di schede ridondanti (vedi Nota:
Impostazione della Ridondanza)
Nota: Impostazione della ridondanza
Questa funzione consente di gestire la ridondanza dei moduli di potenza. Ad esempio: un carico richiede N moduli di
potenza; X moduli di potenza dovranno essere aggiunti per ottenere la ridondanza N+X.
Nel caso in cui durante il funzionamento il carico applicato superi la potenza di N moduli, il gruppo di continuità
segnala la mancanza di ridondanza.
Di seguito viene fornito un esempio numerico:
Carico
Schede
potenza
Potenza
totale (W)
Ridondanza
Allarme
Ridondanza (W)
Allarme
Sovraccarico (W)
3700
3
3750
0
no
3750
3700
4
5000
1
3750
5000
1500
4
5000
2
2500
5000
1000
4
5000
3
1250
5000
15
4 - Personalizzazione delle modalità di funzionamento
Ingresso
Abilitazione PLL
Range PLL esteso
➧
Abilitazione
PLL
Se abilitato, il gruppo di continuità sincronizza la sinusoide
di uscita con l’ingresso.
Se disabilitato la tensione di uscita non è sincronizzata
con l’ingresso e viene segnalato con il lampeggio
dell’indicatore di stato (verde)
Range PLL
esteso
Se abilitato, il gruppo di continuità sincronizza la tensione
di uscita con l’ingresso per variazioni della frequenza del
+/-14% del valore nominale. Se disabilitato il PLL si
sincronizza per variazioni della frequenza del +/-2%.
Nota: Impostazione del PLL
La funzione PLL garantisce che la frequenza di uscita del gruppo sia sincronizzata con l’ingresso in modo che il
passaggio per lo zero avvenga nel medesimo istante. In caso di intervento del By-pass, es. per carichi improvvisi, la
sincronizzazione ingresso-uscita è garantita.
!
ATTENZIONE: Disabilitando la funzione PLL viene disabilitata anche la funzione By-pass automatico.
Nel caso in cui la variazione di frequenza in ingresso sia maggiore del campo impostato, il gruppo di
continuità esclude la funzione PLL, sganciando l’uscita dall’ingresso. Quando il valore rientra nella
tolleranza impostata, la funzione PLL viene riattivata automaticamente.
By-pass
Abilitazione
Modo forzato
Velocità DIP
Modo off-line
Attesa Carico
➧
Abilitazione
Se abilitato, il gruppo di continuità gestisce l’intervento
del By-pass in modo automatico.
Se disabilitato il gruppo di continuità non commuterà mai
in By-pass; in caso di prolungato sovraccarico il gruppo di
continuità si spegne.
Se abilitato, il gruppo di continuità attiva il By-pass in modo
Modo forzato permanente.
Velocità DIP
Consente di variare la sensibilità di attivazione automatica
del Bypass, (modo forzato disabilitato)
LENTO: carichi non sensibili agli abbasamenti di tensione
o microinterruzioni, ma che provocano frequenti spunti.
STANDARD: usi normali.
VELOCE: carichi sensibili alle microinterruzioni.
Se abilitato il By-pass ha il seguente funzionamento:
Modo off-line - in presenza di rete il By-pass è attivo in modo permanente
- in assenza di rete il gruppo di continuità è in modalità
batteria.
Attesa Carico ABILITAZIONE: attiva o disattiva la funzione
Se abilitato, il By-pass viene attivato con carico inferiore al
valore impostato “Soglia carico minimo”
Superata tale soglia il By-pass si disattiva.
Soglia carico minimo: consente di impostare il valore del
carico per la funzione di accensione e spegnimento (vedi
Nota: Attesa Carico in assenza di rete).
Nota: Attesa carico in assenza di rete
Il gruppo di continuità nella modalità “Attesa carico” con carico inferiore alla soglia programmata, attiva il By-pass.
Nel caso di mancanza rete il gruppo di continuità si spegne e si riaccenderà solo al ritorno della stessa.
16
4 - Personalizzazione delle modalità di funzionamento
!
ATTENZIONE!
La programmazione segue la seguente priorità:.
Funzione attiva
Abilitazione
By-pass
Modo forzato
MODO FORZATO
ABILITATO
ABILITATO
MODO OFF-LINE
ABILITATO
DISABILITATO
ABILITATO
ABILITATO
MODO OFF-LINE
ABILITATO
DISABILITATO
ABILITATO
DISABILITATO
MODO ATTESA
CARICO
ABILITATO
DISABILITATO
DISABILITATO
ABILITATO
MODO
AUTOMATICO
ABILITATO
DISABILITATO
DISABILITATO
DISABILITATO
BY-PASS
DISABILITATO
DISABILITATO
X
X
X
Modo off-line
Attesa carico
X
X
X: qualunque programmazione (ABILITATO o DISABILITATO)
Sensore Neutro
Abilitazione
Ignora in RUN
➧
Abilitazione
Se abilitato, il gruppo di continuità verifica mediante il
sensore di neutro che la differenza di tensione tra il neutro e
la terra sia entro i limiti di sicurezza. Nel caso di superamento
della soglia, il gruppo di continuità commuta automaticamente
nel modo di funzionamento a batteria. Se disabilitato, il
gruppo di continuità ignora il sensore di neutro.
Ignora in
RUN
Se abilitato, il gruppo di continuità verifica la tensione
neutro-terra solo ad ogni accensione. Se disabilitato, il
gruppo di continuità verifica la tensione neutro-terra in
tutte le condizioni di funzionamento.
Gestione
capacità
Sono possibili due programmazioni
AVANZATA
Il preavviso di fine autonomia viene calcolato rilevando la
potenza assorbita dal carico collegato al gruppo di
continuità ed è visualizzato come tempo rimanente di
autonomia.
SEMPLICE
Il preavviso di fine autonomia viene calcolato rilevando la
tensione delle batterie
Batterie
Gestione capacità
➧
L’impostazione effettuata determina il tipo di menù di
programmazione batterie.
17
4 - Personalizzazione delle modalità di funzionamento
AVANZATA
Batterie
Gestione capacità
Preavviso Fine Aut
➧
Gestione
capacità
Avanzata
Preavviso
Fine Aut
Impostazione del preavviso di fine autonomia
batterie espresso come tempo di
funzionamento rimanente (minuti)
Gestione
capacità
Semplice
Soglie
batteria
Impostazione del preavviso di fine autonomia
espresso come valore di tensione di batteria.
Sono disponibili due impostazioni all’interno del
menu
Modo
SEMPLICE
Batterie
Gestione capacità
Soglie batteria
➧
Selezionando
Modo - Soglie automatiche
Il gruppo di continuità calcola in modo
automatico, in funzione del carico, le soglie di
tensione al di sotto delle quali il gruppo di
continuità segnala, rispettivamente, RISERVA
AUTONOMIA e FINE AUTONOMIA.
Selezionando
Modo - Soglie fisse
Vengono proposte due impostazioni:
1) Soglia riserva
Impostazione della soglia di tensione batteria al
di sotto della quale il gruppo di continuità
segnala RISERVA AUTONOMIA
2) Soglia fine auton.
Impostazione della soglia di tensione batteria al
di sotto della quale il gruppo di continuità
segnala FINE AUTONOMIA.
18
4 - Personalizzazione delle modalità di funzionamento
Batterie
Max. tempo Batteria
Max. tempo riserva
Abilit.test Accens
Abilit. riaccens
Opzioni esterne
➧
Max tempo
Batteria
Max tempo
riserva
Abilit. test
Accensione
Abilit.
riaccensione
Impostazione del tempo massimo di funzionamento
continuativo nella modalità BATTERIA espresso in secondi.
Impostando “0” la funzione è disabilitata.
Impostazione del tempo massimo di funzionamento nella
modalità BATTERIA raggiunto il livello riserva, espresso in
secondi. Impostando “0” la funzione è disabilitata
Se abilitato viene eseguito il test batterie ad ogni
accensione del gruppo di continuità. Se disabilitato non
viene eseguito il test batterie alla riaccensione
Se abilitato, dopo uno spegnimento per fine autonomia, il
gruppo di continuità si riaccende al ritorno della tensione di
rete.
Se disabilitato, dopo uno spegnimento per fine autonomia,
al ritorno della tensione di rete il gruppo di continuità non si
riaccende.
Opzioni esterne N. Caricabatteria
Impostazione del numero di carica batterie esterni
Unità KB
Impostazione del numero di pacchi da tre batterie installati
esternamente
Lunedi
➧
Impostazione ora e data
Seleziona il valore da modificare
➡
➡
❙
23/06/03 -19:25:06
➡
Regol. Orologio
Aumenta/Diminuisce il valore
Pannello operatore
Lingua
Beep Tastiera
Retroill.display
Contrasto display
Cambio password
➧
Eventi
Visualizzazione
Cancellazione
➧
Lingua
Impostazione della lingua
Beep tastiera
Abilitazione o disabilitazione della segnalazione acustica di
pressione del tasto
Impostazione della retroillumminazione del display
alfanumerico
Fissa: sempre illuminato
Temporizza: l’illuminazione si spegne dopo alcuni secondi
di inattività sulla tastiera
Disabilita: illuminazione sempre spenta.
Retroill.
Display
Contrasto
display
Impostazione del contrasto del display
Cambio
password
Impostazione della password per l’accesso alle
impostazioni del gruppo di continuità
Visualizzazione Visualizza gli eventi memorizzati dal gruppo di continuità,
ad esempio FINE AUTONOMIA, ALLARMI
SOVRATEMPERATURA ecc.. con relativa ORA e DATA
Cancellazione Esegue la cancellazione della memoria eventi
19
4 - Personalizzazione delle modalità di funzionamento
Programmazione
Calendario Prog.
Abilitazione
Visual./Modifica
Sequenza progr.
Cancellazione
➧
Abilitazione
Esegue l’abilitazione o la disabilitazione dei programmi inseriti
Visual./Modifica Consente l’inserimento e la modifica programmi. Sono
disponibili le seguenti funzioni:
Test Batterie (verifica stato batterie)
Calibrazione Batt.(calibrazione batterie)
Turn on (accensione del gruppo di continuita)
Turn off (spegnimento del gruppo di continuità)
Assente (disattivazione del programma)
Ciascun programma può essere eseguito nelle seguenti
modalità:
Giornaliero “ora-minuti”:
viene eseguito tutti i giorni all’ora-minuti impostato;
Unico “giorno-mese-ora-minuti”:
viene eseguito una sola volta al “giorno-mese-ora-minuti”
impostato
Settimanale”nome giorno-ora-minuti”
viene eseguito ogni settimana al “nome giorno-ora-minuti”
impostato.
Sequenza
Consente la visualizzazione di tutti i programmi impostati in
prograr.
ordine giornaliero (max 16)
Cancellazione Cancella tutti i programmi
Riaccensione
Ritardo
Autonomia minima
➧
Ritardo
Durata, in secondi, della segnalazione di preavviso
riaccensione automatica
Autonomia
minima
Percentuale di carica delle batterie al di sotto della quale
l’UPS non si riaccende automaticamente
Ritardo
Durata, in secondi, della segnalazione di preavviso
riaccensione automatica
Spegnimento
Ritardo
➧
Strumenti
Test Segnalazioni
Test Display LCD
Test Batterie
Calibrazione Batt.
➧
Test
Esegue il test delle segnalazioni luminose. Premendo il
Segnalazioni tasto ENTER viene eseguito il test della segnalazione
Verde, Gialla e Rossa e della Segnalazione Acustica
Test display
lcd
Test Batterie
Esegue il test del display alfanumerico. Premendo il tasto
ENTER vengono visualizzati tutti i caratteri disponibili sul
display alfanumerico.
Esegue il test delle batterie. In caso di problemi contattare
il Centro Assistenza.
Esegue la calibrazione delle batterie, rilevando la curva di
Calibrazione scarica delle batterie. Nel caso di cambio batterie si
consiglia di eseguire questo ciclo in modo che il gruppo di
continuità fornisca precise informazioni sullo stato di
carica.
20
5 - Caratteristiche tecniche
5. Caratteristiche Tecniche
Specifiche Costruttive
MEGALINE
1250
Pesi (Kg.)
23,5
Dimensioni
(LxHxP)
Tecnologia
MEGALINE
2500
MEGALINE
3750
MEGALINE
5000
34
43
53
Rack 19” 6U 483,5 X 266 (6U) X 600
PWM ad alta frequenza sia per lo stadio di ingresso che per quello di uscita.
Logica di controllo a microprocessore
Espandibilità
Possibilità di passaggio a configurazioni con potenza superiore, mediante l’aggiunta di uno o più moduli
all’interno dello stesso contenitore, fino ad un massimo di 4.
Possibilità di aumentare l’autonomia mediante l’aggiunta di batterie supplementari entro contenute,
fino ad un massimo di 4 serie di 3 batterie da 12V, 9Ah.
Espandibilità
Per autonomie superiori, possibilità di collegare contenitori batteria opzionali, della capacità di max 3 serie
di 3 batterie da 12V, 9Ah.
Interfaccia
computer
A livelli logici, per interfacciamento con kit opzionali. Uscita su connettore a vaschetta 9 poli maschio,
isolato SELV. Seriale RS232 standard per interfacciamento con personal computer tramite software di
shutdown autodiagnostico. Uscita su connettore a vaschetta 9 poli femmina isolato SELV.
Comando a
distanza
Uscita su connettore a vaschetta 9 poli maschio isolato SELV per collegamento con comando a distanza
opzionale. Possibilità di accensione e spegnimento programmati e visualizzazione principali segnalazioni
dell’UPS.
Protezioni
Elettroniche contro sovraccarichi, cortocircuito ed eccessiva scarica delle batterie. Blocco del
funzionamento per fine autonomia. Limitatore di spunto all’accensione. Sensore di corretto collegamento
del neutro. Back-feed protection (isolamento elettrico di sicurezza della spina d’ingresso durante il
funzionamento a batteria). Contatto EPO per collegamento “fungo VVF”
Statico automatico e manuale (optional).
Intervento per sovraccarico o anomalia di funzionamento.
By-pass
sincronizzato
Specifiche Ambientali
MEGALINE
1250
MEGALINE
2500
MEGALINE
3750
Altitudine max
immagazzinamento
10.000 metri
Gamma
temperature
da -20° C a +50° C
immagazzinam.
Gamma
temperature
da 0° C a +40° C
funzionamento
Gamma umidità
relativa funzion.
20-80% non condensante
Grado di
protezione
(IEC529)
IP 21
Rumore acustico
ad 1mt.
(<) 40dB A
21
MEGALINE
5000
5 - Caratteristiche tecniche
Caratteristiche Elettriche d’ Ingresso
MEGALINE
1250
MEGALINE
2500
MEGALINE
3750
Tensioni nominali
d’ingresso
Gamma tensione
ingresso
Frequenza
nom.ingresso
MEGALINE
5000
230 V
da 184V a 264V con carico nom. - da 100V a 264V al 50% del carico nom.
50 Hz o 60 Hz +2% (autosensing e/o selezionabile dall’utente)
Corrente nominale
d’ingresso
4,6A rms
8,9A rms
13,2A rms
17,7A rms
Corrente massima
d’ingresso
5,75A rms
11,2A rms
16,6A rms
22,2A rms
Distorsione
corrente d’ingresso
Fattore di potenza
d’ingresso
THD
< 3%
> 0,99 dal 20% del carico nominale
Corrente di spunto
100% della corrente nominale
Numero fasi
d’ingresso
Monofase
Fusibile di linea
25 AFF
Caricabatterie
diretto da rete
0,8 A rms
Forma d’Onda d’Uscita
MEGALINE
1250
MEGALINE
2500
In funzionamento
a rete
In funzionamento
a batteria
Tipologia di
funzionamento
MEGALINE
3750
MEGALINE
5000
Sinusoidale
Sinusoidale
Gruppo di continuità di tipo no-break, on-line, doppia conversione con neutro passante
22
5 - Caratteristiche tecniche
Caratteristiche Elettriche di Uscita in Funzionamento a Rete
MEGALINE
1250
Tensione nominale
d’uscita
Frequenza
nominale d’uscita
Corrente d’uscita su
carico lineare fattore
di potenza 0,7
Fattore di cresta
sulla corrente
d’uscita
Potenza nominale
d’uscita VA
Potenza attiva
d’uscita sucarico
lineare o non lineare
P.F. 0,7
MEGALINE
3750
MEGALINE
2500
MEGALINE
5000
230 V ± 1%
50 Hz / 60Hz sincronizzata (autosensing e/o selezionabile dall’utente)
5,37A rms
10,75A rms
16,25A rms
21,6A rms
3,5
1250VA
2500VA
3750VA
5000VA
875W
1750W
2625W
3500W
Distorsione
armonica totale
della tensione di
uscita su carico
nominale
< 0,5%
Distorsione
armonica totale
della tensione di
uscita su carico
nominale non
lineare P.F.0,7
< 1%
Capacità di
sovraccarico
300% per 1 secondo senza intervento del By-pass
200% per 5 secondi senza intervento del By-pass
150% per 30 secondi senza intervento del By-pass
N.ro delle fasi
d’uscita
Monofase
Rendimento di
conversione AC-AC
con carico lineare
P.F. 1 e batterie
cariche:
•al 50% del carico
•al 75% del carico
•al 100% del carico
80%
85%
92%
23
5 - Caratteristiche tecniche
Caratteristiche Elettriche di Uscita in Funzionamento a Batteria
MEGALINE
1250
Tensione nominale
d’uscita
Frequenza
d’uscita
MEGALINE
3750
MEGALINE
2500
MEGALINE
5000
230 V ± 1%
50 Hz / 60Hz ± 1% (autosensing e/o selezionabile dall’utente)
Potenza nominale
d’uscita VA
1250VA
2500VA
3750VA
5000VA
Potenza attiva
d’uscita sucarico
lineare o non lineare
P.F. 0,7
875W
1750W
2625W
3500W
Distorsione
armonica totale
della tensione di
uscita
Capacità di
sovraccarico
< 1%
150% impulsivo
Gamma permessa
dal fattore di
potenza del carico
applicato
da 0,7 a 1
Rendimento di
conversione DC-AC
con carico lineare
P.F. 1 e batterie
cariche:
•al 50% del carico
•al 75% del carico
•al 100% del carico
!
80%
80%
80%
ATTENZIONE: Pericolo di esplosione se la batteria è sostituita con un’altra di tipo scorretto. Eliminare le
batterie usate seguendo le istruzioni e precauzioni di smaltimento indicate sulle stesse.
24
5 - Caratteristiche tecniche
Funzionamento a Batteria
MEGALINE
1250
MEGALINE
5000
MEGALINE
3750
MEGALINE
2500
Autonomia
indicativa in minuti
con batterie
cariche
Carico applicato in
percentuale
50%
80%
100%
50%
80%
100%
50%
80%
100%
50%
80%
100%
UPS Standard
20
11
8
20
11
8
20
11
8
20
11
8
Tempo di ricarica
fino al 90% della
carica totale
Dati tecnici e
quantità delle
batterie
5 - 6 ore a seconda del livello di scarica raggiunto
n. 3 batterie piombo-acido sigillate senza manutenzione 12V 9Ah connesse in serie per ogni modulo.
Segnalazioni di
riserva
da 32,2 V a 36V programmabile dall’utente.
Tensione minima
funzionamento a
batterie durante la
scarica
da 27V a 31,5V con selezione automatica in funzione del carico applicato, oppure programmabile
dall’utente.
Tempo medio di
vita delle batterie
3-6 anni a seconda dell’utilizzo e della temperatura di esercizio.
Attenzione!
Le batterie contenute nell’UPS, sono soggette ad una diminuzione di capacità in funzione del tempo di vita
(caratteristica propria della batterie al piombo dichiarata dal costruttore del manuale tecnico). Ad esempio, la
diminuzione di capacità di una batteria con 4 anni di vita può arrivare fino al 40% con conseguente calo
proporzionale dei tempi di autonomia dell’UPS in funzionamento a batteria.
Caratteristiche del By-pass
MEGALINE
1250
MEGALINE
2500
MEGALINE
3750
Tipo di bypass
Statico ed elettromeccanico
Tempo di
commutazione
nullo
25
MEGALINE
5000
5 - Caratteristiche tecniche
Normative di riferimento
MEGALINE
1250
Sicurezza:
progettato per
soddisfare la
norma
Compatibilità
elettromagnetica:
•immunità
•emissioni
Prestazioni
caratteristiche
MEGALINE
2500
MEGALINE
3750
MEGALINE
5000
Rispondente alla normativa EN 62040-1-1
Rispondente alla normativa EN 50091-2
Rispondente alla normativa EN 50091-2
(classe A)
(classe B)
Rispondente alla normativa EN 62040-3
Dati e caratteristiche tecniche possono essere variati da MetaSystem senza preavviso
MANUTENZIONE PERIODICA
Pulizia
Prima di effettuare le operazioni di pulizia si raccomanda di:
- Spegnere le apparecchiature collegate al gruppo di continuità
- Scollegare le apparecchiature dal gruppo di continuità
- Scollegare la rete dal gruppo di continuità
Pulizia esterna
- Pulire utilizzando un panno morbido e asciutto
Pulizia delle aperture di raffreddamento
- Eseguire periodicamente la pulizia delle aperture di raffreddamento, aspirando o utilizzando un pennello morbido
26
6 - Soluzione ai problemi
6. Soluzione ai problemi
Problemi
Soluzioni
All’accensione l’UPS fa suonare il cicalino e
lampeggiare il segnalatore visivo rosso con
intermittenza di tipo alternato breve-lungo, quindi
si spegne dopo 15 secondi.
È errato il collegamento del conduttore di neutro:
girare la spina di alimentazione, oppure invertire il
senso di collegamento dei cavi di neutro e fase di
ingresso, oppure escludere sensore di neutro.
L’UPS funziona ma ogni 12 secondi emette un
breve segnale acustico ed é sempre acceso il
segnalatore visivo giallo BATTERY.
- Assicurarsi della presenza di tensione nella
presa di rete.
- Controllare il perfetto inserimento del cavo di
alimentazione del gruppo di continuità sia nella
presa di rete che nel connettore del gruppo
stesso.
- Verificare lo stato del fusibile che si trova di
fianco al connettore di ingresso/uscita sotto il
coperchio in plastica (vedi figura 1 o 4).
L’UPS funziona ma emette un segnale acustico
intermittente e lampeggia il segnalatore visivo
rosso + giallo By-pass.
È presente un sovraccarico dell’uscita dell’UPS.
Ridurre il numero di apparecchiature collegate in
modo che il carico non superi la massima potenza
erogabile dal gruppo di continuità. In alternativa,
se non si è già in configurazione massima, è
possibile richiedere al Centro Assistenza Tecnica
di aumentare la potenza del gruppo aggiungendo,
all’interno dell’UPS, uno o più moduli con le
relative batterie.
L’UPS emette un segnale acustico costante ed é
acceso il segnalatore visivo giallo lampeggiante
per circa 15 secondi, dopo di che il gruppo si
spegne.
Il gruppo ha scaricato completamente le batterie,
può ripartire solo se la linea d’ingresso è
presente. Controllare gli interruttori magnetotermici o differenziali a monte del gruppo e il
fusibile d’ingresso
L’UPS funziona ma il segnalatore visivo verde La rete è fuori dai limiti consentiti come tensione
MAINS lampeggia in modo rapido.
e/o come frequenza, ma pur sempre utilizzabile
dall’UPS. Non è però disponibile la funzione di
By-pass.
L’UPS emette un segnale acustico intermittente e
il segnalatore visivo rosso lampeggia in modo
rapido.
È intervenuta la protezione termica. Spegnere il
gruppo di continuità e attendere qualche minuto in
modo che la temperatura interna dell’UPS si
normalizzi. Verificare il corretto funzionamento delle
ventole e che il relativo flusso d’aria non sia
ostacolato (ad es. gruppo troppo vicino ad una
parete).
È avvenuto un guasto in qualche circuito interno.
Contattare il centro di assistenza.
Se il problema persiste contattare il centro assistenza MetaSystem al numero verde:
27
EN
Certification of
Directives applied:
We certify conformity to standards:
Costruttore:
Address:
Type of appliance:
Models:
Year of application of the mark:
conformity
73/23/EEC; modified with directives 92/31/EEC
89/336/EEC; modified with directives 92/31/EEC, 93/68/EEC
EN 62040-1-1, EN 62040-2, EN 62040-3
MetaSystem S.p.A.
via Majakovskij, 10/b Reggio Emilia, Italy
Uninterruptible Power Supply
MEGALINE 1250 RACK - MEGALINE 2500 RACK
MEGALINE 3750 RACK - MEGALINE 5000 RACK
2004
The appliance was tested in the typical configuration for its installation and with peripherals in compliance with the above Directives.
The undersigned certifies that the above appliance satisfies the requirements of the specified Directives.
Reggio Emilia, 01/10/04
Ing. Cesare Lasagni
Technical Manager
All the information contained in this manual is provided as a guide and is subject to change
without notice for product upgrading.
28
Index
Index
1 - Introduction
30
30
Important information
2 - Operation
Operating principle
Mains operation
Battery operation
By-pass operation
Information provided by the display
Visual and acoustic warning signals
3 - Installation
Prior to installation
Where to install your UPS
Front panel
Installation procedure for a single cabinet UPS
Presetting for the expansion of autonomy
Guide to using the diagnostics software
Operating procedures
4 - Customising the UPS operating mode
The functions of the buttons
The “Service Mode” function
Accessing menus
Ups status
Ups configuration
Events
Programming
Tools
5 - Specifications
Construction specifications
Environmental specifications
Electrical input specifications
Output waveform
Electrical output specifications when running on
mains power
Electrical output specifications when running on
battery power
Battery operation
By-pass specifications
Reference standards
6 - Troubleshooting
31
31
32
32
32
32
33
34
34
34
35
35
37
37
37
38
38
38
38
39
41
45
46
46
47
47
47
48
48
49
50
51
51
52
53
29
Introduction
Thank you for choosing to purchase a MetaSystem product. Our company’s main objective is to supply innovative
products that are the outcome of our ongoing research and application of cutting-edge technology.
Our products are covered by several international patents, emblematic of MetaSystem’s quest for exclusivity and
ongoing improvement.
MetaSystem uninterruptible power supplies are designed to protect electronic equipment from problems that may be
encountered with your mains electricity supply, such as power cuts, surges and interference.
In particular, the product you have purchased is enhanced with our exclusive “State of Charge Algorithm” which makes
it possible for your UPS to achieve the best possible performance in terms of autonomy.
Our products comply with international standards: an additional guarantee of the quality of our products.
We recommend you read this manual carefully and keep it for future reference.
Important information
• Do not connect loads in excess of the limit stipulated on the product’s label and in the relative documents
provided.
• Do not dismantle the UPS. Only authorised technical personnel are allowed access to the internal parts
of the UPS.
• Never disconnect the UPS from the mains power supply when it is running: this would cut off the earth
protection of both the UPS and of the loads connected to it.
• Do not insert screwdrivers or other items inside the ventilation holes or into the fan.
• The UPS must be installed according to the instructions in this manual and in compliance with the set
limits.
• Take care that no liquids come into contact with your UPS.
• This product should only be employed for the designated uses described in this manual.
• The manufacturer is not liable for any damage or injury caused by failure to comply with the instructions
in this manual.
All the information contained in this manual is provided as a guide and is subject to change
without notice for product upgrading.
30
2 - Operation
2. Operation
Block diagram
OUTPUT
BY PASS
INPUT
~
=
~
=
POWER
FACTOR
CORRECTOR
INPUT
FILTER
OUTPUT
FILTER
INVERTER
POWER
MODULE
=
=
VOLTAGE BOOSTER
BATTERIES
BATTERY
CHARGER
POWER MODULE
BATTERIES
MICROPROCESSOR
LOGIC
RS 232
INTERFACE
REMOTE
CONTROL
Operating principle
When the mains supply is present, the input voltage is filtered and rectified by a special input stage
(power factor corrector) which is able to optimise the absorption of current from the mains, so that the
power factor becomes practically unitary, and to compensate for any shifts in voltage. This stage is able
to supply the output inverter even in conditions of very low mains voltage.
This feature becomes very striking with very low loads: with a load of around 50% nominal load, mains
operation is possible as low as about 100 V without any exploitation of battery power. This enables more
“intelligent” management of the switchover to battery power, minimising use of the batteries. The voltage
is rectified at the first stage and then taken up by a high frequency inverter to produce the ‘clean’
sinusoidal output voltage, offering very low distortion rates. A rapid, synchronised by-pass circuit
intervenes during peaks of absorption above the inverter’s capacity, for example when certain peripherals
are switched on, demagnetisation of large colour monitors, etc.
Should the mains voltage fail or be subject to excessive sag, a booster stage is automatically activated.
This employs the batteries and safeguards the supply of power to the output inverter, and thus to the
load, without any break. The circuitry is a passing neutral type, i.e. with no alteration of the neutral
system of the appliances connected to it.
During normal operation, a sensor verifies the difference in potential between the neutral wire and the
earth wire: should this be excessive, it will activate the input protection and switch the UPS over to
battery mode, signalling the anomaly. It is, however, possible to modify the parameters of the software so
that only signalling is provided, if preferred.
All the UPS functions are supervised by a microprocessor that is also able to control and memorise
certain operating conditions, in addition to managing the UPS interface with a computer by means of a
RS 232 serial line.
This makes it possible to control the operating functions and any anomalies in real time.
The UPS keeps the operator informed regarding its operating status using visual and acoustic signals:
- alphanumeric display 1 on page 38
- status indicator 7 on page 38
- acoustic signal (located inside the UPS)
31
2 - Operation
The combination of these signals enables rapid and intuitive understanding of its operating status and
recognition of any problems in the power supply.
There are three main operating modes
- Mains operation
- Battery operation
- By-pass operation
Mains operation
This is considered the normal operating condition:
- mains voltage is converted by the power factor corrector (PFC) into continuous current
- the inverter reconstructs the sinusoidal voltage from the continuous current
- the output filter provides extra “cleaning” of the output voltage
- the batteries are recharged
Battery operation
When there is a mains power failure, the UPS automatically switches over to battery mode.
- the voltage of the batteries is increased by the “booster” circuit
- the inverter reconstructs the sinusoidal voltage from the continuous current
- the output filter ensures the voltage supplied to the load is clean
By-pass operation
The by-pass circuit excludes the UPS and connects the output directly to the input. The switchover takes
place in a synchronised manner in order to ensure the correct output voltage is always guaranteed,
preventing the risk of a break in power or excess voltage.
The intervention of the by-pass circuit can be customised by means of a dedicated menu (Config. UPS,
By-pass) which provides many options (automatic, disabled, by-pass in load waiting mode, etc.) in order to
meet the specific demands of the application.
Information provided by the display
The main messages provided by the alphanumeric display in the three different operating modes are
illustrated below.
UPS on mains
IN
212V
OUT 230V/812W ( 31%)
Batt
32,2‘
UPS
On Mains
Indicates normal operating status, when mains voltage is present.
On Battery
Indicates that there is no mains power and the UPS is using its batteries
to supply power.
On By-pass
Indicates that by-pass operation has been turned on: the output of the
UPS is connected directly to the mains.
IN
xxxV
Indicates the UPS input voltage and the RMS power absorbed by the
mains. This message is not displayed during battery operation.
OUT
xxxV/x,xKW (xx%)
The current power is also given as the percentage of the total power that
the UPS is able to supply.
Batt.
xx,x’
Indicates the state of charge of the batteries in a chart format and the
autonomy available in a numeric format
32
2 - Operation
Visual and acoustic warning signals
STATUS
INDICATOR
ACOUSTIC
SIGNAL
MESSAGES
DISPLAYED
DESCRIPTION
Normal operation with mains present and
loads within the set limits
Green
---
UPS on Mains
IN xxxV
Green
---
UPS on Mains
No sync mains
xx.xHz
Fast flashing
Yellow
Yellow
Short intermittent
sound (every 20sec)
Fast flashing
UPS on Batteries
MAINS ABSENT
Battery operation
UPS on Bypass
By-pass operation
---
Fast flashing
Red
The UPS is indicating that the frequency of
the output voltage is not synchronised with
the input voltage. The cause of this may be:
- PLL disabled
- Frequency of the input voltage is outside the
set limits for the UPS
Module failure
ATTENTION! WE RECOMMEND YOU SWITCH
OFF THE UPS AND CONTACT YOUR SERVICE
CENTRE
Short and fast
intermittent sound
Overload
ATTENTION! WE RECOMMEND REMOVING
SOME OF THE APPLIANCES CONNECTED TO
THE UPS SO THAT CONSUMPTION BY THE
LOAD RETURNS BELOW SET LIMITS
Red
Red
UPS error or failure
ATTENTION! WE RECOMMEND YOU SWITCH
OFF THE UPS AND CONTACT YOUR SERVICE
CENTRE
Continuous sound
--Above 90% of MAX load
1 flash every 10
secs.
Red
Alternating short
long flashing
Red
Short flashing
with pause
Alternating short,
long intermittent
sound
RESERVE
AUTONOMY!
--OUT OF
REDUNDANCY!
Autonomy reserve. During battery
operation
Incorrect battery connection
Incorrect Neutral
Consumption by the load is above the
redundancy that has been set. Power board
redundancy is not guaranteed in case of
failure
NB: press ESC to silence the acoustic signal. The signal will be silenced or enabled each time
this button is pressed.
33
3 - Installation
3. Installation
Prior to installation
Check the packaging has not been opened or damaged and that the product has not been damaged during
transport. Please contact your shipping agent in case of doubt.
Check the contents of the box:
• Nr.1 UPS
• Nr.1 connector for the input/output cable (single cabinet version includes multiple output socket and
input cable)
• Instructions manual
We recommend you keep the equipment’s packaging materials as they can be useful should the need arise to send the product
back for repairs.
Where to install your UPS
Make sure the place where you intend installing your UPS is level and sturdy.
Please comply with the following requisites for installation (Fig. 1):
- The UPS must be located in an enclosed environment: it was not designed to operate out of doors.
- It is essential that you comply with the environmental conditions illustrated in this manual.
- Avoid placing it in very dusty or damp areas or in direct sunlight.
- Avoid places where there are inflammable liquids and/or corrosive substances.
- Aeration (ventilation)should be assured by positioning the UPS at minimum 10 cm distance from any other
appliance located in the rack mount.
- Do not cover the front, back and upper aeration (ventilation) areas.
10cm
Fig.1 Where to install the UPS
34
3 - Installation
Front panel
1
2
3
4
5
6
7
Alphanumeric Display
ESC button / exit function / silence acoustic signal
Button to scroll backwards / increase value
Button to scroll forwards / decrease value
Enter button / confirm function / access menu
Button to switch on / switch off
Multicolour operating status indicator light (green / yellow / red)
Installation procedure for a single cabinet UPS
To the mains
electricity
supply
Electrical connections
Single Cabinet (fig. 2):
8
9
10
11
12
13
13
Input/Output connector
Input/Output plug
Input fuse
RS232 serial interface outlet (9-pin female)
Logic signals outlet ( 9-pin male)
Presetting for expansion of autonomy
12
8
10
11
9
To the loads
Fig. 2 Electrical Connections
35
3 - Installation
Single cabinet
1. Wire up the Input-Output connector supplied as shown in
INPUT-OUTPUT CONNECTOR
Assembly
figure 3, using insulated cable with wires whose section is at
least 2.5 mm2.
2. Insert the connector into the plastic housing and secure it
using the screws supplied. Secure the wires to the housing
using the cable grip (see fig. 3).
3. Take the cover off the plug [9] by removing its screws.
4. Put the Input-Output connector into the plug [9] located on
the rear of the UPS, and secure to its case using the screws
supplied (see fig. 2).
5. Check that the on/off switches of all the appliances to be
connected to the UPS are OFF and connect them to the output
socket.
6. Insert the power supply plug into a power outlet that is
adequate for the voltage and current required.
CONNECTOR
Reference notch
PLASTIC HOUSING
CABLE GRIP
Fig. 3 Connection terminals housing
WARNING
!
Your UPS is fitted with a circuit to protect it against the risk of incorrect connections. This eventuality will be indicated
by means of its red warning light, lit without flashing, and the continuous sounding of its internal buzzer. Should you
note this signal immediately after switching the UPS on, switch it off and remove the power supply plug immediately.
Precautions for installation
•
•
•
•
!
Electrical connections should only be done by trained personnel
Do not modify the electric cables supplied
Make sure that the mains outlet is connected securely to an earth circuit
The mains outlet, or the circuit breaker, must be installed near the appliance and must be easily
accessible
ATTENTION
(for versions 5000/6250/7500/8750/10000)
The cables supplied are fitted with an input plug and outlet sockets whose maximum capacity is 16A.
Therefore, we recommend use of direct cabling from the control panel to the connector supplied (follow
instructions for connections shown in Figs. 3 and 4 on Page 39) for applications where the anticipated
UPS input current will be in excess of 13A (e.g. 5000 VA with Vinn=184V)
ATTENTION
(for versions 1250/2500/3750/5000)
Since current dispersion towards earth of all the loads merges in the UPS protection wire (earth wire), it is
essential to check that the sum of these currents does not exceed 2.7 mA, according to standard EN
50091-1-1, for safety reasons.
!
INPUT-OUTPUT CONNECTOR
Side with insertion of wires
Earth connection
Yellow-green wire
Yellow-green wire
Brown wire
Blue wire
Blue wire
Brown wire
Input cable
(to the mains
electricity supply)
Output cable
(to load)
Terminal n°1 PHASE OUTPUT
Terminal n°2 NEUTRAL OUTPUT
Terminal n°4 NEUTRAL OUTPUT
Terminal n°5 PHASE OUTPUT
36
Fig. 4 Terminals
3 - Installation
Presetting for the expansion of autonomy
Your UPS is complete with presetting for the connection of
additional battery cabinets. One or more extra battery
cabinets can be fitted to a single cabinet UPS as follows:
1. Unscrew screws 1 and 2 shown in figure 5.
2. Slide the protective casing that the connectors located inside the
box are completely accessible.
3. Tighten the screws to secure the metal protection.
4. Connect the battery cabinet to the UPS using the dedicated cables.
5. Use the plaited conductor supplied to safeguard a good contact
2
1
with earth.
!
ATTENTION
Make sure the UPS has been switched off and
disconnected from the mains supply before proceeding
with connections
Procedure Operative
Fig. 5
Guide to using the diagnostics software
Connection
Your UPS is fitted with a standard RS232 interface, which can be used in conjunction with a computer in order to access
data relating to the operation of the UPS and its log. This function must be used together with the interface programme
for WINDOWS environments available from our website www.metasystem.it without charge. A RS232 cable is required
to connect a serial port on your PC to the interface outlet [11] located on the rear of the UPS.
Operating Procedures
Switch off
Switch on
During operation (example)
Press button
UPS on Mains
IN
212V
OUT 230V/812W ( 31%)
Batt
32,2‘
The display reads
UPS switching on......
The status indicator shows the sequence
during switch on (red, yellow, green)
The display shows the operating status
(example)
Press button for a few seconds
UPS on Mains
IN
212V
OUT 230V/812W ( 31%)
Batt
32,2‘
The acoustic warning signal sounds repeatedly
then the UPS switches off (5 seconds).
37
4 - Customising the UPS operating mode
4. Customising the UPS operating mode
The functions of the buttons
The buttons on the front panel of the UPS are used to access its various menus
BUTTON
-
Exit a function without modifying it
Go up a level to an upper level menu
Exit the main menu and return to status display
Silence the buzzer
➡
ESC
DESCRIPTION
- Select previous function
- Increase a value within the function
- Select a new item within the function (e.g. go from DISABLED to ENABLED)
➡
- Select next function
- Reduce a value within the function
- Select a new item within the function (e.g. go from ENABLED to DISABLED)
❙➡
ATTENTION: Some menus contain more than four lines: use the
through items in the menu that are not displayed.
➡
!
➡
- Confirm a value
- Access an item in the menu
- Go down a level to a lower level menu
buttons to scroll
The “Service Mode” Function
➡
❙
All the settings and programming described below can be done even when the UPS is switched off. Press the
button to enter UPS “SERVICE” mode in order to access the Display menu. Press the
button to exit this mode.
Alternatively, the UPS will automatically exit the function and switch off if it does not receive manual or serial commands
within 1 min.
Accessing menus
When the UPS switch on procedure has been completed, the display will read
(example)
Press the
❙➡
UPS on Mains
IN
212V
OUT 230V/812W ( 31%)
Batt
32,2‘
38
button to access the main menu
4 - Customising the UPS operating mode
MAIN MENU
UPS Status
UPS Config.
Events
Programming
Tools
UPS STATUS
UPS Setup
UPS Info
Output
Input
Batteries
History Data
Misc.
Output
Input
Bypass
Neutral Sensor
Batteries
Clock setup
Operator Panel
Events
log View
log Reset
Scheduling
Schedule Planning
Restart
Shutdown Planning
Tools
Signalling Test
LCD Display Test
Battery Test
Battery Calibration
UPS STATUS
UPS Info
Mod Megaline xxxx
POut Max
xxxx
SWVer.
xxxx
S/N
xxxxxxxxx
Installed Modules x
Faulty Modules
x
➧
Mod
POut max
SWVer.
S/N
Serial number
Installed Modules
Number of power modules fitted
Faulty Modules
Number of power modules that have failed
Power
Appar. Pow.
Indicates the active power supplied (W)
V RMS
Indicates the effective voltage (V RMS) supplied at the UPS
output
I RMS
Indicates the effective current (A RMS) supplied at the UPS
output
Indicates the name of the UPS
Indicates the potential maximum active power (W)
Software version
Output
Power
Appar.Pow.
V RMS
I RMS
Peak current
Frequency
I Crest factor
Power fact.
xxxxx
xxxx
xxxx
xxxx
xx
xx
xx
xx
➧
Indicates the apparent power supplied (VA)
Peak current Indicates the peak current supplied at the UPS output (A)
Frequency
Indicates the frequency of the UPS output voltage (Hz)
I Crest factor Indicates the crest factor, calculated as the ratio between
the peak value and the effective value of the current
absorbed by the load
Power fact.
Indicates the power factor for the load connected to the UPS
39
4 - Customising the UPS operating mode
Input
Power
Appar.Pow.
V RMS
I RMS
Peak Current
Frequency
I Crest factor
Power Fact
xxxx
xxxx
xxx
xxxx
x
x
x
x
➧
Power
Appar. Pow.
Indicates the power received from mains (W)
Indicates the apparent power received from mains (VA)
V RMS
Indicates the effective voltage (V RMS) at the UPS input
I RMS
Indicates the effective current (A RMS) received from
mains
Peak Current Indicates the peak current received from mains (A)
Indicates the frequency of the UPS input voltage (Hz)
Frequency
I Crest factor Indicates the crest factor, calculated as the ratio between
the peak value and the effective value of the current
received from mains
Power Fact
Indicates the power factor applied to mains
Batteries
Voltage
xx
Residual Cap. xxxx
xxxx
Discharge count
Usage
xxxx
Cal.dd/mm/yyhh:mm
Ext. KB units
xx
Ext Chargers
xx
➧
Voltage
Indicates the voltage at the terminals of the battery kits (V)
Residual Cap. Indicates the percentage of battery charge
Discharge
Count
Indicates the number of battery discharge cycles
Usage
Cal..
Hours of operation on battery power
Ext. KB units
Indicates the number of external KBs fitted
Ext Chargers
Indicates the number of external battery chargers fitted
(the MetaSystem CB36)
UPS Ontime
Indicates the total number of hours of UPS operation
BoosterOnTime
Indicates the number of hours of UPS operation in booster
mode (running on battery power)
Indicates the date (day / month / year) and the time
(hours / minutes) of the last battery calibration
History Data
UPS Ontime
xxxxx
BoosterOnTime
xxxx
DrainedOut N. xxxx
Booster Int.
xxxx
Bypass Interv. xxxx
OverheatCount xxxx
➧
DrainedOut N. Indicates the number of times the UPS has completely
discharged its batteries.
Booster Int.
Number of times booster mode has intervened (running on
battery power)
Bypass Interv Number of times the by-pass has intervened (refer to
Config.UPS / By-pass menu)
OverheatCount
Number of times the thermal protection has been triggered
(due to excessive load, for example)
40
4 - Customising the UPS operating mode
Misc.
Int. Temp.
Ext. Temp.
Fan speed
xx
xx
xx
➧
Int. Temp.
Indicates the internal temperature of the UPS, shown in
Celsius
Ext. Temp.
Indicates the external temperature of the UPS, shown in
Celsius
Fan speed
Indicates the speed of the UPS cooling fans, shown in a
percentage format (100% = maximum speed)
UPS Setup
Output
Voltage
Frequency
N+x Redundancy
➧
Voltage
To set the UPS output voltage (V)
Frequency
To set the UPS output frequency (Hz)
Nominal Value: to set a numerical value for the output
frequency (50 or 60)
Auto Selection:
If enabled, the UPS reads the frequency of the input
voltage and then synchronises the output to the same
value.
If disabled, the UPS uses the set Nominal Value.
N+x
Redundancy
To set the number of redundant boards (refer to NB:
Redundancy Settings)
NB: Redundancy Settings
This function is used to manage the redundancy of the power modules. For example: a load requires N power
modules; X power modules must be added to achieve N+X redundancy.
If the load applied exceeds the power supplied by N modules during operation, the UPS will signal the lack of
redundancy
A numerical example is given below:
Load
Power
boards
Total
power (W)
Redundancy
Redundancy
alarm (W)
Overload
alarm (W)
3700
3
3750
0
no
3750
3700
4
5000
1
3750
5000
1500
4
5000
2
2500
5000
1000
4
5000
3
1250
5000
41
4 - Customising the UPS operating mode
Input
PLL Enable
Extended PLL Range
➧
PLL Enable
If enabled, the UPS synchronises the output sine wave
with the input
If disabled, the output voltage is not synchronised with the
input. This is indicated by the flashing of the status
warning light (green)
Extended
PLL Range
If enabled, the UPS synchronises the output voltage with
the input for variations in frequency of +/-14% the nominal
value. If disabled, the PLL is synchronised for variations in
frequency of +/-2%.
NB: PLL Settings
The PLL function ensures the UPS output frequency is synchronised with the input so that the changeover at zero
takes place at the exact same time. Should the by-pass intervene, e.g. due to unanticipated loads, input-output
synchronisation is guaranteed.
!
ATTENTION: If the PLL function is disabled, the automatic by-pass function is also disabled.
Should the variation in input frequency be above the set range, the UPS will inhibit the PLL function and
release the output and input lock. When the range returns within the set threshold, the PLL function will be
reinstated automatically.
Bypass
Bypass Enable
Forced mode
DIP Speed
Off-line mode
Load Wait Mode
➧
Bypass
Enable
If enabled, the UPS manages by-pass intervention
automatically.
If disabled, the UPS will never switchover to by-pass
operation. The UPS will switch off in cases of lengthy
overload.
Forced mode If enabled, the UPS enters permanent by-pass operation.
DIP Speed
This is to alter the sensitivity of the automatic intervention
by the by-pass (when forced mode is disabled)
SLOW: for loads that are not sensitive to dips in voltage or
micro breaks but that cause frequent peaks.
STANDARD: normal use
FAST: loads sensitive to micro breaks
If enabled, the by-pass operates as follows:
Off-line mode - When mains power is present, the UPS runs permanently
in by-pass mode
- Should mains power fail, the UPS enters battery mode.
Load Wait
Mode
ENABLE: switches the function on or off
If enabled, the by-pass enters operation when the load is
below the threshold set for “Minimum load threshold”
Above this threshold, the by-pass stops working.
Minimum load threshold: to set the value for the load for
the switching on and off function (refer to NB: Load Waiting
without mains power).
NB: Load Waiting without mains power
In “Load Waiting” mode, the UPS will switch the by-pass on when the load is below the set threshold. Should there be
no mains power, the UPS will switch off and only switch on again when mains power is restored.
42
4 - Customising the UPS operating mode
!
ATTENTION!
Programming priority is as follows:
Operational function
Enable
By-pass
Forced Mode
Off-line mode
Load Waiting
FORCED MODE
ENABLED
ENABLED
X
X
OFF-LINE MODE
ENABLED
DISABLED
ENABLED
ENABLED
OFF-LINE MODE
ENABLED
DISABLED
ENABLED
DISABLED
LOAD WAITING
MODE
ENABLED
DISABLED
DISABLED
ENABLED
ENABLED
DISABLED
DISABLED
DISABLED
DISABLED
X
X
AUTOMATIC MODE
BY-PASS
DISABLED
X
X: either setting (ENABLED or DISABLED)
Neutral Sensor
Enable
Ignore While Run
➧
Enable
Ignore While
Run
If enabled, the UPS uses the neutral sensor to verify that the
difference in voltage between neutral and earth is within
safety limits. Should it go above the threshold, the UPS will
automatically switchover and run on battery mode. If disabled,
the UPS will ignore the neutral sensor.
If enabled, the UPS only verifies neutral-earth voltage when
it is switched on. If disabled, the UPS will verify neutralearth voltage in all operating conditions.
Batteries
Capacity Manag.
➧
Capacity
Manag.
There are two options for programming
ADVANCED MODE
The warning signal for the end of autonomy is determined
by reading the power absorbed by the load connected to
the UPS and is displayed as the remaining autonomy time
SIMPLE MODE
The warning for the end of autonomy is calculated by
reading the battery voltage.
The chosen setting determines the type of battery
programming menu displayed.
43
4 - Customising the UPS operating mode
ADVANCED MODE
Batteries
Set capacity
Reserve Time
➧
Set capacity
Advanced mode
Reserve
Time
Sets the warning signal for the end of battery
autonomy using the remaining run time
(minutes)
Set capacity
Simple mode
Battery
thresholds
Sets the warning signal for the end of battery
autonomy using the battery voltage.
There are two possible settings in the
Mode menu
SIMPLE MODE
Batteries
Set capacity
Battery Thresholds
➧
If you select
Mode – Automatic thresholds
The UPS automatically calculates the voltage
thresholds based on the load: the UPS will
signal AUTONOMY RESERVE and END OF
AUTONOMY, respectively, below these.
If you select
Mode – Fixed thresholds
There are two options for this setting:
1) Reserve threshold
Sets the battery voltage threshold; the UPS will
signal AUTONOMY RESERVE below this
2) Exhaust threshold.
Sets the battery voltage threshold; the UPS will
signal END OF AUTONOMY below this.
44
4 - Customising the UPS operating mode
Batteries
Max Time On Batt.
Max time reserve
TurnOn Test Enable
Restart Enable
External options
➧
Max Time On
Batt.
Sets the maximum time for continuous operation in
BATTERY mode, shown in seconds. If “0” is set, this
function is disabled.
Max time
Sets the maximum time for operation in BATTERY mode
after the reserve limit has been reached, shown in seconds.
reserve
If “0” is set, this function is disabled.
If enabled, the batteries are tested each time the UPS is
TurnOn Test
switched on. If disabled, the batteries are not tested when
Enable
it is switched on again.
Restart Enable If enabled, the UPS will switch on again when mains power
is restored after switching off due to the end of its
autonomy. If disabled, the UPS will not switch back on when
mains power is restored after switching off due to the end
of its autonomy.
External options Battery Chargers N°
Sets the number of external battery chargers
KB Units
Sets the number of packs of three batteries fitted externally
Monday
➧
Sets the time and date
Select the setting to alter
➡
➡
❙
23/06/03 -19:25:06
➡
Setup Clock
Increases/Decreases the setting
Operator Panel
Language
Keyboard Beep
Display Backlight
Display contrast
Password Change
➧
Events
Log View
Log Reset
➧
Language
Set the language
Keyboard Beep
Enables or disables the acoustic signal when buttons are
pressed
Display
Backlight
Set the backlighting of the alphanumeric display
- Fixed: always lit
-Timed: the illumination switches off when the keypad has
been inactive for a few seconds
- Disabled: the illumination is always off
Display
contrast
Sets the contrast of the display
Password
Change
Sets the password to access the UPS settings
Log View
Displays the events stored in the UPS memory, for example
END OF AUTONOMY, OVERHEATING ALARMS etc.. with
relative TIME and DATE
Log Reset
Deletes the events stored in the UPS memory
45
4 - Customising the UPS operating mode
Programming
Planning Schedule
Enable
View/Edit
Sched. sequence
Reset
➧
Enable
To enable or disable set programmes
View/Edit
To set and modify programmes. The following functions are
available:
- Batteries Test (verifies the status of the batteries)
- Batt. Calibration (calibration of the batteries)
- Turn on (to switch the UPS on)
- Turn off (to switch the UPS off)
- Absent (disables programming)
Each programme can be executed in the following ways:
- Daily “hour-minutes”: executed every day at the set hourminutes;
- Single “day –month –hour -minutes”: executed once on
the set “day –month –hour -minutes”
- Weekly “day name –hour -minutes” : executed every week
on the set “day name –hour -minutes”.
Sched.
sequence
Used to display all the set programmes in the daily order
(max 16)
Reset
Deletes all settings
Delay
Duration, in seconds, of the warning signal that the UPS is
about to switch back on
Min.
Autonomy
Percentage of battery charge below which the UPS will not
automatically switch back on
Delay
Duration, in seconds, of the warning signal that the UPS is
about to switch back on
Restart
Delay
Min. autonomy
➧
Shutdown
Delay
➧
Tools
Signalling
Test
Segnalling Test
LCD Display Test
Battery Test
Battery Calibration
➧
LCD
Display Test
Battery Test
Battery
Calibration
Tests the warning lights. Press the ENTER button to
execute the test of the Green, Yellow and Red warning
lights and the Acoustic warning signal.
Tests the alphanumeric display. Press the ENTER button
and all the available digits are shown on the alphanumeric
display.
Tests the batteries. Contact your Service Centre in case of
problems.
Calibrates the batteries, calculating the discharge curve for
the batteries. We recommend this cycle be carried out
when the batteries have been changed so that the UPS is
able to provide precise information regarding the status of
their charge.
46
5 - Specifications
5. Specifications
Construction specifications
Weight (Kg.)
MEGALINE
1250
MEGALINE
2500
MEGALINE
3750
23,5
34
43
Size
(LxHxP)
MEGALINE
5000
53
Rack 19” 6U 483,5 X 266 (6U) X 600
Technology
PWM high frequency both for input stage and output stage. Microprocessor control logic
Expandability
Optional upgrading to configurations with higher power by fitting one or more extra power modules
inside the same cabinet, up to a maximum of 4.
Optional upgrading of autonomy by fitting extra batteries inside,
up to a maximum of 4 sets of 3, 12V, 9Ah batteries.
Expandability
Computer
Interface
Remote
control
For greater autonomies, optional battery cabinets can be connected, each with a capacity of max 3 sets of
3, 12V, 9Ah batteries.
With logic levels, to interface with optional kits. Output with 9-pin male, SELV insulated connector.
Standard serial RS232 for interfacing with personal computer using diagnostics software. Output with 9pin, female, SELV insulated, connector.
Output with 9-pin male, SELV insulated connector for connection to optional remote control. Optional
scheduling of UPS switch on/off and display of main UPS signals.
Protection
Electronic protection against overloads, short circuits and excessive battery discharge. Operation blocked at
end of autonomy. Inrush limitation when switching on. Sensor for correct neutral connection. Back-feed
protection (electrical insulation for the safety of the input plug when running in battery mode). EPO contact
(emergency power off)
Synchronised
By-pass
Automatic static and manual (optional).
Intervenes in case of overload and operating anomaly.
Environmental specifications
MEGALINE
1250
Maximum altitude
for storage
Storage
temperature
range
Operating
temperature
range
Range of relative
humidity for
operating
MEGALINE
3750
MEGALINE
2500
10.000 metres
from -20° C to +50° C
from 0° C to +40° C
20-80% non condensing
Grade of
protection
(IEC529)
IP 21
Noise level
at 1 metre
(<) 40dB A
47
MEGALINE
5000
5 - Specifications
Electrical input specifications
MEGALINE
1250
MEGALINE
3750
MEGALINE
2500
Nominal input
voltage
Input voltage
range
Nominal input
frequency
MEGALINE
5000
230 V
from 184V to 264V with nom. load – from 100V to 264V with 50% of nom. load
50 Hz or 60 Hz +/-2% (autosensing and/or as selected by operator)
Nominal input
current
4,6A rms
8,9A rms
13,2A rms
17,7A rms
Maximum input
current
5,75A rms
11,2A rms
16,6A rms
22,2A rms
Distortion of input
current
Input power
factor
THD
< 3%
> 0,99 dal 20% of nominal load
In-rush current
100% of nominal current
Number of input
phases
Single phase
Line fuse
25 AFF
Battery charger
directly from mains
0,8 A rms
Output wave form
MEGALINE
1250
MEGALINE
2500
MEGALINE
3750
With mains
operation
Sine wave
With battery
operation
Sine wave
Type of
operation
No break, on line UPS with passing neutral and double conversion
48
MEGALINE
5000
5 - Specifications
Electrical output specifications when running on mains power
MEGALINE
1250
Nominal output
voltage
Nominal output
frequency
Output current with
linear load and
power factor 0,7
MEGALINE
2500
MEGALINE
3750
230 V ± 1%
50 Hz / 60Hz synchronised (autosensing and/or as selected by operator)
5,37A rms
10,75A rms
Crest factor on
output current
Nominal output
power VA
Active output power
with linear or nonlinear load P.F. 0,7
MEGALINE
5000
16,25A rms
21,6A rms
3,5
1250VA
2500VA
3750VA
5000VA
875W
1750W
2625W
3500W
Total harmonic
distortion of output
voltage with
nominal load
< 0,5%
Total harmonic
distortion of output
voltage with
nominal non-linear
load P.F.0,7
< 1%
Overload
capacity
300% for 1 second without By-pass intervention
200% for 5 seconds without By-pass intervention
150% for 30 seconds without By-pass intervention
Number of output
phases
Single phase
AC-AC conversion
efficiency with
linear load PF = 1
and charged
batteries:
•with 50% load
•with 75% load
•with 100% load
80%
85%
92%
49
5 - Specification
Electrical output specifications when running on battery power
MEGALINE
1250
Nominal output
voltage
Output
frequency
MEGALINE
2500
MEGALINE
3750
MEGALINE
5000
230 V ± 1%
50 Hz / 60Hz ± 1% (autosensing and/or as selected by operator)
Nominal output
power VA
1250 VA
2500 VA
3750 VA
5000 VA
Active output power
with linear or nonlinear load P.F. 0,7
875 W
1750 W
2625 W
3500 W
Total harmonic
distortion of output
voltage
Overload
capacity
< 1%
150% impulsive
Tolerated power
factor range of
applied load
from 0,7 to 1
DC-AC conversion
efficiency with
linear load P.F. 1
and charged
batteries:
•with 50% load
•with 75% load
•with 100% load
!
80%
80%
80%
ATTENTION: There is a danger of explosion should the batteries be replaced with the wrong type.
Dispose of used batteries as per the instructions and precautions for their disposal on the battery label!
50
5 - Specification
Battery operation
MEGALINE
1250
MEGALINE
5000
MEGALINE
3750
MEGALINE
2500
Approximate
autonomy in
minutes with
charged batteries
Percentage of
applied load
50%
80%
100%
50%
80%
100%
50%
80%
100%
50%
80%
100%
Standard UPS
20
11
8
20
11
8
20
11
8
20
11
8
Recharge time up to
90% of total charge
5 - 6 hours according to level of discharge
Specifications and
quantity of
batteries
n. 3 pcs 12V 9Ah, sealed, lead-acid, maintenance free batteries connected in series for each power module
Reserve signals
from 32.2 V to 36V, can be programmed by operator
Minimum voltage
for battery
operation during
discharge
from 27V to 31.5V with automatic selection depending on applied load, or as programmed by operator.
Average battery
life
3-6 years according to use and working temperature
Warning!
The batteries in the UPS are subject to a reduction in capacity depending on their age (a feature of lead batteries
declared by their manufacturer in the technical manual). For example, the reduction of capacity of a 4-year-old
battery can be as much as 40%, resulting in a proportional reduction of UPS autonomy time when running on
battery power.
By-pass Specifications
MEGALINE
1250
MEGALINE
2500
MEGALINE
3750
Type of by-pass
Static and electromechanical
Switchover time
zero
51
MEGALINE
5000
5 - Specifications
Reference Standards
MEGALINE
1250
Safety:
Designed to
satisfy standard
MEGALINE
2500
MEGALINE
3750
MEGALINE
5000
Conforms to standard EN 62040-1-1
Electromagnetic
compatibility:
•immunity
•emission
Conforms to standard EN 50091-2
Conforms to standard EN 50091-2
Typical
performance
(class A)
(class B)
Conforms to standard EN 62040-3
MetaSystem reserves the right to vary data and specifications without notice
ROUTINE MAINTENANCE
Cleaning
Before cleaning, it is essential to verify the following:
- all appliances connected to the UPS have been switched off
- all the appliances have been disconnected from the UPS
- the UPS has been disconnected from the mains power supply
Cleaning the cabinet
- Clean with a soft dry cloth
Cleaning the air vents
- Clean the air vents regularly by vacuuming them or using a soft brush
52
6 - Troubleshooting Guide
6. Troubleshooting
Problems
Solutions
When the UPS is switched on, the buzzer sounds
and the red warning light makes alternating
short-long flashes, then the UPS switches off
after 15 seconds
The connection of the neutral conductor is wrong:
invert the power supply plug, or invert the
connections of the neutral and phase input leads,
or exclude the neutral sensor.
The UPS works but a short beep is heard every
12 seconds and the yellow warning light is lit
without flashing.
The UPS works but it beeps intermittently and the
red warning light and the yellow warning light are
flashing.
The UPS beeps continuously and the yellow
warning light flashes for about 15 seconds, after
which the UPS switches off
- Check power is present at the mains outlet.
- Check that the UPS power supply cable is
correctly inserted in both the mains outlet and in
the connector on the UPS itself.
- Check the fuse located at the side of the
input/output connector under the plastic
housing (refer to fig.1 or 4)
There is an overload on the UPS output. Reduce
the quantity of appliances connected so that the
load does not exceed the maximum power that
the UPS can supply. Alternatively, if the UPS is not
in its maximum configuration, you can ask your
Service Centre to increase the power of your UPS
by fitting extra power boards and relative batteries
inside the UPS cabinet.
The UPS has completely flattened its batteries; it
can only start up again when the mains input line
is present. Check the magneto-thermal or
differential switches that precede the UPS and
the input fuse
The UPS works but the green warning light is The mains supply is out of the limits permitted for
flashing quickly
the voltage and/or frequency, but it can still be
used by the UPS. However, the by-pass function is
not operational
The UPS beeps intermittently and the red warning
light is flashing quickly.
53
The thermal protection has been tripped. Switch the
UPS off and wait for a few minutes so that the
internal temperature of the UPS can get back to
normal. Check that the fans operate correctly and
that the relative airflow is not obstructed (e.g. if the
UPS is too close to a wall).
There is a fault on one of the internal circuits.
Contact your service centre.
DE
Konformitätserklärung
Angewandte EU-Richtlinien:
73/23/EWG; geändert durch die Richtlinien 92/31/EWG
89/336/EWG; geändert durch die Richtlinien 92/31/EWG, 93/68/EWG
Bezugsnormen für die Konformitätserklärung: EN 62040-1-1, EN 62040-2, EN 62040-3
Hersteller:
MetaSystem S.p.A.
Anschrift:
via Majakovskij 10/b, Reggio Emilia, Italien
Gerätetyp:
Unterbrechungsfreie Stromversorgungseinheit
Modelle:
MEGALINE 1250 RACK - MEGALINE 2500 RACK
MEGALINE 3750 RACK - MEGALINE 5000 RACK
Jahr der Anbringung des Prüfzeichens:
2004
Das Gerät wurde in der typischen Installationskonfiguration und mit Periphereinrichtungen geprüft, die den o.g. Richlinien
entsprechen.
Der Unterzeichnete erklärt, dass das o.g. Gerät den Anforderungen der oben angegebenen Richtlinien entspricht.
Reggio Emilia, den 01.10.04
Ing. Cesare Lasagni
Technischer Leiter
Die in der vorliegenden Bedienungsanleitung enthaltenen Informationen sind nicht verbindlich
und können im Zuge der Produktverbesserung ohne Ankündigung geändert werden.
54
Inhaltsverzeichnis
Inhaltsverzeichnis
1 - Einführung ............................................................................56
Sicherheitshinweise ................................................................56
2 - Betrieb
..............................................................................57
Funktionsprinzip......................................................................57
Netzbetrieb ............................................................................58
Batteriebetrieb........................................................................58
Bypassbetrieb ........................................................................58
Informationen auf dem Display ................................................58
Optische und akustische Anzeigen ..........................................59
3 - Installation ..........................................................................60
Vorbereitung der Installation ....................................................60
Aufstellen der USV-Einheit ......................................................60
Bedienfront ............................................................................61
Installation einer einzelnen Einheit ..........................................61
Vorbereitung für die Verlängerung der Autonomiezeit ................63
Benutzeranleitung für die Eigendiagnose-Software ....................63
Verfahrensweisen....................................................................64
4 - Anpassung der Betriebsarten ................................................64
Funktionen der Tasten ............................................................64
Funktion “Service Mode” ........................................................64
Zugriff auf die Menüs ..............................................................64
Zustand der USV-Einheit ..........................................................65
Konfiguration der USV-Einheit ..................................................67
Ereignisse ..............................................................................71
Programmierung......................................................................72
Testfunktionen ........................................................................72
5 - Technische Eigenschaften ....................................................73
Konstruktive Merkmale............................................................73
Umwelteigenschaften ..............................................................73
Elektrische Eingangseigenschaften ..........................................74
Ausgangswellenform ..............................................................74
Elektrische Ausgangseigenschaften beim Netzbetrieb................75
Elektrische Ausgangseigenschaften beim Batteriebetrieb ..........76
Batteriebetrieb........................................................................77
Eigenschaften des Bypass ......................................................77
Bezugsnormen........................................................................78
6 - Abhilfe bei Problemen............................................................79
55
Einführung
Wir danken Ihnen, dass Sie sich für ein Produkt von MetaSystem entschieden haben. Unser Unternehmen hat es sich
zum Ziel gesetzt, stets absolut moderne Produkte anzubieten, die das Ergebnis intensiver Forschung und der
Anwendung der innovativsten Technologien sind.
Unsere Geräte sind durch zahlreiche internationale Patente geschützt, die das große Engagement von MetaSystem
zugunsten der kontinuierlichen Produktverbesserung beweisen.
Die USV-Anlagen von MetaSystem wurden zum Schutz von elektronischen Geräten im Falle von netzabhängigen
Problemen wie Stromausfall, Schwankungen und Störungen konzipiert.
So sieht das von Ihnen erworbene Produkt den exklusiven Berechnungsalgorithmus “State of Charge” vor, der die
besten Leistungen beim netzunabhängigen Betrieb der USV-Einheit gewährleistet.
Die Konformität unseres Produktes mit den internationalen Bestimmungen ist eine weitere Garantie für die Qualität
unserer Produkte.
Wir raten Ihnen, die vorliegende Bedienungsanleitung aufmerksam durchzulesen und sorgfältig
aufzubewahren, damit Sie sie auch später erneut zu Rate ziehen können.
Sicherheitshinweise
• Keine Lasten anschließen, die die auf dem Leistungsschild und in der beiliegenden Dokumentation
angegebenen Grenzwerte überschreiten.
• Das Gerät nicht öffnen. Eingriffe an den internen Komponenten der USV-Einheit dürfen nur von autorisierten
Fachkräften vorgenommen werden.
• Die in Betrieb befindliche USV-Einheit nicht vom Netz trennen, da hierdurch die Schutzerdung des Geräts
selbst und der an es angeschlossenen Verbraucher unterbrochen würde.
• Keinen Schraubendreher oder sonstige Gegenstände in die Lüftungsschlitze bzw. in das Schutzgitter des
Lüfters einführen.
• Das Gerät nach den Anweisungen in der vorliegenden Bedienungsanleitung und unter Beachtung seiner
Leistungsgrenzen installieren.
• Darauf achten, dass keine Flüssigkeit in die USV-Einheit eindringt.
• Das Gerät ausschließlich zu den in der vorliegenden Bedienungsanleitung angegebenen Zwecken verwenden.
• Der Hersteller haftet nicht für Schäden, die auf die Missachtung der Anweisungen in der vorliegenden
Bedienungsanleitung zurückzuführen sind.
Die in der vorliegenden Bedienungsanleitung enthaltenen Informationen sind nicht verbindlich
und können im Zuge der Produktverbesserung ohne Ankündigung geändert werden.
56
2 - Betrieb
2. Betrieb
Blockschaltbild
AUSGANG
BY PASS
EINGANG
~
=
~
=
LEISTUNGSFAKTOR
REGLER
EINGANGSFILTER
AUSGANGSFILTER
WECHSELRICHTER
LEISTUNGS
MODUL
=
=
SPANNUNGS
VERSTÄRKER
BATTERIEN
BATTERIE
LADEGERÄT
LEISTUNGSMODUL
BATTERIE
LOGIK MIT
MIKROPROZESSOR
SCHNITTSTELLE
RS 232
COMANDO
FERNSTELLERUNG
A
DISTANZA
Funktionsprinzip
Beim Vorliegen der Netzspannung wird die Eingangsspannung von einer speziellen Eingangsstufe (Leistungsfaktorregler) gefiltert und gleichgerichtet, um einerseits die Stromaufnahme vom Netz zu optimieren, indem der
Leistungsfaktor fast auf 1 gebracht wird, und andererseits Spannungsschwankungen auszugleichen. Diese
Eingangsstufe ist in der Lage, den Ausgangswechselrichter auch bei sehr niedrigen Netzspannungen zu speisen.
Dieses Merkmal macht sich besonders bei sehr kleinen Lasten bemerkbar, da bei einer Last von rund 50% der
Nennlast der Netzbetrieb bis rund 100V Netzspannung ohne Energieaufnahme von den Batterien möglich ist. Dies
gestattet das “intelligente” Management der Umschaltung auf den Batteriebetrieb, das darauf abzielt, den
Gebrauch der Akkumulatoren auf ein Minimum zu reduzieren. Ein Hochfrequenz-Wechselrichter verwendet dann die
von der ersten Stufe gleichgerichtete Spannung zum Erzeugen der “sauberen” sinusförmigen Ausgangsspannung
mit minimaler Verzerrung. Eine synchronisierte schnelle Bypass-Schaltung greift bei einer zu hohen, die Leistung
des Wechselrichters überschreitenden Stromaufnahme ein, zu der es z.B. beim Einschalten spezieller
Periphereinrichtungen, bei der Entmagnetisierung von großen Farbbildschirmen usw. kommen kann.
Bei Ausfall oder Einbruch der Netzspannung wird automatisch eine Spannungsverstärkerstufe aktiviert, die mit
Hilfe der Batterien die unterbrechungsfreie Stromversorgung des Ausgangswechselrichters und folglich der Last
gewährleistet. Beim Schaltungstyp handelt es sich um eine Schaltung mit durchgeführtem Neutralleiter, um die
Neutralleiterbehandlung der an die USV-Einheit angeschlossenen Verbraucher nicht zu verändern.
Während des Normalbetriebs kontrolliert ein Sensor die Potentialdifferenz zwischen Neutralleiter und
Schutzleiter. Falls die Differenz übermäßig ist, aktiviert der Sensor die Eingangsschutzschaltung und schaltet die
Einheit auf Batteriebetrieb um. Diese Umschaltung wird als Störung signalisiert. Durch entsprechende Änderung
der Parametereinstellungen kann man den Eingriff auf die bloße Anzeige beschränken.
Alle Funktionen der USV-Einheit werden von einem Mikroprozessor überwacht, der auch besondere
Betriebsbedingungen kontrollieren und speichern sowie die Anbindung der USV-Einheit an einen Computer über
eine serielle Schnittstelle RS232 verwalten kann.
Es ist möglich, in Echtzeit die Betriebsparameter und die eventuellen Anomalien zu überprüfen.
Die USV-Einheit signalisiert dem Benutzer den Betriebszustand durch optische und akustische Anzeigen:
- alphanumerisches Display 1 (s. Seite 94)
- Zustandsanzeige 7 (s. Seite 94)
- akustischer Signalgeber (in der USV-Einheit)
57
2 - Betrieb
Die Kombination dieser Anzeigen erlaubt die rasche und intuitive Erkennung des Betriebszustands und
eventueller Störungen im Versorgungsnetz.
Es gibt drei Hauptbetriebsarten:
- Netzbetrieb
- Batteriebetrieb
- Bypassbetrieb
Netzbetrieb
Dies ist der normale Betriebszustand:
- Die Netzspannung wird vom Leistungsfaktorregler (PFC) in Gleichspannung umgewandelt.
- Der Wechselrichter erzeugt aus der Gleichspannung wieder eine Sinusspannung.
- Das Ausgangsfilter realisiert eine weitere “Bereinigung” der Ausgangsspannung.
- Die Batterien werden nachgeladen.
Batteriebetrieb
Die USV-Einheit schaltet bei Ausfall der Netzspannung automatisch auf den Batteriebetrieb.
- Die Spannung der Batterien wird von der Spannungsverstärkerschaltung erhöht.
- Der Wechselrichter erzeugt aus der Gleichspannung wieder eine Sinusspannung.
- Das Ausgangsfilter garantiert die Reinigung der Spannung für die Verbraucher.
Bypassbetrieb
Die Bypassschaltung umgeht die USV-Einheit und verbindet den Ausgang direkt mit dem Eingang. Die
Umschaltung erfolgt synchronisiert, um stets die richtige Ausgangsspannung zu garantieren und
Unterbrechungen oder Überspannungen zu verhindern.
Der Eingriff der Bypassschaltung kann mit Hilfe eines dedizierten Menüs angepasst werden (Konfig. USV,
Bypass); es sind zahlreiche Optionen vorgesehen (automatisch, ausgeschaltet, Bypass mit Lasterkennung
usw.), um den speziellen Erfordernissen der Anwendung entsprechen zu können.
Informationen auf dem Display
Nachstehend werden die wichtigsten Meldungen aufgeführt, die auf dem alphanumerischen Display in den
drei Betriebsarten erscheinen können.
USV im Netzbetrieb
IN 212V
OUT 230V/812W ( 31%)
Batt
32,2’
Netzbetrieb
Sie signalisiert den normalen Betriebszustand beim Vorliegen der
Netzspannung.
Batteriebetrieb
Sie signalisiert, dass die Netzspannung fehlt und die USV-Einheit die
Stromversorgung mit Hilfe der Batterien realisiert.
Bypassbetrieb
Sie signalisiert, dass auf Bypassbetrieb geschaltet wurde; der Ausgang
der USV-Einheit ist folglich direkt mit dem Netz verbunden.
IN
xxxV
Zeigt den Spannungswert am Eingang der USV-Einheit und den Ist-Wert der vom Netz
aufgenommenen Leistung. Beim Batteriebetrieb erscheint diese Meldung nicht.
OUT
xxxV/x,xkW (xx%)
Die Leistung wird auch als Prozentanteil der von der USV-Einheit lieferbaren
Gesamtleistung angegeben.
Batt.
xx,x’
Graphische Anzeige des Ladezustands der Batterien und numerische
Anzeige der verfügbaren Autonomiezeit.
USV
58
2 - Betrieb
Optische und akustische Anzeigen
ZUSTANDSANZEIGE
AKUSTISCHER
SIGNALGEBER
MELDUNGEN
AUF DEM DISPLAY
BESCHREIBUNG
Grün
---
Netzbetrieb
IN xxxV
Normalbetrieb beim Vorliegen der Netzspannung
und Last innerhalb der zulässigen Grenzen.
Grün
---
Netzbetrieb
Netz nicht
synchron xx.xHz
Die USV-Einheit signalisiert, dass die Frequenz
der Ausgangsspannung nicht mit der der
Eingangsspannung synchronisiert ist. Hierfür
können folgende Gründe verantwortlich sein:
- PLL-Funktion deaktiviert.
- Frequenz der Eingangsspannung außerhalb
der von der USV vorgesehenen Grenzen.
Batteriebetrieb
Batteriebetrieb
Bypass - Betrieb
Bypassbetrieb
Blinkend, schnell
Gelb
Gelb
Blinkend,
langsam (alle 20s)
---
Blinkend,
schnell
Rot
Blinkend, schnell
Modul defekt
ACHTUNG! ES WIRD EMPFOHLEN, DIE USVEINHEIT AUSZUSCHALTEN UND SICH AN DEN
KUNDENDIENST ZU WENDEN.
Blinkend, langsam
und schnell
Überlast
ACHTUNG! ES WIRD EMPFOHLEN, EINIGE
VERBRAUCHER ABZUKLEMMEN, UM DIE
STROMAUFNAHME WIEDER INNERHALB DEN
VORGESEHENEN GRENZEN ZU BRINGEN.
Rot
USV-Fehlfunktion oder -Störung
ACHTUNG! ES WIRD EMPFOHLEN, DIE USVEINHEIT AUSZUSCHALTEN UND SICH AN DEN
KUNDENDIENST ZU WENDEN.
Leuchtend
Rot
--90% der MAX. Last überschritten
1x Blinken
alle 10s
Rot
Blinkend,
abwechselnd
kurz- und
langdauernd
Rot
Blinkend,
langsam mit
Pause
Blinkend,
abwechselnd kurzund langdauernd
BATTERIE RESERVE!
--KEINE
REDUNDANZ!
Autonomiereserve. Beim Batteriebetrieb.
Fehlerhafter Anschluss
des Neutralleiters an die Batterie.
Die Lastaufnahme ist größer als die
eingestellte Redundanz. Im Fehlerfall ist die
Redundanz der Leistungsplatinen nicht
gewährleistet.
ESC
Anmerkung: Zum Stummschalten des akustischen Signalgebers die Taste
drücken;
bei jeder weiteren Betätigung wird der Signalgeber dann wieder ein- bzw. ausgeschaltet.
59
3 - Installation
3. Installation
Vorbereitung der Installation
Sicherstellen, dass die Verpackung unversehrt ist und dass das Gerät nicht beim Transport beschädigt wurde.
Bei Problemen den Spediteur kontaktieren.
Den Inhalt der Verpackung überprüfen:
• 1 Unterbrechungsfreie Stromversorgungseinheit
• 1 Steckverbinder für die Verkabelung IN/OUT (Version Einzelgerät einschließlich Mehrfachsteckdose und
Eingangskabel)
• Bedienungsanleitung
Es wird empfohlen, die Originalverpackung für die eventuelle Wiederverwendung oder für die Rücksendung des Geräts
im Falle eines Defekts aufzubewahren.
Aufstellen der USV-Einheit
Eine ebene und solide Oberfläche für die Aufstellung der USV-Einheit auswählen.
Die folgenden Installationsbedingungen beachten (Abb. 1):
- Die USV-Einheit muss in einem geschlossenen Raum aufgestellt werden: Sie ist nicht für den Gebrauch im
Freien konzipiert.
- Die in der vorliegenden Bedienungsanleitung angegebenen Umweltbedingungen beachten.
- Das Gerät nicht in übermäßig staubigen oder feuchten Räumen aufstellen und gegen direkte
Sonneneinstrahlung schützen.
- Das Gerät nicht in Räumen aufstellen, in denen sich entflammbare Flüssigkeiten und/oder aggressive
Substanzen befinden.
- Bei der UPS Positionerung bitte die Lueftung gewaerhleisten, mit ca. 10 cm. entfernt vom anderen Anlagen ,
die im "Rack Schrank" sind.
- Bitte nicht die Vorder-Hinter-Oberlueftungszonen zudecken.
10cm
Abb.1 Aufstellung der USV-Einheit
60
3 - Installation
Bedienfront
1
2
3
4
5
6
7
Alphanumerisches Display
Taste ESC (Verlassen von Funktionen / Stummschalten des akustischen Signalgebers)
Pfeiltaste auf (zurückrollen / Werte erhöhen)
Pfeiltaste ab (vorrollen / Werte herabsetzen)
Eingabe-Taste (Annahme von Funktionen / Aufrufen von Menüs)
Taste Einschalten / Ausschalten
Mehrfarbige Zustandsanzeige (grün / gelb / rot)
Installation einer einzelnen Einheit
Elektrische Anschlüsse
Einzelne Einheit (Abb. 2):
8
9
10
11
12
13
Stromverteilnetz
13
Steckverbinder Eingang/Ausgang
Anschluss Eingang/Ausgang
Eingangssicherung
Serielle Schnittstelle RS232 (9-polig, weiblich)
Anschlüsse für Logiksignale ( 9-polig, männlich)
Vorbereitung für die Verlängerung der Autonomiezeit
12
8
10
11
9
Verbaucher
Abb. 2 Elektrische Anschlüsse
61
3 - Installation
Einzelne Einheit
1. Den beiliegenden Steckverbinder Eingang-Ausgang wie in
Abbildung 2 gezeigt verdrahten; hierzu ummantelte Kabel
verwenden, deren Leiter einen Mindestquerschnitt von
2,5 mm2 haben.
2. Die Klemmenplatte in den Kunststoffdeckel einsetzen und
mit den zugehörigen Schrauben befestigen. Dann die Kabel
mit der Zugentlastung am Deckel sichern (siehe Abb. 3).
3. Die Befestigungsschraube der Abdeckung des Anschlusses
[9] lösen und die Abdeckung entfernen.
4. Den Steckverbinder Eingang-Ausgang an den Anschluss [9]
auf der Rückseite der USV-Einheit anschließen und mit den
zugehörigen Schrauben am Rahmen befestigen (siehe Abb. 2).
5. Sicherstellen, dass die Netzschalter der verschiedenen
Verbraucher ausgeschaltet sind und erst anschliessend die
Verbraucher an die Ausgangssteckdosen anschließen.
6. Den Netzstecker an eine Netzsteckdose anschließen, die
für die Spannung und die Stromaufnahme geeignet ist.
!
Abb. 3 Deckel der Klemmenplatte
HINWEIS
Die USV-Einheit verfügt über eine Schutzschaltung gegen Verpolung; ein fehlerhaft ausgeführter Anschluss wird durch
das ständige Aufleuchten der roten optischen Anzeige und durch einen Dauerton des internen Summers signalisiert.
Wenn dieses Signal unmittelbar nach der Einschaltung der USV-Einheit gegeben wird, das Gerät sofort ausschalten und
den Netzstecker aus der Steckdose ziehen.
Vorsichtsmaßregeln für die Installation
•
•
•
•
!
Es ist ratsam, die elektrischen Anschlüsse vom Fachmann ausführen zu lassen.
Die beiliegenden elektrischen Verkabelungskomponenten nicht verändern.
Sicherstellen, dass die Netzsteckdose über eine wirksame Erdung verfügt.
Die Netzsteckdose bzw. der Netztrennschalter muss sich in der Nähe der USV-Einheit befinden und soll
mühelos erreichbar sein.
ACHTUNG
(gilt für die Modelle 1250/2500/3750/5000)
Die mitgelieferten Kabel sind mit einem Eingangsstecker und verschiedene Ausgangssteckdosen mit max.
Leistung von 16 A ausgestattet. Bei den Anwendungen, in denen die Nenneingangsstrom der USV 16 A
überschreitet (z.B. 5000 VA bei Vinn=184V), wird daher empfohlen, den Schaltschrank direkt mit dem
beiliegenden Steckverbinder zu verbinden, wobei die Anschlusshinweise in den Bildern 3 / 4 auf Seite 95
beachtet werden sollen.
Da sich die Fehlerströme gegen Erde aller Verbraucher im Schutzleiter der USV-Einheit summieren, ist
gemäß Norm EN 50091-1-1 aus Sicherheitsgründen sicherzustellen, dass die Summe dieser Ströme nicht
größer ist als 2,7 mA.
Abb. 4 Klemmenplatte
62
3 - Installation
Vorbereitung für die Verlängerung der Autonomiezeit
Die USV-Einheit verfügt über eine Vorrüstung für den
Anschluss zusätzlicher Batterieeinheiten: Zum Anschließen
von einer oder mehreren zusätzlichen Einheiten an das
Einzelgerät wie folgt vorgehen:
1. Die Schrauben 1 und 2 (siehe Abb. 5) abschrauben.
2. Die Schutzabdeckung schieben, um auf die Steckverbinder im
Innern des Ausschnitts zugreifen zu können.
3. Die Schrauben wieder anziehen, um den mechanischen Schutz zu
gewährleisten.
4. Die Batterieeinheit mit den zugehörigen Kabeln an die USV-Einheit
anschließen.
5. Durch den Geflechtschirm eine wirksame Erdung herstellen.
!
2
1
ACHTUNG
Für die Ausführung aller Anschlüsse muss das Gerät
ausgeschaltet und vom Stromnetz getrennt sein.
Abb. 5
Benutzeranleitung für die Eigendiagnose-Software
Anschluss
Die USV-Einheit verfügt über eine Standardschnittstelle RS232, über die auf eine Reihe von die Betriebsbedingungen
und die bei der USV aufgetretenen Ereignisse betreffenden Daten mit Hilfe eines geeigneten Rechners zugegriffen
werden kann. Für diese Funktion steht auf der Homepage von Metasystem www.metasystem.it ein
Schnittstellenprogramm für WINDOWS kostenlos zur Verfügung. Um die Funktion nutzen zu können, muss man die
serielle Schnittstelle des PC mit der seriellen Schnittstelle [11] auf der Rückseite der USV-Einheit unter Verwendung
eines seriellen RS232 Kabels verbinden.
Verfahrensweisen
Ausschalten
Einschalten
Während des Betriebs (Beispiel):
Taste drücken.
USV im Netzbetrieb
IN 212V
OUT 230V/812W ( 31%)
Batt
32,2’
Auf dem Display erscheint
USV wird eingeschaltet .....
Die
Zustandsanzeige
zeigt
die
Einschaltreihenfolge an (rot, gelb, grün).
Auf dem Display wird der aktuelle
Betriebszustand angezeigt (Beispiel):
Taste einige Sekunden drücken.
USV im Netzbetrieb
IN 212V
OUT 230V/812W ( 31%)
Batt
32,2’
Der akustische Signalgeber emittiert einige
kurze Töne; dann schaltet sich die USV-Einheit
aus (5 Sekunden).
63
4 - Anpassung der Betriebsarten
4. Anpassung der Betriebsarten
Funktionen der Tasten
Der Zugriff auf die Menüs der USV-Einheit erfolgt mit den Tasten auf der Bedienfront.
TASTE
Verlassen einer Funktion ohne Speichern der Änderungen
Wechseln von einer Menüebene zu einer höheren Ebene
Verlassen des Hauptmenüs und Rückkehr zur Zustandsanzeige
Stummschalten des akustischen Signalgebers
- Wahl der vorherigen Funktion
- Erhöhung eines Werts innerhalb einer Funktion
- Wahl einer neuen Option innerhalb einer Funktion (z.B. von AUSGESCHALTET nach EINGESCHALTET)
➡
- Wahl der nächsten Funktion
- Herabsetzen eines Werts innerhalb einer Funktion
- Wahl einer neuen Option innerhalb einer Funktion (z.B. von EINGESCHALTET nach AUSGESCHALTET)
- Bestätigen eines Werts
- Zugriff auf eine Menüoption
- Wechseln von einer Menüebene zu einer niedrigeren Ebene
❙➡
Menüoptionen die Tasten
➡
ACHTUNG: Einige Menüs enthalten mehr als vier Zeilen: Zum Anzeigen der nicht angezeigten
➡
!
-
➡
ESC
BESCHREIBUNG
verwenden.
Funktion “Service Mode”
Die USV-Einheit erlaubt die Ausführung der nachstehend beschriebenen Einstellungen und Programmierungen auch im
ausgeschalteten Zustand:
Drückt man die Taste
, schaltet die USV-Einheit in die Betriebsart “SERVICE”, so dass man auf das Menü Display
zugreifen kann. Zum Verlassen dieser Betriebsart die Taste
drücken. Wenn die USV-Einheit allerdings für die Dauer
von 1 Minute keine manuellen oder externen Befehle erhält, verlässt sie automatisch diese Funktion und schaltet sich
aus.
➡
❙
Zugriff auf die Menüs
Am Ende der Einschaltprozedur erscheint auf dem Display die folgende Meldung
(Beispiel):
Die Taste
❙➡
USV im Netzbetrieb
IN 212V
OUT 230V/812W ( 31%)
Batt
32,2’
64
drücken, um das Hauptmenü zu öffnen.
4 - Anpassung der Betriebsarten
HAUPTMENÜ
USV-Status
USV-Setup
Ereignisse
Zeitprogramm
Test/Kalib.
ZUSTAND USV
Konfig. USV
Ausgang
Eingang
Bypass
Sensor
Neutralleiter
Batterien
Einst. Uhr
Bedienfeld
USV-Info
Ausgang
Eingang
Batterie
Ereignisse
Allgemein
Ereignisse
Anzeigen
Löschen
Programmierung
Kalender Progr.
Wiedereinschalten
Ausschalten
Testfunktionen
Anzeigentest
Test LCD-Display
Batterientest
Batt. kalibrieren
ZUSTAND USV
USV Info
Mod. Megaline xxxx
Pout Max
xxxx
SW-Stand
xxxx
SNr
xxxxxxxxx
Install Module
x
➧
Mod Megaline
Modell des Geräts
Pout Max.
SW-Stand
SNr
Maximal abgebbare Wirkleistung (W)
Seriennummer
Install Module
Anzahl der installierten Leistungsmodule
Fehlezhafte Module
Anzahl der defekten Leistungsmodule
Leistung
Abgegebene Wirkleistung (W)
Scheinleistung
Abgegebene Scheinleistung (550 VA)
V RMS
Ist-Wert der Spannung (V RMS) am Ausgang der USVEinheit
I RMS
Ist-Wert des Stroms (A RMS) am Ausgang der USV-Einheit
I Peak
Spitzenwert des Stroms, den die USV-Einheit am Ausgang
abgibt (A)
Frequenz
Frequenz der Spannung am Ausgang der USV-Einheit (Hz)
I CF
Scheitelfaktor, d.h. das Verhältnis zwischen dem Spitzenwert
und dem Ist-Wert der Stromaufnahme der Last
PF
Leistungsfaktor der an die USV-Einheit angeschlossenen
Last
Fehlezhafte Module
Software-Version
Ausgang
Leistung
Scheinleistung
V RMS
I RMS
I Peak
Frequenz
I CF
PF
xxxxx
xxxx
xxxx
xxxx
xx
xx
xx
xx
➧
65
4 - Anpassung der Betriebsarten
Eingang
Leistung
Leistung
xxxx
Scheinleistung xxxx
V RMS
xxx
I RMS
xxxx
I Peak
x
Frequenz
x
I CF
x
PF
x
➧
Scheinleistung
Leistungsaufnahme vom Netz (W)
Scheinleistungsaufnahme vom Netz (VA)
V RMS
Ist-Wert der Spannung (V RMS) am Eingang der USV-Einheit
I RMS
Ist-Wert der Stromaufnahme vom Netz (A RMS)
I Peak
Spitzenwert der Stromaufnahme vom Netz (A)
Frequenz
Frequenz (Hz) der Spannung am Eingang der USV-Einheit
I CF
Scheitelfaktor, d.h. das Verhältnis zwischen dem
Spitzenwert und dem tatsächlichen Wert der
Stromaufnahme vom Netz
PF
Leistungsfaktor für das Netz
Batterie
Spannung
Spannung
Restkapazität
Entladungen
betriebszeit
xx
xxxx
xxxx
xxxx
Kalibr.TT/MM/JJhh:mm
externe KB
xx
ext. Ledergeratexx
➧
Restkapazität
An den Klemmen des Batteriesatzes gemessene Spannung (V)
Ladezustand der Batterie in Prozent
Entladungen Anzahl der Entladezyklen der Batterie
betriebszeit
Kalibr.
Betriebsstunden im Batteriebetrieb
externe KB
Anzahl der extern installierten KB
ext.
Ledergerate
Anzahl der externen Batterieladegeräte (Modell CB36
MetaSystem)
Angabe des Datums (Tag / Monat / Jahr) und der Uhrzeit
(Stunden / Minuten) der letzten Kalibration der Batterien
Ereignisse
Betrieszeit USV Anzahl der Gesamtbetriebsstunden der USV-Einheit
Betrieb.UPS
xxxxx
Betrieb.Booster xxxx
Tiefentladungen xxxx
Boosterein
xxxx
Bypass-Betrieb xxxx
Ûbertemp.
xxxx
➧
Betrieb.Booster
Anzahl der Betriebsstunden der USV-Einheit in der
Betriebsart Booster (Batteriebetrieb)
Tiefentladun Anzahl der vollständigen Entladungen der Batterien der
USV-Einheit
gen
Anzahl der Umschaltungen in die Betriebsart Booster
Boosterein
(Batteriebetrieb)
BypassBetrieb
Ûbertemp.
Anzahl der Umschaltungen in die Betriebsart Bypass (siehe
Menü Konfig.UPS / Bypass)
Anzahl der Auslösungen der thermischen Schutzeinrichtung
(z.B. wegen Überlastung)
66
4 - Anpassung der Betriebsarten
Allgemein
Int. Temp.
Ext, Temp.
Lüfter Geschw.
xx
xx
xx
➧
Int. Temp.
Temperatur innerhalb der USV-Einheit in °C
Ext. Temp.
Temperatur außerhalb der USV-Einheit in °C
Lüfter
Geschw.
Drehzahl der Lüfter der USV-Einheit in Prozent
(100% = maximale Drehzahl)
USV-Setup
Ausgang
Spannung
Frequenz
N+x Redundanz
➧
Spannung
Einstellung der Ausgangsspannung (V) der USV-Einheit
Frequenz
Einstellung der Ausgangsfrequenz (Hz) der USV-Einheit
Nennwert: Für die Eingabe eines numerischen Werts der
Ausgangsfrequenz (50 oder 60)
Autoselect:
Ist diese Option aktiviert, detektiert die USV-Einheit die
Frequenz der Eingangsspannung und stellt den Ausgang
auf denselben Wert ein; ist die Option deaktiviert,
verwendet die USV-Einheit den Nennwert
N+x Redundanz Eingabe der Anzahl der redundanten Platinen (siehe
Anmerkung “Einstellung der Redundanz”)
Anmerkung: Einstellung der Redundanz
Diese Funktion erlaubt die Verwaltung der Redundanz der Leistungsmodule. Erfordert z.B. eine Last eine bestimmte
Anzahl (N) von Leistungsmodulen, muss eine gewisse Anzahl von Leistungsmodulen (X) hinzugefügt werden, damit die
Redundanz N+x erreicht wird.
Wenn während des Betriebs die angeschlossene Last die Leistung von N Modulen überschreitet, signalisiert die USVEinheit, dass die Redundanz nicht mehr gegeben ist.
Nachstehend folgt ein Zahlenbeispiel:
Last
Leistungsplatinen
Gesamte
Leistung (W)
Redundanz
Alarm
Redundanz (W)
Alarm
Überlast (W)
3700
3
3750
0
nein
3750
3700
4
5000
1
3750
5000
1500
4
5000
2
2500
5000
1000
4
5000
3
1250
5000
67
4 - Anpassung der Betriebsarten
Eingang
PLL Aktiv
Erweiterter PLL
➧
PLL Aktiv
Bei Aktivierung dieser Option synchronisiert die USVEinheit die Sinuswelle am Ausgang mit dem Eingang;
ist die Option deaktiviert, ist die Ausgangsspannung nicht
mit dem Eingang synchronisiert, was durch das Blinken
der Zustandsanzeige (grün) signalisiert wird
Erweiterter
PLL
Bei Aktivierung dieser Option synchronisiert die USV-Einheit die
Ausgangsspannung mit dem Eingang bei Frequenzschwankungen
von +/-14% des Nennwerts; ist die Option deaktiviert, synchronisiert
sich die PLL-Schaltung bei Frequenzschwankungen von +/-2%
Anmerkung: Einstellung der PLL-Funktion
Die Funktion PLL garantiert, dass die Ausgangsfrequenz der USV-Einheit mit dem Eingang synchronisiert wird, damit der
Nulldurchgang im selben Augenblick erfolgt. Bei Ansprechen der Bypass-Funktion wegen z.B. plötzlicher Überlast ist die
Synchronisation Eingang-Ausgang garantiert.
!
ACHTUNG: Wenn die Funktion PLL deaktiviert wird, wird auch die automatische Bypass-Funktion deaktiviert.
Wenn die Schwankung der Eingangsfrequenz außerhalb des eingestellten Bereichs liegt, schaltet die USV-Einheit
die PLL-Funktion aus und trennt den Ausgang vom Eingang. Wenn der Wert wieder in den eingestellten Bereich
zurückkehrt, wird die PLL-Funktion automatisch wieder aktiviert.
Bypass
Bypass Aktiv
Erzwungenen
Bypass Dynamik
Offline-Betrieb
USV nuz bei last
➧
Bypass Aktiv Bei Aktivierung dieser Option verwaltet die USV-Einheit die
automatische Umschaltung in den Bypassbetrieb
Ist diese Option deaktiviert, schaltet die USV-Einheit nicht
auf Bypassbetrieb; bei längerer Überlastung wird die USVEinheit ausgeschaltet
Erzwungenen
Bei Aktivierung dieser Option schaltet die USV-Einheit
ständig in den Bypassbetrieb
Bypass
Dynamik
Erlaubt das Ändern der Empfindlichkeit für die automatische
Umschaltung in den Bypassbetrieb (Zwangsbetrieb deaktiviert)
LANGSAM: Lasten, die für Spannungseinbrüche oder MikroUnterbrechungen unempfindlich sind, doch häufige Stöße erzeugen
NORMAL: Normaler Gebrauch
SCHNELL: Für Mikro-Unterbrechungen empfindliche Lasten
OfflineBetrieb
Bei Aktivierung dieser Option funktioniert der Bypass wie folgt:
- Beim Vorliegen der Netzspannung wird auf ständigen
Bypassbetrieb geschaltet
- Beim Ausfall der Netzspannung arbeitet die USV-Einheit im
Batteriebetrieb
USV nuz bei
last
AKTIV: Die Funktion wird aktiviert bzw. deaktiviert
Bei Aktivierung der Funktion wird der Bypass bei Lasten unter
dem eingestellten Wert “Untergrenze Last” aktiviert;
nach Überschreiten dieses Grenzwerts wird der Bypass
deaktiviert
Min. Lastschwelle: Erlaubt die Einstellung des Werts der Last für
die Einschalt- und Ausschaltfunktion (siehe Anmerkung
“Lasterkennung bei Netzausfall”)
Anmerkung: Lasterkennung bei Netzausfall
Die USV-Einheit im Modus “Lasterkennung” schaltet bei einer Last unter dem eingestellten Grenzwert auf den
Bypassbetrieb Bei Netzausfall schaltet sich die USV-Einheit aus und wird sich erst bei Rückkehr der Netzspeisung wieder
einschalten.
68
4 - Anpassung der Betriebsarten
!
ACHTUNG!
Die Programmierung erfolgt nach den folgenden Prioritäten:
Aktiver
Betriebsmodus
Aktivierung
Bypass
Zwangsbetrieb
ZWANGSBETRIEB
AKTIVIERT
AKTIVIERT
OFFLINE-MODUS
AKTIVIERT
DEAKTIVIERT
AKTIVIERT
AKTIVIERT
OFFLINE-MODUS
AKTIVIERT
DEAKTIVIERT
AKTIVIERT
DEAKTIVIERT
MODUS
LASTERKENNUNG
AKTIVIERT
DEAKTIVIERT
DEAKTIVIERT
AKTIVIERT
AKTIVIERT
DEAKTIVIERT
DEAKTIVIERT
DEAKTIVIERT
AUTO-BETRIEB
BYPASS
DEAKTIVIERT
DEAKTIVIERT
X
Offline-Modus
Lasterkennung
X
X
X
X
X: Beliebige Programmierung (AKTIVIERT oder DEAKTIVIERT).
Neutralleiter Sensor
Aktiv
Ignorieren im
BETRIEB
➧
Aktiv
Bei Aktivierung dieser Option kontrolliert die USV-Einheit mit Hilfe
des Neutralleiter-Sensors, ob die Spannungsdifferenz zwischen
Neutralleiter und Erde innerhalb der Sicherheitsgrenzen liegt. Bei
Überschreitung des Grenzwerts schaltet die USV-Einheit
automatisch auf den Batteriebetrieb. Ist diese Option deaktiviert,
beachtet die USV-Einheit den Neutralleiter-Sensor nicht.
Ignorieren im Bei Aktivierung dieser Option kontrolliert die USV-Einheit
BETRIEB
die Spannung Neutralleiter-Erde nur bei jeder Einschaltung;
ist die Option deaktiviert, kontrolliert die USV-Einheit die
Spannung Neutralleiter-Erde in allen Betriebszuständen
Batterie
Kapaz-management
➧
Kapazmanagement
Zwei Einstellungen sind möglich:
FORTSCHRITTLICH
Für die Vorwarnung wird das Ende der Autonomiezeit auf
Grundlage der Messung der Leistungsaufnahme der an
die USV-Einheit angeschlossenen Last berechnet und als
verbleibende Autonomiezeit angezeigt
EINFACH
Für die Vorwarnung wird das Ende der Autonomiezeit auf
Grundlage der Messung der Batteriespannung berechnet
Die vorgenommene Einstellung bestimmt die Art des
Batterie-Programmiermenüs
69
4 - Anpassung der Betriebsarten
ERWEITERT
Batterie
Kapaz-management
Reservezeit
➧
Kapazmanagement
Erzweitert
Reservezeit
Einstellung der Vorwarnung für das Ende der
Batterienautonomiezeit als verbleibende
Betriebszeit (in Minuten)
Kapazmanagement
Normal
Batt.schwellen
Einstellung der Vorwarnung für das Ende der
Autonomiezeit als Wert der Batteriespannung
Das Menü bietet zwei Einstellungsmöglichkeiten:
Modus
NORMAL
Batterie
Kapaz-management
Batt.-schwellen
➧
Wählt man den Modus
Automat. Schwellwerte
berechnet die USV-Einheit die Spannungsgrenzwerte, bei deren Unterschreitung die Meldungen
RESERVE AUTONOMIEZEIT und ENDE AUTONOMIE
ausgegeben werden, automatisch in Abhängigkeit
von der Last
Wählt man den Modus
Fix Schwellwerte
werden zwei Einstellungen vorgeschlagen:
1) Reserve Schwelle
Einstellung des Grenzwerts der
Batteriespannung, bei dessen Unterschreitung
die USV-Einheit die Meldung
AUTONOMIERESERVE ausgibt
2) Tiefentladeschwelle
Einstellung des Grenzwerts der Batteriespannung,
bei dessen Unterschreitung die USV-Einheit die
Meldung ENDE AUTONOMIE ausgibt
70
4 - Anpassung der Betriebsarten
Batterien
Max. Batteriezeit
Max. Reservezeit
Test beim Einsch-aktiv
Autostart aktiv
Externe Optionen
➧
Max.
Batteriezeit
Max.
Reservezeit
Test beim
Einsch aktiv
Autostart aktiv
Externe
Optionen
Einstellung der maximalen Dauerbetriebszeit in Sekunden
im Batteriebetrieb
Gibt man “0” ein, wird die Funktion deaktiviert
Einstellung der maximalen Betriebszeit in Sekunden im
Batteriebetrieb nach Erreichen der Reserve
Gibt man “0” ein, wird die Funktion deaktiviert
Bei Aktivierung dieser Option wird der Batterientest bei jeder
Einschaltung der USV-Einheit ausgeführt. Falls deaktiviert,
wird bei der Wiedereinschaltung kein Batterientest ausgeführt
Bei Aktivierung dieser Option schaltet sich die USV-Einheit
nach einer Ausschaltung wegen Ende der Autonomie nach
Rückkehr des Netzes wieder ein
Ist die Option deaktiviert, schaltet sich die USV-Einheit nach
einer Ausschaltung wegen Ende der Autonomie nach
Rückkehr des Netzes nicht wieder ein
Anz. Batterieladegeräte
Einstellung der Anzahl der externen Batterieladegeräte
Einstellung der Anzahl von Paketen mit drei Batterien, die
extern installiert sind
Einheit KB
Montag
➧
Einstellung von Uhrzeit und Datum
Wahl des zu ändernden Werts
➡
➡
❙
23/06/03 -19:25:06
➡
Uhr Stellen
Heraufsetzen/Herabsetzen des Werts
Bedienpanel
Sprache
Tasten-ton
Hintergrundlicht
Kontrast
Passwort ändern
➧
Sprache
Sprachenwahl
Tasten-ton
Aktivierung bzw. Deaktivierung des akustischen Signals bei
Betätigung der Tasten
Einstellung der Hintergrundbeleuchtung des
alphanumerischen Displays
Fest: stets beleuchtet
Zeitgesteuert: Die Beleuchtung erlischt, nachdem die
Tastatur einige Sekunden nicht mehr betätigt wurde
Deaktiviert: Hintergrundbeleuchtung immer ausgeschaltet
Hintergrundlic
ht
Kontrast
Ereignisse
Datenansicht
Daten löschen
➧
Einstellung des Display-Kontrasts
Passwort
ändern
Eingabe des Passworts für den Zugriff auf die
Einstellungen der USV-Einheit
Datenansicht
Die von der USV-Einheit gespeicherten Ereignisse, wie z.B.
ENDE AUTONOMIE, ALARM ÜBERTEMPERATUR usw. werden
mit Angabe von UHRZEIT und DATUM angezeigt
Daten löschen
Der Ereignisspeicher wird gelöscht
71
4 - Anpassung der Betriebsarten
Zeitprogramm
Zeitplan
Aktiv
Bearbeiten
Sequenz
Reset
➧
Aktiv
Zum Aktivieren oder Deaktivieren der eingegebenen Programme
Bearbeiten
Erlaubt die Eingabe und das Ändern der Programme
Folgende Funktionen sind verfügbar:
Batterientest (Zustandskontrolle der Batterien)
Batt.kalibrieren(Kalibration der Batterien)
Einschaltung (Einschalten der USV-Einheit)
Ausschaltung (Ausschalten der USV-Einheit)
Deaktivierung (Deaktivieren des Programms)
Sequenz
Jedes Programm kann in den folgenden Betriebsweisen
ausgeführt werden:
Täglich “Stunde-Minuten”:
Es wird jeden Tag um die eingestellte Uhrzeit (StundeMinuten) ausgeführt
Einmalig “Tag-Monat-Stunde-Minuten”:
Es wird nur einmal am eingegebenen Datum und Uhrzeit
(“Tag-Monat-Stunde-Minuten”) ausgeführt
Wöchentlich “Wochentag-Stunde-Minuten”
Es wird einmal in der Woche am eingegebenen “WochentagStunde-Minuten” ausgeführt
Erlaubt die Anzeige aller eingegebenen Programme in der
Reihenfolge des Tages (max. 16)
Reset
Alle Programme werden gelöscht
Verzögerung
Dauer in Sekunden der Vorwarnmeldung vor einer
automatischen Wiedereinschaltung
Min.
Autonomie
Prozentsatz der Batterieladung, unterhalb dessen sich die
USV-Einheit nicht automatisch wiedereinschaltet
Verzögerung
Dauer in Sekunden der Vorwarnmeldung vor einer
automatischen Wiedereinschaltung
Signal-test
Ausführung des Tests der Leuchtanzeigen
Bei Betätigung der Taste ENTER wird der Test der grünen,
gelben und roten Anzeige sowie des akustischen Signalgebers ausgeführt
Anzeige-test
Ausführung des Tests des alphanumerischen Displays
Bei Betätigung der Taste ENTER werden alle beim
alphanumerischen Display verfügbaren Zeichen angezeigt
Die Funktionsfähigkeit der Batterien wird getestet
Bei Problemen den Kundendienst kontaktieren
Restart
Verzögerung
Min. autonomie
➧
Shutdown
Verzögerung
➧
Test/Kalib.
Signal-test
Anzeige-test
Batt. test
Batt. kalibrierung
➧
Batt. test
Batt.
kalibrierung
Kalibration der Batterien durch Erfassung ihrer Entladungskurve
Es wird empfohlen, diesen Zyklus im Falle des Batterienaustauschs auszuführen, um der USV-Einheit präzise Informationen
zum Ladezustand bereitzustellen
72
5 - Technische Eigenschaften
5. Technische Eigenschaften
Konstruktive Merkmale
MEGALINE
1250
Gewicht (kg)
23,5
Abmessungen
(BxHxT)
Erweiterungsmöglichkeit
Computerschnittstelle
MEGALINE
3750
MEGALINE
5000
43
53
34
Rack 19” 6U 483,5 X 266 (6U) X 600
Technologie
Erweiterungsmöglichkeit
MEGALINE
2500
Hochfrequenz-PWM bei Eingangs- und Ausgangsstufe
Steuerungslogik mit Mikroprozessor
Möglichkeit des Übergangs zu Konfigurationen mit höherer Leistung durch Hinzufügen von einem oder
mehreren Modulen in ein und dasselbe Gehäuse (maximal 4).
Möglichkeit der Verlängerung der Autonomiezeit durch Hinzufügen von zusätzlichen Batterien im selben
Gehäuse (maximal 4 Reihen mit 3 Batterien 12V/9Ah)
Für höhere Autonomiezeiten besteht die Möglichkeit, optionale Batteriegehäuse mit einer Kapazität von bis
zu 3 Reihen mit je 3 Batterien 12V/9Ah anzuschließen
Auf logischer Ebene für die Anbindung an optionale Sätze. Ausgabe über 9-poligen Wannenstecker
(männlich) mit Isolierung für Signal- und Schutzkleinspannung (SELV). Serielle RS232Standardschnittstelle für die Anbindung an einen PC mittels Eigendiagnose-Software. Ausgabe über 9poligen Wannenstecker (weiblich) mit Isolierung für Signal- und Schutzkleinspannung (SELV)
Fernbedienung
Ausgabe über 9-poligen Wannenstecker (männlich) mit Isolierung für Signal- und Schutzkleinspannung
(SELV) für den Anschluss einer optionalen Fernbedienung. Möglichkeit der programmierten Ein- und
Ausschaltung und der Anzeige der wichtigsten Anzeigen der USV-Einheit.
Schutzfunktionen
Elektronische Schutzschaltungen gegen Überlast und Tiefentladung der Batterien. Betriebssperre am Ende
der Autonomiezeit. Begrenzung der Einschaltspitzen. Stromsensor am Neutralleiter. Back-feed protection
(Schutz gegen Rückspeisung ins Netz, elektrische Schutzisolierung des Eingangssteckers während des
Batteriebetriebs). EPO-Kontakt
Synchronisierter BypassBetrieb
Statisch automatisch und manuell (optional)
Umschaltung im Falle von Überlast bzw. Fehlfunktion
Umwelteigenschaften
MEGALINE
1250
MEGALINE
2500
MEGALINE
3750
Max. Höhenlage
Lagerung
10.000 m
Temperaturbereich
-20° C bis +50° C
Lagerung
Temperaturbereich
0° C bis +40° C
Betrieb
Luftfeuchtigkei
Betrieb
20-80%, nicht kondensierend
Schutzart
(IEC529)
IP 21
Geräuschpegel
in 1 m Abstand
(<) 40dB A
73
MEGALINE
5000
5 - Technische Eigenschaften
Elektrische Eigenschaften des Eingangs
MEGALINE
2500
MEGALINE
1250
MEGALINE
5000
MEGALINE
3750
Nenneingangsspannung
230 V
Eingangsspannung
184V bis 264V bei Nennlast - 100V bis 264V bei 50% der Nennlast
Nenneingangsfrequenz
50 Hz bzw. 60 Hz +2% (Autosensing und/oder durch Benutzer einstellbar)
Nenneingangsstrom
4,6A rms
8,9A rms
13,2A rms
17,7A rms
Maximaler
Eingangsstrom
5,75A rms
11,2A rms
16,6A rms
22,2A rms
Verzerrung des
Eingangsstroms
Leistungsfaktor
Eingang
THD < 3%
> 0,99 ab 20% der Nennlast
Einschaltstrom
100% des Nennstroms
Anzahl
Eingangsphasen
einphasig
Hauptsicherung
25 AFF
32 + 32 AFF
Batterieladegerät,
vom Netz gespeist
0,8 A rms
Ausgangswellenform
MEGALINE
1250
MEGALINE
2500
MEGALINE
3750
Beim
Netzbetrieb
sinusförmig
Beim
Batteriebetrieb
sinusförmig
Funktionstyp
MEGALINE
5000
USV-Einheit Typ No-break, mit Online-Doppelwandler-Technologie und durchgeführtem Neutralleiter
74
5 - Technische Eigenschaften
Elektrische Eigenschaften des Ausgangs beim Netzbetrieb
MEGALINE
1250
Nennausgangsspannung
Nennausgangsfrequenz
Ausgangsstrom bei
linearer Last
Leistungsfaktor 0,7
Scheitelfaktor des
Ausgangsstroms
Nennausgangsleistung VA
Ausgangswirkleistung bei linearer bzw.
nicht-linearer Last
SF 0,7
MEGALINE
2500
MEGALINE
3750
230 V ± 1%
50 Hz bzw. 60 Hz, synchronisiert (Autosensing und/oder durch Benutzer einstellbar)
5,37A rms
16,25A rms
10,75A rms
21,6A rms
3,5
1250VA
2500VA
3750VA
5000VA
875W
1750W
2625W
3500W
Gesamt-Klirrfaktor
der Ausgangsspannung bei
Nennlast
< 0,5%
Gesamt-Klirrfaktor
der Ausgangsspannung bei
nicht-linearer
Nennlast SF 0,7
Überlastbarkeit
MEGALINE
5000
< 1%
300% für 1 s ohne Auslösung der Bypass-Funktion
200% für 5 s ohne Auslösung der Bypass-Funktion
150% für 30 s ohne Auslösung der Bypass-Funktion
Anz.
Ausgangsphasen
einphasig
Wirkungsgrad ACAC bei linearer
Last SF 1 und
geladenen
Batterien:
•bei 50% der Last
•bei 75% der Last
•bei 100% der Last
80%
85%
92%
75
5 - Technische Eigenschaften
Elektrische Eigenschaften des Ausgangs beim Batteriebetrieb
MEGALINE
1250
Nennausgangsspannung
Ausgangsfrequenz
MEGALINE
2500
MEGALINE
3750
MEGALINE
5000
230 V ± 1%
50 Hz bzw. 60 Hz ± 1% (Autosensing und/oder durch Benutzer einstellbar)
Nennausgangsleistung
1250VA
2500VA
3750VA
5000VA
Ausgangswirkleistung bei linearer
bzw. nicht-linearer
Last SF 0,7
875W
1750W
2625W
3500W
Gesamt-Klirrfaktor
der Ausgangsspannung
Überlastbarkeit
< 1%
150% impulsiv
Zulässiger Bereich
des Leistungsfaktors
der angeschlossenen
Last
0,7 bis 1
Wirkungsgrad DCAC bei linearer
Last SF 1 und
geladenen
Batterien:
•bei 50% der Last
•bei 75% der Last
•bei 100% der Last
!
80%
80%
80%
ACHTUNG: Wenn die Batterie durch eine Batterie des falschen Typs ersetzt wird, besteht Explosionsgefahr!
Gebrauchte Batterien nach den auf ihnen befindlichen Anweisungen entsorgen.
76
5 - Technische Eigenschaften
Batteriebetrieb
MEGALINE
1250
MEGALINE
5000
MEGALINE
3750
MEGALINE
2500
Ungefähre
Autonomiezeit in
Minuten bei
geladenen Batterien
Angeschlossene
Last in Prozent
50%
80%
100%
50%
80%
100%
50%
80%
100%
50%
80%
100%
USV Standard
20
11
8
20
11
8
20
11
8
20
11
8
Aufladedauer auf
90% der Kapazität
Technische Daten
und Anzahl der
Batterien
5 - 6 Stunden je nach Entladung
3 wartungsfreie Blei-Säure-Batterien 12V/9 Ah, je Modul in Reihe geschaltet
Reserveanzeige
Mindestspannung
für Batteriebetrieb
Mittlere
Lebenszeit der
Batterien
von 32,2 V bis 36V, vom Benutzer programmierbar
von 27V bis 31,5V mit automatischer Wahl in Abhängigkeit von der angeschlossenen Last oder vom
Benutzer programmierbar
3-6 Jahre je nach Gebrauchsbedingungen und Betriebstemperatur
Achtung!
Bei den in der USV-Einheit enthaltenen Batterien kommt es mit der Zeit zu einer Kapazitätsabnahme (ein vom
Hersteller im technischen Handbuch erklärtes typisches Merkmal der Batterien). So kann zum Beispiel die
Kapazitätsabnahme bei einer 4 Jahre alten Batterie bis zu 40% betragen, was eine proportionale Abnahme der
Autonomiezeit der USV-Einheit im Batteriebetrieb zur Folge hat.
Eigenschaften des Bypass
MEGALINE
1250
Bypass-Typ
MEGALINE
2500
MEGALINE
3750
statisch und elektromechanisch
Umschaltzeit
keine
77
MEGALINE
5000
5 - Technische Eigenschaften
Bezugsnormen
MEGALINE
2500
MEGALINE
1250
Sicherheitsvorschriften:
Elektromagn.
Verträglichkeit:
•Störfestigkeit
•Störaussendung
MEGALINE
3750
MEGALINE
5000
Die Auslegung entspricht der Norm EN 62040-1-1
Entspricht der Norm EN 50091-2 (Klasse A)
Entspricht der Norm EN 50091-2 (Klasse B)
Kennzeichnende
Leistungsmerkmale
Entsprechen der Norm EN 62040-3
Die Daten und die technischen Eigenschaften können von MetaSystem ohne Ankündigung geändert werden.
PLANMÄSSIGE WARTUNG
Reinigung
Vor Beginn der Reinigung müssen folgende Vorkehrungen getroffen werden:
- Die an die USV-Einheit angeschlossenen Verbraucher ausschalten.
- Die Verbraucher von der USV-Einheit trennen.
- Die USV-Einheit vom Netz trennen.
Außenreinigung
- Mit einem weichen, trockenen Tuch reinigen.
Reinigung der Lüftungsschlitze
- Die Lüftungsschlitze regelmäßig mit einem Staubsauger oder einem weichen Pinsel reinigen.
78
6 - Abhilfe bei Problemen
6. Abhilfe bei Problemen
Probleme
Abhilfe
Beim Einschalten der USV-Einheit ertönt der
Summer und die rote optische Anzeige blinkt
kurz-lang; anschließend schaltet sich die USVEinheit nach 15 Sekunden aus.
Fehlerhafter Anschluss des Neutralleiters: Den
Netzstecker herumdrehen oder die Anschlussposition
von Neutralleiter und Phasenleiter vertauschen oder
den Sensor des Neutralleiters ausschalten.
Die USV-Einheit funktioniert, doch ertönt alle 12
Sekunden ein kurzer Signalton und die gelbe
optische Anzeige BATTERY leuchtet ständig.
- Kontrollieren, ob an der Netzsteckdose die
Netzspannung anliegt.
- Kontrollieren, ob die Steckverbinder des
Netzkabels der USV-Einheit richtig in die
Netzsteckdose und in den Steckverbinder der USVEinheit selbst eingesteckt ist.
- Die Sicherung, die sich neben dem Steckverbinder
Eingang/Ausgang unter der Kunststoffabdeckung
befindet, kontrollieren (siehe Abbildung 1 oder 4).
Die USV-Einheit funktioniert, doch ertönt ein
intermittierender Signalton und die rote und die
gelbe (Bypass) optische Anzeige blinkt.
Überlast am Ausgang der USV-Einheit. Die Anzahl der
angeschlossenen Verbraucher reduzieren, damit die
Last nicht die maximal von der USV-Einheit lieferbare
Leistung überschreitet. Alternativ kann man, wenn
man nicht schon die maximale Konfiguration erreicht
hat, beim Technischen Kundendienst um die
Erhöhung der Leistung der Anlage bitten, indem man
in der USV-Einheit ein oder mehrere Module mit den
zugehörigen Batterien hinzufügt.
Die USV-Einheit gibt ein ständiges akustisches
Signal ab und die gelbe optische Anzeige blinkt
für ungefähr 15 Sekunden; anschließend
schaltet die USV ab.
Die Batterien der USV-Einheit sind vollständig
entladen; sie kann nur wieder starten, wenn die
Netzleitung vorhanden ist. Die Leistungs- oder FISchalter vor der USV-Einheit und die
Eingangssicherung kontrollieren.
Die USV-Einheit funktioniert, doch die grüne Das Spannung und/oder Frequenz des Netzes liegt
optische Anzeige MAINS blinkt schnell.
außerhalb der zulässigen Grenzen, erlaubt jedoch
dennoch den Betrieb der USV-Einheit. Die BypassFunktion ist jedoch nicht verfügbar.
Die USV-Einheit gibt ein intermittierendes
akustisches Signal aus und die rote optische
Anzeige blinkt schnell.
79
Der thermische Schutz hat ausgelöst. Die USVEinheit ausschalten und einige Minuten abwarten, bis
sich die Temperatur im Innern des Geräts wieder
normalisiert hat.
Kontrollieren, ob die Lüfter
ordnungsgemäß funktionieren und ob der Luftzustrom
unbehindert erfolgen kann (ob z.B. das Gerät zu nahe
an einer Wand aufgestellt wurde).
Eine interne Schaltung ist defekt. Den Kundendienst
kontaktieren.
FR
Déclaration
Directives du conseil appliquées:
Standard auquel est déclarée la conformité:
Constructeur:
Adresse:
Type d’appareil:
Modèles:
Année d’apposition de la marque:
de Conformité
73/23/CEE modifiée par les directives 93/68/CEE;
89/336/CEE modifiée par les directives 92/31/CEE, 93/68 CEE
EN 62040-1-1, EN 62040-2, EN 62040-3
MetaSystem S.p.A.
via Majakovskij, 10/b Reggio Emilia, Italie
Onduleur
MEGALINE 1250 RACK - MEGALINE 2500 RACK
MEGALINE 3750 RACK - MEGALINE 5000 RACK
2004
L'appareillage a été essayé dans la configuration typique de l'installation et avec des périphériques conformes aux directives
susmentionnées.
Je soussigné, déclare que ledit appareil remplit les conditions de protection exigées par les Directives visées plus haut.
Reggio Emilia, 01/10/04
Ing. Cesare Lasagni
Directeur Technique
Les informations contenues dans ce manuel sont purement indicatives. Dans le souci
d’améliorer son produit, le Constructeur se réserve de les modifier sans préavis.
80
Index
Index
1 - Introduction
82
82
Mises en garde
2 - Fonctionnement
Principe de fonctionnement
Fonctionnement sur secteur
Fonctionnement sur batterie
Fonctionnement en mode By-pass
Informations affichées
Signalisations visuelles et sonores
3 - Installation
Préparation pour l’installation
Mise en place de l’onduleur
Façade
Procédure d’installation en bâti unique
Connexion pour l’extension de l’autonomie
Guide à l’emploi du logiciel d’autodiagnostic
Procédures
4 - Personnalisation des modalités de fonctionnement
Fonctions des touches
Fonction “Service Mode”
Accès aux menus
Etat de l’ASI
Configuration de l’ASI
Événements
Programmation
Outils
5 - Caractéristiques Techniques
83
83
84
84
84
84
85
86
86
86
87
87
89
91
91
92
92
92
92
93
96
99
99
99
99
99
99
100
100
Spécifications de construction
Spécifications ambiantes
Caractéristiques électriques d’entrée
Forme d’onde de sortie
Caractéristiques électriques de sortie du fonctionnement
sur secteur
101
Caractéristiques électriques de sortie du fonctionnement
sur batterie
102
Fonctionnement sur batterie
103
Caractéristiques du By-pass
104
Réglementations de référence
104
6 - Problèmes éventuels et solutions
106
81
Introduction
Nous vous remercions d’avoir choisi un produit MetaSystem. Le souci premier de notre société est de toujours fournir
des produits à l’avant-garde qui sont le résultat de la recherche et de l’application des technologies les plus innovantes.
Nos appareils sont couverts par de nombreux brevets internationaux, qui reproduisent le caractère exclusif et
l’amélioration continue de l’entreprise MetaSystem.
Les onduleurs MetaSystem ont été conçus pour protéger les appareillages électroniques en les gardant à l’écart des
problèmes typiques du secteur électrique : coupures, fluctuations, perturbations.
En particulier, le produit que vous venez d’acheter prévoit un Algorithme de calcul exclusif " State of charge " pour
obtenir les meilleures performances d’autonomie.
La conformité de notre produit aux standards internationaux est une garantie ultérieure de qualité.
Nous vous conseillons de lire attentivement ce manuel et de le conserver pour toute consultation future
Mises en garde
• Ne branchez pas sur l’onduleur des charges supérieures aux limites indiquées sur l’étiquette
d’identification et sur la documentation fournie
• N’ouvrez pas l’appareil. L’accès à l’ASI est réservé au personnel technique autorisé.
• Ne débranchez jamais l’onduleur du secteur pendant qu’il fonctionne ; cette opération déconnecte la
mise à la terre de l’onduleur et des charges qui sont branchées dessus.
• Ne jamais remettre le neutre à la terre en sortie de l’onduleur.
• N’introduisez pas de tournevis ou d’autres objets dans les orifices d’aération ou dans le ventilateur.
• Installez votre onduleur en respectant les indications de ce manuel et les limites prévues.
• Ne versez pas de liquides sur l’onduleur.
• N’utilisez l’appareillage que pour les emplois indiqués dans ce manuel.
• Le constructeur décline toute responsabilité dans le cas de dommages provoqués par la non-observation
des instructions de ce manuel.
Les informations contenues dans ce manuel sont purement indicatives. Dans le souci
d’améliorer son produit, le Constructeur se réserve de les modifier sans préavis.
82
2 - Fonctionnement
2. Fonctionnement
SORTIE
Schéma fonctionnel
BY-PASS
ENTRÉE
~
=
~
=
FILTRE
D’ENTRÉE
FILTRE DE
SORTIE
RÉGULATEUR
DU FACTEUR DE
PUISSANCE
INVERSEUR
MODULE DE
PUISSANCE
=
=
BATTERIES
SURVOLTEUR
CHARGEUR DE
BATTERIES
MODULE DE
PUISSANCE
BATTERIES
LOGIQUE
A MICROPROCESSEUR
INTERFACERS
RS 232
COMMANDE
A
DISTANCE
Principe de fonctionnement
Sur secteur, la tension d'entrée est filtrée et redressée par un étage régulateur du facteur de puissance
qui est en mesure d’optimiser l’absorption de courant du secteur, en rendant le facteur de puissance
quasiment unitaire, et de compenser les variations éventuelles de tension. Cet étage régulateur alimente
l’onduleur de sortie même à des tensions très basses. Cette caractéristique est encore plus accentuée
avec des charges basses, si bien qu’avec une charge d’environ 50% de la valeur nominale, le
fonctionnement sur secteur est possible jusqu’à environ 100 V du secteur, sans fonctionner sur les
batteries. Cela permet une gestion “intelligente” du passage sur batterie, qui vise à minimiser l’utilisation
des accumulateurs. La tension, redressée par le premier étage, est ensuite utilisée par un onduleur à
haute fréquence qui génère une tension de sortie sinusoïdale “propre” et à très faible distorsion; un
circuit rapide de commutation synchronisée intervient pendant les pics de courant dépassant la
capacité de l’inverseur, comme l’allumage de périphériques particulières, la démagnétisation d’écrans
couleur de grandes dimensions, etc.
La coupure du courant ou sa diminution excessive activent automatiquement un étage survolteur qui, à
travers les batteries, assure l’alimentation ininterrompue à l’onduleur de sortie et, par conséquent, à la
charge. La typologie du circuit est à neutre passant ; par conséquent il ne peut pas altérer le régime de
neutre des appareils qui lui sont connectés.
Pendant le fonctionnement normal, un capteur vérifie la différence de potentiel entre conducteur de
neutre et conducteur de terre et si elle est trop grande il active la protection d'entrée, commute
l’onduleur en batterie et signale l’anomalie. En modifiant les paramètres du logiciel, il est possible d’avoir
la seule signalisation.
Toutes les fonctions de l’onduleur sont supervisées par un microprocesseur qui peut également contrôler
et mémoriser des conditions de fonctionnement particulières et gérer l’interfaçage de l’ASI avec un
ordinateur en passant par la ligne série RS 232.
Il est possible ainsi de contrôler en temps réel les paramètres de fonctionnement et les anomalies
éventuelles.
L’onduleur signale à l’opérateur son état de fonctionnement à travers des signalisations optiques et
sonores :
- afficheur alphanumérique 1 Page10
- indicateur d’état 7 Page10
- signal sonore (à l’intérieur de l’onduleur)
83
2 - Fonctionnement
L’association de ces signalisations facilite la détermination de l’état de fonctionnement et des problèmes
éventuels au secteur, en la rendant rapide et intuitive.
Les modes de fonctionnement possibles sont trois
- Fonctionnement sur secteur
- Fonctionnement sur batterie
- Fonctionnement en By-pass
Fonctionnement sur secteur
C’est la condition de fonctionnement normal:
- la tension du secteur est convertie par le régulateur du facteur de puissance (PFC) en tension
continue
- l’onduleur reproduit la tension sinusoïdale à partir de la tension continue
- le filtre de sortie assure un " nettoyage " supplémentaire de la tension de sortie
- les batteries sont rechargées
Fonctionnement sur batterie
En cas de coupure du secteur, l’onduleur fait automatiquement la commutation en mode de
fonctionnement sur batterie.
- la tension des batteries est élevée par le circuit “survolteur”
- l’onduleur reproduit la tension sinusoïdale à partir de la tension continue
- le filtre de sortie assure le " nettoyage " de la tension vers la charge
Fonctionnement en mode By-pass
Le circuit de By-pass exclut l’onduleur et relie directement la sortie à l’entrée. La commutation est
synchronisée afin de garantir toujours la tension correcte de sortie, en évitant les coupures ou les
surtensions.
L’intervention du circuit de By-pass peut être personnalisée à travers un menu dédié (Config. ASI, Bypass) qui prévoit de nombreuses options (automatique, désactivé, By-pass en attente de charge, etc..)
afin de répondre aux exigences spécifiques de l’application.
Informations affichées
Voir ci-dessous les principaux messages qui apparaissent dans l’afficheur alphanumérique pour les trois
modes de fonctionnement.
ASI sur secteur
IN
212V
OUT 230V/812W ( 31%)
Batt
32,2‘
Secteur présent
Indique l’état de fonctionnement normal, avec secteur présent.
UPS
sur Batterie
Indique que le secteur est absent et que l’onduleur est en train de délivrer
le courant à travers les batteries.
UPS
sur By pass
Indique que le mode by-pass est activé et que la sortie de l’onduleur est
reliée directement sur le secteur.
IN
xxxV
Indique la tension d’entrée dans l’ASI et la puissance RMS absorbée sur le
secteur. En cas de fonctionnement sur batterie, le message n’est pas affiché.
OUT
xxxV/x,xKW (xx%)
La valeur de la puissance est exprimée même en pour cent de la puissance
totale délivrée par l’onduleur.
Batt.
xx,x’
Indique sous forme graphique l’état de charge des batteries et, sous
forme numérique, la durée d’autonomie disponible.
84
2 - Fonctionnement
Signalisations visuelles et sonores
INDICATEUR
D’ETAT
SIGNAL
SONORE
MESSAGES
AFFICHÉS
DESCRIPTION
Vert
---
Secteur Présent
IN xxxV/x.xkW
Fonctionnement normal avec secteur
présent et charge dans les limites
Vert
---
Secteur Présent
Non
synchronisée
xx.xHz
L’onduleur signale que la fréquence de la
tension de sortie n’est pas synchronisée
avec la tension d’entrée. La cause peut être :
- PLL désactivé
- Fréquence de la tension d’entrée hors des
limites prévues par l’Onduleur
Intermittent
rapide
Jaune
Jaune
Intermittent
bref (tous les 20s.)
Intermittent
rapide
Fonctionnement sur batterie
UPS sur By-pass
Fonctionnement en mode By-pass
---
Intermittent
rapide
Rouge
UPS sur Batterie
SECTEUR ABSENT
Module en panne
ATTENTION ! ÉTEINDRE L’ONDULEUR ET
APPELER LE S.A.V.
Intermittent
bref et rapide
Surcharge
ATTENTION ! DÉBRANCHER DES
UTILISATIONS JUSQU’A RAMENER
L’ABSORPTION DE LA CHARGE DANS LES
LIMITES PRÉVUES
Rouge
ASI en erreur ou panne détectée
ATTENTION ! ÉTEINDRE L’ONDULEUR ET
APPELER LE S.A.V.
Continu
Rouge
--90% de la charge MAX a été dépassé
1 tous les 10 s.
Rouge
Intermittent
alterné bref, long
Rouge
Intermittent bref
avec pause
Intermittent
alterné bref, long
Réserve d’autonomie. En fonctionnement
sur batterie
Connexion erronée sur Batterie
Neutre
FIN D’AUTONOMIE!
--PLUS DE
REDONDANCE!
L’absorption de la charge est plus grande que
la redondance programmée. En cas de
panne, la redondance des cartes de
puissance n’est pas garantie
Nota: pour arrêter le signal sonore appuyez sur la touche
aura l’arrêt ou le déclenchement du signal.
85
ESC
; à chaque pression on
3 - Installation
3. Installation
Préparation à l’installation
Vérifiez que l’emballage est en parfait état et que le produit n’a pas subi de dommages pendant le
transport. En cas de problèmes, veuillez contacter le transporteur.
Vérifiez le contenu de l’emballage :
• 1 onduleur
• 1 connecteur d’interface in/out (version bâti unique, avec multiprise de sortie et cordon d’entrée)
• Notice d’emploi
Nous conseillons de conserver l'emballage de l'appareil ; en cas de réparations vous pourrez l'utiliser pour l'expédition.
Mise en place de l’onduleur
Choisissez une surface horizontale et solide pour la mise en place de l’onduleur.
Pour l’installation, procédez de la manière suivante (Fig. 1) :
- l’onduleur doit être placé dans des milieux fermés : il n’est pas projeté pour un usage à l’extérieur.
- Respectez les conditions ambiantes indiquées dans ce manuel.
- Évitez les milieux poussiéreux, humides et soumis au rayonnement direct du soleil.
- Évitez les milieux contenant des liquides inflammables et/ou des substances corrosives.
- Assurez l’aération en mettant l’appareil à une distance d’au moins 10 cm des parois
- Ne couvrez pas les zones de ventilation avant, arrière et latérales.
10cm
Fig.1 Mise en place de l’onduleur
86
3 - Installation
Façade
1
2
3
4
5
6
7
Afficheur alphanumérique
Touche ESC / quitter les fonctions / arrêter le signal sonore
Touche défilement arrière / augmenter la valeur
Touche défilement avant / diminuer la valeur
Touche envoi / accepter les fonctions / ouvrir le menu
Touche marche / arrêt
Indicateur d’état de fonctionnement multicolore (vert / jaune / rouge)
Procédure d’installation en bâti unique
Connexions électriques
Alla rete di
distribuzione
elettrica
Bâti unique (fig. 2):
13
8
9
10
11
12
13
Connecteur Entrée/Sortie
Fiche Entrée/Sortie
Fusible d’entrée
Prise Interface série RS232 (9 P femelle)
Prises à signaux Logiques ( 9 P mâle )
Connexion pour extension d’autonomie
12
8
10
11
9
Agli utilizzatori
Fig. 2 Connexions Électriques
87
3 - Installation
Bâti unique
CONNECTEUR D’ENTRÉE-SORTIE
Assemblage
1. Câblez le connecteur d’entrée-sortie fourni, comme
l’indique la figure 2, à l’aide d’un cordon gainé avec
conducteurs internes d’une section d’au moins 2,5 mm2
2. Branchez le connecteur sur le couvercle en plastique en le
fixant par les vis prévues à cet effet, ensuite fixez les fils sur
le couvercle par un serre-câble (voir fig. 3).
3. Déposez le cache de la fiche [9] en enlevant la vis de
fixation.
4. Reliez le connecteur d’entrée-sortie à la fiche [9] derrière
l’onduleur en le fixant sur le châssis par les vis (voir fig. 2).
5. Branchez les charges sur la prise de sortie; les
interrupteurs des utilisations doivent être éteints.
6. Branchez la fiche d’alimentation sur une prise de courant
d’une tension adaptée aux courants demandés.
CONNECTEUR
Encoche de repère
COUVERCLEEN PLASTIQUE
SERRE-CABLE
Fig. 3 Couvercle du bornier
MISE EN GARDE
!
L’onduleur dispose d’un circuit de protection contre les erreurs de connexion. Une erreur éventuelle est signalée par
l’indicateur couleur rouge qui s’allume de manière fixe et par le son continu du buzzer interne. Si cette signalisation se
vérifie immédiatement après la mise en marche de l’ASI, arrêtez l’appareil et déconnectez immédiatement la fiche
d’alimentation.
Recommandation pour l’installation
• Nous conseillons de confier la réalisation des connexions électriques à un technicien qualifié.
• Ne pas modifier les fils électriques fournis.
• Vérifier que la prise du secteur sur laquelle l’onduleur est branché est connectée de façon sure au circuit de terre.
• La prise d’alimentation de secteur ou le dispositif de sectionnement doivent être installés à proximité de
l’onduleur et doivent être facilement accessibles.
• Les fils d’alimentation entrée/sortie doivent être impérativement en câble souple.
!
ATTENTION
(pour les modèles 1250/2500/3750/5000)
Les câbles qu’ils sont inclus dans le kit accessoires de l’onduleur, sont équipé avec des prises et une fiche
avec une courant maximum de 16A. On se conseille donc d’utilise un câblage direct entre le tableau
électrique et le connecteur Entrée/Sortie de l’onduleur (selon les instructions de branchement à page 11,
figures 3 et 4 ) dans les installations ou la courante en entrée de l’onduleur est au-dessus de 16A
(exemple : MegaLine 3750 ou 5000 avec Vin=184V)
ATTENTION
(pour les modèles 1250/2500/3750/5000)
Étant donné que les courants de dispersion à terre de toutes les charges s’additionnent dans le conducteur
de protection (fil de terre) de l’onduleur, veillez, par mesure de sécurité et conformément à la norme N
50091-1-1, à ce que la somme de ces courants ne dépasse pas la valeur de 2,7 mA.
!
CONNECTEUR D’ENTREE-SORTIE
Vue côté introduction des fils
Fil jaune-vert
Fil marron
Fil jaune-vert
Fil bleu
Fil bleu
Fil marron
Cordon de sortie
(vers la charge)
Borne n°1 SORTIE PHASE
Borne n°2 SORTIE NEUTRE
Cordon d’entrée
(vers le secteur)
Borne n°1 SORTIE PHASE
Borne n°2 SORTIE NEUTRE
Fig. 4 Bornier
88
3 - Installation
Connexion pour extension Autonomie
L’ASI dispose d’une connexion pour des modules de
batteries additionnelles : pour ajouter un ou plusieurs bâtis
supplémentaires à l’unité, procédez de la manière suivante:
1. Desserrez les vis 1 e 2 de la figure 5 sans les dévisser
entièrement
2. Déplacez le couvercle de protection vers la gauche, jusqu’à
découvrir les connecteurs situés à l’intérieur de la fenêtre.
3. Serrez de nouveau les vis pour assurer la protection métallique.
4. Connecter le module batteries à l’onduleur par les fils prévus à cet effet.
5. Assurez un bon contact de terre à travers la tresse.
!
2
1
ATTENTION
Effectuez les connexions avec l’onduleur éteint et
débranché du secteur d’alimentation
Fig. 5
Guide à l’utilisation du logiciel d’autodiagnostic
Connexion
L’onduleur dispose d’un interface standard RS232 qui lui permet d’accéder, à travers un ordinateur, à une série de
données sur le fonctionnement et l’histoire de l’onduleur. Cette fonction est utilisable à travers le programme
d’interface pour environnement WINDOWS disponible gratis sur le site www.metasystem.it, en reliant un port série du
PC à la prise [11] qui se trouve derrière l’onduleur par un cordon RS232.
Procédures
Mise en marche
Arrêt
Appuyez sur la touche
Pendant le fonctionnement (exemple)
Secteur présent
IN
212V
OUT 230V/812W ( 31%)
Batt
32,2‘
L’affichage sera le suivant
Initialisation UPS …..
L’indicateur d’état signale la
séquence d’allumage (rouge, jaune,
vert)
L’afficheur indique l’état de
fonctionnement (exemple)
Appuyez quelques secondes sur la
touche
L’avertisseur sonore émet quelques
sons brefs et puis l’onduleur s’éteint
(5 secondes)
Secteur présent
IN
212V
OUT 230V/812W ( 31%)
Batt
32,2‘
89
4 - Personnalisation des modes de fonctionnement
4. Personnalisation des modes de fonctionnement
Fonctions des touches
L’accès au menu de l’onduleur est obtenu en utilisant les touches prévues sur la façade.
TOUCHE
Quitter une fonction sans la modifier
Passer d’un niveau de menu inférieur à un niveau supérieur
Quitter le menu principal et retourner à l’affichage de l’état
Arrêter le signal sonore
- Sélectionner la fonction précédente
- Augmenter une valeur à l’intérieur d’une fonction
- Sélectionner une nouvelle option pour une fonction (ex. : de DÉSACTIVÉ à ACTIVÉ)
➡
- Sélectionner la fonction suivante
- Diminuer une valeur à l’intérieur d’une fonction
- Sélectionner une nouvelle option pour une fonction (ex. : d’ACTIVÉ à DÉSACTIVÉ)
❙➡
ATTENTION: Certains menus contiennent plus de quatre lignes : utilisez les touches
per scorrere le voci di menu non visualizzate.
➡
- Confirmer une valeur
- Accéder à une option de menu
- Passer d’un niveau de menu supérieur à un niveau inférieur
➡
!
-
➡
ESC
DESCRIPTION DES FONCTIONS
Fonction “Service Mode”
➡
❙
L’onduleur permet d’effectuer tous les paramétrages et les programmations décrites ci-après, même quand il est éteint.
Si vous appuyez sur la touche
l’onduleur se met en mode “SERVICE” en permettant l’accès au menu Display. Pour
quitter ce mode appuyez sur la touch e ,sinon au bout d’une minute sans recevoir de commandes manuelles ou série,
l’onduleur quitte automatiquement cette fonction et s’éteint.
Accès aux menus
A la fin de la procédure d’allumage, l’affichage sera le suivant
(exemple)
Appuyez sur la touche
90
❙➡
Secteur présent
IN
212V
OUT 230V/812W ( 31%)
Batt
32,2‘
pour ouvrir le menu principal
4 - Personnalisation des modes de fonctionnement
MENU PRINCIPAL
Etat ASI
Config. ASI
Événements
Programmation
Instruments
Etat UPS
Info UPS
Sortie
Entrée
Batteries
Historique
Divers
Configuration UPS
Sortie
Entrée
Bypass
Senseur du neutre
Batteries
Réglage de l’heure
Réglage Panel
Evénement
Visualisation
Effacement
Programmation
Plann. programmable
Rédemarrage
Arrêt
Outils
Test des voyants
Test Afficheur
Test Batterie
Réglage Batterie
ETAT ASI
Info UPS
Mod Megaline xxxx
P Sortie Max
xxxx
Ver.SW
xxxx
S/N
xxxxxxxxx
Modules installés x
Modules en panne x
➧
Mod Megaline
Indique le modèle de l’appareillage
P Sortie Max
Ver. SW
S/N
Indique la puissance active maxi. délivrée (W)
Version logiciel
Numéro de matricule
Modulés Installés Nombre de modules de puissance installés
Modulés en
panne
Nombre de modules de puissance éventuellement en panne
Sortie
Puissance (W) xxxxx
Puissance
xxxx
Tension RMS
xxxx
Courant RMS
xxxx
Courant Créte
xx
Fréquence
xx
Facteure créte
xx
Fact.Puissance
xx
➧
Puissance (W) Indique la valeur de la puissance active délivrée (W)
Puissance
Indique la valeur de la puissance apparente délivrée (VA)
Tension RMS
Indique la valeur de la tension efficace (V RMS) délivrée à
la sortie par l’onduleur
Courant RMS Indique la valeur de courant efficace (AV RMS) délivré à la
sortie par l’onduleur
Courant Créte
Indique la valeur du courant de pic délivré à la sortie par
l’onduleur (A)
Fréquence
Indique la valeur de la fréquence de la tension de sortie de
l’onduleur (Hz)
Facteure créte Indique la valeur du facteur de crête calculé comme rapport
entre la valeur de pic et la valeur efficace du courant
absorbé par la charge
Fact. Puissance Indique la valeur du facteur de puissance de la charge
admise à l’onduleur
91
4 - Personnalisation des modes de fonctionnement
Entrée
Puissance (W) xxxx
Puissance
xxxx
Tension RMS
xxx
Courant RMS
xxxx
Courant créte
x
Fréquence
x
Facteur crête
x
Fact. Puissance
x
Puissance (W) Indique la valeur de la puissance absorbée du secteur (W)
Indique la valeur de la puissance apparente absorbée du secteur (VA)
Puissance
➧
Tension RMS
Indique la valeur de la tension efficace (V RMS) d’entrée
de l’onduleur
Courant RMS Indique la valeur du courant efficace (A RMS) absorbée du
secteur
Courant créte
Fréquence
Indique la valeur du courant de pic absorbé du secteur (A)
Indique la valeur de la fréquence de la tension d’entrée de
l’onduleur (Hz)
Facteur crête Indique la valeur du facteur de crête calculée comme
rapport entre la valeur de pic et la valeur efficace du
courant absorbé du secteur
Fact.
Puissance
Indique la valeur du facteur de puissance appliqué au
secteur
Batteries
Tension
xx
Capacité dispo xxxx
Nombre décharge xxxx
Tps batterie
xxxx
Cal.jj/mm/aahh:mm
Kit externe
xx
Chargeur externe xx
➧
Tension
Indique la tension mesurée sur le kit batteries (V)
Capacité dispo Indique en pour cent l’état de charge des batteries
Nombre
décharge
Indique le nombre de cycles de décharge effectués par la
batterie
Tps batterie
Heures de fonctionnement sur batterie
Cal.jj/mm/aahh: Indique la date (jour / mois / année) et l’heure (heures /
mm
minutes) du dernier calibrage des batteries
Kit externe
Indique le nombre de Ko qui sont installés à l’extérieur
Chargeur
externe
Indique le nombre de chargeur de batterie extérieurs
(modèle CB36 MetaSystem
Historique
TPS. UPS
TPS. UPS
xxxxx
TPS. Booster
xxxx
Décharge Totale xxxx
Int.Booster
xxxx
Int.Bypass
xxxx
Surchauffe
xxxx
➧
Indique le nombre d’heures de fonctionnement total de
l’onduleur
TPS. Booster Indique le nombre d’heures de fonctionnement de
l’onduleur en mode booster (fonctionnement sur batterie)
Décharge
Totale
Int. Booster
Indique le nombre de fois que l’onduleur a déchargé
complètement ses batteries.
Int. Bypass
Nombre des interventions en mode By-pass (voir le menu
Configuration UPS - By pass)
Surchauffe
Nombre des interventions en mode booster
(fonctionnement sur batterie)
Nombre des interventions de la protection thermique (dues
par exemple à la charge excessive)
92
4 - Personnalisation des modes de fonctionnement
Divers
Températutre int. xx
Températutre ext. xx
% ventilation
xx
➧
Températutre
int.
Températutre
ext.
% ventilation
Indique la température à l’intérieur de l’onduleur, exprimée
en degrés centigrades
Tension
Détermination de la tension de sortie de l’onduleur (V)
Fréquence
Détermination de la fréquence de sortie de l’onduleur (Hz)
Valeur Nominale: permet de déterminer une valeur
numérique de la fréquence de sortie (50 ou 60)
Auto Sélection:
Si activée, l’onduleur détecte la fréquence de la tension
d’entrée et synchronise la sortie à la même valeur. Si
désactivée, l’onduleur utilise la Valeur Nominale.
Redondance
N+x
Détermination du nombre de cartes redondantes
(voir Nota : Détermination de la Redondance)
Indique la température à l’extérieur de l’onduleur, exprimée
en degrés centigrades
Indique la vitesse des ventilateurs de refroidissement de
l’onduleur, exprimée comme valeur pourcentage
(100% = vitesse maximum).
Configuration UPS
Sortie
Tension
Fréquence
Redondance N+x
➧
Nota: Gestion de la redondance
Cette fonction permet de gérer la redondance des modules de puissance. Par exemple, une charge exige N modules
de puissance ; X modules de puissance seront ajoutés pour obtenir la redondance N+X.
Si pendant le fonctionnement la charge appliquée dépasse la puissance de N modules, l’onduleur signale le manque
de redondance.
Ci-dessous un exemple numérique:
Charge
Carte de
puissance
Puissance
totale (W)
Redondance
Alarme
Redondance (W)
Alarme
Surcharge (W)
3700
3
3750
0
no
3750
3700
4
5000
1
3750
5000
1500
4
5000
2
2500
5000
1000
4
5000
3
1250
5000
93
4 - Personnalisation des modes de fonctionnement
Entrée
Validation PLL
Tolérance PLL etendu
➧
Validation
PLL
Si activé, l’onduleur synchronise la sinusoïde de sortie
avec l’entrée.
Si désactivée, la tension de sortie n’est pas synchronisée
avec l’entrée et cela est signalé par le clignotement de
l’indicateur d’état (vert)
Tolérance
PLL etendu
Si activé, l’onduleur synchronise la tension de sortie avec
l’entrée, pour des variations de la fréquence de +/-14% de
la valeur nominale. Si désactivée, le PLL se synchronise
pour des variations de la fréquence de +/-2%.
Nota: Gestion du PLL
La fonction PLL garantit que la fréquence de sortie du groupe est synchronisée avec l’entrée afin que le passage
par le zéro soit simultané. En cas d’intervention du By-pass, par ex. pour des charges imprévues, la synchronisation
entrée-sortie est garantie.
!
ATTENTION: En désactivant la fonction PLL, la fonction de By-pass automatique est également désactivée.
Si la fréquence d’entrée est plus grande que la valeur paramétrée, l’onduleur exclut la fonction PLL en
libérant la sortie de l’entrée. Quand la valeur rentre dans la plage de tolérance programmée, la fonction PLL
est réactivée automatiquement
By pass
Validation bypass
Mode forcé
Vitesse transfer
Mode off-line
Mode Attente Charge
➧
Validation
bypass
Si activée, l’onduleur gère l’intervention du By-pass
automatiquement.
Si désactivée, l’onduleur ne passera jamais en mode Bypass ; en cas de surcharge prolongée, l’onduleur s’éteint.
Mode forcé
Si activé, l’onduleur active le By-pass en mode permanent.
Vitesse
Transfer
Permet de modifier la sensibilité d’activation automatique
du By-pass, (mode forcé désactivé)
LENT: charges non sensibles aux baisses de tension ou
aux distorsions, mais qui provoquent des décollages
fréquents.
STANDARD: usages courants.
RAPIDE: charges sensibles aux distorsions.
Si activé, le fonctionnement du By-pass est le suivant:
Mode off-line - avec secteur présent, le By-pass est actif en mode
permanent
- avec secteur absent, l’onduleur est en mode batterie.
Mode Attente VALIDATION: active ou désactive la fonction. Si validé, le
By-pass est activé lorsque la charge est inférieure à la
Charge
valeur programmée " Seuil de charge minimum ". Au-delà
de cette limite le By-pass se désactive.
Seuil de charge minimum: permet de programmer la
valeur de la charge pour la fonction de marche et arrêt
(voir Nota : Attente Charge avec secteur absent).
Nota: Attente charge avec secteur absent
Si l’onduleur en mode " Attente charge " a une charge inférieure au seuil programmé, il active le By-pass.
En cas de secteur absent, l’onduleur s’éteint et ne se rallume qu’au retour du courant.
94
4 - Personnalisation des modes de fonctionnement
!
ATTENTION!
La programmation suit la priorité suivante:
Fonction active
Validation
By-pass
Mode forcé
MODE FORCÉ
ACTIVÉ
ACTIVÉ
MODE OFF-LINE
ACTIVÉ
DÉSACTIVÉ
ACTIVÉ
ACTIVÉ
MODE OFF-LINE
ACTIVÉ
DÉSACTIVÉ
ACTIVÉ
DÉSACTIVÉ
MODE ATTENTE
CHARGE
ACTIVÉ
DÉSACTIVÉ
DÉSACTIVÉ
ACTIVÉ
MODE
AUTOMATIQUE
ACTIVÉ
DÉSACTIVÉ
DÉSACTIVÉ
DÉSACTIVÉ
BY-PASS
DÉSACTIVÉ
DÉSACTIVÉ
X
Mode off-line
X
X
X
Attente charge
X
X: n’importe quelle programmation (ACTIVÉ ou DÉSACTIVÉ)
Senseur du Neutre
Validation
Ignorez si ON
➧
Validation
Si activé, l’onduleur vérifie à travers le capteur de neutre que
la différence de tension entre le neutre et la terre est
comprise dans les limites de sécurité. Lorsque le seuil est
dépassé, l’onduleur passe automatiquement en mode de
fonctionnement sur batterie. Si désactivé, l’onduleur ignore le
capteur de neutre.
Ignorez si
ON
Si activé, l’onduleur ne vérifie la tension neutre-terre qu’à
l’allumage. Si désactivé, l’onduleur vérifie la tension
neutre-terre dans toutes les conditions de fonctionnement.
Réglage
capacité
Deux programmations sont possibles :
AVANCÉ
Le préavis de fin d’autonomie est calculé en détectant la
puissance absorbée par la charge reliée à l’onduleur et il
est affiché comme temps restant d’autonomie.
SIMPLE
Le préavis de fin d’autonomie est calculé en mesurant la
tension des batteries.
Batteries
Réglage capacité
➧
Le préavis de fin d’autonomie est calculé en mesurant la
tension des batteries.
95
4 - Personnalisation des modes de fonctionnement
AVANCÉE
Batteries
Gestion capacité
Alarm fin autonomie
➧
Gestion
capacité
Alarm fin
autonomie
Avancé
Gestion
capacité
Seuil
Batteries
Simple
Définition du préavis de fin d’autonomie des
batteries exprimé comme temps restant de
fonctionnement (minutes)
SiMPLE
Batteries
Gestion capacité
Seuil Batteries
➧
Définition du préavis de fin d’autonomie des
batteries exprimé comme valeur de tension de
batterie.
Deux options sont disponibles dans le menu
Mode
Si vous sélectionnez
Mode - Seuil automatique
L’onduleur calcule automatiquement, en fonction
de la charge, les seuils de tension au-dessous
desquels l’onduleur signale respectivement,
RESERVE AUTONOMIE et FIN D’AUTONOMIE.
Si vous sélectionnez
Mode - Seuil fixe
Deux options sont proposées :
1) Seuil batterie basse
Définition du seuil de tension batterie audessous duquel l’onduleur signale RESERVE
AUTONOMIE
2) Seuil fin autonomie
Définition du seuil de tension batterie audessous duquel l’onduleur signale FIN
AUTONOMIE.
96
4 - Personnalisation des modes de fonctionnement
Batteries
Temps max. sur Batt.
Temps max. restant
Test démarrage ok
Redemarrage ok
Option externe
➧
Temps max.
sur Batt.
Définition durée maximum de fonctionnement continu en
mode BATTERIE exprimée en secondes. Si vous entrez “0”
la fonction est désactivée
Temps max.
restant
Définition durée maximum de fonctionnement en mode
BATTERIE exprimée en secondes, une fois le niveau de réserve
atteint, exprimée en secondes. Si vous entrez " 0 " la fonction
est désactivée. Si vous entrez " 0 " la fonction est désactivée.
Si activé, le test des batteries est effectué chaque mise en
Test
démarrage ok marche de l’onduleur. Si désactivé, lors du rallumage le test
des batteries n’est pas effectué.
Redemarrage Si activé, après un arrêt par fine d’autonomie, l’onduleur se
rallume dès le retour du courant.
ok
Si désactivé, après un arrêt par fin d’autonomie, l’onduleur
ne se rallume pas.
Option
externe
N. Chargeur batterie
Définition du nombre de charge extérieure.
Kit batterie définition du nombre de paquets de trois
batteries installés à l’extérieur de l’Unité KB
Lundi
➧
Programmation heure et date
Pour sélectionner valeur à modifier
➡
➡
❙
23/06/03 -19:25:06
➡
Réglage de l’heure
Pour augmenter/diminuer la valeur
Réglage panel
Langue
Bip clavier
Rétro éclairage
Contraste
Changement mot passe
➧
Langue
Choix de la langue
Bip clavier
Activation ou désactivation du signal sonore de pression
de la touche
Rétro
éclairage
Sélection du rétroéclairage de l’afficheur alphanumérique
Fixe : toujours allumé
Temporiser : l’éclairage s’éteint au bout de quelques
secondes d’inactivité sur le clavier
Désactiver : éclairage toujours éteint.
Contraste
Événement
Visualisation
Effacement
➧
Sélection du contraste de l’afficheur.
Changement
mot passe
Sélection du mot de passe pour l’accès au paramétrage
de l’onduleur
Visualisation
Permet de visualiser les événements mémorisés par
l’onduleur, par exemple FIN AUTONOMIE, ALARMES
SURTEMPERATURE etc., avec l’HEURE et la DATE
Effacement
Permet de supprimer les événements de la mémoire
97
4 - Personnalisation des modes de fonctionnement
Programmation
Plann. programmable
Validation
Visualisation
Séquence progr.
Annulation
➧
Validation
Active ou désactive les programmes chargés
Visualisation Permet de charger et modifier des programmes. Les
fonctions disponibles sont les suivantes :
Test Batterie (contrôle état batteries)
Calibrage Batt.(calibrage des batteries)
Démarrage (mise en marche de l’onduleur)
Arrét (arrêt de l’onduleur)
Absent (désactivation du programme)
Les modalités d’exécution de chaque programme sont les
suivantes:
Journalier “heure-minutes ”:
il est exécuté tous les jours à l’heure et aux minutes
programmés;
Simple “jour-mois-heure-minutes ”:
il est exécuté une seule fois par “jour-mois-heure-minutes”
programmés
Hebdomadaire”nom jour-heure-minutes ”
il est exécuté chaque semaine au "nom jour-heure-minutes”
programmés
Rédemarrage
Retard
Autonomie min.
➧
Séquence
progr.
Annulation
Permet d’afficher tous les programmes enregistrés par
ordre journalier (max. 16)
Retard
Durée, en secondes, de la signalisation de préavis
rallumage automatique
Autonomie
minimum
Pour cent de charge des batteries au-dessous duquel l’ASI
ne se rallume pas automatiquement
Retard
Durée, en secondes, de la signalisation de préavis
rallumage automatique
Permet de supprimer tous les programmes
Arrêt
Retard
➧
Outils
Test des
voyants
Test des voyants
Test afficheur
Test Batterie
Réglage Batterie
➧
Test
afficheur
Test Batterie
Réglage
Batterie
Fait le test des signalisations lumineuses. Appuyez sur la
touche ENTER pour faire le test de la signalisation Verte,
Jaune, Rouge et de la Signalisation sonore
Fait le test de l’afficheur alphanumérique. Appuyez sur la
touche ENTER pour afficher tous les caractères disponibles
de l’afficheur alphanumérique.
Fait le test des batteries. En cas de problèmes, contactez
le SAV.
Fait le calibrage des batteries, en détectant la courbe de
décharge des batteries. En cas de changement des
batteries, nous conseillons d’exécuter ce cycle afin que
l’onduleur puisse fournir des informations précises sur
l’état de charge.
98
5 - Caractéristiques Techniques
5. Caractéristiques Techniques
Spécifications de Construction
Poids (Kg.)
MEGALINE
1250
MEGALINE
2500
MEGALINE
3750
23,5
34
43
Dimensions
(LxHxP)
MEGALINE
5000
53
270 x 475 x 570 mm
Technologie
Etage d’entrée et de sortie PWM haute fréquence.
Logique de contrôle gérée par microprocesseur
Extension
possible
Possibilité de passer à des configurations de puissance supérieure, en ajoutant un ou plusieurs modules
dans la même baie, jusqu’à 4 au maximum.
Possibilité d’augmenter l’autonomie en ajoutant des batteries supplémentaires à l’intérieur, jusqu’à 4
séries de 3 batteries de 12V, 9Ah au maximum.
Extension
possible
Pour des autonomies plus grandes, possibilité de relier des kits batterie en option, d’une capacité de 10
séries de 3 batteries de 12V, 9Ah au maximum.
Interface
ordinateur
A niveaux logiques, pour la connexion avec des kits en option. Sortie sur connecteur creux à 9 broches
mâle, isolé SELV. Série RS232 Standard pour l'interfaçage avec un PC à travers le logiciel
d'autodiagnostic fourni. Sortie sur connecteur creux à 9 broches femelle, isolé SELV.
Commande à
distance
Protections
Sortie connecteur creux à 9 broches mâle isolé SELV pour brancher la commande à distance en option.
Possibilité de marche et arrêt programmés et d’affichage des principales signalisations de l’onduleur.
Electroniques contre les surcharges, court-circuit et décharge profondes des batteries. Blocage du
fonctionnement par fin d'autonomie. Demarrage progressif à la mise en marche. Détecteur de bon
raccordement du neutre. Back-feed protection (isolation électrique de sécurité de la fiche d'entrée pendant
le fonctionnement sur batterie). Contact EPO de connexion " arrét d’urgence externe "
Statique automatique et manuel (en option).
Intervention par surcharge ou mauvais fonctionnement.
By-pass
synchronisé
Spécifications ambiantes
MEGALINE
1250
MEGALINE
2500
MEGALINE
3750
Altitude max.
de stockage
Gamme
température
de stockage
Gamme
température de
fonctionnement
Gamme humidité
relative de fonct.
20-80% non condensante
Degré de
protection
(IEC529)
IP 21
Niveau sonore à
1m
(<) 40dB A
10.000 mètres
de -20° C a +50° C
de 0° C a +40° C
99
MEGALINE
5000
5 - Caractéristiques Techniques
Caractéristiques Electriques d’Entrée
MEGALINE
1250
MEGALINE
2500
MEGALINE
3750
Tension nominale
d'entrée
Gamme tensions
d'entrée
Fréquence
nominale d'entrée
MEGALINE
5000
230 V
de 184V à 264V avec charge nom. - de 100V à 264V à 50% de la charge nom.
50 Hz ou 60 Hz +2% (autosensing et/ou sélectionnée par l’utilisateur)
Courant nominal
d'entrée
4,6A rms
8,9A rms
13,2A rms
17,7A rms
Courant maximum
d'entrée
5,75A rms
11,2A rms
16,6A rms
22,2A rms
Distorsion du
courant d'entrée
Facteur de
puissance d'entrée
THD
< 3%
> 0,99 de 20% de la charge nominale
Courant
d'amorçage
100% du courant nominal
Nombre des
phases d'entrée
Monophasé
Fusible de ligne
25 AFF
Chargeur de
batterie sur secteur
0,8 A rms
Forme d’Onde de Sortie
MEGALINE
1250
MEGALINE
2500
Fonctionnement
sur secteur
Fonctionnement
sur batterie
Type de
fonctionnement
MEGALINE
3750
Sinusoïdale
Sinusoïdale
Onduleur type "no-break", on-line, double conversion avec neutre passant
100
MEGALINE
5000
5 - Caractéristiques Techniques
Caractéristiques Electriques de Sortie en Fonctionnement sur Secteur
MEGALINE
1250
Tension nominale
de sortie
Fréquence
nominale de sortie
Courant de sortie sur
charge linéaire
facteur de
puissance 0,7
Facteur de crête
admis sur le
courant de sortie
Puissance
nominale de
sortie VA
Puissance active de
sortie sur charge
linéaire ou non
linéaire P.F.=0,7
MEGALINE
2500
MEGALINE
3750
MEGALINE
5000
230 V ± 1%
50 Hz / 60 Hz synchronisée (autosensing et/ou sélectionnable par l'utilisateur)
5,37A rms
16,25A rms
10,75A rms
21,6A rms
3,5
1250VA
2500VA
3750VA
5000VA
875W
1750W
2625W
3500W
Distorsion
harmonique totale
de la tension de
sortie sur charge
nominale
< 0,5%
Distorsion
harmonique totale
de la tension de
sortie sur charge
nominale non
linéaire P.F.=07
< 1%
Capacité de
surcharge
300% pendant 1 seconde sans intervention du By-pass
200% pendant 5 secondes sans intervention du By-pass
150% pendant 30 secondes sans intervention du By-pass
Nombre des
phases de sortie
Monophasé
Rendement de
conversion CA-CA
avec charge linéaire
P.F.=1 et batteries
chargées :
oà 50% de la charge
oà 75% de la charge
oà 100% de la
charge
80%
85%
92%
101
5 - Caractéristiques Techniques
Caractéristiques Électriques de Sortie en Fonctionnement sur Batterie
MEGALINE
1250
Tension nominale
de sortie
Fréquence de
sortie
MEGALINE
2500
MEGALINE
3750
MEGALINE
5000
230 V ± 1%
50 Hz / 60Hz ± 1% (autosensing et/ou sélectionnable par l’utilisateur)
Puissance
nominale de sortie
1250 VA
2500 VA
3750 VA
5000 VA
Puissance active
de sortie sur
charge linéaire ou
non linéaire P.F. 0,7
875 W
1750 W
2625 W
3500 W
Distorsion
harmonique totale
de la tension de
sortie
< 1%
Capacité de
surcharge
150% impulsif
Gamme du facteur
de puissance de la
charge appliquée
de 0,7 à 1
Rendement de
conversion CC-CA
avec charge linéaire
P.F.= 1 et batteries
chargées :
•à 50% de la charge
•à 75% de la charge
•à 100%de la charge
!
80%
80%
80%
ATTENTION: Risque d’explosion si la batterie est remplacée par une autre non correcte. Éliminer les
batteries usagées en suivant les instructions et les précautions d’élimination indiquées.
102
5 - Caractéristiques Techniques
Fonctionnement sur Batterie
MEGALINE
1250
MEGALINE
5000
MEGALINE
3750
MEGALINE
2500
Autonomie
indicative en
minutes, batteries
chargées
Charge appliquée en
pourcentage
50%
80%
100%
50%
80%
100%
50%
80%
100%
50%
80%
100%
Onduleur standard
20
11
8
20
11
8
20
11
8
20
11
8
Temps de recharge
jusqu’à 90% de la
charge totale
Données techniques
et nombre de
batteries
5 à 6 heures selon le niveau de décharge
n. 3 batteries plomb-acide scellées sans entretien 12V 9Ah branchées en série pour chaque module.
Signaux de
réserve
de 32,2 V à 36 V programmable par l’utilisateur
Tension minimum
du mode batteries
pendant la
décharge
de 27 V à 31,5 V avec sélection automatique en fonction de la charge appliquée, ou programmable par
l’utilisateur
Durée moyenne
des batteries
3 à 6 ans selon l'utilisation et la température de service
Attention !
Les batteries contenues dans l'onduleur sont sujettes à une baisse de capacité qui dépend de la durée de vie
(caractéristique des batteries au plomb déclarée par le constructeur dans le manuel technique). Par exemple, la
baisse de capacité d'une batterie de 4 ans peut arriver jusqu'à 40% et entraîner une baisse proportionnelle de
la durée d'autonomie de l'onduleur quand il fonctionne sur batterie.
103
5 - Caractéristiques Techniques
Caractéristiques du By-pass
MEGALINE
1250
MEGALINE
2500
MEGALINE
3750
Type de
By-pass
Statique et électromécanique
Durée de
commutation
nulle
MEGALINE
5000
Réglementation de référence
MEGALINE
1250
MEGALINE
2500
MEGALINE
3750
Sécurité :
étudié pour
satisfaire la
norme
Conforme à la réglementation EN 62040-1-1
Compatibilité
électromagnétique
* immunité
* émissions
Conforme à la réglementation EN 50091-2 (classe A)
Conforme à la réglementation EN 50091-2 (classe B)
Performances
caractéristiques
MEGALINE
5000
Conforme à la réglementation EN 62040-3
Les données et les caractéristiques techniques peuvent être modifiées par MetaSystem sans préavis
ENTRETIEN PERIODIQUE
Nettoyage
Avant d’effectuer les opérations de nettoyage, nous vous recommandons :
- d’éteindre les appareillages reliés à l’onduleur
- de débrancher les appareillages de l’onduleur
- de débrancher le cordon d’alimentation de l’onduleur du secteur.
Nettoyage extérieur
- Nettoyer avec un chiffon souple et sec
Nettoyage des fentes de refroidissement
- Nettoyez périodiquement les fentes de refroidissement à l’aide d’un aspirateur ou d’un pinceau à soies souples
104
6 - Problèmes éventuels et solutions
6. Problèmes éventuels et solutions
Problèmes
Solutions
Dès la mise en marche de l'onduleur, le buzzer
sonne et l’indicateur visuel rouge clignote de
manière intermittente (clignotement bref-long),
puis il s'éteint au bout de 15 secondes.
Le conducteur de neutre est mal branché ; tournez la
fiche du cordon d'alimentation de l'onduleur, ou bien
inversez le sens de connexion des câbles de neutre et
phase d’entrée, ou bien excluez le détecteur de neutre.
L'onduleur fonctionne mais toutes les 12
secondes il émet un bref signal sonore et
l'indicateur jaune BATTERIE est toujours allumé.
- Vérifiez que la tension arrive dans la prise de
secteur.
- Contrôlez si le cordon d'alimentation de
l'onduleur est branché parfaitement dans la
prise de secteur et dans le connecteur de
l'onduleur.
- Vérifiez l'état du fusible d'entrée qui se trouve à
côté du connecteur d’entrée/sortie, sous le
couvercle en plastique (voir figure 1 ou 4).
L'onduleur fonctionne mais il émet un signal
sonore intermittent, tandis que l'indicateur rouge
+ jaune By-pass clignote
La sortie est surchargée. Réduisez le nombre
d'appareillages connectés de manière à ce que la
charge ne dépasse pas le puissance maximum
que peut fournir l'onduleur. Autrement, si vous
n’êtes pas déjà en configuration maximum, vous
pouvez demander au SAV d’augmenter la
puissance de l’onduleur en ajoutant, à l’intérieur
de l’ASI, un ou plusieurs modules avec leurs
batteries.
L'onduleur émet un signal sonore constant et
l'indicateur jaune clignote environ 15 secondes,
après quoi l'onduleur s'éteint.
L'onduleur a travaillé sur les batteries qui sont
pratiquement à plat. Il ne peut marcher que sur
secteur.
Vérifiez
les
disjoncteurs
magnétothermiques ou différentiels en amont de
l'onduleur et le fusible d'entrée.
L'onduleur fonctionne, mais l'indicateur vert Le secteur est hors des limites admises comme
MAINS clignote de manière rapide.
tension et/ou comme fréquence, mais il est
utilisable par l'onduleur. La fonction de by-pass
n'est pas disponible.
L'onduleur émet un signal sonore intermittent et
l'indicateur rouge clignote de manière rapide.
La protection thermique est intervenue. Arrêtez
l'onduleur et attendez quelques minutes de manière
à ce que la température interne de l'onduleur se
stabilise. Vérifiez le bon fonctionnement des
ventilateurs et que le flux d'air ne soit pas gêné (par
ex. l'onduleur est trop près d'une paroi).
Il y a un problème dans un circuit intérieur.
Contacter le SAV.
105