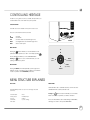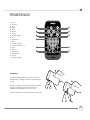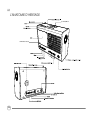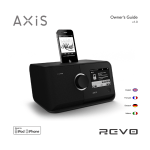
1
Version 2.0
DELUXE TABLE RADIO
With docking for iPod and iPhone
DAB | DAB+ | FM | Internet Radio | Audio Streaming
Owner’s Manual
Bedienungsanleitung
Manuel de l’utilisateur
Manuale dell’utente
TECHNICAL SUPPORT
WARRANTY
Should you encounter problems using this product, please refer to the
troubleshooting section on page 39 of this owner’s guide.
Alternatively, call Revo technical support on :
Revo Technologies Ltd warrants to the end user that this product will
be free from defects in materials and workmanship in the course of
normal use for a period of one year from the date of purchase.
This guarantee covers breakdowns due to manufacturing faults and
does not apply in cases such as accidental damage, general wear
and tear, user negligence, modification or repair not authorised by
Revo Technologies Ltd.
UK 01555 666161
From outside the UK + 44 1555 666161
Alternatively, e-mail [email protected] or visit the troubleshooting
section of our website at: www.revo.co.uk/support
ENVIRONMENTAL INFO
PRODUCT DISPOSAL INSTRUCTIONS (WEEE DIRECTIVE)
The symbol shown here and on the product means that it is classed
as Electrical or Electronic Equipment and should not be disposed with
other household or commercial waste at the end of its working life.
The Waste of Electrical and Electronic Equipment (WEEE) Directive
(2002/96/EC) has been put in place to recycle products using best
available recovery and recycling techniques to minimise the impact
on the environment, treat any hazardous substances and avoid the
increasing landfill.
For more information please contact your local authority or the retailer
where the product was purchased.
RoHS COMPLIANT & CE MARK
This product has been designed to comply with international
directives on the Restriction of Hazardous Substances (RoHS) and has
been designed and type-tested to comply with EU
requirements and carries a CE mark.
To register your purchase please visit www.revo.co.uk/register
COPYRIGHTS AND
ACKNOWLEDGEMENTS
Copyright 2011 Revo technologies Ltd. All rights reserved.
No part of this publication may be copied, distributed, transmitted
or transcribed in any form or by any means, electronic, mechanical,
magnetic, manual or otherwise, without the permission of Revo
Technologies Limited.
REVO and HERITAGE are trademarks or registered trademarks of
Revo Technologies Ltd. iPod and iPhone are trademarks of Apple
Inc., registered in the U.S. and other countries.
Revo Technologies Ltd
The Inox Building, Caldwellside, Lanark,
Scotland, United Kingdom, ML11 7SR
Tel: 01555 66 61 61
Fax: 01555 66 33 44
Int. Tel: +44 1555 66 61 61
Int. Fax: +44 1555 66 33 44
Email: [email protected]
Website: www.revo.co.uk
DISCLAIMER
SAFETY WARNINGS
• Do not operate this radio near water
• Do not remove screws or casing parts
ISO 7000-0434
• Use only the power supply unit supplied
• Avoid small objects and liquids from entering the product
02
Revo Technologies Limited makes no representation or
warranties with respect to the content of this publication, and
specifically disclaims any implied warranties of merchantability or
fitness for any particular purpose. Further, Revo Technologies Limited
reserves the right to make changes to this publication from time to
time, without notification to any person or organisation.
CONTENTS
02
Technical Support
02
Environmental Info
02
Warranty
02
Copyrights and Acknowledgements
02
Disclaimer
03
Welcome / Overview / Unpacking
04
Anatomy
05
Remote Control
06
Power Supply
06
Set-Up
07
Controlling Heritage / Menu Structure
08 - 09
DAB Mode
10 - 11
DAB Mode Menu Options
12
FM Mode
13
FM Mode / AUX-IN Mode
14 - 16
iPod Mode
17 - 22
Internet Radio Mode
23
Internet Radio Portal
24 - 25
Setting Up A Music Server
26 - 28
Music Player Mode
29 - 31
Last.fm Mode
32 - 33
Alarm Clock
34 - 38
System Settings
39 - 40
Troubleshooting
41
Error Messages
WELCOME
Thank you for purchasing our Heritage radio, we are sure that it will
provide you with many years of enjoyment and reliable service.
This guide has been designed to quickly get you up-and-running
with your radio, offer guidance on the more complex features of
this product and provide information on safety, warranty details and
troubleshooting.
HERITAGE OVERVIEW
Heritage is a contemporary reinterpretation of classic European
table radio designs from the 60’s. A multi-format digital radio that
provides coverage of DAB, DAB+, FM and Wi-Fi internet radio –
as well as wireless audio streaming and iPod/iPhone docking
functionality.
Heritage is crafted using the finest quality materials and components.
Its cabinet is constructed using a combination of aluminium and
furniture-grade American walnut. Audio performance is delivered by
a custom-designed 3” neodymium speaker driver, driven by a superb
7W amplifier. Lastly, Heritage benefits from a large, graphical OLED
display and intuitive control system.
UNPACKING HERITAGE
Carefully remove Heritage from its packaging before removing the
other items from the box.
The box should contain the following:
• Heritage radio
• Remote control
• iPod/iPhone dock adaptor kit
• Power adaptor with multi - country adaptors (UK, Euro, USA)
• Owner’s Manual
Should any item be missing or damaged, please contact your point
of purchase or call Revo directly on +44 (0) 1555 66 61 61
NOTE: Heritage’s packaging should be retained for possible future
use, it is the safest way to transport Heritage should it be necessary.
03
ANATOMY OF HERITAGE
Snooze/Sleep Bar
Play/Pause
iPod/iPhone Dock
Skip Back
Skip Forward
Feedback
OLED
Cursor Control
Mode
Menu
Info
Alarm
Volume Dial
Station Presets 1 - 5
iPod Video Out
Telescopic Antenna
Power/Standby
DC Power Socket
Digital Optical Out
Wired LAN
Aux-In
3.5 Headphone Connector
Stereo RCA Connectors
04
REMOTE CONTROL
01 - Mode
02 - Scroll up
03 - Menu
04 - Power
3
1
2
4
6
8
10
11
05 - Back
06 - Select
5
7
07 - Forward
08 - Volume increase
12
9
09 - Info
10 - Scroll Down
13
11 - Alarm
12 - Volume Decrease
13 - Presets 1- 10
14 - Sleep
15
14
15 - Snooze
16 - Skip Back (Fast Rewind)
19
16
17
18
17 - Play/Pause
18 - Skip Forward (Fast Forward)
19 - Feedback (Love/Ban)
1
BATTERY REPLACEMENT
The Heritage remote control is powered by a single 3V lithium
battery. Depending on usage, the battery should happily run for
between 1 and 2 years.
2
Replace the battery when button presses seem sluggish, or when the
operating range appears to have reduced significantly.
Replace the old battery with a new CR2025 lithium cell.
05
POWER SUPPLY (PSU)
Your Heritage radio is supplied with a multi-region power supply,
meaning that it can be operated in a number of countries around
the world.
Simply choose the correct adaptor for your country from the
selection supplied, then follow the instructions below.
PU
SH
UK
EURO
U.S.A
SET-UP
2 Fully extend the antenna for DAB or FM operation
1 Using the PSU supplied, connect one end to the DC power socket found on the
rear of Heritage, then plug the opposite end into the mains socket on the wall.
3 Press the POWER button once to start the initialisation process.
06
CONTROLLING HERITAGE
In order for you to get the most from your radio, it is important for you
to understand how its control and menu system operates.
CURSOR CONTROL
Your radio uses a cursor based control system for ease of use.
The cursor control has five functions as follows:
UP
DOWN
LEFT
RIGHT
PRESS
Scrolls Up
Scrolls Down
Scrolls Left and moves back through menus
Scrolls Right and moves forward through menus
Selects current option
CURSOR
MENU BUTTON
‘UP’
Pressing the
button will take you to the Mode Menu for the
particular mode of operation you are in. For example, pressing
when in DAB Mode will take you to the DAB MODE MENU.
Pressing the
button for a second time will return you to the
‘playing screen’ that you just left.
‘LEFT’
(BACK)
SELECT
MODE BUTTON
‘RIGHT’
(FORWARD)
‘PRESS’
(TO SELECT)
Pressing the MODE button will sequentially cycle through each of
Heritage’s modes of operation. It is also possible to move between
modes of operation via the MAIN MENU (see below).
‘DOWN’
MENU STRUCTURE EXPLAINED
MAIN MENU
MODE MENUS
The MAIN MENU provides access to the following modes and
sub-menus:
• Internet radio
• Music player
• Last.fm
• DAB radio
• FM radio
• iPod
• Auxiliary Input
• Alarms
• System settings
The Mode Menus are so called because they show the functions
available within the currently selected mode.
Pressing the
button at any time will take you to the Mode
Menu for the mode of operation your radio is currently in.
Each of the Mode Menus also includes a listing for MAIN MENU,
allowing you to return to the top level MAIN MENU.
07
DAB RADIO MODE
GETTING READY FOR DAB OPERATION
Please ensure that the radio’s antenna is extended before operation
in DAB Mode.
To enter DAB MODE, press the
button until the DAB MODE intro
screen is displayed, alternatively press
DAB
radio
then select MAIN MENU,
then DAB from menu option list.
On power-up, Heritage will automatically perform a full scan to see
what stations are being broadcast in your area, before storing them
Scanning
Stations : 21
Scanning
alphabetically in the radio’s memory.
It may be necessary to perform a manual scan from time to time, in
order to update your radio’s station list. This may be required for any
one of the following reasons:
1. Station availability can change from time to time as new stations
appear, or existing stations cease broadcasting.
2. If reception was poor during the initial automatic scan, for
example the radio’s antenna was not completely extended,
it may be that the station list is incomplete or even empty.
3. If you have poor reception on some of the stations (resulting in
broken or poor quality audio), you may wish to list only stations that
have a strong signal strength.
To start a manual scan, press the
from the menu list.
button then select FULL SCAN
To scan for only stations that have a strong signal strength, press
then select LOCAL SCAN from the menu list.
When the scan is complete, your radio will list all available stations.
To remove stations that are listed but unavailable, press
then
choose PRUNE INVALID. When asked whether you wish to “remove all
invalid stations”, select YES.
08
Prune Invalid
This removes all invalid
stations, continue?
YES
NO
DAB RADIO MODE
SELECTING A STATION
To access your radio’s station list, press UP, DOWN or LEFT on the cursor
control at any time, alternatively press
then select STATION LIST.
Scroll through the available stations using UP and DOWN on the
cursor control then either press the select button to select your station
choice, or tap RIGHT.
Station list
Absolute
Amazing
BBC 1Xtr
BBC 6Mus
BBC Gael
FAVOURITE STATION PRESETS
Heritage allows you to store your favourite stations as presets, either
via its 5 front panel mounted ‘hot-keys’, or 10 preset buttons located
on the Heritage remote control.
To store the station you are currently listening to as a preset, simply
press and hold a preset button until “Preset Stored” is display on your
radio’s screen. The preset number that has been assigned to the
station will be displayed at the bottom of the screen.
BBC Radio 6Music
u to vote for a track that
missed out on the 6:00 AM
Music playlist
If you want to change a particular preset in the future, repeat the
process and the previously stored preset will be automatically
overwritten.
09
DAB MODE MENU OPTIONS
STATION INFO
In DAB MODE, Heritage is capable of displaying various pieces of information on
its screen. By pressing the
button, you can sequentially cycle through the
following types of information.
BBC Radio 6Music
STANDARD DAB SCREEN
Shows scrolling text info from broadcaster
Now Playing : Glasvegas
Go Square Go!
PROGRAMME TYPE
For example News, Rock Music, Classical etc.
Rock Music
MULTIPLEX AND FREQUENCY
Multiplex owner and station frequency
BBC National DAB
Freq: 225.648 MHz
SIGNAL STRENGTH
Station’s current signal strength
Signal Level : 90
BBC Radio 6Music
BBC Radio 6Music
BBC Radio 6Music
Strength
10
BBC Radio 6Music
BIT RATE AND CODEC
Audio format, sample rate, mono or stereo
Bit rate: 128 kbps
Codec : MP2
Channels : Joint Stereo
DATE
Today’s date
Today’s Date :
22/12/09
BBC Radio 6Music
DAB MODE MENU OPTIONS
DYNAMIC RANGE COMPRESSION (DRC)
If you are listening to music with a high dynamic range in a noisy
environment (for example, classical music while cooking), you may
wish to compress the audio’s dynamic range. This has the effect of
making quiet sounds louder, and loud sounds quieter.
To change the DRC setting, press
DRC
DRC Low
DRC High
DRC Off
#
then choose the DRC option,
before selecting OFF, LOW or HIGH.
STATION ORDER
It is possible to choose the order of the DAB station list to be either
ALPHANUMERIC, ENSEMBLE or VALID.
As the name implies, ALPHANUMERIC lists stations in alphanumeric
order.
ENSEMBLE lists groups of stations that are broadcast together on the
same ensemble, for example BBC or Central Scotland Local.
Station order
Alphanumeric
Ensemble
Valid
#
VALID lists valid stations first, alphanumerical, then off-air stations.
To change the station order, press
then select STATION ORDER,
before choosing either ALPHANUMERIC, ENSEMBLE or VALID.
STATION ORDER
DESCRIPTION
ALPHANUMERIC
Display all stations in alphanumeric order.
ENSEMBLE
List active stations [ones that are currently broadcasting] before inactive ones.
VALID
Remove inactive stations from the station list.
11
FM RADIO MODE
FM OPERATION
Please ensure that the radio’s antenna is extended before operation
in FM MODE.
To enter FM MODE, press the
button until the FM MODE intro
screen is displayed, alternatively press
then select MAIN MENU,
then FM from menu option list.
If this is the first time that Heritage has been used in FM MODE,
scanning will start at the beginning of the frequency range otherwise Heritage will default to the station you were listening to last.
FM
radio
87.50 MHz
Pressing the select button will start the radio scanning for the next
available station. Heritage will automatically stop scanning when a
station is found.
To fine tune, use UP or DOWN on the cursor control to
incrementally change the frequency.
When on an FM station that has a strong signal and is broadcasting
RDS information, Heritage will display the station name and other
pieces of text information on-screen.
BBC R3
Composer of the Week
Coming next - Proms
Chamber Music 2009
FAVOURITE STATION PRESETS
Heritage allows you to store your favourite stations as presets, either
via its 5 front panel mounted ‘hot-keys’, or 10 preset buttons located
on the Heritage remote control.
To store the station you are currently listening to as a preset, simply
press and hold a preset button until “Preset Stored” is display on your
radio’s screen. The preset number that has been assigned to the
station will be displayed at the bottom of the screen.
If you want to change a particular preset in the future, repeat
the process and the previously stored preset will be automatically
overwritten.
12
Preset stored
FM RADIO MODE
FM SETTINGS
Press the
button to access the FM MODE MENU. From here
you can set some FM preferences such as SCAN SETTING and AUDIO
SETTING.
SCAN SETTING allows you to decide whether the radio should stop
scanning only when it finds a station with a strong signal.
Scan setting
Audio setting
Main menu
AUDIO SETTING gives you the option of listening to a station in mono,
should the signal strength not be sufficiently strong to allow stereo
reception.
>
AUX IN MODE
AUX IN MODE allows you to play audio from an external source (such
as an MP3 player) through your radio.
To do so, connect your external audio source to the 3.5mm AUX IN
connector on the rear of Heritage.
Turn the volume down low on both Heritage and, if adjustable, the
external device.
Now press
press
until the AUX IN screen is displayed, alternatively
Auxiliary I nput
then select MAIN MENU, then choose AUX IN.
Aux in
Adjust the volume of Heritage and, if necessary, the external audio
device as required.
Audio in
Today’s Date :
15/10/09
13
iPod MODE
FITTING A DOCK ADAPTOR
Adaptor No.
iPod Model
9
iPod classic 80GB
10
iPod classic 120GB
Select the adaptor that is compatible with your iPod/iPhone using the
compatibility table on the right - each one is numbered
(see illustration 1 below).
12
iPhone
13
iPod nano (3rd generation)
15
iPhone 3G
To fit the adaptor, remove the dock dust cover before inserting the
adaptor into the recess that surrounds the dock connector
(see illustration 2 ). If a dock adaptor for your specific iPod/iPhone
model is not one of the adaptors included with your radio, please use
the adaptor supplied by Apple as part of your iPod/iPhone kit.
16
iPod touch (2nd and 3rd generation)
Heritage is supplied with a selection of dock adaptors to fit most
iPod/iPhone models.
17
iPod nano (4th generation)
18
iPod nano (5th generation)
19
iPhone 4
20
iPod touch (4th generation)
2
1
19
ENTERING iPod MODE
Connect your iPod/iPhone to the dock connector. Heritage will
automatically ask if you would like to switch to iPod mode.
Select YES or NO using the cursor control.
iPod attached switch to iPod mode?
YES
If an iPod/iPhone is already connected to Heritage, press
the iPod MODE intro screen is displayed, or press
MAIN MENU, then iPod.
14
NO
until
then select
iPod
iPod MODE
CONTROL AND PLAYBACK
Basic track control functions can be carried out by using the media
controls located on the top face of Heritage.
Pressing
will start the currently selected track. Pressing it when a
track is playing will PAUSE the current track.
Pressing
will advance to the next track. Pressing and holding will
fast-forward.
Pressing
will skip-back to the previous track. Pressing and holding
will fast-rewind.
Alternatively, your iPod/iPhone can be operated using the Heritage
remote control, which offers advanced control of menus etc.
Lastly, it is possible to control the iPod/iPhone by using the controls on
the iPod/iPhone itself.
VIDEO
Heritage is equipped with a set of composite video-out connectors,
making it possible to view iPod/iPhone movies, slideshows etc. on your
television - all directly from your radio.
To use this functionality, go to SETTINGS on your iPod/iPhone, select
VIDEO, then switch TV OUT to ON. Now set the TV SIGNAL to either PAL
or NTSC, depending on the broadcast system that your TV uses.
Should you need to buy a composite video cable, they can be
purchased directly from the Apple Store.
Composite Video-Out
15
iPod MODE
NOW PLAYING INFO
When an iPod/iPhone has been docked and the authentication process has
been completed, your radio will display the artist and track information for the
current track (if this information is stored on your iPod/iPhone).
Heritage is capable of displaying various pieces of information about the current
track and the iPod/iPhone that is connected. By pressing the
button, it is
possible to sequentially cycle through the following types of information.
STANDARD SCREEN
Shows track name and artist
iPod/iPhone TYPE
Shows model of iPod/iPhone currently connected
AUTHENTICATION STATUS
Whether authentication was successful or not
TRACK TIME
Shows track length and current position in track
As you Are
Travis
As you Are
iPod touch
As you Are
iPod touch
Authentication:
Success
As you Are
3:54
16
ALBUM TITLE
Displays album title if available
DATE
Today’s date
As you Are
The Man Who
As you Are
Today’s Date:
14/10/09
4:14
INTERNET SETUP
USING THE INTERNET RADIO SETUP WIZARD
The first time you use Heritage in INTERNET RADIO MODE, you will be
asked whether you would like to run the SETUP WIZARD. The ‘WIZARD’
will run through a series of questions, and is the simplest way to get
internet radio up and running on your device.
You can run the SETUP WIZARD again at any time, it can be found
under the NETWORK heading, in the SYSTEM SETTINGS MENU.
To set up your radio for online operation using the INTERNET WIZARD,
follow these steps:
Press the select button to select YES, and start the SETUP WIZARD
procedure.
Date/Time
1
12/24 hour format
Choose and select your preferred hour format (12 or 24 hour).
12
24 *
Auto update
2
Choose and select UPDATE FROM NETWORK.
Update from DAB
Update from FM
Update from Network
No update
*
Set Timezone
3
Scroll and select your local timezone from the menu.
UTC
UTC
UTC
UTC
UTC
+
+
+
+
+
00
00
01
01
02
:
:
:
:
:
00
30
00
30
00
: Dublin , London#
:
: Madrid , Ar
:
: Athens , Ci
Daylight savings
4
Choose and select your preferred daylight savings status.
Daylight savings
YES
NO
Wlan region
5
Scroll and select your Wlan region.
Most of Europe
USA
Canada
Spain
France
17
INTERNET SETUP
6 Scroll and select your NETWORK. In some cases your radio may find
more than one. Simply choose the one you want to use.
WIRED CONNECTIONS
SSID
Homehub
FAMILY net
[Rescan]
[Wired]
[Manual config]
If you would like to use your radio over a wired connection, rather
than a wireless one, simply choose the WIRED option from the SSID list.
Internet Radio
7 If your wireless network is not password protected, Heritage will
automatically connect, and the following screen will be displayed:
8 If you do use password protection, enter your network password using the cursor control to scroll over and select the correct
alphanumeric characters. When you have correctly entered your
password, select OK.
Last Listened
Station List
Main Menu
Key:
xxxxx
0123456789., a b
cdefghijklmnopq
rstuvwxyzABCDE
FGHIJKLMNOPQ
Select
BKSP
character.
(back space) if you have entered an incorrect
Heritage will save the password into its memory. There will be no
need to re-enter the password again.
18
>
>
BKSP
OK
CANCEL
INTERNET RADIO MODE
GETTING STARTED
To enter INTERNET RADIO MODE, press the
button until the
INTERNET RADIO MODE intro screen is displayed, alternatively press
Internet
radio
then select MAIN MENU, then INTERNET RADIO from the menu
option list.
The INTERNET RADIO MENU comprises of the following options:
My Favourites: Used to navigate to your favourite stations. These can
be set up by visiting the Frontier Silicon Radio Portal (using your PC or
Mac). See page 23 for further information.
Local: A comprehensive list of all the stations being broadcast from
within your own geographical area (or country).
BBC: Used as a shortcut to all BBC stations broadcast worldwide.
Stations: Find stations using a number of search criteria such as:
location, genre, most popular etc.
Internet radio
My Favourites
Local United Kingdom
BBC
Stations
Podcasts
>
>
>
>
>
Podcasts: Find Podcasts or ‘Listen-Again’ broadcasts by location,
genre or search by name.
My Added Stations: Shows stations that you have personally added
to your radio’s station list via the Frontier Silicon Radio Portal.
See page 23 for full details.
Help: Find your radio’s ACCESS CODE here. Required to access the
Frontier Silicon Radio Portal. See page 23.
Stations
CHOOSING A STATION
To choose a station, select STATION LIST from the INTERNET RADIO
MENU, then select STATIONS using the cursor control.
Location
Genre
Search Stations
Popular Stations
New Stations
>
>
>
>
You now have the option to choose or find a station using the
following search criteria:
LOCATION (country of origin)
SEARCH STATIONS (by name)
NEW STATIONS
GENRE
POPULAR STATIONS
19
INTERNET RADIO MODE
CHOOSING A STATION (Continued)
Using the cursor control, scroll through the options and press select
to choose your search criteria.
For example, choosing LOCATION will give you an alphabetical list of
continents/regions, and then a list of countries. Use the cursor control
to scroll through the list and press select to choose the continent,
then country. You will then be given the option of choosing
ALL STATIONS or a GENRE, to further refine your search.
Location
Africa
Asia
Caribbean
Central America
Europe
>
>
>
>
>
After selecting your search criteria, you will be presented with a list of
stations. Simply select a station from the list to begin listening.
SEARCH
You can search for an internet radio station by name (if you know it),
or by using a keyword from within its title.
To SEARCH for a station, select SEARCH STATIONS from the STATIONS
MENU, then enter a keyword using the keyboard input screen (similar
to the keyboard screen you used for password input).
Stations
ROCKF
0123456789 ABCD
EFGHIJKLMNOPQRS
TUVWXYZ
If your station is found, simply select to listen.
BKSP
OK
CANCEL
If you searched for a keyword, Heritage will list all the stations found
that contain that particular keyword. Scroll through the list and
select your station.
CHOOSING A PODCAST
BBC Radio 1
Podcasts (also referred to as ‘Listen Again’) are searched and
selected in the same way as a regular station.
BBC Radio 1
Podcasts
Select PODCAST from the INTERNET RADIO MENU, then search by
location, genre or a combination of both.
The main difference when searching for a Podcast, is that when
you have selected a station, you will then be presented with a list of
Shows (or Podcasts) available from that station.
Simply select your choice from the list.
20
Podcasts
Adam and Joe
BBC Introducing
Bruce Dickinson
Chris Hawkins
Clare McDonnell
>
INTERNET RADIO MODE
MY FAVOURITES
It is possible to compile a list (or lists) of your favourite stations,
allowing quick and easy access to a number of stations from different
countries and genres.
To do this you must first register your radio with the Frontier Silicon
Radio Portal. See the INTERNET RADIO PORTAL section on page 23.
To store a station as a favourite, press and hold the select button until
FAVOURITE ADDED appears on the screen. The chosen station will
now appear in the default favourites stations list.
To access the MY FAVOURITES list, select STATION LIST, then MY
FAVOURITES, followed by STATIONS. You can now scroll through and
select any station in the list.
Your Rock Favourites
Kerrang!
North Sea Classic rock
Rock FM
Takeover Radio
The Arrow
>
>
>
>
>
MY ADDED STATIONS
If you have added any of your own stations to the internet radio
station list (via the Frontier Silicon Radio Portal, see page 23), they will
be listed here. The MY ADDED STATIONS option can be found under
the STATION LIST MENU, in INTERNET RADIO MODE.
BBC
The BBC option is a shortcut to the entire BBC station list.
Simply select this option from the STATION LIST MENU, then scroll
through and select a station in the normal way.
BBC
BBC
BBC
BBC
BBC
BBC
Radio
Radio
Radio
Radio
Radio
1
1Xtra
2
3
3
>
>
>
>
>
LAST LISTENED
Last Listened
When you enter INTERNET RADIO MODE, the last-listened station is
automatically selected. To select another station that you’ve listened
to recently, select LAST LISTENED. A full list will be displayed (the most
recent being at the top).
Clyde 1
West FM
BBC Radio6
BBC Radio 1
Chill
>
>
>
>
>
21
INTERNET RADIO MODE
HELP
The HELP option can be found in the STATIONS LIST MENU. Under HELP,
you will find the ACCESS CODE that you require to register your radio
on the Frontier Silicon Radio Portal (see page 23 for full instructions).
Get access code
Access code
HEBZM0Z
A helpful FAQ audio track can also be found under the HELP
heading.
LOCAL
The LOCAL station list can be found under the STATION LIST MENU and
will differ depending on which country you are currently located in.
For example, if you are based in the UK, this selection will display
stations originating from the UNITED KINGDOM. Likewise, if you are
using your radio in Germany, this selection will display only stations
that are being broadcast from Germany.
Select this option to navigate either all of the available local stations,
or alternatively you can search the list by genre.
22
Local United Kingdom
All Stations
Highlighted Stations
Alternative
Ambient
Big Band
>
>
>
>
>
INTERNET RADIO PORTAL
ACCESSING ADDITIONAL FEATURES
Some of Heritage’s more advanced internet radio features can only
be accessed by visiting the Frontier Silicon Radio Portal.
In order to access these features you must first register your radio.
REGISTERING YOUR RADIO
In order to register your radio, you will need your radio’s unique
access code.
To find the access code, firstly enter INTERNET RADIO MODE, then
press
. Select STATION LIST, then HELP. Now select GET ACCESS
CODE.
Write down the access code.
Now, using your PC or Mac, visit the portal website at www.wifiradio-frontier.com
Click on the REGISTER HERE link (located on the left hand panel) to
begin the registration process.
If you already have an account and wish to add an additional
radio, log in to your account and select MY PREFERENCES, then ADD
ANOTHER Wi-Fi RADIO.
When you have registered your radio with the portal, you can
immediately take advantage of various additional features and
services that it provides.
23
SETTING UP A MUSIC SERVER
In order for Heritage to be able to play music files from a connected
computer, the computer must first be set up for media sharing.
UPnP media sharing allows devices like Heritage to play music from
a shared media library, navigating through tag menus such as Artist,
Album or Genre.
If you are running a PC with Windows Media Player 11 or later (WMP),
or an Apple Mac with OS X 10 or later and a UPnP application
installed, you can connect Heritage and stream audio.
NOTE: iTunes does not currently operate as a UPnP media server, but
there are a number of third party software add-ons available that will
allow you to access your iTunes library.
SHARING MEDIA WITH WINDOWS MEDIA PLAYER
The most common UPnP server is Windows Media Player (version11
or later) although other UPnP platforms and servers may be used.
To set up WMP for media sharing, performs the following steps:
Ensure that your PC and radio are connected to the same network.
Heritage will be recognised as ‘Heritage’ by your PC.
1 In WMP, add to the media library the audio files and folders you want
to share with Heritage (LIBRARY > ADD TO LIBRARY . . . .).
2 Make sure that the radio has access to the shared media by
selecting it and clicking ALLOW. You can also set a name for the
shared media settings.
The PC is now ready to stream music to your radio. The WMP UPnP
service runs in the background; there is no need to start WMP
explicitly.
24
SETTING UP A MUSIC SERVER
SHARING MEDIA WITH A MAC
In order to connect Heritage to your Apple Mac, a third party UPnP
server application is required. There are a number of applications
available to download from the Internet.
One such application is EyeConnect. This is an easy to install media
sharing application that enables Heritage to stream audio.
EyeConnect can be downloaded from:
http://www.elgato.com
3 Once installed, EyeConnect can be found on the System Preference
panel. When connecting Heritage, make sure EyeConnect is shown
as running on its setup screen.
Heritage will appear as ‘Jupiter 6.2’ in the EyeConnect list of devices.
The ENABLE box must be checked and the ACCESS selection set to
ENABLE NEW DEVICES.
Your Mac is now ready to stream music to your radio. EyeConnect
will normally run automatically after boot up.
25
MUSIC PLAYER MODE
PLAYING AUDIO TRACKS IN THE MUSIC PLAYER
MUSIC PLAYER MODE allows you to play audio files such as MP3s,
AACs, WMAs or FLACs directly from a computer or music server on
your local network.
To enter MUSIC PLAYER MODE, press
until the MUSIC PLAYER
MODE intro screen is displayed, alternatively press
then select
Once in music player mode, press
, then select either SHARED
MEDIA.
You can navigate your way through the list using the cursor control,
using UP and DOWN to scroll through the list, and either Push (SELECT)
or RIGHT to advance through folders. When you reach your desired
track, a short press of the select button will start the track playing, a
long press will add the track to the playlist (see PLAYLISTS on page 28
for more information).
Audio tracks can also be controlled using the
mounted on your radio’s top panel.
buttons
Pressing and holding the
button will fast-rewind the track your
are currently playing, while doing the same with the
button will
fast-forward.
26
Music player
Shared media
My playlist
Repeat play: Off
Shuffle play: Off
MAIN MENU, then MUSIC PLAYER from the menu option list.
>
>
MUSIC PLAYER MODE
SHARED MEDIA (From a UPnP Media Server)
In MUSIC PLAYER MODE select SHARED MEDIA. If you have set up
shared media (as described on page 24), you should see an entry,
for the server you set up, example “SB-Laptop: Audio”. If you have
more than one computer sharing media, the alternatives are listed.
Select the shared media you want to play.
SB-laptop: Audio
Music
Video
Pictures
Playlists
<Search>
>
>
>
>
From this point on, the menus are generated from the shared media
server (typically Windows Media Player). The first menu shows a
list of media types, for example music, video, pictures and playlists.
Heritage can only play music and playlists.
There is also a search function, which finds tracks in a similar way to
Internet radio search, as described on page 20.
Music
For music there are numerous ways of selecting tracks, including:
Genre | Artist | Album | Composer | Rating
Music
All Artists
Contributing Artists
Album Artists
Composers
>
>
>
>
>
Once you have found a track you want to play, press the select button to select. A short press plays the track immediately, while a long
press will add the track to the PLAYLIST.
Note: Tracks played in UPnP mode are SROBBLED to Last.fm, if
SCROBBLING is turned on in the Last.fm menu. For more information
about SCROBBING, see page 29.
27
MUSIC PLAYER MODE
PLAYLISTS
Heritage is capable of holding a queue of up to 500 tracks in its
playlist. Playlist tracks can be mixed from multiple UPnP servers and
USB devices. To manage the playlist, select MY PLAYLIST from the
MUSIC PLAYER MENU.
To view the contents of the playlist, scroll through it using the cursor
control. To play the playlist from a certain track, give the select
button a short press. To delete a track from the playlist, give the
select button a long press, then confirm YES to erase.
My playlist
Human
>
Just My Imagination.wma
Back At One
Can’t Fight This Feelng. . . . . .
Three birds.mp3
If you select a track/album/folder for instant playback, without using
the playlist feature, the playlist will be preserved and will continue to
be stored by your radio until you choose to delete it.
REPEAT/SHUFFLE
You can choose to repeat tracks or play them in random order by
selecting REPEAT PLAY or SHUFFLE PLAY from the MUSIC PLAYER MENU.
NOW PLAYING INFORMATION
While a track is playing, Heritage will display the track and artist
name (UPnP). There is also a progress bar with displays elapsed and
total track time.
To view further track information, press
Each time you press
.
, another piece of information is displayed
as follows:
UPnP: Track name/artist, progress bar/track times, album, codec/
sampling rate, playback buffer and today’s date.
28
Music player
Human.mp3
1:01
Music player
Letter To Me
Album:
5th Gear
3:08
LAST.FM MODE
In addition to its terrestrial and internet radio capabilities, Heritage
is also capable of providing access to online music service Last.fm.
Simply choose an artist or genre and let Last.fm build the perfect
playlist from its library of 5 million tracks – unique to you, and fresh
every time.
If you already subscribe to the service, you can use your existing
Last.fm profile on Heritage, alternatively visit www.last.fm, complete
a profile, then subscribe.
If you have a Trial Subscription Voucher, visit www.last.fm/voucher
and follow the on-screen prompts.
ADDING A USER ACCOUNT
To enter LAST.FM MODE, press
User Accounts
until the LAST.FM MODE intro
screen is displayed, alternatively press
<Add new account>
then select MAIN MENU,
then LAST.FM from the menu list.
To add an account, select LAST.FM SETUP from the menu, then select
USER ACCOUNTS.
Now select ADD NEW ACCOUNT and enter your LAST.FM user name
and password using the on-screen keyboard.
Last.fm
Station list
last.fm setup
System settings
Main menu
Search:
>
>
>
>
Rolling
0123456789., a b
cdefghijklmnopq
rstuvwxyzABCDE
FGHIJKLMNOPQ
BKSP
OK
CANCEL
SCROBBLING AND LOVE/BAN TRACKS
To get the most from LAST.FM, you can SCROBBLE all the tracks that
you’ve listened to, in both UPnP and LAST.FM modes (and even those
from an iPod or computer media server with the correct software
plug-ins). This sends track names to LAST.FM, adding them to your
library, and helps the service tailor recommendations (and neighbours) to your musical tastes. You can playback your LAST.FM library
by selecting the YOUR LIBRARY station in the LAST.FM MENU.
Last.fm
Your library
Your Recommendations
Your neighbourhood
Artist radio
Tag radio
Last.fm setup
To turn SCROBBLING ON or OFF, select LAST.FM SETUP, then
SCROBBLING, now select ON or OFF.
User Accounts
>
Scrobbling: on
Note: if you intend to let other people use Heritage in LAST.FM MODE,
you may want to turn SCROBBLING OFF. Alternatively, you could
switch to another account.
29
LAST.FM MODE
While listening to LAST.FM you can choose to LOVE or BAN tracks
(which SCROBBLES them even if SCROBBLING is set to OFF). Telling
LAST.FM that you LOVE a track will add that particular track to your
YOUR LOVED TRACKS list, allowing playback at a future time.
BANNING a track will mean it will never be played again.
Last.fm
Love
To LOVE or BAN a track press the
Ban
button and use the cursor to
select either LOVE or BAN.
The
button can be found on the top face of your radio,
or alternatively on the remote control. When listening to LAST.FM
you can choose to SKIP a track by pressing the
button. It is
not possible to PAUSE a track in LAST.FM.
Note: You can edit your library and track ratings by visiting
the LAST.FM website.
PLAYING MUSIC
There are several types of streams, or ‘radio stations’ available in LAST.
FM. To choose one, select STATION LIST from the LAST.FM MODE menu.
If you are new to LAST.FM, we recommend that you perhaps start off
with ARTIST or TAG RADIO, to allow you to be fully comfortable with
the basic features of the service.
The following options are available:
YOUR LIBRARY
Plays all the tracks SCROBBLED to your profile, or tracks by artists
you’ve added to your library. Can be edited on the LAST.FM website.
YOUR RECOMMENDATIONS
Plays tracks recommended to you based on your music profile and
that of other listeners with similar tastes.
YOUR LOVED TRACKS
Plays tracks you have rated as LOVED.
YOUR NEIGHBOURHOOD
Plays tracks from the libraries of people on LAST.FM with similar music
tastes to yours.
30
Last.fm
Your library
Your Recommendations
Your neighbourhood
Artist radio
Tag radio
LAST.FM MODE
PLAYING MUSIC (continued)
ARTIST RADIO
Plays a selection of tracks by a certain artist, together with tracks by
artists that have a similar musical style. Pick an artist by entering their
name or part of their name (you don’t have to enter the full name,
so for example to find ROLLING STONES you can just enter ROLLING),
then pick the artist from the list of search results and select OK.
Artist radio
Search:
Rolling
0123456789., a b
cdefghijklmnopq
rstuvwxyzABCDE
FGHIJKLMNOPQ
BKSP
OK
The Rolling Stones
Rolling Stones
Rolling Baba and the
Rolling Stones and Dave Matt
CANCEL
TAG RADIO
Plays a selection of tracks tagged with certain keywords. Pick a
tag word/genre by entering a word or phrase (its advisable to be
as specific as possible, for example BOLLYWOOD rather than BOLLY,
because tags are user-generated, so there tends to be many
spurious tags connected to only a few tracks, which may then give
an insufficient content error). Pick a tag from the list of search results
and select OK.
Last.fm
This Hard Land
Album:
Greatest Hits
HISTORY
Lists the tracks you have listened to recently, with the most recent
track listed first. It is not possible to select a track from this list and
listen to it again on demand.
History
Last.fm
Your Loved Tracks
Your Neighbourhood
Artist Radio
Tag Radio
History
>
Rapture by DatA from
Visions by Cut Copy from. . . .
We Are The People by E . . . . .
She’s got me dancing by. . . . .
Meddle by Little Boots f. . . . .
ON-SCREEN INFORMATION
While LAST.FM is playing, the screen will display the track name and
progress bar, with figures for elapsed and total track time. A LAST.FM
icon is shown at the bottom of the screen to signify that you are in
LAST.FM MODE.
During track playback, pressing the
button will allow you to
cycle though other pieces of information such as artist, album, track
Last.fm
This Hard Land
Artist:
Bruce Springstein
Last.fm
This Hard Land
Album:
Greatest Hits
name, radio name, codec/samplying rate, playback buffer and
today’s date.
31
ALARM CLOCK
SETTING AN ALARM
Heritage is able to store two individual alarm settings. To set or
change an alarm, either press the
button, or select MENU,
Alarms
Alarm 1: Off [06:55AM]
Alarm 2: Off [07:50AM]
then MAIN MENU, then ALARM. Select which of the ALARM SETTINGS
(Alarm 1 or Alarm 2) you would like to modify or enable.
Using the cursor control, scroll through the options below, setting your
preferences.
Alarm 1
• Enable: on/off
• Frequency: Daily, Once, Weekends or Weekdays.
• Time
• Mode: Buzzer, Internet Radio, DAB, FM or iPod or Last.fm
• Preset: Last listened or favourite station preset 1-10
• Volume: 0 - 20
Enable : Daily
Time : 7:30AM
Mode : internet radio
Preset : last listened
Volume :
6
When your preferences have been set, remember to select SAVE.
Heritage shows any active alarms by displaying an icon at the
bottom of its screen.
When in STANDBY MODE, by simply pressing the
turn any alarms held in memory ON or OFF. Pressing
button, you can
will cycle
through ALARM 1 and ALARM 2 settings, enabling, and disabling
them. If the ALARM icons are displayed, the alarm is enabled.
12/10/2009
14:30
06: 55AM
07: 50AM
If no alarm icon is shown, the alarms are switched off.
STOPPING AN ALARM
When an alarm is sounding, pressing any one of Heritage’s
buttons will STOP the alarm.
When the alarm has been cancelled, an ALARM OFF message will be
displayed on Heritage’s screen.
32
Alarm off
ALARM CLOCK
SLEEP MODE
By using the SLEEP function, you can set Heritage to automatically
switch itself into STANDBY mode. The SLEEP mode can be engaged in
one of two ways:
Set sleep time
The quickest method is via the SNOOZE BAR. Simply tap the SNOOZE
BAR to cycle through a range of pre-set SLEEP durations, from SLEEP
OFF, through 15, 30, 45 and 60 minutes.
Alternatively, press
15 MINS
then select MAIN MENU, then SLEEP. You can
now set the SLEEP timer to any one of the following pre-sets.
When you have selected a sleep duration, Heritage will return to the
MAIN MENU.
Press
to return to the NOW PLAYING screen.
SNOOZE FUNCTION
Heritage includes a SNOOZE feature and incorporates a dedicated
SNOOZE BAR, found on the top face of the radio. SNOOZE allows you
to temporarily silence the alarm for a period of up to 30 minutes.
The SNOOZE duration can only be set when your radio is actually in
the process of alarming. At this point, simply tap the SNOOZE BAR to
cycle through a range of pre-set SNOOZE durations, either 5, 10, 15 or
30 minutes.
Set snooze
5 MINS
When SNOOZE is activated, Heritage will return to standby for the set
period with the icon of the SNOOZED alarm shown on-screen.
33
SYSTEM SETTINGS
EQUALISER
Heritage provides the user with a significant degree of control over its
standard (factory default) audio settings. This includes control over
BASS and TREBLE, LOUDNESS and the ability to use one of a number of
preset EQ settings. It is also possible to create your own personalised
EQ setting - known as “My EQ”.
To adjust the audio settings , press
then select MAIN MENU,
followed by SYSTEM SETTINGS. Now select EQUALISER from the menu.
Equaliser
Classic
Pop
News
My EQ
Heritage will display a list of nine EQ options as follows:
Normal, Flat, Jazz, Rock, Movie, Classic, Pop, News and My EQ.
My EQ profile setup
>
Simply select your preference from the list by highlighting your option
and pressing the select button. Heritage will now store this setting in
its memory. For reference, the current EQ setting is highlighted by an
asterisk (*) in the EQ list.
To configure your own personal EQ setting, select MY EQ PROFILE
SETUP from the EQUALISER menu. Now adjust the BASS and TREBLE
levels, decide whether you would like the LOUDNESS function OFF or
ON - before selecting SAVE. Your personalised EQ setting can now be
selected by choosing MY EQ from the EQUALISER menu.
34
My EQ profile
Bass : 0
Treble : 0
Loudness : Off
Bass
Bass
0
dB
SYSTEM SETTINGS
NETWORK
Internet Setup
The NETWORK MENU can be found under SYSTEM SETTINGS in the
MAIN MENU and includes an entry for the INTERNET WIZARD, which
will assist you in setting up your radio’s internet connection.
Network Wizard
scanning/
For the more experienced user, a variety of manual settings can also
be accessed from here, as follows:
INTERNET WIZARD :
Simplifies the setup of your radio’s internet connection by taking you
through step-by-step instructions.
PBC WLAN SETUP :
Used to pair your radio with a router that uses WPS security.
VIEW SETTINGS :
View the MAC address, Wlan region, etc.
WLAN REGION :
Where you are using your radio - Europe, USA etc.
Internet Setup
Internet Wizard
PBC Wlan setup
View settings
Wlan region
Manual settings
>
MANUAL SETTINGS :
Detailed control of Wired and Wireless connections.
NETWORK PROFILE :
Shows the names of the last four wireless networks Heritage has been
connected to.
NOTE: Heritage remembers the last four wireless networks it has
connected to, and automatically tries to connect to whichever
one of them it can find. It’s possible however to delete unwanted
networks, simply select SYSTEM SETTINGS, then NETWORK, then
NETWORK PROFILE. Now select the network profile you’d like to
delete by selecting and confirming delete YES.
35
SYSTEM SETTINGS
TIME / DATE
Found in the SYSTEM SETTINGS menu, this menu offers you the option
of changing a number of time/date related settings. The TIME/DATE
menu has three listings as follows:
SET TIME / DATE : Allows you to manually set the time/date.
AUTO UPDATE : Choose from three different automatic setting options.
SET FORMAT : Choose whether you would like to use 12hr or 24hr
formats.
Time/Date
Set Time/Date
Auto update
Set format
Set timezone
Daylight savings
>
>
Update from DAB :
Automatically takes time/date from DAB signal. Heritage needs to
have been operated in DAB MODE (and have received a signal)
before this information can be extracted.
Auto update
Update from FM :
Sets time/date from FM broadcast. Like DAB, Heritage needs to have
been operated in FM MODE, and have received RDS information
before time/date information can be extracted.
Update from DAB
Update from Network
No update
*
Update from Network :
Takes time/date from your internet connection.
BRIGHTNESS
Heritage allows a degree of control over the brightness of its OLED
display, meaning that both its STANDBY and POWER ON brightness
levels can be independently set to either HIGH, MEDIUM or LOW
brightness levels.
To change the brightness settings, press
then select MAIN
MENU, followed by SYSTEM SETTINGS. Now select BRIGHTNESS from the
menu list. You will now be able to modify the default brightness level
settings for the two modes of operation - STANDBY and POWER ON.
Select the mode you’d like to change from these two options, then
choose your desired brightness level. Your chosen settings will be
held in memory indefinitely, but can be changed at any time.
36
Brightness
Power-On Level
Standby Level
*
SYSTEM SETTINGS
LANGUAGE
The default language on your radio is English, though 12 other
languages are supported as follows:
Danish
Norwegian
Dutch
Polish
Finnish
Portuguese
French
Spanish
German
Swedish
Italian
Turkish
Language
To change the current language setting, select SYSTEM SETTINGS from
the MAIN MENU, then LANGUAGE, then select your choice.
English
Danish
German
Italian
Norweigian
*
FACTORY RESET
By selecting FACTORY RESET from the SYSTEM SETTINGS menu, you can
reset Heritage to its default factory values, erasing any personal
settings that may have been configured (time/date, network
configuration and presets will be erased). However, Heritage’s
current software version is maintained, as is its registration with the
internet radio portal. Internet radio favourites are therefore retained,
unless you re-register your radio with another account on the portal.
Factory Reset
To perform a factory reset, press
then select MAIN MENU,
Proceed?
followed by SYSTEM SETTINGS, then FACTORY RESET. Now answer YES.
YES
NO
SOFTWARE UPDATES
From time to time we will make software updates available for your
radio. These are necessary for general maintenance reasons, as well
as for adding additional functionality to your radio. Software updates
are carried out ‘over-the-air’, via your broadband connection.
Heritage will to check for software updates each time it is switched
on, and if an update is available, will ask you to confirm that you’d
like to go ahead and commence the download.
Please note that after a software upgrade, all user settings are
maintained.
37
SYSTEM SETTINGS
SOFTWARE UPDATES (Continued)
If you’d prefer to manually check for software updates, press
then select MAIN MENU. Now choose SYSTEM SETTINGS, then
SOFTWARE UPDATES. Select AUTO-CHECK SETTING then choose NO
when prompted.
Software update
Auto-Check setting
Check now
*
To manually check for updates, select CHECK NOW from the
SOFTWARE UPDATES menu.
CAUTION: Before commencing a software upgrade, ensure that
Heritage is plugged into a stable mains power connection.
Disconnecting power during a software update may permanently
damage your radio.
System settings
Language
Factory reset
Software Update
Setup Wizard
Info
SETUP WIZARD
The SETUP WIZARD simplifies the set-up of both time/date and internet
settings, by running through a series of questions.
To access the SETUP WIZARD, press
then select MAIN MENU,
followed by SYSTEM SETTINGS. Now select SETUP WIZARD from the
menu list.
INFO
When dealing with a technical support issue, you may be asked for
the SOFTWARE VERSION or RADIO ID number. Both these pieces of
information can be found under the INFO heading, in the SYSTEM
SETTINGS menu.
Press
38
then select MAIN MENU, followed by SETTINGS, then INFO.
Info
SW version:
domino_V2.0.16.25756-5
Radio ID:
00226100C3D6
>
TROUBLESHOOTING
PROBLEM
FM: HISS
CAUSE
SOLUTIONS
Low signal strength.
Check/move antenna.
Move radio to another location.
Rescan local (high-strength)
stations only.
For DAB, check local coverage at
www.ukdigitalradio.com/coverage
DAB: ‘No stations available’
Low signal strength.
As above, then rescan stations.
Cannot connect to network
Network down.
Check that network is working
between computer and the router.
Router restricts access to listed
MAC addresses.
Obtain the Heritage MAC address
from MENU > SYSTEM SETTINGS >
NETWORK > VIEW SETTINGS and
add to router list
DAB: Burbling/Intermittent
Cut-Out
NOTE: Heritage has separate MAC addresses for
wired and wireless networks; only the current network adaptor method address is displayed, but
the other address can be obtained by changing
the first pair of digits between ‘00’ (wireless) and
‘02’ (wired)
Insufficient Wi-Fi signal strength.
Check distance to router.
See if a computer can connect to
the network in this location.
Unknown encryption method.
Change encryption method on
router. Heritage supports WEP, WPA
and WPA2.
Unusual network configuration.
Setup network manually through
MENU > SYSTEM SETTINGS >
NETWORK > MANUAL SETTINGS
Firewall preventing access.
Check the following ports are open
on the router:
UDP and TCP ports 80 and 123
DNS port 53
Windows shares: ports 135 - 139
and 445
Windows media player: varies Non-Microsoft firewalls may require
configuration for UPnP.
39
TROUBLESHOOTING
PROBLEM
Cannot connect to Internet
Cannot play particular Internet
radio station
CAUSE
SOLUTIONS
Internet connection down
Check that the Internet is working
for a computer connected to the
same network.
Firewall preventing access
Check the following ports are
open:
UDP and TCP ports 80 and 123
DNS port 53.
Some Internet radio stations may
require additional ports to be
opened.
Station not broadcasting
Overloaded or insufficient
bandwidth.
Try other stations.
Try listening on computer via
Internet radio portal website.
Try later.
Station broadcasting using
unknown codec.
Link out of date.
40
Cannot play Last.fm
‘Unauthorized’ message
Account details wrong.
Account details not entered.
Region not supported.
(Last.fm is currently restricted to
particular regions e.g. US/UK)
due to licensing issues.
Last.fm: Insufficient content to play
There are not enough tracks
available and licensed to play for
the particular artist or tag radio
station you have.
Select a different radio station.
ERROR MESSAGES
MESSAGE
DESCRIPTION
EXAMPLE
Failed to connect
Correct key entered, but router
rejects request.
MAC filtering enabled on router.
Format error
Cannot recognise file format independent of network.
Received .wma, but found that the
stream wasn’t WMA when trying to
decode.
Network error
Problem past router - incorrect
data being received from network.
Data obtained from server is
unreadable.
Network timeout
Problem past router - no response
being received from network.
Streaming IR station and suddenly
station becomes unavailable.
No UPnP media found
No UPnP servers found.
Service not available (DAB)
No DAB reception.
Unauthorised
Access not grated by UPnP server.
Update failed
Software upgrade failed.
Network not ready
problem with connection to router.
Allow access for Heritage in UPnP
server settings.
Router switched off.
41
NOTES
42
43
TECHNICAL SUPPORT
TEL - + 44 (0) 1555 666161
E-MAIL - [email protected]
WEB - www.revo.co.uk/support
“Made for iPod”, and “Made for iPhone”, means that an electronic accessory has been designed to connect specifically
to iPod or iPhone, respectively, and has been certified by the developer to meet Apple performance standards.
Version 2.0
DELUXE TISCHRADIO
geeignet zum Andocken von iPod und iPhonedock
DAB | DAB+ | FM | Internet Radio | Audio Streaming
Bedienungsanleitung
TECHNISCHE HILFE
GARANTIE
Sollten Sie bei der Nutzung dieses Produktes Probleme haben,
lesen Sie bitte das Kapitel “Problemlösungen” auf Seite 39 dieser
Bedienungsanleitung. Wahlweise können Sie auch Revos technischen
Hilfsdienst anrufen:
Revo Technologies Ltd garantiert dem Benutzer, dass dieses
Produkt nei normalem Gebrauch für die Dauer von einem
Jahr beginnend mit dem Kaufdatum frei von Material- und
Herstellungschäden sein wird. Diese Garantie deckt Betriebsausfälle
welche auf Herstellungsfehlern basieren und ist nicht anwendbar
in Fällen von versehentlich zugefügtem Schaden, normalen
Abnutzungserscheinungen und nicht durch Revo Technologies Ltd
autorisierten Veränderungen oder Reparaturen.
Vereinigtes Königreich 01555 666161
Außerhalb des Vereinigten Königreiches + 44 1555 666161
Alternativ senden Sie eine Email an [email protected] oder besuchen
Sie die Sektion „Problemlösungen auf unserer webseite
www.revo.co.uk/support.
Um Ihren Kauf zu registrieren besuchen Sie bitte die folgende
webseite: www.revo.co.uk/register
UMWELTINFORMATIONEN
URHEBERRECHT UN
DANKSAGUNGEN
INFORMATIONEN ZUR ENTSORGUNG (WEEE RICHTLINIE)
Copyright 2011 Revo Technologies Ltd. Alle Rechte vorbehalten.
Das hier und auf dem Produkt dargestellte Symbol bedeutet, dass
dieses Heritage in die Gruppe elektrischer oder elektronischer Produkte
gehört und nicht mit normalem Hausmüll oder gewerblichem Abfall
entsorgt werden darf.
Die Richtlinie 2002/96/EG über Elektro- und Elektronikaltgeräte wurde
entwickelt, um entsprechende Produkte mit den besten zur Verfügung
stehenden Wiederherstellungs- und Recyclingmethoden zu behandeln
und somit den Einfluss auf die Umwelt zu verringern. Sie regelt weiterhin
die Behandlung gefährlicher Substanzen und meidet die wachsende
Deponiemüllnutzung.
Für weitere Informationen kontaktieren Sie bitte Ihre Kommune oder
den Verkäufer bei welchem Sie das Produkt erstanden haben.
RoHS KONFORM & CE KENNZEICHNUNG
Dieses Produkt wurde entsprechend internationaler Richtlinien zur
Begrenzung gefährlicher Substanzen (RoHs) und europäischen
Anforderungen entwickelt und gestest und trägt die CE Kennzeichnung.
Es ist nicht erlaubt, Teile dieser Veröffentlichung ohne vorherige
Erlaubnis durch Revo Technologies Limited in jedweder Form
oder durch jedwede Mittel, seien diese elektronisch, mechanisch,
magnetisch, manuell oder noch andere, zu kopieren, zu verteilen, zu
vermitteln oder umzuschreiben.
REVO und HERITAGE sind Handelsmarken oder eingetragene
Warenzeichen von
Revo Technologies Ltd. iPod ist eine Handelsmarke der Apple Inc.,
registriert in den U.S.A. und anderen Ländern.
Revo Technologies Ltd
The Inox Building, Caldwellside, Lanark,
Scotland, United Kingdom, ML11 7SR
Tel: 01555 66 61 61
Fax: 01555 66 33 44
Email: [email protected]
Int. Tel: +44 1555 66 61 61
Int. Fax: +44 1555 66 33 44
Webseite: www.revo.co.uk
HAFTUNGSAUSSCHLUSS
SICHERHEITSHINWEISE
• Benutzen Sie dieses Radio nicht in der Nähe von Wasser.
• Entfernen Sie keine Schrauben oder Gehäuseteile.
ISO 7000-0434
• Nutzen Sie nur das beigefügte Netzanschlussgerät.
• Verhindern Sie, das kleine Objekte oder Flüssigkeiten in das Gerät
gelangen.
46
Revo Technologies Limited gibt keine Garantie und ist nicht
repräsentativ haftbar für die Inhalte dieser Veröffentlichung und
lehnt jedwede implizierte Mängelgewährleistung klar ab. Revo
Technologies Limited behält sich weiterhin das Recht vor, von Zeit zu
Zeit und ohne Personen oder Organisationen informieren zu müssen,
Änderungen an dieser Veröffentlichung vorzunehmen.
INHALT
WILLKOMMEN
46
Technische Hilfe
46
Umweltinformationen
46
Garantie
46
Urheberrecht und Danksagungen
46
Haftungsausschluss
Wir danken Ihnen, dass Sie sich zum Kauf dieses Heritage Radios
entschieden haben und wir sind sicher, dass es Ihnen viele
Jahre lang Freude und verlässliche Dienste geben wird. Diese
Bedienungsanleitung wurde entwickelt, um Ihnen eine schnelle
Inbetriebnahme Ihres Radios zu ermöglichen und Sie mit den
komplexeren Eigenschaften dieses Produktes vertraut zu machen.
Weiterhin bietet sie Ihnen Information zu Sicherheitsfragen,
Garantiedetails und Problemlösungen
47
Willkommen / Übersicht / Auspacken
48
Anatomie
49
Fernbedienung
50
Stromzufuhr
50
Aufbau
51
Heritage Bedienung / Menüstruktur
52 - 53
DAB Modus
54 - 55
DAB Modus Menüoptionen
56
FM Modus
57
FM Modus / AUX-IN Modus
58 - 60
iPod Modus
61- 66
Internetradiomodus
67
Internetradioportal
68 - 69
Einstellen eines Musikservers
70 - 72
Abspielmodus
73 - 75
Last.fm Modus
76 - 77
Wecker
78 - 82
Systemeinstellungen
83 - 84
Problemlösungen
85
Fehlermeldungen
86
Notizen
HERITAGE ÜBERSICHT
Heritage ist die moderne Neuinterpretation des klassischen,
europäischen Tischradios aus den 60er Jahren. Ein Multi-FormatDigitalradio, das Radiostandards wie DAB, DAB+, UKW und Wi-FiInternetradio unterstützt, aber auch kabelloses Streaming Audio bietet
und als iPod- und iPhone-Dockingstation eingesetzt werden kann.
Heritage wurde aus hochwertigsten Materialien und Bauelementen
gefertigt. Sein Gehäuse ist eine Kombination aus Aluminium und
hochwertigem amerikanischem Walnussholz. Die Audioleistung wird
von einem anwendungsspezifischen 3”-Neodym-Lautsprechertreiber
geliefert, der durch einen 7W-Verstärker angetrieben wird. Schließlich
profitiert Heritage von einem großen, grafischen OLED-Display und
einem intuitiven Steuersystem.
DAS AUSPACKEN VON
HERITAGE
Entnehmen Sie Heritage vorsichtig aus der Verpackung bevor Sie alle
weiteren Artikel aus der Box nehmen.
Die Verpackung sollte folgendes enthalten:
• Heritage Radio
• Fernbedienung
• Adapter Set zum Andocken Ihres iPod/iPhone
• Multinetzadapter zur Nutzung in verschiedenen
Ländern (UK, Euro, USA)
• Bedienungsanleitung
Sollte irgendein Artikelfehler oder beschädigt sein, wenden Sie sich bitte
an Ihren Verkäufer oder rufen Sie Revo direkt an +44 (0) 1555 66 61 61
HINWEIS: Die Verpackung Ihres Heritage sollte für zukünftige Nutzung
zurückgelegt werden. Sie ist der sicherste Weg, das Produkt bei Bedarf
zu transportieren.
47
HERITAGE ANATOMIE
Snooze/Schlafleis te
Abspielen/
Pause
Zurück
iPod/iPhone Dock
Vorwärts
Feedback
Bildschirm
Cursorsteuerung
Modus
Menü
Info
Alarm
Lautstärke
Voreingestellte Sender 1 - 5
iPod Videoausgang
Antenne
An/Aus/Standby
DC Stromanschluss
Digitalausgang (optisch)
LAN Anschluss
Aux-In
3.5 Kopfhöreranschluss
Stereo RCA Anschlüsse
48
FERNBEDIENUNG
01 - Modus
02 - Hochrollen
03 - Menü
04 - An/Aus
3
1
2
4
6
8
10
11
05 - Zurück
06 - Auswahl
5
7
07 - Vorwärts
08 - Lautstärke steigern
12
9
09 - Info
10 - Herunterrollen
13
11 - Alarm
12 - Lautstärke verringern
13 - Voreingestellte Sender 1- 10
14 - Schlaf
15
14
15 - Snooze
16 - Zurückspulen
19
16
17
18
17 - Abspielen/Pause
18 - Vorspulen
19 - Feedback (Love/Ban)
1
BATTERIEWECHSEL
Die Heritage Fernbedienung wird durch eine einzelne 3V Lithium
batterie betrieben. Abhängig vom Gebrauch hält die Batterie gut
1-2 Jahre.
2
Wechseln Sie die Batterie wenn das Aufforderungen durch Drücken
der Knöpfe schleppend ausgeführt werden oder wenn der
Betriebsbereich bedeutend geschrumpft zu sein scheint.
Tauschen Sie die Batterie mit einer neuen CR2025 Lithiumbatterie aus.
49
STROMZUFUHR (PSU)
Ihr Heritage Radio ist mit einem Mehrregionenadapter ausgestattet.
Es kann somit in verschiedenen Ländern in der ganzen Welt problemlos genutzt werden.
Wählen Sie einfach den korrekten Adapter für Ihr Land und folgen Sie
den unten angezeigten Anweisungen.
PU
SH
UK
EURO
U.S.A
AUFBAU
2 Ziehen Sie die Antenne für DAB und FM
Betrieb voll aus.
1 Nutzen Sie den beigefügten Netzadapter und verbinden Sie das eine Ende mit dem
DC Stromanschluss auf der hinteren Seite von Heritage und das andere mit einer
normalen Wandsteckdose.
3 Drücken Sie den Knopf An/Aus einmal, um den
Initialisierungsprozess zu starten.
50
BEDIENEN IHRES HERITAGE RADIOS
Zur optimalen Nutzung Ihres Radios ist es wichtig, dass Sie verstehen,
wie sein Steuer- und Menüsystem arbeitet.
CURSORKONTROLLE
Zur einfachen Handhabung verwendet Ihr Radio ein Steuersystem, das mit
einem Cursor arbeitet. Die Cursorsteuerung hat die folgenden fünf Funktionen:
HOCH
RUNTER
LINKS
RECHTS
DRÜCKEN
Rollt Hoch
Rollt Herunter
Rollt nach links und geht in Menüs zurück
Rollt nach rechts und geht in Menüs vorwärts
Wählt gegenwärtige Option
JOYSTICK
DIE MENÜTASTE
Drücken der
‘ HOCH’
Menütaste ruft das Modusmenü für den
Operationsmodus auf, in welchem Sie sich gerade befinden. Drücken
Sie die
Menütaste zum Beispiel im DAB Modus, wird das DAB
Modusmenü aufgerufen. Ein zweites drücken der
Menütaste
bringt Sie zurück zum vorherigen ‚Abspielbildschirm‘.
‘LINKS’
(ZURÜCK)
SELECT
‘RECHTS’
(VORWÄRTS)
DIE MODUSTASTE
‘DRÜCKEN’
(ZUR AUSWAHL)
Drücken der MODUS Taste ruft einen sequenziellen Ablauf durch
alle Heritage Operationsmodi auf. Es ist auch möglich, mit Hilfe des
HAUPTMENÜS (siehe unten) durch die Operationsmodi zu wechseln.
‘RUNTER’
DIE MENÜSTRUKTUR ERKLÄRT
HAUPTMENÜ
MODUSMENÜS
Dies ist das prinzipielle (auf höchster Ebene) Heritage Menü, es
ermöglicht Ihnen das Betreten verschiedener Operationsmodi, das
Ändern von Einstellungen und das Ansehen von Informationen wie
die ID Nummer und die Softwareversion Ihres Radios.
Das Hauptmenü ermöglicht Zugang zu den folgenden Modi und
Untermenüs:
Die Modusmenüs erhalten Ihren Namen von der Tatsache, dass Sie
die zugänglichen Funktionen in einem gegenwärtig ausgewählten
Modus anzeigen.
•
•
•
•
•
Internetradio
Musik abspielen
Last.fm
DAB Radio
FM Radio
•
•
•
•
iPod
Kopfhöhrereingang
Alarm und Weckfunktionen
Systemeinstellungen
Drücken der
Menütaste wird Ihnen zu jeder Zeit in das Modus-
menü desjenigen Modus aufrufen, welchen Ihr Radio gegenwärtig
nutzt.
Jedes Modusmenü beinhaltet auch den Listenpunkt HAUPTMENÜ,
mit welchem Sie in dieses zurückkehren.
51
DAB RADIOMODUS
DAB BEDIENUNG VORBEREITEN
Bitte stellen Sie sicher, dass die Radioantenne ausgezogen ist, bevor
Sie die Benutzung im DAB Modus beginnen.
Um den DAB MODUS zu betreten, drücken Sie die
Modustaste
DAB
bis der Einführungsbildschirm des DAB MODUS angezeigt wird. Alternativ können Sie auch die
radio
Menütaste drücken, das HAUPTMENÜ
betreten und in diesem DAB aus der Optionsliste wählen.
Scanning
Beim Einschalten führt Heritage automatisch einen Vollscan der
verfügbaren Sender durch und speichert diese dann in alfabetischer
Reihenfolge.
Stations : 21
Scanning
Es kann nötig sein, von Zeit zu Zeit eine manuelle Suchabfrage durchzuführen, um die Senderliste Ihres Radios aktuell zu halten. Dies kann
in den folgenden Situationen möglich sein:
1. Die Verfügbarkeit eines Senders kann sich ändern, da neue Sender
entstehen oder existierende Sender abgeschafft werden.
2. Ist während des anfänglichen automatischen Vollscans der
Empfang schlecht, weil z.B. die Radioantenne nicht komplett
ausgezogen war, kann die Senderliste inkomplett oder sogar leer sein.
3. Sollte bestimmte Sender eine schlechte Empfangsqualität aufweisen (beschädigte oder schlechter Audioqualität), wollen Sie vielleicht
nur Sender speichern, welche ein starkes Empfangssignal haben..
Um eine manuelle Suchabfrage zu beginnen, drücken Sie die
Menütaste und wählen Sie VOLLSCAN aus der Menüliste.
Um nur nach Sendern zu suchen , welche eine starkes Empfangssignal aufweisen, drücken Sie LOKALE SUCHABFRAGE in der Menüliste.
Ist die Suchabfrage vollständig durchgeführt, listet Ihr Radio alle
verfügbaren Sender auf.
Um aufgelistete aber nicht verfügbare Sender zu löschen, drücken
Sie die
Menütaste. Dann wählen Sie UNGÜLTIGE AUSSCHNEIDEN
und beantworten Sie „Wollen Sie alle ungültigen Sender löschen“
mit Ja.
52
Prune Invalid
This removes all invalid
stations, continue?
YES
NO
DAB RADIOMODUS
SENDERAUSWAHL
Um zu Ihrer Radiosenderliste zu gelangen, können Sie jederzeit
UP, DOWN oder LEFT auf der Cursorsteuerung drücken. Alternativ
drücken Sie
und wählen dann STATION LIST aus.
Scrollen Sie durch die verfügbaren Sender, indem Sie UP und DOWN
auf der Cursorsteuerung drücken. Dann drücken Sie entweder die
Auswahltaste oder RIGHT, um Ihre Senderauswahl zu treffen.
Station list
Absolute
Amazing
BBC 1Xtr
BBC 6Mus
BBC Gael
VOREINSTELLEN BEVORZUGTER SENDER
Heritage gibt Ihnen die Möglichkeit, Ihre Lieblingssender voreinzustellen. Dies ist entweder über die 5 Schnelltasten auf der Vorderseite
des Gerätes möglich, oder Sie benutzen die 10 Schnelltasten auf der
Heritage Fernbedienung.
Um den Sender, welchen Sie gegenwärtig anhören als vorreingestellt
zu speicher, drücken und halten Sie einfach eine der Schnelltasten
bis „Voreinstellung gespeichert“ auf dem Bildschirm angezeigt wird.
Die dem voreingestellten Sender zugeordnete Nummer wird auf dem
unteren Rand des Bildschirms angezeigt.
BBC Radio 6Music
u to vote for a track that
missed out on the 6:00 AM
Music playlist
Sollten Sie zu einem späteren Zeitpunkt einen bestimmten voreingestellten Sender ändern wollen, wiederholen Sie einfach den oben
erläuterten Ablauf und der vorher eingestellte Sender wird automatisch gelöscht.
53
DAB MODUS MENÜOPTIONEN
SENDERINFORMATIONEN
Im DAB MODUS kann Heritage verschiedene Informationen auf seinem Bildschirm
anzeigen. Durch drücken der
Infotaste können Sie in Reihenfolge durch die
folgenden Informationen wechseln:
BBC Radio 6Music
STANDARD DAB ANZEIGE
Zeigt Rolltextinformationen der Sendeanstalt
Now Playing : Glasvegas
Go Square Go!
PROGRAMMTYP
Zum Beispiel News, Rock Music, Klassisch etc.
Rock Music
MULTIPLEX UND FREQUENZ
Multiplex Besitzer und Sendefrequenz
BBC National DAB
Freq: 225.648 MHz
SIGNALSTÄRKE
Gegenwärtige Signalstärke
Signal Level : 90
BBC Radio 6Music
BBC Radio 6Music
BBC Radio 6Music
Strength
54
BBC Radio 6Music
BITRATE UND CODEC
Audioformat, Abtastrate, Mono oder Stereo
Bit rate: 128 kbps
Codec : MP2
Channels : Joint Stereo
DATUM
Heutiges Datum
Today’s Date :
22/12/09
BBC Radio 6Music
DAB MODUS MENÜOPTIONEN
Kompression des Lautstärkeumfangs (Dynamic Range Controll)
Wenn Sie Musik mit einem hohen Lautstärkeumfang in einer geräuschvollen Umgebung hören (z.B. klassische Musik beim Kochen),
kann es sein dass Sie wünschen, den Lautstärkeumfang der Musik zu
komprimieren. Dies hat den Effekt, dass leise Töne lauter
wiedergegeben werden und laute Töne leiser klingen.
Um die DRC Einstellung zu ändern, drücken Sie die
DRC
DRC Low
DRC High
DRC Off
#
Menütaste
und wählen Sie dann die DRC Option in welcher Sie AUS, NIEDRIG
oder HOCH wählen.
SENDERREIHENFOLGE
Es ist möglich die Reihenfolge, in welcher die DAB Sender angezeigt
werden, entsprechend den folgenden Kriterien zu wählen:
ALPHANUMERISCH, ENSEMBLE oder VERFÜGBAR.
Wie der Name andeutet, listet ALPHANUMERISCH die Sender in
alphanumerischer Reihenfolge auf.
Station order
Alphanumeric
Ensemble
Valid
#
ENSEMBLE listet Sendergruppen auf, welche zusammen von derselben Funkanstalt gesendet werden (z.B. BBC, Central Scotland
Local).
VERFÜGBAR zeigt erst alle verfügbaren in alphanumerischer
Reihenfolge an und listet dann alle nicht verfügbaren Sender auf.
Um die Senderreihenfolge zu ändern, drücken Sie die
Menütaste
und wählen Sie dann SENDERREIHENFOLGE. Dort wählen Sie nun
zwischen ALPHANUMERISCH; ENSEMBLE oder VERFÜGBAR.
SENDERREIHENFOLGE
BESCHREIBUNG
ALPHANUMERISCH
Zeigt alle Sender in alphanumerischer Reihenfolge an.
ENSEMBLE
Zeigt verfügbar Sender [welche gegenwärtig senden] vor nicht verfügbaren.
VERFÜGBAR
Entfernt inaktive Sender aus der Senderliste.
55
FM RADIOMODUS
FM BEDIENUNG
Bitte stellen Sie sicher, dass die Radioantenne ausgezogen ist, bevor
Sie die Nutzung im FM MODUS beginnen.
Um den DAB MODUS zu betreten, drücken Sie die
Modustaste
FM
radio
bis der Einführungsbildschirm des FM MODUS angezeigt wird. Alternativ können Sie auch die
Menütaste drücken, das HAUPTMENÜ
betreten und in diesem FM aus der Optionsliste wählen.
Wenn Sie Heritage das erste Mal im FM MODUS benutzen, beginnt
ein Vollscan ab der ersten Frequenzspanne. Ansonsten stellt Heritage
automatisch den Sender ein, welchen Sie zuletzt gehört haben.
87.50 MHz
Durch Drücken der Auswahltaste startet das Radio den Suchlauf
nach dem nächsten verfügbaren Sender. Heritage unterbricht den
Suchlauf automatisch, wenn ein Sender gefunden wurde.
Zur Feineinstellung verwenden Sie UP oder DOWN auf der Cursorsteuerung, um die Frequenz stufenweise zu ändern.
Wird ein FM Sender wiedergegeben, der ein starkes Sendesignal aufweist und welcher RDS Informationen sendet, zeigt Heritage auf dem
Bildschirm den Sendernamen und andere Textinformationen an.
BBC R3
Composer of the Week
Coming next - Proms
Chamber Music 2009
VOREINSTELLEN BEVORZUGTER SENDER
Heritage gibt Ihnen die Möglichkeit, Ihre Lieblingssender voreinzustellen. Dies ist enweder über die 5 Schnelltasten auf der Vorderseite
des Gerätes möglich, oder Sie benutzen die 10 Schnelltasten auf der
Heritage Fernbedienung.
Um den Sender, welchen Sie gegenwärtig anhören als voreingestellt
zu speichern, drücken und halten Sie einfach eine der Schnelltasten
bis „Voreinstellung gespeichert“ auf dem Bildschirm angezeigt wird.
Die dem voreingestellten Sender zugeordnete Nummer wird auf dem
unteren Rand des Bildschirms angezeigt.
Sollten Sie zu einem späteren Zeitpunkt einen bestimmten voreingestellten Sender ändern wollen, wiederholen Sie einfach den oben
erläuterten Ablauf und der vorher eingestellte Sender wird automatisch gelöscht.
56
Preset stored
FM RADIOMODUS
FM EINSTELLUNGEN
Drücken Sie die
Menütaste, um das FM MODUSMENÜ zu
betreten. Hier können Sie FM Optionen wie SCANEINSTELLUNG und
AUDIOEINSTELLUNG bestimmen.
SCANEINSTELLUNG erlaubt es Ihnen zu entscheiden, ob das Radio
nur dann eine Suchabfrage beenden soll, wenn es einen Sender mit
starkem Signal gefunden hat.
Scan setting
Audio setting
Main menu
>
AUDIOEINSTELLUNG gibt Ihnen die Möglichkeit, einen Sender in Mono
anzuhören, sollte die Sendestärke nicht groß genug sein, um einen
Stereoempfang zu ermöglichen.
AUX-IN MODUS
Der AUX-IN MODUS erlaubt Ihnen die Audiowiedergabe von einer
externen Quelle (z.B. MP3 Player) über Ihr Radio.
Um dies zu tun, verbinden Sie die externe Audioquelle mit dem
3.5mm Aux-In Eingang auf der Rückseite Ihres Heritage
Stellen Sie die Lautstärke an Heritage und, wenn möglich, dem
externen Gerät leise.
Drücken Sie nun die
Modustaste, bis der Aux-In Bildschirm
angezeigt wird. Alternativ können Sie die
Auxiliary I nput
Menütaste drücken,
Hauptmenü auswählen und in diesem dann AUX-In wählen.
Aux in
Audio in
Today’s Date :
15/10/09
Passen Sie die Lautstärke von Heritage und, wenn nötig, die des
externen Gerätes entsprechend an.
57
iPod MODUS
ANBRINGEN EINES DOCKADAPTERS
Adaptor No.
iPod Model
9
iPod classic 80GB
10
iPod classic 120GB
Wählen Sie den Adapter aus, der mit Ihrem iPod/iPhone kompatibel
ist. Nutzen Sie hierfür die Kompatibilitätstabelle auf der rechten
Seite – jeder Adapter ist nummeriert (Siehe Abbildung 1 unten).
12
iPhone
13
iPod nano (3rd generation)
15
iPhone 3G
Um den Adapter einzupassen, entfernen Sie die Dock-Staubabdeckung,
bevor Sie den Adapter in die Aussparung, die die Dock-Anschlussstelle
umgibt, einsetzen (siehe Abbildung 2 ). Sollte sich der Dock-Adapter
für Ihr spezielles iPod-/iPhone-Modell nicht unter den Adaptern, die mit
Ihrem Radio mitgeliefert wurden, befinden, verwenden Sie bitte den
Adapter, der zum Apple-Zubehörset Ihres iPod/iPhone gehört.
16
iPod touch (2nd and 3rd generation)
Mit dem Heritage wird eine Auswahl an Dock-Adaptern, die für die
meisten iPod-/iPhone-Modelle passen, mitgeliefert.
17
iPod nano (4th generation)
18
iPod nano (5th generation)
19
iPhone 4
20
iPod touch (4th generation)
2
1
19
DEN iPod MODUS BETRETEN
Schließen Sie Ihren iPod / Ihr iPhone an die Dock-Anschlussstelle an.
Ihr Heritage-Radio wird Sie automatisch fragen, ob Sie auf den iPodModus umschalten wollen. Unter Zuhilfenahme der Cursorsteuerung
wählen Sie bitte YES oder NO aus.
iPod attached switch to iPod mode?
YES
NO
Wenn ein iPod/iPhone bereits an Ihr Heritage-Radio angeschlossen
ist, drücken Sie
bis der iPod MODE auf dem Intro-Bildschirm
angezeigt wird, oder drücken Sie
und anschließend iPod aus.
58
und wählen Sie MAIN MENU
iPod
iPod MODUS
KONTROLLE UND WIEDERGABE
Die grundlegenden Kontrollfunktionen können mit den Kontrolltasten
auf der Oberseite Ihres Heritage durchgeführt werden.
Das Drücken von
startet den gegenwärtig ausgewählten Titel.
Drücken Sie diese Taste während ein Titel abgespielt wird, halten Sie
diesen an.
Durch Drücken von
springen Sie zum nächsten Titel. Durch
Drücken und Halten dieser Taste, spulen Sie schnell vor.
Durch Drücken von
springen Sie zum vorherigen Titel. Durch
Drücken und Halten dieser Taste, spulen Sie schnell zurück.
Alternativ können Sie Ihren iPod / Ihr iPhone unter Zuhilfenahme der
Heritage-Fernbedienung, die eine erweiterte Steuerung des Menüs
usw. bietet, bedienen.
Schließlich ist es möglich, den iPod / das iPhone mit Hilfe der Bedienelemente auf dem iPod/iPhone zu bedienen.
VIDEO
Heritage ist mit einem Satz Composite Video-Ausgangssteckern ausgestattet, durch die es möglich ist, iPod/iPhone Filme, Diashows usw.
auf Ihrem Fernseher anzusehen, alles direkt von Ihrem Radio aus.
Um diese Funktionalität zu nutzen, gehen Sie zu SETTINGS auf Ihrem
iPod/iPhone, wählen Sie dann VIDEO und schalten Sie anschließend
von TV OUT auf ON um. Stellen das TV SIGNAL nun entweder auf
PAL oder NTSC ein. Dies hängt davon ab, welche Fernsehnorm Ihr
Fernsehgerät verwendet.
Gemischter Videoausgang
Sollte der Kauf eines Composite Video-Kabels notwendig werden,
können Sie dieses direkt beim Apple Store erwerben.
59
iPod MODUS
ABSPIELINFORMATION
Wird ein iPod mit dem Radio verbunden und der Erkennungssprozess ist abgeschlossen, zeigt Ihr Radiobildschirm den Künstlernamen und die Titelinformationen für den
wiedergegebenen Titel an (gesetzt dem Fall, diese Informationen sind auf Ihrem iPod
gespeichert).
Heritage ist es möglich, verschiedene Informationen über den gegenwärtig wiedergegebenen Titel und den verbundenen iPod anzuzeigen. Durch Drücken der
Infotaste ist es möglich, in Reihenfolge durch die folgenden Informationen zu wechseln
STANDARBILDSCHIRM
Zeigt Titelname und Künstler
VERBUNDENER iPod TYP Zeigt das Model des verbundenen iPods
ERKENNUNGSSTATUS
Zeigt an, ob die Erkennung erfolgreich war.
TITELLÄNGE Zeigt die Titellänge und den gegenwärtigen Abspielstatus
As you Are
Travis
As you Are
iPod touch
As you Are
iPod touch
Authentication:
Success
As you Are
3:54
60
As you Are
ALBUMTITEL Gibt den Albumtitel wieder (wenn verfügbar)
The Man Who
DATUM
Today’s Date:
14/10/09
Heutiges Datum
As you Are
4:14
INTERNETEINSTELLUNGEN
VERWENDEN DES INTERNETRADIO-INSTALlATIONSASSISTENTEN
Wenn Sie zum ersten Mal Ihr Heritage-Radio im INTERNET RADIO MODE
verwenden wollen, werden Sie gefragt, ob Sie den SETUP WIZARD
(Installationsassistenten) starten wollen. Der ‘WIZARD’ wird Sie durch
eine Reihe von Fragen leiten. Dies ist der einfachste Weg, Zugang zum
Internetradio zu bekommen und es auf Ihrem Gerät laufen zu lassen.
Sie können den SETUP WIZARD jederzeit erneut starten. Sie können
ihn unter der Überschrift NETWORK im SYSTEM SETTINGS MENU finden.
Um Ihr Radio mit Hilfe des INTERNET WIZARD für den Online-Betrieb
einzurichten, müssen Sie die folgenden Schritte durchführen:
Drücken Sie die Auswahltaste, um YES auszuwählen und den SETUP
WIZARD Vorgang zu starten
Date/Time
1
12/24 hour format
Wählen und bestätigen Sie Ihr bevorzugtes Stundenformat (12 oder 24).
12
24 *
Auto update
2
Wählen und bestätigen UPDATE AUS DEM NETZWERK.
Update from DAB
Update from FM
Update from Network
No update
*
Set Timezone
3
Scrollen Sie im Menü durch die Zeitzonen und bestätigen Sie Ihre lokale Zeitzone.
UTC
UTC
UTC
UTC
UTC
+
+
+
+
+
00
00
01
01
02
:
:
:
:
:
00
30
00
30
00
: Dublin , London#
:
: Madrid , Ar
:
: Athens , Ci
Daylight savings
4
Wählen und bestätigen Ihren bevorzugten Zeitumstellungsstatus.
Daylight savings
YES
NO
Wlan region
5
Scrollen Sie durch die Regionen und wählen Sie Ihre Wlan-Region
Most of Europe
USA
Canada
Spain
France
61
INTERNETEINSTELLUNGEN
6 Scrollen Sie durch die Möglichkeiten und wählen Sie Ihr NETZWERK. In
einigen Fällen kann es sein, dass Ihr Radio nicht mehr als ein Netzwerk
findet. Wählen Sie einfach das Netzwerk, welches Sie bevorzugen.
KABELVERBINDUNGEN
SSID
Homehub
FAMILY net
[Rescan]
[Wired]
[Manual config]
Sollten Sie Ihr Radio über eine Kabelverbindung nutzen wollen,
wählen Sie einfach KABEL aus der SSID Liste.
7 Ist Ihr kabelloses Netzwerk nicht mit einem Passwort geschützt, wird
Heritage sich automatisch mit diesem verbinden und den folgenden
Bildschirm anzeigen:
8 Wenn Sie einen Passwort-Schutz verwenden, geben Sie Ihr NetzwerkPasswort ein, indem Sie mit der Cursorsteuerung durch die alphanummerischen Zeichen scrollen und diese auswählen. Wenn Sie Ihr
Passwort korrekt eingegeben haben, drücken Sie OK.
Wählen Sie BKSP (Zurück), sollten Sie ein inkorrektes Zeichen
eingegeben haben.
Heritage wird das Passwort speichern. Es wird nicht nötig sein, das
Passwort erneut einzugeben.
62
Internet Radio
Last Listened
Station List
Main Menu
>
>
Key:
xxxxx
0123456789., a b
cdefghijklmnopq
rstuvwxyzABCDE
FGHIJKLMNOPQ
BKSP
OK
CANCEL
INTERNETRADIOMODUS
VORBEREITUNG
Um den INTERNETRADIOMODUS zu betreten, drücken Sie die
Modustaste bis INTERNETRADIOMODUS auf dem Bildschirm
angezeigt wird. Alternativ drücken Sie die
Internet
radio
Menütaste, wählen
Sie HAUPTMENÜ und wählen Sie dann INTERNETRADIO aus der Liste
der Menüoptionen.
Das INTERNETRADIOMENÜ beinhaltet die folgenden Optionen:
Meine Favoriten: Ermöglicht es Ihnen, durch Ihre Lieblingssender zu
navigieren. Diese können durch einen Besuch des Frontier Silicon
Radioportals (mit Hilfe Ihres PCs oder Macs) eingestellt werden.
Vergleichen Sie Seite 23 für weitere Informationen.
Lokal: Eine verständliche Liste aller in Ihrem Gebiet (oder Land)
gesendeten Sender.
BBC: Eine Abkürzung für alle weltweit gesendeten BBC Sender.
Internet radio
My Favourites
Local United Kingdom
BBC
Stations
Podcasts
>
>
>
>
>
Sender: Finden Sie Sender mit Hilfe einer Reihe von Suchkriterien wie
z.B.: Lage, Genre, Beliebtheitsgrad etc.
Podcasts: Finden Sie Podcasts oder Sendungen zum ‘Erneut Anhören’
über Lage, Genre oder namentliche Suche.
Meine gespeicherten Sender: Zeigt Sender die Sie persönlich mit
Hilfe des Frontier Silicon Radioportals zur Senderliste Ihres Radios
hinzugefügt haben. Vergleichen Sie S. 23 für Details.
Hilfe: Hier finden Sie den ZUGANGSCODE Ihres Radios. Dieser ist nötig,
um das Frontier Silicon Radioportal zu betreten. Vgl. S. 23.
EINENSENDER AUSWÄHLEN
Stations
To choose a station, select STATION LIST from the INTERNET RADIO
MENU, then select STATIONS using the cursor control.
Location
Genre
Search Stations
Popular Stations
New Stations
>
>
>
>
Sie haben nun die Möglichkeit, einen Sender mit Hilfe der folgenden
Suchkriterien zu wählen oder zu finden:
LAGE (Ursprungsland)
SENDERSUCHE (nach Name)
GENRE
BELIEBTE SENDER NEUE SENDER
63
INTERNETRADIOMODUS
EINEN SENDER AUSWÄHLEN (Fortsetzung)
Mit Hilfe des cursor, scrollen Sie nun durch die Optionen. Drücken Sie
den cursor um Ihr gewünschtes Suchkriterium auszuwählen.
Wenn Sie beispielsweise LOCATION auswählen, erscheint eine
alphabetische Liste der Kontinente/Regionen und dann eine Liste
der Länder. Verwenden Sie die Cursorsteuerung, um durch die Liste
zu scrollen und drücken Sie “select”, um den Kontinent und dann das
Land auszuwählen. Ihnen wird daraufhin die Möglichkeit gegeben, ALL
STATIONS oder ein GENRE zu wählen, um die Suche weiter zu verfeinern.
Location
Africa
Asia
Caribbean
Central America
Europe
>
>
>
>
>
Nachdem Sie die besten Suchkriterien ausgewählt haben, wird
Ihnen eine Senderliste angezeigt. Um einen dieser Sender anzuhören,
wählen Sie diesen einfach von Liste.
SUCHE
Sie können einen Internetradiosender nach dem Namen (wenn Sie
diesen kennen) oder durch die Nutzung bestimmter Schlüsselwörter
des Titels suchen.
Um einen Sender zu SUCHEN, wählen Sie SENDER SUCHEN aus dem
SENDERMENÜ und geben Sie dann ein Schlüsselwort über den
Eingabebildschirm ein (ähnlich der Passworteingabe).
Stations
ROCKF
0123456789 ABCD
EFGHIJKLMNOPQRS
TUVWXYZ
Wird der Sender gefunden, wählen Sie diesen zum Anhören einfach
aus.
BKSP
OK
CANCEL
Haben Sie mit Hilfe eines Schlüsselwortes eine Suchabfrage gestartet,
listet Heritage alle Sender auf, die dieses bestimmte Wort enthalten.
Scrollen Sie durch die Liste und t Sie einen Sender.
EINEN PODCAST AUSWÄHLEN
Podcasts (auch ‘Erneut Anhören’ genannt) werden nach denselben
Kriterien gesucht und ausgewählt, wie normale Sender.
BBC Radio 1
BBC Radio 1
Podcasts
Wählen Sie PODCAST aus dem INTERNETRADIOMENÜ und suchen Sie
nach Lage, Genre oder einer Kombination aus beidem.
Der Hauptunterschied bei der Suche nach einem Podcast ist, dass
Ihnen nach der Wahl eines Senders eine Liste mit verfügbaren
Sendungen (Podcasts) angezeigt wird.
Wählen Sie einfach die gewünschte Sendung aus der Liste.
64
Podcasts
Adam and Joe
BBC Introducing
Bruce Dickinson
Chris Hawkins
Clare McDonnell
>
INTERNETRADIOMODUS
MEINE FAVORITEN
Es ist möglich, eine oder mehrere Listen mit Ihren Lieblingssendern
anzulegen und Ihnen somit einen schnellen und einfachen Zugang
zu einer bestimmten Anzahl von Sendern aus verschiedenen Ländern
und Genres zu beschaffen.
Für diese Option müssen Sie zuerst Ihr Radio im Frontier Silicon
Radioportal registrieren. Vergleichen Sie hierzu die Sektion
INTERNETRADIOPORTAL auf Seite 23.
Um einen Sender als Ihren Lieblingssender abzuspeichern, drücken
und halten Sie die Auswahltaste bis FAVOURITE ADDED auf dem
Bildschirm erscheint. Der ausgewählte Sender erscheint nun in der
Standardsenderliste Ihrer Lieblingssender.
Um die Liste unter MEINE FAVORITEN zu betreten, wählen Sie
SENDERLISTE, MEINE FAVORITEN und zuletzt SENDER. Sie können nun
durch die Liste scrollen und einen Sender aus dieser wählen.
Your Rock Favourites
Kerrang!
North Sea Classic rock
Rock FM
Takeover Radio
The Arrow
>
>
>
>
>
MEINE GESPEICHERTEN SENDER
Wenn Sie der Internetradiosenderliste selbst Sender über das Frontier
Silicon Radioportal (vgl. S. 23) hinzugefügt haben, werden diese hier
aufgelistet. Die Option MEINE GESPEICHERTEN SENDER kann unter
dem Menü SENDERLISTE im INTERNETRADIOMODUS gefunden werden.
BBC
Die Option BBC ist eine Abkürzung zur kompletten BBC Senderliste.
Wählen Sie einfach diese Option aus dem Menü SENDERLISTE,
scrollen Sie durch die Sender und treffen Sie Ihre Auswahl.
BBC
BBC
BBC
BBC
BBC
BBC
Radio
Radio
Radio
Radio
Radio
1
1Xtra
2
3
3
>
>
>
>
>
ZULETZT GEHÖRT
Last Listened
Wenn Sie den INTERNETRADIOMODUS betreten, wird automatisch der
zuletzt gehörte Sender wiedergegeben. Um einen anderen kürzlich
gehörten Sender auszuwählen, wählen Sie ZULETZT GEHÖRT. Eine
volle Liste wird angezeigt, bei der die zuletzt gehörten Sender zuerst
angezeigt werden.
Clyde 1
West FM
BBC Radio6
BBC Radio 1
Chill
>
>
>
>
>
65
INTERNETRADIOMODUS
HILFE
Die Option HILFE kann im Menü SENDERLISTE gefunden werden. Unter
HILFE finden Sie den ZUGANGSCODE, welchen Sie zur Registrierung
Ihres Radios im Frontier Silicon Radioportal benötigen (vgl. S. 23 für
eine komplette Anleitung).
Get access code
Access code
HEBZM0Z
Unter HILFE finden Sie außerdem einen hilfreichen Audiotitel zu häufig
gestellten Fragen.
LOKAL
Die LOKALE Senderliste kann unter dem Menü SENDERLISTE gefunden
werden und ist abhängig von dem Land, in welchem Sie sich gerade
befinden. Beispiel: Befinden Sie sich im Vereinigten Königreich, wird
eine Auswahl Sender aus diesem Gebiet angezeigt. Befinden Sie sich
in Deutschland, werden nur Sender angezeigt, die in Deutschland
gesendet werden.
Wählen Sie diese Option entweder um durch alle lokalen Sender
zu navigieren oder suchen Sie alternative nach einem bestimmten
Genre.
66
Local United Kingdom
All Stations
Highlighted Stations
Alternative
Ambient
Big Band
>
>
>
>
>
INTERNETRADIOPORTAL
ZUGRIFF AUF ZUSÄTZLICHE FEATURES
Einige von Heritages erweiterten Internetradioeigenschaften können
nur durch einen Besuch des Frontier Silicon Radioportals genutzt
werden.
Um diese Feature zu benutzen, müssen Sie Ihr Radio erst registrieren.
REGISTRIERUNG IHRES RADIOS
Um Ihr Radio zu registrieren, benötigen Sie den spezifischen Zugangscode Ihres Radios.
Um diesen Zugangscode zu finden, betreten Sie zuerst den INTERNETRADIOMODUS. Drücken Sie nun die
Menütaste, wählen
Sie SENDERLISTE und dann HILFE. Wählen Sie nun ZUGANGSCODE
ERHALTEN.
Notieren Sie sich den Zugangscode.
Mit Hilfe Ihres PCs oder Macs besuchen Sie nun die Webseite des
Portals - www.wifiradio-frontier.com
Klicken Sie auf den Link HIER REGISTRIEREN (auf der linken Seite) und
beginnen Sie den Registrierungsprozess.
Wenn Sie schon ein Mitgliedskonto haben und ein neues Radio
hinzufügen möchten, loggen Sie sich ein und wählen Sie MEINE
PRÄFERENZEN. Wählen Sie nun EIN WEITERES WI-FI RADIO HINZUFÜGEN.
Wenn Sie Ihr Radio im Portal registriert haben, können Sie sofort dessen verschiedene Feature und Leistungen in Anspruch nehmen.
67
EINEN MUSIKSERVER EINRICHTEN
Damit Heritage in der Lage ist Musikdateien von einem Computer
abzuspielen, muss zuerst der Computer für die geteilte Nutzung von
Mediadateien vorbereitet warden.
UPnP Media Sharing macht es Geräten wie Heritage möglich, Musik
aus einer gemeinsam genutzten Mediabibliothek abzuspielen und
durch Untermenüs wie Künstler, Album oder Genre zu navigieren.
Wenn Sie eine UPnP Applikation installiert haben und einen PC mit
Windows Media Player 11 oder älter (WMP) oder einen Apple Mac
mit OS X 10 oder älter benutzen, können Sie Heritage mit diesem
Verbinden und Audio im Streaming abspielen.
HINWEIS: iTunes arbeitet gegenwärtig noch nicht als UPnP Mediaserver aber es existieren eine Anzahl von Add-on Softwares von
Drittanbietern, welche es Ihnen ermöglichen, Ihre iTune Bibliothek zu
benutzen.
MEDIADATEIEN MIT WINDOWS MEDIAPLAYER TEILEN
Der am meisten genutzte UPnP Server ist Windows Media Player
(Version 11 oder älter), auch wenn andere UPnP Plattformen genutzt
werden können.
Um WMP für das Teilen von Mediadateien vorzubereiten, führen Sie
die folgenden Schritte durch:
Vergewissern Sie sich, dass Ihr PC und das Radio mit demselben
Netzwerk verbunden sind. Heritage wird von Ihrem PC als ‘Heritage’
erkannt,
1 Im WMP, fügen Sie der Mediabibliothek die Audiodateien und Ordner
zu, welche Sie mit Heritage teilen wollen.
(BILBLIOTHEK > HINZUFÜGEN. . . .).
2 Stellen Sie sicher, dass das Radio Zugang zu den geteilten Mediadateien hat, indem Sie diese
auswählen und ERLAUBEN klicken. Sie können die geteilten Mediaeinstellungen auch benennen. t
Der PC ist jetzt bereit, Musik zu Ihrem Radio zu leiten. Der WMP UPnP
Service läuft im Hintergrund, es ist nicht nötig, WMP extra zu starten.
68
EINEN MUSIKSERVER EINRICHTEN
MEDIADATEIEN MIT EINEM MAC TEILEN
Um Ihren Heritage mit Ihrem Apple Mac zu verbinden, benötigen Sie
eine UPnP Serverapplikation eines Drittanbieters. Es ist möglich, eine
Anzahl von Applikationen direkt aus dem Internet herunter zu laden.
Eine dieser Applikationen ist EyeConnect. Es handelt sich um eine
einfach zu intasllierende Applikation zum Media Sharing welche es
Heritage ermöglicht, Audiodateien im Streaming abzuspielen. EveConnect kann auf folgender Webseite heruntergeladen werden:
http://www.elgato.com
3 Wenn Sie EyeConnect installiert haben, finden Sie das Progamm
unter den Präferenzen des Systemanzeigefelds wieder. Wenn Sie
Heritage mit dem Mac verbinden, stellen Sie sicher, das EyeConnect
mit der Setupanzeige läuft.
Heritage wird als ‘Heritage’ in der Geräteliste von EyeConnect
aufgelistet. Die ENABLE Box muss ausgewählt sein und die Auswahl für
den Zugang (ACCESS) muss als ENABLE NEW DEVICES eingestellt sein.
Ihr Mac ist jetzt bereit, um Musik zu Ihrem Radio zu leiten. EyeConnect
wird automatisch normal weiterlaufen.
69
MUSIKABSPIELMODUS
ABSPIELEN VON AUDIOTITELN MIT DEM MUSIKPLAYER
Der MUSIC PLAYER MODE ermöglicht das Abspielen von Audiodateien
wie MP3-, AAC-, WMA- oder FLAC-Dateien direkt von einem Computer
oder einem Musikserver in Ihrem lokalen Netzwerk aus.
Um zum MUSIC PLAYER MODE zu gelangen, drücken Sie
bis auf
Ihrem Intro-Bildschirm MUSIC PLAYER MODE angezeigt wird, alternativ
drücken Sie
, dann wählen Sie MAIN MENU und anschließend
MUSIC PLAYER aus der Optionsliste des Menüs aus.
Wenn Sie sich im Musikplayer-Modus befinden, drücken Sie
Music player
Shared media
My playlist
Repeat play: Off
Shuffle play: Off
,
dann wählen Sie SHARED MEDIA aus.
MUSIK VON EINEM USB SPEICHER ABSPIELEN
Verbinden Sie zuerst den USB Speicher über den entsprechenden
Anschluss auf der Rückseite Ihres Radios mit dem Gerät.
Die Auswahl von USB WIEDERGABE aus dem Menü MUSIK ABSPIELEN
wird den Inhalt des externen Speichers in Form einer Dateiliste
anzeigen.
Mit Hilfe der Cursorsteuerung können Sie sich durch die Liste bewegen.
Um durch die Liste zu scrollen, müssen Sie die Tasten UP und DOWN
verwenden. Um durch die Ordner zu blättern, drücken Sie entweder
(SELECT) oder RIGHT. Wenn Sie den gewünschten Titel erreicht haben,
wird durch ein kurzes Drücken der Auswahltaste der Titel abgespielt.
Durch langes Drücken wird der Titel zur Wiedergabeliste hinzugefügt
(siehe PLAYLISTS auf Seite 28 für weitere Informationen).
Audiotitel können auch gesteuert werden, indem Sie die
-Tasten, die auf der Oberseite des Radios angebracht sind, verwenden.
Durch Drücken und Halten der
-Taste wird der Titel, der gerade
gespielt wird, schnell zurückgespult. Wenn Sie hingegen die
-Taste drücken und halten, wird der Titel schnell vorwärts gespult.
70
Friendly Fires
-01-Jump.MP3
-02-Paris.MP3
>
>
MUSIKABSPIELMODUS
SHARED MEDIA (VON EINEM UPnP MEDIASERVER)
Im MUSIKABSPIELMODUS wählen Sie SHARED MEDIA. Wenn Sie geteilte
Mediadateien vorbereitet haben (vgl. S. 24), sollte für den erstellen
Server ein Eintrag sichtbar sein (z.B. „SB-Laptop: Audio). Haben Sie
geteilte Mediadateien von mehr als einem Computer zur Verfügung,
sind die Alternativen aufgelistet. Wählen Sie die Mediadateien,
welche Sie abzuspielen wünschen.
SB-laptop: Audio
Music
Video
Pictures
Playlists
<Search>
>
>
>
>
Von diesem Moment an werden Menüs vom geteilten Mediaserver
erstellt (normalerweise Windows Media Player). Das erste Menü zeigt
eine Liste mit Mediatypen, z.B. Musik, Video, Bilder oder Abspiellisten.
Heritage kann nur Musik oder Abspiellisten wiedergeben.
Eine Suchfunktion ermöglicht es Ihnen außerdem, Titel zu finden.
Die Funktion ist ähnlich der Internetradiosuche, welche auf S. 20
beschrieben ist.
Music
Es gibt mehrere Möglichkeiten, Musiktitel auszuwählen, zum Beispiel:
Genre | Künstler | Album | Komponist | Rating
Music
All Artists
Contributing Artists
Album Artists
Composers
>
>
>
>
>
Wenn Sie den Titel, den Sie abspielen wollen, gefunden haben,
drücken Sie die Auswahltaste, um diesen auszuwählen. Durch kurzes
Drücken wird der Titel sofort abgespielt, während der Titel durch
langes Drücken der PLAYLIST hinzugefügt wird.
HINWEIS: Titel die im UPnP Modus abgespielt werden, werden zu
Last.fm geleitet (gescrobbelt), wenn diese Funktion im Last.fm Menü
eingestellt ist. Für weitere Informationen vergleichen Sie S. 29.
71
MUSIKABSPIELMODUS
ABSPIELLISTEN
Heritage ist in der Lage, eine Abfolge von bis zu 500 Titeln in seinen
Wiedergabelisten zu speichern. Die Titel in der Wiedergabeliste
können von mehreren UPnP Servern und USB-Geräten gemischt
werden. Um die Wiedergabeliste zu verwalten, wählen Sie MY
PLAYLIST im MUSIC PLAYER MENU aus.
Um die Inhalte der Wiedergabeliste anzusehen, scrollen Sie
durch diese unter Zuhilfenahme der Cursorsteuerung. Um die
Wiedergabeliste von einem bestimmten Titel an zu spielen, drücken
Sie die Auswahltaste kurz. Um einen Titel aus der Wiedergabeliste zu
entfernen, drücken Sie die Auswahltaste lang und bestätigen dann
zum Löschen mit YES.
My playlist
Human
>
Just My Imagination.wma
Back At One
Can’t Fight This Feelng. . . . . .
Three birds.mp3
Wenn Sie einen Titel / ein Album / einen Folder sofort abspielen
wollen, ohne die Wiedergabeliste-Funktion zu verwenden, bleibt
die Wiedergabeliste erhalten und wird weiterhin von Ihrem Radio
gespeichert, bis Sie sie löschen wollen.
WIEDERHOLEN/ZUFÄLLIGE WIEDERGABE
Sie haben die Möglichkeit, Titel wiederholt oder zufällig abzuspielen,
indem Sie REPEAT PLAY oder SHUFFLE PLAY im MENU MUSIC PLAYER
auswählen.
ABSPIELINFORMATIONEN
Während ein Titel abgespielt wird, zeigt Heritage den Titel und
den Namen des Interpreten (UPnP) an. Es gibt auch einen
Fortschrittsbalken, der die vergangene Spielzeit und die Gesamtspiel
des Titels anzeigt.
Um weitere Informationen zum Titel anzuzeigen, drücken Sie
Jedes Mal, wenn Sie
.
drücken, wird eine weitere Information wie
folgt angezeigt:
UPnP: Name des Titels / Interpret, Fortschrittsbalken /Titelspielzeiten,
Album, Codec/Abtastrate, Wiedergabepuffer und Tagesdatum.
72
Music player
Human.mp3
1:01
Music player
Letter To Me
Album:
5th Gear
3:08
LAST.FM MODUS
Zusätzlich zu seinen Radio und Internetradio Features, ist Heritage
auch in der Lage, Zugang zum online Musikservice Last.fm zu bieten.
Wählen Sie einfach einen Künstler oder ein Genre und lassen Sie Last.
fm eine Abspielliste aus seinen über 5 Millionen gespeicherten Titeln
erstellen – für Sie jedes Mal einzigartig und frisch.
Wenn Sie diesen Service schon nutzen, können Sie Ihr existierendes
Last.fm Profil auf Heritage anwenden. Ansonsten besuchen Sie www.
last.fm, erstellen Sie ein Profil und melden Sie sich an.
Sollten Sie im Besitz eines Probevouchers sein, besuchen Sie www.last.
fm/voucher und folgen Sie den Bildschirmanweisungen.
EIN BENUTZERKONTO HINZUFÜGEN
Um den LAST.FM MODUS zu betreten, drücken Sie die
Last.fm
Modu-
Station list
last.fm setup
System settings
Main menu
staste bis Last.fm auf dem Bildschirm erscheint. Alternative drücken
Sie die
Menütaste, wählen Sie HAUPTMENÜ und dann LAST.FM
>
>
>
>
aus der Liste der Menüoptionen.
Um ein Konto hinzuzufügen, wählen Sie LAST.FM SETUP aus dem Menü
und wählen Sie dann BENUTZERKONTEN.
User Accounts
<Add new account>
Wählen Sie nun NEUES KONTO HINZUFÜGEN und geben Sie Ihren LAST.
FM Benutzernamen und das Passwort mit Hilfe der Bildschirmtastatur
ein.
Search:
Rolling
0123456789., a b
cdefghijklmnopq
rstuvwxyzABCDE
FGHIJKLMNOPQ
BKSP
OK
CANCEL
SCROBBELN UND LOVE/BAN VON TITELN
Um LAST.FM bestmöglich zu nutzen, können Sie alle Titel welche Sie im
UPnP und im Last.fm Modus gehört haben SCROBBELN (dies ist sogar
mit Titeln von einem iPod oder Computermediaserver mit der korrekten Software). Dieser Vorgang sendet Titelnamen zu LAST.FM und
fügt diese automatisch Ihrer Bibliothek zu, um zu helfen, maßgeschneiderte Vorschläge für Ihren Musikgeschmack zu entwerfen. Sie können Ihre Last.fm Bibliothek wiedergeben, indem Sie IHRE BIBLIOTHEK
im LAST.FM MENÜ auswählen.
Last.fm
Your library
Your Recommendations
Your neighbourhood
Artist radio
Tag radio
Last.fm setup
Um SCROBBELN AN oder AUS zu schalten, wählen Sie LAST.FM SETUP,
gefolgt von SCROBBELN und dann AN oder AUS.
User Accounts
>
Scrobbling: on
Hinweis: Sollten andere Personen Ihr Heritage im LAST.FM MODUS
benutzen, sollten Sie SCROBBELN ausschalten. Sonst könnten Sie zu
einem anderen Benutzerkonto wechseln.
73
LAST.FM MODUS
Während Sie LAST.FM anhören, könne Sie entscheiden, Titel zu
bevorzugen (LOVE) oder zu entfernen (BAN). Solche Titel werden
gescrobbelt, auch wenn SCROBBELN auf AUS gestellt ist. Die
Auswahl LOVE für einen Titel lässt Last.fm diesen bestimmten Titel auf
IHRE LIEBLINGSTITELLISTE setzen. Diese können Sie in Zukunft wieder
abspielen. BAN bedeutet, dass ein Titel nicht wieder gespielt wird.
Last.fm
Love
Ban
Um LOVE oder BAN für einen Titel einzustellen, drücken Sie die Taste
und nutzen Sie dann den cursor um LOVE oder BAN
auszuwählen.
Die
Taste befindet sich auf der oberen Seite Ihres Radios der
alternativ können auf der Fernbedienung. Während Sie LAST.FM
anhören, können Sie Titel überspringen, indem Sie die Taste
drücken. Es ist nicht möglich Titel in LAST.FM anzuhalten.
Hinweis: Sie können Ihre Bibliothek und das Rating für Ihre Titel auf der
LAST.FM Webseite ändern.
MUSIK WIEDERGEBEN
Im LAST.FM MODUS sind verschiedene Streamings oder ‘Radiosender’
verfügbar. Um einen auszuwählen, wählen Sie SENDERLISTE im LAST.
FM MODUS Menü. Wenn Sie neu bei LAST.FM sind, raten wir Ihnen, mit
ARTIST oder TAG RADIO zu beginnen, welche Ihnen eine komfortable
Nutzung der Grundeigenschaften und Leistungen erlauben.
Es gibt die folgenden Optionen:
IHRE BIBLIOTHEK
Spielt alle zu Ihrem Profil gescrobbelten Titel oder Titel von Künstlern
die Sie Ihrer Bibliothek hinzugefügt haben. Kann über die LAST.FM
Webseite bearbeitet werden.
IHRE VORSCHLÄGE
Spiel Titel welche Ihnen aufgrund Ihres Musikprofils und das anderer
Hörer mit ähnlichem Geschmack vorgeschlagen werden.
IHRE LIEBLINGSTITEL
Spielt Titel mit dem Rating LOVED.
IHRE NACHBARSCHAFT
Spielt Titel aus Bibliotheken anderer Personen mit ähnlichem
Musikgeschmack.
74
Last.fm
Your library
Your Recommendations
Your neighbourhood
Artist radio
Tag radio
LAST.FM MODUS
MUSIK WIEDERGEBEN (fortgesetzt)
ARTIST RADIO
Gibt eine Auswahl an Titeln eines bestimmten Künstlers wieder,
zusammen mit Titeln von Künstlern mit ähnlichem Stil. Wählen Sie
einen Künstler durch Eingabe des Namens oder Teile des Names (die
Eingabe des vollen Namens ist nicht notwendig, ROLLING STONES
kann als STONES eingegeben werden). Wählen Sie nun den Künstler
aus der Ergebnisliste und wählen Sie OK:
Artist radio
Search:
Rolling
0123456789., a b
cdefghijklmnopq
rstuvwxyzABCDE
FGHIJKLMNOPQ
BKSP
OK
The Rolling Stones
Rolling Stones
Rolling Baba and the
Rolling Stones and Dave Matt
CANCEL
TAG RADIO
Gibt eine Auswahl von Titeln wieder, die durch ein bestimmtes
Schlüsselwort verbunden sind. Wählen Sie ein Wort oder Genre indem
Sie ein Wort oder einen Satz eingeben. Es ist ratsam, so genau wie
möglich zu sein, also besser BOLLYWOOD als BOLLY einzugeben, da
Tags von Benutzern erstellt werden und daher sehr vielfältig sind.
Wählen Sie einen Tag aus der Ergebnisliste und wählen Sie dann OK
Last.fm
This Hard Land
Album:
Greatest Hits
GESCHICHTE
Listet Titel auf, die Sie vor kurzem gehört haben, die letzten Titel zuerst.
Es ist nicht möglich, Titel aus dieser Liste zu wählen und nach Bedarf
erneut anzuhören.
History
Last.fm
Your Loved Tracks
Your Neighbourhood
Artist Radio
Tag Radio
History
>
Rapture by DatA from
Visions by Cut Copy from. . . .
We Are The People by E . . . . .
She’s got me dancing by. . . . .
Meddle by Little Boots f. . . . .
BILDSCHIRMINFORMATIONEN
Während LAST.FM spielt, werden auf dem Bildschirm der Titelname
und ein Abspielbalken mit Anzeigen zur abgelaufenen Zeit und zur
totalen Titeldauer angezeigt. Eine LAST.FM Ikone wird am unteren
Bildschirmrand angezeigt um den LAST.FM MODUS anzuzeigen.
Last.fm
Während der Titelwiedergabe, können Sie durch Drücken der
Last.fm
Infotaste durch weitere Informationen wechseln, wie z.B. Künstler,
This Hard Land
Album, Titelname, Radioname, Codec/Abtastrate, Wiedergabebuffer
This Hard Land
Artist:
Bruce Springstein
Album:
Greatest Hits
und Heutiges Datum.
75
WECKER
EINEN ALARM EINSTELLEN
Heritage gibt Ihnen die Möglichkeit, zwei verschiedene
Alarmeinstellungen zu speichern. Um einen Alarm einzustellen oder
zu verändern, drücken Sie entweder die
Menütaste oder
Alarms
Alarm 1: Off [06:55AM]
Alarm 2: Off [07:50AM]
wählen Sie MENÜ, HAUPTMENÜ und dann ALARM. Wählen Sie die
Alarmeinstellung, welche Sie bearbeiten möchten (Alarm 1 Alarm 2).
Unter Zuhilfenahme der Cursorsteuerung können Sie durch die
untenstehenden Optionen scrollen und Ihre Favoriten festlegen.
Alarm 1
•
•
•
•
•
•
Alarm: an/aus
Frequenz: Täglich, Einmal, Wochentags oder Wochenende
Zeit
Modus: Buzzer, Internetradio, DAB, FM oder iPod oder Last.fm
Voreinstellungen: zuletzt gehört oder Voreingestellte Sender 1-10
Laustärke: 0 - 20
Enable : Daily
Time : 7:30AM
Mode : internet radio
Preset : last listened
Volume :
6
Sind Ihre Vorlieben eingestellt, erinnern Sie sich SPEICHERN
auszuwählen.
Heritage zeigt einen aktiven Alarm durch Anzeige einer Alarmikone
am unteren Bildschirmrand.
Im STANDBYMODUS können Sie durch einfaches Drücken der
Alarmtaste einen gespeicherten Alarm AN- oder AUSCHALTEN.
Drücken der
Alarmtaste wechselt zwischen Alarm 1 und Alarm
2 Einstellungen, welche an- und abgeschaltet werden. Werden
die Alarmikonen angezeigt, ist ein Alarm angeschaltet. Wird keine
12/10/2009
14:30
06: 55AM
07: 50AM
Alarmikone angezeigt, sind die Alarme abgeschaltet.
EINEN ALARM ANHALTEN
Wenn ein Alarm erklingt, kann dieser durch Drücken einer beliebigen
Taste Ihres Heritage GESTOPPT werden.
Wurde ein Alarm angehalten, wird eine ALARM AUS Nachricht auf
dem Bildschirm Ihres Heritage angezeigt.
76
Alarm off
WECKER
SCHALFMODUS
Durch Nutzen der Schlaffunktion können Sie Heritage so einstellen,
dass das Gerät sich automatisch in den STANDBY MODUS setzt. Der
Schlafmodus kann auf zwei verschiedene Arten eingestellt werden:
Set sleep time
Die schnellste Methode ist die SNOOZELEISTE. Tippen Sie diese einfach
an, um durch die Spanne der voreingestellten SCHLAFZEITEN zu
wechseln, von SCHLAF AUS zu 15, 30, 45 und 60 Minuten.
Alternativ, drücken Sie die
15 MINS
Menütaste, wählen Sie HAUPTMENÜ
und dann SCHLAF. Sie können den SCHLAFTIMER nun entsprechend
der gewünschten Voreinstellung einstellen.
Wenn Sie die Schlafzeit ausgewählt haben, wird Heritage in das
HAUPTMENÜ zurückkehren.
Drücken Sie die
Menütaste, um zur WIEDERGABEANZEIGE
zurückzukehren.
SNOOZEFUNKTION
Heritage beinhaltet ein SNOOZEFEATURE mit entsprechender SNOOZELEISTE auf der oberen Seite des Radios. SNOOZE erlaubt es Ihnen,
einen Alarm temporär und für einen Zeitraum von bis zu 30 Minuten
abzuschalten.
Die SNOOZEDAUER kann nur genutzt werden, wenn Ihre Radio
einen Alarm wiedergibt. Zu diesem Zeitpunkt tippen Sie einfach
auf die SNOOZELEISTE, um durch eine Spanne von voreingestellten
SNOOZEZEITEN zu wechseln (5, 10, 15 oder 30 Minuten).
Set snooze
5 MINS
Ist SNOOZE aktiviert, wird Heritage für die eingestellte SNOOZEDAUER
in Standby zurückkehren. Eine SNOOZE-Ikone wird auf dem Bildschirm
angezeigt.
77
SYSTEMEINSTELLUNGEN
EQUALIZER
Heritage bietet dem Nutzer ein großes Maß an Kontrolle über seine
Standardaudioeinstellungen (Fabrikeinstellungen). Dies beinhaltet
Kontrolle über BASS, TREBLE und LAUTSTÄRKE und die Fähigkeit,
eine gewisse Anzahl voreingestellter EQ-Einstellungen zu nutzen.
Es ist weiterhin möglich, Ihre eigenen, maßgeschneiderten EQEinstellungen zu erstellen – “Mein EQ“ genannt.
Wählen Sie Ihren Favoriten ganz einfach aus der Liste aus, indem Sie Ihre
Auswahl markieren und die Auswahltaste drücken. Heritage wird nun
Ihre Einstellungen in seinem Speicher abspeichern. Als Referenz wird die
aktuelle EQ-Einstellung durch ein Sternchen (*) in der EQ-Liste markiert.
Equaliser
Classic
Pop
News
My EQ
Heritage wird eine Liste von neun EQ Optionen anzeigen: Normal,
Flat, Jazz, Rock, Movie, Klassik, Pop, News und Mein EQ.
My EQ profile setup
>
Wählen Sie Ihren Favoriten ganz einfach aus der Liste aus, indem Sie Ihre
Auswahl markieren und die Auswahltaste drücken. Heritage wird nun
Ihre Einstellungen in seinem Speicher abspeichern. Als Referenz wird die
aktuelle EQ-Einstellung durch ein Sternchen (*) in der EQ-Liste markiert.
Um Ihre persönliche EQ-Einstellung zu konfigurieren, wählen Sie
MEIN EQ PROFILEINSTELLUNGSSETUP im EQUALIZER Menü. Passen Sie
nun die BASS und TREBLE Einstellungen an und entscheiden Sie, ob
die Funktion LAUTSTÄRKE An oder AUS sein soll. Speichern Sie Ihre
Einstellungen mit SPEICHERN. Ihre persönlichen EQ-Einstellungen
können nun unter MEIN EQ im EQUALIZER Menü aufgerufen werden.
78
My EQ profile
Bass : 0
Treble : 0
Loudness : Off
Bass
Bass
0
dB
SYSTEMEINSTELLUNGEN
NETZWERK
Das NETZWERKMENÜ kann unter SYSTEMEINSTELLUNGEN im HAUPTMENÜ gefunden werden und beinhaltet einen INTERNET WIZARD,
welcher Ihnen beim Einstellen der Internetverbindung Ihres Radios
hilft.
Internet Setup
Network Wizard
scanning/
Für erfahrene Nutzer ist es auch möglich, eine Reihe manuell einstellbarer Einstellungsmenüs von hier zu betreten:
INTERNET WIZARD :
Vereinfacht die Einstellung der Internetverbindung Ihres Radios mit
Hilfe von Schritt-für-Schritt Instruktionen
PBC WLAN EINSTELLUNG :
Wird genutzt, um Ihr Radio mit einem WPS Security Router zu verbinden.
ANZEIGEEINSTELLUNGEN:
Lassen Sie die MAC Adresse, Wlan-Region etc. anzeigen.
WLAN-REGION :
Wo Sie Ihr Radio nutzen - Europa, USA etc.
Internet Setup
Internet Wizard
PBC Wlan setup
View settings
Wlan region
Manual settings
>
MANUELLE EINSTELLUNGEN:
Detailierte Kontrolle über Kabelverbindungen und kabellose Verbindungen.
NETZWERKPROFIL:
Zeigt die Namen der letzten vier kabellosen Netzwerke an, mit denen
Heritage verbunden war
HINWEIS: Heritage speichert die letzten vier Netzwerke, mit denen
das Gerät verbunden war und versucht automatisch, sich mit diesen
zu verbinden. Es ist möglich, nicht gewollte Netzwerke zu löschen.
Wählen Sie einfach SYSTEMEINSTELLUNGEN, NETZWERK und NETZWERKPROFIL. Wählen Sie nun das Netzwerkprofil, welches Sie löschen
möchten. Wählen sie Löschen und bestätigen Sie mit JA.
79
SYSTEMEINSTELLUNGEN
UHRZEIT / DATUM
Dieses im SYSTEMEINSTELLUNGSMENÜ befindliche Untermenü
ermöglicht Ihnen eine Anzahl an Einstellungen zu Uhrzeit und Datum.
Das Menü UHRZEIT/DATUM beinhaltet die drei folgenden Optionen:
UHRZEIT / DATUM EINSTELLEN: Erlaubt das manuelle Einstellen von
Uhrzeit und Datum.
AUTO UPDATE : Wählen Sie aus drei verschiedenen automatischen
Einstellungsoptionen.
FORMAT EINSTELLEN: Wählen Sie zwischen dem 12 oder 24 Stunden
Format.
Time/Date
Set Time/Date
Auto update
Set format
Set timezone
Daylight savings
>
>
DAB Update:
Übernimmt automatisch Uhrzeit und Datum aus dem DAB Signal.
Heritage muss im DAB MODUS aktiv gewesen sein (und muss ein
Signal empfangen haben), um diese Informationen zu erhalten.
FM Update:
Übernimmt Uhrzeit und Datum aus dem FM Signal. Wie bei DAB, muss
Heritage im FM MODUS aktiv gewesen sein und RDS Informationen
empfangen haben, bevor diese Informationen erhalten werden
können.
Auto update
Update from DAB
Update from Network
No update
*
Netzwerkupdate:
Übernimmt Uhrzeit und Datum aus der gegenwärtigen
Internetverbindung.
HELLIGKEIT
Heritage ermöglicht ein gutes Maß an Kontrolle über die
Helligkeit seines OLED Bildschirms. Das Helligkeitslevel kann für den
Betriebsmodus und den Standby Modus unterschiedlich eingestellt
werden. Helligkeitslevel sind HOCH, MEDIUM oder NIEDRIG.
Um die Helligkeitseinstellungen zu verändern, drücken Sie die
Menütaste,, wählen sie HAUPTMENÜ und dann
SYSTEMEINSTELLUNGEN: Wählen Sie nun HELLIGKEIT aus der Menüliste.
Es ist Ihnen jetzt möglich, das voreingestellte Helligkeitslevel für die
beiden Operationsmodi, Standby und Betriebsmodus, einzustellen.
Wählen Sie den gewünschten Modus und das gewünschte
Helligkeitslevel. Die gewählten Einstellungen werden gespeichert,
können aber jederzeit geändert werden.
80
Brightness
Power-On Level
Standby Level
*
SYSTEMEINSTELLUNGEN
SPRACHE
Die voreingestellte Sprache auf Ihrem Radio ist Englisch. Es werden
weitere 12 Sprachen unterstützt:
Dänisch
Französisch
Norwegisch
Spanisch
Holländisch
Deutsch
Polnisch
Schwedisch
Finnisch
Italienisch
Portugiesisch
Türkisch
Um die gegenwärtige Sprache zu wechseln, wählen Sie SYSTEMEINSTELLUNGEN aus dem HAUPTMENÜ und dort SPRACHE. Tätigen Sie nun
Ihre Wahl.
Language
English
Danish
German
Italian
Norweigian
*
RESET DER BETRIEBLICHEN VOREINSTELLUNGEN
Durch Auswahl von FACTORY RESET aus dem Menü SYSTEMEINSTELLUNGEN; können Sie die betrieblichen Voreinstellungen Ihres Heritage
wieder aufrufen. Alle persönlichen Einstellungen wie Uhrzeit/Datum,
Netzwerkkonfiguration und voreingestellte Sender werden gelöscht.
Die gegenwärtig genutzte Softwareversion Ihres Heritage wird
beibehalten, sowie die Registrierung im Internetradioportal. Das heißt,
dass auch Internetradiofavoriten beibehalten werden, solange Sie Ihr
Radio nicht mit einem anderen Benutzerkonto im Portal anmelden.
Um die betrieblichen Voreinstellungen wieder aufzurufen, drücken Sie
die
Factory Reset
Proceed?
Menütaste und wählen Sie HAUPTMENÜ, SYSTEMEINSTELLUN-
GEN und dann FACTORY RESET. Antworten Sie mit JA.
YES
NO
SOFTWAREUPDATES
Von Zeit zu Zeit werden für Ihr Radio Softwareupdates zur Verfügung
gestellt. Diese sind nötig für regelmäßige Wartung und um Ihr Radio
mit zusätzlicher Funktionalität auszustatten. Softwareupdates werden
über Sendeverbindungen durchgeführt.
Heritage wird bei jedem Anschalten nach Softwareupdates suchen.
Ist ein Update zugänglich, werden Sie gefragt, den Download zu
bestätigen.
Bitte beachten Sie, dass nach einem Softwareupdate alle Benutzereinstellungen beibehalten werden.
81
SYSTEMEINSTELLUNGEN
SOFTWAREUPDATES (fortgesetzt)
Sollten Sie es bevorzugen, manuell die Möglichkeit für Softwareupdates zu kontrollieren, drücken Sie die
Menütaste und wählen
Sie HAUPTMENÜ. Wählen Sie nun SYSTEMEINSTELLUNGEN und dann
Software update
Auto-Check setting
Check now
*
SOFTWAREUPDATES. Wählen Sie AUTO-CHECK EINSTELLUNG und
beantworten Sie mit NEIN.
Um manuell nach Softwareupdates zu suchen, wählen Sie JETZT
SUCHEN aus dem Menü SOFTWAREUPDATES.
ACHTUNG: Vor dem Starten eines Softwareupdates, stellen Sie
sicher, dass Heritage mit dem Hauptstromnetz verbunden ist. Eine
Stromunterbrechung während eines Updates kann Ihrem Radio
bleibende Schäden zufügen.
System settings
Language
Factory reset
Software Update
Setup Wizard
Info
EINSTELLUNGSWIZARD
Der EINSTELLUNGSWIZARD vereinfacht das Einstellen von Uhrzeit/
Datum und Internet mit Hilfe einer Reihe von Fragen.
Um dem EINSTELLUNGSWIZARD aufzurufen, drücken Sie die
Menütaste und wählen Sie HAUPTMENÜ. Wählen Sie nun SYSTEMEINSTELLUNGEN gefolgt von EINSTELLUNGSWIZARD.
INFO
Bei technischen Hilfeanfragen, kann es sein, dass Sie nach der SOFTWAREVERSION oder der ID NUMMER Ihres Radios gefragt werden.
Beide Informationen können im Untermenü INFO des Menüs SYSTEMEINSTELLUNGEN gefunden werden.
Drücken Sie die
Menütaste und wählen Sie HAUPTMENÜ. Wählen
Sie nun SYSTEMEINSTELLUNGEN gefolgt von INFO.
82
Info
SW version:
domino_V2.0.16.25756-5
Radio ID:
00226100C3D6
>
PROBLEMLÖSUNGEN
PROBLEM
FM: Zischt.
URSACHE
LÖSUNGEN
Schwache Signalstärke.
Kontrollieren/Bewegen Sie die Antenne.
Wechseln Sie den Standort.
Lokale Suchabfrage (nur starke Sender).
Für DAB, kontrollieren Sie lokale
Verfügbarkeit unter
www.ukdigitalradio.com/coverage
DAB: ‘Keine Sender verfügbar’
Schwache Signalstärke.
Wie oben, versuchen Sie dann eine erneute
Suchabfrage.
Kann Netzwerk nicht kontaktieren.
Netzwerk operiert nicht.
Kontrollieren Sie, dass das Netzwerk zwischen Computer und Router funktioniert.
Router begrenzt Zugang auf
eingetragene MAC Adressen.
Entnehmen Sie die Heritage MAC Adresse
aus MENÜ > SYSTEMEINSTELLUNGEN > NETZWERK > ANZEIGEEINSTELLUNGEN und fügen
Sie diese der Routerliste hinzu.
DAB: Unklar/Setzt aus
Ausgeschnitten
HINWEIS: Heritage hat separate MAC Adressen für kabellose
und verkabelte Netzwerke. Nur die gegenwärtige Netzwerkadaptermethode wird angezeigt. Die andere Adresse kann
durch Ändern der ersten zwei Nummern von ’00’ (kabellos)
zu ‘02’ (verkabelt) erstellt werden.
Wi-Fi Signalstärke zu schwach.
Kontrollieren Sie die Distanz zum Router.
Versuchen Sie, ob ein Computer an
derselben Stelle mit dem Netzwerk
verbunden werden kann.
Unbekannte Kodierungsmethode.
Ändern Sie die Kodierungsmethode des
Routers. Heritage unterstützt WEP, WPA und
WPA2.
Ungewöhnliche Netzwerkkonfiguration.
Stellen Sie das Netzwerk manuell über
MENÜ > SYSTEMEINSTELLUNGEM > NETZWERK
> MANUELLE EINSTELLUNGEN ein.
Firewall verhindert Zugang.
Kontrollieren Sie, dass die folgenden Ports
des Routers offen sind:
UDP und TCP Ports 80 und 123
DNS Port 53
Windows shares: Ports 135 - 139
und 445
Windows Media Player: verschieden Nicht-Microsoft Firewall kann Konfiguration
für UPnP verlangen.
83
PROBLEMLÖSUNGEN
PROBLEM
Kann nicht mit Internet verbinden.
Ein bestimmter Internetradiosender
kann nicht abgespielt werden.
URSACHE
LÖSUNGEN
Internetverbindung nicht operativ.
Kontrollieren Sie, die Funktionalität
des Internets mit einem Computer.
Firewall verhindert Zugang.
Kontrollieren Sie, dass die folgenden Ports offen sind:
UDP und TCP Ports 80 und 123
DNS Port 53.
Einige Internetradiosender können
weitere Ports verlangen.
Sender sendet nicht.
Überladene oder ungenügende
Bandbreite.
Versuchen Sie einen anderen
Sender.
Versuchen Sie, den Sender am
Computer über die Internetradioportalseite zu hören.
Versuchen Sie es zu einem späteren Zeitpunkt noch einmal.
Sender sendet mit unbekanntem
Codec.
Link veraltet.
84
Cannot play Last.fm
‘Unauthorized’ message
Falsche Kontodetails. Kontodetails
nicht eingegeben. Region nicht
unterstützt.
(Last.fm sind wegen Lizenzaspekten gegenwärtig auf bestimmte
Regionen in den USA/UK beschränkt.)
Last.fm: Inhalt reicht nicht zur
Wiedergabe
Für Ihre bestimmten Künstler- oder
Tag-Radiosender sind nicht genug
Titel verfügbar und lizensiert.
Wählen Sie einen anderen Sender.
FEHLERMELDUNGEN
NACHRICHT
BESCHREIBUNG
BEISPIEL
Verbindung nicht erfolgreich.
Schlüssel korrekt eingegeben aber
Router weist die Anfrage ab.
MAC Filter auf Router aktiv.
Formatfehler
Kann das Dateiformat nicht erkennen – unabhängiges Netzwerk.
.wma erhalten aber beim Dekodieren erkannt, dass der Stream nicht
WMA ist.
Netzwerkfehler
Problem nach Router – inkorrekte
Daten werden vom Netzwerk
übertragen.
Die vom Server empfangenen
Daten sind nicht lesbar.
Netzwerk Timeout
Problem nach Router – keine Antwort vom Netzwerk.
Normales Senderstreaming bevor
der Sender plötzlich nicht mehr
verfügbar ist.
Keine UPnP Mediadatei gefunden
Kein UPnP Server gefunden.
Service nicht verfügbar (DAB)
Kein DAB Empfang.
Nicht autorisiert.
Zugang von UPnP Server nicht
gestattet.
Update fehlgeschlagen
Softwareupgrade fehlgeschlagen.
Netzwerk nicht bereit
Problem mit der Routerverbindung.
Erlauben Sie Heritage Zugang zu
den Servereinstellungen
Router abgeschaltet.
85
NOTIZEN
86
87
TECHNISCHE HILFE
TEL - + 44 (0) 1555 666161
E-MAIL - [email protected]
WEB - www.revo.co.uk/support
Version 2.0
RADIO DA TAVOLO DELUXE
Con docking station per iPod e iPhone
DAB | DAB+ | FM | Internet Radio | Audio Streaming
Manuel de l’utilisateur
SUPPORTO TECNICO
GARANZIA
Per ogni problema riscontrato nell’utilizzo di questo prodotto vi preghiamo di consultare l’apposita sezione alla pagina 39 di questo manuale.
In alternative è possibile contattare direttamente il servizio di assistenza
tecnica Revo:
Revo Technologies Ltd garantisce all’utilizzatore finale che questo
prodotto è privo di difetti in materiali e nella fattura se utilizzato in
modo idoneo ed è pertanto garantito per la durata di un anno dalla
data d’acquisto.
UK 01555 666161
Fuori da UK + 44 1555 666161
E’ anche a disposizione un’email, [email protected] ed un sito
internet con una sezione appositamente dedicata ai possibili problemi:
www.revo.co.uk/support
INFORMAZIONI AMBIENTALI
ISTRUZIONI SULLO SMALTIMENTO DEL PRODOTTO (DIRETTIVA WEEE)
La garanzia copre i soli difetti di produzione e non può essere
considerate valida in caso di danno accidentale, usura o rotture,
negligenza dell’utilizzatore, modifiche o riparazioni non autorizzate
da Revo Technologies Ltd.
Per registrare l’acquisto: www.revo.co.uk/register
COPYRIGHT E
RICONOSCIMENTI
Copyright 2011 Revo technologies Ltd. Tutti i diritti riservati.
Il simbolo riportato su questo prodotto, come da esempio, significa che
è classificato come Materiale Elettrico o Elettronico e pertanto non
smaltibile nei rifiuti generici domestici o commerciali alla fine del suo
ciclo vitale.
La Direttiva sullo Smaltimento di Materiale Elettrico ed Elettronico
(WEEE) (2002/96/EC) è stata creata per riciclare I prodotti grazie a
tecniche che minimizzino l’impatto dei materiali e delle sostanze pericolose sull’ambiente e per evitare l’aumento di aree sempre più vaste
di stoccaggio irrecuperabile.
Per ottenere maggiori informazioni a riguardo vi preghiamo di contattare le autorità locali o il rivenditore di questo prodotto.
CERTIFICAZIONE RoHS & MARCHIO CE
Questo prodotto è stato progettato e sviluppato nel pieno rispetto
delle regolamentazioni internazionali in tema di Restrizioni sulle Sostanze
Pericolose (RoHS). Inoltre il prodotto è stato sottoposto a test e controlli
sia durante le fasi di progettazione che di produzione, come richiesto
dall’UE, e per questo riporta il marchio CE.
INFORMATIVA SUI RISCHI
• Non utilizzare la radio vicino all’acqua
• Non rimuovere viti o parti
ISO 7000-0434
• Utilizzare solo gli alimentatori forniti
• Evitare che possano penetrare piccoli oggetti o liquidi all’interno del
prodotto
90
E’ vietata la copia, la distribuzione la trasmissione o la trascrizione in
qualunque forma e con qualunque mezzo di questo documento
senza il permesso di Revo Technologies Limited.
REVO e HERITAGE sono marchi o marchi registrati di Revo
Technologies Ltd. iPod è un marchio Apple Inc., registrato negli U.S.
ed in altri Paesi.
Revo Technologies Ltd
The Inox Building, Caldwellside, Lanark,
Scotland, United Kingdom, ML11 7SR
Tel: 01555 66 61 61
Fax: 01555 66 33 44
Int. Tel: +44 1555 66 61 61
Int. Fax: +44 1555 66 33 44
Email: [email protected]
Website: www.revo.co.uk
DISCLAIMER
Revo Technologies Limited non ha rappresentazioni o garanzie nel
rispetto del contenuto di questa pubblicazione, e nello specifico
disconosce ogni implicita garanzia di vendita o d’uso ad ogni fine.
Inoltre, Revo Technologies Limited si riserva il diritto di effettuare
cambiamenti a questa pubblicazione qualora fosse necessario,
senza obbligo di notifica a nessuna associazione o organizzazione.
CONTENUTI
BENVENUTI
90
Supporto Tecnico
90
Informazioni Ambientali
90
Garanzia
90
Copyright e Riconoscimenti
Grazie per aver acquistato la nostra radio Heritage, siamo sicuri
che vi regalerà molti anni di divertimento e di affidabilità. Questa
guida è stata creata per garantire un’installazione rapida e sicura
della vostra nuova radio, offrendovi ogni tipo di informazione utile e
di guida anche sugli aspetti più complessi, nonché note essenziali
sulla vostra sicurezza, note a riguardo della garanzia e risoluzione dei
problemi.
90
Disclaimer
91
Benvenuti /Il Marchio / Estrazione dall’Imballo
92
Anatomia
93
Telecomando
94
Alimentazione
94
Set-Up
95
Controllo Heritage / Struttura Menu
96 - 97
Modalità DAB
98 - 99
Opzioni MENU MODALITA’DAB
100
Modalità FM
101
Modalità FM / Modalità AUX-IN
101 - 104
Modalità iPod
105 - 110
Modalità Radio Internet
Rimuovere cautamente Heritage dalla sua confezione estraendo gli
altri oggetti dalla scatola.
111
Portale Radio Internet
All’interno della confezione troverete:
112 -113
Impostare un Server Musicale
114 - 116
Modalità Music Player
117 - 119
Modalità Last.fm
120 - 121
Sveglia
122 - 126
Impostazioni di Sistema
127 - 128
Risoluzione Problemi
129
Messaggi d’Errore
130
Note
IL MARCHIO HERITAGE
Heritage è una reinterpretazione contemporanea della classica
radio europea da tavolo stile anni 60. Una radio digitale multi formato
con funzioni DAB, DAB+, FM e Wi-Fi internet radio, come anche
wireless audio streaming e funzioni docking iPod/iPhone.
Heritage è fabbricato utilizzando materiali e componenti delle
migliori qualità. Case in alluminio e vero noce americano. Prestazioni
audio assicurate da driver altoparlante al neodimio da 3”
personalizzato, e da un eccellente amplificatore hi-fi da 7W. Infine,
Heritage dispone di un ampio display grafico OLED e di un sistema di
comando intuitivo.
ESTRAZIONE DELL’IMBALLO
DI HERITAGE
• Radio Heritage
• Telecomando
• Kit d’adattamento dock station per iPod/iPhone
• Alimentatore con adattatori multi-paese (UK, Euro, USA)
• Manuale d’Uso
Qualora mancassero delle componenti o se le trovaste danneggiate,
contattare immediatamente il proprio rivenditore o chiamare Revo
al numero +44 (0) 1555 66 61 61
NOTE: L’imballo Heritage dovrebbe essere conservato per un
eventuale futuro utilizzo poiché è il modo più sicuro di trasportare
Heritage e pertanto necessario.
91
ANATOMY OF HERITAGE
Snooze/Sleep Bar
Play/Pause
iPod/iPhone Dock
Indietro
Avanti
Feedback
OLED
Controllo di cursore
Mode
Menu
Info
Svegli
Volume Dial
Station Presets 1 - 5
iPod Video Out
Telescopic Antenna
Accendi/Standby
Cavo di Corrente
Digital Optical Out
Cavo LAN
Aux-In
3.5 Connectore Cuffie
Connettore Stereo RCA
92
TELECOMANDO
01 - Mode
02 - Visualizza Sopra
03 - Menu
04 - Accendi
3
1
2
4
6
8
10
11
05 - Indietro
06 - Seleziona
5
7
07 - Avanti Veloce
08 - Aumento Volume
12
9
09 - Info
10 - Visualizza Giù
13
11 - Sveglia
12 - Diminuisci Volume
13 - Pre-Sintonizzate 1- 10
14 - Sleep
15
14
15 - Snooze
16 - Skip Back (Indietro Veloce)
19
16
17
18
17 - Play/Pausa
18 - Skip Forward (Avanti Veloce)
19 - Feedback (Love/Ban)
1
SOSTOTUZIONE BATTERIA
Il telecomando Heritage è alimentato da una singola batteria al litio
da 3V. A seconda di quanto utilizzata, la batteria dovrebbe durare
senza problemi da 1 a 2 anni.
2
Sostituire la batteria quando si evidenzia un rallentamento nella
percezione dei comandi o quando le funzionalità risultano
significativamente ridotte.
Sostituire la vecchia batteria con una nuova cellula al litio CR2025.
93
ALIMENTATORE (PSU)
La vostra radio Heritage è fornita di adattatori multi-paese, il che
significa che possono operare in molti dei paesi del mondo.
Scegliete l’adattatore corrispondente al vostro paese tra le
alternative fornite e seguite le istruzioni illustrate qui in basso.
PU
SH
UK
EURO
U.S.A
SET-UP
2 Estrarre completamente l’antenna per DAB o FM
1 Utilizzando la PSU fornita, connettere un’estremità all’ingresso di corrente posizionato sul retro di Heritage, a questo punto inserite l’altra estremità alla presa sul muro.
3 Premere il tasto ACCENDI una sola volta per iniziare il
processo di inizializzazione.
94
CONTROLLO HERITAGE
Per ottenere il massimo dalla vostra radio, è importante capire il
funzionamento del suo sistema di comando e del menu.
COMANDO CURSOR
La vostra radio utilizza un sistema di comando basato sul cursore per
semplicità di utilizzo. Il comando del cursore ha cinque funzioni:
UP
DOWN
LEFT
RIGHT
PRESS
Scorre verso l’Alto
Scorre verso il Basso
Scorre verso Sinistra va indietro tra I Menu
Scorre a Destra e va Avanti tra Menu
Seleziona l’opzione
LEVA DI COMANDO
TASTO MENU
Grazie al tasto
‘SU’
potrete entrare nel Mode Menu della funzion-
alità in cui vi trovate. Ad esempio, premendo il tasto nella modalità
DAB, vi
riporterà nel DAB MODE MENU. Tenendo premuto
per un secondo, rientrerete nella schermata “play” iniziale.
‘SINISTRO’
(PARTE POSTERIORE)
SELECT
‘DESTRA’
(DI ANDATA)
TASTO MODE
Premendo il tasto MODE si visualizzeranno tutte le modalità operative
di Heritage. E’ anche possibile muoversi tra le diverse modalità attraverso il MENUPRINCIPALE (vedi sotto).
‘GIÙ’
‘STAMPA’
(PER PER SELEZIONARE)
FUNZIONAMENTO MENU
MENU PRINCIPALE
MENU MODALITA’
E’ il menu più importante di Heritage e permette di entrare nelle
diverse modalità operative, di cambiare le impostazioni e di visualizzare le informazioni come ad esempio l’ID del software della radio.
I Menu Modalità si chiamano così perché illustrano le funzioni
disponibili nella modalità corrente.
Il MENU PRINCIPALE offre accesso alle seguenti modalità e
sotto-menus:
Premendo il tasto
•
•
•
•
•
Ognuna dei Menu Modalità include anche la voce MENU
PRINCIPALE, così che possiate ritornare al livello superiore del MENU.
Radio Internet
Lettore Musicale
Last.fm
Radio DAB
Radio FM
•
•
•
•
iPod
Ingresso Ausiliario
Sveglia
Impostazioni di sistema
vi riporterà in qualunque momento nel
Menu Modalità della modalità in cui vi trovate in quel momento.
95
MODALITA’ DAB RADIO
PREPARARSI PER L’OPERAZIONE DAB
Prima di avviare la Modalità DAB, estendere completamente
l’antenna.
Per entrare in DAB MODE, premere
il tasto MODE finché non si
visualizza la voce DAB MODE oppure premere
DAB
radio
e poi selezionare
MENU PRINCIPALE, poi DAB dalle opzioni menu.
Scanning
Al momento dell’accensione, Heritage farà automaticamente una
scansione delle stazioni disponibili nella zona e poi le memorizzerà in
ordine alfabetico.
Stations : 21
Scanning
Potrebbe essere necessario operare una scansione manuale di tanto
in tanto per aggiornare la lista delle stazioni radio. Questo potrebbe
essere necessario per le seguenti motivazioni:
1. La disponibilità delle stazioni può cambiare quando compaiono
nuove stazioni oppure qualora emittenti esistenti cessassero la
programmazione.
2. Se la ricezione è scarsa durante lo scanning automatico, ad esempio se l’antenna della radio non è stata estratta del tutto potrebbe
verificarsi che la lista delle stazioni sia incomplete o vuota.
3. Se alcune stazioni non hanno una buona ricezione (audio spezzato
o di scarsa qualità), così da selezionare solamente quelle con un
buon segnale.
Per una scansione manuale, premere
il tasto e in seguito
selezionare SCAN COMPLETO dalla lista menu.
Per scansionare solo le stazioni con il segnale chiaro, premere e poi
selezionare SCAN LOCALE dalla lista menu. Una volta completato la
scansione, la radio elencherà tutte le stazioni disponibili.
Per rimuovere stazioni presenti nella lista ma non valide, premere e
poi scegliere ABOLISCI NON VALIDE Quando sullo schermo
Prune Invalid
This removes all invalid
stations, continue?
comparirà la domanda “rimuovere tutte le stazioni non valide?”,
selezionare Sì.
96
YES
NO
MODALITA’ RADIO DAB
SELEZIONARE UNA STAZIONE
Per accedere all’elenco delle stazioni radio, premere UP, DOWN o
LEFT sul comando del cursore quando lo desiderate, oppure premere
poi selezionare STATION LIST.
Station list
Scorrere l’elenco delle stazioni disponibili con i comandi UP e DOWN
del cursore poi premere il tasto selezione per selezionare la stazione
desiderata, o premere RIGHT.
Absolute
Amazing
BBC 1Xtr
BBC 6Mus
BBC Gael
PRESELEZIONE STAZIONI PREFERITE
Heritage vi permette di conservare le vostra stazioni favorite come
preselezioni accedendovi sia dai suoi 5 tasti montati sul frontalino
che dai 10 tasti disposti sul telecomando.
Per salvare la stazione in ascolto in quel preciso momento, premere
e tenere premuto il tasto corrispondente finché non si visualizzerà la
scritta “Preselezione Memorizzata”. Il numero di stazione assegnato
alla nuova memorizzazione sarà visibile in fondo allo schermo.
BBC Radio 6Music
u to vote for a track that
missed out on the 6:00 AM
Music playlist
Se in futuro si desiderasse cambiare una particolare preselezione,
ripetere il processo e sopra descritto e la selezione precedente sarà
sovrascritta con la nuova scelta.
97
OPZIONI MENU MODALITA’ DAB
INFORMAZIONI STAZIONE
In DAB MODE, Heritage è in grado di visualizzare diversi tipi di informazioni sullo
schermo. Premendo il tasto
è possibile ottenere le seguenti informazioni.
BBC Radio 6Music
SCHERMO DAB STANDARD
Scorre le informazioni standard dell’emittente.
Now Playing : Glasvegas
Go Square Go!
TIPO PROGRAMMA
Ad esempio, News, Rock Music, Classica ecc.
Rock Music
MULTIPLEX E FREQUENZA
Proprietario Multiplex e frequenza stazione.
BBC National DAB
Freq: 225.648 MHz
POTENZA SEGNALE
La Potenza del segnale in quel momento.
Signal Level : 90
BBC Radio 6Music
BBC Radio 6Music
BBC Radio 6Music
Strength
98
BBC Radio 6Music
BIT RATE E CODEC
Formato audio, velocità media, mono o stereo
Bit rate: 128 kbps
Codec : MP2
Channels : Joint Stereo
DATA
Data odierna.
Today’s Date :
22/12/09
BBC Radio 6Music
DYNAMIC RANGE COMPRESSION (DRC)
Se state ascoltando della musica ad alto contenuto dinamico in un
ambiente rumoroso (ad esempio, musica classica mentre cucinate),
con questa opzione potrete comprimere la dinamica dell’audio
aumentando così i suoni più bassi e riducendo i suoni più alti per un
effetto più omogeneo.
Per cambiare le impostazioni DRC,
DRC
DRC Low
DRC High
DRC Off
#
premere e poi scegliere
l’opzione DRC, prima di selezionare SPENTO, BASSO o ALTO.
ORDINE STAZIONE
E’ possibile impostare l’ordine della lista di stazioni DAB come
ALFANUMERICO, ENSEMBLE o VALIDE.
Come suggerisce la denominazione, l’ ALFANUMERICO elenca le
stazioni in ordine numerico.
ENSEMBLE elenca gruppi di stazioni che sono trasmesse insieme nello
stesso insieme, ad esempio BBC o Central Scotland Local.
Station order
Alphanumeric
Ensemble
Valid
#
VALIDE visualizza per prime le stazioni valide, poi le alfanumeriche e
infine quelle non ricevibili.
Per cambiare l’ordine delle stazioni, premere
e poi
selezionare ORDINE STAZIONI, prima di scegliere tra ALFANUMERICO,
ENSEMBLE o VALIDE.
ORDINE STAZIONE
DESCRIZIONE
ALFANUMERICO
Visualizza tutte le stazioni in ordine alfanumerico.
ENSEMBLE
Elenca le stazioni attive [quelle che trasmettono segnale] prima di quelle inattive.
VALIDE
Rimuove le stazioni inattive dalla lista stazioni.
99
MODALITA’ RADIO FM
OPERAZIONE FM
Assicurarsi che l’antenna della radio sia completamente estesa
prima diavviare la MODALITA’ FM.
Per entrare in MODALITA’ MODE, premere il tasto
fino
FM
radio
all’apparire della scritta MODALITA’ FM sullo schermo, oppure
Premere
e poi selezionare MAIN MENU, poi FM dalla lista delle
opzioni.
Se questa è la prima volta che si utilizza Heritage in MODALITA’
FM, effettuare una scansione a partire dalla prima frequenza
disponibile – altrimenti Heritage si sintonizzerà automaticamente
sull’ultima stazione ascoltata in precedenza.
87.50 MHz
Premendo il tasto selezione, partirà la scansione automatica fino alla
prima stazione disponibile. Non appena la stazione viene trovata, la
ricerca si interrompe.
Per migliorare manualmente la sintonizzazione, utilizzare i comandi UP
o DOWN del cursore.
Quando ci si trova su una frequenza FM con un segnale molto forte e
con la stazione che sta trasmettendo informazioni RDS, Heritage
visualizzerà il nome della stazione insieme ad alter informazioni utili sul
display.
BBC R3
Composer of the Week
Coming next - Proms
Chamber Music 2009
PRESELEZIONI RADIO PREFERITE
Heritage permette di memorizzare le proprie stazioni preferite come
preselezioni, sia utilizzando i suoi 5 comodi pulsanti disposti sul
pannello frontale che i 10 tasti del telecomando.
Per memorizzare la stazione in ascolto, tenere semplicemente
premuto un pulsante di preselezione fino alla comparsa della scritta
“Preselezione Memorizzata” sul display della radio. Il numero di
preselezione assegnato alla stazione sarà visibile sul fondo dello
schermo.
Se si desidera cambiare una particolare preselezione, ripetere il
processo sopra descritto e la nuova frequenza salvata sostituirà
automaticamente la precedente.
100
Preset stored
MODALITA’ RADIO FM
IMPOSTAZIONI FM
Premere
per accedere al MENU MODALITA’ FM. Da qui potrete
impostare le preferenze FM come le IMPOSTAZIONI RICERCA e le
IMPOSTAZIONI AUDIO.
IMPOSTAZIONI RICERCA vi permette di decidere se la radio in fase di
ricerca di nuove frequenze deve fermarsi solamente quando riceve
un segnale molto forte.
Scan setting
Audio setting
Main menu
IMPOSTAZIONI AUDIO vi permette di ascoltare una certa stazioni in
mono, qualora il segnale non fosse abbastanza forte da permettere
la diffusione in modalità stereo.
>
MODALITA’ AUX IN
La MODALITA’ AUX IN vi permette di riprodurre un formato audio da
una fonte esterna (come un lettore MP3) connettendola alla vostra
radio.
Per tale scopo, connettete la font esterna alla presa AUX IN di
3.5mm posta sul retro di Heritage.
Abbassate sia il volume di Heritage che, se possibile,
dell’apparecchiatura esterna.
Premete
premere
fino a visualizzare la scritta AUX IN, oppure
Auxiliary I nput
e poi selezionare MAIN MENU, e scegliere AUX IN.
Audio in
Regolate il volume di Heritage e, se necessario, quello dell’unità
Aux in
Today’s Date :
15/10/09
esterna.
101
MODALITA’ iPod
INSTALLARE L’ADATTATORE
Adaptor No.
iPod Model
9
iPod classic 80GB
10
iPod classic 120GB
Selezionare l’adattatore compatibile con il vostro iPod/iPhone
utilizzando la tabella di compatibilità sulla destra – ad ogni modello
corrisponde un numero 1 (vedi immagine seguente).
12
iPhone
13
iPod nano (3rd generation)
15
iPhone 3G
Per montare l’adattatore, rimuovere la protezione antipolvere prima
di inserire l’adattatore nel vano del connettore dock 2
(vedi immagine). Nel caso in cui l’adattatore dock per il vostro
modello di iPod/iPhone non fosse compreso tra quelli in dotazione
con la radio, vi preghiamo di utilizzare l’adattatore fornito da Apple
nel kit del vostro iPod/iPhone.
16
iPod touch (2nd and 3rd generation)
Heritage dispone di una scelta di adattatori dock compatibili con la
maggior parte dei modelli iPod/iPhone.
17
iPod nano (4th generation)
18
iPod nano (5th generation)
19
iPhone 4
20
iPod touch (4th generation)
2
1
19
ENTRARE IN MODALITA’ iPod
Collegare il vostro iPod/iPhone al connettore dock. Heritage vi
chiederà automaticamente se desiderate passare alla modalità
iPod. Selezionare YES o NO tramite il comando del cursore.
iPod attached switch to iPod mode?
YES
NO
Se un iPod/iPhone è già collegato a Heritage al momento
dell’accensione, premere
fino a visualizzare la schermata
introduttiva iPod MODE, oppure premere
MENU, poi iPod.
102
poi selezionare MAIN
iPod
MODALITA’ iPod
CONTROLLO E RIPRODUZIONE
Le funzioni di controllo di base vengono gestite dai comandi
multimediali posti sul lato frontale di Heritage.
Il tasto
lancerà la traccia selezionata. Premendolo durante
l’esecuzione del brano, la traccia andrà in PAUSA.
Il tasto
passerà alla traccia successive. Tenendo premuto questo
tasto, si avrà un avanzamento veloce del brano.
Il tasto
passerà alla traccia precedente. Tenendo premuto
questo tasto, si avrà un riavvolgimento veloce del brano.
In alternativa, il vostro iPod/iPhone può essere utilizzato tramite il
telecomando di Heritage, dotato di comandi menu avanzati etc.
Infine, è possibile utilizzare l’iPod/iPhone tramite i comandi presenti
sull’iPod/iPhone stesso.
VIDEO
Heritage dispone di un set di diversi connettori uscita video, che
consentono di visualizzare filmati e presentazioni dell’iPod/iPhone
sulla vostra TV - direttamente dalla vostra radio.
Per utilizzare questa funzione, andare a SETTINGS sul vostro iPod/
iPhone, selezionare VIDEO, poi passare TV OUT su ON. Ora impostare
il TV SIGNAL su PAL o NTSC, a seconda del sistema di trasmissione
utilizzato dalla vostra TV.
Se doveste aver bisogno di acquistare un cavo video composito,
potete rivolgervi direttamente all’Apple Store.
Uscita Video Composito
103
MODALITA’ iPod
INFORMAZIONI ESECUZIONE
Quando è stato collegato un iPod ed è stata conclusa con successo la fase di
autenticazione, la radio visualizzerà il nome dell’artista e il titolo della traccia (se
queste informazioni sono presenti nell’iPod).
Heritage è in grado di visualizzare diverse informazioni sulla traccia in ascolto e
sull’iPod connesso. Premendo il tasto
è possibile scorrere le seguenti
informazioni.
SCHERMO STANDARD
Visualizza titolo e artista
TIPO iPod
Mostra il modello dell’iPod connesso
STATO AUTENTICAZIONE
Se l’autenticazione è andata a buon fine o no
TEMPO TRACCIA
Indica la lunghezza del brano e la posizione nella lista
As you Are
Travis
As you Are
iPod touch
As you Are
iPod touch
Authentication:
Success
As you Are
3:54
TITOLO ALBUM
Dà il titolo dell’album, se presente
DATA
Data odierna
104
As you Are
The Man Who
As you Are
Today’s Date:
14/10/09
4:14
SETUP INTERNET
UTILIZZO DEL SETUP WIZARD DELLA RADIO INTERNET
La prima volta che utilizzerete Heritage in INTERNET RADIO modE,
vi verrà chiesto se desiderate lanciare il SETUP WIZARD. Il ‘WIZARD’
porrà una serie di domande. E’ il modo più semplice per mettere in
funzione la radio internet, sul vostro dispositivo.
Potete avviare nuovamente il SETUP WIZARD quando lo desiderate, lo
troverete nella sezione NETWORK, nel MENU SYSTEM SETTINGS.
Per impostare la vostra radio sul funzionamento online tramite INTERNET WIZARD, procedere come di seguito descritto:
Premere il tasto selezione per scegliere YES, e avviare la procedura
SETUP WIZARD.
Date/Time
1
12/24 hour format
Scegliere e selezionare il formato preferito (12 o 24 ore).
12
24 *
Auto update
2
Scegliere e selezionare AGGIORNA DA NETWORK.
Update from DAB
Update from FM
Update from Network
No update
*
Set Timezone
3
Scorrere e selezionare il proprio fuso orario dal menu.
UTC
UTC
UTC
UTC
UTC
+
+
+
+
+
00
00
01
01
02
:
:
:
:
:
00
30
00
30
00
: Dublin , London#
:
: Madrid , Ar
:
: Athens , Ci
Daylight savings
4
Scegliere e selezionare il proprio stato di risparmio energia.
Daylight savings
YES
NO
Wlan region
5
Scorrere e selezionare la regione Wlan.
Most of Europe
USA
Canada
Spain
France
105
SETUP INTERNET
6 Scorrere e selezionare la propria RETE. In alcuni casi la vostra radio
Potrebbe trovarne più di una. Scegliere quella che si desidera utilizzare.
CONNESISONI VIA CAVO
SSID
Homehub
FAMILY net
[Rescan]
[Wired]
[Manual config]
Se desiderate utilizzare la vostra radio con una connessione via cavo
piuttosto che una wireless, scegliere l’opzione CAVO dalla lista SSID.
7
8
Se la vostra rete wireless non è protetta da una password, Heritage si
connetterà automaticamente e si visualizzerà la seguente
schermata:
Se utilizzate una password di protezione, inserire la password di
rete utilizzando il comando del cursore per scorrere e selezionare i
caratteri alfanumerici desiderati. Dopo aver correttamente inserito la
password, selezionare OK.
Internet Radio
Last Listened
Station List
Main Menu
Key:
xxxxx
0123456789., a b
cdefghijklmnopq
rstuvwxyzABCDE
FGHIJKLMNOPQ
Usare
se avete inserito un carattere scorretto.
BKSP
Heritage salverà la password nella memoria. Non ci sarà più
bisogno di inserirla nuovamente.
106
>
>
BKSP
OK
CANCEL
MODALITA’ RADIO INTERNET
INIZIARE
Per entrare nella MODALITA’ RADIO INTERNET, premere il tasto
Internet
radio
fino a visualizzare la scritta MODALITA’ RADIO INTERNET, oppure
premere
e poi selezionare MAIN MENU, poi RADIO INTERNET dal
menu delle opzioni.
Il MENU RADIO INTERNET comprende le seguenti opzioni:
Preferiti: Utile per navigare le proprie stazioni preferite. Queste
possono essere impostate visitando il Frontier Silicon Radio Portal (dal
vostro PC o Mac). Vedere pag. 23 per ulteriori informazioni.
Locali: Una lista completa di tutte le stazioni trasmesse nella
propria area geografica (o Paese).
Internet radio
BBC: Utile come scorciatoia alle stazioni della BBC trasmesse in tutto il
mondo.
Stazioni: Trova le stazioni radiofoniche sulla base di diversi criteri,
come: luogo, genere, più popolari, ecc.
My Favourites
Local United Kingdom
BBC
Stations
Podcasts
>
>
>
>
>
Podcast: Trova i Podcast o ‘Ascolta-Ancora’ trasmessi per luogo,
genere o per nome.
Mie Stazioni Aggiunte: Mostra tutte le stazioni che si ha
personalmente aggiunto dal Frontier Silicon Radio Portal. Vedere
pag. 23 per tutti i dettagli.
Aiuto: Trova il proprio CODICE D’ACCESSO. Il codice serve per
accedere al Frontier Silicon Radio Portal. Vedi pag. 23.
Stations
SCELTA DELLA STAZIONE
Per scegliere una stazione, selezionare STATION LIST dal menu INTERNET
RADIO, poi selezionare STATIONS con il comando del cursore.
Location
Genre
Search Stations
Popular Stations
New Stations
>
>
>
>
Ora potrete scegliere o trovare una stazione sulla base dei
seguenti criteri di ricerca:
LUOGO (paese d’origine)
RICERCA STAZIONI (per nome)
NUOVE STAZIONI
GENERE
STAZIONI POPOLARI
107
MODALITA’ RADIO INTERNET
SCEGLIERE UNA STAZIONE (Seguito)
Per mezzo del curseur di controllo, scorrere tra le opzioni e premere
per scegliere il proprio criterio di ricerca.
Per esempio, selezionando LOCATION visualizzerete un elenco
alfabetico di continenti/regioni, e successivamente un elenco di nazioni.
Utilizzare il comando del cursore per scorrere la lista e premere selezione
per scegliere il continente, poi la nazione. Potrete poi selezionare ALL
STATIONS o un GENRE, per raffinare ulteriormente la vostra ricerca.
Location
Africa
Asia
Caribbean
Central America
Europe
>
>
>
>
>
Dopo aver selezionato i criteri, otterrete una lista di stazioni.
Selezionate una stazione per iniziare l’ascolto.
RICERCA
E’ possibile ricercare una stazione della radio internet per nome (se
conosciuto), o per parola chiave.
Per CERCARE una stazione, selezionare RICERCA STAZIONI dal MENU
STAZIONI, poi inserire una parola chiave utilizzando il tastierino
(simile a quello utilizzato per inserire la password).
Se la stazione è stata trovata, selezionare per ascoltarla.
Se si ricerca per parola chiave, Heritage elencherà tutte le stazioni
trovateche contengono quella particolare parola. Scorrere la lista e
poi selezionare la stazione.
Stations
ROCKF
0123456789 ABCD
EFGHIJKLMNOPQRS
TUVWXYZ
BKSP
OK
CANCEL
SCEGLIERE UN PODCAST
BBC Radio 1
I podcast (anche detti ‘Ascolta Ancora’) vengono ricercati e
selezionati allo stesso modo di una normale stazione.
BBC Radio 1
Podcasts
Selezionare PODCAST dal MENU INTERNET RADIO, poi cercare per
luogo, genere o la combinazione dei due.
La differenza principale nel ricercare un Podcast è che una volta
selezionata la stazione, vi verranno presentati una serie di
Programmi (o Podcast) disponibili per quella
stazione. Selezionare la propria scelta.
108
Podcasts
Adam and Joe
BBC Introducing
Bruce Dickinson
Chris Hawkins
Clare McDonnell
>
MODALITA’ RADIO INTERNET
PREFERITI
E’ possibile compilare una lista (o liste) delle proprie stazioni preferite,
in modo da poter accedere facilmente e rapidamente a numerose
stazioni di diversi paesi e generi.
Prima di poter accedere a questo servizio è necessario registrarsi al
Frontier Silicon Radio Portal. Vedere la sezione dedicate ad PORTALE
RADIO INTERNET a pag. 23.
Per memorizzare una stazione tra i preferiti, premere e tenere
premuto il tasto selezione fino a visualizzare sullo schermo FAVOURITE
ADDED. La stazione selezionata comparirà nell’elenco predefinito
delle stazioni preferite.
Per accedere alla lista PREFERITI, selezionare LISTA STAZIONI, poi
PREFERITI e poi STATIONS. Ora sarà possibile scorrere tra le stazioni
della lista e selezionare la propria scelta.
Your Rock Favourites
Kerrang!
North Sea Classic rock
Rock FM
Takeover Radio
The Arrow
>
>
>
>
>
MIE STAZIONI AGGIUNTE
Se avete aggiunto delle stazioni alla lista predefinita (attraverso il
Frontier Silicon Radio Portal, vedi pag. 23), verranno elencate qui.
L’opzione MIE STAZIONI AGGIUNTE si trova all’interno del MENU LISTA
STAZIONI, nella MODALITA’ RADIO INTERNET.
BBC
BBC
L’opzione BBC è una scorciatoia alla lista completa delle stazioni
della BBC. Selezionare questa opzione dal MENU LISTA STAZIONI, poi
scorrere e selezionare una stazione normalmente.
BBC
BBC
BBC
BBC
BBC
Radio
Radio
Radio
Radio
Radio
1
1Xtra
2
3
3
>
>
>
>
>
ULTIMA ASCOLTATA
Quando si entra nella MODALITA’ RADIO INTERNET verrà selezionata
automaticamente la stazione ascoltata l’ultima volta. Per selezionare
un’altra stazione ascoltata recentemente, selezionare ULIMI ASCOLTI.
Verrà visualizzata una lista completa delle ultime stazioni ascoltate
(le più recenti all’inizio).
Last Listened
Clyde 1
West FM
BBC Radio6
BBC Radio 1
Chill
>
>
>
>
>
109
MODALITA’ RADIO INTERNET
AIUTO
L’opzione AIUTO si trova all’interno del MENU LISTA STAZIONI. In AIUTO,
troverete anche il CODICE D’ACCESSO che servirà per registrarvi al
Frontier Silicon Radio Portal (vedi pag. 23 per le istruzioni complete).
Get access code
Access code
HEBZM0Z
Sotto la voce AIUTO troverete anche un’utile FAQ.
LOCALI
La lista delle stazioni LOCALI può essere trovato all’interno del MENU
LISTA STAZIONI e potrebbe variare a seconda del paese in cui ci si
trova. Ad esempio, se vi trovate in UK, questa scelta visualizzerà le
stazioni del REGNO UNITO. Allo stesso modo, se state utilizzando la
radio in Germania, scegliendo questa opzione avrete la lista delle
stazioni trasmesse in Germania.
Selezionare questa opzione per navigare tra le stazioni di un
determinato paese o, alternativamente, è possibile raffinare la
ricerca per genere.
110
Local United Kingdom
All Stations
Highlighted Stations
Alternative
Ambient
Big Band
>
>
>
>
>
PORTALE RADIO INTERNET
ACCEDERE AI CONTENUTI SPECIALI
Alcuni delle caratteristiche più avanzate di Heritage possono essere
attivate solo dal Frontier Silicon Radio Portal. Per poter accedere a
questi contenuti è necessario prima registrare la propria radio.
REGISTRARE LA RADIO
Per registrare la propria radio è necessario inserire il codice
d’accesso.
Per trovare il codice d’accesso bisogna prima entrare nella MODALITA’ RADIO INTERNET, poi premere MENU. Selezionare LISTA STAZIONI e
poi AIUTO. Ora selezionare
OTTIENI CODICE D’ACCESSO.
Appuntatevi il codice d’accesso.
Ora,utilizzando il PC o Mac, visitate il portale del sito all’indirizzo www.wifiradio-frontier.com
Cliccate su REGISTRATEVI QUI (situato nel pannello a sinistra) per
iniziare il processo di registrazione.
Se avete già un account e desiderate registrare un’altra radio,
effettuate il log in al vostro account e selezionate PREFERENZE, poi
AGGIUNGI ALTRA RADIO Wi-Fi.
Una volta registrata la radio nel portale potrete immediatamente
accedere alle varie componenti aggiuntive e ai servizi offerti.
111
PREDISPORRE UN SERVER MUSICALE
Affinché Heritage possa eseguire brani da un computer connesso al
sito, il computer deve prima essere predisposto per il media sharing.
UPnP media sharing permette alle apparecchiature come Heritage
di eseguire brani musicali da una libreria musicale condivisa,
navigando tra liste divise per Nome Artista, Album o Genere.
Se il vostro PC utilizza Windows Media Player 11 o superiore (WMP), o
un Apple Mac con OS X 10 o superiore ed installate l’applicazione
UPnP, potrete connettere Heritage e ascoltare in streaming l’audio.
NOTA: iTunes attualmente non opera come server UPnP ma esistono
numerose componenti aggiuntive disponibili sul mercato che vi
permetteranno di accedere alla vostra libreria iTunes.
CONDIVIDERE CON WINDOWS MEDIA PLAYER
Il server UPnP più comune è Windows Media Player (versione11
o superiore) anche se è possibile utilizzare altre piattaforme UPnP e
altri server. Per predisporre WMP per la condivisione multimediale,
eseguire i seguenti passi:
Assicurarsi che il proprio PC e la radio siano connessi alla stessa rete.
Heritage sul vostro PC verrà riconosciuto come ‘Heritage’.
1 In WMP, aggiungere alla libreria multimediale i file audio e le cartelle
che si desiderano condividere con Heritage (LIBRARY > ADD TO
LIBRARY . . ).
2 Assicurarsi che la radio abbia accesso al materiale condiviso
selezionando e cliccando PERMETTI. E’ anche possibile impostare
un nome per il materiale condiviso.
Il PC ora è pronto per eseguire in streaming la musica attraverso la
radio. WMP UPnP funziona sullo sfondo; non è necessario attivare
WMP appositamente.
112
IMPOSTARE UN SERVER MUSICALE
CONDIVIDERE CON UN MAC
Per connettere Heritage al proprio Apple Mac, è necessaria
un’applicazione esterna UPnP. Ci sono numerose applicazioni
disponibili su Internet.
Una tra le altre è EyeConnect. Questa applicazione è facile da
scaricare e installare e permette a Heritage di eseguire audio in
streaming. EyeConnect può essere scaricato da:
http://www.elgato.com
3 Una volta installato, EyeConnect si sistemerà all’interno delle
Preferenze di Sistema. Quando ci si connette con Heritage, assicurarsi
che EyeConnect sia visibile sullo schermo.
Heritage apparirà come ‘Heritage’ nella lista delle periferiche di
EyeConnect. La finestra PERMETTI deve essere autorizzata
spuntando ACCESSO a PERMETTI NUOVE FUNZIONI.
Il proprio Mac ora è pronto per eseguire brani in streaming sulla radio.
EyeConnect verrà lanciato automaticamente all’accensione.
113
MODALITA’ MUSIC PLAYER
ESEGUIRE TRACCE AUDIO NEL LETTORE MUSICALE
MUSIC PLAYER MODE vi consente di ascoltare file audio come MP3,
AAC, WMA o FLAC direttamente dal pc o da un music server sulla
vostra rete locale.
Per entrare in MUSIC PLAYER MODE, premere
fino a visualizzare
la schermata introduttiva di MUSIC PLAYER MODE, in alternativa
premere
poi selezionare MAIN MENU, poi MUSIC PLAYER
dall’elenco opzioni menu.
Quando sarete in modalità music player, premere
, poi
selezionare o SHARED MEDIA.
Potete navigare nell’elenco con il comando del cursore, utilizzando
UP e DOWN per scorrere la lista. Per spostarsi tra le cartelle premere
il tasto (SELECT ) o RIGHT. Trovato il brano desiderato, una rapida
pressione sul tasto selezione farà partire la riproduzione, una
pressione prolungata aggiungerà il brano alla playlist (vedi PLAYLISTS
a pag. 28 per ulteriori informazioni).
La gestione dei brani può avvenire anche tramite i tasti
presenti sul pannello superiore della vostra radio.
Premendo e tenendo premuto il tasto
avrete accesso alla
funzione indietro-veloce del brano in esecuzione. Premendo e
tenendo premuto il tasto
avrete accesso alla funzione avantiveloce.
114
Music player
Shared media
My playlist
Repeat play: Off
Shuffle play: Off
>
>
MODALITA’ MUSIC PLAYER
MATERIALE CONDIVISO (Da un Media Server UPnP )
Nella MODALITA’ MUSIC PLAYER selezionare MATERIALE CONDIVISO.
Se avete impostato la condivisione multimediale (come descritto a
pag. 24), dovreste vedere una scritta del server impostato, ad esempio “SBLaptop: Audio”. Se avete più di un computer in condivisione
di materiale,le alternative saranno elencate. Selezionare il materiale
condiviso da riprodurre.
SB-laptop: Audio
Music
Video
Pictures
Playlists
<Search>
>
>
>
>
Da questo punto, i menu sono generati dal server che gestisce il
materiale condiviso (di solito Windows Media Player). Il primo menu
visualizza una lista di file, ad esempio musica, video, immagini e
playlist. Heritage può riprodurre solo brani e playlist.
Esiste anche una funzione di ricerca che trova tracce in modo simile
alla ricerca radio internet, come descritto a pag. 20.
Per la musica esistono molti modi per selezionare il brano, incluso:
Genere | Artista | Album | Compositore | Voto
Music
Music
All Artists
Contributing Artists
Album Artists
Composers
>
>
>
>
>
Trovato il brano desiderato, premere il tasto selezione. Premendo
rapidamente il tasto, il brano sarà riprodotto, tenendo il tasto premuto, il brano verrà aggiunto alla PLAYLIST.
Nota: Le tracce eseguite in modalità UPnP sono SCROBBLATE a Last.
fm, se lo SCROBBLING è ON sul menu di Last.fm. Per saperne di più
sullo SCROBBING, vedere pag. 29.
115
MODALITA’ MUSIC PLAYER
PLAYLIST
Heritage può memorizzare fino a 500 brani nella sua playlist. I brani
della playlist possono provenire da server UPnP multipli e dispositivi
USB . Per gestire la playlist, selezionare MY PLAYLIST dal MENU MUSIC
PLAYER.
Per visualizzare i contenuti della playlist, scorrerla utilizzando il
comando del cursore. Per riprodurre la playlist da un dato brano in
avanti, premere brevemente il tasto selezione. Per eliminare un brano
dalla playlist, tenere premuto il tasto selezione, poi confermare YES
per cancellare.
My playlist
Human
>
Just My Imagination.wma
Back At One
Can’t Fight This Feelng. . . . . .
Three birds.mp3
Se selezionate un brano/album/cartella per l’esecuzione immediata,
senza utilizzare l’opzione playlist, la playlist precedente resterà in
memoria e continuerà ad essere archiviata nella vostra radio, fino a
quando sceglierete di eliminarla.
RIPETI/MESCOLA
E possibile selezionare la ripetizione del brano o la riproduzione casuale,
selezionando REPEAT PLAY o SHUFFLE PLAY dal MENU MUSIC PLAYER.
INFORMAZIONI SUL BRANO IN ESECUZIONE
Durante la riproduzione di un brano, Heritage mostrerà il titolo
del brano ed il nome dell’artista (UPnP). C’è anche una barra di
avanzamento che mostra il tempo trascorso e la durata totale del
brano.
Music player
Human.mp3
1:01
Music player
Per visualizzare ulteriori informazioni sul brano, premere
Ogni volta che premerete
, visualizzerete un’ulteriore
informazione, come di seguito descritto:
.
UPnP: Titolo brano/artista, barra di avanzamento /durata brani,
album, codec/ Velocità di acquisizione, buffer di esecuzione e data.
116
Letter To Me
Album:
5th Gear
3:08
MODALITA’ LAST.FM
Oltre a potersi connettere alle frequenze terrestri e internet, Heritage
può anche accedere al servizio musicale online di Last.fm. E’ sufficiente Scegliere un artista o il genere e lasciare che Last.fm
costruisca la playlist perfetta pescando tra la sua libreria contenente
oltre 5 milioni di tracce – su misura per voi e nuove ogni volta.
Se siete già iscritti al servizio, potrete utilizzare il vostro profilo Last.fm
esistente su Heritage, in alternativa visitate www.last.fm, completate
il profilo e poi iscrivetevi.
Se siete in possesso di un Buono Iscrizione Prova, visitate www.last.fm/
voucher e seguite i suggerimenti on-screen.
AGGIUNGERE UN ACCOUNT UTENTE
Per entrare nella MODALITA’ LAST.FM, premere
Last.fm
fino a veder
Station list
last.fm setup
System settings
Main menu
comparire MODALITA’ LAST.FM sullo schermo, in alternativa premere
poi selezionare MAIN MENU, poi LAST.FM dalla lista menu.
Per aggiungere un account, selezionare LAST.FM SETUP dal menu, poi
selezionare USER ACCOUNTS.
Ora selezionare AGGIUNGI NUOVO ACCOUNT ed inserire il nome
utente e la password scelte per accedere a LAST.FM usando la
tastiera sullo schermo.
User Accounts
<Add new account>
>
>
>
>
Search:
Rolling
0123456789., a b
cdefghijklmnopq
rstuvwxyzABCDE
FGHIJKLMNOPQ
BKSP
OK
CANCEL
SCROBBLING E LOVE/BAN TRACCE
Per trarre il massimo da LAST.FM, è possibile FARE SCROBBLE di tutte le
tracce ascoltate, sia in modalità UPnP che LAST.FM (e anche quelle
da un iPod o da un computer con i giusti plug-ins). Questa opzione
invierà a LAST.FM le informazioni dei brani, aggiungendoli alla vostra
libreria, aiutandovi ad ottendere un servizio e dei vicini sempre più
vicini ai vostri gusti musicali. E’ possibile riascoltare la propria libreria
LAST.FM selezionando la stazione TUA LIBRERIA nel MENU LAST.FM.
Last.fm
Your library
Your Recommendations
Your neighbourhood
Artist radio
Tag radio
Last.fm setup
Per scegliere SCROBBLE ON o OFF, selezionare LAST.FM SETUP, poi
SCROBBLING, selezionare ON o OFF.
User Accounts
>
Scrobbling: on
Nota: Se desiderate che anche altre persone accedano ad Heritage in MODALITA’ LAST.FM, è consigliabile impostare SCROBBLING
OFF. In alternativa, è possibile passare ad un altro account.
117
MODALITA’ LAST.FM
Durante l’ascolto di LAST.FM è possibile scegliere se contrassegnare
un brano con LOVE o BAN (che le metterà in SCROBBLE anche se
SCROBBLING è OFF). Comunicando a LAST.FM che si AMA una
canzone, la si andrà ad aggiungere alla lista TUE TRACCE PREFERITE,
accettando di ascoltarla in futuro. Assegnare BAN ad una traccia
significa che questa non verrà più eseguita nella playlist.
Last.fm
Love
Ban
Per assegnare LOVE o BAN ad un brano, premere e usare il
curseur per selezionare
LOVE o BAN.
Il tasto
si trova sia sulla parte frontale alta della vostra radio,
che sul telecomando. Durante l’ascolto di LAST.FM è possibile
scegliere di SALTARE una traccia semplicemente premendo
.
Non è possibile mettere in PAUSA un brano in LAST.FM.
Nota: Potrete modificare la libreria o il gradimento ai brani
accedendo al sito LAST.FM.
ESEGUIRE I BRANI
Ci sono vari tipi di streaming o di ‘stazioni radio’ disponibili su LAST. FM.
Per sceglierne uno, selezionare LISTA STAZIONI dal menu MODALITA’
LAST.FM. Se non siete esperti di LAST.FM, vi suggeriamo di iniziare con
una ricerca per ARTISTA o TAG RADIO, così da iniziare a conoscere le
principali caratteristiche del servizio. Sono disponibili le seguenti
opzioni:
TUA LIBRERIA
Esegue tutte le tracce SCROBBLE sul proprio
profilo, o brani degli artisti inseriti nella propria libreria. È possibile
modificare l’opzione dal sito LAST.FM.
SUGGERIMENTI
Esegue i brani suggeriti sulla base dei gusti musicali inseriti nel profilo
di altri utenti con gusti similari.
TRACCE PREFERITE
Esegue tutte le canzoni contrassegnate con LOVE.
VICINATO
Esegue le tracce tratte dalle librerie di altri utenti con gusti similari
connessi in quel momento a LAST.FM.
118
Last.fm
Your library
Your Recommendations
Your neighbourhood
Artist radio
Tag radio
MODALITA’ LAST.FM
ESEGUIRE I BRANI (seguito)
ARTISTA RADIO
Esegue una serie di brani di un determinato artista e di artisti di
genere similare. Scegliete un artista ed inserite il suo nome o parte
di esso (non è necessario inserire il nome completo, ad esempio per
trovare i ROLLING STONES è possibile inserire solamente ROLLING), e
selezionare l’artista dalla lista dei risultati selezionando OK.
Artist radio
Search:
Rolling
0123456789., a b
cdefghijklmnopq
rstuvwxyzABCDE
FGHIJKLMNOPQ
BKSP
OK
The Rolling Stones
Rolling Stones
Rolling Baba and the
Rolling Stones and Dave Matt
CANCEL
TAG RADIO
Esegue dei brani catalogati con una certa parola chiave. Scegliete
una tag parola/genere inserendo una parola o una frase (cercando
di essere il più specifici possibile, ad esempio BOLLYWOOD piuttosto
che BOLLY, perché le tags sono generate dagli utenti e quindi
potrebbero crearsi molte tag fittizie connesse a solo poche canzoni
che potrebbero portare alla segnalazione di errore per contenuto insufficiente). Scegliere una tag dalla lista dei risultati e selezionare OK.
Last.fm
This Hard Land
Album:
Greatest Hits
STORICO
Evidenzia le trace ascoltate di recente, con le più recenti all’inizio.
Non è possibile selezionare una canzone da questa lista per
riascoltarla nuovamente.
History
Last.fm
Your Loved Tracks
Your Neighbourhood
Artist Radio
Tag Radio
History
>
Rapture by DatA from
Visions by Cut Copy from. . . .
We Are The People by E . . . . .
She’s got me dancing by. . . . .
Meddle by Little Boots f. . . . .
INFORMAZIONI ON-SCREEN
Mentre LAST.FM è in funzione, sullo schermo si visualizzeranno nome
dell’artista e barra di scorrimento, con i minuti trascorsi e totali.
Un’icona LAST.FM è visibile sul fondo dello schermo, ricordando che si
è in MODALITA’ LAST.FM.
Durante la riproduzione, il tasto
vi permetterà di scorrere tra
le alter informazioni del brano come artista, album, titolo, nome radio,
Last.fm
This Hard Land
Artist:
Bruce Springstein
Last.fm
This Hard Land
Album:
Greatest Hits
codec/samplying rate, buffer data odierna.
119
SVEGLIA
IMPOSTARE UNA SVEGLIA
Alarms
Heritage è in grado di memorizzare due sveglie individuali.
Per impostare o modificare una sveglia, premere o selezionare
,
Alarm 1: Off [06:55AM]
Alarm 2: Off [07:50AM]
poi MAIN MENU e ALARM. Selezionare quail IMPOSTAZIONI SVEGLIA
(Alarm 1 o Alarm 2) si desidera modificare o abilitare.
Utilizzando il comando del cursore, scorrere tra le seguenti opzioni,
impostando le vostre preferenze.
Alarm 1
•
•
•
•
•
•
Abilita: on/off
Frequenza: Giornaliera, Una Volta, Weekend o Giorni Lavorativi.
Ora
Modalità: Buzzer, Internet Radio, DAB, FM o iPod o Last.fm
Preset: Ultima ascoltata o stazione favorita preselezionata 1-10
Volume: 0 - 20
Enable : Daily
Time : 7:30AM
Mode : internet radio
Preset : last listened
Volume :
6
Una volta definite le preferenze, ricordatevi di selezionare SALVA.
Heritage mostra le sveglie attivate con un’icona sul fondo dello
schermo.
Se in MODALITA’ STANDBY, cliccando il tasto
, potrete
mettere in su ON o OFF le sveglie impostate. Cliccando
sarà possibile scorrere tra le impostazioni di ALARM 1 e ALARM 2,
abilitarle e disabilitarle in ogni momento. Se le icone SVEGLIA sono
12/10/2009
14:30
06: 55AM
07: 50AM
visualizzate, la sveglia è in funzione. Se non è presente l’icona, la
sveglia non è in funzione.
ARRÊT D’UNE ALARME
Quand une alarme est retentissement, appuyer sur des n’importe
quels des boutons de l’héritage ARRÊTERA l’alarme.
Quand l’alarme a été annulée, une ALARME OUTRE de message sera
affichée sur l’écran de l’héritage.
120
Alarm off
SVEGLIA
MODALITA’ SLEEP (seguito)
Utilizzando la funzione SLEEP è possibile impostare Heritage a passare
autonomamente alla modalità STANBY. La modalità SLEEP può essere
attivata in due modi:
Set sleep time
Il metodo più veloce è attraverso la SNOOZE BAR. E’ sufficiente
premere la SNOOZE BAR per scorrere tra le diverse possibilità di
durata dello SLEEP, da SLEEP OFF a 15, 30, 45 e 60 minuti.
15 MINS
In alternativa, premere e selezionare
PRINCIPALE, poi SLEEP. Ora
è possibile impostare il timer SLEEP su una delle preselezioni fornite.
Una volta selezionata la durata della modalità, Heritage farà ritorno
al MENU PRINCIPALE.
Premere
per ritornare alla schermata IN ESECUZIONE.
FUNZIONE SNOOZE
Heritage include una funzione SNOOZE ed incorpora anche una
SNOOZE BAR, posta sulla parte frontale alta della radio. Lo SNOOZE
permette di spegnere temporaneamente la sveglia fino ad un
massimo di 30 minuti.
La durata dello SNOOZE può essere impostata solamente mentre
l’allarme della sveglia è in funzione. A questo punto, premere la
SNOOZE BAR per scorrere tra le varie opzioni preimpostate di
durata dello SNOOZE: 5, 10, 15 o 30 minuti.
Set snooze
5 MINS
Quando lo SNOOZE è attivato, Heritage ritornerà in standby per il
tempo indicato e apparirà l’icona SNOOZED sullo schermo.
121
IMPOSTAZIONI DI SISTEMA
EQUALIZZATORE
Heritage offre all’utente la possibilità di avere un certo controllo sulle
impostazioni audio (default). Ciò include il controllo dei BASSI,del
TREBLE, e degli ALTI, e la possibilità di utilizzare una tra le numerose
modalità EQ preselezionate. E’ anche possibile creare le proprie
impostazioni EQ personali – riportate come “Mie EQ”.
Per aggiustare le impostazioni audio, premere
poi selezionare
MAIN MENU, seguito da IMPOSTAZIONI DI SISTEMA. Ora selezionare
EQUALIZZATORE dal menu.
Equaliser
Classic
Pop
News
My EQ
Heritage visualizzerà 9 opzioni EQ come segue: Normale,
Piatto, Jazz, Rock, Film, Classica, Pop, News e Mia EQ.
My EQ profile setup
>
Selezionare la vostra preferenza dall’elenco evidenziando l’opzione
scelta e premendo il tasto selezione. Heritage memorizzerà questa
impostazione. L’attuale impostazione EQ è evidenziata da un
asterisco (*) nell’elenco EQ.
Per configurare le proprie impostazioni EQ, selezionare MIA EQ
PROFILE SETUP dal menu EQUALIZZATORE. Regolare i BASSI e il TREBLE,
decidere se si desidera impostare su OFF o ON gli ALTI – prima
selezionare SALVA. L’EQ personalizzato ora sarà sempre disponibile
ing MIA EQ nel menu EQUALIZZATORE.
122
My EQ profile
Bass : 0
Treble : 0
Loudness : Off
Bass
Bass
0
dB
IMPOSTAZIONI DI SISTEMA
RETE
Internet Setup
Il MENU RETE si trova sotto IMPOSTAZIONI DI SISTEMA nel MAIN MENU
ed include una voce per INTERNET WIZARD, che vi assisterà
nell’installazione delle impostazioni internet sulla vostra radio.
Network Wizard
scanning/
Per gli utenti più esperti, da qui si può accedere a numerose
impostazioni manuali:
INTERNET WIZARD :
Semplifica il setup della connessione internet della vostra radio con
istruzioni passo-passo.
PBC WLAN SETUP :
Utile per abbinare la vostra radio ad un router che utilizza WPS
security.
VEDI IMPOSTAZIONI:
Visualizza l’indirizzo MAC, la regione Wlan, ecc.
REGIONE WLAN:
Il paese da dove utilizzate la radio - Europa, USA ecc.
Internet Setup
Internet Wizard
PBC Wlan setup
View settings
Wlan region
Manual settings
>
IMPOSTAZIONI MANUALI :
Controllo dettagliato delle connessioni Via Cavo e Wireless.
PROFILO RETE:
Visualizza la denominazione delle ultime quattro reti wireless a cui di
è connessa Heritage.
NOTA: Heritage ricorda le ultime quarto reti wireless a cui si è
connesso e cerca automaticamente di riconnettersi con la prima
disponibile. Tuttavia, è possibile cancellare le reti non più desiderate
andando in IMPOSTAZIONI DI SISTEMA, RETI, PROFILO RETI. Ora
selezionare il profilo della rete che si desidera cancellare
selezionandolo e cliccando Sì.
123
IMPOSTAZIONI DI SISTEMA
ORA/ DATA
Posto all’interno delle IMPOSTAZIONI DI SISTEMA, questo menu vi permette di scegliere tra diverse impostazioni di ora/data. Il menu ORA/
DATA ha tre possibili opzioni:
IMPOSTA ORA/ DATA : Per impostare manualmente la data e l’ora.
Time/Date
AUTO AGGIORNAMENTO: Scegliete tra tre diverse opzioni di
impostazione automatica.
IMPOSTA FORMATO: Selezionare se si preferisce usare il formato 12hr o
24hr.
Set Time/Date
Auto update
Set format
Set timezone
Daylight savings
>
>
Aggiorna da DAB :
Prende automaticamente data e ora dal segnale DAB. Prima di
poter offrire queste informazioni, Heritage deve essere impostato sul
funzionamento in MODALITA’ DAB (e aver ricevuto il segnale).
Auto update
Aggiorna da FM :
Imposta data e ora dal segnale FM. Come per il DAB, Heritage deve
operare in MODALITA’ FM ed aver ricevuto le informazioni RDS prima
di poter offrire le informazioni richieste.
Update from DAB
Update from Network
No update
*
Aggiorna da Rete :
Prende data e ora dalla vostra connessione internet.
LUMINOSITA’
Heritage permette di avere un certo controllo sulla luminosità del
suo display OLED, ciò significa che sia in STANDBY che ACCESA i livelli
si luminosità possono essere impostati indipendentemente tra ALTO,
MEDO o BASSO.
Per modificare la luminosità, premere
poi selezionare MAIN
MENU e IMPOSTAZIONI DI SISTEMA. Adesso selezionare LUMINOSITA’
dalla lista. Ora potrete modificare le impostazioni della luminosità per
entrambe le funzioni - STANDBY e ACCESA. Selezionare l’opzione su
cui si desidera intervenire, poi scegliere la luminosità scelta. Le
modifiche apportate verranno memorizzate stabilmente ma potrete
intervenire nuovamente ogni volta lo desideriate.
124
Brightness
Power-On Level
Standby Level
*
IMPOSTAZIONI DI SISTEMA
LINGUA
La lingua impostata per default è l’Inglese, tuttavia si può scegliere
tra una varietà di 12 lingue:
Danese
Olandese
Norvegese Polacco
Finlandese Francese Tedesco Italiano
Portoghese Spagnolo Svedese Turco
Language
Per cambiare lingua, selezionare IMPOSTAZIONI DI SISTEMA dal MAIN
MENU, poi LINGUA, e selezionare la propria scelta.
English
Danish
German
Italian
Norweigian
*
IMPOSTA A ZERO
Selezionando IMPOSTA A ZERO dal menu delle IMPOSTAZIONI DI
SISTEMA, è possibile reimpostare Heritage ai valori iniziali (casa madre), cancellando tutte le modifiche personali apportate nel tempo
(data e ora, configurazione rete e preselezioni, tutto verrà cancellato). Tuttavia, l’attuale software di Heritage verrà mantenuto, così
come la registrazione al portale. Le tracce internet preferite saranno
anch’esse mantenute, a meno che non si registri nuovamente la
radio con un altro account al portale.
Factory Reset
Per resettare a zero, premere
poi selezionare MAIN MENU,
Proceed?
seguito da IMPOSTAZIONI DI SISTEMA, poi IMPOSTA A ZERO. Cliccare Sì.
YES
NO
AGGIORNAMENTI SOFTWARE
Di tanto in tanto metteremo a disposizione degli utenti degli aggiornamenti del software. Questi sono necessari per ragioni di manutenzione generale, oltre che per aggiungere migliori funzioni alla vostra
radio. Gli aggiornamenti verranno eseguiti ‘over-the-air’, attraverso la
connessione a banda larga.
Heritage controllerà la presenza di possibili aggiornamenti ad
ogni accensione e se ne trovasse uno, vi chiederà di confermare
prima di iniziare il download.
Si prega di notare che dopo ogni aggiornamento, tutte le
impostazioni dell’utente saranno mantenute.
125
IMPOSTAZIONI DI SISTEMA
AGGIORNAMENTI SOFTWARE (seguito)
Se si desiderasse operare manualmente la ricerca per
l’aggiornamento del software, premere
e selezionare
Software update
Auto-Check setting
Check now
*
MAIN MENU. Ora scegliere IMPOSTAZIONI DI SISTEMA, poi
AGGIORNAMENTO SOFTWARE. Selezionare IMPOSTAZIONI
AUTO-RICERCA e impostare su NO.
Per cercare manualmente gli aggiornamenti, selezionare CERCA
ORA dal menu AGGIORNAMENTI SOFTWARE.
ATTENZIONE: prima di iniziare l’upgrade del software, assicurarsi che
Heritage sia connesso ad una linea di corrente stabile, una disconnessione improvvisa potrebbe danneggiare irreparabilmente la
vostra radio.
System settings
Language
Factory reset
Software Update
Setup Wizard
Info
SETUP WIZARD
Il SETUP WIZARD semplifica l’impostazione di data e ora e delle
impostazioni internet facendovi una serie di domande.
Per accedere al SETUP WIZARD, premere
poi selezionare MAIN
MENU, e in seguito IMPOSTAZIONI DI SISTEMA. Adesso selezionare
SETUP WIZARD dalla lista.
INFO
Se vi imbattete in un problema tecnico potrebbe venirvi chiesto la
VERSIONE DEL SOFTWARE o il numero ID DELLA RADIO. Entrambe le
informazioni possono essere trovate all’interno della voce INFO, nel
menu IMPOSTAZIONI DI SISTEMA.
Premere
poi INFO.
126
poi selezionare MAIN MENU, seguito da IMPOSTAZIONI,
Info
SW version:
domino_V2.0.16.25756-5
Radio ID:
00226100C3D6
>
RISOLUZIONE PROBLEMI
PROBLEMA
FM: FISCHIO
CAUSA
SOLUZIONI
Segnale debole.
Controllare/muovere l’antenna.
Spostare sede della radio.
Nuovo scanning delle stazioni
locali (segnale forte).
Per DAB, cercare copertura
www.ukdigitalradio.com/coverage
DAB: ‘No Stazioni Disponibili’
Segnale debole.
Come sopra, poi nuovo scanning.
Impossibile connettersi a rete
Assenza rete.
Controllare che la rete sia in
funzione tra router e pc.
Router impedisce accesso agli
indirizzi MAC elencati.
Ottenere gli indirizzi Heritage
MAC da MENU > IMPOSTAZIONI
SISTEMA> RETE> VEDI IMPOSTAZIONI
e aggiungere lista router.
DAB: A scatti/Intermittente
Interruzione
NOTA: Heritage ha separate indirizzi MAC
per reti via cavo e wireless; è visualizzato
solo l’indirizzo dell’adattatore di rete
corrente ma gli altri indirizzi si possono ottenere cambiando le prime due cifre da
‘00’ (wireless) e ‘02’ (via cavo).
Segnale Wi-Fi insufficiente.
Controllare la distanza del router.
Verificare se il computer riesce a
connettersi al router da quel punto.
Metodo di codificazione errato.
Cambiare metodo di
codificazione
sul router. Heritage supporta WEP,
WPA e WPA2.
Configurazione rete inusuale.
Impostare manualmente la rete da
MENU > IMPOSTAZIONI DI SISTEMA>
RETE> IMPOSTAZIONE MANUALE
Firewall impedisce accesso.
Verificare che sul router siano
aperte le seguenti porte:
UDP e TCP porte 80 e 123
DNS porta 53
Windows shares: porte 135 - 139
e 445
Windows media player: variabile Firewall Non-Microsoft potrebbero
richiedere configurazione per UPnP.
127
RISOLUZIONE PROBLEMI
PROBLEMA
Impossibile connettersi a Internet
Impossibile aprire una
particolare stazione internet
CAUSA
SOLUZIONI
Connessione internet non presente
Verificare che un computer
connesso alla stessa rete riesca
a connettersi ad internet.
Firewall impedisce accesso
Verificate che le seguenti
porte siano aperte:
UDP e TCP porte 80 e 123
DNS porta 53.
Alcune stazioni radio internet
possono necessitare di porte
addizionali per essere aperte.
Stazione non trasmette.
Banda troppo carica o
insufficiente.
Stazione trasmette con
codec sconosciuto.
Provare a cercare alter stazioni.
Provare ad ascoltare dal computer
la radio
internet.
Provare più tardi.
Link scaduto.
128
Impossibile aprire
Last.fm
Messaggio ‘Non Autorizzato’
Dettagli account errati.
Dettagli account non inseriti.
Regione non supportata.
(Last.fm sono attualmente ristrette
ad alcune regioni ex. US/UK)
Problemi di licenza.
Last.fm: Materiale audio insufficiente
Non ci sono sufficienti trace
disponibili
e autorizzate (licenza) da poter
eseguire di un particolare artista o
stazione tag radio.
Select a different radio station.
MESSAGGI D’ERRORE
MESSAGGIO
DESCRIZIONE
ESEMPIO
Impossibile connettersi
Parola chiave corretta ma
router rifiuta la richiesta.
Filtro MAC abilitato sul router.
Errore formato
impossibile riconoscere
segnale - indipendente dalla
rete.
Ricevuto .wma, ma il segnale
WMA era impossibile da
decodificare.
Errore rete
Problema dopo router – dati
ricevuti
dalla rete non corretti
Dati ricevuti dal server non
leggibili.
Timeout rete
Problema dopo router – nessuna
risposta ricevuta dalla rete.
Stazione IR in streaming e di colpo
la stazione non è più disponibile.
Nessun media UPnP trovato
Nessun server UPnP trovato.
Servizio non disponibile (DAB)
Nessuna ricezione DAB.
Non autorizzato
Accesso non riuscito con UPnP.
Aggiornamento fallito
Aggiornamento software non
riuscito.
Rete non pronta
Problema di connessione al router.
Permette accesso a Heritage nelle
unità
UPnP.
Router spento.
129
NOTE
130
131
SUPPORTO TECNICO
TEL - + 44 (0) 1555 666161
E-MAIL - [email protected]
WEB - www.revo.co.uk/support
Version 2.0
RADIO DE TABLE DE LUXE
Avec dock pour iPod et iPhone
DAB | DAB+ | FM | Internet Radio | Audio Streaming
Manuale dell’utente
SUPPORT TECHNIQUE
GARANTIE
Si vous rencontrez des problèmes à l’usage de ce produit, veuillez vous
référer à la section de dépannage, page 39 de ce manuel.
Vous pouvez également appeler le support technique de Revo au :
Revo Technologies Ltd garantit l’utilisateur que cet appareil ne présentera
pas de défauts en ce qui concerne le matériel ou la construction durant
son utilisation normale pour une période d’un an à compter de sa date
d’achat.
Ceci garantit la couverture de pannes dues à des défauts de fabrication
et ne s’applique pas en cas de dommage accidentel, d’usure
normale due à l’utilisation, de négligence de la part de l’utilisateur, de
modifications ou de réparations non autorisées par Revo Technologies Ltd.
Au Royaume-Uni 01555 666161
Hors du Royaume-Uni + 44 1555 666161
Vous pouvez également envoyer un message à [email protected]
ou visiter la section de dépannage sur notre site Web: www.revo.co.uk/
support
Afin d’enregistrer votre achat, veuillez visiter le site www.revo.co.uk/register
INFOS ENVIRONNEMENTALES
DROITS D’AUTEUR ET
REMERCIEMENTS
INSTRUCTIONS POUR L’ELIMINATION DE CE PRODUIT (REGLEMENTATION WEEE)
Ce symbole se trouvant sur le produit signifie qu’il est classé en tant
qu’Appareil Électrique ou Électronique et qu’il ne devrait pas être éliminé
avec d’autres déchets domestiques ou commerciaux à la fin de sa vie utile.
Le Règlement WEEE pour les Appareils Électriques et Électroniques
(2002/96/EC) a été mis en place afin de recycler les appareils en utilisant
les meilleures techniques disponibles de réutilisation et de recyclage afin
de minimiser leur impact sur l’environnement, de traiter les substances
dangereuses et d’éviter l’augmentation des sites d’enfouissement.
Pour de plus amples informations, veuillez prendre contact avec vos
autorités locales ou le revendeur chez qui l’appareil a été acheté.
Conformité RoHS et marque CE
C’est appareil a été conçu afin d’être conforme aux règlements
internationaux concernant la Restriction des Substances Dangereuses
(RoHS) et il a été testé afin d’être conforme aux exigences EU.
Il porte la marque CE.
Droits d’auteur 2011 Revo technologies Ltd. Tous droits réservés.
Aucune partie de ce manuel ne peut être copiée, distribuée,
transmise ou transcrite sous aucune forme ou par aucun moyen
électronique, mécanique, magnétique, manuel ou autre, sans la
permission de Revo Technologies Limited.
REVO et HÉRITAGE sont des marques déposées ou enregistrées de
Revo Technologies Ltd. iPod est une marque déposée d’Apple Inc.,
enregistrée aux USA et dans d’autres pays.
Revo Technologies Ltd
The Inox Building, Caldwellside, Lanark,
Écosse, Royaume Uni, ML11 7SR
Tel: 01555 66 61 61
Fax: 01555 66 33 44
Int. Tel: +44 1555 66 61 61
Int. Fax: +44 1555 66 33 44
E-mail : [email protected]
Site Web : www.revo.co.uk
DECHARGE
AVERTISSEMENTS DE SECURITE
• N’utilisez pas cette radio près de l’eau.
ISO 7000-0434
• N’enlevez pas de vis ni de parties du boîtier
• Utilisez uniquement l’unité d’alimentation électrique fournie
• Évitez que de petits objets ou du liquide entrent à l’intérieur de l’appareil
134
Revo Technologies Limited ne fait aucune déclaration en ce qui concerne
cette publication et n’en garantit pas le contenu, et se décharge
spécifiquement de toute garantie légale de conformité ou d’usage dans
un but particulier. En outre, Revo Technologies Limited se réserve le droit
d’apporter par moments des modifications à cette publication, sans
notification préalable à quelque personne ou organisation que ce soit.
TABLE DES MATIÈRES
BIENVENUE
Nous vous remercions d’avoir acheté notre radio Héritage, nous sommes certains que vous en retirerez des années de plaisir et de service
fiable. Ce guide a été conçu pour que vous soyez rapidement prêt à
utiliser et écouter votre radio, pour vous offrir des conseils sur les fonctions plus complexes de ce produit et vous fournir des informations sur
la sécurité, la garantie et le dépannage.
134
Support technique
134
Informations environnementales
134
Garantie
134
Droits d’auteur et Remerciements
134
Décharge
135
Bienvenue / Aperçu / Déballage
136
Anatomie
137
Télécommande
138
Alimentation électrique
138
Mise en fonctionnement
139
Contrôle d’Héritage / Structure des menus
140 - 141
Mode DAB
142 - 143
Options des menus en mode DAB
144
Mode FM
145
Mode FM / Mode AUX-IN
146 - 148
Mode iPod
149 - 154
Mode radio Internet
155
Portail radio Internet
Ôtez Héritage de son emballage avec précaution avant de retirer
les autres articles de la boîte.
156 - 157
Installer un serveur musical
La boite devrait contenir les articles suivants :
158 - 160
Mode Lecteur de musique
161 - 163
Mode Last.fm
164 - 165
Réveil
166 - 170
Réglage des paramètres
171 - 172
Dépannage
173
Messages d’erreur
174
Notes
APERÇU D’HERITAGE
Heritage est une réinterprétation contemporaine des conceptions classiques européennes des radios de table à partir des années 60. Une radio
multi-format numérique qui offre une couverture des DAB, DAB +, FM et radio
Internet Wi-Fi - ainsi que le streaming audio sans fil et les fonctionnalités docking de l’iPod/iPhone.
Heritage est conçu à l’aide de matériaux et de composants de première
qualité. Son coffret est construit en utilisant une combinaison d’aluminium
et de noyer américain de qualité pour meubles. La performance audio est
délivrée par une enceinte néodyme 3” personnalisée, pilotée par un superbe
amplificateur de 7W. Enfin, Heritage bénéficie d’un grand écran OLED
graphique et d’un système de contrôle intuitif.
DEBALLAGE D’HERITAGE
• La radio Héritage
• Télécommande
• Kit d’adaptation dock iPod/iPhone
• Alimentation électrique avec des adaptateurs multi-pays
(Royaume-Uni, Eu, USA)
• Manuel de l’utilisateur
Si un article manque ou est abîmé, veuillez contacter votre revendeur ou appelez Revo directement au +44 (0) 1555 66 61 61
NOTE: L’emballage d’Héritage devrait être conservé pour un usage
ultérieur : c’est la manière la plus sûre de transporter Héritage si
nécessaire.
135
L’ANATOMIE D’HERITAGE
Dock iPod/iPhone
Commande de curseur
136
TÉLÉCOMMANDE
01 - Mode
02 – Défiler vers le haut
03 - Menu
04 - Allumage
3
1
2
4
6
8
10
11
05 - Retour
06 - Sélectionner
5
7
07 - Avance
08 – Augmenter le volume
12
9
09 - Info
10 – Défiler vers le bas
13
11 - Réveil
12 – Diminuer le volume
13 - Programmes 1- 10
14 - Sommeil
15
14
15 - Veille
16 – Retour (Rembobinage rapide)
19
16
17
18
17 – Marche/Arrêt
18 – Avance (Avance rapide)
19 - Rétroalimentation (Coup de cœur/Bannir))
1
REMPLACEMENT DE LA BATTERIE
La télécommande d’Héritage est alimentée par une seule batterie
3V lithium. Selon son utilisation, cette batterie devrait fonctionner
correctement entre 1 et 2 ans.
2
Remplacez la batterie lorsque les touches ne fonctionnent plus
bien, ou si la distance de fonctionnement s’est réduite de manière
significative.
Remplacez l’ancienne batterie avec une nouvelle CR2025 lithium
cell.
137
ALIMENTATION ÉLECTRIQUE
Votre radi o Héritage est fournie avec une alimentation multi-régions, ce qui
signifie qu’elle peut fonctionner dans plusieurs pays du monde.
Choisissez simplement l’adaptateur correct pour votre pays parmis ceux qui
vous sont fournis, puis suivez les instructions suivantes.
PU
SH
UK
EURO
U.S.A
MISE EN FONCTIONNEMENT
2 Étendez complètement l’antenne pour le fonctionnement DAB ou FM
1 Avec la PSU fournie, connectez un côté à la prise DC à l’arrière d’Héritage, ensuite
branchez le côté opposé à la prise du secteur dans le mur.
3 Appuyez une fois sur la touche Power afin de commencer le processus d’initialisation.
138
CONTROLE D’HÉRITAGE
Afin d’obtenir le meilleur de votre radio, il est important pour vous de
comprendre comment fonctionne son système de commande et de menu.
CONTRÔLE PAR CURSOR
Votre radio utilise un système de commande avec curseur pour
faciliter son utilisation.
Le contrôle du curseur a cinq fonctions comme suit:
UP (haut)
DOWN (bas)
LEFT (gauche)
RIGHT (droite)
menus PRESS
Défile vers le haut
Défile vers le bas
Défile vers la gauche et revient en arrière
dans les menus
Défile vers la droite et avance dans les
Sélectionne l’option actuelle
CURSOR
‘HAUT’
TOUCHE MENU
Appuyer sur la touche
vous mènera au mode menu pour le
mode particulier de fonctionnement où vous vous
trouvez.
Par exemple, appuyer en mode DAB vous mènera au menu MODE
DAB. Appuyer sur la touche
une deuxième fois vous ramènera
‘LEFT’/GAUCHE’
(RETOUR)
SELECT
à l’écran « playing screen » que vous venez de quitter.
‘RIGHT’/DROITE’
(AVANCER)
‘PRESS’/APPUYER’
(POUR CHOISIR)
TOUCHE MODE
‘BAS’
Appuyer sur la touche MODE vous fera passer par chaque mode de
fonctionnement d’Héritage. Il est aussi possible de passer entre les
modes de fonctionnement via le MENU PRINCIPAL (voir ci-dessous).
EXPLICATION DE LA STRUCTURE DU MENU
MENU PRINCIPAL
MODE MENUS
C’est le menu principal d’Héritage, qui vous permet d’entrer dans différents
modes de fonctionnement, changer les réglages et voir des informations
comme le numéro d’identité de la version du logiciel de votre radio.
Les menus mode montrent les fonctions disponibles au sein du
mode sélectionné actuellement.
Le MENU PRINCIPAL fournit l’accès aux modes et sous-menus suivants :
• Radio Internet
• Lecteur de musique
• Last.fm
• Radio DAB
• Radio FM
• iPod
• Entrée auxiliaire
• Réveils
• Réglages du Système
Appuyer sur la touche
à tout moment vous mènera au Mode
Menu pour le mode de fonctionnement dans lequel se trouve votre
radio actuellement.
Chacun des Menus Mode inclut également une liste pour le MAIN
MENU/MENU PRINCIPAL, qui vous permet de revenir au MENU PRINCIPAL.
139
MODE RADIO DAB
LA FONCTION DAB
Veuillez vous assurer que l’antenne de la radio est étendue avant de
fonctionner en Mode DAB.
Afin d’entrer en mode DAB, appuyez sur la touche
jusqu’à ce que
DAB
radio
l’écran d’introduction au MODE DAB soit affiché, ou appuyez sur
puis sélectionnez MAIN MENU, ensuite DAB depuis la liste des options du menu.
Scanning
À l’allumage, Héritage réalisera automatiquement un balayage
complet afin de voir quelles stations sont diffusées dans votre région,
Stations : 21
Scanning
avant de les stocker alphabétiquement dans la mémoire de la radio.
Il peut être nécessaire de réaliser un balayage manuel de temps en
temps, afin de mettre la liste de stations de votre radio à jour. Cela
peut être nécessaire pour les raisons suivantes :
1. La disponibilité des stations peut changer de temps en temps quand de
nouvelles stations apparaissent, ou des stations existantes cessent de diffuser.
2. Si la réception était médiocre durant le balayage initial, par
exemple si l’antenne de la radio n’était pas complètement étendue,
il se peut que la liste de stations soit incomplète ou même vide.
3. Si vous disposez d’une réception médiocre de certaines stations
(résultant en un son de mauvaise qualité), il se peut que vous vouliez
mettre dans la liste seules les stations qui une bonne réception.
Afin de commencer un balayage manuel, appuyez sur la touche
ensuite sélectionnez FULL SCAN dans la liste du menu.
Afin de balayer uniquement les stations qui ont un signal puissant, appuyez
sur puis sélectionnez LOCAL SCAN/BALAYAGE LOCAL dans la liste du menu
Une fois que le balayage est terminé, la radio montrera une liste des stations disponibles.
Afin d’enlever les stations qui sont dans la liste mais sont indisponibles,
appuyez sur la touche
puis choisissez PRUNE INVALID.
Lorsqu’on vous demande si vous désirez « remove all invalid stations/
ôter toutes les stations invalides », sélectionnez YES/OUI.
140
Prune Invalid
This removes all invalid
stations, continue?
YES
NO
MODE RADIO DAB
SÉLECTION DES STATIONS
Pour accéder à la liste de station de votre radio, appuyez à tout
moment sur HAUT (UP), BAS (DOWN) ou GAUCHE (LEFT) sur la
commande du curseur, ou bien appuyez sur
puis sélectionnez
LISTE DES STATIONS (STATION LIST).
Station list
Faites défiler les stations disponibles en utilisant HAUT (UP) et BAS
(DOWN) sur la commande du curseur, puis appuyez sur la touche
SELECT pour choisir votre station, ou appuyez sur DROITE (RIGHT).
Absolute
Amazing
BBC 1Xtr
BBC 6Mus
BBC Gael
PRÉSÉLECTION DE STATIONS PRÉFÉRÉES.
Héritage vous permet de présélectionner vos stations préférées, soit
via les 5 « hot-keys » du panneau avant, ou les 10 touches situées sur
la télécommande d’Héritage.
Afin de présélectionner la station que vous écoutez actuellement,
appuyez et maintenez enfoncée une touche de présélection jusqu’à
ce que l’écran affiche « Preset stored ». Le numéro de présélection
assigné à cette station sera affiché au bas de l’écran.
BBC Radio 6Music
u to vote for a track that
missed out on the 6:00 AM
Music playlist
Si vous désirez changer une présélection dans le futur, répétez le
processus et la présélection précédente sera automatiquement
remplacée.
141
OPTIONS DES MENUS EN MODE DAB
INFORMATIONS SUR LES STATIONS
En MODE DAB, Héritage peut afficher plusieurs informations sur son écran. En appuyant sur la touche
vous pouvez passer par les types suivants d’information.
STANDARD DAB SCREEN
(écran DAB standard)
Montre de l’information en texte déroulant
d’un difffuseur
PROGRAMME TYPE
Par exemple News, Rock Music, Classical etc.
MULTIPLEX AND FREQUENCY
(multiplex et fréquence)
Propriétaire Multiplex et fréquence
de la station.
SIGNAL STRENGTH
(puissance du signal)
Puissance actuelle du signal de la station
BBC Radio 6Music
Now Playing : Glasvegas
Go Square Go!
BBC Radio 6Music
Rock Music
BBC Radio 6Music
BBC National DAB
Freq: 225.648 MHz
BBC Radio 6Music
Signal Level : 90
Strength
BIT RATE AND CODEC
DATE
142
Format audio, taux de l’échantillon, mono
ou stéréo
Date d’aujourd’hui
BBC Radio 6Music
Bit rate: 128 kbps
Codec : MP2
Channels : Joint Stereo
BBC Radio 6Music
Today’s Date :
22/12/09
OPTIONS DES MENUS EN MODE DAB
COMPRESSION DE LA PLAGE DYNAMIQUE (DYNAMIC RANGE COMPRESSION, DRC)
Si vous écoutez de la musique ayant une plage dynamique élevée
dans un environnement bruyant, (p. ex., de la musique classique en
cuisinant), vous pouvez comprimer la plage dynamique audio. Cela
rend les sons doux plus forts, et les sons forts plus doux.
Afin de changer le réglage DRC, appuyez sur
DRC
DRC Low
DRC High
DRC Off
#
puis choisissez
l’option DRC, avant de sélectionner OFF, LOW ou HIGH.
ORDE DES STATIONS
Vous pouvez choisir l’ordre de la liste des stations DAB pour qu’elle soi
ALPHANUMERIQUE, ENSEMBLE ou VALIDE.
Comme son nom l’indique, la liste ALPHANUMERIQUE présente les stations par ordre alphanumérique.
Les listes ENSEMBLE regroupent des stations qui sont diffusées ensemble, comme par exemple la BBC ou l’Écosse Centrale local.
Station order
Alphanumeric
Ensemble
Valid
#
Les listes VALIDE montrent d’abord les stations valides par ordre
alphanumérique, puis les stations qui ne sont pas sur antenne.
Afin de changer l’ordre des stations, appuyez sur
puis sélection-
nez STATION ORDER avant de choisir ALPHANUMERIC, ENSEMBLE ou
VALID.
ORDRE DES STATIONS
DESCRIPTION
ALPHANUMERIQUE
Affiche toutes les stations par ordre alphanumérique.
ENSEMBLE
Donne la liste des stations actives (celles qui diffusent actuellement) avant les stations inactives.
VALID
Ôte les stations inactives de la liste de stations.
143
MODE RADIO FM
FONCTIONNEMENT FM
Veuillez vous assurer que l’antenne de la radio est étendue avant de
fonctionner en Mode FM.
Afin d’entrer en mode FM, appuyez sur la touche
jusqu’à ce
que l’écran d’intro MODE FM soit affiché, ou appuyez sur
puis
sélectionnez MAIN MENU, ensuite FM depuis la liste des options du
menu.
Si c’est la première fois qu’Héritage est utilisé en mode FM, le
balayage commencera au début de la plage des fréquences –
sinon, Héritage se placera par défaut sur la station que vous avez
écoutée en dernier lieu.
FM
radio
87.50 MHz
En appuyant sur le bouton de sélection, le scan de la radio
commencera à chercher la prochaine station disponible. Heritage
arrêtera automatiquement le scan lorsqu’une station sera trouvée.
Pour affiner l’écoute, utilisez (HAUT) UP ou BAS (DOWN) sur le contrôle
du curseur pour progressivement changer la fréquence.
Quand la radio se trouve sur une station FM qui a un signal puissant
et qui diffuse des informations RDS, Héritage affichera le nom de la
station et d’autres informations en texte sur l’écran.
BBC R3
Composer of the Week
Coming next - Proms
Chamber Music 2009
PRÉSÉLECTIONS DES STATIONS PRÉFÉRÉES.
Héritage vous permet de présélectionner vos stations préférées, soit
via les 5 « hot-keys » du panneau avant, ou les 10 touches situées sur
la télécommande d’Héritage.
Afin de présélectionner la station que vous écoutez actuellement,
appuyez simplement et maintenez enfoncée une touche de
présélection jusqu’à ce que l’écran de votre radio affiche « Preset
stored ». Le numéro de présélection assigné à cette station sera
affiché au bas de l’écran.
Si vous désirez changer une présélection particulière dans le futur,
répétez ce processus et la présélection précédente sera remplacée
automatiquement.
144
Preset stored
MODE RADIO FM
PARAMÈTRES FM
Appuyez sur la touche
afin d’accéder au menu mode FM.
De là, vous pouvez programmer des préférences FM comme SCAN
SETTING et AUDIO SETTING.
SCAN SETTING vous permet de décider si la radio doit cesser le
balayage seulement si elle trouve une station avec un signal puissant.
Scan setting
Audio setting
Main menu
AUDIO SETTING vous donne l’option d’écouter une station en mono,
si la puissance du signal n´est pas suffisamment forte pour permettre
la réception stéréo.
>
MODE AUX IN
Le MODE AUX IN vous permet d’écouter de la musique depuis une
source externe (comme un lecteur MP3) à travers votre radio.
Pour ce faire, connectez votre source audio externe à la prise AUX IN
3,5 mm à l’arrière d’Héritage.
Baissez le volume tant sur Héritage que, si possible, sur le
périphérique.
Appuyez ensuite sur
appuyez sur puis
jusqu’à ce que l’écran AUX IN s’affiche, ou
Auxiliary I nput
sélectionnez MAIN MENU, et ensuite choisissez
AUX IN.
Aux in
Audio in
Today’s Date :
15/10/09
Ajustez le volume d’Héritage et, si nécessaire, du périphérique audio.
145
MODE iPod
MONTAGE D’UN ADAPTATEUR DOCK
Adaptor No.
iPod Model
9
iPod classic 80GB
10
iPod classic 120GB
Sélectionnez l’adaptateur qui est compatible avec votre iPod /
iPhone en utilisant le tableau de compatibilité sur la droite – ils sont
tous numérotés (voir illustration ci-dessous).
12
iPhone
13
iPod nano (3rd generation)
15
iPhone 3G
Pour installer l’adaptateur, enlever le cache-poussière avant d’insérer
l’adaptateur dans le logement qui entoure le connecteur dock (voir
illustration). Si aucun des adaptateurs inclus avec votre radio ne
s’adapte à votre modèle Ipod/ Iphone, veuillez utiliser l’adaptateur
fourni par Apple dans le kit de l’Ipod/ Iphone.
16
iPod touch (2nd and 3rd generation)
Heritage est fourni avec une sélection d’adaptateurs dock pour
s’adapter à la plupart des modèles iPod/ iPhone.
17
iPod nano (4th generation)
18
iPod nano (5th generation)
19
iPhone 4
20
iPod touch (4th generation)
2
1
19
Accès au mode iPod
Connectez votre iPod / iPhone au connecteur dock. Heritage
demandera automatiquement si vous souhaitez passer en mode
iPod. Sélectionnez OUI ou NON en utilisant le contrôle du curseur.
iPod attached switch to iPod mode?
YES
NO
Si un iPod / iPhone est déjà connecté à Heritage, appuyer sur
jusqu’à ce que le mode Ipod s’affiche, ou appuyez sur
sélectionnez MENU PRINCIPAL (MAIN MENU), puis IPod.
146
puis
iPod
MODE iPod
CONTROLE ET PLAYBACK
Les fonctions de base de contrôle des pistes peuvent être réalisées
via les contrôles média situés sur la face supérieure d’Héritage.
Appuyer sur la touche
fera débuter le morceau sélectionné.
Appuyer sur cette touche lorsqu’un morceau est joué fera ARRETER cette piste.
Appuyer sur la touche
vous fera avancer vers le morceau
suivant. Appuyer et maintenir vous fera avancer rapidement (fast-forward)
Appuyer sur la touche
vous fera revenir vers le morceau précédent.
Appuyer et maintenir vous fera revenir rapidement en arrière (fast rewind).
Sinon, votre iPod/ iPhone peut aussi être exploité en utilisant la
commande à distance de Heritage, qui offre un contrôle avancé
des menus, etc. Enfin, il est possible de commander l’iPod/ iPhone en
utilisant les commandes situées sur l’iPod/ iPhone même.
Enfin, il est possible de contrôler l’iPod grâce à ses propres
commandes.
iPod VIDÉO
Heritage est équipé d’un ensemble de vidéo composite sur
connecteurs, permettant de visualiser des films iPod/ iPhon, des
diaporamas, etc. sur votre
télévision - directement à partir de votre radio.
Pour utiliser cette fonctionnalité, allez dans PARAMETRES (SETTINGS) sur
votre iPod / iPhone, sélectionner VIDEO, puis passer de TV OUT à TV
ON. Réglez maintenant le SIGNALTV (TV SIGNAL) en PAL ou en NTSC,
selon le système de diffusion qu’utilise votre téléviseur.
Sortie vidéo composite
Si vous avez besoin d’acheter un câble vidéo composite, vous
pouvez directement l’acheter auprès de l’Apple Store.
147
MODE iPod
INFORMATIONS AU SUJET DE L’ÉCOUTE ACTUELLE (NOW PLAYING)
Lorsqu’un iPod/iPhone a été mis sur dock et que le processus d’authentification
est complet, votre radio va afficher les information concernant l’artiste pour le
morceau actuel (si ces informations sont disponibles sur votre iPod/iPhone).
Héritage peut afficher plusieurs informations au sujet du morceau actuel et de
l’iPod/iPhone qui est connecté. En appuyant sur la touche
vous pouvez
passer par les types suivants d’information.
STANDARD SCREEN (écran standard)
Montre le nom du morceau et de l’artiste
iPod/iPhone TYPE
Montre le modèle d’iPod/iPhone connecté
AUTHENTICATION STATUS
Si l’authentification est réussie ou pas
(satut de l’authentification)
TRACK TIME (temps du morceau)
Montre la longueur du morceau et la position actuelle sur le morceau
As you Are
Travis
As you Are
iPod touch
As you Are
iPod touch
Authentication:
Success
As you Are
3:54
ALBUM TITLE (titre de l’album)
Affiche le titre de l’album, si disponible
DATE
Date d’aujourd’hui
148
As you Are
The Man Who
As you Are
Today’s Date:
14/10/09
4:14
INSTALLATION INTERNET
UTILISATION DE L’ASSISTANT D’INSTALLATION DE LA RADIO INTERNET
La première fois que vous utilisez Heritage en mode Radio
Internet, il vous sera demandé si vous souhaitez suivre l’ASSISTANT
CONFIGURATION (SET UP WIZARD). L’”assistant” passera par une
série de questions, et sera le moyen le plus simple d’obtenir la radio
Internet et mettre en marche votre appareil.
Vous pouvez suivre l’assistant de configuration à tout moment, il peut être
trouvé sous la rubrique NETWORK, dans le menu SYSTEM SETTINGS
Pour configurer votre radio en utilisant l’Assistant Internet en ligne,
procédez comme suit:
Appuyez Appuyez sur le bouton de sélection pour sélectionner OUI
(YES), et commencer la procédure ASSISTANT DE CONFIGURATION.
Date/Time
1
12/24 hour format
Choisissez et sélectionnez votre format horaire préféré (12 ou 24 heures).
12
24 *
Auto update
2
Choisissez et sélectionnez UPDATE FROM NETWORK (mise à jour sur réseau).
Update from DAB
Update from FM
Update from Network
No update
*
Set Timezone
3
Faites défiler et sélectionnez votre zone horaire locale dans le menu.
UTC
UTC
UTC
UTC
UTC
+
+
+
+
+
00
00
01
01
02
:
:
:
:
:
00
30
00
30
00
: Dublin , London#
:
: Madrid , Ar
:
: Athens , Ci
Daylight savings
4
Choisissez et sélectionnez votre statut préféré pour l’heure d’été.
Daylight savings
YES
NO
Wlan region
5
Faites défiler et sélectionnez votre région Wlan.
Most of Europe
USA
Canada
Spain
France
149
INSTALLATION INTERNET
6 Faites défiler et sélectionnez votre RESEAU. Dans certains cas vous pouvez en
trouver plus d’un. Choisissez simplement celui que vous désirez utiliser.
CONNECTIONS SUR RESEAU
SSID
Homehub
FAMILY net
[Rescan]
[Wired]
[Manual config]
Si vous désirez utiliser votre radio sur réseau, plutôt que sans fil, choisissez simplement l’option WIRED de la liste SSID.
Internet Radio
7 Si votre réseau sans fil n’est pas protégé par un mot de passe, Héritage
se connectera automatiquement, et l’écran suivant sera affiché :
8 Si vous utilisez un mot de passe de protection, entrez votre mot de
passe réseau en utilisant le contrôle du curseur pour faire défiler et
sélectionner les caractères alphanumériques corrects. Lorsque vous
avez correctement entré votre mot de passe, cliquez sur OK.
Last Listened
Station List
Main Menu
Key:
xxxxx
0123456789., a b
cdefghijklmnopq
rstuvwxyzABCDE
FGHIJKLMNOPQ
Sélectionnez
incorrect.
BKSP
(retour) si vous avez saisi un caractère
Héritage sauvegardera le mot de passe en mémoire. Il ne faudra
plus le saisir.
150
>
>
BKSP
OK
CANCEL
MODE RADIO INTERNET
COMMENT DEBUTER
Afin d’entrer en mode INTERNET RADIO, appuyez sur la touche
jusqu’à ce que l’écran d’intro INTERNET RADIO soit affiché, ou
appuyez sur
Internet
radio
puis sélectionnez MAIN MENU, ensuite INTERNET
RADIO depuis la liste des options du menu.
Le menu INTERNET RADIO comprend les options suivantes :
Mes stations favorites : Sert à naviguer vers vos stations préférées. Elles
peuvent être programmées en visitant le portail Frontier Silicon Radio (à
l’aide de votre PC ou Mac). Voir page 23 pour de plus amples informations.
Local : Une liste complète de toutes les stations diffusées depuis votre
propre zone géographique (ou pays).
BBC: Raccourci vers toutes les stations BBC diffusées dans le monde.
Stations: Trouve les stations à partir de certains critères tels que :
localisation, genre, les plus populaires, etc.
Internet radio
My Favourites
Local United Kingdom
BBC
Stations
Podcasts
>
>
>
>
>
Podcasts: Trouve les Podcasts ou diffusions de « Réécoute » par
localisation, genre ou recherche par nom.
Mes stations ajoutées : Montre les stations que vous avez ajoutées
personnellement à votre liste de stations via le portail Frontier Silicon
Radio.Voir page 23 pour de plus amples informations.
Aide : Vous trouverez ici votre CODE d’ACCES. Requis pour avoir
accès au portail Frontier Silicon Radio. Voir page 23.
SÉLECTION D’UNE STATION
Pour choisir une station, sélectionnez LISTE DES STATIONS (STATION
LIST) dans le MENU RADIO INTERNET (INTERNET RADIO MENU), puis
sélectionnez STATIONS en utilisant la commande du curseur.
Stations
Location
Genre
Search Stations
Popular Stations
New Stations
>
>
>
>
Vous avez maintenant l’option de choisir ou de trouver une station
en utilisant les critères de recherche suivants :
LOCALISATION (pays d’origine)
GENRE
CHERCHER DES STATIONS (par nom) STATIONS POPULAIRES
NOUVELLES STATIONS
151
MODE RADIO INTERNET
SÉLECTION D’UNE STATION (suite)
Avec le cursor, faites défiler les options et appuyez afin de choisir
votre critère de recherche.
Par exemple, choisir l’emplacement vous donnera une liste alphabétique
de continents / régions, et ensuite une liste de pays. Utilisez la commande
de curseur pour faire défiler la liste et appuyez sur Select pour choisir le
continent, puis le pays. Il vous sera alors donné la possibilité de choisir toutes
les stations (ALL STATIONS) ou un GENRE, pour affiner votre recherche.
Location
Africa
Asia
Caribbean
Central America
Europe
>
>
>
>
>
Après avoir sélectionné votre critère de recherche, vous verrez
une liste de stations. Sélectionnez une station de la liste afin de
commencer à écouter.
RECHERCHE
Vous pouvez chercher une station radio Internet par nom (si vous le
connaissez), ou en utilisant un mot-clé de son titre.
Afin de CHERCHER une station, sélectionnez SEARCH STATIONS dans le menu
STATIONS, ensuite saisissez un mot-clé via l’écran d’entrée du clavier (similaire
à l’écran d’entrée du clavier que vous avez utilisé pour le mot de passe).
Stations
ROCKF
0123456789 ABCD
EFGHIJKLMNOPQRS
TUVWXYZ
Si votre sation est trouvée, sélectionnez simplement pour écouter.
BKSP
OK
CANCEL
Si vous avez cherché par mot-clé, Héritage donnera la liste de
toutes les stations contenant ce mot-clé. Faites défiler la liste et
sélectionnez votre station.
SÉLECTION D’UN PODCAST
BBC Radio 1
es podcasts (ou « réécoutes ») se cherchent et sélectionnent de la
même manière qu’une station normale.
BBC Radio 1
Podcasts
Sélectionnez PODCAST dans le menu INTERNET RADIO, puis cherchez
par localisation, genre ou l’association des deux.
La différence principale lorsque vous cherchez un Podcast, est que
quand vous avez sélectionné une station, vous verrez alors une liste
de shows (ou Podcasts) disponibles sur cette station.
Sélectionnez simplement votre choix dans cette
152
Podcasts
Adam and Joe
BBC Introducing
Bruce Dickinson
Chris Hawkins
Clare McDonnell
>
MODE RADIO INTERNET
MES FAVORITES
Il est possible de compiler une ou plusieurs listes de vos stations
favorites, vous premettant d’accéder rapidement et facilement à
plusieurs stations de pays et de genres différents.
À cette fin il faut d’abord enregistrer votre radio sur le portail Frontier
Silicon Radio. Voir la section PORTAIL RADIO INTERNET page 23.
Pour mémoriser une station comme favorite, maintenez appuyé le bouton de
sélection jusqu’à ce que FAVORI AJOUTé (FAVOURITE ADDED) apparaisse sur
l’écran. La station choisie apparaît désormais dans la liste des stations favorites.
Your Rock Favourites
Afin d’accéder à la liste MES FAVORITES, sélectionnez STATION LIST, puis
MY FAVOURITES, et ensuite STATIONS. Vous pouvez à présent faire défiler
la liste et sélectionner n’importe quelle station de la liste.
Kerrang!
North Sea Classic rock
Rock FM
Takeover Radio
The Arrow
>
>
>
>
>
MES STATIONS AJOUTÉES
Si vous avez ajouté une ou des stations à la liste des stations radio
Internet (via le portail Frontier Silicon Radio, voir page 23), elles se
trouveront dans cette liste. L’option MY ADDED STATIONS se trouve
dans le menu STATION LIST, dans le mode INTERNET RADIO.
BBC
L’option BBC est un raccourci vers la liste complète des stations BBC.
Sélectionnez cette option du menu STATION LIST, puis faites défiler
et sélectionnez une station de la manière habituelle.
BBC
BBC
BBC
BBC
BBC
BBC
Radio
Radio
Radio
Radio
Radio
1
1Xtra
2
3
3
>
>
>
>
>
DERNIÈRES ÉCOUTÉES
Last Listened
Lorsque vous passez en mode RADIO INTERNET, la dernière station
écoutée est sélectionnée automatiquement. Afin de sélectionner une
autre station que vous avez écoutée récemment, sélectionnez LAST
LISTENED. Une liste complète sera affichée (la plus récente sera en haut).
Clyde 1
West FM
BBC Radio6
BBC Radio 1
Chill
>
>
>
>
>
153
MODE RADIO INTERNET
AIDE (HELP)
L’option HELP se trouve dans le menu STATION LIST. Sous HELP, vous trouverez le CODE D’ACCES requis pour enregistrer votre radio sur le portail
Frontier Silicon Radio (voir page 23 pour de plus amples instructions).
Get access code
Access code
HEBZM0Z
Il y a également une piste audio utile contenant une FAQ sous le titre
HELP.
LOCAL
La liste de stations locales, « LOCAL » se trouve dans le menu STATION
LIST et dépend du pays dans lequel vous vous trouvez.
Par exemple, si vous êtes au Royaume Uni (UK), cette sélection affichera les stations diffusées au UK. De la même manière, si vous utilisez
votre radio en Allemagne, cette sélection affichera uniquement les
stations qui sont diffusées en Allemagne.
Sélectionnez cette option afin de naviguer soit sur toutes les stations
locales disponibles, soit par genre.
154
Local United Kingdom
All Stations
Highlighted Stations
Alternative
Ambient
Big Band
>
>
>
>
>
PORTAIL RADIO INTERNET
ACCEDER A DES FONCTIONS SUPPLEMENTAIRES
Quelques fonctions de radio Internet plus avancées d’Héritage ne
sont accessibles que par le portail Frontier Silicon Radio.
Afin d’y avoir accès, il faut d’abord enregistrer ou inscrire votre radio.
ENREGISTREMENT/INSCRIPTION DE VOTRE RADIO
Pour enregistrer votre radio, vous aurez besoin de votre code d’accès
unique.
Afin de trouver le code d’accès, saisissez d’abord INTERNET RADIO
MODE, puis appuyez sur
. Sélectionnez STATION LIST, puis HELP.
Sélectionnez ensuite GET ACCESS CODE.
Écrivez le code d’accès sur une feuille.
À présent, via votre PC ou Mac, visitez le portail du site Web
www.wifiradio-frontier.com
Cliquez sur le lien REGISTER HERE (se trouvant sur le panneau gauche)
pour commencer le processus d’inscription.
Si vous avez déjà un compte et désirez ajouter une radio supplémentaire, connectez-vous à votre compte et sélectionnez
MY PREFERENCES, puis ADD ANOTHER Wi-Fi RADIO.
Lorsque vous avez enregistré vorte radio sur le portail, vous pouvez
immédiatement profiter de plusieurs fonctions et services supplémentaires qu’il fournit.
155
INSTALLER UN SERVEUR MUSICAL
Pour qu’Héritage puisse jouer des fichiers de musique à partir d’un ordinateur connecté, cet ordinateur doit d’abord avoir été paramétré
pour partager les média.
Le partage de média UPnP permet aux appareils comme Héritage
de jouer de la musique depuis une bibliothèque média partagée, via
des menus comme Artiste, Album ou Genre.
Si vous utilisez un PC avec Windows Media Player 11 ou une version
plus récente (WMP), ou un Apple Mac avec OS X 10 ou une version
plus récente et une application UPnP, vous pouvez connecter Héritage et transmettre du matériel audio.
NOTE: iTunes ne fonctionne pas comme serveur média UPnP, mais il
existe plusieurslogiciels tiers disponibles qui vous permettront d’avoir
accès à votre bibliothèque iTunes.
PARTAGER LES MEDIA AVEC WINDOWS MEDIA PLAYER
Le serveur UPnP le plus courant est Windows Media Player (version11
ou plus récente), bien que d’autres plates-formes UPnP et serveurs
Peuvent être utilisé(e)s. Pour préparer WMP pour le partage des
Assurez-vous que votre PC et votre radio sont connectés au même
réseau. Héritage sera reconnu comme « Heritage » par votre PC.
1 Dans WMP, ajoutez à la bibliothèque média les fichiers et dossiers que
vous voulez partager avec Héritage (LIBRARY > ADD TO LIBRARY . . .).
2 Assurez-vous que la radio a accès au média partagé en le
sélectionnant et cliquant sur ALLOW. Vous pouvez également donner
un nom aux réglages des média partagés.
Le PC est à présent prêt à transmettre de la musique à votre radio.
Le service WMP UPnP fonctionne à l’arrière-plan ; il n’est pas nécessaire de faire démarrer WMP explicitement.
156
INSTALLER UN SERVEUR MUSICAL
PARTAGER DES MEDIA AVEC UN MAC
Afin de connecter Héritage à votre Mac Apple, une application
d’un serveur UPnP tiers sera requise. Il existe plusieurs applications
disponibles sur Internet.
Une d’entre elles est EyeConnect. C’est une application de partage
de média qui permet à Héritage de transmettre du matériel audio.
Eyecontact peut être téléchargé sur :
http://www.elgato.com
3 Une fois installé, EyeConnect se trouvera sur System Preferences.
Lorsque vous connectez Héritage, assurez-vous qu’EyeConnect est
affiché comme étant en fonctionnement sur son écran d’installation.
Héritage apparaîtra comme « Heritage » dans la liste de
périphériques d’Eyeconnect. La case ENABLE doit être cochée et la
sélection ACCESS réglée sur ENABLE NEW DEVICES.
Votre Mac est à présent prêt à transmettre de la musique à votre radio. EyeConnect fonctionnera automatiquement après l’amorçage.
157
MODE LECTEUR DE MUSIQUE
LECTURE DE PLAGES AUDIO DANS LE LECTEUR AUDIO
Le MODE LECTEUR DE MUSIQUE (MUSIC PLAYER MODE) vous permet de
lire des fichiers audio tels que MP3, AAC, WMA ou FLAC directement à
partir d’un ordinateur ou d’un serveur de musique sur votre réseau local.
Pour entrer en mode lecteur audio (MUSIC PLAYER MODE), appuyez
jusqu’à ce que l’écran affiche le mode musique (MUSIC PALYER
MODE), ou appuyez sur
puis sélectionnez le MENU PRINCIPAL
(MAIN MENU), puis LECTEUR DE MUSIQUE (MUSIC PLAYER) depuis la
liste des options de menu
.
Une fois en mode lecteur de musique, appuyez sur
, puis
sélectionnez Media partagé (SHARED MEDIA).
Vous pouvez naviguer à travers la liste en utilisant la commande
du curseur, en utilisant HAUT (UP) et BAS (DOWN) pour faire défiler
la liste, et Push (SELECT) ou bien DROITE (RIGHT) pour faire avancer
les dossiers. Lorsque vous atteignez votre piste désirée, appuyez
brièvement sur le bouton de sélection pour commencer la lecture
de la piste, ou appuyer plus longtemps pour ajouter la piste à la
playlist (voir PLAYLISTS en page 28 pour plus d’informations).
Les pistes audio peuvent également être contrôlées en utilisant les boutons
montés sur la partie supérieure de votre radio.
Maintenez appuyé le bouton
, cela fera rapidement revenir en
arrière la piste en cours de lecture; faire la même chose avec le
bouton
: cela permettra d’avancer rapidement.
158
Music player
Shared media
My playlist
Repeat play: Off
Shuffle play: Off
>
>
MODE LECTEUR DE MUSIQUE
PARTAGE de MEDIA (à partir d’un serveur media UPnP)
En mode MUSIC PLAYER, sélectionnez SHARED MEDIA. Si vous avez installé un
partage de média (comme décrit page 24), vous devriez aperçevoir une
entrée, pour le serveur que vous avez installé, par ex. « SB-Laptop : Audio”.
Si vous avez plus qu’un média de partage d’ordinateur, les alternatives sont
dans la liste. Sélectionnez le média partagé que vous voulez écouter.
SB-laptop: Audio
Music
Video
Pictures
Playlists
<Search>
>
>
>
>
À partir d’ici, les menus sont générés à partir du serveur de partage de
média (en général Windows Media Player). Le premier menu montre
une liste de types de média, par exemple musique, vidéo, photos et
playlists. Héritage ne peut jouer que de la musique et des playlists.
Il existe également une fonction de recherche, qui trouve les morceaux de
manière similaire à la recherche radio Internet, comme décrite page 20.
Pour la musique, il existe de nombreuses façons de sélectionner les morceaux, dont :
Genre | Artiste | Album | Compositeur | Classification
Music
Music
All Artists
Contributing Artists
Album Artists
Composers
>
>
>
>
>
Une fois que vous avez trouvé une piste que vous voulez lire, appuyez
sur le bouton de sélection pour la sélectionner. Une pression brève
permettra de lire la piste immédiatement, tandis qu’une pression
longue ajoutera le morceau à la playlist.
Note: Les listes jouées en mode UPnP sont envoyées à Last.fm, si
SCROBBLING est allumé dans le menu Last.fm. Pour de plus amples
informations au sujet de SCROBBLING, voir page 29.
159
MODE LECTEUR DE MUSIQUE
PLAYLISTS
Heritage est capable de contenir jusqu’à 500 pistes dans sa playlist. Les
pistes de la playlist peuvent être mixées à partir de multiples serveurs
UPnP et de périphériques USB. Pour gérer la playlist, sélectionnez MY
PLAYLIST du menu du lecteur audio (MUSIC PLAYER MENU).
Pour afficher le contenu de la playlist, faites défiler à l’aide de la
commande du curseur. Pour écouter la playlist d’une piste donnée,
appuyez brièvement sur le bouton SELECT. Pour supprimer une piste de la
playlist, appuyez plus longtemps puis confirmez OUI (YES) pour effacer.
My playlist
Human
>
Just My Imagination.wma
Back At One
Can’t Fight This Feelng. . . . . .
Three birds.mp3
Si vous sélectionnez une piste / album / dossier pour une lecture
instantanée, sans utiliser la fonction playlist, la playlist sera préservée
et continuera à être stockée par votre radio jusqu’à ce que vous
choisissiez de la supprimer.
REPEAT/SHUFFLE
Vous pouvez choisir de répéter les pistes ou de les lire dans un ordre
aléatoire en sélectionnant REPETITION LECTURE (REPEAT PLAY) ou LECTURE
ALéATOIRE (SHUFFLE PLAY) du menu du lecteur audio (MUSIC PLAYER MENU).
INFORMATIONS EN LECTURE
Music player
Lorsqu’un piste est en cours de lecture, Heritage affichera la piste et le
nom de l’artiste (UPnP). Il ya également une barre de progression avec
temps total et temps écoulé.
Pour afficher des informations supplémentaires de la piste, appuyez sur
Chaque fois que vous appuyez sur
, un autre élément d’information est
affiché comme suit:
UPnP: nom de piste / artiste, barre de progression / temps écoulé,
album, codec / taux d’échantillonnage, mémoire tampon de lecture
et date d’aujourd’hui.
160
Human.mp3
1:01
Music player
Letter To Me
Album:
5th Gear
3:08
MODE LAST.FM
En plus de ses capacités de radio terrestre et Internet, Héritage peut
également fournir l’accès au service de musique en ligne Last.fm.
Choisissez un artiste ou un genre et laissez Last.fm construire la playlist
parfaite à partir de sa bibliothèque de 5 millions de pistes – qui vous
est unique, et nouvelle à chaque fois.
Si vous êtes déjà abonné(e) à ce service, vous pouvez utiliser votre
profil Last.fm sur Héritage, ou visitez www.last.fm, créez un profil et
abonnez-vous.
Si vous disposez d’un bon d’abonnement d’essai, visitez www.last.fm/
voucher et suivez les indications qui s’affichent.
AJOUTER UN COMPTE D’UTILISATEUR
Afin d’entrer en mode LAST.FM MODE, appuyez sur
que l’écran d’intro LAST.FM soit affiché, ou appuyez sur
Last.fm
jusqu’à ce
Station list
last.fm setup
System settings
Main menu
puis
sélectionnez MAIN MENU, ensuite LAST.FM depuis la liste du menu.
Afin d’ajouter un compte, sélectionnez LAST.FM SETUP du menu, puis
sélectionnez USER ACCOUNTS.
User Accounts
<Add new account>
Search:
Rolling
0123456789., a b
cdefghijklmnopq
À présent sélectionnez ADD NEW ACCOUNT et saisissez votre nom
d’utilisateur et mot de passe LAST.FM via le clavier sur l’écran.
>
>
>
>
rstuvwxyzABCDE
FGHIJKLMNOPQ
BKSP
OK
CANCEL
LE SCROBBLING ET LES PISTES COUP DE CŒUR/BANNIR
Pour profiter au mieux de Last.fm, vous pouvez SCROBBLER toutes les
morceaux que vous avez écoutées en modes UpnP et LAST.FM (et mêmes
celles d’un iPod ou ordinateur avec les plugins de logiciel corrects). Cela envoie les noms des pistes vers LAST.FM, les ajoute à votre bibliothèque, et aide
le service à faire des recommandations musicales (et de voisins) adaptées
à vos goûts musicaux. Vous pouvez écouter votre bibliothèque LAST.FM en
sélectionnant la station YOUR LIBRARY dans le menu LAST.FM.
Last.fm
Your library
Your Recommendations
Your neighbourhood
Artist radio
Tag radio
Last.fm setup
Afin d’allumer ou d’éteindre le , sélectionnez . , puis
SCROBBLING, ensuite sélectionnez ON ou OFF.
User Accounts
>
Scrobbling: on
Note: si vous désirez laisser d’autres personnes utiliser Héritage en
mode LAST.FM, vous pouvez éteindre SCROBBLING. Vous pouvez
également passer à un autre compte
161
MODE LAST.FM
Durant votre écoute de LAST.FM vou pouvez choisir de SELECTIONNER
ou BANNIR des pistes (ce qui a pour résultat de les SCROBBLER, même si
SCROBBLE est éteint). Dire à LAST.FM que vous aimez un morceau (LOVE/
COUP DE COEUR) va l’ajouter à votre liste YOUR LOVED TRACKS/VOS
MORCEAUX COUPS DE COEUR, vous permettant de les réécouter dans le
futur. BANNIR un morceau signifie qu’il ne sera plus jamais joué.
Last.fm
Love
Ban
Pour sélectionner ou bannir un morceau, appuyez sur
et utilisez le
curseur pour sélectionner soit LOVE/COUP DE COEUR ou BAN/BANNIR.
La touche
se trouve sur la face supérieure de votre radio,
ainsi que sur la télécommande. En écoutant LAST.FM, vous pouvez
choisir de SKIP (PASSER) un morceau en appuyant sur
. Il n’est pas
possible de faire PAUSE pour un morceau sur LAST.FM.
Note: Vous pouvez éditer votre bibliothèque et le classement des
pistes sur le site Web de LAST.FM.
ÉCOUTER DE LA MUSIQUE
Il existe plusieurs types de streams, ou « stations radio» disponibles
sur LAST. FM. Afin d’en choisir une, sélectionnez STATION LIST dans
le menu LAST.FM MODE. Si vous êtes un nouvel utilisateur de LAST.
FM, nous vous recommandons de commencer avec ARTIST or TAG
RADIO, afin de vous familiariser avec les fonctions basiques.
Les options suivantes sont disponibles :
VOTRE BIBLIOTHEQUE
Joue toutes les morceaux SCROBBLES sur votre profil, ou les morceaux par artistes
que vous avez ajoutées à votre profil. Elle peut être éditée sur le site Web LAST.FM.
VOS RECOMMANDATIONS
Joue les morceaux qui vous ont été recommandés selon votre profil
musical et celui d’autres personnes ayant des goûts musicaux similaires.
VOS COUPS DE CŒUR
Joue les morceaux que vous avez classés
VOTRE VOISINAGE
Joue des pistes de bibliothèques de personnes sur LAST.FM ayant des
goûts musicaux similaires aux vôtres.
162
Last.fm
Your library
Your Recommendations
Your neighbourhood
Artist radio
Tag radio
MODE LAST.FM
ÉCOUTER DE LA MUSIQUE (suite)
ARTIST RADIO (RADIO D’ARTISTE)
Joue une sélection de pistes d’un certain artiste et d’autres artistes
ayant un style musical similaire. Choisissez un artiste en saisissant
son nom ou une partie de celui-ci (vous ne devez pas saisir le nom
complet, par ex. pour ROLLING STONES vous pouvez simplement saisir
ROLLING), puis choisir l’artiste de la liste de résultatset sélectionner OK.
Artist radio
Search:
Rolling
0123456789., a b
cdefghijklmnopq
rstuvwxyzABCDE
FGHIJKLMNOPQ
BKSP
OK
The Rolling Stones
Rolling Stones
Rolling Baba and the
Rolling Stones and Dave Matt
CANCEL
TAG RADIO
Joue une sélection de pistes tagguées avec certains mots-clé. Choisissez un tag mot/genre en saisissant un mot ou une phrase (essayez
d’être aussi spécifique que possible, p. ex. BOLLYWOOD plutôt que
BOLLY, car les tags sont générés par les utilisateurs, et il y a beaucoup de faux tags connectés à quelques pistes, qui donnent
un contenu d’erreur insuffisante). Choisissez un tag de la liste de
résultats et sélectionnez OK.
Last.fm
This Hard Land
Album:
Greatest Hits
HISTOIRE
Fait une liste des pistes que vous avez écoutées récemment, la plus
récente étant la première. Il n’est pas possible de sélectionner un
morceau de cette liste et de le réécouter sur demande.
History
Last.fm
Your Loved Tracks
Your Neighbourhood
Artist Radio
Tag Radio
History
>
Rapture by DatA from
Visions by Cut Copy from. . . .
We Are The People by E . . . . .
She’s got me dancing by. . . . .
Meddle by Little Boots f. . . . .
INFORMATIONS SUR ECRAN
Pendant que LAST.FM joue, l’écran affiche le nom du morceau et
la barre de progrès montrant le temps écoulé et le temps total du
morceau. Une icône LAST.FM se trouve au bas de l’écran, signifiant
que vous êtes en mode LAST.FM.
Durant l’écoute d’un morceau, appuyer sur
va vous permettre
de passer par les autres informations comme l’artiste, l’album, le nom
Last.fm
This Hard Land
Artist:
Bruce Springstein
Last.fm
This Hard Land
Album:
Greatest Hits
du morceau, de la radio, codec/taux d’échantillonnage, tampon de
playback et date d’aujourd’hui.
163
RÉVEIL
RÉGLAGE DU REVEIL
Héritage peut retenir deux réglages individuels d’alarme. Afin de régler
ou changer une alarme, soit appuyez sur la touche
, ou sélectionnez
Alarms
Alarm 1: Off [06:55AM]
Alarm 2: Off [07:50AM]
MENU, puis MAIN MENU et ensuite ALARM. Sélectionnez l’alarme « ALARM
SETTINGS » (Alarme 1 ou Alarme 2) que vous voulez modifier ou activer.
En utilisant la commande du curseur, faites défiler les options
ci-dessous, et configurez vos préférences.
Alarm 1
• Activer : on/off
• Fréquence : Quotidiennement, Une fois, Weekends ou Jours de la semaine.
• Heure
• Mode : Sonnerie, Radio Internet , DAB, FM ou iPod ou Last.fm
• Presélection : Dernière écoutée ou présélection de stations favorites 1-10
• Volume : 0 – 20
Enable : Daily
Time : 7:30AM
Mode : internet radio
Preset : last listened
Volume :
6
Lorsque vos préférences ont été réglées, n’oubliez pas de
sélectionner SAVE.
Héritage montre les alarmes activées en affichant une icône au bas de l’écran.
En mode STANBY, en appuyant sur
, vous pouvez allumer ou
éteindre les alarmes en mémoire. Appuyer sur
vous fera passer
par ALARM 1 et ALARM 2 , les activant ou les désactivant. Si les
icônes ALARM sont affichées, ces alarmes sont activées. Si aucune
12/10/2009
14:30
06: 55AM
07: 50AM
icône n’est affichée, les alarmes sont désactivées.
FERMATA DELL’ALLARME
Quando un allarme è suonare, premere qualunque dei bottoni
dell’eredità FERMERÀ l’allarme.
Quando l’allarme è stato annullato, un ALLARME FUORI dal
messaggio video sullo schermo dell’eredità.
164
Alarm off
RÉVEIL
MODE SOMMEIL (suite)
Grâce à la fonction SLEEP/VEILLE, vous pouvez faire passer Héritage
automatiquement en mode STANDBY. Le mode SLEEP/VEILLE peut
être atteint de deux manières:
La méthode la plus rapide est via la barre SNOOZE/SOMMEIL.
Touchez simplement la barre SNOOZE/SOMMEIL afin de passer par
une gamme de durées présélectionnées de SLEEP/VEILLE, partant de
SLEEP OFF et passant par 15, 30, 45 et 60 minutes.
Vous pouvez également appuyer sur
Set sleep time
15 MINS
puis sélectionner MAIN
MENU/MENU PRINCIPAL, puis SLEEP/VEILLE. Vous pouvez alors régler la
minuterie SLEEP/VEILLE sur une de ces durées.
Lorsque vous avez sélectionné une durée de veille, Héritage
reviendra au MAIN MENU/MENU PRINCIPAL.
Appuyez sur
afin de revenir à l’écran NOW PLAYING/MORCEAU ACTUEL.
VEILLE
Héritage inclut une fonction SNOOZE ou VEILLE et possède une barre
SNOOZE, sur la face supérieure de la radio. SNOOZE vous permet de
mettre l’alarme sous silence pour une période allant jusqu’à 30 minutes.
La durée de SNOOZE ne peut être réglée que quand votre radio se
trouve dans le processus de sonner l’alarme. À ce moment, touchez
simplement la barre SNOOZE pour passer par une série de durées
pré-établies de SNOOZE: soit 5, 10, 15 ou 30 minutes.
Set snooze
5 MINS
Lorsque SNOOZE est activé, Héritage reviendra en Standby pour la
période préréglée, l’icône de l’alarme SNOOZE étant affichée.
165
PARAMÈTRES DU SYSTEME
EQUALISEUR
Héritage fournit un certain degré de contrôle sur ses paramètres
audio standard ou originaux. Cela inclut le contrôle sur les BASS et
TREBLE, LOUDNESS et la possibilité d’utiliser des paramètres préréglés
d’EQ. Il est également possible de créer vos propres paramètres EQ,
appelés « My EQ ».
Afin d’ajuster les paramètres audio, appuyez sur
puis sélectionnez MAIN
MENU, suivi par SYSTEM SETTINGS. Ensuite sélectionnez EQUALISER dans le menu.
Equaliser
Classic
Pop
News
My EQ
Héritage affichera une liste de neuf options EQ comme suit : Normal,
Flat, Jazz, Rock, Cinéma, Classique, Pop, Nouvelles et Mon EQ.
My EQ profile setup
>
Il suffit de sélectionner votre préférence de la liste en mettant en
évidence votre option et en appuyant sur le bouton Select. Heritage
stockera désormais ce paramètre dans sa mémoire. Pour référence,
le réglage actuel de l’égaliseur (EQ) est mis en évidence par un
astérisque (*) dans la liste EQ.
Afijn de configurer vos propres paramètres EQ, sélectionnez MY EQ PROFILE
SETUP dans le menu EQUALISER. À présent, ajustez les niveaux BASS et TREBLE,
décidez si vous désirez que la fonction LOUDNESS soit ON ou OFF – avant de
sélectionner SAVE. Vos paramètres EQ personnalisés peuvent maintenant
être sélectionnés en choisissant MY EQ dans le menu EQUALISER.
166
My EQ profile
Bass : 0
Treble : 0
Loudness : Off
Bass
Bass
0
dB
PARAMÈTRES DU SYSTEME
RÉSEAU
Internet Setup
Le menu NETWORK se trouve dans SYSTEM SETTINGS dans le MAIN MENU
et inclut une entrée pour l’assistant Internet (INTERNET WIZARD), qui vous
assistera dans l’installation de la connexion de votre radio Internet.
Network Wizard
scanning/
Pour les utilisateurs chevronnés, divers paramètres manuels peuvent
également être atteints à partir d’ici, comme suit :
INTERNET WIZARD (Assistant Internet) :
Simplifie l’installation de la connexion votre radio Internet en vous
menant étape par étape grâce aux instructions.
PBC WLAN SETUP (Installation WLAN PBC) :
Sert à coupler votre radio avec un routeur qui utilise la sécurité WPS.
VIEW SETTINGS (voir les paramètres) :
Voir l’adresse MAC, la région Wlan, etc.
WLAN REGION :
La région où vous utilisez votre radio : Europe, USA etc.
Internet Setup
Internet Wizard
PBC Wlan setup
View settings
Wlan region
Manual settings
>
MANUAL SETTINGS (Réglages manuels) :
Contrôle détaillé des connexions sur réseau et sans fil.
NETWORK PROFILE (Profil réseau) :
Montre les noms des quatre derniers réseaux sans fil auxquels
Héritage a été connecté.
NOTE: Héritage se rappelle des quatre derniers réseaux sans fil
auxquels il a été connecté, et essaye automatiquement de se connecter à celui d’entre eux qu’il trouve. Cependant, il est possible
d’effacer des réseaux non désirés : sélectionnez SYSTEM SETTINGS,
puis NETWORK, puis NETWORK PROFILE. Sélectionnez à présent le
profil réseau que vous voudriez effacer en sélectionnant et confirmant delete YES (effacer OUI).
167
PARAMÈTRES DU SYSTEME
HEURE/DATE :
Se trouvant dans le menu SYSTEM SETTINGS, ce menu vous offre
l’option de changer des paramètres liés à l’heure et la date. Le
menu TIME/DATE dispose de trois énumérations, comme suit :
SET TIME / DATE (régler l’heure et la date): Permet de régler l’heure et
la date manuellement.
AUTO UPDATE (mise à jour automatique) : Choisissez entre trois options de réglages automatiques différents.
Time/Date
Set Time/Date
Auto update
Set format
Set timezone
Daylight savings
>
>
SET FORMAT (format horaire): Choisissez d’utiliser le format de 12h ou 24h.
Update from DAB (mise à jour DAB) :
Prend automatiquement l’heure et la date du signal DAB. Héritage
doit avoir déjà été utilisé en mode DAB (et reçu son signal) avant
que ces informations puissent être extraites.
Auto update
Update from FM (mise à jour FM) :
Donne l’heure et la date de la diffusion FM. Comme pour DAB, Héritage doit avoir déjà été utilisé en mode FM (et reçu des informations
RDS) avant que ces informations puissent être extraites.
Update from DAB
Update from Network
No update
*
Update from Network (mise à jour réseau) :
Prend l’heure et la date de votre connexion Internet.
CLARTE
Héritage vous permet de contrôler la clarté de l’écran OLED, ce
qui signifie que les niveaux de clarté pour STANDBY et POWER ON
peuvent être réglés de manière indépendante sur HIGH, MEDIUM ou
LOW.
Afin d’ajuster les paramètres de clarté, appuyez sur
puis
sélectionnez MAIN MENU, suivi par SYSTEM SETTINGS. Sélectionnez
ensuite BRIGHTNESS dans la liste du menu. Vous pourrez alors modifier
le niveau du réglage de la clarté par défaut pour les deux modes de
fonctionnement : STANDBY et POWER ON. Sélectionnez le mode que
vous voulez changer, puis choisissez le niveau de clarté désiré. Vos
réglages seront gardés en mémoire indéfiniment, mais vous pouvez
les changer à tout moment.
168
Brightness
Power-On Level
Standby Level
*
PARAMÈTRES DU SYSTEME
LANGUAGE
La langue par défaut de votre radio est l’anglais, cependant 12
autres langues sont disponibles :
Dannois
Norvégien
Néerlandais Finnois
Polonais
Portugais
Français
Espagnol
Allemand
Suédois
Italien
Turc
Afin de chagner le réglage actuel de la langue, sélectionnez SYSTEM
SETTINGS dans le menu MAIN MENU, puis LANGUAGE, puis sélectionnez votre choix.
Language
English
Danish
German
Italian
Norweigian
*
RETOUR AUX PARAMÈTRES ORIGINAUX
En sélectionnant FACTORY RESET dans le menu SYSTEM SETTINGS, vous
pouvez revenir aux valeurs par défaut d’Héritage, et ainsi effacer tous les
réglages personnels qui auraient été configurés (heure/date, configuration
réseau et présélections seront effacés). Cependant, La version actuelle
d’Héritage sera maintenue, tout comme son inscription au portail radio
Internet. Les favoris de la radio Internet sont donc retenus, à moins que
vous ne ré-inscriviez votre radio sur un autre compte sur le portail.
Pour réaliser un e reparamétrrisation, appuyez sur
puis
Factory Reset
Proceed?
sélectionnez MAIN MENU, suivi par SYSTEM SETTINGS, puis FACTORY
RESET. Répondez ensuite YES/OUI.
YES
NO
MISES A JOUR DU LOGICIEL
De temps en temps, nous présenterons des mises à jour du logiciel
de votre radio. Elles sont nécessaires pour des raisons d’entretien, et
pour ajouter des fonctions supplémentaires à votre radio. Les mises à
jour sont effectuées par « air », via votre connexion à large bande.
Héritage cherchera les mises à jour chaque fois qu’il est allumé, et si
une mise à jour est disponible, il vous demandera de confirmer que
vous voudriez commencer le téléchargement.
Veuillez noter qu’après une mise à jour du logiciel, tous les
paramètres d’utilisateur seront maintenus.
169
PARAMÈTRES DU SYSTEME
MISES A JOUR DU LOGICIEL (suite)
Si vous préférez chercher les mises à jour manuellement, appuyez sur
puis sélectionnez MAIN MENU. Choisissez ensuite SYSTEM SETTINGS,
puis SOFTWARE UPDATES. Sélectionnez AUTO-CHECK SETTING puis NO
lorsqu’on vous le demande.
Software update
Auto-Check setting
Check now
*
Afin de chercher maneullement les mises à jour, sélectionnez CHECK
NOW dans le menu SOFTWARE UPDATES (MISE A JOUR DU LOGICIEL).
AVERTISSEMENT : Avant de commencer la mise à jour du logociel,
assurez-vous qu’Héritage est branché à une connexion réseau
stable. Le fait de déconnecter l’électricité durant une mise à jour de
logiciel pourrait endommager irréversiblement votre radio.
System settings
Language
Factory reset
Software Update
Setup Wizard
Info
ASSISTANT D’INSTALLATION (SETUP WIZARD)
L’assistant d’istallation simplifie le réglage de l’heure et de la date et
des paramètres internes, par l’intermédiaire de quelques questions.
Pour accéder à l’Assistant, appuyez sur
puis sélectionnez MAIN
MENU, suivi par SYSTEM SETTINGS. Sélectionnez ensuite SETUP WIZARD/
ASSISTANT D’INSTALLATION dans la liste du menu.
INFO
Lorsque vous vous adressez au support technique, il se peut qu’on
vous demande la VERSION DU LOGICIEL ou le numéro D’IDENTITE
de la RADIO. Ces informations se trouvent dans INFO, dans le menu
SYSTEM SETTINGS.
Appuyez sur
puis INFO.
170
puis sélectionnez MAIN MENU, suivi par SETTINGS,
Info
SW version:
domino_V2.0.16.25756-5
Radio ID:
00226100C3D6
>
DÉPANNAGE
PROBLÈME
CAUSE
SOLUTIONS
Faible puissance du signal.
Vérifier/bouger l’antenne.
Déplacer la radio vers un autre
endroit. Re-balayer les stations locales
(de haute puissance) uniquement.
Pour DAB, vérifier couverture locale sur
DAB : ‘Pas de stations disponibles’
Faible puissance du signal.
Comme ci-dessus. Puis refaire un
balayage des stations.
Ne peut pas se connecter au
réseau
Réseau en panne.
Vérifier que le réseau fonctionne
entre l’ordinateur et le routeur.
Le routeur restreint l’accès aux
adresses MAC de la liste.
Obtenez l’adresse MAC Héritage
dans MENU > SYSTEM SETTINGS
> NETWORK > VIEW SETTINGS et
ajoutez-là à la liste du routeur.
FM: Sifflement, grésillement
DAB: Murmure/Intermittent
Coupur
www.ukdigitalradio.com/coverage
NOTE: Héritage a des adresses MAC séparées
pour les réseaux branchés et sans fil ; seule
l’adresse de la méthode utilisée pour le réseau
actuel est affichée, l’autre adresse peut être obtenue en changeant les deux premiers numéros
de « 00 » (sans fil) à
‘02’ (branché/sur réseau)
La puissance du signal Wi-Fi insuffisante.
Vérifier la distance au routeur.
Voir si un ordinateur peut se connecter au réseau à cet endroit.
Méthode de cryptage inconnue.
Changer la méthode de crytage
sur le routeur. Héritage accepte
WEP, WPA et WPA2.
Configuration de réseau inhabituelle.
Installer le réseau manuellement
via MENU > SYSTEM SETTINGS >
NETWORK > MANUAL SETTINGS
Le pare-feu empêche l’accès.
Vérifier si les ports suivants sont
ouverts sur le routeur :
UDP et TCP ports 80 et 123
DNS port 53
Windows partage : ports 135 - 139
et 445
Windows media player : varie Les pare-feu non-Microsoft peuvent nécessiter une configuration
pour UPnP
171
DÉPANNAGE
PROBLÈME
Ne peut pas se connecter à
Internet
Ne peut pas jouer une station radio
Internet particulière.
CAUSE
SOLUTIONS
Connexion Internet en panne
Vérifier que l’Internet fonctionne
pour un ordinateur connecté au
même réseau.
Le pare-feu empêche l’accès.
Vérifier que les ports suivants sont
ouverts :
UDP et TCP ports 80 et 123
DNS port 53
Certaines radios Internet peuvent
requérir l’ouverture de ports supplémentaires.
La station ne diffuse pas. Largeur
de bande surchargée ou insuffisante.
Essayez d’autres stations.
Essayez d’écouter sur l’ordinateur,
via le site Web de la radio Internet.
Essayez plus tard.
La station diffuse via un codec
inconnu.
Lien périmé.
172
Ne peut pas jouer Last.fm
Message ‘Unauthorized /
Non-autorisé’
Détails du compte erronés. Détails
du compte non saisis. Région non
desservie.
(Last.fm sont actuellement
restreints à certaines régions, p.ex.
US/UK) étant donné les problèmes
de brevets.
Last.fm : Contenu insuffisant
Il n’y a pas assez de morceaux
disponible et brevetés pour pouvoir
jouer un certain artiste ou une station radio tag que vous avez.
Sélectionnez une autre station
radio.
MESSAGES D’ERREUR
MESSAGE
DESCRIPTION
EXAMPLE
Ne peut pas se connecter
Code correct, mais le routeur
rejette la requête.
Filtre MAC activé sur le routeur.
Erreur de format
Ne peut pas reconnaître le format
– indépendant du réseau.
WMA reçu, mais le stream n’était
pas WMA lors du décodage.
Erreur de réseau
roblème au-delà du routeur – données incorrectes reçues du réseau.
Données reçues du serveur sont
illisibles.
Arrêt du réseau
Problème au-delà du routeur – pas
de réponse reçue du réseau.
Station radio Internet diffusant et
soudain la station est indisponible.
Aucun media UPnP trouvé.
Aucun serveur UPnP trouvé.
Service indisponible (DAB).
Pas de réception DAB.
Non autorisé
Accès non accordé par serveur
UPnP.
Mise à jour a échoué
Mise à jour du logiciel a échoué.
Le réseau n’est pas prêt
Problème de connexion au routeur.
Permettre accès d’Héritage aux
réglages du serveur UPnp.
Routeur éteint.
173
NOTES
174
175
SUPPORT TECHNIQUE
TEL - + 44 (0) 1555 666161
E-MAIL - [email protected]
WEB - www.revo.co.uk/support
“Made for iPod” and “Made for iPhone” means that an electronic accessory has been designed to connect specifically
to iPod or iPhone and has been certified by the developer to meet Apple performance standards.