1
Manuale per il collegamento e l’uso
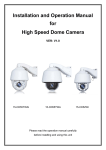
Installation and operation manual
46335.020
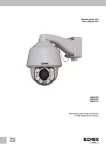
Telacamera Speed dome HD-SDI full HD 20x
HD-SDI full HD 20x Speed dome camera
Indice
1
2
3
4
5
1
Precauzioni
Caratteristiche.............................................................................................................................................. 1
Specifiche tecniche...................................................................................................................................... 3
Guida all’installazione.................................................................................................................................. 4
Configurazione della dome.......................................................................................................................... 8
Precauzioni
1. Leggere con attenzione il presente manuale utente prima dell’installazione e dell’utilizzo del dispositivo.
2. Sicurezza nel trasporto
Durante il trasporto e lo stoccaggio il dispositivo non deve essere sottoposto a forti sollecitazioni, a vibrazioni violente o a
schizzi di acqua. L’unità deve essere trasportata in un imballo separato. Qualsiasi danno causato da un unico imballo, durante le spedizioni da parte del distributore e le consegne post-manutenzione, non è coperto dalla garanzia.
3. Installazione
Durante l’installazione, non sottoporre il dispositivo a forti sollecitazioni e a vibrazioni violente. Non toccare direttamente la
copertura della dome. Durante il collegamento all’alimentazione, attenersi a tutti gli standard di sicurezza elettrici e utilizzare
solamente l’alimentatore adatto al dispositivo. Posizionare i segnali video e di controllo ad una distanza adeguata dai dispositivi e dai cavi ad alta tensione. Non alimentare la dome prima di aver concluso l’installazione.
4. Ambiente interno
Posizionare l’alloggiamento della dome lontano da materiali di metallo e infiammabili, per evitare corto circuiti e danni al
dispositivo. Non far penetrare liquidi all’interno del dispositivo. Se ciò si verifica, spegnere il dispositivo e staccare la spina.
Quindi informare immediatamente dell’accaduto il personale tecnico.
5. Sicurezza elettrica
L’immagine video subisce interferenze se la dome viene installata vicino a televisori, trasmettitori radio,convertitori di tensione e amplificatori audio.
6. Protezione della telecamera
Evitare di riprendere oggetti molto luminosi ad esempio il sole o lampade e non fissare l’obiettivo della telecamera su oggetti
luminosi statici per un lungo periodo, poiché ciò potrebbe causare danni irreparabili al CCD della telecamera.
7. Metodo di pulizia
Non utilizzare detergenti abrasivi e violenti per la pulizia della dome. Utilizzare panni asciutti e detergenti neutri. Utilizzare
carta per obiettivi per la pulizia degli stessi.
8. La rimozione di parti interne, l’assemblaggio e le riparazioni devono essere eseguite esclusivamente da personale di servizio
qualificato.
9. Utilizzare i nostri prodotti in conformità con i seguenti standard ambientali:
2
Temperatura dell'ambiente
-35°C - 60°C
Umidità dell'ambiente
<95%
Pressione barometrica
86~106KPa
Alimentazione
DC12V/4A
I
2 Caratteristiche
2.1 Caratteristiche principali
•
•
Cambiamenti di velocità senza sbalzi zoom automatico/velocità corrispondente
Panoramica 0.01~360o/S, Rotazione 0.01o~120o/S, Impostazioni predefinite: 400o/S (speed dome a infrarossi ad alta
velocità)
Panoramica 0.5o~20o, Rotazione 0.5o~20o, Impostazioni predefinite: 20o/S (dome a infrarossi a velocità variabile)
Tracciamento automatico dell’oggetto con zoom avanti/indietro e rilevamento del movimento (Modello con tracciamento
automatico)
Segmenti d’azione temporale per 7 giorni di programmazione
Riscaldatore semiconduttore e sensore digitale della temperatura incorporati
Ventola di raffreddamento PWM a velocità variabile per il controllo della temperatura
Interfaccia e spazio di rete dedicati per la modalità di rete
Precisione rotazione panoramica +/- 0.1o, 220 posizioni predefinite
8 Cruising, ogni gruising può gestire 32 Preset
4 Pattern o modelli, 10 minuti di memoria, 500 istruzioni programmabili
Multi protocollo attraverso RS485
8 auto Scan con confini a destra e a sinistra definiti in base all’utilizzo e alla velocità di analisi regolabile
8 zone di privacy con nome della telecamera in inglese
Compatibile automaticamente con PELCO_P, compatibile con PELCO_D
Posizione di guardia: La dome ritorna alla posizione preimpostata dopo un periodo di inattività
Innesco allarme: l’allarme può innescare le impostazioni predefinite, l’analisi automatica, l’avanzamento e i percorsi
modello
Funzione indirizzo flessibile: l’utente può impostare l’indirizzo della dome senza dover disinstallare lo stesso
•
•
•
•
•
•
•
•
•
•
•
•
•
•
•
•
2.2 Rotatore PTZ integrato ad altissima velocità
•
•
•
•
Delicato motore passo-passo, stabile, sensibile e preciso
Panoramica a 360°e intervallo di rotazione di 90° (ribaltamento automatico) senza zone cieche
Cambiamenti di velocità senza sbalzi, zoom automatico/velocità corrispondente
Luce automatica a infrarossi vicino/lontano corrispondente allo zoom avanti/indietro
2.3 Telecamera ad alta definizione giorno/notte incorporata
• Diaframma a iride automatico, compensazione automatica della retroilluminazione
• Bilanciamento del bianco automatico/manuale
• Controllo della luminosità automatico/manuale
• Messa a fuoco automatica/manuale
• Compatibile con telecamere di vari marchi, quali Sony, Samsung, LG, CNB, Sanyo ecc.
2.4 Progettato per esterni in tutte le condizioni meteorologiche
• Scocca in lega di alluminio pressofuso da 15,24 centimetri
• Forma ad alta precisione con elevata conducibilità termica
• Isolamento completamente chiuso per il dissipatore
• Obiettivi a nanometri antipolvere, impermeabili e anti-appannamento
• Grado di protezione IP66
• Protezione da fulmini e sovratensioni fino a 3000V
2.5 Istruzioni di funzionamento
• Corrispondenza automatica della messa a fuoco /velocità del PTZ
È possibile regolare automaticamente la velocità di panoramica/rotazione in base alla messa a fuoco avanti/indietro, per
rendere il Tracking manuale dell’oggetto più agevole. (Solo le speed dome a infrarossi hanno l’auto Tracking)
• Ribaltamento automatico
Quando la telecamera ruota verso il basso e supera appena la posizione verticale, la stessa ruota di 180 gradi.
• Configurazione e richiamo delle posizioni predefinite
Nella funzione Preset la cupola memorizza il pan / tilt angolo corrente, zoom e altri parametri di posizione in memoria. Quando
necessario, la cupola ricorda questi parametri e regola la telecamera in una posizione particolare. L’utente può memorizzare,
richiamare e cancellare i preset facilmente e rapidamente utilizzando il controller della tastiera. La cupola in grado di memorizzare fino a 220 preset.
I
1
• Auto Scan (Scansione automatica)
L’utente può impostare i confini di destra e di sinistra utilizzando la tastiera. Lo speed dome effettua quindi l’analisi entro questi
confini. Supporta fino a 8 gruppi di traiettorie di analisi.
• Cruising Track
I preset predefiniti possono essere programmata per essere richiamati in un set di sequenze. Questa sequenza può essere
impostata per far eseguire l’analisi alla telecamera da una posizione alla successiva in un ciclo con velocità impostata. Questa
funzione è definita “avanzamento automatico”. È possibile impostare la sequenza di avanzamento e il tempo di sequenza di
ogni impostazione predefinita. Supporta fino a 8 tracce di avanzamento, ognuna con 32 impostazioni predefinite.
• Pattern
La dome può memorizzare fino a 600 traiettorie di esecuzione o 500 istruzioni programmabili. Durante il Pattern, la speed
dome si muove automaticamente in base alla traiettoria di azione registrata. Supporta 4 gruppi di Pattern
• Posizione di guardia o Parking
Se non viene eseguita alcuna operazione durante il periodo impostato, la dome ritorna automaticamente alla posizione predefinita.
• Azione di default
All’avvio delle telecamera dome, o se non viene immesso alcun comando per un lungo periodo di tempo, la telecamera dome
ritorna alle funzioni di default, quali il posizionamento base, la panoramica automatica, l’avanzamento e la traiettoria automatici.
• Configurazione dell’indirizzo della dome
La dome supporta fino a 256 indirizzi e risponde solo alle istruzioni date ai suoi indirizzi. Verificare l’interruttore DIP sul fondo
della dome per la configurazione dell’indirizzo.
• Tracciamento manuale dell’oggetto
È possibile spostare il joystick verso l’alto, verso il basso, verso sinistra o destra per tracciare l’oggetto che appare sullo
schermo e utilizzare il joystick per zoomare avanti e indietro con la messa a fuoco automatica.
• Protezione maschera di privacy
Selezionare le aree da mascherare in nero per proteggere le zone di privacy. È possibile impostare le aree di privacy nere; il
dispositivo supporta fino a 8 zone di mascheramento.
• Funzione di regolazione delle tempistiche
L’utente può impostare le attività dello speed dome per un totale di 8 aree di tempistica per 7 giorni.
• Visualizzazione delle coordinate e delle direzioni
L’utente può definire la direzione della dome verso nord, per consentire un’esatta visualizzazione delle direzioni di movimento
sulla schermata. La dome supporta una zona nominale da visualizzare quando si muove nella zona specificata.
• Auto Tracking (Tracciamento automatico)
Ia dome fissa automaticamente l’oggetto in movimento e lo traccia in base alle impostazioni dell’utente programmate nel OSD.
• Rilevamento del movimento
La dome rileva i cambiamenti nella zona video definita e innesca l’allarme.
Supporta fino a 8 aree video, ognuna con 4 zone di rilevamento.
• Controllo del PTZ e degli obiettivi
1) Controllo dello zoom
È possibile controllare lo zoom dalla tastiera per acquisire immagini vicine o lontane.
2)Controllo della messa a fuoco
L’impostazione di default è la messa a fuoco automatica. La telecamera esegue la messa a fuoco automatica in base alla
posizione centrale del video, per ottenere un immagine nitida. In alcune occasioni, è possibile effettuare la messa a fuoco
manuale per ottenere l’effetto desiderato sull’immagine.
3) Controllo del diaframma a iride automatico
Lo scopo del diaframma a iride automatico è quello di rilevare le condizioni di luce dell’ambiente e di regolare il diaframma a
iride per stabilizzare la luminosità dell’immagine.
2
I
4) Compensazione automatica della retroilluminazione
Su uno sfondo molto luminoso, lo scopo della compensazione automatica della retroilluminazione è quello di compensare la
luminosità dell’oggetto scuro e di regolare la retroilluminazione per ottenere un’immagine nitida.
5) Bilanciamento del bianco automatico/manuale
AWB automatico/manuale dipende dai cambiamenti della luce dell’ambiente.
6) Interruttore giorno e notte (solo per telecamere giorno/notte)
La telecamera speed dome può passare automaticamente da una modalità all’altra in base ai cambiamenti nell’illuminazione
dell’ambiente.
7)Configurazione OSD (solo per telecamere con menu)
Richiamare l’impostazione predefinita N° 95 per accedere all’interfaccia di configurazione del menu OSD. Premere “Focus”
per scegliere le voci del menu e premere “Iris” per impostare i contenuti del menu.
3 Specifiche tecniche
Alimentazione
DC12V+10% 50W
Distanza notturna infrarossi
120/150/180metri
Velocità manuale
Panoramica 0.01o~180o, Rotazione 0.01o~100o (alta velocità) /
Panoramica:0.5o~35o/S, Rotazione:0.5o~35o/S (velocità variabile)
Velocità preimpostata
360 °/S (alta velocità) / 35°/S (velocità variabile)
Angolo di panoramica
360° rotazione panoramica continuativa
Angolo di rotazione
90° (Ribaltamento automatico)
Posizioni predefinite
220
Precisione predefinita
+/-0.1°
Auto analisi
8 tracce di auto analisi con confini a destra e a sinistra definiti dall'utente e velocità di analisi
regolabile
Avanzamento automatico
8 tracce di avanzamento, ognuna con 32 posizioni predefinite, tempo di sequenza definito
dall'utente
Percorso modello
4 gruppi, ognuno con 10 minuti di memoria, 500 istruzioni programmabili
Posizione di guardia
La dome ritorna alla posizione preimpostata dopo un periodo di inattività.
Modalità con LED a infrarossi
Manuale/Automatica/a Tempo
Comunicazione di dati
RS-485
Protocolli
Compatibile automaticamente con PELCO_P, PELCO_D
Modulo telecamera
Compatibile automaticamente con SONY, LG, Samsung, CNB, HITACH, ecc.
Velocità in baud
2400/4800/9600bps
Umidità di funzionamento
0~90%
Temperatura di funzionamento
-35°C ~ +60 °C
I
3
4
Guida all’installazione
4.1 Preparazione
1) Requisiti base
Tutti i lavori elettrici devono essere eseguiti e completati in conformità con le norme elettriche e antincendio in vigore (e
con tutte le norme relative). Verificare, in base alla distinta di carico, se tutti gli accessori sono presenti. Assicurarsi inoltre
che l’installazione venga eseguita conformemente. In caso di bisogno durante l’installazione, contattare il nostro servizio di
assistenza.
2) Verifica dello spazio e della densità necessari per l’installazione
Assicurarsi che lo spazio sia grande abbastanza per installare la dome. Assicurarsi inoltre che la densità dei soffitti e dei muri
sia sufficiente per supportare il peso totale
Modelli
Distanza massima (Piedi\Metri)
RG59/U
750pd (229m)
RG6//U
1.000pd (305m)
RG11/U
1.500pd (457m)
3) Preparazione cavi
Utilizzare il cavo adeguato in base alla distanza di trasmissione. I requisiti minimi del cavo coassiale BNC sono indicati di
seguito:
4) Configurazione dell’interruttore DIP per l’indirizzo della dome
*Per maggiori dettagli, fare riferimento alla Sezione 5.
4
I
4.2 Metodo di installazione
Lo speed dome a infrarossi può essere installata al muro oppure a soffitto
4.3 Dimensioni di installazione
Installazione a muro
I
5
Installazione a soffitto
Staffa per
supporto
sospeso
4.4 Procedure di installazione
*Nota: I muri e il soffitto devono essere spessi abbastanza per consentire l’installazione dei bulloni ad
espansione e devono supportare 4 volte il peso della telecamera dome.
Procedure di installazione a muro:
1) Estrarre la staffa dall’imballo (come illustrato), segnare la posizione dei buchi sul muro facendo riferimento
alla base della staffa.
6
I
2) Con un trapano, bucare il muro e installare 4 bulloni ad espansione M8 nei buchi.
Buchi per l’installazione
Buchi per l’installazione
3) Estrarre lo speed dome a infrarossi e far passare i cavi attraverso le fessure alla base della staffa sospesa.
Utilizzare le viti M5 per fissare la staffa e l’alloggiamento della dome.
Staffa per supporto
sospeso
4) Utilizzando i dadi con rondella, fissare la staffa al muro.
Nota: La staffa da soffitto non è adatta ad essere installata in ambienti esterni. Se è necessario utilizzarla, assicurarsi che la
dome venga installata in una posizione resistente all’acqua.
I
7
5. Configurazione della dome
Prima di installare la dome, configurare il protocollo di comunicazione, la velocità in baud e l’indirizzo della dome. Impostare
l’interruttore DIP posizionato sul corpo della dome.
Fare riferimento al diagramma seguente per visualizzare la posizione dell’interruttore DIP e i cavi di connessione.
SW1— Interruttore DIP per l’indirizzo della dome
SW1— Interruttore DIP per il protocollo della dome
1)
Configurazione del protocollo
Lo speed dome a infrarossi supporta tre protocolli: Pelco P, Pelco D e HS.
Ognuno di loro supporta una velocità in baud di 9600bps, 4800bps, 2400bps.
Impostare l’interruttore DIP N° 1~4 per configurare il protocollo.
Protocollo
SW2-1
HS
OFF
OFF
OFF
OFF
PELCO P
ON
OFF
OFF
OFF
PELCO D
OFF
ON
OFF
OFF
Riservato
…
…
…
…
8
SW2-2 SW2-3 SW2-4
I
2)
Configurazione della velocità in baud rate
Impostare l’interruttore DIP N° 5~6 per configurare la velocità in baud rate
Velocità in baud
SW2-5
9600
OFF
SW2-6
OFF
4800
ON
OFF
2400
OFF
ON
Riservato
…
…
3)
Configurazione dell’indirizzo della dome
Protocollo PELCO-P & PELCO-D
I
Add
SW-1
1
1
SW1-2 SW1-3 SW1-4 SW1-5 SW1-6 SW1-7 SW1-8
0
0
0
0
0
0
0
2
0
1
0
0
0
0
0
0
3
1
1
0
0
0
0
0
0
4
0
0
1
0
0
0
0
0
5
1
0
1
0
0
0
0
0
6
0
1
1
0
0
0
0
0
7
1
1
1
0
0
0
0
0
8
0
0
0
1
0
0
0
0
9
1
0
0
1
0
0
0
0
10
0
1
0
1
0
0
0
0
11
1
1
0
1
0
0
0
0
12
0
0
1
1
0
0
0
0
13
1
0
1
1
0
0
0
0
14
0
1
1
1
0
0
0
0
15
1
1
1
1
0
0
0
0
16
0
0
0
0
1
0
0
0
17
1
0
0
0
1
0
0
0
18
0
1
0
0
1
0
0
0
19
1
1
0
0
1
0
0
0
20
0
0
1
0
1
0
0
0
21
1
0
1
0
1
0
0
0
22
0
1
1
0
1
0
0
0
23
1
1
1
0
1
0
0
0
24
0
0
0
1
1
0
0
0
25
1
0
0
1
1
0
0
0
26
0
1
0
1
1
0
0
0
27
1
1
0
1
1
0
0
0
28
0
0
1
1
1
0
0
0
29
1
0
1
1
1
0
0
0
30
0
1
1
1
1
0
0
0
31
1
1
1
1
1
0
0
0
32
0
0
0
0
0
1
0
0
…
…
…
…
…
…
…
…
…
253
1
0
1
1
1
1
1
1
254
0
1
1
1
1
1
1
1
9
4) Descrizione dei cavi
Connettore BNC
Connettore
alimentazione
Connettore BNC: Cavo video coassiale
Connettore alimentazione: DC12V
Rosso: RS485A
Giallo: RS485B
Rosso: RS485A
Giallo: RS485B
Istruzioni operative
1) Scelta rapida delle funzioni principali
Lo speed dome ad infrarossi supporta 220 posizioni predefinite.
È possibile attivare alcune funzioni speciali richiamando il codice 65-99
Numero di serie
Comando
Scelta rapida
1
Avvio analisi automatica
Preset 99
2
Avvio avanzamento automatico
Preset 98
3
Avvio modello di giro
Preset 97
Nota
Avvio di default analisi automatica del gruppo n° 1
Avvio di default avanzamento automatico del gruppo
n° 1
Avvio di default modello di
giro del gruppo n° 1
Gruppo n° 1 - 8
4
Avvio analisi automatica del gruppo n° Preset 80+ Preset N°Gruppo+
Preset 99
5
Avvio avanzamento automatico del
Preset 80+ Preset N°Gruppo +
gruppo n°
Preset 98
6
Avvio modello di giro del gruppo n°
Preset 80+ Preset N°Gruppo + Gruppo n° 1 - 4
Preset 97
7
Arresto modalità automatica/Fine della Preset 96
configurazione
8
Apertura menu OSD
Immettere 95 (o Preset 95)
9
Ripristino remoto
Preset 94
10
Ripristinare alle impostazioni di default Preset 82
2) Test automatico del sistema
In seguito all’avvio, la dome esegue un test automatico e lo stato del sistema visualizza la dicitura “Normale” se il sistema funziona regolarmente. Se si verifica un errore, il risultato del test visualizza “○” o “X”. “○” significa normale “X” significa errore. Verificare il significato relativo
in base alla seguente tabella:
Numero di serie
Significato
3)
1
2
3
Interruttore DIP Sensore di temperatura Archivio
4
5
6
Panoramica
Rotazione
Telecamera
Comandi del menu OSD
Premere la scelta rapida predefinita 95 per accedere al menu principale OSD (o premere la scelta rapida predefinita n° 1 per due volte consecutive entro due secondi)
Utilizzare il joystick per spostare il cursore all’interno del menu
Premere “Apri Iris” per accedere al menu delle selezioni
Spostare il joystick su o giù per selezionare la voce
Premere “Apri Iris” per confermare la selezione
Premere “Chiudi Iris” per cancellare la selezione
*Nota: Se il dispositivo di comando non è dotato di joystick, utilizzare i tasti su o giù.
10
I
4) Funzioni del menu OSD
I
11
LINGUA
È possibile selezionare la lingua dei menu visualizzati
sulla schermata.
Per modificare la lingua visualizzata:
Premere Apri Iris per accedere alla selezione.
Tutti i menu delle schermate vengono impostati sulla lingua selezionata.
INFORMAZIONI DI SISTEMA
L’utente può verificare le informazioni di sistema della dome.
Le informazioni di sistema comprendono: L’ID della dome, l’indirizzo, la velocità in baud,
il protocollo, la temperatura, la tensione, le informazioni sugli allarmi, il nome della dome,
la versione, la data, l’ora e la scala di temperatura, della Dome.
Per visualizzare le schermate delle informazioni di sistema, seguire le fasi seguenti:
1. Utilizzare il joystick per posizionare il cursore su INFORMAZIONI DI SISTEMA.
2. Premere Apri Iris. Viene visualizzata la schermata INFORMAZIONI DI SISTEMA.
3. Spostare il joystick su o giù per selezionare la voce.
4. Premere Apri Iris per accedere alla configurazione di ogni voce.
SYETEM INFORMATION
DOME ID ;1234567890
ADDRESS:001
BAUDRATE:2400
PROTOCOL:PELCO-D
TEMPERATURE:31
VOLTAGE:12.0V
ALARM:000000 00
<OTHERS>
BACK
EXIT
OTHERS
VERSION:V220ST
TILTE:SDI DOME
DARE:2009-01-01
TIME:10:20:00
TEMP SCALE:CELSIUS
BACK
12
EXIT
I
DISPLAY SETUP
a configurazione delle visualizzazione consente all’utente di definire la modalità di visualizzazione dei nomi della dome sul monitor.
Di seguito vengono elencati i nomi visualizzati:
NOME DOME: Indica la dome
PREDEFINITO: Indica il tempo di sequenza per il nome predefinito
MOVIMENTO: Indica il tempo di sequenza per i nomi con funzioni automatiche (analisi
automatica/avanzamento automatico/percorso modello)
ZONE: Indica il tempo di sequenza per i nomi delle zone
DATA/ORA: Visualizza la data e l’ora attuali
PANORAMICA/ROTAZIONE: Il tempo di visualizzazione delle informazioni del PTZ e
dello zoom
ALLARME: Il tempo di visualizzazione delle informazioni dell’entrata/uscita allarme
INFORMAZIONI LED INFRAROSSI:Il tempo di visualizzazione delle informazioni LED
infrarossi
CONFERMA: Visualizzazione delle informazioni di conferma
Due opzioni per il nome della dome e per la data/ora: OFF e ON
Altre impostazioni comprendono:
OFF: Se attivato, il nome non viene visualizzato.
ON: Se attivato, il nome viene visualizzato continuamente.
2 SEC: All’attivazione, il nome viene visualizzato per 2 secondi.
5 SEC: All’attivazione, il nome viene visualizzato per 5 secondi.
10 SEC: All’attivazione, il nome viene visualizzato per 5 secondi.
Utilizzando il joystick, spostare il cursore sull’impostazione da configurare, quindi premere Apri Iris per accedere alla voce. Spostare il joystick per selezionare lo stato e premere
Apri Iris per confermare.
I nomi possono essere posizionati ovunque sul monitor. Questa funzione consente di
personalizzare la schermata del monitor.
Per impostare la posizione di un nome:
1. Utilizzare il joystick per posizionare il cursore su POSIZIONE DI VISUALIZZAZIONE.
2. Premere Apri Iris.
3. Utilizzare il joystick per spostare il nome verso l’alto, verso il basso, verso sinistra o
verso destra.
4. Premere Apri Iris.
5. Ripetere le fasi da 1 a 4 per posizionare gli altri nomi
6. Posizionare il cursore su INDIETRO o ESCI. Premere Apri Iris per salvare le impostazioni e uscire dal menu.
I
13
LED infrarossi
Nel menu OSD, è possibile aprire o chiudere il LED a infrarossi manualmente e impostare la modalità di funzionamento del LED a infrarossi. (durante il normale funzionamento, è possibile premere APRI IRIS e CHIUDI IRIS per regolare la potenza del
LED a infrarossi):
1) MODALITÀ DI CONTROLLO:
AUTO: Il LED a infrarossi si apre e si chiude automaticamente in base alle condizioni della luce.
TEMPISTICHE: Il LED viene regolato automaticamente in base ai tempi di Apertura
e Chiusura.
APERTO: Il LED a infrarossi viene aperto forzatamente
CHIUSO: Il LED a infrarossi viene chiuso forzatamente
TELECAMERA: Lo stato del LED a infrarossi (Aperto/Chiuso) viene sincronizzato
con il passaggio della telecamera dalla modalità giorno a quella notte (e viceversa)
2) SENSIBILITÀ: Per impostare manualmente la sensibilità, da 1 a 5. Minore è il valore e più bassa è la luce dell’ambiente necessaria per accendere il LED a infrarossi.
3) POTENZA LED INFRAROSSI: Per impostare la modalità di potenza: NORMALE,
CORRISPONDENTE e UTENTE.
NORMALE: Il LED a infrarossi vicino si accende sul campo lungo e il LED a infrarossi lontano si accende sul campo corto.
CORRISPONDENTE: I LED a infrarossi vicino e lontano si accendono e si spengono automaticamente per corrispondere allo zoom avanti e indietro.
UTENTE: L’utente può regolare manualmente i LED a infrarossi vicino e lontano.
4) CONTROLLO AUTOMATICO: Se attivato, il LED a infrarossi imposta il consumo
di potenza allo stato di stand-by, per estendere la durata dei LED a infrarossi. In
questa modalità, quando gli oggetti vengono visualizzati sullo schermo, il LED a
infrarossi reimposta il consumo di potenza sullo stato normale.
5) POTENZA IN STAND-BY: Quando viene attivato il CONTROLLO AUTOMATICO,
questa funzione consente di impostare la potenza in stand-by.
6) RITARDO DI STAND-BY: Per impostare dopo quanto tempo, se non viene visualizzato alcun oggetto in movimento, il LED a infrarossi attiva lo stato di stand-by.
7) SENSIBILITÀ: Quando viene attivato il CONTROLLO AUTOMATICO, questa funzione consente di impostare la sensibilità di rilevamento degli oggetti in movimento.
8) MODALITÀ AVANZATA: In condizioni di stato normale, premere APRI IRIS per aumentare la potenza del LED a infrarossi; una volta impostata sul massimo, tenere
premuto APRI IRIS per 2 secondi per accedere alla modalità avanzata. La luminosità totale dell’immagine viene migliorata. Spostare il cursore su MODALITÀ AVANZATA e premere IRIS per accedere e selezionare tra “STATICO” e “DINAMICO”
9) TEMPO DI AVVIO/ARRESTO: Per impostare il tempo di apertura e di chiusura del
LED a infrarossi, nella modalità di controllo delle “TEMPISTICHE”.
14
I
WIPER
L’utente può eseguire la regolazione per il tergicristallo in questo menu (adatto a cupola
wiper attrezzata)
1. Numeri: Spostare il cursore su “NUMBER” e premere IRIS OPEN per entrare nel
setup di Wiper Number. Spostare il joystick in alto e in basso per selezionare il numero
di movimenti del tergicristallo da (1-10), quindi premere IRIS OPEN per confermare.
2.Speed: Spostare il cursore su “SPEED” e IRIS OPEN per accedere alla configurazione del Wiper speed. Move il joystick in alto e in basso per selezionare “HIGH”, “MID” o
“Basso”, la stampa IRIS OPEN per confermare.
3.Start: Spostare il cursore e premere IRIS OPEN per avviare wiper.
(No.71 preimpostato è disponibile per avviare tergicristallo)
I
15
INATTIVO
L’impostazione INATTIVO consente alla dome, se non viene inviato alcun comando al
dome per un determinato periodo di tempo, di eseguire le azioni in base a quanto è
stato predefinito.
1) TEMPO: Spostare il cursore su “TEMPO” e premere APRI IRIS per accedere, quindi
spostare il joystick verso l’alto o verso il basso per selezionare tra 30 sec, 1 min, 5
min, 10 min e 30 min. Premere APRI IRIS per confermare.
2) AZIONE: Spostare il cursore su “AZIONE” quindi premere APRI IRIS per accedere.
Spostare il cursore per selezionare l’azione tra “NESSUNA, PRESET, SCAN, SEQUENZA Pattern”. Premere APRI IRIDE per confermare.
16
I
ALLARME
La dome è dotata di 2 entrate dell’allarme e di 1 uscita dell’allarme. (funzione facoltativa). Quando viene ricevuto un allarme, un segnale in entrata alla dome innesca l’azione
definita dall’utente (quale predefinite, traiettorie, ecc.) e attiva allo stesso tempo i segnali
di uscita dell’allarme.
N° ALLARME: Spostare il cursore su N° ALLARME. Premere APRI IRIS per accedere
e spostare il joystick verso l’alto o verso il basso per selezionare il numero dell’entrata
dell’allarme (Canale 1 e Canale 2)
STATO DI ENTRATA: Per impostare lo stato di contatto dell’allarme. Sono presenti due
stati di entrata, APERTURA e CHIUSURA.
APERTURA contatto normalmente aperto
CHIUSURA contatto normalmente chiuso
MODALITÀ ALLARME
OFF La funzione allarme viene disattivata.
ON La funzione allarme viene attivata.
AUTOMATICA La funzione allarme AUTOMATICA viene attivata e disattivata tra il TEMPO DI AVVIO e il TEMPO DI ARRESTO.
AZIONE: Per selezionare l’azione dell’allarme:
NESSUNA (default) Nessuna azione.
PRESET La dome avvia I PRESET. (PRESET 1 di default)
SCAN La dome avvia la SCAN (SCAN 1 di default)
SEQ La dome avvia Il CRUISE (CRUISE 1 di default)
Pattern
La dome esegue il Pattern (Pattern 1 di default)
USCITA ALLARME: Per impostare l’ausiliario da attivare:
OFF Non viene attivata alcuna uscita allarme.
USC1 Un’azione di allarme attiverà l’uscita AUX 1.
USC2 Un’azione di allarme attiverà l’uscita AUX 2.
TEMPO DI RIPRISTINO: Per impostare il tempo dell’uscita dell’allarme (come la sirena
di allarme) quando viene innescato dal rilevatore.
TEMPO DI AVVIO/ARRESTO: Per impostare in MODALITÀ ALLARME il tempo di avvio
e di arresto dell’allarme, SOLO nella modalità AUTOMATICA.
I
17
MASCHERA DI PRIVACY
La maschera di privacy consente di mascherare le aree di privacy con una cornice nera.
È possibile impostare al massimo 8 maschere di privacy.
N° MASCHERA: Spostare il cursore su questa voce e premere APRI IRIS per accedere
alla configurazione del numero di maschera della zona di privacy.
ABILITA: Per abilitare o disabilitare la maschera di privacy.
IMPOSTA: Spostare il cursore su questa voce e premere APRI IRIS per accedere alla
modalità di configurazione della maschera di privacy. Spostare il joystick (sinistra/destra/
su/giù) sulla schermata per impostare la zona di privacy, quindi premere APRI IRIS per
confermare.
ELIMINA: Spostare il cursore su questa voce e premere APRI IRIS per eliminare il numero attuale della zona di maschera di privacy.
18
I
OROLOGIO
La dome può visualizzare la data e l’ora. Accedere al menu OROLOGIO per impostare
la DATA e l’ORA.
DATA: Spostare il cursore su questa voce e premere APRI IRIS per accedere. Spostare
il joystick verso sinistra o verso destra per scegliere la posizione della data e spostarlo
verso l’alto o verso il basso per regolare le cifre. Premere APRI IRIDE per confermare.
TEMPO: Spostare il cursore su questa voce e premere APRI IRIS per accedere. Spostare il joystick verso sinistra o verso destra per scegliere la posizione dell’ora e spostarlo
verso l’alto e verso il basso per regolare le cifre. Premere APRI IRIDE per confermare.
SALVA/CANCELLA: Spostare il cursore su “SALVA” quindi premere APRI IRIS per salvare le impostazioni. Spostare il cursore su “CANCELLA” quindi premere APRI IRIS per
cancellare le impostazioni.
I
19
PASSWORD
La dome è dotata di una funzione di protezione tramite password per prevenire modifiche non autorizzate alle impostazioni della dome. Se la funzione PASSWORD è abilitata, l’operatore deve immettere una password valida per accedere alle impostazioni
della dome.
MODIFICA PASSWORD: Spostare il cursore su questa voce e premere APRI IRIS per
accedere. Immettere la vecchia password prima di inserire quella nuova. La password
iniziale è “111111”
ABILITA: Spostare il cursore su questa voce e premere APRI IRIS per accedere. Spostare il joystick e selezionare “ON” o “OFF”. Se “ABILITA” è su ON, è necessario immettere
la password quando si accede al menu OSD.
20
I
NOME DELLA DOME
È possibile impostare un nome della dome per identificare ogni telecamera. Il nome della
dome può contenere massimo 12 caratteri.
Spostare il cursore e premere INPUT. Premere APRI IRIDE per accedere.
1) Spostare il joystick verso sinistra o verso destra per posizionare il simbolo “←”, quindi premere APRI IRIS per eliminare il carattere presso “←”. Premere CHIUDI IRIS
per uscire dalla modalità di modifica.
4) Spostare il cursore su “<CAP>” quindi premere APRI IRIS per accedere. Spostare il
joystick verso l’alto o verso il basso e selezionare il metodo di immissione (tra Maius
inglese, inglese, cinese, figure e simboli)
5) Spostare il cursore sulla linea seguente di <CAP>, quindi premere APRI IRIS per
accedere alla modalità di immissione dei caratteri. Il carattere selezionato viene
evidenziato. Spostare il joystick verso l’alto/basso/sinistra/destra per scegliere i caratteri desiderati. Premere APRI IRIS per spostare il carattere selezionato verso la
posizione di INPUT a “←”.
6) Dopo aver immesso i caratteri, spostare il cursore su “OK” e premere APRI IRIS per
confermare.
7) È possibile anche spostare il cursore su “CANCELLA” per cancellare i caratteri immessi.
I
21
AUX
MAIN MENU
LANGUAGE:ENGLIS
<SYSTEM INFORMATION>
<DISPLAY SETUP>
<DOME SETTINGS>
<CAMERA>
<MOTION>
RESTART
FACTORY DEFAULTS
HEIP
EXIT
È possibile impostare l’uscita ausiliaria di modo che inneschi altri dispositivi da un allarme o da un dispositivo di comando.
Spostare il cursore su AUX, quindi premere APRI IRIS per accedere e selezionare “ON”
o “OFF” per abilitare o disabilitare questa funzione.
DOME SETTINGS
<IR LED>
<IDLE>
<ALARM>
<PRAVICY MASK>
<CLOCK>
<PASSWORD>
<ADVANCED>
<OTHERS>
BACK
EXIT
ADVANCED
<AUX>
<SOFT LIMIT>
<DOME SPEED>
<POWER ON ACTON>
<CAMERA>
<COMMUNICATION TEST>
<TILT ANGLE >
BACK
AUX1:OFF
AUX2:OFF
EXIT
AUX
BACK EXIT
22
I
LIMITE FLESSIBILE
MAIN MENU
LANGUAGE:ENGLIS
<SYSTEM INFORMATION>
<DISPLAY SETUP>
<DOME SETTINGS>
<CAMERA>
<MOTION>
RESTART
FACTORY DEFAULTS
HEIP
EXIT
È possibile impostare il limite flessibile per definire il limite di destra e di sinistra del
movimento della panoramica.
LIMITE FLESSIBILE: Spostare il cursore su questa voce e premere APRI IRIS per accedere. Spostare il joystick e selezionare “ON” o “OFF” per attivare o disattivare questa
funzione.
LIMITE SINISTRO: Spostare il cursore su questa voce e premere APRI IRIS per accedere. Spostare il joystick per impostare il movimento PANORAMICA della dome su una
posizione definita per il limite sinistro. Premere APRI IRIDE per confermare.
LIMITE DESTRO: Spostare il cursore su questa voce e premere APRI IRIS per accedere. Spostare il joystick per impostare il movimento PANORAMICA della dome su una
DOME SETTINGS
<IR LED>
<IDLE>
<ALARM>
<PRAVICY MASK>
<CLOCK>
<PASSWORD>
<ADVANCED>
<OTHERS>
BACK
EXIT
posizione definita per il limite destro. Premere APRI IRIDE per confermare.
ELIMINA LIMITE: Spostare il cursore su questa voce e premere APRI IRIS per eliminare
tutte le impostazioni.
ADVANCED
<AUX>
<SOFT LIMIT>
<DOME SPEED>
<POWER ON ACTON>
<CAMERA>
<COMMUNICATION
TEST>
<TILT ANGLE >
LIMIT SETTING
SOFT LIMIT OFF
<LEFT LIMIT>
<RIGHT LIMIT>
LIMIT DELETE
BACK
I
EXIT
23
VELOCITÀ DELLA DOME
MAIN MENU
LANGUAGE:ENGLIS
<SYSTEM INFORMATION>
<DISPLAY SETUP>
<DOME SETTINGS>
<CAMERA>
<MOTION>
RESTART
FACTORY DEFAULTS
HEIP
EXIT
Per effettuare una selezione della velocità di cupola, l’utente può accedere a questo
menu per impostare.
Spostare il cursore su BACK / EXIT e premere IRIS OPEN per eseguire il comando di
BACK o EXIT.
DOME SETTINGS
<IR LED>
<IDLE>
<ALARM>
<PRAVICY MASK>
<CLOCK>
<PASSWORD>
<ADVANCED>
<OTHERS>
BACK
EXIT
ADVANCED
<AUX>
<SOFT LIMIT>
<DOME SPEED>
<POWER ON ACTON>
<CAMERA>
<COMMUNICATION TEST>
<TILT ANGLE >
BACK
AUX1:OFF
AUX2:OFF
EXIT
AUX
BACK EXIT
24
I
AZIONE DI ACCENSIONE
L’utente può definire l’azione della dome quando questo viene acceso.
MAIN MENU
LANGUAGE:ENGLIS
<SYSTEM INFORMATION>
<DISPLAY SETUP>
<DOME SETTINGS>
<CAMERA>
<MOTION>
RESTART
FACTORY DEFAULTS
HEIP
EXIT
Spostare il cursore su AZIONE DI ACCENSIONE, quindi premere APRI IRIS per
accedere alla modalità di configurazione.
NESSUNA (default) Nessuna azione.
PRESET La dome avvia le impostazioni di Preset. (Preset 1 di default)
SCAN La dome avvia la Scan (Scan automatica 1 di default)
SEQ La dome avvia il Crouse (Crouse automatico 1 di default)
Pattern
La dome esegue il Pattern (Pattern 1 di default)
DOME SETTINGS
<IR LED>
<IDLE>
<ALARM>
<PRAVICY MASK>
<CLOCK>
<PASSWORD>
<ADVANCED>
<OTHERS>
BACK
EXIT
ADVANCED
<AUX>
<SOFT LIMIT>
<DOME SPEED>
<POWER ON ACTON>
<CAMERA>
<COMMUNICATION
TEST>
<TILT ANGLE >
LIMIT SETTING
SOFT LIMIT OFF
<LEFT LIMIT>
<RIGHT LIMIT>
LIMIT DELETE
BACK
I
EXIT
25
TELECAMERA
La dome riconosce automaticamente i modelli di telecamera principali presenti
sul mercato. Se la telecamera non viene riconosciuta, è possibile configurarla
da qui.
TELECAMERA: Spostare il cursore su questa voce e premere APRI IRIS per
accedere alla modalità di configurazione. Spostare il joystick verso l’alto o verso il basso per selezionare il tipo di telecamera. Premere APRI IRIDE per
confermare.
VELOCITÀ IN BAUD: Spostare il cursore su questa voce e premere APRI IRIS
per accedere alla modalità di configurazione. Spostare il joystick verso l’alto
o verso il basso per selezionare la velocità in baud. Premere APRI IRIDE per
confermare.
PARITÀ: Spostare il cursore su questa voce e premere APRI IRIS per accedere alla modalità di configurazione. Spostare il joystick verso l’alto o verso il basso per selezionare la modalità di parità. Premere APRI IRIDE per confermare.
26
I
TEST DI COMUNICAZIONE
La dome può eseguire un autodiagnosi delle comunicazioni tra la tastiera e la speed
MAIN MENU
LANGUAGE:ENGLIS
<SYSTEM INFORMATION>
<DISPLAY SETUP>
<DOME SETTINGS>
<CAMERA>
<MOTION>
RESTART
FACTORY DEFAULTS
HEIP
EXIT
dome. Il test deve essere compatibile con il nostro software VK200.
Se il test automatico viene completato con successo attraverso il software, il sistema
visualizza i risultati del test, come illustrato nel diagramma sulla sinistra.
DOME SETTINGS
<IR LED>
<IDLE>
<ALARM>
<PRAVICY MASK>
<CLOCK>
<PASSWORD>
<ADVANCED>
<OTHERS>
BACK
EXIT
ADVANCED
<AUX>
<SOFT LIMIT>
<DOME SPEED>
<POWER ON ACTON>
<CAMERA>
<COMMUNICATION TEST>
<TILT ANGLE >
BACK
EXIT
COMMUNICATION TEST
KEYBOARD->DOME:100/100
KEYBOARD<-DOME:100/100
DOME RECEIVE:100%
KEYBOARD RECEIVE:100%
BACK
I
EXIT
27
tilt angle
L’utente può impostare l’angolo di inclinazione nel menu di TILT ANGLE
MAIN MENU
LANGUAGE:ENGLIS
<SYSTEM INFORMATION>
<DISPLAY SETUP>
<DOME SETTINGS>
<CAMERA>
<MOTION>
RESTART
FACTORY DEFAULTS
HEIP
EXIT
Spostare il cursore su “TILT ANGLE” e premere IRIS OPEN per la messa a punto di
inclinazione Spostare il joystick in alto e in basso per selezionare l’angolo e premere
il IRIS OPEN per confermare. .
DOME SETTINGS
<IR LED>
<IDLE>
<ALARM>
<PRAVICY MASK>
<CLOCK>
<PASSWORD>
<ADVANCED>
<OTHERS>
BACK
EXIT
ADVANCED
<AUX>
<SOFT LIMIT>
<DOME SPEED>
<POWER ON ACTON>
<CAMERA>
<COMMUNICATION TEST>
<TILT ANGLE >
BACK
EXIT
TILT ANGLE SETTINGS
TILT ANGLE:-5
BACK EXIT
28
I
ALTRE IMPOSTAZIONI
Nel menu “ALTRE IMPOSTAZIONI”, l’utente può impostare la MODALITÀ DI TEM-
MAIN MENU
LANGUAGE:ENGLIS
<SYSTEM INFORMATION>
<DISPLAY SETUP>
<DOME SETTINGS>
<CAMERA>
<MOTION>
RESTART
FACTORY DEFAULTS
HEIP
EXIT
PERATURA, la VENTOLA INTERNA, il BLOCCO PREDEFINITO, il TEMPO DI ARRESTO, il TEMPO DI SPEGNIMENTO DEL MENU e lo ZERO NORD.
MODALITÀ DI TEMPERATURA: Per configurare la modalità di controllo delle ventole e dei riscaldatori della dome. Comprende tre modalità: AUTOMATICA, VENTOLA
AD ALTA VELOCITÀ e VENTOLA A BASSA VELOCITÀ.
BLOCCO PRESET: Questa funzione blocca la Il Preset sul monitor quando il dispositivo attiva un’impostazione predefinita. Ciò consente un passaggio fluido da un
Preset ad un’altro.
RIBALTAMENTO AUTOMATICO: Quando la telecamera ruota verso il basso e supera appena la posizione verticale, la stessa ruota di 180 gradi. Per impostare que-
DOME SETTINGS
<IR LED>
<IDLE>
<ALARM>
<PRAVICY MASK>
<CLOCK>
<PASSWORD>
<ADVANCED>
<OTHERS>
BACK
EXIT
sta funzione su on/off, premere APRI IRIS per accedere.
TEMPO DI ARRESTO: Per impostare il tempo di arresto della dome dopo la ricezione dell’ultimo comando. Le opzioni comprendono 5/15/30/60 sec.
TEMPO DI SPEGNIMENTO DEL MENU: Per impostare il tempo di spegnimento del
menu OSD se non vengono effettuate operazioni. Le opzioni comprendono 1/2/5/10
min.
ZERO NORD: Per impostare il nord vero della dome (Immagine della telecamera
rivolta verso Nord)
Spostare il cursore su questa voce e premere APRI IRIS per accedere.
Spostare il joystick della dome finche la telecamera non riprende il Nord, quindi
OTHERS
TEMP MODE :AUTO
PRESET FREEZE:OFF
AUTO FLIP :ON
MENU STYLE:IMAGE 2
MENU OFF:5MIN
<DOME TITLE>
<AZIMUTH ZERO>
BACK
I
premere APRI IRIS per confermare.
EXIT
29
TELECAMERA
MAIN MENU
LANGUAGE:ENGLIS
<SYSTEM INFORMATION>
<DISPLAY SETUP>
<DOME SETTINGS>
<CAMERA>
<MOTION>
RESTART
FACTORY DEFAULTS
HEIP
EXIT
In questo menu è possibile regolare le telecamere.
MODALITÀ MESSA A FUOCO: La MESSA A FUOCO AUTOMATICA consente all’obiettivo della telecamera di mantenere la messa a fuoco durante lo zoom avanti, lo
zoom indietro e il movimento di panoramica/rotazione. Spostare il cursore su questa
voce e premere APRI IRIS per accedere. Impostare la modalità: “AUTOMATICA” o
“OFF” e premere APRI IRIS per confermare. Quando la messa a fuoco automatica è
disabilitata, è necessario impostare la messa a fuoco manualmente.
ZOOM DIGITALE: Spostare il cursore su questa voce e premere APRI IRIS per
accedere. Impostare la funzione su “ON” o “OFF”.
RETROILLUMINAZIONE: Spostare il cursore su questa voce e premere APRI IRIS
per accedere. Impostare la funzione su “ON” o “OFF”.
CAMERA SETTING
FOCUS MODE:AUTO
DIGITAL ZOOM:OFF
BACKLIGHT:OFF
PICTURE FLIP:OFF
ZOOM SPEED:NORMAL
DAY NIGHT:AUTO
<ADVANCED>
BACK
EXIT
RIBALTAMENTO DELL’IMMAGINE: Per impostare il ribaltamento dell’immagine sul
dome. Spostare il cursore su questa voce e premere APRI IRIS per accedere. Impostare la funzione su “ON” o “OFF”.
BLOCCO: Se questa funzione viene abilitata, l’immagine sullo schermo viene bloccata fino a quando la funzione non viene nuovamente disabilitata. Spostare il cursore su questa voce e premere APRI IRIS per accedere. Impostare la funzione su
“ON” o “OFF”.
VELOCITÀ ZOOM: Per impostare la velocità dello zoom su Bassa, Normale e Alta,
durante lo zoom avanti e indietro. Spostare il cursore su questa voce e premere
APRI IRIS per accedere. Spostare il cursore sul valore desiderato quindi premere
APRI IRIS per confermare.
GIORNO NOTTE: Per impostare la modalità giorno e notte dell’AUTOMATICO, COLORE e B/N. Spostare il cursore su questa voce e premere APRI IRIS per accedere.
Spostare il cursore sul valore desiderato quindi premere APRI IRIS per confermare.
30
I
IMPOSTAZIONI AVANZATE TELECAMERA
Nel menu IMPOSTAZIONI AVANZATE TELECAMERA è possibile impostare parametri più dettagliati della telecamera.
WB: Per impostare il bilanciamento del bianco della telecamera. Le opzioni comprendono AUTOMATICO, MANUALE, INTERNO ed ESTERNO. È possibile selezionare la modalità in base ai differenti luoghi.
GUADAGNO SUL ROSSO: È possibile regolarlo solo se il WB è impostato su manuale.
GUADAGNO SUL BLU: È possibile regolarlo solo se il WB è impostato su manuale.
LUMINOSITÀ: Per impostare la luminosità dell’immagine. Spostare il cursore su
questa voce e premere APRI IRIS per accedere. Spostare il cursore sul valore da
regolare quindi premere APRI IRIS per confermare.
ESPOSIZIONE: Per impostare la modalità di esposizione della telecamera. Le opzioni comprendono AUTOMATICA, MANUALE, PRIORITÀ DELL’OTTURATORE,
PRIORITÀ DEL DIAFRAMMA A IRIDE E PRIORITÀ DELLA LUMINOSITÀ. È possibile selezionare la modalità in base ai differenti luoghi.
Wide Dynamic: L’ampia gamma dinamica (WDR) bilancia le sezioni più chiare e più
scure di una scena per produrre un immagine perfettamente bilanciata in termini
di luce e nitidezza. Le impostazioni disponibili sono OFF, BASSA, MEDIA e ALTA.
L’impostazione di default è OFF.
I
31
PRESET
La dome supporta 220 Preset. Per configurare i Preset, seguire le fasi indicate di
seguito.
1) N° PRESET: Spostare il cursore su questa voce e premere APRI IRIS per accedere alla configurazione del numero di Preset. Spostare il joystick per selezionare un numero di Preset dal (1-64 e 100-255), quindi premere APRI IRIS per
confermare.
2) NOME: Spostare il cursore su questa voce e premere APRI IRIS per accedere
alla configurazione del nome dell’impostazione predefinita. Verificare questa informazione nelle impostazioni del NOME DELLA DOME.
3) <SET>: Spostare il cursore su questa voce e premere APRI IRIS per accedere.
Spostare la dome nella posizione definita come punto predefinito e premere
APRI IRIS per salvare la posizione predefinita.
4) RICHIAMARE: Spostare il cursore su questa voce e premere APRI IRIS per
richiamare l’impostazione predefinita attuale.
5) ELIMINA: Spostare il cursore su questa voce e premere APRI IRIS per eliminare
l’impostazione predefinita attuale.
6) VELOCITÀ: Spostare il cursore su questa voce e premere APRI IRIS per impostare la velocità dell’impostazione predefinita su BASSA, MEDIA o ALTA.
32
I
SCAN AUTOMATICO
La dome supporta 8 gruppi di Scan. Per configurare, fare riferimento alle fasi indicate di seguito.
1) N° SCAN: Spostare il cursore su questa voce e premere APRI IRIS per accedere alla configurazione del numero di SCAN. Spostare il joystick per selezionare
un numero di SCAN (1-8), quindi premere APRI IRIS per confermare.
2) NOME: Spostare il cursore su questa voce e premere APRI IRIS per accedere
alla configurazione del nome dell’ANALISI. Verificare questa informazione nelle
impostazioni del NOME DELLA DOME.
3) <LIMITE SINISTRO>: Spostare il cursore su questa voce e premere APRI IRIS
per accedere. Spostare la dome nella posizione definita come limite sinistro e
premere APRI IRIS per salvare questo confine di sinistra.
4) <LIMITE DESTRO>: Spostare il cursore su questa voce e premere APRI IRIS
per accedere. Spostare la dome nella posizione definita come limite destro e
premere APRI IRIS per salvare questo confine di destra.
5) AVVIA: Spostare il cursore su questa voce e premere APRI IRIS per avviare
l’analisi attuale.
6) VELOCITÀ DI ANALISI: Spostare il cursore su questa voce e premere APRI
IRIS per impostare l’intervallo di velocità dell’analisi da 1-30.
I
33
CRUISE AUTOMATICO (SEQUENZA)
La dome supporta 8 gruppi di Cruise automatico e ognuno di essi supporta 32 Cruise. Per configurare l’avanzamento, fare riferimento alle fasi indicate di seguito.
1) N° SEQ: Spostare il cursore su questa voce e premere APRI IRIS per accedere
alla configurazione del numero di Sequenza. Spostare il joystick per selezionare
un numero di CRUISE (1-8), quindi premere APRI IRIS per confermare.
2) NOME: Spostare il cursore su questa voce e premere APRI IRIS per accedere
alla configurazione del nome della Sequenza. Verificare questa informazione
nelle impostazioni del NOME DELLA DOME.
3) <CONF. SEQUENZA>: Spostare il cursore su questa voce e premere APRI IRIS
per accedere. Spostare il cursore su MODIFICA e premere APRI IRIS per accedere alla modalità di modifica della Sequenza. Spostare il joystick verso destra
o verso sinistra per selezionare la voce.
a) Quando < > è sulla voce N°, spostare il joystick verso il basso o verso l’alto
per selezionare il numero di serie dei Prest di una sequenza. È possibile selezionare fino a un massimo di 32 Preset per ogni sequenza.
b) Quando < > è sulla voce PRESET, spostare il joystick verso il basso o verso
l’alto per selezionare il numero di Preset che si desidera aggiungere alla sequenza.
c) Quando < > è su INTERVALLO, spostare il joystick verso l’alto o verso il
basso per selezionare il tempo di intervallo tra ogni Preset.
d) Quando < > è sull’ultima voce,spostare il joystick verso l’alto o verso il basso
per selezionare la modalità di modifica tra “INS (immettere)”, “ok” ed “elimina”.
Se viene selezionato INS, premere APRI IRIS per immettere le impostazioni
nella posizione del numero di serie attuale.
Se viene selezionato OK, premere APRI IRIS per sostituire le impostazioni del
numero di serie attuale.
Se viene selezionato ELIMINA, premere APRI IRIS per eliminare le impostazioni
del numero di serie attuale.
Premere APRI IRIS per salvare tutte le impostazioni, quindi premere CHIUDI
IRIS per uscire.
4) ELIMINA/AVVIA: Spostare il cursore su questa voce e premere APRI IRIS per
eliminare/ avviare la sequenza attuale.
34
I
PERCORSO DEL Pattern
La dome supporta 4 Pattern e ogni Pattern copre al massimo 10 minuti o 500 comandi. Per configurare un Pattern, fare riferimento alle fasi indicate di seguito.
1) N° Pattern: Spostare il cursore su questa voce e premere APRI IRIS per accedere alla configurazione del numero del Pattern. Spostare il joystick per selezionare un numero di Pattern (14), quindi premere APRI IRIS per confermare.
2) NOME: Spostare il cursore su questa voce e premere APRI IRIS per accedere
alla configurazione del nome del Pattern. Verificare questa informazione nelle
impostazioni del NOME DELLA DOME.
3) <SET>: Spostare il cursore su questa voce e premere APRI IRIS per accedere. Spostare la dome verso l’alto/basso/sinistra/destra, zoomare avanti/indietro,
quindi premere APRI IRIS per salvare il percorso modello.
4) AVVIA: Spostare il cursore su questa voce e premere APRI IRIS per avviare il
percorso modello.
5) ELIMINA: Spostare il cursore su questa voce e premere APRI IRIS per eliminare
il percorso modello.
I
35
ZONE
È possibile impostare delle zone nominali per identificare un luogo definito, che
rendono più semplice identificare il luogo. La dome supporta 8 zone nominali. Per
configurare una zona, fare riferimento alle fasi indicate di seguito.
1) N° ZONA: Spostare il cursore su questa voce e premere APRI IRIS per accedere alla configurazione del numero della Zona. Spostare il joystick per selezionare un numero di zona (1-8), quindi premere APRI IRIS per confermare.
2) NOME: Spostare il cursore su questa voce e premere APRI IRIS per accedere
alla configurazione del nome della Zona. Verificare questa informazione nelle
impostazioni del NOME DELLA DOME.
3) <LIMITE SINISTRO>: Spostare il cursore su questa voce e premere APRI IRIS
per accedere. Spostare la dome nella posizione definita come limite sinistro e
premere APRI IRIS per salvare questo confine di sinistra.
4) <LIMITE DESTRO>: Spostare il cursore su questa voce e premere APRI IRIS
per accedere. Spostare la dome nella posizione definita come limite destro e
premere APRI IRIS per salvare questo confine di destra.
5) ELIMINA: Spostare il cursore su questa voce e premere APRI IRIS per eliminare
la zona attuale.
36
I
SEGMENTI TEMPORALI D’AZIONE
L’impostazione SEGMENTI TEMPORALI D’AZIONE consente di impostare le azioni
della dome per 7 giorni (ogni giorno con 8 segmenti temporali). Una volta impostato, la dome eseguirà le azioni in base ai movimenti impostati durante il segmento
temporale definito.
N°: Per visualizzare il giorno della settimana. Spostare il cursore su questa voce e
premere APRI IRIS per accedere. Spostare il joystick verso l’alto o verso il basso
per selezionare il numero di serie (1-8) del segmento temporale d’azione. Premere
APRI IRIDE per confermare.
AVVIA: Per impostare il tempo di avvio del movimento definito con questo segmento
temporale. Premere APRI IRIDE per confermare.
ARRESTA: Per impostare il tempo di arresto del movimento definito con questo
segmento temporale. Premere APRI IRIDE per confermare.
MOVIMENTO: Per impostare il movimento che verrà eseguito in questo segmento
temporale. Le opzioni di movimento comprendono: NESSUNO. PRESET 1-8, SCAN
1-4, SEQUENZE 1-4 e Pattern 1-4.
ON/OFF: Spostare il cursore su questa voce e premere APRI IRIS per accedere e
abilitare o disabilitare questa funzione. Premere APRI IRIDE per confermare.
COPIA: È possibile impostare gli 8 segmenti dei 7 giorni separatamente oppure
copiare le impostazioni di un giorno su un altro giorno. Spostare il cursore su questa
voce e premere APRI IRIS per copiare le impostazioni.
INDIETRO: Premere APRI IRIS per salvare e tornare al menu precedente.
NOTA: Non è possibile impostare il medesimo segmento temporale nello stesso
giorno. Inoltre, il segmento temporale non può eccedere 00:00. Durante il segmento
temporale d’azione, se la dome viene spostato, l’azione definita viene interrotta. Al
termine del movimento, l’azione verrà riattivata, se il segmento temporale in atto è
ancora nel segmento temporale d’azione.
I
37
RILEVAMENTO DEL MOVIMENTO
In questo menu è possibile impostare fino a 8 scene di rilevamento del movimento
(ogni scena con 4 aree di rilevamento). Se oggetti in movimento accedono a queste
aree, l’uscita allarma verrà innescata
N° SCENA: Spostare il cursore su questa voce e premere APRI IRIS per accedere
alla configurazione del numero della scena. Spostare il joystick per selezionare un
numero di impostazione predefinita (1-8), quindi premere APRI IRIS per confermare.
<MODIFICA SCENA>: Spostare il cursore su questa voce e premere APRI IRIS
per accedere. Spostare la dome su una scena di rilevamento definita dall’utente.
Premere APRI IRIDE per confermare.
<MODIFICA AREA>: Spostare il cursore su questa voce e premere APRI IRIS per
accedere al menu di MODIFICA AREA.
a) N° AREA: Spostare il cursore su questa voce e premere APRI IRIS per accedere
alla configurazione del numero dell’AREA. Spostare il joystick per selezionare
un numero di impostazione predefinita (1-4), quindi premere APRI IRIS per confermare.
b) <MODIFICA AREA>: Spostare il cursore su questa voce e premere APRI IRIS
per accedere alla configurazione della MODIFICA AREA. Viene visualizzato sullo schermo il riquadro con il numero di serie. Spostare il riquadro nell’angolo
in alto a sinistra dell’area di rilevamento desiderata e premere APRI IRIS per
confermare. Quindi spostare il joystick per regolare la grandezza dell’area di
rilevamento e premere APRI IRIS per confermare.
c) ELIMINA: Spostare il cursore su questa voce e premere APRI IRIS per eliminare
l’area di rilevamento attuale.
d) SENSIBILITÀ: Spostare il cursore su questa voce e premere APRI IRIS per
accedere. Selezionare un’opzione tra BASSA, MEDIA e ALTA, quindi premere
APRI IRIS per confermare la sensibilità.
e) ELIMINA SCENA: Spostare il cursore su questa voce e premere APRI IRIS per
eliminare la scena attuale.
f) ATTIVA AUX: La dome può attivare l’uscita allarme aux quando rileva un oggetto in movimento. Premere APRI IRIS per accedere, quindi selezionare “ON” o
“OFF” per attivare o disattivare questa funzione.
g) CANCELLA (SEC): Questa funzione consente di determinare, quando l’uscita
aux dell’allarme viene attivata dalla funzione di rilevamento, per quanto tempo
durerà prima che l’uscita aux venga chiusa. L’intervallo temporale è di 1-60 sec.
h) AVVIA: Spostare il cursore su questa voce e premere APRI IRIS per avviare la
funzione di rilevamento del movimento.
38
I
AUTO TRACKING
Quando la modalità di AUTO TRACKING è abilitata, la dome traccia automaticamente gli oggetti in movimento che entrano nella scena. Quando l’oggetto si sposta
al di fuori della scena, la dome ritorna alla posizione predefinita definita nelle tempistiche.
SENSIBILITÀ: In questo menu è possibile impostare la sensibilità del tracciamento
automatico. Se viene impostata su BASSA, la dome esegue il tracciamento automatico quando oggetti evidenti entrano nella scena. Se viene impostata su ALTA,
la dome esegue il tracciamento automatico quando oggetti piccoli si muovono nella
scena. Spostare il cursore su questa voce e premere APRI IRIS per accedere. Le
opzioni comprendono: BASSA, MEDIA e ALTA.
BERSAGLIO: Per impostare le dimensioni dell’oggetto da tracciare. Le opzioni comprendono: GRANDE, MEDIO e PICCOLO.
AUX: Se viene impostato su “ON”, l’oggetto su cui viene effettuato il tracciamento
automatico fa scattare allo stesso tempo anche l’uscita allarme aux. Premere APRI
IRIS per accedere e selezionare “ON” o “OFF”.
CORRISPONDENZA ZOOM: Nel modello con Auto Tracking, se la funzione CORRISPONDENZA ZOOM viene attivata, la dome effettua uno zoom avanti e indietro
durante il tracciamento per mantenere la giusta proporzione tra l’oggetto e lo sfondo.
Spostare il cursore su questa voce e premere APRI IRIS per accedere. Spostare il
joystick per selezionare lo zoom ottico.
ABILITA: Spostare il cursore su questa voce, quindi premere APRI IRIS per accedere e selezionare “ON” o “OFF” per abilitare o disabilitare questa funzione.
IMPOSTAZIONI SCENA TRACKING: Qui è possibile impostare la scena che la
dome restituisce una volta completato l’auto tracking. Spostare il cursore su
questa voce e premere APRI IRIS per accedere. Spostare il cursore sulla scena
desiderata, quindi premere APRI IRIS per confermare.
ELIMINA: Spostare il cursore su questa voce e premere APRI IRIS per eliminare
la scena restituita.
RITARDO DI RITORNO: Per impostare il tempo di ritardo della dome nel restituire
la scena.
I
39
RIPRISTINO
Qui l’utente può impostare la scena che la PTZ dovrà fornire quando finisce
l’azione di localizzazione automatica. Spostare il cursore su RESTANT e premere IRIS OPEN per entrare. Spostare la dome alla scena desiderata e premere IRIS OPEN per confermare.
DELETE: Spostare il cursore qui e premere IRIS OPEN per cancellare la scena di
ritorno.
RITORNO RITARDO: Per impostare il tempo che dome in attesa di tornare a questa
scena.
ricomincia
La cupola consente all’utente di resettare le impostazioni da remoto in questo menu.
Spostare il cursore qui e premere IRIS OPEN per entrare.
Selezionare “OK” o “Cancella” per continuare il ripristino o cancellare il reset.
40
I
IMPOSTAZIONI DI FABBRICA
L’opzione IMPOSTAZIONI DI FABBRICA consente all’utente di ripristinare tutte le
impostazioni ai valori di default.
Spostare il cursore su questa voce e premere APRI IRIS per accedere.
Selezionare “OK” o “CANCELLA” per continuare il ripristino o cancellarlo.
I
41
Table of Contents
Precautions………………………………………….…………………………………...........................................................................43
Features………………………………………………………….………….…..…………......................................................................44
Technical Data…………………………………………………………………..…..…........................................................................46
Installation Guide………………………………………………….……………….......................................................................……47
Dome Settings…………………………………………………………..…........................................................................………...…51
42
EN
1 Precaution
1. Please read this manual carefully before the installations and operations.
2. Transportation Security
No heavy stress, violent vibration or water splash are allowed during transportation, storage. The unit should be transported in
separated packing. In shipments of distributor and delivery of maintenance, any damages caused by integral packing are not
covered by warranty.
3. Installation
Avoid heavy stress and violent vibration during installation. Don’t touch the dome cover directly by hand. When connecting the
power source, please follow all electric safety standards and only use the power supply designated for this device. Keep the
video and control signal in a decent distance from high voltage devices and cable. Don’t apply power to dome before finishing
the installation.
4. Internal Environment
Keep metal and inflammable material away from dome body to avoid fire short circuit and damage. Please prevent all liquids
material from entering the dome. If this occurs, please shut down the power and pull out the plug-in. Then please inform the
technical personnel immediately.
5. Electrical Safety
The video image would be interfered when the dome is installed near
Television, radio transmitter, voltage changer and audio amplifier.
6. Camera Protection
Avoid shooting very bright objects directly into the camera’s CCD (such
As the sun or light fittings) and avoid fixating the camera lens on bright static object for long time, as it will cause Irreparable
damage to the camera’s CCD.
7. Cleaning Method
Please don’t use abrasive and violent detergent to clean the dome. Please choose dry fabric and neutral detergent. And please
use lens paper to clean the lens.
8. Internal removing, assembly, repair and operations should be only performed by qualified service personnel.
9. Please use our production under the following environmental standards:
Environmental Temperature
-35~60 °C
Environmental Humidity
<95%
Barometric Pressure
86~106KPa
Power Supply
DC12V/5A
EN
43
2 Features
2.1 Main Features
•
•
•
•
•
•
•
•
•
•
•
•
•
•
•
•
The lowest manual speed 0.01o/S smoothly running,the highest cruise speed 360o/S precise positioning
Powerful video analysis,support auto object tracking(Auto Track Model) and motion detection alarm
3D positioning to achieve screen coordinates and partial zoom in/out with specified master device
Build-in precision RTC clock for timing actions with 7 days of programmable schedule(not for vari-speed dome)
Built-in Semi-conductor heater & digital temperature sensor, PWM cooling fan vari-speed temperature control
HD-SDI transfer mode,no IP transmission process of compressed packet and image distortion,with higher data security
Support PELCO-P PELCO-D protocol
Multiple compatible camera brands including Sony,HITACHI, LG, CNB,etc.
7 alarm inputs,2 alarm outputs
256 preset positions ,8 cruising tracks, each cruising track has 32 presets
4 pattern tours,each can record 500 programmable instructions or 600s path
8 auto scan with use-defined left and right boundaries and settable scan speed
8 Privacy Zones with defined English camera title
Guard Location: the dome will rotate back to preset position,automatic scan,automatic cruise after a period of vacant time
Alarm triggering: the alarm can trigger preset, auto scan, cruising and pattern tour functions
Soft Address Function: the use can set up the dome address without uninstall the dome
2.2 Integrated Super Speed PTZ Rotator
•
•
•
•
•
Delicate stepping motor, stable, sensitive and accurate
Integratesd design,compact strcture
360°continuous Pan rotation and -10°~90° Tilt range (auto-flip) without blind area
Stepless speed change, auto zoom/speed matching
Manual speed:0.01°-180°/s,the highest cruise up to 360°/s
2.3 Built-in High Definition Corlor Camera
•
•
•
•
•
•
Auto iris, auto back light compensation
Auto/manual white balance
Auto/manual brightness control
Auto/manual focus
High definiton corlor camera(720P/1080P)
Optional multi-zoom cameras
2.4 All-weather Outdoor Design
•
•
•
•
•
•
44
6 Inch High die-cast alloy aluminum construction
High Precision Mould with high heat conductivity
Fully enclosed isolation design for heat sink
Nanometer Dustproof, waterproof and fog-proof lens
IP66 Waterproof
3000V lightning and surge current protection
EN
2.5 Function Instructions
• Focus / PTZ Speed Auto Match
The pan/tilt rotation speed could be automatically adjusted according to the focus in/out, which makes it much more practical for
manual target tracking. (Only for the auto tracking IR speed dome)
• Auto Flip
When the camera tilts downward and goes just beyond the vertical position, the camera will rotate 180 degrees.
• Preset Position Set up and Call Up
In the Preset function the dome stores the current pan/tilt angle, zoom and other position parameters in its memory. When necessary the dome recalls these parameters and adjusts the camera to a particular position. The user can store, recall and clear
the presets easily and promptly by using the keyboard controller. The dome can store up to 220 presets.
• Auto Scan
Users can set up the left and right boundaries by control keyboard. Then speed
dome can scan between this boundary. It supports up to 8 groups of scanning paths.
• Cruising Track
The preset position can be programmed to be recalled in a set of sequences. This sequence can be set to let the camera scan
from one position to the next in a cycle at a set speed. This feature is called the “auto cruise”. The cruise sequence and dwell
time of each preset can be set. It supports up to 8 cruising tracks, each cruising track with 32 presets.
• Pattern Tour
Dome can memorize 600s running path or 500 programmable instructions. When start pattern tour, speed dome will move automatically according recorded action path. It supports 4 groups of pattern tours.
• Guard Location
The dome will automatically return to preset position if there is no operation in a period of vacant time.
• Default Action
When you start up the dome camera or do not send commands over a long time, the dome camera will return to its default functions which include the home place, auto pan, auto cruise and pattern.
• Dome Address Setup
The dome supports up to 256 addresses and the dome will only response to the instructions given to its own address. Please
check the dip switch on the bottom of the dome for address setup.
• Manual Object Tracking
The use can move the joystick up, down, left or right to track the appearing object in the screen and use the joystick to zoom in
and out with auto focus.
• Privacy Mask Protection
Set black mask areas to protect the privacy zones. The black privacy locations can be set, and support up to 8 mask zones.
• Timing Running Function
Users can set speed dome operation task at total 8 timing areas during 7 days.
• Coordinates and Directions Display
User can define the dome’s direction of due north, which will help to show up the exact moving directions on screen. And zone
title is supported to
display when the dome moves to the specified zone.
• Auto Tracking
The dome will automatically fix and track the moving object according to the user’s setup via OSD.
• Motion Detection
The dome will detect the changes in the defined video zone and trigger alarm.
It supports to 8 video Locations, each with 4 detection zones.
EN
45
• PTZ and Lens Control
1) Zoom Control
Users can control zoom by keyboard to get near or far images.
2) Focus Control
The default setting is auto focus. The camera will auto focus based on the center of the video display to get the clear image. In
some special occasions, the user could do the manual focus to get the desired image effect.
3) Auto Iris Control
Auto Iris is aiming to detect the environmental lights condition and adjust the iris to get the stabilized brightness of the image.
4) Auto Back Light Compensation
In the highly bright background, auto back light compensation is aiming to compensate the brightness of the dark object and
adjust the background brightness to get a clear image.
5) Auto/Manual White Balance
Auto/Manual WB adjust depending on the environment light changes.
6) Day and Night Switch (Only for Day/Nigh Camera)
Speed dome camera can auto switch according to the environmental illumination changes.
7) OSD Setup (Only for camera with menu)
Call upon preset No.95 to enter into OSD menu setup interface. Press “Focus” to choose menu items and press “Iris” to set
menu contents.
3 Technical Specifications
Power Supply
DC12V+10% 50W
Night IR Distance
120/150/180meters
Manual Speed
Pan 0.01o~180o, Tilt 0.01o~100o (high speed) / Pan:0.5o~35o/S, Tilt:0.5o~35o/S (Vair-speed)
Preset Speed
360 °/S (high speed) / 35°/S (Vari-speed)
Pan Angle
360° continuous pan rotation
Tilt Angle
90° (Auto Flip)
Presets Positions
256
Preset Accuracy
+/-0.1 °
Auto Scan
8 auto scan tracks, user-defined left and right boundaries and scan speed
Auto Cruising
8 cruising tracks, each cruising tracks has 32 preset positions, user-defined dwell time
Pattern Tour
4 groups, each one with 10 Mins memory, 500 programmable instructions
Guard Location
The dome will rotate back to preset position after a period of vacant time.
IR LED On Mode
Manual/Auto/Timing
Data Communication
RS-485
Protocols
Auto Compatible PELCO_P, PELCO_D
Camera Module
Auto Compatible SONY, LG, Samsung, CNB, HITACH, etc.
Baud Rate
2400/4800/9600bps
Operating Humidity
0~90%
Operating Temp
-35°~ +60°C
46
EN
4 Installation Guide
4.1 Preparations
1) Basic Requirements
All the electric work must be finished under the latest electric & fire prevention law and rules (and any related law and rules).
Please check according to the packing list if every accessory is included. And also make sure the installation is operated as
required. Please contact us for any help during the installation.
2) Installation Space and Density Checkup
Please make sure the space is big enough to install our dome. And also ensure the density of the ceilings or walls to hold total
weight of the dome and its accessories.
3) Cables Preparation
Please choose the proper cable according to the transmission distance. The min requirement of coaxial BNC cable is listed as
follows for reference
4) Setup Dip Switch for Dome Address
*Please turn to Part 5 for details.
Models
EN
Max Distance (Feet\Meter)
RG59/U
750ft (229m)
RG6//U
1,000ft (305m)
RG11/U
1,500ft (457m)
47
4.2 Installation Method
The IR speed dome could be installed in wall-mount and pedant-mount
4.3 Installation Dimensions
Wall Mount
48
EN
Pendant Mount
4.4 Installation Procedures
*Notice: The wall and ceiling must be thick enough to install the expansion
bolts and can bear 4 times the weight of the dome camera itself.
Wall-mount Installation Procedures:
1) Take out the bracket from the package (as shown), mark the installation hole positions on the wall referencing
to the bottom of bracket.
EN
49
2)
Drill the hole and install 4 pieces of M8 expansion bolt into the hole.
Drill installation Holes
3
Drill installation Holes
Take out the IR speed dome and put the cables through the bracket.
Use M5 screws to fix the bracket and dome body.
4) ) Use screw nuts with washer to fix the bracket on the wall.
Notice: Pendant-bracket is not designed for outdoor installation. If specially required, please do make sure the waterproof installation of the dome.
50
EN
5 - Dome Setting
Before the dome is installed, please finish the setup of the communication protocol, baud rate and dome address. Set the DIP
switch inside the dome body. The relative DIP switch site and connecting wires are diagramed below for reference.
SW1— Dip switch for the dome address
SW2— Dip switch for the dome protocol
1) Protocol Setup
Our IR speed dome supports three protocols including Pelco P, Pelco D and HS.
All of them supports baud rate of 9600bps, 4800bps, 2400bps.
Set the No.1~4 dip switch for the protocol configuration.
Protocol
SW2-1
HS
OFF
OFF
OFF
OFF
PELCO P
ON
OFF
OFF
OFF
PELCO D
OFF
ON
OFF
OFF
Reserved
…
…
…
…
EN
SW2-2 SW2-3 SW2-4
51
2) Baud Rate Setup
Set the No.5~6 dip switch for the baud rate configuration.
Baud Rate
SW2-5
9600
OFF
SW2-6
OFF
4800
ON
OFF
2400
OFF
ON
Reserved
…
…
3) Dome Address Setup
PELCO-P & PELCO-D Protocol
52
Add
SW-1
1
1
SW1-2 SW1-3 SW1-4 SW1-5 SW1-6 SW1-7 SW1-8
0
0
0
0
0
0
0
2
0
1
0
0
0
0
0
0
3
1
1
0
0
0
0
0
0
4
0
0
1
0
0
0
0
0
5
1
0
1
0
0
0
0
0
6
0
1
1
0
0
0
0
0
7
1
1
1
0
0
0
0
0
8
0
0
0
1
0
0
0
0
9
1
0
0
1
0
0
0
0
10
0
1
0
1
0
0
0
0
11
1
1
0
1
0
0
0
0
12
0
0
1
1
0
0
0
0
13
1
0
1
1
0
0
0
0
14
0
1
1
1
0
0
0
0
15
1
1
1
1
0
0
0
0
16
0
0
0
0
1
0
0
0
17
1
0
0
0
1
0
0
0
18
0
1
0
0
1
0
0
0
19
1
1
0
0
1
0
0
0
20
0
0
1
0
1
0
0
0
21
1
0
1
0
1
0
0
0
22
0
1
1
0
1
0
0
0
23
1
1
1
0
1
0
0
0
24
0
0
0
1
1
0
0
0
25
1
0
0
1
1
0
0
0
26
0
1
0
1
1
0
0
0
27
1
1
0
1
1
0
0
0
28
0
0
1
1
1
0
0
0
29
1
0
1
1
1
0
0
0
30
0
1
1
1
1
0
0
0
31
1
1
1
1
1
0
0
0
32
0
0
0
0
0
1
0
0
…
…
…
…
…
…
…
…
…
253
1
0
1
1
1
1
1
1
254
0
1
1
1
1
1
1
1
EN
4) Cable Definition
BNC Connector: Video Coaxial Cable
Power Connector: DC12V
Red: RS485A
Yellow: RS485B
Operation Instructions
1) Main Functions Fast Call Up
Our IR Speed dome supports 220 preset positions. You can activate some special functions by calling upon code number 65-99.
Serial No.
Command
Fast Call Up
Note
1
Start Auto Scan
Call 99
Default to start auto scan of group No.1
2
Start Auto Cruise
Call 98
Default to start auto cruise of group No.1
3
Start Pattern Tour
Call 97
Default to start pattern tour of group No.1
4
Start Auto Scan of Group No.
Call 80+ Call pp+ Call 99
pp means: Group No.1-8
5
Start Auto Cruise of Group No.
Call 80+ Call pp+ Call 98
6
Start Pattern Tour of Group No.
Call 80+ Call pp+ Call 97
7
Stop Auto Mode/End up Setting
Call 96
8
Open OSD Menu
9
Remote Reset
Call 94
10
Recover Factory Default
Call 82
pp means: Group No.1-4
Set 95 (or Call 95)
2) System Self-Testing
The dome will do self-testing after power up, and system status will show “Normal” if system Is running normally. If error happens, testing result
will be shown in “○” or “X”. “○” means normal and “X” means error. Please check the according meaning as follows:
Serial No.
1
Meaning
Dip Switch
3)
2
3
4
5
6
Temperature Sensor
Storage
Pan
Tilt
Camera
OSD Menu Operations
Call Preset 95 to enter the main OSD menu (or call preset No.1 two times continuously within two seconds)
Control the joystick to move the cursor around the menu
Press “Iris Open” to enter the menu for selections
Move the joystick up and down to select the item
Press “Iris Open” to confirm the selection
Press “Iris Close” to cancel the selection
*Note: If your controller does not have a joystick, use the up or down key.
EN
53
4) OSD Menu Functions
54
EN
LANGUAGE
The language for the on-screen menus is Selectable.
To change the display language:
Press Iris Open to enter selection.
All on-screen menus are changed to the selected language.
SYSTEM INFORMATION
The user can check the dome system information as required. The system information
includes: Dome ID, dome address, baud rate, protocol, temperature, voltage, alarm info,
dome title, version, date, time, and temperature scale.
Use the following steps to display the
System Information screens:
1. Use the joystick to position the cursor along the SYSTEM INFORMATION.
2. Press Iris Open. The SYSTEM INFORMATION screen opens.
3. Mover the joystick up and town to select the item.
4. Press Iris Open to enter the setup of each item.
SYETEM INFORMATION
DOME ID ;1234567890
ADDRESS:001
BAUDRATE:2400
PROTOCOL:PELCO-D
TEMPERATURE:31
VOLTAGE:12.0V
ALARM:000000 00
<OTHERS>
BACK
EXIT
OTHERS
VERSION:V220ST
TILTE:SDI DOME
DARE:2009-01-01
TIME:10:20:00
TEMP SCALE:CELSIUS
BACK
EN
EXIT
55
DISPLAY SETUP
Display setup allows the user to define the way to display the dome titles on the monitor.
The displayed titles are listed as follows:
DOME TITLE Indicate dome
PRESET
Indicate the dwell time for preset title
MOTION
Indicate the dwell time for auto function titles
ZONES
(auto scan/auto cruise/pattern tour)
DATE/TIME
Indicate the dwell time for zone titles
Display the current date and time
PAN/TILT
Time to display PTZ info and zoom info
ALARM
Time to display alarm in/out info
IR LED INFO Time to display IR LED info
PROMPT
Display prompt info
Two options for the Dome Title and Date/Time: OFF and ON
Other setup selections include:
OFF Title will not be displayed when activated.
ON
Title will be continuously displayed when activated.
2 SEC Title will be displayed for 2 seconds after activation.
5 SEC Title will be displayed for 5 seconds after activation.
10 SEC Title will be displayed for 5 seconds after activation.
Move the cursor by joystick to the one you need to set, and press Iris Open to enter the
item. Move the joystick select the status and press Iris Open to confirm.
Titles can be placed anywhere on the monitor. This feature allows you to customize the
window of your monitor screen. To set a title position:
1. Use the joystick to position the cursor in the DISPLAY POSITION
2. Press Iris Open.
3. Use the joystick to move the title up, down, left, or right.
4. Press Iris Open.
5. Repeat steps 1 through 4 to position other titles
6. Position the cursor at BACK or EXIT. Press Iris Open to save settings and exit menu.
isplay setup allows the user to define the way to display the dome titles on the monitor.
56
EN
IR LED
The user can open and close the IR LED manually and set up the IR LED work mode
under this OSD mean. (Under normal operation mode, the user can press IRIS OPEN
and IRIS CLOSE to adjust the IR LED power):
1) CONTROL MODE:
AUTO: IR LED will be opened or closed automatically according to the light conditions.
TIMING: LED will be adjusted according to Open and Close Time.
OPEN: IR LED forcedly open
CLOSE: IR LED forcedly close
CAMERA: IR LED status (Open/Close) will be synchronized with Camera day and
night switching
2) SENSITIVIRY:
Here the user can manually set the sensitivity from 1-5. The smaller the number is,
the lower light of the environment will be when the IR LED on.
3) IR LED POWER: Here the use can choose the power mode covering: NORMAL,
MATCH and USER.
NORMAL: Near IR LED will be turned on when wide angle. and Far IR LED will be
turned on when small angle.
MATCH: The Near and Far IR LED will be turned on and off automatically to match
the zoom in and out.
USER: The user can manually adjust the Near and Far IR LED.
4) AUTO CONTROL: When it is on, the IR LED will turn its power consumption to the
standby status which will effectively extend the service life of IR LEDs. And under
this mode, when objects appear in the screen, the IR LED will turn its power consumption back to the normal status.
5) STANDBY POWER: When the AUTO CONTROL is on, the user can set up the
standby power here.
6) STANDBY DELAY: Set up how long if there is not moving object, the IR LED will turn
into standby status.
7) SENSITIVITY: When the AUTO CONTROL is on, the user can set up the sensitivity
to detect the moving objects.
8) ENHANCED MODE: Under normal status, press IRIS OPEN to enhance the IR
LED power, when it is turned to maximum, press IRIS OPEN continuously for 2
seconds to enter the enhanced mode. And the whole brightness of the image will
be improved. Move the cursor to EHNANCED MODE and press IRIS to enter and
select between” STATIC” and “DYNAMIC”
9) START/STOP TIME: Set up time for IR LED to open and close under “TIMING” of
control mode.
EN
57
WIPER
The user can make adjustment for the wiper under this menu (suitable for wiper-equipped dome)
1. Numbers : Move the cursor to “NUMBER” and press IRIS OPEN to enter the setup of
Wiper Number. Move the joystick up and down to select number (1-10),then press IRIS
OPEN to confirm.
2.Speed: Move the cursor to “SPEED” and IRIS OPEN to enter the setup of Wiper speed.Move the joystick up and down to select “HIGH” ,“MID ”OR “ LOW”,the press IRIS
OPEN to confirm.
3.Start : Move the cursor and press IRIS OPEN to start wiper.
(NO.71 preset is available to start wiper)
58
EN
IDLE
IDLE setting means if there is no command for the dome for a period of time, the dome
will run the actions as defined.
1)TIME: Move the cursor to “TIME” and press IRIS OPEN to enter, and move the joystick up and dome to select among 30 sec, 1 min, 5 min, 10 min and 30 min. And press
IRIS OPEN to confirm.
2)ACTION: Move the cursor to “ACTION” and press IRIS OPEN to enter. Move the
joystick to select the actions including” NONE, PRESET, SCAN, SEQUENCE, PATTERN. Press IRIS OPEN to confirm.
EN
59
ALARM
The dome system has 2alarm inputs and 1 alarm output. (optional function). When an
alarm is received, an input signal to the dome triggers the user defined action (such as
presets, patterns, etc.), and at meantime the alarm output signals is activated.
ALARM NO.: Move the cursor to the ALARM NO. Press IRIS OPEN to enter and move
the joystick up and down to select the alarm input no. (Channel 1 and Channel 2)
INPUT STATE: Set the alarm contact status. There are
two input states, OPEN and CLOSE.
OPEN normally open
CLOSE normally close
ALARM MODE
OFF Alarm function is deactivated.
ON Alarm function is activated.
AUTO
AUTO Alarm function will be activated and
deactivated between START TIME and STOP TIME.
ACTION: Set the alarm action:
NONE
(default) No action.
PRESET Dome goes to preset. (Default as Preset 1)
SCAN Dome starts auto scan (Default as Auto Scan 1)
SEQ Dome runs auto cruise (Default as Auto Cruise 1)
PATTERN
Dome runs pattern (Default as Pattern 1)
ALARM OUT: Set the auxiliary to activate:
OFF Not alarm output will be activated.
OUT1 An alarm action will close AUX 1 output..
OUT2 An alarm action will activate AUX2 output.
RESET TIME: Set up time for the alarm output (such as an alarm buzzed) when is
triggered by the detector. .
START /STOP TIME: Set up the time to start alarm and stop alarm ONLY under the
AUTO mode under ALARM MODE.
60
EN
PRIVACY MASK
Privacy mask allows the user to mask the privacy areas with black frame. The user can
set up 8 privacy masks at most.
MASK NO.: Move the cursor here and press IRIS OPEN to enter the setup of Mask
Number of the privacy zone,
ENABLE: To enable or disable this privacy mask function.
SET: Move the cursor here and press IRIS OPEN to enter the mode of setting the privacy
mask. Move the joystick (Left/Right/Up/Down) on the screen to set up the privacy zone
and press IRIS OPEN to confirm.
DELETE: Move the cursor here and press IRIS OPEN to delete the current No. of privacy mask zone.
EN
61
CLOCK
he dome can display the data and time. And the user could enter this CLOCK menu to
set up the DATE and TIME.
DATE: Move the cursor here and press IRIS OPEN to enter. Move the joystick left and
right to choose the date position and move it up and dome to adjust the figures. Press
IRIS OPEN to confirm.
TIME: Move the cursor here and press IRIS OPEN to enter. Move the joystick left and
right to choose the time position and move it up and dome to adjust the figures. Press
IRIS OPEN to confirm.
SAVE/CANCEL: Move the cursor to “SAVE” and press IRIS OPEN to save the settings.
Move the cursor to “DELETE” and press IRIS OPEN to cancel the settings.
62
EN
PASSWORD
The dome features password protection function to prevent unanthorized changes to the
dome settings. If the PASSWORD function is enabled, the operator can not access any
dome setting without entering a valid password.
EDIT PASSWORD: Move the cursor here and press IRIS OPEN to enter. Please under
the old password before set up the new password. The initial password is “111111”
ENABLE: Move the cursor here and press IRIS OPEN to enter. Move the joystick to
select between “ON” and “OFF” . The user need to enter the password when opening
the OSD under the status of “ENABLE: ON”.
EN
63
DOME TITLE
The user can set up the dome title to define each camera. Dome title support up to 12
characters.
Move the cursor according the left steps and select INPUT. Press IRIS OPEN to enter.
1) Move the joystick left and right to position “←”, and press IRIS OPEN to delete the
character at“←”. Press IRIS CLOSE to exit the edit mode.
3) Move the cursor to “<CAP>” and press IRIS OPEN to enter. Move the joystick up and
down to select the input method (such as English Cap, English, Chinese, Figures,
and Symbols)
4) Mover the cursor to next line of <CAP> and press IRIS OPEN to enter the mode of
character input. The selected character will be shown in high brightness. Move the
joystick up/down/left/right to choose the needed characters. Press IRIS OPEN to
move the selected character to the INPUT position at“←”.
5) After finishing the character inputs, move the cursor to “OK” and press IRIS OPEN
to confirm.
6) Also user can move the cursor to “CANCEL” to cancel the character input settings.
64
EN
AUX
MAIN MENU
LANGUAGE:ENGLIS
<SYSTEM INFORMATION>
<DISPLAY SETUP>
<DOME SETTINGS>
<CAMERA>
<MOTION>
RESTART
FACTORY DEFAULTS
HEIP
EXIT
The user can set up the auxiliary output to trigger other devices from an alarm or a
controller.
Move the cursor to AUX and press IRIS OPEN to enter to select “ON” or “OFF” to enable
or disable this function.
DOME SETTINGS
<IR LED>
<IDLE>
<ALARM>
<PRAVICY MASK>
<CLOCK>
<PASSWORD>
<ADVANCED>
<OTHERS>
BACK
EXIT
ADVANCED
<AUX>
<SOFT LIMIT>
<DOME SPEED>
<POWER ON ACTON>
<CAMERA>
<COMMUNICATION TEST>
<TILT ANGLE >
BACK
AUX1:OFF
AUX2:OFF
EXIT
AUX
BACK EXIT
EN
65
aux
MAIN MENU
LANGUAGE:ENGLIS
<SYSTEM INFORMATION>
<DISPLAY SETUP>
<DOME SETTINGS>
<CAMERA>
<MOTION>
RESTART
FACTORY DEFAULTS
HEIP
EXIT
SOFT LIMIT
The user can set up the soft limit to define the left and right boundaries for the pan
movement
SOFT LIMIT: Move the cursor here and press IRIS OPEN to enter.Now the joystick to
select “ON” or“OFF”to ennable or disable this function.
LEFT LIMIT: Move the cursor here and there IRIS OPEN to enter .Now the user can
move the joystick to control the PAN movement of the dome to a defined positon for the
left limit .Press IRIS OPEN to confirm.
RIGHT LIMIT: Move the cursor here and press IRIS OPEN to enter.Now the user can
move the joystick to control the PAN movement of the dome to a defined position for the
DOME SETTINGS
<IR LED>
<IDLE>
<ALARM>
<PRAVICY MASK>
<CLOCK>
<PASSWORD>
<ADVANCED>
<OTHERS>
BACK
EXIT
right limit .Press IRIS OPEN to confirm.
LIMIT DELETE: Move the cursor here and press IRIS OPEN to delete all the settings.
ADVANCED
<AUX>
<SOFT LIMIT>
<DOME SPEED>
<POWER ON ACTON>
<CAMERA>
<COMMUNICATION
TEST>
<TILT ANGLE >
LIMIT SETTING
SOFT LIMIT OFF
<LEFT LIMIT>
<RIGHT LIMIT>
LIMIT DELETE
BACK
66
EXIT
EN
DOME SPEED
MAIN MENU
LANGUAGE:ENGLIS
<SYSTEM INFORMATION>
<DISPLAY SETUP>
<DOME SETTINGS>
<CAMERA>
<MOTION>
RESTART
FACTORY DEFAULTS
HEIP
EXIT
DOME SPEED
To make a selection of the dome speed,the user can enter this menu to set up.
Move the cursor to BACK/EXIT and press IRIS OPEN to run the command of BACK or
EXIT.
DOME SETTINGS
<IR LED>
<IDLE>
<ALARM>
<PRAVICY MASK>
<CLOCK>
<PASSWORD>
<ADVANCED>
<OTHERS>
BACK
EXIT
ADVANCED
<AUX>
<SOFT LIMIT>
<DOME SPEED>
<POWER ON ACTON>
<CAMERA>
<COMMUNICATION TEST>
<TILT ANGLE >
BACK
AUX1:OFF
AUX2:OFF
EXIT
AUX
BACK EXIT
EN
67
POWER ON ACTION
POWER ON ACTION
MAIN MENU
LANGUAGE:ENGLIS
<SYSTEM INFORMATION>
<DISPLAY SETUP>
<DOME SETTINGS>
<CAMERA>
<MOTION>
RESTART
FACTORY DEFAULTS
HEIP
EXIT
The user can define the dome action when power on,
Move the cursor to POWER ON ACTION and press IRIS OPEN to enter the mode
of setup.
NONE
(default) No action.
PRESET Dome goes to preset. (Default as Preset 1)
SCAN Dome starts auto scan (Default as Auto Scan 1)
SEQ Dome runs auto cruise (Default as Auto Cruise 1)
PATTERN
Dome runs pattern (Default as Pattern 1)
DOME SETTINGS
<IR LED>
<IDLE>
<ALARM>
<PRAVICY MASK>
<CLOCK>
<PASSWORD>
<ADVANCED>
<OTHERS>
BACK
EXIT
ADVANCED
<AUX>
<SOFT LIMIT>
<DOME SPEED>
<POWER ON ACTON>
<CAMERA>
<COMMUNICATION
TEST>
<TILT ANGLE >
LIMIT SETTING
SOFT LIMIT OFF
<LEFT LIMIT>
<RIGHT LIMIT>
LIMIT DELETE
BACK
68
EXIT
EN
CAMERA
CAMERA
The dome can automatically recognize the main camera modules in the market.For the cameras it can not recognize,the user can set up here.
CAMERA:Move the cursor here and press IRIS OPEN to enter the setup
mode.Move the joystick up and down to select the camera types.Press IRIS
OPEN to confirm.
BAUDRATE :Move the cursor here and press IRIS OPEN to enter the setup
mode.Move the joystick up and down to select the baudrate.Press IRIS OPEN
to confirm.
PARITY:Move the cursor here and press IRIS OPEN to enter the setup mode.
Move the joystick up and down to select the parity mode.Press IRIS OPEN
to confirm.
EN
69
Camera
COMMUNICATION TEST
MAIN MENU
LANGUAGE:ENGLIS
<SYSTEM INFORMATION>
<DISPLAY SETUP>
<DOME SETTINGS>
<CAMERA>
<MOTION>
RESTART
FACTORY DEFAULTS
HEIP
EXIT
The dome can do self diagnosis for the communications between keyboard and
speed dome. The test needs to match with our software VK200.
If the self testing is successfully finished via the software, the system will show up
the testing results as left diagram.
DOME SETTINGS
<IR LED>
<IDLE>
<ALARM>
<PRAVICY MASK>
<CLOCK>
<PASSWORD>
<ADVANCED>
<OTHERS>
BACK
EXIT
ADVANCED
<AUX>
<SOFT LIMIT>
<DOME SPEED>
<POWER ON ACTON>
<CAMERA>
<COMMUNICATION TEST>
<TILT ANGLE >
BACK
EXIT
COMMUNICATION TEST
KEYBOARD->DOME:100/100
KEYBOARD<-DOME:100/100
DOME RECEIVE:100%
KEYBOARD RECEIVE:100%
BACK
70
EXIT
EN
tilt angle
The user can set up the tilt angle under the menu of TILT ANGLE
MAIN MENU
LANGUAGE:ENGLIS
<SYSTEM INFORMATION>
<DISPLAY SETUP>
<DOME SETTINGS>
<CAMERA>
<MOTION>
RESTART
FACTORY DEFAULTS
HEIP
EXIT
Move the cursor to”TILT ANGLE”and press IRIS OPEN to the setup of tilt angle
.Move the joystick up and down to select the angle and press the IRIS OPEN to
confirm.
DOME SETTINGS
<IR LED>
<IDLE>
<ALARM>
<PRAVICY MASK>
<CLOCK>
<PASSWORD>
<ADVANCED>
<OTHERS>
BACK
EXIT
ADVANCED
<AUX>
<SOFT LIMIT>
<DOME SPEED>
<POWER ON ACTON>
<CAMERA>
<COMMUNICATION TEST>
<TILT ANGLE >
BACK
EXIT
TILT ANGLE SETTINGS
TILT ANGLE:-5
BACK EXIT
EN
71
OTHERS
MAIN MENU
LANGUAGE:ENGLIS
<SYSTEM INFORMATION>
<DISPLAY SETUP>
<DOME SETTINGS>
<CAMERA>
<MOTION>
RESTART
FACTORY DEFAULTS
HEIP
EXIT
OTHERS
The user can set up TEMP MODE, INTERNAL FAN, PRESET FREEZE, STOP
TIME. MENU OFF TIME and NORTH ZERO here under the menu of “OTHERS”
TEMP MODE: To set up the control mode of dome fans and heaters. It includes three
modes of AUTO, FAN HIGH SPEED and FAN LOW SPEED.
PRESET FREEZE: This feature freezes the scene on the monitor when going to a
preset. This allows smooth switching from one preset scene to another.
AUTO FLIP: When the camera tilts downward and goes just beyond the vertical
position, the camera will rotate 180 degrees. The user can press IRIS OPEN to enter
and choose to turn on/off this function.
DOME SETTINGS
<IR LED>
<IDLE>
<ALARM>
<PRAVICY MASK>
<CLOCK>
<PASSWORD>
<ADVANCED>
<OTHERS>
BACK
EXIT
MENU STYLE:There are two menu modes:ordinary and image to be selected according to user’s preference.
STOP TIME: To set up the time that dome will stops after receiving the last command. Options include 5/15/30/60 Sec.
MENU OFF TIME: To set up the time that OSD menu be off when no operations.
Options include 1/2/5/10 min.
NORTH ZERO: To set up the due north of the dome (pan 0º)Move the cursor here
and press IRIS OPEN to enter. Move the joystick to control the dome to pan 0º and
press IRIS OPEN to confirm.
OTHERS
TEMP MODE :AUTO
PRESET FREEZE:OFF
AUTO FLIP :ON
MENU STYLE:IMAGE 2
MENU OFF:5MIN
<DOME TITLE>
<AZIMUTH ZERO>
BACK
72
EXIT
EN
CAMERA
MAIN MENU
LANGUAGE:ENGLIS
<SYSTEM INFORMATION>
<DISPLAY SETUP>
<DOME SETTINGS>
<CAMERA>
<MOTION>
RESTART
FACTORY DEFAULTS
HEIP
EXIT
CAMERA
The user can make adjustment for the cameras under this menu.
FOCUS MODE: AUTO FOCUS allows the camera lens to remain in focus during zooming in, zooming out and pan/tilt movement. Move the cursor here and press IRIS
OPEN to enter. Setup the mode: AUTO” or “OFF” and press IRIS OPEN to confirm.
When auto focus is off, the user needs to do manual focus.
DIGITAL ZOOM: Move the cursor here and press IRIS OPEN to enter. Setup the
function to be “ON” or “OFF”.
BACKLIGHT: Move the cursor here and press IRIS OPEN to enter. Setup the function to be “ON” or “OFF”.
CAMERA SETTING
FOCUS MODE:AUTO
DIGITAL ZOOM:OFF
BACKLIGHT:OFF
PICTURE FLIP:OFF
ZOOM SPEED:NORMAL
DAY NIGHT:AUTO
<ADVANCED>
BACK
EXIT
PICTURE FLIP: To set up the Tilt flip for the dome. Move the cursor here and press
IRIS OPEN to enter. Setup the function to be “ON” or “OFF”.
ZOOM SPEED: To set up the zoom speed of Low, Normal and high when doing the
zoom in and out. Move the cursor here and press IRIS OPEN to enter. Move the
joystick to choose and press IRIS OPEN to confirm
DAY NIGHT: To set up the day and night mode of AUTO, CLOUR and B/W. Move the
cursor here and press IRIS OPEN to enter. Move the joystick to choose and press
IRIS OPEN to confirm
EN
73
CAMERA ADVANCED
The use can set up more detailed parameters of camera here under the menu of
CAMERA ADVANCED.
WB: To set up the white balance of the camera. Options include AUTO, MANUAL.
INDOOR and OUTDOOR. The use can select different mode according the different
locations.
RED GAIN: Only can be adjusted whet WB set as manual.
BLUE GAIN: Only can be adjusted whet WB set as manual.
BIRGHT: To set up the brightness of the image. Move the cursor here and press IRIS
OPEN to enter. Move the joystick to adjust and press IRIS OPEN to confirm
EXPOSURE: To set up the exposure mode of the camera. Options include AUTO,
MANUAL, SHUTTER PRIORITY, IRIS PRIORITY and BRIGHT PRIORITY. The use
can select different mode according the different locations.
WIDE DYNAMIC: Wide dynamic range (WDR) balances the
brightest and darkest sections of a scene to produce a picture that is perfectly balanced in light and clarity. Available settings are OFF.LOW.MID and HIGH. The default
setting is OFF.
74
EN
PRESET
he dome supports 256 presets. Please check the following steps to set up a preset.
1) PRESET NO.: Move the cursor here and press IRIS OPEN to enter the setup of
Preset Number. Move the joystick to select a preset number (1-64 and 100-255)
and press IRIS OPEN to confirm.
2) TITLE: Move the cursor here and press IRIS OPEN to enter the setup of Preset
Title. Check the detailed above in DOME TITLE settings.
3) <SET>: Move the cursor here and press IRIS OPEN to enter. Move the dome
to a defined position as preset point and press IRIS OPEN to save the preset
position.
4) CALL: Move the cursor here and press IRIS OPEN to call up the current preset.
5) DELETE: Move the cursor here and press IRIS OPEN to delete the current
preset.
6) SPEED: Move the cursor here and press IRIS OPEN to set up the preset call up
speed of LOW, MID and HIGH.
EN
75
AUTOSCAN
he dome supports 8 groups of auto scan. Please check the following steps to set
up a scan.
1) SCAN NO.: Move the cursor here and press IRIS OPEN to enter the setup of
SCAN Number. Move the joystick to select a preset number (1-8) and press IRIS
OPEN to confirm.
2) TITLE: Move the cursor here and press IRIS OPEN to enter the setup of SCAN
Title. Check the detailed above in DOME TITLE settings.
3) <LEFT LIMIT>: Move the cursor here and press IRIS OPEN to enter. Move the
dome to a defined position as left limit and press IRIS OPEN to save this left
boundary.
4) <RIGHT LIMIT>: Move the cursor here and press IRIS OPEN to enter. Move the
dome to a defined position as right limit and press IRIS OPEN to save this right
boundary.
5) START: Move the cursor here and press IRIS OPEN to start the current scan.
6) SCAN SPEED: Move the cursor here and press IRIS OPEN to set up the scan
speed ranging 1-30.
76
EN
AUTO CRUISE (SEQUENCE)
The dome supports 8 groups of auto cruise and each cruise supports 32 presets. .
Please check the following steps to set up cruise.
1) SEQ NO.: Move the cursor here and press IRIS OPEN to enter the setup of
Sequence Number. Move the joystick to select a preset number (1-8) and press
IRIS OPEN to confirm.
2) TITLE: Move the cursor here and press IRIS OPEN to enter the setup of Sequence Title. Check the detailed above in DOME TITLE Settings.
3) <SEQUENCE SET>: Move the cursor here and press IRIS OPEN to enter. Move
the cursor to EDIT and press IRIS OPEN enter edit mode of sequence. Move the
joystick left and right to select each item.
a) When the < > is on the item NO., move joystick up or down to select the Serial
NO. of the preset in a sequence. There are up to 32 presets in each sequence.
b) When the < > is on the item PRESET, move the joystick up or down to select the
preset NO. that the user wants to add in the sequence.
c) When the < > is on the INTERVAL, move the joystick up or down to select the
interval time between each preset.
d) When the < > is on the last item, move the joystick up or down to select edition
mode as “INS (insert)”, “ok” and “delete”.
Press IRIS OPEN when selecting INS to insert the settings into the position
of current Serial No.
Press IRIS OPEN when selecting OK to override the settings of Current Serial
No. Press IRIS OPEN when selecting delete to delete the settings of the Current
Serial No.Press IRIS OPEN to save all the setting and press IRIS CLOSE to
exit.
4) DELETE/START: Move the cursor here and press IRIS OPEN to delete/start the
current sequence.
EN
77
PATTERN TOUR
he dome supports 4 pattern tours and each pattern cover at most 10 Minutes of 500
commands. Please check the following steps to set up a pattern.
1) PATTERN NO.: Move the cursor here and press IRIS OPEN to enter the setup
of Pattern Number. Move the joystick to select a pattern number (14) and press
IRIS OPEN to confirm.
2) TITLE: Move the cursor here and press IRIS OPEN to enter the setup of Pattern
Title. Check the detailed above in DOME TITLE settings.
3) <SET>: Move the cursor here and press IRIS OPEN to enter. Move the dome
up/down/left right, make the zoom in/out and press IRIS OPEN to save the pattern tour.
4) START: Move the cursor here and press IRIS OPEN to start the current pattern
tour.
5) DELETE: Move the cursor here and press IRIS OPEN to delete the current
pattern tour.
78
EN
ZONES
The use can set up zone title when the camera moves to a defined location, which
will make it much easier for the user to identify the location. The dome supports 8
zone titles. Please check the following steps to set up a zone
1) ZONE NO.: Move the cursor here and press IRIS OPEN to enter the setup of
Zone Number. Move the joystick to select a zone number (1-8) and press IRIS
OPEN to confirm.
2) TITLE: Move the cursor here and press IRIS OPEN to enter the setup of Zone
Title. Check the detailed above in DOME TITLE settings.
3) <LEFT LIMIT>: Move the cursor here and press IRIS OPEN to enter. Move the
dome to a defined position as left limit and press IRIS OPEN to save this left
boundary.
4) <RIGHT LIMIT>: Move the cursor here and press IRIS OPEN to enter. Move the
dome to a defined position as right limit and press IRIS OPEN to save this right
boundary.
5) DELETE: Move the cursor here and press IRIS OPEN to delete the current
zone.
EN
79
TIMING ACTION
TIMING ACTION allows the user to set up the actions of the dome in 7 days (each
day with 8 timing segments). When fishing the setup, the dome will do the actions
according to the setup motion during the defined time segment.
NO.: Here shows the day within a week. Move the cursor here and press IRIS OPEN
to enter. Move joystick up or down to select the Serial No. (1-8) for the timing action.
Press IRIS OPEN to confirm.
START: To set up the start time for the defined motion within this time segment.
Press IRIS OPEN to confirm.
STOP: To set up the stop time for the defined motion within this time segment. Press
IRIS OPEN to confirm.
MOTION: To setup the motion that will be operated in this time segment. The motion
includes: NONE. PRESET 1-8, SCAN 1-4, SEQUENCE 1-4 and PATTERN 1-4.
ON/OFF: Move the cursor here and press IRIS OPEN to enter to enable or disable
this function. Press IRIS OPEN to confirm.
COPY: The user could set up each 8 segment of 7 days separately or can copy the
finished setting for one day to the current day. Move the cursor there and press IRIS
OPEN to copy the settings.
BACK: Press IRIS OPEN to save and be back to last menu.
NOTE: It is not allowed to set up the same time segment during one day. And the
time segment can not exceed 00:00. During the timing action segment, the defined
action will be stopped if the user moves the dome. If there is operation during the
defined time segment, the action will re-activated as long as it is in the defined timing
action segment.
80
EN
MOTION DETECT
The user can set up 8 motion detection scenes (each scene with 4 detecting areas)
under this menu. The alarm output will be triggered when moving objects enter these
detecting areas
SCENE NO.: Move the cursor here and press IRIS OPEN to enter the setup of
Scene Number. Move the joystick to select a preset number (1-8) and press IRIS
OPEN to confirm.
<EDIT SCENE>: Move the cursor here and press IRIS OPEN to enter. Move the
dome to a user-defined detecting scene. Press IRIS OPEN to confirm.
<EDIT AREA>: Move the cursor here and press IRIS OPEN to enter the menu of
AREA EDIT.
a) AREA NO.: Move the cursor here and press IRIS OPEN to enter the setup of
AREA Number. Move the joystick to select a preset number (1-4) and press IRIS
OPEN to confirm.
b) <AREA EDIT>: Move the cursor here and press IRIS OPEN to enter the setup of
AREA EDIT. The screen will display frame with Serial No. The user can move the
frame to the top left conner of the wanted detecting area and press IRIS OPEN
to confirm. Then move the joystick to adjust the size of the detecting area and
press IRIS OPEN to confirm
c) DELETE: Move the cursor here and press IRIS OPEN to delete the current
detecting area.
d) SENSITIVITY: Move the cursor here and press IRIS OPEN to enter. Select
among LOW. MID and HIGH and press IRIS OPEN to confirm the sensitivity.
e) DELETE SCENE: Move the cursor here and press IRIS OPEN to delete the
current scene.
f) AUX ACTIVATE: The dome can activate the alarm aux output when detecting
the moving object. Press IRIS OPEN to enter and select between “ON” and
“OFF” to activate or deactivate this function.
g) CANCEL (SEC): Here means when the alarm aux output is activated by the
detecting function, for how long it will last before the aux output will be closed.
The time ranging 1-60 Sec.
h) START: Move the cursor here and press IRIS OPEN to start the function of
motion detection.
EN
81
AUTO TRACKING
Under the auto tracking mode, the dome will auto track the moving objects entering
the scene. When the object is moving out of the scene, the dome will return to a
preset position as defined after the defined time.
SENSITIVITY: The user can set up the auto tracking sensitivity under this menu.
When set as LOW, the dome will do auto tracking when obvious object entering the
screen. When set as HIGH, the dome will do auto tracking when small object moving into the screen. Move the cursor there and press the IRIS OPEN to enter. The
options include: LOW, MID and HIGH.
TARGET: To set up the size of the tracking object. The options include Large. MID
and SMALL.
AUX: If set “ON” here, the object auto tracking will activate alarm aux output at the
same time. Press IRIS OPEN to enter to select “ON” or “OFF”
ZOOM MATCH: Under the auto tracking model, if turn on the function of ZOOM
MATCH, the dome will do zooming in and out during auto tracking to keep the right
proportion between the object and background. Move the cursor there and press the
IRIS OPEN to enter. And move the joystick to select the optical zoom.
ENABLE: Move the cursor here and press IRIS OPEN to enter to select “ON” or
“OFF” to enable or disable this function.
82
EN
RIPRISTINO
TRACKING SCENE SET: Here the user can set the scene that the dome will det
back to when finishing the section of auto tracking. Move the cursor to this
item and press IRIS OPEN to enter. Move the cursor to the wanted scene, then
press IRIS OPEN to confirm.
DELETE: Move the cursor here and press IRIS OPEN to delete the return scene.
RETURN DELAY: To set up the time that dome will waiting to return to this scene.
RESTART
The dome allows the user to reset its settings remotely under this menu.
Move the cursor here and press IRIS OPEN to enter.
Select “OK” or “CANCEL” to continue the reset or cancel the reset.
FACTORY DEFAULTS
FACTORY DEFAULTS will allow the user to recover all the setting to factory default
setting.
Move the cursor here and press IRIS OPEN to enter.
Select “OK” or “CANCEL” to continue the reset or cancel the reset
EN
83
Vimar SpA: Viale Vicenza, 14
36063 Marostica VI - Italy
Tel. +39 0424 488 600 - Fax (Italia) 0424 488 188
Fax (Export) 0424 488 709
www.vimar.com
49400757A0 00 14 11
VIMAR - Marostica - Italy