1
OPERATING INSTRUCTIONS & PARTS MANUAL
20" PORTABLE BOX FAN
with THERMOSTAT
20" (50.8 cm) MODEL 4TM67/9700
READ AND SAVE THESE INSTRUCTIONS
READ CAREFULLY BEFORE ATTEMPTING TO ASSEMBLE, INSTALL, OPERATE OR MAINTAIN THE PRODUCT DESCRIBED.
PROTECT YOURSELF AND OTHERS BY OBSERVING ALL SAFETY INFORMATION. FAILURE TO COMPLY WITH
INSTRUCTIONS COULD RESULT IN PERSONAL INJURY AND/OR PROPERTY DAMAGE!
RETAIN INSTRUCTIONS FOR FUTURE REFERENCE.
Electrical Code (NEC) and all applicable local codes and ordinances.
This work must be done only by a qualified electrician, using copper
wire only.
WARNING: USE OF A THREE-PRONG TO TWO-PRONG ADAPTER IS
NOT RECOMMENDED. IMPROPER CONNECTION MAY CREATE
THE RISK OF ELECTROCUTION. USE OF SUCH ADAPTERS IS NOT
PERMITTED IN CANADA.
3. Where possible, avoid the use of extension cords. If they must be
used, minimize the risk of overheating by ensuring that they are UL
listed and of the proper gage and length. Never use a single extension
cord to operate more than one fan.
4. Do not insert fingers or foreign objects into the fan. Do not block or
tamper with the fan in any manner while it is in operation.
5. To avoid the possibility of overturning the fan, ensure that it is
operating on a stable, level surface.
6. Unplug power cord before installing or servicing the fan
DESCRIPTION
7. Completely reassemble fan, according to instructions, before
reconnection to power supply.
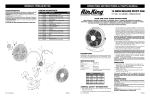
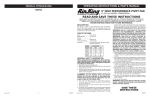
The Airking 20" (50.8 cm) portable box fan features 3-speed rotary knob
operation, adjustable thermostat, lighted comfort level indicator and
rounded corners. The 5-paddle blade is driven by a permanent prelubricated
motor with a 6' (1.83 m) 18/3 cordset. Fan is fully assembled.
WARNING: DO NOT DEPEND UPON THE ON-OFF SWITCH AS THE
SOLE MEANS OF DISCONNECTING POWER WHEN INSTALLING OR
SERVICING THE FAN. ALWAYS UNPLUG THE POWER CORD.
8. This fan is intended for general use ONLY. It must NOT be used in
potentially dangerous locations such as flammable, explosive, chemical-laden or wet atmospheres. DO NOT use fan in a window. Rain may
create an electrical hazard.
SPECIFICATIONS
Motor ................................... 120V, 60 Hz
Blade Diameter ................... 20" ( 50.8 cm)
Speeds ................................ 3
Control ................................ Rotary Knob
Approvals ............................ UL listed. Close mesh fan guard meets
OSHA requirements.
WARNING: TO REDUCE THE RISK OF FIRE OR ELECTRIC SHOCK,
DO NOT USE THIS FAN WITH ANY SOLID STATE SPEED CONTROL
DEVICE.
OPERATION
1. Be sure Fan is in OFF position.
MODEL
4TM67/9700
SPEED
HIGH
MED
LOW
CFM
M3/s
RPM
Amps
Watts
dB A
4550
2.15
925
1.79
165
65
3430
1.62
690
1.30
117
48
2580
1.22
550
1.00
87
43
2. Plug Fan into any standard 120v Ac household outlet.
3. Turn Thermostat to the highest setting (Cooler).
4. Turn Fan on to desired speed - High (3),
Med. (2) or Low (1).
5. When a desired temperature has been
reached, adjust the Thermostat until the
Fan stops. Your Fan will now turn ON and
OFF to maintain the desired comfort level.
As an added safety feature, the Thermostat
Light will come ON to let you know that your
Fan is still in the ON position and the Fan
can turn itself back on.
GENERAL SAFETY INFORMATION
1. Make certain that the power source conforms to the electrical
requirements of the fan.
2. The power cord is equipped with a three-prong grounded plug that
must be inserted into a matching receptacle. Under no circumstances
must the grounding prong be cut off the plug. Where a two-prong wall
receptacle is encountered, it must be replaced with a properly grounded
three-prong receptacle installed in accordance with the National
New 4/98
IMPORTANT: Your AirKing Ultra Box Fan is equipped with a Climate
Control Thermostat. This Thermostat functions by sensing the temperature
in the room and will turn the Fan on or off AUTOMATICALLY as the
temperature changes.
1
2084533
MODEL 4TM67/9700
MAINTENANCE
WARNING: ALWAYS UNPLUG THE CORD BEFORE SERVICING.
CLEANING: Use a soft cloth and a mild soap solution such as liquid dish
washing detergent.
CAUTION: Do not use gasoline, benzine, thinner, harsh cleaners,
etc. which will damage the fan.
Dry all parts with a soft cloth completely before reconnecting to power
supply.
STORAGE: When not in use, keep unit in a clean dry place.
MOTOR IS PERMANENTLY LUBRICATED.
TROUBLE SHOOTING GUIDE
TROUBLE
PROBABLE CAUSE
SUGGESTED REMEDY
Fan will not start
1.
Fuse or circuit breaker blown or off
1. Check main and branch fuse or circuit breaker
2.
Thermostat knob turned to low
2. Adjust Thermostat knob to higher setting (towards
COOLER)
Fan turns OFF automatically
1.
Thermostat has reached desired temperature
1. Change Thermostat setting towards COOLER for
Fan to come on again
Fan stays on
1.
Thermostat knob is turned to high
(cooler) position
1. Adjust Thermostat knob till Fan
goes off
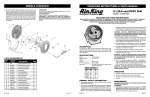
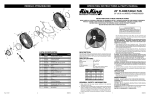
REPLACEMENT PARTS LIST
Key
1
2
1
2
3
4
5
6
7
8
9
10
11
12
13
14
15
16
17
18
3
4
5
6
7
10
8
11
9
12
17
18
13
14
Part No.
2091119
2011128
2011416
2011417
2011415
2057405
2091599
2061711
2050031W
2090553
2057067
2046302
2011000
2031226
2011004
2011127
2091217
2091118
Description
Qty.
Screw #6 x 3/8 Type ABZP PPH
Rear Grill
Switch Knob
Thermostat Knob
Handle
Control Box Assembly
Snap-On Wire Cover
Fan Body
Cordset
Wire Nut
Switch
Ribbon Cable
Motor Spacer
Motor
Blade
Front Grill
Screw #10-24 x 1-3/8" Type AB PPH
Screw #6 x 3/8 Type AB PPH
12
1
1
1
1
1
1
1
1
1
1
1
1
1
1
1
4
1
15
16
1
New 4/98
2
2084533
MANUAL DE INSTRUCCIONES DE OPERACIÓN Y PARTES
EL VENTILADOR DE PORTÁTIL CAJA
DE 20" (50.8 cm) con TERMOSTATO
20" (50.8 cm) MODELO 4TM67/9700
LEA Y GUARDE ESTAS INSTRUCCIONES
LÉALAS CUIDADOSAMENTE ANTES DE INTENTAR ARMAR, INSTALAR, OPERAR O DAR MANTENIMIENTO AL PRODUCTO
DESCRITO. PROTÉJASE A SÍ MISMO Y A LOS DEMÁS OBSERVANDO TODA LA INFORMACIÓN SOBRE SEGURIDAD. ¡NO
SEGUIR LAS INSTRUCCIONES PODRÍA RESULTAR EN LESIONES PERSONALES Y/O DAÑOS A LA PROPIEDAD!
GUARDE LAS INSTRUCCIONES PARA REFERENCIAS FUTURAS.
ADVERTENCIA: NO SE RECOMIENDA EL USO DE UN ADAPTADOR
DE TRES A DOS ESPIGAS. LA CONEXIÓN INDEBIDA PODRÍA CREAR
EL RIESGO DE SER ELECTROCUTADO. EL USO DE TALES
ADAPTADORES NO ESTÁ PERMITIDO EN CANADÁ.
3. Siempre que sea posible, evite el uso de extensiones eléctricas. Si tienen
que usarse, minimice el riesgo de sobrecalentamiento asegurándose de
que sean de catalogación UL y del calibre y la longitud adecuadas.
Nunca use una sola extensión para operar más de un ventilador.
4. No introduzca los dedos ni objetos extraños en el ventilador. No obstruya
ni manipule indebidamente el ventilador mientras esté en operación.
5. Para evitar toda posibilidad de que el ventilador se vaya de lado,
asegúrese de colocarlo en una superficie estable y nivelada.
6. Desenchufe el cordón eléctrico antes de instalar o dar servicio al
ventilador.
7. Vuelva a armar completamente el ventilador, de acuerdo con las
instrucciones, antes de volver a conectarlo a la alimentación eléctrica.
DESCRIPCIÓN
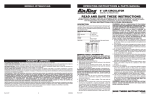
El ventilador de portátil caja AirKing 20" (50.8 cm) ofrece una operación
de perilla rotativa de 3 velocidades, termostato ajustable, indicador
iluminado de nivel de confort y esquinas redondeadas. Sus 5 paletas se
mueven impulsadas por un motor prelubricado y dispone de un cordón
18/3 de 1.83 cm (6 pies). El ventilador viene completamente ensamblado.
ADVERTENCIA: NO DEPENDA DEL INTERRUPTOR DE ENCENDIDO
Y APAGADO COMO EL ÚNICO MEDIO PARA INTERRUMPIR LA
ALIMENTACIÓN ELÉCTRICA CUANDO INSTALE O DÉ SERVICIO AL
VENTILADOR. SIEMPRE DESENCHUFE EL CORDÓN ELÉCTRICO.
8. Este ventilador es para uso general EXCLUSIVAMENTE. NO deberá
usarse en localidades potencialmente peligrosas tales como atmósferas
inflamables, explosivas, cargadas de gases o húmedas. NO utilice el
ventilador en una ventana, ya que la lluvia podría crear un peligro eléctrico.
ESPECIFICATIONES Y FUNCIONAMIENTO
Motor ............................................................. 120V, 60 Hz
Tamano De Paletas ...................................... 20" (50.8 cm)
Velocidades .................................................. 3
Control .......................................................... Perillar Rotario
Aprobaciones. ..................... Catalogación UL. El protector de malla
cerrada del ventilador satisface las
normas OSHA.
FUNCIONAMIENTO
1. Asegúrese de que el Ventilador esté apagado.
2. Enchufe el Ventilador en cualquier toma de corriente casero normal
de C.A. de 120V.
4TM67/9700
3. Poner el Termostato en el punto más alto (Más Fresco: Cooler).
1. Cerciórese de que la fuente de electricidad se adapte a los
requerimientos eléctricos del ventilador.
2. El cordón eléctrico está equipado con una clavija a tierra de tres espigas
que tiene que ser enchufada a un receptáculo del mismo diseño. Bajo
ninguna circunstancia deberá cortarse la espiga a tierra de la clavija. De
existir un receptáculo de pared de dos espigas, deberá reemplazarse por
uno de tres espigas debidamente puesto a tierra e instalado de
conformidad con el Código Nacional de Electricidad y todos los códigos
y ordenanzas locales aplicables. El trabajo deberá hacerlo un electricista
calificado, utilizando exclusivamente alambre de cobre.
New 4/98
o)
(A
pa
ga
d
o)
INFORMACIÓN GENERAL SOBRE SEGURIDAD
es
5. Cuando se haya llegado a la temperatura
deseada, regular el Termostato hasta que
el Ventilador pare. Ahora su Ventilador se
ENCENDERÁ y se APAGARÁ para
mantener el nivel de comodiad deseado.
Como característica de seguridad
agregada, la Luz del Termostato se
ENCENDERÁ para avisarle que su
Ventilador todavía está en la posición de
ENCENDIDO y que el Ventilador se puede
volver a enceder por sí solo.
co
)
4. Poner el Ventilador a la velocidad deseada: Alta (3), Media (2) o
Baja(1).
sc
2580
1.22
550
1.00
87
43
Fr
BAJA
3430
1.62
690
1.30
117
48
re
MEDIA
4550
2.15
925
1.79
165
65
(F
ALTA
CFM
M3/s
RPM
Amps
Watts
dB A
ás
VELOC.
(M
MODELO
ADVERTENCIA: PARA REDUCIR EL RIESGO DE INCENDIOS O
DESCARGAS ELÉCTRICAS, NO USE ESTE VENTILADOR CON NINGÚN
DISPOSITIVO DE CONTROL DE VELOCIDAD DE ESTADO SÓLIDO.
IMPORTANTE: Su Ventilador de Caja de Fuerza Ultra LASKO está
equipado con Termostato de Control de Clima. Este Termostato
funciona detectando la temperatura de la habitación y encenderá o
apagará el Ventilador AUTOMÁTICAMENTE a medida que cambie la
temperatura.
3
2084533
MODELO 4TM67/9700
MANTENIMIENTO
ADVERTENCIA: DESCONECTE SIEMPRE EL CORDÓN ANTES DE
INTENTAR REALIZAR CUALQUIER FUNCIÓN DE SERVICIO.
LIMPIEZA: Use un trapo y una solución de jabón suave, tal como
detergente líquido para lavar trastes.
ADVERTENCIA: No use gasolina, bencina, diluyente de pintura ni
limpiadores fuertes en aerosol, ya que éstos dañarán el ventilador.
ALMACENAMIENTO: Cuando no lo utilice, mantenga el aparato en un
lugar limpio y seco.
EL MOTOR HA SIDO PERMANENTEMENTE LUBRICADO.
GUÍA PARA DESCUBRIR Y CORREGIR ANORMALIDADES
ANORMALIDAD
CAUSA PROBABLE
SOLUCIÓN SUGERIDA
1. El Ventilador no arranca
1. Fusible o interruptor automático
quemado o desconectado
1. Revisar el fusible o el interruptor automático
principal o el derivado
2. Perilla del Termostato puesta en bajo
2. Regular la perilla del Termostato hasta un punto
más alto (hacia MÁS FRESCO: COOLER)
1. El Ventilador se apaga
automáticamente
1. El Termostato ha llegado al punto deseado
1. Cambiar el Termostato regulando la temperatura
hacia MÁS FRESCO para que el Ventilador
arranque otra vez
1. El Ventilador se queda
encendido
1. La perilla del Termostato está puesta en la
posición de alto (más fresco)
1. Regular la perilla del Termostato hasta que el
Ventilador se apague
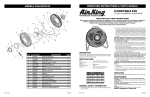
LISTA DE REPUESTOS
1
2
3
4
5
6
7
10
8
11
9
12
17
18
13
14
Ref
No.
No. De
Parte
1
2
3
4
5
6
7
8
9
10
11
12
13
14
15
16
17
18
2091119
2011128
2011416
2011417
2011415
2057405
2091599
2061711
2050031W
2090553
2057067
2046302
2011000
2031226
2011004
2011127
2091217
2091118
Descripción
Cant.
Tornillo #6 x 3/8 Tipo ABZP PPH
Rejilla Trasera
Botón del Interruptor
Botón del Termostato
Agarradera
Ensamblado de la Caja de Control
Tapa de Presíon
Cuerpo del Ventilador
Cordón Eléctrico
Tuerca para Alambre
Interruptor
Cable Liston
Espacio en Motor
Motor
Hélice
Rejilla Delantera
Tornillo de #10-24 x 1-3/8" Tipo AB PPH
Tornillo de #6 x 3/8 Tipo AB PPH
12
1
1
1
1
1
1
1
1
1
1
1
1
1
1
1
4
1
15
16
1
New 4/98
4
2084533