1
For use with / Utiliser avec
eclips™ electronic shape-cutting machine
Design & Font Cartridge
Cartouche de Création
et Caractères
Fête d’anniversaire et Temps d’amusement Alphabet
Fiesta de cumpleaños y Tiempos de la Diversión Alfabeto
ALPHABET
BIRTHDAY PARTY &
FUN TIMES
Table of Contents
Translations . . . . . . . . . . . . . . . . . . . . . . . . . . . . . . . . .3
Traductions
Traducciones
Übersetzungen
Handheld Remote Control Features . . . . . . . . . . . . . . . . .4
Caractéristiques Télécommande Portable
Funciones del Telemando de Mano
Steuerungsfunktionen
Screen Features. . . . . . . . . . . . . . . . . . . . . . . . . . . . . . .6
Caractéristiques Écran
Funciones de la Pantalla
Bildschirmfunktionen
Picture-in-Picture. . . . . . . . . . . . . . . . . . . . . . . . . . . . . .8
Image dans l’Image
Imagen en Imagen
Bild-in-Bild
Borders . . . . . . . . . . . . . . . . . . . . . . . . . . . . . . . . . . . 10
Bordures
Bordes
Bordüren
Scoring . . . . . . . . . . . . . . . . . . . . . . . . . . . . . . . . . . . 12
Rainage
Calado
Anritzen
Cards & Envelopes . . . . . . . . . . . . . . . . . . . . . . . . . . . . 14
Cartes et enveloppes
Tarjetas y sobres
Karten und Umschläge
Definitions . . . . . . . . . . . . . . . . . . . . . . . . . . . . . . . . . 16
Définitions
Definiciones
Definitionen
Font Sizes. . . . . . . . . . . . . . . . . . . . . . . . . . . . . . . . . . 18
Tailles des Caractères
Tamaños de la Fuente
Schriftgröße
Image Directory . . . . . . . . . . . . . . . . . . . . . . . . . . . . . 19
Répertoire d’Images
Guía de Imágenes
Bildverzeichnis
Contact Information. . . . . . . . . . . . . . . . . . . . . . . . . . . 96
Contacts
Información de Contacto
Kontaktinformationen
Warranty Information. . . . . . . . . . . . . . . . . . . . . . . . . . 97
Informations sur Garantie
Información de Garantía
Garantie-Informationen
2
ADD TO QUEUE: Ajouter à la file d’attentetAgregar a la colat
In die warteschlange
ALT BLUE RECTANGLE: Rectangle bleu ALTtALT-Rectángulo azult
ALT – Blaues quadrat
ALT RED CIRCLE: iÀViÊÀÕ}iÊ/ÊUÊ/ÊqÊ
ÀVÕÊÀÊUÊ/ÊqÊ,ÌÊÀiÃ
BLADE POSITIONER CONTROL: ÌÀiÊ`iÊ>iÊ*ÃÌiÕÀÊUÊÊ
ÌÀÊ`iÊ«ÃV>`iÀÊ`iÊ
>ÊUÊ}iÊ-ÌiÕ}ÃÀi}iÀÊÌÀi
CUT: jVÕ«iÊUÊ
ÀÌ>ÀÊUÊ-V
ÌÌÊ
DELETE: -Õ««ÀiÀÊUÊÀÀ>ÀÊUÊÃV
i
DISPLAY WINDOW: Fenêtre d’affichagetPantallatAnzeigefenster
ESCAPE: EchaptEscapetEscape
FUNCTION KEYS: Touches fonctionstTeclas de funcióntFunktionstasten
KEYPAD: >ÛiÀÊUÊ/iV>`ÊUÊ/>ÃÌ>ÌÕÀ
MAIN DISPLAY: Affichage principaltPanel PrincipaltHauptanzeige
OPTIONS MENU: Menu OptionstMenú opcionestMenü Optionen
POP-UP MENU: iÕÊjV>ÀÊUÊiÖÊ`iÊÛiÌ>>ÊiiÀ}iÌiÊUÊ*«1«Ê
Menü
QUEUE DISPLAY: Affichage file d’attentetPanel de la colatAnzeige
der warteschlange
RETURN: RetourtRetornotEingabetaste
SCREEN NAVIGATOR CONTROL: Contrôle de Navigateur écrant
Control de Navegador de PantallatBildschirmnavigator Kontrolle
SELECTION DISPLAY: Affichage sélectiontPanel de selecciónt
Auswahlanzeige
SHIFT: >ÕÃVÕiÊUÊ>ÞÖÃVÕ>ÊUÊ1ÃV
>ÌÌ>ÃÌi
TOGGLE: /ÕV
iÊDÊL>ÃVÕiÊUÊÌiÀ>ÀÊUÊ/}}iÌ>ÃÌi
Translations
HANDHELD REMOTE CONTROL FEATURES
STYLES
BORDER: À`ÕÀiÊUÊÀ`iÊUÊÀ`ØÀi
EMBELLISHMENTS: LiÃÃiiÌÊUÊiVÀ>VÊUÊiÀ>Ì
ORIGINAL: OriginaltOriginaltOriginal
OUTLINE: ÌÕÀÊUÊ
ÌÀÊUÊÌÕÀ
PIECES: PiècestPiezastStücke
SHADOW: "LÀjÊUÊ-LÀi>`ÊUÊ-V
>ÌÌiÀÌ
SOLID: 1ÊUÊ-`ÊUÊivØÌ
3
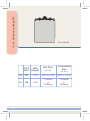
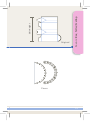
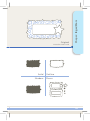
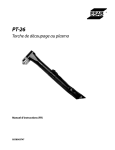
Handheld Remote Control Features
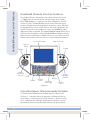
Handheld Remote Control Features
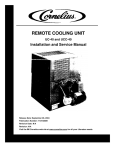
The Handheld Remote Control offers many robust features (see Figure
1). Toggle takes you to and from the Selection Display to the Options
Menu. Add to Queue (+) adds items you have highlighted in Selection
Display to Queue. The Pop-Up Menu reveals several advanced cutting
functions. Escape allows you to go back to the previous screen. OK selects
the highlighted item. Cut is used to either cut the shape highlighted in the
Selection Display or cut all the objects in Queue. The up/down and left/
right arrows work as expected; the Screen Navigator Control allows you to
scroll and select throughout, while the Blade Positioner Control moves the
blade over the material to be cut. Delete functions as your delete key, while
Return works exactly like the Enter key on a standard computer keyboard.
Display Window
Add to Queue
Pop-Up
Menu
Escape
Toggle
Cut
Blade
Positioner
Control
Shift
Delete
Alt Pink
Circle
Return
Alt Blue
Rectangle
Screen
Navigator
Control
Function
Keys
Figure 1
Caractéristiques Télécommande Portable
Le Télécommande Portable offre de multiples fonctions robustes (voir
Schéma 1). La fonction bascule fait passer de le Affichage sélection au
menu Options. La fonction Ajouter à la file d’attente (+) ajoute les articles
mis en surbrillance dans Affichage sélection pour File d’attente. Le menu
éclair révèle plusieurs fonctions de coupe avancées. Echap vous permet
4
Funciones del Télémando de Mano
El Télémando de Mano ofrece muchas funciones importantes (véase la
figura 1). La función Alternar cambia entre el panel de selección y el
menú opciones. La función Agregar a la cola (+) agrega los elementos que
usted ha resaltado en el panel de selección a la cola. El menú de ventana
emergente revela varias funciones de corte avanzadas. La función Escape le
permite volver a la pantalla anterior. La función Aceptar (OK) selecciona el
elemento resaltado. La función Cortar se utiliza para cortar la forma resaltada
en el panel de selección o para cortar todos los objetos que están en la
cola. Las flechas arriba/abajo e izquierda/derecha le permiten moverse hacia
las respectivas direcciones; control de navegador de pantalla le permite
desplazarse y realizar selecciones y control de posicionador de hoja mueve
la hoja por el material que se va a cortar. Borrar funciona como la tecla
Suprimir, mientras que Retorno funciona exactamente como la tecla Intro en
cualquier teclado de ordenador estándar.
Handheld Remote Control Features
de revenir à l’écran précédent. Cliquez sur OK pour sélectionner l’article en
surbrillance. La fonction Découpe est utilisée soit pour découper la forme
en surbrillance dans le Affichage sélection, soit pour découper tous les
objets dans la File d’attente. La fonction des flèches haut/bas et gauche/
droite est implicite; la Contrôle de navigateur écran vous permet de faire
défiler et de sélectionner l’ensemble des éléments, tandis que la Contrôle
de lame positionneur positionne la lame au-dessus du matériau à découper.
La touche Supprimer sert de touche de suppression, tandis que le Retour
fonctionne exactement comme la touche Entrée d’un clavier ordinaire.
Steuerungsfunktionen
Die Steuerung bietet viele feststehende Funktionen (siehe Abbildung
1). Die Toggle-Taste dient zum Wechsel zwischen Auswahlanzeige und
Menü Optionen. Die Taste „In die Warteschlange (+)“ reiht Elemente,
die im Auswahlanzeige markiert wurden, in der Warteschlange ein. Das
Pop-Up-Menü mehrere fortgeschrittene Schneidfunktionen angezeigt. Mit
der „Escape“ – Taste können Sie zum vorherigen Bildschirm zurückkehren.
OK wählt das markierte Element aus. „Schnitt“ wird verwendet, um
entweder die im Auswahlanzeige markierte Form oder alle Objekte in der
Warteschlange zu schneiden. Die Navigationstasten (Nach Oben/Nach
Unten und Rechts/Links) bringen Sie an die gewünschte Stelle; mit der
Bildschirmnavigator Kontrolle können Sie in der gesamten Anzeige den
Bildlauf verwenden sowie Markierungen durchführen, und die Steuertasten
zur Klinge Stellungsregler kontrollieren die Position der Klinge über dem zu
schneidenden Material. Die Löschen funktioniert wie die Löschtaste und
die Eingabetaste (Return) funktioniert genau wie die Eingabetaste auf einer
Standard-Computertastatur.
5
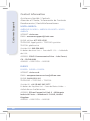
Screen Features
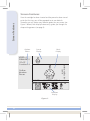
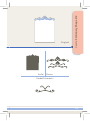
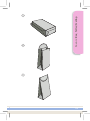
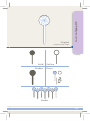
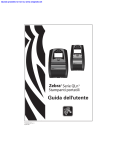
Screen Features
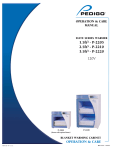
Once the cartridge has been inserted and the power has been turned
on for the first time, you will be prompted to set your defaults.
Thereafter, you will notice many different options on your screen (see
Figure 2 below). Each display feature easily guides you through the
shape-cutting process (see page 4).
Options
Menu
Queue
Display
Main
Display
SPEED: 4
PRESSURE: 2
Outline
Shadow
Pieces
H: 2.25"
W: 1.51"
QTY: 1
Selection
Display
Figure 2
6
Starter and Rockin’
Janie
12"x12"
Cardstock L
Une fois la cartouche insérée et l’appareil sous tension en marche (sur
ON) pour la première fois, vous êtes invité(e) à définir vos paramètres
par défaut. Vous remarquerez de multiples options sur votre écran
(voir Schéma 2 ci-dessous). Chaque fonction d’affichage vous guide
facilement au fil de la procédure de découpage de forme (voir page 4).
Funciones de la Pantalla
Una vez insertado el cartucho y encendido por primera vez, el sistema
le indicará cómo configurar los valores predeterminados. A partir de
ahí, verá muchas opciones diferentes en su pantalla (véase la figura 2
a continuación). Cada función de la pantalla lo guía fácilmente en el
proceso de troquelado (véase la página 4).
Screen Features
Caractéristiques Écran
Bildschirmfunktionen
Nach Einlegen der Kartusche und erstmaligem Einschalten des
Netzstroms werden Sie zur Einstellung Ihrer Standardwerte
aufgefordert. Danach sehen Sie viele verschiedene Optionen auf dem
Bildschirm (siehe Abbildung 2 unten). Jede Anzeigefunktion führt Sie
leicht durch den Formschnittprozess (siehe Seite 4).
7
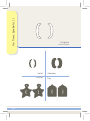
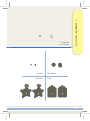
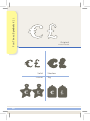
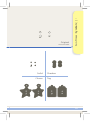
Picture-in-Picture
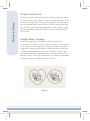
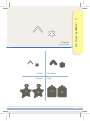
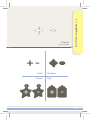
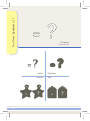
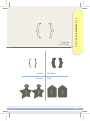
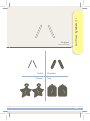
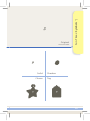
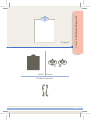
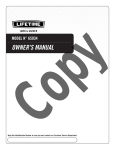
Picture-in-Picture
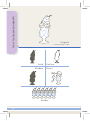
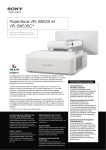
PIP (picture-in-picture) takes the shape you have selected and encloses
it inside of a circle, square, flower, star or any number of shapes. To use
this function, simply select PIP and scroll through the Selection Display
on the Handheld Remote Control. Refer to Figure 3 below to see how
you can take a simple dog shape and encircle it with a heart or a circle.
For more information about the PIP feature, please refer to the eclips™
User’s Guide.
Image dans l’Image
La fonction Image dans l’image prend la forme sélectionnée et
l’enferme dans un cercle, un carré, une fleur, une étoile, ou toute forme
voulue. Pour utiliser cette fonction, il suffit de sélectionner la fonction
Image dans l’image et de faire défiler le Affichage sélection à partir de
la télécommande portable. Se reporter au Schéma 3 ci-dessous pour
voir comment prendre une forme de chien simple pour l’entourer d’un
cœur ou un cercle. Pour plus d’informations sur la fonction Image dans
l’image, se reporter au Guide de utilisateurs eclips™.
Figure 3
8
PIP (imagen en imagen) toma la forma que ha seleccionado y la
encierra en un círculo, cuadrado, flor, estrella u otra forma. Para usar
esta función, no tiene más que seleccionar PIP y desplazarse por el
panel de selección del mando a distancia manual. Consulte la figura 3
a continuación para ver cómo puede tomar una sencilla forma de perro
e incluirla en un corazón o un círculo. Para obtener más información
sobre la función PIP, consulte la Guía del Usuario de eclips™.
Bild-in-Bild
Bild-in-Bild (PIP, picture-in-picture) umschließt die ausgewählte
Form in einem Kreis, Quadrat, einer Blume, einem Stern oder in den
unterschiedlichsten Formen. Zur Verwendung dieser Funktion wählen
Sie einfach PIP (Bild-in-Bild) und scrollen durch der Auswahlanzeige
auf der Fernbedienung. Abbildung 3 unten zeigt, wie Sie eine
einfache Hundeform mit einem Herzen oder Kreis umschließen.
Nähere Informationen zur PIP-Funktion finden Sie in der eclips™
Benutzerhandbuch.
Picture-in-Picture
Imagen en Imagen
9
Borders
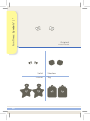
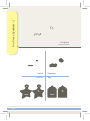
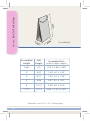
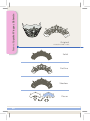
Borders
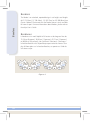
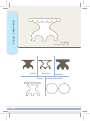
The Border is an attached, repeated design in set heights and lengths
of 6" (15.24cm), 12" (30.48cm), 18" (45.72cm) or 24" (60.96cm) (see
Figure 4 below). Please note that the Border feature is only available
for some shapes. For more information about Borders, please refer to
the eclips User’s Guide.
Bordures
La bordure est un motif répété et lié hauteur et de longueur fixes de
15,24 cm (6 pouces), 30,48 cm (12 pouces), 45,72 cm (18 pouces),
ou 60,96 cm (24 pouces), (voir Schéma 4 ci-dessous). Remarque :
la fonction Bordure n’est disponible que pour certaines formes. Pour
plus d’informations sur la fonction Bordure, se reporter au Guide de
utilisateurs eclips.
Figure 4
10
El borde es un diseño repetido adjunto que se conecta con
dimensiones fijas de altura y longitud de 15,24 cm (6"), 30,48cm (12"),
45,72 cm (18") ó 60,96 cm (24") (véase la figura 4 a continuación).
Recuerde que la función Borde está disponible sólo para algunas
formas. Para obtener más información sobre la función Bordes,
consulte la Guía del Usuario de eclips™.
Bordüren
Borders
Bordes
Die Bordüre ist ein angefügtes, wiederholtes Design in fixen Längenund Höhenabmessungen, die von 15,24 cm (6"), 30,48 cm (12"),
45,72 cm (18") oder 60,96 cm (24") (siehe Abbildung 4 unten). Es
ist zu beachten, dass die Bordürenfunktion nur für bestimmte Formen
verfügbar ist. Nähere Informationen zu Bordüren finden Sie in der
eclips™ Benutzerhandbuch.
6"
12"
18"
24"
11
Scoring
Scoring
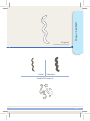
The Scoring feature makes folding simple by partially cutting through
the material for a clean fold. Scoring lines are indicated on particular
designs with a dotted line in the Display Window. Scoring depth can
be adjusted under the Setup key on the keypad.
Scoring adjustment should be varied relative to the material being
used. If the default setting is not scoring deeply enough for a clean
fold, the depth should be increased to a higher number. If the material
has been cut along the scoring lines, then the scoring depth should
be set to a lower number. For more information, please refer to the
eclips™ User’s Guide.
Scoring requires at least Version 2.0 of the Sizzix eclips Software,
available at Sizzix.com/eclips.
Rainage
La fonction de rainage simplifie le pliage en coupant partiellement
le matériau pour un pli net. Les lignes de rainage sont indiquées sur
certains dessins avec une ligne pointillée dans la fenêtre d’affichage.
La profondeur du rainage peut être réglée avec la touche « Setup »
du pavé numérique.
Le réglage du rainage devrait varier selon le matériau utilisé. Si le
réglage par défaut ne permet pas de rainer assez profondément pour
obtenir un pli net, la profondeur doit être augmentée à un nombre plus
élevé. Si le matériau a été coupé le long des lignes de rainage, alors
la profondeur de rainage devrait être réglée à un nombre inférieur.
Pour plus d’informations, veuillez vous reporter au Guide de
l’utilisateur d’« eclipsMC ».
Le rainage nécessite au moins la version 2.0 du logiciel « eclips »
de Sizzix, offerte sur Sizzix.com/eclips.
12
El Calado permite que se pueda doblar fácilmente cortando
parcialmente el material para que se doble de manera prolija.
Las líneas caladas se indican en diseños particulares con líneas
punteadas en la ventana Display Window (Visor). La profundidad
de Calado puede ser ajustada mediante la tecla Setup (configuración)
del teclado numérico
El ajuste del Calado varía según el material utilizado. Si la
configuración por defecto no cala con la suficiente profundidad
para obtener un doblez prolijo, el índice de profundidad se debe
incrementar a un número mayor. Si el material ha sido cortado a
través de las líneas de calado, entonces la profundidad de calado
se debe fijar en un número más bajo. Para más información, consulte
la Guía de Usuario eclips™.
Scoring
Calado
El Calado requiere al menos la Versión 2.0 del Software Sizzix eclips,
disponible en Sizzix.com/eclips.
Anritzen
Die Funktion Anritzen erleichtert das Falten, indem das Material nur
eingeschnitten wird, was einen sauberen Falz ergibt. Ritzlinien werden
bei bestimmten Mustern im Anzeigefenster als gepunktete Linien
angezeigt. Die Ritztiefe kann über die Taste Setup auf dem Tastenfeld
eingestellt werden.
Die Einstellung des Anritzens sollte entsprechend des benutzten
Materials verändert werden. Wenn die Standardeinstellung nicht tief
genug einritzt, um eine gute Faltung zu erreichen, sollte die Tiefe auf
eine höhere Nummer eingestellt werden. Wenn das Material entlang
der Ritzlinien durchgeschnitten wurde, sollte die Ritztiefe auf eine
tiefere Nummer eingestellt werden. Weitere Informationen befinden
sich im eclips™-Benutzerhandbuch.
Die Funktion Anritzen benötigt mindestens Version 2.0 der Sizzix eclips
Software, erhältlich unter Sizzix.com/eclips.
13
Cards
Folder:
& Envelopes
Airplane
Cards & Envelopes
Selecting a shape and editing its size is somewhat different in this
cartridge from other cartridges. Highlight the Card or Envelope
category desired and press OK. A sub-category will open to display
Card (or Envelope) sizes. Press OK to view designs.
Scroll through designs and press OK to select a design and change its
size. Dimensions to create the exact size of Card selected will appear in
Options Menu. These dimensions must be entered manually for
the Card to cut at the desired size.
For more information about navigating menus and changing shape
size, please refer to the eclips™ User’s Guide.
Cartes et enveloppes
Choisir la forme et modifier la taille diffère quelque peu avec cette
cartouche comparativement aux autres cartouches. Surlignez la
catégorie de carte ou d’enveloppe souhaitée et appuyez sur OK.
Une sous-catégorie s’ouvrira pour afficher la taille de la carte
(ou de l’enveloppe). Appuyez sur OK pour voir les modèles.
Défilez parmi les modèles et appuyez sur OK pour choisir un modèle
et pour modifier sa taille. Les dimensions pour créer la taille exacte de
la carte choisie apparaîtront dans le menu Options. Ces dimensions
doivent être entrées manuellement afin de couper la carte à
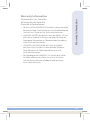
la taille souhaitée.
Pour de plus amples informations sur la navigation dans les menus
ainsi que sur le changement de taille et de forme, veuillez vous
reporter au guide de l’utilisateur eclipsMC.
14
En este cartucho, seleccionar una forma y editar su tamaño es algo
diferente a otros cartuchos. Resalte la categoría deseada de tarjeta o
sobre y presione OK. Se abrirá una categoría secundaria para mostrar los
tamaños de tarjeta (o sobre). Presione OK para ver los diseños.
Desplácese a través de los diseños y presione OK para seleccionar un
diseño y cambiar su tamaño. Las dimensiones para crear el tamaño
exacto de la tarjeta seleccionada aparecerán en el menú de opciones
(Options Menu). Estas dimensiones se deben ingresar manualmente
para que la tarjeta se corte en el tamaño deseado.
Para obtener más información sobre los menús de navegación y cómo
cambiar forma o tamaño, consulte la Guía del usuario de eclips™
Phrase:
Cards
The Road
& Envelopes
Less Traveled
Tarjetas y sobres
Karten und Umschläge
Bei dieser Kassette funktioniert die Auswahl einer Form und Größe
etwas anders als bei anderen Kassetten. Markieren Sie die gewünschte
Karten- oder Umschlagkategorie und drücken Sie OK. Es öffnet sich eine
Unterkategorie, in der Kartengrößen (oder Umschlaggrößen) angezeigt
werden. Drücken Sie auf OK, um die verschiedenen Designs anzusehen.
Scrollen Sie durch die Designs und drücken Sie zum Auswählen eines
Designs und zur Änderung der Größe auf OK. Im Menü Optionen
erscheinen die Dimensionen, um die genaue Größe der ausgewählten
Karte zu erstellen. Diese Dimensionen müssen manuell eingegeben
werden, damit die Karte auf die richtige Größe zugeschnitten wird.
Weitere Informationen zur Navigation von Menüs und Änderung der Größe
und Form finden Sie im eclips™-Benutzerhandbuch.
15
Definitions
Definitions
Please note that all designs may not include every feature
listed here.
Border: Attached, repeated design in lengths of 6" (15.24cm),
12" (30.48cm), 18" (45.72cm) or 24" (60.96cm)
Embellishment: Additional shape decorations
Original: Unembellished shape or font
Outline: A 2mm-wide outline of shape or font fitting within
edge of original
Pieces: All parts that comprise shape
Shadow: Cut extends 2mm over original shape or font with
inside lines removed
Solid: Silhouette of shape or font with inside lines removed
Définitions
Remarque : il est possible que tous les motifs ne présentent pas
toutes les caractéristiques énumérées.
Bordure: Motif joint et répété, disponible en 15,24 cm (6 pouces),
30,48 cm (12 pouces), 45,72 cm (18 pouces), 60,96 cm
(24 pouces)
Embellissement: Formes de décorations supplémentaires
Original: Forme ou police sans ornements
Contour: Contour de forme ou ajustement de police de 2 mm
de large à l’intérieur de la bordure de l’original
Pièces: Toutes les parties qui composent la forme
Ombré: La découpe se prolonge de 2 mm sur la forme ou la
police initiale, les lignes intérieures étant supprimées
Uni: Silhouette de la forme ou police, lignes intérieures supprimées
16
Recuerde que algunos diseños pueden no incluir todas las
funciones que se mencionan aquí.
Borde: Diseño repetido, adjunto en longitudes de 15,24 cm (6"),
30,48cm (12"), 45,72 cm (18") o 60,96 cm (24")
Decoración: Adornos adicionales para la forma
Original: Fuente o forma sin decorar
Contorno: Contorno de 2 mm de ancho de la forma o la fuente
que sigue el borde del original por su parte interior
Piezas: Todas las partes que componen la forma
Sombreado: La función Cortar extiende en 2 mm la fuente o
forma original por el exterior y se eliminan las líneas interiores
Sólido: Silueta de la fuente o forma en la que se han
eliminado las líneas interiores
Definitions
Definiciones
Definitionen
Bitte beachten Sie, dass nicht alle Designs alle hier aufgeführten
Merkmale enthalten.
Bordüre: Angefügtes, wiederholtes Design in Längen von 15,24 cm
(6"), 30,48 cm (12"), 45,72 cm (18") oder 60,96 cm (24")
Dekoration: Weitere Formdekorationen
Original: Nicht dekorierte Form oder Schriftart
Kontur: Eine 2 mm breite Kontur einer Form oder Schriftart, die in
den Rand des Originals passt
Stücke: Alle Teile, die eine Form ausmachen
Schattiert: Der Schnitt erstreckt sich 2 mm über die Originalform
oder -schriftart, wobei die inneren Linien entfernt werden
Gefüllt: Silhuette der Form oder Schriftart mit entfernten Innenlinien
17
Font Sizes
Font Sizes
When a font size is selected, it is measured by the height of the tallest
character. A size of 1" (2.54 cm) is shown in Figure 5 below. The heights
of other letters may vary.
Lowercase letters, as represented by the lowercase letter “a” below, will
cut in proportion to the selected font size.
To cut any letter at a particular size, use the Actual key on the keypad.
Tailles des Caractères
Quand une taille des caractères est sélectionnée, elle est mesurée par
la hauteur du plus grand caractère. Une taille de 2,54 cm (1 pouce) est
montré dans la figure 5 ci-dessous. Les hauteurs d'autres caractères
mai varier.
Lettres minuscules, comme représenté par la lettre minuscule « a » ci-dessous,
permettra de réduire en proportion de la taille des caractères choisi.
Pour couper toute lettre à une taille particulière, utilisez la touche Actual
sur le clavier.
Tamaños de la Fuente
Cuando se selecciona un tamaño de la fuente, se mide por la altura del
carácter más alto. Un tamaño de 2,54 cm (1 pulgada) se muestra en la
Figura 5. Las alturas de los otros carácteres pueden variar.
Letras minúsculas, representadas por la letra minúscula «a» abajo,
reducirá en proporción al tamaño de la fuente seleccionado.
Para cortar cualquier letra en un tamaño determinado, utilice la tecla
Actual en el teclado.
Schriftgröße
Wenn eine Schriftgröße ausgewählt wird, wird es durch das höchsten
Zeichen. Eine Größe von 2,54cm (1 Zoll) gemessen wird, in Abbildung 5
dargestellt. Die Höhen das anderen Zeichen können variieren.
Kleinbuchstaben, wie die Kleinbuchstaben „a“ unten dargestellt, wird
geschnitten im Verhältnis zu den ausgewählten Schriftgröße.
Um jeden Buchstaben in einer bestimmten Größe zugeschnitten,
verwenden Sie die Actual Taste auf der Tastatur.
Figure 5
1"
Actual On
18
Cards . . . . . . . . . . . . . . . . . . . . . . . . . . . . . . . . . . . . . . . . 68
Cartes
Tarjetas
Karten
Favors . . . . . . . . . . . . . . . . . . . . . . . . . . . . . . . . . . . . . . . 76
Faveurs
Favores
Bevorzugungen
Image Directory
Fun Times (Alphabet, Numbers, Symbols) . . . . . . . . . . . 20
Alphabet, Nombres, Symboles
Alfabeto, Números, Símbolos
Alphabet, Zahlen, Symbole
Food . . . . . . . . . . . . . . . . . . . . . . . . . . . . . . . . . . . . . . . . 81
Nourriture
Alimento
Nahrung
Phrases . . . . . . . . . . . . . . . . . . . . . . . . . . . . . . . . . . . . . . 84
Formules
Frases
Wortgruppen
Shapes . . . . . . . . . . . . . . . . . . . . . . . . . . . . . . . . . . . . . . 88
Formes
Formas
Formen
“Assembled” shows finished product.
“Assembled” montre le produit assemblé.
“Assembled” muestra el producto armado.
„Assembled“ Zeigt Erzeuguis zusammengelsaut.
Use “Created at” size for optimum results. For smaller sizes, perform test cut.
L’utilisation “Created at” à la taille pour des résultats optimaux. Pour de plus
petites tailles, exécutez la coupe d’essai.
El uso “Created at” el tamaño para los resultados óptimos. Para tamaños más
pequeños, realice el corte de la prueba.
Gebrauch „verursachte“ an der Größe für optimale Resultate. Für kleinere
Größen führen Sie Testschnitt durch.
19
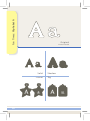
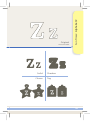
Fun Times: Alphabet A
Original
Created at 0.80"
Solid
Charm
20
Shadow
Tag
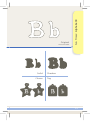
Solid
Charm
Fun Times: Alphabet B
Original
Created at 0.80"
Shadow
Tag
21
FunFolder:
Times: Airplane
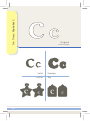
Alphabet C
Original
Created at 0.80"
Solid
Charm
22
Shadow
Tag
Solid
Charm
Fun Times: Alphabet D
Original
Created at 0.80"
Shadow
Tag
23
FunFolder:
Times:Airplane
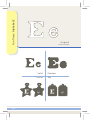
Alphabet E
Original
Created at 0.80"
Solid
Charm
24
Shadow
Tag
Solid
Charm
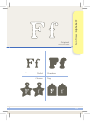
Fun Times: Alphabet F
Original
Created at 0.80"
Shadow
Tag
25
FunFolder:
Times: Airplane
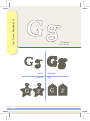
Alphabet G
Original
Created at 0.80"
Solid
Charm
26
Shadow
Tag
Solid
Charm
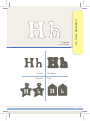
Fun Times: Alphabet H
Original
Created at 0.80"
Shadow
Tag
27
FunFolder:
Times:Airplane
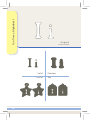
Alphabet I
Original
Created at 0.80"
Solid
Charm
28
Shadow
Tag
Solid
Charm
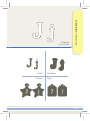
Fun Times: Alphabet J
Original
Created at 0.80"
Shadow
Tag
29
FunFolder:
Times: Airplane
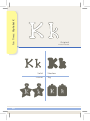
Alphabet K
Original
Created at 0.80"
Solid
Charm
30
Shadow
Tag
Solid
Charm
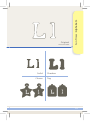
Fun Times: Alphabet L
Original
Created at 0.80"
Shadow
Tag
31
FunFolder:
Times: Airplane
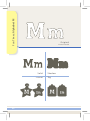
Alphabet M
Original
Created at 0.80"
Solid
Charm
32
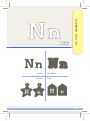
Shadow
Tag
Solid
Charm
Fun Times: Alphabet N
Original
Created at 0.80"
Shadow
Tag
33
FunFolder:
Times: Airplane
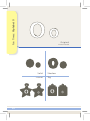
Alphabet O
Original
Created at 0.80"
Solid
Charm
34
Shadow
Tag
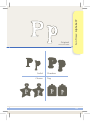
Solid
Charm
Fun Times: Alphabet P
Original
Created at 0.80"
Shadow
Tag
35
FunFolder:
Times: Airplane
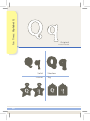
Alphabet Q
Original
Created at 0.80"
Solid
Charm
36
Shadow
Tag
Solid
Charm
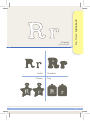
Fun Times: Alphabet R
Original
Created at 0.80"
Shadow
Tag
37
FunFolder:
Times:Airplane
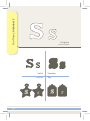
Alphabet S
Original
Created at 0.80"
Solid
Charm
38
Shadow
Tag
Solid
Charm
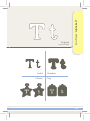
Fun Times: Alphabet T
Original
Created at 0.80"
Shadow
Tag
39
FunFolder:
Times: Airplane
Alphabet U
Original
Created at 0.80"
Solid
Charm
40
Shadow
Tag
Solid
Charm
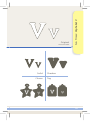
Fun Times: Alphabet V
Original
Created at 0.80"
Shadow
Tag
41
FunFolder:
Times: Airplane
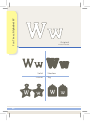
Alphabet W
Original
Created at 0.80"
Solid
Charm
42
Shadow
Tag
Solid
Charm
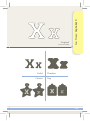
Fun Times: Alphabet X
Original
Created at 0.80"
Shadow
Tag
43
FunFolder:
Times:Airplane
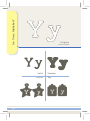
Alphabet Y
Original
Created at 0.80"
Solid
Charm
44
Shadow
Tag
Solid
Charm
Fun Times: Alphabet Z
Original
Created at 0.80"
Shadow
Tag
45
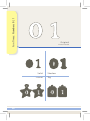
Fun Times:
Folder:Numbers
Airplane 0 | 1
Original
Created at 0.80"
Solid
Charm
46
Shadow
Tag
Solid
Charm
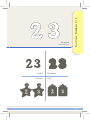
Fun Times: Numbers 2 | 3
Original
Created at 0.80"
Shadow
Tag
47
Fun Times:
Folder:Numbers
Airplane 4 | 5
Original
Created at 0.80"
Solid
Charm
48
Shadow
Tag
Solid
Charm
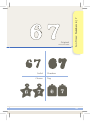
Fun Times: Numbers 6 | 7
Original
Created at 0.80"
Shadow
Tag
49
Fun Times:
Folder:Numbers
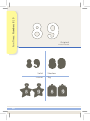
Airplane 8 | 9
Original
Created at 0.80"
Solid
Charm
50
Shadow
Tag
Solid
Charm
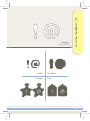
Fun Times: Symbols ! | @
Original
Created at 0.80"
Shadow
Tag
51
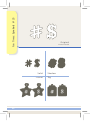
Fun Times:
Folder:Symbols
Airplane# | $
Original
Created at 0.80"
Solid
Charm
52
Shadow
Tag
Solid
Charm
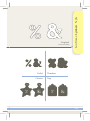
Fun Times: Symbols % | &
Original
Created at 0.80"
Shadow
Tag
53
Fun Folder:
Times: Symbols
Airplane ( | )
Original
Created at 0.80"
Solid
Charm
54
Shadow
Tag
Solid
Charm
Fun Times: Symbols . | ,
Original
Created at 0.80"
Shadow
Tag
55
Fun Times:
Folder:Symbols
Airplane€ | £
Original
Created at 0.80"
Solid
Charm
56
Shadow
Tag
Solid
Charm
Fun Times: Symbols ; | :
Original
Created at 0.80"
Shadow
Tag
57
Fun Folder:
Times: Symbols
Airplane " | "
Original
Created at 0.80"
Solid
Charm
58
Shadow
Tag
Solid
Charm
Fun Times: Symbols ^ | *
Original
Created at 0.80"
Shadow
Tag
59
Fun Times:
Folder:Symbols
Airplane~ | `
Original
Created at 0.80"
Solid
Charm
60
Shadow
Tag
Solid
Charm
Fun Times: Symbols + | -
Original
Created at 0.80"
Shadow
Tag
61
Fun Times:
Folder:Symbols
Airplane= | ?
Original
Created at 0.80"
Solid
Charm
62
Shadow
Tag
Solid
Charm
Fun Times: Symbols { | }
Original
Created at 0.80"
Shadow
Tag
63
Fun Folder:
Times: Symbols
Airplane [ | ]
Original
Created at 0.80"
Solid
Charm
64
Shadow
Tag
Solid
Charm
Fun Times: Symbols / | \
Original
Created at 0.80"
Shadow
Tag
65
Fun Times:
Folder:Symbols
Airplane< | >
Original
Created at 0.80"
Solid
Charm
66
Shadow
Tag
Solid
Charm
Fun Times: Symbols ' |
Original
Created at 0.80"
Shadow
Tag
67
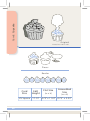
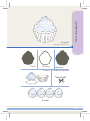
Folder:
Cards: Cupcake
Airplane
Original
Created at 11.07" x 4.75"
Pieces
Border
Card
Size
Edit
Height
US Square 11.07
68
Flat Size
(w x h)
Assembled
Size
(w x h)
4.75" x 11.07" 4.75" x 5.53"
Party
Hat
Phrase: Cards:
The Road
Less
Traveled
Original
Created at 12.81" x 4.65"
Pieces
Card Edit
Size Height
US
A6
12.81
EU
A6
325
Flat Size
(w x h)
Assembled
Size
(w x h)
4.65" x 12.81" 4.65" x 6.41"
118mm
x
325mm
118mm
x
163mm
69
Cards:Folder:
Stationery
Airplane
Shape #1
Assembled
Card Edit
Size Height
70
Flat Size
(w x h)
Assembled
Size
(w x h)
US
A6
4.75
4.75" x 6.5"
4.75" x 6.5"
EU
A6
121
121mm
x
165mm
121mm
x
165mm
Solid
Shadow
Cards:The
Stationery
Shape
#1
Phrase:
Road Less
Traveled
Original
Outline
Pieces
Border
71
Cards:Folder:
Stationery
Airplane
Shape #2
Assembled
Card Edit
Size Height
72
US
A7
7.25
EU
A6
184
Flat Size
(w x h)
Assembled
Size
(w x h)
5.25" x 7.25" 5.25" x 7.25"
133mm
x
184mm
133mm
x
184mm
Solid
Cards:The
Stationery
Shape
#2
Phrase:
Road Less
Traveled
Original
Embellishments
Pieces
73
Cards:Folder:
Stationery
Airplane
Shape #3
Assembled
Card Edit
Size Height
74
US
A7
7.25
EU
A6
184
Flat Size
(w x h)
Assembled
Size
(w x h)
5.25" x 7.25" 5.25" x 7.25"
133mm
x
184mm
133mm
x
184mm
Solid
Cards:The
Stationery
Shape
#3
Phrase:
Road Less
Traveled
Original
Embellishments
Pieces
75
Favors:
Folder:
Box, Airplane
Tall w/Scallop
Assembled
Assembled
Height
Edit
Height
(width x height x depth)
2.66"
4.5
1.28" x 2.66" x 0.89"
3"
5.07
1.44" x 3" x 1.00"
4"
6.77
1.92" x 4" x 1.34"
5"
8.46
2.41" x 5" x 1.67"
6"
10.15
2.89" x 6" x 2.00"
*7.57"
13.13
3.69" x 7.57" x 2.55"
Assembled Size
* Requires use of 12" x 24" Cutting Mat.
76
Edit Height
Favors:
TallLess
w/Scallop
Phrase:
TheBox,
Road
Traveled
Original
Pieces
77
78
Favors:
Folder:
Box, Airplane
Tall w/Scallop
79
Favors:
TallLess
w/Scallop
Phrase:
TheBox,
Road
Traveled
Favors:Strength:
Cupcake Wrapper,
AlphabetElaborate
A
Original
Created at 2.40" x 1.86"
Solid
Outline
Shadow
Pieces
80
Solid
Outline
Pieces
Cupcake
Phrase:Food:
The Road
Less #4
Traveled
Original
Created at 2.48" x 2.15"
Shadow
Embellishments
Border
81
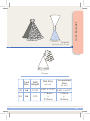
Food: Folder:
Ice Cream
Airplane
Sundae #4
Original
Created at 3.46" x 1.44"
Solid
Shadow
Outline
Pieces
Border
82
Solid
Shadow
Lollipop
Phrase:Food:
The Road
Less#2
Traveled
Original
Created at 2.65" x 0.96"
Outline
Pieces
Border
83
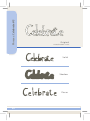
Phrases: Celebrate #3
Original
Created at 0.92" x 2.78"
Solid
Shadow
Pieces
84
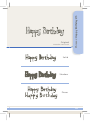
Phrases: Happy Birthday #5
Original
Created at 1.52" x 5.52"
Solid
Shadow
Pieces
85
Phrases:
Folder:
Let's
Airplane
Party #2
Original
Created at 1.47" x 3.91"
Solid
Shadow
Pieces
86
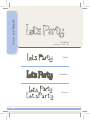
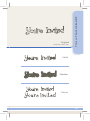
Phrases: You're Invited #2
Original
Created at 1.06" x 4.47"
Solid
Shadow
Pieces
87
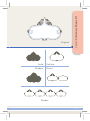
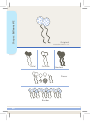
Shapes:
Folder:Balloons
Airplane#2
Original
Created at 2.35" x 1.11"
Solid
Outline
Shadow
Pieces
Border
88
Solid
Shadow
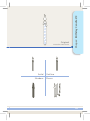
Shapes:
Birthday
Candle
#3
Phrase:
The
Road Less
Traveled
Original
Created at 2.86" x 0.35"
Outline
Pieces
89
Shapes:
Folder:Cake
Airplane
Stand
Original
Created at 1.50" x 1.94"
Solid
Outline
Pieces
90
Shadow
Embellishments
Solid
Confetti
Phrase: Shapes:
The Road
Less Traveled
Original
Created at 1.83" x 0.47"
Shadow
Embellishments
91
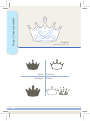
Shapes:
Folder:
Crown,
Airplane
Jeweled
Original
Created at 1.73" x 2.16"
Solid
Shadow
92
Outline
Pieces
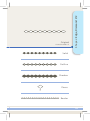
Shapes:
#2
Phrase:
TheEdge,
RoadDiamond
Less Traveled
Original
Created at 0.40" x 6"
Solid
Outline
Shadow
Pieces
Border
93
Shapes:Folder:
Party Hat
Airplane
w/Stripes #2
Original
Created at 2.62" x 1.59"
Solid
Shadow
Outline
Pieces
Border
94
Solid
Shadow
Shapes:
Tag Less
w/Stars
Phrase:
The Road
Traveled
Original
Created at 2.29" x 4.10"
Outline
Pieces
95
Customer Support
Contact Information
Assistance clientèle / Contacts
Atención al Cliente / Información de Contacto
Kundenservice / Kontaktinformationen
NORTH AMERICA
AMÉRIQUE DU NORD t".3*$"%&-/035&t/035)
AMERICA
INTERNET: sizzix.com
&."*[email protected]
1)0/&UPMMGSFF877-355-4766
5-1)0/& "QQFMHSBUVJUt5&-'0/0HSBUVJUPt
5&-&'0/HFCÊISFOGSFJ
Outside USA: 949-598-8821
&OEFIPSTEFT¹UBUT6OJTt'VFSBEF&&66t"VFSIBMC
der USA:
ADDRESS: $PNNFSDFOUSF%SJWFt-BLF'PSFTU
$"t
ADRESSE: t DIRECCIÓNtADRESSE:
EUROPE
&6301&t&6301"t&6301"
INTERNET: sizzix.co.uk
&."*[email protected]
1)0/&0844 499 8181
5-1)0/&t5&-'0/0t5&-&'0/
Outside UK: +44 (0) 845 345 2277
&OEFIPSTEV3PZBVNF6OJt'VFSBEFM3FJOP6OJEPt
"VFSIBMCWPO(SPCSJUBOOJFO
ADDRESS: &MMJTPO&VSPQF-UE6OJUt8IJUFHBUF
*OEVTUSJBM&TUBUFt8SFYIBN--6(6OJUFE
Kingdom
ADRESSE: t DIRECCIÓNtADRESSE:
96
Informations sur Garantie
Información de Garantía
Garantie-Informationen
t %BZ-*.*5&%8"33"/5:'PSEFUBJMTQMFBTFTFFFDMJQT
&MFDUSPOJD4IBQF$VUUJOH.BDIJOFBOE)BOEIFME3FNPUF
$POUSPM6TFST(VJEFPSWJTJU4J[[JYDPNXBSSBOUJFT
t ("3"/5*&-*.*5&EFKPVST1PVSEFTE¹UBJMTTJMWPVT
QMB¾UWPJSMF(VJEFEF6UJMJTBUFVSTEFFDMJQT.BDIJOFEF
%¹DPVQBHF&MFDUSPOJRVFFU5¹M¹DPNNBOEF1PSUBCMFPV
WJTJUFS4J[[JYDPNXBSSBOUJFT
t ("3"/5¡"-*.*5"%"EFE½BT1BSBMPTEFUBMMFT
QPSGBWPSWFBMB(V½BEF6TVBSJPTEFFDMJQT.²RVJOB
Corte Electrónica et Telemando de Mano o visita
4J[[JYDPNXBSSBOUJFT
Warranty Information
Warranty Information
t 5BHFTCFHSFO[UF("3"/5*&'ÊS%FUBJMTCJUUFTFIFO
Sie Eclips elektronische Form-Ausschnitt Maschine
VOE4UFVFSVOH#FOVU[FSIBOECVDIPEFSCFTVDIFO
4J[[JYDPNXBSSBOUJFT
97
sizzix.com
©2010 Ellison All Rights Reserved
T10-0368
Printed in China