1
MAINTAINING YOUR VACUUM MANTENER LA ASPIRADORA
ENTRETIEN DE L’ASPIRATEUR
POST THIS INFORMATION FOR REFERENCE NEAR THE LOCATION YOU STORE THE VACUUM.
COLOQUE ESTA INFORMACIÓN DE REFERENCIA CERCA DE LA UBICACIÓN DONDE GUARDA LA ASPIRADORA.
AFFICHER CES INDICATIONS BIEN EN VUE À PROXIMITÉ DE L’ESPACE DE RANGEMENT DE L’ASPIRATEUR.
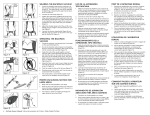
OPERATING THE VACUUM: FUNCIONAMIENTO DE LA ASPIRADORA: FONCTIONNEMENT DE L’ASPIRATEUR:
1
2
3
4
A
Pour abaisser la poignée, poser simplement le
pied sur l’embout électromécanique, puis tirer la
poignée vers soi.
6
L’aspirateur est doté d’un interrupteur marche-arrêt
placé sur la poignée.
I = Moteur de l’aspirateur sous tension.
O = Hors tension.
II = Embout électromécanique et moteur
sous tension.
(Modelo XP únicamente)
Al usar el accesorio de tubo, hale el tubo del ducto del
tubo y una el cepillo para el polvo o la boquilla hacia
el extremo del tubo.
(Modelo XP únicamente)
La herramienta combo tiene dos herramientas en
una. La herramienta de tapicería tiene dos lados que
se voltean cuando se necesite (A). El cepillo para el
polvo se usa del lado opuesto de la herramienta
para tapicería (B).
(Modèle XP seulement)
Pour utiliser un accessoire, sortir le tuyau de son
conduit, puis insérer la brosse circulaire ou l’embout
à bec plat.
7
RES
The panel on the front of the vacuum contains the
indicators listed below:
El panel de la parte frontal de la aspiradora contiene
los siguientes indicadores:
Le panneau à l’avant de l’aspirateur est doté des indicateurs suivants:
(Modèle XP seulement)
L’embout combiné est en deux parties. L’embout pour
meubles capitonnés comporte deux côtés qui peuvent
être inclinés (A). La brosse circulaire se trouve du côté
opposé de l’embout pour meubles capitonnés (B).
ET
8
ET
5
(XP Model Only)
The combo tool has two tools in one.
The upholstery tool has two sides that flip down
(A). The dust brush is used from the opposite side
of the upholstery tool (B).
RES
Localice el interruptor de encendido/apagado en la
manija. Este interruptor tiene 3 posiciones que usted
puede seleccionar.
I = Motor de la aspiradora encendido.
O = Apagado.
II = Motores de la aspiradora y de la
boquilla de succión ancha encendidos.
Para bajar la manija, simplemente coloque su pie
en la boquilla de succión ancha de la aspiradora
y hale la manija hacia usted.
(XP Model Only)
When using wand accessory, pull wand from wand
duct and attach dust brush or crevice tool to end
of wand.
RES
RES
To lower handle, simply place your foot on
the power nozzle base and pull handle
toward you.
ET
Locate the on/off switch on handle. This switch
has 3 positions.
I = Vacuum Motor On.
O = Off.
II = Power Nozzle and
Vacuum Motor On.
B
ET
BAG FULL – Indicator is lit when Intercept
Micro Filter should be changed.
BOLSA LLENA – Este indicador se enciende cuando
se debe cambiar la bolsa.
SAC PLEIN – Voyant qui s’allume lorsque le microfiltre
Intercept doit être remplacé.
(XP Model Only)
Support vacuum with one hand while
cleaning with the wand.
(Modelo XP únicamente)
Sostenga la aspiradora con una mano
mientras limpia el tubo.
(Modèle XP seulement)
Tenir l’aspirateur de la main libre
pendant qu’on tient la rallonge de tuyau
pour nettoyer.
POWER NOZZLE ON – Indicator is lit
when power nozzle is turned on.
BOQUILLA DE SUCCIÓN ANCHA ENCENDIDA – Este
indicador se enciende cuando la boquilla de succión
ancha está en funcionamiento.
EMBOUT ÉLECTROMÉCANIQUE SOUS TENSION – Voyant qui est
allumé lorsque l’embout électromécanique est sous tension.
JAMMED BRUSH ROLL – Indicator is lit
when brush roll is jammed.
OBSTRUCCIÓN EN EL RODILLO DEL CEPILLO – Este indicador
se enciende cuando el rodillo del cepillo está obstruido.
BROSSE BLOQUÉE – Voyant qui s’allume lorsque la brosse de
l’embout est bloquée.
FILTER MAINTENANCE:
GENUINE / AUTÉNTICA / VÉRITA BLE
INTERCEPT MICRO
®
Replac em e nt F i l t e rs / F i l t ro s de re pue st o / F i l t re s de re c hang e
248
sq. in.
pulgadas cuadradas
po2
ProForce
ProCare
1600
sq. cm
cuadrados cm
cm2
®
®
The American Lung Association
does not endorse products.
NO COMBUSTIBLES!
¡NINGUNOS COMBUSTIBLES!
AUCUN COMBUSTIBLE !
NO LIQUIDS!
¡NINGUNOS LIQUIDOS!
AUCUNS LIQUIDES !
Made in China / Fabricados en China / Fabriqués aux Chine
#103483
866.888.2168
© 2006-2011 ProTeam, Inc. All Rights Reserved. ProTeam, ProForce, ProCare, Intercept Micro, and Four Level are registered trademarks of
ProTeam, Inc. © 2006-2011 ProTeam, Inc. Todos los derechos reservados. ProTeam, ProForce, ProCare, Intercept Micro, y Four Level son marcas
registradas de ProTeam, Inc. © 2006-2011 ProTeam, Inc Tous droits réservés. ProTeam, ProForce, ProCare, Intercept Micro, et Four Level sont des
marques déposées de ProTeam, Inc.
Presione rojo el interruptor automático del
circuito para reiniciar el motor después de
limpiar un atasco u obstrucción.
There are 2 recommended ways to lift the vacuum:
Either place your hand under the carry handle or
place your hand over the carry handle.
Appuyer sur l’interrupteur de réarmement
rouge pour redémarrer le moteur après avoir
débloquer l’aspirateur.
Existen 2 formas recomendadas para levantar la
aspiradora: Coloque su mano debajo de la manija para
transportar o coloque su mano sobre la manija para
transportar.
MANTENIMIENTO DEL FILTRO:
USE ONLY GENUINE PROTEAM REPLACEMENT
FILTERS TO ENSURE OPTIMAL PERFORMANCE,
IMPROVE INDOOR AIR QUALITY AND MAINTAIN
A VALID VACUUM WARRANTY.
Date:
Press the red reset switch to restart
motor after clearing a blockage.
Deux façons d’allumer l’aspirateur sont recommandées:
soit en saisissant la poignée de transport en dessous ou
par-dessus.
ENTRETIEN DES FILTRES:
USE SÓLO FILTROS DE REPUESTO PROTEAM GENUINOS PARA
GARANTIZAR UN RENDIMIENTO ÓPTIMO, OBTENER UNA MEJOR
CALIDAD DE AIRE EN EL INTERIOR Y MANTENER VÁLIDA LA GARANTÍA DE LA ASPIRADORA.
N’UTILISER QUE LES FILTRES PROTEAM AUTHENTIQUES
AFIN D’ASSURER LE RENDEMENT APPROPRIÉ DE L’ASPIRATEUR,
D’AMÉLIORER LA QUALITÉ DE L’AIR INTÉRIEURE ET DE
MAINTENIR LA GARANTIE DE L’ASPIRATEUR EN VIGUEUR.
INTERCEPT MICRO® FILTER
MOTOR INTAKE FILTER
HEPA FILTER
EMPTY and INSPECT the Intercept Micro Filter every time
you start and finish vacuuming; replace filter if necessary.
A clogged and dirty filter restricts airflow and results
in overheating and reduced suction.
There is a “Bag Full” indicator light that will illuminate
when the Intercept Micro Filter needs to be changed or an
obstruction exists within the suction path of the vacuum.
To replace Intercept Micro Filter, press the release button
on top of the filter cover and open the filter cover lid.
The Motor Intake filter is located under the Intercept Micro
Filter. To clean the Motor Intake Filter, remove filter, wash with
warm, soapy water, rinse, and let air dry thoroughly. After the
Motor Intake Filter is completely dry, replace it and the Intercept
Micro Filter. Then, close filter cover lid until it snaps into place.
It is recommended that the Motor Intake Filter be cleaned every
other time you change the Intercept Micro Filter.
The HEPA Filters are located on (A) the side of the
vacuum near the powerhead. To replace, lift latch and
remove filter housing (A). DO NOT wash this filter.
Match the top of the new housing motor filter to the
top of cage. The latch goes on the bottom (B).
INTERCEPT MICRO FILTRO
FILTRO DE ENTRADA AL MOTOR
VACÍE e INSPECCIONE el filtro Intercept Micro Filter cada vez
que comience y termine de aspirar; cambie el filtro si fuese
necesario. Un filtro obstruido y sucio restringe el flujo de aire y
provoca sobrecalentamiento y menor succión.
Existe una luz indicadora de “bolsa llena” que se iluminará
cuando el Micro Filtro Intercept se deba cambiar o si hay una
obstrucción en el camino de succión de la aspiradora.
Para reemplazar el Micro Filtro Intercept, presione el botón para
abrir en la parte superior de la cubierta del filtro y abra la tapa
de la cubierta del filtro.
El filtro de entrada al motor se encuentra debajo del Micro Filtro
Intercept. Para limpiar el filtro de entrada del motor, retire el
filtro, lávelo con agua tibia y jabonosa, enjuáguelo y déjelo
secar completamente. Una vez que el filtro de entrada al motor
esté completamente seco, vuelva a colocarlo y coloque también el
Micro Filtro Intercept. Luego, cierre la tapa de la cubierta del filtro
hasta que suene que cerró correctamente. Usted puede considerar
limpiar el filtro de entrada del motor cuando cambie el Micro Filtro
Intercept.
MICROFILTRE INTERCEPT
FILTRE DU MOTEUR D’ASPIRATION
VIDER et INSPECTER le microfiltre Intercept chaque fois avant
de commencer à passer l’aspirateur et après l’avoir passé.
Remplacer le filtre si nécessaire. Un filtre obstrué ou souillé
restreint le débit d’air et provoque la surchauffe de l’appareil
et diminue la qualité d’aspiration.
Le voyant BAG FULL (SAC PLEIN) s’allumera lorsqu’il faudra
changer le microfiltre Intercept ou si le circuit d’aspiration
est bloqué.
Pour remettre le microfiltre Intercept en place, ouvrir le couvercle
du filtre en appuyant sur le bouton d’ouverture sur le dessus.
Le filtre du moteur d’aspiration est situé sous le microfiltre Intercept.
Pour le nettoyer, retirer le filtre, le laver à l’eau tiède savonneuse,
le rincer et le laisser sécher à l’air libre. Dès que le filtre est sec,
remettre en place le filtre du moteur d’aspiration et le microfiltre
Intercept. Il est conseillé de nettoyer le filtre du moteur d’aspiration
chaque fois que l’on change le microfiltre Intercept.
ProTeam recommends replacing this filter every 6 to 9
months when normal cleaning functions are performed.
ProTeam recommends replacing this filter every
6 to 9 months when normal cleaning functions
are performed.
FILTRO HEPA
A
ProTeam recomienda cambiar este filtro cada 6 a 9 meses cuando
realice las funciones de limpieza normales.
ProTeam recommande de remplacer ce filtre tous les six à neuf mois
dans le cours normal d’utilisation de l’aspirateur.
El filtro HEPA está localizado en (A) el costado de
la aspiradora, cerca del cabezal. Para reemplazarlo, levante el seguro y retire la carcasa del filtro
(A). NO lave este filtro. Haga coincidir la parte
superior de la nueva carcasa de filtro del motor
con la parte superior del soporte. El seguro va en
la parte inferior (B).
B
ProTeam recomienda cambiar este filtro cada
6 a 9 meses cuando realice las funciones de
limpieza normales.
FILTRE D’ÉCHAPPEMENT HEPA
Le filtre d’échappement HEPA est situé sur le côté
(A) de l’aspirateur, près de l’embout électromécanique. Pour le remplacer, soulever le taquet de
verrouillage, puis retirer le boîtier du filtre (A). NE
PAS laver ce filtre. Jumeler le dessus du boîtier du
nouveau filtre avec le dessus de la cage. Replacer
le taquet de verrouillage dans le bas (B).
ProTeam recommande de remplacer ce filtre tous les
six à neuf mois dans le cours normal d’utilisation de
l’aspirateur.
ProTeam, Inc.
Post Office Box 7385
Boise, Idaho 83707
ph 866.888.2168
fax 208.377.3014
www.pro-team.com
The American Lung Association
does not endorse products.
SP6805 8/11