1
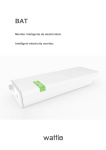
POD
Enchufe inteligente
Smart plug
Intelligente Steckdose
Contenido – Content - Inhalt
Manual Técnico POD ................................................................................................................. 3
Descripción ................................................................................................................................ 3
Instalación ................................................................................................................................. 3
Funcionamiento ........................................................................................................................ 4
Calendarios ................................................................................................................................ 5
Características técnicas ............................................................................................................. 8
Normas y estándares................................................................................................................. 8
POD Technical Manual .............................................................................................................. 9
Description ................................................................................................................................ 9
Installation................................................................................................................................. 9
Operation ................................................................................................................................ 10
Calendars ................................................................................................................................. 11
Technical Features .................................................................................................................. 14
Norms and standards .............................................................................................................. 14
Technisches Handbuch POD ................................................................................................... 15
Beschreibung .......................................................................................................................... 15
Installation .............................................................................................................................. 15
Funktion .................................................................................................................................. 16
Kalender .................................................................................................................................. 17
Technische Merkmale ............................................................................................................. 20
Normen und Standards ........................................................................................................... 20
Manual Técnico POD
Especificaciones técnicas
Descripción
Enchufe inteligente que mide el consumo de energía de aparatos enchufables y que permite el
encendido y apagado remoto de los mismos desde el smart phone o cualquier otro dispositivo
con acceso a internet. Posibilita eliminar el stand by y automatizar el funcionamiento de los
aparatos que se le enchufan.
El POD es repetidor de señal, por lo que se puede aumentar la cobertura del sistema Wattio
añadiendo PODs.
Instalación
ES IMPORTANTE QUE TOME ALGUNAS PRECAUCIONES:
Aunque la instalación es muy sencilla, se aconseja que la
realice un profesional. Por favor
lea y actúe según la información contenida en las páginas
siguientes. Se recomienda
desconectar la fuente general de energía para la instalación.
Antes de comenzar la instalación, es importante anotar en el manual los dígitos de la pegatina
en la parte trasera del POD. Estos dígitos son los que identificarán el dispositivo en el proceso
de registro del sistema.
PASOS DE INSTALACIÓN:
1º Se recibe un POD y se enchufa.
2º Se registra el POD en la aplicación web,
siguiendo el proceso guiado por el asistente.
Durante este proceso se pedirá el código
identificativo del POD.
Funcionamiento
Una vez que el POD está instalado y
registrado, el usuario tiene visible el
estado del POD y el consumo que tiene
conectado. El dispositivo guarda
históricos de la carga media cada 15
minutos y estas estadísticas estarán
visibles en la plataforma web
https://myhome.wattio.com o a través
de la aplicación móvil.
Tanto los consumos instantáneos como los acumulados en W, euros y CO2 se pueden
consultar y los distintos PODs se pueden agrupar si se desea.
La app Wattio para smart phones se puede encontrar para descargar gratuitamente en las
diferentes tiendas que tienen los principales sistemas operativos del mercado. Desde aquí, así
como desde la app web, se pueden consultar los consumos en distintos formatos y se pueden
encender y apagar los elementos enchufados a los PODs. Esta funcionalidad es especialmente
interesante efectuarla remotamente desde el móvil. Un buen ejemplo de uso es la simulación
de presencia si estamos de vacaciones, gracias al encendido y apagado de una lámpara o de la
televisión de manera remota.
Calendarios
Este dispositivo puede ser programado para encenderse y apagarse cuando el usuario lo
desee, para lo cual el usuario tendrá que, mediante la app web, generar un calendario
indicando la hora en la que se quiere el encendido o apagado de la carga. Para la primera vez
que se genere un calendario, se puede ver una guía de pautas en la interface correspondiente:
Estos son los pasos a seguir:
1. Crear un nuevo calendario. Definir nombre e intervalo de actuación (15 ó 60 minutos)
y umbral si se desea. Esta característica se explicará un poco más adelante.
2. Cumplimentar calendario asignando el estado deseado para a cada unidad de tiempo
(15 ó 60 mins, dependiendo del intervalo seleccionado). Para hacer esto, se pincha en
estado y se asigna ese estado a cada unidad de intervalo bien pinchando el mismo o
bien arrastrando sobre los intervalos deseados.
3. Guardar el calendario.
4. Asignar el calendario al dispositivo deseado. Para ello, hay que
elegir el dispositivo deseado y pinchar en el símbolo “+”
En caso de que el usuario mande un encendido o apagado mientras se esté ejecutando un
calendario, la orden del usuario prevalecerá hasta que por el calendario se tenga un cambio de
estado.
Los calendaRios de automatización del POD ofrecen una funcionalidad para eliminar los
consumoS de stand by mediante la opción de “umbral”. El umbral define el consumo por
debajo del cual el POD debe cortar la corriente al aparato que tiene enchufado.
Para ello, es indispensable conocer el consumo que ese aparato tiene en stand by, de manera
que el umbral pueda definirse en unos vatios por encima de ese valor.
Es decir, si mi televisión tiene un consumo de 5W en stand by, y defino el umbral en 6W, se
podrá establecer un período de tiempo en el cual el POD cortará la corriente al aparato
siempre que éste tenga un consumo menor a 6W a través de un calendario y así terminar con
los consumos fantasma y ahorrar en la factura de la luz.
Los PODs también pueden ser accionados rápidamente desde el GATE de manera muy cómoda
incluso si se cae la conexión a internet.
NOTA: Wattio evoluciona día a día, por lo que puede que las imágenes tomadas de las
distintas aplicaciones no se correspondan con su versión.
Características técnicas
El POD de Wattio es un Dispositivo de control de montaje independiente para montaje sobre
una superficie.
Alimentación
Tensión de alimentación
Frecuencia de la alimentación
230 V ~
50-60Hz
Salidas de control
Corriente máxima de salida
16A
Vida útil
30.000 ciclos
Resolución de ajustes y visualizaciones
Precisión
Consignas
Horas de conmutación
Valores reales
Hora del día
Grado de contaminación
Tipo de enchufe
Peso
Color del frontal de la carcasa
1%
0,1 W
15 min
0,1 W
1 min
2
Tipo F, CEE 7/4, Schuko
0,107 Kg.
blanco y verde
Normas y estándares
Conformidad según
Directiva EMC
Directiva de bajo voltaje
Directiva radio
Estándares de producto
EMC
Bajo voltaje
Clase de seguridad
Grado de protección de carcasa
2004/108/CE
2006/95/CE
1999/5/CE
UNE-EN 60669-2-1:2005
UNE-EN 50428:2006
ETSI EN 301489-1 v1.9.2
ETSI EN 301489-17 v2.2.1
EN 60730-1:2011
EN 60950-1:2006
I según EN 60730
IP20 según EN 60529
Conformidad del producto con la legislación de la UE
Conformidad del producto La Directiva de Residuos de Aparatos Eléctricos y
Electrónicos
Nota
Para equipos alimentados por toma de corriente se debe instalar una toma de corriente cerca
del equipo y debe ser fácilmente accesible.
POD Technical Manual
Technical specifications
Description
The smart plug that measures the power consumption of connected devices and allows to
switch on and off the connected appliances remotely from your smart phone or any other
device connected to the internet. The POD also makes it possible for you to eliminate the
stand by, as well as to automate your appliances’ operation by programming calendars.
The POD is also signal repeater, so it can be used to increase the signal network of the Wattio
system.
Installation
IT IS IMPORTANT THAT YOU OBSERVE SOME SIMPLE PRECAUTIONS:
Even if the installation is very simple, it is recommended
the installation to be done by a professional. Please read
and act upon the important information on the following
pages. It is recommended to switch off the general
energy supply system.
Before getting started to the installation, it is important to write down the POD’s identification
digits. The Wizard will ask you for them during the registration process on the web platform
later on.
INSTALLATION STEPS
1. Plug the POD.
2. The POD is registered in the web
platform following the process guided
by the Wizard. During this process the
Wizard will ask for the POD’s
identification digits.
Operation
Once the POD is registered and installed,
the user can see the state of the switch
and the consumption connected. The
device saves the track record of the
average load every 15 minutes, and these
statistics are visible through the web
platform at https://myhome.wattio.com
and the mobile app.
The real-time consumption and the accumulated one in W, euros and CO2 can be also checked
and the different PODs can be grouped if wanted.
The mobile app is available to be downloaded for free at the different stores for the main
operating systems in the market. From both, the mobile and the web apps the consumption
can be checked in different formats and it also allows to switch remotely the PODs so as the
plugged appliances. This functionality is especially interesting to be used from the smart
phone, for example to simulate presence when you are on holiday switching on and off the TV
or a lamp.
Calendars
This device can be programmed to be turn on and off when the user wants. It will be a must to
set up a calendar on the web app indicating the status for different time periods. This calendar
will be sent to the wanted POD or POD group so that it starts performing accordingly. For the
first time, the web interface will show a short starting guide.
For a more detailed explanation, follow the steps below:
1. Create a new calendar and define the name, the time interval (15 or 60 minutes) and
the Threshold value if wanted. We will come back to this concept later on.
2. Fulfill the calendar adding a status for each interval box. Click on the wanted status to
select it and then click on the interval boxes one by one or drag the mouse over the
interval boxes to allocate them the status.
3. Save the calendar.
4. Link the calendar to the wanted POD or POD group by clicking the green
cross on the right of the device.
In case the user sends an on or off action while running a calendar, the user command will
prevail until the calendar finds a status change.
The POD automation calendars offer a feature to allow eliminating the stand by consumption
by the activation of the “Threshold”. It defines the consumption under what the POD shuts
down the energy feeding the plugged appliance.
In order to define the Threshold value, it is a must to know the consumption of the appliance
in standby, so that the threshold value could be defined some watts over this value.
For example, if my TV consumes 5W in standby, I will define a threshold value of 6W. In case
we chose the stand by status for a period of time, it means that the consumption of the
appliance will be literally 0W, eliminating totally this consumption in order to reduce the
electricity bill.
The PODs can also be operated very quickly from the GATE very easily, even with no internet
connection.
NOTICE: Wattio evolves very quickly, so it might happen that the images illustrating the app
could have already changed according to your software version.
Technical Features
The Wattio POD is a device of independent assembly control for mounting on a surface.
Supply
Supply voltage
Supply frequency
230 V ~
50-60Hz
Control outputs
Maximum output current 16A
Life
30,000 cycles
Resolution of settings and views
Accuracy
Setpoints
Switching times
Actual values
Time of day
Pollution Degree
Type of plug
Weight
Color of front shell
1%
0.1 W
15 min
0.1 W
1 min
2
Type F CEE 7/4 Schuko
0.107 Kg
white and green
Norms and standards
Conformity to
EMC Directive
Low Voltage Directive
Radio Directive
Product standards
EMC
Low Voltage
Safety class
Shell Protection degree
2004/108/CE
2006/95/CE
1999/5/C E
UNE-EN 60669-2-1:2005
UNE-EN 50428:2006
ETSI EN 301489-1 v1.9.2
ETSI EN 301489-17 v2.2.1
EN 60730-1:2011
EN 60950-1:2006
I according to EN 60730
IP20 according to EN 60529
Product Compliance with EU legislation
Product Compliance Directive on Waste Electrical and Electronic Equipment
Note
For mains powered equipment an outlet near the equipment should be installed and shall be
easily accessible.
POD Technisches Handbuch
Technische Daten
Beschreibung
Intelligente Steckdose, die den Stromverbrauch angeschlossener Geräte misst und das
ferngesteuerte Ein- oder Ausschalten von Ihrem Smartphone oder einem anderen Gerät aus
mit Internetanschluss ermöglicht. Mit ihr wird der Stromverbrauch der angeschlossenen
Geräte gemessen. Damit können Sie die Funktion Ihrer elektrischen Geräte steuern. Sie
können die Standby-Funktion beseitigen und Sie werden in der Lage sein, die Funktion der
Geräte zu automatisieren.
Der POD ist der Signalverstärker, mit dem man das Signalnetzwerk vom Wattio-System
erhöhen kann, indem man PODs hinzufügt.
Installation
ES IST WICHTIG, EINIGE VORKEHRUNGEN ZU TREFFEN:
Obwohl die Installation sehr einfach ist, wird es empfohlen, sie
von einem Spezialisten durchführen zu lassen. Bitte lesen und
handeln Sie nach den in den nachfolgenden Seiten
enthaltenen Informationen. Es empfiehlt sich, den Hauptstrom
für die Installation auszuschalten.
Vor der Installation ist es wichtig, sich die Ziffern im Handbuch zu notieren, die sich auf der
Rückseite des PODs befinden. Diese Ziffern werden das Gerät beim Prozess der Registrierung
des Wattio-Systems identifizieren.
Beispiel/
INSTALLATIONSSCHRITTE:
1º Stecken Sie den POD ein.
2º Der POD wird in der Anwendung registriert, indem Sie den Anweisungen des Assistenten
folgen.
Während diesem Prozess wird Sie der Assistent nach dem Identifizierungscode fragen.
Funktion
Wenn der POD erst einmal registriert und installiert ist, kann der Benutzer den Zustand und
Verbrauch des Gerätes sehen.
Das Gerät speichert die Erfolgsbilanz der durchschnittlichen Belastung alle 15 Minuten, und
diese Statistiken sind über die Web-Plattform auf https://myhome.wattio.com oder die mobile
Anwendung sichtbar.
Sowohl der Verbrauch in Echtzeit als auch der kumulierte in W, Euro oder CO2 kann überprüft
und die verschiedenen PODs können gruppiert werden, wenn man das möchte.
Die Wattio-App für Smartphones finden Sie kostenlos zum Herunterladen in den
verschiedenen App Stores, die die wichtigen Betriebssysteme vom Markt haben. Von beiden
aus, der Mobilen und der Web-App kann der Konsum in verschiedenen Formaten kontrolliert
werden und die an den POD angeschlossenen Elemente können an- und ausgeschaltet werden.
Diese Funktionalität ist besonders interessant über das Smartphone zu benutzen, z. B. um
Anwesenheit vorzutäuschen, wenn Sie im Urlaub sind und den Fernseher oder die Lampe
ferngesteuert anschalten.
Kalender
Dieses Gerät kann programmiert werden, um es an- oder auszuschalten, wann Sie das
möchten. Dafür müssten Sie mittels Web-App einen Kalender erstellen, indem Sie den Status
für die Zeit eingeben, in der Sie möchten, dass es an- oder ausgeschaltet ist.
Das erste Mal, wenn Sie ein Kalender erstellen, werden Sie eine Kurzanleitung in dem
jeweiligen Web-Interface finden:
Dies sind die nächsten Schritte:
1. Erstellen Sie einen neuen Kalender. Bestimmen Sie den Namen, den Zeitintervall (15
oder 60 Minuten) und den Schwellwert, wenn Sie das möchten.
Diese Charakteristik wird ein wenig später erklärt.
2. Füllen Sie den Kalender aus, indem Sie den gewünschten Status für jeden Zeitraum (15
oder 60 Minuten, vom ausgewählten Intervall abhängig) hinzufügen. Um das zu tun,
klicken Sie auf den gewünschten Status und ordnen Sie ihn jeder Einheit des Intervalles
zu, indem Sie einfach klicken oder ihn einfach über die gewünschten Intervalle
verschieben.
3. Speichern Sie den Kalender.
4. Ordnen Sie dem Kalender den gewünschten POD zu, indem Sie das gewünschte Gerät
auswählen und auf das grüne Plus „+“ klicken.
Falls Sie einen AN- oder AUS-Befehl senden, während der Kalender läuft, wird Ihr Befehl
ausgeführt, bis der Kalender einen Statuswechsel findet.
Die Kalender der POD-Automatisierung bieten eine Funktion an, um den Standby-Verbrauch
über die Option „Schwelle“ zu beseitigen. Die Schwelle bestimmt den Konsum, unterhalb
dessen der POD den Strom vom angeschlossenen Apparat nehmen muss.
Dafür ist es unbedingt notwendig, den Konsum dieses Apparates in Standby zu kennen, sodass
die Schwelle einige Watt über diesen Wert festgelegt werden kann.
Das heiβt, wenn mein Fernseher einen Konsum von 5W in Standby hat und ich eine Schwelle in
6W festlege, ein Zeitraum erstellt wird, in diesem der POD den Strom vom Apparat abschaltet,
insofern dieser einen Konsum von weniger als 6W durch einen Kalender hat. So wird der
Verbrauch ganz beseitigt, um die Stromrechnung zu verringern.
Die PODs können auch schnell und bequem vom GATE aus betätigt werden, sogar wenn die
Internetverbindung wegfällt.
BEMERKUNG: Wattio entwickelt sich Tag für Tag weiter, so kann es sein, dass die Bilder in
den verschiedenen Apps nicht mit Ihrer Version übereinstimmen.
Technische Merkmale
Der Wattio POD ist eine Vorrichtung der unabhängigen Steueranordnung zur Montage an einer
Oberfläche.
Versorgung
Versorgungsspannung
Netzfrequenz
230 V ~
50-60 Hz
Steuerausgänge
Maximale Ausgangsstrom
Lebensdauer
16A
30.000 Zyklen
Auflösung von Einstellungen und Ansichten
Genauigkeit
Sollwerte
Schaltzeiten
Ist-Werte
Tageszeit
Verschmutzungsgrad
Steckertyp
Gewicht
Farbe der Vorderschale
1%
0,1 W
15 min
0,1 W
1 min
2
Typ F CEE 7/4 Schuko
0.107 Kg
weiß und grün
Normen und Standards
Konformität zu
EMC-Richtlinie
Niederspannungsrichtlinie
Radio-Richtlinie
Produktnormen
EMC
Niederspannung
Schutzklasse
Shell Schutzart
2004/108 / EG
2006/95 / EG
1999/5 / C E
UNE-EN 60669-2-1: 2005
UNE-EN 50428: 2006
ETSI EN 301489-1 v1.9.2
ETSI EN 301489-17 V2.2.1
EN 60730-1: 2011
EN 60950-1:2006
I nach EN 60730
IP20 nach EN 60529
Űbereinstimmung des Produktes mit der Gesetzgebung der EU
Űbereinstimmung des Produktes der EEAG Richtlinie
(Richtlinie über Elektro- und Elektronikaltgeräte)
Anmerkung
Für netzbetriebene Geräte muss eine Steckdose in der Nähe des Gerätes installiert werden, die
leicht zugänglich ist.