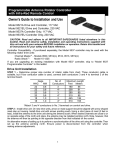
1
Wireless Installation of Keypad, continued
Step 1: Mount the keypad cover using
the large screws provided. Slide the
keypad face into the cover and secure
with the small screws at the bottom of
the keypad face.
2
3
4
5
6
7
8
9
1
0
Step 2: Program your master code and
additional entry codes. See page 5.
Mount the Keypad Cover
Secure Keypad with screws
Wired Installation of the Keypad
Step 1:
Always turn the control box OFF before you connect an accessory to the operator
control board!
Use 16 gauge, stranded, direct burial low voltage wire (see GTO Accessory
Catalog) to connect the keypad to the opener control box (NOTE: use the same gauge
wire for the jumper wire). Run wire through PVC pipe from the ground to keypad
and from the ground to the opener control box to protect the wire from lawn mowers
or grazing animals.
Determine how the wire will enter the keypad (i.e. from the back through a hole
drilled in the mounting post or running the wire on the surface of the post).
Pull the wire through the plastic grommet in the back of the keypad cover. Then
mount the keypad cover to the post using the large screws provided.
Illustration A
connect to WHT terminal on
the operator control board
connect to GRN terminal on
the operator control board
JUMP
WHT (Common)
GRN (Normally Open)
To wire keypad directly to operator – use 16 gauge,
stranded, low voltage, direct burial wire.
Step 2: Strip 3/16” of insulation from the wires and attach them to the
terminal block on the keypad control board as shown in Illustration A. The
wire from the terminal marked GRN on the keypad control board connects to
the ACCESSORY terminal marked GRN on the operator control board. The
wire from the terminal marked WHT on the keypad control board connects
to the ACCESSORY terminal marked WHT on the operator control board.
Connect a short jumper wire from the JUMP terminal to the GRN terminal
on the keypad control board. See illustrations on page 4 for instructions on
wiring the keypad to the control board.
connect jumper wire to
GRN terminal on this
board (do not use if
keypad is wireless).
2
3
4
5
6
7
8
9
1
0
Step 3: Place keypad into keypad
cover and secure using the small
screws provided.
Jumper Wire
To WHT Terminal on
Operator Control Board
To GRN Terminal on
Operator Control Board
3