1
PROFESSIONAL RESIDENTIAL
ACCESS
SYSTEMS
PROFESSIONAL RESIDENTIAL
F320
ACCESS
SYSTEMS
Heavy
Duty
Digital
Keypad
PROFESSIONAL RESIDENTIAL
Gates That Open, LLC
3121 Hartsfield Road • Tallahassee, Florida 32303
Sales: 1-800-543-GATE (4283) • Technical Support: 1-800-543-1236
www.gtoinc.com
Printed in China for Gates That Open, LLC
©2013 GTO
F320
CONTENTS
SPECIFICATIONS
INTRODUCTION.......................................................................2
SPECIFICATIONS.......................................................................2
FEATURES..................................................................................2
COMPONENT LOCATIONS......................................................3
WIRING DIAGRAM....................................................................3
INSTALLATION..........................................................................4
FACTORY DEFAULTS................................................................6
BASIC PROGRAMMING.......................................................... 6
PROGRAMMING OPTIONS.....................................................7
F320 OPERATION...................................................................10
GTO/ACCESS LIMITED WARRANTY.....................................11
FCC NOTICE.............................................................................11
MECHANICAL
Case dimensions: 4.00” W x 5.50” H x 3.00” D
ELECTRICAL
Voltage:12-24 Volts AC or DC
Current:10 mA typical, 150 mA maximum
Outputs:Relay #1
Form “C” 5 Amps @ 24 Volts maximum
Relay #2
Form “C” 1 Amp @ 24 Volts maximum
Solid state outputs (Outputs #3 & #4)
Short-to-common 100 mA
@ 24 VDC maximum
ENVIRONMENTAL
Temperature:-22°F to 149°F (-30°C to 65°C)
Humidity: 5% to 95% non-condensing
INTRODUCTION
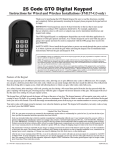
The F320 is a digital keyless entry system designed for
access control applications. The keypad is housed in a
rugged cast aluminum enclosure that can be mounted to a
pedestal or bolted directly to a wall. The die-cast keys have
bright, easy-to-read yellow graphics.
Up to 120 entry codes, from 1 to 6 digits in length, can be
programmed. They can activate either, or both, of the relay
outputs. Relay #1 has a 5 Amp capacity. Relay #2 has a 1
Amp capacity.
Two LED indicators show the status of the entry system. The
left LED lights red to indicate power, then turns green when
access is granted. The right LED lights yellow when the
keypad is in “lockout” condition (from too many incorrect
code entries). The keypad’s courtesy light can be always
off, always on or be programmed to illuminate from 1-4
minutes after any keypress (default 2 minutes). An internal
sounder beeps when each key is pressed.
The DOOR SENSE/INHIBIT input can be used two ways.
If programmed for “door sense”, a switch on the door
detects forced entry or door ajar situations. If programmed
for “inhibit”, the input can be wired to a “service” switch
or automatic timer that will disable the Relay #1 when
required.
The REQUEST-TO-ENTER input can be wired to a pushbutton
or fire access keyswitch to provide codeless entry for
authorized personnel. The “anti-passback” feature prevents
using the same code twice before the programmed time
elapses.
The ALARM SHUNT output activates when access is granted.
This output can be wired to shunt alarm contacts on the
access door/gate to prevent triggering of an alarm when
authorized access occurs.
Two solid state outputs, capable of switching 100 mA to
common, are programmable to signal forced entry, door
ajar, lockout, alarm circuit shunting, request-to-enter, and
keypad active conditions.
The F320 is powered from a 12-24 Volt AC or DC source.
Power can be obtained from the access device or a separate
power supply. The EEPROM memory retains all entry codes
and programming, even without power.
2 F320 Instruction Manual
FEATURES
KEYPAD PROGRAMMABLE
120 ENTRY CODE CAPACITY
1-6 DIGIT ENTRY CODE LENGTH
4 INDEPENDENT OUTPUTS (TIMED/TOGGLED)
4 INDEPENDENT TIMERS
EACH ENTRY CODE CAN BE PROGRAMMED TO
ACTIVATE EITHER OR BOTH RELAYS
RELAY CONTACTS ARE FORM “C” (N.O. & N.C)
SOLID STATE OUTPUTS ARE OPEN COLLECTOR
SWITCH-TO-COMMON
TWO LED INDICATORS
COURTESY LAMP
PIEZO SOUNDER
TIMED ANTI-PASSBACK (LAST 3 VALID ENTRIES)
KEYPAD LOCKOUT
TACTILE KEY FEEL
DOOR SENSE INPUT
INHIBIT INPUT
REQUEST-TO-ENTER INPUT
rev 03.26.13
COMPONENT LOCATIONS
RED/GREEN
POWER/ACCESS
INDICATOR
YELLOW
"LOCKOUT"
INDICATOR
JUMPER JP2
RESETS
MASTER CODE
TERMINAL
BLOCK J3
OUTPUTS
NIGHT
LIGHT
TACTILE
KEYPAD
TERMINAL BLOCK J4
POWER AND INPUTS
JUMPER JP1
REMOVE TO
REDUCE
BEEPER SOUND
KEYLOCK
Figure 1. Component Locations
WIRING DIAGRAM
TYPICAL GATE INSTALLATION WIRING
F320
J3
N.O. 1
RELAY #1
COMMON2
N.C. 3
J4
OUTPUT #3 4
1
2
OUTPUT #4 5
POWER
N.O. 6
3 INHIBIT
RELAY #2
COMMON7
4 COMMON
5 REQUEST-TO-ENTER
6 EARTH GROUND
INHIBIT
TIMER
REQUIRED WIRING
N.C. 8
COMMON9
GROUND
FIRE
ACCESS
AUXILIARY
POWER
OPEN
Figure 2. Wiring Diagram
OPTIONAL WIRING
GATE OPERATOR
rev 03.26.13
F320 Instruction Manual
3
INSTALLATION
To avoid damage to the unit from static discharges, connect
the EARTH GROUND terminal to a good earth grounding
point. Suggested wiring size is 18 AWG for earth ground
and power (up to 500 feet of 18 AWG wire can be run for
power, use larger wire for longer runs). Use 22 AWG or larger
(depending on the load) for all other connections.
CAUTION: If the unit is AC powered, and one side of
the power transformer secondary is connected to earth
ground, connect the grounded side to the “-” power
terminal of the unit.
Select a location for the keypad. For door access control
installations, mount the keypad near the controlled door.
For gate control installations, mount the keypad in clear
view of the gate, but far enough from the gate so the
user cannot touch the gate from the keypad.
WARNING: TO AVOID SERIOUS INJURY OR DEATH,
MAKE SURE THAT THE UNIT IS FAR ENOUGH FROM THE
GATE SO THAT THE USER CANNOT TOUCH THE GATE
WHILE OPERATING THE KEYPAD. HOWEVER, THE GATE
MUST BE FULLY VISIBLE FROM THE KEYPAD.
Pedestal Mounting
The F320 keypad can be mounted on a standard
pedestal.
Use four security bolts and locking nuts to secure the
keypad’s backplate to the pedestal (see Figure 3).
PEDESTAL
MOUNT BACKPLATE WITH
SECURITY BOLTS AND LOCKNUTS
Figure 3. Pedestal Mounting Keypad Backplate
WALL MOUNTING
Wall Mounting
The F320 keypad can be mounted directly to a wall or
flat surface.
Use the appropriate fasteners to secure the keypad’s
back plate to the mounting surface.
When mounting the keypad to a concrete wall,
use concrete wedge anchors or molly anchors (see
Figu re 4).
USE CONCRETE
WEDGE ANCHORS
OR MOLLY ANCHORS
Figure 4. Wall Mounting Keypad Backplate
4 F320 Instruction Manual
rev 03.26.13
Gate Control
Route four wires between the gate and the keypad
(two for power, two for control).
Connect the gate operator’s auxiliary or radio power
output terminals to the keypads POWER input
terminals (observe wiring polarity).
Connect the gate operator’s OPEN terminals to the
keypad’s Relay #1 COMMON & N.O. terminals.
NOTE: For operator wiring specifics, refer to the gate
operator’s wiring diagram.
If a request-to-enter pushbutton or fire access
keyswitch is going to be used, route two wires from
the keypad to the normally open switch. Connect the
wires to the normally open switch and to the keypad’s
REQUEST-TO-ENTER and COMMON terminals.
If an inhibit switch or timer is going to be used, route
two wires from the keypad to the inhibit switch or
timer relay. Connect the inhibit switch/timer terminals
to the keypad’s INHIBIT and COMMON terminals.
NOTE: If the INHIBIT input is going to be used, it must
be programmed to select that input type. See the
Programming Options section of this manual.
Door Control
Install a low voltage electric door strike for unlocking
the door.
Choose a location for the power supply or transformer.
Route two wires between the power supply and the
keypad. Connect the power supply’s output terminals
to the keypad’s POWER input terminals (observe
wiring polarity).
Route two wires between the door strike and the
keypad. Connect one of the door strike wires to the
keypad’s Relay #1 N.O. terminal. Connect the other
door strike wire to the keypad’s POWER + terminal.
Connect a wire between the keypad’s POWER –
terminal and the Relay #1 COMMON terminal.
If a request-to-enter pushbutton or fire access
keyswitch is going to be used, route two wires from
the keypad to the normally open switch. Connect the
wires to the normally open switch and to the keypad’s
REQUEST-TO-ENTER and COMMON terminals.
To use the door sense feature to detect forced entry
or door ajar conditions, install a normally closed door
switch on the door and route two wires from the
switch to the keypad. Connect the door switch to the
keypad’s DOOR SENSE and COMMON terminals.
If an inhibit switch or timer is going to be used, route
two wires from the switch or timer to the keypad.
Connect the inhibit switch/timer terminals to the
keypad’s INHIBIT and COMMON terminals.
NOTE: Either door sense or inhibit can be used. Both
features cannot be used at the same time.
DOOR
SENSE
SWITCH
F320
KEYPAD
FIRE
ACCESS
KEYSWITCH
GATE
OPERATOR
(BEHIND GATE)
2 WIRES FOR
REQUEST-TO-ENTER
2 WIRES
FOR DOOR
SENSE
F320
KEYPAD
2 WIRES
FOR
POWER
2 WIRES FROM AK-11
TO TRIGGER GATE OPEN
2 WIRES FROM OPERATOR
FOR F320 POWER
ELECTRIC
DOOR
STRIKE
Figure 5. Gate Installation
rev 03.26.13
2 WIRES
FOR DOOR
STRIKE
FROM
POWER
SUPPLY
Figure 6. Door Installation
F320 Instruction Manual 5
FACTORY DEFAULTS
Setting Entry Code Length
MASTER PROGRAMMING CODE . . . . . . . . . . . . . . . . . . . . 123456
ENTRY CODE LENGTH . . . . . . . . . . . . . . . . . . . . . . . . . . . . 4 DIGITS
REQUEST-TO-ENTER OUTPUT . . . . . . . . . . . . . . . . . . . . RELAY #1
ALARM SHUNT OUTPUT . . . . . . . . . . . . . . . . . . . . . . . . DISABLED
FORCED ENTRY OUTPUT . . . . . . . . . . . . . . . . . . . . . . OUTPUT #3
DOOR AJAR OUTPUT . . . . . . . . . . . . . . . . . . . . . . . . . . OUTPUT #4
RELAY #1 ON TIME . . . . . . . . . . . . . . . . . . . . . . . . . . . . 2 SECONDS
RELAY #2 ON TIME . . . . . . . . . . . . . . . . . . . . . . . . . . . . 2 SECONDS
SOLID STATE OUTPUT #3 ON TIME . . . . . . . . . . . . . 2 SECONDS
SOLID STATE OUTPUT #4 ON TIME . . . . . . . . . . . . . 2 SECONDS
DOOR SENSE/INHIBIT INPUT . . . . . . . . . . . . . . . . . DOOR SENSE
KEYPAD LOCKOUT OUTPUT . . . . . . . . . . . . . . . . . . . . . DISABLED
KEYPAD ACTIVE OUTPUT . . . . . . . . . . . . . . . . . . . . . . . DISABLED
DOWNLIGHT ON-TIME . . . . . . . . . . . . . . . . . . . . . . . . . 2 MINUTES
BEEPER SOUNDS WHEN KEY PRESSED . . . . . . . . . . . . . . . . . YES
BEEPER SOUNDS DURING RELAY #1 . . . . . . . . . . . . . . . . . . . . NO
BEEPER SOUNDS DURING RELAY #2 . . . . . . . . . . . . . . . . . . . . NO
BEEPER SOUNDS DURING OUTPUT #3 . . . . . . . . . . . . . . . . . . NO
BEEPER SOUNDS DURING OUTPUT #4. . . . . . . . . . . . . . . . . . NO
KEYPAD LOCKOUT COUNT . . . . . . . 3 TRIES BEFORE LOCKOUT
ANTI-PASSBACK TIME . . . . . . . . . . . . . . . . . NO ANTI-PASSBACK
BASIC PROGRAMMING
When the F320 is in programming mode, both LEDs will
turn off until programming begins. After a programming
option number is entered the yellow LED will blink.
This indicates that the F320 is ready to accept the new
programming data. After the new data entry is complete,
the green LED will light while the data is being stored.
The red LED will light if any programming data is entered
incorrectly, and the command will have to be fully reentered.
Entering Programming Mode
The 6-digit Master Programming Code (default = 123456) is
used to enter Programming Mode.
Press: # 9 # Master Code
Master Code = the current 6-digit Master Programming Code
Exiting Programming Mode
Press:
**
#
The red LED will light when Programming Mode is exited.
NOTE: The F320 will automatically exit Programming
Mode after two minutes of inactivity.
Re-entering a Command After a Mistake
If the red LED lights, indicating an incorrect entry, or a
wrong key is pressed during programming, to clear the
keypad and re-enter
the command:
Press:
6 F320 Instruction Manual
*9#
Default: 4 digits
Press: 0 3 # Length #
Length = 1 - 6 for entry code length
NOTE: If the Entry Code Length is going to be changed
from the factory default of four digits, make this change
first, before programming any entry codes.
Adding a New Entry Code
Press: 0 1 # Code # Code # Action #
Code = The new entry code: 1-999999, depending on code length
Action = Relay output entry code will activate as follows:
1 = Relay #1, timed open
2 = Relay #2, timed open
3 = Both Relays, timed open
10 = Relay #1, toggled
20 = Relay #2, toggled
30 = Both Relays, toggled
12 = Relay #1 toggled; Relay #2, timed open
21 = Relay #1, timed open; Relay #2 toggled
The yellow LED will flash quickly while the F320 searches its
memory for available space and duplicate entries. The green
LED will light when the new code is stored. If the new entry
code chosen is already being used for another entry code, the
red LED will light. A new unique code needs to be entered.
NOTE: Leading zeros (zeros before the code number, i.e.
0001) do not need to be entered when programming a new
entry code. The F320 will internally add any zeros to fill all
digits determined by the entry code length setting. Leading
zeros will have to be entered by the user when entering their
code to gain access.
Erasing a Single Entry Code
Press: 0 2 # Code # Code #
Code = The entry code to delete.
The yellow LED will flash quickly while the F320
searches its memory for the code to erase. The green LED
will light when the code is erased.
Erasing All Entry Codes
WARNING: Performing this command will remove all
entry codes from the memory.
Press: 9 7 # 0 0 0 0 0 0 # 0 0 0 0 0 0 #
Code = The entry code to delete.
NOTE: The green LED will light while the memory is being
erased. This may take up to 15 seconds.
Changing the 6-Digit Master Programming Code
Press: 9 8 # Master Code # Master Code #
Code = The entry code to delete.
Master Code = The new 6-digit Master Programming Code
New master code: _____________________
rev 03.26.13
PROGRAMMING OPTIONS
Select Door Sense or Inhibit Input
Default: Door Sense
The input on terminal block J4, terminal #3 can be
programmed for DOOR SENSE or INHIBIT.
Select Alarm Shunt Output
Default: No Output
Sets which output activates during the time access is
granted. (Use this output to shunt alarm contacts attached
to the access door.) This output may be timed or latched.
Press: 1 0 # Input#
Press: 1 5 # Output #
Input = 1 for Inhibit,
= 0 for Door Sense
When programmed for DOOR SENSE, if an open condition
on the input occurs before access is granted (with an entry
code or with the request-to-enter input) a FORCED ENTRY
output will occur. If an open condition remains 60 seconds after
a relay activation for access, a DOOR AJAR output will occur.
When programmed for INHIBIT, a closed condition on the input
will prevent relay #1 from activating when access is requested
(with an entry code). This mode is typically used with an
external timer to disable the access device at certain times.
Select Forced Entry Output
Default: Output #3
Sets which output activates if the Door Sense input opens
before access is granted. This output is not timed.
Press: 1 1 # Output #
Output = Output to Activate (0-4)
1 = Relay #1 2 = Relay #2 3 = Output #3,
4 = Output #4 0 = No Output
Select Request-to-Enter Output
Default: Relay #1
Sets which output activates when the Request-to-Enter
input is grounded. This output remains activated for at least
the length of time specified by the On-times for the relays
or outputs. If the Request-to-Enter input continues to be
grounded beyond the time specified by the On-times for
the relays or outputs, the output will remain activated as
long as the Request-to-Enter input remains grounded.
Press: 1 6 # Output #
Output = Output to Activate (0-4)
1 = Relay #1 2 = Relay #2 3 = Output #3
4 = Output #4 0 = No Output
Output = Output to Activate (0-4)
1 = Relay #1 2 = Relay #2 3 = Output #3
4 = Output #4 0 = No Output
Relay #1 On-time
Default: 2 Seconds
Sets the length of time Relay #1 activates when triggered.
Select Door Ajar Output
Default: Output #4
Sets which output activates if the Door Sense input stays
open after access is granted. This output is not timed.
Seconds = Output time in seconds (0-60)
Press: 1 2 # Output #
Output = Output to Activate (0-4)
1 = Relay #1 2 = Relay #2 3 = Output #3
4 = Output #4 0 = No Output
Press: 2 1 # Seconds #
Relay #2 On-time
Default: 2 Seconds
Sets the length of time Relay #2 activates when triggered.
Press: 2 2 # Seconds #
Seconds = Output time in seconds (0-60)
Select Keypad Lockout
Output Default: No Output
Sets which output activates when the keypad is “locked out”
after toomany incorrect entry code attempts. The lockout
time is 60 seconds.
Solid-state Output #3 On-time
Default: 2 Seconds
Sets the length of time Output #3 activates when triggered.
Press: 1 3 # Output #
Seconds = Output time in seconds (0-60) 99 = Toggle mode
Output = Output to Activate (0-4)
1 = Relay #1 2 = Relay #2 3 = Output #3
4 = Output #4 0 = No Output
Solid-state Output #4 On-time
Default: 2 Seconds
Sets the length of time Output #4 activates when triggered.
Select Keypad Active Output
Default: No Output
Sets which output activates when any keys are pressed. This
output is timed.
Seconds = Output time in seconds (0-60) 99 = Toggle mode
Press: 1 4 # Output #
Output = Output to Activate (0-4)
1 = Relay #1 2 = Relay #2 3 = Output #3
4 = Output #4 0 = No Output
rev 03.26.13
Press: 2 3 # Seconds #
Press: 2 4 # Seconds #
Set Downlight On-Time
Default: 2 Minutes
Sets the time duration that the downlight remains on after
a key press.
Press: 2 5 # Duration #
0 = Always off 1 = 1 minute 2 = 2 minutes 3 = 3 minutes
4 = 4 minutes 99 = Always on
F320 Instruction Manual
7
Beep Sounds on Keystrokes
Default: Yes
Selects whether or not the keypad beeps as each key is
pressed.
Press: 4 0 # Sound #
Sound = 1 for Yes = 0 for No
Beep Sounds During Relay #1
Default: No
Selects whether or not the keypad beeps during Relay #1
activation.
Press: 4 1 # Sound #
Sound = 1 for Yes = 0 for No
Beep Sounds During Relay #2
Default: No
Selects whether or not the keypad beeps during Relay #2
activation.
Press: 4 2 # Sound #
Sound = 1 for Yes = 0 for No
Beep Sounds During Output #3
Default: No
Selects whether or not the keypad beeps during Output #3
activation.
Master Reset
CAUTION: Performing a master reset will clear
the entire memory of the F320 and return all
programmable options to the factory default values.
ALL ENTRY CODES WILL BE ERASED.
STEP 1 Disconnect power from the keypad.
STEP 2 Press and hold down the * and # keys.
STEP 3 Apply power to the keypad, continue holding the keys down until the red LED starts flashing.
STEP 4 Release the keys. The red and yellow LEDs will remain lit until the process is complete, then the yellow LED will go out.
Resetting the Master Code
STEP 1 Open the F320 case.
STEP 2 Locate jumper JP2. This jumper is used to reset the master code.
STEP 3 With power applied to the keypad, remove jumper JP2. The keypad will begin to beep, signaling that the code has been reset.
STEP 4 Replace jumper JP2.
THE MASTER PROGRAMMING CODE IS NOW 123456.
Press: 4 3 # Sound #
Sound = 1 for Yes = 0 for No
Beep Sounds During Output #4
Default: No
Selects whether or not the keypad beeps during Output #4
activation.
Press: 4 4 # Sound #
Sound = 1 for Yes = 0 for No
Keypad Lockout Count
Default: 3 Tries
Sets the number of incorrect entry code attempts allowed
before the keypad “locks out”.
Press: 5 0 # Attempts #
Attempts = Number of attempts before lockout (2-7)
Anti-passback Time
Default: No Anti-passback
Sets the length of time an entry code will not function after
it is used.
Press: 5 1 # Minutes #
Minutes = Time in Minutes (1-4)
0 = No Anti-passback
8 F320 Instruction Manual
rev 03.26.13
Solid State Outputs
The two solid state outputs (Output #3 & Output #4) can be
programmed to activate during various conditions. These
outputs can be used to activate indicators or sounders. See
Figure 7 for wiring examples using the solid state outputs.
DC
POWER
SOURCE
ELECTRONIC
BEEPER
1K Ω @ 12 volts
2K Ω @ 24 volts
LED
OUTPUT #3
Locking Keypad
After the installation is complete. Lock the keypad using the
keylock (see Figure 9).
LED
OUTPUT #4
EACH
OUTPUT
100 mA
MAXIMUM
EXAMPLE 1: OUTPUT #3 LIGHTS AN LED,
OUTPUT #4 LIGHTS AN LED AND SOUNDS A BEEPER
OUTPUT #3
LOW VOLTAGE
LAMP
OUTPUT #4
POWER
SOURCE
EACH
OUTPUT
100 mA
MAXIMUM
HOOK KEYPAD
ONTO BACKPLATE
N.O. ZONE
END-OF-LINE
RESISTOR
COMMON
GROUND
ALARM PANEL
USE KEY TO
LOCK KEYPAD
COMMON
EXAMPLE 2: OUTPUT #3 LIGHTS A LAMP POWERED FROM AN EXTERNAL
SOURCE, OUTPUT #4 TRIGGERS A NORMALLY OPEN ALARM PANEL ZONE
Figure 9. Locking the Keypad Case
Figure 7. Using the Solid State Outputs
Beeper Sound Level
The keypad’s beeper can be set to low or high level.
If the keypad’s beeper is too loud for the keypad’s
location, remove jumper JP1 (see Figure 8).
REMOVE JUMPER JP1 TO REDUCE
THE SOUND LEVEL OF THE BEEPER
Figure 8. Removing Beeper Jumper
rev 03.26.13
F320 Instruction Manual
9
F320 OPERATION
Users of the F320 have up to 40 seconds to key in their
entry code.
Up to eight seconds are allowed between each
keystroke.
All digits of the entry code must be entered. Example:
If the code is 0042, the user must enter “0 0 4 2”.
If the wrong key is pressed, pressing the key will
reset the keypad. The correct code can then be reentered.
After a correct code is entered, the red LED will turn
green and the programmed relay will activate for the
programmed time.
If the number of incorrect codes entered exceeds
the keypad lockout count, the yellow LED will light,
indicating that the keypad is locked out. The lockout
will remain for one minute.
After a valid code has been entered, it will be unusable
until the anti-passback time expires.
*
RED LED TURNS
GREEN WHEN
ACCESS IS GRANTED
YELLOW LED WILL LIGHT
DURING KEYPAD LOCKOUT IF
TOO MANY INCORRECT CODES
ARE ENTERED
PRESS STAR KEY TO
RESET KEYPAD IF THE
WRONG KEY IS PRESSED
USERS HAVE UP TO
40 SECONDS TO ENTER
THEIR COMPLETE CODE
Figure 10. Operating F320
10 F320 Instruction Manual
rev 03.26.13
GTO LIMITED TWO YEAR WARRANTY
FCC NOTICE
Gates That Open, LLC gate openers and accessories are
covered under warranty by the manufacturer against
defects in materials and manufacturer workmanship for a
period of two (2) years from date of purchase, provided the
recommended installation procedures have been followed.
In the case of product failure due to defective material
or manufacturer workmanship within the two (2) year
warranty period, the product will be repaired or replaced
(at the manufacturer’s option) at no charge to the customer,
if returned freight prepaid to GTO, 3121 Hartsfield Road,
Tallahassee, Florida, USA 32303.
IMPORTANT: Call (800) 543-1236 for a Return Goods
Authorization (RGA) number before returning accessory
to factory. Products received at the factory without an
RGA number will not be accepted. Replacement or repaired
parts are covered by this warranty for the remainder of the
two (2) year warranty period or six (6) months, whichever is
greater. GTO will pay the shipping charges (equal to United
Parcel Service GROUND rate) for return to the owner of
items repaired under warranty.
The manufacturer will not be responsible for any charges
or damages incurred in the removal of the defective parts
for repair, or for the reinstallation of those parts after
repair. This warranty shall be considered void if damage
to the product(s) was due to improper installation or use,
connection to an improper power source, or if damage was
caused by electrical power surge, lightning, wind, fire, flood,
insects or other natural agent.
After the two (2) year warranty period, GTO, will make any
necessary repairs for a nominal fee.
Call GTO at (800) 543-1236 for more information. This
warranty gives you specific legal rights, and you may also
have other rights which may vary from state to state. This
warranty is in lieu of all other warranties, expressed or
implied.
NOTE: Verification of the warranty period requires
copies of receipts or other proof of purchase. Please
retain these records.
Changes or modifications not expressly described in this
manual or approved by the manufacturer could void the
user’s authority to operate the equipment.
This equipment has been tested and found to comply
with the limits for a Class B digital device, pursuant to Part
15 of the FCC Rules. These limits are designed to provide
reasonable protection against harmful interference in a
residential installation. This equipment generates, uses
and can radiate radio frequency energy and, if not installed
and used in accordance with the instructions, may cause
harmful interference to radio communications. However,
there is no guarantee that interference will not occur in a
particular installation. If this equipment does cause harmful
interference to radio or television reception, which can be
determined by turning the equipment off and on, the user
is encouraged to try to correct the interference by one or
more of the following measures:
•Reorient or relocate the receiving antenna.
rev 03.26.13
• Increase the separation between the equipment and receiver.
• Connect the equipment into an outlet on a circuit different from that to which the receiver is connected.
• Consult the dealer or an experienced radio/TV technician for help.
F320 Instruction Manual
11
ACCESS
SYSTEMS
PROFESSIONAL RESIDENTIAL
Gates That Open, LLC • 3121 Hartsfield Road • Tallahassee, Florida 32303
www.gtoaccess.com
For online Technical Support visit the Online Troubleshooter Wizard 24 hrs/day 7 days/week at
http://support.gtoinc.com/support/troubleshooter.aspx and open a Tech Ticket
Technical Support Hours: MON - FRI 8:00AM - 7:00PM (ET)
1-800-543-1236