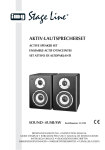
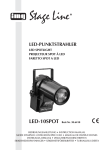
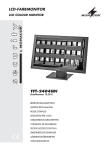
1
TFT-LCD-FARBMONITOR TFT LCD COLOUR MONITOR TVLCD-720COL Bestellnummer 18.8300 BEDIENUNGSANLEITUNG INSTRUCTION MANUAL MODE D’EMPLOI ISTRUZIONI PER L’USO MANUAL DE INSTRUCCIONES INSTRUKCJA OBSŁUGI VEILIGHEIDSVOORSCHRIFTEN SIKKERHEDSOPLYSNINGER SÄKERHETSFÖRESKRIFTER TURVALLISUUDESTA 2 3 4 9 5 10 1 11 12 13 8 7 6 a b c d e 2 D A CH F B CH Bevor Sie einschalten … GB Before switching on … Wir wünschen Ihnen viel Spaß mit Ihrem neuen Gerät von MONACOR. Bitte lesen Sie diese Bedienungsanleitung vor dem Betrieb gründlich durch. Nur so lernen Sie alle Funktionsmöglichkeiten kennen, vermeiden Fehlbedienungen und schützen sich und Ihr Gerät vor eventuellen Schäden durch unsachgemäßen Gebrauch. Heben Sie die Anleitung für ein späteres Nachlesen auf. We wish you much pleasure with your new MONACOR unit. Please read these operating instructions carefully prior to operating the unit. Thus, you will get to know all functions of the unit, operating errors will be prevented, and yourself and the unit will be protected against any damage caused by improper use. Please keep the operating instructions for later use. Der deutsche Text beginnt auf der Seite 4. The English text starts on page 7. Avant toute installation … I Nous vous souhaitons beaucoup de plaisir à utiliser cet appareil MONACOR. Lisez ce mode dʼemploi entièrement avant toute utilisation. Uniquement ainsi, vous pourrez apprendre lʼensemble des possibilités de fonctionnement de lʼappareil, éviter toute manipulation erronée et vous protéger, ainsi que lʼappareil, de dommages éventuels engendrés par une utilisation inadaptée. Conservez la notice pour pouvoir vous y reporter ultérieurement. Prima di accendere … Vi auguriamo buon divertimento con il vostro nuovo apparecchio di MONACOR. Leggete attentamente le istruzioni prima di mettere in funzione lʼapparecchio. Solo così potete conoscere tutte le funzionalità, evitare comandi sbagliati e proteggere voi stessi e lʼapparecchio da eventuali danni in seguito ad un uso improprio. Conservate le istruzioni per poterle consultare anche in futuro. Il testo italiano inizia a pagina 13. La version française se trouve page 10. E Antes de la utilización … PL Le deseamos una buena utilización para su nuevo aparato MONACOR. Por favor, lea estas instrucciones de uso atentamente antes de hacer funcionar el aparato. De esta manera conocerá todas las funciones de la unidad, se prevendrán errores de operación, usted y el aparato estarán protegidos en contra de todo daño causado por un uso inadecuado. Por favor, guarde las instrucciones para una futura utilización. Przed uruchomieniem … Życzymy zadowolenia z nowego produktu MONACOR. Dzięki tej instrukcji obsługi będą państwo w stanie poznać wszystkie funkcje tego urządzenia. Stosując się do instrukcji unikną państwo błędów i ewentualnego uszkodzenia urządzenia na skutek nieprawidłowego użytkowania. Prosimy zachować instrukcję. Tekst polski zaczyna się na stronie 19. La versión española comienza en la página 16. NL B Voor u inschakelt … DK Før du tænder … Tillykke med dit nye MONACOR produkt. Læs sikkerhedsanvisningerne nøje før ibrugtagning, for at beskytte Dem og enheden mod skader, der skyldes forkert brug. Gem manualen til senere brug. Wij wensen u veel plezier met uw nieuwe apparaat van MONACOR. Lees de veiligheidsvoorschriften grondig door, alvorens het apparaat in gebruik te nemen. Zo behoedt u zichzelf en het apparaat voor eventuele schade door ondeskundig gebruik. Bewaar de handleiding voor latere raadpleging. Sikkerhedsanvisningerne findes på side 22. De veiligheidsvoorschriften vindt u op pagina 22. S Innan du slår på enheten … Vi önskar dig mycket glädje med din nya MONACOR produkt. Läs igenom säkerhetsföreskrifterna innan enheten tas i bruk för att undvika skador till följd av felaktig hantering. Behåll instruktionerna för framtida bruk. Säkerhetsföreskrifterna återfinns på sidan 23. FIN Ennen kytkemistä … Toivomme Sinulle paljon miellyttäviä hetkiä uuden MONACOR laitteen kanssa. Ennen laitteen käyttöä pyydämme Sinua huolellisesti tutustumaan turvallisuusohjeisiin. Näin vältyt vahingoilta, joita virheellinen laitteen käyttö saattaa aiheuttaa. Ole hyvä ja säilytä käyttöohjeet myöhempää tarvetta varten. Turvallisuusohjeet löytyvät sivulta 23. 3 D A CH Auf Seite 2 finden Sie alle beschriebenen Bedienelemente und Anschlüsse. 1 Übersicht der Bedienelemente und Anschlüsse Beachten Sie auch unbedingt die folgenden Punkte: G Verwenden Sie die Geräte nur im Innenbereich und schützen Sie sie vor Tropf- und Spritzwasser, hoher Luftfeuchtigkeit und Hitze (zulässiger Einsatztemperaturbereich 0 – 40 °C). G Nehmen Sie den Monitor nicht in Betrieb bzw. ziehen Sie sofort das Netzgerät aus der Steckdose, 1. wenn sichtbare Schäden an den Geräten vorhanden sind, 2. wenn nach einem Sturz oder Ähnlichem der Verdacht auf einen Defekt besteht, 3. wenn Funktionsstörungen auftreten. Geben Sie die Geräte in jedem Fall zur Reparatur in eine Fachwerkstatt. G Verwenden Sie für die Reinigung nur ein trockenes, weiches Tuch, niemals Wasser oder Chemikalien. G Werden die Geräte zweckentfremdet, nicht richtig angeschlossen, falsch bedient oder nicht fachgerecht repariert, kann keine Haftung für daraus resultierende Sach- oder Personenschäden und keine Garantie für die Geräte übernommen werden. 1.1 Monitor (Abb. 1) 1 IR-Sensor für die Fernbedienungssignale 2 Taste , um den Monitor einzuschalten oder in den Stand-by-Modus zu schalten 3 Taste MENU zum Aufrufen der Menüpunkte des Bildschirmmenüs 4 Taste V1/ V2 zum Umschalten zwischen den Videoquellen 5 Tasten + und - für Einstellungen im Bildschirmmenü 6 Stromversorgungsbuchse zum Anschluss des beiliegenden Netzgeräts oder zur Verbindung mit dem 12-V-Bordnetz eines Kraftfahrzeugs über das beiliegende Zigarettenanzünderkabel 7 3,5-mm-Klinkenbuchse AV IN zum Anschluss von zwei Videoquellen über das beiliegende Verteilerkabel mit Cinch-Steckern Hinweis: Die Kamera eines Kfz-Rückfahrsystems an den Cinch-Stecker „AV2“ anschließen. Werfen Sie verbrauchte Batterien der Fernbedienung nicht in den Hausmüll, sondern geben Sie sie nur in den Sondermüll (z. B. Sammelbehälter bei Ihrem Fachhändler). Sollen die Geräte endgültig aus dem Betrieb genommen werden, übergeben Sie sie zur umweltgerechten Entsorgung einem örtlichen Recyclingbetrieb. 8 bei Einsatz in einem Kfz-Rückfahrsystem: Eingang BACK zur Verbindung mit der Rückfahrscheinwerfer-Leitung über das beiliegende einadrige Kabel (für eine Umschaltung auf das Kamerabild beim Einlegen des Rückwärtsgangs) 3 1.2 Fernbedienung (Abb. 2) 9 Taste : entspricht Position (2) am Monitor 10 Tastenfeld zum Einstellen der Bildparameter: Tasten Helligkeit Tasten COL Farbsättigung Tasten Kontrast Mit der jeweiligen Pfeiltaste den Wert erhöhen (L) oder reduzieren (M). 11 Taste V1\V2: entspricht Position (4) am Monitor 12 Taste P.P zum Umschalten zwischen verschiedenen Bildeinstellungen 2 R R R R 13 Taste SYS zur Bildspiegelung: Hinweise für den sicheren Gebrauch Die Geräte (Monitor und Steckernetzgerät) entsprechen allen relevanten Richtlinien der EU und sind deshalb mit gekennzeichnet. WARNUNG Das Netzgerät wird mit lebensgefährlich hoher Netzspannung versorgt. Nehmen Sie deshalb niemals selbst Eingriffe am Netzgerät vor. Durch unsachgemäßes Vorgehen besteht die Gefahr eines elektrischen Schlages. 4 Einsatzmöglichkeiten Dieser LCD-Farbmonitor in TFT-Aktivmatrix-Technologie ist universell einsetzbar, z. B. in Video-Überwachungsanlagen. Durch seine Bildspiegelungsfunktion ist er auch speziell für den Einsatz in Kfz-Rückfahrsystemen geeignet. Er verfügt über zwei Videoeingänge und bietet ein scharfes, kontrastreiches Bild im Format 16 : 9 oder 4 : 3. Die Einstellungen können über berührungsempfindliche Tasten auf der Frontseite oder über die beiliegende Infrarot-Fernbedienung durchgeführt werden. Zum Lieferumfang gehören außerdem eine Monitorhalterung, ein Steckernetzgerät sowie die erforderlichen Anschlusskabel. 4 Aufstellung / Montage Über die beiliegende Halterung (Abb. 3), bestehend aus Sockel und Gelenkhalter, kann der Monitor aufgestellt oder an eine Wand montiert werden: 1) Die Montageschraube (b) am Halter lösen, so dass die kleine Metallplatte (c) in die Führungsschiene (a) auf der Monitorrückseite geschoben werden kann. Die Metallplatte so weit wie gewünscht in die Führungsschiene schieben und durch Festziehen der Montageschraube den Halter an der Führungsschiene festklemmen. 2) Den Sockel über seine gefederte Kreuzschlitzschraube (d) an den Halter schrauben. Die Schraube so fest anziehen, dass Sockel und Halter stabil verbunden sind. 3) Die Feststellschraube (e) am Haltergelenk lösen, die gewünschte Monitorneigung einstellen und die Schraube wieder anziehen. 4) Soll der Monitor stehend installiert werden, den Sockel auf eine waagerechte Fläche stellen (Abb. 4.) und ggf. für eine bessere Standfestigkeit mit zwei Schrauben festschrauben. Für eine Wandmontage den Sockel mit zwei Schrauben festschrauben (Abb. 5). ACHTUNG: Bei der Montage im Fahrzeug muss der Sockel an einer stabilen Stelle fest verschraubt werden, damit er sich nicht löst und mit dem Monitor zusammen zu einem gefährlichen Geschoss wird. 5 Anschluss Beim Einsatz im Fahrzeug müssen die Kabel so verlegt werden, dass ihre Isolierung nicht beschädigt werden kann. Den Monitor über das beiliegende Verteilerkabel mit den Videoausgängen der Videoquellen (z. B. Kamera, DVD-Player, etc.) verbinden: Den Klinkenstecker an die Buchse AV IN (7) des Monitors anschließen, den Cinch-Stecker „AV1“ an die 1. Videoquelle und den Cinch-Stecker „AV2“ an die 2. Videoquelle. Wird als Videoquelle die Kamera eines Rückfahrsystems verwendet, diese mit „AV2“ verbinden Kapitel 5.1. Zur Stromversorgung über das 230-V-Netz das beiliegende Netzgerät an die Stromversorgungsbuchse (6) des Monitors anschließen und in eine Netzsteckdose (230 V~/50 Hz) stecken. Beim Betrieb im Kraftfahrzeug die Stromversorgungsbuchse des Monitors über das beiliegende Zigarettenanzünderkabel mit der 12-V-Bordspannungssteckdose (Zigarettenanzünder) verbinden. 5.1 Automatische Umschaltung auf das Kamerabild in Kfz-Rückfahrsystemen Beim Einsatz in einem Kfz-Rückfahrsystem kann der Monitor so angeschlossen werden, dass er automatisch auf das Bild der Kamera (Videoquelle „AV2“) umschaltet, wenn der Rückwärtsgang eingelegt wird. Dazu den Steckverbinder des beiliegenden einadrigen Kabels an den Eingang BACK (8) anschließen und das offene Kabelende mit der +12-V-Leitung für den Rückfahrscheinwerfer verbinden. 6 Fernbedienung Die Fernbedienung wird mit Batterie geliefert. Bei Betätigen der Fernbedienung, diese immer auf den IRSensor (1) des Monitors richten. Sollte sie nicht mehr funktionieren oder die Reichweite nachlassen, muss die Batterie ersetzt werden: Die Lasche des Batteriehalters nach rechts drücken (1. Pfeil in Abb. 6) und den Halter herausziehen (2. Pfeil). Eine 3-V-Knopfzelle vom Typ CR 2025 mit dem Pluspol nach oben in den Halter legen und diesen wieder hineinschieben. D A CH Bei längerem Nichtgebrauch die Batterie sicherheitshalber aus der Fernbedienung nehmen, damit diese bei einem eventuellen Auslaufen der Batterie nicht beschädigt wird. 7 Bedienung 1) Im Stand-by-Modus (Bereitschaft) leuchtet die Taste (2) am Monitor. Zum Einschalten des Monitors auf diese Taste drücken oder auf der Fernbedienung die Taste (9) betätigen. Die Beleuchtung der Taste erlischt und auf dem Bildschirm erscheint das Bild der zuletzt gewählten Videoquelle sowie für einige Sekunden die Einblendung „AV1“ für Videoquelle 1 bzw. „AV2“ für Videoquelle 2. (Erhält der Monitor kein Videosignal von der angewählten Videoquelle, ist der Bildschirm blau und „AV1“ bzw. „AV2“ bleibt permanent eingeblendet.) Mit derselben Taste wird auf Stand-by zurückgeschaltet. Zum kompletten Ausschalten muss der Monitor von der Stromversorgung getrennt werden. Bei längerem Nichtgebrauch auch das Netzgerät bzw. das Zigarettenanzünderkabel aus der Steckdose ziehen. Anderenfalls verbrauchen diese einen geringen Strom, auch wenn sie nicht mit dem Monitor verbunden sind. 2) Zum Umschalten zwischen den Videoquellen am Monitor auf die Taste V1/ V2 (4) drücken oder auf der Fernbedienung die Taste V1\V2 (11) betätigen. Die Kennzeichnung für die gewählte Videoquelle („AV1“ oder „AV2“) wird für einige Sekunden eingeblendet. Ist der Monitor Teil eines Kfz-Rückfahrsystems und entsprechend angeschlossen ( Kapitel 5.1), erfolgt beim Einlegen des Rückwärtsgangs eine automatische Umschaltung auf das Kamerabild. 3) Die Bildparameter Helligkeit, Kontrast und Farbsättigung können mit den Pfeiltasten (10) der Fernbedienung geändert werden: Tasten für die Helligkeit Tasten COL für die Farbsättigung Tasten für den Kontrast Der Wert kann in einer Skala von 0 bis 100 mit der jeweiligen Pfeiltaste erhöht (L) oder reduziert (M) werden (auch über das Menü möglich Bedienschritt 6). Die Skala blendet sich kurz nach dem letzten Tastendruck aus. 5 D A CH Die geänderten Parameter bleiben auch nach dem Ausschalten des Monitors als Bildeinstellung MEMORY gespeichert. Bei Umschaltung auf eine andere Bildeinstellung mit der Taste P.P (12) werden die eigenen Werte jedoch auf die Werkseinstellungen zurückgesetzt ( Bedienschritt 4). Um Einstellungen durchzuführen, die Tasten zügig hintereinander drücken, da sich das Menü kurz nach dem letzten Tastendruck wieder ausblendet. Reihenfolge der Menüpunkte: 1. BRIGHT [HELLIG.*] 2. CONTRAST [KONTR.*] 3. COLOR [FARBSÄT.*] Über die ersten drei Menüpunkte können die Bildparameter Helligkeit, Kontrast und Farbsättigung geändert werden: den jeweiligen Wert mit der Taste + erhöhen oder mit der Taste - reduzieren. 4. ZOOM Mit der Taste + oder - zwischen den Bildformaten „16 : 9“ und „4 : 3“ umschalten. 5. SIGNAL Mit der Taste + oder - zwischen den Videoquellen „AV1“ und „AV2“ umschalten. 6. LANG. [SPRA.*] Mit der Taste + oder - auf die gewünschte Menüsprache umschalten. Verfügbar sind Englisch, Deutsch, Französisch, Spanisch, Portugiesisch, Italienisch, Niederländisch, Russisch und Chinesisch. 4) Mit der Taste P.P (12) auf der Fernbedienung kann zwischen verschiedenen Bildeinstellungen umgeschaltet werden. Beim ersten Drücken der Taste wird die aktuelle Einstellung eingeblendet und mit jedem weiteren Drücken der Taste auf die nächste umgeschaltet: STANDARD SOFT VIVID LIGHT MEMORY Die gewählte Einstellung wird für einige Sekunden eingeblendet. Für die Bildeinstellungen sind folgende Werte für Helligkeit, Farbsättigung und Kontrast festgelegt: Werte COL Bildeinstellung STANDARD SOFT VIVID LIGHT MEMORY 50 50 50 40 50 40 60 70 60 70 70 70 70 70 70 Bei Änderung der Bildparameter – über die Pfeiltasten (10) oder das Menü – wechselt der Monitor auf MEMORY und übernimmt die geänderten Werte unter dieser Einstellung. Die eigenen Werte werden jedoch wieder durch die voreingestellten MEMORYWerte ersetzt, sobald mit der Taste P.P auf eine andere Bildeinstellung umgeschaltet wird. 5) Mit der Taste SYS (13) kann auf Bildspiegelung umgeschaltet werden. Beim ersten Drücken der Taste wird die aktuelle Darstellungsart eingeblendet und mit jedem weiteren Drücken der Taste auf die nächste umgeschaltet: keine Spiegelung R Spiegelung oben / unten R Spiegelung links / rechts R R Drehung 180° 6) Der Monitor verfügt über ein Bildschirmmenü, das aus mehreren Menüpunkten besteht. Mit jedem Drücken der Taste MENU (3) am Monitor wird der nächste Menüpunkt angewählt und, wenn der letzte Menüpunkt erreicht ist, das Menü wieder verlassen. Die Einstellungen eines Menüpunkts können mit den Tasten + und - (5) am Monitor geändert werden. Hinweis: Wird die Taste + oder - gedrückt, wenn kein Menüpunkt aufgerufen ist, erscheint für einige Sekunden eine Skala zum Einstellen der Lautstärke. Diese Funktion ist jedoch nicht verfügbar, da für den Monitor keine Tonwiedergabe vorgesehen ist. 8 Technische Daten Bildschirmdiagonale: . 17,8 cm (7″) Farbsystem: . . . . . . . . PAL/NTSC (autom. Umschaltung) Auflösung: . . . . . . . . . hor. 800 × vert. 480 Pixel Videoeingänge: . . . . . 1 Vss/75 Ω Anschlüsse Video: . . . . . . . . . . . über beiliegendes Adapterkabel (3,5-mm-Klinkenstecker auf 2 × Cinch-Stecker) Stromversorgung: . . Buchse für einen Hohlstecker mit den Maßen 3,5/1,35 mm (∅ außen / innen), Innenkontakt = Pluspol Einsatztemperatur: . . . 0 – 40 °C Stromversorgung: . . . . 12 V /250 mA über beiliegendes Steckernetzgerät oder Kfz-Bordnetz Maße, Gewicht: . . . . . 185 × 120 × 27 mm, 750 g Änderungen vorbehalten. * wenn als Menüsprache Deutsch gewählt ist Diese Bedienungsanleitung ist urheberrechtlich für MONACOR ® INTERNATIONAL GmbH & Co. KG geschützt. Eine Reproduktion für eigene kommerzielle Zwecke – auch auszugsweise – ist untersagt. 6 All operating elements and connections described can be found on page 2. 1 Operating Elements and Connections G The units are suitable for indoor use only. Protect them against dripping water and splash water, high air humidity and heat (admissible ambient temperature range 0 – 40 °C). G Do not operate the monitor or immediately disconnect the power supply unit from the socket 1. if the units are visibly damaged, 2. if a defect might have occurred after a unit was dropped or suffered a similar accident, 3. if malfunctions occur. In any case the units must be repaired by skilled personnel. G For cleaning only use a dry, soft cloth; never use water or chemicals. G No guarantee claims for the units and no liability for any resulting personal damage or material damage will be accepted if the units are used for other purposes than originally intended, if they are not correctly connected or operated, or if they are not repaired in an expert way. 1.1 Monitor (fig. 1) 1 IR sensor for the remote control signals 2 Button to switch on the monitor or to go to standby mode 3 Button MENU to activate the menu items of the OSD menu 4 Button V1/ V2 to switch between the video sources 5 Buttons + and - for settings in the OSD menu 6 Power supply jack to connect the power supply unit provided or the 12 V electrical system of a vehicle via the cigarette lighter cable provided 7 3.5 mm jack AV IN for connection of two video sources via the supplied distribution cable with RCA plugs Note: Connect the camera of a car rear view system to the RCA plug “AV2”. 8 For use in a car rear view system: Input BACK for connection to the cable of the reversing light via the single-core cable provided (to switch to the camera image when putting the car into reverse). GB Used batteries of the remote control must not be placed in the household waste; always take them to a special waste disposal, e. g. collection container at your retailer. If the units are to be put out of operation definitively, take them to a local recycling plant for a disposal which will not be harmful to the environment. 1.2 Remote control (fig. 2) 9 Button : corresponding to item (2) on the monitor 10 Keypad to adjust the image parameters: buttons brightness buttons COL colour intensity buttons contrast Press the corresponding arrow button to increase (L) or decrease (M) the value. 11 Button V1\V2: corresponding to item (4) on the monitor 12 Button P.P to switch over different image adjustments 3 Applications This LCD colour monitor with TFT active matrix technology is suitable for universal applications, e. g. in video surveillance systems. Due to its mirror image mode, it is ideally suited for use in car rear view systems. It features two video inputs and offers a sharp image of high contrast in the format 16 : 9 or 4 : 3. Settings are made via touch-sensitive buttons on the front side or via the IR remote control provided. The monitor is supplied with a support, a plug-in power supply unit and the connection cables required. 13 Button SYS for mirror image mode: 2 R R R R Safety Notes The units (monitor and plug-in power supply unit) correspond to all relevant directives of the EU and are therefore marked with . WARNING The power supply unit uses dangerous mains voltage. Leave servicing to skilled personnel only. Inexpert handling or modification of the unit may result in electric shock. Please observe the following items in any case: 4 Setting Up / Installation For setting up the monitor or for wall mounting, use the support provided (fig. 3), consisting of a base and a hinged bracket: 1) Release the mounting screw (b) on the bracket so that it will be possible to slide the small metal plate (c) into the guide rail (a) on the rear side of the monitor. Slide the metal plate as far as desired into the guide rail and fasten the mounting screw to clamp the bracket to the guide rail. 2) Screw the base to the bracket via its spring-loaded recessed head screw (d). Fasten the screw in such a way that a stable connection between the base and the bracket is ensured. 7 GB 3) Release the locking screw (e) on the hinge, adjust the desired inclination of the monitor and fasten the screw again. 4) To install the monitor in an upright way, put the base on a horizontal surface (fig. 4). If required, fasten it with two screws to obtain a higher stability. For wall mounting, fasten the base with two screws (fig. 5). ATTENTION: For installation in the car, screw down the base at a stable place so that it will not work loose and become a dangerous projectile together with the monitor. 5 Connection For use in the car, lay the cables in such a way that their insulation will not be damaged. Connect the monitor via the distribution cable provided to the video outputs of the video sources (e. g. camera, DVD player, etc.): Connect the 3.5 mm plug to the jack AV IN (7) of the monitor, connect the RCA plug “AV1” to the first video source and the RCA plug “AV2” to the second video source. When using the camera of a rear view system as a video source, connect it to “AV2” chapter 5.1. For power supply via the 230 V mains, connect the power supply unit provided to the power supply jack (6) of the monitor and to a mains socket (230 V~ / 50 Hz). For operation in the car, connect the power supply jack of the monitor to the 12 V socket of the vehicleʼs electrical system (cigarette lighter socket) via the cigarette lighter cable provided. 5.1 Automatic switching to the camera image in car rear view systems For use in a car rear view system, the monitors allows connection in such a way that it will automatically switch to the image of the camera (video source “AV2”) when you put the car into reverse. For this purpose, connect the connector of the single-core cable provided to the input BACK (8) and the open cable end to the +12 V cable for the reversing light. 6 Remote Control The remote control is supplied with a battery. When using the remote control, always direct it towards the IR sensor (1) of the monitor. If it fails to function or if its range decreases, replace the battery: Push the lug of the battery support to the right (arrow 1 in fig. 6) and remove the support (arrow 2). Insert a 3 V button cell of the type CR 2025 (positive pole upwards) into the support and push the support back in. 8 If the remote control is not in use for a longer period of time, remove the battery from the remote control as a precaution so that it will not be damaged in case the battery should leak. 7 Operation 1) In the stand-by mode, the button (2) on the monitor will light up. To switch on the monitor, press this button or press the button (9) on the remote control. The button is no longer illuminated. The monitor will display the image of the last video source selected and the insertion “AV1” for video source 1 or “AV2” for video source 2 will appear for a few seconds. (If the monitor does not receive any video signal from the video source selected, the screen is blue and “AV1” or “AV2” is inserted permanently.) Press the same button to set the monitor to stand-by again. To switch off completely, disconnect the monitor from the power supply. If the monitor is not in use for a longer period of time, also disconnect the power supply unit or the cigarette lighter cable from the socket; they will have a low power consumption, even if they are not connected to the monitor. 2) To switch between the video sources, press the button V1/ V2 (4) on the monitor or the button V1\V2 (11) on the remote control. The identification for the video source selected (“AV1” or “AV2”) will be inserted for a few seconds.. If the monitor is part of a car rear view system and has been connected accordingly ( chapter 5.1), it will automatically switch to the camera image when you put the car into reverse. 3) The image parameters brightness, contrast and colour intensity can be changed with the arrow buttons (10) of the remote control: buttons for brightness buttons COL for colour intensity buttons for contrast Press the corresponding arrow button to increase (L) or decrease (M) the value on a scale from 0 to 100 (also possible via the menu step 6). The scale will disappear shortly after the last button has been pressed. The parameters changed remain memorized as image adjustment MEMORY even after switching off the monitor. When switching over to another image adjustment with the button P.P (12), the individual values are, however, reset to the factory settings ( step 4). 4) Use the button P.P (12) on the remote control to switch over different image adjustments. When the button is pressed for the first time, the present adjustment is inserted. Each time the button is pressed, the unit is switched over to the next adjustment: STANDARD SOFT VIVID LIGHT MEMORY The adjustment selected is inserted for a few seconds. 5. SIGNAL Switch between the video sources “AV1” and “AV2” with the button + or -. 6. LANG. Switch to the desired menu language with the button + or -. The following menu languages are available: English, German, French, Spanish, Portuguese, Italian, Dutch, Russian and Chinese. The following values for brightness, colour intensity and contrast are defined for the image adjustments: Values COL Image adjustment STANDARD SOFT VIVID LIGHT MEMORY 50 50 50 40 50 40 60 70 60 70 70 70 70 70 70 When changing the image parameters – via the arrow buttons (10) or the menu – the monitor will go to MEMORY and accept the values changed under this adjustment. The individual values are, however, reset by the preset MEMORY values as soon as the monitor is switched to another image adjustment with the button P.P. 5) Use the button SYS (13) to switch over to mirror image mode. When the button is pressed for the first time, the present display mode is inserted. Each time the button is pressed, the monitor will be switched to the next display mode: no mirror image R mirror image up / down R mirror image left / right R R rotation 180° 6) The monitor has an on-screen menu which consists of several menu items. Each time the button MENU (3) on the monitor is pressed, the next menu item will be selected and, when the last menu item is reached, the menu will be exited. The adjustments of a menu item can be changed with the buttons + and - (5) on the monitor. Note: If the button + or - is pressed when no menu item is activated, a scale for volume adjustment will appear for a few seconds. However, this function is not available as no audio reproduction is provided for the monitor. 8 GB Specifications Diagonal screen size: . 17.8 cm (7″) Colour system: . . . . . . PAL/NTSC (automatic switching) Resolution: . . . . . . . . . hor. 800 × vert. 480 pixels Video inputs: . . . . . . . 1 Vpp/75 Ω Connections Video: . . . . . . . . . . . via adapter cable provided (3.5 mm plug to 2 × RCA plug) Power supply: . . . . . jack for a hollow plug of the dimensions 3.5/1.35 mm (∅ outside/inside), internal contact = positive pole Ambient temperature: . 0 – 40 °C Power supply: . . . . . . . 12 V /250 mA via power supply unit provided or the vehicleʼs electrical system Dimensions, weight: . . 185 × 120 × 27 mm, 750 g Subject to technical modification. To make adjustments, press the buttons successively without delay as the menu will disappear shortly after the last button has been pressed. Order of the menu items: 1. BRIGHT 2. CONTRAST 3. COLOR The image parameters brightness, contrast and colour intensity can be changed via the first three menu items: increase the corresponding value with the button + or decrease it with the button -. 4. ZOOM Switch between the image sizes “16 : 9” and “4 : 3” with the button + or -. All rights reserved by MONACOR ® INTERNATIONAL GmbH & Co. KG. No part of this instruction manual may be reproduced in any form or by any means for any commercial use. 9 F B CH Vous trouverez page 2 lʼensemble des éléments et branchements. 1 Respectez scrupuleusement les points suivants : G Les appareils ne sont conçus que pour une utilisation en intérieur. Protégez-les de tout type de projections dʼeau, des éclaboussures, dʼune humidité élevée de lʼair et de la chaleur (plage de température de fonctionnement autorisée : 0 – 40 °C). G Ne faites pas fonctionner le moniteur ou débranchez immédiatement le bloc secteur lorsque : 1. des dommages visibles apparaissent sur les appareils, 2. après une chute ou un cas similaire, vous avez un doute sur lʼétat de lʼappareil, 3. des dysfonctionnements apparaissent. Dans tous les cas, les dommages doivent être réparés par un technicien spécialisé. G Pour le nettoyage, utilisez seulement un chiffon sec et doux, en aucun cas, de produits chimiques ou dʼeau. G Nous déclinons toute responsabilité en cas de dommages matériels ou corporels résultants si les appareils sont utilisés dans un but autre que celui pour lequel ils ont été conçus, sʼils ne sont pas correctement branchés ou utilisés ou sʼils ne sont pas réparés par une personne habilitée, en outre, la garantie deviendrait caduque. Eléments et branchements 1.1 Moniteur (schéma 1) 1 Capteur infrarouge pour les signaux de la télécommande 2 Touche pour allumer le moniteur ou commuter en mode veille (stand by) 3 Touche MENU pour appeler les points de menu du menu écran 4 Touche V1/ V2 pour commuter entre les sources vidéo 5 Touches + et - pour les réglages sur le menu écran 6 Prise dʼalimentation pour brancher le bloc secteur livré ou relier au système électrique 12 V dʼun véhicule via le cordon allume-cigare livré 7 Prise jack 3,5 AV IN pour brancher deux sources vidéo via le cordon répartiteur livré avec fiches RCA mâles Remarque : Reliez la caméra dʼun système de recul de véhicule à la prise RCA mâle “AV2”. 8 Si vous utilisez un système de recul : Entrée BACK pour relier au câble du projecteur de recul via le câble 1 conducteur livré (pour une commutation sur lʼimage de la caméra en passant la marche arrière du véhicule) Ne jetez pas les batteries usagées de la télécommande dans la poubelle domestique, déposez-les dans un container spécifique ou ramenez-les à votre détaillant. Lorsque les appareils sont définitivement retirés du service, vous devez les déposer dans une usine de recyclage adaptée pour contribuer à leur élimination non polluante. 1.2 Télécommande (schéma 2) 9 Touche : correspond à la position (2) sur le moniteur 10 Touches pour régler les paramètres dʼimage Touches : luminosité Touches COL : saturation des couleurs Touches : contraste Avec la touche flèche correspondante, augmentez (L) ou diminuez (M) la valeur. 11 Touche V1\V2 : correspond à la position (4) sur le moniteur 12 Touche P.P pour commuter entre les différents réglages dʼimage 13 Touche SYS pour le mode miroir de lʼimage : R R R R 2 Possibilités dʼutilisation Ce moniteur couleur LCD avec technologie matrice active TFT peut être utilisé de manière universelle, par exemple dans des installations de vidéosurveillance. Grâce à sa fonction miroir, il est également idéal pour des systèmes de recul dans des véhicules. Il dispose de deux entrées vidéo et propose une image précise, riche en contraste, au format 16 : 9 ou 4 : 3. Les réglages peuvent sʼeffectuer via les touches tactiles sur la face avant ou via la télécommande infrarouge livrée. Un support pour le moniteur, un bloc secteur et les cordons de branchement nécessaires sont également livrés. Conseils importants dʼutilisation Les appareils (moniteur et bloc secteur) répondent à toutes les directives importantes de lʼUnion européenne et portent donc le symbole . AVERTISSEMENT Le bloc secteur est alimenté par une tension élevée et dangereuse. Ne touchez jamais lʼintérieur du bloc secteur, vous pourriez subir une décharge électrique. 10 3 4 Positionnement / Montage Via le support livré (schéma 3), composé dʼun socle et dʼun support à rotule, le moniteur peut être posé directement sur une surface ou monté sur un mur : 1) Desserrez la vis de montage (b) sur le support de telle sorte que la petite plaque métallique (c) puisse glisser dans le rail de guidage (a) sur la face arrière du moniteur. Poussez la plaque métallique comme souhaité dans le rail de guidage et en fixant la vis de montage, fixez le support sur le rail. 2) Vissez le socle via la vis cruciforme à ressort (d) sur le support. Serrez la vis pour que le socle et le support soient reliés de manière stable. 3) Desserrez la vis de réglage (e) sur lʼarticulation du support, réglez lʼinclinaison voulue du moniteur et revissez la vis. 4) Si le moniteur doit être posé, mettez le support sur une surface horizontale (schéma 4) et le cas échéant, vissez avec deux vis pour une meilleure stabilité. Pour un montage mural, vissez le socle avec deux vis (schéma 5). ATTENTION : Pour un montage dans un véhicule, il faut visser le socle dans une endroit stable afin quʼil ne se desserre pas et ne se transforme, avec le moniteur, en projectile dangereux. 5 Branchement Pour une utilisation dans un véhicule, positionnez les câbles de telle sorte que leur isolation ne puisse pas être endommagée. Reliez le moniteur via le cordon répartiteur livré aux sorties vidéo des sources vidéo (par exemple caméra, lecteur DVD etc.) : reliez la fiche jack 3,5 à la prise AV IN (7) du moniteur, reliez la fiche RCA mâle “AV1” à la première source vidéo et la fiche RCA mâle “AV2” à la seconde source vidéo. Si la caméra dʼun système de recul est utilisée comme source vidéo, reliez-la à “AV2”, chapitre 5.1. Pour lʼalimentation via le secteur 230 V, reliez le bloc secteur livré à la prise dʼalimentation (6) du moniteur et lʼautre extrémité à une prise secteur 230 V~ / 50 Hz. Pour une utilisation dans un véhicule, reliez la prise alimentation du moniteur via le cordon allume-cigare livré à la prise 12 V du système électrique du véhicule (allume-cigare). 5.1 Commutation automatique sur lʼimage de caméra dans des systèmes de recul de véhicule Pour une utilisation dans des systèmes de recul, le moniteur peut être branché de telle sorte quʼil commute automatiquement sur lʼimage de la caméra (source vidéo “AV2”) lorsque la marche arrière est enclenchée. Pour ce faire, reliez le connecteur du cordon 1 conducteur livré à lʼentrée BACK (8) et lʼextrémité nue au câble +12 V pour le projecteur de recul. 6 Télécommande La télécommande est livrée avec sa batterie. Lorsque vous utilisez la télécommande, dirigez-la toujours vers le capteur infrarouge (1) du moniteur. Si elle ne fonctionne plus ou si la portée diminue, il faut remplacer la batterie : poussez vers la droite la languette (première flèche sur le schéma 6) et retirez le support (seconde flèche). Insérez une batterie 3 V de type CR 2025, pôle plus vers le haut dans le support et repoussez le support dans sa position initiale. F B CH En cas de non utilisation prolongée, par mesure de précaution, retirez la batterie de la télécommande, elle pourrait couler et lʼendommager. 7 Utilisation 1) En mode Stand by (veille), la touche (2) sur le moniteur sʼallume. Pour allumer le moniteur, appuyez sur cette touche ou activez la touche (9) sur la télécommande. La touche nʼest plus éclairée. Le moniteur affiche lʼimage de la dernière source vidéo sélectionnée ainsi que “AV1” pour la source vidéo 1 ou ”AV2” pour la source vidéo 2 pendant quelques secondes. (Si le moniteur ne reçoit pas de signal vidéo de la source vidéo sélectionnée, lʼécran reste bleu et “AV1” ou “AV2” reste affiché en permanence.) Avec la même touche, vous pouvez revenir au mode Stand by. Pour un arrêt complet, il faut débrancher le moniteur de lʼalimentation. En cas de non utilisation prolongée, débranchez également le bloc secteur ou le cordon allume-cigare car ils ont une faible consommation même sʼils ne sont pas reliés au moniteur. 2) Pour commuter entre les sources vidéo, appuyez sur la touche V1/ V2 (4) sur le moniteur ou sur la touche V1\V2 (11) sur la télécommande. Le repérage pour la source vidéo sélectionnée (“AV1” ou “AV2”) sʼaffiche pendant quelques secondes. Si le moniteur est un composant dʼun système de recul de véhicule et branché en conséquence ( chapitre 5.1), lorsque vous passez la marche arrière, il commute automatiquement sur lʼimage de la caméra. 3) Les paramètres dʼimage luminosité, contraste et saturation des couleurs peuvent être réglés avec les touches flèche (10) de la télécommande : touches pour la luminosité touches COL pour la saturation des couleurs touches pour le contraste Vous pouvez augmenter avec la touche flèche (L) ou diminuer avec la touche flèche (M) correspondante, la valeur sur une échelle de 0 à 100 (même via le menu, point 6). Lʼéchelle disparaît de lʼaffichage brièvement après la dernière pression sur une touche. Les paramètres modifiés sont conservés sous forme de réglage dʼimage MEMORY, même après lʼarrêt du moniteur. Lorsque vous commutez sur un 11 F B CH autre réglage dʼimage avec la touche P.P (12), les valeurs propres sont réinitialisées sur les réglages usine ( point 4). Pour effectuer les réglages, appuyez sur les touches les unes après les autres rapidement puisque le menu disparaît brièvement après la dernière activation dʼune touche. 4) Avec la touche P.P (12) sur la télécommande, vous pouvez commuter entre les différents réglages dʼimage. Lors de la première pression sur la touche, le réglage actuel est affiché, à chaque nouvelle pression sur la touche, vous passez au réglage suivant : STANDARD SOFT VIVID LIGHT MEMORY Le réglage sélectionné est affiché pendant quelques secondes. Suite des points du menu : 1. BRIGHT [LUMINO.*] 2. CONTRAST [CONTR.*] 3. COLOR [COULEUR*] Via les trois premiers points du menu, vous pouvez modifier les paramètres luminosité, contraste et saturation des couleurs : augmentez avec la touche + ou diminuez avec la touche - la valeur correspondante. 4. ZOOM Avec la touche + ou -, commutez entre les formats dʼimage “16 : 9” et “4 : 3”. 5. SIGNAL Avec la touche + ou -, commutez entre les sources vidéo “AV1” et “AV2”. 6. LANG. Avec la touche + ou -, commutez sur la langue voulue pour le menu. Sont disponibles : anglais, allemand, français, espagnol, portugais, italien, néerlandais, russe et chinois. Pour les réglages dʼimage, les valeurs suivantes sont définies pour la luminosité, le contraste et la saturation des couleurs : Valeurs COL Réglage image STANDARD SOFT VIVID LIGHT MEMORY 50 50 50 40 50 40 60 70 60 70 70 70 70 70 70 Lorsque vous modifiez les paramètres dʼimage – via les touches flèche (10) ou le menu –, le moniteur commute sur MEMORY et prend les valeurs modifiées sous ce réglage. Les valeurs propres sont remplacées par les valeurs MEMORY préréglées dès que vous commutez sur un autre réglage dʼimage avec la touche P.P. 5) Avec la touche SYS (13), vous pouvez commuter sur une image en mode miroir. Lorsque vous appuyez la première fois sur la touche, le type actuel dʼaffichage est indiqué ; à chaque nouvelle pression vous passez au type suivant : aucune inversion R inversion haut / bas R inversion droite / gauche R R rotation 180° 6) Le moniteur dispose dʼun menu écran composé de plusieurs points. A chaque pression sur la touche MENU (3) sur le moniteur, vous sélectionnez le point suivant et lorsque le dernier point est atteint, vous quittez le menu. Les réglages dʼun point du menu peuvent être modifiés avec les touches + et (5) sur le moniteur. Conseil : si vous appuyez sur la touche + ou - et si aucune point du menu nʻest appelé, une échelle pour régler le volume sʼaffiche pendant quelques secondes. Cette fonction nʼest cependant pas disponible puisquʼaucune lecture audio nʼest prévue pour le moniteur. 8 Caractéristiques techniques Diagonale dʼécran : . . 17,8 cm (7″) Système couleur : . . . PAL/NTSC (commutation automatique) Résolution : . . . . . . . . hor. 800 × vert. 480 pixels Entrées vidéo : . . . . . . 1 Vcc/75 Ω Branchements Vidéo : . . . . . . . . . . . via cordon adaptateur livré (jack 3,5 mâle sur 2 × RCA mâle) Alimentation : . . . . . prise pour fiche de dimensions 3,5/1,35 mm (∅ ext / int), contact intérieur = pôle plus Température fonc. : . . 0 – 40 °C Alimentation : . . . . . . . 12 V /250 mA par bloc secteur livré ou système électrique du véhicule Dimensions, poids : . . 185 × 120 × 27 mm, 750 g Tout droit de modification réservé. * si le français est sélectionné comme langue du menu Notice dʼutilisation protégée par le copyright de MONACOR ® INTERNATIONAL GmbH & Co. KG. Toute reproduction même partielle à des fins commerciales est interdite. 12 A pagina 2 trovate tutti gli elementi di comando e i collegamenti descritti. 1 Si devono osservare assolutamente anche i seguenti punti: G Usare gli apparecchi solo allʼinterno di locali e proteggerli dallʼacqua gocciolante e dagli spruzzi dʼacqua, da alta umidità dellʼaria e dal calore (temperatura dʼimpiego ammessa fra 0 e 40 °C). G Non mettere in funzione il monitor e staccare subito lʼalimentatore dalla la presa di rete se: 1. gli apparecchi presentano dei danni visibili; 2. dopo una caduta o dopo eventi simili sussiste il sospetto di un difetto; 3. gli apparecchi non funzionano correttamente. Per la riparazione rivolgersi sempre ad unʼofficina competente. G Per la pulizia usare solo un panno morbido, asciutto; non impiegare in nessun caso prodotti chimici o acqua. G Nel caso dʼuso improprio, di collegamenti sbagliati, dʼimpiego scorretto o di riparazione non a regola dʼarte degli apparecchi, non si assume nessuna responsabilità per eventuali danni consequenziali a persone o a cose e non si assume nessuna garanzia per gli apparecchi. Elementi di comando e collegamenti 1.1 Monitor (fig. 1) 1 Sensore IR per i segnali del telecomando 2 Pulsante per accendere il monitor o per metterlo nel modo standby 3 Pulsante MENU per chiamare le voci del menù sullo schermo 4 Pulsante V1/ V2 per cambiare fra le sorgenti video 5 Pulsanti + e - per le impostazioni nel menù sullo schermo 6 Presa alimentazione per il collegamento dellʼalimentatore in dotazione oppure per il collegamento con la rete di bordo 12 V di un autoveicolo per mezzo del cavo in dotazione per accendisigari 7 Presa jack 3,5 mm AV IN per il collegamento di due sorgenti video tramite il cavo ripartitore con connettori RCA in dotazione Nota: Collegare la telecamera di un sistema di retromarcia per autoveicoli con il connettore RCA “AV2”. 8 usando un sistema di retromarcia: Ingresso BACK per il collegamento con la linea del faro retromarcia per mezzo del cavo a conduttore unico in dotazione (per passare allʼimmagine della telecamera quando si mette la retromarcia) I Non gettare le batterie scariche o difettose del telecomando nelle immondizie di casa bensì negli appositi contenitori (p. es. presso il vostro rivenditore). Se si desidera eliminare gli apparecchi definitivamente, consegnarli per lo smaltimento ad unʼistituzione locale per il riciclaggio 1.2 Telecomando (fig. 2) 9 Tasto : corrisponde alla posizione (2) sul monitor 10 Tastiera per impostare i parametri dellʼimmagine: Tasti luminosità Tasti COL saturazione cromatica Tasti contrasto Con il relativo tasto freccia aumentare (L) o ridurre (M) il valore. 11 Tasto V1\V2: corrisponde alla posizione (4) sul monitor 12 Tasto P.P per cambiare fra le varie impostazioni dellʼimmagine 13 Tasto SYS per specchiare lʼimmagine: R R R R 2 Avvertenze di sicurezza 3 Possibilità dʼimpiego Questo monitor LCD a colori con matrice attiva TFT è previsto per impieghi universali, p. es. in impianti di sorveglianza video. Grazie alla funzione di specchiare lʼimmagine è adatto in modo particolare anche per lʼimpiego in sistemi di retromarcia di autoveicoli. Dispone di due ingressi video e offre unʼimmagine nitida, contrastata nel formato 16 : 9 o 4 : 3. Le impostazioni sono possibili tramite pulsanti sensibili al tocco sul frontale oppure tramite il telecomando a IR in dotazione. Sono in dotazione inoltre un supporto per il monitor, un alimentatore a spina nonché i cavi di collegamento necessari. 4 Collocamento / montaggio Gli apparecchi (monitor e alimentatore a spina) sono conformi a tutte le direttive rilevanti dellʼUE e pertanto portano la sigla . Il monitor può essere collocato o montato ad una parete per mezzo del supporto in dotazione (fig. 3), composto da zoccolo e supporto snodato: AVVERTIMENTO Lʼalimentatore funziona con pericolosa tensione di rete. Non intervenire mai personalmente al suo interno. La manipolazione scorretta può provocare delle scariche elettriche pericolose. 1) Allentare la vite di montaggio (b) sul supporto in modo che la piccola piastra metallica (c) possa essere spinta nella guida (a) posta sul retro del monitor. Inserire la piastra metallica nella guida secondo necessità e bloccare il supporto nella guida stringendo la vite di montaggio. 13 I 2) Avvitare lo zoccolo al supporto servendosi della sua vite con taglio a croce con molla (d). Stringere la vite in modo che lo zoccolo e il supporto siano saldamento collegati. 3) Allentare la vite di fissaggio (e) sullo snodo del supporto, impostare lʼinclinazione desiderata del monitor e stringere di nuovo la vite. 4) Se il monitor deve essere installato in modo autonomo, sistemare lo zoccolo su un piano orizzontale (fig. 4) e avvitarlo eventualmente con due viti per migliorarne la stabilità. Per il montaggio a parete, avvitare lo zoccolo con due viti (fig. 5). ATTENZIONE: In caso di montaggio in un veicolo, lo zoccolo deve essere avvitato in un punto sicuro in modo che non possa staccarsi diventando, insieme al monitor, un proiettile pericoloso. 5 Collegamento In caso dʼimpiego in un autoveicolo, sistemare i cavi in modo tale che il loro isolamento non possa essere danneggiato. Collegare il monitor con le uscite video delle sorgenti video (p. es. telecamera, lettore DVD ecc.) usando il cavo ripartitore in dotazione: collegare il jack con la presa AV IN (7) del monitor, il connettore RCA “AV1” con la prima sorgente video e il connettore RCA “AV2” con la seconda sorgente video. Se come sorgente video si adopera la telecamera di un sistema di retromarcia, collegare detta telecamera con “AV2” Capitolo 5.1. Per lʼalimentazione tramite la rete 230 V, collegare lʼalimentatore in dotazione con la presa dʼalimentazione (6) del monitor e inserirlo poi in una presa di rete (230 V~ / 50 Hz). Nel caso dʼimpiego in un autoveicolo, collegare la presa dʼalimentazione del monitor con la presa della tensione di bordo 12 V (accendisigari) servendosi del rispettivo cavo in dotazione. 5.1 Cambio automatico allʼimmagine della telecamera nei sistemi di retromarcia Nel caso dʼimpiego in sistemi di retromarcia, il monitor può essere collegato in modo tale che passa automaticamente allʼimmagine della telecamera (sorgente video “AV2”), se si mette la retromarcia. Per fare ciò collegare il connettore del cavo a conduttore unico allʼingresso BACK (8) e collegare il terminale aperto del cavo con la linea +12 V per il faro di retromarcia. 6 Telecomando Il telecomando viene consegnato con la batteria. Azionando il telecomando orientarlo sempre verso il sensore IR (1) del monitor. Se non dovesse più funzionare o se la portata dovesse ridursi, occorre sostituire la batteria: spingere la linguetta del porta batterie verso 14 destra (1. freccia in fig. 6) e togliere il supporto (2. freccia). Posizionare nel porta batteria una batteria bottone del tipo CR 2025 con il polo positivo rivolto verso lʼalto e rimettere il porta batterie nella sua sede. In caso di mancato uso prolungato conviene togliere la batteria dal telecomando per evitare che perdendo possa danneggiare il telecomando. 7 Funzionamento 1) Nel modo stand-by è acceso il pulsante (2) sul monitor. Per accendere il monitor premere questo pulsante oppure azionare il tasto (9) sul telecomando. Lʼilluminazione del pulsante si spegne e sullo schermo appare lʼimmagine della sorgente video scelta per ultima nonché per alcuni secondi lʼindicazione “ AV1” per la sorgente video 1 oppure “AV2” per la sorgente video 2. (Se il monitor non riceve nessun segnale video dalla sorgente selezionata, lo schermo diventa blu e si vede “AV1” o “AV2” in modo permanente.) Con lo stesso pulsante / tasto si ritorna nel modo stand-by. Per lo spegnimento completo occorre separare il monitor dallʼalimentazione. In caso di mancato uso per un certo periodo conviene staccare anche lʼalimentatore o il cavo nellʼaccendisigari dalle relative prese. Altrimenti consumano un poʼ di corrente anche se non sono collegati con il monitor. 2) Per cambiare le sorgenti video, premere sul monitor il pulsante V1/ V2 (4) oppure azionare il tasto V1\V2 (11) sul telecomando. Lʼidentificazione della sorgente selezionata (”AV1” o “ AV2”) si vede per alcuni secondi. Se il monitor è parte di un sistema di retromarcia con relativo collegamento ( Capitolo 5.1), quando si mette la retromarcia avviene il cambio automatico allʼimmagine della telecamera. 3) I parametri dellʼimmagine luminosità, contrasto e saturazione cromatica possono essere modificati con i tasti freccia (10) del telecomando: Tasti per la luminosità Tasti COL per la saturazione Tasti per il contrasto Con il relativo tasto freccia, il valore può essere aumentato (L) o ridotto (M) con una scala da 0 a 100 (possibile anche tramite il menù punto 6). La scala si spegne poco tempo dopo lʼultima pressione del tasto. I parametri modificati rimangono memorizzati anche dopo lo spegnimento del monitor come impostazione dellʼimmagine MEMORY. Passando con il tasto P.P (12) ad unʼimpostazione differente dellʼimmagine, i valori propri vengono resettati alle impostazioni della fabbrica ( punto 4). Ordine delle voci del menù: 1. BRIGHT [LUMINO.*] 2. CONTRAST [CONTR.*] 3. COLOR [SATUR.*] Con le prime tre voci del menù si possono modificare i parametri luminosità, contrasto e saturazione: aumentare il relativo valore con il tasto + e ridurlo con il tasto -. 4. ZOOM Con il tasto + o - cambiare fra i formati dellʼimmagine “16 : 9” e “4 : 3”. 5. SIGNAL Con il tasto + o - cambiare fra le sorgenti video “AV1” e “AV2”. 6. LANG. [LING.*] Con il tasto + o - passare alla lingua richiesta per il menù. Sono disponibili inglese, tedesco, francese, spagnolo, portoghese, italiano, neerlandese, russo e cinese. 4) Con il tasto P.P (12) sul telecomando si può cambiare fra varie impostazioni dellʼimmagine. Con la prima pressione è visualizzata lʼimpostazione attuale, e con ogni ulteriore pressione si passa allʼimpostazione successiva: STANDARD SOFT VIVID LIGHT MEMORY Lʼimpostazione selezionata viene visualizzata per alcuni secondi. Per le impostazioni dellʼimmagine sono fissati i seguenti valori per luminosità, saturazione e contrasto: Valori COL Impostazione dellʼimmagine STANDARD SOFT VIVID LIGHT MEMORY 50 50 50 40 50 40 60 70 60 70 70 70 70 70 70 Modificando i parametri – tramite i tasti freccia (10) o tramite il menù – il monitor passa a MEMORY e assume i valori modificati con questa impostazione. Tuttavia, il valori individuali vengono sostituiti nuovamente dai valori MEMORY preimpostati, se con il tasto P.P si passa ad unʼaltra impostazione. 5) Con il tasto SYS (13) si può passare al rispecchiamento dellʼimmagine. Con la prima pressione del tasto si vede la rappresentazione attuale, e con ogni nuova pressione si passa al modo successivo di rappresentazione: immagine non specchiata R immagine specchiata sopra / sotto R R R immagine rotazione specchiata 180° sinistra / destra 6) Il monitor dispone di un menù sullo schermo con diverse voci. Con ogni pressione del tasto MENU (3) sul monitor si sceglie la voce successiva e, giunto allʼultima voce si esce dal menù. Le impostazioni di una voce del menù possono essere modificate con i tasti + e - (5) sul monitor. N.B.: Se si preme il tasto + o -, quando non è chiamato nessuna voce del menù, per alcuni secondi appare una scala per impostare il volume. Comunque, questa funzione non è disponibile in quanto per il monitor non è previsto lʼaudio. Per effettuare le impostazioni premere i tasti uno dopo lʼaltro senza esitazioni, perché poco dopo lʼultima pressione di un tasto, il menù si spegne. 8 I Dati tecnici Diagonale dello schermo: . . . . . 17,8 cm (7″) Sistema colori: . . . . . PAL/NTSC (cambio automatico) Risoluzione: . . . . . . . orizz. 800 × vert. 480 pixel Ingressi video: . . . . . 1 Vpp/75 Ω Contatti Video: . . . . . . . . . tramite cavo adattatore in dotazione (jack 3,5 mm su 2 × connettore RCA) Alimentazione: . . . presa per spinotto 3,5 / 1,35 mm (∅ esterno/ interno), contatto interno = positivo Temperatura dʼesercizio: . . . . . . . . 0 – 40 °C Alimentazione: . . . . . 12 V /250 mA tramite alimentatore a spina in dotazione o rete di bordo dellʼautoveicolo Dimensioni, peso: . . 185 × 120 × 27 mm, 750 g Con riserva di modifiche tecniche. * se come lingua del menù è stato scelto lʼitaliano La MONACOR ® INTERNATIONAL GmbH & Co. KG si riserva ogni diritto di elaborazione in qualsiasi forma delle presenti istruzioni per lʼuso. La riproduzione – anche parziale – per propri scopi commerciali è vietata. 15 E Todos los elementos de funcionamiento y las conexiones que se describen pueden encontrarse en la página 2. 1 Preste atención a los siguientes puntos bajo cualquier circunstancia: G Los aparatos están adecuados para su utilización sólo en interiores. Protéjalos de goteos y de salpicaduras, de la elevada humedad del aire y del calor (temperatura ambiente admisible: 0 – 40 ºC). G No utilice el monitor o desconecte inmediatamente el alimentador de la toma de corriente si: 1. Los aparatos están visiblemente dañados. 2. Alguno de los aparatos ha sufrido daños después de una caída o accidente similar. 3. No funciona correctamente. Sólo el personal cualificado puede reparar los aparatos bajo cualquier circunstancia. G Utilice sólo un paño suave y seco para la limpieza; no utilice nunca ni agua ni productos químicos. G No podrá reclamarse garantía o responsabilidad alguna por cualquier daño personal o material resultante si los aparatos se utilizan para otros fines diferentes a los originalmente concebidos, si no se conectan correctamente, no se utilizan adecuadamente o no se reparan por expertos. Elementos de Funcionamiento y Conexiones 1.1 Monitor (fig. 1) 1 Sensor IR para las señales del control remoto 2 Botón para conectar el monitor o pasar a modo Standby 3 Botón MENU para activar los objetos de menú del menú OSD 4 Botón V1/V2 para cambiar entre las fuentes de vídeo 5 Botones + y - para ajustes en el menú OSD 6 Toma de alimentación para conectar el alimentador entregado o el sistema eléctrico de 12 V de un vehículo mediante el cable de mechero entregado 7 Jack 3,5 mm AV IN para conectar dos fuentes de vídeo mediante el cable de distribución con conectores RCA entregado Nota: Conecte la cámara de un sistema de visión trasera de un coche al conector RCA “AV2”. 8 Para utilizar en un sistema de visión trasera de coche: Entrada BACK para conectar al cable de luz de marcha atrás mediante el cable de un conductor entregado (para cambiar a la imagen de cámara cuando ponga el coche en marcha atrás). Las baterías agotadas del control remoto no se deben tirar a la basura, tienen que depositarse en el contenedor adecuado, p. ej. el contenedor de recogida de su vendedor. Si va a poner los aparatos fuera de servicio definitivamente, llévelos a la planta de reciclaje más cercana para que su eliminación no sea perjudicial para el medioambiente. 1.2 Control remoto (fig. 2) 9 Botón : Corresponde al objeto (2) del monitor 10 Teclado para ajustar los parámetros de imagen: Botones Brillo Botones COL Intensidad del color Botones Contraste Pulse el botón de flecha correspondiente para aumentar (L) o disminuir (M) el valor. Aplicaciones 13 Botón SYS para el modo de imagen en espejo: R R R Este monitor LCD a color con tecnología de matriz activa TFT está adecuado para aplicaciones universales, p. ej. en sistemas de vigilancia vídeo. Gracias a su modo de imagen en espejo, está adecuado especialmente para utilizarse en sistemas de visión trasera para coches. Contiene dos entradas de vídeo y ofrece una imagen nítida de gran contraste en formato 16 : 9 ó 4 : 3. Los ajustes se hacen mediante botones sensibles al tacto de la parte frontal o mediante el control remoto IR entregado. El monitor se entrega con un soporte, un alimentador y los cables de conexión necesarios. 2 4 11 Botón V1\V2: correspondiente al objeto (4) del monitor 12 Botón P.P para conmutar entre varios ajustes de imagen R 16 3 Notas de Seguridad Colocación / Instalación Los aparatos (monitor y alimentador) cumplen con todas las directivas relevantes de la UE y por lo tanto están marcados con el símbolo . Para colocar el monitor o para el montaje en pared, utilice el soporte entregado (fig. 3), formado por una base y un soporte de bisagra: ADVERTENCIA El alimentador utiliza un voltaje de corriente peligroso. Deje el mantenimiento en manos del personal cualificado. El manejo inexperto o la modificación del aparato pueden provocar una descarga. 1) Afloje el tornillo de montaje (b) del soporte para que se pueda deslizar la pequeña placa metálica (c) por la guía (a) de la parte posterior del monitor. Deslice la placa metálica cuanto quiera por la guía y apriete el tornillo de montaje para sujetar el soporte en la guía. 2) Atornille la base en el soporte mediante su tornillo con resorte de cabeza hueca (d). Fije el tornillo de modo que se cree una conexión estable entre la base y el soporte. 3) Afloje el tornillo de cierre (e) por la bisagra, ajuste la inclinación deseada para el monitor y apriete de nuevo el tornillo. 4) Para instalar el monitor verticalmente, ponga la base en una superficie horizontal (fig. 4). Si es necesario, fíjela con dos tornillos para obtener una mayor estabilidad. Para el montaje en pared, fije la base con dos tornillos (fig. 5). ATENCIÓN: Para la instalación en un coche, atornille la base con fuerza en un lugar estable de modo que no se suelte y se convierta en un proyectil peligro junto con el monitor. 5 Conexión Para el uso en coche, coloque el cableado de modo que su aislamiento no se dañe. Conecte el monitor mediante el cable de distribución entregado a las salidas de vídeo de las fuentes de vídeo (p. ej. cámara, lector DVD, etc.): Conecte el conector jack 3,5 mm a la toma jack 3,5 mm AV IN (7) del monitor, conecte el conector RCA “AV1” a la primera fuente de vídeo y el conector RCA “AV2” a la segunda fuente de vídeo. Cuando utilice la cámara de un sistema de visión trasera como fuente de vídeo, conéctela al conector “AV2” apartado 5.1. Para la alimentación mediante corriente de 230 V, conecte el alimentador entregado a la toma de alimentación (6) del monitor y a un enchufe (230 V~ / 50 Hz). Para el funcionamiento en el coche, conecte la toma de alimentación del monitor a una toma de 12 V del sistema eléctrico (toma de mechero) mediante el cable de mechero entregado. 5.1 Conmutación automática a la imagen de cámara en sistemas de visión trasera de un coche Para utilizarse en un sistema de visión trasera de un coche, el monitor permite la conexión de modo que cambie automáticamente a la imagen de la cámara (fuente de vídeo “AV2”) cuando ponga el coche marcha atrás. Para ello, conecte el conector del cable de un conductor entregado a la entrada BACK (8) y la punta pelada al cable +12 V de la luz de marcha atrás. 6 Control Remoto El control remoto se entrega con una batería. Cuando utilice el control remoto, diríjalo siempre hacia el sensor IR (1) del monitor. Si falla al funcionar o disminuye el rango de funcionamiento, cambie la batería: Apriete el seguro del soporte de la batería hacia la derecha (flecha 1 en la fig. 6) y extraiga el soporte (flecha 2). Inserte una pila botón de 3 V del tipo CR 2025 con el polo positivo hacia arriba en el soporte y empújelo hacia atrás. E Si no va a utilizar el control remoto durante un largo periodo de tiempo, extraiga la batería del control remoto como precaución para que no se dañe en caso de derrame. 7 Funcionamiento 1) En el modo Standby, se iluminará el botón (2) del monitor. Para conectar el monitor, pulse este botón o pulse el botón (9) del control remoto. El botón deja de iluminarse. El monitor visualizará la imagen de la última fuente de vídeo seleccionada y la indicación “AV1” para la fuente de vídeo 1 o “AV2” para la fuente de vídeo 2 aparecerá durante unos segundos (Si el monitor no recibe ninguna señal de vídeo de la fuente de vídeo seleccionada, la pantalla se volverá azul y aparecerá “AV1” o “AV2” permanentemente.) Pulse el mismo botón para ajustar el monitor en Standby de nuevo. Para una desconexión completa, desconecte el monitor de la alimentación. Si el monitor no se va a utilizar durante un largo periodo de tiempo, desconecte también el alimentador o el cable de mechero del enchufe; tienen un bajo consumo incluso si no están conectados al monitor. 2) Para cambiar entre las fuentes de vídeo, pulse el botón V1/ V2 (4) en el monitor o en el botón V1\V2 (11) del control remoto. Se insertará durante unos segundos la identificación para la fuente de vídeo seleccionada (“AV1” o “AV2”). Si el monitor forma parte de un sistema de visión trasera de un coche y se ha conectado como corresponde ( apartado 5.1), cambiará automáticamente a la imagen de cámara cuando ponga su coche marcha atrás. 3) Los parámetros de imagen brillo, contraste y intensidad de color se pueden cambiar con los botones de flecha (10) del control remoto: Botones Para el brillo Botones COL Para la intensidad del color Botones Para el contraste Pulse el botón de flecha correspondiente para aumentar (L) o reducir (M) el valor en una escala de 0 a 100 (también es posible mediante el menú paso 6). La escala desaparecerá unos segundos después de que se haya pulsado el último botón. Los parámetros modificados permanecen memorizados como ajuste de imagen MEMORY incluso 17 E Orden de los objetos del menú: 1. BRIGHT [BRILLO*] 2. CONTRAST [CONTR.*] 3. COLOR Los parámetros de imagen brillo, contraste y intensidad de color se pueden cambiar con los primeros tres objetos del menú: aumente el valor correspondiente con el botón + o redúzcalo con el botón -. 4. ZOOM Cambie el formato de imagen entre “16:9” y “4:3” con el botón + o -. 5. SIGNAL Cambie entre las fuentes de vídeo “AV1” y “AV2” con el botón + o -. 6. LANG. [IDIO.*] Cambie al idioma de menú deseado con el botón + o -. Los idiomas disponibles son: inglés, alemán, francés, español, portugués, italiano, holandés, ruso y chino. después de desconectar el monitor. Al cambiar a otro ajuste de imagen con el botón P.P (12), los valores individuales volverán a los ajustes de fábrica ( paso 4). 4) Utilice el botón P.P (12) del control remoto para cambiar entre varios ajustes de imagen. Cuando se pulsa el botón por primera vez, se indica el ajuste presente. Cada vez que se pulse el botón, el aparato cambia al siguiente ajuste: STANDARD SOFT VIVID LIGHT MEMORY El ajuste seleccionado se indica durante unos segundos. Se definen los valores siguientes para brillo, intensidad de color y contraste para los ajustes de imagen: Valores COL Ajuste de imagen STANDARD SOFT VIVID LIGHT MEMORY 50 50 50 40 50 40 60 70 60 70 70 70 70 70 70 Al cambiar los parámetros de imagen – mediante los botones de flecha (10) o el menú – , el monitor cambiará a MEMORY y aceptará los valores cambiados bajo este ajuste. Los valores individuales, sin embargo, se reinician con los valores de preajuste MEMORY en cuanto el monitor cambia a otro ajuste de imagen con el botón P.P. 5) Utilice el botón SYS (13) para cambiar a modo espejo. Cuando se pulsa el botón por primera vez, se inserta el modo de visualización presente. Cada vez que se pulse el botón, el monitor cambiará al siguiente modo de visualización: sin imagen en espejo R imagen en espejo arriba / abajo R imagen en espejo iz. / der. R R rotación 180° 6) El monitor tiene un menú en pantalla que está formado por varios objetos. Cada vez que se pulsa el botón MENU (3) en el monitor, se selecciona el siguiente objeto del menú, cuando se llega al último objeto del menú, se sale del menú. Los ajustes de un objeto de menú se pueden cambiar con los botones + y - (5) del monitor. Nota: Si se pulsa el botón + o - cuando no hay ningún objeto de menú activado, aparecerá una escala para ajustar el volumen durante unos segundos. Sin embargo, esta función no está disponible ya que no hay reproducción de audio para el monitor. Para hacer ajustes, pulse sucesivamente los botones sin hacer pausas ya que el menú desaparece poco después de que se pulse el último botón. 8 Especificaciones Diagonal del tamaño de pantalla: . . . . . . . . . 17,8 cm (7″) Sistema de color: . . . . PAL/NTSC (cambio automático) Resolución: . . . . . . . . hor. 800 × vert. 480 píxeles Entradas de vídeo: . . . 1 Vpp/75 Ω Conexiones Vídeo: . . . . . . . . . . . Mediante cable adaptador entregado (conector jack 3,5 mm a 2 × conector RCA) Alimentación: . . . . . Toma de bajo voltaje para una toma de dimensiones 3,5 /1,35 mm (∅ exterior / interior), contacto interior = polo positivo Temperatura ambiente: . . . . . . . . . . 0 – 40 °C Alimentación: . . . . . . . 12 V /250 mA mediante alimentador entregado o mediante el sistema eléctrico del vehículo Dimensiones, peso: . . 185 × 120 × 27 mm, 750 g Sujeto a modificaciones técnicas. * Si se selecciona español como idioma de menú Manual de instrucciones protegido por el copyright de MONACOR ® INTERNATIONAL GmbH & Co. KG. Toda reproducción mismo parcial para fines comerciales está prohibida. 18 Wszystkie opisywane elementy operacyjne I połączeniowe pokazano na stronie 2. 1 Należy przestrzegać następujących zasad: G Urządzenie jest przeznaczone tylko do użytku wewnątrz pomieszczeń. Należy chronić je przed działaniem wody, dużej wilgotności powietrza oraz wysokiej temperatury (dopuszczalny zakres 0 – 40 °C). G Nie należy włączać lub natychmiast odłączyć zasilacz urządzenia od sieci w przypadku gdy 1. stwierdzono widoczne uszkodzenie urządzenia, 2. urządzenie mogło ulec uszkodzeniu na skutek upadku lub podobnego zdarzenia, 3. stwierdzono nieprawidłowe działanie. Naprawy urządzenia może dokonywać tylko przeszkolony personel. G Do czyszczenia używać suchej miękkiej ściereczki, nie używać wody ani środków chemicznych. G Producent ani dostawca nie ponoszą odpowiedzialności za wynikłe uszkodzenia sprzętu lub obrażenia użytkownika, w przypadku gdy urządzenie było wykorzystywane w innych celach niż to się przewiduje lub jeśli zostało nieodpowiednio zainstalowane, użytkowane lub poddane nieautoryzowanej naprawie. Elementy operacyjne i połączeniowe 1.1 Monitor (rys. 1) 1 Czujnik IR do zdalnego sterowania 2 Przycisk monitora do włączania i wyłączania (stand-by) 3 Przycisk MENU do aktywacji poleceń z menu ekranowego OSD 4 Przycisk V1/ V2 do przełączania między źródłami wideo 5 Przyciski + oraz - do wprowadzania ustawień w menu ekranowym OSD 6 Gniazdo zasilania do podłączania dołączonego zasilacza lub napięcia zasilającego 12 V z gniazda zapalniczki samochodu, za pomocą dołączonego kabla 7 Gniazdo 3,5 mm AV IN o podłączania dwóch źródeł sygnału wideo, za pomocą dołączonego kabla rozdzielającego z wtykami RCA Uwaga: Do podłączania tylnej kamery w samochodzie służy wtyk RCA “AV2”. 8 Do użytku z tylną kamerą w samochodzie. Wejście BACK do łączenia z kablem światła wstecznego, za pomocą dołączonego kabla z jedną żyłą (do włączania obrazu z kamery razem z biegiem wstecznym). PL Zużyte baterie z pilota sterującego należy wyrzucać do specjalnie oznaczonych pojemników, nie do zwykłych koszy na śmieci. Aby nie zaśmiecać środowiska po całkowitym zakończeniu eksploatacji urządzenia należy je oddać do punktu recyklingu. 1.2 Pilot zdalnego sterowania (rys. 2) 9 Przycisk : równoważny z przyciskiem (2) na monitorze 10 Klawiatura do sterowania parametrami obrazu: przyciski jasność przyciski COL intensywność kolorów przyciski kontrast Wcisnąć odpowiedni przycisk, aby zwiększyć (L) lub zmniejszyć (M) wartość. 11 Przycisk V1\V2: równoważny z przyciskiem (4) na monitorze 12 Przycisk P.P do przełączania między poszczególnymi parametrami obrazu 13 Przycisk SYS do włączania odbicia lustrzanego R obrazu: R R R 2 3 Zastosowanie Ten kolorowy monitor LCD z aktywną matrycą TFT przeznaczony jest uniwersalnych zastosowań np. w systemach monitoringu wideo. Dzięki funkcji lustrzanego odbicia obrazu, jest idealnym rozwiązaniem do systemów wstecznego monitorowania w samochodzie. Wyposażony jest w dwa wejścia wideo i zapewnia ostry obraz o dużym kontraście, zarówno w formacie 16 : 9 jak i 4 : 3. Wprowadzanie ustawień odbywa się za pomocą wrażliwych na dotyk przycisków, znajdujących się na tylnej stronie monitora, lub poprzez dołączony pilot IR. W komplecie z monitorem dostarczany jest uchwyt, zasilacz oraz komplet kabli połączeniowych. Środki bezpieczeństwa Urządzenia (monitor oraz zasilacz) spełniają wszystkie wymagania norm UE dzięki czemu są oznaczone symbolem . UWAGA Zasilacz urządzenia pracuje na wysokim napięciu. Wszelkie naprawy należy zlecić przeszkolonemu personelowi. Nieprawidłowa obsługa lub wprowadzanie modyfikacji może spowodować porażenie prądem elektrycznym. 4 Przygotowanie do pracy / instalacja Do ustawiania monitora lub jego montażu na ścianie służy dołączony uchwyt (rys. 3), składający się z podstawy oraz ramienia z przegubami: 1) Poluzować śrubę blokującą (b) aby można było przesuwać małą metalową płytkę (c) w szynie prowadzącej (a) na tylnej stronie monitora. Przesunąć płytkę tak daleko jak trzeba i zablokować ją śrubą w odpowiednim miejscu w szynie. 19 PL 2) Przykręcić podstawę do uchwytu za pomocą śrub sprężynujących (d). Przykręcić śruby aby zapewnić stabilne połączenie uchwytu i podstawy. 3) Poluzować śrubę blokującą (e) na przegubie, ustawić żądane nachylenie monitora i przykręcić ją ponownie. 4) Monitor można również zainstalować na poziomej powierzchni (rys. 4). Jeżeli trzeba, dokręcić bardziej śruby w celu uzyskania większej stabilności. Przy montażu ściennym, przymocować podstawę za pomocą dwóch śrub (rys. 5). UWAGA: Podczas instalacji w samochodzie, należy przymocować podstawę solidnie w takim miejscu, aby monitor nie stanowił zagrożenia dla kierowcy ani pasażerów. 5 Podłączanie Podczas instalacji w samochodzie, należy tak poprowadzić kable, aby ich izolacja nie była narażona na uszkodzenie. Podłączyć monitor do źródeł wideo (np. kamery, odtwarzacza DVD) za pomocą kabla rozdzielającego: podłączyć wtyk 3,5 mm do gniazda AV IN (7) na monitorze, natomiast wtyk RCA “AV1” do pierwszego, a wtyk RCA “AV2” do drugiego źródła wideo. Tylną kamerę należy podłączać do wtyku “AV2” – rozdz. 5.1. W przypadku zasilania z 230 V sieci, podłączyć zasilacz do gniazda (6) na monitorze oraz do gniazdka sieciowego (230 V~ / 50 Hz). Przy instalacji w samochodzie, połączyć gniazdo zasilania monitora do 12 V gniazda zapalniczki, za pomocą dołączonego kabla z odpowiednim wtykiem. 5.1 Automatyczne przełączanie na obraz z kamery przy cofaniu Przy zastosowaniu w systemie wstecznego monitorowania, monitor można podłączyć w taki sposób, aby przełączał się automatycznie na obraz z kamery (źródło “AV2”) przy włączaniu wstecznego biegu. W tym celu, połączyć złącze jednożyłowego kabla (w komplecie) do wejścia BACK (8), a jego drugi koniec do końcówki kabla zasilającego +12 V wstecznego światła. 6 Pilot zdalnego sterowania Pilot zdalnego sterowania zasilany jest z baterii. Pilot należy kierować w stronę czujnika IR (1) na monitorze. Jeżeli pilot przestał działać lub jego zasięg znacznie się zmniejszył, należy wymienić baterie na nowe: przesunąć blokadę pokrywy w prawo (strzałka 1 na rys. 6) i zdjąć pokrywę (strzałka 2). Włożyć 3 V baterię pastylkową typu CR 2025 dodatnim stykiem do góry i założyć ponownie pokrywę. 20 Jeżeli pilot zdalnego sterowania nie będzie przez dłuższy czas używany, należy wyjąć z niego baterie, aby uniknąć jego uszkodzenia na skutek wylania baterii. 7 Obsługa 1) W trybie stand-by, świeci przycisk (2) na monitorze. Aby włączyć monitor, wcisnąć ten przycisk lub przycisk (9) pilocie. Zgaśnie podświetlenie przycisku . Monitor wyświetli obraz z ostatnio wybranego źródła sygnału, ponadto na kilka sekund pojawi się wskazanie “AV1” dla źródła 1 lub “AV2” dla źródła 2. (Jeżeli monitor pozostaje niebieski obraz oraz wyświetlone jest na stałe “AV1” lub “AV2”, nie odbiera on żadnego sygnału z tego źródła.) Wcisnąć ten sam przycisk aby przełączyć monitor ponownie w tryb stand-by. Aby go całkowicie wyłączyć, odłączyć monitor od zasilania. Jeżeli monitor nie będzie przez dłuższy czas wykorzystywany, należy także odłączyć zasilacz lub kabel od gniada zaliczki samochodowej; pobierają one niewielką ilość prądu nawet przy odłączonym monitorze. 2) Do przełączania między źródłami wideo służy przycisk V1/V2 (4) na monitorze oraz przycisk V1\V2 (11) na pilocie. Wybrane źródło wskazywane jest przez kilka sekund na monitorze (“AV1” lub “AV2”). Jeżeli monitor jest częścią systemu wstecznego monitorowania ( rozdz. 5.1), przełącza się automatycznie na obraz z kamery po włączeniu wstecznego biegu. 3) Do zmiany ustawień jasności, kontrastu lub nasycenia kolorów, służą przyciski ze strzałkami (10) na pilocie: przyciski dla jasności przyciski COL dla intensywności kolorów przyciski dla kontrastu Wcisnąć odpowiedni przycisk aby zwiększyć (L) lub zmniejszyć (M) wartość pomiędzy 0 a 100 (regulacja możliwa jest także poprzez menu ekranowe krok 6). Skala zniknie po kilku sekundach od ostatniego wciśnięcia przycisku. Zmiany parametrów zostają zapamiętane jako ustawienie MEMORY także po wyłączeniu monitora. Przełączanie pomiędzy poszczególnymi gotowymi ustawieniami odbywa się za pomocą przycisku P.P (12), można również powrócić do ustawień fabrycznych ( krok 4). 4) Za pomocą przycisku P.P (12) na pilocie możliwe jest przełączanie między gotowymi ustawieniami parametrów obrazu. Pierwsze wciśnięcie przycisku powoduje wyświetlenie bieżącego ustawienia, każde kolejne – przejście do następnego ustawienia: STANDARD SOFT VIVID LIGHT MEMORY Wybrane ustawienie wyświetlane jest przez kilka sekund. Kolejność poleceń w menu: 1. BRIGHT (jasność) 2. CONTRAST (kontrast) 3. COLOR (kolor) Do zmiany wartości wybranego ustawienia, służą przyciski + oraz -. 4. ZOOM Wcisnąć przycisk + lub - aby przełączyć się na format “16 : 9” lub “4 : 3”. 5. SIGNAL (sygnał) Wcisnąć przycisk + lub - aby przełączyć się między źródłami wideo ”AV1” oraz “AV2”. 6. LANG. (język) Wcisnąć przycisk + lub - aby przełączyć się między poszczególnymi językami. Dostępne są: angielski, niemiecki, francuski, hiszpański, portugalski, włoski, holenderski, rosyjski oraz chiński. Wartości parametrów dla poszczególnych gotowych ustawień są następujące: Wartości COL Gotowe ustawienie STANDARD SOFT VIVID LIGHT MEMORY 50 50 50 40 50 40 60 70 60 70 70 70 70 70 70 Wprowadzone zmiany parametrów – za pomocą przycisków ze strzałkami (10) lub poprzez menu – zostają zapamiętywane jako ustawienie MEMORY. Indywidualne ustawienia zostają jednak utracone po przełączeniu się z ustawienia MEMORY na inne, za pomocą przycisku P.P. 5) Aby włączyć lustrzane odbicie obrazu, wcisnąć przycisk SYS (13). Pierwsze wciśnięcie przycisku powoduje wyświetlenie obrazu zgodnie z bieżącym ustawieniem. Każde kolejne wciśnięcie przycisku powoduje włączenie innego odbicia obrazu: odbicie góra /dół R odbicie lewo / prawo R R bez odbicia R obrót 180° 6) Aby włączyć menu ekranowe OSD, wcisnąć przycisk MENU (3) na monitorze. Menu ekranowe OSD składa się z kilku poleceń. Każde wciśnięcie przycisku MENU, powoduje przejście do kolejnego polecenia. Aby zmienić wybrane ustawienie, wcisnąć przyciski + oraz - (5) na monitorze. Uwaga: Jeżeli przycisk + lub - zostaje wciśnięty bez wcześniejszego wybrania polecenia z menu, wyświetlona zostanie skala głośności. Funkcja ta jest jednak nieaktywna, gdyż monitor nie posiada wejścia audio. Aby dokonać zmiany ustawień, wcisnąć odpowiednią sekwencję przycisków bez dłuższych przerw, gdyż menu zostaje wyłączone kilka sekund po ostatnim wciśnięciu przycisku. 8 PL Specyfikacja Przekątna ekranu: . . . 17,8 cm (7″) System kolorów: . . . . . PAL/NTSC (automatyczne przełączanie) Rozdzielczość: . . . . . . poz. 800 × pion. 480 pikseli Wejścia wideo: . . . . . . 1 Vpp/ 75 Ω Złącza Wideo: . . . . . . . . . . . kabel (wtyk 3,5 mm na 2 × wtyk RCA) Zasilanie: . . . . . . . . gniazdo niskonapięciowe dla wtyku 3,5 /1,35 mm (∅ zewn./ wewn.), wewnętrzny styk = dodatni biegun Zakres temperatur: . . . 0 – 40 °C Zasilanie: . . . . . . . . . . 12 V /250 mA z doł. zasilacza lub systemu elektrycznego samochodu Wymiary, waga: . . . . . 185 × 120 × 27 mm, 750 g Z zastrzeżeniem możliwości zmian. Instrukcje obsługi są chronione prawem copyright for MONACOR ® INTERNATIONAL GmbH & Co. KG. Przetwarzanie całości lub części instrukcji dla osobistych korzyści finansowych jest zabronione. 21 NL B TFT-LCD-kleurmonitor TFT LCD farvemonitor Lees aandachtig de onderstaande veiligheidsvoorschriften, alvorens het apparaat in gebruik te nemen. Voor meer informatie over de bediening van het apparaat raadpleegt u de anderstalige handleidingen. Læs nedenstående sikkerhedsoplysninger opmærksomt igennem før ibrugtagning af enheden. Bortset fra sikkerhedsoplysningerne henvises til den engelske tekst. Veiligheidsvoorschriften Vigtige sikkerhedsoplysninger De apparaten (monitor en netadapter) zijn allemaal in overeenstemming met alle relevante EU-Richtlijnen en dragen daarom het -kenmerk. Enhederne (monitor og strømforsyning) overholder alle relevante EU-direktiver og er derfor mærket med . WAARSCHUWING De netspanning van de netadapter is levensgevaarlijk. Open het apparaat daarom nooit zelf! U loopt het risico van een elektrische schok. ADVARSEL Strømforsyningsenheden benytter livsfarlig netspænding. Overlad servicering til autoriseret personel. Forkert håndtering kan forårsage fare for elektrisk stød. Let eveneens op het volgende: Vær altid opmærksom på følgende: G De apparaten zijn uitsluitend geschikt voor gebruik binnenshuis. Vermijd druip- en spatwater, plaatsen met een hoge vochtigheid en uitzonderlijk warme plaatsen (toegestaan omgevingstemperatuurbereik: 0 – 40 °C). G Monitoren og strømforsyningsenheden er kun beregnet til indendørs brug. Beskyt enhederne mod vanddråber og -stænk, høj luftfugtighed og varme (tilladt omgivelsestemperatur 0 – 40 °C). G G Schakel de monitor niet in en trek onmiddellijk de netadapter uit het stopcontact, wanneer: 1. de monitor of de netadapter zichtbaar beschadigd zijn, 2. er een defect zou kunnen optreden nadat het toestel bijvoorbeeld gevallen is, 3. het toestel slecht functioneert. De toestellen moeten in elk geval hersteld worden door een gekwalificeerd vakman. Tag ikke monitoren i brug og tag straks strømforsyningsenheden ud af stikkontakten i følgende tilfælde: 1. hvis der er synlig skade på monitoren eller strømforsyningsenheden. 2. hvis der kan være opstået skade, efter at enheden er tabt eller lignende. 3. hvis der forekommer fejlfunktion. Enhederne skal altid repareres af autoriseret personel. G G Bij de montage in het voertuig moet de monitorhouder op een stabiele plaats stevig worden vastgeschroefd, zodat hij niet los komt en samen met de monitor een gevaarlijk projectiel gaat vormen. Ved installering i biler, skal foden fastmonteres på et solidt underlag, sådan at den ikke kan løsne sig under kørser. G Ved brug i biler, skal kablerne monteres på en sådan måde at isoleringen ikke ødelægges. G Bij gebruik in een voertuig moeten de kabels zo worden geplaatst, dat de isolatie ervan niet kan worden beschadigd. G Til rengøring må kun benyttes en tør, blød klud; der må under ingen omstændigheder benyttes kemikalier eller vand. G Gebruik voor de reiniging uitsluitend een droge, zachte doek. Gebruik in geen geval chemicaliën of water. G G In geval van ongeoorloofd of verkeerd gebruik, verkeerde aansluiting, foutieve bediening of van herstelling door een niet-gekwalificeerd persoon vervalt de garantie en de verantwoordelijkheid voor hieruit resulterende materiële of lichamelijke schade. Hvis monitoren eller strømforsyningen benyttes til andre formål, end den oprindeligt er beregnet til, hvis den ikke er tilsluttet korrekt, hvis den betjenes forkert, eller hvis den ikke repareres af autoriseret personel, omfattes eventuelle skader ikke af garantien. Geef lege batterijen van de afstandsbediening niet met het gewone huisvuil mee, maar verwijder ze als KGA (bijvoorbeeld bij uw vakhandelaar). Wanneer de apparaten definitief uit bedrijf worden genomen, bezorg ze dan voor verwerking aan een plaatselijk recyclagebedrijf. 22 DK Brugte batterier må aldrig smides ud sammen med den øvrige husholdningsaffald. Aflever dem altid i genbrugsstationens battericontainere. Hvis monitoren og strømforsyningen skal tages ud af drift for bestandigt, skal de bringes til en lokal genbrugsstation for bortskaffelse. S TFT LCD färgmonitor FIN TFT LCD värimonitori Ge akt på säkerhetsinformationen innan enheten tas i bruk. Skulle ytterliggare information behövas kan den återfinnas i Manualen för andra språk. Ole hyvä ja huomioi joka tapauksessa seuraavat turvallisuuteen liittyvät seikat ennen laitteen käyttöä. Laitteen toiminnasta saa lisätietoa tarvittaessa tämän laitteen muunkielisistä käyttöohjeista. Säkerhetsföreskrifter Turvallisuudesta Enheterna (monitor och nätaggregat) motsvarar alla relevanta direktiv inom EU och är därför märkt. Nämä laiteet (monitori ja virtalähde) täyttävät kaikki niihin kohdistuvat EU-direktiivit ja niille on myönnetty hyväksyntä. VARNING Nätaggregatet till enheten använder farlig strömförsörningsspänning. Lämna endast serviceåtaganden till utbildad personal. Ovan hantering av enheten kan resultera I elektrisk chock. VAROITUS Liitettävä virtalähde toimii hengenvaarallisella jännitteellä. Jätä huoltotoimet valtuutetulle huoltoliikkeelle. Epäpätevä huolto ja käsittely saattavat aiheuttaa sähköiskun vaaran. Vänligen notera följande: Huomioi seuraavat seikat: G Enheterna får endast användas inomhus. Skydda dem mot droppande vatten och stänk, hög luftfuktighet och värme (arbetstemperatur 0 – 40 °C). G G Använd inte monitorn eller koppla ur strömförsörjningen om följande sker: 1. om monitorn eller nätaggegatet är skadad 2. om ett fel intäffar efter att enheten har blivit tappad eller liknande 3. om fel uppstår Om något av detta sker, får endast enheten repareras av utbildad personal. Nämä laitteet soveltuvat käytettäväksi ainoastaan sisätiloissa. Suojele laitetta kosteudelta, vedeltä ja kuumuudelta (sallittu ympäröivä lämpötila 0 – 40 Celsius astetta). G För installation i bilen, skruva fast monitorns stöd på en stabil plats så att det inte kan lossna och bli en farlig projektil tillsammans med bildskärmen. Irrota virtalähteen johto pistorasiasta, äläkä käynnistä laitetta, jos: 1. laitteessa tai virtalähteessä on havaittu vaurio, 2. laitteiden putoaminen tai vastaava vahinko on saattanut aiheuttaa vaurion, 3. laitteissa esiintyy toimintahäiriöitä. Kaikissa tapauksissa laite tulee toimittaa valtuutettuun huoltoliikkeeseen. G För användning i bilen, lägg kablar på ett sådant sätt att dess isolering inte skadas. Autoasennuksissa on huolehdittava siitä, että monitorin teline asennetaan stabiiliin paikkaan, ettei se pääse irtoamaan yhdessä monitorin kanssa. G G Använd en torr, mjuk trasa för rengörning; använd aldrig vatten eller kemikalier. Autossa käytettäessä huomioi, että kaapelit on asetettu siten, ettei niiden eristys pääse vahingoittumaan. G G Inga garantianspråk för de enheter och inget ansvar för eventuella personskador kommer att godkännas om enheterna använts på annat sätt eller för andra ändamål än som ursprungligen avsågs. Inte heller om de ansluts, drivs eller reparerats på ett felaktigt sätt. Käytä puhdistamiseen pelkästään kuivaa, pehmeää kangasta. Älä käytä puhdistusaineita taikka vettä puhdistamiseen. G Jos laitetta käytetään muuhun kuin mihin ne ovat alun perin tarkoitettu, jos niitä käytetään väärin taikka niitä ei ole huollettu tai korjattu valtuutetussa huoltoliikkeessä, takuu ei ole voimassa, eikä valmistaja, maahantuoja taikka myyjä ota vastuuta aiheutuneesta vahingosta. G G Förbrukade batterier från fjärrkontrollen får inte slängas bland hushållssopor. Lämna alltid in dem hos uppsamlingsställen (som t. ex. batteriholkar eller hos er återförsäljare). Om enheterna ska skrotas, ta dem då till en lokal återvinningsanläggning för omhändertagande på ett sätt som inte är skadligt för miljön. Käytöstä poistettavat kauko-ohjaimen patterit on vietävä niille tarkoitettuihin keräyspisteisiin, eikä niitä saa hävittää muun sekajätteen mukana. Kun laite poistetaan lopullisesti käytöstä, huolehdi, että laite hävitetään asianmukaisesti jätteenkäsittelylaitoksessa. 23 ® MONACOR INTERNATIONAL GmbH & Co. KG • Zum Falsch 36 • 28307 Bremen • Germany A-1472.99.04.11.2013 Copyright © by MONACOR INTERNATIONAL. All rights reserved.