1
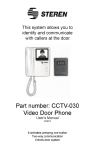
INTERCOMUNICADOR CON MONITOR
A COLOR
CCTV-080
Gracias por la compra de este producto Steren.
Este manual contiene todas las indicaciones necesarias para manejar su
nuevo Intercomunicador con monitor a color.
Por favor, revíselo completamente para estar seguro de cómo utilizar
apropiadamente el producto.
Para apoyo, compras y todo lo nuevo que tiene Steren,
visite nuestro sitio web:
www.steren.com
La información que se muestra en este manual sirve únicamente
como referencia sobre el producto. Debido a actualizaciones pueden
existir diferencias.
Por favor, consulte nuestra página web (www.steren.com) para
obtener la versión más reciente del instructivo.
2
IMPORTANTE
No intente abrir el equipo, podría dañarlo y perder la garantía.
No instale ni almacene el equipo en lugares donde existan goteras,
humedad o salpicaduras de agua, podría causar un mal funcionamiento o
choque eléctrico.
No utilice solventes u otros productos químicos para limpiar el equipo.
Tenga cuidado de no instalar el cableado cerca de fuentes de ruido
electromagnético (motores eléctricos, cercas electrificadas, interruptores de
alimentación, etc.), así como dentro de la misma tubería donde se encuentran
cables de energía eléctrica ya que esto podría distorsionar la imagen.
3
1. CARACTERÍSTICAS
El sistema intercomunicador es ideal para la vigilancia o supervisión del acceso a su
casa u oficina, ya que le permite ver quién toca y evitar ser sorprendido.
Funciona con luz de día o incluso de noche, gracias a que la cámara tiene LEDs
infrarrojos para visión nocturna. El monitor tiene una pantalla a color de 4” y boton
para apertura de cerradura eléctrica. Además de la visualización de imagen incluye
un auricular para tener mayor privacidad durante la comunicación.
La cámara se encuentra montada sobre un chasis metálico de alta resistencia para
usarse en exteriores e intemperie.
• Diseño estilizado.
• Pantalla LCD de 4” a color.
• Control de chapa eléctrica por medio de un botón.
• Apagado automático.
• Cámara con visión nocturna infrarroja.
• Cámara resistente a la lluvia.
4
2. CONTROLES
LEDs de funcionamiento
Intercomunicador
Altavoz
Entrada
auricular
-
+
LED
infrarojo
5
3. CONTENIDO
Monitor de interior
con auricular
Cámara
Soportes
de cámara
Soporte de
monitor
CCTV-080
Intercomunicador
con monitor a color
Manual de instrucciones
V1.0
0715a
Instructivo
Adaptador
de corriente
Cable
de auricular
Arnés de video
6
Tornillos
4. INSTALACIÓN
4.1 Instalación del Monitor
1. Fije el soporte del monitor con los tornillos incluidos.
2. En el monitor conecte el cable proveniente de la cámara de acuerdo a los colores
del diagrama 1.
3. Coloque el monitor en el soporte y presione hacia abajo.
4. Conecte el auricular al monitor usando el cable incluido.
5. Conecte el adaptador de corriente a un contacto eléctrico cercano y el extremo
contrario al intercomunicador.
7
4.2 Instalación de la cámara
La altura óptima para instalar la cámara es entre 180 a 110 cm, desde el centro de la
cámara al piso (esto es sólo como referencia).
1. Empotrar
2. Sobreponer
3. Sobreponer
en esquina
1. Elija cualquiera de los tres soportes y fije la cámara como se muestra en las
imágenes.
2. Conecte la cámara utilizando el cable incluido como se muestra en el diagrama 1
3. Conecte 2 cables (positivo / negativo) a una cerradura eléctrica (no incluida) para
la apertura de puerta.
No coloque la cámara en lugares donde le dé el sol directamente.
8
5. DIAGRAMAS DE CONEXIÓN
5.1 Diagrama de uno a uno
A V
B+
50 m max.
(No incluido)
+
-
G
+13.5V
A V
B+
A V
B+
Si requiere cable adicional al incluido en la cámara, utilice cable UTP CAT 5, máximo 50m
9
5.2 Diagrama de uno a dos
A V
B+
50 m máximo
G
+13.5V
A V
B+
A V
B+
1
1
Diagrama 2
Utilice cable UTP CAT 5 para interconectar ambos monitores, máximo 50 m
10
6. OPERACIÓN
6.1 Llamada del visitante
Cuando un visitante presiona el botón llamada, el timbre del monitor sonará, éste se
encenderá y la imagen del visitante aparecerá en él. Cuando el monitor se encienda,
levante el auricular para hablar con el visitante. Presione
para abrir la puerta.
Cuelgue el auricular para apagar el monitor y terminar la comunicación.
6.2 Vigilancia
Mientras esté en modo de espera, presione el botón
del exterior en el monitor.
para poder ver la imagen
6.3 Intercomunicador (disponible sólo con más de 2
monitores)
En modo de espera, presione el botón
para llamar al otro monitor instalado
Si el tiempo de espera es mayor a 60 segundos, el monitor extensión se
apagará automáticamente.
11
6.4 Selección de idioma
1. Cuando el equipo esté en modo de reposo presione
al menú.
2. Presione
y
para entrar
para elegir el idioma deseado.
3. Para salir busque la opción volver oprimiendo
y confirme con
6.5 Configuración de fecha y hora
1. En modo de reposo presione
y
2. Seleccione la opción fecha con
, para editar el año, mes o día.
3. Presione
o
valores presionando
para entrar al menú.
para ingresar el valor deseado. Desplácese entre los
.
4. Para cambiar la hora repita el paso anterior con la opción hora.
5. Para salir busque la opción volver oprimiendo
y confirme con
6.6 Fotografía Automática
Siempre que un visitante toque el botón de llamada y nadie conteste, la pantalla
del monitor encenderá y automáticamente se tomará una fotografía.
(Aparecerá el ícono
1)
NOTA: El equipo puede almacenar hasta 20 imágenes .Después de llegar a su
máxima capacidad se sobrescribirán.
12
6.7 Reproducción
1. En modo de reposo, presione
y
para visualizar la última imagen.
2. Oprima nuevamente
, para visualizar las siguientes o
para ver las
anteriores.
3. Para salir oprima
o retire el auricular y cuelgue.
6.8 Eliminar fotografía
1. En modo de espera, presione
y
para entrar al menú.
2. Seleccione con
la opción de borrar todo para eliminar las imágenes almacenadas,
confirme con
13
7. SOLUCIÓN DE PROBLEMAS
1. No hay sonido mientras hay una llamada.
• Revise la conexión del cable entre el monitor y la cámara.
• El volumen está en el nivel más bajo.
2. Imagen poco clara.
• Revise el brillo del monitor, puede estar en el nivel más bajo; ajústelo a un nivel más
claro.
3. La puerta no se abre.
• El cable para abrir no está bien conectado o tiene cortocircuito, o la conexión del
cable entre la unidad interior y la exterior está muy lejos o es demasiado delgada,
cambie el cable por uno de mejor calidad.
• Revise que la cerradura eléctrica sea compatible con este equipo.
4. La fecha y la hora son incorrectas.
• Si hay una falla eléctrica o un corte de energía, cuando se reestablezca la hora y la
fecha estarán erróneas, vuelva a configurarlas.
14
8. ESPECIFICACIONES
Monitor
Alimentación: 13,5 V --- 1,5 A
Consumo: 10 W / h
Consumo en espera: 0,5 W / h
Salida (a cámara): 12 V --Resolución: 480 x 272
Salida de video: 1 Vpp
Cámara
Alimentación: 12 V --Consumo: 2 W
Angulo de visión: 53°
Iluminación mínima: 0,1 lux a 30 cm
Convertidor de Voltaje
Alimentación: 100-240 V ~ 50 - 60 Hz 600 mA
Salida: 13,5 V --- 1,5 A
Longitud de cable de la cámara: 4 m
Grado de protección cámara: IP43
15
Producto: Intercomunicador con monitor a color
Modelo: CCTV-080
Marca: Steren
PÓLIZA DE GARANTÍA
Esta póliza garantiza el producto por el término de un año en todas sus partes y mano de obra, contra
cualquier defecto de fabricación y funcionamiento, a partir de la fecha de entrega.
CONDICIONES
1.- Para hacer efectiva la garantía, presente esta póliza y el producto, en donde fue adquirido o en
Electrónica Steren S.A. de C.V.
2.- Electrónica Steren S.A de C.V. se compromete a reparar el producto en caso de estar defectuoso sin
ningún cargo al consumidor. Los gastos de transportación serán cubiertos por el proveedor.
3.- El tiempo de reparación en ningún caso será mayor a 30 días, contados a partir de la recepción del
producto en cualquiera de los sitios donde pueda hacerse efectiva la garantía.
4.- El lugar donde puede adquirir partes, componentes, consumibles y accesorios, así como hacer válida esta
garantía es en cualquiera de las direcciones mencionadas posteriormente.
ESTA PÓLIZA NO SE HARÁ EFECTIVA EN LOS SIGUIENTES CASOS:
1.- Cuando el producto ha sido utilizado en condiciones distintas a las normales.
2.- Cuando el producto no ha sido operado de acuerdo con el instructivo de uso.
3.- Cuando el producto ha sido alterado o reparado por personal no autorizado por Electrónica Steren S.A.
de C.V.
El consumidor podrá solicitar que se haga efectiva la garantía ante la propia casa comercial donde adquirió
el producto. Si la presente garantía se extraviara, el consumidor puede recurrir a su proveedor para que le
expida otra póliza, previa presentación de la nota de compra o factura respectiva.
DATOS DEL DISTRIBUIDOR
Nombre del Distribuidor __________________________
Domicilio ______________________________________
Producto ______________________________________
Marca ________________________________________
Modelo _______________________________________
Número de serie ________________________________
Fecha de entrega ________________________________
En caso de que su producto presente alguna
falla, acuda al centro de distribución más
cercano a su domicilio y en caso de tener alguna
duda o pregunta por favor llame a nuestro Centro
de Atención a Clientes, en donde con gusto le
atenderemos en todo lo relacionado con su
producto Steren.
16
Centro de Atención a Clientes
01 800 500 9000
ELECTRÓNICA STEREN S.A. DE C.V.
Camarones 112, Obrero Popular, 02840,
Del. Azcapotzalco, México, D.F. RFC: EST850628-K51
STEREN PRODUCTO EMPACADO S.A. DE C.V.
Biólogo Maximino Martínez No. 3408 Int. 2, 3 y 4, San
Salvador Xochimanca, Del. Azcapotzalco,
México, D.F. 02870, RFC: SPE941215H43
ELECTRÓNICA STEREN DEL CENTRO, S.A. DE C.V.
Rep. del Salvador 20 A y B, Centro, 06000,
Del. Cuauhtémoc, México. D.F. RFC: ESC9610259N4
ELECTRÓNICA STEREN DE GUADALAJARA, S.A.
López Cotilla No. 51, Centro, 44100, Guadalajara, Jal.
RFC: ESG810511HT6
ELECTRÓNICA STEREN DE MONTERREY, S.A.
Colón 130 Pte., Centro, 64000, Monterrey, N.L. RFC:
ESM830202MF8
ELECTRÓNICA STEREN DE TIJUANA, S.A. de C.V.
Calle 2a, Juárez 7636, Centro, 22000, Tijuana, B.C.N.
RFC: EST980909NU5
COLOR VIDEO DOOR PHONE
CCTV-080
Thank You on purchasing your new Steren product.
This manual includes all the feature operations and troubleshooting necessary
to install and operate your new Steren´s Color video door phone.
Please review this manual thoroughly to ensure proper
installation and operation of this product. For support, shopping,
and everything new at Steren, visit our website:
www.steren.com
The instructions of this manual are for reference about the product. There may
be differences due to updates.
Please check our web site (www.steren.com) to obtain the latest version of the
instruction manual.
2
IMPORTANT
Do not open the device, you could damage it and lose your warranty.
Do not install or store the equipment in places where there are leaks,
humidity or splashing water, it could cause a malfunction or electric
shock.
Do not use solvents or other chemicals to clean the device.
Be careful not to install wiring near electromagnetic noise sources
(electric motors, electric fences, power switches, etc.) as well as
within the same pipe where power lines are located as this may distort
the image.
3
1. HIGHLIGHTS
The door phone system is perfect for surveillance or supervision purposes, at home
or office.
It works with day light or even by night, due the camera includes IR LED for night vision.
The monitor has a 4” color screen and buttons for electric door lock.
The system has a handset for private conversations. The camera is mounted over a
metallic case, perfect for outdoors.
• Stylish design.
• 4” LCD color screen.
• Electric door lock control.
• Automatic power off
• Night vision camera.
• Water resistant camera.
4
2. CONTROLS
Handset
Screen
Operating LEDs
Monitor button
Unlook button
Every household
intercom button
Playback button
Speaker
Brightness
Ring-tone volume
adjust Communication
volume adjust
Time/date button
headphone
input
-
+
Infrared
LED
Product design and specifications are subject to change, without notice.
5
3. CONTENT
Indoor monitor
with headphone
Camera
Camera
support
Monitor stand
CCTV-080
Color video
door phone
Manual de instrucciones
V1.0
0715a
User manual
Power
adapter
Telephone
wire
Video harness
6
Screws
4. INSTALLATION
4.1 Installing the monitor
1. Fix the bracket using the included screws.
2. In the monitor, connect the cable from the camera according to the colors on the
Diagram 1.
3. Place the monitor on the bracket and push it down.
4. Connect the handset to the monitor using the included cable.
5. Connect the power cable to an electrical outlet near the intercom.
If you require additional cable, use UTP CAT 5 cable, maximum 50 m
7
4.2 Installing the Camera
The optimum height of the camera for installation is 180 to 110 cm, from the centre
of the screen of the camera to the ground. (This data provides to consult only)
1. Embed
2. Overlay
3. Overlay
corner
1. Choose any of the three carriers and secure the camera as shown in the pictures.
2. Connect the camera using the included cable as shown in diagram 1
3. Connect two wires (positive / negative) to an electric lock (not included) for opening
door.
Do not place the camera where it in direct sunlight.
8
5. CONNECTION DIAGRAMS
5.1 One to one diagram
A V
B+
50 m max.
(Not included)
+
-
G
+13.5V
A V
B+
A V
B+
9
5.2 One to two diagram
A V B+
s
_H
+13.5V
A V B+
^
Withe
Black
Red
Yellow
G
d
A V B+
s
_H
d
^
Withe
Black
Red
Yellow
Electric Lock
Camera
Use UTP CAT 5 cable to plug both monitors, maximum 50 m
10
6. OPERATION
6.1 Call
When a visitor press the call button, the buzzer will sound, it will turn on and the image
of the visitor will appear in the screen. When the monitor is turned on, lift the handset to
talk to the visitor. Press
to open the door. Hang up to finish the communication.
6.2 Surveillance
While in standby mode, press the button
to see the image on the monitor.
6.3 Intercom (available only with more than 2
monitors)
In standby mode, press the button
to call another monitor installed
If the waiting time is longer than 60 seconds, the extension automatically
turns off.
11
6.4 Language
1. When the system is in stand-by mode press
2. Press
and
to enter the menu.
to choose the desired language.
3. To exit the option look back pressing
and confirm with
6.5 Date and time setting
1. In stand-by mode, press
2. Select the date using
3. Press
pressing
or
and
to enter the menu.
to edit the year, month or day option.
to enter the desired value. Scroll through the values by
.
4. To change the time repeat the previous step with the time option.
5. To exit the option
(The icon appears
look back and confirm by pressing
1)
6.6 Auto Picture
Whenever a visitor touch the call button and no one answers, the monitor screen
automatically turn on and a photograph is taken.
NOTE: The machine can store up to 20 images After arriving at full capacity they
will be overwritten.
12
6.7 Play back
1. In standby mode, press
and
to display the last image.
2. Press again
to display the next or
to see previous.
3. To exit, press
or remove the handset and hang up.
6.8 Delete photo
In standby mode, press
and
to enter the menu.
2. Select with
the option to delete all to delete the stored images, confirm
with
13
7. TROUBLESHOOTING
1. No sound while a call.
• Check the cable connection between the monitor and camera.
• The volume is at the lowest level.
2. Unclear image.
• Check the monitor brightness, it may be at the lowest level; adjust to another level.
3. The door cannot open.
• The cable to open the door is not connected or has short circuit , or the cable connection between indoor and outdoor units is far or too thin, replace the cable with one
of better quality.
• Check that the electric lock is compatible with this device.
4. The date and the time are incorrect.
• If there is a power failure or a power outage, when the power is restored the time and
date will be incorrect, reconfigure.
14
8. SPECIFICATIONS
Monitor
Power: --- 13.5 V 1.5 A
Consumption: 10 W / h
Standby power consumption: 0.5 W / h
Outtput ( to camera): 12 V --Resolution: 480 x 272
Video output: 1 Vpp
Camera
Input: 12 V --Consumption: 2 W
Angle of vision: 53 °
Minimum light: 0.1 lux at 30 cm
Power converter
Input: 100-240 V ~ 50-60 Hz 600 mA
Output: 13.5 V 1.5 --- A
Camera cable length: 4 m
IP: IP43
15
Product:CCTV-080
Part number: Color video door phone
Brand: Steren
WARRANTY
This Steren product is warranted under normal usage against defects in workmanship
and materials to the original purchaser for one year from the date of purchase.
CONDITIONS
1. This warranty card with all the required information, invoice, product box or
package, and product, must be presented when warranty service is required.
2. If the product is in the warranty time, the company will repair it free of charge.
3. The repairing time will not exceed 30 natural days, from the day the claim was
received.
4. Steren sell parts, components, consumables and accessories to customer, as well
as warranty service, at any of the addresses mentioned later.
THIS WARRANTY IS VOID IN THE NEXT CASES:
If the product has been damaged by an accident, acts of God, mishandling, leaky
batteries, failure to follow enclosed instructions, improper repair by unauthorized
personnel, improper safe keeping, among others.
a) The consumer can also claim the warranty service in the purchase establishment.
b) If you lose the warranty card, we can reissue it, if you show the invoice or purchase
ticket.
RETAILER INFORMATION
Name of the retailer
Address
Product
Brand
Part number
Serial number
Date of delivery
In case your product fails
or have questions, please
contact your nearest dealer.
If you are in Mexico, please
call to our Call Center.
01 800 500 9000
16