1
MGE-250 · MGE-400 INSTRUCTION MANUAL
MANUAL DE INSTRUCCIONES
Press TOTAL and RESET (13 s). The display will show: ‘P’. If it does not
show ‘P’, it means that the meter is blocked. Call the TECHNICAL
SERVICE.
Fill an amount of liquid into a calibrated recipient. Maximum of litres: 99.99.
Then press RESET to accept. Note the liquid volume in litres (or in the
corresponding volume to be measured) and decimals with the maximum
resolution it is possible.
The display shows ‘L 0.00’ with the right digit blinking. The TOTAL key
makes the digit move forward.
The RESET key validates it and passes to the next digit. After the fourth
digit, accept it with RESET. The calculated calibration factor will be shown
blinking. Press RESET to accept and end the calibration process or press
TOTAL to cancel and not to save the calibration.
Pulsar TOTAL y RESET (13 segundos). En la pantalla aparecerá: 'P' (si no
aparece ‘P' significa que el medidor está bloqueado y habrá que que
contactar con un instalador).
Llenar una cantidad de líquido en un recipiente calibrado. Máximo de litros:
99,99. A continuación pulsar RESET. Anotar el volumen de líquido en litros
y decimales suministrados.
5.3. Battery replacing operation
5.3. Operación de sustitución de la batería
La pantalla muestra ‘L 0.00’ con el dígito de la derecha intermitente.
TOTAL incrementa el digito.
RESET valida y pasa al siguiente digito. Después del cuarto dígito pulsar
RESET para aceptar. Se mostrará intermitentemente el factor de
calibración calculado. Presionar RESET para aceptar y finalizar con la
calibración. Presionar TOTAL para cancelar y desestimar la calibración
realizada.
Err C: Calculation error · Err P: without pulses
Err C: Error en cálculo · Err P: sin pulsos
Err L: value 0.00
Err L: valor de litros 0,00
When it shows 'Err', it means it has not been calibrated correctly. Try to Cuando aparece 'Err', la calibración no es correcta. Calibrar de nuevo.
calibrate it again.
ATTENTION: The calibration process must be made with
ATENCIÓN: El proceso de calibrado debe realizarse con el
the meter at its maximum flow or the nominal operation
medidor al máximo caudal posible o en el caudal nominal
flow of the installation. Otherwise, the calibration will not
de funcionamiento de la instalación, ya que, de lo
be exact.
contrario, el calibrado que se realiza no es exacto.
The meter works with a button battery of lithium, DL2450 or C2450 model. El medidor funciona con una pila botón de litio modelo DL2450 ó CR2450.
Its estimated duration is approximately 4 years (according its application).
La duración estimada de esta batería es de aproximadamente 4 años (en
función de su uso).
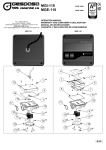
To replace the battery, remove the screws (12), open the cover and also Para proceder a la sustitución de la batería, retire los tornillos (12), abra la
remove the screws (9) that are subjecting the electronic board.
tapa y quite también los tornillos (9) que sujetan la placa electrónica.
With the help of a little screwdriver, push the battery to one side.
Con la ayuda de un destornillador pequeño, empujar la batería existente
hacia el lateral.
Replace the old battery for the new one. The correct battery position is the Sustituir la pila antigua por una de nueva. La posición correcta de la pila es
negative pole (-) is placed looking at the bottom (touching the board).
de tal modo que el polo negativo (-) quede en la parte inferior (tocando a la
placa).
ATTENTION
ATENCIÓN
Do not put the battery on the wrong way. This can damage
No poner la pila al revés. Esto podría ocasionar la avería de
the electronics.
la electrónica
It is important to follow the battery manufacturer
Es importante seguir todas las instrucciones del fabricante
instructions. Do not throw it to the general rubbish; throw
de la batería. No la tire a la basura general, deposítela en
it to a recycling centre or where the batteries are picked
un centro de reciclaje o en los lugares de recogida de pilas
up.
y baterías.
Once the battery is changed, follow the above steps to assemble the meter Una vez cambiada la pila, realizar los pasos a la inversa para volver a
top.
montar la parte superior del medidor.
It is not necessary to make any other operation. The electronics remembers No es necesario realizar ninguna operación, la electrónica recuerda el
the total counter and saves the last calibration factor.
contador total y guarda el factor de calibración anterior.
6. METER ASSEMBLY & DISASSEMBLY
6. MONTAJE Y DESMONTAJE DEL MEDIDOR
TO GO TO THE GEARS (4) or THE MEASURING CHAMBER
PARA ACCEDER A LOS ENGRANAJES (4) o A LA CÁMARA DE
MEDICIÓN
6.1. Desenroscar los tornillos (19) de la tapa inferior y sacarlos. Sacar la
tapa trasera del medidor (1). Actuar con precaución ya que en su interior se
encuentran los engranajes (4) del mecanismo de medición.
6.2. Antes de sacar los engranajes, fijarse donde está montado el
engranaje con los imanes ya que, si los montamos a la inversa, el medidor
no funcionará correctamente.
6.3. Para proceder a su montaje, seguir a la inversa los pasos descritos
teniendo en cuenta la correcta colocación de los tornillos, pasadores y
tórica del cuerpo medidor.
6.1. Unscrew the screws (19) of the bottom cover and remove them.
Remove the back meter cover (1). Be careful because there are the gears
(4) of the measuring device in its inner.
6.2. Before removing the gears, take into account where the magnet gear is
assembled. If you assemble it the other way round, the meter will not work
correctly.
6.3. For its assembly, please follow the above described steps inversely,
taking into account the correct meter body screw, pin, and joint placing.