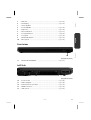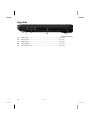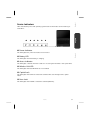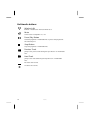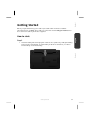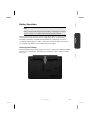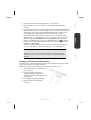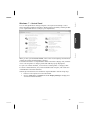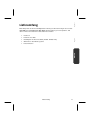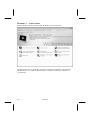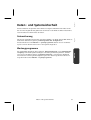
1
Ordenador portátil 39,6 cm/15,6" MEDION® AKOYA® E6222 (MD 98780) cm ,65,6" 39 1 Medion Service Center Visonic S.A. c/ Miguel Faraday, 6 Parque Empresarial „La Carpetania“, N-IV Km. 13 28906 Getafe, Madrid España Hotline: 902196437 Fax: 914604772 Internet www.medion.es/ E-mail Support IIa/01/12 [email protected] MSN 4003 8944 Manual de instucciones Mantenga estas instrucciones a mano junto a su ordenador personal. Guarde bien el manual de instrucciones para poder dárselo al nuevo dueño del ordenador en el caso de una futura venta. Español Indicaciones para estas instrucciones EL objetivo de este Manual de Instrucciones de Uso es hacerle accesible el funcionamiento de su ordenador en un idioma más cercano y comprensible para Ud. En el Menú de Inicio de su ordenador, encontrará igualmente más indicaciones sobre el ordenador portable. Para el servicio de los programas de aplicación y del sistema operativo puede ayudarse de las múltiples teclas de función que le ofrece el programa pulsando una tecla (generalmente F1) o por medio del ratón. Estas ayudas están disponibles para Ud. durante la utilización del sistema operativo de Microsoft ® Windows o de los respectivos programas de aplicación. Puede consultar otras fuentes importantes de información en la sección Software a partir de la página 56. Personal Anote lo siguiente como garantía de ser Ud. el propietario: Número de Serie ...................................... Fecha de Compra ...................................... Lugar de Compra ...................................... El número de serie de su ordenador lo encontrará en la parte posterior del ordenador. Si es necesario, transfiera también el número a un lugar seguro. Deutsch Lea los capítulos “Seguridad de funcionamiento” (a partir de la página 1) y “Puesta en marcha” (a partir de la página 18) antes de poner el ordenador portable en funcionamiento. English Hemos reunido estas instrucciones de manera que Ud. pueda ver en cualquier momento la tabla de contenidos con las informaciones que necesita. Al final de este manual, encontrará un índice. Nuestros Destinatarios Estas instrucciones están dirigidas a los nuevos usuarios, así como a los avanzados. Pese a que se utilice por motivos profesionales, el PC está concebido para su uso en el entorno privado. Las diversas posibilidades de uso están a disposición de toda la familia. La Calidad Hemos elegido los componentes por su alta funcionalidad, sencilles de manejo, seguridad y confianza que proporcionan. Por medio de un concepto equilibrado del hardware y del software, podemos presentarle un PC con visión de futuro que le proporcionará muy buenos momentos mientras lo utiliza en el trabajo o en su tiempo libre. Le agradecemos la confianza depositada en nuestros productos y nos alegramos de darle la bienvenida como cliente. Copyright © 2011 Reservados todos los derechos. Este manual está protegido por la ley de propiedad intelectual. ® El Copyright pertenece a la empresa Medion . Marcas comerciales: ® ® ® MS-DOS y Windows son marcas registradas de Microsoft . ® ® Pentium es una marca registrada de Intel . HDMI, el logotipo de HDMI y el interfaz “High-Definition Multimedia Interface” son marcas registradas de HDMI Licensing LLC. Otras marcas comerciales son propiedad de sus respectivos propietarios. Reservado el derecho de modificación técnica. ii Español Contenido Seguridad de Funcionamiento ....................................................... 1 Recomendaciones de Seguridad ................................................................. 3 Alimentador de Energía ....................................................................... 7 Câbles.................................................................................................. 8 Vistas & Puesta en Marcha ........................................................... 11 English Volumen de envío .................................................................................... 13 Aspecto Físico........................................................................................... 14 Teclas multimedia ................................................................................. 18 Puesta en Marcha ..................................................................................... 19 Paso 1 ................................................................................................ 19 Paso 2 ................................................................................................ 21 Paso 3 ................................................................................................ 21 Descripción breve de la superficie Windows® ......................................... 22 Componentes principales............................................................. 25 Deutsch Alimentación de Energía ........................................................................... 27 Instalación del Acumulador ............................................................... 29 Retirada del Acumulador.................................................................... 30 Recarga del Acumulador .................................................................... 31 Carga de la Batería ............................................................................. 31 Funcionamiento del Acumulador ....................................................... 31 Suspender ......................................................................................... 33 Hibernar ............................................................................................ 33 Display ..................................................................................................... 34 Duplicar estas pantallas ..................................................................... 37 Extender estas pantallas ..................................................................... 37 Mostrar escritorio sólo en 1................................................................ 37 Mostrar escritorio sólo en 2................................................................ 37 Introducción de Datos .............................................................................. 38 Combinación de Teclas Específicas del Ordenador ............................. 38 Ratón táctil ............................................................................................ 39 El disco duro ............................................................................................ 40 La unidad óptica ....................................................................................... 42 Recuperación de Emergencia de un Disco Bloqueado ........................ 44 CDs y DVDs vírgenes ......................................................................... 46 La Tarjeta De Sonido ................................................................................ 47 Funcionamiento en una red ..................................................................... 49 Salida de red Ethernet ........................................................................ 49 Solución de problemas en la red ........................................................ 51 Lector de tarjetas Multimedia ................................................................... 52 La cámara web ......................................................................................... 53 La Conexión Bus Universal en Serie .......................................................... 54 iii Asegurar el ordenador portátil ................................................................. 55 Software .................................................................................................. 56 Windows® 7 - Novedades ................................................................... 56 Barra de tareas mejorada ................................................................... 56 Lista de archivos recientes ................................................................. 56 Escritorio mejorado ........................................................................... 57 Administración de dispositivos mejorada ........................................... 57 Windows® 7 - Ayuda y soporte técnico ............................................... 58 Windows® 7 – Tareas iniciales ............................................................ 59 Windows® 7 - Control de cuentas de usuario ..................................... 60 Windows® 7 – Panel de control .......................................................... 61 Así podrá instalar su software ............................................................ 66 Desinstalación del software ............................................................... 66 Activación de Windows ..................................................................... 67 Activación del producto en el ordenador portátil .............................. 67 Ejecución de la Instalación de BIOS ................................................... 68 Kaspersky Internet Security ................................................................... 69 Consejos y trucos..................................................................................... 71 Asistencia Propria ........................................................................ 73 Protección de datos y del sistema............................................................. 75 Restaurar sistema ..................................................................................... 76 Restaurar el estado en la entrega.............................................................. 79 Preguntas frecuentes ............................................................................... 81 Servicio .................................................................................................... 82 Fallos y Causas .................................................................................. 83 Mantenimiento ..................................................................................... 86 Cuidado de la Pantalla .......................................................................... 87 Re-/Adaptación y Reparación ................................................................... 88 Reciclado y eliminación de desechos ........................................................ 90 Apéndice ...................................................................................... 93 Recomendaciones sobre la conformidad .................................................. 95 Reproducción de este manual .................................................................. 97 Índice....................................................................................................... 98 iv Seguridad de Funcionamiento Tema Español English Capítulo 1 Página Seguridad de Datos ................................................................ 4 Ambiente Previsto ................................................................... 5 Ergonomía ............................................................................... 6 Conexión ................................................................................. 7 Información de conformidad R&TTE ....................................... 9 Indicaciones para el Touchpad ............................................... 9 Funcionamiento del Acumulador ......................................... 10 Deutsch Lugar de Instalación................................................................. 4 2 Contenido Español Recomendaciones de Seguridad Mantenga alejados a los niños de jugar con aparatos eléctricos. Los niños no siempre son conscientes de todos los peligros. Evite que los niños jueguen con las bolsas de plástico. ¡Existe peligro de asfixia! En los dispositivos de CD-ROM-/CDRW-/DVD-se puede instalar el Láser clase 1, siempre que este aparato pueda ser utilizado en una carcasa cerrada de ordenador. No quite la tapa del dispositivo porque se emiten radiaciones de láser invisibles. No mire las radiaciones ni siquiera con instrumentos ópticos. ¡No abra nunca la carcasa del ordenador portátil, de la batería ni del adaptador de red! Esto podría causar un cortocircuito eléctrico e incluso fuego, lo que supone el daño de su ordenador. No introduzca objetos por fisuras ni aperturas del interior del ordenador. Esto podría causar un cortocircuito eléctrico e incluso fuego, lo que supone el daño de su ordenador. Las ranuras y aperturas deben estar expuestas al aire. No cubra estas aperturas para evitar que el ordenador se caliente en exceso. El ordenador no está pensado para el uso industrial. No utilice el ordenador portátil en momentos de tormenta para evitar daños causados por los relámpagos. No ponga ningún objeto sobre el ordenador ni ejerza sobre él presión alguna. Podría peligrar la pantalla. Existe peligro de daño si se rompe el Display del TFT. Embale las piezas rotas con guantes de seguridad y envíelas al servicio técnico para que las revise un especialista. Lávese después las manos con jabón para eliminar todo resto de producto químico. La pantalla no debe ser abierta más de los 120°. Trate de abrirla con cuidado. No toque la pantalla con los dedos ni con objetos angulosos para evitar daños. No sujete el ordenador por la pantalla porque podría romper las bisagras. Recomendaciones de Seguridad 3 Deutsch English Lea este capítulo con atención hasta el final y siga todas las recomendaciones indicadas. Así podrá garantizar un buen funcionamiento de su ordenador personal así como una larga duración de éste. Apague el ordenador inmediatamente, no lo encienda, desenchúfelo o diríjase al Servicio de Atención al Cliente cuando... ... el adaptador de red o el cable de red a él conectado o el enchufe estén dañados. Cambie el cable o el adaptador de red por otro recambio original. No debe repararlos en ningún caso. ... la carcasa del ordenador portátil esté dañada o si entran líquidos en su interior. Haga revisar el ordenador por el Servicio de Atención al Cliente. De no ser así, puede ocurrir que el ordenador no llegue a funcionar correctamente. Puede correr peligro de muerte por cortocircuíto eléctrico o sufrir una radiación de láser dañina. Seguridad de Datos ¡Atención! Haga una copia de seguridad en un soporte de memoria externo después de cada actualización. La reclamación de daños por consecuencias relativas a la pérdida de datos queda excluída. Lugar de Instalación 4 Mantenga alejados del fuego al ordenador y a todos sus instrumentos y evite el polvo, el calor y las radiaciones solares directas. El no seguir estas indicaciones puede suponer molestias o daños al ordenador. No utilice el ordenador al aire libre, porque elementos externos como la lluvia o la nieve pueden dañar el ordenador. Coloque y utilice todos los componentes en un lugar estable, plano y libre de vibraciones para evitar daños en el ordenador. No utilice el ordenador mucho tiempo sobre las rodillas o sobre cualquier otra parte del cuerpo ya que el calentamiento de la parte anterior puede llevar a aumentos de calor desagradables. Los aparatos nuevos pueden desprender durante las primeras horas de utilización un olor típico e inconfundible pero completamente inofensivo que va desapareciendo con el paso del tiempo. Para contrarrestar la formación de olor, le recomendamos que airee regularmente la habitación. Recomendaciones de Seguridad El ordenador puede utilizarse en una temperatura ambiente de entre 5° C y 35° C y con una humedad relativa del aire entre 20% - 80% (no condensada). Cuando está apagado, el ordenador puede almacenarse en temperaturas entre 0° C y 60° C. En caso de tormenta, retire el enchufe y separe especialmente el cable de la antena. Para garantizar seguridad adicional, recomendamos el uso de una protección del exceso de voltaje que protega a su ordenador de los daños causados por subidas de tensión o por rayos de corriente eléctrica. Después de haberlo transportado, espere a que el aparato recupere la temperatura ambiente. Con altas temperaturas o con fluctuaciones de humedad puede ocurrir que la condensación lleve a la formación de humedad y que se produzca un cortocircuito eléctrico. Guarde el embalaje original por si acaso tiene que transportar en alguna ocasión el aparato. Deutsch English Español Ambiente Previsto Recomendaciones de Seguridad 5 Ergonomía Tenga cuidado La pantalla debe estar puesta de tal modo que se eviten los reflejos, los deslumbramientos y los fuertes contrastes entre claros y oscuros. (¡y que la vista por la ventana sea igual de atractiva. Si permanece sentado en una posición fija durante largos periodos de tiempo puede resultar incómodo. Para reducir al mínimo la probabilidad de incomodidad física o de lesiones, es importante que mantenga una postura adecuada. 6 Espalda: Mientras permanezca sentado junto a la superficie de trabajo, asegúrese de que la espalda quede apoyada en el respaldo de la silla y en posición vertical o ligeramente inclinada hacia atrás. Brazos: Los brazos deben quedar en una postura relajada y con movilidad, los codos cerca de los lados del cuerpo y los antebrazos y manos en una postura prácticamente paralela al suelo. Muñecas: Las muñecas deben estar lo más rectas posible mientras utiliza el teclado, el ratón o el trackball: No deben estar dobladas hacia los lados ni más de 10 grados hacia arriba o hacia abajo. Piernas: Los muslos deben estar en posición horizontal o ligeramente inclinados hacia abajo. La parte inferior de las piernas debe encontrarse prácticamente en ángulo recto respecto de los muslos. Los pies deben quedar apoyados horizontalmente sobre el suelo. Si es necesario, utilice un reposapiés, pero asegúrese antes de utilizarlo de que la altura del asiento sea la adecuada. Cabeza: La cabeza debe permanecer en posición vertical o inclinada ligeramente hacia adelante. Evite trabajar con la cabeza o el tronco girados. En general: Cambie frecuentemente de posición y realice pausas periódicamente, para evitar la fatiga. Recomendaciones de Seguridad Español Conexión Respete las siguientes recomendaciones para una correcta conexión de su ordenador: Alimentador de Energía No abra la carcasa de las conexiones de red. Si se abre, existe el peligro de muerte por descarga eléctrica. No contiene ninguna pieza de mantenimiento. El enchufe debe estar cerca del ordenador y poder ser fácilmente accesible. Para interrumpir la alimentación de energía de su ordenador, retire el cable del enchufe. Utilice el ordenador solamente enchufado con corriente de AC 100-240V~/ 50-60 Hz. Si no está seguro del voltaje del enchufe, pregunte al proveedor. Utilice únicamente los cables de conexión a la red y de red adjuntos. Para garantizar seguridad adicional, recomendamos el uso de una protección del exceso de voltaje que proteja a su ordenador de los daños causados por subidas de tensión o por rayos de corriente eléctrica. Si quiere quitar el adaptador de red de la corriente eléctrica, quite primero el enchufe de la toma de corriente y después el enchufe del ordenador. El orden inverso podría dañar el adaptador de la red o el ordenador. Mantenga siempre bien ajustado el enchufe cuando lo retire. Nunca lo conecte a la corriente. Recomendaciones de Seguridad 7 Deutsch English Câbles 8 Ponga los cables de manera que nadie los pise ni tropiece. No coloque objetos en el cable de modo que pueda dañarse. No deje que actúen cerca del aparato fuerzas grandes, por ejemplo por el lateral. Esto podría dar lugar a daños en el aparato. Para la conexión de cables y enchufes, no utilice ninguna fuerza y tenga cuidado de orientar el enchufe hacia el lado correcto. Si retira el cable de conexión del aparato, tire del enchufe, no del cable. Evite los cortocircuitos y la rotura del cable no apretando ni retorciendo el cable. Conecte los dispositivos periféricos, tales como el teclado, el ratón, el monitor, etc. sólo estando desconectado el PC para evitar que se produzcan daños en el ordenador o los dispositivos. Algunos periféricos sí se pueden conectar estando el PC en funcionamiento. Este es el caso de la mayoría de los dispositivos con conector USB. Aténgase siempre a las advertencias de seguridad de las respectivas instrucciones de uso. Sitúese al menos a un metro de distancia de las fuentes de perturbación de alta frecuencia y magnéticas (televisores, altavoces, teléfonos móviles, teléfonos DECT, etc.) para evitar las perturbaciones de las funciones y la pérdida de datos. Tenga cuidado con que solamente sean conectados al ordenador cables blindados (max. 3m) para los uniones esternos. Utilice únicamente los cables adjuntos. Utilice como cables de impresora únicamente cables con doble refuerzo. No intercambie el cable que se le entrega con ningún otro. Utilice exclusivamente los cables previstos para el aparato porque están especialmente examinados en nuestros laboratorios para este uso. Utilice para la conexión para sus periféricos únicamente los cables de conexión que se le entregan junto con su aparato. Asegúrese de que todos los cables de conexión estén conectados con sus correspondientes periféricos para evitar radiaciones. Retire los cables que no necesite. Solamente pueden conectarse al ordenador los aparatos que cumplan la norma EN60950 “Seguridad de equipamiento de la técnica de información” o con la norma EN60065 “Requisitos de seguridad – aparatos electrónicos de audio, video y similares”. Recomendaciones de Seguridad Español Información de conformidad R&TTE Con este PC han sido verificadas las siguientes directivas R&TTE (1999/5/EC): Lan sin cables English Debido al rendimiento de la solución LAN inalámbrica incorporada (>100mW), el uso en Francia sólo está permitido en el interior de edificios. En todos los demás países de la UE, no existen de momento limitaciones. Infórmese en cada uno de los países de todo lo relativo al uso específico en cada uno de ellos atendiendo a la legislación local. Indicaciones para el Touchpad El teclado se mueve con los pulgares y otro dedo y reacciona a la energía dada por la piel. No utilice ningún bolígrafo u objeto porque podría resultar en un defecto del teclado. Deutsch Recomendaciones de Seguridad 9 Funcionamiento del Acumulador El acumulador guarda energía eléctrica en su interior y la utiliza cuando sea necesario. Para alargar la vida y la buena condición del acumulador, así como para garantizar un funcionamiento seguro, han de seguirse las siguientes recomendaciones: 10 No exponga nunca el acumulador a radiaciones solares largas ni directas ni al calor. No tire el acumulador al fuego. Un erróneo seguimiento de estas recomendaciones llevará al daño e incluso en determinadas circunstancias a la explosión del acumulador. No abra nunca el acumulador. No contiene ninguna pieza de mantenimiento. Evite la contaminación y el contacto con materiales conductores de electricidad así como con substancias químicas y con productos de limpieza. Para cargar el acumulador, utilice solamente la pieza original. Asegúrese de que el acumulador está completamente descargado antes de cargarlo de nuevo. Cargue el acumulador hasta que se apague el indicativo. Tenga cuidado a las recomendaciones de “Recarga del acumulador” en la página 31 para mantenerlo en buen estado. Recargue el acumulador solamente cuando esté desconectado. Cambie su acumulador sólo por uno igual o por uno similar que le recomiende el fabricante. Los acumuladores son un desecho especial. Diríjase a su Departamento de Atención al Cliente. Recomendaciones de Seguridad Español Capítulo 2 Tema Página English Vistas & Puesta en Marcha Volumen de envío ................................................................ 13 Aspecto Físico ....................................................................... 14 Ordenador portátil abierto ............................................ 14 Parte Izquierda ............................................................... 15 Parte Derecha ................................................................. 16 Indicativos de Funcionamiento y Estado ......................... 17 Teclas multimedia ............................................................ 18 Puesta en Marcha .................................................................. 19 Así es como se inicia ........................................................ 19 Descripción breve de la superficie Windows® .................... 22 Deutsch Parte Delantera ................................................................ 15 12 Recomendaciones de Seguridad Español Volumen de envío Compruebe que el envío esté completo y avísenos hasta 14 días después de realizada la compra, en el caso de que no esté completo. Indíquenos sin falta el número de serie. Ordenador portátil Acumulador Li-Ion Adaptador de red con cable de conexión (FSP065-ASC) Versión OEM del sistema operativo Instrucciones Deutsch English Junto al PC que ha adquirido, se encuentran los siguientes componentes: Volumen de envío 13 Aspecto Físico Ordenador Portátil Abierto 1 10 2 3 3 4 9 5 8 6 14 7 Aspecto Físico (Illustración similar) - Pantalla .................................................................................( p. 34) 3 - Altavoces 4 - Interruptor encendido/apagado ............................................( p. 27) 5 - Teclado ..................................................................................( p. 38) 6 - Indicativos de estado y de funcionamiento ...........................( p. 17) 7 - Teclas Touchpad .....................................................................( p. 39) 8 - Touchpad ..............................................................................( p. 39) 9 - Teclas multimedia................................................................... (p. 18) 10 - Micrófono ...............................................................................( p. 48) Español - Cámara web ..........................................................................( p. 53) 2 English 1 11 (Illustración similar) 11 - Lector de tarjetas multimedia..................................................( p. 52) Parte Izquierda 12 13 15 14 16 (Illustración similar) 12 - Conexión red .......................................................................( p. 28) 13 - Conexión LAN (RJ-45) ...........................................................( p. 49) 14 - Conexión monitor externo VGA ...........................................( p. 34) 15 - Conexión HDMI .....................................................................( p. 36) 16 - Puerto de USB 3.0 ...............................................................( p. 54) Aspecto Físico 15 Deutsch Parte Delantera Parte Derecha 17 18 19 20 21 (Illustración similar) 17 - Salida de audio...................................................................... ( p. 48) 18 - Conexión micrófono .............................................................. ( p. 48) 19 - Puerto de USB 2.0 ............................................................... ( p. 54) 20 - Lector óptico ......................................................................... ( p. 42) 21 - Cierre Kensington® .................................................................. ( p. 55) 16 Aspecto Físico English El sistema se muestra bajo el cuidado de la corriente LEDs y de las condiciones de funcionamiento del sistema. Los indicativos de funcionamiento del sistema aparecen siempre que se produce una actividad en el ordenador: Español Indicativos de Funcionamiento Indicativo de funcionamiento Deutsch Se ilumina cuando el ordenador se encuentra en estado de funcionamiento. Indicativo de carga de batería Este indicativo se ilumina cuando la batería se carga. El indicativo desaparece cuando se haya cargado la batería por completo. Indicativo de acceso El indicativo LED se ilumina o parpadea cuando se está accediendo al disco duro o al lector óptico del ordenador portátil. Indicativo WLAN Indicativo de intercambio de datos sin cable. Si el indicativo se ilumina de manera duradera significa que la función LAN sin hilos está activada. Capital Lock – Bloqueo de mayúsculas Se reconoce que el bloqueo de mayúsculas ha sido activado cuando se enciende el indicativo LED. En este caso, las letras del teclado serán escritas automáticamente en mayúsculas. Num Lock – Bloqueo numérico El bloqueo numérico ha sido activado (Num Lock), si se enciende este indicativo LED. Aspecto Físico 17 Teclas multimedia Wireless LAN Con esta combinación de teclas, puede activar y desactivar la función WLAN. Enciende y apaga el altavoz. Tecla de pausa/reproducción Inicia la reproducción de archivos multimedia o detiene la reproducción en un punto elegido. Tecla de parada Pone fin a la reproducción de archivos multimedia. Título anterior Salta al título anterior de la reproducción de archivos multimedia. Título siguiente Salta al título siguiente de la reproducción de archivos multimedia. Reduce el volumen. Aumenta el volumen. 18 Aspecto Físico Español Puesta en Marcha Para utilizar su ordenador de forma segura y para garantizar una vida larga, debe haber leído el capítulo “Seguridad y Mantenimiento” al inicio de este manual. El ordenador viene instalado de antemano de forma que no tiene que instalar ningún conductor y puede comenzar de inmediato. English Así es como se Inicia: Paso 1 Antes de poner el ordenador en funcionamiento, inserte la batería en su compartimento. Bloquee sin falta la batería para evitar su caída accidental. Deutsch Puesta en Marcha 19 Conecte el cable de red con el adaptador () y después a un enchufe (). Conecte el enchufe de la pieza de red en la conexión del adaptador de red en la parte derecha del ordenador (). Coloque el interruptor del adaptador de red (opcional) en la posición I para que el ordenador sea alimentado por la corriente y se recargue la batería. (Coloque este interruptor en 0 para interrumpir la alimentación de corriente.). Abra la pantalla y establezcala a continuación en la posición deseada. La pantalla no debe ser abierta más de los 120°. Si se supera este valor, se pueden causar daños a la carcasa o al ordenador. Trate de abrirla con cuidado. (Illustración similar) Recomendación La primera vez que utilice el ordenador, asegúrese de que la batería esté insertada y de que el cable de red esté conectado. Esto es importante para que Windows ®7 pueda informar correctamente del índice de servicios Windows. Encienda el ordenador portátil con la ayuda del botón de encendido y apagado (4). El ordenador portátil se enciende y recorre ahora diferentes fases. Recomendación No debe tener ningún disco cargable (p.ej. el disco de recuperación) en el lector óptico porque el sistema operativo no se carga desde el disco duro. 20 Puesta en Marcha Español A continuación, se cargará el sistema operativo del disco duro. El proceso de carga dura un poco más la primera vez. Tras haber introducido todos los datos necesarios, el sistema está preparado. El sistema operativo está completamente cargado cuando se visualiza una pantalla de bienvenida. Recomendación English La primera instalación puede durar hasta 30 minutos. Durante la primera instalación no desconecte el ordenador portátil de la corriente ni lo apague. Esto podría tener consecuencias negativas en la instalación. Desconecte el ordenador portátil solamente cuando la instalación se haya realizado con éxito y cuando aparezca el escritorio de Windows. Paso 2 El proceso de bienvenida le conducirá, entre otros, por las siguientes pantallas y cuadros de diálogo. Si tiene alguna pregunta, haga clic en . Contrato de Licencia Lea con atención el contrato de licencia. Contiene importantes indicaciones legales sobre la utilización de productos de software. Para ver el texto completo, tiene que bajar el indicador de altura de la derecha de su pantalla hasta abajo. Se considera que acepta el contrato cuando hace clic en la opción voluntaria del campo “Acepto el contrato”. Sólo así se le autoriza a utilizar el producto según las condiciones. Paso 3 Tras completar el proceso de registro, aparecerá en su pantalla el logotipo de ® Windows . Puede suprimirse de modo que cambie el aspecto de su pantalla. La operación básica está garantizada. Puesta en Marcha 21 Deutsch Siga las instrucciones del monitor. Los diferentes cuadros de diálogo explican los pasos que hay que seguir. Recomendación Windows kann in den ersten Tagen nach der Erstinstallation Daten aktualisieren und konfigurieren (z. B. durch neue Updates), was zu Verzögerungen des Herunterfahrens und Startens des Notebooks führen kann. Schalten Sie daher das Notebook nicht vorzeitig aus. Dies könnte sich negativ auf die Installation auswirken. Descripción breve de la superficie Windows ® El botón de inicio Haga clic una vez con el botón izquierdo del ratón sobre este botón para que aparezca el menú de inicio ilustrado. Todos los programas Aquí encontrará las entradas de todos los programas instalados en su PC. También aquí podrá tratar las entradas con el botón derecho del ratón. Barra de tareas Desde la barra de tareas bajo la pantalla puede iniciar programas y cambiar a programas ya iniciados. En Windows® 7, puede fijar programas en la barra de tareas, para que siempre se abra con un clic. Además, puede volver a ordenar los símbolos de la barra de tareas haciendo clic en él simplemente y llevándolos a la posición deseada. Mueva el cursos del ratón sobre el símbolo para que aparezcan las miniaturas de los archivos o de de las ventanas que estén abiertos en este programa. Búsqueda Windows Búsqueda Windows le ayuda a encontrar de forma rápida y sencilla todos los archivos que se encuentren en el ordenador portátil. Con Windows® 7, los resultados de la búsqueda son aún más relevantes y más fáciles de comprender. Lista de programas Los programas más utilizados aparecerán en esta lista. El sistema operativo la reconoce automáticamente. Si hace clic con el botón derecho del ratón en una entrada, podrá determinar usted mismo de qué entrada se trata y retirarla de la lista, si así lo desea. El programa conectado a la entrada no se borrará. Apagar Para apagar el PC, haga clic con la tecla izquierda del ratón en este icono y seleccione la opción Apagar. 22 Puesta en Marcha Mostrar escritorio Español Si desea minimizar todas las ventanas abiertas en la barra de tareas, para disponer de una vista más libre del escritorio, haga clic en este icono. Iconos en el „escritorio“ Los Iconos son enlaces a los programas que se utilizan para el inicio de los programas a los que se refieren. Haciendo doble clic (presionar dos veces seguidas el botón izquierdo del ratón) en el símbolo se iniciará la aplicación. English El escritorio comprende aproximadamente la pantalla completa y es la superficie de archivo de estas entradas o de otros enlaces a los cuales puede acceder de manera rápida. Usuario registrado Aquí se mostrará el usuario registrado. Para modificar la imagen mostrada, haga clic encima. Panel de control Se trata de la central de funcionamiento de su PC. Aquí puede configurar su PC según sus preferencias. Para ello, debe leer en „Ayuda y soporte tecnico“ cómo llevar a cabo las modificaciones. Campo de información Se trata del campo de información con la hora actual. Cuando obtiene algunos resultados, por ejemplo al recibir un correo electrónico o al abrir el gestor de tareas, puede suceder que se muestren en este campo demasiados símbolos de información. Windows® muestra un símbolo de información cuando hay un resultado. Tras un tiempo corto, Windows® pone el símbolo en el fondo para poder ver este campo. Puede acceder al símbolo que está ahora en el fondo haciendo clic en un icono del campo de información. Puesta en Marcha 23 Deutsch 24 Puesta en Marcha Español Capítulo 3 Tema Página English Componentes principales Alimentación de energía ....................................................... 27 Display ................................................................................. 34 Introducción de datos ........................................................... 38 La unidad óptica .................................................................. 42 La tarjeta de sonido .............................................................. 47 Funcionamiento en una red ................................................. 49 Lector de tarjetas Multimedia ................................................ 52 Cámara web .......................................................................... 53 Conexión USB ....................................................................... 54 Asegurar el ordenador portátil ............................................. 55 Software .............................................................................. 56 Consejos y trucos ................................................................. 69 Deutsch Disco duro ........................................................................... 40 26 Puesta en Marcha Español Alimentación de Energía Conector/Desconector Con el interruptor encendido/apagado se enciende/apaga el ordenador. English El anuncio del estatus le informa sobre el estado de funcionamiento. El ordenador se apaga independientemente del sistema cuando el botón está accionado de forma continuada más de 4 segundos. ¡Cuidado! Deutsch No apague el ordenador mientras esté funcionando el disco duro o los lectores de disquetes y sus correspondientes luces estén encendidas. De hacerlo, pueden perderse los datos. Para proteger el disco duro, deberá esperar siempre al menos 5 segundos antes de volverlo a encender. Alimentación de Energía 27 Funcionamiento de la Red Su ordenador viene con un adaptador de red universal para corriente alternativa que se adecua automáticamente dependiendo de la fuente de corriente ofrecida. Se apoyan los siguientes valores: AC 100-240V~/ 50-60 Hz. Observe las Recomendaciones de Seguridad para la alimentación de energía de la página 7. El cable de corriente continua del adaptador de red se conecta en la parte izquierda del ordenador (12). El adaptador dispone de un interruptor de encendido y apagado (opcional). Si el interruptor se encuentra en APAGADO (0), no se utilizará ninguna alimentación de corriente y el ordenador no será alimentado por energía. El adaptador alimenta el ordenador con energía si el interruptor se encuentra en la posición ENCENDIDO (1) y la batería está en proceso de recarga. Los indicativos de alimentación de energía facilitan información sobre el estado de funcionamiento. Así se recarga el acumulador mientras Ud. está trabajando con el enchufe conectado a su ordenador. El adaptador de la red necesita también corriente cuando el ordenador no está conectado con él. Retire por lo tanto el adaptador del enchufe cuando no esté conectado con el ordenador o ponga el interruptor en la posición APAGADO (0). ¡Atención! Utilice solamente la pieza de red y el cable de conexión a la red adjuntos. 28 Alimentación de Energía Español Funcionamiento del Acumulador Recomendación Los acumuladores de la batería acumulan energía eléctrica en sus celdas para transmitirla posteriormente cuando sea necesario. La vida útil y el rendimiento de la batería dependen de su correcto manejo. La batería debería estar completamente descargada antes de cada proceso de carga y debería cargarse de nuevo por completo, de esta manera se optimiza su vida últil y su rendimiento. English Cargue y descargue completamente la nueva batería dos o tres veces seguidas para que llegue a su máxima capacidad de rendimiento! Instalación del Acumulador Introduzca el paquete de la batería como se indica. Bloquee sin falta la batería para evitar su caída accidental. Alimentación de Energía 29 Deutsch Es importante que tenga en cuenta las indicaciones de seguridad que encontrará a partir de la página 10. Retirada del Acumulador Para extraer el bloque de la batería, deslice el pestillo de seguridad hasta la posición de desbloqueo o “unlock”, mantenga pulsado el botón de expulsión y retire el paquete de batería del compartimento. ¡Atención! No separe el acumulador mientras la luz está encendida porque corre el riesgo de perder los datos. ¡Atención! Tenga cuidado con el tipo de almacenamiento de la batería y con la utilización del portátil de manera que los contactos con la batería y con el portátil no estén sucios ni dañados. Esta puede conllevar fallos en las funciones. 30 Alimentación de Energía Español Recarga del Acumulador El acumulador se recarga con la pieza de red. Si ésta está enchufada, el acumulador se carga automáticamente, independientemente de que el ordenador esté o no encendido. Con el ordenador desconectado, serán necesarias varias horas para recargar el acumulador. Si el ordenador está encendido, serán obviamente necesarias más horas. Recomendación English El proceso de carga se interrumpe cuando la temperatura o la tensión del acumulador son demasiado altas. Carga de la Batería Utilice el ordenador haciendo funcionar la batería hasta que ésta se descargue y el ordenador se apague por sí mismo. Deutsch Recomendación Acuérdese de guardar a tiempo los archivos que tenga abiertos para evitar así una posible pérdida de datos. Funcionamiento del Acumulador La duración de funcionamiento varía según los ajustes realizados en las funciones de ahorro de energía. Puede regular estas funciones según sus necesidades en Administración de energía del Panel de control. Además, recuerde que su ordenador requiere un mayor consumo de energía para determinadas aplicaciones, como por ejemplo, para la reproducción de un DVD. Alimentación de Energía 31 Revisión de la carga del Acumulador Para revisar el actual estado de carga del acumulador, mueva el curso al símbolo de “Power” en el teclado. Cuando funciona la batería, se muestra un símbolo de una pila. Encontrará más información al respecto si hace doble clic sobre el símbolo. Recomendación Si ignora el signo de aviso cuando el nivel de energía del acumulador es bajo, se cambia el ordenador al modo Suspender. ¡Atención! Nunca separe el acumulador cuando el ordenador esté encendido ni cuando no esté todavía en el modo “Suspender” porque se pueden perder los datos. 32 Alimentación de Energía Su ordenador ofrece funciones de ahorro de energía automático y manual que puede utilizar para maximizar la duración del uso del acumulador y para reducir los costes totales de utilización. Los modos de ahorro de energía se denominan “modo Suspender” y “modo Hibernar”. Español Administración de Energía (Power Management) Suspender English Si se elige “Suspender”, el contenido de la memoria de su ordenador se mantiene mientras que prácticamente todos los demás componentes de su ordenador se desconectan o mientras que el uso de energía se reduce al mínimo de corriente. Hibernar es una alternativa razonable a apagar por completo el ordenador. En esta condición, se copian todos los datos de la memoria (sistema y gráficos) en el disco duro. En cuanto todos los datos se hayan almacenado de forma segura, el ordenador se desconecta. La siguiente vez que se enciende, los datos vuelven a escribirse en la memoria por medio del BIOS. En unos instantes, el ordenador se encuentra en el mismo estado que la última vez que lo utilizó. Si el apaga el ordenador durante la preparación de un documento (se supone la previa instalación del correspondiente ACPI), el ordenador hace el resto para Ud. de forma automática. Al iniciarlo de nuevo, se encontrará en el mismo punto que lo dejó. Alimentación de Energía 33 Deutsch Hibernar Display Abrir y Cerrar la Pantalla La exposición será bloqueada gracias a un dispositivo especial de bloqueo de exposición de modo que no es necesario un bloqueo adicional. Para abrir, abra la pantalla con ayuda de los dedos pulgar e índica hasta colocarla en la posición deseada. ¡Atención! La pantalla no debe ser abierta más de los 120°. Trate de abrire la pantalla con cuidado. El cierre o apertura de la pantalla pueden estar asignados a diferentes funciones. Resolución de la Pantalla La pantalla incorporada cuenta, dependiendo de la diagonal de la imagen 1366 x 768 puntos de imagen. En caso de que el programa de ayuda de Windows „Panel de control Apariencia y personalización Configuración de pantalla Ajustar resolución de pantalla“ cambie a una presentación con actitudes variables, el indicativo no aparece en la pantalla entera. Al ampliarse, especialmente la escritura, pueden suceder las deformaciones en la representación. Puede por lo tanto trabajar con resoluciones más altas si conecta una pantalla externa con una mayor resolución. Al aumentar la resolución, el fondo de color se reduce porque la memoria de vídeo solamente admite una capacidad determinada. Con el programa de ayuda de Windows „Panel de control Apariencia y personalización Configuración de pantalla Ajustar resolución de pantalla Configuración avanzada“ Ud. ajusta la representación en el modo. 34 Display Este programa le ofrece la posibilidad de ajustar la representación en su pantalla. Esto incluye, por ejemplo, la imagen de fondo, el protector de pantalla, el escritorio activo (Web) así como otras opciones adicionales de su pantalla y de su tarjeta gráfica. El programa puede ser inicializado siguiendo los pasos siguientes: Clic con el botón derecho del ratón en el icono de Windows (escritorio) y clic con el botón izquierdo del ratón en Personalización o En Inicio Panel de control Apariencia y personalización haciendo doble clic con el botón izquierdo del ratón. Deutsch English Español Apariencia y personalización Tiene a su disposición las siguientes posibilidades de configuración: Personalización Pantalla Gadgets de escritorio Barra de tareas y menú Inicio Centro de accesibilidad Opciones de carpeta Fuentes Display 35 Conexión de un monitor externo El ordenador dispone de una conexión VGA (14) para un monitor externo. 1. Coloque el ordenador correctamente. 2. Conecte el cable de señal del monitor externo al conector VGA del ordenador (14). De manera alternativa, puede utilizar la conexión digital HDMI (High Definiton Multimedia Interface) (15) para la transferencia de imágenes y sonido. 3. Conecte el monitor externo con la corriente y enciéndalo. 4. Ahora encienda el ordenador. Una vez cargado el sistema operativo, se pondrá en funcionamiento la pantalla exterior. Aparece entonces la siguiente ventana y se ponen a su disposición diversas posibilidades de representación: 1. Haga clic con el botón derecho del ratón sobre la pantalla. 2. Seleccione en la ventana de selección la opción Resolución de pantalla. En „Varias pantallas“, seleccione una de las siguientes opciones: 36 Duplicar estas pantallas Extender estas pantallas Mostrar escritorio sólo en 1 Mostrar escritorio sólo en 2 Display Español Duplicar estas pantallas Este modo duplica lo mostrado en el ordenador en el monitor externo. Recomendación Extender estas pantallas En este modo, se muestra un escritorio vacío en el segundo monitor (externo). La ventana de la primera pantalla puede desplazada e invertida. English En este modo, ambos aparatos deben tener la misma resolución de pantalla. La resolución de pantalla y la calidad del color del único dispositivo de indicación pueden ser ajustadas individualmente en Inicio Panel de control Apariencia y personalización. Deutsch Mostrar escritorio sólo en 1 El Escritorio se mostrará ahora en el monitor principal. Mostrar escritorio sólo en 2 El Escritorio se mostrará ahora en el monitor segundo (externo). Display 37 Introducción de Datos El Teclado Ciertas teclas le proporcionan las mismas opciones por medio del teclado de Windows en sus ventanas. Algunas funciones son ordenadas con ayuda del teclado típico Fn del ordenador. Combinación de Teclas Específicas del Ordenador Combinación Fn + F1 Descripción Función de ahorro de energía Para ajustar esta tecla de acuerdo con sus necesidades, diríjase a Características del Indicativo en el Ahorro de energía. Fn + F2 WLAN Con esta combinación de teclas, puede activar y desactivar la función WLAN. Fn + F4 Smart Power Con esta combinación de teclas puede elegir entre varias posibilidades: modo de superahorro de energía, modo de ahorro de energía, equilibrado y alta velocidad. Fn + F5 Reduce la claridad de la pantalla. Fn + F6 Aumenta la claridad de la pantalla. Fn + F7 Iluminación de fondo Fn + F8 El indicativo de pantalla se enciende entre LCD, CRT y los indicativos simultáneos. Fn + F9 Enciende y apaga il ráton táctil. Fn + F10 Enciende y apaga el altavoz. Fn + F11 Reduce el volumen. Fn + F12 Aumenta el volumen. Apague la iluminación de fondo para ahorrar energía. Rotación Fn + Sc Lk 38 Con esta combinación de teclas se activa y desactiva la función „Rotación“. En la mayor parte de las aplicaciones se utiliza para moverse por la pantalla sin tener que mover el cursor. Introducción de Datos Español Ratón táctil El indicativo del ratón se dirige en la dirección que le indique su dedo con el movimiento en el teclado. ¡Atención! Bajo el Touchpad se encuentran las teclas izquierda y derecha del ratón, que se utilizan como en un ratón convencional. Puede hacer también los clics con el Touchpad. English No utilice un bolígrafo ni cualquier otro objeto porque producirá un defecto en su Touchpad. Deutsch En la dirección del sistema de Windows®, encontrará en el punto “Ratón” un número de funciones muy útiles que le facilitarán el trabajo diario. Introducción de Datos 39 El disco duro El disco duro es su medio principal de memoria, donde se encuentra la mayor capacidad de almacenamiento y donde el acceso a los datos es más rápido. Junto al PC ha adquirido una versión OEM del sistema operativo Microsoft ® Windows , compatible con todas las prestaciones del PC. Hemos configurado el disco duro de su PC para que pueda trabajar de forma óptima sin necesidad de tener que realizar ninguna instalación. ® El sistema operativo Windows necesita una pequeña parte de la capacidad para administrar el disco duro, por lo que no se dispone de toda la capacidad del disco duro. Esto explica las posibles diferencias entre la indicación BIOS y las indicaciones del sistema operativo. En el disco duro se encuentra el sistema operativo del PC, otras aplicaciones y archivos de seguridad, de forma que no se dispone de la capacidad completa. Recomendación Trate de no apagar nunca el ordenador mientras está en el acceso porque puede tener como consecuencia la pérdida de datos. En la primera partición (C:\) se encuentran el sistema operativo, las aplicaciones y los documentos de los usuarios configurados. La segunda partición (D:\) sirve para el almacenamiento de datos y contiene además controladores (D:\Controladores) y utilidades (D:\Tools) para su PC. Recomendación Por otra parte, en otras dos particiones no reemplazables encontrará los archivos de inicio para la reproducción del sistema ( pág. 76), así como los archivos de instalación de Windows® 7. Estas particiones no son visibles y no pueden ser borrados. 40 El disco duro A continuación especificamos los directorios más importantes y describimos el contenido. Español Directorios importantes ¡Atención! C:\ En el directorio raíz de la unidad C: se encuentran importantes archivos imprescindibles para el inicio de Windows. En la configuración de fábrica estos datos no se visualizan por razones de seguridad. C:\Archivos de Tal y como indica el nombre, los programas instalan en este programas directori los archivos pertenecientes a la aplicación. C:\Windows El directorio principal de Windows. Aquí almacena sus datos el sistema operativo. D:\Driver En esta carpeta encontrará los controladores necesarios para su PC (ya instalados). D:\Tools Aquí encontrará programas adicionales y más documentación sobre su PC. El disco duro 41 Deutsch English No elimine ni modifique estos directorios ni tampoco sus contenidos, ya que de lo contrario se podrían perder datos o se pone en peligro el funcionamiento correcto del sistema. La unidad óptica Introducir un CD/DVD Al contrario que el CD-ROMs en un PC, el ordenador portátil utiliza un elemento para detener la adherencia del CD. Cuando introduzca un CD, tenga cuidado de que sea presionado en el lugar adecuado. Recomendación No pegue plásticos protectores sobre los CDs ni otro tipo de pegatinas. No utilice CD deformados ni dañados para evitar dañar el aparato. ¡Atención! No utilice discos arañados, rotos, sucios ni de mala calidad. Pueden romperse debido a la alta velocidad que adquieren en el interior del lector y los datos que contengan serían entonces dañados. Mire bien los discos antes de introducirlos. Si reconoce daños o suciedad, no los utilice. Los daños que resulten de medios defectuosos están excluídos de las garantías y deberán ser reparados a su cargo. ¡Atención! Si es CD no está correctamente colocado puede causar daños al cerrar la bandeja del lector. 42 La unidad óptica 3. Saque el CD de su funda preferiblemente sin tocar la parte donde están los datos. Español 1. Presione el botón de apertura del lector de CD para abrir la bandeja. 2. Extraiga la bandeja completamente y con cuidado. 5. Compruebe que puede dar vueltas libremente y empuje la bandeja al interior del ordenador con cuidado. En el momento de la entrega, el lector óptico viene marcado con la letra “E”.Con el explorador de Windows (Ordenador) podrá acceder fácilmente a los datos del disco. Inicie el programa de ayuda Ordenador con la conexión del escritorio o y la tecla “E”. El pulsando al mismo tiempo la tecla de Windows Explorador se abre en Inicio Todos los programas Accesorio. Al acceder a los videos en DVD (p.ej. archivos de audio y de video en CDs convencionales) será utilizada automáticamente la reproducción de media previamente instalada. English 4. Ponga el disco en el lector con la etiqueta hacia arriba y apriételo con cuidado hacia abajo para que quede plano en la bandeja y pueda ser bien leído. Deutsch 6. Si quiere sacar un CD, presione la tecla de extracción. ¡Atención! Mientras el ordenador está accediendo al lector de CD-ROM, se enciende un indicativo de acceso. No trate de recuperar el CD del lector mientras esto ocurra. La unidad óptica 43 Recuperación de Emergencia de un Disco Bloqueado Si la bandeja no se abriera de forma automática, se puede abrir manualmente suponiendo que su aparato tiene un sistema de apertura de emergencia. 1. Finalice Windows y apague el ordenador. 2. Introduzca un objeto punzante (p.ej. un clip) en la apertura de emergencia hasta que encuentre resistencia. 3. Con un pequeña presión, se abrirá ahora la bandeja. 4. Recupere el CD e inicie de nuevo el ordenador. Seleccionar y Reproducir Discos Recomendación Algunos discos comienzan automáticamente cuando son insertador. Esto depende del sistema operativo y de la configuración establecida. Su PC puede reproducir CD de sonido, películas en DVD o archivos en CD/DVD. Después de cargar un disco, se abre una ventana de selección con diferentes opciones para la reproducción. Por regla general dispondrá de diversos programas. Si no se abre la ventana de selección, siempre tiene la posibilidad de abrirla a través del Explorador de Windows del Equipo óptico. 44 o en el disco La unidad óptica La reproducción de títulos de películas en DVD contiene la decodificación de video MPEG2, de datos de audio AC3 digital y la decodificación de contenido protegido CSS. CSS (a veces conocido también como Copy Guard) es la designación de un programa de seguridad de datos que ha sido utilizado por la industria cinematográfica como medida frente a las copias ilegales. Español Reproducción de Información Regional en DVD Para facilitar la salida de películas geográficamente definidas, se publican títulos de DVD de determinadas regiones. Las leyes de los derechos de autor requieren que todas las películas en DVD queden limitadas a una determinada región (generalmente, la región en la que se compran). English Entre las muchas reglamentaciones sobre la licencia CSS se encuentran principalmente las restricciones de reproducción de contenidos específicos del estado. Deutsch Es posible la publicación de versiones de películas en DVD en varias regiones pero las regulaciones referentes a CSS permanecen iguales, en el sentido de que todos los sistemas para descifrar el CSS son aplicables únicamente en una región. ¡Atención! Las opciones de la región pueden ser modificadas hasta cinco veces y es la última modificación la que se mantiene. Si desea modificar de nuevo las opciones de la región, debe quedar establecido de fábrica. Los costes de envío y de tratamiento deben ser soportados por el usuario. La unidad óptica 45 Temas relacionados con la regrabadora de CDs Esta sección se refiere únicamente a los aparatos que han sido entregados con un CD-RW, un combinado o un lector de DVD-RW. En primer lugar obtendrá información sobre los llamados CDs vírgenes. Estos medios, necesarios para que una regrabadora de CD pueda grabar un CD se denominan CD-Recordable (CD-R, grabable) o CD-Rewritable (CD-RW, regrabable). CDs y DVDs vírgenes Los CDs y DVDs normales se prensan con una pieza master de cristal y a continuación se sellan. En el caso de los CDs y DVDs vírgenes, el láser de la unidad CD-ReWriter marca mediante calor los “ceros” y los “unos”, por lo que son más delicados que los CDs y DVDs convencionales. Por esta razón evite lo siguiente, sobre todo en CDs vírgenes no utilizados: 46 Irradiación solar (UVA/UVB) Arañazos y daños Temperaturas elevadas La unidad óptica Español La Tarjeta De Sonido Deutsch English Su ordenador tiene un tarjeta de sonido estéreo incorporada con 16 Bit y efectos de sonido espacial (3D). La tarjeta de sonido es compatible con los estándares industriales Sound Blaster y Microsoft Sound System Version 2.0. Esto garantiza el cuidado óptimo de todos los programas y juegos actuales. Para cambiar el volumen básico, haga clic en el símbolo del altavoz. Haga clic en Mezclador para abrir el ajustador de volumen de sonido. Con ayuda de la combinación de teclas Fn + F11 und Fn + F12 tiene además la posibilidad de ajustar el volument. La Tarjeta De Sonido 47 Externo Conexiones Audio Su ordenador contiene altavoz para poder reproducir el sonido sin dispositivos adicionales. La conexión a un dispositivo HiFi aumenta considerablemente la calidad del sonido. La utilización de las conexiones externas le ofrece la buena posibilidad de conectar el portátil con aparatos externos. ¡Atención! El uso de cascos de audición con un nivel alto de volumen de sonido puede dañar el sistema auditivo. Antes de la reproducción, ajuste el nivel de volumen de sonido en su valor más bajo. Inicie la reproducción y aumente el volumen poco a poco hasta llegar a un nivel que le resulte cómodo. Si utiliza un aparato mucho tiempo con un nivel alto de volumen de sonido con los cascos de audición, puede sufrir daños en el sistema auditivo. Salida de audio (17) Conexión de micrófono (18) 48 Para la reproducción de sonido mediante un equipo estéreo externo como altavoces (activo) o auriculares. Para grabar utilizando un micrófono externo. La Tarjeta De Sonido Español Funcionamiento en una red ¿Qué es una Red? Se habla de una red cuando hay varios PCs conectados entre sí. De esta forma los usuarios pueden transmitir información y datos de PC a PC y compartir sus recursos (impresora, módem y unidades). En una oficina de intercambian mensajes por correo electrónico y se administran las citas de forma centralizada. Los usuarios comparten una impresora en la red y guardan sus datos en un ordenador central (servidor). Dos o más PCs se interconectan para disfrutar de juegos en red o intercambiar datos. Salida de red Ethernet Si su PC dispone de una salida de red Ethernet, podrá conectarlo a una red. Las siguientes explicaciones se refieren a ordenadores que cuentan con una conexión a la red. Conecte un extremo con la conexión RJ45 (enchufe occidental) al enchufe de red de su ordenador portátil (13) y el otro a otro PC o interruptor / conector. ® Para más información sobre la red, consulte la ayuda de Windows en el menú Inicio. Funcionamiento en una red 49 Deutsch English Estos son algunos ejemplos de la práctica: LAN sin cables (red de radio) La LAN sin cables es un equipamiento opcional. Esta función le permite pasar por la radio una conexión de red a una estación receptora apropiada. Antes de la activación, le aconsejamos que lea las condiciones necesarias de la página siguiente. La función Wireless LAN se activa y desactiva mediante la combinación de teclas Fn + F2. ¡Atención! No utilice la función WLAN en lugares (ej.: hospitales, aviones, etc.) en los que pueda haber aparatos sensibles a las ondas de radio. Encienda el aparato únicamente si queda garantizada la inexistencia de posibles peligros. Condiciones Como Punto de Acceso se puede utilizar un llamado Punto de Acceso LAN. Un Punto de Acceso es un aparato de transmisión de radio que se comunica con su ordenador y que acceder a la red conectada. Los Puntos de Acceso LAN se encuentran con frecuencia en oficinas grandes, aeropuertos, estaciones de tren, universidades o cibercafés. Le ofrecen el acceso a ciertos servicios y redes así como a Internet. Generalmente se necesita la autorización para el acceso, que puede estar asociado a costes adicionales. Con frecuencia se pueden encontrar Puntos de Acceso con módems DSL integrados. Estos llamados Routers establecen la conexión con las conexiones de Internet DSL existentes así como con las LAN sin cables. También puede establecerse una conexión sin Punto de Acceso a otro aparato con la funcionalidad LAN sin cables. Sin embargo, esto limita la red sin Router en los aparatos conectados directamente. La conexión a la red sin cables funciona de acuerdo con el estándar IEEE * 802.11n (compatible con el estándar 802.11b/g). Si se utiliza una codificación durante la transmisión, ésta debe funcionar en todos los aparatos según el mismo procedimiento. La codificación es un procedimiento que protege la red de accesos no autorizados. La velocidad de transferencia puede variar dependiendo de la distancia y de la amplitud de la contraposición. Es el caso, por ejemplo, cuando la contraposición funciona según el estándar 802.11b. * Para poder utilizar la prestación completa, es necesario un router WLAN según el estándar 802.11n. 50 Funcionamiento en una red Español Solución de problemas en la red ¿Por qué no se visualizan los usos compartidos en el entorno de red? El entorno de red sufre un leve retardo. Verifique el uso compartido buscando los correspondientes nombres de PC. ¿Por qué aparece un mensaje de error cuando hago clic en Entorno de red? English El nombre de PC sólo puede aparecer una vez en la red y no debe denominarse de la misma forma que el grupo de trabajo. Parece que las tarjetas de red no pueden comunicarse. ¿A qué se puede deber? Es posible que una de las tarjetas de red utilizadas funcione a otra velocidad (p. ej. 10 en lugar de 100 Mbit/s) y que su PC de red no puede reconocerlo. Ajuste, en tal caso, la velocidad compatible en el controlador de red. Si se desea conectar dos PC entre sí, necesita un cable Cross-Link, en caso contrario utilice un cable Patch. Deutsch Compruebe también los protocolos y la configuración. La transmisión de datos es errónea o muy lenta. ¿A qué se puede deber? Compruebe que el cable que utiliza sea el correcto (UTP / CAT3 o inferior) y que no esté demasiado cerca de un cable de electricidad u otra fuente perturbadora. Funcionamiento en una red 51 Lector de tarjetas Multimedia Las tarjetas de memoria son medios que se utilizan por ejemplo en el campo de la fotografía digital y que poco a poco van sustituyendo al disquete como medio de almacenamiento de datos. La forma y la capacidad de una tarjeta de memoria pueden variar según el fabricante. Su adaptador soporta los siguientes formatos: MMC (MultiMediaCard) SD (Secure Digital), SDHC, SDXC Memory Stick / Memory Stick Pro Al introducir la tarjeta de memoria preste atención de que los contactos, como se describe en la siguiente lista, estén en la dirección correcta. La introducción incorrecta de una tarjeta puede causar daños al adaptador o a la tarjeta. Tipo de tarjeta Contacto de conexión SD (Secure Digital) MMC (MultiMediaCard) Memory Stick Memory Stick Pro hacia abajo hacia abajo hacia abajo hacia abajo Introducir tarjeta de memoria Recomendación Las tarjetas de memoria sólo pueden instalarse en una dirección. Siga las recomendaciones de la página precedente. Introduzca la tarjeta con una ligera presión. Retirar tarjeta de memoria Para retirar la tarjeta, púlsela primero en la conexión para borrar la seguridad. Ahora puede retirar la tarjeta del compartimento y guardarla correctamente. 52 Lector de tarjetas Multimedia Español La cámara web La cámara web incorporada permite el uso de diversos servicios, como el Messenger de Windows. 1. Inicie el Messenger de Windows y cree una cuenta de usuario, en el caso en el que no lo haya hecho ya. Esta cuenta es gratuita. El único coste es incurrido por la conexión a Internet. English Ejemplo de utilización con Messenger de Windows Fotografía de la persona de contacto Fotografía propia Símbolo de la cámara (Apart.: Ventana de Messenger, mensajería instantánea) La cámara web 53 Deutsch 2. Seleccione la persona con la que desea conversar de las que hay dentro de su lista de contactos haciendo clic sobre el símbolo de la cámara que se encuentra bajo la fotografía. Un asistente le ayuda a establecer los ajustes óptimos para el altavoz, micrófono y cámara web. Siga las indicaciones que irán apareciendo en la pantalla. 3. Haga clic en Conectar para transmitir imágenes por su cámara web. 4. Si la persona de contacto tuviera conectada una cámara web, haga clic en el símbolo de la cámara que se encuentra bajo la fotografía de la persona de contacto para recibir la imagen emitida en directo. La Conexión Bus Universal en Serie La conexión bus universal en serie (USB 1.0 o 2.0) es el estándar más moderno para la conexión de aparatos de input, escáneres y demás periféricos. Con el USB se pueden conectar hasta 127 aparatos con un único cable. Las conexiones USB 3.0 son totalmente compatibles con USB 2.0 y 1.1. Su ordenador posee 2 conexiones USB 2.0 (compatible con USB 1.1) (19) y 2 conexiones USB 3.0 (16). Recomendación De ser posible, conecte siempre sus aparatos USB en la conexión en la que fueron instalados. De lo contrario, recibirá un nuevo ID y es necesaria una post-instalación del controlador. 54 La Conexión Bus Universal en Serie Español Asegurar el ordenador portátil Su ordenador portátil dispone de nuevas soluciones de software y hardware contra un acceso no autorizado. Puede proteger su ordenador a través de una contraseña del uso no autorizado. Al encender el ordenador, aparece la solicitud de contraseña en la pantalla. La contraseña se incluye en BIOS. English Contraseña de arraque ¡Atención! También puede aprovecharse de la opción de seguridad de Windows para proteger sus datos frente a accesos no autorizados. Consulte otras indicaciones en la sección “Protección de datos y del sistema” en la página 75. Cierre de seguridad Con el llamado Cierre de Seguridad Kensington puede proteger su ordenador del robo. Puede encontrar este cierre de seguridad con un cable como accesorio en un comercio especializado. Para fijar el cierre de seguridad, ate el cable a un objeto fijo como, por ejemplo, la pata de una mesa. Coloque el cierre en el dispositivo Kensington y gire la llave para cerralo. Mantenga la llave en un lugar seguro. Asegurar el ordenador portátil 55 Deutsch Guarde su contraseña en un lugar seguro. Si olvida su contraseña, no tiene ninguna posibilidad de borrarla. Diríjase en ese caso al Departamento de Atención al Cliente. Software Esta sección trata de los programas. Para ello, diferenciamos entre el sistema operativo, los programas (los programas de las aplicaciones), la activación de Windows y el BIOS. ® Aprender a utilizar Windows 7 Con Windows® 7, Microsoft saca al mercado el nuevo sistema operativo y la continuación de Vista®. Windows® 7 contiene una serie de funciones innovadoras y nueva tecnología, para que el PC trabaje de forma rápida y fiable y pueda ser utilizado fácilmente. Windows® 7 - Novedades Barra de tareas mejorada Desde la barra de tareas que se encuentra en la parte inferior de la pantalla puede iniciar programas y cambiar entre dos programas ya iniciados. En Windows® 7 puede fijar todos los programas en la barra de tareas para que siempre se abran al hacer un solo clic. Además, puede reordenar los símbolos de la barra de tareas, simplemente haciendo clic y llevándolos a la posición deseada. Los símbolos han sido también diseñados en un tamaño superior para poder ser utilizados con mayor facilidad. Mueva el cursor del ratón sobre los iconos y se mostrarán miniaturas de todos los archivos y ventanas que estén abiertas en ese programa. Si mueve el cursor del ratón sobre la miniatura, se mostrará la ventana en pantalla completa. Si retira el cursor del ratón de la miniatura, se cerrará la vista de pantalla completa. Lista de archivos recientes Las listas de archivos recientes le ofrecen la posibilidad práctica de abrir archivos en los que ha estado trabajando la última vez. Para mostrar los archivos utilizados recientemente, haga clic simplemente con el botón derecho del ratón en el icono de la aplicación de la barra de tareas. Si hace también clic con el botón derecho del ratón en el icono Word, se mostrarán los archivos Word utilizados recientemente. Además, puede también incluir en la lista otros archivos que desee tener a mano para que se muestren siempre. Así podrá disponer de documentos que utiliza con frecuencia y acceder a ellos con pocos clics de su ratón. Las listas de archivos recientes de algunos programas como Windows® Media Player pueden llenarse con los comandos de uso frecuente. Así puede ver en la 56 Software En la lista de archivos recientes de Internet Explorer se muestran los sitios web que haya visitado recientemente y con mayor frecuencia. En algunos programas, puede acceder así con mayor rapidez a órdenes que en el pasado sólo estaban accesibles en el mismo programa, como la orden de escribir un mensaje de correo electrónico. Español lista para Windows® Media Player opciones por ejemplo para la reproducción de determinada música o para abrir de nuevo la última lista de reproducción. Con Windows® 7 la ejecución de las tareas cotidianas es más fácil. Con la función de encajar ("Snaps") es por ejemplo más fácil que nunca comparar dos ventanas abiertas. Ya no tiene que ajustar manualmente el tamaño de las ventanas abiertas para compararlas. Arrastre simplemente la ventana con el ratón a uno de los laterales de la pantalla y ocupará la mitad de la pantalla. Encaje la pantalla a ambos lados y será más fácil que nunca comparar ventanas. Si desea mostrar todas las miniaplicaciones del escritorio, mueva simplemente el ratón en la esquina inferior de la pantalla del escritorio. Así, todas las ventanas abiertas serán transparentes, para poder ver inmediatamente el escritorio y las miniaplicaciones. Haga clic en la barra de títulos de la ventana, "muévala" y todas las demás ventanas se mostrarán como iconos en la barra de tareas. "Mueva" la ventana de nuevo y se mostrarán otra vez las demás ventanas. Administración de dispositivos mejorada Con Windows® 7 puede conectar, administrar y utilizar dispositivos adicionales con la función central "Aparatos e impresora". Todos los aparatos se mostrarán en un lugar centralizado. Con la nueva tecnología Device Stage, Windows® 7 mejora aún más la administración de dispositivos. Device Stage le ayuda en la utilización de todos los aparatos compatibles que están conectados al ordenador. Gracias a Device Stage, puede mostrar en una ventana el estado del aparato y acceder a los comandos más utilizados. Aquí encontrará incluso imágenes de los aparatos para que pueda ver fácilmente cuáles son los conectados. El fabricante del aparato puede personalizar Device Stage. Si el fabricante de su cámara por ejemplo tiene una versión personalizada de Device Stage, puede ver detalles como el número de fotos de la cámara, y acceder a enlaces con información útil, siempre que conecte la cámara al PC. Software 57 Deutsch Windows® 7 simplifica el trabajo con ventanas en el escritorio. Dispone de posibilidades más intuitivas para abrir y cerrar, modificar el tamaño y ordenar. English Escritorio mejorado Grupos Hogar Con Grupo Hogar, una nueva función de Windows® 7, la conexión de su ordenador en casa será un juego de niños. Un grupo de red doméstica será establecido automáticamente cuando conecte el primer PC a Windows® 7 con la conexión doméstica. La adición de otros equipos con Windows® 7 al grupo doméstico se realiza rápidamente, puede especificar exactamente lo que será visible de cada PC en el grupo. Posteriormente, la utilización conjunta de archivos en los diferentes PC domésticos, y en otros muchos aparatos distintos, será tan sencilla como si se tratara de archivos en un único disco duro. Así puede guardar fotografías digitales en el ordenador en su lugar de trabajo y acceder a ellas con un ordenador portátil en otro lugar. Del mismo modo, la impresora del lugar de trabajo será accesible a todos los PC en casa automáticamente, cuando se encuentre dentro de un grupo doméstico. ® Windows 7 - Ayuda y soporte técnico Aquí encontrará una relación completa de instrucciones, ayudas y consejos para solucionar posibles problemas. Esta ayuda abarca todo el sistema operativo Windows. Es recomendable tanto para principiantes como para profesionales. La información subestructurada en temas se puede imprimir y también se pueden utilizar marcadores. Para iniciar: 1. Haga clic en Inicio . 2. Seleccione Ayuda y soporte técnico 58 Software Español Windows® 7 – Tareas iniciales Deutsch English Aprenda todo lo que necesita saber para configurar el ordenador portátil. El objetivo de esta herramienta es llevar a cabo las regulaciones de la primera utilizacion de usuarios con experiencia así como de los usuarios por primera vez, tanto en la primer utilización como en mejoras posteriores para el uso óptimo de Windows® 7. Software 59 Las Tareas iniciales para comprendre mejor su PC y poder utilizarlo de manera óptima. También le sirve como fuente adicional de información para reconocer y solucionar posibles problemas. Contiene los siguientes enlaces: Conectarse para obtener información acerca de las noveda… Personalizar Windows Transferir archivos y configuraciones de otro equipo Usar un grupo en el hogar para compartir con otros equipos del … Elija cuándo desea recibir notificaciones acerca de cambios… Hacer copia de seguridad de los archivos Agregar nuevos usuarios al equipo Cambiar el tamaño del texto en pantalla Utilice las Tareas iniciales como sigue: 1. Haga clic en Inicio 2. Elija en la lista de programas Tareas iniciales. Windows® 7 - Control de cuentas de usuario El Control de cuentas de usuario contribuye al hecho de evitar las modificaciones no autorizadas en el PC. Si se realiza una modificación no autorizada, aparece una ventana con la indicación “¿Desea permitir que este programa realice cambios en el equipo? ” 60 Haga clic en Continuar, para seguir con el proceso Haga clic en Interrumpir, para interrumpir el proceso. Software Deutsch English Con ayuda del panel de control, puede modificar la configuración de Windows. Esta configuración controla casi toda la representación y las funciones de Windows, y le permite configurar Windows según sus necesidades. Español Windows® 7 – Panel de control Cuando abra por primera vez el Panel de control se mostrarán algunos de los elementos más frecuentemente utilizados del panel de control agrupados por categorías. En la vista de categorías, necesitará más información sobre el panel de control. En ese caso, mueva el ratón sobre el icono o el nombre de la categoría para leer el texto indicado. Para abrir uno de estos elementos, debe hacer clic sobre el icono correspondiente o sobre el nombre de la categoría. Para algunos de estos elementos, se abrirá una lista con las tareas ejecutables y una selección de los elementos del panel de control. Para la búsqueda por elemento de control deseado, existen los siguientes métodos: Introduzca una palabra o una frase en el cuadro de búsqueda. Haga clic en Pantalla en Iconos grandes o Iconos pequeños para que aparezca una lista con todos los elementos del panel de control. Software 61 Instalación de software Recomendación Si su sistema operativo está configurado de forma que sólo se admite la instalación de software y controladores si están rotulados (autorizados por Microsoft), aparecerá un cuadro. El software que se suministra con el PC ya está completamente instalado. ¡Atención! Al instalar programas o controladores puede ocurrir que se sobrescriban archivos importantes. Para poder acceder a los archivos originales, en el caso de que surgieran problemas tras una instalación, debería hacer una copia de seguridad del contenido del disco duro antes de realizar la instalación. Encontrará más información sobre copias de seguridad de datos a partir de la página 75. 62 Software Windows Media Center es la plataforma para su Home-Entertainment individual en Windows® 7. Con Windows Media Center, puede ver la televisión, grabar programas de televisión, reproducir DVD y música, ver fotos y mucho más… por control remoto (no incluido en el paquete de entrega) o haciendo simplemente clic con el ratón. Español Windows Media Center Recomendación English El soporte de las funciones depende de la configuración del hardware del ordenador. Por ejemplo, requiere la función de TV de un sintonizador de TV (no incluido en el paquete de entrega). Así se inicia su Home-Entertainment individual: 1. Encienda el ordenador. 2. Haga clic en Inicio Windows Media Center. Deutsch 3. Haga clic en . A continuación, se indica un cuadro general de las funciones de Windows Media Center: Menú principal TV + Películas Menú secundario Indicativos Si conecta un sintonizador de TV, tiene la posibilidad de marcar los canales. En este punto del menú, puede reproducir programas concretos, borrarlos o tostarlos a soportes externos. Reproducir DVD Aquí se reproducen DVD. Ajuste de TV Mientras disponga de un programa de sintonización de TV externo, tiene la posibilidad de configurar la señal de TV. Medios online Programas Esta biblioteca de programas le presenta una lista con los diferentes medios en línea. En Medios online hace aparecer contenido de Internet (de la videoteca Online del portal de noticias o de tiendas de música, por ejemplo). Para utilizar esta función, necesita como configuración previa una simple conexión a Internet. Software 63 Menú principal Menú secundario Tareas Configuraciones Ajuste aquí los requisitos y necesidades en Windows Media Center. Establezca aquí, por ejemplo, las configuraciones de seguridad infantil. Apagado Aquí no sólo se apaga el Windows Media Center sino que puede apagar todo el sistema operativo. Asegúrese de que todas las demás aplicaciones ya hayan sido cerradas antes de desconectar el sistema. Copia de CD/DVD Aquí puede abrir el programa que utilice para realizar copias iniciando un proceso de copia Sincronización Conecte un aparato externo, como por ejemplo un reproductor de MP3 o una cámara digital, y sincronice aquí los datos de un aparato externo con el ordenador. Iniciación del Extender Aquí puede configurar un Windows Media Center Extender. Utilizando un cable o red inalámbrica, puede acceder a los archivos de su ordenador. "Sólo medios" Aquí activa el modo pantalla completa del Media Center. Imágenes + Vídeos Biblioteca de imágenes En la biblioteca de imágenes, se encuentran todas las imágenes guardadas en su ordenador. Comience aquí la reproducción de sus fotografías. Reproducir todo Para comenzar directamente con la reproducción de todas sus fotografías, seleccione "Reproducir todas". Biblioteca de vídeos En la biblioteca de vídeos, se encuentran todos los vídeos guardados en su ordenador. 64 Software Menú secundario Música Biblioteca de música Español Menú principal En la biblioteca de música, se encuentran todos los cortes de música guardados en su ordenador. Aquí puede reproducir un álbum completo, un intérprete o una canción determinada. Reproducir todo English Aquí inicia la reproducción de todos los archivos que se encuentren en la biblioteca de música. Radio Mientras disponga de un hardware externo de sintonización de radio, tiene la posibilidad de escuchar y organizar las emisoras de radio. Aquí puede buscar piezas por título de la canción, compositor, intérprete, álbum, etc. La búsqueda comienza en cuanto introduzca la primera letra. Software 65 Deutsch Buscar Así podrá instalar su software Siga las instrucciones que su proveedor de software ha adjuntado al paquete de software. A continuación, describiremos una instalación “típica”. Cuando inserte el CD se iniciará automáticamente el menú de instalación. Recomendación Si no funciona el inicio automático, es posible que esté desactivada la función de ejecución automática denominada “Autorun“. Consulte la ayuda de Windows para modificar esto. Ejemplo de una instalación manual sin autorun: 1. Haga clic en Inicio . 2. Haga clic en Todos los programas. 3. Abra el punto del programa 4. Seleccione la entrada Accesorio. Ejecutar. 5. Introduzca en el campo “Abrir” la letra de la unidad del CD-ROM, seguido de dos puntos y el nombre del programa setup 6. Confirme su entrada haciendo clic en “Aceptar”. 7. Siga las instrucciones del programa. Desinstalación del software Siga los siguientes pasos para eliminar el software instalado de su PC: 1. Haga clic en Inicio 2. Haga clic en . Panel de control. 3. Seleccione a continuación la opción Programas. 4. Seleccione el programa que desee desinstalar, inicie la desinstalación y siga las instrucciones que aparecen en pantalla. 66 Software Para protegerse contra la piratería de software, Microsoft utiliza la activación del producto. La versión de Windows® 7 que hay instalada en su PC, al igual que la que se suministra con el PC, no la tiene que activar, ya que la hemos activado nosotros para su PC. Español Activación de Windows Una activación sólo es necesaria cuando cambia componentes esenciales del PC o utilice una BIOS no autorizada. Podrá activar de nuevo Windows® 7 las veces que desee, si resultara necesario. English Encontrará más información al respecto en el sistema de ayuda o en: http://www.microsoft.com/spain/piracy/prodact/xp_activation.asp Activación del producto en el ordenador portátil En algunos casos, puede ser necesario de todos modos que se solicite activar Windows ® 7. En caso de que la activación a través de Internet sea interrumpida con un mensaje de fallo, debe seguir los pasos siguientes. 1. Elija la activación telefónica y haga clic de nuevo. Deutsch 2. Haga clic ahora en modificación de la tecla del producto. Aparece entonces una nueva ventana. Introduzca la tecla del producto. Puede encontrarla en el Certificado de Autenticidad (Certificate of Authenticity, COA) en la carcasa. 3. Confirme la introducción y siga las indicaciones que irán apareciendo en la pantalla. Si fuera necesario, póngase en contacto con el consultor de Microsoft con el que adquirió la licencia de uso utilizada en el uso de este ordenador. Software 67 Programa de Instalación BIOS El programa de instalación BIOS (configuración de hardware básica de su sistema) contiene numerosas posibilidades de instalación para el uso de su ordenador. Por ejemplo, puede modificar el funcionamiento de los interfaces, las instrucciones de seguridad o el suministro de energía. El ordenador viene instalado de fábrica para garantizar un funcionamiento óptimo. No cambie la instalación más que cuando sea absolutamente necesario o cuando esté realmente familiarizado con las posibilidades de configuración. ¡Atneción! Si no está seguro de que los datos que ha introducido sean correctos, debe cargar el “Setup-Defaults”. Ejecución de la Instalación de BIOS Puede ejecutar el programa de configuración solamente después de iniciar el sistema. Cuando el ordenador ya está encendido, apáguelo y vuelva a iniciarlo. Presione la tecla F2 para que comience la instalación de BIOS. 68 Software Kaspersky Internet Security es una poderosa herramienta para la protección de sus datos. La aplicación le ofrece no solo una protección completa contra los virus sino también protección contra ataques de spam y acceso a la red. Otros componentes del programa protegen su ordenador de amenazas hasta ahora desconocidas y de ataques de phishing y permiten limitar el acceso a Internet. Una protección integral abarca todos los campos de la transferencia e intercambio de datos. English Kaspersky Internet Security está preinstalado por lo que no es necesaria su instalación. Si, no obstante, desea realizar una instalación (p. ej., tras una recuperación del sistema), el paquete de software se encuentra en el disco de aplicación/soporte suministrado. Español Kaspersky Internet Security Antivirus de archivos El antivirus de archivos protege al sistema de archivos del ordenador de una infección. Los componentes se inician al arrancar el sistema operativo, se guardan siempre en la memoria de trabajo del ordenador y protegen todos los datos que se abran, guarden e inicien en el ordenador y en las unidades conectadas a él. Kaspersky Internet Security intercepta todos los accesos a archivos y protege los archivos de los virus conocidos. Solo se permitirá trabajar con un archivo si este está libre de virus o ha sido desinfectado correctamente por el programa. Antivirus de correo El antivirus de correo protege los correos electrónicos entrantes y salientes de su ordenador. Solo se entregará un correo al destinatario si no contiene ningún elemento peligroso. Filtro web / protección infantil El filtro web bloquea la visita a sitios web peligrosos y permite un uso más seguro de Internet. La protección infantil permite que diferentes usuarios del ordenador accedan a recursos y programas en línea limitando el acceso dependiendo de su edad con gran flexibilidad. Con una conexión activa a Internet, Kaspersky Internet Security se activa automáticamente. No es necesaria la activación manual. Una vez transcurridos 90 días, Kaspersky Internet Security se desactivará automáticamente. Le recomendamos que compre su licencia a tiempo para garantizar la máxima protección de su PC. Software 69 Deutsch Kaspersky Internet Security está formado, entre otros, por los siguientes componentes: El paquete Kaspersky Internet Security se actualiza con la información más actualizada sobre los virus durante 90 días tras el registro gratuito. Consulte más información al respecto en Internet en: https://www.Kaspersky.com Recomendación En la primera conexión a Internet, se actualizarán automáticamente el sistema operativo y el programa antivirus. Este proceso puede durar varios minutos. Durante este tiempo, pueden detectarse alteraciones en la velocidad de funcionamiento del ordenador que solo serán detectables la primera vez que lo utilice. 70 Software Español Consejos y trucos Ayuda Control del teclado Windows Puede cambiar la ventana activa con ALT + TAB. Con la tecla TAB salta al siguiente campo de texto o de introducción, con las teclas SHIFT + TAB, al anterior. ALT + F4 cierra la ventana / programa actuales. STRG + F4 cierra una ventana de un programa. Con las teclas Windows ( )+ M se pueden minimizar todas las ventanas. La ventana actual se minimiza con las teclas ALT + SPACE + N. Con la tecla ALT llega al menú del programa en el que puede navegar con las teclas de las flechas. Deutsch Modificar las opciones del ratón. Puede encontrar las opciones de las características del ratón en el control del sistema: 1. Haga clic en „Inicio“ y luego en „Panel de control “. 2. Abra Hardware y sonido y haga clic en Dispositivos e impresoras en la entrada Ratón. Puede adaptar ahora su ratón de acuerdo con sus necesidades (configuración de superficies, velocidad de doble clic, indicativo del ratón, etc.). ¿Cómo puedo copiar archivos, textos o imágenes en otro lugar? Lo mejor es hacerlo en la copia intermedia. Marque el texto con el ratón (mueva el indicativo del ratón sobre el texto con la tecla izquierda pulsada) o haga clic sobre la imagen. Pulse Ctrl + C para copiar la parte seleccionada en la copia intermedia. Ahora cambie al lugar en el que desea introducir los datos copiados. Pulse Ctrl + V para introducir allí el contenido de la copia intermedia. Función Teclas Cortar [Ctrl]+[X] Introducir [Ctrl]+[V] Copiar [Ctrl]+[C] Borrar [Del] Consejos y trucos English Para obtener más recomendaciones sobre el teclado, refiérase a la página 38. 71 Adaptaciones e informaciones del sistema Función de Autoinicio del puerto óptico Cuando inserte un disco, éste será implementado de acuerdo con su contenido (música, video, etc.). Si no fuera éste el caso, puede deberse a varios motivos: El disco no cuenta con la función de autoinicio, la función está desactivada o la función está desactivada para este tipo. Así se activa o desactiva la función en general: 1. Haga clic en Inicio 2. Haga clic en . Panel de control. 3. Seleccione a continuación la opción Hardware y sonido o directamente el punto secundario Reproducir un CD u otros archivos multimedia automáticamente. 72 Consejos y trucos Español Capítulo 4 Tema Página English Asistencia Propria Protección de datos y del sistema ..................................... 75 Restaurar sistema .............................................................. 76 Restaurar el estado en la entrega ...................................... 79 Servicio ............................................................................. 82 Re-/adaptación y reparación ............................................ 88 Reciclado y eliminación de desechos ................................ 90 Deutsch Preguntas frecuentes ........................................................ 81 74 Consejos y trucos Español Protección de datos y del sistema Los programas descritos están integrados en Windows. Para información más detallada consulte las palabras clave en negrita en la ayuda de Windows. Consulte también las notas de la página 4. Haga copias de seguridad con frecuencia en medios externos, tales como CD-R o CD-RW. Windows le ofrece para ello el programa “Estado y configuración de copias de seguridad”. El programa se encontrará en Todos los programas Accesorios Herramientas del sistema. Haga copias de seguridad de sus contraseñas y de la configuración del sistema en disquetes. English Protección de datos La ejecución regular de los programas “Desfragmentador de disco” y “Liberador de espacio en disco” puede eliminar causas de errores y aumentar el rendimiento del sistema . También es muy útil el programa auxiliar “Información del sistema”, que le proporciona información detallada sobre la configuración de su sistema. Estos programas también se encuentran en la carpeta de programas, en Accesorios Herramientas del sistema. Protección de datos y del sistema 75 Deutsch Programas de mantenimiento Restaurar sistema Windows® 7 dispone de una función adicional (Restaurar sistema) , con la que es posible guardar los llamados puntos de recuperación. El sistema registra la configuración actual como una grabación momentánea y la utiliza en el caso de que sea necesario. Esto tiene la ventaja de poder deshacer una instalación fallida. Los puntos de recuperación los crea el sistema de forma automática, pero también se pueden establecer manualmente. Ud. puede decidir esto y configurar cuánto espacio se puede utilizar como máximo en el disco duro para tal fin. Encontrará este programa en la carpeta de programas Accesorios, Herramientas del sistema. Le recomendamos que especifique un punto de recuperación antes de instalar software nuevo o un controlador nuevo. De esta forma, si su sistema no funciona correctamente, podrá volver a una configuración que funcione correctamente sin que se eliminen los documentos nuevos. Consulte en el siguiente apartado las diferentes posibilidades de reparación en caso de una instalación incorrecta. Solución a problemas Windows® 7 incluye diferentes funciones que garantizan que el PC y las aplicaciones y dispositivos instalados funcionen correctamente. Estas funciones le ayudan a solucionar problemas que le hayan podido surgir al añadir, eliminar o sustituir archivos que sean necesarios para el funcionamiento del sistema operativo, las aplicaciones y los dispositivos. La función o funciones de recuperación que deberá utilizar depende del tipo del problema o error que surja. En la ayuda de Windows encontrará información detallada al respecto. 76 Restaurar sistema ® Español Windows Update Windows Update es la actualización en línea de Windows. Utilice Windows Update para descargar de Internet información como actualizaciones de seguridad, actualizaciones importantes, los archivos de ayuda actuales, controladores y otros productos de Internet. Windows Update realiza una búsqueda en el ordenador y establece un listado especial de actualizaciones individuales para la configuración de su ordenador. Todas las actualizaciones que Microsoft considera importantes para el funcionamiento del sistema operativo, de programas o de componentes del hardware será guardada como „actualización importante“ y seleccionada su instalación automáticamente.. English El sitio web renueva regularment su contenido para que siempre encuentre las últimas actualizaciones y correcciones de manera que pueda proteger el ordenador y garantizar así el buen funcionamiento de sus funciones. Las actualizaciones importantes son preparadas para resolver problemas conocidas y proteger el ordenador de riesgos de seguridad conocidos. 1. Haga clic en Inicio Deutsch Realice los pasos siguientes para descargar las actualizaciones importantes y devolver el ordenador al estado actual: . 2. Haga clic en Todos los programas. 3. Abra Windows Update. 4. Haga clic en Buscar actualización. 5. Haga clic en Añadir mientras se busca las actualizaciones disponibles en cada una de las categorías para elegir la actualización deseada y realizar su instalación. Puede obtener una descripción completa de cada uno de los elementos haciendo clic en la tecla Lea más. 6. Haga clic en Verificar e instalar actualizaciones una vez que haya seleccionado todas las actualizaciones deseadas y haga clic en Instalar ahora. Restaurar sistema 77 Actualización de información de Windows para la seguridad de los datos Para poder preparar un listado adecuado con actualizacioens, Windows Update necesita del ordenador. Estas informaciones se guardan en las siguientes carpetas: Número de la versión del sistema operativo Número de la versión de Internet Explorer Número de la versión de otros programas Reconocimiento Plug & Play del hardware Windows Update protege sus datos privados y no revela su nombre, dirección postal, dirección de correo-e ni otros datos personales. Todas estas informaciones sólo se utilizarán durante su conexión al sitio web. No serán almacenadas. 78 Restaurar sistema Español Restaurar el estado en la entrega Si su sistema no funciona pese a haber seguido las indicaciones descritas para la resolución de problemas, puede volver a establecerlo al nivel de fábrica. Las modificaciones de la configuración realizadas con posterioridad (configuración de acceso telefónico a redes/escritorio/Internet) y las instalaciones de software no se restauran. No se tienen en cuenta actualizaciones de controladores ni ampliaciones de hardware realizadas con posterioridad. English Limitación de la restauración ¡Atención! Deutsch Se eliminarán todos los datos de la unidad C, incluida la carpeta destinada a almacenar los archivos de los usuarios “Documentos”. Haga una copia de seguridad en la unidad D y en medios externos (es muy importante que tenga en cuenta las notas de la página 4 y la página 75). Se recuperará siempre el estado de fábrica. Las instalaciones que ha realizado Ud. las tendrá que volver a realizar. Restaurar el estado en la entrega 79 Recuperación de los datos de la copia de seguridad 1. Retire todos los aparatos de soporte de datos que puedan estar conectados (tarjetas de memoria, lápiz USB, etc.). 2. Encienda el PC All-In-On. 3. Pulse al ver el mensaje „ Press F11 to run recovery “ la tecla correspondiente. Tras algunos segundos, aparece el mensaje „ Windows is loading files “. Espera hasta que los datos hayan sido cargados. Al final, aparecerá el menú „ Power Recover “. 4. Seleccione el idioma del menú de recuperación. 5. Haga clic en „Next“. 6. Ahora puede elegir entre dos opciones: Restaurar en HDD - sin copia de seguridad de datos del usuario Todos los datos del ordenador portátil se borrarán irreparablemente. Se volverá a la configuración establecida en fábrica. Restaurar en HDD - con copia de seguridad de datos del usuario. Se volverá al nivel de fábrica y se guardarán todos los datos del usuario en C:\User are preserved. ¡Respetar sin falta! En la opción Restaurar en HDD - con copia de seguridad de datos del usuario, la recuperación tarda bastante tiempo. Se guardará los datos que se encuentren en la carpeta C:\usuario. Todos los demás datos se borrarán. Realice con frecuencia una copia de seguridad en un soporte de datos externo. La reclamación de daños y perjuicios por la pérdida de datos no serán cursadas. 7. Haga clic en Next y siga las demás indicaciones que aparecen en pantalla para volver a los valores de fábrica. 80 Restaurar el estado en la entrega Español Preguntas frecuentes ¿Cuándo debo activar Windows? Puede encontrar informaciones sobre este tema a partir de la página 67. El programa está preactivado de fábrica. El software está preinstalado de fábrica. Es necesaria una activación si ... ... más componentes (tarjeta gráfica, CPU, etc.) son creados. English ... ha instalado un nuevo teclado. ... se instala una versión diferente de BIOS. ... instala el software en otro PC. ¿Dónde encuentro el controlador necesario para el ordenador? El controlador se encuentra en la segunda partición del disco duro, en la carpeta Driver (controlador) y Tools. Realice una copia de seguridad de los archivos elegidos en un soporte externo (CD-R) para familiarizarse con la técnica. No es posible utilizar una copia de seguridad en el case de que no pueda restablecer los archivos defectuosos o si el soporte deja de estar. ¿Debe instalar todavía los discos adjuntos? No. En principio, todos los programas están ya instalados. Los discos están considerados como copias de seguridad. ¿Cuándo se recomienda el restablecimiento del estado de entrega? Este método sólo puede ser elegido como última solución. Lea en el capítulo „Restaurar sistema“ cuáles son las alternativas que se ofrecen. ¿Por qué debo volver a instalar el aparato USB si ya lo he hecho? Si el aparato se pone en funcionamiento en una conexión USB diferente a aquélla en la que ha sido instalado, aparecerá automáticamente un nuevo mensaje. El sistema operativo lo tratará entonces como si fuera un nuevo aparato y querrá instalarlo de nuevo. Utilice el controlador instalado o conecte el aparato al puerto en el que fue instalado. Preguntas frecuentes 81 Deutsch ¿Cómo realizo una copia de seguridad de los archivos? Servicio Primeros auxilios en caso de problemas con el Hardware Las disfunciones pueden deberse a veces a hechos banales pero también a defectos de los componentes. Nos gustaría poner en sus manos a continuación una guía para resolver problemas. Si las medidas aquí indicadas no tienen éxito, le ayudaremos encantados. ¡Llámenos! Localización de la causa Comience con un atento examen de todas las conexiones de los cables. Si las luces no funcionan, asegúrese de que el ordenador y todos los periféricos tienen suministro de corriente de forma correcta. Si el ordenador funciona con la pieza de red, compruebe que el enchufe, los cables y todos los conectores estén conectados a la corriente. Apague el ordenador y compruebe la conexión de todos los cables. Si el ordenador está conectado a los periféricos, compruebe también las conexiones de los enchufes de los conectores. No intercambie los cables de los distintos aparatos indiscriminadamente incluso si parece iguales. Una vez que se ha asegurado de que hay corriente en los aparatos y de que todas las conexiones están intactas, encienda de nuevo el ordenador. ® Las actualizaciones regulares del programa Windows tales como la „Desfragmentador de disco“ pueden evitar orígenes de fallos y aumentar el rendimiento del sistema (ver página 75). El programa de ayuda „Información del sistema“ es igualmente muy rico en ayudas. Puede encontrarlo en el archivo de sistema „Herramientas del sistema“. 82 Servicio Español Fallos y Causas La pantalla está oscura: Este error puede tener diversas causas: 1. La luz indicadora de funcionamiento (Interruptor ON/OFF) no se ilumina y el ordenador está en estado de permutar. Solución: Accione el interruptor ON/OFF. English 2. La indicación de standby parpadea. El ordenador está en modo standby. Solución: Accione el interruptor ON/OFF. 3. La iluminación de fondo ha sido desactivada con la combinación de teclas Fn + F7. Solución: Confirme con cualquier tecla para volver a encender la iluminación de fondo. La batería podría estar vacía. Conecte el ordenador al adaptador de red y recargue la batería. El ordenador no se enciende. Utilice el ordenador con la batería y verifique si ésta está correctamente introducida y cargada. Indicativo erróneo de hora y fecha. Hacer clic sobre el indicativo de la hora e introducir los valores correctos. No pueden leerse los datos de la undida óptica. Compruebe que el disco se ha introducido correctamente. ¿Aparece el lector en el Explorer? En caso afirmativo, pruebe con otro disco. La conexión WLAN no funciona. Para activar la conexión WLAN, debe pulsar la combinación de teclas Fn + F2. El touchpad no funciona. Para activar el touchpad, pulse la combinación de teclas Fn + F9. Servicio 83 Deutsch El ordenador se apaga durante el funcionamiento. ¿Necesita Más Ayuda? Si, a pesar de las indicaciones anteriores, continúa teniendo problemas, póngase en contacto con su línea de atención al cliente. Trataremos de ayudarle por teléfono. Antes de dirigirse a su Servicio Técnico, prepare los siguientes datos: ¿Ha realizado ampliaciones o modificaciones en la configuración de salida? ¿Qué tipo de periféricos adicionales está utilizando? ¿Qué indica la pantalla, si es que se indica algo? ¿Qué software utilizaba cuando apareció el fallo? ¿Qué pasos ha seguido ya para resolver el problema? Soporte del Driver El sistema ha sido ampliamente probado con los controladores instalados en nuestros laboratorios con éxito. No obstante, en la rama de la informática es habitual actualizar de tanto en tanto los controladores. Esto se debe a que, por ejemplo, se han producido posibles problemas de compatibilidad con otros componentes aún no probados (programas, dispositivos). En la siguiente dirección de Internet encontrará actualizaciones de controladores: http://www.medion.com 84 Servicio Apague el ordenador. Para evitar daños, ponga las cabezas del disco duro en lugar seguro. Después de haberlo transportado, espere a que el aparato recupere la temperatura ambiente. Con altas temperaturas o con fluctuaciones de humedad puede ocurrir que la condensación lleve a la formación de humedad y que se produzca un cortocircuito. Cierre el ordenador y asegúrese de que el estuche está bien cerrado. Utilice un maletín de transporte para evitar la suciedad, humedad, trastornos y arañazos. Utilice el embalaje de cartón original para el envío de su ordenador y déjese aconsejar por la empresa de transporte al respecto. Cargue siempre el acumulador y eventualmente el que tenga de recambio antes de iniciar un viaje largo. Antes de viajar, infórmese sobre el tipo de corriente y de comunicación utilizadas en el punto de destino. Adquiera antes del viaje y cuando sea necesario el adaptador requerido para la corriente o comunicación (Módem, LAN etc.). Durante el envío del ordenador, deje la batería en un embalaje diferente al del propio del ordenador. Cuando pase por el control de equipaje del aeropuerto, es recomendable que incluya el ordenador y todos los medios de almacenamiento magnéticos (disquetes, discos duros externos) en el detector por rayos-X- (la máquina en la que deposita sus bolsos de mano). Evite el detector magnético (la máquina por la que pasa Ud.) y la barra magnética (el aparato de mano del personal de seguridad), puesto que éstos podrían causar daños a los datos que Ud. tiene guardados. Servicio 85 Deutsch Siga las siguientes recomendaciones si quiere transportar su ordenador: English Español Transporte Mantenimiento ¡Atención! La carcasa del ordenador no contiene ninguna pieza de mantenimiento ni de limpieza. Puede prolongar la vida de su ordenador siguiendo las siguientes recomendaciones: 86 Desenchúfelo siempre antes de limpiarlo y separe el acumulador. Limpie el ordenador con un paño seco. No utilice ningún producto de limpieza ácido o disolvente. Para limpiar el lector de CD-ROM-/ CDRW-/DVD no utilice ningún disco de limpieza ni productos similares que limpien la lente del láser. El polvo o la grasa en el teclado dificulta su sensibilidad. Elimine el polvo o la grasa de la superficie del teclado con una tira adhesiva. Con el tiempo, puede acumularse polvo en el interior del ordenador que puede obturar las ranuras de refrigeración. Esto provoca que aumente la velocidad del ventilador y con ello también empeore el funcionamiento del ordenador. Por otra parte, este hecho puede provocar el calentamiento en exceso y los defectos en el funcionamiento del aparato. Haga que personal especializado limpie con cierta regularidad el interior del ordenador. Servicio Español Cuidado de la Pantalla Cierre el ordenador una vez que haya acabado de trabajar con él. Evite los arañazos a la pantalla, porque es muy fácil dañarla. Limpie la pantalla con un paño suave y seco. Tenga cuidado de que no caiga ninguna gota de agua en la pantalla. El agua puede causar alteraciones estables en los colores. Puede exponer la pantalla a la luz solar o a los rayos ultravioletas. El ordenador y su embalaje son reciclables. English Recomendación La superficie está protegida con material de protección para evitar que el aparato se raye durante la fabricación y el transporte. Deutsch Retire este material tras haber colocado bien el aparato y antes de ponerlo en funcionamiento. Servicio 87 Re-/Adaptación y Reparación Deje la re-/adaptación en manos del personal especialmente cualificado. Si Ud. no dispone de los conocimientos necesarios, pídale ayuda al correspondiente Servicio-Técnico. Diríjase a nuestro Servicio Técnico si tiene algún problema técnico con su ordenador. En el caso de que sea necesaria una reparación, diríjase exclusivamente a nuestros servicios de reparación autorizados. Recomendaciones para el servicio técnico 88 La apertura de la carcasa del ordenador así como su re-/adaptación está sólo reservada para el Servicio Técnico. Utilice solamente recambios originales. Elimine de delante de la apertura de la carcasa todos los cables de electricidad y de conexión y desconecte el acumulador. Si no se desconecta el ordenador de la corriente por la parte de su apertura, existe el peligro de que puedan ser dañados los componentes. Los componentes internos del ordenador pueden ser dañados por medio de una descarga electroestática (ESD). Realice las ampliaciones del sistema así como las modificaciones y las reparaciones en un puesto de trabajo ESD. En caso de no disponer de un puesto tal, póngase un uniforme antiestático o esté en contacto con un cuerpo metálico conductor. Los daños causados por una manipulación errónea serán reparados sin coste alguno. Re-/Adaptación y Reparación En el ordenador se pueden utilizar tipos de láser entre las clases 1 y 3b. En caso de carcasa no abiertas, se utilizará la clase 1. Al abrir la carcasa del ordenador, recibirá radiaciones hasta la clase 3b. Español Recomendaciones sobre las radiaciones láser Los lectores de CD-ROM-/CDRW-/DVD- incorporados no tienen piezas previstas para la observación o reparación. La reparación de los lectores de CD-ROM-/CDRW-/DVD- será realizada exclusiva-mente por el fabricante. No mire a la corriente de láser, ni siquiera con instrumentos ópticos. No se exponga a la radiación láser. Evite la radiación en ojos y piel, sea directa o indirecta. Deutsch English En caso de extensión o apertura, hay que tener en cuenta lo siguiente: Re-/Adaptación y Reparación 89 Reciclado y eliminación de desechos Aparato No tire bajo ningún concepto el aparato al final de su vida útil a la basura doméstica normal. Infórmese sobre las posibilidades de las que dispone para eliminarlo de forma respetuosa con el medio ambiente. Pilas ¡No tire las pilas usadas a la basura doméstica! Deben ser depositadas en un punto de recogida para pilas usadas. Embalaje Los materiales y accesorios de embalaje son reciclables y deben ser depositados en un contenedor para reciclaje cuando ya no sean necesarios. Si tiene preguntas sobre la eliminación de residuos, diríjase a su punto de venta o a nuestro servicio. 90 Reciclado y eliminación de desechos Las pilas pueden contener sustancias inflamables. El manejo inadecuado puede descargar las pilas, sobrecalentarlas, inflamarlas o incluso hacerlas explotar, lo que podría ocasionar daños al aparato o perjudicar su salud. Por favor, siga atentamente las siguientes indicaciones: Mantenga las pilas fuera del alcance de los niños. En caso de que se tragaran las pilas por descuido, avise inmediatamente al médico. Nunca cargue las pilas (a no ser que lo indique expresamente). Nunca descargue las pilas con una potencia de salida elevada. Nunca ponga las pilas en cortocircuito. Nunca someta las baterías a calor excesivo como por ejemplo radiaciones solares, fuego o similar! Evite el calor y no arroje las pilas al fuego. No desmonte o deforme las pilas. Podría herirse en las manos o en los dedos, o el líquido de las pilas podría derramarse y entrar en contacto con los ojos o con la piel. Si esto ocurriese, enjuague bien las zonas afectadas con abundante agua clara e informe inmediatamente al médico. Evite fuertes golpes y sacudidas. Jamás confunda la polaridad. Asegúrese de que los polos Más (+) y Menos (-) están bien colocados, de esta forma evitará cortocircuitos. Nunca mezcle pilas nuevas y usadas, ni pilas de diferente tipo. Esto podría ocasionar averías en el funcionamiento del aparato. Además, las pilas menos potentes podrían descargarse demasiado. Saque inmediatamente las pilas descargadas del aparato. Saque las pilas del aparato si éste no va a ser utilizado durante un largo periodo de tiempo. Sustituya al mismo tiempo todas las pilas descargadas del aparato por otras nuevas del mismo tipo. Aísle los contactos de las pilas con cinta adhesiva cuando desee almacenarlas o tirarlas. ¡Las pilas usadas no deben tirarse a la basura doméstica! Proteja el medioambiente y deposite las baterías usadas en los contenedores de recogida selectiva previstos para tal fin. En caso necesario, diríjase a su vendedor o a nuestro servicio de atención al cliente. ¡Muchas gracias! Reciclado y eliminación de desechos 91 Deutsch English Español Indicaciones de seguridad de baterias 92 Reciclado y eliminación de desechos Español Capítulo 5 Tema Página English Apéndice Recomendaciones sobre la conformidad ................................ 95 Deutsch Índice ................................................................................... 98 94 Reciclado y eliminación de desechos Español Recomendaciones sobre la conformidad El dispositivo cumple los requisitos de compatibilidad electromagnética y seguridad eléctrica. Este aparato cumple con las normativas básicas y recomendaciones importantes relativas a la directiva sobre el diseño ecológico 2009/125/EG (Reglamento 1275/2008). English El dispositivo cumple con los requisitos de la Directiva 2004/108/CE de EMC y la Directiva de Baja Tensión 2006/95/CE. En el Aktiv Matrix LCDs (TFT) con una resolución de 1366 x 768 Pixels hay un total aproximado de unos 3,1 mil transistores que consisten cada uno en tres sub-pixels (rojo, verde, azul). Debido a este gran número de transistores y a que el proceso de fabricado asociado es tremendamente complejo puede darse en ocasiones la pérdida o el falso control de pixels o de sub-pixels individuales. En el pasado había muy variadas maneras para definir el error de pixel permitido. Sin embargo, éstos eran generalmente muy complicados y muy diferentes entre los distintos fabricantes. MEDION se ocupa de todos los productos con pantalla TFT con el desarrollo de la garantía de las necesidades estrictas y transparentes de la norma ISO 13406-2, clase II que se resumen brevemente en los siguientes: El estándar ISO 13406-2 define entre otras cosas las guías generalmente válidas en relación con los errores de pixel. Los errores de pixel quedan establecidos en cuatro categorías de fallos y en tres tipos de fallos. Cada pixel individual se compone a su vez de tres sub-pixels, cada uno de un color (rojo, verde, azul). Recomendaciones sobre la conformidad 95 Deutsch ISO 13406-2 clase II Estructura del Pixel: lineas azul verde rojo Tipos de fallos de Pixel: Tipo 1: pixel luminoso largo tiempo (punto blanco, claro) pero no dirigido. El pixel blanco es el resultado de la luz de tres sub-pixel. Tipo 2: pixel no luminoso (punto negro, oscuro) pero dirigido Tipo 3: sub-pixel anormal o defectuoso de color rojo, verde o azul (p.ej. encendido largo tiempo con luminosidad media, sin color, intermitente o trémula pero no de tipo 1 ni 2) Suplemento: Cluster de tipo 3 ( = pérdida de dos o más sub-pixels en un bloque de 5 x 5 pixels. Un Cluster es un campo de 5 x 5 pixels (15 x 5 Sub-pixels). ISO 13406-2, Clase fallo II Resolución Tipo 1 Tipo 2 Tipo 3 Cluster Tipo1, Cluster Tipo 3 Tipo 2 96 1024 x 768 2 2 4 0 2 1280 x 800 3 3 6 0 3 1280 x 854 3 3 6 0 3 1280 x 1024 3 3 7 0 3 1366 x 768 3 3 7 0 3 1400 x 1050 3 3 8 0 3 Recomendaciones sobre la conformidad Una pantalla SXGA de ca. 44 cm (17”) está compuesta de 1280 puntos de imagen (pixels) horizontales y 1024 verticales, que suman un total de 1.31Mio. Pixel. En relación con un millón de Pixels, esto supone un factor de cerca de 1,31. Español Ejemplo: La clase de fallo II permite tres fallos de tipo 1 y tipo 2 y siete fallos de tipo 3 y 3 Cluster de tipo 3. English Generalmente, no se trata de un caso de garantía. Un caso de garantía tiene lugar cuando el número de fallo arriba indicado queda excedido en una categoría. Reproducción de este manual Deutsch Este documento contiene informaciones protegidas por la ley. Todos los derechos reservados. Queda prohibida la reproducción por medios mecánicos, electrónicos o de otro tipo sin autorización por escrito del fabricante. Reproducción de este manual 97 Índice A Activación de Windows .............. 67 Activación del producto en el ordenador portátil .................. 67 Administración de energía.......... 33 Alimentación de corriente Administración de energía ...... 33 Funcionamiento de la red ....... 28 Funcionamiento del acumulador ........................ 29 Alimentación de corriente ...... 7, 17 Alimentación de energía ............ 27 Apariencia y personalización ...... 35 Asegurar el ordenador portátil ... 55 Autorun ..................................... 66 C Cámara web............................... 53 Capacidad del acumulador ........ 31 Carga de la batería ..................... 31 CD-ROM .................................... 42 CDs vírgenes .............................. 46 Cierre de seguridad .................... 55 Cierre de Seguridad Kensington . 55 Combinación de teclas específicas .............................. 38 Conector/desconector................ 27 Conexión ..................................... 7 Conexión Bus Universal en Serie (USB) ............................. 54 Conexión de un monitor externo 36 Conexiones Conexión red ......................... 15 LAN ........................................ 15 Lector de tarjetas multimedia . 15 USB .................................. 15, 16 VGA ........................................ 15 Consejos y trucos Copiar textos u otras imágenes ............................ 71 Función de Autoinicio ............ 72 98 Índice Contrato de Licencia .................. 21 Copiar archivos .......................... 71 Cuidado de la pantalla ............... 87 D Defragmentación ................. 75, 82 Desinstalación del software........ 66 Directorios ................................. 41 Disco duro ................................. 40 Display ...................................... 34 Abrir y cerrar la pantalla ......... 34 E Ejecución automática ................. 66 Ejecución de la Instalación de BIOS ...................................... 68 Ergonomía ................................... 6 Externo conexiones audio .......... 48 F Fallos y causas ........................... 83 Fast Ethernet .............................. 49 Función de Autoinicio ................ 72 Funcionamiento de la red .......... 28 Funcionamiento del acumulador ..................... 10, 29 Capacidad.............................. 31 Carga ..................................... 31 Instalación ............................. 29 Recarga .................................. 31 Retirada ................................. 30 Funcionamiento en una red ....... 49 H Hibernar .................................... 33 I Indicaciones de seguridad de baterias .................................. 91 Indicaciones para el teclado ......... 9 Indicativos Carga de batería .................... 17 K Kaspersky Internet Security ........ 69 L LAN sin cables............................ 50 Lector de tarjetas multimedia..... 52 LEDs .......................................... 17 Lugar de Instalación..................... 4 M Mantenimiento .......................... 86 Memory Stick ............................ 52 MMC ......................................... 52 MultiMediaCard ........................ 52 P Panel de contol .......................... 61 Preguntas frecuentes ................. 81 Primeros auxilios ........................ 82 problemas con el hardware ....... 82 Producto de Limpieza ................ 86 Programa de Aprendizaje del Ratón ..................................... 21 Programa de Instalación BIOS .... 68 Programas de mantenimiento.... 75 Protección de datos ................... 75 Protección de datos y del sistema .................................. 75 Puesta en marcha ...................... 19 SD .............................................. 52 Secure Digital ............................. 52 Seguridad de Datos ...................... 4 Seleccionar y Reproducir Discos . 44 Servicio ...................................... 82 Servicio de atención teléfonico ... 84 Software ............................... 56, 66 Solución a problemas ................. 76 Soporte del driver....................... 84 ® Superficie Windows ................... 22 Suspender .................................. 33 R T R&TTE ......................................... 9 Radiaciones láser........................ 89 Ratón táctil ................................ 39 Re-/adaptación y reparación ...... 88 Recarga del acumulador ............ 31 Reciclado y eliminación de desechos ................................ 90 Tarjeta de memoria Introducir ............................... 52 Retirar..................................... 52 Tarjeta de sonido ........................ 47 Teclado ...................................... 38 Temperatura Ambiente ................ 5 Transporte.................................. 85 S Índice 99 Español English Recomendaciones de seguridad Funcionamiento del acumulador ........................ 10 Alimentación de Corriente ........ 7 Câbles ...................................... 8 Conexión.................................. 7 Lugar de instalación ................. 4 Seguridad de datos................... 4 Teclado .................................... 9 Temperatura ambiente ............. 5 Recuperación de emergencia ..... 44 Recuperación del sistema ........... 76 Red ¿Qué es una red?.................... 49 LAN sin cables ........................ 50 Solución de problemas ........... 51 Rendimiento del sistema ...... 75, 82 Reproductor de CD .................... 46 Resolución de la pantalla ............ 34 Restauración............................... 79 Revisión de la carga del acumulador ............................ 32 Deutsch Indicativo de acceso ............... 17 Instalación de nuevo software ... 62 Instalación de software .............. 66 Introducción de datos ................ 38 ISO 13406-2 .............................. 95 U Unidad de disco ......................... 42 Unidad óptica............................. 42 V Vistas Cámara web ........................... 15 ® Cierre Kensington .................. 16 Conexión LAN ........................ 15 Conexión red ......................... 15 Conexión USB ........................ 15 Encendido / apagado ............. 15 Indicativos de estado .............. 15 Indicativos de funcionamiento 15 Lector de tarjetas multimedia . 15 100 Índice Lector óptico .......................... 16 Pantalla .................................. 15 Puerto de USB .................. 15, 16 Teclado .................................. 15 Teclas Touchpad .................... 15 Touchpad .............................. 15 VGA ....................................... 15 Volumen de envío ..................... 13 W Windows® 7 Novedades ............................. 56 Panel de control ..................... 61 Tareas iniciales ....................... 59 ® Windows Update ...................... 77 Keep these instructions with your computer at all times. The proper set up, use and care can help extend the life of your computer. In the event that you transfer ownership of this computer, please provide these instructions to the new owner. Español Notes on This Manual This manual is divided into sections to help you find the information you require. Along with the Table of Contents, an Index has been provided to help you locate information. English In addition, many application programs include extensive help functions. As a general rule, you can access help functions by pressing F1 on the keyboard. These help functions are available to you when you use the Microsoft Windows® operating system or the various application programs. This interactive manual is designed to provide additional information about your Notebook as well as useful links accessible via the World Wide Web. We have listed further useful sources of information starting on page 53. Deutsch Document Your Notebook It is important to document the details of your Notebook purchase in the event you need warranty service. The serial number can be found on the back of the Notebook: Serial Number ...................................... Date of Purchase ...................................... Place of Purchase ...................................... Audience These instructions are intended for both the novice and advanced user. Regardless of the possible professional utilization, this Notebook is designed for day-to-day household use. The functions and applications for use with this Notebook have been designed with the entire family in mind. i Quality We have selected the components in this computer for their high level of functionality, ease of use, safety and reliability. Through balanced hardware and software design we are able to provide you with an innovative personal computer useful for applications relating to both work and leisure. We are pleased to welcome you as our newest customer. Copying this manual This document contains legally protected information. All rights reserved. Copying in mechanical, electronic and any other form without the written approval of the manufacturer is prohibited. Copyright© 2011 MEDION® All rights reserved. Microsoft®, MS-DOS®, and Windows are registered trademarks of Microsoft Corporation in the U.S. and other countries. Pentium® is a registered trademark of Intel Corporation. HDMI, the HDMI Logo and High-Definition Multimedia Interface are registered trademarks of HDMI Licensing LLC. The names of actual companies and products mentioned herein may be the trademarks of their respective owners. Information in this document is subject to change without notice. ii Español Table of Contents Safety Instructions ........................................................................................... 3 Data Security ............................................................................................... 4 Set-Up Location ........................................................................................... 4 Ambient Temperature ................................................................................. 5 Working in Comfort .................................................................................... 6 Connecting ................................................................................................. 7 Power supply......................................................................................... 7 Cabling .................................................................................................. 8 Information about the regulatory compliance according to R&TTE ............. 9 Touch Pad ................................................................................................... 9 Battery Operation...................................................................................... 10 English Safety and Maintenance ...................................................................... 1 Included with Your Notebook ....................................................................... 13 Views ............................................................................................................ 14 Open Notebook ........................................................................................ 14 Front view ................................................................................................. 15 Left Side .................................................................................................... 15 Right Side .................................................................................................. 16 Device Indicators ....................................................................................... 17 Multimedia buttons .................................................................................. 18 Getting Started .............................................................................................. 19 How to start: ............................................................................................. 19 Step 1 .................................................................................................. 19 Step 2 .................................................................................................. 21 Step 3 .................................................................................................. 21 Short Description of the Windows® Desktop ......................................... 22 Main Components ............................................................................ 25 Power Supply ................................................................................................ 27 On/Off Button ........................................................................................... 27 Power Adapter .......................................................................................... 28 Battery Operation...................................................................................... 29 Inserting the Battery ............................................................................ 29 Removing the Battery .......................................................................... 30 Charging the Battery............................................................................ 31 Discharging the battery ....................................................................... 31 Battery Performance ............................................................................ 31 Power Management .................................................................................. 33 Sleep Mode ......................................................................................... 33 Hibernate Mode ................................................................................... 33 iii Deutsch Views & Handling ............................................................................ 11 Display .......................................................................................................... 34 Opening and Closing the Display .............................................................. 34 Screen Resolution...................................................................................... 34 Appearance and Personalization ............................................................... 35 Connecting an External Monitor ............................................................... 36 Duplicate the Desktop ......................................................................... 37 Extend the Desktop.............................................................................. 37 Only display the Desktop on 1 ............................................................. 37 Only display the Desktop on 2 ............................................................. 37 Data Entry ..................................................................................................... 38 The Keyboard ............................................................................................ 38 Notebook-Specific Key Combinations .................................................. 38 Touch Pad ..................................................................................................... 39 The Hard Drive .............................................................................................. 40 Important Directories ................................................................................ 41 The Optical Drive .......................................................................................... 42 Loading a Disc ........................................................................................... 42 Emergency Ejection of a Blocked Disc .................................................. 43 Playing Back and Retrieving Data from Discs ............................................. 44 Regional Playback Information for DVD ..................................................... 44 Subjects Concerning the CD/DVD-Rewriter ............................................... 45 Recordable/Rewriteable Discs .............................................................. 45 The Sound Card ............................................................................................ 46 External Audio Ports .................................................................................. 47 The Network ................................................................................................. 48 What is a network? .................................................................................... 48 Ethernet-Network ................................................................................ 48 Wireless LAN ............................................................................................. 49 Conditions ........................................................................................... 49 Troubleshooting within the Network ................................................... 50 The Multimedia Card Reader ......................................................................... 51 Inserting Memory Cards ............................................................................ 51 Removing Memory Cards .......................................................................... 51 Webcam ........................................................................................................ 52 Actual example using Windows Live Messenger ........................................ 52 Universal Serial Bus (USB) Port....................................................................... 52 Securing the Notebook ................................................................................. 53 Startup Password ...................................................................................... 53 Using a safety lock ..................................................................................... 53 Software........................................................................................................ 54 Getting to Know Windows® 7.................................................................... 54 Windows® 7 - News .............................................................................. 54 Windows® 7 - Help and Support ........................................................... 56 Windows® 7 – Getting Started .............................................................. 57 Windows® 7 - User Account Control ..................................................... 58 Windows® 7 – Control Panel................................................................. 59 iv Appendix ....................................................................................... 85 Information about Conformity ...................................................................... 87 ISO 13406-2 Class II .................................................................................. 87 FCC Compliance Statement ...................................................................... 89 Index ............................................................................................................. 90 v Español English First Aid ........................................................................................ 69 Data and System Security .............................................................................. 71 Data Security ............................................................................................. 71 Maintenance Programs ............................................................................. 71 System Restore .............................................................................................. 72 Correction ................................................................................................. 72 Windows® Update ..................................................................................... 73 Windows Update Information for Data Security ................................... 74 System Restore .............................................................................................. 75 Limits of the Recovery ............................................................................... 75 Carrying out a Restore ............................................................................... 76 FAQ – Frequently Asked Questions ................................................................ 77 Customer Service .......................................................................................... 78 Localize the Cause ..................................................................................... 78 Check Cables and Connections ................................................................. 78 Errors and Possible Causes ................................................................... 79 Additional Support .................................................................................... 80 Driver Support .......................................................................................... 80 Transporting the Notebook ....................................................................... 81 Maintenance ............................................................................................. 82 Care of the TFT Display ............................................................................. 82 Upgrades and Repairs.................................................................................... 83 Notes for Service Engineers .................................................................. 83 Recycling and Disposal .................................................................................. 84 Deutsch Windows Media Center ............................................................................. 60 Installation of Software.............................................................................. 63 How to Install your Software ............................................................... 63 Software Uninstallation........................................................................ 64 Windows Activation .................................................................................. 65 Product activation on your Notebook .................................................. 65 The BIOS Set-up-Program.......................................................................... 66 Running the BIOS Set-up ..................................................................... 66 Kaspersky Internet Security ....................................................................... 67 vi Español Chapter 1 Subject English Safety and Maintenance Page Safety Instructions ............................................................. 3 Data Security ...................................................................... 4 Set-up Location .................................................................. 4 Ambient Temperature ...................................................... 5 Deutsch Working in Comfort .......................................................... 6 Connecting ........................................................................ 7 Information about the regulatory compliance according to R&TTE ........................................................... 9 Touch Pad .......................................................................... 9 Battery Operation............................................................. 10 1 2 Safety Instructions Español Safety Instructions Do not allow small children to play unattended with electrical equipment. Children are incapable of judging potential risks properly. Keep the packing materials, such as plastic sheet away from children. The danger of suffocation could arise in the case of misuse. Do not open the case of the notebook, the battery or the power adaptor. When the case is open there is a danger of severe electric shock. CD-ROM-/CDRW-/DVD-drives are Laser Class 1 devices. These lasers must remain in their sealed casing. DO NOT remove the drive covers, as exposure to the lasers may be harmful. Do not insert objects through the slots and openings of the notebook. This may lead to electric shock, electrical short-circuit or fire that will damage your notebook. Slots and openings in the notebook serve to ventilate it. Do not cover up these openings, because the notebook could overheat. The notebook is not intended to be operated in a heavy industry company. Operation under extreme environmental conditions can result in damage to your notebook. Do not operate the notebook during a thunderstorm, in order to avoid damage through lightning strike. Never place objects on top of the notebook that would exert any pressure on the display. There is a danger that even slight pressure may break the TFT display. There is a risk of injury if the TFT display breaks. Use protective gloves to pack up the broken pieces and contact customer service to arrange for proper disposal. It is important to thoroughly wash your hands after handling a broken TFT display. There is a chance that chemicals may have been released. To avoid damage to the LCD display, never open it more than 120º. Always hold the display firmly in the centre when opening up or positioning it. Do not forcibly open it. In order to avoid damage to the display, do not touch it with your fingers or sharp objects. Never lift the notebook by the TFT Display; doing so could break the hinges. Safety Instructions 3 Deutsch English Please follow the instructions in this section for the safe operation of your notebook: Switch off your Notebook immediately or do not switch it on at all and contact customer service … … if the power cord or the connectors attached to it are burnt or damaged. Replace the defective power cord with an original power cord. Under no circumstances may a defective power cord be repaired. ... if the housing of the Notebook is damaged or fluids have leaked into it. Have the Notebook checked by customer service first, because the Notebook may not be safely operated otherwise and there may be a life-threatening risk of electrocution! Data Security Attention! Every time you update your data make back-up copies on an external storage medium. The supplier does not assume liability for data loss or damage to data storage units, and no claims can be accepted for damages resulting from the loss of data or consequential losses. Set-Up Location 4 Keep your notebook and all connected peripherals away from moisture, dust, heat and direct sunlight. Failure to do so can lead to Notebook malfunction or damage. It is highly recommended you do not use the notebook outdoors. Operate the notebook and all peripherals on a stable, balanced and vibration-free surface. Do not leave the base of your notebook on your lap or any part of your body for a long period of time. The notebook can become very warm while it is turned on or charging and can cause discomfort or injury from heat exposure. In the first hours of operation, new devices may emit a typical, unavoidable but completely harmless smell, which will decline increasingly in the course of time. We recommend that you ventilate the room regularly, in order to counteract the formation of the smell. During the development of this product, we have made sure that the applicable limits are clearly lowered. Safety Instructions When powered off, the notebook can be stored at temperatures between 32° and 140° F (0° and 60° C). Unplug the cable during thunderstorms and make especially sure to remove the antenna cables, if present. We recommend the use of a surge protector for additional safety, in order to protect your notebook from being damaged by power peaks or lightning strikes through the power network. Wait until the notebook has reached ambient (room) temperature before turning it on or connecting it to the power adapter. Drastic variations in temperature and humidity can create condensation within the Notebook and may cause it to short-circuit. For transporting the notebook keep the original packing. Español The notebook is most reliably operated at an ambient temperature between +41° (5° C) and +95° F (35° C) and at a relative humidity between 20% and 70% (without condensation). Deutsch English Ambient Temperature Safety Instructions 5 Working in Comfort Sitting in one position for long periods can be uncomfortable. To minimize the potential for physical discomfort or injury, it’s important that you maintain proper posture. 6 Back – While sitting at your work surface, make sure your back is supported by the chair’s backrest in an erect position or angled slightly backwards. Arms – Your arms should be relaxed and loose, elbows close to your sides, with forearms and hands approximately parallel to the floor. Wrists – Your wrists should be as straight as possible while using the keyboard, mouse or trackball. They should not be bent sideways, or more than 10 degrees up or down. Legs – Your thighs should be horizontal or angled slightly downward. Your lower legs should be near a right angle to your thighs. Your feet should rest flat on the floor. If necessary, use a footrest, but double check that you have your seat height adjusted correctly before getting a footrest. Head – Your head should be upright or tilted slightly forward. Avoid working with your head or trunk twisted. Overall – Change your position frequently and take regular breaks to avoid fatigue. Safety Instructions Español Connecting Pay attention to the following information, in order to connect your notebook correctly: Do not open the power adapter housing. When the housing is open there is a danger of severe electric shock. It contains no user-serviceable parts. The electric outlet must be in the vicinity of the notebook and within reach of the power adapter cables. To disconnect your notebook from the power source, or set the notebook to battery operation, remove the power cord from the notebook’s power socket. Only use the notebook with a power adaptor operating at AC 110-240V~/50-60 Hz. For details on power consumption, please refer to the rating plate on the rear of your notebook. If you are unsure of the type of power supply available at the point of use, ask your local power company. Use only the supplied power cord and power adapter. To provide additional protection against electric shock, power surges, lightning strikes, or other electrical damage to your notebook, we recommend the use of a surge protector. Firstly remove the plug, and then the connector of the notebook, from the power source, if you want to detach the network adapter from the mains power supply. A reverse sequence could damage the network adapter or the notebook. Always hold the connector firmly when removing it. Never pull on the power cord. Safety Instructions 7 Deutsch English Power supply Cabling 8 Arrange cables so no one can walk on or trip over them. Do not place objects on any of the cables. Do not allow any large forces to be exerted on the plug-in connections, from the side, for example. This will otherwise lead to damage to and in your device. Do not exert any force when connecting cables and plugs and pay attention to the correct orientation of each plug. Pull the connection at the plug, not at the cable, of you are detaching a connection cable from your device. Avoid short circuits and cable breaks by not squeezing the cable or bending it sharply. To avoid damage to your Notebook, connect your peripherals (e.g., keyboard, mouse and monitor) whilst your notebook is powered off. Some devices can be connected whilst your notebook is in use. These devices usually have a USB connector. Please follow the appropriate instructions for each device. Keep the notebook at least one meter (approximately three feet) away from high frequency and magnetic interference sources (e.g., televisions, loudspeaker cabinets, mobile telephones, etc.) in order to avoid malfunctions and/or loss of data. Please note that only shielded cables shorter than 3 metres (9.84 ft) should be used for the LPT, COM, USB, IEEE 1394, audio, video and network interfaces with this notebook. Please use only doubly screened cables in the case of printer cables. Do not replace the cables supplied. Only use the cable supplied with the notebook, since that cable will have been tested extensively in our laboratory. Also only use the connection cables supplied with the devices to connect your peripherals. Make sure that all connecting cables are connected with the respective peripheral devices, in order to avoid perturbing radiation. Remove any cables not needed. The connection of devices is limited to equipment that complies with EN60950 “Safety of information technology equipment” or EN60065 “Audio, video and similar electronic apparatus. Safety requirements”. Safety Instructions Español Information about the regulatory compliance according to R&TTE The following remote equipment has been supplied with this notebook: The company declares herewith that these devices are in agreement with the fundamental requirements and the other relevant terms of the 1999/5/EG Guideline. Complete declarations of conformity are available under www.medion.com/conformity. Touch Pad Light pressure with the tip of your finger is all that is required to operate the touch pad. Because the touch pad is electrostatic sensitive, objects cannot be used in place of your fingers. Using a pen or other object can damage the touch pad or cause the notebook to malfunction. Safety Instructions 9 English Wireless LAN Deutsch Due to the capacity of the built-in wireless LAN solution (> 100 mW) the device may only be used within buildings in France. Currently none of the other EU-countries have any restrictions. For use in other countries please obtain information about the applicable regulations locally. Battery Operation To extend the life and power of your battery and guarantee secure operation, the instructions below should be followed: 10 Never expose the battery to direct sunlight or heat for long periods. Do not dispose of the battery by fire. Disregarding these instructions will lead to damage and under some circumstances may even cause the battery to explode. Do not open the battery housing; it contains no user-serviceable parts. Keep the battery away from electrically conductive materials, chemical substances and cleaning agents. Only use the originally supplied power adapter to charge the battery. Ensure (through the display or the signalling sound of the notebook) that the battery is completely discharged before recharging it. Replace the battery only with the same type or an equivalent type recommended by the manufacturer. Charge the battery only until the battery charging light goes out. Also, refer to the instructions under “Charging the Battery” on page 31 for instructions on checking the battery level. Only change the battery when the unit is switched off. Batteries are classified as special waste and should always be disposed of properly. Contact Customer Service for more details. Safety Instructions Español Chapter 2 Subject English Views & Handling Page Included with your notebook ............................................ 13 Views .................................................................................. 14 Open notebook ............................................................. 14 Front view ..................................................................... 15 Deutsch Left side......................................................................... 15 Right side ...................................................................... 16 Power and status indicators........................................... 17 Multimedia buttons ...................................................... 18 Getting started ................................................................... 19 How to start .................................................................. 19 Short Description of the Windows® Desktop.................. 22 11 12 Included with Your Notebook Español Included with Your Notebook Notebook Battery Power adapter with connection cable (FSP065-ASC) OEM version of operating system Documentation Deutsch English Please check that the contents are complete and notify us within 14 days of purchase if any of the following components are missing: Included with Your Notebook 13 Views 1 Open Notebook 10 2 3 3 4 9 5 8 6 14 7 (Diagram the same) Views 3 - Stereo Speaker 4 - Power ON/OFF ......................................................................( p. 27) 5 - Keyboard ...............................................................................( p. 38) 6 - Device Indicators ...................................................................( p. 17) 7 - Touchpad buttons ..................................................................( p 39) 8 - Touchpad ..............................................................................( p. 39) 9 - Multimedia buttons ...............................................................( p. 18) 10 - Microphone ...........................................................................( p. 47) Español - Webcam ................................................................................ ( p. 52) - TFT Display .............................................................................( p. 34) English 1 2 Deutsch Front view 11 (Diagram the same) 11 - Multimedia Card Reader .......................................................( p. 51) Left Side 12 13 15 14 16 (Diagram the same) 12 - Power Socket .......................................................................( p. 28) 13 - LAN Port (RJ-45) ....................................................................( p. 48) 14 - External monitor port VGA .....................................................( p. 35) 15 - HDMI Connector ....................................................................( p. 36) 16 - USB 3.0 Port ..........................................................................( p. 52) Views 15 Right Side 17 18 19 20 21 (Diagram the same) 17 - Audio Out .............................................................................. ( p. 47) 18 - Microphone ..........................................................................( p. 47) 19 - USB 2.0 Port ..........................................................................( p. 52) 20 - Optical Drive ........................................................................( p. 42) 21 - Kensington® Lock ...................................................................( p. 53) 16 Views Español Device Indicators English LED's indicate the power and operating system states of the Notebook. The meaning of each LED is: Power Indicator Deutsch This LED lights blue, when the notebook is turned on. Battery LED This LED lights when the battery is charging. Access indicator This LED lights or flashes when the notebook is accessing the hard disk or the optical drive. Wireless LAN LED This LED lights when the WLAN function is activated. Capital Lock This LED lights when CAPS-Lock has been activated. This sets the keyboard to capital letters. Num Lock This LED lights when NUM-Lock has been activated (NumLk). Views 17 Multimedia buttons Wireless LAN Enables or disables the wireless LAN function. Mute Switches the loudspeakers on / off. Pause/Play Button Starts the playback of multimedia files or pauses the playback at the selected point. Stop Button Stops the playback of multimedia files. Previous Track Jumps to the previous title during the reproduction of multimedia files. Next Track Jumps to the next title during the reproduction of multimedia files. Decreases the volume. Increases the volume. 18 Views Español Getting Started Before you get started using your notebook, first take a few moments to read the important section on Safety. This notebook comes with software fully pre-installed. You do not have to install any of the discs supplied. Step 1 Insert the battery before bringing the notebook into operation by sliding the battery pack into the compartment. Lock the battery under all circumstances, in order to avoid it falling out unintentionally. Deutsch English How to start: Getting Started 19 Connect the supplied power adapter (), connect the power adapter via a power cable to a free AC power outlet (). Connect the power adapter to the notebook at the notebook power socket at the left side () of the notebook. Set the switch on the power adapter (optional) to the I setting, in order to supply the notebook with electricity and to charge the battery. (Set the switch to 0 to interrupt the electricity supply.) Open the display to the required position with your thumb and index fingers. To avoid damage to the TFT Display, never open it more than 120º. Always hold the display firmly in the centre when opening up or positioning it. Do not forcibly open it. (Diagram the same) Note Please ensure that the battery is inserted and the power adapter connected when operating the Notebook for the first time. If you fail to do this, Windows® 7 will not be able to calculate the performance index correctly. Switch the notebook on by operating the On/Off Switch (6). The notebook starts and now goes through a number of phases. Note Make sure there is no bootable disc (e.g., the Recovery disc) in the optical drive. Such discs will prevent the operating system from loading off the hard drive. 20 Getting Started Español The operating system is loaded from the hard disk. During the initial set-up, the loading process takes slightly longer than normal to register the operating system and the individual components completely. Your operating system is finished loading when a welcome screen is shown on your display. Note English The initial installation may take up to 30 minutes to complete. Do no unplug the notebook from the mains or switch it off during the initial installation. This may adversely affect the installation. Only switch the notebook off after installation has been completed successfully and the Windows desktop appears. Step 2 Follow the instructions on the screen. Dialogue boxes will explain any steps that need to be taken. Should you have any questions just click on . License Agreement The greeting procedure also displays the license agreement. Please read this carefully. It contains important legal information on the use of your software. In order to see the full text, use the mouse and the scroll bar on the right side of the screen to move downwards until you have reached the end of the document. You accept the agreement by clicking on the “I accept the agreement” option field. Only by doing so will you be entitled to use the product under lawful terms and conditions. Step 3 After the login procedure the Windows® desktop appears on your screen. You will find a brief overview on the following pages. After the login procedure the Windows® desktop appears on your screen. This can be adjusted so that the screen of your computer looks different. However, basic operation is guaranteed. Note Windows might update and configure data (e.g. by means of new updates) in the first days after the initial installation. This could lead to delays during shutting down and starting up the notebook computer. Do not switch off the laptop/notebook prematurely for this reason. This could have a negative effect on the installation. Getting Started 21 Deutsch The greeting procedure will guide you through a series of dialogue boxes. The information in each dialogue box will explain the steps that need to be taken. Short Description of the Windows® Desktop Start Button Clicking the Start button brings up a menu where you can access help, software programs, files, and settings All Programs All of the software programs installed on your notebook are ordinarily listed here. Click All Programs to reveal an extensive menu. Taskbar You can start programs and switch between already active programs using the taskbar beneath the screen. You can place every program in the taskbar under Windows® 7, so that you can always open it with a single click. Furthermore, you can rearrange the symbols on the taskbar by clicking on them and dragging them to the desired position. Move the cursor over the symbols, and the system will display a miniature of every file or window open in the program. When you move your cursor over the miniature, the system will display a full-screen preview of the particular window. If you move the cursor away from the miniature, the full-screen preview will close. Windows Search Windows Search helps you find almost all data located on the notebook, quickly and easily. With Windows® 7, you get search results with greater relevance, and they are easier to understand. Program Bar The most commonly used software programs are listed here. The operating system recognises all this automatically. Clicking on an entry with the right mouse key enables you to decide which entry on the list to keep or to remove. The program linked to the input is not erased. Turn Off To turn off the notebook, click on the Shut down button with the left mouse key. Display Desktop Click on this Button if you would like to minimise all the windows open onto the taskbar, in order to obtain a clear view of the Desktop. Desktop Icons Desktop icons link to their respective programs. To start a program, double-click its desktop icon. The desktop encompasses nearly the entire screen and acts as the shelf space for such entries or for other links, to which you would like rapid access. Logged in User This tells you which user is logged in to your notebook. 22 Getting Started Español Control Panel System tray Deutsch System tray on the current time. When certain events occur, for example, upon receipt of an e-mail message or upon opening the task manager, it may happen that too many notification symbols are displayed in this field. Windows® displays a notification symbol when an event occurs. After a short time, Windows® places the symbol in the background, in order to maintain the straightforwardness of the field. You can access the symbols placed in the background by clicking on a button in the system tray. English You can use the icons in Control Panel to change the appearance and functionality of Windows®7. These icons represent options for configuring your notebook. You should, however, consult “Help and Support“ on the potential effects of certain changes. Getting Started 23 24 Getting Started Español Chapter 3 Subject English Main Components Page Power Supply ..................................................................... 27 Display ............................................................................... 34 Data entry .......................................................................... 38 Hard Drive ........................................................................... 40 Deutsch Optical Drive ....................................................................... 42 Sound Card ......................................................................... 46 Network .............................................................................. 48 The Multi Card Reader......................................................... 51 Webcam .............................................................................. 52 Universal Serial Bus (USB) Port ............................................ 52 Securing the Notebook ...................................................... 53 Software.............................................................................. 54 25 26 Power Supply Español Power Supply On/Off Button The operational indicator will inform you about the operational status of the notebook. The notebook will always be switched off, if the main switch is pressed for more than 4 seconds. English Power on or off your notebook by pressing the on/off button briefly. Warning! Deutsch Do not switch off your notebook while the hard disk or the optical drive is running. Otherwise data may be lost. To protect the hard disk you should always wait for 20 seconds after powering down the notebook before powering it up again. Power Supply 27 Power Adapter Your notebook is supplied with a universal AC power adapter, which automatically adjusts to the available power source. The following levels are supported: AC 100-240V~/ 50-60 Hz. Please follow the power supply safety instructions found on page 5. The power adapter is connected via a power cord to an AC outlet. The DC power lead from the power adapter is connected to the left side of the notebook (12). (Diagram the same) The adapter has an on and off switch. No electricity will be used and the notebook will not be supplied with electricity if the switch is set to OFF (0). The adapter provides the notebook with power in the ON setting (1) and also charges the battery. The power supply indicators of the notebook provide details on the operating state. The battery is also being charged when you are working on your notebook with the power adapter. The power adapter is still live if the notebook is not connected with it. You should therefore unplug the power adapter from the outlet if it is not connected to the notebook or set the adapter to OFF (0). Warning! Use only the power adapter and power cord supplied with your notebook. 28 Power Supply Español Battery Operation Note Please charge and discharge the new battery completely two to three times in succession, so that it will achieve its full performance! Batteries store electrical energy in their cells and then deliver it when needed. English The useful life and performance of your battery depend on careful handling. The battery should be completely discharged before a charging process and completely charged again, in order to optimize its useful life and its performance. You must also pay attention to the Safety Notes from page 8. Insert the battery before bringing the notebook into operation by sliding the battery pack into the compartment. The battery should remain locked in order to avoid it falling out. Power Supply 29 Deutsch Inserting the Battery Removing the Battery Push the battery lock outwards, in order to remove the battery, and remove the battery pack from the compartment. Warning! Do not remove the battery while the notebook is running on battery power, this will very likely cause data loss. Warning! Keep the contacts on the battery and notebook clean when storing them. Dirty contacts might lead to malfunctions. 30 Power Supply The battery is charged via the power adapter. If the power adapter is connected, it charges the battery automatically, whether the notebook is turned on or not. When the notebook is switched off, full charging takes a few hours. If the notebook is switched on, the charging process takes a significantly longer time. Español Charging the Battery Note English The charging process will be interrupted if the temperature or the voltage of the battery is too high. Discharging the battery Operate the notebook by means of the battery until it switches off independently because of the low battery charge. Deutsch Note Think about saving your open files in good time, to avoid a possible loss of data. Battery Performance The particular operating duration will vary according to the setting of the energy saving functions. You can adjust these to your requirements under Energy Options in System Control. Apart from this, your notebook will require a higher power demand when carrying out certain tasks. Power Supply 31 Checking the Battery Level In order to check the current level of the battery, move the cursor over the power symbol in the taskbar. The symbol of a battery is displayed during battery operation. You will receive additional information about settings if you double click on this symbol. Note If you ignore the warning signal when the battery level is low, your notebook goes into hibernate mode. Warning! Never remove the battery while the notebook is switched on or if the notebook has not yet gone into hibernate mode, as this may lead to loss of data. 32 Power Supply Español Power Management Your notebook offers automatic and modifiable power saving functions that you can use to maximize battery life and reduce overall operating costs. The power saving modes are known as sleep mode and hibernate mode. When in sleep mode, the contents of the RAM of your notebook are preserved while practically all other components of your notebook are shut down, reducing your power consumption to a minimum. By pressing any key on the keypad, you can bring your notebook back to the fully operational state. You will restart at precisely the line in which you were working prior to the interruption. The computer takes less time to go into and come out of sleep mode, but uses more power than hibernate mode. English Sleep Mode The hibernate mode is an alternative to a complete shutdown of the notebook. In this mode all data from RAM (system and graphic data) are copied to the hard disk as a file. As soon as the data has been safely saved, the notebook powers down. When the notebook is switched on again, this file is written back to RAM by the BIOS. In a few moments the notebook is in the exact state as when it was last used. If while working on a document the notebook is closed (assuming the correct ACPI setting), the notebook saves the data in RAM for you automatically. You will restart at precisely the line in which you were working prior to the interruption. The computer uses no power while it is in hibernate mode, but it takes a little longer for the computer to go into and come out of hibernation compared to sleep. Power Supply 33 Deutsch Hibernate Mode Display Opening and Closing the Display The display is locked by means of a special construction of the display hinge so that an additional lock is not necessary. 1. To open, lift the display with your thumb and index finger and position it as desired. Warning! To avoid damage to the LCD display, never open it more than 120º. Always hold the display firmly in the centre when opening up or positioning it. Do not forcibly open it. The opening and closing of the display can be assigned various functions via the Power management feature. Screen Resolution The integral screen has a native resolution of 1366 x 768 pixels. Using a higher resolution can lead to distortion of the display, especially with text. Using a lower resolution may cause the display to use only a portion of the screen area. You can adjust the presentation to the mode supported with the Windows “Control Panel Appearance and Personalization Display Settings Adjust screen resolution Advanced Settings“ Help Program. 34 Display This program offers you the possibility of adjusting the presentation on your display. This includes the background image, the screensaver, Active Desktop (web) and additional settings of your display and your graphics card, for example. The program can be started in the following way: Español Appearance and Personalization Right mouse click on the Windows interface (Desktop) and left mouse click on Personalization Via Start Control Panel Appearance and Personalization with a double-click with the left mouse button. Deutsch English or The following adjustment possibilities are available: Personalization Display Desktop Gadgets Taskbar and Start Menu Ease of Access Center Folder Options Fonts Display 35 Connecting an External Monitor The notebook has a VGA port (14) for connecting an external monitor. 1. Shut down your notebook. 2. Connect the video signal cable of the external monitor to the VGA port of the notebook (14). Alternatively, you will be able to use the digital HDMI (High Definition Multimedia Interface) connection (15) for the transmission of image and sound signals, provided that your output device (a monitor or LCD TV) has a corresponding input. 3. Connect the external monitor to the electrical socket and power it up. 4. Start your notebook. The external screen will be determined after the operating system has been loaded. Several possibilities will be available to you. You will call them up as follows: 1. A right click on the display. 2. Select the Screen Resolution option in the selection window. 3. Select from the following options under Multiple displays: 36 Duplicate these displays Extend these displays Show desktop only on 1 Show desktop only on 2 Display Español Duplicate the Desktop This Mode duplicates the display of the notebook on an external monitor. Information Extend the Desktop An empty Desktop will be shown on the second (external) monitor in this mode. Windows from the first screen can be pushed to the second screen and vice versa. The screen resolution and the colour quality of the individual display devices can be set individually under Start System control Appearance and Personalization. English The same screen resolution must have been set on both devices in the case of this mode. Only display the Desktop on 1 Deutsch The Desktop will only be displayed on the main monitor 1. Only display the Desktop on 2 The Desktop will only be displayed on the second (external) monitor. Display 37 Data Entry The Keyboard By dual assignment of certain keys you have the same range of functions available to you as with a normal Windows® keyboard. Some functions are input using the Fn key, which is normal on notebook computers. Notebook-Specific Key Combinations Combination Description Fn + F1 This key combination is set to shut down as save energy. Please go through Personalization, Energy Options, in order to adjust this key combination to your needs. Fn + F2 WLAN Enables or disables the wireless LAN function. Fn + F4 Smart Power You will be able to select between two different Energy Saving Modes with this key combination. Fn + F5 Reduces screen brightness. Fn + F6 Enhances screen brightness. Fn + F7 Background lighting Switches the backlight off to save power. Pressing any key switches the backlight on again. Fn + F8 Display Toggles the display screen between internal monitor, external monitor and simultaneous display. Fn + F9 Touchpad Switches the touchpad on / off. Fn + F10 Mute Switches the loudspeakers on / off. Fn + F11 Decreases the volume. Fn + F12 Increases the volume. Fn + Scr Lk Scroll This key combination activates / deactivates the scroll function. Many applications use this function to scroll the screen without moving the cursor. 38 Data Entry Español Touch Pad The touchpad is positioned in front of the keyboard. The mouse pointer (cursor) follows the direction pre-determined on the touchpad by the movement of your finger in the normal mode. Do not use a ball-point pen or other object on the touch pad, as this could damage or cause a malfunction of your touch pad. Below the touch pad are the left and right mouse buttons which can be used as on a normal mouse. English Caution! You can also perform a direct click or double click using the touch pad by tapping the surface briefly once or twice. Deutsch In the Windows® Control Panel you will find a number of useful settings that will make using the touch pad easier. Touch Pad 39 The Hard Drive The hard drive is the main storage medium combining large storage capacity and rapid data access. The hard drive contains the operating system of the computer, other application programs and backup files. These programs and files are pre-installed on your notebook, so you may note that some of the space on your hard drive is already taken. The Windows operating system cannot use the full capacity of the hard drive, which means that there will be a difference between the capacity that the BIOS displays and what the operating system displays. The operating system of the notebook, further application programs and backup files are located on the hard drive and reduce its total capacity. Note Never switch off the computer while the busy indicator is lit since this may result in loss of data. A flickering hard drive display is your indication that the notebook is accessing the hard drive. In your first partition (C:\) you will find the operating system, application programs and the users’ documents. The second partition (D:\) serves for data security and contains additional drivers (D:\Driver) and tools (D:\Tools) for your notebook. Note You will also find in two otherwise non-overwriteable partitions the system restoration start files ( p. 75), as well as installation files for Windows® 7. These partitions are not visible and should not be erased. 40 The Hard Drive In the following we have listed the most important directories and described their content. Español Important Directories Attention! C:\ The master directory of drive C: includes important files required to start Windows®. In the factory setting these files are hidden for safety reasons. English Do not delete or modify these directories or their contents since data could be lost or the functionality of the system could be at risk. C:\Windows The main directory of Windows®. This is where the files of the operating system are saved. D:\Driver This folder includes the drivers required by your computer (preinstalled). D:\Tools Here you find additional programs and other documentation for your notebook. The Hard Drive 41 Deutsch C:\Program Files As the name suggests, in this directory programs install the files belonging to the application. The Optical Drive Loading a Disc Unlike optical drives of desktop PC’s optical drives of notebooks retain discs with the help of a locking mechanism. When inserting the disc, you should take care to push the disc right onto the locking mechanism so that it can lock in position. Note Do not place protective foils or other stickers on your discs. To avoid damage to your drive, do not use deformed or damaged discs. Warning! Do not use scratched or dirty discs, discs with pieces broken off or discs of poor quality. Because of the high speeds in the drive the discs might break and damage your data as well as your drive. Examine the discs before you insert them. If damage or dirt is visible, you should not use them. Damage caused by faulty media is excluded from warranty and their repair must be charged. Warning! The disc can be damaged when the drive drawer is pushed in if it has not been pushed onto the locking mechanism correctly. 42 The Optical Drive Español 2. Remove the disc from its case without touching the unprinted side if possible. 3. Place the disc on the tray so that it lays flat with the label facing upward and gently push the tray in to close it. The disc will now lie flat on the tray and will engage onto the disc holder audiblyTest that the disc is able to turn freely and then push the tray back into the optical drive carefully. The ‘E’ drive letter will have been allocated to your optical drive in the delivery status. You will have easy access to your files on your disks with Windows® Explorer (Computer). Start the Computer Help Program by and the ‘E’ means of the Desktop link or by pressing the Windows® key key at the same time. Open Windows® Explorer by means of Start All Programs Accessories. The pre-installed media reproduction will be used automatically during access to DVD videos (or audio and video files on normal data CDs). English 1. Press the eject button at the optical drive to open the tray. Warning! Deutsch While the notebook is accessing the optical drive the media activity indicator is lit. Do not try to remove the disc from the drive while this LED is lit. Emergency Ejection of a Blocked Disc If the tray fails to open automatically, the tray can be opened manually provided there is an opening for emergency ejection. Restart your notebook and if the tray is still locked proceed as follows: 1. Shut down Windows® and switch off your notebook. 2. Insert a long thin object (like a straightened paper clip) into the emergency ejection opening until you feel resistance. 3. Press lightly and the tray will open. 4. Remove the disc and restart the notebook. The Optical Drive 43 Playing Back and Retrieving Data from Discs Your notebook is able to playback and to retrieve information of Audio CDs, DVD Movies and Data discs. After loading the disc your operating system will open a selection window with different options for playback. Normally there are various programs at your disposal. If your operating system doesn’t open the selection window you still have the possibility of the access via the “Explorer” or “Computer”. Regional Playback Information for DVD The playback of DVD movies includes the decoding of MPEG2 videos, digital AC3 audio data and the deciphering of CSS protected contents. CSS (sometimes called copy guard) is the name of a data protection program incorporated by the movie industry as an action against illegal copies. Among the numerous regulations for CSS licensees the most important ones are the country specific playback restrictions. In order to facilitate the geographically restricted release of movies, DVD titles are released for certain regions. Copyright laws require the restriction of each DVD movie to a certain region (usually the region in which it is sold). DVD movie versions can be published in several regions but the CSS regulations require that each CSS decipherable system may only be used in one region. Note The decoding software included with your notebook may be changed for regional DVD decoding up to five times, after which the drive will only play DVD movies for the region setting last entered. Changing the region code after that will require factory resetting which is not covered by warranty. If resetting is desired, shipping and resetting costs will be billed to the user. 44 The Optical Drive Español Subjects Concerning the CD/DVD-Rewriter This Section only relates to devices that have been supplied with a CD-RW, a combination drive or a DVD-RW drive. First of all, you receive information on the so-called blank discs. Normal Discs are pressed from a digital, glass master and then sealed. In the case of blank disc, the information is burnt onto the disc with the laser of the Rewriter. Therefore these discs are more sensitive than normal discs. Please avoid the following when using recordable/rewriteable discs that have never before been used: radiation by direct sunlight (UVA/UVB) scratches and damage to the disc surface extreme temperatures Deutsch English Recordable/Rewriteable Discs The Optical Drive 45 The Sound Card Your notebook has an integrated stereo sound card (on-board) with 16-bit and 3D spatial sound effects (3D). The sound card is compatible with the industry standard Sound Blaster and Microsoft Sound System Version 2.0. This guarantees optimal support for all popular programs and games. If you wish to alter the base volume, click on the loudspeaker symbol in the task bar. Click on Mixer, in order to open the volume mixer. By using the keys Fn +F11 and Fn +F12 you have the possibility to regulate the volume. 46 The Sound Card Español External Audio Ports Your notebook has a loudspeaker, so you can always playback sounds without additional equipment. The use of the external connections gives you a good opportunity to connect your notebook to external devices. Caution! English The use of earphones with a high volume can lead to lasting damage to your hearing. Set the volume to the lowest level before reproducing any sound. Start the sound reproduction and increase the volume to the level that is comfortable for you. It can cause damage to the hearing ability of the listener if a device is operated through earphones with an increased volume for a long period. Microphone In (18) For sound reproduction via external stereo equipment such as loudspeakers (active) or headphones. Deutsch Audio Out (17) For recording via an external microphone. The Sound Card 47 The Network What is a network? A network means connecting your notebook to one or several other computers. Users can transfer data between computers and share resources such as printers, modems and hard disk drives. Here are some practical examples: You can exchange E-mail and manage appointments in an office. Users can share a printer in a network and save their data on a central server. Two or more computers can be connected to play network games or share data. Ethernet-Network If your notebook has an Ethernet connection, you can use this to connect to a network. The following explanation refers to notebooks with a network connector. Connect one end to the RJ45 connection (Western plug) at the network interface of your notebook (13) and the other to another notebook or a hub/switch. The Windows Help and Support Centre offer extensive information about networking your Notebook. You can access this information by clicking on Start, then Help and Support. 48 The Network Español Wireless LAN Wireless LAN is an optional feature. This function allows you to create a wireless network link with an access point or directly with another wireless-enabled PC. Using the Quick launch key combination Fn+F2 you can enable or disable the wireless LAN function. English Warning! Make sure the Wireless LAN option is switched OFF in any environment where it might interfere with critical and sensitive devices, e.g. on aircraft, in hospitals and other medical centres, etc. An access point is a wireless transmitter that communicates with your notebook and controls access to the network connection (e.g., a home network or a broadband connection such as DSL). Wireless access points are often found in offices, airports, universities or Internet cafés. They offer access to networks or to the Internet. Access authorizations are normally needed. A fee may be required to use a public access point. To set up a wireless network to share Internet access, files, and printers at home, you will need an access point, a router, and a broadband (DSL or cable) modem. Some access points can also serve as a router and/or a broadband modem. Check with your retailer or Internet Service Provider to find the best solution for your needs. A link to another computer with wireless LAN functionality can also be created without an access point. This will allow you to share files, but you will need an access point and a router to share an Internet connection. The wireless network connection works in accordance with the * IEEE 802.11n Standard (compatible with the 802.11b/g Standard). If encrypted transmission is used, this must operate according to the same principle on all devices. Encryption is a method of protecting the network from unauthorized access. The transmission speed can vary according to the distance and loading of the partner. * A WLAN router in accordance with the 801.11 standard will be necessary, in order to be able to exploit the complete performance. The Network 49 Deutsch Conditions Troubleshooting within the Network Why does an error message appear when I click on the network environment? The computer name must be unique on the network and may not be the same as the task group. It appears that the network boards are unable to communicate. What might be the problem? Maybe one of the used network boards works with a different speed (e. g. 10 instead 100 Mbit/s) and your network computer is unable to recognize this. If necessary, set the network driver to the compatible speed. If two PCs should be linked you require a cross-link cable, otherwise use a patch cable. In addition, check the protocols and the configuration. The data transmission is incorrect or very slow. What might be the problem? Maybe you have the wrong cable (UTP / CAT3 or lower) or the problem is the proximity of a power cord or another source of interference. For further hints on troubleshooting refer to the Windows help under “Network errors”. 50 The Network Español The Multimedia Card Reader Memory cards are media that are being used for a variety of purposes, especially in digital photography. They are increasingly replacing the floppy disk. The form and capacity of a memory card can vary according to the manufacturer. MMC (MultiMediaCard) SD® (Secure Digital), SDHC, SDXC Memory Stick / Memory Stick Pro Card type Contacts SD® (Secure Digital) MMC (MultiMediaCard) Memory Stick Memory Stick Pro pointing downwards pointing downwards pointing downwards pointing downwards Deutsch When inserting memory cards, ensure that the contacts are facing the right way. See table below. Incorrect insertion of a card can cause damage to the card reader and/or the card. Inserting Memory Cards Note Memory cards can only be installed in one direction. Refer to the instructions above. Push the memory card into the slot. Removing Memory Cards To remove the SD®/MMC-cards or memory sticks pull it out and remove it. The Multimedia Card Reader English Your notebook supports the following formats: 51 Webcam Various services like calling online can be used with the built in webcam. Actual example using Windows Live Messenger 1. Start Windows Live Messenger and create a user account if you do not already have one. This service is free of charge. You only pay the cost of your Internet connection. 2. Select your contact from the list and click on the camera icon below your display image. A wizard helps you optimize the settings of your speakers, microphone and webcam. Follow the instructions on your screen. 3. Click on Finish to transmit your image via the webcam. 4. If your contact also has a webcam, click on the camera icon below the display image of your contact to receive the live image. Universal Serial Bus (USB) Port USB ports provide an easy way to connect many peripheral devices to your notebook. You can use any USB device with any USB port. Your notebook has 2 USB 2.0 connection sockets (USB 1.1 compatible) (19) and 2USB 3.0 connection sockets (16). Note Some USB devices require that you reinstall software drivers when you connect the device to a different USB port than the one originally used. This can be avoided by always using a certain device with the same USB port. 52 Webcam Español Securing the Notebook Unauthorized access to software and hardware solutions will be made available to you with your new Notebook. Startup Password English You can protect your notebook against unauthorized use with a switching on password. Then, an invitation to enter the password will appear on the screen when the notebook is switched on. The password will be set up in BIOS. Warning! Deutsch Keep your password in a safe place. You will not be able to delete your password if you forget it. Contact your customer Service if you lose your password. Using a safety lock You can prevent theft by using a so called Kensington lock, which can be bought at your local retailer. The cable wraps around an object and the “T” shaped end inserts into the Kensington lock port and a key or combination dial is used to secure the lock in place. Please keep your key at a safety place. Securing the Notebook 53 Software This section concerns itself with software. We make a distinction between the operating system, the software (application program), Windows activation, BIOS and the security package, which is delivered with the device. Getting to Know Windows® 7 With Windows® 7, is launching the new operating system and successor to Vista®. Windows® 7 contains a number of innovative functions and technologies, enabling your notebook to work quickly and reliably, while being easy to use. ® Windows 7 - News Improved Taskbar The Taskbar at the bottom of the screen enables you to start programs and change between programs which are already running. Using Windows® 7, you can place any program in the Taskbar, so that it will always open with one single click. You can also arrange the symbols on the Taskbar simply by clicking on them and dragging them to the desired position. The symbols are also considerably bigger, so that they are easier to use. Moving the cursor over the symbols will display miniatures of each file or each window open in the program. Moving the cursor over the miniature displays a full-screen preview of the particular window. Moving the cursor away from the miniature closes the full-screen preview. Jump lists Jump lists offer a practical possibility when opening files which you have recently worked on. To display recently used files, just right-click the application symbol on the Taskbar. Right-clicking on the Word symbol will display recently used Word documents. You can also easily place other files in the jump list if you would like to have them readily at hand, in which case they will always be displayed. This allows you to access documents which you use more frequently, with just a few mouse clicks. The jump lists from a few programs, such as Windows® Media Player, can be filled in advance with frequently used commands. Thus, for example, the Windows® Media Player jump list might contain options to play all music or to re-open the latest play list. The Internet Explorer jump list displays frequently and most recently visited websites. For certain programs, this enables rapid access commands which, in the past, could only be retrieved from the program itself, such as the command to create a new e-mail message. 54 Software Español Improved Desktop Windows® 7 simplifies working with the windows on the Desktop. This provides you with more intuitive possibilities for opening and closing, as well as for changing the size and for rearranging. If you would like to display all Desktop mini-applications, simply move the mouse into the lower right hand corner of the Desktop. This makes all open windows transparent, so that the Desktop and all the mini-applications located on it will be instantly visible. English Windows® 7 makes the performance of everyday tasks even simpler. For example, the Snaps function makes it easier than ever to compare two open windows. You do not need to adjust the size of the open window for comparison. Simply pull the window, using the mouse, to one of the edges at the side of the screen, and it will fill half the screen. Snap the window on both sides, and it is already easier than ever to compare two windows. Click on the Titlebar of the window, "shake" it, and all open windows will be displayed as symbols on the Taskbar. "Shake" the window again, and the other windows will be displayed again. Windows® 7 enables you to close, manage and use all devices through the "Devices and Printers" central function. All devices are displayed in a central position. With the new Device Stage Technology, Windows® 7 even goes one step further in device management. Device Stage helps you use all compatible devices connected to your computer. Thanks to Device Stage, now you display the device status in one single window and carry out often-used commands. You will even find pictures of the devices here, easily enabling you to see which devices are connected. The manufacturer of the devices can even adapt Device Stage. If the manufacturer of your camera, for example, prepares an adapted version of Device Stage, you can see the number of photos on the camera and receive links to useful information when you link the camera to the notebook. Software 55 Deutsch Better device management Homegroup With homegroups, a new function of Windows® 7, the linking of home computers is really simple. A home network group is created automatically, for example, when you link the first notebook under Windows® 7 with the home network. The addition of additional PCs with Windows® 7 to the home network group is quickly accomplished. You can indicate exactly what should be released on each PC for all other PCs in the home network group. Finally, the shared use of files on the various home PCs, and on many other devices, is so simple that it is as if all files were located on one single hard drive. This allows you to store digital photos on the computer in your home office and then enjoy easy access to them from a laptop in any other room in the house. Similarly, the printer in home office is automatically released for all PCs in the house, as long as they are all in the home network group. Beginners and persons changing from other Windows versions systems are advised to read this material carefully. Windows® 7 - Help and Support An answer to almost every question can be found in this program. This help function fully covers the Windows operating system. It is helpful for both beginners and professionals. You can print or bookmark the information, which is categorized into topics. You start like this: 1. Click on Start 2. Now select Help and Support 56 Software Español Windows® 7 – Getting Started Deutsch English Learn everything you need to know about the features of the notebook. It is the aim of this feature to enable both beginners and experienced users to make additional setting for the optimal use of Windows®7 after first bringing the Notebook into operation. Software 57 Getting Started has been subdivided into many small groups of subjects, so that the user will have the possibility of adjusting the content optimally to his or her knowledge. There are some of the links in the following: Go online to find out what’s new in Windows®7 Personalize Windows Transfer files and settings from another computer Use a homegroup to share with other computers in your home Choose when tob e notified about changes to your computer Back up your files Add new users to your computer Change the size of the text on your screen Use Getting Started to understand your notebook better and in order to be able to use it optimally. It will also serve you as an additional source of information for recognizing and removing potential problems. You will call up Getting Started as follows: 1. Click on Start 2. Select Getting Started in the Program List. Windows® 7 - User Account Control The User Account Control contributes to the prevention of unauthorized changes to the notebook. A window with the message “Do you want to allow the following program to make changes to this computer?” will appear as soon as you carry out an unauthorized change. 58 Click on Continue, in order to continue the procedure. Click on Cancel, in order to end the procedure. Software Deutsch English You can change Windows settings using the control panel. The settings control almost everything relating to Windows displays and functionalities, and they enable you to organise Windows according to your requirements. Español Windows® 7 – Control Panel When you first open the Control Panel, a few of the most frequently used elements of the Control Panel are displayed by category. For further information on any element in the Control Panel category view, hold the cursor over the symbol or category name and read the pop-up display text. To open one of these elements, click on the associated symbol or category name. For a few of these elements, a list, with executable tasks will open, with a selection of individual Control Panel elements. Searching for the desired control elements may be effected in the following ways: Enter a word or expression in the search field. Click on Large Icons or Small Icons under Display Settings to display a list of all Control Panel elements. Software 59 Windows Media Center The Windows Media Center is the platform for your individual home entertainment in Windows®7. You will be able to record television, TV broadcasts, DVDs and music, look at photos and much more by a remote (not included in the scope of supply) or by a click of the mouse, with the Windows Media Center. Information The support of the functions depends on the hardware equipment of the notebooks. For example, the TV function requires a TV tuner (not included in the scope of supply). You will start your individual entertainment as follows: 1. Turn on your notebook. 2. Click on Start 3. Click on . Windows Media Center. An overview of the Windows Media Center functions is below: Main menu Sub-menu TV + Films Recordings You will have the possibility of recording broadcasts if you connect a TV tuner. You can play back the broadcasts recorded, delete them or burn them on external media through this Menu point. Play back DVD You will play DVDs through this Menu point. Set up TV You will have the possibility of configuring the TV signal here, if you have an external TV tuner available. Online Media Programmes This library of programmes offers a listing of various online media. You will call up content through the Internet, from the online video library, through news portals to the music shop, by means of the online media. An existing Internet connection is the requirement for the use of this function. 60 Software Sub-menu Tasks Settings Español Main menu Adapt the Windows Media Center to your requirements and needs here. For example, make the settings for the protection of children here. Stand by English You will not only close the Windows Media Center but you will be able to put the whole operating system in stand-by through this sub-menu. Pay attention that all applications have been already closed before putting the system into stand-by. Burn CD/DVD Call up your burning software to start a burning process through this sub-menu If you connect an external device, such as an MP3 player or a digital camera; you will be able to synchronise the respective data to an external device with the notebook through this sub-menu. Extension set-up You will be able to set up a Windows Media Center extension by means of this sub-menu. You will be able to access the data on your notebook by means of a cable or wireless network. ‘Only media’ You will switch to the full image of the Media Center by means of this sub-menu. Images + Videos Library of images All the images stored in your notebook will be located in the library of images. Start the playback in a slide show here. Play back everything Select ‘Play back everything’, to start the playback of a slide show directly. Video library All the videos stored in your notebook will be located in its video library. Software 61 Deutsch Synchronising Main menu Music Sub-menu Music library All the music titles stored in your notebook will be located in the music library. You will be able to start the selected playback of an album, an artist or a selected title here. Play back everything You will start the playback of all the files stored in your music library by means of this sub-menu. Radio You will have the possibility of listening to a radio broadcaster and to administrate it, if you have external radio tuner hardware available. Search You will be able to search for music titles, composers, artists, albums, etc. in a targeted way by means of this submenu. The search will start as soon as you have entered the first letters. 62 Software Español Installation of Software Note If your operating system is configured so that the installation procedure accepts only signed drivers (default) and software an information screen will appear. English The software included in delivery is already pre-installed in the factory. Attention! You may find that during the installation procedure important files may be changed or even cancelled. To avoid further problems in using older files after an installation, make sure you safeguard your hard disk. See page 71 for further information regarding data backup. Deutsch How to Install your Software Please follow the instruction of the software vendor. We will describe a typical installation. Once you insert a CD, the installation menu is started automatically. Note If the automatic start does not work, it is likely that the so-called Autorun function has been deactivated. Read the respective chapter in Windows Help on how to activate this function. Software 63 An example for the manual installation without the autorun function: 1. Click on Start . 2. Click on All Programs. 3. Open the Accessories program point. 4. Select the item Run. 5. Now enter the letter of the CD-ROM drive followed by a colon and the program name setup: 6. Click on “OK”. 7. Follow the instruction given by the program. Software Uninstallation In order to remove installed software from your notebook, follow the next steps: 1. Click on Start 2. Click on . Control Panel. 3. Then select the Programs option. 4. Select the respective program, start the uninstallation and follow the instructions on the screen. 64 Software Español Windows Activation Microsoft is committed to the protection of intellectual property rights and the reduction of software piracy. Therefore Windows® 7 contains software-based product activation technology. Your copy of Windows® 7 has already been activated for your notebook. You will probably need to activate Windows® 7 by telephone even if Internet Activation is available. This is due to the pre-activated SLP version which runs with a special Product-ID. However, activation needs your unique Product ID which can be found on the Certificate of Authenticity sticker on your notebook housing. When you call, please inform your agent that you are running an OEM-(SLP) version of the software. English Product activation is needed if some components of your notebook have been replaced or you use a non-authorized BIOS. If necessary you can activate Windows® 7 as often as requested. In few cases it may still be required to activate Windows® 7. If activation via the internet is acknowledged with an error message you should perform the following steps. 1. Please select the telephone activation and click until the related screen appears. 2. Now click on Change Product Key. A new window appears. Enter the product key. This is located on the Certificate of Authenticity (COA), on the computer’s casing. 3. Acknowledge your entry and follow the instructions on the screen. Notify your Microsoft consultant, if necessary, that you have purchased an OEM license with your computer. Software 65 Deutsch Product activation on your Notebook The BIOS Set-up-Program In BIOS setup (Basic Configuration) there are a number of configurable parameter settings available for your notebook. For example, you can change the operating mode of the interfaces, security features or power management. Warning! The notebook is factory pre-set to guarantee optimum operation. Only modify the parameters if necessary and if you are familiar with the configuration options. Running the BIOS Set-up You can only run the BIOS configuration program at system start-up. If the notebook has already started, power it down and then up again. Press the F2 key in order to start the BIOS-SET-UP. 66 Software Kaspersky Internet Security is already installed, so that additional installation will not be necessary. If you nevertheless have to carry out an installation (e.g. after system restoration), you will find the software package on the application/support disc supplied with the machine. Kaspersky Internet Security consists of the following security components: File Anti-Virus File Anti-Virus will protect the file system of the computer against infection. The components will be started when the operating system is started. They will be permanently located in the working memory of the computer and will check all the files that are opened, saved or started on your computer and all the connected hard drives. Kaspersky Internet Security will intercept any attack on a file and will check the respective file for known viruses. A file will then only be released for use if it is virus-free or has been successfully disinfected by the program. Mail Anti-Virus Mail Anti-Virus will check the incoming and outgoing emails on your computer. An email will only be delivered to the respective recipient if it does not contain any dangerous elements. Web Filter / Child Protection The Web Filter will block visits to dangerous web pages and will create a safe working environment during Internet surfing in this way. Child protection allows access to Internet resources and programs to be restricted flexibly for different users of the computer depending on age. Information Kaspersky Internet Security will be activated automatically if the Internet connection is active. Manual activation will not be necessary. Kaspersky Internet Security will be deactivated automatically after 90 days. We recommend the acquisition of a licence in good time, to ensure the optimum protection of your computer, for this reason. Software 67 Español English Kaspersky Internet Security is a comprehensive tool to protect your data. The use of it not only offers you full protection against viruses, but also against spam and attacks against your network. Further components of the software will protect your computer against threats and phishing attacks unknown up to now and allows the access to the Internet to be restricted sensibly. Full protection will cover all areas of data transfers and exchanges. Deutsch Kaspersky Internet Security The Kaspersky Internet Security Package will be updated with the most up-to-date virus information for 90 days after the free registration. Read the activation information about this on the internet at: https://www.Kaspersky.com Note The operating system and anti-virus software are automatically updated when the first online connection is made. These processes usually take a few minutes, during which time the operating speed of the computer may be affected although this is only noticeable on initial start-up. 68 Software Español Chapter 4 Subject English First Aid Page Data and System Security .................................................... 71 System Restore .................................................................... 72 FAQ ..................................................................................... 77 Customer Service ............................................................... 78 Deutsch Upgrades and Repairs ......................................................... 83 Recycling and Disposal ...................................................... 84 69 70 Software Español Data and System Security The programs described below are part of your Windows operating system. You can find additional information on these programs in the Windows Help file. Please also read the notes on page 4. Back up data regularly on external media such as a CD-R or CD-RW. Windows offers Backup Status and Configuration. This program is found in Accessories System Tools within the Start menu. You should make a backup disk with all your passwords and the operating system’s original configuration. English Data Security You can avoid some hardware and software errors with the help programs such as Disk Defragmenter and Disk Cleanup. The help program System Information can also be helpful as it gives you detailed information about your system configuration. You can also find these programs in Accessories System Tools too. Data and System Security 71 Deutsch Maintenance Programs System Restore Windows® 7 provides a useful function (System Restore) enabling the storage of the so-called Recovery points. The system remembers the current configuration as a snapshot and returns to this, if necessary. The advantage is that an unsuccessful installation can be cancelled. Recovery points are created automatically by the system, but they can also be set manually. You can determine and configure yourself the maximum memory taken up by this. You find this program in the program file under Accessories System Tools. We recommend setting a recovery point before installing new software or drivers. At this point if the system does not run properly this recovery point should enable you to return to a workable configuration without deleting newly created documents. In the next paragraph you will find your options for the repair of an incorrect installation. Correction Windows® 7 includes various functions ensuring that the PC as well as the installed applications and devices work correctly. These functions assist you in solving the problems which might occur by adding, deleting or replacing files required for the functionality of the operating system, the applications and devices. The recovery function or functions you use depend on the type of occurring problem or error. For detailed information refer to the Windows help. 72 System Restore Windows Update is the online updating of Windows. Use Windows Update to download elements such as security updates, important updates, the newest help files, drivers and Internet products from the Internet. Español Windows® Update Windows Update will search through the notebook and provide a list of individual updates especially for the configuration of your notebook. Each update that Microsoft regards as important for the operation of the operating system, programs or hardware components will be classified as an “important update” and automatically selected for installation for you. English The website is regularly augmented by new content, so that you can download the newest updates and error corrections at any time, to protect the notebook and guarantee its functioning. Important updates will be provided to remove known problems and to protect the notebook against known security risks. Carry out four simple steps, to download the updates needed and to keep your computer on the current status of technology: . Deutsch 1. Click on Start 2. Click on All Programs. 3. Open Windows Update. 4. Click on Check for update. 5. Click on Add to select the desired update and to add it to the updates to be installed, while you are searching through the available updates in each category. You can also read a complete description of each individual element by clicking on the Read further Link. 6. Click on Check and install updates, when you have selected all the desired updates, and then click on Install now. System Restore 73 Windows Update Information for Data Security Windows Update needs certain information about the respective notebook, so that a suitable list with updates can be provided for you. This information will include the following: Version number of the operating system Version number of Internet Explorer Version numbers of additional software programs Plug & Play identification key of the hardware devices Windows Update will stand up for the protection of your private data and will not record your name, address, email address or other forms of personal data. The information collected will only be used during the time that you are visiting the website. It will also not be stored. The update can only be executed via the Internet. Ensure that you are on-line with your notebook when downloading the updates. 74 System Restore Español System Restore If your system is not functioning properly, you should use the Application Support Disc to restore your system. Changes made to the original configuration (RAS, Desktop or Internet settings) and installed Software will be ignored by this Recovery and will not be reloaded. Driver Updates or hardware installed by you will be ignored by this Recovery. English Limits of the Recovery All data on drive C will be erased. If necessary, backup all required data on drive D. (You must pay attention to the information of pages 4 and 71). This recovery will reset your system to its condition at delivery. Printer installations or other additional software must be reinstalled. System Restore 75 Deutsch Warning! Carrying out a Restore 1. Remove any mass storage devices you may be using (memory cards, USB sticks, etc.). 2. Switch on the notebook. 3. Press the corresponding key when you see the message "Press F11 to run recovery". After a few seconds, the message "Windows is loading files" will appear. Wait until the files are loaded. The "Power Recover" menu will then appear. 4. Select the language of the restoration menu. 5. Click on "Next". 6. You may now choose between two forms of restoration: Restore to HDD – no backup of user data All data on the notebook are irretrievably erased, restoring delivery condition. Restore to HDD – with backed up user data Delivery condition is restored and all user data under C:\User are preserved. Warning! When using the option with backed up user data, the restoration procedure takes a long time. Data are only preserved if they are located in the C:\user folder. All other data will be erased. For this reason, you must perform regular backups on external data carriers. We will not be liable for data loss and/or consequential damages. 7. Click on Next and follow the further instructions, which will appear on the screen, to restore the delivery condition. 76 System Restore Español FAQ – Frequently Asked Questions Do I still have to install the enclosed discs? No. Basically all programs are already preinstalled. The discs are only intended as backup copies. Where will I find the necessary drivers for my laptop? English The drivers are on the second partition of the hard drive in the Drivers and Tools folders. What is the Windows activation? Your operating instructions include a chapter about this subject. When do I have to activate Windows? Deutsch Your software has been preactivated in the factory. An activation will only be required, if ... ... several components are replaced by others. ... you installed a new motherboard. ... a different BIOS version has been installed. ... you install the software on to another computer. When is the recovery of the factory setting recommended? This method should be chosen as the last resort. Read chapter “System Restore” concerning the possible alternatives. How will I make a data back-up? Make a back-up and a recovery back-up of selected data on external media (CD-R), in order to become familar with the technique. A back-up will be unusable if you are not in a position to recreate the data, or the medium (CD-R) is defective or no longer available. Why do I have to reinstall my USB device, although I have already done so? The device will receive a new identification key, if it is not operated at the same USB connection at which it was installed. The operating system will then treat it as a new device and intend to install it anew. Use the drivers installed or connect the device at the connection at which it was installed. FAQ – Frequently Asked Questions 77 Customer Service Localize the Cause Errors can have simple causes, but sometimes they are caused by faulty equipment. We would like to give you some tips to help solve common problems. Should these instructions not lead to success, please feel free to contact us. Check Cables and Connections Visibly check all cables and connections. Should all lights be off, check whether all equipment is supplied with power. In battery mode, connect the notebook to the power adapter and ensure that the battery is charged up. If you are operating the notebook with the power adapter, check the electrical socket, power cord and all switches in the circuit of the electrical socket. Switch off the notebook and check all cable connections. Check the connections to peripherals. Do not exchange cables, even though they may look similar. The polarity in the cables may be different. When it is confirmed that the notebook has power and all connections are correct, turn the notebook on again. Frequent use of the programs Disk Defragmenter and Disk Cleanup will help you to avoid problems with your operating system. The tool "System Information", available in the program folder "System Tools" is also very useful. 78 Customer Service Español Errors and Possible Causes The screen is black: This error can have different causes: 2. The sleep LED is flashing. The notebook is in the sleep mode. Solution: Press the On /Off switch. 3. The background lighting has been deactivated with the Fn+F7 shortcut. Solution: Press any key to switch on the background lighting again. English 1. The operational display (On /Off switch) does not shine and the notebook is busy with 'file swapping'. Solution: Press the On /Off switch. The notebook switches itself off during operation. The battery could be empty. Connect the notebook to the AC adapter and charge the battery. Deutsch The notebook cannot be switched on. Try using the notebook on battery power and and check whether it is correctly inserted and charged. Incorrect time and date display. Click the time display in the task bar and set the correct values. No data can be read from the optical drive. Check whether the disc is correctly inserted. Is the drive displayed in Explorer? If yes, test another disc. The WLAN connection is not functioning. Using the key combination Fn+F2 you can enable or disable the wireless LAN function. The touchpad is not functioning. Press the Fn + F9 key combination in order to activate the touchpad. Customer Service 79 Additional Support If the suggestions in the above section have not solved your problem, please contact customer care and we will attempt to help you solve the problem. Before you call, however, please have the following information available: How is your computer configured? What additional peripherals do you use? What messages, if any, appear on your screen? What software were you using when the error occurred? What steps have you already undertaken to solve the problem? Have you upgraded or removed drivers or hardware? Can you manually repeat the problem? If you have been given a customer number previously, please have this available. Driver Support This notebook has been extensively tested in our laboratories with a large number of compatible devices. It fulfils all required standards and complies with the standard “Designed for Windows”, which certifies utmost compatibility. However, the software drivers for individual components are updated from time to time. This is a regular process provided by the manufacturer to mend possible compatibility problems that may occur with components (e.g., programs or hardware) that were not tested at the time of your notebook’s manufacture. 80 Customer Service Español Please use the following guidelines when transporting the notebook: Switch off the notebook. This will prevent damage to the hard disk. When the notebook is turned off, the hard disk heads are moved into a safe area. Wait until the Notebook has reached ambient (room) temperature before connecting it to the power supply. Drastic variations in temperature and humidity can create condensation within the Notebook and may cause it to short-circuit. Close the notebook and ensure that the cover locks shut. Always use the notebook carrying case. This helps to protect the notebook from dirt, moisture, jolts and scratches. Should you need to ship your notebook, always use the original packaging and make certain the shipper knows the contents contain fragile electronic equipment. Fully charge your battery and any spare batteries immediately before a long journey. Enquire about the electricity and communication provision at the location before a journey. Acquire the necessary adapter for electricity or communication (modem, LAN, etc.), if necessary, before starting your journey. Put the battery into the packaging separately when despatching the notebook. It is recommended to send the notebook and all magnetic storage media (floppy disks, external drives) through the x-ray device (the device into which you put your bags), when you are passing through the baggage check at airports. Avoid the magnetic detector (the construction, through which you walk) or the magnetic rod (the manual device of the security personnel), because they could destroy your data, among other consequences. Customer Service Deutsch English Transporting the Notebook 81 Maintenance Warning! There are no user-serviceable or user-cleanable parts inside the notebook housing. Never open the notebook housing. Following these measures can extend the lifetime of your notebook: Before cleaning, always remove the power adapter plug and all connecting cables. Only use a damp, lint-free cloth to clean the notebook. Do not use any solvents, corrosive or gaseous cleaning agents. Dust or grease on the touchpad will impair its sensitivity. Remove dust or grease on the surface of the Touchpad with a strip of sticky tape. Dust, which will close the cooling slots, can collect inside the laptop/notebook in the course of time. This will lead to an increase in the rotation of the ventilator and consequently also of the operating noise of your laptop/notebook. In addition, this can lead to overheating and malfunctions. Have the inside of the laptop/notebook cleaned by your Service Center or a professional for this reason. Care of the TFT Display Always close the notebook when not in use. Avoid touching or scratching the surface of the screen as it is easily damaged. Make sure that no water drops are allowed to remain on the screen. Water can cause permanent discoloration. Clean the screen with a dry, soft, lint-free cloth. Do not expose the screen to bright sunlight or ultraviolet radiation. The notebook and its packaging are recyclable. Note Protective film is on the surfaces to protect the device against scratching during production and transportation. Pull off all the film after you have set up the device correctly and before bringing it into operation. 82 Customer Service Español Upgrades and Repairs Only a qualified Service Engineer should perform upgrades and repairs to your notebook. If you do not have the necessary qualifications, go to an appropriate Service Engineer. Please contact the Service Centre if you are experiencing technical problems with your notebook. Please contact our authorized Service Partners exclusively in the case of a necessary repair. Notes for Service Engineers Before opening the housing, disconnect the notebook from all power sources and remove any connecting cables. If the notebook has not been disconnected from the power outlet before being opened, there is a danger of severe electric shock. There is also a risk of damage to the components. Internal components of the notebook may be damaged by electrostatic discharge (ESD). Perform system upgrades and changes in an ESD-protected work area. If no such work area is available, wear an antistatic wrist strap or touch a highly conductive metal object. Your service centre can repair damage sustained by inappropriate handling for a fee. Use only original spare parts. Notes on Laser Radiation Laser devices of Laser Class 1 to Laser Class 3b may be used in the notebook. Where the notebook housing remains closed, the device meets the requirements of Laser Class 1. By opening the notebook housing you will gain access to laser devices of up to Laser Class 3b. The CD-ROM/CD-RW/DVD/DVD-RW drive contains no user-serviceable parts. Only the manufacturer should perform repairs to the CD-ROM/CDRW/DVD/DVD-RW drives. When removing and/or opening laser devices, the following guidelines must be observed: DO NOT look into the laser beam, even while wearing optical protection. DO NOT allow yourself to be exposed to the laser beam. Avoid exposure of the eyes or skin to direct or stray radiation. Upgrades and Repairs 83 Deutsch English Recycling and Disposal Device At the end of its life, the appliance must not be disposed of in household rubbish. Enquire about the options for environmentally-friendly disposal Batteries Do not dispose of used batteries in the household rubbish! They must be deposited at a collection point for used batteries. Packaging To avoid damage during transport, the Notebook is stored in a packaging. Packaging is produced mostly from materials which can be disposed of in an environmentally friendly manner and be professionally recycled. Should you have any questions concerning the disposal please contact your dealer or our service. 84 Recycling and Disposal Español Chapter 5 Subject English Appendix Page Information about Conformity ............................................ 87 Deutsch Index ................................................................................... 90 85 86 Recycling and Disposal Español Information about Conformity The device fulfils electromagnetic compatibility and electricity safety requirements. Your device complies with the basic requirements and the relevant Australian EMC guidelines [electromagnetic compatibility] and the Australian electrical safety guidelines. English This device fulfils the basis requirements and the relevant regulation of the Ecodesign Guideline 2009/125/EG (Commission Regulation 1275/2008). ISO 13406-2 Class II There have been several attempts in the past to define the acceptable number of defective pixels. But this can be difficult and varies widely between different manufacturers. We, therefore, adhere to the clear and strict requirements of ISO 13406-2, class II, for the warranty handling of all TFT display products. These requirements are summarized below. Within ISO-standard 13406-2 the general requirements regarding pixel defects are defined. Pixel defects are classified into three failure types and four failure classes. Each individual pixel is made up of three sub-pixels in the primary colours (red, green, blue). Information about Conformity 87 Deutsch Active matrix LCDs (TFT) with a resolution of 1366 x 768 pixel, which are in turn composed of three sub-pixels each (red, green, blue), contain about 3.1 million addressable transistors. Because of this very high number of transistors and their extremely complex production process occasionally defective or incorrectly addressed pixels or sub-pixels may occur. Pixel structure Rows Blue Green Red Types of Pixel Failures: Type 1: A constantly lit pixel (a bright, white spot), even though it is not addressed. A white pixel is caused when all three sub-pixel are lit. Type 2: A pixel that does not light up (dark, black spot), although it is addressed Type 3: Abnormal or defective red, green or blue sub-pixels. (E.g. constantly lit with half the brightness, one colour is not shining, blinking or flickering, but not belonging to Type 1 or 2 Pixel Failures) In addition: A cluster of type 3 (= 2 or more defective sub-pixels in an array of 5 x 5 pixel). A cluster is an array of 5 x 5 pixel (15 x 5 sub-pixel). ISO 13406-2, Class II Resolution Type 1 Type 2 Type 3 Cluster Type 1, Type 2 Cluster Type 3 1024 x 768 2 2 4 0 2 1280 x 854 3 3 6 0 3 1280 x 1024 1366 x 768 1400 x 1050 3 3 7 0 3 3 3 7 0 3 3 3 8 0 3 Example: An approx 43 cm (17”) - SXGA-display consists of 1280 horizontal and 1024 vertical picture dots (pixel), which amounts to a total of 1,31 million pixels. Based on one million pixels this translates into a factor of about 1.31. Class II type failure consequently allows for three defects each of type 1 and type 2 and 7 defects of type 3 and 3 cluster of type 3. These cases are normally not covered by warranty. If the number of failures exceeds the figures of any category mentioned above then this may be covered by the warranty. 88 Information about Conformity Reorient or relocate the receiving antenna. Increase the separation between the equipment and receiver. Connect the equipment into an outlet on a circuit different from that to which the receiver is connected. Consult the dealer or an experienced technician for help. Information about Conformity Deutsch Changes or modifications not expressly approved by the party responsible for compliance could void the user’s authority to operate the equipment. Shielded interface cables, if any, must be used in order to comply with the emission limits. Español This equipment has been tested and found to comply with the limits for a Class B digital device, pursuant to Part 15 of FCC Rules. These limits are designed to provide reasonable protection against harmful interference in a residential installation. This equipment generates, uses, and can radiate radio frequency energy and, if not installed and used in accordance with the instructions, may cause harmful interference to radio communications. However, there is no guarantee that interference will not occur in a particular installation. If this equipment does cause harmful interference to radio or television reception, which can be determined by turning the equipment off and on, the user is encouraged to try to correct the interference by one or more of the following measures: English FCC Compliance Statement 89 Index Discharging the battery ................. 31 Discs Loading ..................................... 42 Removing Blocked Discs ............ 43 Display .......................................... 34 Opening and Closing the Display .................................. 34 Screen resolution ...................... 34 Driver Support .............................. 80 DVD-Drive ..................................... 42 A All programs ................................. 22 Ambient Temperature ..................... 5 Appearance and Personalization ... 35 Autorun ........................................ 63 B Battery operation .......................... 29 Battery power ........................... 31 Charging ................................... 31 Checking the battery level ......... 32 Discharging the battery ............. 31 Removing .................................. 30 Battery Power ................................ 31 BIOS Setup-Program ..................... 66 BIOS Utility Running .................................... 66 E Emergency Ejection of a Blocked Disc ........................................... 43 Extended Desktop ......................... 37 External Monitor ........................... 36 F Fast Ethernet-Network ................... 48 FCC Compliance Statement .......... 89 Fn ................................................. 38 C Cabling ........................................... 8 Card Reader .................................. 51 Care of Displays ............................ 82 Carrying out a Restore ................... 76 CD/DVD-Rewriter .......................... 45 CD-blanks ..................................... 45 CD-ROM ....................................... 42 Charging the battery ..................... 31 Checking the battery level ............. 32 Connectors External Monitor ....................... 36 Power Socket ............................ 15 Sound card................................ 46 USB ........................................... 52 Control panel ................................ 59 Customer service........................... 78 H Hard drive ..................................... 40 HD .............................. See Hard drive I Icons ............................................. 22 Installation of Software ................. 63 Introduction .................................... 3 ISO 13406-2 Class II ...................... 87 K Kaspersky Internet Security ........... 67 Kensington-lock ............................ 53 Keyboard ...................................... 38 D L Data and system security............... 71 Data Entry ..................................... 38 Data security ............................. 4, 71 Directories ..................................... 41 Disc-Drive ..................................... 42 90 Laser radiation............................... 83 License agreement ........................ 21 Index N Network ........................................ 48 Fast Ethernet-Network ............... 48 Troubleshooting........................ 50 What is a network? .................... 48 Wireless LAN.............................. 49 O On/Off button ............................... 27 Optical Drive ................................. 42 P Power Management ...................... 33 Power supply .................................. 7 Battery operation ...................... 29 Main operation.......................... 28 Hibernate Mode ........................ 33 Sleep Mode ............................... 33 Product activation on your notebook .................................. 65 Program bar .................................. 22 T Table of Contents........................... vi The Card Reader............................ 51 Touchpad ................................. 9, 39 Transport ...................................... 81 Troubleshooting ........................... 72 Errors and Possible Causes ........ 79 R U R&TTE ............................................. 9 Recycling and Disposal .................. 84 Removing the Battery .................... 30 Repairs .......................................... 83 Running the Bios Setup ................. 66 Universal Serial Bus ....................... 52 Upgrades and Repairs ................... 83 Using a safety lock......................... 53 V Views Audio Out ................................. 16 Device Indicators ....................... 15 HDMI Connector ....................... 15 S Safety and maintenance .................. 1 Safety instructions ........................... 3 Index 91 Español English Main operation ............................. 28 Maintenance ................................. 82 Care of the TFT Display.............. 82 Transporting the notebook........ 81 Maintenance programs ................. 71 Memory cards Inserting .................................... 51 Removing .................................. 51 Memory Stick ................................ 51 MMC............................................. 51 Mouse ........................................... 39 Multimedia buttons ...................... 18 Deutsch Care of the display .................... 82 Data Security ............................... 4 Maintenance ............................. 82 Ambient Temperature ................. 5 Battery Operation...................... 10 Cabling ....................................... 8 Power supply .............................. 7 Set-Up location ........................... 4 Touch Pad ................................... 9 Upgrades and Repairs ............... 83 Screen resolution .......................... 34 SD ................................................. 51 Secure Digital ................................ 51 Securing the Notebook Startup Password ...................... 53 Service Engineers .......................... 83 Set-Up Location .............................. 4 Sleep Mode ................................... 33 Software ....................................... 54 Software uninstallation ................. 64 Sound card ................................... 46 External audio ports .................. 47 Standards FCC Compliance Statement ...... 89 Start button .................................. 22 Support ........................................ 80 Suspend to Disk ............................ 33 System Restore .............................. 72 M ® Kensington lock ........................ 16 Keyboard................................... 15 LAN Port .................................... 15 Microphone .............................. 16 Optical Drive ............................. 16 Power ON/OFF .......................... 15 Power socket ............................. 15 TFT Display................................ 15 Touchpad .................................. 15 USB Port .............................. 15, 16 VGA ........................................... 15 Windows 7 User account control ................. 58 Battery device management ...... 55 Control panel ............................ 59 Getting started .......................... 57 Help and Support ..................... 56 Homegroup .............................. 56 Improved Desktop .................... 55 Improved taskbar ...................... 54 Jump lists .................................. 54 News ......................................... 54 ® Windows Desktop ........................ 22 ® Windows Update.......................... 73 Wireless LAN ................................. 49 Working in Comfort ........................ 6 W Webcam ........................................ 52 Windows activation ....................... 65 Windows Media Center ................. 60 92 Index Halten Sie diese Bedienungsanleitung stets griffbereit in der Nähe Ihres Notebooks. Bewahren Sie die Bedienungsanleitung und die Verpackung gut auf, um sie bei einer Veräußerung des Notebooks dem neuen Besitzer weiter geben zu können. Español Hinweise zu dieser Bedienungsanleitung Wir empfehlen, auch die anderen Kapitel zu lesen, um detaillierte Erklärungen und Bedienhinweise zu Ihrem Notebook zu erhalten. Ziel dieser Bedienungsanleitung ist es, Ihnen die Bedienung Ihres Notebooks in leicht verständlicher Sprache nahe zu bringen. English Wir haben dieses Dokument so gegliedert, dass Sie jederzeit über das Inhaltsverzeichnis die benötigten Informationen nachlesen können. Ein Stichwortverzeichnis (Index) finden Sie am Ende dieses Handbuches. Um das Notebook gleich in Betrieb zu nehmen, lesen Sie bitte die Kapitel Betriebssicherheit (ab Seite 3) und Erste Inbetriebnahme (ab Seite 18). Zur Bedienung der Anwendungsprogramme und des Betriebssystems können Sie die umfangreichen Hilfefunktionen nutzen, die Ihnen die Programme auf Tastendruck (meist F1) bzw. Mausklick bieten. Diese Hilfen werden Ihnen während der Nutzung des Betriebssystems Microsoft Windows® oder dem jeweiligen Anwendungsprogramm bereitgestellt. Weitere sinnvolle Informationsquellen finden Sie im Abschnitt „Windows® 7 kennen lernen“ ab der Seite 55. Persönliches Notieren Sie zu Ihrem Eigentumsnachweis: Seriennummer ................................................ Kaufdatum ................................................ Kaufort ................................................ Die Seriennummer Ihres Notebooks finden Sie auf der Unterseite des Notebooks. Übertragen Sie die Nummer ggf. auch in Ihre Garantieunterlagen. Unsere Zielgruppe Diese Bedienungsanleitung richtet sich an Erstanwender sowie an fortgeschrittene Benutzer. Ungeachtet der möglichen professionellen Nutzung, ist das Notebook für den Betrieb in einem Privathaushalt konzipiert. Die vielfältigen Anwendungsmöglichkeiten stehen der ganzen Familie zur Verfügung. Deutsch Begriffe des Computerjargons zu übersetzen schafft oft Verwirrung, daher haben wir gebräuchliche Computerbegriffe beibehalten. Die Qualität Wir haben bei der Wahl der Komponenten unser Augenmerk auf hohe Funktionalität, einfache Handhabung, Sicherheit und Zuverlässigkeit gelegt. Durch ein ausgewogenes Hard- und Softwarekonzept können wir Ihnen ein zukunftsweisendes Notebook präsentieren, das Ihnen viel Freude bei der Arbeit und in der Freizeit bereiten wird. Wir bedanken uns für Ihr Vertrauen in unsere Produkte und freuen uns, Sie als neuen Kunden begrüßen zu können. Vervielfältigung dieses Handbuchs Dieses Dokument enthält gesetzlich geschützte Informationen. Alle Rechte vorbehalten. Vervielfältigung in mechanischer, elektronischer und jeder anderen Form ohne die schriftliche Genehmigung des Herstellers ist verboten. Copyright © 2011 Alle Rechte vorbehalten. Dieses Handbuch ist urheberrechtlich geschützt. Das Copyright liegt bei der Firma MEDION®. Warenzeichen: MS-DOS® und Windows® sind eingetragene Warenzeichen der Fa. Microsoft®. Pentium® ist ein eingetragenes Warenzeichen der Firma Intel®. HDMI, das HDMI Logo sowie High-Definition Multimedia Interface sind eingetragene Warenzeichen der HDMI Licensing LLC. Andere Warenzeichen sind Eigentum ihrer jeweiligen Besitzer. Technische und optische Änderungen sowie Druckfehler vorbehalten. ii Español Inhalt Betriebssicherheit ............................................................................. 1 English Betriebssicherheit ............................................................................................... 3 Datensicherung............................................................................................... 4 Aufstellungsort................................................................................................ 4 Umgebungsbedingungen ............................................................................... 5 Ergonomie ...................................................................................................... 5 Komfortables Arbeiten ................................................................................. 6 Anschließen .................................................................................................... 7 Stromversorgung......................................................................................... 7 Verkabelung ................................................................................................ 8 Konformitätsinformation nach R&TTE ............................................................. 9 Hinweise zum Touchpad ................................................................................. 9 Akkubetrieb................................................................................................... 10 Ansichten & Erste Inbetriebnahme ...................................................... 11 Deutsch Lieferumfang .................................................................................................... 13 Ansichten ......................................................................................................... 14 Geöffnetes Notebook .................................................................................... 14 Vorderseite .................................................................................................... 15 Linke Seite ..................................................................................................... 15 Rechte Seite .................................................................................................. 16 Betriebs- und Statusanzeigen ........................................................................ 17 Multimediatasten .......................................................................................... 18 Erste Inbetriebnahme ....................................................................................... 19 So starten Sie: ............................................................................................... 19 Schritt 1 ..................................................................................................... 19 Schritt 2 ..................................................................................................... 21 Schritt 3 ..................................................................................................... 21 Kurzbeschreibung der Windows®-Oberfläche ................................................ 22 Hauptkomponenten ......................................................................... 25 Stromversorgung ............................................................................................. 27 Ein-/Ausschalter ............................................................................................ 27 Netzbetrieb ................................................................................................... 28 Akkubetrieb................................................................................................... 29 Einsetzen des Akkus ................................................................................... 29 Entnehmen des Akkus ................................................................................ 30 Aufladen des Akkus .................................................................................... 31 Entladen des Akkus .................................................................................... 31 Akkuleistung .............................................................................................. 31 Energieverwaltung (Power Management) ..................................................... 33 Energie Sparen........................................................................................... 33 Ruhezustand (Hibernate) ........................................................................... 33 Display ............................................................................................................. 34 Öffnen und Schließen des Displays ............................................................... 34 iii Bildschirmauflösung ..................................................................................... 34 Darstellung und Anpassung .......................................................................... 35 Anschluss eines externen Monitors................................................................ 36 Desktop duplizieren ................................................................................... 37 Desktop erweitern ..................................................................................... 37 Desktop nur auf 1 anzeigen ....................................................................... 37 Desktop nur auf 2 anzeigen ....................................................................... 37 Dateneingabe ................................................................................................... 38 Die Tastatur................................................................................................... 38 Notebookspezifische Tastenkombinationen ............................................... 38 Das Touchpad .................................................................................................. 39 Die Festplatte ................................................................................................... 40 Wichtige Verzeichnisse .................................................................................. 41 Das optische Laufwerk...................................................................................... 42 Einlegen einer Disc ........................................................................................ 42 Notentnahme einer blockierten Disc .......................................................... 44 Discs abspielen / auslesen ............................................................................. 44 Regionale Wiedergabeinformationen bei DVD............................................... 45 Themen rund um den Brenner ...................................................................... 45 CD- und DVD-Rohlinge .............................................................................. 45 Die Soundkarte................................................................................................. 46 Externe Audioverbindungen.......................................................................... 47 Netzwerkbetrieb ............................................................................................... 48 Was ist ein Netzwerk?.................................................................................... 48 Ethernet-Netzwerkanschluss ...................................................................... 48 Wireless LAN (Funk-Netzwerk) ...................................................................... 49 Problembeseitigung im Netzwerk .............................................................. 50 Der Multikartenleser ......................................................................................... 51 Speicherkarte einlegen .................................................................................. 51 Speicherkarte entfernen ................................................................................ 51 Die Webcam ..................................................................................................... 52 Anwendungsbeispiel mit dem Windows Live Messenger .............................. 52 Der Universal Serial Bus-Anschluss .................................................................... 53 Notebook sichern ............................................................................................. 54 Einschaltkennwort......................................................................................... 54 Kensington-Sicherheitsschloss ....................................................................... 54 Software ........................................................................................................... 55 Windows® 7 kennen lernen ............................................................................ 55 Windows® 7 - Neuheiten ............................................................................ 55 Windows® 7 - Hilfe und Support ................................................................. 57 Windows® 7 - Erste Schritte ......................................................................... 58 Windows® 7 - Benutzerkontensteuerung .................................................... 59 Windows® 7 - Systemsteuerung .................................................................. 60 Windows Media Center ................................................................................. 61 Softwareinstallation ...................................................................................... 64 So installieren Sie Ihre Software ................................................................. 65 Deinstallation einer Software ..................................................................... 66 iv Deutsch English Español Windows-Aktivierung .................................................................................... 66 Produktaktivierung bei Ihrem Notebook .................................................... 67 BIOS Setup-Programm .................................................................................. 68 Ausführen des BIOS Setup ......................................................................... 68 Kaspersky Internet Security............................................................................... 69 Tipps und Tricks ............................................................................................... 71 Bedienhilfen .................................................................................................. 71 Systemeinstellungen und -informationen...................................................... 72 Selbsthilfe ...................................................................................... 73 Daten- und Systemsicherheit ............................................................................ 75 Datensicherung............................................................................................. 75 Wartungsprogramme ................................................................................... 75 Systemwiederherstellung ................................................................................. 76 Fehlerbehebung ............................................................................................ 76 Windows Update .......................................................................................... 77 Windows Update-Informationen zur Datensicherheit ................................. 78 Auslieferungszustand wiederherstellen............................................................. 79 Beschränkung der Wiederherstellung ............................................................ 79 Rücksicherung durchführen .......................................................................... 80 FAQ - Häufig gestellte Fragen ........................................................................... 81 Kundendienst ................................................................................................... 82 Erste Hilfe bei Hardwareproblemen ............................................................... 82 Lokalisieren der Ursache ................................................................................ 82 Fehler und mögliche Ursachen................................................................... 83 Benötigen Sie weitere Unterstützung? .......................................................... 84 Treiberunterstützung .................................................................................... 84 Transport ...................................................................................................... 85 Wartung........................................................................................................ 86 Pflege des Displays ........................................................................................ 86 Auf-/Umrüstung und Reparatur ........................................................................ 87 Hinweise für den Servicetechniker.............................................................. 87 Hinweise zur Laserstrahlung ...................................................................... 87 Recycling und Entsorgung ............................................................................... 88 Anhang ......................................................................................... 89 Konformitätsinformationen .............................................................................. 91 Europäische Norm EN ISO 13406-2 Klasse II .................................................. 91 Index ................................................................................................................ 93 v vi Español Kapitel 1 Thema English Betriebssicherheit Seite Betriebssicherheit .............................................................. 3 Datensicherung ................................................................. 4 Aufstellungsort .................................................................. 4 Umgebungsbedingungen .................................................. 5 Deutsch Ergonomie .......................................................................... 5 Anschließen ...................................................................... 7 Konformitätsinformation nach R&TTE ................................ 9 Hinweise zum Touchpad .................................................. 9 Akkubetrieb ..................................................................... 10 1 2 Betriebssicherheit Español Betriebssicherheit Bitte lesen Sie dieses Kapitel aufmerksam durch und befolgen Sie alle aufgeführten Hinweise. So gewährleisten Sie einen zuverlässigen Betrieb und eine lange Lebenserwartung Ihres Notebooks. Lassen Sie Kinder nicht unbeaufsichtigt an elektrischen Geräten spielen. Kinder können mögliche Gefahren nicht immer richtig erkennen. Halten Sie das Verpackungsmaterial, wie z. B. Folien von Kindern fern. Bei Missbrauch könnte Erstickungsgefahr bestehen. Öffnen Sie niemals das Gehäuse des Notebooks, Akkus oder Netzadapters! Dies könnte zu einem elektrischen Kurzschluss oder gar zu Feuer führen, was die Beschädigung Ihres Notebooks zur Folge hat. Bei optischen Laufwerken (CD/CDRW/DVD) handelt es sich um Einrichtungen der Laser Klasse 1, sofern diese Geräte in einem geschlossenen Notebook-Gehäuse betrieben werden. Entfernen Sie nicht die Abdeckung der Laufwerke, da sonst unsichtbare Laserstrahlung austritt. Führen Sie keine Gegenstände durch die Schlitze und Öffnungen ins Innere des Notebooks. Diese könnten zu einem elektrischen Kurzschluss oder gar zu Feuer führen, was die Beschädigung Ihres Notebooks zur Folge hat. Schlitze und Öffnungen des Notebooks dienen der Belüftung. Decken Sie diese Öffnungen nicht ab, da es sonst zu Überhitzung kommen könnte. Das Notebook ist nicht für den Betrieb in einem Unternehmen der Schwerindustrie vorgesehen. Betreiben Sie das Notebook nicht bei Gewitter, um Schäden durch Blitzeinschlag zu vermeiden. Legen Sie keine Gegenstände auf das Notebook und üben Sie keinen Druck auf das Display aus. Andernfalls besteht die Gefahr, dass das TFT-Display bricht. Es besteht Verletzungsgefahr, wenn das TFT Display bricht. Sollte dies passieren, packen Sie mit Schutzhandschuhen die geborstenen Teile ein und senden Sie diese zur fachgerechten Entsorgung an Ihr Service Center. Waschen Sie anschließend Ihre Hände mit Seife, da nicht auszuschließen ist, dass Chemikalien ausgetreten sein könnten. Klappen Sie das Display nicht um mehr als 120° auf. Eine Überschreitung dieses Wertes kann zur Beschädigung des Gehäuses oder des Notebooks führen. Halten Sie das Display beim Aufklappen und Positionieren immer mittig fest. Bei Nichtbeachtung könnte das Display beschädigt werden. Versuchen Sie niemals, es mit Gewalt zu öffnen. Berühren Sie nicht das Display mit den Fingern oder mit kantigen Gegenständen, um Beschädigungen zu vermeiden. Heben Sie das Notebook nie am Display hoch, da sonst die Scharniere brechen könnten. Betriebssicherheit 3 Deutsch English Schalten Sie das Notebook sofort aus bzw. erst gar nicht ein, ziehen Sie den Netzstecker und wenden Sie sich an den Kundendienst wenn... ... der Netzadapter oder die daran angebrachten Netzkabel- oder Stecker angeschmort oder beschädigt sind. Lassen Sie das defekte Netzkabel/Netzadapter gegen Originalteile austauschen. Auf keinen Fall dürfen diese repariert werden. ... das Gehäuse des Notebooks beschädigt ist, oder Flüssigkeiten hineingelaufen sind. Lassen Sie das Notebook erst vom Kundendienst überprüfen. Andernfalls kann es sein, dass das Notebook nicht sicher betrieben werden kann. Es kann Lebensgefahr durch elektrischen Schlag bestehen oder/und gesundheitsschädliche Laserstrahlung austreten! Datensicherung Achtung! Machen Sie nach jeder Aktualisierung Ihrer Daten Sicherungskopien auf externe Speichermedien (CD-R: siehe Seite 75). Die Geltendmachung von Schadensersatzansprüchen für Datenverlust und dadurch entstandene Folgeschäden wird ausgeschlossen. Aufstellungsort 4 Halten Sie Ihr Notebook und alle angeschlossenen Geräte von Feuchtigkeit fern und vermeiden Sie Staub, Hitze und direkte Sonneneinstrahlung. Das Nichtbeachten dieser Hinweise kann zu Störungen oder zur Beschädigung des Notebooks führen. Betreiben Sie Ihr Notebook nicht im Freien, da äußere Einflüsse, wie Regen, Schnee etc. das Notebook beschädigen könnten. Stellen und betreiben Sie alle Komponenten auf einer stabilen, ebenen und vibrationsfreien Unterlage, um Stürze des Notebooks zu vermeiden. Betreiben Sie das Notebook oder den Netzadapter nicht längere Zeit auf Ihrem Schoß oder einem anderen Körperteil, da die Wärmeableitung an der Unterseite zu unangenehmen Erwärmungen führen kann. Neue Geräte können in den ersten Betriebsstunden einen typischen, unvermeidlichen aber völlig ungefährlichen Geruch abgeben, der im Laufe der Zeit immer mehr abnimmt. Lüften Sie den Raum regelmäßig, um der Geruchsbildung entgegenzuwirken. Ihr Notebook ist nicht für den Einsatz an Bildschirmarbeitsplatzgeräten im Sinne §2 der Bildschirmarbeitsplatzverordnung geeignet. Betriebssicherheit Español Das Notebook kann bei einer Umgebungstemperatur von 5° C bis 30° C und bei einer relativen Luftfeuchtigkeit von 20 % - 80 % (nicht kondensierend) betrieben werden. Im ausgeschalteten Zustand kann das Notebook bei 0° C bis 60° C gelagert werden. Ziehen Sie bei einem Gewitter den Netzstecker. Wir empfehlen zur zusätzlichen Sicherheit die Verwendung eines Überspannungsschutzes, um Ihr Notebook vor Beschädigung durch Spannungsspitzen oder Blitzschlag aus dem Stromnetz zu schützen. Warten Sie nach einem Transport des Notebooks so lange mit der Inbetriebnahme, bis das Gerät die Umgebungstemperatur angenommen hat. Bei großen Temperatur- oder Feuchtigkeitsschwankungen kann es durch Kondensation zur Feuchtigkeitsbildung innerhalb des Notebooks kommen, die einen elektrischen Kurzschluss verursachen kann. Bewahren Sie die originale Verpackung auf, falls das Gerät verschickt werden muss. Deutsch English Umgebungsbedingungen Ergonomie Hinweis Vermeiden Sie Blendwirkungen, Spiegelungen und zu starke Hell-DunkelKontraste, um Ihre Augen zu schonen. Das Notebook soll niemals in unmittelbarer Nähe eines Fensters stehen, weil an dieser Stelle der Arbeitsraum durch das Tageslicht am hellsten beleuchtet ist. Diese Helligkeit erschwert die Anpassung der Augen an das dunklere Display. Das Notebook soll stets mit einer zur Fensterfront parallelen Blickrichtung aufgestellt sein. Falsch ist die Aufstellung mit vom Fenster abgewandter Blickrichtung, da dann Spiegelungen der hellen Fenster im Bildschirm unvermeidbar sind. Ebenso falsch ist eine Aufstellung mit Blickrichtung zum Fenster, da der Kontrast zwischen dunklem Bildschirm und hellem Tageslicht zu Anpassungsschwierigkeiten der Augen und zu Beschwerden führen kann. Die parallele Blickrichtung sollte auch in Bezug auf künstliche Beleuchtungseinrichtungen eingehalten werden. Das heißt, es gelten bei der Beleuchtung des Arbeitsraumes mit künstlichem Licht im Wesentlichen dieselben Kriterien und Gründe. Soweit es der Raum nicht zulässt, den Bildschirm wie beschrieben aufzustellen, kann man durch die richtige Positionierung (Drehen, Neigen) des Notebooks/Bildschirms Blendwirkungen, Spiegelungen, zu starke HellDunkel-Kontraste usw. verhindern. Durch Lamellen- oder Vertikalstores an den Fenstern, durch Stellwände oder durch Änderungen der Beleuchtungseinrichtung kann ebenfalls in vielen Fällen eine Verbesserung erreicht werden. Betriebssicherheit 5 Komfortables Arbeiten Langes Sitzen ohne Veränderung der Haltung kann unbequem sein. Um die Risiken physischer Beschwerden oder Schäden zu minimieren, ist es wichtig, die richtige Haltung einzunehmen. 6 Rücken – Beim Sitzen am Arbeitsplatz muss der Rücken durch die aufrechte oder leicht nach hinten geneigte Rückenlehne des Arbeitsstuhls abgestützt werden. Arme – Die Arme und Ellenbogen sollten entspannt und locker sein. Die Ellenbogen sollten nahe am Körper anliegen. Halten Sie Unterarme und Hände annähernd parallel zum Boden. Handgelenke – Die Handgelenke sollten bei der Arbeit mit der Tastatur, der Maus oder dem Trackball möglichst gestreckt und nicht mehr als 10° angewinkelt sein. Beine – Die Oberschenkel sollten horizontal oder leicht nach unten geneigt verlaufen. Die Unterschenkel sollten mit den Oberschenkeln einen Winkel von ungefähr 90° bilden. Die Füße sollten flach auf dem Boden ruhen. Verwenden Sie gegebenenfalls eine Fußstütze, doch vergewissern Sie sich vorher, dass die Sitzhöhe richtig eingestellt ist. Kopf – Der Kopf sollte aufrecht oder nur leicht nach vorne geneigt sein. Arbeiten Sie nicht mit verdrehtem Kopf oder Oberkörper. Allgemein – Verändern Sie häufig (ca. alle 20-30 Minuten) Ihre Haltung, und legen Sie häufig Pausen ein, um Ermüdungen zu vermeiden. Betriebssicherheit Español Anschließen Beachten Sie nachfolgende Hinweise, um Ihr Notebook ordnungsgemäß anzuschließen: Öffnen Sie nicht das Gehäuse des Netzadapters. Bei geöffnetem Gehäuse besteht Lebensgefahr durch elektrischen Schlag. Es enthält keine zu wartenden Teile. Die Steckdose muss sich in der Nähe des Notebooks befinden und leicht zugänglich sein. Um die Stromversorgung zu Ihrem Notebook (über Netzadapter) zu unterbrechen, ziehen Sie den Netzstecker aus der Steckdose. Betreiben Sie den Notebooknetzadapter nur an geerdeten Steckdosen mit AC 100 – 240 V~, 50 - 60 Hz. Wenn Sie sich der Stromversorgung am Aufstellungsort nicht sicher sind, fragen Sie beim betreffenden Energieversorger nach. Benutzen Sie nur das beiliegende Netzadapter- und Netzanschlusskabel. Wir empfehlen zur zusätzlichen Sicherheit die Verwendung eines Überspannungsschutzes, um Ihr Notebook vor Beschädigung durch Spannungsspitzen oder Blitzschlag aus dem Stromnetz zu schützen. Wenn Sie den Netzadapter vom Stromnetz trennen möchten, ziehen Sie zunächst den Stecker aus der Steckdose und anschließend den Stecker des Notebooks. Eine umgekehrte Reihenfolge könnte den Netzadapter oder das Notebook beschädigen. Halten Sie beim Abziehen immer den Stecker selbst fest. Ziehen Sie nie an der Leitung. Betriebssicherheit 7 Deutsch English Stromversorgung Verkabelung 8 Verlegen Sie die Kabel so, dass niemand darauf treten oder darüber stolpern kann. Stellen Sie keine Gegenstände auf die Kabel, da diese sonst beschädigt werden könnten. Lassen Sie keine großen Kräfte, z. B. von der Seite, auf Steckverbindungen einwirken. Dies führt sonst zu Schäden an und in Ihrem Gerät. Wenden Sie beim Anschließen von Kabeln und Steckern keine Gewalt an und achten Sie auf die richtige Orientierung der Stecker. Wenn Sie ein Anschlusskabel von Ihrem Gerät trennen, ziehen Sie es am Stecker heraus, nicht am Kabel. Vermeiden Sie Kurzschluss und Kabelbruch indem Sie Kabel nicht quetschen oder stark biegen. Schließen Sie die Peripheriegeräte wie Tastatur, Maus, Monitor etc. nur an, wenn das Notebook ausgeschaltet ist, um Beschädigungen des Notebooks oder der Geräte zu vermeiden. Einige Geräte können auch im laufenden Betrieb angeschlossen werden. Dies ist meist bei Geräten mit USB- Anschluss der Fall. Befolgen Sie in jedem Fall die Hinweise der entsprechenden Bedienungsanleitung. Wahren Sie mindestens einen Meter Abstand von hochfrequenten und magnetischen Störquellen (TV-Gerät, Lautsprecherboxen, Mobiltelefon, DECT-Telefone usw.), um Funktionsstörungen und Datenverlust zu vermeiden. Bitte beachten Sie, dass in Verbindung mit diesem Notebook nur abgeschirmte Kabel kürzer als 3 Meter für die externen Schnittstellen eingesetzt werden dürfen. Bei Druckerkabeln benutzen Sie bitte nur doppelt abgeschirmte Kabel. Tauschen Sie die mitgelieferten Kabel nicht gegen andere aus. Benutzen Sie ausschließlich die zum Lieferumfang gehörenden Kabel, da diese in unseren Labors ausgiebig geprüft wurden. Benutzen Sie für den Anschluss Ihrer Peripherien ebenfalls nur die mit den Geräten ausgelieferten Anschlusskabel. Stellen Sie sicher, dass alle Verbindungskabel mit den dazugehörigen Peripheriegeräten verbunden sind, um Störstrahlungen zu vermeiden. Entfernen Sie die nicht benötigten Kabel. Am Notebook dürfen nur Geräte angeschlossen werden, welche die Norm EN60950 „Sicherheit von Einrichtungen der Informationstechnik“ oder Geräte welche die Norm EN60065 „Sicherheitsanforderungen - Audio-, Video- und ähnliche elektronische Geräte“ erfüllen. Betriebssicherheit Español Konformitätsinformation nach R&TTE Mit diesem Notebook wurden folgende Funkausstattungen ausgeliefert: Wireless LAN Hinweise zum Touchpad Das Touchpad wird mit dem Daumen oder einem anderen Finger bedient und reagiert auf die von der Haut abgegebene Energie. Benutzen Sie keine Kugelschreiber oder andere Gegenstände, da dies zu einem Defekt Ihres Touchpads führen könnte. Betriebssicherheit 9 Deutsch Hiermit erklärt die MEDION AG, dass sich dieses Gerät in Übereinstimmung mit den grundlegenden Anforderungen und den übrigen einschlägigen Bestimmungen der Richtlinie 1999/5/EG befindet. Vollständige Konformitätserklärungen sind erhältlich unter www.medion.com/conformity. English Bedingt durch die Leistung der eingebauten Wireless LAN Lösung (>100mW) ist der Gebrauch in Frankreich nur innerhalb von Gebäuden gestattet. In allen anderen EU-Ländern gibt es zurzeit keine Einschränkungen. Für den Gebrauch in anderen Ländern informieren Sie sich vor Ort über die jeweils gültigen gesetzlichen Vorschriften. Akkubetrieb Um die Lebensdauer und Leistungsfähigkeit Ihres Akkus zu verlängern sowie einen sicheren Betrieb zu gewährleisten, sollten Sie nachfolgende Hinweise beachten: 10 Setzen Sie den Akku nie längerer, direkter Sonneneinstrahlung oder Hitze aus. Werfen Sie den Akku nicht ins Feuer. Die Missachtung dieser Hinweise führt zur Beschädigung und unter Umständen gar zur Explosion des Akkus. Öffnen Sie niemals den Akku, er enthält keine zu wartenden Teile. Vermeiden Sie Verschmutzung und Kontakt zu elektrisch leitenden Materialien sowie chemischen Substanzen und Reinigungsmitteln. Benutzen Sie zur Ladung des Akkus nur den mitgelieferten Originalnetzadapter. Stellen Sie sicher (durch Anzeige oder Signalton des Notebooks), dass der Akku vollständig entladen ist, bevor er erneut aufgeladen wird. Achtung: Explosionsgefahr bei unsachgemäßem Auswechseln des Akkus. Tauschen Sie den Akku nur gegen denselben Typ oder den vom Hersteller empfohlenen gleichwertigen Typ aus. Laden Sie den Akku stets solange auf, bis die Akku-Ladeanzeige erlischt. Beachten Sie bitte auch die Hinweise unter „Aufladen des Akkus“ auf der Seite 31, um den Ladezustand Ihres Akkus zu bewerten. Wechseln Sie den Akku nur im ausgeschalteten Zustand. Akkus sind Sondermüll. Führen Sie nicht mehr benötigte Akkus einer fachgerechten Entsorgung zu. Ihr Kundendienst ist hierfür der richtige Ansprechpartner. Betriebssicherheit Ansichten & Erste Inbetriebnahme Thema Español English Kapitel 2 Seite Lieferumfang .................................................................. 13 Ansichten ........................................................................ 14 Deutsch Geöffnetes Notebook ................................................ 14 Vorderseite ................................................................. 15 Linke Seite ................................................................. 15 Rechte Seite .............................................................. 16 Betriebs- und Statusanzeigen .................................... 17 Multimediatasten........................................................ 18 Erste Inbetriebnahme ....................................................... 19 So starten Sie .............................................................. 19 Kurzbeschreibung der Windows®-Oberfläche ............. 22 11 12 Lieferumfang Español Lieferumfang Notebook Lithium-Ionen Akku Netzadapter mit Anschlusskabel (Modell: FSP065-ASC) OEM Version des Betriebssystems Dokumentation Deutsch English Bitte überprüfen Sie die Vollständigkeit der Lieferung und benachrichtigen Sie uns bitte innerhalb von 14 Tagen nach dem Kauf, falls die Lieferung nicht komplett ist. Mit dem von Ihnen erworbenen Produkt haben Sie erhalten: Lieferumfang 13 Ansichten 1 Geöffnetes Notebook 10 2 3 3 4 9 5 8 6 14 7 (Abbildung ähnlich) Ansichten 3 - Stereo Lautsprecher 4 - Ein-/Ausschalter ..................................................................... ( S. 27) 5 - Tastatur ................................................................................. ( S. 38) 6 - Betriebs- und Statusanzeigen ................................................ ( S. 17) 7 - Touchpad Tasten ................................................................... ( S. 39) 8 - Touchpad .............................................................................. ( S. 39) 9 - Multimediatasten .................................................................. ( S. 18) 10 - Mikrofon ............................................................................... ( S. 38) Español - Webcam ................................................................................ ( S. 52) - Display .................................................................................. ( S. 34) English 1 2 11 (Abbildung ähnlich) 11 - Multikartenleser ................................................................... ( S. 51) Linke Seite 12 13 15 14 16 (Abbildung ähnlich) 12 - Netzadapteranschluss .......................................................... ( S. 28) 13 - Netzwerkanschluss (LAN) (RJ-45) .......................................... ( S. 48) 14 - Externer Monitor Anschluss VGA ........................................... ( S. 36) 15 - HDMI-Anschluss ................................................................... ( S. 36) 16 - USB 3.0 Anschluss ................................................................. ( S. 53) Ansichten 15 Deutsch Vorderseite Rechte Seite 17 18 19 20 21 (Abbildung ähnlich) 17 - Audioausgang* / Digital Audioausgang (S/P-DIF, optisch) ................................ ( S. 47) 18 - Mikrofonanschluss* .............................................................. ( S. 47) 19 - USB 2.0 Anschluss .................................................................. ( S. 53) 20 - Optisches Laufwerk ............................................................... ( S. 42) 21 - Öffnung für Kensingtonschloss® ........................................... ( S. 54) * Anschlüsse mit Doppelbelegung, Konfiguration erfolgt via Software ( S. 47) 16 Ansichten English Das System zeigt über LEDs Stromversorgungs- und Betriebszustände an. Die Betriebsanzeigen leuchten jeweils bei der entsprechenden Aktivität des Notebooks auf: Español Betriebs- und Statusanzeigen Betriebsanzeige Deutsch Diese Anzeige leuchtet, wenn das System eingeschaltet ist. Akkuladeanzeige Diese Anzeige leuchtet auf, wenn der Akku geladen wird. Die Anzeige erlischt, wenn der Akku aufgeladen ist. Zugriffsanzeige Wenn diese LED leuchtet bzw. blinkt, greift das Notebook auf die Festplatte oder auf das optische Laufwerk zu. WLAN-Anzeige Anzeige für drahtlosen Datenaustausch. Leuchtet die Anzeige dauerhaft, ist die Wireless LAN-Funktion aktiviert. Capital Lock – Großschrift Die Großschrift [Caps Lock] wurde mit der Feststelltaste aktiviert, wenn diese LED leuchtet. Hierbei werden die Buchstaben der Tastatur automatisch großgeschrieben. Num Lock - Ziffernblock Die numerische Tastaturbelegung wurde aktiviert [Num Lock], wenn diese LED leuchtet. Ansichten 17 Multimediatasten Wireless LAN Schaltet die WLAN-Funktion ein oder aus. Stummschaltung (Mute) Schaltet die Tonwiedergabe ein oder aus. Pause/Play Taste Startet die Wiedergabe von Multimedia-Dateien bzw. hält die Wiedergabe an der gewählten Stelle an. Stopp-Taste Beendet die Wiedergabe von Multimedia-Dateien. Vorheriger Titel Springt zum vorherigen Titel bei der Wiedergabe von Multimedia-Dateien. Nächster Titel Springt zum nächsten Titel bei der Wiedergabe von Multimedia-Dateien. Leiser Verringert die Lautstärke der Tonwiedergabe. Lauter Erhöht die Lautstärke der Tonwiedergabe. 18 Ansichten Español Erste Inbetriebnahme Um Ihr Notebook sicher zu betreiben und eine hohe Lebenserwartung zu gewährleisten sollten Sie das Kapitel „Betriebssicherheit“ am Anfang dieses Handbuches gelesen haben. Das Notebook ist bereits vollständig vorinstalliert, so dass Sie keine Treiber mehr laden müssen und sofort starten können. English So starten Sie: Schritt 1 Legen Sie vor der Inbetriebnahme den Akku ein, indem Sie ihn in das Fach gleiten lassen. Verriegeln Sie unbedingt den Akku, um ein ungewolltes Herausfallen des Akkus zu vermeiden. Deutsch Erste Inbetriebnahme 19 Verbinden Sie das Netzkabel mit dem Adapter () und schließen es anschließend an einer Steckdose an (). Stecken Sie den Netzteilstecker in den Netzadapteranschluss an der linken Seite Ihres Notebooks (). Stellen Sie den Schalter am Netzadapter auf die Stellung I, um das Notebook mit Strom zu versorgen und den Akku aufzuladen. (Stellen Sie diesen Schalter auf 0, um die Stromzufuhr zu unterbrechen.). (Abbildung ähnlich) Klappen Sie das Display mit Daumen und Zeigefinger bis zur gewünschten Position auf. Das Display sollte nicht um mehr als 120° aufgeklappt werden. Halten Sie das Display beim Aufklappen und Positionieren immer mittig fest. Bei Nichtbeachtung könnte das Display beschädigt werden. Versuchen Sie niemals, es mit Gewalt zu öffnen. Hinweis Bitte stellen Sie bei der ersten Inbetriebnahme Ihres Notebooks sicher, dass der Akku eingesetzt und das Netzteil angeschlossen ist. Dies ist notwendig, damit Windows® 7 den Windows Leistungsindex korrekt ermitteln kann. Schalten Sie das Notebook ein, indem Sie den Ein-/Ausschalter (4) betätigen. Das Notebook startet und durchläuft nun verschiedene Phasen. Hinweis Es darf sich keine bootfähige Disc (z. B. die Recovery-Disc) im optischen Laufwerk befinden, da sonst das Betriebssystem nicht von der Festplatte geladen wird. 20 Erste Inbetriebnahme Español Das Betriebssystem wird von der Festplatte geladen. Der Ladevorgang dauert bei der Ersteinrichtung etwas länger. Erst nachdem alle erforderlichen Daten eingegeben worden sind, ist das Betriebssystem eingerichtet. Das Betriebssystem ist vollständig geladen, wenn ein Begrüßungsbildschirm angezeigt wird. Hinweis English Die Erstinstallation kann bis zu 30 Minuten in Anspruch nehmen. Nehmen Sie während der Erstinstallation das Notebook nicht vom Strom und schalten Sie es nicht aus. Dies könnte sich negativ auf die Installation auswirken. Schalten Sie das Notebook erst dann aus, wenn die Installation erfolgreich abgeschlossen wurde und der Windows Desktop erscheint. Schritt 2 Folgen Sie den Anweisungen auf dem Bildschirm. Die einzelnen Dialoge erklären die durchzuführenden Schritte. Wenn Sie Fragen haben, klicken Sie einfach auf das . Lizenzvertrag Lesen Sie bitte den Lizenzvertrag aufmerksam durch. Sie erhalten wichtige rechtliche Hinweise zur Nutzung Ihres Softwareproduktes. Um den gesamten Text zu sehen, müssen Sie mit der Maus den Rollbalken nach unten verschieben, bis Sie das Ende des Dokumentes erreicht haben. Sie stimmen dem Vertrag zu, indem Sie auf das Optionsfeld „Ich nehme den Vertrag an“ klicken. Nur dies berechtigt Sie, das Produkt gemäß den Bedingungen zu nutzen. Schritt 3 Nach dem Anmeldungsprozess erscheint die Oberfläche von Windows® auf Ihrem Bildschirm. Eine kurze Übersicht finden Sie auf den nächsten Seiten. Dieses Erscheinungsbild kann umgestaltet werden, so dass u. U. der Bildschirm bei Ihrem Notebook anders aussieht. Die Grundbedienung ist jedoch gewährleistet. Erste Inbetriebnahme 21 Deutsch Die Begrüßungsprozedur führt Sie u. a. durch nachfolgende Bildschirme und Dialoge. Hinweis Windows kann in den ersten Tagen nach der Erstinstallation Daten aktualisieren und konfigurieren (z. B. durch neue Updates), was zu Verzögerungen des Herunterfahrens und Startens des Notebooks führen kann. Schalten Sie daher das Notebook nicht vorzeitig aus. Dies könnte sich negativ auf die Installation auswirken. ® Kurzbeschreibung der Windows -Oberfläche Der Start-Button Klicken Sie mit der linken Maustaste einmal auf diese Schaltfläche, um das abgebildete Startmenü aufzurufen. Alle Programme Hier finden Sie die Einträge zu allen auf Ihrem Notebook installierten Programmen. Auch hier können Sie Einträge mit der rechten Maustaste bearbeiten. Taskleiste Von der Taskleiste unten am Bildschirm aus können Sie Programme starten und zwischen bereits gestarteten Programmen wechseln. Unter Windows® 7 können Sie jedes Programm in die Taskleiste setzen, sodass Sie es immer mit einem einzigen Klick öffnen können. Darüber hinaus können Sie die Symbole auf der Taskleiste neu anordnen, indem Sie einfach darauf klicken und sie an die gewünschte Position ziehen. Bewegen Sie den Mauszeiger über die Symbole, und es werden Miniaturen jeder Datei oder jedes Fensters angezeigt, das in diesem Programm geöffnet ist. Wenn Sie den Mauszeiger über die Miniatur bewegen, wird eine Vollbildvorschau des jeweiligen Fensters angezeigt. Wenn Sie den Mauszeiger von der Miniatur weg bewegen, wird auch die Vollbildvorschau geschlossen. Windows Search Windows Search hilft Ihnen dabei, faktisch alle auf dem Notebook befindlichen Daten schnell und einfach zu finden. Mit Windows® 7 erhalten die Suchergebnisse zudem mehr Relevanz, und sie sind einfacher zu verstehen. Programmleiste Die am häufigsten verwendeten Programme werden hier aufgelistet. Dies erkennt das Betriebssystem selbständig. Wenn Sie mit der rechten Maustaste auf einen Eintrag klicken, können Sie selbst bestimmen welcher Eintrag erhalten bzw. von der Liste entfernt werden soll. Das mit dem Eintrag verbundene Programm wird nicht gelöscht. Ausschalten Um das Notebook auszuschalten, klicken Sie mit der linken Maustaste auf diese Schaltfläche Herunterfahren. 22 Erste Inbetriebnahme Desktop anzeigen Wenn Sie alle geöffneten Fenster auf die Taskleisten minimieren möchten, um eine freie Sicht auf dem Desktop zu haben, klicken Sie auf diese Schaltfläche. „Icons“ auf dem „Desktop“ Español Icons sind Programmverknüpfungen, die zum Starten der betreffenden Programme benutzt werden. Mit einem Doppelklick (zwei Mal die linke Maustaste kurz hintereinander drücken) auf dem Symbol wird die Anwendung gestartet. Der Desktop umfasst annähernd den gesamten Bildschirm und ist die Ablagefläche für solche Einträge oder für andere Verknüpfungen, auf die Sie schnell zugreifen möchten. Angemeldeter Benutzer English Hier wird der angemeldete Benutzer angezeigt. Um das angezeigte Bild zu ändern, klicken Sie es an. Systemsteuerung Dies ist die Steuerzentrale für Ihr Notebook. Hier können Sie Ihr Notebook nach Belieben konfigurieren. Sie sollten jedoch in „Hilfe und Support“ lesen, wie sich etwaige Änderungen auswirken. Infobereich Informationsbereich über die aktuelle Uhrzeit. Wenn bestimmte Ereignisse eintreten, z. B. beim Empfang einer E-Mail-Nachricht oder beim Öffnen des Task-Managers, kann es vorkommen, dass zu viele Benachrichtigungssymbole in diesem Bereich angezeigt werden. Windows® zeigt ein Benachrichtigungssymbol an, wenn ein Ereignis eintritt. Nach kurzer Zeit setzt Windows® das Symbol in den Hintergrund, um diesen Bereich überschaubar zu halten. Sie können auf die Symbole zugreifen, die in den Hintergrund gesetzt wurden, indem Sie auf eine Schaltfläche im Infobereich klicken. Erste Inbetriebnahme 23 Deutsch 24 Erste Inbetriebnahme Español Kapitel 3 Thema English Hauptkomponenten Seite Stromversorgung ............................................................. 27 Display ............................................................................ 34 Dateneingabe .................................................................. 38 Das Touchpad .................................................................. 39 Deutsch Die Festplatte .................................................................. 40 Das optische Laufwerk .................................................... 42 Die Soundkarte ............................................................... 46 Netzwerkbetrieb ............................................................... 48 WLAN .......................................................................... 49 Der Multikartenleser ........................................................ 51 Webcam ........................................................................... 52 Der Universal Serial Bus-Anschluss .................................... 53 Notebook sichern ............................................................ 54 Software ......................................................................... 55 Tipps und Tricks .............................................................. 71 25 26 Stromversorgung Español Stromversorgung Ein-/Ausschalter Die Betriebsanzeige informiert Sie über den Betriebszustand. Unabhängig vom Betriebssystem wird das Notebook ausgeschaltet, wenn der Schalter länger als 4 Sekunden ununterbrochen betätigt wird. Achtung! English Halten Sie den Ein-/Ausschalter kurz gedrückt, um das Notebook ein- bzw. auszuschalten. Deutsch Schalten Sie Ihr Notebook nicht aus, während auf die Festplatte oder das optische Laufwerk zugegriffen wird. Andernfalls können Daten verloren gehen. Zum Schutz der Festplatte sollten Sie nach Ausschalten des Notebooks immer mindestens 5 Sekunden warten, bevor Sie es wieder einschalten. Stromversorgung 27 Netzbetrieb Ihr Notebook wird mit einem Universal-Netzadapter für Wechselstrom ausgeliefert, welcher sich automatisch auf die angebotene Stromquelle einstellt. Unterstützt werden die folgenden Werte: AC 100 - 240V~/ 50 - 60 Hz. Beachten Sie die Sicherheitshinweise zur Stromversorgung auf den Seiten 7ff. Der Adapter wird über ein Netzkabel an eine Wechselstromsteckdose angeschlossen. Das Gleichstromkabel des Netzadapters wird an der linken Seite des Notebooks angeschlossen (12). Verfahren Sie beim Anschließen in der Reihenfolge wie in der Abbildung gezeigt. (Abbildung ähnlich) Der Adapter verfügt über einen Ein-/Ausschalter. Steht der Schalter auf AUS (0), wird kein Strom verbraucht und das Notebook wird nicht mit Strom versorgt. Der Adapter versorgt das Notebook mit Strom in Stellung EIN (I) und lädt zudem den Akku auf. Die Betriebsanzeigen am Notebook geben Auskunft über den Betriebszustand. Ihr Akku wird auch dann geladen, wenn Sie bei angeschlossenem Netzadapter mit Ihrem Notebook arbeiten. Der Netzadapter verbraucht auch dann Strom, wenn das Notebook nicht mit dem Netzadapter verbunden ist. Ziehen Sie daher den Stecker des Netzadapters aus der Steckdose, wenn es nicht mit dem Notebook verbunden ist oder stellen Sie den Schalter auf AUS (0). Achtung! Benutzen Sie nur das beiliegende Netzadapter- und Netzanschlusskabel. 28 Stromversorgung Español Akkubetrieb Hinweis Akkus speichern elektrische Energie in ihren Zellen und geben sie dann bei Bedarf wieder ab. Die Lebensdauer und Leistungsfähigkeit Ihres Akkus ist abhängig von einer sorgfältigen Handhabung. English Bitte laden und entladen Sie den neuen Akku zwei- bis dreimal hintereinander vollständig, damit dieser seine volle Leistungsfähigkeit erreicht! Der Akku sollte vor einem Ladevorgang immer vollständig entladen und wieder komplett geladen werden, um die Lebensdauer und die Leistungsfähigkeit zu optimieren. Beachten Sie auch unbedingt die Sicherheitshinweise auf Seite 10. Einsetzen des Akkus Stromversorgung Deutsch Stecken Sie den Akkupack in das entsprechende Akkufach. Verriegeln Sie unbedingt den Akku, um ein ungewolltes Herausfallen des Akkus zu vermeiden. 29 Entnehmen des Akkus Um den Akkupack zu entfernen, schieben Sie die Akkuriegel nach außen und entnehmen Sie den Akkupack aus dem Fach. Achtung! Entfernen Sie den Akku nicht, während das Gerät eingeschaltet ist, da andernfalls Daten verloren gehen können. Achtung! Achten Sie bei der Lagerung der Akkus und der Benutzung des Notebooks darauf, dass die Kontakte an Akku und Notebook nicht verschmutzt oder beschädigt werden. Dies könnte zu Fehlfunktionen führen. 30 Stromversorgung Der Akku wird über den Netzadapter aufgeladen. Wenn der Netzadapter angeschlossen und eingeschaltet ist, lädt sich der Akku automatisch auf, unabhängig davon, ob das Notebook eingeschaltet ist oder nicht. Eine vollständige Aufladung benötigt bei abgeschaltetem Notebook einige Stunden. Wenn das Notebook eingeschaltet ist, dauert der Ladevorgang deutlich länger. Español Aufladen des Akkus Hinweis English Der Ladevorgang wird unterbrochen, wenn Temperatur oder Spannung des Akkus zu hoch sind. Entladen des Akkus Betreiben Sie das Notebook über den Akku, bis es sich aufgrund der niedrigen Akkuladung von allein ausschaltet. Deutsch Hinweis Denken Sie daran, Ihre geöffneten Dateien rechtzeitig zu sichern, um eventuellen Datenverlust zu vermeiden. Akkuleistung Die jeweilige Betriebsdauer variiert je nach Einstellung der Stromsparfunktionen. Diese können Sie in der Systemsteuerung unter Energieoptionen Ihren Ansprüchen entsprechend anpassen. Außerdem erfordert Ihr Notebook einen höheren Leistungsanspruch bei der Ausführung bestimmter Anwendungen, wie z. B. das Abspielen einer DVD. Stromversorgung 31 Überprüfen der Akkuladung Zur Überprüfung des aktuellen Ladezustands des Akkus bewegen Sie den Cursor über das Power-Symbol in der Taskleiste. Im Batteriebetrieb wird das Symbol einer Batterie angezeigt. Weitere Informationen zu Einstellungen erhalten Sie, wenn Sie einen Doppelklick auf das Symbol machen. Hinweis Wenn Sie die Warnsignale bei niedrigem Akkustand ignorieren, wird Ihr Notebook heruntergefahren. Achtung! Entfernen Sie niemals den Akku, während das Notebook eingeschaltet ist oder wenn das Notebook noch nicht in den Ruhezustand gewechselt ist, da dies zu Datenverlusten führen kann. 32 Stromversorgung Ihr Notebook bietet automatische und modifizierbare Stromspar- und Energiefunktionen, die Sie zur Maximierung der Akkunutzungsdauer und Reduzierung der gesamten Betriebskosten verwenden können. Man unterscheidet zwischen dem Energie Sparen Modus und dem Ruhezustand (Hibernate). Español Energieverwaltung (Power Management) Bei dieser Einstellung bleibt der Inhalt des Arbeitsspeichers Ihres Notebooks erhalten, während praktisch alle anderen Komponenten Ihres Notebooks abgeschaltet werden oder ihren Stromverbrauch auf ein Minimum reduzieren. Ein kurzes Betätigen des Ein-/Ausschalters schaltet das Gerät wieder ein. English Energie Sparen Der Ruhezustand ist eine weitere Variante des vollständigen Ausschaltens. Bringen Sie das Notebook in den Ruhezustand, werden alle Daten der aktuellen Sitzung aus dem Arbeitsspeicher in Form einer Datei auf die Festplatte ausgelagert. Sobald alle Daten sicher ausgelagert wurden, schaltet das Notebook ab. Beim nächsten Einschalten des Notebooks wird diese Datei durch das BIOS wieder zurück in den Arbeitsspeicher geschrieben. Nach kurzer Zeit befindet sich das Notebook in genau dem Zustand, den Sie bei der letzten Nutzung verlassen hatten. Wenn Sie also während der Bearbeitung eines Dokumentes das Notebook zuklappen (bei entsprechender Einstellung der Energieoptionen in der Systemsteuerung), macht das Notebook den Rest automatisch für Sie. Wenn Sie das Notebook wieder einschalten, sind Sie genau an dem Punkt, den Sie vor der Arbeitsunterbrechung bearbeitet hatten. Stromversorgung 33 Deutsch Ruhezustand (Hibernate) Display Öffnen und Schließen des Displays Das Display wird durch die spezielle Konstruktion der Displayscharniere verschlossen, sodass eine zusätzliche Verriegelung nicht erforderlich ist. Zum Öffnen klappen Sie das Display mit Daumen und Zeigefinger bis zur gewünschten Position auf. Achtung! Klappen Sie das Display nicht um mehr als 120° auf. Eine Überschreitung dieses Wertes kann zur Beschädigung des Gehäuses oder des Notebooks führen. Halten Sie das Display beim Aufklappen, Positionieren und Schließen immer mittig fest. Bei Nichtbeachtung könnte das Display beschädigt werden. Versuchen Sie niemals, es mit Gewalt zu öffnen. Dem Schließen und Öffnen des Displays können über die Energieverwaltung unterschiedliche Funktionen zugewiesen werden. Bildschirmauflösung Der eingebaute Bildschirm stellt bis zu 1366 x 768 Bildpunkte dar. Falls Sie im WindowsHilfsprogramm „Systemsteuerung Darstellung und Anpassung“ auf eine Darstellung mit abweichenden Einstellungen wechseln, erscheint die Anzeige u. U. nicht auf der vollen Bildschirmfläche. Durch die Vergrößerung kommt es, besonders bei Schriften, zu Verzerrungen in der Darstellung. Sie können jedoch mit einer höheren Auflösung arbeiten, wenn Sie einen externen Bildschirm mit höherer Auflösung anschließen. Mit dem Windows-Hilfsprogramm „Systemsteuerung Darstellung und Anpassung“ passen Sie die Darstellung auf die unterstützten Modi an. 34 Display Dieses Programm bietet Ihnen die Möglichkeit, die Darstellung auf Ihrem Bildschirm anzupassen. Dazu gehört z. B. das Hintergrundbild, der Bildschirmschoner, der Active Desktop (Web) sowie weiterführende Einstellungen Ihres Bildschirms und Ihrer Grafikkarte. Das Programm kann folgendermaßen gestartet werden: Español Darstellung und Anpassung Rechter Mausklick auf die Windowsarbeitsfläche (Desktop) und linker Mausklick auf Anpassung Über Start Systemsteuerung Darstellung und Anpassung durch Doppelklick mit der linken Maustaste. Deutsch English oder Folgende Einstellungsmöglichkeiten stehen Ihnen zur Verfügung: Anpassung Anzeige Minianwendungen Taskleiste und Startmenü Center für erleichterte Bedienung Ordneroptionen Schriftarten Display 35 Anschluss eines externen Monitors Das Notebook verfügt über eine VGA-Anschlussbuchse (14) für einen externen Monitor. 1. Fahren Sie Ihr Notebook ordnungsgemäß herunter. 2. Schließen Sie das Signalkabel des externen Monitors an die VGA-Buchse des Notebooks (14) an. Alternativ können Sie den digitalen HDMI-Anschluss (High Definition Multimedia Interface) (15) zur Übertragung von Bild- und Tonsignalen benutzen. 3. Verbinden Sie den externen Monitor mit dem Stromnetz, und schalten Sie ihn ein. 4. Schalten Sie nun Ihr Notebook ein. Nachdem das Betriebssystem geladen wurde, wird der externe Bildschirm ermittelt. Es stehen Ihnen mehrere Möglichkeiten zur Verfügung. Diese rufen Sie wie folgt auf: 1. Rechtsklick auf dem Display. 2. Wählen Sie im Auswahlfenster die Option Bildschirmauflösung aus. 3. Unter „Mehrere Anzeigen“ wählen Sie unter den nachfolgenden Optionen: 36 Diese Anzeigen duplizieren Diese Anzeigen erweitern Desktop nur auf 1 anzeigen Desktop nur auf 2 anzeigen Display Español Desktop duplizieren Dieser Modus dupliziert die Anzeige des Notebooks auf den externen Monitor. Hinweis Desktop erweitern In diesem Modus wird auf dem zweiten (externen) Monitor ein leerer Desktop angezeigt. Fenster aus dem ersten Bildschirm können auf den zweiten verschoben werden und umgekehrt. English Bei diesem Modus muss bei beiden Geräten die gleiche Bildschirmauflösung eingestellt sein. Die Bildschirmauflösung und die Farbqualität der einzelnen Anzeigegeräte kann individuell unter Start Systemsteuerung Darstellung und Anpassung eingestellt werden. Deutsch Desktop nur auf 1 anzeigen Der Desktop wird nur auf dem Hauptmonitor 1 angezeigt. Desktop nur auf 2 anzeigen Der Desktop wird nur auf dem zweiten (externen) Monitor angezeigt. Display 37 Dateneingabe Die Tastatur Durch Doppelbelegung einiger Tasten steht Ihnen der gleiche Funktionsumfang wie bei einer herkömmlichen Windows-Tastatur zur Verfügung. Einige Funktionen werden mit Hilfe der für Notebooks typischen Fn-Taste eingegeben: Notebookspezifische Tastenkombinationen Kombination Beschreibung Fn + F1 Energiesparen. Hier können Sie verschiedene Einstellungen vornehmen. Um diese Taste an Ihre eigenen Bedürfnisse anzupassen, gehen Sie bitte über Eigenschaften von Anzeige in die Energieverwaltung. Fn + F2 WLAN Schaltet die WLAN-Funktion ein oder aus. Fn + F4 Smart Power Mit dieser Tastenkombination können Sie zwischen verschiedenen Möglichkeiten wählen: Supersparmodus, Stromsparmodus, ausgeglichen und Hochgeschwindigkeit. Fn + F5 Dunkler Verringert die Bildschirmhelligkeit. Fn + F6 Heller Erhöht die Bildschirmhelligkeit. Fn + F7 Hintergrundbeleuchtung Schaltet die Hintergrundbeleuchtung ein oder aus. Fn + F8 Anzeige Schaltet die Bildschirmanzeige zwischen LCD, externem Display und gleichzeitiger Anzeige um. Fn + F9 Touchpad Schaltet das Touchpad ein oder aus. Fn + F10 Stummschaltung Schaltet die Tonwiedergabe ein oder aus. Fn + F11 Leiser Verringert die Lautstärke der Tonwiedergabe. 38 Dateneingabe Lauter Español Fn + F12 Erhöht die Lautstärke der Tonwiedergabe. Rollen Fn + Sc Lk Mit dieser Tastenkombination aktivieren bzw. deaktivieren Sie die Funktion „Rollen“. Wird in den meisten Anwendungsprogrammen benutzt, um über den Bildschirm zu rollen, ohne den Cursor bewegen zu müssen. English Das Touchpad Im normalen Modus folgt der Mauszeiger (Cursor) der Richtung, die auf dem Touchpad durch Bewegung Ihres Fingers in die entsprechende Richtung vorgegeben wird. Achtung! Deutsch Benutzen Sie keine Kugelschreiber oder anderen Gegenstände, da dies zu einem Defekt Ihres Touchpads führen könnte. Unter dem Touchpad befindet sich die linke und rechte Maustaste, die wie bei einer gewöhnlichen Maus genutzt werden können. Sie können aber auch direkt mit dem Touchpad einen Klick oder Doppelklick ausführen, indem Sie die Touchpadfläche einmal oder zweimal kurz antippen. In der Systemsteuerung von Windows® finden Sie unter dem Punkt „Maus“ eine Vielzahl von nützlichen Einstellungen, die Ihnen die tägliche Arbeit erleichtert. Das Touchpad 39 Die Festplatte Die Festplatte ist Ihr Hauptspeichermedium, das hohe Speicherkapazität und schnellen * Datenzugriff vereint. Mit Ihrem Notebook haben Sie eine OEM-Version des Betriebssystems Microsoft Windows® erworben, die alle Leistungsmerkmale des Notebooks voll unterstützt. Wir haben die Festplatte Ihres Notebooks bereits so konfiguriert, dass Sie in der Regel optimal damit arbeiten können, ohne selbst installieren zu müssen. Das Betriebssystem Windows® benötigt einen kleinen Teil der Kapazität zur Verwaltung der Festplatte, daher steht die komplette Kapazität der Festplatte nicht zur Verfügung. Dies erklärt mögliche Differenzen zwischen BIOS-Anzeige und Betriebssystemanzeigen. Auf der Festplatte befinden sich das Betriebssystem des Notebooks, weitere Anwendungsprogramme und Sicherheitsdateien, so dass die volle Kapazität bereits verringert ist. In der ersten Partition (C:\) befindet sich das Betriebssystem, die Anwendungsprogramme und die „Dokumente“ der eingerichteten Benutzer. Die zweite Partition (D:\) dient der Datensicherung und beinhaltet zusätzlich Treiber (D:\Driver) und Dienstprogramme (D:\Tools) für Ihr Notebook. Achtung! Des Weiteren finden Sie in zwei weiteren nicht überschreibbaren Partitionen die Startdateien zur Systemwiederherstellung ( S. 79), sowie Installationsdateien von Windows® 7. Diese Partitionen sind nicht sichtbar und dürfen nicht gelöscht werden. * Original Equipment Manufacturer / vom Hersteller gekaufte Programmversionen, die meist in Verbindung mit Endgeräten verkauft wird 40 Die Festplatte Nachfolgend haben wir die wichtigsten Verzeichnisse aufgeführt und den Inhalt beschrieben. Español Wichtige Verzeichnisse C:\ Im Stammverzeichnis des Laufwerks C: befinden sich wichtige, für den Start von Windows® erforderliche Dateien. Im Auslieferungszustand sind diese Dateien aus Sicherheitsgründen ausgeblendet. C:\Programme Wie der Name schon vermuten lässt, installieren Programme in diesem Verzeichnis die zur Anwendung gehörenden Dateien. C:\Windows Das Hauptverzeichnis von Windows. Hier speichert das Betriebssystem seine Dateien. D:\Driver In diesem Ordner finden Sie die für Ihr Notebook erforderlichen Treiber (bereits installiert). D:\Tools Hier finden Sie Zusatzprogramme und weitere Dokumentation zu Ihrem Notebook. Die Festplatte 41 Deutsch Löschen oder verändern Sie diese Verzeichnisse oder die sich darin befindenden Inhalte nicht, da ansonsten Daten verloren gehen können oder die Systemfunktionalität gefährdet ist. English Achtung! Das optische Laufwerk Einlegen einer Disc Anders als bei optischen Laufwerken in einem Desktop-PC verwendet das Notebook eine Halterung zum Arretieren der Disc. Beim Einlegen der Disc ist darauf zu achten, dass sie genau auf die Halterung gedrückt wird und dort einrastet. Hinweis Bekleben Sie die Disc nicht mit Schutzfolien oder anderen Aufklebern. Benutzen Sie keine verformten oder beschädigten Discs, um Schäden an Ihrem Laufwerk vorzubeugen. Achtung! Benutzen Sie keine verkratzten, angebrochenen, verschmutzten oder qualitativ schlechten Discs. Durch die hohen Geschwindigkeiten im Laufwerk können diese brechen und Ihre Daten zerstören sowie Ihr Gerät beschädigen. Schauen Sie sich die Discs genau an, bevor Sie diese einlegen. Sind Schäden oder Verschmutzungen erkennbar, dürfen Sie diese nicht benutzen. Schäden, die durch defekte Medien entstehen, sind von der Gewährleistung ausgenommen und müssen kostenpflichtig repariert werden. Achtung! Wenn die Disc nicht korrekt auf die Halterung platziert wird, kann sie beim Schließen der Laufwerksschublade beschädigt werden. 42 Das optische Laufwerk 2. Ziehen Sie die Lade vorsichtig vollständig heraus. 3. Nehmen Sie die Disc aus ihrer Hülle, möglichst ohne die unbedruckte Seite anzufassen. Español 1. Drücken Sie bei eingeschaltetem Gerät die Auswurftaste am optischen Laufwerk, um die Lade zu öffnen. 5. Prüfen Sie, ob sich die Disc frei drehen kann und schieben Sie die Lade dann vorsichtig wieder in das optische Laufwerk zurück, bis sie einrastet. Im Auslieferungszustand ist Ihrem optischen Laufwerk der Laufwerksbuchstabe „E“ zugewiesen. Mit dem Windows-Explorer (Computer) können Sie bequem auf die Daten Ihrer Discs zugreifen. Starten Sie das Hilfsprogramm Computer über die und Desktopverknüpfung oder durch gleichzeitiges Drücken der Windowstaste der Taste „E“. Den Windows-Explorer öffnen Sie über Start Alle Programme Zubehör. Beim Zugriff auf DVD-Videos (bzw. Audio- und Videodateien auf herkömmlichen Daten-CDs) wird automatisch die vorinstallierte Medienwiedergabe verwendet. English 4. Legen Sie die Disc mit der Beschriftung nach oben auf die Lade und drücken sie vorsichtig hinunter. Die Disc liegt nun flach auf der Lade auf und rastet hörbar auf der Disc-Halterung ein. Deutsch 6. Wenn Sie eine Disc entnehmen wollen, drücken Sie die Auswurftaste. Achtung! Solange das Notebook auf das optische Laufwerk zugreift, versuchen Sie nicht, die Disc aus dem Laufwerk zu nehmen. Das optische Laufwerk 43 Notentnahme einer blockierten Disc Sollte sich die Schublade nicht mehr automatisch öffnen, kann sie manuell geöffnet werden, sofern Ihr Gerät eine Notentnahmeöffnung hat. 1. Beenden Sie Windows und schalten Sie das Notebook aus. 2. Führen Sie einen langen spitzen Gegenstand (z. B. aufgebogene Büroklammer) soweit in die Notentnahmeöffnung ein, bis Sie einen Widerstand spüren. 3. Durch einen leichten Druck öffnet sich nun die Schublade. 4. Entnehmen Sie die Disc und starten Sie nun das Notebook erneut. Discs abspielen / auslesen Ihr optisches Laufwerk ist in der Lage, Audio CDs, DVD-Filme oder Daten CDs/DVDs abzuspielen. Nachdem eine Disc geladen wurde, öffnet sich ein Auswahlfenster mit verschiedenen Optionen zur Wiedergabe. I. d. R. stehen Ihnen diverse Programme zur Verfügung. Sollte sich das Auswahlfenster nicht öffnen, besteht immer die Möglichkeit, über den oder den Computer Explorer das optische Laufwerk zuzugreifen. 44 auf Das optische Laufwerk Español Regionale Wiedergabeinformationen bei DVD Die Wiedergabe von DVD-Filmtiteln beinhaltet Dekodierung von MPEG2-Video, digitaler AC3 Audiodaten und Entschlüsseln von CSS-geschützten Inhalten. CSS (manchmal auch Copy Guard genannt) ist die Bezeichnung eines Datenschutzprogrammes, das von der Filmindustrie als Maßnahme gegen illegale Kopien aufgenommen wurde. Unter den vielen Reglementierungen für CSS-Lizenznehmer sind die wichtigsten die Wiedergabeeinschränkungen bei landesspezifischen Inhalten. English Um geographisch abgegrenzte Filmfreigaben zu erleichtern, werden DVD-Titel für bestimmte Regionen freigegeben. Copyright-Gesetze verlangen, dass jeder DVD-Film auf eine bestimmte Region beschränkt wird (meistens die Region, in der er verkauft wird). Zwar können DVD-Filmversionen in mehreren Regionen veröffentlicht werden, aber die CSS-Regeln verlangen, dass jedes CSS-dechiffrierfähige System nur für eine Region einsetzbar sein darf. Hinweis Deutsch Die Regions-Einstellung kann über die Ansichtssoftware bis zu fünf Mal verändert werden, dann bleibt die letzte Einstellung permanent. Wenn Sie die Regions-Einstellung dann nochmals verändern wollen, muss dies werksseitig vorgenommen werden. Kosten für Versand und Einstellung müssen vom Anwender getragen werden. Themen rund um den Brenner Dieser Abschnitt bezieht sich nur auf Geräte, die mit einem CD-RW, einem Kombo (Kombination aus CD-/DVD-Leselaufwerk) oder einem DVD-RW-Laufwerk ausgeliefert wurden. Zunächst erhalten Sie Informationen zu den sog. Rohlingen. CD- und DVD-Rohlinge Normale CDs werden von einem Glas-Master gepresst und anschließend versiegelt. Bei Rohlingen werden digitale Informationen mit dem Laser des Brenners eingebrannt. Daher sind sie empfindlicher als die herkömmlichen Discs. Vermeiden Sie daher, insbesondere bei unbeschriebenen Rohlingen, unbedingt: Bestrahlung durch Sonnenlicht (UVA/UVB) Kratzer und Beschädigungen Extreme Temperaturen Das optische Laufwerk 45 Die Soundkarte Ihr Notebook besitzt eine integrierte Stereosoundkarte mit 16 Bit und räumlichen Klangeffekten (3D). Die Soundkarte ist kompatibel zu den Industriestandards Sound Blaster und Microsoft Sound System Version 2.0. Dies gewährleistet eine optimale Unterstützung für alle gängigen Programme und Spiele. Wenn Sie die Grundlautstärke ändern wollen, klicken Sie auf das Lautsprechersymbol in Ihrer Taskleiste. Klicken Sie auf Mixer, um den Lautstärkemixer zu öffnen. Mit Hilfe der Tastenkombinationen Fn + F11 und Fn + F12 haben Sie ebenfalls die Möglichkeit, die Lautstärke zu regulieren. 46 Die Soundkarte Ihr Notebook verfügt über eingebaute Stereo-Lautsprecher, so dass Sie stets ohne zusätzliche Geräte Klänge wiedergeben können. Die Benutzung der externen Anschlüsse gibt Ihnen eine gute Möglichkeit, Ihr Notebook mit externen Geräten zu verbinden. Español Externe Audioverbindungen Vorsicht! English Zu große Lautstärke bei der Verwendung von Ohrhörern oder Kopfhörern erzeugt übermäßigen Schalldruck und kann zum Verlust des Hörsinns führen. Stellen Sie die Lautstärke vor der Wiedergabe auf den niedrigsten Wert ein. Starten Sie die Wiedergabe und erhöhen Sie die Lautstärke auf den Pegel, der für Sie angenehm ist. Durch Verändern der Grundeinstellung des Equalizers kann sich die Lautstärke erhöhen und damit zu bleibenden Hörschäden führen. Ferner kann das Verändern der Treiber, der Software, des Equalizers, des Betriebssystems etc. zur Erhöhung der Lautstärke und daher ebenfalls zu bleibenden Hörschäden führen. Audio Ausgang / Digitaler Audioausgang (S/P-DIF optisch) (17) Mikrofonanschluss (18) Deutsch Wenn ein Gerät längere Zeit mit erhöhter Lautstärke über einen Kopfhörer/Ohrhörer betrieben wird, kann das Schäden am Hörvermögen des Zuhörers verursachen. Zur Soundausgabe mit einem externen Raumklangdecoder über ein optisches Kabel (separat im Fachhandel erhältlich). Zur Soundwiedergabe über externe Stereogeräte wie Lautsprecher (aktiv) oder Kopfhörer. Zur Aufnahme über ein externes Mikrofon. Die Soundkarte 47 Netzwerkbetrieb Was ist ein Netzwerk? Man spricht von einem Netzwerk, wenn mehrere Computer direkt miteinander verbunden sind. So können die Anwender Informationen und Daten untereinander übertragen und sich Ihre Ressourcen (Drucker und Laufwerke) teilen. Hier einige Beispiele aus der Praxis: In einem Büro werden Nachrichten per E-Mail ausgetauscht und Termine werden zentral verwaltet. Anwender teilen sich einen Drucker im Netzwerk und sichern Ihre Daten auf einem Zentralrechner (Server). Zwei oder mehrere Computer werden miteinander verbunden, um Netzwerkspiele zu spielen oder Daten auszutauschen. Ethernet-Netzwerkanschluss Ist Ihr Notebook mit einem Ethernet-Netzwerkanschluss ausgestattet, können Sie ihn an ein Netzwerk anschließen. Die nachfolgenden Erläuterungen beziehen sich auf Notebooks, die einen Netzwerkanschluss besitzen. Schließen Sie ein Ende mit dem RJ45-Anschluss (Westernstecker) an die Netzwerkschnittstelle Ihres Notebooks (13) an und das andere an einen anderen Computer oder Hub/Switch. Weitere Erläuterungen zum Netzwerk finden Sie in der Windows®-Hilfe im Start-Menü. 48 Netzwerkbetrieb Diese Funktion ermöglicht es Ihnen, über Funk eine Netzwerkverbindung zu einer entsprechenden Gegenstelle aufzubauen. Bitte lesen Sie vor der Aktivierung die erforderlichen Voraussetzungen. Español Wireless LAN (Funk-Netzwerk) Die Wireless LAN- Funktion wird über die Tastenkombination Fn + F2 aktiviert bzw. deaktiviert. English Achtung! Betreiben Sie die WLAN Funktion nicht an Orten (Bsp.: Krankenhaus, Flugzeug etc.), in denen funkempfindliche Geräte stehen. Schalten Sie das Gerät nur ein, wenn sichergestellt ist, dass keine Beeinträchtigung besteht. Als Gegenstelle kann man einen sog. LAN Access Point benutzen. Ein Access Point ist ein Funkübertragungsgerät, das mit Ihrem Notebook kommuniziert und den Zugriff auf das angeschlossene Netzwerk steuert. LAN Access Points sind häufig in Großraumbüros, Flughäfen, Bahnhöfen, Universitäten oder Internet-Cafés zu finden. Sie bieten Zugriff auf eigene Dienste und Netzwerke oder das Internet. Meist sind Zugangsberechtigungen erforderlich, die i. d. R. kostenpflichtig sind. Oft findet man Access Points mit integriertem DSL-Modem. Diese sog. Router stellen die Verbindung zum vorhandenen DSL-Internetanschluss und dem Wireless LAN her. Es kann auch ohne Access Point eine Verbindung zu einem anderen Endgerät mit Wireless LAN-Funktionalität hergestellt werden. Allerdings limitiert sich das Netzwerk ohne Router auf die direkt verbundenen Geräte. * Die drahtlose Netzwerkverbindung arbeitet nach dem Standard IEEE 802.11n und ist kompatibel zum Standard IEEE 802.11b/g. Wird eine Verschlüsselung bei der Übertragung benutzt, muss diese bei allen Geräten nach dem gleichen Verfahren arbeiten. Die Verschlüsselung ist ein Verfahren, um das Netzwerk vor unbefugtem Zugriff zu schützen. Die Übertragungsgeschwindigkeit kann je nach Entfernung und Auslastung der Gegenstelle variieren. * Um die gesamte Leistung nutzen zu können ist ein WLAN Router nach dem Standard 802.11n erforderlich. Netzwerkbetrieb 49 Deutsch Voraussetzungen Problembeseitigung im Netzwerk Warum werden in der Netzwerkumgebung die Freigaben nicht angezeigt? Die Netzwerkumgebung ist zeitverzögert. Überprüfen Sie die Freigabe, indem Sie nach dem betreffenden Computernamen suchen. Warum bekomme ich eine Fehlermeldung wenn ich auf die Netzwerkumgebung klicke? Der Computername muss im Netzwerk einmalig sein und darf nicht wie die Arbeitsgruppe heißen. Es sieht so aus, als ob die Netzwerkkarten nicht kommunizieren können. Woran kann das liegen? Vielleicht arbeitet eine der verwendeten Netzwerkkarten mit einer anderen Geschwindigkeit (z. B. 10 statt 100 Mbit) und Ihr NetzwerkNotebook ist nicht in der Lage dies zu erkennen. Stellen Sie ggf. die kompatible Geschwindigkeit im Netzwerktreiber ein. Sollen zwei PCs miteinander verbunden werden, benötigen Sie ein Cross-Link Kabel, andernfalls verwenden Sie ein Patch Kabel. Kontrollieren Sie auch die Protokolle und die Konfiguration. Die Datenübertragung ist fehlerhaft oder sehr langsam. Woran kann das liegen? Sie haben vielleicht das falsche Kabel (UTP / CAT3 oder niedriger) oder es liegt in der Nähe eines Stromkabels oder einer anderen Störquelle. Weitere Fehlerbehebungshinweise finden Sie in der Windowshilfe unter dem Stichwort „Netzwerkfehler“. 50 Netzwerkbetrieb Español Der Multikartenleser Speicherkarten sind Medien, die z. B. im Bereich der digitalen Fotografie eingesetzt werden und nach und nach das Medium Diskette ersetzen. Die Form und Kapazität einer Speicherkarte kann je nach Hersteller variieren. Ihr Notebook unterstützt folgende Formate: MMC (MultiMediaCard) SD (Secure Digital), SDHC, SDXC Memory Stick/Memory Stick Pro Kartentyp Verbindungskontakte SD (Secure Digital) zeigen nach unten MMC (MultiMediaCard) zeigen nach unten Memory Stick zeigen nach unten Memory Stick Pro zeigen nach unten Deutsch Achten Sie beim Einlegen der Speicherkarten darauf, dass die Kontakte, wie in der folgenden Auflistung beschrieben, in die richtige Richtung zeigen. Das falsche Einlegen einer Karte könnte zu Beschädigung des Kartenlesers und/oder der Karte führen. Speicherkarte einlegen Hinweis Die Speicherkarten können nur in eine Richtung eingelegt werden. Beachten Sie bitte die Hinweise im oberen Abschnitt. Schieben Sie die Karte bis zum Anschlag hinein. Speicherkarte entfernen Um SD/MMC-Karten oder Memory Sticks zu entfernen, drücken Sie diese zunächst in den Anschluss hinein, um die Sicherung zu lösen. Ziehen nun die Karte aus dem Schacht und lagern Sie diese fachgerecht. Der Multikartenleser English 51 Die Webcam Die eingebaute Webcam ermöglicht die Nutzung diverser Dienste wie z. B. den Windows Live Messenger. Anwendungsbeispiel mit dem Windows Live Messenger 1. Starten Sie den Windows Live Messenger und erstellen Sie ein Benutzerkonto, sofern noch nicht geschehen. Dieser Dienst ist kostenlos. Es fallen lediglich die Kosten für die Internetverbindung an. 2. Wählen Sie Ihren Gesprächspartner aus Ihrer Liste aus und klicken Sie auf das Kamerasymbol unter Ihrem Anzeigebild. Anzeigebild Gesprächspartner Eigenes Anzeigebild Kamerasymbol (Abb.: Messengerfenster Sofortnachricht) 52 Die Webcam Español Ein Assistent hilft Ihnen, die optimalen Einstellungen für Ihre Lautsprecher, Ihr Mikrofon und Ihre Webcam vorzunehmen. Folgen Sie den Anweisungen auf dem Bildschirm. 3. Klicken Sie auf Fertigstellen, um Ihr Bild mit der Webcam zu übertragen. 4. Sollte Ihr Gesprächspartner ebenfalls eine Webcam angeschlossen haben, klicken Sie auf das Kamerasymbol unter dem Anzeigebild Ihres Gesprächspartners, um das Live-Bild zu empfangen. English Der Universal Serial Bus-Anschluss An den Anschlüssen für USB (Universal Serial Bus 1.1 und 2.0) können bis zu 127 Geräte angeschlossen werden, die dem USB-Standard entsprechen. Die USB 3.0 Anschlüsse sind vollständig abwärtskompatibel zu USB 2.0 und 1.1. Ihr Notebook verfügt über 2 USB 2.0 Anschlussbuchsen (USB 1.1 kompatibel) (19) und 2 USB 3.0 Anschlussbuchsen (16). Deutsch Hinweis Schließen Sie Ihre USB-Geräte möglichst immer an dem Anschluss an, an dem sie installiert wurden. Andernfalls erhalten Geräte eine neue ID und eine Nachinstallation der Treiber ist erforderlich. Der Universal Serial Bus-Anschluss 53 Notebook sichern Gegen unbefugten Zugriff stellt Ihnen Ihr neues Notebook Software- und Hardwarelösungen zur Verfügung. Einschaltkennwort Sie können Ihr Notebook mit einem Einschaltkennwort gegen unbefugte Benutzung schützen. Beim Einschalten des Notebooks erscheint dann eine Aufforderung zur Eingabe des Kennwortes auf dem Bildschirm. Das Kennwort wird im BIOS eingerichtet. Achtung! Bewahren Sie Ihr Kennwort an einem sicheren Ort auf. Wenn Sie Ihr Kennwort vergessen, haben Sie keine Möglichkeit, dieses zu löschen. Wenden Sie sich in diesem Falle an Ihren Kundendienst. Sie können auch die Sicherheitsoption von Windows nutzen, um Ihre Daten vor unbefugten Zugriff zu schützen. Siehe weitere Hinweise im Abschnitt „Daten- und Systemsicherheit“ ab Seite 75. Kensington-Sicherheitsschloss Mit einem sog. Kensington-Sicherheitsschloss können Sie Ihr Notebook gegen Diebstahl schützen. Im Fachhandel finden Sie dieses Sicherheitsschloss mit Kabel als Zubehör. Um das Sicherheitsschloss anzubringen, wickeln Sie das Kabel um einen stationären Gegenstand, z. B. ein Tischbein. Stecken Sie das Schloss in die Kensington-Vorrichtung und drehen Sie den Schlüssel, um es abzuschließen. Bewahren Sie den Schlüssel an einem sicheren Ort auf. 54 Notebook sichern Español Software Dieser Abschnitt befasst sich mit dem Thema Software. Dabei unterscheiden wir zwischen dem Betriebssystem, der Software (den Anwendungsprogrammen), der WindowsAktivierung, dem BIOS sowie dem mitgelieferten Sicherheitspaket. ® Mit Windows® 7 stellt Microsoft das neue Betriebssystem und den Nachfolger von Vista® auf den Markt. Windows® 7 enthält eine Reihe innovativer Funktionen und neuer Technologien, womit Ihr Notebook schnell und zuverlässig arbeitet und dabei einfach zu bedienen ist. English Windows 7 kennen lernen Windows® 7 - Neuheiten Von der Taskleiste unten am Bildschirm aus können Sie Programme starten und zwischen bereits gestarteten Programmen wechseln. Unter Windows® 7 können Sie jedes Programm in die Taskleiste setzen, sodass Sie es immer mit einem einzigen Klick öffnen können. Darüber hinaus können Sie die Symbole auf der Taskleiste neu anordnen, indem Sie einfach darauf klicken und sie an die gewünschte Position ziehen. Die Symbole wurden auch erheblich größer gestaltet, sodass sie einfacher zu bedienen sind. Bewegen Sie den Mauszeiger über die Symbole, und es werden Miniaturen jeder Datei oder jedes Fensters angezeigt, das in diesem Programm geöffnet ist. Wenn Sie den Mauszeiger über die Miniatur bewegen, wird eine Vollbildvorschau des jeweiligen Fensters angezeigt. Wenn Sie den Mauszeiger von der Miniatur weg bewegen, wird auch die Vollbildvorschau geschlossen. Sprunglisten Sprunglisten bieten eine praktische Möglichkeit zum Öffnen von Dateien, mit denen Sie in letzter Zeit gearbeitet haben. Zum Anzeigen der kürzlich verwendeten Dateien klicken Sie einfach mit der rechten Maustaste auf das Anwendungssymbol auf der Taskleiste. Wenn Sie also mit der rechten Maustaste auf das Word-Symbol klicken, werden die kürzlich verwendeten Word-Dokumente angezeigt. Darüber hinaus können Sie auch andere Dateien, die Sie schnell zur Hand haben möchten, einfach in die Sprungliste setzen, damit sie immer angezeigt werden. Auf diese Weise können Sie auf Dokumente, die Sie häufiger verwenden, mit nur wenigen Mausklicks zugreifen. Die Sprunglisten von einigen Programmen wie Windows® Media Player können im Vorfeld mit häufig verwendeten Befehlen gefüllt werden. So sehen Sie in der Sprungliste für Windows® Media Player beispielsweise Optionen zum Abspielen der gesamten Musik oder zum erneuten Öffnen der letzten Wiedergabeliste. Software 55 Deutsch Verbesserte Taskleiste In der Sprungliste für Internet Explorer werden die häufig und zuletzt besuchten Websites angezeigt. Bei einigen Programmen können Sie hiermit sogar schnell auf Befehle zugreifen, die in der Vergangenheit nur aus dem Programm selbst aufgerufen werden konnten, wie den Befehl zum Verfassen einer neuen E-Mail-Nachricht. Verbesserter Desktop Windows® 7 vereinfacht das Arbeiten mit Fenstern auf dem Desktop. Sie verfügen damit über intuitivere Möglichkeiten zum Öffnen und Schließen, zum Ändern der Größe und zum Anordnen. Mit Windows® 7 wird die Erledigung alltäglicher Aufgaben noch einfacher. Mit der Einrastfunktion ("Snaps") wird es beispielsweise einfacher denn je, zwei geöffnete Fenster zu vergleichen. Sie müssen die Größe der geöffneten Fenster für den Vergleich nicht manuell anpassen. Ziehen Sie das Fenster einfach mit der Maus an einen der Seitenränder des Bildschirms, und es füllt den halben Bildschirm aus. Rasten Sie Fenster an beiden Seiten ein, und schon ist es einfacher denn je, die Fenster zu vergleichen. Wenn Sie alle Desktop-Minianwendungen anzeigen möchten, bewegen Sie einfach die Maus in die untere rechte Ecke des Desktops. Damit werden alle geöffneten Fenster transparent, sodass der Desktop und die hierauf befindlichen Minianwendungen sofort sichtbar werden. Klicken Sie auf die Titelleiste des Fensters, "schütteln" Sie es, und alle anderen geöffneten Fenster werden als Symbole auf der Taskleiste angezeigt. "Schütteln" Sie das Fenster erneut, und die anderen Fenster werden wieder angezeigt. Bessere Geräteverwaltung Mit Windows® 7 können Sie sämtliche Geräte über die zentrale Funktion "Geräte und Drucker" anschließen, verwalten und nutzen. Alle Geräte werden an einer zentralen Stelle angezeigt. Mit der neuen Device Stage-Technologie geht Windows® 7 bei der Geräteverwaltung jedoch noch einen Schritt weiter. Device Stage hilft Ihnen bei der Nutzung aller kompatibler Geräte, die an den Computer angeschlossen sind. Dank Device Stage können Sie nun in einem einzigen Fenster den Gerätestatus anzeigen und häufig verwendete Befehle ausführen. Hier finden Sie sogar Bilder von den Geräten, sodass Sie auf einfache Weise sehen können, welche Geräte angeschlossen sind. Die Hersteller der Geräte können Device Stage sogar anpassen. Wenn der Hersteller Ihrer Kamera beispielsweise eine angepasste Version von Device Stage bereitstellt, können Sie Angaben wie die Anzahl der Fotos auf der Kamera sehen und erhalten Links zu hilfreichen Informationen, wenn Sie die Kamera mit dem Notebook verbinden. 56 Software Español Mit Heimnetzgruppen, einer neuen Funktion von Windows® 7, wird das Verbinden von Heimcomputern zu einem Kinderspiel. Eine Heimnetzgruppe wird automatisch eingerichtet, wenn Sie den ersten PC unter Windows® 7 mit dem Heimnetzwerk verbinden. Das Hinzufügen weiterer PCs mit Windows® 7 zur Heimnetzgruppe ist schnell erledigt. Sie können exakt angeben, was auf jedem PC für alle anderen PCs in der Heimnetzgruppe freigegeben werden soll. Anschließend ist die gemeinsame Nutzung von Dateien auf den unterschiedlichen Heim-PCs – und auf vielen anderen Geräten – so einfach, als würden sich alle Daten auf einer einzigen Festplatte befinden. Auf diese Weise können Sie digitale Fotos auf dem Computer im Arbeitszimmer speichern und dann einfach von einem Laptop in einem beliebigen anderen Raum darauf zugreifen. Ebenso wird auch der Drucker im Arbeitszimmer automatisch für alle PCs im Haus freigegeben, wenn er sich einmal in der Heimnetzgruppe befindet. English Heimnetzgruppe Windows® 7 - Hilfe und Support Hier finden Sie eine umfassende Sammlung von Anleitungen, Hilfestellungen und Vorschlägen zur Problembeseitigung. Deutsch Diese Hilfe bespricht das gesamte Spektrum des Windows-Betriebssystems. Sie empfiehlt sich für Anfänger wie auch für Profis. Die in Themen unterteilten Informationen lassen sich ausdrucken oder mit Lesezeichen versehen. So starten Sie: 1. Klicken Sie auf Start 2. Wählen Sie nun Hilfe und Support Software 57 Windows® 7 - Erste Schritte Erfahren Sie alles, was Sie zum Einrichten des Notebooks wissen müssen. Ziel dieses Features ist es, Anfängern sowie auch erfahrenen Anwendern, nach der Erstinbetriebnahme, noch zusätzliche Einstellungen zur optimalen Nutzung von Windows® 7 vorzunehmen. 58 Software Neues in Windows® 7 online abrufen Windows anpassen Dateien und Einstellungen von anderem Computer übertragen Weitere Computer mithilfe einer Heimnetzgruppe freigeben Einstellungen für Benutzerkontensteuerung anpassen Windows Live Essentials online erwerben Dateien sichern Neue Benutzer zu dem Computer hinzufügen Textgröße auf dem Bildschirm ändern Español English Erste Schritte ist in viele kleine Themenbereiche aufgeteilt, so dass der Anwender die Möglichkeit hat, den Inhalt optimal auf seine Kenntnisse abzustimmen. Nachfolgend einige Links: Nutzen Sie Erste Schritte, um Ihr Notebook besser zu verstehen und optimal bedienen zu können. Es dient Ihnen auch als zusätzliche Informationsquelle zur Erkennung und Beseitigung möglicher Probleme. Rufen Sie Erste Schritte es wie folgt auf: 2. Wählen Sie in der Programmliste Deutsch 1. Klicken Sie auf Start Erste Schritte. Windows® 7 - Benutzerkontensteuerung Die Benutzerkontensteuerung trägt dazu bei, dass nicht autorisierte Änderungen an dem Notebook verhindert werden. Sobald Sie eine nicht autorisierte Änderung vornehmen, erscheint ein Fenster mit dem Hinweis „Möchten Sie zulassen, dass durch das folgende Programm Änderungen an diesem Computer vorgenommen werden?“. Klicken Sie auf Ja, um mit dem Vorgang fortzufahren Klicken Sie auf Nein, um den Vorgang abzubrechen. Software 59 Windows® 7 - Systemsteuerung Mithilfe der Systemsteuerung können Sie Einstellungen für Windows ändern. Diese Einstellungen steuern fast alles zur Darstellung und Funktionsweise von Windows, und sie ermöglichen Ihnen das Einrichten von Windows entsprechend Ihren Anforderungen. Beim ersten Öffnen der Systemsteuerung werden einige der am häufigsten verwendeten Elemente der Systemsteuerung nach Kategorien gruppiert angezeigt. Benötigen Sie in der Kategorieansicht weitere Informationen zu einem Element der Systemsteuerung, müssen Sie den Mauszeiger über das Symbol oder den Kategorienamen halten und den daraufhin angezeigten Text lesen. Um eines dieser Elemente zu öffnen, müssen Sie auf das zugehörige Symbol oder den Kategorienamen klicken. Für einige dieser Elemente wird eine Liste mit ausführbaren Aufgaben sowie eine Auswahl einzelner Systemsteuerungselemente geöffnet. Für die Suche nach dem gewünschten Steuerungselement gibt es die folgenden beiden Methoden: 60 Geben Sie ein Wort oder einen Ausdruck im Suchfeld ein. Klicken Sie unter Anzeige auf Große Symbole oder Kleine Symbole, um eine Liste aller Systemsteuerungselemente anzuzeigen. Software Windows Media Center ist die Plattform für Ihr individuelles Home-Entertainment in Windows® 7. Mit Windows Media Center können Sie fernsehen, TV-Sendungen aufzeichnen, DVDs und Musik abspielen, Fotos betrachten und vieles mehr - per Fernbedienung (nicht im Lieferumfang enthalten) oder Mausklick. Español Windows Media Center Hinweis English Die Unterstützung der Funktionen hängt von der Hardwareausstattung des Notebooks ab. Z. B. erfordert die Funktion TV einen TV-Tuner (nicht im Lieferumfang enthalten). Und so starten Sie Ihr individuelles Home-Entertainment: 1. Notebook einschalten 2. Klicken Sie auf Start Windows Media Center. Deutsch 3. Klicken Sie auf . Nachfolgend eine Übersicht der Windows Media Center Funktionen: Hauptmenü Untermenü TV + Filme Aufzeichnungen Sollten Sie einen TV-Tuner anschließen, haben Sie die Möglichkeit Sendungen aufzuzeichnen. Über diesen Menüpunkt können Sie die aufgezeichneten Sendungen wiedergeben, löschen oder auf externe Medien brennen. DVD wiedergeben Hierüber spielen Sie DVDs ab. TV einrichten Sofern Sie über eine externe TV-Tuner Hardware verfügen, haben Sie hier die Möglichkeit das TV-Signal zu konfigurieren. Online-Medien Programme Diese Programmbibliothek bietet eine Auflistung unterschiedlicher Online-Medien. Über Online-Medien rufen Sie Inhalte über das Internet ab - von der Online-Videothek über News-Portale bis hin zum Musikshop. Voraussetzung zur Nutzung dieser Funktion ist eine bestehende Internet-Verbindung. Software 61 Hauptmenü Untermenü Aufgaben Einstellungen Passen Sie hier das Windows Media Center Ihren Anforderungen und Bedürfnissen an. Nehmen Sie hier zum Beispiel die Jugendschutzeinstellungen vor. Herunterfahren Hierüber beenden Sie nicht nur Windows Media Center sondern können das gesamte Betriebssystem herunterfahren. Achten Sie darauf, dass alle andere Anwendungen bereits geschlossen wurden, bevor Sie das System herunter fahren. CD/DVD brennen Rufen Sie hierüber Ihre Brennsoftware auf, um einen Brennvorgang zu starten Synchronisieren Schließen Sie ein externes Gerät wie zum Beispiel einen MP3-Player oder eine digitale Kamera an, können Sie hierüber die Daten auf dem externen Gerät mit dem Notebook synchronisieren. Extender-Setup Hierüber können Sie einen Windows Media Center Extender einrichten. Über ein Kabel- oder Drahtlosnetzwerk können Sie auf die Daten Ihres Notebooks zugreifen. "Nur Medien" Hierüber schalten Sie in den Vollbildmodus des Media Centers um. Bilder + Videos Bildbibliothek In der Bildbibliothek befinden sich alle auf Ihrem Notebook abgelegten Bilder. Starten Sie hier die Wiedergabe einer Diashow. Alle wiedergeben Um direkt mit der Wiedergabe einer Diashow zu starten, wählen Sie "Alle wiedergeben". Videobibliothek In der Videobibliothek befinden sich alle auf Ihrem Notebook abgelegten Videos. 62 Software Español Musikbibliothek In der Musikbibliothek befinden sich alle auf Ihrem Notebook abgelegten Musiktitel. Hier können Sie die gezielte Wiedergabe eines Albums, eines Interpreten oder eines bestimmten Titels starten. Alles wiedergeben Hierüber starten Sie die Wiedergabe aller Dateien, die sich in der Musikbibliothek befinden. Radio English Musik Untermenü Sofern Sie über eine externe Radio-Tuner Hardware verfügen, haben Sie hier die Möglichkeit Radiosender zu hören und zu verwalten. Suchen Hierüber können Sie gezielt nach Musiktitel, Komponisten, Interpreten, Alben etc. suchen. Die Suche beginnt, sobald Sie den ersten Buchstaben eingegeben haben. Deutsch Hauptmenü Software 63 Softwareinstallation Hinweis Sollte Ihr Betriebssystem so eingestellt sein, dass die Installation von Software und Treibern nur angenommen wird, wenn diese signiert (von Microsoft freigegeben) sind, erscheint ein solcher oder ähnlicher Dialog: Klicken Sie zur Installation der Treiber auf „Diese Treibersoftware trotzdem installieren“. Die mitgelieferte Software ist bereits vollständig installiert. Achtung! Bei der Installation von Programmen oder Treibern können wichtige Dateien überschrieben und verändert werden. Um bei eventuellen Problemen nach der Installation auf die Originaldateien zugreifen zu können, sollten Sie vor der Installation eine Sicherung Ihres Festplatteninhaltes erstellen. Näheres zur Datensicherung finden Sie ab Seite 75. 64 Software Befolgen Sie die Anweisungen, die der Softwarelieferant dem Softwarepaket beigelegt hat. Nachfolgend beschreiben wir eine „typische“ Installation. Wenn Sie eine Disc einlegen, wird automatisch das Installationsmenü gestartet. Español So installieren Sie Ihre Software Hinweis English Sollte der automatische Start nicht funktionieren, ist wahrscheinlich die sog. „Autorun“-Funktion deaktiviert. Schauen Sie in der Windows® 7 Hilfe nach, um dies zu ändern. Beispiel für eine manuelle Installation ohne Autorun: 1. Klicken Sie auf Start . 2. Klicken Sie auf Alle Programme. 3. Öffnen Sie den Programmpunkt Ausführen aus. 5. Geben Sie nun in das Feld „Öffnen“ den Laufwerksbuchstaben des optischen Laufwerks ein, gefolgt von einem Doppelpunkt und dem Programmnamen setup. 6. Bestätigen Sie Ihre Eingabe mit einem Klick auf „OK“. 7. Folgen Sie den Anweisungen des Programms. Software 65 Deutsch 4. Wählen Sie den Eintrag Zubehör. Deinstallation einer Software Um installierte Software von Ihrem Notebook zu entfernen, befolgen Sie bitte folgende Schritte: 1. Klicken Sie auf Start 2. Klicken Sie auf . Systemsteuerung. 3. Wählen Sie anschließend die Option Programme. 4. Wählen Sie das betreffende Programm aus, starten Sie die Deinstallation und folgen Sie den Anweisungen auf Ihrem Bildschirm. Windows-Aktivierung Zum Schutz gegen Softwarepiraterie hat Microsoft die Produktaktivierung eingeführt. Die auf Ihrem Notebook installierte wie auch die mit dem Notebook gelieferte Windows® 7Version brauchen Sie nicht zu aktivieren, da diese von uns für Ihr Notebook freigeschaltet ist. Eine Aktivierung ist nur dann erforderlich, wenn Sie mehrere wesentliche Komponenten des Notebooks austauschen oder ein nicht autorisiertes BIOS verwenden. Sie können Windows® 7 beliebig oft neu aktivieren, wenn dies erforderlich sein sollte. Detaillierte Informationen finden Sie im Hilfesystem und bei: http://www.microsoft.com/germany/piraterie/produktaktivierung.mspx 66 Software In einigen wenigen Fällen kann es trotzdem passieren, dass man aufgefordert wird, Windows® 7 zu aktivieren. Falls die Aktivierung via Internet mit einer Fehlermeldung quittiert wird, sollten bitte folgende Schritte durchgeführt werden. Español Produktaktivierung bei Ihrem Notebook 1. Bitte wählen Sie telefonische Aktivierung aus und klicken Sie auf weiter. Deutsch English 2. Klicken Sie nun auf Product Key ändern. Ein neues Fenster erscheint. Geben Sie dort bitte den Product Key ein. Dieser befindet sich auf dem Echtheitszertifikat (Certificate of Authenticity, COA), auf Ihrem Gehäuse. 3. Bestätigen Sie Ihre Eingabe und folgen Sie den Anweisungen auf dem Bildschirm. Teilen Sie ggf. dem Microsoft-Berater mit, dass Sie eine OEM-Lizenz in Verbindung mit dem Notebook erworben haben. Software 67 BIOS Setup-Programm Im BIOS Setup (Hardware Basis-Konfiguration Ihres Systems) haben Sie vielfältige Einstellungsmöglichkeiten zum Betrieb Ihres Notebooks. Beispielsweise können Sie die Betriebsweise der Schnittstellen, die Sicherheitsmerkmale oder die Verwaltung der Stromversorgung ändern. Das Notebook ist bereits ab Werk so eingestellt, dass ein optimaler Betrieb gewährleistet ist. Achtung! Bitte ändern Sie die Einstellungen nur, wenn dies absolut erforderlich ist und Sie mit den Konfigurationsmöglichkeiten vertraut sind. Ausführen des BIOS Setup Sie können das Konfigurationsprogramm nur kurz nach dem Systemstart ausführen. Wenn das Notebook bereits gestartet ist, schalten Sie es ab und starten es erneut. Drücken Sie die F2 Funktionstaste, um das BIOS-SETUP zu starten. 68 Software Español Kaspersky Internet Security Kaspersky Internet Security ist bereits vorinstalliert, sodass eine Installation nicht erforderlich ist. Sollten Sie dennoch eine Installation durchführen müssen (z. B. nach einer Systemwiederherstellung), finden Sie das Softwarepaket auf der mitgelieferten Application-/Support-Disc. English Kaspersky Internet Security ist ein umfangreiches Werkzeug zum Schutz Ihrer Daten. Die Anwendung bietet Ihnen nicht nur einen umfassenden Schutz vor Viren, sondern auch Schutz vor Spam und Netzwerkangriffen. Weitere Komponenten der Software schützen Ihren Computer vor bisher unbekannten Bedrohungen und Phishing-Attacken und erlauben es, den Zugang zum Internet sinnvoll zu beschränken. Ein umfassender Schutz deckt alle Bereiche des Datentransfers und – austausches ab. Datei-Anti-Virus Datei-Anti-Virus schützt das Dateisystem des Computers vor einer Infektion. Die Komponente wird beim Hochfahren des Betriebssystems gestartet, befindet sich ständig im Arbeitsspeicher des Computers und untersucht alle Dateien, die auf Ihrem Computer und auf allen angeschlossenen Laufwerken geöffnet, gespeichert und gestartet werden. Kaspersky Internet Security fängt jeden Zugriff auf eine Datei ab und untersucht die Datei nach bekannten Viren. Eine Datei wird nur dann zur Arbeit freigegeben, wenn die Datei virenfrei ist oder erfolgreich vom Programm desinfiziert wurde. Mail-Anti-Virus Mail-Anti-Virus untersucht ein- und ausgehende E-Mails auf Ihrem Computer. Eine E-Mail wird nur dann dem Empfänger zugestellt, wenn sie keine gefährlichen Objekte enthält. Web-Filter / Kindersicherung Der Web-Filter blockiert den Besuch von gefährlichen Webseiten und erschafft so eine sichere Arbeitsumgebung während des Surfens im Internet. Die Kindersicherung erlaubt es, den Zugriff auf Internetressourcen und Programme für unterschiedliche Computerbenutzer altersabhängig flexibel einzuschränken. Hinweis Mit einer aktiven Internet Verbindung wird Kaspersky Internet Security automatisch aktiviert. Eine manuelle Aktivierung ist nicht notwendig. Nach Ablauf von 90 Tagen wird Kaspersky Internet Security automatisch deaktiviert. Wir empfehlen daher, rechtzeitig eine Lizenz zu erwerben um optimalen Schutz für Ihren PC sicherzustellen. Kaspersky Internet Security 69 Deutsch Kaspersky Internet Security besteht u. a. aus folgenden Sicherheitskomponenten: Das Kaspersky Internet Security Paket wird für die Dauer von 90 Tagen nach der kostenlosen Registrierung mit den neuesten Vireninformationen aktualisiert. Lesen Sie dazu die Informationen im Internet unter: https://www.Kaspersky.com/de/ Hinweis Mit der ersten Onlineverbindung werden das Betriebssystem und die Antiviren-Software automatisch aktualisiert. Diese Vorgänge dauern erfahrungsgemäß einige Minuten. In dieser Zeit kann es zu Beeinträchtigungen in der Arbeitsgeschwindigkeit des Computers kommen, diese sind nur bei der Erstinbetriebnahme spürbar. 70 Kaspersky Internet Security Español Tipps und Tricks Bedienhilfen Windows - Tastatursteuerung Mit ALT + TAB wechseln Sie das aktive Fenster. Mit der TAB-Taste springen Sie zum nächsten Text-/Eingabefeld, mit SHIFT + TAB zum vorherigen ALT + F4 schließt das aktuelle Fenster/Programm. STRG + F4 schließt ein Fenster eines Programms. English Hinweise zu der Tastatur finden Sie ab Seite 38. Mit der ALT - Taste gelangen Sie in das Programm-Menü in dem Sie mit den Pfeiltasten navigieren können. Mit der Windows ( Deutsch Haben Sie keine Windows ( )-Tasten auf der Tastatur, können Sie das Startmenü auch über STRG + ESC aufrufen. Mit der Windows-Taste + M kann man alle Fenster minimieren. Das aktuelle Fenster wird mit ALT + LEERTASTE + N minimiert. )-Taste + TAB wechseln Sie zwischen den aktiven Fenstern. Einstellungen der Maus verändern. ? Die Einstellungsmöglichkeiten der Maus finden Sie in der Systemsteuerung: 1. Klicken Sie auf Start . 2. Klicken Sie auf Systemsteuerung. 3. Öffnen Sie Hardware und Sound und klicken Sie unter Geräte und Drucker auf den Eintrag Maus. 4. Sie können nun die Maus Ihren Bedürfnissen entsprechend (Schaltflächenkonfiguration, Doppelklickgeschwindigkeit, Mauszeiger etc.) anpassen. Wie kann ich Dateien, Text oder Bilder an eine andere Stelle kopieren? Am besten über die Zwischenablage. Markieren Sie den Text mit der Maus (ziehen Sie den Mauszeiger mit gedrückter linker Taste über den Text) oder klicken Sie das Bild an. Drücken Sie STRG + C, um das Markierte in die Zwischenablage zu kopieren. Nun wechseln Sie an die Stelle, wo das Markierte eingefügt werden soll. Drücken Sie STRG + V, um den Inhalt der Zwischenablage dort einzufügen. Funktion Tastenkombination Ausschneiden [Strg]+[X] Einfügen [Strg]+[V] Kopieren [Strg]+[C] Löschen [Entf] Tipps und Tricks 71 Systemeinstellungen und -informationen Autostart-Funktion des optischen Laufwerks Wenn Sie eine Disc einlegen, wird diese gemäß dem Inhalt (Musik, Video etc.) ausgeführt. Ist dies nicht der Fall, kann das mehrere Ursachen haben: Die Disc hat keine Autostart-Funktion, die Funktion ist deaktiviert oder die Funktion ist für diesen Typ deaktiviert. So aktivieren bzw. deaktivieren Sie die Funktion generell: 1. Klicken Sie auf Start . 2. Klicken Sie auf Systemsteuerung. 3. Wählen Sie anschließend die Option Hardware und Sound oder direkt den Unterpunkt Automatische Wiedergabe. 72 Tipps und Tricks Español Kapitel 4 Thema English Selbsthilfe Seite Daten- und Systemsicherheit .......................................... 75 Systemwiederherstellung ................................................ 76 Auslieferungszustand wiederherstellen ............................ 79 FAQ – Häufig gestellte Fragen ......................................... 81 Deutsch Kundendienst .................................................................. 82 Auf-/Umrüstung und Reparatur ........................................ 87 Recycling und Entsorgung .............................................. 88 73 74 Daten- und Systemsicherheit Español Daten- und Systemsicherheit Die beschriebenen Programme sind in Windows integriert. Detaillierte Informationen finden Sie unter Angabe der fett gedruckten Stichwörter in der Windows-Hilfe im Startmenü. Lesen Sie bitte auch die Hinweise auf Seite 4. Machen Sie regelmäßig Sicherungen auf externe Medien, wie CD-R oder CD-RW. Windows bietet Ihnen dazu das Programm „Sicherungsstatus und -konfiguration“. Dieses befindet sich unter Zubehör Systemprogramme. Machen Sie sich Sicherheitskopien von Ihren Kennwörtern und von der Systemkonfiguration. English Datensicherung Das regelmäßige Ausführen der Programme „Defragmentierung“ und „Datenträgerbereinigung“ kann Fehlerquellen beseitigen sowie die Systemleistung erhöhen. Sehr hilfreich ist auch das Hilfsprogramm „Systeminformationen“, welches Ihnen detaillierte Informationen zu Ihrer Systemkonfiguration gibt. Auch diese Programme finden Sie im Programmordner unter Zubehör Systemprogramme. Daten- und Systemsicherheit 75 Deutsch Wartungsprogramme Systemwiederherstellung Windows® 7 liefert eine nützliche Funktion (Systemwiederherstellung), die es ermöglicht, so genannte Wiederherstellungspunkte zu speichern. Das System merkt sich die aktuelle Konfiguration als Momentaufnahme und kehrt bei Bedarf zu dieser zurück. Dies hat den Vorteil, dass eine missglückte Installation wieder rückgängig gemacht werden kann. Wiederherstellungspunkte werden vom System automatisch erstellt, können aber auch manuell gesetzt werden. Sie können dies selbst bestimmen und konfigurieren, wie viel Speicherplatz maximal dafür in Anspruch genommen werden soll. Dieses Programm finden Sie im Programmordner unter Zubehör, Systemprogramme. Wir empfehlen Ihnen, vor Installation einer neuen Software oder eines Treibers einen Wiederherstellungspunkt zu setzen. Sollte Ihr System nicht mehr stabil laufen, haben Sie so meist die Möglichkeit zu einer lauffähigen Konfiguration zurückzukehren, ohne dass neu erstellte Dokumente gelöscht werden. Lesen Sie im nächsten Abschnitt, welche Möglichkeiten Sie zur Reparatur einer fehlerhaften Installation haben. Fehlerbehebung Windows® 7 enthält verschiedene Funktionen, die sicherstellen, dass das Notebook sowie die installierten Anwendungen und Geräte korrekt funktionsfähig sind. Diese Funktionen helfen Ihnen beim Lösen der Probleme, die durch Hinzufügen, Löschen oder Ersetzen von Dateien entstehen können, die für die Funktionsfähigkeit von Betriebssystem, Anwendungen und Geräten erforderlich sind. Welche Wiederherstellungsfunktion Sie verwenden, ist abhängig von dem Typ des auftretenden Problems oder Fehlers. In der Windows-Hilfe finden Sie detaillierte Informationen dazu. 76 Systemwiederherstellung Español Windows Update Windows Update ist die Onlineerweiterung von Windows. Verwenden Sie Windows Update, um Elemente wie Sicherheitsupdates, wichtige Updates, die neuesten Hilfedateien, Treiber und Internetprodukte über das Internet zu laden. Windows Update durchsucht das Notebook und stellt eine Liste individueller Updates speziell für die Konfiguration Ihres Notebooks bereit. Jedes Update, das Microsoft für den Betrieb des Betriebssystems, von Programmen oder Hardwarekomponenten als wichtig betrachtet, wird als "wichtiges Update" eingestuft und automatisch für Sie zum Installieren ausgewählt. English Die Website wird regelmäßig durch neuen Inhalt ergänzt, damit Sie jederzeit die neuesten Updates und Fehlerkorrekturen downloaden können, um das Notebook zu schützen und dessen Funktionsfähigkeit zu gewährleisten. Wichtige Updates werden bereitgestellt, um bekannte Probleme zu beheben und das Notebook vor bekannten Sicherheitsrisiken zu schützen. Führen Sie vier einfache Schritte aus, um die benötigten Updates zu downloaden und Ihr Notebook auf dem aktuellen Stand zu halten: . Deutsch 1. Klicken Sie auf Start 2. Klicken Sie auf Alle Programme. 3. Öffnen Sie Windows Update. 4. Klicken Sie auf Nach Updates suchen. 5. Klicken Sie auf Hinzufügen, während Sie die verfügbaren Updates in jeder Kategorie durchsuchen, um das gewünschte Update auszuwählen und zu den zu installierenden Updates hinzuzufügen. Sie können auch eine vollständige Beschreibung jedes einzelnen Elements lesen, indem Sie auf die Verknüpfung Weiterlesen klicken. 6. Klicken Sie auf Updates überprüfen und installieren, wenn Sie alle gewünschten Updates ausgewählt haben, und klicken Sie dann auf Jetzt installieren. Systemwiederherstellung 77 Windows Update-Informationen zur Datensicherheit Damit eine geeignete Liste mit Updates für Sie bereitgestellt werden kann, benötigt Windows Update bestimmte Informationen zum jeweiligen PC. Diese Informationen umfassen Folgendes: Versionsnummer des Betriebssystems Versionsnummer von Internet Explorer Versionsnummern weiterer Softwareprogramme Plug & Play-Kennungen der Hardwaregeräte Windows Update tritt für den Schutz Ihrer privaten Daten ein und erfasst nicht Ihren Namen, Ihre Adresse, E-Mail-Adresse oder andere Formen von persönlichen Daten. Die gesammelten Informationen werden nur in der Zeit verwendet, in der Sie die Website besuchen. Sie werden auch nicht gespeichert. 78 Systemwiederherstellung Español Auslieferungszustand wiederherstellen Sollte Ihr System trotz der voran beschriebenen Fehlerbehebung nicht mehr richtig funktionieren, können Sie den Auslieferungszustand wiederherstellen. Nachträglich vorgenommene Konfigurationsänderungen (DFÜ-/Desktop-/InternetEinstellung) und Softwareinstallationen werden nicht wiederhergestellt. Nachträgliche Treiberaktualisierungen und Hardwareergänzungen werden nicht berücksichtigt. English Beschränkung der Wiederherstellung Alle Daten von Laufwerk C, auch der für die Dateiablage der Benutzer gedachte Ordner „Dokumente“, werden gelöscht. Machen Sie ggf. eine Sicherung auf externe Medien, wie z. B. CD-R / DVD-R oder externe Festplatten (Beachten Sie unbedingt die Hinweise auf der Seite 4 und auf Seite 75). Es wird immer der Zustand der Auslieferung hergestellt. Von Ihnen durchgeführte Installationen und Konfigurationen müssen ggf. erneut erfolgen. Auslieferungszustand wiederherstellen 79 Deutsch Achtung! Rücksicherung durchführen 1. Entfernen Sie alle eventuell eingesetzten Massenspeichergeräte (Speicherkarten, USB-Stick etc.). 2. Schalten Sie das Notebook ein. 3. Drücken Sie bei der Meldung „Press F11 to run recovery“ die entsprechende Taste. Nach einigen Sekunden erscheint die Meldung „Windows is loading files“. Warten Sie ab, bis die Daten geladen sind. Am Ende erscheint das Menü „Power Recover“. 4. Wählen Sie die Sprache des Wiederherstellungsmenüs. 5. Klicken Sie auf „Next“. 6. Sie haben nun die Wahl zwischen zwei Rücksicherungen: Auf HDD zurücksetzen - keine Sicherung der Benutzerdaten Alle Daten auf dem Notebook werden unwiderruflich gelöscht. Es wird der Auslieferungszustand wieder hergestellt. Auf HDD zurücksetzen - mit gesicherten Benutzerdaten. Es wird der Auslieferungszustand erstellt und alle Benutzerdaten unter C:\User werden gesichert. Unbedingt beachten! Bei der Option mit gesicherten Benutzerdaten dauert die Rücksicherung sehr lange. Es werden nur die Daten gesichert, die sich in dem Ordner C:\user befinden. Alle weiteren Daten werden gelöscht. Führen Sie daher immer regelmäßig eine Datensicherung auf externen Datenträgern durch. Die Geltendmachung von Schadensersatzansprüchen für Datenverlust und dadurch entstandene Folgeschäden wird ausgeschlossen. 7. Klicken Sie auf Weiter und folgen Sie den weiteren Anweisungen auf dem Bildschirm, um den Auslieferungszustand wieder herzustellen. 80 Auslieferungszustand wiederherstellen Español FAQ - Häufig gestellte Fragen Muss ich die beiliegenden Discs noch installieren? Nein. Grundsätzlich sind alle Programme bereits vorinstalliert. Die Discs sind lediglich als Sicherheitskopie gedacht. Wo finde ich die notwendigen Treiber für mein Notebook? English Die Treiber befinden sich auf der zweiten Partition der Festplatte in den Ordnern Driver (Treiber) und Tools. Was ist die Windows-Aktivierung? In dieser Bedienungsanleitung finden Sie ein entsprechendes Kapitel mit detaillierten Informationen zu diesem Thema. Wann muss ich Windows aktivieren? Deutsch Ihre Software ist ab Werk voraktiviert. Eine Aktivierung wird erst erforderlich, wenn ... ... mehrere Komponenten (Grafikkarte, CPU etc.) durch andere ersetzt werden; ... Sie ein neues Motherboard eingebaut haben; ... eine fremde BIOS-Version installiert wurde; ... Sie die Software auf einen anderen PC installieren. Wann empfiehlt sich die Wiederherstellung des Auslieferungszustandes? Diese Methode sollte nur als letzte Lösung gewählt werden. Lesen Sie im Kapitel „Systemwiederherstellung“ auf Seite 76, welche Alternativen sich anbieten. Wie mache ich eine Datensicherung? Machen Sie eine Sicherung und eine Rücksicherung ausgewählter Daten auf externen Medien (CD-R), um sich mit der Technik vertraut zu machen. Eine Sicherung ist unbrauchbar, wenn Sie nicht in der Lage sind, die Daten wiederherzustellen, das Medium (CD-R) defekt oder nicht mehr verfügbar ist. Warum muss ich mein USB-Gerät erneut installieren, obwohl ich dies bereits getan habe? Wird das Gerät nicht am gleichen USB-Anschluss betrieben, an dem es installiert worden ist, erhält es automatisch eine neue Kennung. Das Betriebssystem behandelt es dann wie ein neues Gerät und möchte es neu installieren. Verwenden Sie den installierten Treiber oder schließen Sie das Gerät an dem Port an, an dem es installiert wurde. FAQ - Häufig gestellte Fragen 81 Kundendienst Erste Hilfe bei Hardwareproblemen Fehlfunktionen können manchmal banale Ursachen haben, aber manchmal auch von defekten Komponenten ausgehen. Wir möchten Ihnen hiermit einen Leitfaden an die Hand geben, um das Problem zu lösen. Wenn die hier aufgeführten Maßnahmen keinen Erfolg bringen, helfen wir Ihnen gern weiter. Rufen Sie uns an! Lokalisieren der Ursache Beginnen Sie mit einer sorgfältigen Sichtprüfung aller Kabelverbindungen. Wenn die Leuchtanzeigen nicht funktionieren, vergewissern Sie sich, dass das Notebook und alle Peripheriegeräte ordnungsgemäß mit Strom versorgt werden. Bei Akkubetrieb schließen Sie das Notebook an den Netzadapter an und vergewissern Sie sich, dass der Akku geladen ist. Wenn Sie das Notebook mit Netzadapter betreiben wollen, trennen Sie den Netzadapter von der Steckdose und schließen Sie zum Test z. B. eine Lampe an dieselbe Steckdose an. Funktioniert die Lampe auch nicht, fragen Sie einen Elektriker um Rat. Schalten Sie das Notebook aus und überprüfen Sie alle Kabelverbindungen. Wenn das Notebook an Peripheriegeräte angeschlossen ist, überprüfen Sie auch hier die Steckverbindungen aller Kabel. Tauschen Sie Kabel für verschiedene Geräte nicht wahllos gegeneinander aus, auch wenn Sie genau gleich aussehen. Die Pinbelegungen im Kabel sind vielleicht anders. Wenn Sie mit Sicherheit festgestellt haben, dass das Gerät mit Strom versorgt wird und alle Verbindungen intakt sind, schalten Sie das Notebook wieder ein. Das regelmäßige Ausführen der Windows® Programme wie z. B. „Defragmentierung“ kann Fehlerquellen beseitigen sowie die Systemleistung erhöhen (siehe Seite 75). Sehr hilfreich ist auch das Hilfsprogramm „Systeminformationen“, welches Sie im Programmordner „Systemprogramme“ finden. 82 Kundendienst Español Fehler und mögliche Ursachen Der Bildschirm ist schwarz. Dieser Fehler kann unterschiedliche Ursachen haben: 2. Die Energie Sparen Anzeige blinkt. Das Notebook befindet sich im Energie Sparen Modus. Lösung: Betätigen Sie den Ein-/Ausschalter. English 1. Die Betriebsanzeige (Ein-/Ausschalter) leuchtet nicht und das Notebook befindet sich im Ruhezustand. Lösung: Betätigen Sie den Ein-/Ausschalter. 3. Die Hintergrundbeleuchtung wurde mit der Tastenkombination Fn+F7 deaktiviert. Lösung: Drücken Sie die Tastenkombination Fn+F7 erneut, um die Hintergrundbeleuchtung wieder einzuschalten. Deutsch Das Notebook schaltet sich während des Betriebs aus. Der Akku könnte leer sein. Schließen Sie das Notebook über den Netzadapter an und laden Sie den Akku auf. Das Notebook lässt sich nicht einschalten. Betreiben Sie das Notebook über den Akku, überprüfen Sie, ob dieser richtig eingelegt und geladen ist. Falsche Zeit- und Datumsanzeige. Klicken Sie die Uhrzeitanzeige in der Taskleiste an. Wählen Sie die Option Datums- und Uhrzeiteinstellung ändern und stellen Sie anschließend die korrekten Werte ein. Vom optischen Laufwerk können keine Daten gelesen werden. Überprüfen Sie, ob die Disc ordnungsgemäß eingelegt ist. Wird das Laufwerk im Explorer angezeigt? Wenn ja, testen Sie eine andere Disc. Die WLAN-Verbindung funktioniert nicht. Um die WLAN-Verbindung zu aktivieren, müssen Sie die Tastenkombination Fn + F2 drücken. Das Touchpad ist ohne Funktion. Um das Touchpad zu aktivieren, drücken Sie die Tastenkombination Fn + F9. Kundendienst 83 Benötigen Sie weitere Unterstützung? Wenn Sie trotz der Vorschläge im vorangegangenen Abschnitt immer noch Probleme haben, nehmen Sie bitte Kontakt mit Ihrer Hotline auf oder wenden Sie sich an www.medion.de/service. Wir werden Ihnen weiterhelfen. Bevor Sie sich jedoch an Ihr Technologie Center wenden, bereiten Sie bitte folgende Daten vor: Haben Sie Erweiterungen oder Änderungen an der Ausgangskonfiguration vorgenommen? Was für zusätzliche Peripheriegeräte nutzen Sie? Welche Meldungen, wenn überhaupt, erscheinen? Welche Software wurde beim Auftreten des Fehlers verwendet? Welche Schritte haben Sie zur Lösung des Problems bereits unternommen? Treiberunterstützung Das System ist mit den installierten Treibern in unseren Testlabors ausgiebig und erfolgreich getestet worden. In der Computerbranche ist es jedoch üblich, dass die Treiber von Zeit zu Zeit aktualisiert werden. Dies kommt daher, dass sich z. B. eventuelle Kompatibilitätsprobleme zu anderen, noch nicht getesteten Komponenten (Programme, Geräte) ergeben haben. Sie können aktuelle Treiber aus dem Internet auf folgenden Adressen finden: http://www.medion.de Bitte wenden Sie sich an die Service-Adresse des Landes, in denen das Gerät erworben wurde. 84 Kundendienst Español Schalten Sie das Notebook aus. Um Beschädigungen zu vermeiden, werden die Köpfe der Festplatte dabei automatisch in einem sicheren Bereich bewegt. Entfernen Sie eingelegte DVDs/CDs. Warten Sie nach einem Transport des Notebooks solange mit der Inbetriebnahme, bis das Gerät die Umgebungstemperatur angenommen hat. Bei großen Temperatur- oder Feuchtigkeitsschwankungen kann es durch Kondensation zur Feuchtigkeitsbildung innerhalb des Notebooks kommen, die einen elektrischen Kurzschluss verursachen kann. Schließen Sie das Notebook und stellen Sie sicher, dass der Deckel fest schließt. Verwenden Sie stets eine Notebook-Tragetasche, um das Notebook vor Schmutz, Feuchtigkeit, Erschütterungen und Kratzern zu schützen. Benutzen Sie für den Versand Ihres Notebooks stets die originale Kartonage und lassen Sie sich von Ihrem Transportunternehmen diesbezüglich beraten. Laden Sie Ihren Akku und eventuell vorhandene Ersatzakkus vor Antritt längerer Reisen unbedingt voll auf und vergessen Sie nicht, den Netzadapter mitzunehmen. Erkundigen Sie sich vor einer Reise über die am Zielort vorhandene Strom- und Kommunikationsversorgung. Erwerben Sie vor dem Reiseantritt bei Bedarf die erforderlichen Adapter für Strom bzw. Kommunikation (LAN etc.). Legen Sie, bei Versand des Notebooks, den Akku separat in die Kartonage. Wenn Sie die Handgepäckkontrolle am Flughafen passieren, ist es empfehlenswert, dass Sie das Notebook und alle magnetischen Speichermedien (Disketten, externe Festplatten) durch die Röntgenanlage (die Vorrichtung, auf der Sie Ihre Taschen abstellen) schicken. Vermeiden Sie den Magnetdetektor (die Konstruktion, durch die Sie gehen) oder den Magnetstab (das Handgerät des Sicherheitspersonals), da dies u. U. Ihre Daten zerstören könnte. Kundendienst 85 English Beachten Sie folgende Hinweise, wenn Sie das Notebook transportieren wollen: Deutsch Transport Wartung Achtung! Es befinden sich keine zu wartenden oder zu reinigenden Teile innerhalb des Notebook-Gehäuses. Die Lebensdauer des Notebooks können Sie durch folgende Maßnahmen verlängern: Ziehen Sie vor dem Reinigen immer den Netzstecker, alle Verbindungskabel und entfernen Sie den Akku. Reinigen Sie das Notebook nur mit einem angefeuchteten, fusselfreien Tuch. Verwenden Sie keine Lösungsmittel, ätzende oder gasförmige Reinigungsmittel. Benutzen Sie zur Reinigung Ihres optischen Laufwerks keine CD-ROMReinigungsdiscs oder ähnliche Produkte, welche die Linse des Lasers säubern. Staub oder Fett auf dem Touchpad beeinträchtigt seine Empfindlichkeit. Entfernen Sie Staub oder Fett auf der Oberfläche des Touchpads mit einem Klebestreifen. Im Laufe der Zeit kann sich im Inneren des Notebooks Staub ansammeln, der die Kühllammellen verschließt. Das führt dazu, dass sich die Lüfterdrehzahl erhöht und somit auch die Betriebslautstärke Ihres Notebooks. Des Weiteren kann dies zu Überhitzungen und Fehlfunktionen führen. Lassen Sie daher in regelmäßigen Abständen das Innere des Notebooks von Ihrem Service oder einem Fachmann reinigen. Pflege des Displays Schließen Sie das Notebook, wenn nicht damit gearbeitet wird. Vermeiden Sie ein Verkratzen der Bildschirmoberfläche, da diese leicht beschädigt werden kann. Achten Sie darauf, dass keine Wassertröpfchen auf dem Bildschirm zurückbleiben. Wasser kann dauerhafte Verfärbungen verursachen. Reinigen Sie den Bildschirm mit einem weichen, fusselfreien Tuch. Setzen Sie den Bildschirm weder grellem Sonnenlicht, noch ultravioletter Strahlung aus. Das Notebook und seine Verpackung sind recyclingfähig. Hinweis Auf den Oberflächen befinden sich Schutzfolien, um das Gerät vor Kratzern während der Produktion und dem Transport zu schützen. Ziehen Sie alle Folien ab, nachdem Sie das Gerät korrekt aufgestellt haben und bevor Sie es in Betrieb nehmen. 86 Kundendienst Español Überlassen Sie die Auf- oder Umrüstung Ihres Notebooks ausschließlich qualifiziertem Fachpersonal. Sollten Sie nicht über die notwendige Qualifikation verfügen, beauftragen Sie einen entsprechenden Service-Techniker. Bitte wenden Sie sich an Ihren Kundendienst, wenn Sie technische Probleme mit Ihrem Notebook haben. Im Falle einer notwendigen Reparatur wenden Sie sich bitte ausschließlich an unsere autorisierten Servicepartner. Hinweise für den Servicetechniker Das Öffnen des Notebook-Gehäuses sowie die Auf- und Umrüstung Ihres Notebooks ist nur Service-Technikern vorbehalten. Verwenden Sie nur Originalersatzteile. Ziehen Sie vor dem Öffnen des Gehäuses alle Strom- und Anschlusskabel und entfernen Sie den Akku. Wird das Notebook vor dem Öffnen nicht vom Stromnetz getrennt, besteht die Gefahr, dass Komponenten beschädigt werden könnten. Interne Komponenten des Notebooks können durch elektrostatische Entladung (ESD) beschädigt werden. Führen Sie Systemerweiterungen und -veränderung sowie Reparaturen an einem ESD-Arbeitsplatz durch. Ist ein solcher Arbeitsplatz nicht vorhanden, tragen Sie eine Antistatik-Manschette oder berühren Sie einen gut leitenden, metallischen Körper. Schäden, die durch unsachgemäße Handhabung entstehen, werden von uns kostenpflichtig repariert. Hinweise zur Laserstrahlung In dem Notebook können Lasereinrichtungen der Laserklasse 1 bis Laserklasse 3b verwendet sein. Die Einrichtung erfüllt die Anforderungen der Laserklasse 1. Durch Öffnen des Gehäuses des optischen Laufwerks erhalten Sie Zugriff auf Lasereinrichtungen bis zur Laserklasse 3b. Bei Ausbau und/oder Öffnung dieser Lasereinrichtungen ist folgendes zu beachten: Die eingebauten optischen Laufwerke enthalten keine zur Wartung oder Reparatur vorgesehenen Teile. Die Reparatur der optischen Laufwerke ist ausschließlich dem Hersteller vorbehalten. Blicken Sie nicht in den Laserstrahl, auch nicht mit optischen Instrumenten. Setzen Sie sich nicht dem Laserstrahl aus. Vermeiden Sie die Bestrahlung des Auges oder der Haut durch direkte oder Streustrahlung. Auf-/Umrüstung und Reparatur 87 English Deutsch Auf-/Umrüstung und Reparatur Recycling und Entsorgung Gerät Werfen Sie das Gerät am Ende seiner Lebenszeit keinesfalls in den normalen Hausmüll. Erkundigen Sie sich nach Möglichkeiten einer umweltgerechten Entsorgung. Batterien Verbrauchte Batterien gehören nicht in den Hausmüll! Sie müssen bei einer Sammelstelle für Altbatterien abgegeben werden. Verpackung Ihr Gerät befindet sich zum Schutz vor Transportschäden in einer Verpackung. Verpackungen sind aus Materialien hergestellt, die umweltschonend entsorgt und einem fachgerechten Recycling zugeführt werden können. Wenn Sie Fragen zur Entsorgung haben, wenden Sie sich bitte an Ihre Verkaufsstelle oder an unseren Service. 88 Recycling und Entsorgung Español Kapitel 5 Thema English Anhang Seite Konformitätsinformationen............................................... 91 Deutsch Index .............................................................................. 93 89 90 Español Konformitätsinformationen Das Gerät erfüllt die Anforderungen der elektromagnetischen Kompatibilität und elektrischen Sicherheit. Ihr Gerät entspricht den grundlegenden Anforderungen und den relevanten Vorschriften der EMV-Richtlinien 2004/108/EG und der Richtlinie für Niederspannungsgeräte 2006/95/EG. Europäische Norm EN ISO 13406-2 Klasse II Bei Aktiv Matrix LCDs (TFT) mit einer Auflösung von 1366 x 768 Pixeln, welche sich aus je drei Sub-Pixeln (Rot, Grün, Blau) zusammensetzen, kommen insgesamt ca. 3,1 Mio. Ansteuertransistoren zum Einsatz. Aufgrund dieser sehr hohen Anzahl von Transistoren und des damit verbundenen äußerst komplexen Fertigungsprozesses, kann es vereinzelt zu einem Ausfall oder zur fälschlichen Ansteuerung von Pixeln bzw. einzelnen Sub-Pixeln kommen. In der Vergangenheit gab es immer wieder verschiedenste Ansätze die Anzahl der erlaubten Pixelfehler zu definieren. Diese waren aber zumeist sehr kompliziert und von Hersteller zu Hersteller völlig unterschiedlich. MEDION folgt daher für alle TFT-Display-Produkte bei der Garantieabwicklung den strengen und transparenten Anforderungen der Norm ISO 13406-2, Klasse II; welche im Folgenden kurz zusammengefasst sind. Der ISO-Standard 13406-2 definiert u. a. allgemein gültige Vorgaben in Bezug auf Pixelfehler. Die Pixelfehler werden in vier Fehlerklassen und drei Fehlertypen kategorisiert. Jeder einzelne Pixel setzt sich wiederum aus drei Sub-Pixeln mit je einer Grundfarbe (Rot, Grün, Blau) zusammen. Konformitätsinformationen 91 Deutsch English Dieses Gerät erfüllt die grundlegenden Anforderungen und relevanten Vorschriften der Öko-Design Richtlinie 2009/125/EG (Verordnung 1275/2008). Pixelaufbau Pixelfehler-Typen: Typ 1: dauerhaft leuchtende Pixel (heller, weißer Punkt), obwohl nicht angesteuert. Ein weißer Pixel entsteht durch das Leuchten aller drei Subpixel. Typ 2: nicht leuchtende Pixel (dunkler, schwarzer Punkt), obwohl angesteuert Typ 3: abnormale oder defekte Subpixel der Farben Rot, Grün oder Blau (z. B. dauerhaft leuchtend mit halber Helligkeit, nicht leuchtend einer Farbe, blinkend oder flackernd, aber nicht vom Typ 1 oder 2) Ergänzung: Cluster vom Typ3 ( = Ausfall von zwei oder mehr Sub-Pixeln in einem Block von 5 x 5 Pixeln. Ein Cluster ist ein Feld von 5 x 5 Pixeln (15 x 5 Subpixeln). ISO 13406-2, Fehlerklasse II Auflösung Typ 1 Typ 2 Typ 3 Cluster Typ1, Typ2 Cluster Typ 3 1024 x 768 2 2 4 0 2 1280 x 800 3 3 6 0 3 1280 x 854 3 3 6 0 3 1280 x 1024 3 3 7 0 3 1366 x 768 3 3 7 0 3 1400 x 1050 3 3 8 0 3 Beispiel: Ein ca. 43 cm (17”) - SXGA-Display besteht aus 1280 horizontalen und 1024 vertikalen Bildpunkten (Pixel), dies sind 1.31Mio. Pixel insgesamt. Bezogen auf eine Million Pixel ergibt dies einen Faktor von rund 1,31. Die Fehlerklasse II erlaubt somit je drei Fehler vom Typ 1 und Typ 2 und sieben Fehler vom Typ 3 und 3 Cluster vom Typ 3. Dabei handelt es sich in der Regel nicht um einen Garantiefall. Ein Garantiefall liegt u.U. vor, wenn die oben angegebene Fehleranzahl in einer Kategorie überschritten ist. 92 Konformitätsinformationen Español Akkubetrieb .................................. 10, 29 Akku aufladen ................................. 31 Akku einsetzen ................................ 29 Akku entladen ................................. 31 Akku entnehmen ............................ 30 Akkuleistung ................................... 31 Anpassung ......................................... 35 Anschließen .......................................... 7 Externer Monitor ............................. 36 HDMI .............................................. 15 Mikrofon Eingang ........................... 16 Multimediakartenleser .................... 15 Netzadapteranschluss ..................... 15 USB ........................................... 15, 16 VGA ................................................ 15 Ansichten Display............................................ 15 Ein-/Ausschalter .............................. 15 Geräteanzeigen............................... 15 HDMI .............................................. 15 Lieferumfang .................................. 13 Mikrofonanschluss .......................... 16 Multimediakartenleser .................... 15 Netzadapteranschluss ..................... 15 Netzwerkanschluss ......................... 15 Öffnung für Kensingtonschloss® ...... 16 Optisches Laufwerk......................... 16 Tastatur .......................................... 15 Touchpad ....................................... 15 USB ........................................... 15, 16 VGA ................................................ 15 Anzeige .............................................. 35 Anzeigen Akkuladeanzeige ............................. 17 Betriebsanzeige ............................... 17 Capital Lock .................................... 17 Num Lock ....................................... 17 WLAN ............................................. 17 Zugriffsanzeige ............................... 17 B Backup bei Rücksicherung.................. 80 Betriebssicherheit ................................. 3 Akkubetrieb .................................... 10 Anschließen ..................................... 7 Austellungsort .................................. 4 Datensicherung ................................ 4 Stromversorgung ............................. 7 Touchpad......................................... 9 Umgebungsbedingungen ................ 5 Verkabelung ..................................... 8 Bildschirmarbeitsplatz .......................... 5 Bildschirmauflösung .......................... 34 BIOS Setup-Programm ....................... 68 Brenner .............................................. 45 C CD-ROM ............................................ 42 CD-ROM-Reinigungsdiscs .................. 86 D Dateien kopieren ................................ 71 Daten- und Systemsicherheit.............. 75 Datensicherung ............................. 4, 75 Index 93 English Arbeitshaltung Allgemein ......................................... 6 Arme ................................................ 6 Beine ................................................ 6 Handgelenke .................................... 6 Kopf ................................................. 6 Rücken ............................................. 6 Auf-/Umrüstung ................................. 73 Aufladen des Akkus ............................ 31 Aufstellungsort .................................... 4 Ausführen des Bios Setup ................... 68 Auslagerungszustand ......................... 33 Auslieferungszustand wiederherstellen............................. 79 Autorun ............................................. 65 Autostart ............................................ 65 Autostart-Funktion ............................. 72 A Deutsch Index Defragmentierung ........................ 75, 82 Deinstallation der Software ................. 66 Digitaler Audioausgang ...................... 47 Disc-Laufwerk ..................................... 42 Display ............................................... 34 DVD-Laufwerk .................................... 42 Minianwendungen ............................ 35 MMC ................................................. 51 Multikartenleser ................................. 51 MultiMediaCard ................................. 51 Multimediatasten ............................... 18 E Netzbetrieb ........................................ 28 Netzwerk LAN Access Point ............................ 49 Problembeseitigung ....................... 50 Was ist ein Netzwerk? ..................... 48 Wireless LAN .................................. 49 WLAN aktivieren ............................. 49 Netzwerkbetrieb ................................ 48 Notebook sichern Einschaltkennwort .......................... 54 Kensington Sicherheitsschloss ........ 54 Notentnahme einer Disc .................... 44 N Ein-/Ausschalter .................................. 27 Energieverwaltung ............................. 33 Entladen des Akkus ............................. 31 Entsorgung ......................................... 88 Erleichterte Bedienung ........................ 35 Erste Hilfe ........................................... 82 Externe Audioverbindungen ............... 47 F FAQ - Häufig gestellte Fragen ............. 81 Fehler und mögliche Ursachen ........... 83 Fehlerbehebung ................................. 76 Festplatte ............................................ 40 O H Ordneroptionen ................................. 35 Harddisk ............................................. 40 Hardwareprobleme ............................ 82 HD .................................. Siehe Festplatte Pflege des Displays ............................. 86 P I R Inbetriebnahme .................................. 19 Akku einlegen ........................... 20, 29 Notebook einschalten ..................... 20 Installation neuer Software ................. 64 ISO 13406-2 ....................................... 91 R&TTE .................................................. 9 Recycling ........................................... 88 Reinigungsmittel ................................ 86 Rohlinge ............................................ 45 Rücksicherung durchführen ............... 80 Ruhezustand ...................................... 33 K S Kaspersky Internet Security ................. 69 Kensington-Sicherheitsschloss ............ 54 Konformitätsinformationen................. 91 Kundendienst ..................................... 82 SD ...................................................... 51 Secure Digital ..................................... 51 Selbsthilfe .......................................... 73 Daten- und Systemsicherheit .......... 75 Wartung ......................................... 86 Sicherheitsschloss............................... 54 Sicherheitsvorrichtung ....................... 54 Software ............................................ 65 Softwareinstallation ........................... 65 Soundkarte ........................................ 46 Speicherkarte einlegen ....................... 51 Speicherkarte entfernen ..................... 51 Startmenü .......................................... 35 L Laserstrahlung .................................... 87 Lieferumfang ...................................... 13 Lizenzvertrag ...................................... 21 M Maus .................................................. 71 Memory Stick ..................................... 51 Mikrofonanschluss .............................. 47 94 Index Stromversorgung ........................... 7, 27 Akkubetrieb .................................... 29 Auslagerungszustand ..................... 33 Energieverwaltung.......................... 33 Netzbetrieb ..................................... 28 Systemleistung ............................. 75, 82 Systemsteuerung ................................ 60 Anpassung ...................................... 35 Anzeige........................................... 35 Darstellung und Anpassung ........... 35 Erleichterte Bedienung .................... 35 Minianwendung ............................. 35 Ordneroptionen.............................. 35 Startmenü....................................... 35 Taskleiste ........................................ 35 Systemwiederherstellung ................... 76 Español U Überprüfen der Akkuladung ............... 32 Umgebungsbedingungen .................... 5 Universal Serial Bus ............................ 53 V Verkabelung......................................... 8 Verzeichnisse...................................... 41 T Taskleiste ............................................ 35 Tastatur .............................................. 38 Tastatursteuerung .............................. 71 Tipps & Tricks Autostart-Funktion .......................... 72 Einstellungen Maus......................... 71 Kopieren von Text oder Bildern ....... 71 Tastatursteuerung........................... 71 Touchpad ........................................... 39 Transport ............................................ 85 Treiberunterstützung .......................... 84 Index 95 Deutsch Wartung ............................................ 86 Wartungsprogramme ........................ 75 Webcam............................................. 52 Windows Media Center ...................... 61 Windows Update ............................... 77 ® Windows 7 Benutzerkontensteuerung .............. 59 Datenträgerbereinigung ................. 75 Defragmentierung.......................... 75 Erste Schritte .................................. 58 Hilfe und Support .......................... 57 Neuheiten ...................................... 55 Sicherungsstatus und -konfiguration ............................ 75 Systeminformationen ..................... 75 Systemsteuerung ........................... 60 Windows®-Oberfläche ......................... 22 Windows-Aktivierung ......................... 66 Wireless LAN ...................................... 49 Aktivieren ....................................... 49 Voraussetzungen ........................... 49 English W 96 Index Ordenador portátil 39,6 cm/15,6" MEDION® AKOYA® E6222 (MD 98780) cm ,65,6" 39 1 Medion Service Center Visonic S.A. c/ Miguel Faraday, 6 Parque Empresarial „La Carpetania“, N-IV Km. 13 28906 Getafe, Madrid España Hotline: 902196437 Fax: 914604772 Internet www.medion.es/ E-mail Support IIa/01/12 [email protected] MSN 4003 8944 Manual de instucciones