1
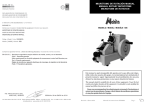
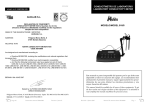
MICRÓTOMO DE ROTACIÓN ROTATION MICROTOME Serie / Series / 591 Este manual es parte inseparable del aparato por lo que debe estar disponible a todos los usuarios del equipo. Le recomendamos leer atentamente el presente manual y seguir rigurosamente los procedimientos de uso para obtener las máximas prestaciones y una mayor duración del mismo. This manual should be available for all users of these equipments. To get the best results and a higher duration of this equipment it is advisable to read carefully this manual and follow the processes of use. Revisión 1 June-2007 Manual de instrucciones 52507000 Pág. 1 CASTELLANO Gracias por haber adquirido este equipo. Deseamos sinceramente que disfrute del microtomo de rotación Nahita 591 Le recomendamos que cuide el equipo conforme a lo expuesto en este manual. Nahita desarrolla sus productos según las directrices del marcado CE y haciendo hincapié en la ergonomía y seguridad del usuario. La calidad de los materiales empleados en la fabricación y el correcto proceder le permitirán disfrutar del equipo por muchos años. El uso incorrecto o indebido del equipo puede dar lugar a accidentes, descargas eléctricas, cortocircuitos, fuegos, lesiones, etc. Lea el punto de Mantenimiento, donde se recogen aspectos de seguridad. ENGLISH ANEXO I: CERTIFICADO CE AUXILAB S.L. DECLARATION OF CONFORMITY NAHITA MICROTOME of Auxilab, S.L for the Directive of Machines (89/392/CEE modified) and the regulations adopted for their transposition LEA DETALLADAMENTE ESTE MANUAL DE INSTRUCCIONES ANTES DE OPERAR CON ESTE EQUIPO CON EL FIN DE OBTENER LAS MÁXIMAS PRESTACIONES Y UNA MAYOR DURACIÓN DEL MISMO. NAME OF THE MANUFACTURER / IMPORTER: AUXILAB, S.L. Tenga especialmente presente lo siguiente: ADDRESS: Polígono Morea Norte, 8 31191 Beriáin (Navarra) Este manual es parte inseparable del microtomo de rotación Nahita 591, por lo que debe estar disponible para todos los usuarios del equipo. Debe manipularse siempre con cuidado evitando los movimientos bruscos, golpes, caídas de objetos pesados o punzantes; evite el derrame de líquidos en su interior. Nunca desmonte el equipo para repararlo usted mismo, además de perder la garantía podría producir un funcionamiento deficiente de todo el equipo, así como daños a las personas que lo manipulan. Cualquier duda puede ser aclarada por su distribuidor (instalación, puesta en marcha, funcionamiento). Usted puede también mandarnos sus dudas o sugerencias a la siguiente dirección de correo del Servicio Técnico Nahita ([email protected]) o bien llamando al Tfno.: 807117040 (0.30 Euros/min). Este equipo está amparado por la Ley de garantías y bienes de consumo (10/2003). No se consideran en garantía las revisiones del equipo. La manipulación del equipo por personal no autorizado provocará la pérdida total de la garantía. Los accesorios, así como la pérdida de los mismos, no están cubiertos por dicha garantía. Tampoco estarán cubiertos por el periodo de garantía las piezas en su desgaste por uso natural. Asegúrese de guardar la factura de compra para tener derecho de reclamación o prestación de la garantía. En caso de enviar el equipo al Servicio Técnico adjunte factura o copia de la misma como documento de garantía. Rellene y envíe la garantía antes de los 15 días después de la compra. El fabricante se reserva los derechos a posibles modificaciones y mejoras sobre este manual y equipo. ¡ATENCIÓN! NO SE ADMITIRÁ NINGÚN APARATO PARA REPARAR QUE NO ESTÉ DEBIDAMENTE LIMPIO Y DESINFECTADO. Pág. 2 Manual de instrucciones 50591000 Revisión 1 Febrero-07 WE STATE THAT: MICROTOME 591 CODE 50591000 Is designed and manufactured according to: Directive 89/392/CEE, including the modifications and national regulations that transpose them. And that the following harmonized rules have been applied (or a part of them): UNE 61010-1/A2, UNE-EN61010-2-051. BERIAIN 28th February 2007 Signed by: ALFONSO AINCIBURU SANZ DIRECTOR/MANAGER Polígono Morea Norte, 8 31191 Beriain (Navarra) - Spain. Tel. 948 310 513 Fax 948 312 071 Internet: www.auxilab.es · Email: [email protected] Version 1 February-07 Instruction manual 50591000 Page 23 ENGLISH TROUBLE CAUSE SOLUCIÓN Knife clearance angle too wide. Systematically reduce clearance angle until optimum angle width has been found. Insufficient clamping of sample and/or knife holder Check all screws and clamping mechanisms at sample holder system and knife holder. Retighten if necessary. No blade feed, no more sections Blade has reached front limit stop position. Move blade backwards via coarse feed knob. Blades wear out very quickly Cutting forces too high Select sectioning speed or section thickness. Reduce section thickness or turn handwheel at slower speed. CASTELLANO ÍNDICE DE IDIOMAS Castellano Inglés 3-12 13-23 ÍNDICE DE CONTENIDOS 1. APLICACIONES DEL INSTRUMENTO 2. DESCRIPCIÓN 3. ESPECIFICACIONES TÉCNICAS 4. PUESTA EN SERVICIO 5. MODO DE USO 6. MANTENIMIENTO Y LIMPIEZA 7. PROBLEMAS MÁS COMUNES ANEXO I: CERTIFICADO CE 3 3 6 6 6 9 10 12 1. APLICACIONES DEL INSTRUMENTO El microtomo de rotación Nahita 591 está diseñado con la tecnología más avanzada para la realización de cortes de tejidos vegetales o animales incluidos en parafina en las aplicaciones histológicas de rutina en centros médicos y de investigación. 2. DESCRIPCIÓN INSTRUCTIONS ON ENVIRONMENT PROTECTION At the end of its life cycle, please, do not dispose of this equipment by throwing it in the usual garbage; hand it over a collection point for the recycling of electrical and electronic appliances. It does not contain dangerous or toxic products for humans but a non adequate disposal would damage the environment. The materials are recyclable as mentioned in its marking. By recycling material or by other forms of re-utilization of old appliances, you are making an important contribution to protect our environment. Please inquire at the community administration for the authorized disposal location. El microtomo es un equipo mecánico de precisión que se utiliza para realizar cortes en tejidos que han sido objeto de inclusión en parafina, siendo las secciones conseguidas de espesor micrométrico lo suficientemente delgadas para permitir su examen por el microscopio. Existen diversos tipos de microtomos (de mano, de balanceo, de rotación, de deslizamiento, criostato, ultramicrotomo, etc.) siendo el más empleado el de rotación por las ventajas que aporta: gran precisión y la posibilidad de producir secciones en serie muy finas, gracias a la desmultiplicación que produce el cambio de un movimiento de rotación a otro de traslación. El microtomo de rotación consta de las siguientes partes: Porta-muestras: es el dispositivo en el que se coloca el tejido incluido en algún medio de homogeneización, generalmente parafina. Gracias a los tornillos podemos orientar la superficie del bloque de parafina de manera que quede perfectamente paralelo a la cuchilla. Page 3 Instruction manual 50591000 Version 1 February-07 Revisión 1, Febrero-07 Manual de instrucciones 50591000 Pág. 3 CASTELLANO ENGLISH Cleaning Porta-cuchillas: mediante un mando de avance macro se puede regular el grado de aproximación de la cuchilla al porta-muestras. Never use scourers or substances that can grate for cleaning metallic parts such as stainless steel, aluminium, coatings, etc. as they damage the microtome and produce an early ageing of the equipment. Neither use alcohol or alcohol containing detergents nor abrasive detergents or acetone or xylene containing solvents. Use a fluff-free cloth dampened with soaped water that does not contain abrasives. Mecanismo de avance: en los microtomos de rotación es el portabloques el que avanza sobre la cuchilla a la vez que realiza un movimiento arriba-abajo, permaneciendo la cuchilla inmóvil en todo momento. Para realizar esta serie de movimientos es necesario un complejo sistema mecánico que permite la realización de cortes sucesivos de tejidos a partir del bloque. ATTENTION!! IF EQUIPMENTS ARE NOT PROPERLY CLEAN AND DISINFECTED THEY WOULD NOT BE ALLOWED TO REPAIR BY OUR TECHNICAL SERVICE. Cuchilla: desechable universal. 7. TROUBLESHOOTING TROUBLE Alternately thick and thin sections are produced In extreme cases, no section is obtained. Volante manual: Transmite al mecanismo de avance el impulso necesario para su funcionamiento; cada vuelta dada al volante produce una secuencia de corte. El volante manual presenta un pequeño mecanismo que lo bloquea en caso de que el equipo deba ser transportado o cuando no está siendo utilizado. Por tanto, antes de usar el microtomo es imprescindible tirar del mecanismo de bloqueo y dar medio giro al volante manual para colocarlo en posición de corte. 1. Base porta-cuchillas 2. Palanca sujeción del mecanismo de desplazamiento lateral 3. Palanca sujeción del porta-cuchillas 4. Porta-cuchillas 5. Palanca sujeción cuchilla 6. Escala ángulo libre 7. Mando selección del espesor de corte 8. Avance macro 9. Palanca bloqueo avance macro 10. Volante manual Pág. 4 Blade insufficiently clamped Blunt cutting edge Knife clearance angle too narrow. 11. Bloqueo volante 12. Dispositivo de sujeción del portamuestras 13. Palanca sujeción del porta-muestras 14. Pinza universal para casetes 15. Expulsor de casetes 16. Tornillo de orientación Norte/Sur del porta-muestras 17. Tornillo de orientación Este/oeste del porta-muestras 18. Palanca bloqueo orientación Manual de instrucciones 50591000 CAUSE Revisión 1 Febrero-07 SOLUTIÓN Re-clamp blade Adjust knife holder laterally or use new blade. Systematically try wider clearance angle until optimum angle width has been found. Blunt cutting edge Use different zone of cutting blade or use new blade. Sample too warm Cool sample prior to sectioning Sectioning speed too high Work at lower sectioning speed Noise during sectioning Knife "sing." when sectioning hard samples. Sections show scratches. Sectioning speed too high Work at lower sectioning speed Version 1 February-07 Instruction manual 50591000 Sections are extremely compressed, wrinkled or jammed together Page 4 ENGLISH CASTELLANO Put the microtome on top of a horizontal, plane and stable table making a free space at least at 30 cm per side. Do not expose the microtome directly to the sun, etc. Avoid vibrations, dust and dry environments. Always remove the blade before detaching the knife holder from the instrument. Never try to catch a falling knife. Never place a knife anywhere with the cutting edge facing upwards. Always clamp the sample block before clamping the knife. When working with cleaning detergents, please bear in mind manufacturer safety instructions as well as current laboratory regulations. Wear glasses in case of working with samples that can produce splinters. Always lock the handwheel prior to equipment cleaning (see Cleaning), prior to any manipulation of knife or sample and during all work breaks. No fluid must enter the interior of the equipment during cleaning. Never try to repair the microtome by yourself, since you will lose the warranty and may provoke damages to the general operating system. Made under the European regulations for security on machines. 11 10 16 13 15 6. MAINTENANCE AND CLEANING 17 To get the best results and a higher duration of the microtome it is essential to follow the processes of use. 14 Note: All the processes of use mentioned below will not have any value unless you keep a continued and careful maintenance. 5 4 Please follow the processes of use of this manual. This manual should be available for all users of this equipment. Always use original components and supplies. Other devices can be similar but they 2 18 can damage the equipment. Never try to repair the microtome by yourself, since you will lose the warranty and may provoke damages to the general operating system. In the event of breakdown please contact your distributor to overhaul through Nahita Technical Assistance Department. 6 12 9 3 Before each cleaning: Move sample clamp to uppermost position and lock handwheel. Insert the knife into the receptacle for used blades in the base of the blade dispenser. Remove knife holder and knife holder base for cleaning. Remove sample from sample clamp. Remove section waste with a dry brush. Remove sample clamp and clean it. Page 20 Instruction manual 50591000 Version 1 February-07 1 8 7 Revisión 1, Febrero-07 Manual de instrucciones 50591000 Pág. 5 CASTELLANO 3. ESPECIFICACIONES TÉCNICAS Espesor del corte Regulación mínima Ángulo libre Avance macro Espesor de desbaste Dimensiones (LxWxH) Peso ENGLISH Orientate sample in north-south direction with screw (1.16) and in east-west direction with screw (1.17). 1-25 μ m 1 μm 0-10º Manual, a través de mando de avance macro Seleccionable máx. 25 μ m 320x380x320 mm 42 Kg (aprox.) Turn clamp upwards. 5.5 Trimming the sample Sample can be trimmed via the section thickness selection (max. 25 μ m): Approach the knife holder to the sample via the coarse feed knob (1.8). Select section thickness (e.g. 25 μ m) with the adjusting knob (1.7). Turn handwheel (1.10) until sample has been trimmed down to the desired level. 5.6 Sectioning 4. PUESTA EN SERVICIO Desembale el microtomo y retire todas las protecciones que lo envuelven. Asegúrese de que no presenta ningún daño debido al transporte. De ser así, comuníquelo inmediatamente a su transportista o suministrador para que pueda hacer las debidas reclamaciones en el plazo establecido. Guarde el embalaje, ya que siempre se deben realizar las devoluciones en su embalaje original con todos los accesorios suministrados. Solo aceptamos devoluciones de equipos en los 15 días posteriores al envío y siempre que vengan completos en su embalaje original. 4.1 Montaje de la pinza universal para casetes El dispositivo de sujeción del porta-muestras le permitirá ajustar la pinza porta-casetes: Coloque el dispositivo de sujeción para las pinzas porta-casetes (1.12) en el punto más alto; para ello gire el volante manual (1.10) y bloquéelo mediante el dispositivo de seguridad situado en su parte inferior (1.11). Para colocar la pinza porta-casetes gire la palanca de sujeción del porta-muestras (1.13) en sentido contrario de las agujas del reloj. Inserte la pinza porta-casetes (1.14) desde la derecha y deslícela hasta llegar al tope. Para fijar la pinza porta-casetes, gire la palanca de sujeción del porta-muestras (1.13) en sentido de las agujas de reloj. 4.2 Colocación del porta-cuchillas Afloje la palanca de sujeción del porta-cuchillas (1.3) girándola en sentido contrario de las agujas del reloj. Deslice la ranura del porta-cuchillas (1.4) sobre la pieza en T de la base del porta-cuchillas. Sujete el porta-cuchillas girando la palanca de sujeción (1.3) en sentido de las agujas del reloj. Never cut sample with the same region of the blade edge used for trimming. The knife holder base presents a lateral displacement system that allows the use of the entire width of the blade without having to release the knife: Turn backwards the clamp located at the left side of the knife holder base (1.2) to release. Move laterally the knife holder base with the knife holder to the desired position. Hold the knife holder base at this position by turning forwards the lever (1.2). Before sectioning it is essential to unlock the manual handwheel; for this purpose pull the locking device and give a half-turn to the handwheel to place it on cutting position. Select the section thickness (in microns) through the corresponding knob (1.7) For sectioning, turn handwheel evenly (1.10) in clockwise direction. IMPORTANT: Do not lock the coarse feed knob while rotating the manual handwheel. If the coarse feed knob is locked the knife does not advance and sectioning is not possible. Pick up the obtained sections and mount them on microscope slides. 5.7 Finishing operation Move sample clamp to uppermost position and lock the handwheel. Insert the knife into the receptacle for used blades in the base of the blade dispenser. Remove sample from sample clamp. Remove all section waste. Clean the equipment (see Cleaning). 5.8 Security 5. MODO DE USO The microtome must be used by previously qualified staff that knows how the equip- 5.1 Colocación de la muestra Pág. 6 NOTE: always rotate handwheel evenly. Rotating speed must be adjusted to the sample hardness; harder samples should be cut at slower speed. Manual de instrucciones 50591000 Revisión 1 Febrero-07 Version 1 February-07 Instruction manual 50591000 Page 19 ENGLISH wheel must be always locked before changing the sample as well as during all work breaks. Move the holding device for sample clamp (1.12) to the uppermost position; for this purpose, turn the manual handwheel (1.10) and lock it by the device located at the lower side (1.11). Insert the cassette horizontally or vertically into the sample clamp. For this purpose, pull forward the expelling lever (1.15) and place the cassette. Release the lever to secure the cassette in position. 5.2 Placing the knife Nahita microtome 591 is equipped with a knife holder for standard disposable blades of common use. NOTE: Be careful when handling disposable blades for microtome. The blade edge is extremely sharp and can cause severe injuries Turn upwards the knife holding clamp (1.5). Carefully insert the disposable blade from one side into the knife holder. To hold the knife, turn downwards the holding clamp (1.5). Pay attention to the blade edge; replace the knife when the obtained sections present CASTELLANO NOTA: siempre monte primero la muestra y después la cuchilla. Siempre se debe bloquear el volante manual antes de cambiar las muestras así como durante las pausas de trabajo. Coloque el dispositivo de sujeción para las pinzas porta-casetes (1.12) en el punto más alto; para ello gire el volante manual (1.10) y bloquéelo mediante el dispositivo de seguridad situado en su parte inferior (1.11). Inserte el casete en posición horizontal o vertical en la pinza porta-muestras. Para ello, tire hacia delante de la palanca expulsor de casetes (1.15) y coloque el casete. Suelte la palanca para que el casete quede sujeto. 5.2 Colocación de la cuchilla El microtomo Nahita 591 está equipado con un porta-cuchillas para cuchillas desechables de uso corriente. NOTA: Cuidado al manejar cuchillas desechables de microtomo. El filo es muy agudo, podría cortarse fácilmente. Gire hacia arriba la palanca de sujeción de la cuchilla (1.5). Inserte la cuchilla desechable cuidadosamente desde un lado en el porta-cuchillas. Para sujetar la cuchilla gire hacia abajo la palanca de sujeción (1.5). Preste atención al filo de la cuchilla; sustituya la cuchilla cuando vea que se producen rayas en los cortes obtenidos que pueden llegar a fragmentar todo el corte y hacer que deban ser desechados. scratches that could make them useless. 5.3 Adjusting the clearance angle The marks (0º, 5º and 10º) for clearance angle adjustment (1.6) are on the right side of the knife holder. Another mark is on the right side of the knife holder base which serves as a reference point to select the desire angle. Rotate anticlockwise the clamping lever for knife holder (1.3) to release. Adjust the knife holder position until the selected mark matches the reference mark on the knife holder base. Hold the knife holder at this position and turn clockwise the camping lever (1.3) to secure it. 5.4 Sample orientation Orientation system of the sample holder allows adjusting the position of the block surface without having to release the clamping lever. Unlock the coarse feed knob (1.8) by turning to the right the locking lever (1.9). Rotate the coarse feed knob and make advance the knife holder base with the knife holder until nearly reaching the sample. Move the holding device for sample clamp (1.12) to the uppermost position and lock the manual handwheel. Release the locking lever of the orientation system (1.18) by turning downwards. Page 18 Instruction manual 50591000 Version 1 February-07 5.3 Ajuste del ángulo libre Las marcas (0º, 5º y 10º) para el ajuste del ángulo libre (1.6) se encuentran en el lado derecho del porta-cuchillas. En el lado derecho de la base porta-cuchillas se encuentra otra raya índice que sirve como punto de referencia para seleccionar el ángulo. Afloje la palanca de sujeción del porta-cuchillas (1.3) girándola en sentido de las agujas del reloj. Ajuste el porta-cuchillas, orientándose hasta que la raya deseada coincida con la raya de referencia en la base porta-cuchillas. Mantenga el porta-cuchillas en la posición seleccionada y sujetándolo gire la palanca (1.3) en sentido de las agujas del reloj. 5.4 Orientación de la muestra El sistema de orientación del porta-muestras permite ajustar la posición de la superficie de la muestra sin tener que aflojar la palanca de sujeción. Desbloquee el mando de avance macro (1.8) girando la palanca de bloqueo (1.9) hacia la derecha Gire el mando de avance macro y haga avanzar la base porta-cuchillas junto con el porta-cuchillas hasta que se encuentre justamente delante de la muestra. Coloque el dispositivo de sujeción para las pinzas porta-casetes (1.12) en el punto más alto y bloquee el volante manual. Revisión 1, Febrero-07 Manual de instrucciones 50591000 Pág. 7 CASTELLANO 5.5 Desbaste de la muestra La muestra puede ser desbastada mediante la selección de un espesor de corte grueso (máx. 25 μ m): Mediante el mando de avance macro (1.8) acerque el porta-cuchillas a la muestra. Con el mando de selección (1.7), seleccione un espesor de corte grueso (ej. 25 μ m). Desbaste la muestra girando el volante manual (1.10) hasta llegar al plano de corte deseado. 5.6 El corte NOTA: siempre gire el volante manual uniformemente. La velocidad de giro tiene que ajustarse a la dureza de la muestra; cuanto más dura es la muestra, más lenta es la velocidad de giro. Para cortar no trabaje con la misma zona del filo de la cuchilla que ha sido utilizada para el desbaste. La base porta-cuchillas dispone de un sistema de desplazamiento lateral que permite aprovechar toda la longitud del filo sin necesidad de aflojar el sistema de sujeción de la cuchilla: Afloje la palanca situada en la parte izquierda de la base porta-cuchillas (1.2), girándola hacia atrás. Desplace lateralmente la base porta-cuchillas junto con el porta-cuchillas hasta encontrar una zona del filo aún no desgastada por el desbaste. Sujete la base porta-cuchillas en esta posición girando la palanca (1.2) hacia delante. Antes de realizar los cortes es imprescindible liberar el volante manual, para lo que se debe tirar del mecanismo de bloqueo e imprimir un giro de media vuelta al volante para colocarlo en posición de corte. Seleccione el espesor de corte deseado (en micras) mediante el mando correspondiente (1.7) Para cortar, gire el volante manual (1.10) uniformemente en sentido de las agujas del reloj. IMPORTANTE: No bloquee el mando de avance macro mientras se este girando el volante manual. Con el mando de avance macro bloqueado la cuchilla no avanza y no se pueden realizar cortes. Recoja los cortes obtenidos y móntelos sobre portaobjetos. 5.7 Fin del trabajo volante. Inserte la cuchilla en la parte inferior del dispensador de cuchillas. Saque la muestra de la pinza porta-casetes. Elimine todos los desechos. Limpie el equipo (ver apartado limpieza). Manual de instrucciones 50591000 3. TECHNICAL SPECIFICATIONS 1-25 μ m 1 μm 0-10º Manual, through coarse feed knob Adjustable max. 25 μ m 320x380x320 mm 42 Kg (approx.) Slice thickness Min. adjustment Clearance angle Coarse feed Trimming thickness Dimensions (LxWxH) Weight 4. SETTING-UP Unwrap the microtome and take off all the protections in which it comes fitted. Make sure that the equipment does not present any damage because of the shipment. In case it presents any damage, tell it immediately to your transport agent or dealer so that they can make the claims in the correct time limit. Please keep the original wrapping; you will always need it for returns enclosed with all the accessories supplied. We will only accept any equipment return within 15 days after delivery and provided it comes in its original wrapping. 4.1 Mounting the universal cassette clamp The holding device of the sample holder will let you adjust the cassette clamp: Move the holding device for sample clamp (1.12) to the uppermost position; for this purpose, turn the manual handwheel (1.10) and lock it by the device located at the lower side (1.11). For placing the cassette clamp turn anticlockwise the clamping lever for sample clamp (1.13). Insert the cassette clamp (1.14) from the right side and slide it. To secure the cassette clamp, turn clockwise the clamping lever (1.13). 4.2 Mounting the knife holder Desplace la pinza porta-muestras con el volante manual al punto más alto y bloquee el Pág. 8 ENGLISH Revisión 1 Febrero-07 Turn anticlockwise the camping lever for knife holder (1.3) to release it. Slide the groove of knife holder (1.4) onto T-piece of knife holder base. Hold the knife holder by turning clockwise the corresponding camping lever (1.3). 5. OPERATION 5.1 Placing the sample NOTE: Always clamp the sample block before clamping the knife. The manual hand Version 1 February-07 Instruction manual 50591000 Page 17 ENGLISH 11 10 16 13 15 17 CASTELLANO 5.8 Seguridad El microtomo debe ser utilizado por personal cualificado previamente, que conozca el equipo y su manejo mediante el manual de uso. Coloque el microtomo sobre una mesa horizontal, plana y estable, creando un espacio libre de al menos 30 cm por cada lado. No coloque el microtomo junto a equipos que produzcan vibraciones ni en zonas próximas a fuentes de calor (mecheros, sopletes...). No exponga el equipo directamente a la luz del sol. Antes de desmontar el porta-cuchillas siempre debe retirarse la cuchilla desechable. Nunca intente coger una cuchilla que se esté cayendo. Nunca coloque las cuchillas en algún lugar con el filo señalando hacia arriba. Siempre monte primero la muestra y después la cuchilla. Al trabajar con detergentes de limpieza, tenga en cuenta las instrucciones de seguridad del fabricante así como los reglamentos de laboratorio vigentes. Lleve gafas de protección en caso de cortar muestras con peligro de producir astillas. Bloquee siempre el volante manual antes de limpiar el equipo (ver apartado de limpieza), antes de manipular las muestras y/o cuchillas así como durante las pausas de trabajo. No debe entrar líquido en el interior del equipo durante la limpieza. No intente repararlo usted mismo; además de perder la garantía puede causar daños en el funcionamiento general del equipo. Fabricado según las directivas europeas de seguridad en máquinas. 14 6. MANTENIMIENTO Y LIMPIEZA 5 4 Para un adecuado funcionamiento del microtomo es necesario seguir algunas recomendaciones. 2 18 6 12 9 3 8 Antes de cada limpieza: Desplace la pinza porta-casetes al punto de inversión superior y bloquee el volante 7 Instruction manual 50591000 Siga las instrucciones y advertencias relativas a este manual. Tenga este manual siempre a mano para que cualquier persona pueda consultarlo. Utilice siempre componentes y repuestos originales. Puede ser que otros dispositivos sean parecidos, pero su empleo puede dañar el equipo. No intente repararlo usted mismo; además de perder la garantía puede causar daños en el funcionamiento general del microtomo. En caso de avería diríjase a su proveedor para la reparación a través del Servicio Técnico de Nahita. 1 Page 16 Nota: Todas las normas de utilización citadas anteriormente carecerán de valor si no se realiza una continua labor de mantenimiento. Version 1 February-07 Revisión 1, Febrero-07 Manual de instrucciones 50591000 Pág. 9 CASTELLANO manual. Inserte la cuchilla en la parte inferior del dispensador de cuchillas. Desmonte el porta-cuchillas y la base porta-cuchillas para limpiarlos. Saque la muestra de la pinza porta-casetes. Elimine los desechos de corte con un pincel seco. Saque la pinza porta-casetes y límpiela. Limpieza Para la limpieza de las partes metálicas, acero inoxidable, aluminio, pinturas, etc... nunca utilice estropajos o productos que puedan rayar, ya que deterioran el equipo limitando su vida útil. No utilice alcohol o detergentes que contengan alcohol, ni tampoco utilice detergentes abrasivos o solventes que contengan acetona o xileno. Para la limpieza del equipo recomendamos se utilice un trapo libre de pelusa humedecido con agua jabonosa que no contenga productos abrasivos. ¡ATENCIÓN! NO SE ADMITIRÁ NINGÚN APARATO PARA REPARAR QUE NO ESTÉ DEBIDAMENTE LIMPIO Y DESINFECTADO. 7. PROBLEMAS MÁS COMUNES CAUSA PROBLEMA Cortes alternativamente finos y gruesos En casos extremos, no sale corte alguno Cortes muy comprimidos, arrugados o pegados uno al otro. Pág. 10 SOLUCIÓN Cuchilla no correctamente sujetada. Cuchilla sin filo Volver a sujetar la cuchilla. Desplazar el porta-cuchillas lateralmente o insertar otra cuchilla. Ángulo libre de la cuchilla demasiado cerrado. Aumentar el ángulo libre sistemáticamente hasta encontrar el ángulo óptimo. Cuchilla sin filo Trabajar con otra zona de la cuchilla o reemplazar la cuchilla por otra. Muestra no suficientemente fría Enfriar el bloque antes de cortar Velocidad de corte demasiado alta Disminuir la velocidad de corte Manual de instrucciones 50591000 Revisión 1 Febrero-07 ENGLISH Knife holder: the approach of the knife towards the sample can be adjusted through a coarse feed knob. Advance mechanism: in rotary microtomes the sample holder advances over the blade through an up -down movement. A complex mechanical system is necessary to perform these movements that finally allow obtaining serial tissue sections from the paraffin block. Knife: universal disposable blades. Manual handwheel: it transmits to the advance mechanism the impulse necessary for its correct operation; each complete turn of the handwheel produces a cut sequence. The handwheel presents a safety device that blocks it for its transport or when it is not being used. So, before using the microtome it is essential to pull the blocking mechanism and give a half-turn to the handwheel to place it on cutting position. 1. 2. cement 3. 4. 5. 6. 7. 8. 9. Knife holder base Clamping lever for lateral displaClamping lever for knife holder Knife holder Camping lever for knife Clearance angle scale Slice thickness adjusting knob Coarse feed knob Coarse feed locking lever Version 1 February-07 10. 11. 12. 13. 14. 15. 16. 17. 18. system Manual handwheel Handwheel locking device Holding device for sample clamp Clamping lever for sample clamp Universal cassette clamp Cassette expelling lever North/South orientation screw East/West orientation screw Locking lever of the orientation Instruction manual 50591000 Page 15 ENGLISH INDEX OF LANGUAGES Spanish English CASTELLANO PROBLEMA 2-12 13-23 INDEX OF CONTENTS 1. USES OF THE ISNTRUMENT 2. DESCRIPTION 3. TECHNICAL SPECIFICATIONS 4. SETTING UP 5. OPERATION 6. MAINTENANCE AND CLEANING 7. TROUBLESHOOTING ANNEX I: CE CERTIFICATE 14 14 17 17 17 20 21 23 CAUSA Ruidos al cortar La cuchilla "chirria" al cortar muestras duras. Los cortes tienen rayas transversales. Velocidad de corte demasiado alta Disminuir la velocidad de corte. Ángulo libre demasiado abierto. Disminuir el ángulo libre paso a paso hasta encontrar el ángulo óptimo. Sujeción insuficiente en la pinza porta-muestras y/o en el porta-cuchillas. Chequear todas las conexiones por tornillo o palanca en el sistema porta-bloques y porta-cuchillas. Apretar de nuevo los tornillos y palancas, si fuera necesario. INSTRUCCIONES 1. USES OF THE INSTRUMENT SOLUCIÓN SOBRE PROTECCIÓN DEL MEDIO AMBIENTE Nahita rotary microtome is design with the most advanced technology to slice paraffin included plant or animal tissues in histology routine applications in hospital and research laboratories. 2. DESCRIPTION Microtome is a very precise instrument used to slice paraffin included tissues. The obtained sections have a micrometer thickness and this fact allows its observation under the microscope. There are several types of microtomes (hand microtomes, balance, rotary, sliding, criostat, ultramicrotome, etc.) but the most used is the rotary microtome. Some of its advantages are high precision and the posibility of producing very thin serial sections thanks to the desmultiplication process that changes a rotation movement into an advance movement. The rotary microtome presents the following different parts: No se deshaga de este equipo tirándolo a la basura ordinaria cuando haya terminado su ciclo de vida; llévelo a un punto de recogida para el reciclaje de aparatos eléctricos y electrónicos. No contiene elementos peligrosos, tóxicos para el humano pero una eliminación no adecuada, perjudicaría al medio ambiente. Los materiales son reciclables tal como se indica en la marcación. Al reciclar materiales o con otras formas de reutilización de aparatos antiguos, esta Ud. haciendo una contribución importante a la protección del medio ambiente. Por favor póngase en contacto con la administración de su comunidad para que le asesoren sobre los puntos de recogida. Sample holder: it is the device in which the generally paraffin embedded tissue is placed. Thanks to a pair of screws the paraffin block surface can be oriented in a position parallel to the blade. Page 14 Instruction manual 50591000 Version 1 February-07 Revisión 1, Febrero-07 Manual de instrucciones 50591000 Pág. 11 CASTELLANO ANEXO I: CERTIFICADO CE AUXILAB S.L. DECLARACIÓN CE DE CONFORMIDAD MICROTOMO NAHITA de Auxilab,S.L a la Directiva de Máquinas (89/392/CEE modificada) y a las reglamentaciones adoptadas para su transposición TO GET THE BEST RESULTS AND A HIGHER DURATION OF THE EQUIPMENT IT IS ADVISABLE TO READ THOROUGHLY THIS MANUAL BEFORE OPERATING WITH THE EQUIPMENT. NOMBRE DEL FABRICANTE / IMPORTADOR: AUXILAB, S.L. DIRECCIÓN: Polígono Morea Norte, 8 31191 Beriáin (Navarra) DECLARAMOS QUE: MICROTOMO 591 REFERENCIA 50591000 Están diseñados y fabricados de acuerdo a: Directiva 89/392/CEE, incluidas las modificaciones de la misma, y las reglamentaciones nacionales que la transponen. Y que se han aplicado las siguientes normas armonizadas (o parte de ellas): UNE 61010-1/A2, UNE-EN61010-2-051 BERIAIN a 28 de FEBRERO 2007 Fdo: ALFONSO AINCIBURU SANZ DIRECTOR/GERENTE Polígono Morea Norte, 8 31191 Beriain (Navarra) - Spain. Tel. 948 310 513 Fax 948 312 071 Internet: www.auxilab.es · Email: [email protected] Pág. 12 Manual de instrucciones 50591000 ENGLISH Thank you for choosing this equipment. We sincerely wish that you enjoy your Nahita rotary microtome 591. We highly recommend looking after this equipment according to what is stated in this manual. Nahita develops its products according to the CE marking regulations as well as emphasizing the ergonomics and security for its user. The correct using of the equipment and its good quality will permit you to enjoy this equipment for years. The improper use of the equipment can cause accidents and electric discharges, circuit breakers, fires, damages, etc. Please read the point of Maintenance, where we expose the security notes. Revisión 1 Febrero-07 Please bear in mind the following: This manual is inseparable from the Nahita rotary microtome 591, so it should be available for all the users of this equipment. You should carefully handle the equipment avoiding sudden movements, knocks, free fall of heavy / sharp objects on it. Avoid spilling liquids inside the equipment. Never dismantle the different pieces of the equipment to repair it yourself, since it could produce a defective use of the whole equipment and a loss of the product warranty, as well as injuries on people that handle the microtome. If you have any doubt about setting up, installation or functioning do not hesitate in contacting your wholesaler. You can also tell us any doubts or suggestions you have by contacting Nahita Technical Assistance Department by email to [email protected] or by telephone: +34 807 117 040 (0.30 Euros/min). This equipment is protected under the Warranties and consumer goods regulation (10/2003). Overhaul is not covered by the equipment warranty. Operations made by non-qualified staff will automatically produce a loss of the warranty. Accessories (including their loss) are not covered by the product's warranty. The warranty neither covers piece's deterioration due to the course of time. Please make sure you keep the invoice, either for having the right to claim or asking for warranty coverage. In case you have to send the equipment to Nahita Technical Assistance Department you should enclose the original invoice or a copy as guarantee. Please do not forget filling the warranty certificate and send it before 15 days after the date of purchase. Manufacturer reserves the right to modify or improve the manual or equipment. ATTENTION!! IF EQUIPMENTS ARE NOT PROPERLY CLEAN AND DISINFECTED THEY WOULD NOT BE ALLOWED TO REPAIR BY OUR TECHNICAL SERVICE. Version 1 February-07 Instruction manual 50591000 Page 13