1
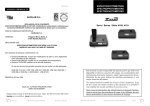
ESPECTOFOTÓMETROS SPECTOPHOTOMETERS Modelo/ Model 4250 Este manual es parte inseparable del aparato por lo que debe estar disponible a todos los usuarios del equipo. Le recomendamos leer atentamente el presente manual y seguir rigurosamente los procedimientos de uso para obtener las máximas prestaciones y una mayor duración del mismo. This manual should be available for all users of these equipments. To get the best results and a higher duration of this equipment it is advisable to read carefully this manual and follow the processes of use. Revisión 3 de Noviembre-03 Manual de instrucciones 54250XXX Pág. 1 ESPAÑOL Gracias por elegir un espectrofotómetro ZUZI, serie 4250. Su elevada calidad le permitirá disfrutar de este instrumento por muchos años, no obstante, le recomendamos leer atentamente el presente manual y seguir rigurosamente los procedimientos de uso para obtener las máximas prestaciones y una mayor duración del mismo. Tenga especialmente presente lo siguiente: Este manual es parte inseparable del aparato por lo que debe estar disponible a todos los usuarios del equipo. Cualquier duda puede ser aclarada contactando con el servicio técnico de ZUZI. Como instrumento de precisión, debe manipularse siempre con cuidado evitando los movimientos bruscos y los golpes. Nunca desmonte las diferentes partes del espectrofotómetro para repararlas usted mismo, además de perder la garantía, podría producir un funcionamiento deficiente en todo el conjunto. No utilizar el equipo con fluidos que puedan desprender vapores o formar mezclas explosivas o inflamables. ¡ATENCION! NUNCA DEBERÁ MANIPULAR LA FUENTE DE ALIMENTACION BAJO NINGUN CONCEPTO. NO NOS HAREMOS RESPONSABLES DE LOS DAÑOS Y PERJUICIOS QUE PUEDA OCASIONAR SU MANIPULACION. NO SE ADMITIRA NINGUNA MAQUINA PARA REPARAR QUE NO ESTE DEBIDAMENTE LIMPIA Y DESINFECTADA. INDICE DE CONTENIDOS 1. APLICACIONES 3 2. DESCRIPCIÓN 3 3. ESPECIFICACIONES TÉCNICAS 4 4. INSTALACIÓN 4 5. MANTENIMIENTO 7 6. RESOLUCIÓN DE PROBLEMAS 8 ANEXO I: GARANTIA 9 Pág. 2 Manual de instrucciones 54250XXX Revisión 3 de Noviembre-03 1. APLICACIONES Es de gran aplicación dentro de un elevado número de campos, empleándose entre otros en: industria petroquímica y bioquímica, minería, ingeniería agrícola, hospitales, conservación medioambiental, así como en laboratorios de investigación y desarrollo científico. 2. DESCRIPCIÓN Figura 1 1 100%T MODE 1.1. Panel de mandos 1.2. Compartimento de muestras: En el interior del compartimento de muestras se encuentra un contenedor con capacidad para 4 cubetas. 1.3. Selector de posición de las cubetas 2 FUNC 0%T ENT P/C 3 Figura 2 - Panel de mandos 1 9 100%T MODE 2 3 4 8 0%T FUNC ENT P/C 5 6 7 2.1. Pantalla digital 2.2. MODE: Botón con el que seleccionamos el modo de trabajo: Absorbancia, Transmitancia o Concentración. 2.3. - 2.4. Selector de la longitud de onda 2.5. FUNC: Botón de selección de función 2.6. ENT: Lo usamos para guardar los datos de concentración estándar en la memoria del espectrofotómetro o para confirmar que una función ha sido seleccionada. 2.7. P/C 2.8. 0% T: Botón para hacer el 0% de Transmitancia. 2.9. 100%T: botón que usamos para hacer el 100% en Transmitancia o el 0% en Absorbancia. Revisión 3 de Noviembre-03 Manual de instrucciones 54250XXX Pág. 3 ESPAÑOL Los espectrofotómetros ZUZI, serie 4250, son unos instrumentos versátiles, de gran aplicación en los laboratorios convencionales, que efectúan precisos análisis cuantitativos y cualitativos dentro del espectro visible y ultravioleta según modelo. Figura 3 - Parte posterior ESPAÑOL 2 1 3 4 3.1. Interruptor encendido / apagado 3.2. Toma de corriente 3.3. Salida analógica: conector base para conectar con un registrador analógico 3.4. Salida digital RS-232C: puerto de comunicaciones con un ordenador 3. ESPECIFICACIONES TÉCNICAS Modelo Selección de longitud de onda Paso de banda Sistema óptico Longitud de onda Rango Precisión Exactitud Estabilidad Luz difusa Fotometría Rango Exactitud Contenedor de cubetas Fuente de luz Alimentación eléctrica Detector Salida de datos Medidas Peso Ruido 4250/20 4250/50 Digital Digital 5nm 5nm Haz simple, red de difracción de 1200 líneas/ mm 320 - 1000 nm (VIS) 190 - 1000 nm (UV-VIS) ±0.5nm ±0.5nm ±2nm ±2nm ±0.002 A/hr a 500nm ≤0.3% a 340 y 400 nm ≤0.3% a 220 y 340 nm 0 / 125%T, -0 / 2.5 A, 0-1999 C (1999C Factor) ±0.004 A a 0.5 A ±0.004 A a 0.5 A Para cuatro cubetas, con cambiador externo Lámpara halógena 6V/10W Lámpara halógena 6V/10W Lámpara de arco de Hidrógeno 115V±10%, 60Hz - 230V±10%, 50Hz Fotocélula Pantalla luminosa de 9 dígitos,Salida digital RS 232 460 x 350 x 180 mm (Ancho x fondo x alto) 10 Kg 12 Kg 0.5% (T) 4. INSTALACIÓN Antes de comenzar a utilizar el instrumento, es conveniente familiarizarse con sus componentes y fundamentos básicos, así como con las funciones de sus controles. Como medida de seguridad el instrumento será revisado previamente a su uso. Desembale el espectrofotómetro y asegúrese de que no presenta ningún daño debido al transporte. De ser así, comuníquelo inmediatamente a su transportista o suministrador. Guarde el embalaje, siempre se deben realizar las devoluciones en su embalaje original con todos los accesorios suministrados. Pág. 4 Manual de instrucciones 54250XXX Revisión 3 de Noviembre-03 Colocar el espectrofotometro en un lugar adecuado, para conseguir el mejor rendimien- Ni el fabricante, ni el distribuidor, asumirán responsabilidad alguna por los daños ocasionados al instrumento o por las lesiones producidas por cualquier persona debido a una manipulación errónea. Procedimiento Enchufar el aparato a la toma de corriente, al encenderlo (3.1) el aparato hace un autochequeo inicial, esperamos unos 20 minutos para que se estabilice. Transcurrido este tiempo el espectrofotometro esta preparado para su funcionamiento. Una vez transcurrido el tiempo de estabilización procedemos a prepararlo según la región del espectro en la que queramos trabajar. Seleccione la longitud de onda deseada (2.3-2.4). Seleccione el modo de trabajo (2.2), Absorbancia, Transmitancia, Concentración. Elija las cubetas que necesita según la región del espectro en la que este trabajando utilice las mismas cubetas tanto para realizar la calibración del Blanco como para realizar las lecturas de las muestras. Recuerde que tiene que utilizar cubetas de cuarzo para la zona Ultravioleta y de vidrio para la zona del visible. En el modelo 4250/50 desde la tecla Func puede seleccionar en que punto quiere que el espectrofotómetro realice el cambio de lámpara de la zona Ultravioleta a la Visible, presione la tecla Func hasta que en la pantalla aparezca el mensaje LAMP EXCHANGE? 340 nm. El espectrofotómetro realiza por defecto el cambio de lámpara a 340 nm, este valor puede cambiarse siempre que el nuevo valor este dentro del rango de 325 nm a 355 nm, con los botones 2.3-2.4 seleccione la longitud de onda y pulse Enter(2.6) para que el dato quede registrado. Con el botón Func (2.5) en el modelo de Espectrofotómetro 4250/50 que realiza medidas en el rango del visible, podemos seleccionar la lámpara de trabajo bien sea la lámpara halógena para la zona visible como la lámpara de Deuterio para la zona Ultravioleta del espectro, si queremos en momento dado cambiarla (no es necesario hacerlo habitualmente ya que al pasar de una zona a otra el cambio de lámpara se realiza automáticamente), presione Func y en la pantalla aparece W Lamp on? ó W Lamp off? según la lámpara esté en ese momento encendida o apagada para cambiar el estado de la misma pulse Enter, siga el mismo procedimiento para la lámpara de Deuterio para la cual los mensajes serán D2 Lamp on? ó D2 Lamp off? según este apagada o encendida. Revisión 3 de Noviembre-03 Manual de instrucciones 54250XXX Pág. 5 ESPAÑOL to de su instrumento, colóquelo sobre una mesa plana, horizontal, manteniéndolo alejado de la humedad, calor, polvo y vibraciones. Mantenerlo en lo posible, sin ninguna fuerza magnética, campo eléctrico, o aparato eléctrico que pueda generar campo de alta frecuencia. Eliminar todo estorbo que pueda impedir el paso de aire debajo y alrededor del espectrofotometro. El espectrofotómetro dispone de un cable de toma de red el cual debe conectarse a tierra. La toma de corriente debe quedar a mano para poder desconectar la clavija rápidamente en caso de emergencia. ESPAÑOL Prepare una cubeta con la muestra que va a utilizar como Blanco, colóquela en el interior del compartimiento de muestras, coloque las muestras de las que va a realizar la lecturas en el interior del compartimiento recuerde que el Espectrofotómetro ZUZI 4250 tiene capacidad para 4 cubetas. Nota: Si durante el transcurso de la utilización del espectrofotometro, la longitud de onda se modifica considerablemente, debemos esperar durante algunos minutos para permitir que el instrumento recupere su funcionamiento normal ya que ese cambio produce perturbaciones en la energía luminosa y el detector necesita un periodo de tiempo para recuperar su nuevo equilibrio. Hay que tener en cuenta que la lámpara de Deuterio debe estar apagada cuándo se trabaja en visible. Medida de la Absorbancia/ Transmitancia Con el botón Mode se selecciona el modo de trabajo bien Absorbancia o Transmitancia. Situar la cubeta de la solución blanco o de la muestra referencia en el contenedor de cubetas. Cierre la compuerta del compartimento de muestras, sitúe la cubeta que contiene la solución blanco en la trayectoria óptica del haz luminoso. Pulse 0%T (2.8) en la pantalla digital (2.1) aparece en mensaje BLANK, indicativo de que el Espectrofotómetro está realizando el blanco, hasta que aparece "100.0%T" en el modo Transmitancia ó "-0.000A" en el modo Absorbancia. Para calibrar el "000.0%T" en Transmitancia ( sólo es necesario hacerlo cuando se comprueba que al colocar una cubeta negra, la transmitancia se desvía del "000.0"), se coloca una cubeta negra en el compartimiento de muestras, en la pantalla digital aparece la palabra ZERO, esperamos hasta que el aparato se calibre y en la pantalla aparezca "000.0%T" en Transmitancia. Sitúe la cubeta de la solución muestra en la trayectoria óptica del haz luminoso, siempre se ha de poner la cubeta en el mismo sentido ( la cara transparente situada en la trayectoria del haz luminoso). La lectura directa de la pantalla nos indicará la Transmitancia (T)/ Absorbancia (A) de la solución muestra. Nota: Durante largos periodos de utilización, los ajustes a, "100.0" T y "0.000" A deben ser repetidamente realizados en concordancia con lo descrito anteriormente. Medida de la concentración Previamente a la medida de la concentración hay que calibrar el equipo a 0A como se describe en el apartado anterior. Una vez realizada la calibración: Se selecciona con el botón Mode (2.2) el modo concentración, se sitúa en el contenedor de cubetas la muestra de concentración conocida (muestra patrón) y las muestras en las que queremos medir la concentración. Se cierra la compuerta del compartimento de muestras, se sitúa la muestra patrón en la trayectoria del haz luminoso pulsamos el botón (2.5) Func hasta que aparece en la pantalla la función CONC/STD=1000 y con los botones (2.3 y 2.4) ajustamos la concentración de la muestra patrón, se pulsa Ent (2.6) para registrar el dato en la memoria del equipo como referencia y ya se puede proceder a la medida de las demás muestras. Pág. 6 Manual de instrucciones 54250XXX Revisión 3 de Noviembre-03 Salida de datos Con la salida digital (3.3) se puede conectar (con el cable suministrado), a una impresora con puerto serie o al puerto serie del ordenador. Para la conexión con el ordenador, seleccione con la tecla Func la opción PC CONNECT?, abra el programa del software y seleccione el puerto serie tal como se indica en el manual del software, una vez conectado en la pantalla del espectrofotómetro aparecerá el mensaje PC - CONN... Con la salida analógica (3.4) podemos conectar con un registrador analógico. 5. MANTENIMIENTO Siempre debe mantenerse el espectrofotómetro limpio y cubierto con su funda para evitar que le entre polvo. Si el espectrofotómetro se encuentra en un ambiente húmedo es aconsejable colocar unas bolsitas de silicagel en el compartimento de muestras, para evitar que los espejos se empañen. Las cubetas suministradas con el aparato han sido igualadas en serie, no se deben mezclar con las cubetas de otros aparatos ya que podemos estar cometiendo errores en las medidas dadas las diferencias entre las cubetas. Hay que tener en cuenta que siempre que se trabaje en la zona de ultravioleta las cubetas que debemos usar son las de cuarzo y cuándo se trabaje en la zona del ultravioleta visible se trabaja con las cubetas de vidrio (el vidrio absorbe fuertemente a longitudes de onda menores a 350 nm - zona UV). En el manejo de las cubetas se debe tener en cuenta evitar el contacto de los dedos con las caras ópticas, agarre siempre las cubetas por la cara opaca. Una vez utilizadas, las cubetas deben ser lavadas con agua destilada para evitar contaminaciones. Para su limpieza utilizaremos paños absorbentes suaves o toallitas especiales para lentes, evitando dejar restos de celulosa o sustancias que puedan interferir en la lectura de la muestra. En la sustitución de la fuente de luz no se deben tocar las lámparas con las manos para evitar que se fundan. Revisión 3 de Noviembre-03 Manual de instrucciones 54250XXX Pág. 7 ESPAÑOL Si queremos trabajar con factor, seleccionamos el modo factor con el botón Func (2.5) e introducimos el factor pulsando los botones (2.3 y 2.4) una vez alcanzada la cifra pulsar Ent (2.6) para fijar ésta cantidad y ya se puede proceder a la lectura de las demás muestras. ESPAÑOL 6. RESOLUCIÓN DE PROBLEMAS PROBLEMA CAUSA -La pantalla digital no funciona - No llega corriente. -La lámpara del piloto de la - El interruptor del aparato fuente de alimentación no luce (3.4) está apagado. SOLUCIÓN - Verificar la línea de corriente - Encender el interruptor. - Insuficiente periodo de estabi- - Periodo de estabilización 30 lización del aparato minutos. - Fluctuaciones en el voltaje - Mantener el voltaje dentro del -Las lecturas son muy inestarango 220V +/- 10%, sin variables. ciones frecuentes. -Exceso de vibraciones en el - Mover el instrumento a un ambiente ambiente más estable. - Exceso de energía luminosa. - Seleccione correctamente el - La pantalla digital muestra - La tapa del compartimento rango de sensibilidad. de muestras está levantada en - Seleccione el modo sobrecarga (Over). Transmitancia y abra la tapa. el modo Absorbancia. - El ajuste a 100%T es muy inestable - Deficiencias en las lámparas - Reemplace la lámpara dañada - Compruebe la posición del contenedor de cubetas, es importante cuándo se trabaja con micro cubetas. - Las cubetas tienen ralladuras o - Al limpiar las cubetas no ejerza mucha presión, evite el -Las lecturas no son constantes marcas de dedos en las caras contacto con los dedos en las ópticas. caras ópticas, agarre siempre las cubetas por la cara opaca. - Insuficiente periodo de estabili- - Aumentar el periodo de estazación de la muestra (burbujas) bilización. - Ajuste incorrecto de la cubeta. - No se puede cambiar la lon- - Nos encontramos en el gitud de onda modo Concentración o Factor Pág. 8 Manual de instrucciones 54250XXX - Cambiar a modo Absorbancia o Transmitancia Revisión 3 de Noviembre-03 GARANTÍA Esta garantía quedará sin efecto cuando el aparato haya sido sometido a un uso indebido o manipulado por persona ajena a nuestro Servicio Oficial, así como por haber sido instalado incorrectamente o por haber utilizado recambios y accesorios no originales. Quedan, asimismo, excluidas de la Garantía las averías producidas por causas catastróficas (fuego, inundación...), atmosféricas, golpes y caídas. Los gastos ocasionados como consecuencia de esta reparación, tales como el transporte de los aparatos a nuestros Servicios Oficiales y su posterior devolución, serán por cuenta del usuario. Es necesaria la presentación del Certificado de Garantía debidamente cumplimentado (sin enmiendas ni tachaduras), para obtener cualquier intervención de nuestro Servicio Oficial sin cargo durante el período indicado. Esta garantía no cubre ni el mantenimiento del aparato ni las piezas o los daños producidos por desgaste natural del uso normal del equipo. Para facilitar un mejor servicio cuando nos envíen un aparato al Servicio Técnico les agradeceríamos nos indiquen los siguientes datos: Distribuidor: Equipo: Modelo: Número de Serie: Fecha: Breve descripción de la avería: AUXILAB, S.L. Polígono Morea Norte, 8 - 31191 BERIAIN (Navarra) Tel(948) 310 513 - Fax(948) 310 500 - 312 071 e-mail: [email protected] http://www.auxilab.es Revisión 3 de Noviembre-03 Manual de instrucciones 54250XXX Pág. 9 ESPAÑOL AUXILAB S.L. garantiza este equipo por un período de doce meses a partir de la fecha de adquisición contra cualquier defecto de fabricación que afecte a su funcionamiento, comprometiéndose a reponer las piezas cuya rotura, se deba a defecto de fabricación. El canje, durante el período de garantía, de estas piezas será gratuito y no implicará prolongación de la misma. Thanks for choosing a ZUZI Spectrophotometer, its high mechanical quality will allow you to make use of this equipment for a long time, nevertheless to get the best results and a higher duration of this instrument it is advisable to read carefully this manual and follow the processes of use. In order to use this instrument, it is advisable to follow the following points: This manual should be available for all the users of this equipment. Any doubt can be clarified getting into touch with the ZUZI technical service. As an accuracy instrument, it should be used carefully avoiding the sudden movements and knocks. Never dismantle the different pieces of the refractometer to repair them, since it could produce a defective use of the whole equipment and a loss of the product warranty. Don't use the equipment with fluids that can give off steams or produce explosive or inflammable mixtures. ENGLISH ATTENTION!! YOU MUST NEVER OPERATE WITH THE POWER FEED. WE WILL NOT TAKE CHARGE OF THE DAMAGES YOU CAN PRODUCE TO THE INSTRUMENT. IF AN EQUIPMENT IS NOT PROPERLY CLEANED AND DISINFECTED IT WOULD NOT BE ALLOWED TO REPAIR BY OUR TECHNICAL SERVICE. CONTENTS 1. USES OF THE INSTRUMENT 11 2. DESCRIPTION 11 3. TECHNICAL SPECIFICATIONS 12 4. OPERATING INSTRUCTIONS 12 5. MAINTENANCE 14 6. TROUBLESHOOTING 15 ANNEX I: WARRANTY INFORMATION 16 Page 10 Instruction manual 54250XXX Version 3 November-03 1. USES OF THE INSTRUMENT Spectrophotometers ZUZI, series 4250, are very versatile instruments and widely used in common laboratories to accurate cuantitative and cualitative analysis in visible and ultraviolet spectro, up to the model. It is widely used in fields like petrochemical industry, biochemistry, mining, ingeniring, hospitals, enviromental preservation, research and development... 2. DESCRIPTION Picture 1 1 2 100%T MODE FUNC 1.1. Control panel 1.2. Samples’ compartment: In the inner part of the samples’ compartment, there is a container of 4 cells capacity. 1.3. Cells’ position selector 0%T ENT P/C 3 Picture 3 - Rear part 1 2 9 100%T MODE 2 3 4 8 0%T FUNC ENT P/C 5 6 7 2.1. Digital screen 2.2. MODE: Button to select the working mode, Absorbance, Transmittance or Concentration. 2.3. - 2.4. Wavelength selector 2.5. FUNC: Function selection button 2.6. ENT: To save the standard concentration data in the spectrophotometer´s memory and also to confirm that a certain function has been selected. 2.7. P/C 2.8. 0% T: Button to obtain 0% in Transmittance. 2.9. 100%T: Button to obtain 100% in Transmittance or 0% in Absorbance. Version 3 November-03 ENGLISH Picture 2 - Control panel 1 3 4 3.1. On/off interruptor 3.2. Current intake 3.3. Analogical outlet 3.4. Digital outlet RS-232C Instruction manual 54250XXX Page 11 3. TECHNICAL SPECIFICATIONS ENGLISH Model Wavelength selection Bandwidth Optical system Wavelenght Range Precision Accuracy Stability Stray light Photometry Range Accuracy Cell holder Light source Electrical supply Detector Data outlet Dimensions Weight Noise 4250/20 4250/50 Digital Digital 5nm 5nm Simple beam, diffraction web of 1200 lines/ mm 320 - 1000 nm (VIS) 190 - 1000 nm (UV-VIS) ±0.5nm ±0.5nm ±2nm ±2nm ±0.002 A/hr to 500nm ≤0.3% to 340 and 400 nm ≤0.3% to 220 and 340 nm 0 / 125%T, -0 / 2.5 A, 0-1999 C (1999C Factor) ±0.004 A to 0.5 A ±0.004 A to 0.5 A For four cells, with external changer Halogen lamp 6V/10W Halogen lamp 6V/10W Hydrogen arc lamp 115V±10%, 60Hz - 230V±10%, 50Hz Photocell Bright display of 9 digits, digital output RS 232 460 x 350 x 180 mm (Width x depht x height) 10 Kg 12 Kg 0.5% (T) 4. OPERATING INSTRUCTIONS Before starting, we advise you to become familiar with the components and the basic fun- daments, as well as the control functions. As a safe measure, you should check your equipment before it works. Remove the spectophotometer from the packing material and examine it carefully to make sure no damage has been ocurred during shipping. If there is any damage, notify it to your dealer/forwarding agency. Keep all packing material until you are sure that the instrument works correctly. All defective items must be returned in the original packing together with any other supplied accesories. Place the spectrophotometer in a proper environment to get its best performance. Look for a flat and horizontal table. Always try to avoid hot, wetness, dust and vibrations. Keep it as far as possible from magnetic source, electrical field or other electrical equipment that could create a high frequency field. Take away every unuseful item that could obstruct air circulates around the spectrophotometer. The spectrophotometer is provided of a current wire that must be connected to ground. It should be easy andel to a fast unplug in case of emergency. Page 12 Instruction manual 54250XXX Version 3 November-03 Neither the producer, nor the distributor, will not take any responsability on instrument damages or injuries due to a wrong usage. Absorbance/ Transmittance measurement Button Mode selects absorbance or transmittance mode. Place the cell with the white solution or the sample or reference in the cell compartment. Close the lid of the compartment and place the cell with the white solution in the optical way of the light beam. Press 0%T (2.8) and in the digital screen (2.1) will appear BLANK.. as a probe the spectrophotometer is doing the white, until "100.0%T" appears in mode Transmittance or "-0.000A" in Absorbance mode. To get the "000.0%T" calibrated in Transmittance ( it is only necessary when you find that when you put a black cell, the transmittance sufres a deviation from "000.0" value), put a black cell in the samples´ compartment and the digital screen will show the word ZERO. You have to Version 3 November-03 Instruction manual 54250XXX Page 13 ENGLISH Procedure Plug the equipment to current. When you turn it on (3.1), the equipment checks itself, so you have to wait for about 20 minutes to get it stable. After this time, the spectrophotometer will be ready to start working. Then, you have to get it prepared based on the spectrum region we want to be working in. Select the wavelength required (2.3-2.4). Select the mode of working (2.2), Absorbance, Transmittance, Concentration. Choose the cells as the spectrum region we are using requires. Use the same cells to calibrate the white and to read sample´s values. Remember you must take quartz cells in ultraviolet zone and glass cells in visible zone. In model 4250/50 you can chose the point from which you want the spectrophotometer change the lamp from zone ultraviolet to visible pressing Func key until the screen shows LAMP EXCHANGE? 340 nm. The spectrophotometer changes automatically the lamp to 340 nm. This value can be changed always the new value is in the range from 325 nm to 355 nm. To do like this, use buttons 2.3-2.4 to select the wavelength and press Enter (2.6) to get the data registered. With button Func(2.5) of spectrophotometer model 4250/50 that gets measures in the range of the visible, you can select the lamp. It can be an halogen one to visible zone or a deuterium lamp to ultraviolet zone. If you need to change it in certain moment (you do not need to do it frequently as when passing from one zone into another, the lamp changes automatically), press Func and the screen will shows W Lamp on? or W Lamp off? as the lamp turned on or off. To change this state, press Enter, and follow the same steps than with deuterium lamp, for which the messages will be D2 Lamp on? or D2 Lamp off? If it is turned off or turned on. Have a cell with the sample to be used as White prepared and put it into the samples´compartment. Place the samples whose measure is required, into the compartment taking into account ZUZI 4250 spectophotometer has a capacity for 4 cells. Note: if the wavelength suffers a great variation while working, you should wait for a couple of minutes to allow the spectrophotometer recovers its usual performance. This change makes perturbations in the luminose power and the detector needs a period of time to recover its new balance. The deuterium lamp must be turned off when working in visible. ENGLISH wait until the equipment is calibrated and the screen shows "000.0%T" in Transmittance. Note: The calibration of 000.00%T in model 4210/50 is automatically done in the initial self- checking that´s why you don´t need to have it calibrated in this point. Put the cell with the solution in the optical way of the light beam. You should always put the cell in the same sense (the transparent face in the way of luminose beam). The direct reading will indicate us the Transmittance (T)/ Absorbance (A) of the sample. Note: when long periods using it, the adjustments to “100.0" T and "0.000" A must be continuously done, according to these instructions. Measurement of concentration Before taking measures of the concentration, you have to calibrate the equipment to 0A as the previous instructions. After having done the calibration: Select concentration mode with button Mode (2.2), and put the sample whose concentration is known (standard sample) and the samples whose concentration we want to obtain, in the cell holder. Close the lid of the compartment and put the standard sample in the way of the luminose beam pressint button (2.5) Func until you read function CONC/STD=1000 on the screen. With buttons (2.3 and 2.4) you can adjust the concentration of the standard sample. Press Ent (2.6) to register the data in the equipment´s memory as a reference and you can measure the rest of the samples. If we want to use in factor mode, we must select factor mode by pressing button Func(2.5) and then we enter the factor with buttons (2.3 and 2.4). Once the figure is reached, press Ent (2.6) to fix this amount and your equipment will be ready to obtain readings of the rest of the samples. Data output With the digital outlet (3.3) you can connect it to a printer thanks to the wire supplied with the equipment and plugged to series port of the printer or the computer. To the connection with the computer, select PC CONNECT?, with Func key and open the software programme and chose the serie port as software´s manual says. Once it is connected to spectrophotometer´s screen, it will appear the following message PC - CONN... With the analogic outlet (3.4) we can be conected to an analogic registrator. 5. MAINTENANCE You should always keep your spectrophotometer clean and protected by its cover to avoid dust and dirtness. If it is located in a wet environment, it is useful putting silica gel bags in the cell holder to avoid mirror mist. The cells supplied with the equipment has been equal mass manufactured, so they can not be mixed with cells of other equipment because you can obtain wrong values due to different cells. You should take into account that always you work in tha ultraviolet area, you should use quartz cells and when you work in visible ultraviolet, you shoul take glass cells (glass absorbs Page 14 Instruction manual 54250XXX Version 3 November-03 strongly in lower wavelenght at 350 nm- zone UV). Try not to touch the optical faces with your fingers, you should always hold them by the opaque face. After having used the cells, they must be washed with distilled water to avoid pollution. You should use absorbent and soft gauzes or tissues specially designed to clean lens. Always try to avoid impurities or odd substances that could change the readings. When replacing light source you must not touch the lamps with finger to avoid they fuse. 6. TROUBLESHOOTING PROBLEM CAUSE SOLUTION -Digital screen doesn´t work -The current doesn´t get the -Check the current -The lamp of the current inta- equipment -Switch on the interruptor ke pilot doesn´t bright -The instrument is switched off -Readings are not stable -Too much luminose energy -Select the range of sensibility -Digital screen shows over -The lid of the sample item is properly -Select Transmittance mode and open in Absorbance mode load (Over) open the lid - Deficiencies in lamps -100% T adjustment is not very stable - Replace the lamp -Wrong adjustment of the cell -Check the position of the cell holder. This is important when using micro cells. -Cells are striped or have fin- -When cleaning the cells do gerprints on the optical faces not press too much. Avoid touching the optical faces. Ever hold the opaque face of the cells -Not enough period of sample -Increase stabilization period stabilization (bubbles) -Readings are not constant -Wave lenght can´t be changed Version 3 November-03 -We are working in 1-Change to Absorbance or Concentration or Factor mode Transmitance mode Instruction manual 54250XXX Page 15 ENGLISH -Stabilization period is not -Stabilization period of 30 long enough minutes -Voltage fluctuations -Keep the voltaje in a range of 220V +/- 10%, avoiding frequent changes. -Too many vibrations in the -Move the equipment to a enviroment more stable enviroment WARRANTY AUXILAB, S.L. warrants this equipment be free from defects in material and workmanship for a period of one year from date of purchase from AUXILAB S.L. or an authorised AUXILAB S.L. dealer. This warranty is limited to such purchaser and is not transferable. During the year warranty period, AUXILAB S.L. will repair or replace, at its option, any defective equipments or pieces at no additional charge, provided that the product is returned, shipping prepaid, to AUXILAB S.L., an authorised dealer or an authorised service location. The purchaser is responsible for insuring any returned product and assumes the risk of loss during shipping. All replaced parts become the property of AUXILAB. This limited warranty does not extend to any products which have been damaged as a result of accident, misuse, abuse or as a result of service or modification by anyone other than AUXILAB, an authorised dealer or an authorised service location. ENGLISH Except as expressly set forth above, no other warranties are expressed or implied, including, but not limited to, any implied warranties of merchantability or fitness for a particular purpose. AUXILAB expressly disclaims all expressed or implied warranties not stated herein. In order to obtain a free reparation or a free piece-replacement by our Technical Service over the above-mentioned period of time, it is absolutely necessary to submit the Warranty Certificate. This warranty doesn't apply for the maintenance of the equipment or for damaged caused by a natural, everyday use. Some states do not allow the exclusion or limitation of incidental or consequential damages for consumer products, and some states do not allow limitations on how long an implied warranty lasts, so the above limitations or exclusions may not apply to you. This limited warranty gives you specific legal rights, and you may also have other rights which vary from state to state. Dealer: Equipment: Model: Serial Number: Date: Brief failure description: AUXILAB, S.L. Polígono Morea Norte, 8 - 31191 BERIAIN (Navarra) Tel(948) 310 513 - Fax(948) 310 500 - 312 071 e-mail: [email protected] http://www.auxilab.es Page 16 Instruction manual 54250XXX Version 3 November-03