1
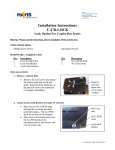
506640-L Important! Read throughly this Manual, before starting the machine ¡Importante! Antes de energizar este aparato, favor de leer todas las instrucciones de este manual MR Thank you for reading this manual. If you have any question, please contact your dealer. Felicidades y gracias por el tiempo dedicado a leer este manual. Cualquier duda o sugerencia, por favor llame a su distribuidor. MARINADORA : Marinating Tumbler : MV-25 Manual de Operación, Servicio y Mantenimiento para Marinadoras. Instructions for Operation and Maintenance of Meat Tumblers. 12 05-06640-L ¡PELIGRO! WA R N I N G ! * El tanque debe de permanecer en posición vertical cuando: 1) Sea cargado con el alimento a marinar; 2) Sea realizado el vacío 3) Al restablecer la presión normal. * La válvula NO debe ser abierta cuando el tanque esté girando o en posición horizontal. * NO se debe dar mantenimiento, ni limpieza, con el equipo conectado. * Este equipo debe estar debidamente aterrizado. * Este equipo NO debe ser operado por niños. * Si el cordón de alimentación es dañado, éste debe ser remplazado por personal calificado para evitar cualquier accidente considerable. El cable de alimentación tiene sujeta-cables tipo Y. Ajuste del desplazamiento del Tanque -Tank Sliding SettingSi el tanque se desliza fuera de las ruedas cuando gira, verifique el nivel de la base. Si existe desnivel, se debe compensar ajustando las patas frontales, hasta lograr que en el contenedor no se desplace. If the tank slides out of the wheels when rotates, verify the base level. If unevenness exists, it must be compensated fitting the frontal legs, screw the legs until container does not displace. Este equipo debe ser conectado a una conexión con protección térmica. * The tank must remain in Vertical Position while: 1) Its loading with the food; 2) Its making the vaccum; and 3) Its releasing the pressure. * The valve must NOT be opened when the tank is tumbling or in horizontal position. * Its NOT allowed to perform the maintenance, nor the cleaning, when the machine is plugged. * This equipment is NOT allowed to be operated by kids. * This equipment must be properly grouded. *If the power cord is damaged, it must be replaced by an authorized technician to avoid any considerable accident. The power cord has Y type Hold-Cable. This machine must be connected to a thermally protected outlet. 2 11 ÍNDICE Pag. Introducción / Introduction Desempacado / Unpacking Instalación / Installation Operación / Operation Limpieza / Cleaning Mantenimiento / Maintenance Listas de Partes / Part List Diagrama Eléctrico / Electrical Diagram Desplazamiento del Tanque / Setting Sliding Tank Introducción -IntroductionFelicidades, acaba usted de adquirir una Marinadora TORREY, la cual está fabricada con materiales de alta calidad y larga duración, por lo tanto diseñada para brindarle muchos años de operación libre de problemas, con un funcionamiento altamente satisfactorio. Congratulations! you are now the owner of a TORREY Meat Tumbler, which is made of high quality and reliable materials to perform the best operation, because it was designed to expect many years of free-issues with a great satisfaction to the user. Desempacado -UnpackingCuando desempaque la marinadora tenga especial cuidado al sacar todos los componentes y verifique que todos estén completos y en perfectas condiciones. Listado de componentes: 1 Tanque. 1 Tapa del Tanque. 1 Marinadora. Se recomienda reciclar el cartón en depósitos especiales para este fin. 10 3 3 3 4 7 7 8 10 11 As soon as you unpack the Meat Tumbler, verify that all the parts are complete, as well as in excellent conditions.. Parts: 1 Tank. 1 Top Cover Tank. 1 Meat Tumbler. Its recommended to recycle the package on the containers that specify it. Instalación -InstallationAntes de conectar la marinadora a la energía eléctrica, siga estas sencillas instrucciones de ensamble (nunca lleve a cabo estos pasos con la marinadora conectada a la energía eléctrica). 1.- Coloque la marinadora en un lugar limpio, seco y nivelado. 2.- Asegúrese que la marinadora quede cerca de un tomacorriente. 3.-Conecte la marinadora a la fuente de alimentación. Nota: Asegúrese de cumplir con los requerimientos de energía eléctrica de la máquina y que el equipo esté debidamante aterrizado. 3 Before plug the Meat Tumbler in the power outlet, you must follow these simple assembly instructions: 1.- Place the Meat Tumbler on a clean, dry and plane surface. 2.- Be sure that the Meat Tumbler is near to the power outlet. 3.- Plug the Meat Tumbler in the Power outlet. Be sure that all the electric requirements are met and the equipment is properly grounded. Operación -OperationEl procedimiento normal para operar la marinadora es el siguiente: 1.- Limpie el tanque y colóquelo en posición vertical. 2.- Introduzca en el tanque los ingredientes a marinar. Peso máximo de ingredientes: 25 kg (50 lb). 3.- Coloque la tapa transparente en la parte superior del tanque, asegurándose que quede centrada y siente bien sobre el empaque. 4.- Inserte el extremo libre de la manguera en la válvula de la tapa transparente. Abra la válvula. Asegúrese que la manguera tenga bien puesto el filtro. NOTA: LA VÁLVULA DEBE ESTAR ABIERTA MIENTRAS SE EXTRAE EL AIRE DEL TANQUE. 5.- Active el interruptor hacia la posición que indica la operación de la bomba de vacío. El nivel de vacío recomendable para un buen marinado está entre 12inHg y 15inHg (40KPa y 50KPa respect.) : 4 9 5.- Turn the switch to VACUUM position. The recommended vacuum level for a good product is between 12inHg and 15inHg (40KPa and 50KPa respectively): seconds until the enviroment pressure is reached. Uncover the tank. 12.- Take the food out and wash and rinse well the tank for the next mixing. 6.- Once the vaccum level is reached, close the valve and turn the switch to the central position (turned off). 7.- Disconnect the hose from the cover valve and insert It to its pin. * El tanque deberá ser limpiado antes de ser utilizado en una carga de alimentos. NOTE: DO NOT OPEN THE VALVE TO AVOID FOOD LEAKAGE. * El tanque deberá ser limpiado entre cargas para evitar mezclas de sabores. 9.- Turn the switch to TUMBLE position. Notice how the TIMER is turned on. Use any of this two modes for mixing the ingredients: b) Count-up Mixing Mode: Press the MIN & SEC Keys at a time to reset the time (Reading 0:00). Press the 0/1 ROTATION key. The tank will rotate until you press the same key (0/1 ROTATION) again. 10.- Once the tumbling is finished, take the tank down of the wheels and place It in vertical position. This is for normalizing the pressure and take the food out of the tank 11.- With the tank in vertical position, open the valve and wait for several 6 El cuidado y limpieza de su Marinadora es importante, de manera que le proporcione un servicio eficiente y satisfactorio. Es importante mantener su equipo siempre limpio, para lo cual se indica los siguiente: * La limpieza del equipo deberá llevarse a cabo diariamente. Para lo cual, el equipo deberá estar sin conectar a la corriente eléctrica. 8.- Hold the tank in horizontal position and place It on the wheels of the tumbler. The cover must face to the outside of the machine. a) Count-Down Mixing Mode: Set minutes and seconds (MIN & SEC Keys) according to the required mixing time, then press the 0/1 ROTATION key. The tank will rotate to mix the food by the programmed time. Then It stops and a beep is heard. If you want to pause or stop the mixing, only press the same key (0/1 ROTATION). Suggested tumbling time: 15 minutes. Limpieza -Cleaning- N O TA : A S E G Ú R E S E D E CONECTAR SIEMPRE EL EQUIPO A UNA FUENTE DE ALIMENTACIÓN DEBIDAMENTE ATERRIZADA. DESCONECTE EL EQUIPO SI NO VA A SER UTILIZADO POR MUCHO TIEMPO. N O T E : A LWAY S P L U G T H E EQUIPMENT IN A PROPERLY GROUNDED OUTLET. UNPLUG THE UNIT FROM THE POWER OUTLET IF IT WILL NOT BE USED FOR A LONG TIME. * Dado que los materiales con los cuales está construido el equipo son de Acero Inoxidable y plásticos de grado alimenticio, se recomienda utilizar detergentes suaves para la limpieza, así como trapos húmedos para el enjuague. Es importante que no queden residuos de jabón, especialmente en el interior del tanque, ya que se podrían contaminar los alimentos. indications: * Cleaning must be performed daily. To do this, the Tumbler must be unplugged to the electric power outlet. * The tank must be cleaned before the food loading takes place. * The tank must be cleaned between loadings to avoid flavor mixes. * Due that the built materials are stainless steel and food grade plastics, Its recommended to use soft soaps to perform the cleaning, as well as soft & wet cloths to do the rinsing. Its huge important that NO soap traces remain on the Tumbler, specially inside the tank, because the food may be contaminated. * The tank can be cleaned with a water stream, but the Meat Tumbler NOT. * NEVER use abrasives cleaners with Chlorine, Vinegar, Acid or fibers, since it can affect the protective coating of the stainless steel and generate oxidation. * Clean the Tumbler as soon as a tank leakage occurs. Mantenimiento -Maintenance- * El tanque puede ser lavado a chorro de agua, la marinadora no. * NUNCA utilice limpiadores abrasivos con Cloro, ni Vinagre, Ácidos (como por ejemplo el Ácido Cítrico, Ácido Muriático e Hipocloritos) o fibras, ya que puede afectar la capa protectora del acero inoxidable y generar oxidación. * Limpie inmediatamente el equipo ante un derrame del tanque. Siempre desconecte la Marinadora de la corriente eléctrica antes de intentar dar mantenimiento o servicio. * Cambie el filtro de aire al menos una vez por año. * Se recomienda que un técnico autorizado dé mantenimiento general a su equipo por lo menos una vez al año. * Si el empaque del tanque se observa agrietado, esta pieza (consumible) deberá ser cambiada, ya que puede haber fuga y perder vacío pudiendo ocasionar un accidente. Cleaning and Caring of the Meat Tumbler is very important to obtain an excellent performance of the machine and satisfaction with the flavors. Its important the Tumbler keep always clean, so the user must follow the next Unplug always the Meat Tumbler from the electric power outlet before any service or maintenance. *Replace the air filter yearly, at least. * Its recommended that a dealer technician check this machine, yearly. 7 Lista de Partes -Parts ListNo. Código -Part Number- Descripción -Description- 6.- Una vez obtenido el vacío requerido, cierre la válvula y regrese el interruptor a la posición central (apagado). Cantidad -Quantity- 1.- 550088: Tanque / Tank 2.- 550089: Tapa del Tanque / Top Cover 3.- 550091: Subensamble Flecha Motriz / Tracking Wheels 4.- 550090: Subensamble Flecha Libre / Free Wheels 5.- 506846: Controlador de Tiempo (115V~) / Timer (115V~) 5.- 506847: Controlador de Tiempo (220V~) / Timer (220V~) 6.- 506618: Interruptor de tres posic / Three Position Switch 7.- 506620: Vacuómetro / Vacuum Gauge 8.- 506622: Filtro de Aire / Air Filter 9.- 506837: Bomba de Vacío (115V~) / Vaccum Pump (115V~) 9.- 500550: Bomba de Vacío (220V~) / Vaccum Pump (220V~) 10.- 506760: Motorreductor (115V~) / GearMotor (115V~) 10.- 506725: Motorreductor (220V~) / GearMotor (220V~) 11.- 506635: Empaque ORing / ORing Gasket 1 1 1 1 1 1 1 1 1 1 1 1 1 1 7.- Desconecte la manguera del tanque e insértela en su soporte. 8.- Coloque el tanque en posición horizontal, sobre las ruedas de la marinadora con la tapa hacia el exterior del equipo. 12.- Extraiga los alimentos marinados y lave y enjuague bien el tanque para usarse nuevamente. NOTA: DESCONECTE EL EQUIPO SI NO VA A SER USADO POR MUCHO TIEMPO. NOTA: NO ABRA LA VÁLVULA EN POSICION HORIZONTAL PARA EVITAR QUE EL PRODUCTO SE DERRAME. 9.- Active el interruptor en posición de MASAJEO. Se debe observar la activación del controlador de tiempo (TIMER). Siga alguno de los modos siguientes para el agitado de los ingredientes: a) Agitado en Cuenta Regresiva: Programe minutos y segundos (Teclas MIN y SEC) que considere adecuados para la operación y pulse la tecla 0/1 ROTACION. El Tanque girará por el tiempo programado. Al término se detendrá y sonará una alarma. En caso de que requiera suspender la operación, pulse nuevamente la tecla 0/1 ROTACION. Tiempo Recomendado: 15 minutos. The normal procedure to operate the Meat Tumbler is: 1.- Clean the tank and place It in vertical position. b) Agitado en Cuenta Progresiva: Pulse las teclas MIN y SEC a la vez hasta leer 0:00. Luego pulse la tecla 0/1 ROTACION. El Tanque girará continuamente hasta que el operador lo detenga, para ello pulse nuevamente la tecla 0/1 ROTACION. 2.- Put all the ingredients into the tank. Max food weight: 25 kg (50 lb). 10.- Una vez detenido el tanque, retírelo de la marinadora y colóquelo en posición vertical para devolver la presión normal y extraer lo alimentos marinados. 4.- Insert the hose free end into the cover valve. Open the valve. 11.- Estando el tanque en posición vertical, abra la válvula y espere unos segundos a que ingrese el aire y se 8 normalice la presión. Retire la tapa transparente. 3.- Place the transparent cover on the top of the tank. Be sure that this cover is centered as well as settled down on the O-Ring rubber gasket. NOTE: THE VALVE MUST BE OPEN WHILE THE VACUUM LEVEL IS REACHED. 5