1
English
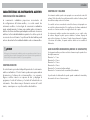
Free/Open Fit Instruments
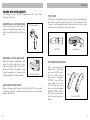
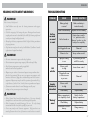
FREE FIT INSTRUMENTS TYPE PLATE
R/L Indicators, Power On/Off, Programming Socket, Type Plate,
Tube Size Indicator
Inserting R/L Ear Indicator: Free FIT INStruments
Insert the small plastic Red or Blue indicator in the top of the earhook
or thin tube. Use this stick to thread the indicator into the tear-shaped
hole on the side of the ear hook or thin tube. Once the marker is flush
with the side of the earhook or thin tube, remove the excess plastic
stick by twisting and pulling until it releases.
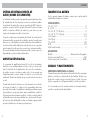
Inserting R/L Ear Indicator: Open/
Free FIT INStruments
Open the battery compartment and locate the white marker that
comes with the hearing aid from factory. Remove the white color
marker, using a small screwdriver or tweezers, and replace with the
red or blue marker.
ON
R/L Ear Indicator
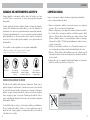
TO POWER ON AND OFF
OFF
Power On/Off
Power is provided via the battery door, which also acts as an On/Off
switch. To turn on: Make sure the battery door is completely CLOSED. To
turn off: Press down slightly on the door lip. When the door moves down
one click and remains SLIGHTLY OPEN, the BTE is OFF. Fully open the
battery door to remove/replace the battery.
8
To remove the original plate insert a pick-type tool in between the battery
door and the type plate and lift the bottom of the type plate from the
housing. Insert the appropriate red or blue indicator in the top slots and
push down to lock the bottom of the plate in place.
#
R E X TO N
Type Plate
Tube Size Indicator
TUBE SIZE INDICATOR
The tube size is located on the lower portion of the tubing near the dome.
Sizes range from 1-6. The right tubes are marked with a red number. The
left tubes are marked with a blue number.
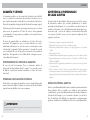
Attachment Procedure for
FREE and Open Dome
Grasp the rounded end of the dome
between your thumb and forefinger and
slide it over the Open tip Adapter until it
reaches the “flared portion” of the tube.
Push on the tip of the dome to make sure it
is snug against the tube tip.
“flared portion”
Tube
Dome
Replacement Procedure
Grasp the rounded end of the dome
between your thumb and forefinger and pull
it off the Open Tip Adapter. Use an alcohol
wipe to remove any wax and debris from
the tube and adapter. Use the blue cleaning
tool to clean the inside of the tube of any
moisture or debris. Reattach a new dome as
outlined above.
9