1
TIPPMANN
®
WARNING
E
N
G
L
I
S
H
THIS IS NOT A TOY. MISUSE MAY CAUSE SERIOUS
INJURY OR DEATH. EYE, FACE AND EAR PROTECTION
DESIGNED FOR PAINTBALL MUST BE WORN BY THE
USER AND ANY PERSON WITHIN RANGE. WE
RECOMMEND AT LEAST 18 YEARS OLD TO PURCHASE.
PERSONS UNDER 18 MUST HAVE ADULT SUPERVISION
WHEN USING THIS PRODUCT. READ THE OWNER’S
MANUAL BEFORE USING THIS PRODUCT.
WARNING
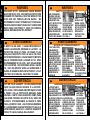
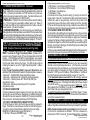
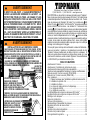
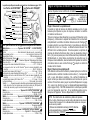
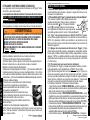
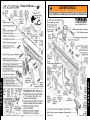
BARREL SLEEVE INSTALLATION
• EXCEPT WHEN YOUR MARKER IS IN USE, ALWAYS MAKE
SURE THAT THE TRIGGER SAFETY IS IN SAFE MODE (SEE
INSTRUCTIONS ON PAGE 4), AND THE BARREL SLEEVE IS
PROPERLY INSTALLED ON YOUR MARKER AS SHOWN BELOW.
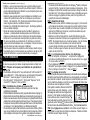
1) SLIDE BARREL INTO SLEEVE AND LOOP CORD OVER TOP
OF RECEIVER AND POSITION AT BACK OF GRIP AS SHOWN
BELOW.
CORD
LENGTH
ADJUSTOR
BUTTON
2) PINCH CORD LENGTH
ADJUSTOR BUTTON AND
HOLD TO BACK OF GRIP AS
YOU PULL CORD THROUGH IT UNTIL ADJUSTOR IS SNUG
AGAINST BACK OF GRIP, THEN RELEASE BUTTON.
3) CHECK TO BE SURE YOU LEAVE ENOUGH CORD
ELASTICITY TO PULL CORD/ADJUSTOR UP OVER TOP OF
MARKER TO REMOVE BARREL SLEEVE FOR FIRING.
4) AFTER CORD LENGTH IS
ADJUSTED, LOCK CORD
LENGTH BY TYING A KNOT IN
THE CORD AGAINST THE BACK
OF THE ADJUSTOR AS SHOWN.
2
2955 Adams Center Road, Fort Wayne, IN 46803 USA
P) 260-749-6022 • F) 260-749-6619 • www.tippmann.com
®
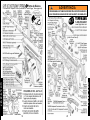
CONGRATULATIONS on your purchase of a Tippmann paintball marker.
We believe our 98 CustomTM line of markers to be the most accurate and
durable paintball markers available, and are proudly manufactured in the
USA. All Tippmann® 98 CustomTM line markers from the non98 Custom
model to our
enabled 98 CustomTM and 98 Custom ProTM models will
give many years of dependable service if cared for properly. The
enabled models contain our exclusive new Anti-Chop Technology, a patent
pending design to help eliminate ball chopping and ensure consistent
performance. Using a new technology that has the front and rear bolt working
independently of each other,
virtually eliminates ball chopping and improves
ball accuracy with less barrel cleaning; and unlike other anti-chop systems,
our system maintains consistent ball velocity shot after shot and does not
have to be re-cocked if the anti-chop technology had to be engaged.
Please take time to read this manual thoroughly and become familiar
w i t h y o u r 9 8 C U S TO M TM m o d e l ’s p a r t s , o p e r a t i o n , a n d s a f e t y
precautions before you attempt to load or fire this marker. If you have
a missing or broken part or need assistance, please contact Tippmann ®
Consumer Relations at 1-800-533-4831 for fast friendly service.
TABLE OF CONTENTS
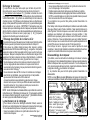
Warning/Caution ........................................................................................... 2
Warning/Caution Barrel Sleeve Installation ........................................... 2
Warning/Liability Statement ....................................................................... 4
Safety is your Responsibility / Familiarize Yourself With Safety ...... 4
Safe Mode = Turning The Safety On (PUSH SAFE) ............................ 4
Fire Mode = Turning The Safety Off (PUSH FIRE) .............................. 4
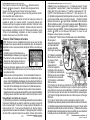
Getting Started ............................................................................................. 6
1. Prepare Marker for Air Supply Cylinder Installation ................... 6
2. Air Supply Cylinder Installation ....................................................... 6
3. Hopper Installation ............................................................................. 7
4. Rate of Fire Adjustments and Troubleshooting ........................... 7
5. Velocity Adjustment ............................................................................ 7
6. Rear Sight Adjustment ....................................................................... 7
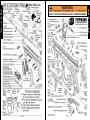
Schematics .................................................................................................. 14
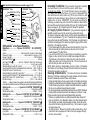
Specifications ............................................................................................. 20
Unloading Your Marker ............................................................................. 21
Air Supply Cylinder Removal ................................................................... 21
Cleaning & Maintenance .......................................................................... 21
Marker Disassembly / Assembly ............................................................. 22
Repairing Air Supply Leaks ..................................................................... 24
Storage ......................................................................................................... 24
Warranty and Repair Policy ..................................................................... 25
Warranty or Repair Procedure ................................................................ 25
Warranty Registration ............................................................................... 25
3
E
N
G
L
I
S
H