1
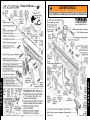
E-Trigger Operating Instructions (continued from page 9)
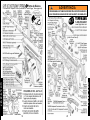
E-Trigger Operating Instructions (continued from page 10)
E-TRIGGER TROUBLESHOOTING - Continued
❏ PROBLEM: You have successfully installed the battery, turned on the ETrigger, installed the air supply and loaded the paintballs and the marker will
not fire. ❏ Check to be sure safety is in "FIRE" position and ❏ make sure
sufficient air supply is hooked up to the marker. If a problem still exists, call
Tippmann® Service Department at 1-800-533-4831.
❏ PROBLEM: the “Ready To Fire” solid Green LED has turned to blinking
red - ❏ The E-Trigger has a Low Battery Indicator feature: the “Ready To
Fire” solid Green LED will turn to blinking red when the battery is low and
needs replaced. ❏ Replace the battery.
❏ PROBLEMS WHEN FIRING: You can fine tune how your marker fires by
making adjustments to the Dwell, Debounce and Rate Of Fire Cap modes. Read
and become familiar with detailed descriptions of problems you may have when
firing and instructions for troubleshooting, tuning and programming to correct
them in the Dwell, DebounceTM and Rate Of Fire sections on pages 10, 11,12 and 13.
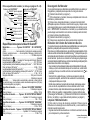
STEP 3: How to program a new Dwell, DebounceTM, Rate Of Fire
Cap or Firing mode setting In the TRIGGER PROGRAMMING
MODE. (Example: Shows how to select a new firing mode).
1) FIRST YOU MUST ENTER INTO THE “TRIGGER PROGRAMMING
MODE:” to access the Trigger Programming Menu: ❏ Make sure the
power is turned off (page 9 step 2). ❏ Press the trigger safety to the FIRE
position. ❏ Pull the trigger and hold it in the back position - as you press
and hold the power button for 1 second (the LED will light red) - then release
first the power button and then the trigger. The LED will stay solid red
indicating the marker is now in the “Trigger Programming Mode” - at Menu
Item number 1.
In the “Trigger Programming Mode”, there are 4 Menu Items, each
identifiable by its LED color which creates the “Programming Menu” sequence:
• Menu Item 1 - Solid Red LED = Dwell (programming mode).
• Menu Item 2 - Solid Green LED = Debounce (programming mode).
• Menu Item 3 - Flickering Green LED = Rate of Fire (ROF) Cap
(programming mode).
• Menu Item 4 - Alternating Green/Orange LED = Firing Mode
(programming mode).
2) TO SELECT A MENU ITEM:
❏ Pull and release the trigger to advance to the next menu item until you
get to the item you want to change. After last item, an additional trigger pull
will restart the menu item sequence. (EXAMPLE:❏ To program a new Firing
Mode, advance to: Alternating Green/Orange LED=Firing Mode).
3) TO CHECK THE MENU ITEM’S CURRENT SETTING:
❏ Pull the trigger and hold it until the LED goes out and then release the
trigger. There will be a 2 second pause and then the LED will flash green ❏ count the number of green flashes to determine the current setting.
EXAMPLE-Firing Mode settings (green LED flashes =):
• 1 LED flash = Semi-auto (2005 NPPL legal).
E-Trigger Operating Instructions
10
(continued on page 11)
• 2 LED flashes = 3 shot Ramping (2005 PSP legal).
• 3 LED flashes = 3 shot Full Auto (2005 NXL legal).
• 4 LED flashes = Auto Response.
• 5 LED flashes = Turbo.
If you decide not to change the item’s setting, ❏ simply do not touch the
trigger at all for 5 seconds. The LED will then blink green/red alternately to
indicate there was no reprogramming, and then it will go back to the
programming menu and the menu item’s setting will not have changed.
❏ You can exit the programming mode by pressing the power button until
the LED turns solid red (❏ then stop pressing button) and LED will turn off.
4) TO CHANGE A MENU ITEM’S SETTING:
Once the LED is done flashing the current setting, there is a 5 second time
period to begin programming the new setting (Note: you do not have to wait
and count the flashes for the current setting, any trigger input immediately
bypasses the flashes and begins programming the new setting). ❏ Pull
and release the trigger the number of times equal to how you wish to program
the item. On each pull of the trigger, the LED will light up red (indicating that
the pull has been detected).
❏ Once you have pulled and released the trigger the number of times necessary
to set the function, wait a few seconds for Programming Verification.
PROGRAMMING VERIFICATION:
• If the programming was successful: The LED will flash red/green/orange
in rapid succession (numerous times) to let you know that the new setting
has been saved. After this, the LED will return to the color representing
what the current programming menu item is. ❏ At this point, you can exit
the programming mode (see below) or you can program other features by
once again pulling and releasing the trigger to toggle between Dwell,
Debounce™ , ROF Cap, and Firing Mode. (Dwell, Debounce™ and Rate of
Fire Cap Programming is described in detail on pages 11, 12 and 13).
• If the programming was unsuccessful, the LED will toggle green/red
alternately to indicate there was a programming error, and it will then return
to the programming menu. If this happens the setting will not have changed
and you will need to ❏ begin programming again at STEP 3: 2). (NOTE:
When adjusting the Firing Mode, if you pull and release the trigger more
than 5 times it will cause a programming error.)
• To exit the Trigger Programming Mode: Turn off the E-TriggerTM, ❏ press
and hold the power button until the LED first flickers red then becomes solid
red, and then release the button.
DWELL, DEBOUNCETM and RATE OF FIRE (ROF) CAP MODES:
The firing mode controls how the marker fires regardless of these 3 mode
settings. Adjust these 3 mode features to fine tune your markers firing as follows.
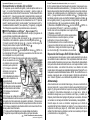
DWELL troubleshooting and tuning / programming: Dwell is the amount
of time that the solenoid will be activated. This time is measured in
milliseconds (1/1000th of a second). The default dwell is 6.0ms. The lowest
E-Trigger Operating Instructions
11
(continued on page 12)
TM
E
N
G
L
I
S
H
TM
TM
TM
TM
E
N
G
L
I
S
H