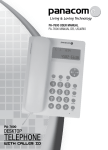
1
PA-7580 USER MANUAL
PA-7580 MANUAL DEL USUARIO
Pg. 1
PA-7580 Desktop Speakerphone with LCD Display
User’s Guide
Thank you for purchasing Panacom’s desktop phone PA-7580.
Please read the manual carefully before operating.
CAUTION
• Do not place product in moisture or hot environment.
• Avoid splashing water or impact on product.
• Overload operation will cause damage and shorten the life of the product.
• Normally clean the speaker using a soft dry cloth. Always before
cleaning, disconnect the power line and all connection cables.
INTRODUCTION
Your Panacom PA-7580 desktop speakerphone is designed to meet
your business needs at home or in an office environment.
Because your time is valuable, and we know you want to use your
phone, not read about it, this user manual presents installation and
basic usage information up front, and discusses advanced features
later in the manual.
Parts Checklist
Your package should contain the following items:
Base unit
Handset
Handset cord
Line cord
Wall Mounting adaptor
User’s manual
PHONE INSTALATION
1) Insert the handset cord into the handset and into the base unit,
2) Apply the caller ID service from your local telecom or on this function. It is a multi-function telephone even no caller ID function.
3) Connect the base unit to the telephone connection outlet using
the line cord.
4) Pick up the handset and you will hear the tone from the exchanger.
5) The phone is ready for use.
Pg. 3
MENU SETTING
Press the SET button to enter the setting status. The LCD will display
“SET 1 DATE”, press UP or DOWN button to review other settings.
Press SET again to modify this setting and press SET again to save
it and go to next setting.
a) Press SET to enter and save
b) Press UP OR DOWN to change the setting values,
c) Press the button DEL to exit.
Setting Date&Time
1) Press SET button to enter into the menu
2) The LCD will show: “SET 1 DATE”
3) Press SET again the LCD will flash year ”2004”.
4) Use UP or DOWN button to adjust the correct Year / Month /Day/
Hour/Minute.
5) Then press SET button to confirm and save the correct
Date&Time.
Setting local area code
After Setting the Date&Ttime, the LCD will show “SET 2 CODE”
1) Press SET to enter into the menu.
2) The LCD will show: “CODE - - - - -“
3) Use UP or DOWN button to set the area code digits
4) Then press SET button to confirm the area code and fo to next
setting.
Setting PABX code
After setting the local area code, the LCD will show “SET 3
PCODE”
1) Press SET to enter into the menu
2) The LCD will show: “PCODE –“
3) Use UP or DOWN button go to set the PABX code.
4) Then press SET button to confirm and go to next setting.
Note:
After setting the PCODE, when calling back the incoming calls, the
phone will dial out the numbers with the PABX Code automatically.
Setting AUTO IP
After setting PABX Code, the LCD will show “SET 4 AUTO IP”
1) Press SET to enter into the menu
2) The LCD will show: “AUTO IP OFF –“
3) Use UP or DOWN button to turn on the setting.
Pg. 4
4) Press SET button and the LCD will display: “INPUT CODE”
5) Input the IP Nº or IP Card Nº and its password.
6) Then press SET button to confirm and go to next setting.
Note:
After setting auto IP function, when calling back or predialing, if the
first digit of the number is “0”, the phone will dial out the IP Nº first
automatically.
Setting Alert Time
After setting AUTO IP, the LCD will show “SET 5 ALERT”
1) Press SET to enter into the menu
2) The LCD will show: “1 00-00 OFF” (First alarm,HH-MM,off/on),
3) Use UP or DOWN button to choose the first/second/third alarm
press SET to enter the setting.
4) .Press UP or DOWN to adjust the alarm time (HH-MM).
5) Press the SET to confirm and go to next setting.
Note:
When the alarm is on, it will keep on ringing for 1 minute. Press any
button to stop ringing.
The first and second alarm is one-off settting. The third one is permanent.
Setting LCD Brightness
After setting the alert, the LCD will show: ”SET 6 LCD”.
1) Press SET to enter into the menu.
The LCD will show: “LCD 3” (there are 5 levels)
2) Use UP or DOWN button to change the LCD brightness.
3) Press SET to confirm and press DEL to exit.
FEATURES
Hands Free function
Press speakerphone button for dialing numbers and conversation.
When new call comes, press speakerphone to start conversation,
press it again to end the call.
Review Caller List
Press UP or DOWN button to view the calls backward/forward. After
it show the last number recorded it will display: “---- END----”.
When receiving incoming calls, the LCD will display “NEW” icon.
When the incoming call number is repeated, the LCD will display
“REP” icon.
Pg. 5
Review Outgoing Call List
Press OUT button to view the last outgoing call made, press it again
to view previously
Make a call from the call’s memory
Press UP or DOWN button to select the number. Then press button
or RD/BACK or pick up the handset to dial out the number
Predialing
While is on-hook enter the phone number to be called, then press
the RD/BACK button to dial out the number.
Press the DEL to delete the current wrong number.
Delete Numbers from List
Press UP or DOWN or OUT buttons to select the number to be deleted. Then press the DEL button to deleted the number. Press the
DEL and hold it for 3 seconds to delete all the list of incoming call or
outgoing call numbers.
Auto Redial
In speaker mode of the line is busy, press RD/BACK button to Autoredial the number. The phone will ring when the line is free.
The interval time is 6 seconds, press any button to stop the autoredialing. The phone will keep on autoredialing until the call is connected. After the seventh ring, the phone will be cut off automatically.
Timer of Call
On conversation, the LCD displays “00-00”. The timer will start when
the line is not busy.
The LCD will keep displaying the conversation time for 3 seconds
after the call ends.
HOLD Function
When you are in conversation you can press HOLD, the other side
will hear music playing. You can put down the handset back to the
base unit. The music will be off when you pick up the handset back
again or press to resume conversation.
DIALING MODE
Before the phone is put in service, you can turn the dialing mode
switch to Pulse (P) or Tone (T) position to be set in accordance with
the dialing method used by your local public telephone exchanger:
NOTE:
T(tone):dual-tone multi-frequency dialing(DTMF)
P(pulse):pulse dialing
Pg. 6
Default: Tone position.
VOLUME RINGER SWITCH
You can adjust the volume of the ringer through the slide on the side
of the base unit. Switch to ‘LO’(low volume),”MED” (medium volume)
or ‘HI’ (high volume) position.
WALL MOUNTABLE
Install the wall mounting adaptor according to the indication on the
bottom of the phone base.
Use a 6 mm drill and 27mm screw to hook when wall mounted.
TROUBLESHOOTING GUIDE
Problem: Called party hears no or weak voice.
Solution: Check the handset and cord connection
Problem: No function
Solution: Unplug the phone, disconnect all cords and reinstall the
phone as written in the manual
Problem: No ringing or dial tone
Solution: Check the line cord connection.
Solution: Check the handset cord connection.
Solution: Check if the telephone line or PABX line is working.
Problem: One ring only and the line is broken
Solution: Check the jumper box.
Solution: Check if there are parallel units on the same line if so remove them.
CARE AND MAINTENANCE
To keep Your Panacom PA-7580 speakerphone working and looking
good, follow these few simple guidelines:
• Avoid putting telephone near heating appliances and devices that
generate electrical noise. (i.e., motors, fluorescent lamps.)
• Telephone should not be exposed to direct sunlight or moisture.
• Avoid dropping the handset and other rough treatment to the phone.
• Clean telephone with a soft cloth. (Remember to first unplug the
phone from the wall outlet.)
• Never use a strong cleaning agent or abrasive powder, as this can
Pg. 7
damage the finish.
• Retain the original packaging for future use.
PANACOM’s SUGGESTION.
At Panacom we strive to get you new technologies that are simple
and friendly. Accordingly to that, we always try to give you exactly
what you are looking for. This is why we have compiled a list of emergency numbers to be ready from the first moment.
Here they are:
In Argentina:
• Any type of emergency: 911
• Medical emergency: 107
• National Firemen Corps: 100
• Police: 101
In Chile:
• Medical emergency: 131
• National Firemen Corps: 132
• Police: 133
In Peru:
• Medical emergency: 117
• National Firemen Corps: 116
• Police: 105
In United Status of America:
• Any type of emergency: 911
In Uruguay:
• Any type of emergency: 911
• Medical emergency: 105
• Police: 109
• National Firemen Corps: 104
If you would like to comment about these lists and suggest new
ones, you are invited to contribute in our website: http://www.panacom.com
Pg. 8
PA-7580 Teléfono de escritorio con Manos Libres y Pantalla
LCD
Guía del Usuario
Gracias por comprar su teléfono Panacom PA-7580 de escritorio
Por favor lea este manual cuidadosamente previo al uso.
CUIDADO
• No exponga el producto a altas temperaturas ni en un ambiente con
humedad elevada.
• Evite los golpes al producto y el contacto con líquidos.
• Sobreexigir las operaciones del producto causará daños y reducción de la vida del producto.
• En caso de limpiar el producto, desconecte siempre la fuente de
energía y el resto de los cables conectados.
INTRODUCCIÓN
Su teléfono con manos libres y pantalla LCD Panacom PA-7580 está
designado para cubrir las necesidades de su negocio ya sea en el
hogar o en un ambiente de oficina.
Dado que su tiempo es valioso, y teniendo en cuenta que sabemos
que usted quiere usar su teléfono y no leer acerca de él, este manual
del usuario presenta la información de instalación y uso básico al principio, y entra en la discusión de rasgos avanzados más adelante.
Contenido del Paquete.
El paquete del teléfono debe tener los siguientes ítems:
1. Unidad Base,
2. Auricular,
3. Cable Rulo de Auricular
4. Cable de línea RJ11
5. Adaptador para montar a la pared
6. Guía del Usuario
INSTALACIÓN DEL TELÉFONO
1) Inserte el cable rulo del auricular en el auricular y en la unidad base.
2) Active el servicio de identificador de llamadas de la compañía de
telefonía que le corresponde.
3) Conecte la unidad base con la ficha de teléfono usando el cable
Pg. 9
de línea RJ11.
4) Levante el auricular y podrá oír el tono de la línea
5) El teléfono está listo para utilizarse.
CONFIGURACIÓN DEL MENU
Presione el botón SET para ingresar al estado de configuración. El
LCD mostrará “SET 1 DATE”, presione el botón ARRIBA (UP) o ABAJO (DOWN) para visualizar las otras configuraciones. Presione el botón SET de nuevo para modificar la configuración actual y presione
SET para guardar y moverse a la siguiente configuración.
a) Presione SET para ingresar y para guardar
b) Presione ARRIBA o ABAJO para cambiar los valores de la configuración
c) Presione el botón DEL para salir
Configuración de Fecha y Hora
1) Presione el botón SET para ingresar al menú
2) La Pantalla LCD mostrará: “SET 1 DATE”
3) Presione SET otra vez y en la pantalla mostrará el año ”2004” destellando.
4) Use botón de ARRIBA o ABAJO para ajustar el año/Mes/Día/Hora/
Minuto correcto.
5) Luego presione SET para confirmar la fecha y hora y continuar con
la siguiente configuración.
Configuración del código de área local
Luego de configurar la fecha y hora, la pantalla LCD mostrará “SET
2 CODE”
1) Presione el botón SET para ingresar al menú.
2) La Pantalla LCD mostrará: “CODE - - - - -“
3) Use botón de ARRIBA o ABAJO para ajustar los dígitos del código de área
4) Luego presione SET para confirmar el código de área y continuar
con la siguiente configuración
Configuración del código PBX (central telefónica secundaria)
Luego de configurar el código de área local, la pantalla LCD mostrará
“SET 3 PCODE”
1) Presione el botón SET para ingresar al menú.
2) La Pantalla LCD mostrará: “PCODE –“
3) Use botón de ARRIBA o ABAJO para ajustar el código de PBX
4) Luego presione SET para confirmar el código PBX y continuar con
la siguiente configuración
Note:
Luego de ajustar el PCODE, cuando realice una llamada a un número
Pg. 10
registrado en llamadas entrantes, el teléfono marcará el número con
el código PBX automáticamente.
Configuración de AUTO IP
Luego de configurar el código PBX, la pantalla LCD mostrará “SET 4
AUTO IP”
1) Presione el botón SET para ingresar al menú.
2) La Pantalla LCD mostrará: “AUTO IP OFF –“
3) Use botón de ARRIBA o ABAJO para encender la configuración
4) Presione SET y la pantalla LCD mostrará: “INPUT CODE”
5) Ingrese el Nº de IP o Nº de Tarjeta IP y la contraseña.
6) Luego presione SET para confirmar el AUTO IP y continuar con la
siguiente configuración
Note:
Luego de confirmar la función auto IP, cuando realice una llamada, si
el primer digito del número es “0” el teléfono marcará primero el Nº
de IP
Configuración de ALARMA
Luego de configurar AUTO IP, la pantalla LCD mostrará “SET 5 ALERT”
1) Presione el botón SET para ingresar al menú.
2) La Pantalla LCD mostrará: “1 00-00 OFF” (primera alarma,HHMM,apagado/encendido),
3) Use botón de ARRIBA o ABAJO para elegir primera/segunda/tercer
alarma y presione SET para ingresar al ajuste.
4) Presione ARRIBA o ABAJO para ajustar la hora de la alarma (HH-MM).
5) Luego presione SET para confirmar la alarma y continuar con la
siguiente configuración
Note:
Cuando la alarma está encendida, continuará timbrando por 1 minuto.
Presione cualquier botón para detener la alarma.
La primera y segunda alarma puede encenderse y apagarse. La tercera es permanente.
Configuración del brillo del LCD
Luego de configurar la Alarma, la pantalla LCD mostrará: ”SET 6 LCD”.
1. Presione el botón SET para ingresar al menu.
2. La Pantalla LCD mostrará: “LCD 3” (Hay 5 niveles)
3. Use botón ARRIBA o ABAJO para cambiar el brillo del LCD.
4. Presione SET para confirmar y presione DEL para salir.
Pg. 11
CARACTERÍSTICAS
Función Manos Libres
Presione el botón de Manos Libres para marcar y establecer una conversación.
Al recibir llamadas entrantes, presione el botón Manos Libres para
atender el llamado, presiónelo nuevamente para finalizarlo.
Revisar la Lista de llamadas entrantes
Presione el botón ARRIBA o ABAJO para visualizar las llamadas (hacia delante y hacia atrás). Luego de mostrar el ultimo número guardado se mostrará en la pantalla: “---- END----”.
Cuando se está recibiendo llamadas, la pantalla LCD mostrará el icono “NEW”. Cuando el número del llamado entrante se repite, la pantalla LCD mostrará el icono “REP”.
Revisar la Lista de llamadas salientes
Presione el botón OUT para visualizar la última llamada realizada, presione el botón nuevamente para ver el número de llamada previa.
Realizar una llamada desde la lista de llamadas
Presione ARRIBA o ABAJO para seleccionar el número. Luego presione o RD/BACK o levante el auricular para marcar el número
Función de Pre-marcado
Cuando el auricular está colgado, ingrese el número que desea llamar,
luego presione RD/BACK para realizar la llamada.
Presione DEL para borrar si el número actual está equivocado.
Eliminar números de la Lista
Presione ARRIBA o ABAJO o OUT para seleccionar el número que
desea eliminar. Luego presione DEL para eliminar el número. Presione
DEL y manténgalo presionado por 3 segundos para eliminar toda la
lista de llamadas entrantes o salientes.
Discado Automático
En modo manos libres, si la línea está ocupada, presione RD/BACK
para discar automáticamente. El teléfono timbrará cuando la línea esté
libre. El teléfono continuará discando hasta que conecte la llamada
El intervalo de tiempo es de 6 segundos, presione cualquier botón
para detener el discado automático.. Luego del séptimo timbrado, se
detendrá la función automáticamente.
Temporizador de llamada
Durante la conversación, la pantalla LCD muestra “00-00”. El temporizador comenzará cuando la llamada no esté ocupada.
La pantalla LCD mostrará el temporizador de la llamada hasta por 3
Pg. 12
segundos luego que la conversación finalizó.
Función HOLD
Cuando uno se encuentra en una llamada, puede presionar HOLD
para que del otro lado se escuche una música de espera. Podrá
colgar el auricular en la unidad base sin que se corte la llamada. La
música se detendrá cuando se vuelva a descolgar el auricular o al
presionar .
MODE DE DISCADO
Antes de utilizar el teléfono, puede cambiar el modo de discado a la
posición de Pulsos (P) o Tono (T) de acuerdo al método utilizado por
el servicio de su empresa de telefonía
NOTA:
Por defecto: Discado por Tonos.
VOLUMEN DEL TIMBRE
Puede ajustar el volumen del timbre desde el costado de la unidad base. Puede cambiar entre la posición ‘LO’(volumen bajo),
“MED”(volumen medio) y o ‘HI’ (volumen alto)
MONTABLE A LA PARED
Instale el adaptador para montar a la pared de acuerdo a lo indicado
debajo de la unidad base del teléfono.
Use un taladro de 6mm y un tornillo de 27mm para colgarlo cuando
lo monte en la pared.
GUIA DE RESOLUCIÓN DE PROBLEMAS
Problema: La persona a la que llamas escucha bajo o no escucha tu voz.
Solución: Verifica la conexión del cable rulo con el auricular.
Problema: No Funciona
Solución: Desconecte el teléfono, desconecte todos los cables y
reinstale el teléfono como se indica en el manual. Si el problema persiste contáctese con el fabricante.
Problema: No suena el timbre ni hay tono de llamado
Solución: Verifica la conexión del cable de línea.
Solución: Verifica la conexión del cable con el auricular.
Solución: Verifica si la línea telefónica funciona correctamente.
Problema: Suena el timbre una vez y luego la línea se pierde.
Solución: Verifica si hay más de una unidad telefónica conectada a
Pg. 13
esa línea, si es así remuévala.
CUIDADO Y MANTENIMIENTO
Para mantener su teléfono Panacom en buen estado de funcionamiento y con una buena apariencia, observe las pautas simples siguientes:
• Evite colocar el teléfono cerca de aparatos calentadores y dispositivos que generan ruido eléctrico (es decir, motores, lámparas fluorescentes, etc.)
• No exponga el teléfono a la luz solar directa ni a la humedad.
• Evite dejar caer el auricular y evite cualquier otro tratamiento brusco
del teléfono.
• Limpie el teléfono con un paño suave. (Recuerde desconectar primero el teléfono del contacto de pared.)
• Nunca utilice un agente limpiador fuerte ni polvo abrasivo, ya que
puede dañar el acabado.
• Conserve los materiales originales de empaque para utilizarlos en
el futuro.
RECOMENDACIÓN DE PANACOM.
En Panacom nos esforzamos para ofrecerte nuevas tecnologías manteniendo la simplicidad del producto agregando valor a tu compra. De
acuerdo con esto, tratamos de darte exactamente lo que cada uno
busca. Es por eso que hemos compilado listado de números de emergencia para que puedas tenerlos a mano desde el primer momento.
En Argentina:
• Todo tipo de emergencias: 911
• Emergencias médicas: 107
• Bomberos: 100
• Policía: 101
En Chile:
• Ambulancia: 131
• Bomberos: 132
• Carabineros: 133
En Estados Unidos de América:
• Todo tipo de emergencias: 911
Pg. 14
En Perú:
• Ambulancias: 117
• Bomberos: 116
• Policía: 105
En Uruguay:
• Todo tipo de emergencias: 911
• Ambulancias: 105
• Bomberos: 104
• Policía: 109
Si quieres comentar acerca de estos listados y sugerir nuevos, estás
invitado a contribuir en nuestro sitio Web: http://www.panacom.com
Pg. 15
INTERNATIONAL WARRANTY
Terms and Conditions
1. PANACOM warrants the operation of this product to be free from
any manufacturing and/or material defect for a period of 12 months
from the date of purchase by the user.
2. This warranty is limited to the repair and/or replacement of this
product, according to our own criterion, free of charge within the
stipulated term and it does not extend to consequential or incidental
damages to other products that may be used with this unit.
3. The warranty shall be voided in the following cases: a) repair or
attempt to repair by third parties not authorized by the company. b)
in case of performing any type of cut in connection cables, plugs,
connectors, or other adapters different from the original ones provided by the company.
4. To make this warranty effective, you shall contact the Authorized
Service Center of your country and they shall carry out the pertinent procedure; this information is available at www.panacom.com.
In order to start the necessary procedure to get the warranty, you
shall hand in the Original Purchase Invoice where the purchase date,
dealer name and product identification shall be stated clearly.
5. Transportation, freight, stay and/or insurance expenses, if any, are
not covered by this warranty.
MODEL...................................................................................
SOLD BY.................................................................................
DATE.......................................................................................
PURCHASED BY....................................................................
ADDRESS...............................................................................
STATE..........................................zip code...........................
Pg. 16
Authorized Service Centers:
Argentina
Elese Telefonía
Av. Santa Fé 2393 C1123AAF, C.A.B.A
Phone: (54 11) 45 82 66 38
Fax: (54 11) 45 82 76 96
E-mail: [email protected]
Chile
Importaciones y Exportaciones X-Tech Ltda.
San Alfonso 637, Santiago de Chile
Phone/Fax: (56 2) 689-1721
E -mail: [email protected]
Uruguay
Comunica S.R.L.
Constituyente 1873 C.P. 11.200 - Montevideo
Phone: (598 2) 403 5480
E-mail: [email protected]
USA
Amaury International Corp
7286-90 NW 70th Street - Miami, FL 33166
Phone: 1(305) 887-7100
Fax: 1 (305) 887-9177
E -mail: [email protected]
Pg. 17
GARANTIA INTERNACIONAL
Términos y Condiciones
1. PANACOM garantiza el funcionamiento de este producto ante cualquier defecto de fabricación y/o vicio de material por el término de 12
meses contado a partir de la fecha de compra por parte del usuario.
2. Esta garantía se limita a la reparación y/o reemplazo de este producto, a nuestro criterio, sin cargo alguno dentro del plazo de vigencia y no se extiende a daños concecuentes o incidentales hacia
otros productos que fueran utilizados con esta unidad.
3. La garantía queda anulada ante: a) reparación o intento de reparación por terceros no autorizados por la compañía. b) en el caso de
realizar cualquier tipo de corte de los cables de conexión, fichas, conectores, u otros adaptadores distintos de los originales de fábrica.
4. Para hacer valer esta garantía se deberá remitir al centro de servicios autorizado de su país quienes gestionarán la misma, dicha
información se encuentra www.panacom.com. Para gestionar dicha
garantía deberá presentar la Factura Original de compra en la cual
deberá constar claramente la fecha de compra, nombre del comercio e indentificación del producto.
5. No quedan cubiertos por esta garantía gastos de traslado, flete,
estadía, y/o seguro si los hubiera.
MODELO..................................................................................
VENDIDO POR........................................................................
FECHA.....................................................................................
COMPRADO POR...................................................................
DOMICILIO..............................................................................
LOCALIDAD............................................CP............................
Pg. 18
Centro de Servicios Autorizado:
Argentina
Elese Telefonía
Av. Santa Fé 2393 C1123AAF, C.A.B.A Phone:
(54 11) 45 82 66 38
Fax: (54 11) 45 82 76 96
E-mail: [email protected]
Chile
Importaciones y Exportaciones X-Tech Ltda.
San Alfonso 637, Santiago de Chile
Phone/Fax: (56 2) 689-1721
E -mail: [email protected]
Uruguay
Comunica S.R.L.
Constituyente 1873 C.P. 11.200 - Montevideo
Phone: (598 2) 403 5480
E-mail: [email protected]
USA
Amaury International Corp
7286-90 NW 70th Street - Miami, FL 33166
Phone: 1(305) 887-7100
Fax: 1 (305) 887-9177
E -mail: [email protected]
Pg. 19
Pg. 20