1
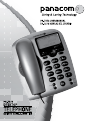
Pg. 1
PA-7272 - USER MANUAL
Thanks for purchasing Panacom Telephone with Caller ID PA-7272.
Please read this manual carefully before using this Telephone.
• Make sure to put your phone on dry place, with ventilation and without
corrosive air presence.
• Put 3 AAA batteries (Alcalines recommended) to visualize the LCD
screen. IF screen LCD cannot visualize correctly, please change
batteries in order to ensure the proper work of the unit.
• Before starting to use your telephone, cintact the telephone service company for the caller ID service. Please disconnect any PABX
or device that might be causing some inconvenient to receive calls!
FEATURES
• Dual System with Incoming Caller ID (FSK/DTMF) even with call-waiting.
• 30 incoming call memories, call back function.
• Revising y redialing of the last 5 outgoing calls and duration time
revising of each conversation.
• 35 VIP memory allocations to storage important telephone numbers.
• 8 normal ringtones and 1 VIP ringtone.
• Local Area Code filter.
• Phone Number Pre-dialing and editing.
• LCD Screen Pantalla LCD with indication of year, month, date
and time.
• Long Distance Calls Blocking Function.
• P/T Function(pulse/tone) and Time
• Alarm Function
• Músic on Hold
OPERATION:
1. Ringer Selection
With earset hung-up, press HOLD key, the screen will deploy the legend RING 1-8, which it means that exists 8 ringtones to select. Choose
the desired ringtone pressing HOLD continuously. When the screen deploys the legend RINGER OFF, it will mean that sound is disabled.
2. Set UP
With earset hung-up, press SET to enter setup menu, the LCD
Pg. 3
screen will deploy the legend SET 1 DATE, press the UP/DOWN key
in order to select different options. Press SET key again to confirm
your election. Use UP/DOWN key to select the way you might need.
After complete the set-up process, press SET key and skip to the
next item. To exit the menú, press DEL key.
On pressing SET (With earset hung-up), you will be managing the
next functions:
Operations Functions settings
DATE/TIME
The LCD screen will deploy SET 1 DATE, press SET key to enter this
function. The number for the year will start to blink, use UP/DOWN key
to select the right one, then press SET key to skip next function.
AREA CODE
The LCD screen will deploy SET 2 CODE, Press SET key again to
confirm your election the screen will show the word ACODE, press
the SET key to enter this function. Use UP/DOWN key to select the
value, then press SET key to skip next function.
The area code can be used to filter this code from incoming calls.
For example, if area code = 75 when exists an incoming call with 75
6554556, it will show on the screen only as 655 4556.
PABX CODE (Private Automatic Branch Exchange)
The LCD screen will deploy SET 3 PCODE, press SET key to enter
this function. The LCD screen will deploy PCODE, Use UP/DOWN
key to select the value, then press SET key to skip next function.
Cuando PABX code is programmed, for example ‘0’ to ‘9’, the telephone automatically will redial that code and will make a pause of 2
seconds followed by the external number (must be over 5 digits).
AUTO-IP
The LCD screen will deploy SET 4 AUTO IP, press SET key to enter
this function.. The LCD screen will deploy AUTO IP OFF and OFF
will blink, Use UP/DOWN key to select the value, then press SET
key to skip next function. When the LCD screen deploys AUTO IP
Pg. 4
ON, press SET key. Then the LCD screen will deploy INPUT CODE
so you can enter the IP numbers. Use DEL key to correct any wrong
number. Then restore all the IP numbers, press SET key to skip next
item. The outgoing will automatically use the IP mode.
Auto IP function allows you replacing a secuence of numbers with
only a 0 (zero). For example, when you set 1455 as Auto IP, when you
need to dial 1455, just dial 0 at beggining (pre-dial mode), 0 2334565
will be dialed as 1455 2334565.
MODE P/T (Pulse/Tone)
The LCD screen will deploy SET 5 P-T, press SET key to enter this function. The LCD screen will deploy TONE. Use UP/DOWN to switch it to
PULSE, presione la tecla SET para desplazarse al siguiente ítem.
ANTI-STEAL
The LCD screen will deploy SET 6 ALAR, press SET key to enter this
function.. The LCD screen will deploy STEAL OFF. Use UP/DOWN to
switch it to ON, press SET key and skip to the next item.
CLOCK
The LCD screen will deploy SET 7 ALERT press SET key to enter this
function. The LCD screen will deploy 1 00-00 OFF, which simbolize
three kind of alarms. Press UP/DOWN key to set the desired alarm.
The phone will ring at the set time. Select ON and press SET key to exit.
3. Incoming Call Reception:
Whenever you have an incoming call, the unit will automatically deploy
on the screen the number of the caller, date and time, and so the serial
number (within is a call #1 or #2). If the income call is set on private
mode it will visualized as “__p__”; it will visualized as “__0__” if it is
impossible to determine the caller number, it will visualized as “—E—“
if caller signal contains any kind of error.
4. Function Keys Operation:
UP & DOWN Key
Despite of the mode selected, press UP/DOWN key in order to check
all incoming numbers.if there’s no one, the unit will show END. The
unit can receive telephone numbers up to 16 dígits.
Pg. 5
OUT key (exit)
Despite of the mode selected, press OUT to check all outcoming
calls and the time there were made. Use UP/DOWN key to select
the desired number from the outgoing call number. Press the key
CALLBACK to dial the selected number.
DEL (Delete)
Despite of the mode selected, whenever you check incoming or outgoing calls, press DEL key to delete the number you’re controlling.
Press and keep it pressed for 4 seconds and will be erased. When
you use the predial function, press DEL key to delete all the digits
one by one. When you enter an IP number or a keyword, use DEL key
to erase the wrong digit.
CALLBACK
With the handset hung, press this key to redial the last dialed number. With the handset offed-hook, pre-dial the number, then press
CALLBACK.
When you check incoming or outcoming, press the CALLBACK key
to get automatically and dial the number at once.
FLASH (600ms)
With the handset offed-hook, press this key during one second to
cut automatically, then press REDIAL key or dial other number.
VIP Key
A) Press PAUSE/VIP to add or cancel VIP phonecalls when you’re
checking incoming or outcoming phonecalls. The VIP numbers are
identified with a lock.
B) VIP number cannot be individually erased. To erase all VIP numbers,
press all VIP numbers, press and keep pressed DEL key for 4 seconds.
C) If you receive a new phonecall and the memory VIP is full, the
normal and VIP will be replaced.
The unit will use a VIP ringtone if the incoming call matches to a VIP
number. Make sure the batteries are installed.
HOLD (Wait)
With the handset hung, press HOLD to insert music when the phonPg. 6
ecall be holded.
PAUSE
With the handset offed-hook, press PAUSE key to add a 4 seconds
pause. For example, 9P8 and inserts a pause of 4 seconds between
9 and 8.
BRIGHT
With the handset hung, press BRIGHT to change LCD contrast. The
unit counts with 5 levels and 5 is the strongest one.
Blocking Function (to avoid the dialing of Long Distance Calls).
It could be dialed any number if the key is in red position; and it wont be possible to dial any number beggining with 0 if the key is in green position.
PANACOM’s RECOMENDATION.
At Panacom we strive to get you new technologies that are simple
and friendly. Accordingly to that, we always try to give you exactly
what you are looking for. This is why we have compiled a list of emergency numbers to be ready from the first moment.
Here they are:
In Argentina:
• Any type of emergency: 911
• Medical emergency: 107
• National Firemen Corps: 100
• Police: 101
In Chile:
• Medical emergency: 131
• National Firemen Corps: 132
• Police: 133
In Perú:
• Medical emergency: 117
• National Firemen Corps: 116
• Police: 105
Pg. 7
In United Status of America:
• Any type of emergency: 911
In Uruguay:
• Any type of emergency: 911
• Medical emergency: 105
• Police: 109
• National Firemen Corps: 104
If you would like to comment about these lists and suggest new
ones, you are invited to contribute in our website:
http://www.panacom.com
Pg. 8
PA-7272 - Manual del Usuario
Gracias por la compra de su Teléfono con Identificador de Llamada
PANACOM PA-7272. Por favor lea este manual cuidadosamente antes de utilizar este Teléfono, para seguir las mejores pautas tendientes a ofrecer el mejor servicio.
• Asegúrese de ubicar el teléfono en lugar seco, con ventilación y sin
presencia de aire corrosivo.
• Instale 3 pilas AAA (Se recomienda utilizar Pilas Alcalinas) para
visualizar la pantalla LCD. Si la pantalla LCD no se puede visualizar
correctamente, por favor cambie las pilas para asegurar el normal
funcionamiento de la unidad.
• Antes de poner en funcionamiento la unidad, por favor controle si se
ha solicitado el servicio de identificación de llamadas a la compañía de
telefonía. Por favor desconecte cualquier central telefónica o dispositivo que pudiere causar alguna inconveniente para recibir llamadas.
CARACTERÍSTICAS
• Sistema dual con Identificador de llamada entrante (FSK/DTMF)
aún con llamada en espera.
• 30 memorias de llamadas entrantes, función call back (devolución
de llamadas)
• Revisión y remarcación de las 5 últimas llamadas salientes y revisión del tiempo de duración de la conversación
• 35 locaciones de Memorias VIP para almacenar números telefónicos importantes
• 8 tonos normales de timbre y 1 tono VIP
• Filtro de código de área local
• Pre-marcación y edición de número telefónico
• Pantalla LCD con indicación del año, mes, fecha y hora
• Función de Bloqueo del discado directo internacional (DDI)
• Función P/T(pulso/tono) y hora
• Función Alarma
• Música en espera
OPERACIÓN
1. Selección del timbre:
Con el auricular colgado, presione la tecla HOLD, la pantalla desplePg. 9
gará la leyenda RING 1-8, lo cual significa que existen ocho tonos de
timbre para seleccionar. Elija el tono de timbre preferido presionando
en forma continua la tecla HOLD. Cuando la pantalla despliegue la
leyenda RINGER OFF, significa que el sonido estará deshabilitado.
2. Configuración:
Con el auricular colgado, presione la tecla SET para ingresar al menú de
configuración, la pantalla LCD del teléfono desplegará la leyenda SET 1
DATE, presione la tecla UP/DOWN para seleccionar las diferentes opciones.
Presione nuevamente la tecla SET para confirmar la elección. Utilice la tecla
UP/DOWN para seleccionar el modo que necesite.
Luego de completar el proceso de configuración, presione la tecla
SET para dirigirse al siguiente ítem. Para salir del menú, presione la
tecla DEL. Al presionar la tecla SET (con el auricular sobre la base),
usted podrá seleccionar las siguientes funciones:
CONFIGURACIÓN DE LAS FUNCIÓNES DE OPERACION
DÍA/HORA
La pantalla LCD desplegará SET 1 DATE, presione la tecla esta función. El número correspondiente al año comenzará UP/DOWN para
seleccionar el correcto, luego presione la siguiente función.
CÓDIGO ÁREA
La pantalla LCD desplegará SET 2 CODE, presione la elección, la pantalla mostrará la palabra ACODE, presione ingresar en esta función.
Utilice la tecla UP/DOWN para luego presione la tecla SET para pasar
a la siguiente El Código de Área se puede utilizar para filtrar dicho
entrantes. Por ejemplo, si el código de área = 75 cuando entrante con
75 6554556, se mostrará en la pantalla solamente
CÓDIGO PABX
(Central automática privadaconectada a la red pública)
La pantalla LCD desplegará SET 3 PCODE, presione la esta función.
La pantalla desplegará PCODE.
AUTO-IP
La pantalla LCD desplegará SET 4 AUTO IP, presione en esta función.
La pantalla LCD desplegará AUTO IP tecla UP/DOWN para seleccioPg. 10
nar el valor. Cuando la pantalla AUTO IP ON, presione la tecla SET.
Luego la pantalla CODE para que usted ingrese los números de IP.
Utilice un ingreso erróneo. Luego de ingresar todos los números SET
para pasar al siguiente ítem. La llamada saliente el modo IP.
La función Auto IP le permite reemplazar una secuencia 0. Por ejemplo, al Configurar 1455 como Auto IP, cuando 1455, solo marque 0 al
principio (modo pre-discado), 1455 2334565.
MODO P/T
(Pulso/Tono)
La pantalla LCD desplegará SET 5 P-T, presione la tecla esta función.
La pantalla LCD desplegará TONE (TONO). para cambiarlo a PULSE
(PULSO), presione la tecla SET siguiente ítem.
ANTI-ROBO
La pantalla LCD desplegará SET 6 ALAR, presione la esta función. La
pantalla LCD desplegará STEAL OFF. para cambiarlo a ON, presione
la tecla SET para pasar (Nota: No seleccione “ON” si usted necesita
una extensión/contrario la extensión no se podrá utilizar)
RELOJ DESPERTADOR
La pantalla LCD desplegará SET 7 ALERT, luego presione ingresar en
esta función. La pantalla LCD desplegará simboliza tres tipos de alarma. Presione la tecla UP/DOWN alarma deseada. El teléfono sonará a
la hora pre-establecida. presione la tecla SET para salir.
3. Recepción de llamadas entrantes:
Al haber una llamada entrante, la unidad automáticamente desplegará en la pantalla el número de la llamada, fecha y hora, y también
el número serial (si es llamada 1, 2 etc.). Si la llamada entrante está
configurada en modo privado, la misma se visualizará como “__p__”;
se visualizará “__0__” si es imposible determinar el número; se visualizará “—E—“si la señal de llamada contiene algún error.
4. Operación de las teclas de función:
Tecla UP y DOWN
En cualquier modo, presione la tecla UP/DOWN para chequear
todos los números de llamadas entrantes. Si no hay ningún número de llamada entrante, la unidad mostrará END (FIN). La unidad
Pg. 11
puede recibir números telefónicos de hasta 16 dígitos.
Tecla OUT (Salida)
En cualquier modo, presione la tecla OUT para chequear los números
de llamadas salientes y la hora en que se realizaron. Utilice la tecla
UP/DOWN para seleccionar números de llamadas salientes. Presione
la tecla CALLBACK para marcar el número seleccionado.
Tecla DEL (Borrar)
En cualquier modo, al chequear tanto las llamadas salientes como
entrantes, presione la tecla DEL para borrar el número que usted esté
controlando. Presione y mantenga presionada la tecla DEL durante
4 segundos y se borrarán todas los números de llamadas entrantes
y salientes. Cuando utilice la función pre-discado, presione la tecla
DEL para borrar los dígitos uno a uno. Cuando ingrese un número IP o
clave, utilice la tecla DEL para borrar el dígito equivocado.
Tecla CALLBACK
Con el auricular sobre la base, presione esta tecla para remarcar el último número discado. Con el auricular descolgado, pre-disque el número,
luego presione la tecla CALLBACK.
Al revisar el número telefónico entrante o saliente, presione la tecla CALLBACK para obtener automáticamente y discar directamente el número.
Tecla FLASH (600ms)
Con el auricular descolgado, presione esta tecla durante un segundo
para cortar de manera automática, luego presione la tecla REDIAL o
disque otro número.
Tecla VIP
A) Presione la tecla PAUSE/VIP para agregar y cancelar llamadas VIP
cuando controle las llamadas entrantes y salientes. Los números VIP
están identificados con una cerradura.
B) El número VIP no se puede eliminar en forma individual. Para borrar
todos los número VIP, presione y mantenga presionada la tecla DEL
durante 4 segundos.
C) Si usted recibe una nueva llamada y la memoria VIP está llena, se
reemplazará el número normal y VIP.
La unidad utilizará un timbre VIP si la llamada entrante es corresponde
a un número VIP. Asegurarse de que las pilas estén instaladas.
Pg. 12
Tecla HOLD (Espera)
Con el auricular sobre la base, presione la tecla HOLD para ingresar
música cuando la llamada se encuentre retenida.
Tecla PAUSE (Pausa)
Con el auricular descolgado, presione la tecla PAUSE para agregar
una pausa de 4 segundos. Por ejemplo, 9P8 y se ingresa una pausa
de 4 segundos entre el 9 y el 8.
Tecla BRIGHT (Brillo)
Con el auricular sobre la base, presione la tecla BRIGHT para cambiar
el contraste de la pantalla LCD. La unidad cuenta con 5 niveles y el
nivel 5 es el de mayor contraste
FUNCIÓN DE BLOQUEO DE DDI
Se podrá marcar cualquier número si la tecla se encuentra en rojo;
no se podrá marcar ningún número que comience con 0 si la tecla se
encuentra en verde.
RECOMENDACIÓN DE PANACOM.
En Panacom nos esforzamos para ofrecerte nuevas tecnologías manteniendo la simplicidad del producto agregando valor a tu compra. De
acuerdo con esto, tratamos de darte exactamente lo que cada uno
busca. Es por eso que hemos compilado listado de números de emergencia para que puedas tenerlos a mano desde el primer momento.
En Argentina:
• Todo tipo de emergencias: 911
• Emergencias médicas: 107
• Bomberos: 100
• Policía: 101
En Chile:
• Ambulancia: 131
• Bomberos: 132
• Carabineros: 133
En Estados Unidos de América:
Pg. 13
• Todo tipo de emergencias: 911
En Perú:
• Ambulancias: 117
• Bomberos: 116
• Policía: 105
En Uruguay:
• Todo tipo de emergencias: 911
• Ambulancias: 105
• Bomberos: 104
• Policía: 109
Si quieres comentar acerca de estos listados y sugerir nuevos, estás
invitado a contribuir en nuestro sitio web: http://www.panacom.com .
Pg. 14
INTERNATIONAL WARRANTY
Terms and Conditions
1. PANACOM warrants the operation of this product to be free from
any manufacturing and/or material defect for a period of 12 months
from the date of purchase by the user.
2. This warranty is limited to the repair and/or replacement of this
product, according to our own criterion, free of charge within the
stipulated term and it does not extend to consequential or incidental
damages to other products that may be used with this unit.
3. The warranty shall be voided in the following cases: a) repair or
attempt to repair by third parties not authorized by the company. b)
in case of performing any type of cut in connection cables, plugs,
connectors, or other adapters different from the original ones provided by the company.
4. To make this warranty effective, you shall contact the Authorized
Service Center of your country and they shall carry out the pertinent procedure; this information is available at www.panacom.com.
In order to start the necessary procedure to get the warranty, you
shall hand in the Original Purchase Invoice where the purchase date,
dealer name and product identification shall be stated clearly.
5. Transportation, freight, stay and/or insurance expenses, if any, are
not covered by this warranty.
MODEL...................................................................................
SOLD BY.................................................................................
DATE.......................................................................................
PURCHASED BY....................................................................
ADDRESS...............................................................................
STATE..........................................zip code...........................
Pg. 15
Authorized Service Centers:
Argentina
Elese Telefonía
Av. Santa Fé 2393 C1123AAF, C.A.B.A
Phone: (54 11) 45 82 66 38
Fax: (54 11) 45 82 76 96
E-mail: [email protected]
Chile
Importaciones y Exportaciones X-Tech Ltda.
San Alfonso 637, Santiago de Chile
Phone/Fax: (56 2) 689-1721
E -mail: [email protected]
Uruguay
Comunica S.R.L.
Constituyente 1873 C.P. 11.200 - Montevideo
Phone: (598 2) 403 5480
E-mail: [email protected]
USA
Amaury International Corp
7286-90 NW 70th Street - Miami, FL 33166
Phone: 1(305) 887-7100
Fax: 1 (305) 887-9177
E -mail: [email protected]
Pg. 16
GARANTIA INTERNACIONAL
Términos y Condiciones
1. PANACOM garantiza el funcionamiento de este producto ante cualquier defecto de fabricación y/o vicio de material por el término de 12
meses contado a partir de la fecha de compra por parte del usuario.
2. Esta garantía se limita a la reparación y/o reemplazo de este producto, a nuestro criterio, sin cargo alguno dentro del plazo de vigencia y no se extiende a daños concecuentes o incidentales hacia
otros productos que fueran utilizados con esta unidad.
3. La garantía queda anulada ante: a) reparación o intento de reparación por terceros no autorizados por la compañía. b) en el caso de
realizar cualquier tipo de corte de los cables de conexión, fichas, conectores, u otros adaptadores distintos de los originales de fábrica.
4. Para hacer valer esta garantía se deberá remitir al centro de servicios autorizado de su país quienes gestionarán la misma, dicha
información se encuentra www.panacom.com. Para gestionar dicha
garantía deberá presentar la Factura Original de compra en la cual
deberá constar claramente la fecha de compra, nombre del comercio e indentificación del producto.
5. No quedan cubiertos por esta garantía gastos de traslado, flete,
estadía, y/o seguro si los hubiera.
MODELO..................................................................................
VENDIDO POR........................................................................
FECHA.....................................................................................
COMPRADO POR...................................................................
DOMICILIO..............................................................................
LOCALIDAD............................................CP............................
Pg. 17
Centro de Servicios Autorizado:
Argentina
Elese Telefonía
Av. Santa Fé 2393 C1123AAF, C.A.B.A Phone:
(54 11) 45 82 66 38
Fax: (54 11) 45 82 76 96
E-mail: [email protected]
Chile
Importaciones y Exportaciones X-Tech Ltda.
San Alfonso 637, Santiago de Chile
Phone/Fax: (56 2) 689-1721
E -mail: [email protected]
Uruguay
Comunica S.R.L.
Constituyente 1873 C.P. 11.200 - Montevideo
Phone: (598 2) 403 5480
E-mail: [email protected]
USA
Amaury International Corp
7286-90 NW 70th Street - Miami, FL 33166
Phone: 1(305) 887-7100
Fax: 1 (305) 887-9177
E -mail: [email protected]
Pg. 18
Pg. 20