1
 MAINTENANCE Inspecting Gaskets An airtight seal at the door opening is crucial to proper stove performance. Any air leakage at this area can cause an over‐fire situation and is therefore a serious safety threat. Because of this, gaskets should always be maintained in good condition. Gasket tightness can be checked using the “dollar‐bill” method: •
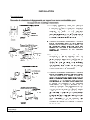
Place a dollar bill between the gasket and the stove body (at the location where the gasket meets the stove). •
Close and tighten the door then attempt to pull the dollar bill out. If the dollar bill slides in and out easily, the gasket needs to be replaced. This test should be repeated around the entire gasket perimeter, as gaskets will sometimes seal tightly on one side, but will be worn and seal poorly on another side. •
Perform this test around the entire perimeter of the door, and visually inspect the window gasket for any leaks. Leaks in the window gasket can generally be located by following the prevailing soot trails left on the window after burning the unit. •
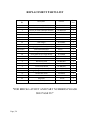
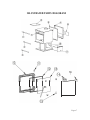
If any area fails the test, the entire gasket should be replaced. The part number appropriate to the gasket being replaced can be found in the “Illustrated Parts” section of this manual. •
Gaskets should only be replaced with equivalent fiberglass gaskets purchased from England’s Stove Works ® specifically for this unit. Gaskets 1. Door ‐ This unit comes with a ¾“ rope gasket around the door that should be replaced at least every year. To replace the door gasket (Part # AC‐DGKHD), the old gasket must first be removed entirely — prior to adding the new adhesive, you may have to scrape the old cement from the door channel. Once the cement and gasket have been added, the door should be closed and latched for twenty‐four hours to allow the cement to harden. 2. Window ‐ If you are replacing the window gasket (Part # AC‐GGK), the new gasket will already have adhesive on one side. First, remove the old gasket. Next, remove the paper on the adhesive side and place the gasket around the outside edge of the glass, centered over the edge. Fold the gasket edges over on the glass, forming a “U” shape. Finish This new unit has been painted with High‐Temperature Paint that should retain its original look for years. If the unit should get wet and rust spots appear, the spots can be sanded with fine steel wool and repainted. It is crucial that only High‐Temperature Spray Paint is used (Part # AC‐MBSP), as others may not adhere to the surface or withstand the high temperatures. Similarly, some brands of paint will not adhere to different brands of paint, so we highly recommend using our proprietary High‐Temperature Spray Paint. Page | 21