1
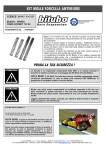
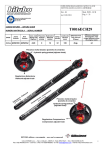
KIT MOLLE FORCELLA SCOOTER
CODICE : MF019
INDICATO PER :
Honda Silver Wing / SW-T
Aggiornato al : 12/09/2011
N. DI MATRICOLA/SERIAL NO./N. DE SERIE
DA INDICARE IN CASO DI RECLAMO
TO BE MENTIONED IN CASE OF CLAIM
A INDIQUER EN CAS DE RECLAMATION
PRIMA LA TUA SICUREZZA !
La forcella è un importante componente dello Scooter, e in questo manuale è
descritto il metodo corretto per il montaggio del Kit Molle Forcella Bitubo.
NOTA BENE: Il Kit Molle Forcella deve essere installato unicamente presso
un’officina specializzata; in caso di dubbi sulle istruzioni qui contenute, Vi
preghiamo di contattare subito un tecnico Bitubo.
Bitubo non potrà essere responsabile di modifiche apportate al Kit che non
sono contenute in questo manuale, e che non sono autorizzate per iscritto.
Bitubo inoltre non potrà essere responsabile di una non corretta installazione
del Kit.
Leggete attentamente questo manuale, per ottenere dalla Forcella il massimo
delle prestazioni e del rendimento.
NOTA BENE: la garanzia del Kit Molle Forcella cessa
nel caso in cui venga montato in maniera errata, o
modificato, senza l’approvazione scritta da Bitubo.
Bitubo non potrà essere responsabile di danni al
prodotto o alle persone, in caso le istruzioni contenute
in questo manuale non vengano seguite esattamente,
o in caso il montaggio del Kit Molle Forcella non venga
effettuato presso una officina specializzata, e da
personale qualificato.
C.D.A. BITUBO s.n.c. – Via A. Volta,24 – 35033 Z.I. Teolo (PD) ITALY – Tel. (+39) 049-990.34.75 (2 linee ISDN)
Fax (+39) 049-990.34.47 – Cod Fisc. e Part. IVA 02007650282 – E-mail: [email protected] - Internet: http://www.bitubo.com
ISTRUZIONI DI MONTAGGIO
Per lo smontaggio e il rimontaggio dei particolari originali dello scooter indicati nella seguente
procedura di installazione del kit Bitubo, attenersi scrupolosamente alle procedure descritte sul
Manuale Tecnico del veicolo (Libretto Uso/Manutenzione-Manuale di Officina)
1.
Posizionare lo Scooter sul cavalletto centrale; in assenza di esso, posizionare lo scooter su appositi appoggi stabili
adatti allo specifico modello di scooter.
2.
Inserire sotto il pianale uno specifico supporto per il sollevamento dell’avantreno.
3.
Togliere eventuali parafanghi e/o carenature anteriori, e tutti gli altri componenti della carrozzeria anteriore, per poter
intervenire agevolmente sulla forcella dello scooter: per questi smontaggi seguire scrupolosamente le istruzioni
riportate sui manuali tecnici originali della moto.
4.
Togliere la ruota anteriore.
5.
Procedere con lo sfilamento di un gambale forcella: allentare le viti di serraggio gambale nella piastra forcella.
6.
Sfilare il gambale dalla piastra forcella.
7.
Ripetere la procedura dei punti 5 e 6 con l’altro gambale.
OPERAZIONI DA ESEGUIRE SU ENTRAMBI I GAMBALI:
1. Togliere il tappo superiore: questo puo’ essere a vite oppure con anello seeger di fermo; in questo caso, spingere il
tappo forcella verso l’interno del fodero fino a scoprire l’anello di fermo, togliere l’anello seeger dalla sua sede, e sfilare
il tappo.
2. Togliere lo spessore distanziale, e sfilare la molla.
3. Rovesciare il gambale forcella e svuotarlo dell’olio. Eseguire alcune compressioni ed estensioni del gambale per
eliminare l’olio residuo.
4. Versare apposito cleaner e ripetere l’operazione di svuotamento (lavaggio).
5. Misurare la lunghezza dell’assieme molla+distanziale originale e annotare la misurazione.
6. All’interno del kit sono presenti, oltre alle molle, due distanziali da 32mm di lunghezza: scegliere di utilizzare assieme
alla molla Bitubo il distanziale fornito nel kit oppure quello originale in modo da riproporre la stessa misura
molla+distanziale dell’assieme originale con tolleranza +/- 5mm.
7. Dopo aver lasciato sgocciolare il gambale per alcuni minuti, posizionare il gambale alla massima compressione e
versare olio BITUBO SAE20 fino a 90 mm dal bordo superiore; controllare attentamente la misura perché
determinante nella progressività finale della forcella.
8. Effettuare alcune compressioni ed estensioni dello stelo sul gambale, e lasciare alcuni minuti il gambale a riposo tutto
esteso per far uscire eventuali residui di aria.
9. Controllare nuovamente il livello dell’olio ed eseguire eventuale rabbocco fino alla misura indicata.
10. Inserire la molla del Kit BITUBO nel gambale. Nel caso di molla progressiva, posizionarla con le spire ravvicinate verso
l’alto.
11. Inserire il distanziale molla bitubo e la rondella di acciaio originale.
12. Chiudere il gambale forcella avvitando il tappo superiore; oppure spingere il tappo dentro il fodero fino a scoprire la
cava di ritenzione dell’anello Seeger, inserire l’anello Seeger (facendo attenzione che sia completamente applicato
nella sua sede), e rilasciare il tappo
13. Nelle forcelle munite di valvola per immissione di aria consigliamo di non inserire pressione.
14. Rimontare i gambali nelle piastre forcella e serrare le viti dei collari piastra forcella.
15. Rimontare parafango, ruota, pinze freno, seguendo scrupolosamente le procedure indicate nei manuali di officina della
moto.
16. Rimontare la carenatura e tutti gli accessori previsti per completare l’operazione.
BITUBO RACCOMANDA
lubrificanti
C.D.A. BITUBO s.n.c. – Via A. Volta,24 – 35033 Z.I. Teolo (PD) ITALY – Tel. (+39) 049-990.34.75 (2 linee ISDN)
Fax (+39) 049-990.34.47 – Cod Fisc. e Part. IVA 02007650282 – E-mail: [email protected] - Internet: http://www.bitubo.com
SCOOTER FRONT FORK KIT
CODE : MF019
INDICATED FOR :
Honda Silver Wing / SW-T
UPDATED ON : 12/09/2011
SERIAL NO.
(see page 1)
TO BE MENTIONED IN CASE OF CLAIM
YOUR SAFETY FIRST !
The fork is an important component of the motor scooter and this manual
describes the correct way to assemble the Bitubo Fork Spring Kit.
NOTE: The Fork Spring Kit must be installed exclusively in a specialised
workshop; if you have any doubts regarding these instructions, please contact
a Bitubo engineer straight away.
Bitubo cannot be held responsible for any modifications to the Kit not
described in this handbook or not authorised in writing. Moreover Bitubo
cannot be held responsible for the incorrect installation of the Kit.
Read this handbook carefully so that you can get the best performance and
efficiency out of the Fork.
NOTE: The warranty for the Fork Spring Kit will be
invalidated by incorrect installation or modifications
carried out without Bitubo’s written authorisation.
Bitubo cannot be held responsible for any damages to
the product or injuries to people if the instructions of
this handbook are not followed to the letter or if the
Fork Spring Kit is not fitted in a specialised workshop
or by qualified personnel.
C.D.A. BITUBO s.n.c. – Via A. Volta,24 – 35033 Z.I. Teolo (PD) ITALY – Tel. (+39) 049-990.34.75 (2 linee ISDN)
Fax (+39) 049-990.34.47 – Cod Fisc. e Part. IVA 02007650282 – E-mail: [email protected] - Internet: http://www.bitubo.com
ASSEMBLING INSTRUCTIONS
For disassembling and assembling the original parts of the motor scooter indicated on the
following Bitubo kit installation procedure, refer carefully to the procedure listed in the Vehicle
technical handbook (Use/Service Manual- Workshop handbook)
1. Position the Motor scooter on the central stand; if not available, put the scooter on proper steady supports
suitable for the specific motor scooter model.
2. Insert a proper support under the chassis for lifting the front end of the vehicle.
3. To work easily on the motor scooter fork, remove any front fender and/or front fairing and all the other
components of the front body.For all disassembling instructions see the technical handbooks of the motorcycle.
4. Remove the front wheel.
5. Proceed by slipping off one fork leg: loosen the fork leg tightening screws on the fork plate.
6. Slip off the fork leg from the fork plate.
7. Repeat the procedure of steps 5 and 6 for the other fork leg.
OPERATIONS TO CARRY OUT ON BOTH FORK LEGS:
1. Remove the top cap: unscrew the cap or push the fork cap inside the sleeve to reveal the snap ring. Then remove
the snap ring and slip off the cap.
2. Remove the spacer, then slip off the spring.
3. Overturn the leg and empty the oil. Compress and extend the fork leg a few times to expel any oil left.
4. Pour the special cleaner and repeat the emptying (flushing) procedure.
5. Measure and note the original spring + spacer length.
6. Inside the kit along with the two springs there are two 32mm spacers: choose the spacer supplied with the kit or the
original one for using it with the Bitubo spring in order to replicate the same spring + spacer length of the original
assembly with a +/- 5mm tolerance.
7. After letting the fork leg drain for a few minutes, compress it to the end of its run and pour oil BITUBO SAE 20 up to
90 mm from the top; check the level carefully because it is vital for the final fork graduality.
8. Compress and extend the leg a few times and leave the fork leg totally extended for a few minutes to get rid of any
air residual.
9. Check the oil level again and top up as required to the level shown.
10. Insert the BITUBO kit spring into the fork leg. If the spring is of the progressive type, position it with its turns close
together facing upwards.
11. Insert the Bitubo spring spacer and the original steel washer.
12. Close the fork leg screwing the top cap or push the cap inside the sleeve to reveal the snap ring stop slot. Insert
the snap ring making sure it is fully fitted to its seat, then release the cap.
13. We recommend you do not put pressure onto forks fitted with an air intake valve.
14. Reassemble the fork legs into the fork plates and tighten the plate screws (check the tightening torque on the
service manual for the Motor scooter)
15. Reassemble the fender, the wheel and the brake calipers following carefully the procedures described in the
service manual for the motorcycle.
16. Reassemble the fairing and all the accessories to complete the operation.
BITUBO RECOMMENDS
lubricants
C.D.A. BITUBO s.n.c. – Via A. Volta,24 – 35033 Z.I. Teolo (PD) ITALY – Tel. (+39) 049-990.34.75 (2 linee ISDN)
Fax (+39) 049-990.34.47 – Cod Fisc. e Part. IVA 02007650282 – E-mail: [email protected] - Internet: http://www.bitubo.com
KIT RESSORTS FOURCHE SCOOTER
CODE : MF019
Modèle :
Honda Silver Wing / SW-T
Mis à jour le : 12/09/2011
N. DE SERIE
(VOIR PAGE 1)
A INDIQUER EN CAS DE RECLAMATION
LA SECURITE AVANT TOUT !
La fourche est un composant fondamental de la moto. Ce manuel décrit le
montage correct du kit ressorts fourche Bitubo.
AVERTISSEMENT : ce kit doit être assemblé uniquement par un professionnel.
En cas de doute, veuillez consulter un technicien Bitubo.
Bitubo ne pourra être tenu responsable de toute modification apportée au
produit qui n’est pas décrite dans ce manuel, ou n’a pas été autorisée par écrit.
Bitubo ne pourra être tenu responsable d’un montage incorrect de ce kit.
Lisez attentivement ce manuel pour profiter au mieux du rendement de ce kit.
NOTE : la garantie du kit ressorts fourche cesse en
cas de montage incorrect et/ou de modifications
apportées sans approbation écrite de Bitubo.
Bitubo ne pourra être tenu responsable des
dommages au produit et/ou aux personnes si les
instructions de montage n’ont pas été suivies
exactement, ou si le montage n’a pas été effectué
dans un garage spécialisé par un personnel qualifié.
C.D.A. BITUBO s.n.c. – Via A. Volta,24 – 35033 Z.I. Teolo (PD) ITALY – Tel. (+39) 049-990.34.75 (2 linee ISDN)
Fax (+39) 049-990.34.47 – Cod Fisc. e Part. IVA 02007650282 – E-mail: [email protected] - Internet: http://www.bitubo.com
INSTRUCTIONS DE MONTAGE
Pour démonter l’amortisseur et les pièces
d’origine, se conformer aux instructions du constructeur du véhicule (Manuel
d’utilisation et d’entretien – Manuel de réparation).
1. Positionner le scooter sur sa béquille centrale (si le scooter en est dépourvu positionner le scooter sur un
support approprié).
2. Le train avant du véhicule ne doit pas toucher le sol.
3. Dégager la partie avant du scooter, retirer tous les éléments (carrosserie, câble, faisceau, durite...) gênant
l’accès à la fourche. Pour le démontage se référer au manuel du constructeur.
4. Retirer la roue avant et le garde boue avant.
5. Dévisser les vis de blocage sur le té de fourche et purger l’air si nécessaire.
6. Retirer le bras de fourche
7. Répéter les étapes 5 et 6 pour le second bras de fourche.
OPERATIONS A EXECUTER SUR LES TUBES DE FOURCHE:
1.
Retirer le bouchon supérieur.
2.
Retirer le plot de centrage du ressort, le ressort ; et retourner le bras de fourche pour le vider de son huile.
Comprimer plusieurs fois la fourche pour extraire la totalité de l huile.
3. Rincer avec un nettoyant approprié. Laisser égoutter quelques minutes
4. Mesurer et noter la longueur du groupe ressort+entretoise d’origine.
5. Le kit contient les ressorts et deux entretoises de 32 mm de long : utiliser soit l’entretoise fournie dans le kit ou celle
d’origine avec le ressort Bitubo, afin d’avoir la même dimension ressort+entretoise que le groupe d’origine, avec une
tolérance de +/- 5 mm.
6. Remplir la fourche avec de l huile SAE 20 jusqu’à 90mm du bord supérieur. ATTENTION : cette opération doit être
effectuée avec précision.
7. Comprimer plusieurs fois la fourche afin d assurer un bon remplissage puis la laisser quelques minutes droite afin
d’évacuer d’éventuelles bulles d’air.
8. Contrôler à nouveau le niveau d’huile et en rajouter si nécessaire.
9. Positionner le ressort dans le tube .Si le ressort est de type progressif positionner les marquages vers le haut.
10.
Repositionner le plot de centrage du ressort : l’origine ou celui livré avec le kit BITUBO (si existant)
11. Fermer le tube
12.
Nous vous recommandons de ne pas rajouter d ‘air par la valve (si elle existe)
13. Repositionner le bras de fourche dans le té et serrer selon les préconisations du constructeur (se référer au manuel
du constructeur)
14.
Remonter le garde boue avant, la roue avant et les étriers de freins (se conformer aux instructions du constructeur)
15. Remonter les éléments restants pour terminer l’opération.
C.D.A. BITUBO s.n.c. – Via A. Volta,24 – 35033 Z.I. Teolo (PD) ITALY – Tel. (+39) 049-990.34.75 (2 linee ISDN)
Fax (+39) 049-990.34.47 – Cod Fisc. e Part. IVA 02007650282 – E-mail: [email protected] - Internet: http://www.bitubo.com