1
INTRODUCTION:
OPERATION:
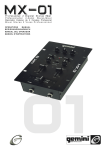
Congratulations on purchasing a Gemini PMX-01 6.5" 2 Stereo Channel
Mixer. This state of the art mixer is backed by a three year warranty,
excluding crossfader and channel slides. Prior to use we suggest that you
carefully read all the instructions.
1. POWER ON: When you have completed making all of your connections,
plug in the 15V AC(1) adapter to your PMX-01 mixer. The power will turn on
and the VU METER (10) power LEDs will glow brightly.
FEATURES:
3. CHANNEL 2: PHONO 2/LINE 2(4) is controlled by the CHANNEL 2
SLIDE(17). GAIN(18), HIGH(19), and LOW(20) rotary controls adjust
CHANNEL 2 with a wide range of sounds.
-
2. CHANNEL 1: PHONO 1/LINE 1(6) is controlled by the CHANNEL 1
SLIDE(16). GAIN(13), HIGH(14), and LOW(15) rotary controls adjust
CHANNEL 1 with a wide range of sounds.
6.5" 2 Stereo Channel Mixer
2 Convertible Phono/Line RCA Inputs
2 Band Rotary Line EQ Control with +/-12 dB Cut Feature
Easy Removable Face Plate for User Replaceable Cross Fader
Rotary Gain Channel Control
Display with Bright LED
Face Plate Located Cue Section Fader Allowing Cue Mix
Front Panel Located Rotary Cue Volume Control
Front Located Headphone Output
4. CROSSFADER SECTION: This section allows mixing from CHANNEL
1(16) to CHANNEL 2(17). The left side of your CROSSFADER(12) is
CHANNEL 1(16) while the right side of your CROSSFADER(12) is CHANNEL 2(17). The CROSSFADER (12) in your unit is removable and if the
need arises can be easily replaced. Just purchase one from your Gemini
dealer and follow the instructions:
User Replaceable Crossfader
1. Unscrew the outside FACE plate
screws and remove FACE plate
from mixer.
CAUTIONS:
1. All operating instructions should be read before using this equipment.
2. Carefully lift the fader and unplug
the CABLE (B).
2. To reduce the risk of electrical shock, do not open the unit. Please refer
servicing to a qualified service technician.
3. Plug the new fader into the cable
and place it back in the mixer.
In the USA ~ if you experience problems with this unit call
Gemini Customer Service at: 1 (732) 738-9003. Do not attempt to
return this equipment to your dealer.
4. Screw the fader to the FACE
plate of the mixer and replace the
mixer FACE plate.
3. Do not expose this unit to direct sunlight or to a heat source such as a
radiator or stove.
4. This unit should be cleaned only with a damp cloth. Avoid solvents or
other cleaning detergents.
5. CUE SECTION: Connecting a set of headphones to the HEADPHONES
JACK(9) allows you to monitor either Channel 1 (16) or Channel 2 (17).
Select Channel 1 by moving CUE FADER (11) to the left. Listen to
CHANNEL 2 by moving CUE FADER (11) to the right. Use CUE VOLUME
(8) to adjust headphone volume without affecting the speaker-driven mix.
Cue facilitates the seamless blending of one recorded track into another.
5. When moving this equipment, it should be placed in its original carton
and packaging. This will reduce the risk of damage during transit.
6. DO NOT EXPOSE THIS UNIT TO RAIN OR MOISTURE.
7. DO NOT USE ANY SPRAY CLEANER OR LUBRICANT ON ANY CON
TROLS OR SWITCHES.
Note: Do not apply pressure while using the Crossfader. Lightly
glide the crossfader back and forth. Pressing down on the controls can bend contacts and cause a loss of sound.
CONNECTIONS:
6. VU METER: VU METER’s(10) power LEDs indicates the MASTER
RCA(2) output.
1. Before plugging in the 15V AC ADAPTER (1), you will notice the VU
METER LED(10) will not be lit. Plug in the 15V AC ADAPTER(1) into the
PMX-01 mixer and then into a proper power source. The VU METER
(10) power LEDs will light up upon plugging the 15V AC(1) into the power
outlet.
SPECIFICATIONS:
INPUTS:
2. The PMX-01 has one output located on the back panel, the MASTER
RCA OUTPUT(2). Plug the MASTER RCA OUTPUT(2) into your main
amplifier in order for sound to play through your home stereo system.
Phono.......................................................................................3 mV, 47 kOhm
Line......................................................................................150 mV, 10 kOhm
3. The PMX-01 has 2 CONVERTIBLE PHONO/LINE RCA INPUTS located
on the back panel on either side of the MASTER RCA OUTPUT(2). Facing
the back panel, the convertible RCA Input on your right is for PHONO 1/
LINE 1(6). The convertible RCA input on your left is for PHONO 2/ LINE
2(4). The PHONO 1/ LINE 1 SWITCH (5) is located just above and to the
left of the PHONO 1/LINE 1 RCA INPUT(6). You may convert from
PHONO 1 to LINE 1. The PHONO 2/LINE 2 SWITCH(3) is also located
just above and to the left of the PHONO 2/LINE 2 RCA INPUT(4). You
may convert from PHONO 2 to LINE 2. Plug the RCA's from your
playable medium into each input to be connected to their respective
CHANNELS. The PHONO INPUTS only accept turntables with a magnetic
cartridge. When using (a) turntable(s), you will need to ground the RCA
cable(s) by screwing in the grounding fork(s) to the GROUNDING
SCREW(7) located in the back panel of the PMX-01 mixer. This is located
just above the MASTER RCA OUTPUT. The STEREO LINE INPUTS
only accept line level inputs such as a CD, DAT, MiniDisc, etc.
NOTE: Not attaching a ground may cause a system "hum."
4. Headphones may be plugged into the front panel 1/4" HEADPHONE
JACK (9).
B
OUTPUTS:
Amp....................................................................................0 dB 1 V, 400 Ohm
Max.....................................................................................20 V Peak to Peak
GENERAL:
Bass (Channels 1-2).................................................................................+/-12dB
High (Channels 1-2)................................................................................+/- 12 dB
Gain (Channels 1-2).............................................................................0 to -20 dB
Frequency Response....................................................20Hz - 20 kHz +/- 2 dB
Distortion.................................................................................less than 0.02%
S/N Ratio...............................................................................better than 80 dB
Headphone Impedance.......................................................................32 Ohm
Power Source..............................115V/15V AC 7.5W (or 230V/15V AC 7.5W)
Dimensions...........................6.5 " x 3.15" x 7.2" (165.1 x 80.01 x 182.88 mm)
Weight................................................................................... 2.3 lbs. (1.04 kg)
Specifications and designs are subject to change without notice for
the purpose of improvement.
(4)