1
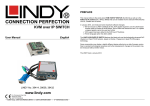
h USB 3.0 Hub & Gigabit Ethernet Adapter User Manual Benutzerhandbuch Manuel d’utilisateur Manuale d’uso English Deutsch Français Italiano LINDY No. 43122 www.lindy.com © LINDY ELECTRONICS LIMITED & LINDY-ELEKTRONIK GMBH - SECOND EDITION (May 2015) User Guide Introduction Thank you for purchasing the LINDY USB 3.0 Hub & Gigabit Ethernet Adapter, which offers a 3 port USB hub as well as a 10/100/1000Mbps network connection. Due to USB 3.0 specification, this adapter ensures true 10/100/1000Mbps network speed. Features • • • • • • • 3 Port USB 3.0 hub & Gigabit Ethernet interface USB 3.0 specification up to 5Gbps, backwards compatible with USB 2.0/1.1 Complies with IEEE 802.3/802.3u/802.3ab, IEEE802.3az Supports Full/Half Duplex Operation USB 3.0 3 Port Hub is BC/Battery Charging 1.1 compliant (max. 1.5A per port, depending on attached power supply) Socket for optional PSU (not included) System Requirements: Windows 8.1/8/7/Vista, Mac OS 10.8 & above, Linux Kernel 2.6.31 Package Contents • • • USB 3.0 Hub & Gigabit Ethernet Adapter Driver CD This Manual Driver Installation Caution! DO NOT connect the Ethernet Adapter to your computer before you install the provided driver. On Windows: Windows 8: 1. Insert the provided CD into your disc drive. Then locate and double-click the setup.exe file under x:\Driver\Windows. User Guide 2. When you click setup.exe, you will see the screen below: 3. Click Finish to complete the Ethernet Driver installation. Now the installation is completed. You can connect the adapter to a network device by an Ethernet cable: 1. Connect an Ethernet cable to the Ethernet port on the adapter. 2. Connect the other end of the Ethernet cable to your network hub, switch or router. The Link LED should light up green to indicate a proper physical connection between the adapter and the network. If the Link LED doesn’t light up, please verify the cable connections between all the network devices. User Guide On Mac OS: 1. Insert the provided driver CD into your CD-ROM drive. Double-click <AX88179….pkg> to launch the setup procedure 2. When the Install AX88179/178A USB Ethernet Adapter Driver screen appears, please select Continue. 3. When the screen below appears, please click Install. User Guide 4. When the screen below appears, please click Continue Installation 5. Please enter your password as prompted. 6. It will take a while to install the driver. User Guide 7. The installation was successful, click Restart to restart your computer On LINUX: The following steps describe the installation on a computer running LINUX. Please read the instructions carefully and only attempt them if you have used similar functions in LINUX previously, alternatively contact your system administrator. • • • • • • • • • • • Open Terminal Install USB 3.0 drivers with 'sudo update-usbids' Download the latest LINUX driver from http://asix.com.tw/products.php?op=pItemdetail&PItemID=131;71;112, AX88179 Switch directories to the folder 'Downloads' or the location you saved the file Extract the archive with tar -xjf XXXXX.tar.bz2 (where XXXXX.tar.bz2 is the name of the file you downloaded) Navigate to the unzipped folder Compile the driver with ‘make’ Install the driver with ‘make install‘ Download the program EthTool and install with ‘sudo apt-get install ethtool‘ Deactivate the original network interface with ‘/etc/network/interfaces ifdown eth0‘ As LINUX does not currently support 1000Mbps Ethernet, set the speed of the new interface with ‘sudo ethtool -s eth1 speed 100 duplex full’ V Verifying the Driver Installation Windows: Once you have finished the installation, you can open the Windows Device Manager to verify if your Ethernet adapter is properly installed. To access the Device Manager: On Windows 7 / Windows® 8: Right-click Computer on the desktop and click System Properties>Device Manager User Guide On Windows Vista: Right-click Computer on the desktop and click Properties > Device Manager. On Windows XP: Right-click My Computer on the desktop and click Properties > (Hardware) > Device Manager. In the Network adapters group, an item named ASIX AX88179 USB 3.0 to Gigabit Ethernet Adapter should be displayed. If there is a question or exclamation mark next to that item, then the driver is not properly installed. Please delete the item, select the Delete the driver software for this device option (if provided), unplug the adapter from your computer and then repeat the installation steps. Mac OS: To verify the driver , follow the below steps to open “About this Mac” 1. When the screen below appears and click More Info. 2. When the screen below appears, please click System Report… User Guide 3. You will find that a new Ethernet network interface is available. It’s usually named USB 3.0 Hub AX88179. (Actual strings depend on your operation system. The screen shots might vary slightly for each operation system.) Now the installation is completed. You can connect the adapter to a network device by an Ethernet cable: 1. Connect an Ethernet cable to the Ethernet port on the adapter. 2. Connect the other end of the Ethernet cable to your network hub, switch or router. The Link LED should light up green to indicate a proper physical connection between the adapter and the network. If the Link LED doesn’t light up, please verify the cable connections between all the network devices. L LINUX On connectorJD (gree)djfjhsdafhdskfhkajdjfggfgfgfdgfjkadk 111ghwhh Benutzerhandbuch Einführung Vielen Dank für den Kauf des LINDY USB 3.0 Hubs & Gigabit Ethernet Adapters. Dieser stellt Ihnen einen 3 Port USB Hub sowie eine 10/100/1000Mbit/s Netzwerkverbindung zur Verfügung. Durch die USB 3.0-Spezifikation kann im Netzwerk eine Geschwindigkeit bis zu 1000Mbit erreicht werden. Eigenschaften • • • • • • • 3 Port USB 3.0 Hub mit Gigabit Ethernet Adapter USB 3.0 Spezifikation mit bis zu 5Gbit/S., abwärts kompatibel mit USB 2.0/1.1 Kompatibel mit IEEE802.3/802.3u/802.3ab, IEEE802.3az Unterstützt Voll- und Halbduplexmodus USB 3.0 3 Port Hub ist kompatibel mit BC/Battery Charging 1.1 (max. 1,5A per port, abhängig vom angeschlossenen Netzteil) Anschluss für optionales Netzteil (nicht im Lieferumfang enthalten) Systemvoraussetzungen: Windows 8.1/8/7/Vista, Mac OS ab 10.8, Linux Kernel 2.6.31 Lieferumfang • • • USB 3.0 Hub & Gigabit Ethernet Adapter Treiber-CD Dieses Handbuch Installation Achtung! Installieren Sie zuerst den Treiber von beiliegender CD bevor Sie den Ethernet Adapter am Computer anschließen! Windows OS: Legen Sie die Treiber-CD in das CD-Laufwerk und starten Sie die Treiberinstallation mit einem Doppelklick auf die Datei <Setup.exe>. Mac OS: Legen Sie die Treiber-CD in das CD-Laufwerk und starten Sie die Treiberinstallation mit einem Doppelklick auf die Datei <AX88179...pkg>. LINUX : Zum Zeitpunkt der Erstellung dieses Handbuchs ist die Unterstützung von Linux nur mit 10/100Mbit/s möglich. Die Installation läuft mit Ubuntu 12.04 LTS wie folgt : • • • • • • Terminal öffnen Aktuelle USB 3.0 - Treiber einspielen mit 'sudo update-usbids' Treiber herunterladen von http://asix.com.tw/products.php?op=pItemdetail&PItemID=131;71;112, AX88179 Verzeichniswechsel in Ordner 'Downloads' Archiv entpacken mit tar -xjf treiber.tar.bz2 In den entpackten Ordner navigieren Benutzerhandbuch • • • • • Treiber kompilieren mit ‘make’ Treiber istallieren mit ‘make install‘ Das Programm EthTool herunterladen und installieren mit ‘sudo apt-get install ethtool‘ Ursprünglich verwendetes Netzwerkinterface deaktivieren mit ‘/etc/network/interfaces ifdown eth0‘ Neues Interface drosseln mit ‘sudo ethtool -s eth1 speed 100 duplex full’ Dieser letzte Schritt ist derzeit noch notwendig, da das Interface mit der standardmäßig installierten Datenrate von 1000MBit/s noch nicht läuft. Überprüfung der korrekten Treiberinstallation Öffnen Sie den Gerätemanager unter Windows. In der Liste der Netzwerkadapter sollte nun ein ASIX….Ethernet Adapter erscheinen. Folgen sie den Schritten wie unten beschrieben um den Gerätemanager auf dem Mac zu öffnen: 1. Schließen Sie den USB Ethernet Adapter am Mac an. 2. Click the Systemeinstellungen -> Netzwerk -> USB Gigabit Ethernet Adapter verbunden Achtung: Wenn ein Frage- oder Ausrufezeichen erscheint, wurde der Treiber nicht korrekt installiert. Bitte löschen Sie dann den Treiber, ziehen Sie den Adapter vom Computer ab und beginnen Sie die Installation von neuem. Anschluss des Adapters Schließen Sie den Adapter nach erfolgter Treiberinstallation an einem vorhandenen Netzwerk an. 1. Verbinden Sie zunächst ein Netzwerkkabel mit dem RJ45-Port des Adapters und dann das andere Ende des Netzwerkkabels mit einem Netzwerkhub, -switch oder Router. 2. Den USB-Stecker des Adapters stecken Sie in einen freien USB-Port des Computers. Ein Pop-up wird über die erfolgte Installation informieren. Achtung: Die grüne Link-LED sollte aufleuchten um eine korrekte Verbindung zwischen Adapter und Netzwerk anzuzeigen. Wenn dies nicht der Fall ist, überprüfen Sie bitte die Kabelverbindungen der Netzwerkgeräte. Anmerkung: Die Treiberinstallation kann abhängig vom Betriebssystem in der Abfolge bzw. bei den Screenshots leicht variieren. Manuel utilisateur Introduction Merci d’avoir choisi l’adaptateur LINDY USB 3.0 Hub & Gigabit Ethernet, qui offre un hub USB 3 ports et une connexion réseau 10/100/1000Mbps. Grace aux spécifications USB 3.0, cet adaptateur permet une connexion réseau 10/100/1000Mbps. Caractéristiques • • • • • • • Hub USB 3.0 3 ports & interface Gigabit Ethernet Spécifications USB 3.0 jusqu’à 5Gbps, rétro-compatible USB 2.0/1.1 Respecte les normes IEEE 802.3/802.3u/802.3ab, IEEE802.3az Supporte Full/Half Duplex Le hub USB 3.0 3 ports respecte la norme « BC/Battery Charging 1.1 » (1,5A maxi par port, dépendant de l’alimentation utilisée) Prise pour alimentation optionnelle (non fournie) Systèmes requis : Windows 8.1/8/7/Vista, Mac OS dès 10.8, Linux Kernel 2.6.31 Contenu • • • Adaptateur hub USB 3.0 & Gigabit Ethernet Pilotes sur CD Ce manuel Installation des pilotes Attention ! Ne connectez PAS l’adaptateur Ethernet à votre ordinateur avant d’installer les pilotes. Sur Windows: Windows 8: 1. Insérez le CD fourni dans votre lecteur CD. Puis lancez le fichier setup.exe sous x:\Driver\Windows. Manuel utilisateur 2. Après avoir cliqué sur setup.exe, vous verrez la fenêtre ci-dessous : 2. Cliquez sur Finish pour terminer l’installation du pilote Ethernet. L’installation est à present terminée. Vous pouvez connecter l’adaptateur au réseau : 1. Connectez un câble Ethernet au port Ethernet de l’adaptateur. 2. Connectez l’autre extrémité du câble Ethernet au switch réseau, ou routeur. La LED “Link” doit s’allumer en vert pour indiquer que la connection physique est bonne entre l’adaptateur et le réseau. Si la LED ‘Link’ ne s’allume pas, merci de vérifier que les connections entre tous les appareils réseau. Manuel utilisateur Sur Mac OS: 1. Insérez le CD dans votre lecteur CD-ROM. Double-cliquez sur <AX88179….pkg> pour lancer l’installation 2. Quand la fenêtre Install AX88179/178A USB Ethernet Adapter Driver apparaît, cliquez sur Continue. 3. Quand la fenêtre ci-dessous apparaît, cliquez sur Install. Manuel utilisateur 4. Quand la fenêtre ci-dessous apparaît, cliquez sur Continue Installation 5. Saisissez votre mot de passe. 6. Laissez l’installation se terminer. Manuel utilisateur 7. L’installation est terminée, cliquez sur Restart pour redémarrer l’ordinateur V Sur LINUX: Les étapes suivantes décrivent comment installer le produit N° Art. 43122, sur un ordinateur fonctionnant sous LINUX. Merci de lire ces instructions : Mettez-vous en mode terminal Installez les pilotes USB 3.0 avec la commande 'sudo update-usbids' Téléchargez les derniers pilotes LINUX depuis http://asix.com.tw/products.php?op=pItemdetail&PItemID=131;71;112, AX88179 Mettez-vous sur le répertoire où vous avez téléchargé les pilotes Démarrez l'extraction du fichier avec la commande "tar -xjf XXXXX.tar.bz2" (où XXXXX.tar.bz2 est le nom du fichier téléchargé) Ouvrez le répertoire décompressé Compilez le pilote avec la commande ‘make’ Installez les pilotes avec la commande ‘make install‘ Téléchargez le programme EthTool et installez-le avec ‘sudo apt-get install ethtool‘ Désactivez l'interface réseau d'origine avec ‘/etc/network/interfaces ifdown eth0‘ Comme LINUX ne supporte pas l'Ethernet 1000Mbps , configurez la vitesse de la nouvelle interface avec ‘sudo ethtool -s eth1 speed 100 duplex full’ Vérifier l’installation des pilotes Windows: Une fois l’installation terminée, vous pouvez ouvrir le Gestionnaire des périphériques Windows pour vérifier si l’adaptateur Ethernet est correctement installé. Pour accéder au Gestionnaire des périphériques : Sur Windows 7 / Windows® 8: clic droit sur Ordinateur sur le bureau et cliquez sur Propriétés>Gestionnaire de périphériques Manuel utilisateur Sur Windows Vista: clic droit sur Ordinateur sur le bureau et cliquez sur Propriétés>Gestionnaire de périphériques Sur Windows XP: clic droit sur Mon Ordinateur sur le bureau et cliquez sur Propriétés>Gestionnaire (hardware) de périphériques Dans le groupe des adaptateurs réseau, un élément nommé ASIX AX88179 USB 3.0 to Gigabit Ethernet Adapter doit être affiché. Si un point d’exclamation sur cet élément, le pilote n’a alors pas été correctement installé. Merci de supprimer cet élément, sélectionnez-le et pressez la touché “Suppr”, déconnectez l’adaptateur de votre ordinateur et répétez les étapes d’installation. Mac OS: Pour verifier le pilote, suivez les étapes suivants pour ouvrir “About this Mac” 1. Quand la fenêtre ci-dessous apparaît, cliquez sur More Info. 2. Quand la fenêtre ci-dessous apparaît, cliquez sur System Report… Manuel utilisateur 3. Vous trouverez une nouvelle interface réseau Ethernet. Elle est nommée USB 3.0 Hub AX88179. (les captures d’écran présentées peuvent changer suivant le système et surtout suivant la langue du système d’exploitation) L’installation est à present terminée. Vous pouvez connecter l’adaptateur au réseau : 1. Connectez un câble Ethernet au port Ethernet de l’adaptateur. 2. Connectez l’autre extrémité du câble Ethernet au switch réseau, ou routeur. La LED “Link” doit s’allumer en vert pour indiquer que la connection physique est bonne entre l’adaptateur et le réseau. Si la LED ‘Link’ ne s’allume pas, merci de vérifier que les connections entre tous les appareils réseau. . Manuale d´uso Introduzione Grazie per aver acquistato l’adattatore LINDY USB 3.0 Hub & Gigabit Ethernet, che dispone di un hub con 3 porte USB e la possibilità di avere una connessione ad una rete lan 10/100/1000Mbps. Grazie alle specifiche USB 3.0, questo adattatore vi assicura una velocità di connessione a 10/100/1000Mbps. Caratteristiche • • • • • • • 3 Porte USB 3.0 hub & Gigabit Ethernet Specifiche USB 3.0 fino a 5Gbps, compatibile con versioni precedenti USB 2.0/1.1 Conforme alle specificheIEEE 802.3/802.3u/802.3ab, IEEE802.3az Supporta Full/Half Duplex La porta dell’hub USB 3.0 3 è conforme alle specifiche BC/Battery Charging 1.1 (max. 1.5A per porta, dipende se è collegato un alimentatore) Connettore per PSU opzionale (non incluso) Requisiti del sistema: Windows 8.1/8/7/Vista, Mac OS 10.8 & oltre, Linux Kernel 2.6.31 Contenuto della confezione • • • Adattatore USB 3.0 Hub & Gigabit Ethernet CD Driver Manual orJD (gree)djfjhsdafhdskfhkajdjfggfgfgfdgfjkadk Installazione Attenzione ! NON collegare l’adattatore Ethernet al Vostro computer prima di aver installato i driver. Windows: ws 8: 1. Inserire il CD nel Vostro lettore. Fate doppio click sul file setup.exe nella direttory x:\Driver\Windows. Manuale d´uso 2. Dopo aver fatto click su setup.exe, apparirà la seguente videata: 3. Fate click su Finish per completare l’installazione del driver. Ora l’installazione è completata. Potete collegare l’adattatore alla periferica di rete tramite un cavo patch: 1. Collegare un cavo di rete 2. Collegare l’altra estremità del cavo alla vostro hub di rete, switch o router. Il LED Link LED diventerà verde ad indicare il corretto collegamento tra l’adattatore e la rete. Nel caso in cui il LED non si illuminasse, pregasi verificare il corretto collegamento del cavo alle periferiche di rete. Manuale d´uso Mac OS: 1. Inserire il CD nel Vostro lettore. Fate doppio click su <AX88179….pkg> per avviare la procedura di setup 2. Quando apparirà la videata Install AX88179/178A USB Ethernet Adapter Driver, selezionare Continue. 3. Quando apparirà la seguente videata, fate click su Install. Manuale d´uso 4. Quando apparirà la seguente videata, fate click su Continue Installation 5. Ora inserire la Vostra password. 6. Per installare I driver sarà necessario qualche minuto. Manuale d´uso 7. L’nstallazione è andata buon fine, fate click su Restart per riavviare il Vostro computer LINUX: I seguenti passi descrivono come installare l’adattatore su un computer che utilizza il sistema LINUX. Pregasi leggere attentamente le istruzioni e se si ha esperienza in installazioni LINUX, altrimenti contattate il Vostro amministratore di. • • • • • • • • • • • Avviare il terminale Installare I driver USB 3.0 con 'sudo update-usbids' Download I recenti driver LINUX driver da http://asix.com.tw/products.php?op=pItemdetail&PItemID=131;71;112, AX88179 Aprite la cartella 'Downloads' o dove avete salvato il file Estrarre il file con tar -xjf XXXXX.tar.bz2 (dove XXXXX.tar.bz2 è il nome del file che avete scaricato) Estrarre la cartella zippata Compilare I driver con ‘make’ Installare i driver con ‘make install‘ Download il programma EthTool ed installatelo con with ‘sudo apt-get install ethtool‘ Disattivare l’interfaccia originale di rete con ‘/etc/network/interfaces ifdown eth0‘ LINUX non supporta correttamente 1000Mbps Ethernet, settate la velocità della nuova interfaccia con ‘sudo ethtool -s eth1 speed 100 duplex full’ V Verificare l’installazione dei driver Windows: Una volta terminate la procedura d’installazione, potete aprire la finestra di Windows Preferenze di sistema per verificare che l’adattatore Ethernet sia stato correttamente installato.. Per accedere alla Gestione delle periferiche: Manuale d´uso Su Windows 7 / Windows® 8: fate click con il tasto destro del mouse sull’icone Computer del desktop e cliccate su Pannello di controllo >Gestione periferiche Su Windows Vista: fate click con il tasto destro del mouse sull’icone Computer del desktop e cliccate su Proprietà > Gestione periferiche. Su Windows XP: fate click con il tasto destro del mouse sull’icone Computer del desktop e cliccate su Proprietà > (Hardware) > Gestione periferiche. Nel gruppo adattatori di rete, apparirà l’icona ASIX AX88179 USB 3.0 to Gigabit Ethernet Adapter. Se c’è un punto di domanda o esclamativo accanto all’icona, significa che il driver non è stato installato correttamente. Cancellate l’icona, selezionate Cancellare il driver software per questa periferica (se previsto), scollegate l’adattatore dal computer e ripetete la procedura d’installazione. Mac OS: Per verificare i driver, seguire I passi sotto elencati ed aprire “About this Mac” 1. Apparirà la seguente finestra e cliccate su More Info. 2. Successivamente apparirà la seguente finestra, cliccate su System Report… Manuale d´uso 3. Troverete una nuova interfaccia di rete Ethernet disponibile. Di solito viene identificata con USB 3.0 Hub AX88179. (Queste stringhe dipendono dal Vostro sistema operativo installato. Potrebbero esserci delle piccole differenze tra i vari sistemi operativi). Ora l’installazione è completata. Potete collegare l’adattatore alla periferica di rete tramite il cavo patch: 1. Collegare un cavo si rete alla pota Ethernet sull’adattatore. 2. Collegare l’altra estremità del cavo di rete al Vostro hub, switch o router. Il LED Link LED diventerà verde ad indicare il corretto collegamento tra l’adattatore e la rete. Nel caso in cui il LED non si illuminasse, pregasi verificare il corretto collegamento del cavo alle periferiche di rete. CE / FCC Statement CE Certification This equipment complies with the requirements relating to Electromagnetic Compatibility Standards EN55022/EN55024 and the further standards cited therein. It must be used with shielded cables only. It has been manufactured under the scope of RoHS compliance. CE Konformitätserklärung – Deutsch Dieses Produkt entspricht den einschlägigen EMV Richtlinien der EU für IT-Equipment und darf nur zusammen mit abgeschirmten Kabeln verwendet werden. Diese Geräte wurden unter Berücksichtigung der ROHS Vorgaben hergesttellt. Die formellle Konformitätserklärung können wir Ihnen auf Anforderung zur Verfügung stellen. FCC Certification This equipment has been tested and found to comply with the limits for a Class B digital device, pursuant to part 15 of the FCC Rules. These limits are designed to provide reasonable protection against harmful interference in a residential installation. You are cautioned that changes or modification not expressly approved by the party responsible for compliance could void your authority to operate the equipment. This device complies with part 15 of the FCC Rules. Operation is subject to the following two conditions: 1. This device may not cause harmful interference, and 2. This device must accept any interference received, including interference that may cause undesired operation. LINDY Herstellergarantie – Hinweis für Kunden in Deutschland LINDY gewährt für dieses Produkt über die gesetzliche Regelung in Deutschland hinaus eine zweijährige Herstellergarantie ab Kaufdatum. Die detaillierten Bedingungen dieser Garantie finden Sie auf der LINDY Website aufgelistet bei den AGBs. Hersteller / Manufacturers (EU): LINDY-Elektronik GmbH Markircher Str. 20 68229 Mannheim GERMANY Email: [email protected] , T: 0049 (0)621 470050 LINDY Electronics Ltd. Sadler Forster Way Teesside Industrial Estate, Thornaby Stockton-on-Tees, TS17 9JY United Kingdom [email protected] , T: +44 (0) 1642 754000 Recycling Information WEEE (Waste of Electrical and Electronic Equipment), Recycling of Electronic Products Europe, United Kingdom In 2006 the European Union introduced regulations (WEEE) for the collection and recycling of all waste electrical and electronic equipment. It is no longer allowable to simply throw away electrical and electronic equipment. Instead, these products must enter the recycling process. Each individual EU member state has implemented the WEEE regulations into national law in slightly different ways. Please follow your national law when you want to dispose of any electrical or electronic products. More details can be obtained from your national WEEE recycling agency. Germany / Deutschland Die Europäische Union hat mit der WEEE Direktive Regelungen für die Verschrottung und das Recycling von Elektro- und Elektronikprodukten geschaffen. Diese wurden im Elektro- und Elektronikgerätegesetz – ElektroG in deutsches Recht umgesetzt. Dieses Gesetz verbietet das Entsorgen von entsprechenden, auch alten, Elektro- und Elektronikgeräten über die Hausmülltonne! Diese Geräte müssen den lokalen Sammelsystemen bzw. örtlichen Sammelstellen zugeführt werden! Dort werden sie kostenlos entgegen genommen. Die Kosten für den weiteren Recyclingprozess übernimmt die Gesamtheit der Gerätehersteller. France En 2006, l'union Européenne a introduit la nouvelle réglementation (DEEE) pour le recyclage de tout équipement électrique et électronique. Chaque Etat membre de l’ Union Européenne a mis en application la nouvelle réglementation DEEE de manières légèrement différentes. Veuillez suivre le décret d’application correspondant à l’élimination des déchets électriques ou électroniques de votre pays. Italy Nel 2006 l’unione europea ha introdotto regolamentazioni (WEEE) per la raccolta e il riciclo di apparecchi elettrici ed elettronici. Non è più consentito semplicemente gettare queste apparecchiature, devono essere riciclate. Ogni stato membro dell’ EU ha tramutato le direttive WEEE in leggi statali in varie misure. Fare riferimento alle leggi del proprio Stato quando si dispone di un apparecchio elettrico o elettronico. Per ulteriori dettagli fare riferimento alla direttiva WEEE sul riciclaggio del proprio Stato. LINDY No. 43122 Tested to Comply with FCC Standards For Home and Office Use! 2nd Edition May 2015 www.lindy.com