1
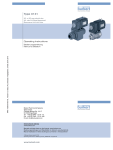
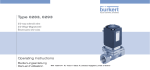
Type 0301
3/2-Way Mini Solenoid Valve
3/2-Wege-Mini-Magnetventil
Électrovanne mini à 3/2 voies
Operating Instructions
Bedienungsanleitung
Manuel d‘utilisation
Bürkert Fluid Control Systems
Sales Center
Christian-Bürkert-Str. 13-17
D-74653 Ingelfingen
Tel. + 49 (0) 7940 - 10 91 111
Fax + 49 (0) 7940 - 10 91 448
E-mail: [email protected]
International address
www.burkert.com
Manuals and data sheets on the Internet : www.burkert.com
Bedienungsanleitungen und Datenblätter im Internet: www.buerkert.de
Manuels d'utilisation et fiches techniques sur Internet: www.buerkert.fr
© Bürkert Werke GmbH, 2014
Operating Instructions 1411/06_EU-ML_00893071 / Original DE
www.burkert.com
EN
Type 0301
1.1 Symbols
Table of Contents
1
The operating instructions...................................................................................................2
2
Authorized use..................................................................................................................................................3
3
Basic safety instructions.......................................................................................................4
4
Technical data................................................................................................................................5
5
Installation.........................................................................................................................................7
6
Disassembly..................................................................................................................................11
7
Maintenance, Troubleshooting.......................................................................................12
8
Spare parts....................................................................................................................................13
9
Transportation, storage, disposal.................................................................................13
1
The operating instructions
The operating instructions contain important information.
▶▶ Read the instructions carefully and follow the safety instructions.
▶▶ Keep the instructions in a location where they are available to every
user.
The liability and warranty for Type 0301 are void if the operating instructions are not followed.
Danger!
Immediate danger! Serious or fatal injuries.
Warning!
Possible danger! Serious or fatal injuries.
Caution!
Danger! Moderate or minor injuries.
Note!
Warns of damage to property.
Important tips and recommendations.
Refers to information in these operating instructions or in other
documentation.
▶▶ Designates instructions for risk prevention.
→→Designates a procedure which you must carry out.
english
2
1.2 Definitions of terms
2.2 Approvals
The term “device” used in the instructions always refers to Type 0301.
The approval rating on the Bürkert type labels refers to Bürkert products.
2
Authorized use
Type 0301 is designed for blocking, dosing, filling and venting
neutral gaseous and liquid media.
▶▶ Do not use the device outdoors.
▶▶ Use according to the authorized data, operating conditions, and
conditions of use specified in the contract documents and operating
instructions.
▶▶ Do not use the device in potentially explosive areas.
▶▶ Use the device only in conjunction with third-party devices and
components recommended and authorized by Bürkert.
▶▶ Use device only when in perfect condition and always ensure proper
storage, transportation, installation and operation.
▶▶ Use the device only as intended.
e1
03 5791
Devices which must bear the type approval mark were approved at the
Federal Motor Transport Authority (Kraftfahrtbundesamt) under the type
approval number
e1*72/245*2006/96*5791*00
and are put into circulation with the indicated type approval mark.
An excerpt of the type approval is available from the address below.
Bürkert Werke GmbH
CQ-Approval Management,
Christian-Bürkert-Str. 13-17,
D-74653 Ingelfingen
2.1 Restrictions
If exporting the system/device, observe any existing restrictions.
english
3
Basic safety instructions
These safety instructions do not take into account any contingencies and
events which may arise during the installation, operation and maintenance
of the devices.
Risk of injury from high pressure in the system or device.
▶▶ Before working on the system or device, switch off the pressure
and vent and drain lines.
Risk of injury due to electric shock.
▶▶ Before working on the system or device, switch off the power supply and secure to prevent reactivation.
▶▶ Observe applicable accident prevention and safety regulations for
electrical equipment.
If switched on for a prolonged time, risk of burns or fire due to
hot device surface.
▶▶ Keep the device away from highly flammable substances and
media and do not touch with bare hands.
4
english
3
Risk of injury due to malfunction of valves with alternating current
(AC).
Sticking core causes coil to overheat, resulting in a malfunction.
▶▶ Monitor process to ensure function is in perfect working order.
General hazardous situations.
To prevent injuries:
▶▶ Feed in only those media specified in Section „4“.
▶▶ The device may be operated only when in perfect condition and in
consideration of the operating instructions.
▶▶ Do not make any internal or external changes on the device and do
not subject it to mechanical stress.
▶▶ Secure to prevent unintentional actuation.
▶▶ Only trained technicians may perform installation and maintenance
work.
▶▶ The valves must be installed in accordance with the regulations
applicable in the country.
▶▶ After an interruption in the power supply, ensure that the process is
restarted in a controlled manner.
▶▶ Observe the general rules of technology.
Type 0301
4
Technical data
4.3 Operating conditions
The following values are indicated on the type label:
•Voltage (tolerance ±10 %) and current type
•Coil power consumption (active power in W, at operating
temperature)
•Pressure range
•Operating principle
•Orifice
•Port connection
•Valve body material (MS = brass, PA = polyamide)
•Seal material
Warning!
Risk of injury from high pressure and discharge of medium.
▶▶ Do not use Type 0301 outdoors.
▶▶ Avoid heat sources, which may cause the permissible temperature
range to be exceeded.
Ambient temperatureNBR -10 – +55 °C
FKM -10 – +55 °C
EPDM -30 – +55 °C
4.1 Conformity
Degree of protectionIP65 in accordance with DIN EN 60529 or
IEC 60529 with connected and installed
cable plug, e.g. Bürkert Type 2507
The solenoid valve Type 0301 conforms to the EC directives according
to the EC Declaration of Conformity.
4.4 Mechanical data
4.2 Standards
The applied standards, which are used to demonstrate compliance with
the EC Directives, are listed in the EC type test certificate and/or the EC
Declaration of Conformity.
Dimensions
see data sheet
Coil material
epoxide
Port connectionsFlange
with hollow screw G1/8
english
4.5 Fluidic data
Media Neutral, gaseous and liquid media which do not attack
housing and seal materials (see resistance table at
www.buerkert.de)
Medium temperatureNBR -10 – +90 °C
FKM -10 – +100 °C
EPDM -30 – +90 °C
Viscosity
max. 21 mm²/s
Switching times
Opening
Closing
12 ms
8 ms
5
Circuit functions (CF)
C
(NC)
D
(NO)
2(A)
1(P) 3(R)
4(B)
1(P) 3(R)
3/2-way valve; closed in rest position,
output A unloaded
3/2-way valve, in rest position, output B
pressurized
4.6 Electrical data
ConnectionsDIN EN 175301-803 (DIN 43650) shape B:
for cable plug Type 2507
Wire connection on request
Switching times [ms]:
Measurement on the valve output at 6 bar and +20 °C as per ISO 12238
Opening: Pressure build-up 0 – 90%
Closing: Pressure reduction 100 – 10%
Operating voltage12 V DC, 24 V DC
24 V / 50 Hz, 230 V / 50 Hz
Voltage tolerance
± 10%
Nominal powerAC
DC
9 VA (pull-in), 6 VA (operation)
4 W or 2 W
Nominal operating modelong-term operation, ED 100%
for block assembly:
2 W long-term operation on request
4 W intermittent operation 60% (30 min)
english
6
5
4.7 Type label
Orifice
Seal material
Circuit function
Valve body material
Made in Germany
Type
0301 C 1.2 NBR PA
FLNSCH PN 0-10 bar
24V DC
2W
00054627
CE
W14UN
Identity number
Voltage, frequency, output
Port connection, pressure range
Fig. 1:
Description of the type label (example)
Installation
DANGER!
Risk of injury from high pressure in the system or device.
▶▶ Before working on the system or device, switch off the pressure
and vent and drain lines.
Risk of injury due to electric shock.
▶▶ Before working on the system or device, switch off the power supply and secure to prevent reactivation.
▶▶ Observe applicable accident prevention and safety regulations for
electrical equipment.
Warning!
Risk of injury from improper installation.
▶▶ Installation may be carried out only by trained technicians and with
the appropriate tools.
▶▶ Secure system against unintentional activation.
▶▶ Following installation, ensure a controlled restart.
english
7
Type 0301
5.1 Fluid Installation
Valve with flanged connection:
→→Remove cover plate.
Risk of injury from high pressure in the system or device.
▶▶ Before working on the system or device, switch off the pressure
and vent and drain lines.
Any installation position is possible, preferably with coil face up.
→→Prior to installation check pipelines for dirt and clean if necessary.
→→If required, install a dirt trap to prevent malfunctions.
Mesh size:
0.2 – 0.4 mm
Warning!
Risk of injury due to discharge of medium.
▶▶ Ensure that the supplied seals are correctly seated in the valve.
▶▶ Ensure that the manifold is even.
▶▶ Ensure that the surface quality of the manifold is adequate.
The solenoid valve can be attached by means of the two through-holes
for cylinder head screws M3 x 45.
→→Attach the solenoid valve using two cylinder head screws M3 x 45
(maximum tightening torque: 1 Nm).
View
Valve from below
14
Observe the flow direction of the valve.
∅ 3.3
from 1(P) → 2(A) (CFC) or
from 1(P) → 2(B) (CFD)
14
4.7
∅ 2.4
DANGER!
Mounting hole
Fig. 2:
Dimensional drawing for flanged connection
english
8
Installing the manifold:
Attaching the manifold
Do not mount solenoid valves of the CFC and CFD on a joint
manifold.
Solenoid valves of the CFC may be mounted together with Type
0201.
Cylinder head screws M3 x 45
Note:
Valves can be turned by
180° and mounted
Hole (2x) for
attaching the
manifold
The manifold can be attached from above or below using cylinder head
screws M4. When installing from above, remove the two outer solenoid
valves (loosen the two cylinder head screws which are not indicated).
Warning!
Risk of injury due to discharge of medium.
▶▶ Ensure that the supplied seals are correctly seated in the valve housing.
→→Remove cover plate.
→→Attach solenoid valves to manifold using cylinder head screw M3 x
45 (see „Fig. 3“; maximum tightening torque: 1 Nm).
Valves can be turned by 180° and mounted.
→→Seal working connections which are not required with sealing plugs.
Manifolds can be connected in a row using connection nipples.
Working connection
Fig. 3:
Installing manifold
english
9
Attaching the manifold:
→→Use PTFE tape as the seal material.
Protective conductor
Note!
Caution risk of breakage.
▶▶ Do not use valve as a lever arm.
→→Hold the device with a suitable tool (open-end wrench) on the
valve body and screw into the pipeline.
or for connection with wire:
yellow-green wire
Fig. 4:
Protective conductor
5.2 Electrical installation with cable plug
Type 2507
DANGER!
Risk of injury due to electric shock.
▶▶ Before working on the system or device, switch off the power supply and secure to prevent reactivation.
▶▶ Observe applicable accident prevention and safety regulations for
electrical equipment.
If the protective conductor is not connected, there is a risk of
electric shock.
▶▶ Always connect protective conductor and check electrical continuity
between coil and valve body.
10
english
Seal
Fig. 5:
max. 1.0 Nm
Connecting the cable plug to the power supply
The cable plug can be turned by 4 x 90° and inserted.
Type 0301
→→Connect terminals.
→→Connect protective conductor.
→→Attach seal and check for correct fit.
→→Mount cable plug (DIN EN 175301-803 (DIN 43650), shape B) and
screw tight, observing the maximum tightening torque 1 Nm.
→→Check electrical continuity between coil and valve body (protective
conductor function).
6
Disassembly
DANGER!
Risk of injury from high pressure in the system or device.
▶▶ Before working on the system or device, switch off the pressure
and vent and drain lines.
Risk of injury due to electric shock.
▶▶ Before working on the system or device, switch off the power
supply and secure to prevent reactivation.
▶▶ Observe applicable accident prevention and safety regulations for
electrical equipment.
Risk of injury from improper disassembly.
▶▶ Disassembly may only be carried out by authorized technicians
and with the appropriate tools.
→→Turn off the pressure and vent the lines.
→→Switch off the power supply.
→→Remove cable plug (if required).
→→To remove the valve, loosen the two screws only.
→→Remove valve from manifold.
english
7
Maintenance, Troubleshooting
7.1 Malfunctions
If malfunctions occur, check whether
DANGER!
Risk of injury from high pressure in the system or device.
▶▶ Before working on the system or device, switch off the pressure
and vent and drain lines.
Risk of injury due to electric shock.
▶▶ Before working on the system or device, switch off the power
supply and secure to prevent reactivation.
▶▶ Observe applicable accident prevention and safety regulations
for electrical equipment.
If switched on for a prolonged time, risk of burns or fire due to
hot device surface.
▶▶ Keep the device away from highly flammable substances and
media and do not touch with bare hands.
Risk of injury from improper maintenance work.
▶▶ Maintenance may only be carried out by authorized technicians
and with the appropriate tools.
▶▶ Secure system against unintentional activation.
▶▶ Following maintenance, ensure a controlled restart.
→→the device has been installed according to the instructions,
→→the electrical and fluid connections are correct,
→→the device is not damaged,
→→all screws have been tightened,
→→the voltage and pressure have been switched on,
→→the pipelines are clean.
Malfunction
Valve does
not switch
Valve does
not close
Possible cause
Short circuit or coil interrupted
Core or core area dirty
Inner compartment of the valve is dirty
If the valve still does not switch, please contact your Bürkert Service
representative.
english
12
8
11
Spare parts
9
Caution!
Risk of injury and/or damage due to the use of incorrect parts.
Incorrect accessories and unsuitable spare parts may cause injuries
and damage the device and the surrounding area.
▶▶ Use original accessories and original spare parts from Bürkert only.
Transportation, storage,
disposal
Note!
Transport damage.
Inadequately protected devices may be damaged during
transportation.
▶▶ Protect the device against moisture and dirt in shock-resistant
packaging during transportation.
▶▶ Prevent the temperature from exceeding or dropping below the
permitted storage temperature.
Incorrect storage may damage the device.
▶▶ Store the device in a dry and dust-free location.
▶▶ Storage temperature -40 – +80 °C.
Damage to the environment caused by device components
contaminated with media.
▶▶ Dispose of the device and packaging in an environmentally friendly
manner.
▶▶ Observe applicable disposal and environmental regulations.
english
13
Type 0301
3/2-Way Mini Solenoid Valve
3/2-Wege-Mini-Magnetventil
Électrovanne mini à 3/2 voies
Operating Instructions
Bedienungsanleitung
Manuel d‘utilisation
Bürkert Fluid Control Systems
Sales Center
Christian-Bürkert-Str. 13-17
D-74653 Ingelfingen
Tel. + 49 (0) 7940 - 10 91 111
Fax + 49 (0) 7940 - 10 91 448
E-mail: [email protected]
International address
www.burkert.com
Manuals and data sheets on the Internet : www.burkert.com
Bedienungsanleitungen und Datenblätter im Internet: www.buerkert.de
Manuels d'utilisation et fiches techniques sur Internet: www.buerkert.fr
© Bürkert Werke GmbH, 2014
Operating Instructions 1411/06_EU-ML_00893071 / Original DE
www.burkert.com
DE
Type 0301
1.1 Darstellungsmittel
Inhaltsverzeichnis
1
Die Bedienungsanleitung..................................................................................................14
2
Bestimmungsgemäße Verwendung................................................................................15
3
Grundlegende Sicherheitshinweise..........................................................................16
4
Technische Daten....................................................................................................................17
5
Installation......................................................................................................................................19
6
Demontage....................................................................................................................................23
7
Wartung, Fehlerbehebung.................................................................................................24
8
Ersatzteile.......................................................................................................................................25
9
Transport, Lagerung, Entsorgung................................................................................25
1
Die Bedienungsanleitung
Die Bedienungsanleitung enthält wichtige Informationen.
▶▶ Anleitung sorgfältig lesen und Hinweise zur Sicherheit beachten.
▶▶ Anleitung so aufbewahren, dass sie jedem Benutzer zur Verfügung
steht.
Die Haftung und Gewährleistung für Typ 0301 entfällt, wenn die Anweisungen der Bedienungsanleitung nicht beachtet werden.
Gefahr!
Unmittelbare Gefahr! Schwere oder tödlichen Verletzungen.
Warnung!
Mögliche Gefahr! Schwere oder tödlichen Verletzungen.
Vorsicht!
Gefahr! Mittelschwere oder leichten Verletzungen.
Hinweis!
Warnt vor Sachschäden.
Wichtige Tipps und Empfehlungen.
verweist auf Informationen in dieser Bedienungsanleitung oder
in anderen Dokumentationen.
▶▶ markiert eine Anweisung zur Gefahrenvermeidung.
→→markiert einen Arbeitsschritt den Sie ausführen müssen.
deutsch
14
1.2 Begriffsdefinition
2.2 Zulassungen
Der in der Anleitung verwendete Begriff „Gerät“ steht immer für Typ 0301.
Die auf den Bürkert-Typschildern aufgebrachte Zulassungskennzeichnung
bezieht sich auf die Bürkert-Produkte.
2
BestimmungsgemäSSe
Verwendung
e1
03 5791
Der Typ 0301 ist zum Sperren, Dosieren, Füllen und Belüften
von neutralen gasförmigen und flüssigen Medien konzipiert.
▶▶ Das Gerät nicht im Außenbereich einsetzen.
▶▶ Für den Einsatz die in den Vertragsdokumenten und der Bedienungsanleitung spezifizierten zulässigen Daten, Betriebs- und Einsatzbedingungen beachten.
▶▶ Gerät nicht in explosionsgefährdeten Bereichen einsetzen.
▶▶ Gerät nur in Verbindung mit von Bürkert empfohlenen bzw. zugelassenen Fremdgeräten und -komponenten einsetzen.
▶▶ Gerät nur in einwandfreiem Zustand betreiben und auf sachgerechte
Lagerung, Transport, Installation und Bedienung achten.
▶▶ Gerät nur bestimmungsgemäß verwenden.
Geräte, die das Typgenehmigungszeichen tragen müssen, wurden beim
Kraftfahrtbundesamt unter der Typgenehmigungsnummer
e1*72/245*2006/96*5791*00
genehmigt und werden mit dem gezeigten Typgenehmigungszeichen
in den Verkehr gebracht.
Einen Auszug der Typgenehmigung erhalten Sie unter der unten stehenden Adresse.
Bürkert Werke GmbH
CQ-Approval Management,
Christian-Bürkert-Str. 13-17,
D-74653 Ingelfingen
2.1 Beschränkungen
Bei der Ausfuhr des Systems/Geräts gegebenenfalls bestehende
Beschränkungen beachten.
deutsch
3
Grundlegende
Sicherheitshinweise
Diese Sicherheitshinweise berücksichtigen keine Zufälligkeiten und Ereignisse, die bei Montage, Betrieb und Wartung der Geräte auftreten können.
Verletzungsgefahr durch hohen Druck in Anlage oder Gerät.
▶▶ Vor Arbeiten an Anlage oder Gerät, den Druck abschalten und
Leitungen entlüften und entleeren.
Verletzungsgefahr durch Stromschlag.
▶▶ Vor Arbeiten an Anlage oder Gerät, die Spannung abschalten und
vor Wiedereinschalten sichern.
▶▶ Die geltenden Unfallverhütungs- und Sicherheitsbestimmungen für
elektrische Geräte beachten.
Verbrennungsgefahr oder Brandgefahr bei längerer Einschaltzeit
durch heiße Geräteoberfläche.
▶▶ Das Gerät von leicht brennbaren Stoffen und Medien fernhalten
und nicht mit bloßen Händen berühren.
16
deutsch
15
Verletzungsgefahr durch Funktionsausfall bei Ventilen mit Wechselspannung (AC).
Festsitzender Kern bewirkt Spulenüberhitzung, die zu Funktionsausfall
führt.
▶▶ Arbeitsprozess auf einwandfreie Funktion überwachen.
Allgemeine Gefahrensituationen.
Zum Schutz vor Verletzungen ist zu beachten:
▶▶ Nur Medien einspeisen, die in Kapitel „4“ aufgeführt sind.
▶▶ Das Gerät nur in einwandfreiem Zustand und unter Beachtung der
Bedienungsanleitung betreiben.
▶▶ Am Gerät keine inneren oder äußeren Veränderungen vornehmen
und nicht mechanisch belasten.
▶▶ Vor unbeabsichtiger Betätigung sichern.
▶▶ Nur geschultes Fachpersonal darf Installations- und Instandhaltungsarbeiten ausführen.
▶▶ Die Ventile müssen gemäß der im Land gültigen Vorschriften installiert
werden.
▶▶ Nach Unterbrechung der elektrischen Versorgung für einen kontrollierten Wiederanlauf des Prozesses sorgen.
▶▶ Die allgemeinen Regeln der Technik einhalten.
Type 0301
4
Technische Daten
4.3 Betriebsbedingungen
Folgende Werte sind auf dem Typschild angegeben:
•Spannung (Toleranz ±10 %) und Stromart
•Spulenleistung (Wirkleistung in W, betriebswarm)
•Druckbereich
•Wirkungsweise
Warnung!
Verletzungsgefahr durch hohen Druck und Mediumsaustritt.
▶▶ Typ 0301 nicht im Außenbereich einsetzen.
▶▶ Wärmequellen vermeiden, die zur Überschreitung des zulässigen
Temperaturbereichs führen können.
•Nennweite
•Leitungsanschluss
•Gehäusewerkstoff (MS = Messing, PA = Polyamid)
•Dichtwerkstoff
4.1 Konformität
Das Magnetventil Typ 0301 ist konform zu den EG-Richtlinien entsprechend der EG-Konformitätserklärung.
4.2 Normen
Die angewandten Normen, mit welchen die Konformität zu den Richtlinien
nachgewiesen wird, sind in der EG-Baumusterprüfbescheinigung und/
oder der EG-Konformitätserklärung nachzulesen.
UmgebungstemperaturNBR -10...+55 °C
FKM -10...+55 °C
EPDM -30...+55 °C
SchutzartIP65 nach DIN EN 60529 bzw. IEC 60529
mit angeschlossener und montierter Gerätesteckdose, z. B. Bürkert Typ 2507
4.4 Mechanische Daten
Abmessungen
siehe Datenblatt
Spulenwerkstoff
Epoxid
LeitungsanschlüsseFlansch
mit Hohlschraube G1/8
deutsch
4.5 Fluidische Daten
Medien Neutrale gasförmige und flüssige Medien, die Gehäuseund Dichtwerkstoffe nicht angreifen (siehe Beständigkeitstabelle unter www.buerkert.de)
Viskosität
max. 21 mm²/s
Schaltzeiten
Öffnen
Schließen
12 ms
8 ms
Wirkungsweisen (WW)
C
(NC)
D
(NO)
MediumstemperaturNBR -10...+90 °C
FKM -10...+100 °C
EPDM -30...+90 °C
17
2(A)
1(P) 3(R)
4(B)
1(P) 3(R)
3/2-Wege-Ventil; in Ruhestellung
geschlossen, Ausgang A entlastet
3/2-Wege-Ventil; in Ruhestellung
Ausgang B druckbeaufschlagt
4.6 Elektrische Daten
AnschlüsseDIN EN 175301-803 (DIN 43650) Form B:
für Gerätesteckdose Typ 2507
Litzenanschluss auf Anfrage
Schaltzeiten [ms]:
Messung am Ventilausgang bei 6 bar und +20 °C nach ISO 12238
Öffnen: Druckaufbau 0...90 %
Schließen: Druckabbau 100...10 %
Betriebsspannung12 V DC, 24 V DC
24 V / 50 Hz, 230 V / 50 Hz
Spannungstoleranz
± 10 %
NennleistungAC
DC
9 VA (Anzug), 6 VA (Betrieb)
4 W oder 2 W
NennbetriebsartDauerbetrieb, ED 100 %
bei Blockmontage:
2 W Dauerbetrieb a. A.
4 W Aussetzbetrieb 60 % (30 min)
deutsch
18
5
4.7 Typschild
Nennweite
Dichtwerkstoff
Wirkungsweise
Gehäusewerkstoff
Made in Germany
Typ
0301 C 1,2 NBR PA
FLNSCH PN 0-10 bar
24V DC
2W
00054627
CE
W14UN
Identnummer
Spannung, Frequenz, Leistung
Leitungsanschluss, Druckbereich
Bild 1:
Beschreibung des Typschilds (Beispiel)
Installation
GEFAHR!
Verletzungsgefahr durch hohen Druck in Anlage oder Gerät.
▶▶ Vor Arbeiten an Anlage oder Gerät, den Druck abschalten und
Leitungen entlüften und entleeren.
Verletzungsgefahr durch Stromschlag.
▶▶ Vor Arbeiten an Anlage oder Gerät, die Spannung abschalten und
vor Wiedereinschalten sichern.
▶▶ Die geltenden Unfallverhütungs- und Sicherheitsbestimmungen für
elektrische Geräte beachten.
Warnung!
Verletzungsgefahr bei unsachgemäßer Installation.
▶▶ Die Installation darf nur geschultes Fachpersonal mit geeignetem
Werkzeug durchführen.
▶▶ Anlage vor unbeabsichtigtem Betätigen sichern.
▶▶ Nach der Installation einen kontrollierten Wiederanlauf gewährleisten.
deutsch
19
Type 0301
5.1 Fluidische Installation
Ventil mit Flanschanschluss:
→→Verschlussplatte entfernen.
Verletzungsgefahr durch hohen Druck in Anlage oder Gerät.
▶▶ Vor Arbeiten an Anlage oder Gerät, den Druck abschalten und
Leitungen entlüften und entleeren.
Die Einbaulage ist beliebig, vorzugsweise Spule nach oben.
→→Rohrleitungen vor dem Einbau auf Verschmutzungen überprüfen und
Verletzungsgefahr durch Mediumsaustritt.
▶▶ Bei mitgelieferten Dichtungen auf den richtigen Sitz im Ventil achten.
▶▶ Auf die Ebenheit der Anschlussplatte achten.
▶▶ Auf ausreichende Oberflächengüte der Anschlussplatte achten.
Das Magnetventil hat zur Befestigung zwei durchgehende Bohrungen
für Zylinderschrauben M3 x 45.
→→Mit zwei Zylinderschrauben M3 x 45 das Magnetventil befestigen
(maximales Anziehdrehmoment: 1 Nm).
Ansicht
Ventil von unten
∅ 3,3
14
gegebenenfalls reinigen.
→→Zum Schutz vor Störungen gegebenenfalls einen Schmutzfänger
Maschenweite:
einbauen.
0,2...0,4 mm
Warnung!
Die Durchflussrichtung des Ventils beachten.
von 1(P) → 2(A) (WWC) oder
von 1(P) → 2(B) (WWD)
14
4,7
∅ 2,4
GEFAHR!
Befestigungsbohrung
Bild 2:
Maßzeichnung für Flanschanschluss
deutsch
20
Anschlussplattenmontage:
Befestigung der Anschlussplatte
Magnetventile der WWC und WWD nicht auf eine gemeinsame
Anschlussplatte montieren.
Magnetventile der WWC können zusammen mit Typ 0201 montiert werden.
Warnung!
Zylinderschrauben M3 x 45
Hinweis:
Ventile können um 180°
gedreht montiert werden
Verletzungsgefahr durch Mediumsaustritt.
▶▶ Bei mitgelieferten Dichtungen auf den richtigen Sitz im Ventilgehäuse
achten.
→→Verschlussplatte entfernen.
→→Magnetventile auf Anschlussplatte mit Zylinderschraube M3 x 45
befestigen (siehe „Bild 3“; maximales Anziehdrehmoment: 1 Nm).
Ventile können um 180° gedreht montiert werden.
→→Nicht benötigte Arbeitsanschlüsse durch Dichtstopfen verschließen.
Bohrung (2x) zur
Befestigung der
Anschlussplatte
Arbeitsanschluss
Bild 3:
Die Anschlussplatte kann von oben oder unten mit Zylinderschrauben M4
befestigt werden. Bei der Montage von oben müssen die beiden äußeren
Magnetventile demontiert werden (die beiden nicht gekennzeichneten
Zylinderschrauben lösen).
Anschlussplatten können mit Hilfe von Verbindungsnippeln
aneinander gereiht werden.
Anschlussplattenmontage
deutsch
21
Anschluss der Anschlussplatte:
→→Als Dichtwerkstoff PTFE-Band verwenden.
Schutzleiter
Hinweis!
Vorsicht Bruchgefahr.
▶▶ Ventil nicht als Hebelarm benutzen.
→→Das Gerät mit geeignetem Werkzeug (Gabelschlüssel) am
Gehäuse festhalten und in die Rohrleitung einschrauben.
oder bei Anschluss mit Litze:
gelb-grüne Litze
Bild 4:
Schutzleiter
5.2 Elektrische Installation mit
Gerätesteckdose
Typ 2507
GEFAHR!
Dichtung
Verletzungsgefahr durch Stromschlag.
▶▶ Vor Arbeiten an Anlage oder Gerät, die Spannung abschalten und
vor Wiedereinschalten sichern.
▶▶ Die geltenden Unfallverhütungs- und Sicherheitsbestimmungen für
elektrische Geräte beachten.
Bei nicht angeschlossenem Schutzleiter besteht Stromschlaggefahr.
▶▶ Schutzleiter immer anschließen und elektrischen Durchgang zwischen
Spule und Gehäuse prüfen.
22
deutsch
Bild 5:
max. 1,0 Nm
Elektrischer Anschluss mit Gerätesteckdose
Der Einsatz der Gerätesteckdose kann um 4 x 90° gedreht
werden.
Type 0301
→→Klemmen anschließen.
→→Schutzleiter anschließen.
→→Dichtung aufstecken und korrekten Sitz prüfen.
→→Gerätesteckdose (DIN EN 175301-803 (DIN
6
Demontage
GEFAHR!
43650), Form B)
montieren und festschrauben, dabei maximales Anziehdrehmoment
1 Nm beachten.
→→Elektrischen Durchgang zwischen Spule und Gehäuse prüfen
(Funktion Schutzleiter).
Verletzungsgefahr durch hohen Druck in Anlage oder Gerät.
▶▶ Vor Arbeiten an Anlage oder Gerät, den Druck abschalten und
Leitungen entlüften und entleeren.
Verletzungsgefahr durch Stromschlag.
▶▶ Vor Arbeiten an Anlage oder Gerät, die Spannung abschalten und
vor Wiedereinschalten sichern.
▶▶ Die geltenden Unfallverhütungs- und Sicherheitsbestimmungen
für elektrische Geräte beachten.
Verletzungsgefahr bei unsachgemäßer Demontage.
▶▶ Die Demontage darf nur autorisiertes Fachpersonal mit geeignetem Werkzeug durchführen.
→→Druck abschalten und Leitungen entlüften.
→→Elektrische Spannung abschalten.
→→Gerätesteckdose demontieren (bei Bedarf).
→→Zur Demontage des Ventils nur die beiden Schrauben lösen.
→→Ventil von Anschlussplatte demontieren.
deutsch
7
Wartung, Fehlerbehebung
7.1 Störungen
Bei Störungen überprüfen, ob
GEFAHR!
Verletzungsgefahr durch hohen Druck in Anlage oder Gerät.
▶▶ Vor Arbeiten an Anlage oder Gerät, den Druck abschalten und
Leitungen entlüften und entleeren.
Verletzungsgefahr durch Stromschlag.
▶▶ Vor Arbeiten an Anlage oder Gerät, die Spannung abschalten
und vor Wiedereinschalten sichern.
▶▶ Die geltenden Unfallverhütungs- und Sicherheitsbestimmungen
für elektrische Geräte beachten.
Verbrennungsgefahr oder Brandgefahr bei längerer Einschaltzeit durch heiße Geräteoberfläche.
▶▶ Das Gerät von leicht brennbaren Stoffen und Medien fernhalten
und nicht mit bloßen Händen berühren.
Verletzungsgefahr bei unsachgemäßer Wartungsarbeiten.
▶▶ Die Wartung darf nur autorisiertes Fachpersonal mit geeignetem
Werkzeug durchführen.
▶▶ Anlage vor unbeabsichtigtem Betätigen sichern.
▶▶ Nach der Wartung einen kontrollierten Wiederanlauf gewährleisten.
→→das Gerät vorschriftsmäßig installiert ist,
→→elektrischer und fluidischer Anschluss ordnungsgemäß ausgeführt
sind,
→→das Gerät nicht beschädigt ist,
→→alle Schrauben fest angezogen sind,
→→Spannung und Druck anliegen,
→→die Rohrleitungen schmutzfrei sind.
Störung
Mögliche Ursache
Ventil schaltet Kurzschluss oder Spulenunterbrechung
nicht
Kern oder Kernraum verschmutzt
Ventil schließt Innenraum des Ventils verschmutzt
nicht
Falls das Ventil dennoch nicht schaltet, wenden Sie sich an Ihren
Bürkert-Service.
deutsch
24
8
23
Ersatzteile
Vorsicht!
Verletzungsgefahr, Sachschäden durch falsche Teile.
Falsches Zubehör und ungeeignete Ersatzteile können Verletzungen
und Schäden am Gerät und dessen Umgebung verursachen.
▶▶ Nur Originalzubehör sowie Originalersatzteile der Firma Bürkert
verwenden.
9
Transport, Lagerung,
Entsorgung
Hinweis!
Transportschäden.
Unzureichend geschützte Geräte können durch den Transport
beschädigt werden.
▶▶ Gerät vor Nässe und Schmutz geschützt in einer stoßfesten Verpackung transportieren.
▶▶ Eine Über- bzw. Unterschreitung der zulässigen Lagertemperatur
vermeiden.
Falsche Lagerung kann Schäden am Gerät verursachen.
▶▶ Gerät trocken und staubfrei lagern.
▶▶ Lagertemperatur -40…+80 °C.
Umweltschäden durch von Medien kontaminierte Geräteteile.
▶▶ Gerät und Verpackung umweltgerecht entsorgen.
▶▶ Geltende Entsorgungsvorschriften und Umweltbestimmungen
einhalten.
deutsch
25
Type 0301
3/2-Way Mini Solenoid Valve
3/2-Wege-Mini-Magnetventil
Électrovanne mini à 3/2 voies
Operating Instructions
Bedienungsanleitung
Manuel d‘utilisation
Bürkert Fluid Control Systems
Sales Center
Christian-Bürkert-Str. 13-17
D-74653 Ingelfingen
Tel. + 49 (0) 7940 - 10 91 111
Fax + 49 (0) 7940 - 10 91 448
E-mail: [email protected]
International address
www.burkert.com
Manuals and data sheets on the Internet : www.burkert.com
Bedienungsanleitungen und Datenblätter im Internet: www.buerkert.de
Manuels d'utilisation et fiches techniques sur Internet: www.buerkert.fr
© Bürkert Werke GmbH, 2014
Operating Instructions 1411/06_EU-ML_00893071 / Original DE
www.burkert.com
FR
Type 0301
1
Manuel d’utilisation..................................................................................................................26
1.1 Symboles
2
Utilisation conforme...............................................................................................................27
Danger !
3
Consignes de sécurité fondamentales...................................................................28
4
Caractéristiques techniques............................................................................................29
5
Installation......................................................................................................................................31
6
Démontage....................................................................................................................................35
7
Maintenance, dépannage..................................................................................................36
8
Pièces de rechange................................................................................................................37
9
Transport, stockage, élimination...................................................................................37
Danger imminent ! Blessures graves ou mortelles.
Avertissement !
Danger potentiel ! Blessures graves ou mortelles.
Attention !
Danger ! Blessures légères ou de moyenne gravité.
Remarque !
Met en garde contre des dommages matériels.
1
Manuel d’utilisation
Le manuel d’utilisation contient des informations importantes.
▶▶ Lire attentivement le manuel d'utilisation et tenir compte des consignes
de sécurité.
▶▶ Conserver le manuel d'utilisation afin qu'il soit accessible à tous les
utilisateurs.
La responsabilité et la garantie légale concernant le type 0301 sont
exclues en cas de non-respect du manuel d'utilisation.
Conseils et recommandations importants.
Renvoie à des informations dans ce manuel d'utilisation ou
dans d'autres documentations.
▶▶ Identifie une consigne pour éviter un danger.
→→Identifie une opération que vous devez effectuer.
26
1.2 Définition des termes
2.2 Homologations
Le terme « appareil » utilisé dans ce manuel désigne toujours le type 0301.
Le marquage d'homologation apposé sur les plaques signalétiques
Bürkert se rapporte aux produits Bürkert.
2
Utilisation conforme
Le type 0301 est conçu pour couper, doser, remplir et aérer des
fluides neutres gazeux et liquides.
▶▶ Ne pas utiliser l'appareil à l'extérieur.
▶▶ Lors de l'utilisation, il convient de respecter les données et conditions
d'utilisation et d'exploitation admissibles spécifiées dans le manuel
d'utilisation et dans les documents contractuels.
▶▶ Ne pas utiliser l'appareil dans des zones présentant des risques
d’explosion.
▶▶ Utiliser uniquement l'appareil en association avec les appareils et
composants étrangers recommandés et homologués par Bürkert.
▶▶ Utiliser l'appareil uniquement en parfait état et veiller au stockage,
au transport, à l'installation et à l'utilisation conformes.
▶▶ Utiliser l'appareil uniquement de manière conforme.
e1
03 5791
Les appareils devant porter l'homologation ont été autorisés par l'office
fédéral (Kraftfahrtbundesamt) sous le numéro
e1*72/245*2006/96*5791*00
et sont mis sur le marché avec cette homologation.
Vous pouvez obtenir un extrait de cette homologation à l'adresse mentionnée ci-dessous.
Bürkert Werke GmbH
CQ-Approval Management,
Christian-Bürkert-Str. 13-17,
D-74653 Ingelfingen
2.1 Limitations
Lors de l'exportation du système/de l'appareil, veuillez respecter les
limitations éventuelles.
27
3
Consignes de sécurité
fondamentales
Ces consignes de sécurité ne tiennent pas compte des hasards et des
événements pouvant survenir lors du montage, de l'exploitation et de la
maintenance des appareils.
Risque de blessures dû à la présence de haute pression dans
l'installation ou l'appareil.
▶▶ Avant d'intervenir dans l'installation ou l'appareil, couper la pression
et désaérer et vider les conduites.
Risque de choc électrique.
▶▶ Avant d'intervenir dans l'installation ou l'appareil, couper la tension
et empêcher toute remise sous tension par inadvertance.
▶▶ Veuillez respecter les réglementations en vigueur pour les appareils
électriques en matière de prévention des accidents ainsi qu'en
matière de sécurité.
Risque de brûlures ou d'incendie lors d’une durée de fonctionnement prolongée dû à la surface brûlante de l’appareil.
▶▶ Tenez les substances et les fluides facilement inflammables à
l'écart de l'appareil et ne touchez pas ce dernier à mains nues.
28
Risque de blessure dû à une panne pour les vannes avec
tension alternative (AC).
Un noyau bloqué provoque la surchauffe de la bobine et donc une panne.
▶▶ Surveiller le bon fonctionnement du processus de travail.
Situations dangereuses d'ordre général.
Pour prévenir les blessures, respectez ce qui suit :
▶▶ Utiliser uniquement les fluides énumérés au chapitre « 4 ».
▶▶ L'appareil doit être utilisé uniquement en parfait état et en respectant
le manuel d'utilisation.
▶▶ Ne pas entreprendre de modifications internes ou externes sur
l'appareil et ne pas l'exposer à des sollicitations mécaniques.
▶▶ Protéger l'appareil contre toute mise en marche involontaire.
▶▶ Seul du personnel qualifié peut effectuer l'installation et la
maintenance.
▶▶ Les vannes doivent être installées conformément à la réglementation
en vigueur dans le pays respectif.
▶▶ Garantir un redémarrage contrôlé du processus après une coupure
de l'alimentation électrique.
▶▶ Respecter les règles générales de la technique.
Type 0301
4
Caractéristiques techniques
4.3 Conditions d'exploitation
Les valeurs suivantes sont indiquées sur la plaque signalétique :
•Tension (tolérance ±10 %) et type de courant
•Puissance de bobine (puissance active en W, à l’état chaud)
•Plage de pression
•Fonction
•Diamètre nominal
•Raccord de conduite
•Matériau du corps (MS = laiton, PA = polyamide)
•Matériau du joint
4.1 Conformité
L'électrovanne type 0301 répond aux directives CE conformément à la
déclaration de conformité CE.
Avertissement !
Danger dû à la pression élevée et à la sortie de fluide.
▶▶ Ne pas utiliser le type 0301 à l'extérieur.
▶▶ Éviter les sources de chaleur pouvant entraîner le dépassement de
la plage de température admissible.
Température ambianteNBR -10...+55 °C
FKM -10...+55 °C
EPDM -30...+55 °C
Degré de protectionIP65 selon DIN EN 60529 / IEC 60529
avec un connecteur connecté et monté, par
ex. le type 2507 de Bürkert
4.4 Caractéristiques mécaniques
4.2 Normes
Dimensions
voir fiche technique
Les normes utilisées attestant de la conformité aux directives, figurent
dans l'attestation CE de type et/ou la déclaration de conformité CE.
Matériau de la bobine
Résine époxy
Raccords de conduiteBride
avec vis à tête creuse G1/8
29
4.5 Données fluidiques
Fluides Fluides liquides et gazeux neutres n'attaquant ni le corps ni
le matériau du joint (voir le tableau de résistance chimique
sur www.buerkert.de)
Température du fluideNBR -10...+90 °C
FKM -10...+100 °C
EPDM -30...+90 °C
Viscosité
max. 21 mm²/s
Fonctions (CF)
C
(NC)
D
(NO)
2(A)
1(P) 3(R)
4(B)
1(P) 3(R)
Vanne 3/2 voies ; fermée en position de
repos, sortie A déchargée
Vanne 3/2 voies ; en position de repos
pression appliquée sur sortie B
4.6 Caractéristiques électriques
Temps de commutation
Ouverture 12 ms
Fermeture 8 ms
ConnexionsDIN EN 175301-803 (DIN 43650) Forme B :
pour connecteur type 2507
Raccordement à cordon sur demande
Temps de commutation [ms] :
Mesure à la sortie de la vanne à 6 bars et +20 °C selon ISO 12238
Ouverture : montée en pression 0...90 %
Fermeture : montée en pression 100...10 %
Tension de service12 V DC, 24 V DC
24 V / 50 Hz, 230 V / 50 Hz
Tolérance de tension ± 10 %
Puissance nominaleAC 9 VA (actionnement), 6 VA (fonctionnement)
DC 4 W ou 2 W
30
Mode de fonctionnement nominalFonctionnement continu, ED 100 %
en montage dos à dos :
2 W Fonctionnement continu sur demande
4 W Fonctionnement intermittent 60 % (30 mn)
4.7 Plaque signalétique
Diamètre nominal
Matériau du joint
Fonction
Matériau du corps
Made in Germany
Type
0301 C 1,2 NBR PA
FLNSCH PN 0-10 bar
24V DC
2W
00054627
CE
Installation
DANGER !
Risque de blessures dû à la présence de haute pression dans
l'installation ou l'appareil.
▶▶ Avant d'intervenir dans l'installation ou l'appareil, couper la pression
et désaérer et vider les conduites.
Risque de choc électrique.
▶▶ Avant d'intervenir dans l'installation ou l'appareil, couper la tension
et empêcher toute remise sous tension par inadvertance.
▶▶ Veuillez respecter les réglementations en vigueur pour les appareils
électriques en matière de prévention des accidents ainsi qu'en
matière de sécurité.
Avertissement !
W14UN
Numéro d'ident.
Tension, fréquence, puissance
Type de raccordement, plage de pression
Fig. 1 :
5
Description de la plaque signalétique (exemple)
Risque de blessures dû à une installation non conforme.
▶▶ L'installation doit être effectuée uniquement par un personnel qualifié et habilité disposant de l'outillage approprié.
▶▶ Empêcher tout actionnement involontaire de l’appareil.
▶▶ Garantir un redémarrage contrôlé après l'installation.
31
Type 0301
DANGER !
Risque de blessures dû à la présence de haute pression dans
l'installation ou l'appareil.
▶▶ Avant d'intervenir dans l'installation ou l'appareil, couper la pression
et désaérer et vider les conduites.
La position de montage est au choix, de préférence bobine vers le haut.
→→Préalablement au montage, vérifier si les conduites ne présentent
Avertissement !
Risque de blessure dû à la sortie de fluide.
▶▶ Veillez au positionnement correct des joints fournis dans la vanne.
▶▶ Respecter la planéité de l’embase.
▶▶ Respecter une qualité de surface suffisante de l’embase.
L'électrovanne dispose pour sa fixation de deux alésages continus pour
des vis à tête cylindrique M3 x 45.
→→Fixer l'électrovanne avec deux vis à tête cylindrique M3 x 45 (couple
de serrage maximal : 1 Nm).
Vue
en dessous
de la vanne
∅ 3,3
14
pas de salissures et les nettoyer le cas échéant.
→→Installez éventuellement un collecteur de boues comme protection
Mailles :
contre les dysfonctionnements.
0,2...0,4 mm
Vanne avec raccord à bride :
→→retirer la plaque de fermeture.
14
4,7
∅ 2,4
5.1 Installation fluidique
Respecter le sens de débit de la vanne.
de 1(P) → 2(A) (CFC) ou
de 1(P) → 2(B) (CFD)
Alésage de fixation
Fig. 2 :
Plan coté pour raccord à bride
32
Montage de l’embase :
Fixation de l’embase
ne pas monter les électrovannes CFC et CFD sur une embase
commune.
Les électrovannes CFC peuvent être montées avec le type 0201.
Vis à tête cylindrique M3 x 45
Remarque :
les vannes peuvent
être montées avec une
rotation de 180°
Alésage (2x) pour la
fixation de l’embase
L’embase peut être fixée par le haut ou par le bas avec des vis à tête
cylindrique M4. Lors du montage par le haut, les deux électrovannes
extérieures doivent être démontées (desserrer les deux vis à tête cylindrique non repérées).
Avertissement !
Risque de blessure dû à la sortie de fluide.
▶▶ Veillez au positionnement correct des joints fournis dans le corps de
vanne.
→→Retirer la plaque de fermeture.
→→Fixer les électrovannes sur l’embase avec la vis à tête cylindrique
M3 x 45 (voir « Fig. 3 » ; couple de serrage maximal : 1 Nm).
Les vannes peuvent être montées avec une rotation de 180°.
→→Fermer les raccords de travail non utilisés avec des bouchons étanches.
Raccord de travail
Fig. 3 :
Montage de l’embase
Les embases peuvent être alignées à l'aide de nipples de
liaison.
33
Raccord de l’embase :
→→utiliser une bande PTFE pour le matériau du joint.
Remarque !
Attention risque de rupture.
▶▶ Ne pas utiliser la vanne comme levier.
→→Maintenir l'appareil sur le corps à l'aide d'un outil approprié (clé à
fourche) et le visser dans la conduite.
5.2 Installation électrique avec connecteur
DANGER !
Risque de choc électrique.
▶▶ Avant d'intervenir dans l'installation ou l'appareil, couper la tension
et empêcher toute remise sous tension par inadvertance.
▶▶ Veuillez respecter les réglementations en vigueur pour les appareils
électriques en matière de prévention des accidents ainsi qu'en
matière de sécurité.
Risque de choc électrique lorsque le conducteur de protection
n’est pas raccordé.
▶▶ Raccorder toujours le conducteur de protection et vérifier le passage
électrique entre la bobine et le corps.
Conducteur de protection
ou en cas de raccordement avec
cordon : cordon jaune-vert
Fig. 4 :
34
Conducteur de protection
Type 0301
Type 2507
6
Démontage
DANGER !
Joint
Fig. 5 :
max. 1,0 Nm
Raccordement électrique avec connecteur
L'insert du connecteur peut être tourné de 4 x 90°.
→→Raccorder les bornes.
→→Raccorder le conducteur de protection.
→→Placer le joint et contrôler sa position correcte.
→→Monter le connecteur (DIN EN 175301-803 (DIN 43650), forme B)
et serrer à fond en respectant le couple de serrage maximal de 1 Nm.
→→Contrôler le passage du courant entre la bobine et le corps (fonction
du conducteur de protection).
Risque de blessures dû à la présence de haute pression dans
l'installation ou l'appareil.
▶▶ Avant d'intervenir dans l'installation ou l'appareil, couper la pression et désaérer et vider les conduites.
Risque de choc électrique.
▶▶ Avant d'intervenir dans l'installation ou l'appareil, couper la tension
et empêcher toute remise sous tension par inadvertance.
▶▶ Veuillez respecter les réglementations en vigueur pour les appareils électriques en matière de prévention des accidents ainsi
qu'en matière de sécurité.
Risque de blessures dû à un démontage non conforme.
▶▶ Le démontage doit être effectué uniquement par un personnel
qualifié et habilité disposant de l'outillage approprié.
→→Couper la pression et purger les conduites.
→→Couper la tension électrique.
→→Démonter le connecteur (si nécessaire).
→→Pour démonter la vanne, desserrer seulement les deux vis.
→→Démonter la vanne de l’embase.
35
7
Maintenance, dépannage
DANGER !
Risque de blessures dû à la présence de haute pression dans
l'installation ou l'appareil.
▶▶ Avant d'intervenir dans l'installation ou l'appareil, couper la pression
et désaérer et vider les conduites.
Risque de choc électrique.
▶▶ Avant d'intervenir dans l'installation ou l'appareil, couper la tension
et empêcher toute remise sous tension par inadvertance.
▶▶ Veuillez respecter les réglementations en vigueur pour les appareils
électriques en matière de prévention des accidents ainsi qu'en
matière de sécurité.
Risque de brûlures ou d'incendie lors d’une durée de fonctionnement prolongée dû à la surface brûlante de l’appareil.
▶▶ Tenez les substances et les fluides facilement inflammables à
l'écart de l'appareil et ne touchez pas ce dernier à mains nues.
Risque de blessures dû à des travaux d'entretien non conformes.
▶▶ La maintenance doit être effectuée uniquement par un personnel
qualifié et habilité disposant de l’outillage approprié.
▶▶ Empêcher tout actionnement involontaire de l’appareil.
▶▶ Garantir un redémarrage contrôlé après la maintenance.
7.1 Pannes
Lors d’incidents, vérifier que :
→→l’appareil est installé dans les règles,
→→le raccord électrique et fluidique est correct,
→→l’appareil n’est pas endommagé,
→→toutes les vis sont bien serrées,
→→la tension et la pression sont disponibles,
→→les conduites sont propres.
Panne
Cause possible
La vanne ne
Court-circuit ou coupure de la bobine
s’enclenche pas Noyau ou cœur encrassé
La vanne ne se Intérieur de la vanne encrassé
ferme pas
Si malgré tout la vanne ne fonctionne pas, veuillez contacter votre
service après-vente Bürkert.
36
8
Pièces de rechange
Attention !
Risque de blessures, de dommages matériels dus à de mauvaises pièces.
De mauvais accessoires ou des pièces de rechange inadaptées
peuvent provoquer des blessures et endommager l’appareil ou son
environnement.
▶▶ Utiliser uniquement des accessoires et des pièces de rechange
d’origine de la société Bürkert.
9
Transport, stockage,
élimination
Remarque !
Dommages dus au transport.
Les appareils insuffisamment protégés peuvent être endommagés
pendant le transport.
▶▶ Transporter l’appareil à l’abri de l’humidité et des impuretés et dans
un emballage résistant aux chocs.
▶▶ Veiller à ce que la température de stockage ne se situe ni au-dessus
ni en dessous de la température de stockage admissible.
Un mauvais stockage peut endommager l'appareil.
▶▶ Stocker l'appareil au sec et à l'abri des poussières.
▶▶ Température de stockage de -40 à +80 °C.
Dommages sur l'environnement causés par des pièces d'appareil contaminées par des fluides.
▶▶ Éliminer l'appareil et l'emballage dans le respect de l'environnement.
▶▶ Respecter les prescriptions en matière d’élimination des déchets
et de protection de l’environnement en vigueur.
37