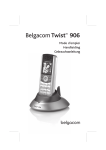
1
INDEX
Nederlandstalige handleiding
3
Manuel d’utilisation Français
32
English manual
60
Bausch Proxima ISDN Lite
ISDN Terminal Adapter
(ISDN Modem)
Handleiding
2
Uitsluiting van aansprakelijkheid
Deze handleiding van BAUSCH DATACOM NV. (hierna als BAUSCH DATACOM NV aangeduid) is een afspiegeling van de huidige staat van de hierin beschreven
producten. Wij hebben ernaar gestreefd, een zo volledig en duidelijk mogelijke beschrijving te geven om ervoor te zorgen dat onze producten zo gemakkelijk mogelijk te
bedienen zijn. De handleiding kan echter technische onjuistheden en typefouten bevatten. Als gevolg van de snelle ontwikkelingen moeten wij ons ook het recht
voorbehouden tec hnische wijzigingen en ontwikkelingen door te voeren zonder voorafgaande kennisgeving.
Daarom geeft BAUSCH DATACOM NV geen garantie op de inhoud van de handleiding en op de blijvende toepasbaarheid ervan.
Evenmin is BAUSCH DATACOM NV aansprakelijk voor eventueel verlies van informatie of enig oneigenlijk gebruik van informatie als gevolg van het raadplegen van de
handleiding. BAUSCH DATACOM NV is met name niet aansprakelijk voor enige directe of indirecte schade (daarbij inbegrepen winstderving en vergelijkbaar verlies),
voortkomend uit het gebruik of oneigenlijk gebruik van deze handleiding, zelfs niet indien BAUSCH DATACOM NV of een vertegenwoordiger van BAUSCH DATACOM
NV erop is gewezen dat zulke schade zou kunnen ontstaan. Dit doet vanzelfsprekend geen afbreuk aan onze wettelijke aansprakelijkheid voor opzettelijk toegebrachte
schade of schade op basis van grove nalatigheid.
Met betrekking tot de in deze handleiding vermelde gegevens garandeert BAUSCH DATACOM NV niet dat er geen industriële eigendomsrecht en (handelsmerken,
octrooien, enz.) zijn. Hetzelfde geldt voor algemeen gebruikelijke merknamen, bedrijfsnamen en productnamen, maar deze zijn onderworpen aan de betreffende
handelsmerken, octrooien en geregistreerde ontwerprechten.
De informatie mag noch geheel, noch gedeeltelijk worden gekopieerd, vertaald, gereproduceerd of op enige andere wijze worden overgedragen op of opgeslagen op
enig elektronisch medium of andere machine, zonder voorafgaande schriftelijke toestemming van BAUSCH DATACOM NV
De aankoop en het gebruik van software is onderworpen aan de Algemene Levering- en Betalingsvoorwaarden alsmede aan de Licentievoorwaarden van BAUSCH
DATACOM NV.
Als enige bepaling betreffende de uitsluiting van aansprakelijkheid over het gebruik om wettelijke redenen ongeldig is of wordt, heeft dit geen weerslag op de overige
bepalingen.
BAUSCH DATACOM NV.
Tiensesteenweg 56
B-3360 Korbeek-Lo
België
© Juli 1999 – Proxima ISDN Lite NL
Proxima is een geregistreerd handelsmerk van BAUSCH DATACOM NV.
IBM is een geregistreerd handelsmerk van International Business Machines Corp (IBM).
MNP is een geregistreerd handelsmerk van Microcom Inc.
3
Inhoudsopgave
0.
Inleiding.............................................................................................................................................................................6
0.1
Voor wie is deze handleiding bestemd? ............................................................................................................6
0.2
Hoe is de handleiding ingedeeld? ......................................................................................................................6
1. ISDN, Datacommunicatie, Internet .............................................................................................................................7
1.1
ISDN ..........................................................................................................................................................................7
1.1.1
Opbouw van een verbinding ........................................................................................................................7
1.2
Functie van de Bausch Proxima ISDN Lite ........................................................................................................8
1.3
Internet Access........................................................................................................................................................8
1.3.1
Remote LAN Access .....................................................................................................................................8
1.4
Databits, controlebit en snelheid .........................................................................................................................9
2. In gebruik nemen van de Bausch Proxima ISDN Lite ..........................................................................................10
2.1
Beschrijving Bausch Proxima ISDN Lite terminal adapter ...........................................................................10
2.1.1
Achterzijde Terminal Adapter.....................................................................................................................11
2.2
Wat heeft u nog meer nodig? .............................................................................................................................11
2.3
Aansluiten van de Terminal Adapter .................................................................................................................11
2.4
Protocollen .............................................................................................................................................................11
2.5
Tot stand brengen van een dataverbinding .....................................................................................................12
3. AT-commando set en S-registers............................................................................................................................15
3.1
De AT-commando set..........................................................................................................................................15
3.1.1
Commandomode en datamode ...............................................................................................................15
3.1.2
Opbouw van een commandoregel ...........................................................................................................15
3.2
S-Registers ............................................................................................................................................................16
3.2.1
Bit-Mapped S-registers ...............................................................................................................................16
3.3
Beschrijving AT-commando’s en S-registers .................................................................................................16
3.4
Algemene instellingen .........................................................................................................................................17
3.5
Kiezen en Beantwoorden ....................................................................................................................................17
3.5.1
Kiezen van een ISDN-nummer..................................................................................................................18
3.6
Seriële poortinstellingen .....................................................................................................................................18
3.6.1
Resultaatcodes ............................................................................................................................................20
3.6.2
Overige meldingen ......................................................................................................................................21
3.7
Profielen en identificatie ......................................................................................................................................22
3.8
Overige commando’s ...........................................................................................................................................22
4. Diversen..........................................................................................................................................................................23
4.1
Instellingen (profielen) .........................................................................................................................................23
4.2
Instellingen niet vluchtig geheugen...................................................................................................................23
5. Speciale toepassingen................................................................................................................................................25
5.1
Inbel configuratie...................................................................................................................................................25
5.1.1
Subadressen ................................................................................................................................................25
5.1.2
MSN-nummers .............................................................................................................................................26
5.1.3
Instellen van protocolprioriteiten...............................................................................................................26
5.1.4
Instellen op afstand (Remote Configuration) .........................................................................................28
Bijlage A: Technische Specificaties..................................................................................................................................29
Bijlage B: RS232C Connector..............................................................................................................................................30
Bijlage C: CALL CLEARING CAUSES...................................................................................................................................31
5
0.
Inleiding
De Bausch Proxima ISDN Lite verbindt twee computers over langere afstand via ISDN, de digitale telefoonlijn. Gegevens
kunnen binnengehaald van of verstuurd worden naar de andere computer. Ook kan op deze manier contact worden gelegd
met Internet of een externe databank. Informatie in deze databank of op het Internet kan gelezen en eventueel binnengehaald
worden.
Deze handleiding beschrijft niet alle stappen die nodig zijn bij datacommunicatie. Een aantal handelingen is namelijk
afhankelijk van het communicatieprogramma dat wordt gebruikt.
De handleiding is met name bedoeld om een overzicht te geven van de toepassingsmogelijkheden van de Bausch Proxima
ISDN Lite.
De installatieprocedure van drivers voor Windows wordt beschreven in de Installatiehandleiding. Hierin wordt ook het
configuratieprogramma behandeld.
0.1
Voor wie is deze handleiding bestemd?
De startende gebruiker maar ook de ervaren gebruiker vindt in deze handleiding de informatie die hij nodig heeft. Voor
eerstgenoemde is om te beginnen hoofdstuk 1 interessant. Hierin wordt namelijk algemene informatie gegeven over
datacommunicatie en het gebruik van de Terminal Adapter. De alfabetische beschrijving van de commando's en de
S-registers (Hoofdstuk AT-commandoset en S-registers ) kunnen als naslagwerk gebruikt worden door beide gebruikers.
0.2
Hoe is de handleiding ingedeeld?
In het eerste hoofdstuk wordt ingegaan op datacommunicatie in het algemeen. Het tweede hoofdstuk beschrijft de Bausch
Proxima ISDN Lite, de installatie en de ingebruikname van de Terminal Adapter. Hoofdstuk drie en vier geven uitleg van de
commando’s en de S-registers. Hoofdstuk vijf tot slot geeft een opsomming van de specifieke mogelijkheden van de Bausch
Proxima ISDN Lite .
In de bijlagen wordt achtergrondinformatie verstrekt over een aantal aspecten, zoals de technische specificaties en de ASCII
tabel.
We wensen u veel plezier met uw Bausch Proxima ISDN Lite!
6
1. ISDN, Datacommunicatie, Internet
In dit hoofdstuk wordt eerst een korte uitleg over ISDN en de functie van de Bausch Proxima ISDN Lite gegeven. Daarna volgt
een beschrijving van het begrip Datacommunicatie.
1.1
ISDN
Met de invoering van ISDN (Integrated Services Digital Network) is het mogelijk om informatie digitaal te versturen. Dit komt de
betrouwbaarheid en snelheid ten goede. ISDN is in het leven geroepen om de bestaande telefoonnetten spraak, data en telex
te integreren tot één netwerk. Naast deze integratie is een apart signaleringnet toegevoegd om de verbinding sneller tot stand
te brengen. Met een modem via het PSTN-netwerk (telefoonnet) duurde het tot stand komen van een verbinding ongeveer 15
seconden, met een terminal adapter via het ISDN-netwerk duurt dit nog maar 2 tot 3 seconden.
Proxima ISDN
PC
fax
Terminal
adapter
telefoon
verdeeldoos
Belgacom
aansluiting
Figuur 1: Mogelijke ISDN-configuratie
Met ISDN is maar één aansluiting nodig voor communicatieapparaten zoals de Fax, telefoon en terminal adapter. Een ISDNapparaat reageert pas op een inkomend gesprek als dit ook daadwerkelijk voor hem bestemd is. Als bijvoorbeeld wordt
gebeld met een terminal adapter, dan zal alleen een terminal adapter reageren. De fax of telefoon reageren dan niet. Dit kan
doordat er informatie wordt meegestuurd over de soort telecommunicatiedienst. Een piepende fax op de lijn behoort dus tot de
verleden tijd.
Met een ISDN2- ofwel BRI- (Basic Rate Interface) aansluiting heeft u de beschikking over twee zogenaamde B-kanalen
(64kbit/s) en een D-kanaal (16kbit/s). De beide B-kanalen zijn datakanalen, het D-kanaal geeft toegang tot het signaleringsnet
en wordt gebruikt om een verbinding te leggen. Op een ISDN2-aansluiting is het mogelijk om acht ISDN-apparaten aan te
sluiten, de totale kabellengte tussen de apparaten en de ISDN2-aansluiting mag maximaal 200 meter bedragen.
1.1.1
Opbouw van een verbinding
Het opbouwen van een dataverbinding via het ISDN-netwerk gaat bijna op dezelfde manier als bij een modem. Nadat een
protocol is geselecteerd, kan met een ATD-commando een nummer gekozen worden. De Bausch Proxima ISDN Lite gaat nu
via het D-kanaal een verbinding tot stand brengen. Als aan beide kanten hetzelfde protocol is geselecteerd, wordt er via één Bof eventueel via beide B-kanalen een dataverbinding opgebouwd.
7
1.2
Functie van de Bausch Proxima ISDN Lite
Computers kunnen onderling informatie uitwisselen, bijvoorbeeld via een floppydisk, door het verbinden van twee RS232poorten of via een netwerk. Bij het gebruik van de Bausch Proxima ISDN Lite wordt er informatie via de RS232-poort en het
ISDN-netwerk uitgewisseld.
Bij een rechtstreekse verbinding van twee seriële poorten is het slechts mogelijk een beperkte afstand te overbruggen (circa
15 meter). Om een grotere afstand te overbruggen wordt gebruik gemaakt van het ISDN-netwerk. Het is een bestaande
infrastructuur waarmee verbindingen over de hele wereld gemaakt kunnen worden. Het ISDN-netwerk is digitaal waardoor de
data van de seriële poort via een protocol direct verstuurd kunnen worden.
De Bausch Proxima ISDN Lite bezit een aantal standaardprotocollen om informatie te kunnen uitwisselen. Voor Internet
Access via een Provider wordt in de meeste gevallen het PPP (Point to Point Protocol) gebruikt. Om met een BSS te kunnen
bellen wordt het V.110 of V.120 protocol gebruikt.
1.3
Internet Access
Er zijn drie gangbare manieren om via ISDN toegang tot internet te verkrijgen:
•
PPP of multilink PPP
•
V.120 met snelheid aanpassing op de seriële poort
•
V.110 zonder snelheid aanpassing op de seriële poort
Welke manier u gebruikt hangt af van de toegang faciliteiten van de Internet Service Provider (ISP) of Point Of Presence (POP)
(zieFiguur 2).
ISDN
Basic Rate
Access
async
V.24
PC with
Online Software
ISDN network
Online (POP) Access Server
CompuServe Access Server
Proxima ISDN
Figuur 2: Toegang tot een Online Service
Configuratie voor Internet
U kunt alleen toegang tot het Internet via ISDN verkrijgen als u een contract hebt met een Internet Service Provider (ISP) die
met ISDN-toegang werkt. Voor het configureren van de Bausch Proxima ISDN Lite hebt u de volgende informatie van je ISP
nodig:
•
ISDN-toegangsnummer (dat in het PC-programma moet worden ingevoerd)
•
Het gebruikte protocol, bijvoorbeeld PPP (commando AT&O7) dat moet worden geconfigureerd in de Bausch Proxima
ISDN Lite )
•
toegang protocol (dat moet worden ingevoerd in de PC-systeemsoftware of Internet-software), meestal PPP
Om de toegangsoftware van Internet te configuren kan het zijn dat u extra informatie nodig hebt, zoals TCP/IP adres,
gebruikersnaam, wachtwoord etc. Raadpleeg hiervoor de handleiding bij de software en vraag de Internet-aanbieder om
informatie.
1.3.1
Remote LAN Access
Voor remote toegang tot een LAN via ISDN is het noodzakelijk dat u het protocol neemt dat de ISDN router op het LAN gebruikt.
Informeer bij de systeembeheerder.
8
1.4
Databits, controlebit en snelheid
De RS232-standaard beschrijft hoe seriële informatie verwerkt (doorgegeven) wordt. In de computer worden bits gelijktijdig
(parallel) verwerkt. Via de seriële poort worden deze bits één voor één doorgegeven. Om te zorgen dat de ontvangende kant
deze databits correct kan interpreteren, worden er een paar extra bits mee gestuurd. Deze bits zijn: een startbit, de
zogenaamde controlebit (pariteitbit voor foutdetectie) en één of twee stopbits. Samen vormt dit een frame of karakter.
De meest gebruikte frame voor standaard asynchrone communicatie is 8N1:
(1 startbit + 8 databits + 1 stopbit)
Startbit
D
D
D
D
D
D
D
D
Stopbit
Databits
Frame
Figuur 3: Asynchroon formaat
Naast het frame (karakter) moet ook de snelheid (baudrate ) ingesteld worden. De snelheid wordt uitgedrukt in Bits per
Seconden (bps).
Mogelijke poortsnelheden zijn: 300, 1200, 2400, 4800, 9600, 19.200, 38.400, 57.600 en 115.200bps
Als de databits, controlebits en snelheid aan de computerzijde zijn ingesteld, past de Bausch Proxima ISDN Lite zich
automatisch aan zodra er een AT commando wordt gestuurd.
Let op! Controleer of de seriële poort van de computer voor 115.200bps geschikt is.
9
2.
In gebruik nemen van de Bausch Proxima ISDN Lite
In dit hoofdstuk wordt achtereenvolgens een beschrijving van de terminal adapter gegeven en de installatieprocedure
uiteengezet. Tot slot wordt het stapsgewijs opbouwen van een verbinding besproken aan de hand van een aantal
voorbeelden.
2.1
Beschrijving Bausch Proxima ISDN Lite terminal adapter
Aan de bovenzijde van de terminal adapter bevinden zich vier Led’s. Drie geven de status van de ISDN-verbinding en van de
seriële poort weer. De vierde geeft aan of er spanning op de Bausch Proxima ISDN Lite aanwezig is.
Figuur 4: Bovenzijde Bausch Proxima ISDN Lite
De betekenis van de Led’s van links naar rechts:
TD
RD
CD
OH
AA
HS
DTR
MR
PWR
transmitted data
received data
carrier detect
channel B1 in use
Ring indicator
channel B2 in use
data terminal ready
clear to send
power
verzonden data
ontvangen data
TA is verbonden
kanaal B1 in gebruik
inkomende oproep
kanaal B2 in gebruik
data terminal ready
clear to send
TA is geactiveerd
10
2.1.1
Achterzijde Terminal Adapter
De aansluitingen van de terminal adapter bevinden zich aan de achterkant.
LINE
ISDN-aansluiting
(S0-interface)
RJ11-connector
PHONE
RS232
niet in gebruik
RS232-poort
aansluiting naar computer
DB25F-connector
Adapteraansluiting
PWR
9VAC, 250mA
2.2
Wat heeft u nog meer nog nodig?
Behalve de terminal adapter heeft u nodig:
1. een ISDN-aansluiting
2. een computer of terminal met een seriële poort.
3. communicatieprogramma
4. ISDN-nummer en andere gegevens (snelheid, pariteit etc.) van de databank waarmee u contact wilt leggen
5. seriële kabel en ISDN-kabel
6. stopcontact
2.3
Aansluiten van de Terminal Adapter
1.
2.
3.
4.
Verbind de seriële poorten van terminal adapter en computer met elkaar.
Neem de ISDN-kabel en klik de RJ45-connector in de terminal adapter (S0 aansluiting).
Steek de Power adapter van de Bausch Proxima ISDN Lite in het stopcontact.
Steek de connector van de Power adapter aan de achterkant van de Bausch Proxima ISDN Lite in de power-aansluiting.
De groene power LED is nu aan.
5. Na het inschakelen zal de terminal adapter een uitgebreide zelftest uitvoeren. Dit duurt een aantal seconden.
!
2.4
Plaatsing
F De transformator in de Power Adapter produceert een magnetisch veld. Plaats deze niet te dicht bij apparatuur
die hierdoor verstoord kan raken, bijvoorbeeld een beeldbuis of een videorecorder.
F Andere apparaten die elektromagnetische storing produceren die binnen de ISDN communicatieband valt
kunnen de communicatie van de terminal adapter verstoren. Geadviseerd wordt dan om in deze gevallen
apparatuur te verplaatsen of leidingen te verleggen.
Protocollen
De Bausch Proxima ISDN Lite kan met verschillende protocollen werken. Een verbinding met een andere Terminal Adapter
(TA) is alleen mogelijk als beide op hetzelfde protocol ingesteld staan. Het is daarom belangrijk om eerst te informeren welk
protocol de TA naar waar er gebeld wordt, ondersteunt.
Met het commando ATI5 wordt een overzicht van de ondersteunde protocollen opgevraagd. De Bausch Proxima ISDN Lite
geeft als respons:
11
Overzicht Protocollen van de Bausch Proxima ISDN Lite
ati5
Bausch Proxima ISDN Lite V0.7, September 1998
Service
Channel
Bearer Typ/max rate Protocols
--------------------------------------------------------------------------7
asyn PPP
B data
115.2/230.4 PPP conversion asyn-sync
8
asyn transp
B data
57.6/ 57.6 V.14
9
asyn transp
B data
19.2/ 38.4 V.110 asyn
10
asyn transp
B data
115.2/230.4 V.120 asyn
13
asyn transp
2B data
230.4/230.4 V.120 asyn, MLP
16
GCI-speech
B1,B2 voice
230.4
18
GCI-data
B1,B2 data
230.4 any
27
asyn transp
B1,B2 data
115.2/230.4 ML PPP RFC1990 asyn-sync
28
asyn transp
B1,B2 data
115.2/230.4 TRANSPARENT asyn-sync
Remote control.
OK
Bovenstaande lijst is een voorbeeld. Het is mogelijk dat uw Bausch Proxima ISDN Lite een ander overzicht geeft omdat er
wijzigingen in de software aangebracht zijn.
Selecteren van een protocol gebeurt met het commando AT&O<n>. Voor <n> moet het getal dat in de linkerkolom staat
ingevuld worden om het corresponderende protocol te selecteren. Bijvoorbeeld:
AT&O7
PPP is het geselecteerde protocol
De fabrieksinstelling is V.120 (&O10).
Met het AT&V commando worden de huidige instellingen getoond. Hiermee kan gecontroleerd worden of het juiste protocol
geselecteerd is.
Bijvoorbeeld:
Ingesteld protocol
at&v
DTE channel 10 (Asynchronous V.120) parameters:
E1 Q0 V1 W0 X4 \Q3 %C0
&C1 &D2 &K3 &M0 &O10 &Q0 &S0 &Y0
S000:000 S001:000 S002:043 S003:013 S004:010 S005:008 S007:060
S012:050 S025:000 S030:000 S039:003 S048:007 S095:000
S110:010 S111:008 S112:000 S113:025 S114:115 S116:000 S117:000
S119:000 S120:000 S121:253 S122:254 S123:000 S124:001 S126:000
S131:000 S133:080 S153:000 S154:000 S161:000
OK
Bij het gebruik van de Bausch Proxima ISDN Lite met Windows is het niet nodig de protocollen door middel van AT commando’s te selecteren. Het is voldoende om de juiste driver te selecteren. Het instellen gaat dan automatisch.
2.5
Tot stand brengen van een dataverbinding
12
In deze paragraaf zullen we stapsgewijs de handelingen doornemen die nodig zijn om een dataverbinding te maken. De
communicatiesoftware wordt hierbij globaal besproken. Elk pakket heeft namelijk zijn eigen commandostructuur.
1. Start het communicatieprogramma.
2. Zorg dat de software de seriële poort aanstuurt waarop de terminal adapter is aangesloten.
3. Selecteer de communicatiesnelheid (baudrate), aantal databits en de pariteit. Bijvoorbeeld: 115200 bps, 8 bits, geen
pariteit.
4. Zorg dat het programma in de 'terminal mode' staat, zodat ingetoetste karakters naar de terminal adapter gestuurd
worden. De terminal adapter echo’t op zijn beurt de karakters naar het scherm.
5. Type vervolgens:
AT <Enter>
Op het scherm verschijnt:
AT
OK
6. Verschijnen de karakters dubbel op het scherm, dan moet in het communicatieprogramma de echo uitgeschakeld worden.
7. Selecteer het protocol dat gebruikt moet worden. Bijvoorbeeld V.120 om een verbinding met een BBS te maken.
Type:
AT&O10<Enter>
Op het scherm verschijnt:
OK
8. Kies een telefoonnummer met het commando ATD
Type bijvoorbeeld: ATD016841111 (POP ISP EUnet).
a. Indien er een verbinding tot stand is gekomen, verschijn(t)en op het scherm bijvoorbeeld één of twee van de volgende
meldingen:
CONNECT
: Verbinding
CONNECT/ARQ
: Verbinding met foutcorrectie
CONNECT 2400
: Verbinding, 2400 bps
CONNECT 2400/ARQ
: Verbinding, 2400 bps met foutcorrectie
CONNECT 115200
: Verbinding, 115200 bps
CONNECT 115200/ARQ
: Verbinding, 115200 bps met foutcorrectie
CARRIER 64000
: Lijn snelheid 64000bps
PROTOCOL: V120
: V.120 protocol
PROTOCOL: PPP
: PPP protocol
Een B-kanaal LED brandt om aan te geven dat er een dataverbinding tot stand is gebracht.
b.
Als het niet lukt een verbinding tot stand te brengen, verschijnt één van de volgende meldingen:
ERROR
U hebt een typefout gemaakt.
NO DIALTONE
De terminal adapter is niet of niet goed verbonden met de ISDNaansluiting (S0). Het is dus niet mogelijk te bellen. Controleer of de
modem met het ISDN-net verbonden is.
BUSY
Het telefoonnummer dat u gekozen hebt, is in gesprek.
NO CARRIER
Het gebelde nummer ondersteunt het protocol dat geselecteerd is niet.
Een andere verklaring is dat er geen terminal adapter op het gekozen
nummer aanwezig is.
9. Verbreek de verbinding. Hiervoor zijn drie mogelijkheden:
a.
b.
c.
Geef de databank opdracht de verbinding te verbreken.
Gebruik het commando van het communicatieprogramma.
Geef de modem opdracht de verbinding te verbreken.
Doe dit als volgt:
Wacht 1 seconde
Type:
Op het scherm verschijnt:
Type vervolgens:
Op het scherm verschijnt:
+++
OK
ATH <Enter>
NO CARRIER
13
3. AT-commandoset en S-registers
3.1
De AT-commandoset
In dit hoofdstuk worden de commando's van de terminal adapter besproken. De meeste terminal adapters en
communicatiesoftware maken gebruik van de AT-commandoset. Om nieuwe apparatuur, zoals terminal adapters, ook met AT commando’s te ondersteunen, hebben de fabrikanten eigen commando's aan de AT-commandoset toegevoegd. Hierdoor
kan er niet meer gesproken worden van een standaard. Er wordt onderscheid gemaakt tussen de 'Standaard AT ' en de
'Extended AT' commandoset.
Er is een aantal redenen aan te geven voor de verschillen tussen de commando's. Door afwijkende keuringseisen zijn
bepaalde commando's of instellingen niet toegestaan in sommige landen. Ook zijn er verschillen in Amerikaanse en
Europese transmissiestandaarden (Bell ten opzichte van ITU, Euro-ISDN).
De terminal adapters kennen zowel de Standaard als de Extended AT-commandoset. Daarnaast is een aantal eigen
commando's toegevoegd.
In de eerste paragraaf van dit hoofdstuk worden de begrippen commandomode en datamode uitgelegd. Vervolgens wordt de
opbouw van een commandoregel besproken. Dan volgt een opsomming van de AT -commando's en S-registers, waarna elk
commando en register afzonderlijk wordt toegelicht.
De beschrijving van de commando’s en registerinstellingen is per onderwerp in een groep ingedeeld:
•
•
•
•
3.1.1
Kiezen en Beantwoorden
Seriële poortinstellingen
Profielen en identificatie
Overige commando’s
Commandomode en datamode
De terminal adapter kent twee modes:
1. Commandomode
In deze mode voert de terminal adapter commando's uit die via de terminal ingetoetst worden. De terminal adapter zit in de
commandomode als hij niet Online is of, bij een dataverbinding, via de escape sequence in de commandomode is gezet.
2. Datamode
De terminal adapter is transparant. Dit wil zeggen dat informatie, die via de beide terminal adapters uitgewisseld wordt,
ongewijzigd blijft. Bij een dataverbinding staat de terminal adapter normaal in datamode. Moet de terminal adapter een
commando uitvoeren, dan kan dat alleen vanuit de commandomode. De terminal adapter kan tijdens een verbinding in de
commandomode gezet worden via de escape sequence.
Escape sequence:
wacht 1 seconde
type: +++
na 1 seconde verschijnt: OK
De terminal adapter staat nu in commandomode.
Met ATO gaat de terminal adapter terug naar de data mode.
3.1.2
Opbouw van een commandoregel
Een commandoregel begint met de l etters AT, afgeleid van het Engelse woord ATtention: Let Op! De letters AT moeten beide
hoofdletters of beide kleine letters zijn. De commandoregel wordt afgesloten met <ENTER>. Er kunnen op een
commandoregel één of meerdere commando's gegeven worden. Een commandoregel mag maximaal 80 karakters zijn.
NB. De terminal adapter onthoudt de laatste commandoregel. Deze kan worden herhaald door te typen: A / (zonder <ENTER>).
Commando's mogen voor de duidelijkheid door spaties van elkaar gescheiden worden. De spaties tellen mee voor de lengte
van de commandoregel.
Soms wordt een commando gevolgd door een parameter (cijfer). Als dit cijfer 0 is, mag het worden weggelaten. Bijvoorbeeld:
ATE0 komt overeen met ATE.
15
Aan de beginletters AT van de commandoregel herkent de Terminal Adapter de baudrate en pariteit van de terminal. De
Terminal Adapter stelt zich hierop in. De snelheden die automatisch herkend worden zijn 300, 1200, 2400, 4800, 9600,
19.200, 38.400, 57.600 en 115.200bps.
Het dataformaat dat herkend wordt is: 7-bits of 8-bits karakters met even, oneven, of geen pariteitbit en 1 stopbit.
3.2
S-Registers
Een aantal instellingen aan de terminal adapter moet met behulp van S-registers gedaan worden.
Een aantal registers heeft één betekenis (functie). Andere registers hebben meerdere functies en worden bit-mapped regis ters genoemd. In deze registers worden instellingen of commando's op bitniveau gedaan.
In de volgende paragraaf wordt uitgelegd wat bit-mapped inhoudt.
Vanaf paragraaf 3.4 staat een gedetailleerde beschrijving van de commando’s met vermelding van de bijbehorende
parameters.
3.2.1
Bit-Mapped S-registers
Bij de bit-mapped S-registers wordt per bit een functie aan- of uitgezet. '1' wil zeggen dat het bit aan of 'geset' is; '0' betekent dat
het bit uit of 'gereset' is.
Deze bits uit het binaire stelsel vertegenwoordigen een decimale waarde. Bit 7=128, 6=64, 5=32, 4=16, 3=8, 2=4, 1=2 en 0=1.
Als u de decimale waarde van de bits die ‘1’ zijn optelt, dan is het resultaat de waarde die in het register gezet moet worden.
3.3
Beschrijving AT-commando’s en S-registers
In de volgende paragrafen komt de betekenis en de inhoud van AT-commando’s en de S-registers aan de orde. Een groot
aantal S-registers heeft een specifiek technische betekenis. Het is daarom niet raadzaam de instelling van een S-register te
wijzigen als u niet weet wat de gevolgen zijn.
De kolom Waarde geeft de in te stellen waarden aan.
In de kolom Def. staat de default waarde voor dat commando.
16
3.4
Algemene instellingen
Met onderstaande commando’s kunnen de algemene instellingen van de Terminal Adapter aangepast worden.
Syntax
S110
S111
O
&M
&M0
&M1
&M2
&O
&O7
&O8
&O9
&O10
&O13
&O16
&O18
&O27
&Q
&Q0
&Q1, &Q4
&Q2
&Q5
3.5
Waarde
1..255
1..255
Def.
10
cnf
0..2
cnf
1..255
10
0..6
cnf
Betekenis
Actieve protocol
Service bij protocol
1 : Voice service
2 : Data modem service
3 : Raw data service
4 : Group 3 fax service
5 : V.14
7 : PAD/X.25 service
8 : V.120 service
10 : Synchronous relay service
Schakel over naar Datamode
Communicatiemode
Asynchroon
Synchroon
Synchroon, DTR kiezen
Selecteer actieve protocol
PPP, 1 x B
V.14, 1 x B
V.110, 1 x B
V.120, 1 x B
Multi Link V.120, 2 x B
GCI-speech, 2 x B
GCI-data, 2 x B
Multi Link PPP, 2 x B
Communicatiemode
Asynchroon
Synchroon
Synchroon, DTR kiezen
Asynchroon, met foutcorrectie
Kiezen en Beantwoorden
Commando’s en instellingen om een verbinding tot stand te brengen (of te beantwoorden) en weer te verbreken.
Syntax
S0
Waarde
0..255
S1
S6
S7
S8
A
D
0..255
H
H0
H1
P
T
0..1
0..255
Def.
0/1
60
kies string
0
Betekenis
Aantal belsignalen voor auto answer
0: auto answer uit
>0: automatic answer aan
Aantal niet beantwoorde belsignalen
Geen functie bij ISDN (blind kiezen)
Wachttijd voor verbinding (seconden)
Geen functie bij ISDN (pauze karakter)
Beantwoord een binnenkomend gesprek
Kies een nummer
Hoorn op/van de haak
Verbinding verbreken
Geen functie bij ISDN
Geen functie bij ISDN (puls kiezen)
Geen functie bij ISDN (toon kiezen)
17
Type
Zie ook: &D (DTR-gedrag), X (resultaat code selectie en detectie informatie tonen), W (terug meldingen), S95 (terug
meldingen), S112 (gedetailleerde indicaties).
3.5.1
Kiezen van een ISDN-nummer
Bij het kiezen van een ISDN-nummer wordt het D -commando gevolgd door het nummer en eventueel een subadres
(voorafgegaan door een ster '*').
Het kiescommando ziet er als volgt uit:
ATDisdn_nb*sub_addr : : dte_channel_id
waarbij: isdn_nb*sub_addr een ISDN-nummer is, eventueel gevolgd door een subadres.
dte_channel_id het protocol nummer is dat gebruikt wordt. Als dit veld leeg is, wordt het actieve protocol
gebruikt.
Voorbeelden:
ATD69855044
kiest nummer 69855044
ATD69855044*5
kiest nummer 69855044 en geeft subadres 5 door
ATD69855044::10
kiest nummer 69855044 en gebruik het V.120 protocol
3.6
Seriële poortinstellingen
Met onderstaande commando’s wordt de seriële poort ingesteld.
Syntax
S2
Waarde
0..255
Def.
43
S3
S4
S5
S25
0..127
0..127
0..127
0..255
13
10
8
0
S39
0..4
3
S95
0..255
0
S112
0..255
0
Betekenis
Escape code karakter '+'
≤ 127 : ASCII code van ingestelde waarde
> 127 : +++ herkenning is uitgeschakeld
Carriage return karakter <cr>
Line feed karakter <lf>
Backspace karakter <bs>
DTR hysterese (in 1/100 seconden, of seconden bij
synchroon)
Flow control
0 : Geen flow control
3 : RTS-CTS flow control (hardware)
4 : XON-XOFF flow control (software)
Protocol en verbinding meldingen
1 : geeft seriële poortsnelheid, niet de lijnsnelheid bij de
CARRIER melding
2 : voeg /ARQ toe bij een verbinding met foutcorrectie
4 : CARRIER melding aan
8 : PROTOCOL melding aan
16 : niet gebruikt
32 : niet gebruikt
64 : niet gebruikt
Gedetailleerde oproep meldingen
Bitgeoriënteerd commando:
1 (bit 0) : formaat RING melding
0 : standaard AT-formaat (RING)
1 : uitgebreide formaat (RING:)
2 (bit 1) : uitgebreide meldingen
0 : kort
1 : lang
8 (bit 3) : AT indicaties
0 : AT standaard
1 : AT uitgebreid (RING melding met nummer van beller,
O CARRIER met oorzaak melding)
128 (bit 7) : aanvullende diensten
0 : melding aanvullende diensten uit
1 : melding aanvullende diensten (ALERT:) aan
Overige bits zijn gereserveerd (default 0)
18
Syntax
S114
Waarde
0..255
Def.
115
S117
0..255
4
S123
0..1
0
S124
0..255
1
E
E0
E1
Q
Q0
Q1
V
V0
V1
W
W0
0..1
1
0..1
0
0..1
1
0..2
2
W1
Betekenis
Serieel asynchrone snelheid en asynchrone clock selectie
75
: 75 bps
3
: 300 bps
12 of 1
: 1200 bps
24 of 2
: 2400 bps
48 of 4
: 4800 bps
72 of 7
: 7200 bps
96 of 9
: 9600 bps
14 of 144 : 14400 bps
19 of 192 : 19200 bps
28
: 28800 bps
38
: 38400 bps
57
: 57600 bps
115
: 115200 bps
255
: selecteer interne clock
(asynchrone clock informatie
wordt afgeleid van de S0 bus)
0
: selecteer externe clock
(asynchrone clock informatie
komt van de seriële poort)
Timer aantal RING-meldingen (seconden)
Tijd tussen twee opeenvolgende RING-meldingen bij
binnenkomende oproepen
0 : eenmalige RING-melding
&D commando
0 : gebruik &D voor de actie van DTR
1 : negeer &D instelling, forceer &D0
Autobaud detectie AT
0 : Autobaud uit
1 : Autobaud aan
Echo
Echo uit
Echo aan
Resultaat codes
Resultaat codes aan
Resultaat codes uit
Resultaat code formaat
Numeriek.
Verbaal
snelheid aanduiding bij CONNECT
CONNECT met seriële poortsnelheid
Bij S95=0 geen uitgebreide protocolmeldingen
CONNECT met seriële poort snelheid
Bij S95=0 tevens CARRIER en PROTOCOL meldingen
CONNECT met lijnsnelheid
Bij S95=0 geen uitgebreide protocolmeldingen
W2
19
Syntax
X
Waarde
0..4
Def.
4
0..2
1
0..3
2
0..4
3
0..1
0
0..2
0
X0
X1
X2
X3
X4
&C
&C0
&C1
&C2
&D
&D0
&D1
&D2
&D3
&K
&K0
&K1, &K3
&K2, &K4
&R
&R0
&R1
&S
&S0
&S1, &S2
Betekenis
Selectiemeldingen en detectie kies- en bezettoon
Bezettoon- en kiestoondetectie uit,
alleen CONNECT melding
Bezettoondetectie uit, kiestoondetectie uit, CONNECT xxx
melding
Bezettoondetectie uit, kiestoondetectie aan, CONNECT xxx
melding
Bezettoondetectie aan, kiestoondetectie uit, CONNECT xxx
melding
Bezettoondetectie aan, kiestoondetectie aan, CONNECT xxx
melding
Carrier Detect signaal (CD, 109) gedrag
Synchrone mode: CD volgt de 'carrier' status Asynchrone
mode:
CD altijd aan
CD volgt 'carrier'
CD aan bij on line, uit bij verdwijnen van de 'carrier', weer
aan in rust
DTR (108) gedrag (zie ook S123)
&Q0, &Q5: DTR heeft geen effect
&Q1: DTR gaat uit: verbinding verbreken
&Q2: DTR gaat uit: verbinding verbreken
DTR uit en aan: begin te kiezen
&Q0, &Q1, &Q5: DTR gaat uit: naar
commandomode
&Q2: DTR gaat uit: verbinding verbreken
DTR uit en aan: begin te kiezen
&Q0, &Q5 : DTR gaat uit: verbinding
verbreken
&Q1: DTR gaat uit: verbinding verbreken,
DTR moet binnen tijd in S25 aan zijn
voor een CONNECT. Geen Auto
Answer als DTR niet aan staat.
&Q2 : DTR gaat uit: verbinding verbreken
DTR uit en aan: begin te kiezen
Geen Auto Answer als DTR niet aan
staat.
&Q0, &Q1, &Q5: DTR gaat uit: reset de
Terminal Adapter
&Q2: DTR gaat uit: reset de TTA
DTR uit en aan: begin te kiezen.
Flow control
Geen flow control
RTS-CTS flow control (hardware)
XON-XOFF flow control (software)
CTS (106) gedrag tijdens synchrone mode (&Q1, &Q2)
CTS volgt RTS bij on-line
CTS staat aan bij on-line
DSR (107) gedrag tijdens asynchrone mode (&Q0, &Q5)
DSR staat altijd aan
DSR staat aan bij on-line, uit bij rust
Zie ook: &Q (communicatie mode)
3.6.1
Resultaatcodes
20
Resultaatcodes worden door de Terminal Adapter na afhandeling van een commandoregel naar de seriële poort gestuurd. De
codes kunnen als tekst of als getal gegeven worden. Dit wordt geselecteerd met het ATV-commando.
Numeriek
0
1
1
2
3
4
5
5
6
7
10
10
11
11
12
12
14
14
18
18
28
28
99
99
3.6.2
3.6.2.1
Tekst
OK
CONNECT
CONNECT/ARQ
RING
NO CARRIER
ERROR
CONNECT 1200
CONNECT 1200/ARQ
NO DIALTONE
BUSY
CONNECT 2400
CONNECT 2400/ARQ
CONNECT 4800
CONNECT 4800/ARQ
CONNECT 9600
CONNECT 9600/ARQ
CONNECT 19200
CONNECT 19200/ARQ
CONNECT 57600
CONNECT 57600/ARQ
CONNECT 38400
CONNECT 38400/ARQ
CONNECT 115200
CONNECT 115200/ARQ
Betekenis
Commando uitgevoerd
Verbinding tot stand gebracht
Verbinding met foutcorrectie
Binnenkomend gesprek
Verbinding verbroken
Fout melding
Verbinding met 1200 bps
idem, echter met foutcorrectie
ISDN-netwerk reageert niet
Gekozen nummer is in gesprek
Verbinding met 2400 bps
idem, echter met foutcorrectie
Verbinding met 4800 bps
idem, echter met foutcorrectie
Verbinding met 9600 bps
idem, echter met foutcorrectie
Verbinding met 19200 bps
idem, echter met foutcorrectie
Verbinding met 57600 bps
idem, echter met foutcorrectie
Verbinding met 38400 bps
idem, echter met foutcorrectie
Verbinding met 115200 bps
idem, echter met foutcorrectie
Overige meldingen
Uitgebreide (protocol) meldingen
Onderstaande meldingen worden bij protocolonderhandelingen gegeven. De meldingen worden aangezet via S95.
Numeriek
Tekst
Betekenis
40
CARRIER 300
Lijnsnelheid 300 bps
46
CARRIER 1200
Lijnsnelheid 1200 bps
47
CARRIER 2400
Lijnsnelheid 2400 bps
48
CARRIER 4800
Lijnsnelheid 4800 bps
50
CARRIER 9600
Lijnsnelheid 9600 bps
54
CARRIER 19200
Lijnsnelheid 19200 bps
56
CARRIER 38400
Lijnsnelheid 38400 bps
57
CARRIER 56000
Lijnsnelheid 56000 bps
58
CARRIER 57600
Lijnsnelheid 57600 bps
59
CARRIER 64000
Lijnsnelheid 64000 bps
60
CARRIER 115200
Lijnsnelheid 115200 bps
66
COMPRESSION: CLASS 5
MNP-5 datacompressie
67
COMPRESSION: V42BIS
V.42bis datacompressie
69
COMPRESSION: NONE
Geen datacompressie
70
PROTOCOL: NONE
Geen communicatieprotocol
77
PROTOCOL: LAP-M
V.42 foutcorrectie
80
PROTOCOL: ALT
MNP-4 foutcorrectie
83
PROTOCOL: V120
V.120 protocol
87
PROTOCOL: V14
V.14 snelheid aanpassing protocol
21
3.7
Profielen en identificatie
Syntax
S121
Waarde
0..255
Def.
0
S122
0..255
254
I
I0
I1
I2
I3
I4
I5
I8
&V
\S
Z
0..4
&F
&W
&Y
0, 255
0
#V
#Z
3.8
Syntax
#CH=
#RM=
#RM=0
#RM=1
Betekenis
Actie na &F commando
0 : standaard (haal fabriekinstellingen
en start opnieuw op)
255 : doe niets
andere waarde: stel het geselecteerde
protocol in
Actie na Z commando
0
: standaard (haal instellingen uit
geheugen en start opnieuw op)
255 : doe niets
andere waarde: stel het geselecteerde
protocol in
Identificatie en interne test
Hardware Identificatie
ROM checksum
ROM checksum test
Productnaam en softwarerevisie
Fabrikant
Overzicht mogelijke protocollen
Euro-ISDN software versie
Toon instellingen
Toon instellingen
Software reset met opgeslagen instellingen
Let op! Met dit commando wordt de Bausch Proxima ISDN
Lite totaal gereset, alle eventuele verbindingen worden
verbroken
Zie ook S122
Software reset met fabriekinstellingen
Zie ook S121
Zet huidige instellingen in het geheugen (Stored Profile)
Selecteer standaardinstellingen bij ops tarten
255: gebruik fabriekinstellingen
Toon lijst met beschikbare protocolnamen
Software reset met opgeslagen instellingen
Overige commando’s
Waarde
zie &O
0..1
Def.
10
1
Betekenis
Standaard protocol DTE kanaal poort 1
Ring mode
Selectie d.m.v. subnummer of MSN
Oproep doorgeven aan actieve protocol
22
4. Diversen
4.1
Instellingen (profielen)
De Bausch Proxima ISDN Lite kent drie instellingen:
1. Actieve Profiel. Huidige instellingen die gebruikt worden bij het geselecteerde protocol.
2. Opgeslagen Profiel. Hierin zijn een aantal instellingen (parameters en configuraties) opgeslagen in een niet vluchtig
geheugen (E2PROM). Vaak worden wijzigingen ten opzichte van de fabriekinstellingen ingesteld en opgeslagen in het
geheugen met AT&W. Het opgeslagen (‘Stored’) profiel wordt bij het aanzetten en na het AT#Z-commando in het actieve
profiel geladen.
3. Fabriek Profiel (Instellingen) staat vast in het geheugen van de Terminal Adapter (Flash EPROM). Deze instellingen
worden met het AT&F-commando in het actieve profiel geladen.
Set Registers
Fabriek
Profiel
Actieve
Profiel
&F
4.2
#xxx=
Aanzetten(Po
werup)
Opgeslagen
Profiel
#Z
--------------S Reg
&W
Instellingen niet-vluchtig geheugen
De instellingen van de Terminal Adapter worden in een niet-vluchtig geheugen (E2PROM) opgeslagen. De gebruikte
commando’s zijn:
•
•
•
Opslaan registerinhoud met AT&W
Telefoonnummer dat gebruikt wordt om automatisch te kiezen (maximaal 40 karakters) opslaan met AT &Z
Softkey functie met AT#softkey=”<commando’s> (altijd afsluiten met #Z).
Bovenstaande commando’s slaan de instellingen op in het niet-vluchtige geheugen, maar worden niet automatisch actief. Ze
worden geactiveerd met het commando AT#Z of door de Bausch Proxima ISDN Lite uit en weer aan te zetten.
AT&F activeert de fabriek instellingen.
23
5. Speciale toepassingen
5.1
Inbelconfiguratie
De Bausch Proxima ISDN Lite is zo in te stellen dat een telefoonnummer gekoppeld is aan een protocol. Wordt dit nummer
gebeld, dan zal de Bausch Proxima ISDN Lite een verbinding volgens het ingestelde protocol opbouwen. Wordt dit nummer
gebeld, dan wordt die oproep altijd doorgegeven aan de analoge aansluiting.
Met speciale AT-commando’s kunnen de subadressen en Multiple Subscriber Numbers (Meervoudige Abonnee Nummers)
gekoppeld worden aan protocollen. In hoofdstuk 3.3 is de algemene opbouw van AT -commando’s beschreven.
5.1.1
Subadressen
Subadressering houdt in dat er een extra karakter (maximaal vier karakters) aan het telefoonnummer wordt toegevoegd. Deze
extra karakters worden doorgegeven aan het ISDN-apparaat dat gebeld wordt. Met het geven van een subadres kan bij de
Bausch Proxima ISDN Lite door de beller (dus op afstand) bijvoorbeeld een protocol geselecteerd worden. Andersom kan de
Bausch Proxima ISDN Lite een nummer kiezen en aan het telefoonnummer extra karakters toevoegen. Dit is alleen mogelijk
met ISDN-apparatuur. De dienst subadressen is niet standaard aanwezig en moet aangevraagd worden.
In onderstaande tabel staan, voor de verschillende types, de AT-commando’s die nodig zijn om de default-koppeling tussen
protocol en subadres te wijzigen. De koppeling wordt uitgeschakeld door geen waarde op te geven (lege string).
Syntax
#SAPPP
#SAV120
#SA2B
#SARTEL
#SARDATA
#SAMPPP
Waarde
4 digits
4 digits
4 digits
4 digits
4 digits
4 digits
Def.
7
10
13
16
18
27
Betekenis
PPP conv. asyn-sync
V.120 asyn
V.120 asyn, MLP (2B)
GCI-speech
GCI-data
Multilink PPP RFC1990
Voorbeelden van subadressen:
a. programmering:
AT#SAPPP=28<return>
AT#Z<return>
Bij bellen naar het eigen ISDN-nummer waarbij 2 8 als extra cijfers toegevoegd worden, gaat de terminal adapter een PPPverbinding opbouwen.
b. koppeling uitschakelen:
AT#SAPPP=<return>
AT#Z<return>
De koppeling tussen het PPP-protocol en het subnummer wordt uitgeschakeld.
c. Kiezen:
Een subadres wordt als volgt meegegeven aan het kiescommando:
ATD010-1234567*28<return>
Kies het nummer 010-1234567 en voeg daar het subadres 28 aan toe.
25
5.1.2
MSN-nummers
Bij een ISDN-aansluiting is het mogelijk om meer dan één (maximaal 8) telefoonnummer aan te vragen bij de Provider (bijv.
PTT-Telecom). Standaard krijgt u 1 hoofdnummer met een optie op 3 extra nummers. Overige nummers moet u aanvragen.
Deze dienst wordt ook wel MSN genoemd (Multiple Subscriber Numbers oftewel Meervoudige Abonnee Nummers). Met de
onderstaande AT-commando’s kunnen protocollen gekoppeld worden aan de laatste vier cijfers van het MSN-nummer. Het is
noodzakelijk dat de default-koppeling tussen het betreffende protocol en een subnummer wordt uitgeschakeld.
Syntax
#NBPPP
#NBV120
#NB2B
#NBRTEL
#NBRDATA
#INBMPPP
#NBPOTS1
#NBPOTS2
Waarde
4 digits
4 digits
4 digits
4 digits
4 digits
4 digits
4 digits
4 digits
Def.
“”
“”
“”
“”
“”
“”
“”
“”
Betekenis
PPP conv. asyn-sync
V.120 asyn
V.120 asyn, MLP (2B)
GCI-speech
GCI-data
Multilink PPP RFC1990
a/b – 1 (analoog)
a/b – 2 (analoog)
Poort
Serieel 1
Serieel 1
Serieel 1
Serieel 1
Serieel 1
Serieel 1
Analoog 1
Analoog 2
Type
Voorbeelden van MSN-nummer programmering:
1.
AT#NBV120=15<return>
AT#SAV120=<return>
AT#Z<return>
Bij bellen naar de Bausch Proxima ISDN Lite, waarbij het eigen ISDN-nummer eindigt met de cijfers 15, wordt door de
terminal adapter een V.120-verbinding opgebouwd. Het is noodzakelijk dat de default-koppeling tussen het V.120-protocol en
het subnummer wordt uitgeschakeld.
2.
AT#NBMPPP=1<return>
AT#Z<return>
Bij bellen naar de Bausch Proxima ISDN Lite, waarbij het eigen ISDN-nummer eindigt op het cijfer 1, wordt een ML-PPPverbinding tot stand gebracht. Let op dat de default-koppeling tussen het ML-PPP-protocol en het subnummer wordt
uitgeschakeld.
5.1.3
Instellen van protocolprioriteiten
In de vorige paragrafen is beschreven hoe er een koppeling gemaakt kan worden tussen protocollen en subadressen en
MSN-nummers. Het is mogelijk dat verschillende protocollen gekoppeld zijn met hetzelfde subadres of MSN-nummer. Het
protocol met de hoogste prioriteit zal door de terminal adapter geselecteerd worden. Met de volgende commando’s kunnen de
prioriteiten van de protocollen ingesteld worden. De waarde 0 geeft de hoogste prioriteit aan en waarde 254 de laagste
prioriteit. Prioriteit 255 betekent dat het betreffende protocol niet op een binnen komende ring reageert. Indien elk protocol een
prioriteit van 255 heeft dan zal de beller een busy melding krijgen omdat de TA niet reageert.
Syntax
#IPPPP
#IPV120
#IP2B
#IPRTEL
#IPDATA
#IPMPPP
#IPPOTS1
#IPPOTS2
Waarde
4 digits
4 digits
4 digits
4 digits
4 digits
4 digits
4 digits
4 digits
Def.
28
16
40
40
40
28
30
30
Betekenis
PPP conv. asyn-sync
V.120 asyn
V.120 asyn, MLP (2B)
GCI-speech
GCI-data
Multilink PPP RFC1990
a/b – 1 (analoog)
a/b – 2 (analoog)
Voorbeeld van het instellen van protocolprioriteiten:
AT#IPV120=15<return>
AT#IPPPP=18<return>
AT#Z<return>
26
Poort
Serieel 1
Serieel 1
Serieel 1
Serieel 1
Serieel 1
Serieel 1
Analoog 1
Analoog 2
Type
Het V.120 protocol krijgt een hogere prioriteit dan het PPP-protocol.
27
5.1.4
Instellen op afstand (Remote Configuration)
De Bausch Proxima ISDN Lite kan op afstand, via het ISDN-netwerk, ingesteld worden. Een beheerder met een Bausch
Proxima ISDN Lite en terminal software, kan een Bausch Proxima ISDN Lite die elders staat (‘remote’) op afstand instellen
door de Bausch Proxima ISDN Lite te bellen met het V.120/RC protocol. Met dit protocol wordt het datapad niet doorgegeven
aan de seriële poort, maar teruggevoerd naar de ISDN-verbinding.
Via « AT » commando’s, kan de remote Bausch Proxima ISDN Lite op dezelfde manier ingesteld worden als via de seriële
poort.
Het Remote Control V.120-protocol wordt bij een ontvangende oproep geselecteerd door een ISDN-nummer en/of een ISDNsubadres (4 cijfers). Dit nummer en/of subadres moeten vooraf ingesteld worden.
Het telefoonnummer met het commando:
AT#remnbrc=<telefoonnr. waarop de instellingen gedaan worden >#Z <return>
Een verbinding waarmee instellingen op afstand gedaan kunnen worden kan op twee manieren beveiligd worden:
• Caller Number Identification (CLI). Hiermee wordt gecontroleerd of het telefoonnummer van de beller overeenkomt
met het geprogrammeerde telefoonnummer
• Controle via Password. Deze toegangscode wordt via UUI (User to User Information) verzonden en vergeleken
met een ingestelde code. Deze code wordt als volgt geprogrammeerd:
AT#passrc=”<password>”#Z<return>
Voorbeeld met CLI:
In dit voorbeeld is het eigen telefoonnummer: 010-1234567 en het nummer van de degene d ie Remote Configuration mag
doen: 020-7654321.
Commando’s:
•
AT#RM=0
•
AT#IPRC=254
•
AT#NBRC=0101234567
•
AT#SARC=
•
AT#REMNBRC=0207654321
•
AT#Z
; Ring mode uit
; Prioriteit instellen
; Eigen nummer programmeren
; Subadres uitzetten
; Nummer van Bausch Proxima ISDN Lite die
ingesteld moet worden
; Opslaan instellingen
AT#REMNBRC=remote msn.nr van de persoon die Rem.Configuratie doen mag.
28
Bijlage A: Technische Specificaties
Algemeen:
♦ Protocollen:
V.110, 1 x B kanaal synchroon/asynchroon
V.120, 1 x B kanaal, 64.000bps
V.120, 2 x B kanaal, 128.000bps
PPP, 1 x B kanaal, 64.000bps
Multi Link PPP (ML-PPP), 2 x B kanaal, 128.000bps (BACP)
♦ Foutcorrectie: V.42, MNP4
♦ Datacompressie: V.42bis, MNP5
♦ Commando sets:
◊ Uitgebreide 'AT' commando set
♦ Remote Control via ISDN voor configuratie op afstand en testen
♦ Software upgrade via de seriële poort (115,2kbps).
♦ V.25bis signalering (HDLC)
♦ ISDN-2 interface: S0-interface volgens CCITT I.430 (1TR3)
♦ S0 aansluiting: RJ45 socket
♦ Permanent geheugen voor instellingen. De instellingen kunnen per protocol verschillend zijn!
♦ Autobaud detectie van 300 tot 115.200bps
♦ Full interspeeder met XON/XOFF en / of RTS/CTS flow control
♦ Zelftest na Power-up
♦ Dataformaat:
◊ Data: 7 of 8 bits
◊ Pariteit: oneven, even, space, mark of geen
◊ Stopbits: 1 of 2
Aansluitingen:
♦ Seriële poort:
◊ DB9F (V.24, RS232) connector
♦ Voeding door middel van Power Adapter 9VAC, 220mA
♦ LED's voor status indicatie van seriële poort en ISDN
Omgeving condities:
♦ spanning
♦ temperatuur gebruik
opslag
♦ vochtigheid gebruik
♦ opslag
: 9VAC, 220mA -15% / +10%
: -5 C tot +60 C
: -20 C tot +70 C
:10% tot 75%
: 5% tot 95%
♦ afmetingen
♦ gewicht
♦ Elektrische veiligheid
: 130x195x37. (b x l x h)
: ± 300 gram (exclusief adapter)
: Klasse II
29
Bijlage B: RS232 Connector
CCITT
109
104
103
108
107
105
106
125
DB25F
Pin
8
2
3
20
7
6
5
4
22
Richting
OUT
OUT
IN
IN
OUT
IN
OUT
OUT
Naam
Data carrier detect
Received Data
Transmitted Data
Data terminal ready
Signal Ground
Data set ready
Request to send
Clear to send
Ring Indicator
30
Verkort
(CD)
(RxD)
(TxD)
(DTR)
(GND)
(DSR)
(RTS)
(CTS)
(RI)
Bijlage C: CALL CLEARING CAUSES
Onderstaande tabel geeft een overzicht van oorzaken van het niet tot stand komen van een verbinding. Deze informatie wordt
bijvoorbeeld via de CLEARED-melding gegeven. De meldingen worden hexadecimaal respectievelijk decimaal gegeven.
Onderstaande meldingen zijn voor een ETSI ISDN-netwerk (Euro-ISDN).
Meldingen met een waarde groter dan 80 hexadecimaal worden door de Bausch Proxima ISDN Lite gegenereerd.
De meldingen worden door de Bausch Proxima ISDN Lite gegeven door bij het kiezen het
AT* D/<nummer> commando te gebruiken.
Onderstaand overzicht is in het Engels omdat deze taal standaard is bij ETSI-normen.
Hex
01
02
03
06
07
10
11
12
13
15
16
1A
1B
1C
1D
1E
1F
22
26
29
2A
2B
2C
2F
31
32
39
3A
3F
41
42
45
46
4F
51
52
53
54
55
56
58
5B
5F
60
Decimal
1
2
3
6
7
16
17
18
19
21
22
26
27
28
29
30
31
34
38
41
42
43
44
47
49
50
57
58
63
65
66
69
70
79
81
82
83
84
85
86
88
91
95
96
Description
unallocated (unassigned) number
no route to specified transit network
no route to destination
channel unacceptable
call awarded and being delivered in an established channel
normal call clearing
user busy
no user responding
no answer from user (user alerted)
call rejected
number changed
non-selected user clearing
destination out of order
invalid number format
facility rejected
response to STATUS ENQUIRY
normal, unspecified
no circuit/channel available
network out of order
temporary failure
switching equipment congestion
access information discarded
requested circuit/channel not available
resources unavailable, unspecified
quality of service unavailable
requested facility not subscribed
bearer capability not authorised
bearer capability not presently available
service or option not available, unspecified
bearer capability not implemented
channel type not implemented
requested facility not implemented
only restricted digital information bearer capability is available
service or option not implemented, unspecified
invalid call reference value
identified channel does not exist
a suspended call exists, but this call identity does not
call identity in use
no call suspended
call having the requested call identity has been cleared
incompatible destination
invalid transit network selection
invalid message, unspecified
mandatory information element i s missing
31
Hex
61
62
Decimal
97
98
63
64
65
66
6F
7F
91
A2
FF
99
100
101
102
111
127
145
162
255
Description
message type non-existent or not implemented
message not compatible with call state or message type non-existent or not
implemented
information element non-existent or not implemented
invalid information element contents
message not compatible with call state
recovery on timer expired
protocol error, unspecified
interworking, unspecified
no signalling data link establishment
no line activation
call clearing, unspecified
Voorbeelden van uitgebreide meldingen.
We gaan uit van een Bausch Proxima ISDN Lite met de volgende instellingen:
• protocol 6 is voor voice (S111 is 1).
• Protocol 11 is voor PAD (S111 is 7).
• S112=35 (maximale informatie en automatische PAD VC).
De meldingen die door de Bausch Proxima ISDN Lite verstuurd worden zijn cursief gedrukt:
AT&O6*D/11
OK:6,0,6
PROGRESS:6,0,0,6,1
ALERT:6,0,6,1
CONNECTED:6,,0,6,1
CLEARED:6,10
AT*D/69855044*5/"Hallo"
OK:6,0,6
CONNECTED:6,"Welkom ",0,1,2
AT*H0/6
selecteer protocol 6, kies ISDN nummer 11.
directe response dat oproep nummer 6 op het ISDN
toegangsnummer 0 met protocol 6 tot stand wordt gebracht.
melding voor oproep 6 met protocol 6, kanaal B1,
communicatie met analoge netwerk.
Bij het opgebelde apparaat gaat de bel over: ALERT melding.
Eerste oproep (6) is tot stand gebracht, kanaal B1 is
geselecteerd.
Oproep (6) is afgebroken met normale oorzaak (10).
terwijl de eerste verbinding tot stand gebracht wordt, volgt er
een tweede commando om ISDN-nummer 69855044 te
kiezen, met subadres 5 en User Informatie “Hallo”.
Merk op dat het niet nodig is om het &O6 commando te geven,
omdat dit protocol al actief is.
directe response dat oproep nummer 6 op het ISDN
toegangsnummer 0 met protocol 6 tot stand wordt gebracht.
tweede oproep (6) is toto stand gebracht. Kanaal B2 is
geselecteerd. De opgebelde heeft geantwoord met “Welkom”
verbreek oproep 6
32
Bausch Proxima ISDN Lite
Adaptateur de terminal RNIS
(Modem RNIS)
Manuel
33
Exclusions de responsabilité
Ce manuel d'Bausch Datacom NV (dorénavant appelé BAUSCH DATACOM) est un reflet de l'état actuel des produits qui y sont décrits. Nous avons essayé de fournir
une description aussi complète et précise que possible afin de faciliter l'utilisation de nos produits. Toutefois, il se peut que le manuel contienne des erreurs
techniques ou typographiques. En raison de l'évolution rapide des technologies, nous nous réservons le droit d'apporter des modifications ou des améliorations
techniques sans préav is.
Par conséquent, BAUSCH DATACOM n'offre aucune garantie, ni sur le contenu du manuel, ni sur son applicabilité à l'avenir.
BAUSCH DATACOM décline également toute responsabilité en ce qui concerne les pertes d'informations ou toute utilisation inappropriée d'une information à la suite de
la consultation de ce manuel. BAUSCH DATACOM ne pourrait être tenu responsable des dommages directs ou indirects (y compris le manque à gagner ou des pertes
comparables) causés par l'utilisation ou par une mauvaise interprétation du manuel, même si BAUSCH DATACOM ou un représentant d'BAUSCH DATACOM aurait été
averti du fait qu'un tel dommage pourrait se produire. Ceci n'ôte évidemment rien à notre responsabilité civile en matière de détérioration intentionnée ou de dégâts
causés par une négligence grave.
En ce qui concerne les données qui figurent dans ce manuel, BAUSCH DATACOM n'offre aucune garantie qu'il ne puisse y avoir des droits de propriété industrielle
(marques commerciales, brevets, etc.). Cela vaut aussi pour les marques, les noms d'entreprise et les noms de produits courants. Ceux -ci sont soumis aux marques
commerciales, brevets et droits de conception déposés.
Aucune information ne peut être copiée, traduite, reproduite, transmise ou archivée par quelque moyen que ce soit dans un système informatique ou autre appareil, que
ce soit entièrement ou partiellement, sans autorisation écrite préalable d'BAUSCH DATACOM.
L'achat et l'utilisation de logiciels sont soumis aux Conditions générales de livraison et de paiement et aux conditions figurant dans la Licence d'BAUSCH DATACOM.
Toute invalidation pour des raisons légales d'une disposition quelconque concernant l'exclusion de responsabilité en matière d'utilisation n'a aucune incidence sur les
autres dispositions.
Bausch Datacom NV
Tiensesteenweg 56
B-3360 Korbeek-Lo
Belgium
© Juli 1999 –Proxima ISDN Lite Frans
34
Proxima est une marque déposée de Bausch Datacom NV.
IBM est une marque déposée de International Business Machines Corp (IBM).
MNP est une marque déposée de Microcom Inc.
35
Table des matières
Table des matières ...............................................................................................................................................................36
0. Introduction....................................................................................................................................................................37
0.1
A qui ce manuel est-il destiné ? .........................................................................................................................37
0.2
Structure du manuel .............................................................................................................................................37
1. RNIS, Télématique, Internet........................................................................................................................................38
1.1
RNIS ........................................................................................................................................................................38
1.1.1 Etablissement d'une communication..............................................................................................................38
1.2
Fonctionnement du Proxima ISDN Lite ............................................................................................................38
1.3
Accès à l'Internet.....................................................................................................................................................39
1.3.1
Accès à distance LAN...................................................................................................................................39
1.4
Bits de données, bit de contrôle et vitesse......................................................................................................40
2. Mise en service du Proxima ISDN Lite ....................................................................................................................41
2.1
Description de l'adaptateur de terminal Proxima ISDN Lite .........................................................................41
2.1.2
Face arrière de l' adaptateur de terminal.....................................................................................................42
2.2
Qu'est-ce qu'il vous faut de plus ? .....................................................................................................................42
2.3
Raccordement de l'adaptateur de terminal .....................................................................................................42
2.4
Protocoles ..............................................................................................................................................................42
2.5 Etablissement d'une communication de données ...............................................................................................43
3. Jeu de commandes AT et registres S.....................................................................................................................45
3.1
Jeu de commandes AT ........................................................................................................................................45
3.1.1
Mode commande et mode données ........................................................................................................45
3.1.2
Structure d'une ligne de commande ........................................................................................................45
3.2 Registres S ..................................................................................................................................................................47
3.2.1
Registres S à mappage par bit..................................................................................................................47
3.3
Description commandes AT et registres S......................................................................................................47
3.4
Réglages courants ...............................................................................................................................................48
3.5
Composer et Répondre.......................................................................................................................................48
3.5.1
Composition d'un numéro RNIS...............................................................................................................50
3.6
Réglages du port série ........................................................................................................................................51
3.6.1
Codes résultat..............................................................................................................................................54
3.6.2
Autres messages ........................................................................................................................................54
3.7
Profiles et identification........................................................................................................................................55
3.8
Autres commandes ..............................................................................................................................................55
4. Divers...............................................................................................................................................................................56
4.1
Réglages (profils).................................................................................................................................................56
4.2
Réglages conservés en mémoire non volatile ...............................................................................................56
5. Applications spéciales................................................................................................................................................57
5.1
Configuration d'appel ...........................................................................................................................................57
5.1.1
Sous-adresses ............................................................................................................................................57
5.1.2
Numéros MSN ..............................................................................................................................................57
5.1.3
Réglage des priorités de protocole..........................................................................................................58
5.1.4
Réglage à distance (Remote Configuration) ..........................................................................................58
Annexe A : Caractéristiques techniques.........................................................................................................................60
Annexe B : Connecteur RS232C.........................................................................................................................................61
Annexe C : CALL CLEARING CAUSES ................................................................................................................................62
36
0.
Introduction
Le Proxima ISDN Lite (adaptateur de terminal) relie deux ordinateurs à distance par RNIS, la ligne téléphonique numérique.
Ceci permet de récupérer ou d'envoyer des données d'un ordinateur à l'autre. De la même façon, on peut se connecter à
l'Internet ou à une base de données externe. Les informations de cette base de données ou d'Internet peuvent être lues et
éventuellement récupérées.
Ce manuel ne décrit pas toutes les étapes nécessaires à la transmission de données. En effet, certaines opérations
dépendent du logiciel de communication utilisé.
Le but de ce manuel est de donner un aperçu des applications possibles du Proxima ISDN Lite.
La procédure d'installation des pilotes pour Windows est décrite dans le Manuel d'installation. Celui-ci traite aussi du
programme de configuration.
0.1
A qui ce manuel est-il destiné ?
Tant l'utilisateur débutant que l'utilisateur chevronné trouvera dans ce manuel les informations dont il a besoin. Le premier
sera surtout intéressé par le premier chapitre. Dans ce chapitre, il trouvera des informations générales sur la transmission de
données et sur l'utilisation de l'adaptateur de terminal. La liste alphabétique des descriptions des commandes et des
registres S (Chapitre Jeu de commandes AT et registres S) peuvent servir de référence aux deux utilisateurs.
0.2
Structure du manuel
Le premier chapitre traite de la télématique en général. Le deuxième chapitre décrit leProxima ISDN Lite, l'installation et la
mise en service de l'adaptateur de terminal. Les chapitres trois et quatre expliquent les commandes et les registres S.
Chapitre cinq donne la liste des applications spécifiques duProxima ISDN Lite.
Les annexes donnent des informations détaillés sur des aspects divers, comme les caractéristiques techniques et la table
ASCII.
Nous espérons que votre Proxima ISDN Lite vous donne entièrement satisfaction !
37
1.
RNIS, Télématique, Internet
Ce chapitre vous explique brièvement RNIS et le fonctionnement du Proxima ISDN Lite. Ensuite, il décrit la notion Télématique.
1.1
RNIS
Grâce à l'introduction de RNIS (Réseau Numérique à Intégration de Services) il est possible d'envoyer des informations de
façon numérique. Ceci augmente la fiabilité et la vitesse. RNIS a été créé dans le but d'intégrer les réseaux existants de lignes
téléphoniques vocales, lignes de données et télex en un seul réseau. En plus de cette intégration, un réseau de signalisation
distinct a été ajouté afin d'accélérer l'établissement d'une connexion. Avec un modem branché sur un rés eau RTC (réseau
téléphonique commuté) l'établissement d'une connexion prend environ 15 secondes ; avec un adaptateur de terminal branché
sur un réseau RNIS, il suffit de 2 à 3 secondes.
Proxima ISDN
PC
télécopieur
Adaptateur
de terminal
téléphon
e
répartiteur
connexion
Belgacom RNIS
Figure 5: Exemple de configuration RNIS
Avec RNIS, une connexion suffit pour tous vos appareils de communication comme le télécopieur, le téléphone et l'adaptateur
de terminal. Un appareil RNIS ne réagit à un appel entrant que si celui-ci lui est destiné. Si l'appel provient par exemple d'un
adaptateur de terminal, seul l'adaptateur de terminal réagit et non le télécopieur ou le téléphone. Ceci est rendu possible par
la transmission d'informations concernant le type de télécommunication. Dorénavant, vous n'entendrez plus le son aigu d'un
télécopieur sur la ligne.
Avec une connexion RNIS2 ou BRI (Basic Rate Interface), vous disposez de deux canaux B (64kbit/s) et d'un canal D (16kbit/s).
Les deux canaux B sont des canaux de données. Le canal D donne accès au réseau de signalisation et sert à établir la
communication. Une connexion RNIS2 permet de brancher huit appareils RNIS. La longueur totale de câble entre les
appareils et la connexion RNIS2 peut atteindre 200 mètres au maximum.
1.1.1 Etablissement d'une communication
L'établissement d'une communication données par le réseau RNIS se passe pratiquement de la même façon qu'avec un
modem. Après avoir sélectionné un protocole, vous pouvez composer un numéro par une commande ATD. Ensuite, le
Proxima ISDN Lite établira une communication par le canal D. Si le même protocole est sélectionné des deux côtés, la
communication données se fait par un canal B ou éventuellement par les deux canaux B.
1.2
Fonctionnement du Proxima ISDN Lite
Deux ordinateurs peuvent échanger des informations, par exemple à l'aide d'une disquette, en raccordant deux ports RS232
ou par un réseau. En utilisant le Proxima ISDN Lite, vous échangez des informations par le port RS232 et le réseau RNIS.
Le raccordement direct de deux ports série ne permet de franchir qu'une distance limitée (environ 15 mètres). Pour franchir
des distances plus grandes, on utilise le réseau RNIS. Grâce à cette infrastructure existante, des communications peuvent
être établies partout dans le monde. Le réseau RNIS est numérique, ce qui permet d'envoyer directement les données d'un
port série à l'aide d'un protocole.
38
Le Proxima ISDN Lite dispose d'un certain nombre de protocoles standard pour échanger des informations. Pour l'accès à
l'Internet par un fournisseur, on utilise la plupart du temps le protocole PPP (Point to Point Protocol). Pour appeler un BSS, on
utilise le protocole V.110 ou V.120.
1.3
Accès à l'Internet
Il y a trois façons courantes d'accéder à l'Internet par une connexion RNIS :
•
PPP ou multilink PPP
•
V.120 avec adaptation de vitesse sur le port série
•
V.110 sans adaptation de vitesse sur le port série
Le protocole utilisé dépend des moyens d'accès du prestataire de services Internet (ISP) ou du Point Of Presence (POP) (voir
Figuur 2).
Accès
RNIS
Basic Rate
async
V.24
PC avec logiciels
de connexion
Réseau RNIS
Serveur d'accès en ligne (POP)
Serveur d'accès à
CompuServe
Proxima ISDN
Figure 6: Accès à un service en ligne
Configuration pour l'Internet
Vous ne pouvez accéder à l'Internet par RNIS que si vous avez souscrit un contrat auprès d'un prestataire de services Internet
(ISP) qui fournit des accès RNIS. Pour configurer le Proxima ISDN Lite, vous devez demander les informations suivantes à
votre ISP :
•
Numéro d'accès RNIS (à entrer dans le logiciel de connexion)
•
Protocole utilisé, par exemple PPP (commande AT&O7) à configurer dans le Proxima ISDN Lite)
•
Protocole d'accès (à entrer dans le système d'exploitation du PC ou dans le logiciel Internet), dans la plupart des
cas, il s'agit du protocole PPP
Afin de pouvoir configurer le logiciel d'accès à l'Internet, il se peut que vous ayez besoin de plus d'informations, comme
l'adresse TCP/IP, le nom d'utilisateur, le mot de passe, etc. Veuillez consulter la documentation fournie avec le logiciel et
renseignez-vous auprès du prestataire de services Internet.
1.3.1
Accès à distance LAN
Pour l'accès à distance à un LAN par RNIS, il faut choisir un protocole que le routeur RNIS utilise sur le LAN. Renseignez-vous
auprès du gestionnaire de système.
39
1.4
Bits de données, bit de contrôle et vitesse
La norme RS232 décrit la façon dont les informations sérielles sont traitées (transmises). L'ordinateur traite les bits en même
temps (parallèlement). Les bits passent un par un par le port série. Pour que l'appareil récepteur puisse correctement
interpréter ces bits de données, q uelques bits supplémentaires sont envoyés. Ces bits sont : un bit de départ, le bit de
contrôle (bit de parité pour détection d'erreurs) et un ou deux bits d'arrêt. Ensemble ils forment une trame ou un caractère.
La trame la plus courante pour la communication asynchrone standard est la 8N1 :
(1 bit de départ + 8 bits de données + 1 bit d'arrêt)
Startbit
D
D
D
D
D
D
D
D
Stopbit
Databits
Frame
Figure 7: Format asynchrone
(startbit = bit de départ, stopbit = bit d'arrêt, databits = bits de données, frame = trame)
En plus de la trame (caractère), la vitesse (vitesse de transmission doit être réglée. La vitesse est mesurée en bits par
seconde (bps) ou en baud.
Voici les vitesses de port possibles : 300, 1200, 2400, 4800, 9600, 19200, 38400, 57600 et 115200bps
Si les bits de données, les bits de contrôle et la vitesse ont été réglés côté ordinateur, le Proxima ISDN Lite s'adapte
automatiquement dès qu'une commande AT est envoyée.
Attention ! Vérifiez si le port série de l'ordinateur est capable de gérer 115200 bps.
40
2.
Mise en service du Proxima ISDN Lite
Dans ce chapitre, vous trouvez d'abord une description de l'adaptateur de terminal et ensuite de la procédure d'installation.
Finalement, il traite de l'établissement en étapes d'une communication à l'aide de quelques exemples.
2.1
Description de l'adaptateur de terminal Proxima ISDN Lite
Sur la face supérieure de l'adaptateur de terminal se trouvent quatre voyants lumineux. Trois d'entre eux témoignent de l'état
de la connexion RNIS et du port série. Le quatrième vous indique si le Proxima ISDN Lite est sous tension.
Figure 8 : Face supérieure du Proxima ISDN Lite
Signification des voyants, de gauche à droite :
TD
RD
CD
OH
AA
HS
DTR
MR
PWR
transmitted data
received data
carrier detect
channel B1 in use
ring indicator
channel B2 in use
data terminal ready
clear to send
power
Transmission de données
Réception de données
Connnection avec un autre TA
Canal B1 actif
Incoming call
Canal B2 actif
data terminal ready
clear to send
Allimentation secteur
41
2.1.2
Face arrière de l' adaptateur de terminal
Les connecteurs se trouvent sur la face arrière de l'adaptateur de terminal.
LINE
Connexion RNIS
(interface S0
connecteur RJ11
PHONE
RS232
Pas connectez
Port RS-232
Raccordement à l’ordinateur
connecteur DB25F
Branchement adaptateur
PWR
9VAC, 250mA
2.2
Qu'est-ce qu'il vous faut de plus ?
En plus de l'adaptateur de terminal vous avez besoin de :
1. une connexion RNIS
2. un ordinateur ou un terminal doté d'un port série
3. un logiciel de communication
4. le numéro RNIS et les autres données (vitesse, parité etc.) de la banque de données à contacter
5. un câble série et un câble RNISc
6. une prise de courant
2.3
Raccordement de l'adaptateur de terminal
1.
2.
3.
4.
Raccordez les ports série de l'adaptateur de terminal et de l'ordinateur.
Prenez le câble RNIS et introduisez le connecteur RJ45 à l'adaptateur de terminal (bus S0) jusqu'au clic.
Branchez l'adaptateur secteur du Proxima ISDN Lite sur la prise de courant.
Branchez le connecteur de l'adaptateur secteur sur la prise de courant à l'arrière du Proxima ISDN Lite. Le voyant de
tension vert s'allume.
5. Après la mise sous tension, l'adaptateur de terminal effectuera un autotest approfondi. Ceci prendra quelques secondes.
2.4
Protocoles
Le Proxima ISDN Lite fonctionne avec plusieurs protocoles. La communication avec un autre adaptateur de terminal (AT) n'est
possible que si les deux appareils ont été réglés sur le même protocole. Par conséquent, il importe de connaître le protocole
utilisé par l'AT contacté.
La commande ATI5 permet d'obtenir une liste des protocoles supportés. Le Proxima ISDN Lite donne la réponse suivante :
Figure 9: Liste des protocoles du Proxima ISDN Lite
ati5
Proxima ISDN Lite V0.7, September 1998
Service Channel Bearer Typ/max rate Protocols
--------------------------------------------------------------------------7 asyn PPP
B data 115.2/230.4 PPP conversion asyn-sync
8 asyn transp
B data 57.6/ 57.6 V.14
9 asyn transp
B data 19.2/ 38.4 V.110 asyn
10 asyn transp
B data 115.2/230.4 V.120 asyn
13 asyn transp 2B data 230.4/230.4 V.120 asyn, MLP
16 GCI-speech B1,B2 voice
230.4
18 GCI-data B1,B2 data
230.4 any
27 asyn transp B1,B2 data 115.2/230.4 ML PPP RFC1990 asyn-sync
28 asyn transp B1,B2 data 115.2/230.4 TRANSPARENT
asyn-sync
42
Remote control.
OK
Cette liste est fournie à titre d'exemple. Il se peut que votre Proxima ISDN Lite affiche une autre liste à cause des modifications
apportées dans le logiciel.
La sélection d'un protocole se fait par la commande AT&O<n>, dans laquelle <n> doit être remplacé par le chiffre qui figure
dans la colonne gauche afin de sélectionner le protocole correspondant. Par exemple :
AT&O7
Le protocole sélectionné est PPP
Le réglage usine est V.120 (&O10).
La commande AT&V affiche les réglages actifs. Elle sert à vérifier si le protocole approprié a été sélectionné.
Par exemple :
at&v
DTE channel 10 (Asynchronous V.120) parameters:
E1 Q0 V1 W0 X4 \Q3 %C0
&C1 &D2 &K3 &M0 &O10 &Q0 &S0 &Y0
S000:000 S001:000 S002:043 S003:013 S004:010 S005:008 S007:060
S012:050 S025:000 S030:000 S039:003 S048:007 S095:000
S110:010 S111:008 S112:000 S113:025 S114:115 S116:000 S117:000
S119:000 S120:000 S121:253 S122:254 S123:000 S124:001 S126:000
S131:000 S133:080 S153:000 S154:000 S161:000
OK
Figure 10 : Protocole configuré
Si vous utilisez le Proxima ISDN Lite avec Windows, il est inutile de sélectionner les protocoles à l'aide des commandes AT. Il
suffit de sélectionner le pilote approprié. Le réglage se fait automatiquement.
2.5 Etablissement d'une communication de données
Dans ce paragraphe, nous parcourons les étapes nécessaires à l'établissement d'une communication de données. Nous
parlerons d'une manière globale du logiciel de communication. Chaque suite possède la propre structure de commandes.
1. Démarrez le logiciel de communication.
2. Veillez à ce que le logiciel commande le port série auquel l'adaptateur de terminal est raccordé.
3. Sélectionnez la vitesse de transmission (en bauds), le nombre de bits de données et la parité. Par exemple : 115200 bps,
8 bits, pas de parité.
4. Veillez à ce que le logiciel soit mis en 'mode terminal', de façon à ce que les caractères entrés soient envoyés à l'adaptateur
de terminal. L'adaptateur de terminal renvoie les caractères à l'écran.
5. Tapez ensuite :
AT <Entrée>
Sur l'écran apparaît :
AT
OK
6. Si les caractères apparaissent deux fois de suite sur l'écran, la fonction écho doit être désactivée dans le logiciel de
communication.
7. Sélectionnez le protocole à utiliser. Par exemple V.120 pour établir une connexion avec un BBS.
Tapez :
AT&O10<Entrée>
Sur l'écran apparaît :
OK
8. Composez un numéro de téléphone avec la commande ATD
Tapez par exemple : ATD0181 698399 (BBS ALLIED DATA).
a.
Si la communication est établie, un ou deux des messages suivants apparaissent sur l'écran :
CONNECT
: Connexion
CONNECT/ARQ
: Connexion, correction d'erreurs
43
CONNECT 2400
: Connexion, 2400 bps
CONNECT 2400/ARQ
: Connexion, 2400 bps, correction d'erreurs
CONNECT 115200
: Connexion, 115200 bps
CONNECT 115200/ARQ
: Connexion, 115200 bps, correct. d'erreurs
CARRIER 64000
: Vitesse de porteuse 64000bps
PROTOCOL: V120
: Protocole V.120
PROTOCOL: PPP
: Protocole PPP
Un voyant de canal B s'allume pour indiquer que la communication est établie.
b.
Si la connexion échoue, un des messages suivants apparaît :
ERROR
Vous avez fait une faute de frappe.
NO DIALTONE
L'adaptateur de terminal n'est pas ou n'est pas bien raccordé au bus RNIS
(S0). Il est donc impossible d'appeler. Vérifiez si le modem est raccordé au
réseau RNIS.
BUSY
Le numéro de téléphone que vous avez composé est occupé.
NO CARRIER
Le numéro appelé est incompatible avec le protocole sélectionné ou il n'y a
pas d'adaptateur de terminal au numéro composé.
9. Déconnectez. Vous avez trois possibilités :
a. Donnez l'ordre à la banque de données de couper la communication.
b. Utilisez la commande du logiciel de communication.
c. Donnez l'ordre au modem de couper la communication.
Pour ce faire :
Attendez 1 seconde
Tapez :
Sur l'écran apparaît :
Tapez ensuite :
Sur l'écran apparaît :
+++
OK
ATH <Entrée>
NO CARRIER
44
3. Jeu de commandes AT et registres S
3.1
Jeu de commandes AT
Ce chapitre traite des commandes de l'adaptateur de terminal. La plupart des adaptateurs de terminal et des logiciels de
communication utilisent le jeu de commandes AT. Pour pouvoir piloter des nouveaux appareils, comme des adaptateurs de
terminal, avec des commandes AT, les fabricants ont ajouté leurs propres commandes au jeu de commandes AT, ce qui fait
que l'on ne peut plus parler d'un standard. Il faut faire la distinction entre le jeu de commandes 'AT standard'' et 'AT étendu'.
Il y a plusieurs raisons aux différences entre les commandes. A cause des normes divergentes, certaines commandes ou
réglages sont interdits dans certains pays.
Il y a aussi des différences entre les normes de transmission américaines et européennes (Bell contre ITU, Euro-ISDN).
Les adaptateurs de terminal reconnaissent à la fois les jeux de commandes AT standard et AT étendu. Ils disposent en plus
de leurs propres commandes.
Dans le premier paragraphe de ce chapitre, les notions mode commande et mode données sont expliquées. Ensuite on
parlera de la structure d'une ligne de commande, avant de donner une liste des commandes AT et de registres S et de
commenter chaque commande et registre.
La description des commandes et des réglages de registre est classée par sujet dans un groupe :
• 3.4 Réglages courants
• 3.5 Composer et Répondre
• 3.6 Réglages du port série
• 3.7 Profiles et identification
• 3.8 Autres commandes
3.1.1
Mode commande et mode données
L'adaptateur de terminal dispose de deux modes :
1. Mode commande
Dans ce mode, l'adaptateur de terminal exécute des commandes entrées sur le terminal. L'adaptateur de terminal se
trouve en mode commande s'il est hors ligne, ou si, pendant une connexion données, il est réglé sur mode commande
par la séquence d'échappement.
2. Mode données
L'adaptateur de terminal est transparent, c.-à-d. que les informations échangées entre adaptateurs de terminal ne sont
pas modifiées. Lors d'une communication de données, l'adaptateur de terminal se trouve normalement en mode
données . Lorsque l'adaptateur de terminal doit exécuter une commande, il ne peut le faire qu'en étant en mode
commande. Pendant une connexion, l'adaptateur de terminal peut être mis en mode commande par la séquence
d'échappement.
Séquence d'échappement :
attendez 1 seconde
tapez: +++
après 1 seconde apparaît : OK
L'adaptateur de terminal est maintenant en mode commande.
La commande ATO fait revenir l'adaptateur de terminal en mode données.
3.1.2
Structure d'une ligne de commande
Une ligne de commande commence par les lettres AT, abréviation d'ATtention. Remarquez que les deux lettres AT doivent
être entrées soit en majuscules, soit en minuscules. La ligne de commande se termine par <ENTREE>. Une ligne de
commande peut contenir une ou plusieurs commandes. Une ligne de com mande peut comporter jusqu'à 80 caractères.
NB. L'adaptateur de terminal se souvient de la dernière ligne de commande. Celle-ci peut être répétée en tapant : A /
(sans <ENTREE>).
Pour plus de clarté, les commandes peuvent être séparées par des espaces. Ces espaces sont prises en compte dans le
calcul de la longueur de la ligne de commande.
Une commande est parfois suivie d'un paramètre (chiffre). Si ce chiffre est un 0, il peut être omis. Par exemple : ATE0
correspond à ATE.
45
L'adaptateur de terminal reconnaît la vitesse de transmission et la parité du terminal aux premières lettres AT de la ligne de
commande. L'adaptateur de terminal s'y adapte. Voici les vitesses automatiquement reconnues : 300, 1200, 2400, 4800,
9600, 19200, 38400, 57600 et 115200 bps.
Voici le format de données reconnu : caractères 7 bits ou 8 bits avec bit de parité pair, impair ou sans parité et 1 bit d'arrêt.
46
3.2 Registres S
Certains réglages de l'adaptateur de terminal se font à l'aide de registres S.
Certains registres ont une s eule signification (fonction). D'autres registres en ont plusieurs et s'appellent des registres à
mappage par bit. Dans ces registres, les réglages et les commandes se font au niveau du bit.
Le paragraphe suivant explique ce que signifie le mappage par bit.
A partir du paragraphe 3.4, une description détaillée des commandes est fournie avec indication des paramètres
correspondants.
3.2.1
Registres S à mappage par bit
Dans les registres à mappage par bit, une fonction par b it est activée ou désactivée. '1' signifie que le bit est activé ou 'mis en
service'; '0' signifie que le bit est désactivé ou 'mis hors service'.
Ces bits du système binaire représentent une valeur décimale. Bit 7=128, 6=64, 5=32, 4=16, 3=8, 2=4, 1=2 et 0=1. Si vous
additionnez les valeurs décimales des bits réglés sur '1', le résultat de cette addition doit être mis dans le registre.
3.3
Description commandes AT et registres S
Les paragraphes suivants traitent de la signification e t du contenu des commandes AT et des registres S. Bon nombre de
registres S ont une signification technique bien définie. Toute modification de registre S est donc fortement déconseillée si
vous en ignorez les conséquences.
La colonne Valeur indique les valeurs à configurer.
La colonne Déf. contient la valeur par défaut pour chaque commande.
47
3.4
Réglages courants
Vous pouvez adapter les réglages courants de l'adaptateur de terminal à l'aide des commandes suivantes.
Syntaxe
S110
S111
O
&M
&M0
&M1
&M2
&O
&O7
&O8
&O9
&O10
&O13
&O16
&O18
&O27
&Q
&Q0
&Q1, &Q4
&Q2
&Q5
3.5
Valeur
1..255
1..255
Déf.
10
cnf
0..2
cnf
1..255
10
0..6
cnf
Signification
Protocole actif
Service avec protocole
1 : Service vocal
2 : Service modem données
3 : Service données brutes
4 : Service télécopie du Groupe 3
5 : V.14
7 : Service PAD
8 : Service V.120
10 : Service relais synchrone
Passe sur mode données
Mode de communication
Asynchrone
Synchrone
Synchrone, composition DTR
Sélectionne protocole actif
PPP, 1 x B
V.14, 1 x B
V.110, 1 x B
V.120, 1 x B
Multi Link V.120, 2 x B
GCI-speech, 2 x B
GCI-data, 2 x B
Multi Link PPP, 2 x B
Mode de communication
Asynchrone
Synchrone
Synchrone, composition DTR
Asynchrone, correction d'erreurs
Composer et Répondre
Commandes et réglages pour établir une connexion (ou pour y répondre) et pour la couper.
Syntaxe
S0
Valeur
0..255
S1
S6
S7
S8
A
D
0..255
H
H0
H1
P
T
0..255
Déf.
0/1
60
chaîne de
compositio
n
0..1
0
Signification
Nombre de sonneries avant réponse automatique
0: réponse automatique désactivée
>0: réponse automatique activée
Nombre de sonneries avant décrochage
Sans fonction avec RNIS (composition aveugle)
Délai avant connexion (secondes)
Sans fonction avec RNIS (caractère pause)
Répond à un appel entrant
Compose un numéro
Raccroche/décroche
Coupe la communication
Sans fonction avec RNIS
Sans fonction avec RNIS (impulsion)
Sans fonction avec RNIS (fréquence vocale)
48
Type
Voir aussi: &D (comportement DTR), X (code résultat sélection et détection tonalités information), W (messages retournés),
S95 (messages retournés), S112 (messages détaillées).
49
3.5.1
Composition d'un numéro RNIS
Lors de la composition d'un numéro RNIS, la commande D est suivie du numéro et éventuellement d'une sous -adresse
(précédée d'une étoile '*').
La commande d'appel possède la structure suivante :
ATDRNIS_nb*sub_addr : : dte_channel_id
dans laquelle:
isdn_nb*sub_addr est un numéro RNIS, éventuellement suivi d'une sous -adresse.
dte_channel_id est le numéro de protocole utilisé. Si ce champ est vide, le protocole actif est utilisé.
Exemples :
ATD69855044 compose le numéro 69855044
ATD69855044*5 compose le numéro 69855044 et transmet la sous -adresse 5
ATD69855044::10
compose le numéro 69855044 en utilisant le protocole V.120
50
3.6
Réglages du port série
Les commandes suivantes permettent de régler le port série.
Syntaxe
S2
Valeur
0..255
Déf.
43
Signification
Caractère code échappement '+'
≤ 127 : code ASCII de la valeur réglée
> 127 : reconnaissance +++ désactivée
S3
S4
S5
S25
0..127
0..127
0..127
0..255
13
10
8
0
S39
0..4
3
S95
0..255
0
S112
0..255
0
Caractère retour chariot <cr>
Caractère saut de ligne <lf>
Caractère espacement arrière <bs>
Hystérésis DTR (en 1/100 secondes, ou en secondes si
synchrone)
Contrôle de flux
0 : Pas de contrôle de flux
3 : Contrôle de flux RTS-CTS (matériel)
4 : Contrôle de flux XON-XOFF (logiciel)
Messages de protocole et de connexion
1 : indique la vitesse du port série, pas la vitesse ligne lors
du message CARRIER
2 : ajoute /ARQ lors d'une connexion avec correction
d'erreurs
4 : message CARRIER activé
8 : message PROTOCOL activé
16 : non utilisé
32 : non utilisé
64 : non utilisé
Messages d'appel détaillés
Commande orientée selon bit :
1 (bit 0) : format message RING
0 : format standard AT (RING)
1 : format étendu (RING:)
2 (bit 1) : messages détaillés
0 : court
1 : long
8 (bit 3) : indications AT
0 : AT standard
1 : AT étendu (message RING avec numéro du
correspondant, message NO
CARRIER avec cause)
128 (bit 7) : services supplémentaires
0 : message services supp. désactivé
1 : message services supp. (ALERT:) activé
Les autres bits sont réservés (val. par déf. 0)
51
Syntaxe
S114
Valeur
0..255
Déf.
115
S117
0..255
4
S123
0..1
0
S124
0..255
1
E
E0
E1
Q
Q0
Q1
V
V0
V1
W
W0
0..1
1
0..1
0
0..1
1
0..2
2
W1
Signification
Sélection vitesse asynchrone sérielle et horloge
asynchrone
75
: 75 bps
3
: 300 bps
12 ou 1
: 1200 bps
24 ou 2
: 2400 bps
48 ou 4
: 4800 bps
72 ou 7
: 7200 bps
96 ou 9
: 9600 bps
14 ou 144 : 14400 bps
19 ou 192 : 19200 bps
28
: 28800 bps
38
: 38400 bps
57
: 57600 bps
115
: 115200 bps
255
: sélectionne horloge interne
(informations horloge asynchrone
en provenance du bus S0)
0
: sélectionne horloge externe
(informations horloge asynchrone
en provenance du port série)
Temporisateur nombre de messages RING (sec.)
Délai entre deux messages RING consécutifs pendant
appels entrants
0 : un seul message RING
Commande &D
0 : utilise &D pour l'action de DTR
1 : ignore réglage &D, force &D0
Détection Autobaud AT
0 : Autobaud désactivé
1 : Autobaud activé
Echo
Echo désactivé
Echo activé
Codes résultat
Codes résultat activés
Codes résultat désactivés
Format codes résultat
Numérique.
Verbal
indication de vitesse avec CONNECT
CONNECT avec vitesse de port série
Si S95=0, pas de messages de protocole détaillés
CONNECT avec vitesse de port série
Si S95=0, aussi messages CARRIER et PROTOCOL
CONNECT avec vitesse ligne
Si S95=0, , pas de messages de protocole détaillés
W2
52
Syntaxe
X
Valeur
0..4
Déf.
4
Signification
Sélection messages et détection tonalité et tonalité
d'occupation
Détection tonalité et tonalité d'occupation désactivée,
seulement message CONNECT
Détection tonalité d'occupation désactivée, détection tonalité
désactivée, message CONNECT xxx
Détection tonalité d'occupation désactivée, détection tonalité
activée, message CONNECT xxx
Détection tonalité d'occupation activée, détection tonalité
désactivée, message CONNECT xxx
Détection tonalité d'occupation activée, détection tonalité
activée, message CONNECT xxx
0..2
1
0..3
2
0..4
3
0..2
0
Comportement signal Carrier D etect (CD, 109)
Mode synchrone : CD suit l'état 'carrier'
Mode asynchrone :
CD toujours activé
CD suit 'carrier'
CD activé si en ligne, désactivé dès la disparition de
'carrier', activé en mode repos
Comportement DTR (108) (voir aussi S123)
&Q0, &Q5: DTR n'a aucun effet
&Q1: DTR s'éteint : couper connexion
&Q2: DTR s'éteint : couper connexion
DTR s'éteint et s'allume : commencer à
composer
&Q0, &Q1, &Q5: DTR s'éteint : passer sur
mode commande
&Q2: DTR s'éteint : couper connexion
DTR s'éteint et s'allume : commencer à
composer
&Q0, &Q5 : DTR s'éteint : couper connexion
&Q1: DTR s'éteint : couper connexion,
DTR doit s'allum er pour un CONNECT
dans le délai enregistré dans S25
Pas de réponse auto si DTR n'est pas
allumé.
&Q2 : DTR s'éteint : couper connexion
DTR s'éteint et s'allume : commencer à
composer
Pas de réponse auto si DTR n'est pas
allumé.
&Q0, &Q1, &Q5: DTR s'éteint : réinitialiser
l'adaptateur de terminal
&Q2: DTR s'éteint : réinitialiser le l'A.T.
DTR s'éteint et s'allume : commencer à
composer.
Contrôle de flux
Pas de contrôle de flux
Contrôle de flux RTS-CTS (matériel)
Contrôle de flux XON-XOFF (logiciel)
Comportement DSR (107) en mode a synchrone (&Q0, &Q5)
DSR toujours allumé
DSR s'allume si en ligne, s'éteint si repos
X0
X1
X2
X3
X4
&C
&C0
&C1
&C2
&D
&D0
&D1
&D2
&D3
&K
&K0
&K1, &K3
&K2, &K4
&S
&S0
&S1, &S2
Voir aussi : &Q (mode communication)
53
3.6.1
Codes résultat
Après exécution d'une ligne de commande, l'adaptateur de terminal envoie des codes résultat au port série. En fonction de la
commande ATV, ces codes peuvent être du texte ou des chiffres.
Chiffre
0
1
1
2
3
4
5
5
6
7
10
10
11
11
12
12
14
14
18
18
28
28
99
99
3.6.2
Texte
OK
CONNECT
CONNECT/ARQ
RING
NO CARRIER
ERROR
CONNECT 1200
CONNECT 1200/ARQ
NO DIALTONE
BUSY
CONNECT 2400
CONNECT 2400/ARQ
CONNECT 4800
CONNECT 4800/ARQ
CONNECT 9600
CONNECT 9600/ARQ
CONNECT 19200
CONNECT 19200/ARQ
CONNECT 57600
CONNECT 57600/ARQ
CONNECT 38400
CONNECT 38400/ARQ
CONNECT 115200
CONNECT 115200/ARQ
Signification
Commande exécutée
Connexion établie
Connexion avec corr. d'erreur
Communication entrante
Connexion coupée
Message erreur
Connexion à 1200 bps
Idem, avec correction d'erreurs
Réseau RNIS ne réagit pas
Numéro composé est occupé
Connexion à 2400 bps
idem, avec correction d'erreurs
Connexion à 4800 bps
idem, avec correction d'erreurs
Connexion à 9600 bps
idem, avec correction d'erreurs
Connexion à 19200 bps
idem, avec correction d'erreurs
Connexion à 57600 bps
idem, avec correction d'erreurs
Connexion à 38400 bps
idem, avec correction d'erreurs
Connexion à 115200 bps
idem, avec correction d'erreurs
Type
Autres messages
3.6.2.1 Messages (protocole) détaillés
Les messages suivants apparaissent lors de négociations de protocole. Les messages sont activés par S95.
Chiffre
Texte
Signification
40
CARRIER 300
Vitesse ligne 300 bps
46
CARRIER 1200
Vitesse ligne 1200 bps
47
CARRIER 2400
Vitesse ligne 2400 bps
48
CARRIER 4800
Vitesse ligne 4800 bps
50
CARRIER 9600
Vitesse ligne 9600 bps
54
CARRIER 19200
Vitesse ligne 19200 bps
56
CARRIER 38400
Vitesse ligne 38400 bps
57
CARRIER 56000
Vitesse ligne 56000 bps
58
CARRIER 57600
Vitesse ligne 57600 bps
59
CARRIER 64000
Vitesse ligne 64000 bps
60
CARRIER 115200
Vitesse ligne 115200 bps
66
COMPRESSION: CLASS 5
Compression MNP-5
67
COMPRESSION: V42BIS
Compression V.42bis
69
COMPRESSION: NONE
Pas de compression
70
PROTOCOL: NONE
Pas de protocole de communication
77
PROTOCOL: LAP-M
Correction d'erreurs V.42
80
PROTOCOL: ALT
Correction d'erreurs MNP-4
83
PROTOCOL: V120
Protocole V.120
54
Chiffre
87
3.7
Texte
PROTOCOL: V14
Profiles et identification
Syntaxe
S121
Valeur
0..255
Déf.
0
S122
0..255
254
I
I0
I1
I2
I3
I4
I5
I8
&V
\S
Z
0..4
&F
&W
&Y
0, 255
0
#V
#Z
3.8
Syntaxe
#CH=
#RM=
#RM=0
#RM=1
Signification
Protocole adaptation vitesse V.14
Signification
Action après commande &F
0 : standard (récupère réglages usine
et redémarre)
255 : aucune action
autre valeur : règle sur le protocole sélectionné
Action après commande Z
0
: standard (récupère réglages de la
mémoire et redémarre)
255 : aucune action
autre valeur : règle sur le protocole sélectionné
Identification et test interne
Identification du matériel
Total du contrôle ROM
Test total du contrôle ROM
Nom de produit et révision logiciel
Fabricant
Liste des protocoles possibles
Version logiciel Euro-ISDN
Réglages tonalité
Réglages tonalité
Réinitialisation logiciel avec réglages enregistrés.
Attention ! En exécutant cette commande, le Proxima ISDN
Lite est entièrement réinitialisé et toutes les connexions
sont coupées.
Voir aussi S122
Réinitialisation logiciel avec réglages usine
Voir aussi S121
Enregistre les réglages en cours (Profil enregistré)
Sélectionne les réglages standard lors du démarrage
255 : utilise les réglages usine
Affiche liste des noms de paramètres disponibles
Réinitialisation du logiciel avec réglages enregistrés
Autres commandes
Valeur
voir &O
0..1
Déf.
10
1
Signification
Protocole standard canal DTE port 1
Mode sonnerie
Sélection par sous -numéro ou par MSN
Transmission de l'appel au protocole actif
55
4.
Divers
4.1
Réglages (profils)
Le Proxima ISDN Lite dispose de trois réglages :
1. Profil actif. Réglages en cours utilisés avec le protocole sélectionné.
2. Profil enregistré. Un certain nombre de réglages (paramètres et configurations) sont conservés en mémoire non volatile
(E2PROM). La commande AT&W apporte souvent des modifications par rapport aux réglages usine et les enregistre. Lors
du démarrage et après la commande AT#Z, le profil enregistré est chargé dans le profil actif.
3. Profil usine (Réglages), enregistré une fois pour toutes dans l'adaptateur de terminal (Flash EPROM). La commande AT&F
permet de charger ces réglages dans le profil actif.
Registres
Profil
usine
Profil
actif
&F
4.2
#xxx=
Démarrage
(mise sous
tension)
Profil
enregistré
#Z
--------------Reg S
&W
Réglages conservés en mémoire non volatile
Les réglages de l'adaptateur de terminal peuvent être conservés en mémoire non volatile (E2PROM). Voici les commandes à
utiliser :
•
•
•
Conserver contenu du registre avec AT&W
Conserver numéro de téléphone utilisé pour composition automatique (40 caractères au maximum) avec AT &Z
Fonction softkey avec AT##NBV120=”< numéro > (toujours finir par #Z).
Ces commandes permettent d'enregistrer les réglages en mémoire non volatile. Ceux-ci ne s'activent pas automatiquement
mais à l'aide de la commande AT#Z ou en éteignant et allumant le Proxima ISDN Lite.
AT&F active les réglages usine.
56
5.
Applications spéciales
5.1
Configuration d'appel
Le Proxima ISDN Lite peut être réglé de façon à affecter un numéro de téléphone à un protocole. Si ce numéro est appelé, le
Proxima ISDN Lite établira une connexion selon le protocole configuré. Si ce numéro est appelé, cet appel sera toujours
acheminé vers le port analogique.
Des commandes AT spéciales permettent d'affecter les sous -adresses et les Multiple Subscriber Numbers (Numéros
d'abonnée multiples) aux protocoles. Le chapitre 3.3 fournit un description de la structure générale des commande AT.
5.1.1
Sous-adresses
Le sous -adressage consiste à ajouter un caractère supplémentaire (4 caractères au maximum) au numéro de téléphone. Ces
caractères supplémentaires sont transmis à l'appareil RNIS appelé. L'ajout d'une sous -adresse permet au correspondant
(donc à distance) de sélectionner un protocole sur le Proxima ISDN Lite. Inversement, le Proxima ISDN Lite peut composer un
numéro de téléphone et y ajouter des caractères supplémentaires. Ceci n'est possible qu'avec un équipement RNIS. Le
service sous -adressage n'est pas disponible d'office. Il faut en faire la demande.
Le tableau suivant montre, pour différents types, les commandes AT dont vous avez besoin pour modifier la liaison par défaut
entre protocole et sous-adresse. Cette liaison est désactivée en entrant une chaîne vide comme valeur.
Syntaxe
#SAPPP
#SAV120
#SA2B
#SARTEL
#SARDATA
#SAMPPP
Valeur
4 chiffres
4 chiffres
4 chiffres
4 chiffres
4 chiffres
4 chiffres
Déf.
7
10
13
16
18
27
Signification
conv. PPP asyn-sync
V.120 asyn
V.120 asyn, MLP (2B)
GCI-speech (vocal)
GCI-data (données)
Multilink PPP RFC1990
Exemples de sous-adresses :
a. programmation :
AT#SAPPP=28<Entrée>
AT#Z<Entrée>
En appelant son propre numéro RNIS et en y ajoutant 28 comme chiffres supplémentaires, l'adaptateur de terminal établit une
connexion PPP.
b. désactiver la liaison :
AT#SAPPP=<Entrée>
AT#Z<Entrée>
La liaison entre le protocole PPP et le sous-numéro est désactivée.
c. composer :
Pour ajouter une sous -adresse à la commande d'appel :
ATD010-1234567*28<Entrée>
Compose le numéro 010-1234567 et y ajoute le sous -numéro 28.
5.1.2
Numéros MSN
Une connexion RNIS permet de demander jusqu'à 8 numéros de téléphone au fournisseur de services (par ex. France
Télécom). Normalement, vous obtiendrez 1 numéro principal et 3 numéros supplémentaires en option. Si vous souhaitez plus
de numéros, vous devez en faire la demande. Ce service s'appelle aussi MSN (Multiple Subscriber Numbers ou Numéros
d'abonnée multiples). Les commandes AT suivantes permettent d'affecter des protocoles aux quatre derniers chiffres du
numéro MSN. La liaison par d éfaut entre le protocole et le sous-numéro doit être désactivée.
57
Syntaxe
#NBPPP
#NBV120
#NB2B
#NBRTEL
#NBRDATA
#INBMPPP
Valeur
4 chiffres
4 chiffres
4 chiffres
4 chiffres
4 chiffres
4 chiffres
Déf.
“”
“”
“”
“”
“”
“”
Signification
conv. PPP asyn-sync
V.120 asyn
V.120 asyn, MLP (2B)
GCI-speech (vocal)
GCI-data (données)
Multilink PPP RFC1990
Port
Série 1
Série 1
Série 1
Série 1
Série 1
Série 1
Type
Exemples de programmation de numéros MSN :
1. AT#NBV120=15<Entrée>
AT#SAV120=<Entrée>
AT#Z<Entrée>
Lors d'un appel au TTA128, alors que son propre numéro RNIS se termine par les chiffres 15, l'adaptateur de terminal établit
une connexion V.120. La liaison par défaut entre le protocole V.120 et le sous-numéro doit être désactivée.
AT#NBMPPP=1<Entrée>
AT#Z<Entrée>
Lors d'un appel au TTA128, alors que son propre numéro RNIS se termine par le chiffre 1, l'adaptateur de terminal établit une
connexion ML-PPP. Veillez à ce que la liaison par défaut entre le protocole ML-PPP et le sous -numéro soit désactivée.
2.
5.1.3
Réglage des priorités de protocole
Les paragraphes précédents décrivent la façon dont les protocoles peuvent être affectés aux sous -adresses et aux numéros
MSN. Une seule sous -adresse ou un seul numéro MSN peut être affe cté à plusieurs protocoles. L'adaptateur de terminal
sélectionnera le protocole avec la plus haute priorité. Les commandes suivantes permettent de régler les priorités des
protocoles. La valeur 0 donne la plus haute priorité, la valeur 254 la plus basse priorité. Priorité 255 signifie que le protocole
concerné ne réagit pas à un appel entrant. Si tous les protocoles ont une priorité de 255, votre correspondant obtiendra le
message BUSY (occupé), puisque l'adaptateur de terminal ne réagit pas.
Syntaxe
#IPPPP
#IPV120
#IP2B
#IPRTEL
#IPDATA
#IPMPPP
Valeur
4 chiffres
4 chiffres
4 chiffres
4 chiffres
4 chiffres
4 chiffres
Déf.
28
16
40
40
40
28
Signification
conv. PPP asyn-sync
V.120 asyn
V.120 asyn, MLP (2B)
GCI-speech (vocal)
GCI-data (données)
Multilink PPP RFC1990
Port
Série 1
Série 1
Série 1
Série 1
Série 1
Série 1
Type
Exemple de réglage de priorité de protocole :
AT#IPV120=15<Entrée>
AT#IPPPP=18<Entrée>
AT#Z<Entrée>
Le protocole V.120 reçoit une plus haute priorité que le protocole PPP.
5.1.4
Réglage à distance (Remote Configuration)
Le Proxima ISDN Lite peut être réglé à distance, par le réseau RNIS. Un gestionnaire disposant d'un Proxima ISDN Lite ou
d'un TTA128 et d'un logiciel de communication peut régler à distance un Proxima ISDN Lite qui se trouve ailleurs (‘remote’) en
appelant le Proxima ISDN Lite avec le protocole V.120/RC. Ce protocole ne transmet pas le chemin de données au port série
mais le renvoie à la connexion RNIS.
Les commandes « AT » permettent de régler le Proxima ISDN Lite distant de la même façon que par le port série.
Lors d'un appel entrant, le protocole de télécommande V.120 est sélectionné par un numéro RNIS et/ou une sous -adresse
RNIS (4 chiffres). Ce numéro et/ou sous-adresse doivent être réglés au préalable.
Numéro de téléphone avec la commande :
AT#remnbrc=<n° de téléphone sur lequel les réglages doivent être effectués>#Z <Entrée>
58
Une connexion qui permet d'effectuer des réglages à distance peut être protégée de deux façons :
• Caller Number Identification (CLI). Permet de vérifier si le numéro de téléphone de l'appelant correspond au
numéro programmé.
• Vérification par Mot de passe. Ce code d'accès est envoyé par le UUI (User to User Information) et comparé à un
code programmé. Ce code est programmé de la façon suivante :
AT#passrc=”<mot de passe>”#Z<Entrée>
Exemple avec CLI (identification de numéro) :
Dans l'exemple suivant, 0112345678 est le propre numéro et 0287654321 est le numéro de la personne autorisée à effectuer
le réglage à distance.
Commandes :
AT#RM=0
AT#IPRC=254
AT#NBRC=0112345678
AT#SARC=
AT#REMNBRC=0287654321
AT#Z
; Mode sonnerie désactivée
; Régler priorité
; Configurer propre numéro
; Désactiver sous adresse
; Numéro du Proxima ISDN Lite à configurer
; Enregistrer les réglages
AT#REMNBRC=n° MSN distant de la personne autorisée à régler à distance.
59
Annexe A : Caractéristiques techniques
Général :
♦ Protocoles:
V.110, 1 x canal B synchrone/asynchrone
V.120, 1 x canal B, 64 000 bps
V.120, 2 x canal B, 128 000 bps
PPP, 1 x canal B, 64 000 bps
Multi Link PPP (ML-PPP), 2 x canal B, 128 000 bps (BACP)
♦ Correction d'erreurs : V.42, MNP4
♦ Compression de données : V.42bis, MNP5
♦ Jeu de commandes :
◊ Jeu de commandes 'AT' étendu
♦ Télécommande par RNIS pour réglage à distance et tests
♦ Mise à jour du logiciel par port série (115,2 kbps).
♦ Signalisation V.25bis (HDLC)
♦ Interface RNIS-2: interface S0 selon la norme CCITT I.430 (1TR3)
♦ Raccordement S0: prise RJ45
♦ Mémoire non volatile pour stocker réglages. Chaque protocole peut être réglé indépendamment !
♦ Détection Autobaud de 300 à 115 200 bps
♦ Full interspeeder avec XON/XOFF et / ou contrôle de flux RTS/CTS
♦ Autotest au démarrage
♦ Format des données :
◊ Données : 7 ou 8 bits
◊ Parité : impair, pair, espace, marque ou sans
◊ Bits d'arrêt : 1 ou 2
Raccordements :
♦ Port série :
◊ connecteur DB9F (V.24, RS232)
♦ Alimentation par adaptateur secteur 9V CA, 220 mA
♦ Voyants pour indiquer les états du port série et de RNIS
Conditions d'utilisation :
♦ alimentation
♦ température utilisation
stockage
♦ humidité
utilisation
♦ stockage
: 9V CA, 220 mA -15% / +10%
: -5 C à +60 C
: -20 C à +70 C
: 10% à 75%
: 5% à 95%
♦ dimensions
♦ poids
♦ sécurité électrique
: 130x195x37. (b x l x h)
: ± 300 grammes (sans adapteur secteur)
: classe II
60
Annexe B : Connecteur RS232C
CCITT
109
104
103
108
107
105
106
125
Broche
DB25F
8
2
3
20
7
6
5
4
22
Sens
OUT
OUT
IN
IN
OUT
IN
OUT
OUT
Nom
Abrév.
Data carrier detect
Received Data
Transmitted Data
Data terminal ready
Signal Ground
Data set ready
Request to send
Clear to send
Ring Indicator
61
(CD)
(RxD)
(TxD)
(DTR)
(GND)
(DSR)
(RTS)
(CTS)
(RI)
Annexe C : CALL CLEARING CAUSES
Le tableau suivant vous fournit une liste des causes de non aboutissement d'un appel. Ces informations vous sont, par
exemple, transmises par le message CLEARED: Ces messages sont soit au format hexadécimal ou décimal. Les
messages suivants se rapportent à un réseau RNIS à la norme ETSI (Euro-ISDN).
Les messages dont la valeur dépas se 80 en hexadécimal sont générés par le Proxima ISDN Lite.
Les messages sont transmis par le Proxima ISDN Lite en utilisant la commande AT* D/<numéro> à la composition du
numéro.
Le tableau suivant est en anglais, parce que c'est la langue officielle utilisée dans les normes ETSI.
Hex
01
02
03
06
07
10
11
12
13
15
16
1A
1B
1C
1D
1E
1F
22
26
29
2A
2B
2C
2F
31
32
39
3A
3F
41
42
45
46
4F
51
52
53
54
55
56
58
5B
5F
Décimal
1
2
3
6
7
16
17
18
19
21
22
26
27
28
29
30
31
34
38
41
42
43
44
47
49
50
57
58
63
65
66
69
70
79
81
82
83
84
85
86
88
91
95
Description
unallocated (unassigned) number
no route to specified transit network
no route to destination
channel unacceptable
call awarded and being d elivered in an established channel
normal call clearing
user busy
no user responding
no answer from user (user alerted)
call rejected
number changed
non-selected user clearing
destination out of order
invalid number format
facility rejected
response to STATUS ENQUIRY
normal, unspecified
no circuit/channel available
network out of order
temporary failure
switching equipment congestion
access information discarded
requested circuit/channel not available
resources unavailable, unspecified
quality of service unavailable
requested facility not subscribed
bearer capability not authorised
bearer capability not presently available
service or option not available, unspecified
bearer capability not implemented
channel type not implemented
requested facility not implemented
only restricted digital information bearer capability is available
service or option not implemented, unspecified
invalid call reference value
identified channel does not exist
a suspended call exists, but this call identity does not
call identity in use
no call suspended
call having the requested call identity has been cleared
incompatible destination
invalid transit network selection
invalid message, unspecified
62
Hex
60
61
62
Décimal
96
97
98
63
64
65
66
6F
7F
91
A2
FF
99
100
101
102
111
127
145
162
255
Description
mandatory information element is missing
message type non-existent or not implemented
message not compatible with call state or message type non-existent or not
implemented
information element non-existent or not implemented
invalid information element contents
message not compatible with call state
recovery on timer expired
protocole error, unspecified
interworking, unspecified
no signalling data link establishment
no line activation
call clearing, unspecified
Exemples de messages détaillés.
Nous partons d'un Proxima ISDN Lite réglé de la façon suivante :
• protocole 6 pour voice (S111 = 1).
• protocole 11 pour PAD (S111 = 7).
• S112=35 (informations maximales et PAD VC automatique).
Les messages générés par le Proxima ISDN Lite sont en italique :
AT&O6*D/11
OK:6,0,6
PROGRESS:6,0,0,6,1
ALERT:6,0,6,1
CONNECTED:6,,0,6,1
CLEARED:6,10
AT*D/69855044*5/"Allô"
OK:6,0,6
CONNECTED:6,"Bienvenue",0,1,2
AT*H0/6
sélectionne protocole 6, compose numéro RNIS 11.
confirmation directe que la communication 6 par le numéro
d'accès RNIS 0 avec le protocole 6 a été établie.
message pour appel numéro 6 avec protocole 6, canal B1,
communication avec réseau analogique.
L'appareil appelé sonne : message ALERT.
Première communication (6) établie, canal B1 sélectionné.
Communication (6) interrompue par une cause normale (10).
pendant que la première connexion est établie, une deuxième
commande est envoyée pour composer le numéro RNIS
69855044, avec sous -adresse 5 et information utilisateur
« Allô ».
Remarquez qu'il n'est pas nécessaire d'exécuter la
commande &O6, parce que ce protocole est déjà actif.
confirmation directe que la communication 6 par le numéro
d'accès RNIS 0 avec le protocole 6 a été établie.
Deuxième communication (6) établie. Canal B2 sélectionné.
La personne appelée a répondu par « Bienvenue ».
Met fin à la communication 6
63
Bausch Proxima ISDN Lite
ISDN Terminal Adapter
(ISDN Modem)
Manual
64
Disclaimer
This manual by BAUSCH DATACOM NV. (hereinafter referred to as Bausch Datacom ) is a reflection of the current state of the
products described in it. It has been our aim to provide a description which would be sufficiently complete and clear to see to it
that our products would be as easy as possible to use. However, this manual may contain technical inaccuracies and typing
errors. As a result of rapid developments, we are also obliged to reserve the right to implement technical modifications and
developments without prior notice.
For this reason, BAUSCH DATACOM does not warrant the contents of the manual and its permanent applicability.
Neither is BAUSCH DATACOM liable for possible loss of information or any improper use of information resulting from the
consultation of this manual. In particular, BAUSCH DATACOM is not liable for any direct or indirect damage (including loss of
profits and comparable losses) resulting from the use or improper use of this manual, even if BAUSCH DATACOM or a
representative of BAUSCH DATACOM has been informed that such damage could arise. Of course, this does not detract from
out legal liability for intentionally inflicted damage or damage on the basis of gross negligence.
In relation to the information mentioned in this manual, BAUSCH DATACOM does not warrant that there are no industrial rights
of ownership (trademarks, patents, etc.). This also applies to commonly used brand names, company names and product
names, but these are subject to the relevant trade mark, patent and registered design laws.
The information is not to be copied, translated, reproduced or transferred or stored on any electronic medium or other machine,
neither wholly nor partly, without prior permission in writing from Bausch Datacom.
The sale and use of software is subject to the BAUSCH DATACOM General Terms of Delivery and Payment as well as its
License Terms.
Should any term regarding the disclaimer be or become void for legal reasons, this will not affect the other terms.
BAUSCH DATACOM NV
Tiensesteenweg 56
B-3360 Korbeek-Lo
Belgium
© july 1999 – Proxima ISDN Lite UK
Proxima is a registered trademark of BAUSCH DATACOM NV
IBM is a registered trademark of International Business Machines Corp (IBM).
MNP is a registered trademark of Microcom Inc.
65
Table of Contents
0.
1.
Introduction....................................................................................................................................................................67
ISDN, Data Communication, the Internet.................................................................................................................68
1.1
ISDN ........................................................................................................................................................................68
1.1.1
Setting up a connection ..............................................................................................................................68
1.2
The Function of the Proxima ISDN Lite .............................................................................................................68
1.3
Internet Access......................................................................................................................................................69
1.3.1
Remote LAN Access ...................................................................................................................................69
1.4
Data bits, control bit and speed .........................................................................................................................70
2. Getting started with the Proxima ISDN Lite............................................................................................................71
2.1
Description of the Proxima ISDN Lite terminal adapter.................................................................................71
2.1.1
The back of the Terminal Adapter.............................................................................................................72
2.2
What else do you need ........................................................................................................................................72
2.3
Connecting the Terminal Adapter......................................................................................................................72
2.4
Protocols.................................................................................................................................................................72
2.5
Establishing a data connection..........................................................................................................................74
3. AT command set and S registers.............................................................................................................................76
3.1
The AT command set...........................................................................................................................................76
3.1.1
Command mode and data mode .............................................................................................................76
3.1.2
Building a command line ...........................................................................................................................77
3.2
S Registers ............................................................................................................................................................77
3.2.1
Bitmapped S regis ters ................................................................................................................................77
3.3
Description of AT commands and S registers ................................................................................................77
3.4
General settings....................................................................................................................................................78
3.5
Dialing and Answering.........................................................................................................................................79
3.5.1
Dialing an ISDN num ber ............................................................................................................................79
3.6
Serial port settings................................................................................................................................................80
3.6.1
Result codes .................................................................................................................................................82
3.6.2
Other messages ..........................................................................................................................................83
3.7
Profiles and identification ....................................................................................................................................83
3.8
Other commands ..................................................................................................................................................84
4. Sundries..........................................................................................................................................................................85
4.1
Settings (profiles)..................................................................................................................................................85
4.2
Nonvolatile memory settings ..............................................................................................................................85
5. Special applications.....................................................................................................................................................86
5.1
Dial-in configuration .............................................................................................................................................86
5.1.1
Subaddresses ..............................................................................................................................................86
5.1.2
MSN numbers...............................................................................................................................................87
5.1.3
Setting protocol priorities............................................................................................................................88
5.1.4
Remote Configuration.................................................................................................................................88
Appendix A: Technical Specifications ..............................................................................................................................89
Appendix B: RS232C Connector.........................................................................................................................................90
Appendix C: Call Clearing Causes .....................................................................................................................................91
66
0.
Introduction
The Proxima ISDN Lite (Terminal Adapter) connects two computers across more remote distances through ISDN, the digital
telephone line. Data may be retrieved from or sent to the other computer. Connections to the Internet or to an external database
are also possible this way. Internet or database information may be read and downloaded if necessary.
This manual doesn’t describe all steps necessary in data communication. It so happens that a number of actions is
dependent on the communication program used.
The manual is specifically meant to outline the use of the Proxima ISDN Lite.
The Windows drivers installation procedure is described in the Installation Manual, which also covers the configuration
program.
0.1
Who should read this manual?
Both starting and experienced users can find the information they need in this manual. First of all, chapter 1 should prove
interesting to the former. It covers general information on data communication and the use of the Terminal Adapter. The
alphabetical description of the commands and the S registers (Chapter: AT command set and S registers) can be used as
reference by both types of users.
0.2
How is the manual set up?
The first chapter examines data communication in general. The second chapter describes the Proxima ISDN Lite, the
installation and bringing into use of the Terminal Adapter. Chapters 3 and 4 explain the commands and the S registers. Lastl y,
chapter 5 sums up the Proxima ISDN Lite’s specific possibilities.
The appendices contain background information on a number of aspects, such as technical specifications and the ASCII table.
We wish you good luck with your Proxima ISDN Lite!
67
2. ISDN, Data Communication, the Internet
This chapter starts off with a brief explanation of ISDN and the function of the Proxima ISDN Lite. After that, the concept of Data
Communication is described.
1.1
ISDN
The introduction of ISDN (Integrated Services Digital Network) has made it possible to send information in a digital format.
This helps improve speed and reliability. ISDN was set up to integrate the existing speech, data and telex telephone networks
into one network. Apart from this integration, a separate signaling net was added to speed up connection. Establishing a
connection through the PSTN network (telephone net) by modem took about 15 seconds; this has been reduced to just 2 or 3
seconds by using a terminal adapter through the ISDN network.
Proxima ISDN
PC
fax
Terminal
adapter
telephone
junction box
ISDN2
connection
Figure 11: Possible ISDN Configuration
In ISDN, only one connection is needed for communication devices like faxes, telephones and terminal adapters. An ISDN
device only responds to an incoming call if the call is actually destined for it. For instance, if a call is made by a terminal
adapter, only a terminal adapter will respond; the fax and telephone will not. This is possible because information is sent
along about the kind of telecommunication service. This means a beeping fax on the line is a thing of the past.
With an ISDN2 or BRI (Basic Rate Interface) connection, you have two so-called B channels (64 Kbps) and a D channel (16
Kbps) at your disposal. Both the B channels are data channels, whereas the D channel gives access to the signaling net and
is used to make a connection. It is possible to connect eight ISDN devices to an ISDN2 connection, with a maximum total
cable length of 200 meters between devices and ISDN2 connection.
1.1.1
Setting up a connection
Setting up a data connection through the ISDN network is almost the same as doing so by modem. Once a protocol has been
selected, a number can be dialed using the ATD command. The Proxima ISDN Lite will now establish a connection through
the
D channel. If the same protocol is selected on both sides, a data connection is set up through one B or possibly both the B
channels.
1.2
The Function of the Proxima ISDN Lite
Computers can exchange information, for example by floppy disk, by connecting two RS232 ports or through a network. When
the Proxima ISDN Lite is used, information is exchanged through the RS232 port and the ISDN network.
In a direct connection between two serial ports, it is only possible to bridge a limited distance (approx. 15 meters). The ISDN
network is used to cross greater distances. It is an existing infrastructure which can be used to establish worldwide
connections. The ISDN network is digital which means data may be sent directly from the serial port by means of a protocol.
68
The Proxima ISDN Lite holds a number of standard protocols for exchanging data. In most cases, PPP (Point to Point Protocol)
is used to g ain Internet access through an Internet Provider. The V.110 or V.120 protocols are used to contact BBSs.
1.3
Internet Access
There are three common ways to gain Internet access through ISDN:
•
PPP or multilink PPP
•
V.120 with serial port speed adjustment
•
V.110 without serial port speed adjustment
The mode you use is dependent on the access facilities of the Internet Service Provider (ISP) or Point Of Presence (POP) (see
Figuur 2).
ISDN
Basic Rate
Access
async
V.24
PC with
Online Software
ISDN network
Online (POP) Access Server
CompuServe Access Server
Proxima ISDN
Figure 12: Access to an On-line Service
Internet Configuration
You can only gain ISDN access to the Internet if you have a contract with an Internet Service Provider (ISP) who works with
ISDN access. You will need the following information from your ISP to configure the Proxima ISDN Lite:
•
ISDN access number (to be entered into the PC program)
•
The protocol used, for instance PPP (command: AT&O7), which has to be configured in the Proxima ISDN Lite
•
Access protocol (which has to be entered into the PC system software or the Internet software), usually PPP
You may need additional information to configure the Internet access software, like TCP/IP address, user name, password,
etc. For more information, consult the software manual and contact your ISP.
1.3.1
Remote LAN Access
In order to gain remote access to a LAN through ISDN, it is necessary for you to apply the protocol used by the ISDN router on
the LAN. Contact the system administrator.
69
1.4
Data bits, control bit and speed
The RS232 standard describes how serial information is processed (passed on). In a computer, bits are processed
concurrently (parallel). These bits are passed on one by one through the serial port. In order to make sure the receiving end
can interpret these data bits correctly, some extra bits are sent along. These are: one start bit or control bit (parity bit for error
detection) and one or two stop bits . Together they form a frame or character.
The most commonly used frame for standard asynchronous communication is 8N1:
(1 start bit + 8 data bits + 1 stop bit)
Start bit
D
D
D
D
D
D
D
D
Stop bit
Data bits
Frame
Figure 13: Asynchronous Format
Apart from the frame (character), the speed (baud rate) has to be set. Speed is expressed in terms of Bits per Second (bps) or
baud.
Possible port speeds are: 300, 1200, 2400, 4800, 9600, 19200, 38400, 57600 and 115200 bps
If data bits, control bits and speed are set at the computer end, the Proxima ISDN Lite will adapt automatically as soon as an
AT command is sent.
Attention! Check whether the computer’s serial port is fit for 115200 bps.
70
2.
Getting started with the Proxima ISDN Lite
In this chapter, a description of the terminal adapter is followed by a discussion of the installation procedure. Lastly, setting up
a step-by-step connection is gone into by giving some examples.
2.1
Description of the Proxima ISDN Lite terminal adapter
The top of the terminal adapter shows four LEDS. Three of them reflect the status of the ISDN connection and the serial port.
The fourth one indicates whether there is power on the Proxima ISDN Lite.
Figure 14: Proxima ISDN Lite: Top
Meaning of the LEDs from left to right:
TD
RD
CD
OH
AA
HS
DTR
MR
PWR
transmitted data
received data
carrier detect
channel B1 in use
ring indicator
channel B2 in use
data terminal ready
clear to send
Power
71
2.1.1
The back of the Terminal Adapter
The connections are found at the back of the terminal adapter.
LINE
ISDN connection
(S0-interface)
RJ11 connector
Not used
PHONE
RS232 RS232 serial port
PWR
2.2
DB25F connector
PS connection
9VAC, 220mA
What else do you need
Apart from the terminal adapter, you need:
1. an ISDN connection
2. a computer or terminal with a serial port
3. a communication program
4. the ISDN number and other data (speed, parity, etc.) of the database you wish to contact
5. a serial cable and ISDN cable
7. an electrical outlet
2.3
Connecting the Terminal Adapter
1.
4.
5.
4.
Connect the serial ports of the terminal adapter and the computer.
Take the ISDN cable and click the RJ45 connector into the terminal adapter (S0 connection).
Plug the Proxima ISDN Lite Power adapter into the electrical outlet.
Plug the Power adapter connector into the power connection at the back of the Proxima ISDN Lite. The green power LED is
now on.
5. After it has been switched on, the terminal adapter will perform an extensive self-test. This will take a few seconds.
2.4
Protocols
The Proxima ISDN Lite can work with different protocols. A connection to another Terminal Adapter (TA) cannot be established
unless both are set to use the same protocol. For this reason, it is important to verify which protocol is supported by the TA
called to.
The ATI5 command is used to retrieve an outline of the protocols supported. The Proxima ISDN Lite will give the following
response:
72
Figure 15: Outline of Proxima ISDN Lite Protocols
ati5
Proxima ISDN Lite V0.7, September 1998
Service Channel Bearer Typ/max rate Protocols
--------------------------------------------------------------------------7 asyn PPP
B data
115.2/230.4 PPP conversion asyn-sync
8 asyn transp
B data
57.6/ 57.6 V.14
9 asyn transp
B data
19.2/ 38.4 V.110 asyn
10 asyn transp
B data
115.2/230.4 V.120 asyn
13 asyn transp
2B data
230.4/230.4 V.120 asyn, MLP
16 GCI-speech B1,B2 voice
230.4
18 GCI-data
B1,B2 data
230.4 any
27 asyn transp B1,B2 data
115.2/230.4 ML PPP RFC1990 asyn-sync
28 asyn transp B1,B2 data
115.2/230.4 TRANSPARENT asyn-sync
Remote control.
OK
The above list is an example. It is possible that your Proxima ISDN Lite will produce another outline due to software changes.
A protocol is selected by using the AT&O<n> command. To select the corresponding protocol, the number found in the left
column has to be entered for <n>. For example:
AT&O7
PPP is the protocol selected
The factory setting is V.120 (&O10).
The AT&V command is used to display current settings. It can be used to check if the correct protocol has been selected. For
example :
at&v
DTE channel 10 (Asynchronous V.120) parameters:
E1 Q0 V1 W0 X4 \Q3 %C0
&C1 &D2 &K3 &M0 &O10 &Q0 &S0 &Y0
S000:000 S001:000 S002:043 S003:013 S004:010 S005:008 S007:060
S012:050 S025:000 S030:000 S039:003 S048:007 S095:000
S110:010 S111:008 S112:000 S113:025 S114:115 S116:000 S117:000
S119:000 S120:000 S121:253 S122:254 S123:000 S124:001 S126:000
S131:000 S133:080 S153:000 S154:000 S161:000
OK
Figure 16: Set Protocol
When the Proxima ISDN Lite is used in Windows, it isn’t necessary to select protocols by using the AT commands.
Selecting the correct driver will do, the setting will be done automatically.
73
2.5
Establishing a data connection
In this section we shall discuss the actions needed to establish a data connection step by step. The communication software
will be dealt with broadly. The fact of the matter is that each package has its own command structure.
1. Start the communication program.
2. Make sure the software addresses the serial port to which the terminal adapter is connected.
3. Select communication speed (baud rate), the number of data bits and parity. For example: 115200 bps, 8 bits, no parity.
4. Make sure the program is in ‘terminal mode’, so that keyed-in characters are sent to the terminal adapter. The terminal
adapter in its turn will echo the characters to screen.
5. Then type:
The screen will show:
AT <Enter>
AT
OK
6. If the characters appear on screen twice, the echo in the communication program has to be switched off.
7. Select the protocol to be used. For instance, select V.120 to connect to a BBS.
Type:
AT&O10<Enter>
The screen will show:
OK
8. Select a telephone number by using the ATD command.
For instance, type: ATD0181 698399 (Allied Data BBS).
a.
If a connection has been established, the screen will show one or two of the following messages:
CONNECT
: Connection
CONNECT/ARQ
: Error-correcting connection
CONNECT 2400
: Connection, 2400 bps
CONNECT 2400/ARQ
: Error-correcting connection, 2400 bps
CONNECT 115200
: Connection, 115200 bps
CONNECT 115200/ARQ : Error-correcting connection, 115200 bps
CARRIER 64000
: Line speed is 64000 bps
PROTOCOL: V120
: V.120 protocol
PROTOCOL: PPP
: PPP protocol
A B channel LED will be on to indicate that a data connection has been established.
b.
If the connection fails, one of the following messages will appear:
ERROR
You have made a typing error.
NO DIALTONE
The terminal adapter is not -- or not properly -- connected to the ISDN
connection (S0). For this reason, it isn’t possible to call. Check to see if the
modem is connected to the ISDN net.
BUSY
The number you have dialed is busy.
NO CARRIER
The number you have called doesn’t support the selected protocol. Another
explanation is that there is no terminal adapter present at the number you
selected.
74
9.
Break the connection. There are three ways to do this :
a.
b.
c.
Order the BBS to break the connection.
Use the command provided by your communication program.
Order the modem to break the connection
Here’s how to do this :
Wait for 1 second
Type
The screen shows
Then type
The screen shows
+++
OK
ATH <enter>
NO CARRIER
75
3.
AT command set and S registers
3.2
The AT command set
This chapter discusses the terminal adapter commands. Most terminal adapters and communication programs use the AT
command set. In order to support new equipment like terminal adapters with AT commands as well, manufacturers have
added commands of their own to the AT command set. This means we can no longer speak of a standard. A distinction is
drawn between the 'Standard AT' and the 'Extended AT' command set.
A number of reasons can be thought of to explain the command differences. Owing to deviating test requirements, some
specific commands or settings are prohibited in some countries. There are also differences in American and European
transmission standards (Bell as distinct from ITU, Euro-ISDN).
The terminal adapters understand b oth the Standard and the Extended AT command set. In addition, a number of separate
commands have been included.
In the first section of this chapter, the command mode and data mode concepts are explained. Next, the command line
structure is discussed. Th is is followed by a list of AT commands and S registers, after which each command and register is
explained individually.
The description of the commands and register settings are grouped per subject:
• General settings
• Kiezen en BeantwoordenDialing and answering
• Dialing an ISDN number
• 3.6 Serial port settings
• 3.7 Profiles and identification
• Overige commando’s
5.1.5
Command mode and data mode
The terminal adapter has two modes:
1. Command mode
In this mode the terminal adapter executes commands that are keyed in at the terminal. The terminal adapter is in
command mode when it isn’t on-line, or in a data connection, when it is set to command m ode by way of the escape
sequence.
2. Data mode
The terminal adapter is transparent, which means the information exchanged through both the terminal adapters remains
unchanged. In a data connection, the terminal adapter normally is in data mode. If the terminal adapter is to execute a
command, this can only be achieved from command mode. The terminal adapter can be switched to command mode
during a connection by using the escape sequence.
Escape sequence:
wait for 1 second
type: +++
‘OK’ appears after 1 second
The terminal adapter is now in command mode.
The terminal adapter can be switched back to data mode through ATO.
76
5.1.6
Building a command line
A command line opens with the lette rs AT, derived from the English word ATtention. The letters AT should both be either
upper-case or lower-case. The command line is followed by <ENTER>. A command line may contain one or more commands.
A command line has an 80-character limit.
NB The terminal adapter memorizes the last command line. It can be repeated by typing: A / (without <ENTER>).
Commands may be space-separated for sake of clarity. Spaces are included in the command line character count.
Sometimes a command is followed by a parameter (number). If the number is 0, it may be left out. For example: ATE0
corresponds to ATE.
The Terminal Adapter recognizes the terminal baud rate and parity from the initial letters AT in the command line. The Terminal
Adapter gears itself to it. Automatically recognized speeds are 300, 1200, 2400, 4800, 9600, 19200, 38400, 57600 and 115200
bps. The recognized data formats are: 7-bits or 8-bits characters with even, odd, or no parity bit and 1 stop bit.
5.2
S Registers
A number of terminal adapter settings have to be done by means of S registers.
A number of registers have one meaning (function). Other registers have several functions and are called bitmapped registers .
In these registers, settings or commands are done at bit level. The following section explains what bitmapped means. A
detailed description of the commands including the accompanying parameters can be found from section 3.4 onward.
5.2.1
Bitmapped S registers
In bitmapped S registers, a function is switched on or off per bit. '1' means the bit is on or ‘set’ ; '0' means the bit is off or
‘reset’..
These bits from the binary system represent a decimal value. Bit 7=128, 6=64, 5=32, 4=16, 3=8, 2=4, 1=2 en 0=1. If you add
the decimal value of the bits that are ‘1’ , the result is the value that has to be set in the register.
5.3
Description of AT commands and S registers
In the following sections, meaning and contents of AT commands and S registers are discussed. A great number of S
registers have specific technical meanings. It is therefore not advisable to change an S register setting if you are not sure of
the consequences.
The Value column indicates the values to be set.
The Def. column gives the default value for that command.
77
5.4
General settings
The commands listed below can be applied to change the Terminal Adapter general settings.
Syntax
S110
S111
O
&M
&M0
&M1
&M2
&O
&O7
&O8
&O9
&O10
&O13
&O16
&O18
&O27
&Q
&Q0
&Q1, &Q4
&Q2
&Q5
Value
1..255
1..255
Def.
10
cnf
0..2
cnf
1..255
10
0..6
cnf
Meaning
Active protocol
Protocol service
1 : Voice service
2 : Data modem service
3 : Raw data service
4 : Group 3 fax service
5 : V.14
7 : PAD service
8 : V.120 service
10 : Synchronous relay service
Switch to Data mode
Communication mode
Asynchronous
Synchronous
Synchronous, select DTR
Select active protocol
PPP, 1 x B
V.14, 1 x B
V.110, 1 x B
V.120, 1 x B
Multi Link V.120, 2 x B
GCI-speech, 2 x B
GCI-data, 2 x B
Multi Link PPP, 2 x B
Communication mode
Asynchronous
Synchronous
Synchronous, select DTR
Asynchronous, error-corrected
78
5.5
Dialing and Answering
Commands and settings to establish (or reply to) a connection, and break it.
Syntax
S0
Value
0..255
S1
S6
S7
S8
A
D
0..255
H
H0
H1
P
T
0..1
0..255
Def.
0/1
60
call string
0
Meaning
Number of ringing signals for auto -answer
0: auto-answer off
>0: automatic answer on
Number of non-replied ringing signals
No function in ISDN (blank choosing)
Connection delay (seconds)
No function in ISDN (pause character)
Answer an incoming call
Dial a number
Type
Receiver on/off the hook
Break connection
No function in ISDN
No function in ISDN (choose pulse)
No function in ISDN (choose tone)
Also refer to: &D (DTR behavior), X (show result of code selection and data detection), W (return messages), S95 (return
messages), S112 (detailed indications).
5.5.1
Dialing an ISDN number
When dialing an ISDN number, the D command is followed by the number and, if necessary, a subaddress (preceded by an
asterisk '*').
The dial command looks like this:
ATDisdn_nb*sub_addr : : dte_channel_id
in which:
isdn_nb*sub_addr is an ISDN number, followed, if necessary, by a subaddress.
dte_channel_id is the protocol number used. If this field is blank, the active protocol is used.
Examples:
ATD69855044
dials number 69855044
ATD69855044*5
dials number 69855044 and passes on subaddress 5
ATD69855044::10
dials number 69855044 and uses the V.120 protocol
79
5.6
Serial port settings
The commands listed below are used to set the serial port.
Syntax
S2
Value
0..255
Def.
43
S3
S4
S5
S25
S39
0..127
0..127
0..127
0..255
0..4
13
10
8
0
3
S95
0..255
0
S112
0..255
0
Meaning
Escape code character '+'
≤ 127 : ASCII code of set value
> 127 : +++ recognition disabled
Carriage return character <cr>
Line feed character <lf>
Backspace character <bs>
DTR hysteresis (in 1/100 seconds)
Flow control
0 : No flow control
3 : RTS-CTS flow control (hardware)
4 : XON-XOFF flow control (software)
Protocol and connection messages
1 : gives serial port speed, not line speed in
CARRIER
message
2 : add /ARQ in an error-correcting
connection
4 : CARRIER message on
8 : PROTOCOL message on
16 : not in use
32 : not in use
64 : not in use
Detailed call messages
Bit-oriented command:
1 (bit 0) : RING message format
0 : standard AT format (RING)
1 : extended format (RING:)
2 (bit 1) : extended messages
0 : short
1 : long
8 (bit 3) : AT indications
0 : AT standard
1 : AT extended (RING message with number of caller,
NO CARRIER with cause of message)
128 (bit 7) : additional services
0 : additional services message off
1 : additional services message (ALERT:) on
The other bits are reserved (default 0)
80
Syntax
S114
Value
0..255
Def.
115
Meaning
Serial asynchronous speed and asynchronous clock
selection
75
: 75 bps
3
: 300 bps
12 of 1
: 1200 bps
24 of 2
: 2400 bps
48 of 4
: 4800 bps
72 of 7
: 7200 bps
96 of 9
: 9600 bps
14 of 144 : 14400 bps
19 of 192 : 19200 bps
28
: 28800 bps
38
: 38400 bps
57
: 57600 bps
115
: 115200 bps
255
: select internal clock
(asynchronous clock information
is derived from the S0 bus)
0
S117
0..255
4
S123
0..1
0
S124
0..255
1
E
E0
E1
Q
Q0
Q1
V
V0
V1
W
W0
0..1
1
0..1
0
0..1
1
0..2
2
W1
W2
: select external clock
(asynchronous clock information
originates from serial port)
Timer of number of RING messages (seconds)
Time between two consecutive RING messages in
incoming calls
0 : single RING message
&D command
0 : use &D for DTR action
1 : ignore &D setting, force &D0
Auto baud detection AT
0 : Auto baud off
1 : Autobaud on
Echo
Echo off
Echo on
Result codes
Result codes on
Result codes off
Result code format
Numeric
Verbal
Speed indication in CONNECT
CONNECT with serial port speed
No extended protocol messages when S95=0
CONNECT with serial port speed
Also CARRIER and PROTOCOL messages when S95=0
CONNECT with line speed
No extended protocol messages when S95=0
81
Syntax
X
Value
0..4
Def.
4
0..2
1
0..3
2
0..4
3
0..2
0
X0
X1
X2
X3
X4
&C
&C0
&C1
&C2
&D
&D0
&D1
&D2
&D3
&K
&K0
&K1, &K3
&K2, &K4
&S
&S0
&S1, &S2
Meaning
Dial and busy tone message and detection selection
Busy tone and dial tone detection off,
only CONNECT message
Busy tone detection off, dial tone detection off CONNECT xxx
message
Busy tone detection off, dial tone detection on CONNECT xxx
message
Busy tone detection on, dial tone detection off CONNECT xxx
message
Busy tone detection on, dial tone detection on, CONNECT
xxx message
Carrier Detect signal (CD, 109) behavior
Synchronous mode: CD follows 'carrier' status
Asynchronous mode:
CD always on
CD follows 'carrier'
CD on when on-line, off when 'carrier' is gone, back on in
rest
DTR (108) behavior (see also S123)
&Q0, &Q5: DTR has no effect
&Q1: DTR going off: break connection
&Q2: DTR going off: break connection
DTR off and on: start dialing
&Q0, &Q1, &Q5: DTR going off: to
command mode
&Q2: DTR going off: break connection
DTR off and on: start dialing
&Q0, &Q5 : DTR going off: break connection &Q1: DTR
going off: break connection,
DTR has to be on within time in S25 for
a
CONNECT. No Auto
Answer if DTR is not on.
&Q2 : DTR going off: break connection
DTR off and on: start dialing
No Auto Answer if DTR is not on.
&Q0, &Q1, &Q5: DTR going off: reset the
Terminal Adapter
&Q2: DTR going off: reset the TTA
DTR off and on: start dialing.
Flow control
No flow control
RTS-CTS flow control (hardware)
XON-XOFF flow control (software)
DSR (107) behavior during asynchronous mode (&Q0, &Q5)
DSR is always on
DSR is on when on-line, off in rest
See also: &Q (communication mode)
5.6.1
Result codes
Result codes are sent to the serial port by the Terminal Adapter once a command line has been processed. The codes may
be given as text or as numbers. This is selected by using the ATV command.
Numeric
Text
Meaning
82
Type
Numeric
0
1
1
2
3
4
5
5
6
7
10
10
11
11
12
12
14
14
18
18
28
28
99
99
5.6.2
Text
OK
CONNECT
CONNECT/ARQ
RING
NO CARRIER
ERROR
CONNECT 1200
CONNECT 1200/ARQ
NO DIALTONE
BUSY
CONNECT 2400
CONNECT 2400/ARQ
CONNECT 4800
CONNECT 4800/ARQ
CONNECT 9600
CONNECT 9600/ARQ
CONNECT 19200
CONNECT 19200/ARQ
CONNECT 57600
CONNECT 57600/ARQ
CONNECT 38400
CONNECT 38400/ARQ
CONNECT 115200
CONNECT 115200/ARQ
Meaning
Command executed
Connection established
Error-correcting connection
Incoming call
Connection broken
Error message
Connected at 1200 bps
Ditto, including error correction
ISDN network does not respond
The number dialed is busy
Connected at 2400 bps
Ditto, including error correction
Connected at 4800 bps
Ditto, including error correction
Connected at 9600 bps
Ditto, including error correction
Connected at 19200 bps
Ditto, including error correction
Connected at 57600 bps
Ditto, including error correction
Connected at 38400 bps
Ditto, including error correction
Connected at 115200 bps
Ditto, including error correction
Type
Other messages
Extended (protocol) messages
The messages listed below are given at protocol negotiations. The messages are switched on through S95.
Numeric
40
46
47
48
50
54
56
57
58
59
60
66
67
69
70
77
80
83
87
5.7
Text
CARRIER 300
CARRIER 1200
CARRIER 2400
CARRIER 4800
CARRIER 9600
CARRIER 19200
CARRIER 38400
CARRIER 56000
CARRIER 57600
CARRIER 64000
CARRIER 115200
COMPRESSION: CLASS 5
COMPRESSION: V42BIS
COMPRESSION: NONE
PROTOCOL: NONE
PROTOCOL: LAP-M
PROTOCOL: ALT
PROTOCOL: V120
PROTOCOL: V14
Meaning
Line speed 300 bps
Line speed 1200 bps
Line speed 2400 bps
Line speed 4800 bps
Line speed 9600 bps
Line speed 19200 bps
Line speed 38400 bps
Line speed 56000 bps
Line speed 57600 bps
Line speed 64000 bps
Line speed 115200 bps
MNP-5 data compression
V.42bis data compression
No data compression
No communication protocol
V.42 error correction
MNP-4 error correction
V.120 protocol
V.14 speed adjustment protocol
Profiles and identification
83
Syntax
S121
Value
0..255
Def.
0
S122
0..255
254
I
I0
I1
I2
I3
I4
I5
I8
&V
\S
Z
0..4
&F
&W
&Y
0, 255
0
#V
#Z
5.8
Syntax
#CH=
#RM=
#RM=0
#RM=1
Meaning
Action following &F command
0 : standard (retrieve factory settings and
restart)
255 : do not undertake action
other value: set the selected protocol
Action following Z command
0
: standard (retrieve settings from
memory
and restart)
255 : do not undertake action
other value: set the selected protocol
Identification and internal test
Hardware Identification
ROM checksum
ROM checksum test
Product name and software revision
Manufacturer
Outline of possible protocols
Euro-ISDN software version
Show settings
Show settings
Software reset using stored settings
Caution! This command completely resets the Proxima
ISDN Lite, all possible connections will be broken
See also S122
Software reset using factory settings
See also S121
Store current settings
(Stored Profile)
Select standard settings at startup
255: use factory settings
Show list of available parameters in sort form
Software reset using stored settings
Other commands
Value
Def.
Refer to &O 10
0..1
1
Meaning
Default protocol DTE channel port 1
Ring mode
Selection by subnumber or MSN
Pass on call to active protocol
84
6. Sundries
6.1
Settings (profiles)
The Proxima ISDN Lite has three settings:
4. Active Profile. Current settings used with the selected protocol.
5. Stored Profile. In this profile a number of settings (parameters and configurations) are stored in a nonvolatile memory
(E2PROM). Changes with regard to the factory settings are often set and stored to memory with AT&W. The stored profile is
loaded into the active profile on power-up on and following the AT#Z command.
6. Factory Profile (Settings) is fixed in the terminal adapter memory (Flash EPROM). These settings are loaded into the active
profile with the AT&F command.
Set Registers
#xxx=
Active
Profile
Stored
Profile
Factory
Profile
&F
6.2
Power-up
#Z
--------------S Reg
&W
Nonvolatile memory settings
The Terminal Adapter settings are stored in a nonvolatile memory (E2PROM). The commands used are:
•
•
•
Save register content with AT&W
Save automatic dial-up number (40 characters maximum) with AT&Z
MSN number function with AT#NBV120=”<number> (always close with #Z).
The above commands store the settings in the nonvolatile memory, but do not become automatically active. They are activated
by using the AT#Z command or by switching the Proxima ISDN Lite off and on again. AT&F activates the factory settings.
85
7. Special applications
7.1
Dial-in configuration
The Proxima ISDN Lite can be set to link a telephone number to a protocol. When this number is called, the Proxima ISDN Lite
will establish a connection according to the set protocol. When this number is called, this call is always passed on to the
analog connection.
Subaddresses and Multiple Subscriber Numbers can be linked to protocols with special AT commands. The general
construction of AT commands is described in chapter 3.3.
7.1.1
Subaddresses
Subaddressing consists of adding an extra character (with a maximum of four characters) to the telephone number. These
extra characters are passed on to the ISDN device that is called. When using the Proxima ISDN Lite, a caller can, for instance,
select a protocol (i.e. remote) by giving a subaddress. Conversely, the Proxima ISDN Lite can dial a number and add extra
characters to the telephone number. This is limited to ISDN equipment. The subaddress service is not a standard feature and
needs to be applied for.
The table given below gives the AT commands for the various types needed to change the default link between protocol and
subaddress. The link is switched off by not entering a value (empty string).
Syntax
#SAPPP
#SAV120
#SA2B
#SARTEL
#SARDATA
#SAMPPP
Value
4 digits
4 digits
4 digits
4 digits
4 digits
4 digits
Def.
7
10
13
16
18
27
Meaning
PPP conv. asyn-sync
V.120 asyn
V.120 asyn, MLP (2B)
GCI-speech
GCI-data
Multilink PPP RFC1990
Examples of subaddresses:
a. programming:
AT#SAPPP=28<ENTER>
AT#Z<ENTER>
Calling your own ISDN number and adding 28 as extra numbers will make the terminal adapter create a PPP connection.
b. switching off link:
AT#SAPPP=<ENTER>
AT#Z<ENTER>
The link between the PPP protocol and the subnumber is disconnected.
c. dialing:
A subaddress is added to the dial command as follows:
ATD010-1234567*28<ENTER>
Dial 010-1234567 and add subaddress 28.
86
7.1.2
MSN numbers
Having an ISDN connection, it is possible for you to apply to your provider (e.g. PTT Telecom) for more than one telephone
number (with a maximum of eight). As a standard, you will be given one main number and an option on three extra numbers.
Further numbers need to be applied for. This service is sometimes referred to as MSN (Multiple Subscriber Numbers). The AT
commands given below can be used to link protocols to the last four digits of the MSN number. It is vital that the default link
between the protocol in question and a subnumber is switched off.
Syntax
#NBPPP
#NBV120
#NB2B
#NBRTEL
#NBRDATA
#INBMPPP
Value
4 digits
4 digits
4 digits
4 digits
4 digits
4 digits
Def.
“”
“”
“”
“”
“”
“”
Meaning
PPP conv. asyn-sync
V.120 asyn
V.120 asyn, MLP (2B)
GCI-speech
GCI-data
Multilink PPP RFC1990
Port
Type
Serial 1
Serial 1
Serial 1
Serial 1
Serial 1
Serial 1
Examples of MSN number programming:
3.
AT#NBV120=15<ENTER>
AT#SAV120=<ENTER>
AT#Z<ENTER>
When calling the TTA 128, your own ISDN number ending in the numbers 15, the terminal adapter establishes a V.120
connection. It is vital that the default link between the V.120 protocol and the subnumber is switched off.
4.
AT#NBMPPP=1<ENTER>
AT#Z<ENTER>
When calling the TTA128, your own ISDN number ending in the number 1, an ML-PPP connection is established. Make sure
that the default link between the ML-PPP protocol and the subnumber is switched off.
87
7.1.3
Setting protocol priorities
The previous sections described how protocols can be linked to subaddresses and MSN numbers. It is possible to link
different protocols to one and the same subaddress or MSN number. The terminal adapter will select the protocol with the
highest priority. The following commands can be used to set the protocol priorities. Value 0 denotes the highest priority, value
254 denotes the lowest priority. Priority 255 means the protocol in question doesn’t respond to an incoming call. If each
protocol has a priority setting of 255, the caller will get a busy message because the TA doesn’t respond.
Syntax
#IPPPP
#IPV120
#IP2B
#IPRTEL
#IPDATA
#IPMPPP
Value
4 digits
4 digits
4 digits
4 digits
4 digits
4 digits
Def.
28
16
40
40
40
28
Meaning
PPP conv. asyn-sync
V.120 asyn
V.120 asyn, MLP (2B)
GCI-speech
GCI-data
Multilink PPP RFC1990
Port
Type
Serial 1
Serial 1
Serial 1
Serial 1
Serial 1
Serial 1
Example of setting the protocol priorities:
AT#IPV120=15<ENTER>
AT#IPPPP=18<ENTER>
AT#Z<ENTER>
The V.120 protocol is given a higher priority than the PPP protocol.
7.1.4
Remote Configuration
The Proxima ISDN Lite can be set remotely, through the ISDN network. An administrator with a Proxima ISDN Lite or a TTA128
and terminal software can configure a Proxima ISDN Lite located elsewhere remotely by calling the Proxima ISDN Lite using
the V.120/RC protocol. In this protocol, the data path isn’t passed on to the serial port but is sent back to the ISDN connection.
The remote Proxima ISDN Lite can be set in the same way as is done through the serial port by using « AT » commands.
In a receiving call, the Remote Control V.120 protocol is selected by an ISDN number and/or an ISDN subaddress (4 digits).
This number and/or subaddress has to be set in advance.
The telephone number with the command:
AT#remnbrc=<telephone no. on which the settings are done >#Z <ENTER>
A remote configuration call can be secured in two ways:
• Caller Number Identification (CLI). This is used to check whether the caller’s telephone number matches the
programmed telephone number
• Password Check. This access code is sent through UUI (User to User Information) and compared to a set code.
The code is programmed as follows:
AT#passrc=”<password>”#Z<ENTER>
CLI example:
In this example your own telephone number is: 010-1234567 and the number of the person allowed to do Remote
Configuration is: 020-7654321.
Command’s:
•
AT#RM=0
•
AT#IPRC=254
•
AT#NBRC=0101234567
•
AT#SARC=
•
AT#REMNBRC=0207654321
•
AT#Z
; Ring mode off
; Set priority
; Program own number
; Switch off subbaddress
; Number of Proxima ISDN Lite to be
; Save settings
AT#REMNBRC=remote msn no. of the person allowed to do Remote Configuration.
88
set
Appendix A: Technical Specifications
General:
♦ Protocols:
V.110, 1 x B channel synchronous/asynchronous
V.120, 1 x B channel, 64000 bps
V.120, 2 x B channel, 128000 bps
PPP, 1 x B channel, 64000 bps
Multi Link PPP (ML-PPP), 2 x B channel, 128000 bps (BACP)
♦ Data Compression: V.42bis, MNP5
♦ Command sets:
◊ Extended 'AT' command set
♦ Remote Control through ISDN for remote configuration and tests
♦ Software upgrade through serial port (115.2 kbps).
♦ V.25b signaling (HDLC)
♦ ISDN-2 interface: S0 interface according to CCITT I.430 (1TR3)
♦ S0 connection: RJ45 socket
♦ Permanent memory for settings. Settings may differ per protocol!
♦
♦
♦
♦
Auto baud detection from 300 to 115200 bps
Full interspeeder with XON/XOFF and/or RTS/CTS flow control
Self-test after power-up
Data format:
◊ Data: 7 or 8 bits
◊ Parity: odd, even, space, mark or none
◊ Stop bits: 1 or 2
Connections:
♦ Serial port:
◊ DB9F (V.24, RS232) connector
♦ Supply by Power Adapter 9VAC, 220mA
♦ LEDs for serial port and ISDN status indication
Environmental conditions:
♦ tension
: 9VAC, 220mA -15% / +10%
♦ temperature use
: -5 C to +60 C
storage : -20 C to +70 C
♦ humidity
use
: 10% to 75%
♦ storage
: 5% to 95%
♦ dimensions
♦ weight
♦ electrical safety
: 130x195x37. (w x l x h)
: approx. 10.5 oz (adapter excluded)
: Class II
89
Appendix B: RS232C Connector
CCITT
109
104
103
108
107
105
106
125
DB9F
Pin
8
2
3
20
7
6
5
4
22
Direction
OUT
OUT
IN
IN
OUT
IN
OUT
OUT
Name
Data carrier detect
Received Data
Transmitted Data
Data terminal ready
Signal Ground
Data set ready
Request to send
Clear to send
Ring Indicator
90
Short
(CD)
(RxD)
(TxD)
(DTR)
(GND)
(DSR)
(RTS)
(CTS)
(RI)
Appendix C: Call Clearing Causes
The table given below outlines the causes for connection failures. This information is given, for instance, by way of the
CLEARED: message. The messages are given in hexadecimal and decimal values respectively. The below messages are for
an ETSI ISDN network (Euro-ISDN).
Messages with a value larger than 80 hexadecimal are generated by the Proxima ISDN Lite. The messages are produced by
the Proxima ISDN Lite by using the AT* D/<number> command at dial-up.
Hex
01
02
03
06
07
10
11
12
13
15
16
1A
1B
1C
1D
1E
1F
22
26
29
2A
2B
2C
2F
31
32
39
3A
3F
41
42
45
46
4F
51
52
53
54
55
56
58
5B
5F
60
61
Decimal
1
2
3
6
7
16
17
18
19
21
22
26
27
28
29
30
31
34
38
41
42
43
44
47
49
50
57
58
63
65
66
69
70
79
81
82
83
84
85
86
88
91
95
96
97
Description
unallocated (unassigned) number
no route to specified transit network
no route to destination
channel unacceptable
call awarded and being delivered in an established channel
normal call clearing
user busy
no user responding
no answer from user (user alerted)
call rejected
number changed
non-selected user clearing
destination out of order
invalid number format
facility rejected
response to STATUS ENQUIRY
normal, unspecified
no circuit/channel available
network out of order
temporary failure
switching equipment congestion
access information discarded
requested circuit/channel not available
resources unavailable, unspecified
quality of service unavailable
requested facility not subscribed
bearer capability not authorized
bearer capability not presently available
service or option not available, unspecified
bearer capability not implemented
channel type not implemented
requested facility not implemented
only restricted digital information bearer capability is available
service or option not implemented, unspecified
invalid call reference value
identified channel does not exist
a suspended call exists, but this call identi ty does not
call identity in use
no call suspended
call having the requested call identity has been cleared
incompatible destination
invalid transit network selection
invalid message, unspecified
mandatory information element is missing
message type non-existent or not implemented
91
Hex
62
Decimal
98
63
64
65
66
6F
7F
91
A2
FF
99
100
101
102
111
127
145
162
255
Description
message not compatible with call state or message type non-existent or not
implemented
information element non-existent or not implemented
invalid information element contents
message not compatible with call state
recovery on timer expired
protocol error, unspecified
interworking, unspecified
no signaling data link establishment
no line activation
call clearing, unspecified
Examples of extended messages.
We start from a Proxima ISDN Lite which has the following settings:
• protocol 6 is for voice (S111 is 1).
• Protocol 11 is for PAD (S111 is 7).
• S112=35 (maximum information and automatic PAD VC).
The messages sent by the Proxima ISDN Lite are printed in italics:
AT&O6*D/11
OK:6,0,6
PROGRESS:6,0,0,6,1
ALERT:6,0,6,1
CONNECTED:6,,0,6,1
CLEARED:6,10
AT*D/69855044*5/"Hello"
OK:6,0,6
CONNECTED:6,"Welcome",0,1,2
AT*H0/6
Select protocol 6, dial ISDN number 11.
Direct response that call number 6 on ISDN access number 0
is being established using protocol 6.
Message for call no. 6 using protocol 6, channel B1,
communication with analog network.
The device called is ringing:
ALERT message.
First call (6) has been established, channel B1 has been
selected.
Call (6) has been broken off by normal cause (10).
While the first connection is being established, a second
command follows to dial ISDN number 69855044,
subaddress 5 and User Information “Hello”.
Note that it isn’t necessary to give the &O6 command as this
protocol is already active.
Direct response that call number 6 on ISDN access number 0
is being established using protocol 6.
Second call (6) has been established. Channel B2 has been
selected. The recipient responded with “Welcome”
Break off call no. 6
92