1
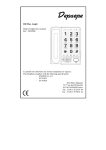
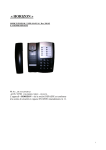
Progress NOTICE D’UTILISATION USER MANUAL Réf. : 26122011 Cet appareil est destiné à être raccordé au réseau téléphonique sur les installations privées (PBX) de la Communauté Européenne. / This product is meant to be connected to private installations (PBX) of the European Community. Henri Depaepe SAS 75-77 rue du Pré Brochet 95110 SANNOIS France Tel : 33 (0) 1 30 25 81 60 Fax : 33 (0) 1 39 98 61 24 Site Web : www.depaepe.com Sommaire / Contents CONTENU DE L’EMBALLAGE PRÉCAUTION D’USAGE DESCRIPTION INSTALLATION UTILISATION Appeler Répondre à un appel Volume d’écoute Fonction mains-libres Rappel des derniers numéros composés Appels reçus Appeler un numéro à partir du répertoire Secret micro Verrouillage du clavier Flashing Recherche du combiné Enregistrement d’un combiné supplémentaire Communications entre combinés Affichage d’appel en instance UTILISATION DU MENU Navigation dans le menu Architecture du menu Consultation/Enregistrement des appels reçus Ajouter le correspondant au répertoire FR 6 7 8 12 15 15 15 16 16 17 17 18 18 19 19 19 20 21 23 24 24 24 25 25 2/79 Supprimer l’appel de la liste Vider la liste des appels Gestion du répertoire Ajouter un contact Modifier un contact Supprimer un contact du répertoire Supprimer le répertoire Etat du répertoire Configuration de la base Suppression d’un combiné enregistré Numérotation FV/DC Flashing Modification du code PIN Réinitialisation de la base Configuration du combiné Réglage de l’alarme Réglage audio Réglage sonnerie Réglage des tonalités Sélection de la langue Choix du nom du combiné Décroché automatique Réglage du Contraste Réglage date et heure Sélection de la base Réinitialisation du combiné SPÉCIFICATIONS TECHNIQUES FR 26 26 27 28 28 29 29 29 30 30 30 31 31 32 32 32 33 34 34 35 36 36 37 37 38 39 40 3/79 UNPACKING SAFETY PRECAUTIONS PHONE LAYOUT AND KEYS DESCRIPTION INSTALLATION BASIC FUNCTIONS Making a Call Receiving a call Adjusting Voice Volume Handsfree Last Number Redial CID Book Dialing a Number from Phone book Muting the Microphone Key Lock Flash signal Paging Registration Calling with more than one handset Caller ID on Call waiting MENU FEATURES Menu Navigation Menu Map View CID numbers Add CID number to Phonebook Delete a number in the CID Book Delete all numbers in the CID Book Phone Book FR 42 43 44 49 51 51 51 52 52 53 53 54 54 55 55 55 56 57 59 60 60 60 61 61 62 62 63 4/79 Adding Phonebook entries Editing Phonebook entries Deleting Phonebook entries Deleting the Phonebook Phonebook status Base Settings Terminate Handset Dial Mode Tone/Pulse Flashing Modify PIN Base Reset Handset Settings Setting alarm Audio Setup Ringer Setting Tone Setup Selecting a language Handset Name Auto Answer LCD Contrast Setting Setting Date & Time Selecting a base Handset Reset TECHNICAL SPECIFICATIONS DÉCLARATION DE CONFORMITÉ FR 64 64 65 65 65 66 66 66 67 67 68 68 68 69 70 70 71 72 72 73 73 74 75 76 78 5/79 Contenu de l’emballage Base ou Chargeur Combiné Manuel d’utilisation 2 batteries rechargeable Ni-MH Adaptateur secteur Cordon de ligne avec fiche PTT* * Equipements non fournis avec un combiné supplémentaire. FR 6/79 Précaution d’usage A LIRE AVANT INSTALLATION Pour un usage optimal et, pour éviter d'endommager le produit, nous recommandons d'observer les précautions suivantes : - Utilisez uniquement les accus rechargeables fournis. Ces accus (de type AAA LR03 – Ni-MH) doivent être mis en place en respectant les polarités indiquées sur le fond de la trappe à piles. - Ne jamais utiliser de piles non rechargeables. - Pour recharger l'appareil, utilisez uniquement la base ou le chargeur fourni. - Eviter de toucher avec un élément métallique les ergots de contact du combiné, de la base ou du chargeur supplémentaire. - Eviter d'installer base ou chargeur supplémentaire dans des endroits humides. Le non-respect de ces recommandations peut entraîner le refus de prise en charge de la garantie. Important : Ces appareils ne sont pas conçus pour des appels d'urgence. En cas de coupure du système électrique, prévoir une solution alternative pour les appels d'urgence (téléphone filaire, mobile, etc.) FR 7/79 Description Combiné Ecouteur Navigation haut / Appels reçus Touche contextuelle Navigation gauche / Interphone Touche composer / Mains – libres Clavier Verrouillage clavier Microphone FR Afficheur Touche contextuelle Haut parleur Navigation droit / Appels émis Raccroché / Hors tension Compartiment Des batteries Navigation bas / Répertoire Contacts pour la recharge des batteries 8/79 Base Vue arrière et dessous de la base Cordon de ligne Chargeur FR Plots pour la recharge des batteries Cordon adaptateur secteur Bouton d’appairage ou de recherche des combinés 9/79 Description des touches Touche de décroché ou activation du haut parleur - Recevoir et émettre un appel. - Activation du haut parleur en cours d’appel. Raccroché ou mise hors tension - Terminer un appel. - Appui long pour mette en/hors tension. Touche de navigation Haut ou liste des appels reçus Défilement durant consultation et utilisation du menu. Augmentation du volume d’écoute. Consultation des appels reçus. Bas ou Répertoire Défilement durant une consultation ou l’utilisation du menu. Diminution du volume d’écoute. Consultation du répertoire. FR 10/79 Gauche ou interphone Appel d’un autre combiné. Transfert d’un appel extérieur vers un autre combiné. Etablir une conférence entre un appel extérieur et un autre combiné. Droite ou liste des appels émis Consultation des appels émis. Ajoute une pause en phase pré-numérotation. Touches contextuelles gauche et droite Fonctions indiquées par le texte de l’affichage (dernière ligne). Touche de verrouillage Activer et désactiver le verrouillage clavier. Activer le mode conférence. FR 11/79 Description des Icones sur l’afficheur Nouvel appel Indique un appel manqué. Message en attente Indique que vous avez un message vocal. Décroché Indique une prise de ligne. Mains-libres Indique que le mode mains-libres est actif. Indicateur du signal Indique la qualité du signal entre la base et la combiné. Si la base est trop loin l’indicateur clignote. Alarme L’alarme horaire a été activée. Verrouillage clavier Le clavier est verrouillé. Indicateur état des batteries Indique le niveau de charge des batteries. Installation FR 12/79 Base 1. Brancher le cordon de l'adaptateur secteur dans l'entrée correspondante sur le dessous de la base (ou du chargeur pour un combiné supplémentaire) puis relier le cordon secteur à une prise de courant. 2. Brancher le cordon téléphonique dans l'entrée correspondante en dessous de la base et son autre extrémité sur une prise téléphonique. Ce terminal est conçu pour être raccordé au réseau d’énergie 100/240V 50/60 Hz (Tension excessive) au travers d’un bloc secteur fourni avec l’appareil et au réseau téléphonique TRT3 au sens de la norme EN 60950 amendements 1 à 11. FR 13/79 Combiné Installez les 2 batteries fournies (AAA, 1.2V, 600mA, NI-MH) dans la trappe arrière du combiné. Veillez à respecter les polarités indiquées dans le fond de la trappe. Batteries rechargeables : n’utilisez que le type de batteries rechargeables fournies avec le combiné. Ne jamais installer de piles non rechargeables. Avant la première utilisation, les batteries doivent être rechargées pendant au moins 15 heures. Si le combiné est éteint et qu’il est posé sur la base, il se met en marche automatiquement. Pour éteindre ou mettre en marche le combiné, appuyez sur le bouton l’extinction ou la mise en service de l’affichage. FR jusqu'à 14/79 Utilisation Appeler - Appuyez sur , le symbole apparaît sur l’écran. Dès que vous entendez la tonalité, composez le numéro. - Pour terminer l’appel, appuyez sur . Pré-numérotation : composez le numéro en premier et si vous faites une erreur, appuyez sur la touche contextuelle "Effac" pour effacer le dernier chiffre. Vous pouvez ajouter une pause avec la touche . Une fois le numéro terminé, appuyez sur la touche pour composer le numéro. Répondre à un appel Lors d’un appel, le combiné sonne et l’afficheur indique "nouv appel". Si vous avez souscrit au service "identification de l'appelant" auprès de votre opérateur ou, si votre système PABX transmet cette information le numéro de l’appelant sera affiché. FR 15/79 Appuyez sur le bouton pour répondre à l’appel. Si vous avez activé le mode "réponse automatique" (voir page 36) vous pouvez prendre l’appel en retirant le combiné de sa base. Volume sonnerie : vous pouvez modifier le niveau de sonnerie à l’aide des touches ou lorsque le combiné sonne. Volume d’écoute Durant une conversation, vous pouvez augmenter ou diminuer le volume d’écoute (écouteur ou haut parleur) à l’aide des touches ou . Le niveau du volume sera indiqué sur l’afficheur. Le niveau du volume peut aussi être modifié à l’aide du menu de configuration du combiné (voir page 33). Fonction mains-libres Pour activer le haut parleur du combiné durant une conversation, appuyez sur la touche . L’icône apparait sur l’afficheur. Pour désactiver le mode mains-libres, appuyez de nouveau sur la touche FR . L’icône disparait de l’afficheur. 16/79 Rappel des derniers numéros composés Les 10 derniers numéros composés sont conservés en mémoire. Pour consulter les derniers numéros, appuyez sur la touche ou la touche contextuelle "BIS". Le dernier numéro composé est alors affiché. Utilisez les touches ou pour sélectionner le numéro désiré. Appuyez sur la touche pour composer le numéro. Options sur la liste des numéros composés. Durant la visualisation de la liste des numéros composés, un appui sur la touche contextuelle "Plus" permet d’accéder à différentes options : - Ajout Rep. : permet d’ajouter le numéro dans le répertoire. - Supprimer : Permet de supprimer le numéro de la liste. - Tout Supp. : Pour supprimer tous les numéros de la liste des appels émis. Appels reçus Si un appel a été reçu en votre absence, l’icône apparait sur l’afficheur. Si vous avez souscrit au service "identification de l'appelant" auprès de votre opérateur ou, si votre système PABX transmet cette information, vous pouvez accéder à la liste des appels reçus en appuyant sur la touche . Utilisez les touches ou pour sélectionner le numéro désiré. Appuyez ensuite sur la touche pour composer le numéro. Durant le défilement des appels reçus, l’icône ↑ s‘affiche lorsque l’appel a été FR 17/79 vu et l’icône si l’appel n’a pas été vu. Si la mémoire des appels reçus est pleine, l’icône clignote. Pour supprimer ou ajouter les numéros dans le répertoire voir l’utilisation du menu (page 25). Appeler un numéro à partir du répertoire Si vous avez enregistré des contacts dans votre répertoire (voir page 28), vous pouvez appeler votre correspondant en le sélectionnant depuis votre répertoire: - Appuyez sur la touche . - Utilisez les touches ou pour sélectionner votre correspondant. - Appuyez sur la touche pour appeler votre correspondant. Secret micro Vous pouvez couper temporairement le microphone, durant une conversation, pour que votre correspondant ne vous entende pas. - Pour couper le microphone : appuyez sur la touche contextuelle "Secret". Le message "Mode Secr." est affiché. - Pour réactiver le microphone : appuyez de nouveau sur la touche contextuelle "Secret". Le message "Mode Secr." disparait. FR 18/79 Verrouillage du clavier Le verrouillage du clavier permet de rendre inactives les touches du combiné exceptée la touche pour répondre aux appels reçus. - Pour verrouiller le clavier : appuyez sur la touche jusqu’à l’affichage du message "Comb. Bloqué". L’icône apparait sur l’afficheur. - Pour déverrouiller le clavier : appuyez sur la touche jusqu’à la disparition de l’icône . Flashing La touche contextuelle "R" durant une prise de ligne permet d’accéder aux services spéciaux de votre PABX. Le menu de configuration de la base permet de changer la durée du flashing (Voir page 31). Recherche du combiné Pour retrouver votre combiné, appuyez brièvement sur le bouton paging à l’arrière de la base (description page 9). Tous les combinés enregistrés sur la base sonneront pendant 60 secondes. Attention : un appui long sur ce bouton déclenche le mode enregistrement d’un combiné. FR 19/79 Enregistrement d’un combiné supplémentaire Le combiné fourni avec la base est déjà enregistré avec le combiné numéro 1. Vous pouvez enregistrer sur une base jusqu'à 5 combinés pouvant utiliser la même ligne téléphonique. De plus un combiné peut être enregistré sur 4 bases. Si un combiné est enregistré sur plusieurs bases, le choix de la base à utiliser se fera par l’utilisation du menu (voir description du menu). Sur la base : Avant de commencer l’enregistrement d’un nouveau combiné, vous devez appuyer sur le bouton d’appairage à l’arrière de la base (description page 9) pendant au moins 5 secondes avant de le relâcher. Sur le combiné : - Appuyez sur la touche contextuelle "Menu". - Utilisez les touches ou pour atteindre la fonction "Enregistr." Puis validez avec "Select". - Utilisez les touches ou pour choisir la base désiré et validez avec "Select". Le combiné démarre alors sa phase de recherche. - Si la base est trouvée, vous serez invité à entrer le code PIN (0000 par défaut) en validant avec "Select". Après un délai de 30 secondes, si la recherche de la base n’a pas aboutie, annulez l’enregistrement avec la touche "Retour". Reprenez la procédure d’enregistrement en maintenant bien enfoncé le bouton d’appairage pendant plus de 5 secondes. FR 20/79 Communications entre combinés Lorsque plusieurs combinés sont enregistrés sur une même base Progress, il est possible de s'appeler entre combinés sans occuper pour autant la ligne extérieure qui reste disponible pour un autre combiné ou un autre téléphone. Il est également possible de transférer un appel externe sur un autre combiné. Appel entre combinés : - Appuyez sur la touche , l’écran vous invite à entrer le numéro du combiné que vous voulez joindre (de 1 à 5). - Si le combiné appelé est indisponible, le combiné reviendra à l’état de repos. Si le combiné est disponible, le combiné appelé sonnera (avec la mélodie de sonnerie intérieure) et le numéro du combiné appelant s'affichera sur son - écran. Le combiné appelé peut répondre avec la touche . Pour mettre fin à la communication, raccrochez de part et d'autre en appuyant sur la touche . Note : Durant une communication interne, si un appel externe arrive, l’affichage vous informe de ce nouvel appel. Pour répondre à cet appel, il faut d’abord terminer la communication interne avec la touche touche FR , puis prendre l’appel extérieur avec la . 21/79 Transférer un appel extérieur vers un autre combiné : Vous pouvez transférer un appel extérieur vers un autre combiné enregistré sur la même base. - Durant un appel extérieur, appuyez sur la touche , l’écran vous invite à entrer le numéro du combiné que vous voulez joindre (de 1 à 5). - Si le combiné appelé répond à votre appel avec la touche vous pouvez l’informer que vous lui transférez un correspondant extérieur. - Appuyez sur la touche pour transférer l’appel. Conférence à trois Cette fonction permet une conversation simultanée entre un correspondant extérieur et 2 correspondants intérieurs. - Durant un appel extérieur, appuyez sur la touche puis sélectionner le numéro du combiné que vous voulez ajouter à la conversation. - Le combiné appelé répond à votre appel avec la touche . Le combiné qui a initialisé la conférence appuie sur la touche nouveau combiné à la conférence. - Le combiné qui souhaite quitter la conférence appuie sur la touche communication reste active avec l’autre combiné. FR pour ajouter le . La 22/79 Affichage d’appel en instance Si vous avez souscrit le service d’appel en instance auprès de votre opérateur, le combiné affichera le numéro du deuxième correspondant qui cherche à vous joindre quand vous êtes en conversation. - Appuyez sur la touche contextuelle "R" pour répondre à votre nouveau correspondant. - La touche contextuelle "R" permet de faire un va et vient entre vos deux correspondants. Note : si l’appel extérieur a été transféré sur un autre combiné, l’information d’appel en instance ne sera pas disponible sur le second combiné. FR 23/79 Utilisation du menu Navigation dans le menu - Pour afficher les options du menu appuyez sur la touche contextuelle "Menu". Pour faire défiler les options utilisez les touches ou . Pour sélectionner un paramètre utilisez la touche contextuelle "Select". La touche contextuelle "Retour" revient à l’écran précédent. - Pour sortir du menu à tout moment appuyez sur la touche . Le combiné retournera au repos si aucune touche n’est appuyée durant 40 secondes. Architecture du menu Liste des appels Répertoire Ajouter une fiche Modifier une fiche Supprimer une fiche Tout supprimer Etat du répertoire Configuration de la base Supprimer un combiné Mode de numérotation FV/DC Flashing Modifier le code PIN Réinitialisation de la base FR Configuration du combiné Alarme Réglage audio Réglage sonnerie Réglage des tonalités Sélection de la langue Nom du combiné Réponse automatique Réglage du Contraste Réglage date et heure Sélection de la base Réinitialisation du combiné Enregistrement d’un combiné 24/79 Consultation/Enregistrement des appels reçus - - Appuyez sur la touche contextuelle "Menu". Appuyez sur la touche contextuelle "Select" pour choisir la fonction "Liste App. " (vous pouvez aussi appuyer directement sur la touche pour accéder à cette fonction). Utilisez les touches ou pour consulter les numéros reçus. Vous pouvez alors appeler ce correspondant avec la touche ou l’enregistrer dans le répertoire avec la touche contextuelle "Plus". Les touches ou vous permettent de choisir l’action à réaliser : Ajouter le correspondant au répertoire Permet d’enregistrer ce correspondant dans le répertoire - Appuyez sur "Select" pour valider la demande d’enregistrement. - Vous pouvez entrer le nom de votre correspondant puis validez avec la touche "Suiv.". - Vous pouvez modifier le numéro de votre correspondant et validez avec la touche "Suiv.". - Vous pouvez ensuite sélectionner une sonnerie pour ce correspondant puis valider avec la touche "Sauve". FR 25/79 Supprimer l’appel de la liste Permet d’effacer le numéro de la liste des appels reçus. - Utilisez les touches ou pour choisir "Supprimer" et validez avec "Select". - L’affichage vous invite à confirmer votre demande en appuyant sur la touche "OK". Un beep sonore vous confirmera la suppression de cet appel. Vider la liste des appels - Utilisez les touches ou pour choisir "Tout Supp" et validez avec "Select". - L’affichage vous invite à confirmer votre demande en appuyant sur la touche "OK". Un beep sonore vous confirmera la suppression de la liste des appels reçus. FR 26/79 Gestion du répertoire Le répertoire de votre combiné permet d’enregistrer les correspondants que vous appelez fréquemment. Pour sélectionner un caractère particulier, appuyez plusieurs fois sur la touche correspondante du clavier : Touche 0 1 2 3 4 5 6 7 8 9 FR Espace 1 A D G J M P T W 0 @ B E H K N Q U X Caractères dans l’ordre d’affichage ? & / . , _ + " ( C a b c 2 F d e f 3 I g h i 4 L j k l 5 O m n o 6 R S p q R V t u v 8 Y Z w x Y ! ) % s 7 z 9 27/79 Ajouter un contact - Appuyez sur la touche contextuelle "Menu". - Utilisez les touches ou pour choisir "Répertoire" et validez avec "Select". - Utilisez les touches ou pour choisir "Ajout. Fiche" et validez avec "Select". - Entrez le nom de votre correspondant puis validez avec la touche "Suiv.". - Entrez ensuite le numéro de votre correspondant (au maximum 20 chiffres) et validez avec la touche "Suiv.". Vous pouvez ajouter une pause dans la numérotation en utilisant la touche . La pause ajoute un délai de 3 secondes dans la numérotation. La lettre "P" représente la pause. - Vous pouvez ensuite sélectionner une sonnerie pour ce correspondant puis validez avec la touche "Sauve". - Vous pouvez ensuite entrer un nouveau contact. Note : La touche contextuelle "Effac" permet de supprimer le dernier caractère entré. Modifier un contact - Appuyez sur la touche contextuelle "Menu". - Utilisez les touches ou pour choisir "Répertoire" et validez avec "Select". - Utilisez les touches ou pour choisir "Modif. Fiche" et validez avec "Select". - Utilisez les touches ou pour sélectionner le contact à modifier puis validez avec "Select". - Modifiez le nom de votre correspondant puis validez avec la touche "Suiv.". FR 28/79 - Modifiez le numéro de votre correspondant puis validez avec la touche "Suiv.". Vous pouvez ensuite sélectionner une sonnerie pour ce correspondant puis validez avec la touche "Sauve". Supprimer un contact du répertoire - Appuyez sur la touche contextuelle "Menu". - Utilisez les touches ou pour choisir "Répertoire" et validez avec "Select". - Utilisez les touches ou pour choisir "Supp. Fiche" et validez avec "Select". - Utilisez les touches ou pour sélectionner le contact à supprimer puis validez avec "Select". - L’affichage vous invite à confirmer votre demande en appuyant sur la touche "OK". Supprimer le répertoire - Appuyez sur la touche contextuelle "Menu". - Utilisez les touches ou pour choisir "Répertoire" et validez avec "Select". - Utilisez les touches ou pour choisir "Tout Supp" et validez avec "Select". - L’affichage vous invite à confirmer votre demande en appuyant sur la touche "OK". Etat du répertoire Permet d’afficher le nombre de contacts déjà enregistré dans le répertoire. - Appuyez sur la touche contextuelle "Menu". - Utilisez les touches ou pour choisir "Répertoire" et validez avec "Select". - Utilisez les touches ou pour choisir "Etat. Répert" et validez avec "Select". FR 29/79 Configuration de la base Suppression d’un combiné enregistré Pour enlever un combiné enregistré sur la base : - Appuyez sur la touche contextuelle "Menu". - Utilisez les touches ou pour choisir "Réglages BS" et validez avec "Select". - Appuyez sur la touche contextuelle "Select" pour sélectionner "Sup. Combiné". Vous serez alors invité à entrer le code PIN (0000 par défaut). Puis validez par "Ok". - Utilisez les touches ou pour choisir le combiné à retirer et validez avec "Select". Si vous sélectionnez le combiné en cours ou un combiné non enregistré, un beep de faute se fera entendre. Numérotation FV/DC Pour changer le mode de numérotation : - Appuyez sur la touche contextuelle "Menu". - Utilisez les touches ou pour choisir "Réglages BS" et validez avec "Select". - Utilisez les touches ou pour choisir "Mode Num." et validez avec "Select". - Utilisez les touches ou pour choisir entre "Freq Vocales" ou "Décimal" et validez avec "Sauve". Un beep de confirmation se fera entendre. FR 30/79 Flashing Pour changer la durée du signal de Flashing : - Appuyez sur la touche contextuelle "Menu". - Utilisez les touches ou pour choisir "Réglages BS" et validez avec "Select". - Utilisez les touches ou pour choisir "Temps flash" et validez avec "Select". - Utilisez les touches ou pour choisir entre "Flash-1" pour 100ms ou "Flash-2" pour 300 ms et validez avec "Sauve". Un beep de confirmation se fera entendre. Modification du code PIN Pour modifier le code PIN (0000 par défaut) : - Appuyez sur la touche contextuelle "Menu". - Utilisez les touches ou pour choisir "Réglages BS" et validez avec "Select". - Utilisez les touches ou pour choisir "Modifier PIN" et validez avec "Select". - Vous devez en premier entrer l’ancien code PIN puis validez par "Suiv." - Entrez ensuite le nouveau code PIN et validez par "Suiv." - Vous devez ensuite recomposer le nouveau code PIN pour confirmer et le valider par "Sauve". Un beep de confirmation se fera entendre. FR 31/79 Réinitialisation de la base Si vous réinitialisez la base tous les paramètres seront remis à leur valeur par défaut (Mode de numérotation FV, Durée de flashing 300ms et Code PIN 0000) : - Appuyez sur la touche contextuelle "Menu". - Utilisez les touches ou pour choisir "Réglages BS" et validez avec "Select". - Utilisez les touches ou pour choisir "RAZ Base" et validez avec "Select". - Il vous sera alors demandé d’entrer le code PIN (0000 par défaut) et de valider avec la touche "R.A.Z.". Configuration du combiné Réglage de l’alarme - Appuyez sur la touche contextuelle "Menu". - Utilisez les touches ou pour choisir "Réglage Comb" et validez avec "Select". - Utilisez les touches ou pour choisir "Alarme" et validez avec "Select". - L’afficheur vous indique l’état de l’alarme. - Utilisez les touches ou pour sélectionner l’activation (On) ou la désactivation (Off) de l’alarme et validez avec "Select". - Si vous choisissez l’activation de l’alarme (On), vous devrez indiquer l’heure de l’alarme au format HH:MM avec le clavier. FR 32/79 - Appuyez sur la touche "Suiv.". Vous pouvez alors activer ou désactiver le mode rappel automatique (toutes les 11 minutes) et terminer avec la touche "Sauve". Quand l’alarme se déclenche appuyez sur une touche pour l’arrêter. Si vous avez sélectionné le mode rappel automatique, un appui sur la touche arrêtera le mode rappel automatique. pendant l’alarme Réglage audio Avec ce menu, vous pouvez modifier les niveaux d’écoute du combiné et du haut parleur : - Appuyez sur la touche contextuelle "Menu". - Utilisez les touches ou pour choisir "Réglage Comb" et validez avec "Select". - Utilisez les touches ou pour choisir "Régl. Audio" et validez avec "Select". - Utilisez ensuite les touches ou pour choisir "Volume HP" ou "Vol Ecoute" et validez avec "Select". - L’afficheur indique le réglage actuel. Utilisez ensuite les touches ou pour choisir le volume désiré (de 1 à 5) et terminer en sélectionnant "Sauve". FR 33/79 Réglage sonnerie Vous avez la possibilité de sélectionner l’une des 10 mélodies de sonnerie pour un appel interne (interphone) ou externe et ajuster le niveau de sonnerie. - Appuyez sur la touche contextuelle "Menu". - Utilisez les touches ou pour choisir "Réglage Comb", validez avec "Select". - Utilisez les touches ou pour choisir "Régl Mélodie", validez avec "Select". - Utilisez les touches ou pour Sélectionner "Appel Int" ou "Appel Ext" puis validez avec "Select". - Utilisez les touches ou pour sélectionner ensuite le paramètre à configurer "Mélodie" pour le type de sonnerie et "Volume" pour le niveau puis validez avec "Select". Vous pouvez choisir l’une des 10 mélodies de sonnerie et ajuster le volume de 1 à 5 ou en mode silence (off). Note : Si vous utilisez le mode silence (volume off), lors de la réception d’un appel, seule l’information "Nouv Appel" sera affichée sur l’écran. Réglage des tonalités Une tonalité peut être activée pour acquitter chaque appui de touche et pour indiquer la limite de portée. - Appuyez sur la touche contextuelle "Menu". - Utilisez les touches ou pour choisir "Réglage Comb", validez avec "Select". FR 34/79 - Utilisez les touches ou pour choisir "Réglage Tona", validez avec "Select". Utilisez les touches ou pour choisir le paramètre à modifier "Bip Clavier" ou "Niv. Alarme" et validez avec "Select". Utilisez les touches ou pour sélectionner l’activation (On) ou la désactivation (Off) et validez avec "Sauve". Un beep de confirmation se fera entendre. Sélection de la langue Le combiné permet de choisir la configuration de l’affichage parmi 13 langages: Anglais, français, espagnol, allemand, Italien, néerlandais, russe, polonais, portugais, slovaque, tchèque, suédois et turc. - Appuyez sur la touche contextuelle "Menu". - Utilisez les touches ou pour choisir "Réglage Comb" et validez avec "Select". - Utilisez les touches ou pour choisir "Langue" et validez avec "Select". - Utilisez les touches ou pour sélectionner le langage et validez avec "Sauve". Un beep de confirmation se fera entendre. FR 35/79 Choix du nom du combiné Un nom peut être affecté au combiné et apparaître sur l’écran de veille. - Appuyez sur la touche contextuelle "Menu". - Utilisez les touches ou pour choisir "Réglage Comb", validez avec "Select". - Utilisez les touches ou pour choisir "Nom Combiné", validez avec "Select". - Entrez le nom du combiné (12 caractères maximums) puis validez avec "Sauve". Un beep de confirmation se fera entendre. - Le nom du combiné s’affichera alors sur l’écran de veille, au dessus du numéro attribué au combiné. Décroché automatique Lorsque cette fonction est activée et que le combiné est placé sur la base, il est possible de répondre à un appel simplement en soulevant le combiné de la base, il décrochera automatiquement. - Appuyez sur la touche contextuelle "Menu". - Utilisez les touches ou pour choisir "Réglage Comb" et validez avec "Select". - Utilisez les touches ou pour choisir "Réponse Auto" et validez avec "Select". FR 36/79 - Utilisez les touches ou pour sélectionner l’activation (On) ou la désactivation (Off) et validez avec "Sauve". Un beep de confirmation se fera entendre. Réglage du Contraste - Appuyez sur la touche contextuelle "Menu". - Utilisez les touches ou pour choisir "Réglage Comb" et validez avec "Select". - Utilisez les touches ou pour choisir "Contraste" et validez avec "Select". - Utilisez les touches ou pour sélectionner le contraste désiré et validez avec "Sauve". Un beep de confirmation se fera entendre. Réglage date et heure - Appuyez sur la touche contextuelle "Menu". - Utilisez les touches ou pour choisir "Réglage Comb", validez avec "Select". - Utilisez les touches ou pour choisir "Date & Heure", validez avec "Select". - Utilisez les touches ou pour choisir le sous menu à configurer et validez avec "Select". Pour le format de la date ou de l’heure: "Format Date" ou "Format H" FR 37/79 - Utilisez les touches ou pour choisir le format de la date (JJ-MM ou MM-JJ) ou de l’heure (12H ou 24H) et validez avec "Sauve". Un beep de confirmation se fera entendre. Pour régler la date ou l’heure : "Régl. Date" ou " Régl. Heure" - Entrez la date courante ou l’heure à l’aide du clavier numérique et validez avec "Sauve". Un beep de confirmation se fera entendre. - Si vous avez choisi le format 12H, il faut enregistrer la date au format 24H et l’affichage ajoutera AM/PM à droite de l’heure. Sélection de la base Lorsqu’un combiné a été enregistré sur plusieurs bases, il est possible de choisir la base que l'on souhaite utiliser (à condition d'être dans le champ de portée de cette base). - Appuyez sur la touche contextuelle "Menu". - Utilisez les touches ou pour choisir "Réglage Comb" et validez avec "Select". - Utilisez les touches ou pour choisir "Select Base" et validez avec "Select". - Utilisez les touches ou pour sélectionner la base désirée et validez avec "Select". Un beep de faute se fera entendre si la base n’existe pas. - L’affichage présentera alors la base sélectionnée. FR 38/79 Réinitialisation du combiné Si vous réinitialisez le combiné, tous les paramètres seront remis à leur valeur par défaut (Alarme, Niveau audio, Sonnerie, Tonalité, Langue, Nom du combiné, Décrochage automatique, Date & heure). Le contraste de l’afficheur ne sera pas impacté. - Appuyez sur la touche contextuelle "Menu". - Utilisez les touches ou pour choisir " Réglage Comb " et validez avec "Select". - Utilisez les touches ou pour choisir "RAZ Combiné" et validez avec "Select". - Il vous sera alors demandé d’entrer le code PIN (0000 par défaut) et de valider avec la touche "R.A.Z.". FR 39/79 Spécifications techniques • Afficheur rétro-éclairé 5 lignes (128x64), • Répertoire de 50 noms / numéros, • Mains-libres, • Identification de l'appelant *, • Appel en instance *, • Journal des 40 derniers appels reçus *, • Journal des 10 derniers appels émis, • Affichage de la durée de communication, • Affichage heure et date, • Alarme, • Menu déroulant (choix de 13 langues), • Choix de 10 mélodies de sonnerie, • Sonnerie différenciée pour appel interne, externe et contacts du répertoire, • Réglage à 5 niveaux pour la sonnerie, l'écouteur et le haut-parleur, • Verrouillage clavier, • Secret micro, • Numérotation FV ou DC, • Flashing réglable (100 – 300), (*) si le service est souscrit auprès de l'opérateur ou si le PABX retransmet le service. FR 40/79 • Standard / Norme : DECT-GAP, • Une base PROGRESS peut enregistrer jusqu'à 5 combinés, • Un combiné peut être enregistré sur 4 bases PROGRESS différentes, • Interphone entre combinés sur une même base, • Transfert d’appel et conférence à trois, • Fréquences radio : 1800-1930 MHz, • Modulation : GFSK, • Puissance d’émission : <250 mW, • Température de fonctionnement : 15°C à 35°C avec 0% à 90% d’humidité, • Alimentation (sortie) : 7.5V, 300 mA, • Portée intérieure/extérieure : 50/300 m, • Autonomie en veille : 200 H - en communication : 10 H, • Accus rechargeables : 2 x 1,2 volts, 600 mAh, LR03 type AAA Ni-MH, • Recharge des batteries : 15heures, • Dimensions combiné : 160 x 48 x 28 mm - Base : 102 x 100 x 105 mm, • Poids combiné : 120 g - Base : 125 g. FR 41/79 Unpacking Base or Charger Handset User’s manual 2 AAA Ni-MH batteries Adapter Line cord and French plug* * Not provided with an additional handset. EN 42/79 Safety precautions READ BEFORE INSTALLATION To reduce the risk of electrical shock and injury, please follow these basic safety precautions before using the phone: - Pay attention to the polarity of the batteries; insert the rechargeable batteries in accordance with polarity symbols (this instruction is found in the installing batteries section). - Use only the batteries indicated in the User's Manual. Never use other ordinary batteries or conventional alkaline batteries. - Use only the power supply indicated in the User's Manual. - Do not use this phone in wet surroundings or environments where there is a risk of explosion. Avoid spilling of any liquid on the phone. - Do not place metallic objects on charging contacts of handset, base or extra charger. Failing to follow the instructions described in this user guide could lead to void the warranty. Important: These devices are not designed for emergency calls. In case of failure of electrical system, provide an alternative solution for emergency calls (fixed phone, mobile, etc.). EN 43/79 Phone layout and keys description Handset Earpiece Up / CID key Display Right soft key Speaker Left soft key Left / Intercom Dial / Speaker key Alphanumeric keys * / Lock key Microphone EN Right / Redial key End key Battery compartment cover Down / Phonebook key Charging contacts 44/79 Base Rear and bottom view of base Phone line Jack Charger Charge pins Power Jack Page button EN 45/79 Keys Description Dial/Speaker key - Makes/Answers a call. - Activates the speakerphone if pressed during a call. End key - Ends a call. - Long press activates power on/off. Navigation keys: Up/CID key Scrolls up through lists and menu options. Increases the earpiece/speakerphone volume during a call. Enters into the CID book. Down/Phonebook key Scrolls down through lists and menu options. Decreases the earpiece/speakerphone volume during a call. Enters into the Phonebook. EN 46/79 Left/Intercom key Sets up an internal call to another handset. Transfers an incoming call to another handset. Sets up a conference call with an external line and an internal handset. Right/Redial key Enters the redial book. Inserts a pause when pre-dialing a number. Left/Right soft key Performs the functions indicated by the text immediately over it (on the bottom line of the display) which changes time by time. Lock key Press and hold to turn on/off keypad lock function. Sets up a conference call. EN 47/79 LCD Windows Icons Description New Call Indicates you have missed one or more calls. MSG Waiting Indicates you have one or more voice messages. Off Hook Indicates the line is engaged. Hands-free Indicates the handsfree function is enabled. Battery Icon Indicates battery charge level. EN Signal Icon Indicates whether the current signal exists or not. If the handset is too far from the base, this icon will blink on the LCD. Alarm Icon This icon appears when you set an alarm to ring at a specified time. Keypad lock This icon appears when the keypad is locked. 48/79 Installation Base 1. Connect the modular end of the AC power adapter to the power jack of the base, and then plug the AC adapters into a standard AC wall outlet. 2. Connect one end of the phone line cord to the phone line jack of the base, and the other end to a standard phone wall outlet. This terminal is designed to be connected to the main power 100/240V 50/60Hz through a power adapter supplied with the unit and to the analog telephone network TNV3 as defined in standard EN 60950 amendments 1 to 11. EN 49/79 Handset The rechargeable Ni-MH batteries (AAA size, 1.2V, 600mAh) come with your phone. Install the batteries before use. - Slide the battery cover in the direction of the arrow and pull it out. - Insert new batteries as indicated, matching correct polarity (+,-). When replacing the batteries, always use good quality Ni-MH re-chargeable batteries. Never use other batteries or conventional alkaline batteries. Before initial operation, you should fully charge the handset for about 15 hours. To charge the handset, you should place it on the base. When you place the handset on the base, the handset automatically turns on. To turn the handset on, press and hold the To turn off the handset, keep the EN key until the display is switched on. key pressed until the display disappears. 50/79 Basic functions Making a Call - Pick up the handset and press the Dial the telephone number. - To end the call, press the key, the icon appears on LCD. key. Predialing: You can enter the desired phone number in standby mode, which allows you to make corrections before dialing. Enter a telephone number (up to 32 digits). Check it. You can also use the key to insert a pause. When the number appears correctly, press the key. Receiving a call When a call is received, the "New Call" information will appear on the LCD. If the caller can be identified, the caller's phone number is displayed. If the caller cannot be identified, only the "New Call" information displays. EN 51/79 To answer the call, press the key. If you have activated the Auto Answer function (see page 72), when the handset is on the base, simply lift it up to answer. Ringer volume: You can select the ringer volume by using the phone rings with an incoming call. or key when the Adjusting Voice Volume During a conversation, you can use the or key to adjust the level of the earpiece (or the handsfree speakerphone one, if activated) volume from V.1 to V.5. The selected volume will be displayed on the LCD. You can also select the earpiece volume or the speaker volume by the Audio Setup in Menu under HS Settings, as described in page 69. Handsfree During a call, you may turn on the speakerphone built in the handset. Press the key, the icon appears on the LCD. To turn the feature off, press the and the icon will disappear. EN key again 52/79 Last Number Redial To search for and redial a number in Redial Book, press the key or "Redial" soft key. The LCD displays the last number you dialed. If you want to scroll through the memory, press or key repeatedly until you find the number you want to dial. Press the key to dial out the number. Use Redial Book options: When the number appears on the display, press the "More" soft key to choose the desired option: - Add to PB. : Allows you to add the number to the phone book. - Delete : Allows you to delete the selected number. - Delete All : Allows you to delete the whole redial book. CID Book If you missed one or more calls, the icon will appear on the LCD. If the caller's information is transmitted from the network on which the call was made (and the caller doesn't hide it), the caller's phone number is displayed. You can access the CID book by pressing the key in standby mode. Use or key to view the numbers, you can make a call by a press of the EN key. Each item of 53/79 the incoming list is marked with the ↑ icon if the call has been reviewed or with the icon if the call hasn't been reviewed yet. If the CID memory is full, the icon will flash on the LCD. To delete a number in the CID Book or add a number to the Phone Book use the Menu as described in page 61. Dialing a Number from Phone book If you have stored numbers in your phonebook (described in page 64), you can view the phonebook entries to dial a number: - Press the key. - Press or key repeatedly until the desired entry is displayed. - Then press the key. Muting the Microphone During a conversation, you can temporarily switch your phone's microphone off, so that the other party cannot hear you. - To mute your microphone, press the "Mute" soft key during the conversation. "Call Muted" appears on the LCD. - To unmute your microphone: press the "Mute" soft key again. You will restore the normal condition. EN 54/79 Key Lock If you turn on this feature, all keys will be locked. You can answer calls by using the - key. To lock the keys, in the standby mode just keep the key pressed till the display shows "HS Locked", then the icon appears. To unlock the keys, keep the key pressed again till the key lock icon disappears from the display. Flash signal When the line is engaged, pressing the "Flash" soft key sends the Flash signal. This key is used in conjunction with special services (e.g. call waiting or transfer) which can be available in your phone network. To configure the Flash time see page 67. Paging You can page the handset from the base unit making it ring with a special tone. It's useful to locate a lost handset. Press the paging key (see page 45) on the base unit (less than 5 seconds), all the handsets registered to the base will ring for about 60 seconds. Note : On a long press, more than or equal to 5 seconds, the base will enter subscription mode. EN 55/79 Registration The supplied handset is already registered with the number 1. You can register to your base additional handsets (up to 5 in total) in order to share the same line with other people. You can also register a handset up to 4 bases. On the base : Before registering a handset to the base, you should press and hold the paging key located on the bottom of the base for more than 5 seconds then release it. With the handset: - Press the "Menu" soft key. - Press or key repeatedly to choose the "Registration." Then press "Select" soft key. - Use or key to scroll through the base names list, press "Select" to choose the base. The handset will search for the requested base. - If the base is found, you will be prompted to enter the PIN code (the default one is 0000). Enter it then press the "Select" soft key. If the PIN code is correct, the Registration tone will sound and then the base assigns a number to the handset, otherwise a warning tone will sound. EN 56/79 Calling with more than one handset If you have more than one handset registered to the same base, you can make internal calls and transfer an external call between the registered handsets. Making an internal call : - Press the key, the LCD displays as follows, then input the number of the handset (1 to 5) you want to call. - If the destination handset is unavailable, the handset will return to standby mode. If the handset entered is valid, the called handset will ring and display HSX Calling. The handset user can press the - key to answer the internal call. At the end of your conversation, press the key. Note : During the internal call, if an external call comes in, the LCD will show the caller's number. You should press the key to answer the call. EN key to end the internal call first then press the 57/79 Call transfer between handsets : You can transfer an external call between the handsets registered to the same base. - During an external call, press the key then input the number of the handset you want to transfer the call to. - If the called party can answer your call, he/she can press the you. At this time you can inform him/her of the incoming call. - After the called party answers, press the key to talk with key. Setting up a 3-way conference call When you have both an external call and an intercom call in progress, you can set up a three-way conference call, like this: - During an external call, press the key and then input the number of the handset you want to join the 3-way call. - The called party presses key to answer. The calling party can press the key to start the 3-way call. - Either of the two internal handsets can press the call at any time. EN key to leave the conference 58/79 Caller ID on Call waiting When you subscribe to Call Waiting service from your local telephone company, the telephone will display the name and number of the second caller while you are having a conversation. - Press the "Flash" soft key to answer the second caller. - When you have finished, press the "Flash" soft key to continue your conversation with the first caller. Note : If you have transferred an external call to another handset, you cannot use the call waiting function via the second handset.. EN 59/79 Menu features Menu Navigation - To display menu items, press the "Menu" soft key. To scroll through menu options, press the or key repeatedly. To select a menu, press "Select" soft key when the desired menu appears on LCD. If you press the "Back" soft key, the phone returns to the previous screen. - To return to standby mode, press the key. The phone will return to standby mode if no key is pressed in the next 40 seconds. Menu Map CID Book Phonebook Adding entries Editing entries Deleting entries Delete all Phonebook status Base settings Delete handset Dial mode Tone/Pulse Flash time Modify PIN Base reset EN Handset settings Setting Alarm Audio setup Ring setup Tone setup Language Handset name Auto answer LCD contrast Date & Time Select base Handset reset Registration 60/79 View CID numbers - Press the "Menu" soft key. Use the "Select" soft key to choose the "CID Book" (you can also access the CID book directly by pressing the key in standby mode). Use or key to view the numbers. You can make a call by a press of the key. You can also add the entry to the phonebook. - Press the "More" soft key to choose one of the following : Add CID number to Phonebook - Use or key to choose "Add to PB". - Press the "Select" soft key, you are prompted to enter the name. - Enter the name and press the "Next" soft key, then you can modify the number you want to store. - Press the "Next" soft key, you are able to select the ring tone from Melody 1 to Melody 10, press the "Save" soft key to confirm and exit, you will hear a confirmation beep. EN 61/79 Delete a number in the CID Book - Use or key to choose "Delete". - Press the "Select" soft key. - The display will show "Confirm ?". Press the "Del" soft key to confirm, you will hear a beep and the LCD shows the next number. Delete all numbers in the CID Book - Use or key to choose "Delete All". - Press the "Select" soft key. - The display will show "Confirm ?". - Press the "Del" soft key to confirm, you will hear a beep and the phone returns to the standby mode after clearing all the CID numbers. EN 62/79 Phone Book The phonebook built in your cordless phone allows you to store frequently used numbers so that you can easily make a call without having to remember or enter the phone number. To enter a specific alphanumeric character, press one or more times the relevant key for the required character according to the following table: once for the first character, twice for the second and so on: Key 0 1 2 3 4 5 6 7 8 9 EN Space 1 A D G J M P T W 0 @ B E H K N Q U X ? _ C F I L O R V Y Characters in the display order & / . + " a b c d e f g h i j k l m n o S p q t u v Z w x , ( 2 3 4 5 6 r 8 y ! ) % s 7 z 9 63/79 Adding Phonebook entries - Press the "Menu" soft key. - Use or key to select "Phonebook", press the "Select" soft key. - Use or key to select "New", press the "Select" soft key. - Enter the name you want to use then press the "Next" soft key to confirm. - Enter the desired number (up to 20 digits) then press the "Next" soft key. You can insert a pause with the key. A pause provides a delay of 3 seconds. The letter "P" will appear at the pause entry. - You can select the ring you like to associate with the number then press the "Save" soft key to confirm. - Repeat if necessary. Note : Use the "Erase" soft key to delete the last character entered. Editing Phonebook entries - Press the "Menu" soft key. - Use or key to select "Phonebook", press the "Select" soft key. - Use or key to select "Edit", press the "Select" soft key. - Use or key until the entry you want to edit is displayed, press "Select" key. - If necessary, press the Erase soft key to clear the digit(s) then enter the desired name and number, press the Next soft key to save. EN 64/79 - You can select the ring you like to associate with the number then press the "Save" soft key to confirm. Deleting Phonebook entries - Press the "Menu" soft key. - Use or key to select "Phonebook", press the "Select" soft key. - Use or key to select "Delete", press the "Select" soft key. - Use or key until the entry you want to delete displays, press the "Select" soft key. - The display shows "Confirm ?". You can press the "Del" soft key to delete it. Deleting the Phonebook - Press the "Menu" soft key. - Use or key to select "Phonebook", press the "Select" soft key. - Use or key to select "Delete All", press the "Select" soft key. - The display will show "Confirm ?". You can press the "Del All" soft key to delete all the entries. Phonebook status The PB Status shows the number of phone book entries already stored. When the "PB Status" shows on the LCD, press the Select soft key to enter it. EN 65/79 Base Settings Terminate Handset This function allows you to delete a handset registration from the base. - Press the "Menu" soft key. - Press or key to choose "BS Settings", then press the "Select" soft key. - Press the "Select" soft key to choose the "Terminate HS" menu. The display shows "PIN?" to prompt you to enter the PIN Code (The default PIN Code is "0000"). Then press the "OK" soft key. - Use or key to select a handset, press the "Select" soft key to confirm. Then the selected handset will behave according to the unregistered condition. If you select the current handset you are using or if you select a non-existent handset, a warning tone will be heard. Dial Mode Tone/Pulse You can change the dial mode by the following steps : - Press the "Menu" soft key. - Press or key to choose "BS Settings", then press the "Select" soft key. - Press or key to choose "Dial Mode", then press the "Select" soft key. - Press or key to select the required dial mode option "Tone" / "Pulse" and press the "Save" soft key. A confirmation beep will be heard. EN 66/79 Flashing You can change the Flash time by the following steps: - Press the "Menu" soft key. - Press or key to choose "BS Settings", then press the "Select" soft key. - Use or key to choose "Flash Time" menu. Press the "Select" soft key. - The display shows the current setting. Use or key to select "Flash-1" (100 ms) / "Flash-2" (300 ms), press the "Save" soft key. A confirmation beep will be heard. Modify PIN This function allows you to change the PIN number of the currently active Base. The default PIN is 0000. - Press the "Menu" soft key. - Press or key to choose "BS Settings", then press the "Select" soft key. - Use or key to choose "Modify PIN" menu. Press the "Select" soft key. - The display shows "PIN?". Enter the current PIN, then press the "Next" key. If the old PIN code is correct, you will be prompted to enter a new PIN code, otherwise a warning beep will sound and the handset will return to the Modify PIN menu. - Enter the new PIN, press the "Next" key. You will be requested to confirm the PIN code. Enter the new PIN again then press the "Save" soft key to confirm and exit. A confirmation beep will be heard. EN 67/79 Base Reset If you reset the base, all the features under BS Settings menu will be restored to the factory initial setting: Dial Mode Tone, Flash Time 300ms and PIN code 0000: - Press the "Menu" soft key. - Press or key to choose "BS Settings", then press the "Select" soft key. - Use or key to choose "RAZ Base" menu. Press the "Select" soft key. - Enter the PIN code (the default PIN is 0000), then press the "Reset" soft key. If the PIN code is correct all base settings will be reset to the factory default, otherwise the settings will remain. Handset Settings Setting alarm - Press the "Menu" soft key. - Press or key to choose "HS Settings", then press the "Select" soft key. - Use or key to choose "Alarm" menu. Press the "Select" soft key. - The display shows the current set. - Use the or key to select "On" / "Off", press the "Select" soft key. - If you select "On", the display indicates you to enter the time in HH:MM format. Use the numeric keypad to enter. EN 68/79 - Press the "Next" soft key, a beep sounds and the display shows "Snooze On/Off", you can press or key to enable or disable the snooze function on the alarm and press the "Save" soft key. When the alarm sounds, press any key to stop the alarm sound. If you choose Snooze On, the alarm will ring at regular intervals of 11 minutes. If you press the key when the alarm sounds, the option will be switched to Snooze Off. Audio Setup You can also use the menu to adjust the audio volume: - Press the "Menu" soft key. - Press or key to choose "HS Settings", then press the "Select" soft key. - Use or key to choose "Audio Setup" menu. Press the "Select" soft key. - Use or key to choose "Speaker V." or "Earpiece V", press the "Select" soft key. - The display shows the current setting. Use the or key to choose the volume level (Volume 1 -Volume 5), press the "Save" soft key. EN 69/79 Ringer Setting You can select your own external (from the telephone Network) or internal (from other handsets registered to the same base) ring tone and adjust the volume. - Press the "Menu" soft key. - Press or key to choose "HS Settings" menu, then press the "Select" soft key. - Press or key to choose "Ring Setup", press the "Select" soft key. - Press the "Select" soft key to choose "INT Ring" or press the key to choose "EXT Ring", press the "Select" soft key. - Press or key to choose "Melody" or "Volume", press the "Select" soft key. You can select the ring tone from Melody 1 to 10 or adjust the volume from Volume 1 to 5, or off. Note : If you set the volume to "Off", when a call comes in, only the "New Call" information appears on the LCD. Tone Setup Every time you press a key, your handset acknowledges it with a key tone. You can disable the key tones for a silent use. A beep will sound when the handset is out of range of the base. You are able to select to enable/disable this audible warning. - Press the "Menu" soft key. - Press or key to choose "HS Settings" menu, then press the "Select" soft key. EN 70/79 - Press or key to choose "Tone Setup", press the "Select" soft key. You can use or to choose "Key Tone" or "Range Alarm", press the "Select" soft key. You can use or key to choose "On" or "Off" to enable or disable the function. Press the "Save" soft key, you will hear a confirmation beep. Selecting a language The handset supports up to 13 predefined languages: English, French, Spanish, German, Italian, Dutch, Russian, Polish, Portuguese, Slovak, Czech, Swedish and Turkish. You can change the language used to display the menu messages. - Press the "Menu" soft key. - Press or key to choose "HS Settings" menu, then press the "Select" soft key. - Use or key to choose "Language", then press the "Select" soft key. - The languages will be displayed. Use the or key to scroll through the options. Each language will be displayed in its own native translation. - Press "Save" soft key to select the required language and you will hear a confirmation beep. EN 71/79 Handset Name You can define a name of the handset in order to easily recognize your handset if you have more than one handset registered on the same base. - Press the "Menu" soft key. - Press or key to choose "HS Settings" menu, then press the "Select" soft key. - Use or key to choose "HS Name", then press the "Select" soft key. - You can enter the handset name (up to 12 characters) by using the alphanumeric keys (use the "Erase" soft key to delete the incorrect characters), then press the "Save" soft key to confirm and exit. The handset name will be displayed above your handset number in standby mode. Auto Answer With this feature, you can answer a call by just picking up the handset from the base without pressing any key. - Press the "Menu" soft key. - Press or key to choose "HS Settings" menu, then press the "Select" soft key. - Use or key to choose "Auto Answer", then press the "Select" soft key. - Use the or key to choose "On" / "Off" to enable/ disable the function, then press the "Save" soft key, you will hear a confirmation beep. EN 72/79 LCD Contrast Setting The adjustment allows you to optimize the visibility of the display by changing its contrast according to the environment conditions. - Press the "Menu" soft key. - Press or key to choose "HS Settings" menu, then press the "Select" soft key. - Use or key to choose "LCD contrast", then press the "Select" soft key. - Use or key repeatedly to choose among the 17 available contrast levels, then press the "Save" soft key. Setting Date & Time - Press the "Menu" soft key. - Press or key to choose "HS Settings" menu, then press the "Select" soft key. - Use or key to choose "Date & Time", then press the "Select" soft key. - Date & Time format: Use or key to choose "Date Format" or "Time Format", press the "Select" soft key. You can use or key to choose the Date Format (DD-MM/MM-DD) or the Time Format (12-Hour/24-Hour), press the "Save" soft key to save. EN 73/79 - Setting date & time Press or key to choose "Set Date" or "Set Time" menu, press the "Select" soft key. Enter the current date/time by numeric keypad and press the "Save" soft key to save and exit. If you select 12-Hour, AM/PM will appear on the right of the time in standby mode. You need to enter the time in 24-Hour format. Selecting a base This function allows you to select a base from those already registered to the handset. You can access the options by scrolling the menu. - Press the "Menu" soft key. - Press or key to choose "HS Settings" menu, then press the "Select" soft key. - Use or key to choose "Select Base", then press the "Select" soft key. - You can or key to select the base you want, then press the "Select" soft key. If you select a non-existent base, the handset will sound a warning tone. - The display will show "Selected BSX". Press the "Select" soft key to confirm. A confirm tone will be heard. EN 74/79 Handset Reset If you reset the handset, all the features under "HS Settings" menu will be restored to the factory initial setting: Alarm, Audio Setup, Ring Setup, Tone Setup, Language, HS Name, Auto Answer and Date & Time. But LCD Contrast cannot be restored. - Press the "Menu" soft key. - Press or key to choose "HS Settings" menu, then press the "Select" soft key. - Use or key to choose "HS Reset", then press the "Select" soft key. - You will be prompted to enter the PIN code. - Enter the PIN code (the default one is 0000), then press the "Reset" soft key. If the PIN code is validated all handset settings will return to the factory default, otherwise a warning tone will be heard and the settings will remain. After resetting, the handset will return to standby mode. EN 75/79 Technical Specifications • 5 row dots matrix LCD display (128 x 64 dots matrix display), • Phonebook with up to 50 entries, • Full handsfree speakerphone, • FSK and DTMF dual system Caller ID *, • Caller ID / Call Waiting *, • Caller ID list with up to 40 entries *, • Redial book with up to 10 entries, • Call duration display, • Date & Time setting, • Alarm clock includes snooze option, • 13 languages selectable, • 10 melody ringer and volume selectable, • VIP ring tones setting for phonebook entries, • Receiver/Speaker volume adjustable, • Keypad lock, • Redial, Flash, Pause, Mute, • TONE/PULSE dialing mode selectable, • FLASH time selectable (100 – 300), (*)The caller ID feature is only available if you subscribe to a Caller Display service from your network provider. EN 76/79 • Standard : DECT-GAP, • Up to 5 handsets for optional for one base, • Up to 4 bases for optional for one handset, • Internal call, • Call transfer and 3-way conference call, • 1.8GHz DECT technology, • Modulation : GFSK, • Carrier Power : <250 mW, • Ambient temperature : 15°C à 35°C avec 0% à 90% Humidity, • Power Supply (Base input) : 7.5V, 300 mA, • Range indoor/outdoor : 50/300 m, • Standby time : 200 H – Talk time : 10 H, • Batteries : 2 x 1,2 volts, 600 mAh, LR03 type AAA Ni-MH, • Charging time : 15heures, • Dimensions Handset : 160 x 48 x 28 mm - Base : 102 x 100 x 105 mm, • Weight Handset : 120 g - Base : 125 g. EN 77/79 Déclaration de conformité Nom : Henri DEPAEPE SAS Siège social : Téléphone : 33 (0) 1 30 25 81 60 Adresse : 75-77 rue du Pré Brochet Télécopie : 33 (0) 1 39 98 61 24 Localité : SANNOIS Code postal : 95110 Identification du produit : - Nature : Terminal de Télécommunications - Type : Poste téléphonique sans fil - DECT - Référence commerciale : PROGRESS - Autres informations : Fonction GAP Déclare sous son entière responsabilité que le produit décrit ci-dessus est conforme aux exigences essentielles de la directive 1999/5/CE du Parlement européen et du Conseil du 9 mars 1999 concernant les équipements hertziens et les équipements terminaux de télécommunications et la reconnaissance mutuelle de leur conformité, ainsi qu’aux normes harmonisées suivantes : Pour la Sécurité Electrique : EN 60950 -1/A11 (2006) Pour la Compatibilité Electromagnétique : EN 301 489-1 V1.8.1 (2008) EN 301 489-6 V1.3.1 (2008) Pour le raccordement au réseau public : EN 301 406 V1.5.1 (2003) (compatibilité électrique et acoustique) EN 78/79 Ce produit est conforme à la : - Directive Européenne 2002/95/CE relative à la limitation de l’utilisation de certaines substances dangereuses dans les équipements électriques et électroniques. (RoHS). - Directive Européenne 2002/96/CE relative aux déchets d’équipements électriques et électroniques. (WEEE). Ce symbole signifie que ce produit ne doit pas être jeté en fin de vie comme un déchet ménager afin de préserver l’environnement et la santé humaine. Adressez-vous à votre fournisseur, aux autorités locales ou à notre service commercial pour le déposer dans un point de collecte prévu à cet effet. This product complies with: - European Directive 2002/95/EC on the restriction of the use of certain hazardous substances in electrical and electronic equipment. (RoHS). - European Directive 2002/96/EC on waste electrical and electronic equipment. (WEEE). This marking indicates this product should not be disposed of with other household wastes at the end of its working life to prevent possible harm to the environment or human health. Please contact your supplier, your local government office or our commercial department to dispose of it in an approved recycling centre. Fabriqué en Chine / Made in China EN 79/79