1
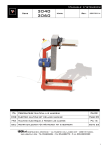
Manuale d’istruzioni . 6705 8230 Code Matr Art. 8230 ITA Rev 20130502 20130502 Art. 6705 Armadietto Fondimiele / Essiccatoio Scaldamiele Pg.0 Pg.02 ENG Honey liquifier cabinet Drier cabinet cabinet Pg.12 Pg.12 FRA meuble chauffant séchoir Pg.22 Pg.22 DEU HonigHonig-Auftauschrank Trockenschrank Pg.32 Pg.32 USA Honey liquifier cabinet Drier cabinet Pg.42 LEGA srl Costruzioni Apistiche – via Maestri del Lavoro 23 – 48018 Faenza www.legaitaly.com - Tel 054626834 – Fax 054628279 – P.iva 00043230390 1 1. PREMESSA Il manuale ha lo scopo di fornire indicazioni riguardanti: • • • • • • utilizzo dell’ Armadietto Fondimiele e dell’Armadietto Essicatoio; caratteristiche tecniche; istruzioni per la movimentazione, l'installazione e il montaggio; informazioni per il personale addetto all’uso; interventi di manutenzione; soluzione di alcuni possibili problemi; Il manuale è da considerarsi come parte integrante dell’ Armadietto Fondimiele – Armadietto Essicatoio ed in quanto tale deve essere conservato con cura, per un futuro riferimento, per tutta la durata dell’apparecchio. Il costruttore si ritiene sollevato da eventuali responsabilità nei seguenti casi: • uso improprio dell’ Armadietto Fondimiele – Armadietto Essiccatoio; • installazione non corretta o non eseguita secondo le procedure qui descritte; • difetti di alimentazione elettrica; • gravi carenze nella manutenzione prevista; • modifiche od interventi non autorizzati; • utilizzo di ricambi non originali o non specifici per il modello; • inosservanza parziale o totale delle istruzioni; Gli apparecchi elettrici possono essere pericolosi per la salute. Le normative e le leggi vigenti devono essere rispettate durante l’installazione e l’impiego di tali apparecchiature. 2. IDENTIFICAZIONE – MARCATURA Per una corretta consultazione di questo manuale è necessario identificare il modello in vostro possesso dalle indicazioni riportate sulla targhetta. (1) (3) (2) (5) (4) (6) (7) 1 – Modello 2 – Codice 3 – Matricola 4 – Data di fabbricazione 5 – Alimentazione alternata di funzionamento 6 – Frequenza di rete 7 – Potenza massima assorbita Figura 1 – Esempio di targhetta di identificazione LEGA srl Costruzioni Apistiche – via Maestri del Lavoro 23 – 48018 Faenza www.legaitaly.com - Tel 054626834 054626834 – Fax 054628279 – P.iva 00043230390 2 / 56 3. IDENTIFICAZIONE – DEFINIZIONE PRODOTTO A) L’armadietto Fondimiele (art.6705) ha in dotazione due piani per supportare fino a 72 vasetti di miele da 1 kg oppure due latte da 25 kg. B) L’armadietto Essiccatoio (art. 8230) ha in dotazione, oltre ai sopracitati 2 piani, altri 10 cassettini per il contenimento del polline. 4. USO PREVISTO PREVISTO DELL’ARMADIETTO Gli Armadietti sono mobili concepiti per il contenimento ed il riscaldamento di miele o l’essicazione di polline. Ogni altro uso è da considerarsi improprio e quindi pericoloso. L’armadietto è già impostato per non superare la temperatura temperatura di circa 45°C. LA TEMPERATURA MASSIMA RAGGIUNGIBILE DELL’ARMADIETTO E' DI 70°C. 5. DESCRIZIONE TECNICA Gli Armadietti LEGA sono costruiti in acciaio; tutti i materiali di diversa natura impiegati nella costruzione, sono garantiti per l’uso alimentare. Funzionamento Il riscaldamento del vano interno avviene tramite una resistenza elettrica termostatata, regolabile dall’esterno dall’utilizzatore, ed un ventilatore che permette la circolazione dell’aria calda all’interno del mobile, attraverso delle condutture appositamente progettate, garantendo una temperatura uniforme in tutto l’apparecchio. 6. IDENTIFICAZIONE DELLE PARTI 1 - Coperchio amovibile (se usato in versione “essiccatoio”) 2 - Pannello di controllo 3 - Vani riscaldati (1) (2) (3) Figura 2 - Armadietto Fondimiele LEGA srl Costruzioni Apistiche – via Maestri del Lavoro 23 – 48018 Faenza www.legaitaly.com - Tel 054626834 054626834 – Fax 054628279 – P.iva 00043230390 3 / 56 7. PANNELLO DI CONTROLLO I dispositivi sul pannello di controllo (Fig. 3) sono: 1 - Termostato digitale. 2 - Interruttore bipolare verde. All’azionamento dell’interruttore (posizione “”, segnalato dall’accensione della spia verde in esso contenuta) vengono alimentate le resistenze e la ventola. La ventola é in funzione per tutto il tempo in cui l’interruttore si trova in questa posizione. 1 2 Figura 3 - Pannello di controllo HTAC 7.1 TERMOSTATO DIGITALE A B B Figura 4 - Termostato digirale LEGA srl Costruzioni Apistiche – via Maestri del Lavoro 23 – 48018 Faenza www.legaitaly.com - Tel 054626834 054626834 – Fax 054628279 – P.iva 00043230390 4 / 56 8. POSIZIONAMENTO Dopo aver tolto l’apparecchio dall’imballo, e averlo posizionato su una pavimentazione solida, piana e stabile, si procede togliendo la pellicola protettiva di plastica bianca, staccandola lentamente. Fatto questo il mobile deve essere livellato con precisione, tramite regolazione dei piedini, avvalendosi dell'ausilio di una livella a bolla. I piedini si regolano in altezza tramite la loro rotazione. Il collocamento dell’armadietto deve essere predisposto in modo da evitare l’ostruzione delle asole di raffreddamento disposte anteriormente, sotto il pannello di controllo. 9. AVVIAMENTO Tutti i modelli della linea HTAC sono predisposti per il funzionamento con un’alimentazione di 230 V AC 50/60Hz. Gli Armadietti descritti nel manuale sono già forniti con spina per il collegamento alla rete elettrica. Verificare preventivamente che: • la tensione della rete corrisponda alla tensione riportata sulla targhetta dell’apparecchio (Fig. 1); per garantire un funzionamento regolare è necessario che la tensione di alimentazione sia compresa tra ±6% del valore nominale; • l’impianto elettrico al quale connettere l’armadietto sia dimensionato adeguatamente alla potenza elettrica nominale da installare; • l’impianto elettrico al quale connettere l’armadietto sia realizzato secondo la normativa vigente; Tutti i modelli descritti in questo manuale sono provvisti di un morsetto equipotenziale progettato per permettere di collegare più mobili di una batteria tra loro con un comune cavo di messa a terra. La morsettiera é situata sulla parte posteriore del Fondimiele, così come il morsetto equipotenziale. ATTENZIONE !!!! Il costruttore non può essere considerato responsabile per eventuali danni causati dalla mancanza o inefficienza dell’impianto di messa a terra, o causati da errata installazione, manomissione, cattiva manutenzione ed imperizia d’uso. LEGA srl Costruzioni Apistiche – via Maestri del Lavoro 23 – 48018 Faenza www.legaitaly.com - Tel 054626834 054626834 – Fax 054628279 – P.iva 00043230390 5 / 56 10. ISTRUZIONI PER L’USO – Armadietto Fondimiele (art.6705) Porre i due ripiani uno sul fondo e l’altro al centro dell’altezza, posizionare i vasetti all’interno dell’armadietto in maniera che la maggior parte degli stessi sia a contatto con l’aria circostante. Evitare per questo colonne di vasetti troppo serrate tra loro. In alternativa è possibile posizionare all’interno anche due latte da 25 kg. Accendere l’interruttore posto sul pannello di controllo (fig. 3 - punto 2) L’armadietto è già impostato per non superare la temperatura di circa 45°C. LA TEMPERATURA MASSIMA RAGGIUNGIBILE DELL’ARMADIETTO E' DI 70°C. 70°C. La prima temperatura visualizzata sul display è quella presente al’interno dell’armadietto al momento dell’accensione; in seguito viene indicatala temperatura massima raggiungibile impostata. Per variare questa temperatura premere il tasto SET (C) per circa 3 secondi e successivamente premere il pulsante con la freccia rivolta (A) in alto per aumentare i gradi o quello con la freccia rivolta in basso (B) per diminuirli. Non superare la temperatura di circa 4040-45°C. Attenzione: Attenzione è consigliabile mettere in funzione l’apparecchio nuovo per alcune ore, vuoto, in modo che eventuali cattivi odori, propri del primo utilizzo dello stesso, non contaminino il contenuto. 11. ISTRUZIONI PER L’USO – Armadietto Essiccatoio (art.8230) L’armadietto essiccatoio di polline è dotato di 10 cassetti estraibili, con intelaiatura e rete inox. Questi cassetti hanno un passaggio d’aria su di un lato per favorire la circolazione forzata dell’aria calda fra i vari cassetti partendo dal basso verso l’alto, fino alla sua uscita attraverso la parete superiore. I cassetti contenenti il polline vanno inseriti nelle guide, curando di avere alternativamente un passaggio d’aria verso la parete posteriore ed uno sul davanti, per costringere l’aria a salire zigzagando ed interessando in misura uguale tutti i cassetti. Stendere in maniera uniforme il polline all’interno dei 10 cassetti e inserirli nelle apposite guide. Accendere l’interruttore posto sul pannello di controllo (fig. 3 - punto 2) L’armadietto è già impostato per non superare la temperatura di circa 45°C. LA TEMPERATURA MASSIMA RAGGIUNGIBILE DELL’ARMADIETTO E' DI 70°C. La prima temperatura visualizzata sul display è quella presente al’interno dell’armadietto al momento massima ima raggiungibile impostata. dell’accensione; in seguito viene indicatala temperatura mass Per variare questa temperatura premere il tasto SET (C) per circa 3 secondi e successivamente premere il pulsante con la freccia rivolta (A) in alto per aumentare i gradi o quello con la freccia rivolta in basso (B) per diminuirli. Non superare la temperatura di circa 4040-45°C. Attenzione: Attenzione è consigliabile mettere in funzione l’apparecchio nuovo per alcune ore, vuoto, in modo che eventuali cattivi odori, propri del primo utilizzo dello stesso, non contaminino il contenuto. LEGA srl Costruzioni Apistiche – via Maestri del Lavoro 23 – 48018 Faenza www.legaitaly.com - Tel 054626834 054626834 – Fax 054628279 – P.iva 00043230390 6 / 56 12. ISTRUZIONI ISTRUZIONI PER LA MANUTENZIONE Prima di eseguire qualsiasi operazione di pulizia o manutenzione scollegare sempre l’alimentazione elettrica. Per la manutenzione delle parti di apparecchiature costruite in acciaio inossidabile, attenersi alle seguenti norme: • pulire accuratamente le superfici usando uno straccio umido; si può usare acqua e sapone od i comuni detersivi purché non contengano abrasivi, sostanze colorate o cloro; • strofinare solo unicamente nel senso della satinatura; • sciacquare quindi con acqua pura ed asciugare accuratamente; La pulizia è importante per mantenere inalterate le caratteristiche dell’apparecchio. Attenzione: nell’effettuare la pulizia degli apparecchi non usare mai getti d’acqua diretti per non provocare infiltrazioni e danni nelle parti interne dell’apparecchio: usare solamente un panno umido. Per quel che riguarda la parte elettrica del mobile è opportuno verificare periodicamente l’integrità del cavo elettrico di alimentazione, facendolo sostituire se presenta segni di usura, e far sottoporre l’apparecchiatura periodicamente (almeno una volta all’anno) ad un generale controllo. LEGA srl Costruzioni Apistiche – via Maestri del Lavoro 23 – 48018 Faenza www.legaitaly.com - Tel 054626834 054626834 – Fax 054628279 – P.iva 00043230390 7 / 56 13. SOLUZIONE AD ALCUNI PROBLEMI Si danno in seguito alcuni casi di malfunzionamento che possono essere riscontrato nell’uso degli armadietti Fondimiele. SINTOMI Il mobile non scalda POSSIBILI CAUSE Alimentazione elettrica interrotta Resistenze guaste Il riscaldamento dei vani è troppo Guasto al termostato elevato Il riscaldamento insufficiente dei La ventola non gira vani Sonda del termostato sporca è Guasto alla ventola Pulire la sonda del termostato. Scollegare l’apparecchio immediatamente e rivolgersi ad un tecnico specializzato Griglie di ventilazione ostruite Resistenza guasta Pulire accuratamente le griglie Scollegare l’apparecchio immediatamente e rivolgersi ad un tecnico specializzato Scollegare l’apparecchio immediatamente e rivolgersi ad un tecnico specializzato Togliere eventuali ostacoli al corretto funzionamento della ventola Guasto alla ventola Ventola bloccata LEGA srl RIMEDI Verificare il corretto inserimento della presa Verificare che l’interruttore sia in posizione “Ι”. Verificare che la linea di alimentazione fornisca tensione alla presa utilizzata Scollegare l’apparecchio immediatamente e rivolgersi ad un tecnico specializzato Scollegare l’apparecchio immediatamente e rivolgersi ad un tecnico specializzato Costruzioni Apistiche – via Maestri del Lavoro 23 – 48018 Faenza www.legaitaly.com - Tel 054626834 054626834 – Fax 054628279 – P.iva 00043230390 8 / 56 14. SCHEMA ELETTRICO HTAC Termometro Interruttore generale Seconda resistenza Termostato Motore Resistenze Morsettiera Figura 8 – Schema elettrico LEGA srl Costruzioni Apistiche – via Maestri del Lavoro 23 – 48018 Faenza www.legaitaly.com - Tel 054626834 054626834 – Fax 054628279 – P.iva 00043230390 9 / 56 15. RICAMBI Per ottenere eventuali ricambi di componenti elettrici contattare LEGA S.r.l. fornendo i dati di identificazione dell’apparecchio, riportati nella targhetta (Fig. 1), o i dati dei possibili componenti come di seguito: VETRO TEMPRATO SPESSORE 6 MM: MOTORE FFR 180/20-1RSN HT BBBLV: PIEDINI PLASTICA: RESISTENZA 500 + 500W RIARMO AUT 90°: SUPPORTI RIPIANO INOX : CERNIERE PORTA BATTENTE: MANIGLIA INOX: LAMPADA SPIA 220V VERDE FLV: INTERR BIPOLARE LUMINOSO ROSSO CON CAPPUCCIO: INTERR BIPOLARE LUMINOSO VERDE CON CAPPUCCIO: TERMOSTATO TR86: GHIERA TERMOSTATO: MORSETTIERA 220V: TERMOMETRO: MANOPOLA NERA: 4D3830000 4D3890000 4D3920000 4D3930000 843014001 847005013 850007100 857002000 857006030 857006050 857007020 857008000 857009110 857027000 858000000 Per smontare il gruppo riscaldante dal mobile occorre seguire attentamente le istruzioni seguenti: Sganciare la porta LEGA srl Togliere i ripiani Smontare il canale inferiore Costruzioni Apistiche – via Maestri del Lavoro 23 – 48018 Faenza www.legaitaly.com - Tel 054626834 054626834 – Fax 054628279 – P.iva 00043230390 10 / 56 Svitare il fermo posteriore LEGA srl Tirare verso l'esterno il pannello comandi facendo uso della maniglia Costruzioni Apistiche – via Maestri del Lavoro 23 – 48018 Faenza www.legaitaly.com - Tel 054626834 054626834 – Fax 054628279 – P.iva 00043230390 11 / 56 1. INTRODUCTION The purpose of this manual is to supply information regarding: • • • • • • Use of the Honey Liquifier Cabinet and of the Drier Cabinet; Technical specifications; Handling, installation and assembly instructions; Information for the machine operators; Maintenance operations; Solutions for possible problems. This manual should be intended as forming an integral part of the Honey Liquifier Cabinet - Drier Cabinet and as such, it should be kept with care for future reference throughout the machine life. The manufacturer shall not be held responsible in the following cases: • not recommended use of the Honey Liquifier cabinet – Drier Cabinet; • incorrect installation or installation not in accordance with the procedures described in this manual; • power supply faults; • major failure to comply with maintenance requirements; • unauthorised changes or operations; • use of non-original spare parts or spare parts that are not model-specific; • failure to comply with the supplied instructions, either wholly or in part; Electric appliances can be dangerous for human health. The applicable laws and regulations in force must be observed during the equipment installation and use. 2. IDENTIFICATION - MARKING In order to make the best use of this manual, the machine model in your possession must be identified according to the indications provided on the machine data plate. (1) (3) (2) (5) (4) (6) (7) 1 – Model 2 – Code 3 – Serial number 4 – Date of manufacturing 5 – Alternate Alternate voltage supply 6 – Line frequency 7 – Max absorbed power Figure 1 – Example of machine data plate LEGA srl Costruzioni Apistiche – via Maestri del Lavoro 23 – 48018 Faenza www.legaitaly.com - Tel 054626834 054626834 – Fax 054628279 – P.iva 00043230390 12 / 56 3. IDENTIFICATION – PRODUCT DEFINITION A) The Honey Liquifier Cabinet (item no. 6705) comes equipped with two shelves to support up to 72 1 kg honey jars or alternatively, two 25 kg cans. B) The Drier Cabinet (item no. 8230) comes equipped with the above-mentioned 2 shelves and with 10 additional drawers for pollen containment. 4. RECOMMENDED CABINET USE The Cabinets have been designed for honey containment and heating and for pollen drying. Any other use should be considered an improper - and therefore dangerous - use. The cabinet is factoryfactory-set not to exceed a temperature of approximately 45°C. 70℃ ℃. THE MAXIMUM TEMPERATURE WHICH CAN BE REACHED BY THE CABINET IS 70 5. TECHNICAL DESCRIPTION The LEGA Cabinets are made from steel; any other material used for equipment construction is guaranteed as food-safe. Operation The inside of the cabinet is heated via a thermostat-equipped electric resistor, which can be adjusted by the user from the outside, while a fan is used to circulate hot air inside the cabinet through specially designed ducts to guarantee uniform temperature distribution in all the equipment areas. 6. PART IDENTIFICATION 1 - Removable cover (if used in "drier" version) 2 - Control panel 3 - Heated interior (1) (2) (3) Figure 2 - Honey Liquifier Cabinet LEGA srl Costruzioni Apistiche – via Maestri del Lavoro 23 – 48018 Faenza www.legaitaly.com - Tel 054626834 054626834 – Fax 054628279 – P.iva 00043230390 13 / 56 7. CONTROL PANEL The instruments on the control panel (Fig. 3) are: 1 – Digital thermostat. 2 – Green bipolar switch. switch When the switch is operated (position “”, indicated by the switch green light lighting up), the electric resistors and fan are powered. The fan remains on throughout the switch operation time. 1 2 Fig. 3 - CONTROL PANEL HTAC 7.1 DIGITAL THERMOSTAT A B C Figura 4 - DIGITAL THERMOSTAT LEGA srl Costruzioni Apistiche – via Maestri del Lavoro 23 – 48018 Faenza www.legaitaly.com - Tel 054626834 054626834 – Fax 054628279 – P.iva 00043230390 14 / 56 8. POSITIONING After removing the equipment from its packaging, place it on a firm, flat and stable floor and proceed by slowly peeling off the white protective plastic film. The cabinet must then be precision-levelled by adjusting its feet using a spirit level. The support feet can be height-adjusted by turning. Position the cabinet making sure that the cooling slots located on the front side, below the control panel, are not covered. 9. STARTSTART-UP All the HTAC line models are pre-set for 230 V AC - 50/60Hz power input. The Cabinets described in this manual come equipped with a plug suitable for power line connection. Before starting up, check that: the line voltage matches the voltage specified on the equipment data plate (Fig. 1); in order to guarantee smooth operation, the input voltage must be within a range of ±6% of the rated value; • the electrical system to which the cabinet must be connected is suitably sized according to the rated electric power to install; • the electrical system to which the cabinet must be connected is built to comply with the applicable standards in force; • All the models described in this manual are equipped with an equipotential terminal designed to allow several cabinets belonging to one bank to be connected together, using a standard grounding wire (Fig. 4). The terminal strip is located in the rear part of the Honey Liquifier, as is the equipotential terminal. CAUTION! The manufacturer manufacturer may not be held responsible for any damages caused by poor or inefficient grounding, wrong installation, tampering, poor maintenance or inexperienced use of the system. 10. OPERATION INSTRUCTIONS – Honey Liquifier Cabinet (item (item 6705) LEGA srl Costruzioni Apistiche – via Maestri del Lavoro 23 – 48018 Faenza www.legaitaly.com - Tel 054626834 054626834 – Fax 054628279 – P.iva 00043230390 15 / 56 Install the two shelves (one at the bottom and one mid-height) and fill the cabinet with jars so that most of them is in contact with the surrounding air. For this reason, avoid stacking jars too close together. Alternatively, it is possible to place two 25 kg cans inside the cabinet. Power on via the main switch located on the control panel (fig. 3 - item 2). The cabinet is factoryfactory-set not to exceed a temperature of approximately 45°C. 70℃ ℃. THE MAXIMUM TEMPERATURE WHICH CAN BE REACHED BY THE CABINET IS 70 The first displayed temperature value shows the temperature inside the cabinet upon powerpower-on; subsequently, the prepre-set value of the maximum temperature which can be reached is displayed. To change this temperature setting, press the SET (C) control and hold it for about 3 seconds; then press the button with the arrow pointing up (A) to increase the temperature degrees or the button with the arrow pointing down (B) to decrease them. Never exceed a temperature of approximately 4040-45°C 45°C Caution: Caution It is advisable to allow your new equipment to run empty for a few hours, to prevent any first-use smells from contaminating the product. 11. OPERATION INSTRUCTIONS – Drier Cabinet (item (item 8230) The pollen drier cabinet comes equipped with 10 extractable drawers with stainless steel mesh and frame. These drawers have an air intake on one side to help hot air forced circulation through the various drawers, starting from the bottom all the way to the top and leaving through the top wall. The drawers containing the pollen to dry must be introduced in their special guides, checking that there are alternately one air intake on the rear wall and one on the front wall, to ensure that air flows to the top in a crisscross pattern going homogenously through all the drawers. Lay pollen homogeneously in the 10 drawers and insert the drawers in their special guides. Power on via the main switch located on the control panel ((fig. 3 - item 2) The cabinet is factoryfactory-set not to exceed a temperature of approximately 45°C. THE MAXIMUM TEMPERATURE TEMPERATURE WHICH CAN BE REACHED BY THE CABINET IS 70℃ 70℃. The first displayed temperature value shows the temperature inside the cabinet upon powerpower-on; subsequently, the prepre-set value of the maximum temperature which can be reached is displayed. To change this temperature setting, press the SET (C) control and hold it for about 3 seconds; then press the button with the arrow pointing up (A) to increase the temperature degrees or the button with the arrow pointing down (B) to decrease them. Never exceed a temperatu temperature ature of approximately 4040-45°C. Caution: Caution It is advisable to allow your new equipment to run empty for a few hours, to prevent any first-use smells from contaminating the product. 12. MAINTENANCE INSTRUCTIONS LEGA srl Costruzioni Apistiche – via Maestri del Lavoro 23 – 48018 Faenza www.legaitaly.com - Tel 054626834 054626834 – Fax 054628279 – P.iva 00043230390 16 / 56 Before carrying out any cleaning or maintenance operations, always unplug the machine from the power line. Carry out any stainless steel equipment part maintenance by complying with the following instructions: • clean the surfaces thoroughly with a damp cloth; water and soap or common detergents can be used as long as they do not contain any abrasives, staining agents or chlorine; • only wipe in the satin finish direction; • rinse with water only and wipe perfectly dry; Cleaning is important to ensure that the equipment characteristics are preserved. Caution: When cleaning the equipment, never use direct pressurised water jets which could cause infiltrations and damage the internal parts of the equipment. Exclusively use a damp cloth. Maintain the electrical parts of the cabinet by regularly checking that the electric input cable is intact; replace the cable if it shows signs of wear-and-tear. Arrange for general equipment overhauling at least once a year. LEGA srl Costruzioni Apistiche – via Maestri del Lavoro 23 – 48018 Faenza www.legaitaly.com - Tel 054626834 054626834 – Fax 054628279 – P.iva 00043230390 17 / 56 13. SOLUTIONS FOR POSSIBLE PROBLEMS The following are instances of malfunctioning that can be observed when Honey Liquifier Cabinets are used. FAULTS The cabinet will not heat up POSSIBLE CAUSES No power from line REMEDIES Check that the cabinet has been correctly plugged in. Check that switch is set to “Ι”. Check for line power supply to the socket used. Faulty resistors Cabinet interior overheating Cabinet heating interior Faulty thermostat. Dirty thermostat probe. insufficient Faulty fan Clogged ventilation grids Faulty resistor Fan not working Faulty fan Jammed fan LEGA srl Unplug the and contact sales centre. Unplug the and contact sales centre. device immediately a specialised afterdevice immediately a specialised after- Clean the thermostat probe. Unplug the device immediately and contact a specialised aftersales centre. Clean the grids thoroughly. Unplug the device immediately and contact a specialised aftersales centre. Unplug the device immediately and contact a specialised aftersales centre. Remove any objects that prevent correct fan operation. Costruzioni Apistiche – via Maestri del Lavoro 23 – 48018 Faenza www.legaitaly.com - Tel 054626834 054626834 – Fax 054628279 – P.iva 00043230390 18 / 56 14. HTAC WIRING DIAGRAM Thermometer Main switch Second resisttor Thermostat Motor Resistors Terminal strip Figure 8 – Wiring diagram LEGA srl Costruzioni Apistiche – via Maestri del Lavoro 23 – 48018 Faenza www.legaitaly.com - Tel 054626834 054626834 – Fax 054628279 – P.iva 00043230390 19 / 56 15 SPARE PARTS To purchase electrical spare parts, contact LEGA S.r.l. and quote your equipment's identification details contained in the data plate (Fig. 1) or the details of the required components listed here below: HARDENED INSULATION GLASS, THICKNESS 6 MM: MOTOR FFR 180/20-1RSN HT BBBLV: PLASTIC FEET: RESISTOR 500 + 500W AUT. RESET 90°: STAINLESS STEEL SHELF SUPPORTS: DOOR HINGES: S. STEEL HANDLE: GREEN INDICATOR LIGHT 220V FLV: BIPOLAR RED LIGHT SWITCH WITH COVER: BIPOLAR GREEN LIGHT SWITCH WITH COVER: THERMOSTAT TR86: THERMOSTAT RING NUT: TERMINAL STRIP 220V: THERMOMETER: BLACK CONTROL: 4D3830000 4D3890000 4D3920000 4D3930000 843014001 847005013 850007100 857002000 857006030 857006050 857007020 857008000 857009110 857027000 858000000 To remove the heating unit from the cabinet, strictly comply with the following instructions: Unhinge the door LEGA srl Remove the shelves Remove the bottom Costruzioni Apistiche – via Maestri del Lavoro 23 – 48018 Faenza www.legaitaly.com - Tel 054626834 054626834 – Fax 054628279 – P.iva 00043230390 20 / 56 Screw out the rear stop LEGA srl Pull out the control panel using the handle Costruzioni Apistiche – via Maestri del Lavoro 23 – 48018 Faenza www.legaitaly.com - Tel 054626834 054626834 – Fax 054628279 – P.iva 00043230390 21 / 56 1. INTRODUCTION INTRODUCTION Le manuel a pour but de fournir des indications concernant : • • • • • • l’utilisation du meuble chauffant et du séchoir ; les caractéristiques techniques ; les instructions pour la manutention, l’installation et le montage ; les informations pour le personnel préposé à l’utilisation ; les opérations d’entretien ; la résolution de problèmes éventuels. Le manuel fait partie intégrante du meuble chauffant et du séchoir, il doit donc être soigneusement conservé pour être consulté durant toute la vie utile de l’appareil. Le fabricant décline toute responsabilité dans les cas suivants : • usage impropre du meuble chauffant – séchoir ; • installation non correcte ou non effectuée selon les procédures décrites dans ce manuel ; • défauts de l’alimentation électrique ; • graves carences au niveau de l’entretien ; • modifications ou interventions non autorisées ; • utilisation de pièces de rechange non d’origine ou non spécifiques au modèle ; • non-observation partielle ou totale des instructions. Les appareils électriques peuvent peuvent être dangereux pour la santé. Les normes et les lois en vigueur doivent être respectées pendant l’installation et l’utilisation de ces appareils. 2. IDENTIFICATION – MARQUAGE Pour une consultation correcte de ce manuel, il faut identifier le modèle en votre possession grâce aux indications reportées sur la plaquette. (1) (3) (2) (5) (4) (6) 1 – Modèle 2 – Code 3 – N° de série 4 – Date de fabrication 5 – Alimentation 6 – Fréquence de réseau 7 – Puissance maximale absorbée (7) Figure 1 – Exemple de plaquette d’identification LEGA srl Costruzioni Apistiche – via Maestri del Lavoro 23 – 48018 Faenza www.legaitaly.com - Tel 054626834 054626834 – Fax 054628279 – P.iva 00043230390 22 / 56 3. IDENTIFICATION – DÉFINITION DU PRODUIT A) Le meuble chauffant (art. 6705) comprend deux tablettes pouvant supporter au maximum 72 pots de miel de 1 kg ou deux seaux de 25 kg. B) En plus de ces deux tablettes, le séchoir (art. 8230) comprend 10 plateaux-tiroirs pour contenir le pollen. 4. UTILISATION DU MEUBLE CHAUFFANT Les meubles chauffants sont conçus pour contenir et chauffer des objets. Toute autre utilisation est impropre et donc dangereuse. Le meuble chauffant/séchoir à pollen est déjà programmé pour ne pas dépasser la température d’environ 45°C. LA TEMPÉRATURE MAXIMUM DU MEUBLE CHAUFFANT/ SÉCHOIR EST DE 70 °C. 5. DESCRIPTION TECHNIQUE Les meubles chauffants LEGA sont construits en acier ; tous les autres matériaux utilisés pour la construction sont garantis pour l’utilisation alimentaire. Fonctionnement (Le réchauffage du compartiment interne) Les compartiments internes sont chauffés grâce à une résistance électrique thermostatée, réglable depuis l’extérieur. Un ventilateur garantit la circulation correcte de l’air chaud à l’intérieur du meuble chauffant, à travers des conduits spécialement mis au point pour garantir une température uniforme dans tout le meuble chauffant. 6. IDENTIFICATION DES PARTIES 1 - Couvercle amovible (s’il est utilisé en version « séchoir ») 2 - Panneau de commande 3 - Compartiments Compartiments chauffés (1) (2) (3) Figure 2 –Meuble chauffant LEGA srl Costruzioni Apistiche – via Maestri del Lavoro 23 – 48018 Faenza www.legaitaly.com - Tel 054626834 054626834 – Fax 054628279 – P.iva 00043230390 23 / 56 7. PANNEAU DE COMMANDE Les dispositifs présents sur le panneau de commande (fig. 3) sont les suivants : 1 - Thermostat numérique. 2 - Interrupteur bipolaire vert. L’actionnement de l’interrupteur (position « », signalé par l’allumage du voyant vert qu’il contient) alimente les résistance et le ventilateur. Le ventilateur fonctionne tant que l’interrupteur est sur cette position. 1 2 Figura 3 - panneau de commande HTAC 7.1 THERMOSTAT NUMERIQUE A B C Fig. 4 Thermostat numérique LEGA srl Costruzioni Apistiche – via Maestri del Lavoro 23 – 48018 Faenza www.legaitaly.com - Tel 054626834 054626834 – Fax 054628279 – P.iva 00043230390 24 / 56 8. MISE EN PLACE Après avoir retiré l’appareil de l’emballage et après l’avoir mis en place sur un sol solide, plat et stable, il faut retirer lentement le film de protection en plastique blanc. Le meuble chauffant doit être ensuite mis à niveau avec précision, en réglant les pieds, à l’aide d’un niveau à bulle. La hauteur des pieds se règle par rotation. Le meuble chauffant doit être positionné de manière à éviter l’obstruction des fentes de refroidissement situées sur la partie avant et au-dessous du côté où se trouve le panneau de commande. Après avoir extrait l’appareil de l’emballage et l’avoir positionné sur un sol solide, plat et stable, retirer lentement le film de protection en plastique blanc. Le meuble doit ensuite être mis à niveau avec précision, en réglant les pieds, à l’aide d’un niveau à bulle. La hauteur des pieds se règle par rotation. L’appareil doit être positionné de manière à éviter à éviter l’obstruction des fentes de refroidissement situées sur la partie avant, sous le panneau de commande. 9. MISE EN MARCHE Tous les modèles de la ligne HTAC sont prévus pour le fonctionnement avec une alimentation de 230 V CA 50/60 Hz. Les meubles chauffants décrits dans le manuel sont déjà équipés d’une prise pour le branchement au réseau électrique. Vérifier au préalable que : • la tension du réseau correspond à la tension reportée sur la plaquette de l’appareil (fig. 1) ; pour garantir un fonctionnement normal, il faut que la tension d’alimentation soit égale à ± 6 % de la valeur nominale ; • l’installation électrique à laquelle est branché le meuble chauffant doit être adéquatement dimensionnée en fonction de la puissance électrique nominale à installer ; • l’installation électrique à laquelle est branché le meuble chauffant doit être réalisée selon les normes en vigueur. Tous les modèles décrits dans ce manuel sont pourvus d’une borne équipotentielle conçue pour permettre de connecter entre eux plusieurs meubles chauffants d’une batterie à l’aide d’un câble ordinaire de mise à la masse (fig. 4). La boîte à bornes est située sur la partie arrière du meuble chauffant, comme la borne équipotentielle. ATTENTION !!!! Le fabricant décline toute responsabilité pour d’éventuels dommages causés par l’absence ou l’inefficacité du système de mise à la masse ou pour des dommages causés par une installation installation erronée, une manipulation non autorisée, un entretien effectué non correctement et une incapacité à utiliser l’appareil. LEGA srl Costruzioni Apistiche – via Maestri del Lavoro 23 – 48018 Faenza www.legaitaly.com - Tel 054626834 054626834 – Fax 054628279 – P.iva 00043230390 25 / 56 10. MODE D’EMPLOI – Meuble chauffant (art. 6705) Placer les deux tablettes, une en bas et une au centre du meuble chauffant, positionner les pots dans le meuble chauffant de sorte que la plupart d’entre eux soit en contact avec l’air. Pour ce faire, éviter les colonnes de pots trop serrées. Il est également possible de positionner à l’intérieur deux seaux de 25 kg. Allumer l’interrupteur placé en haut sur le panneau de commande (fig. 3 - point 2) Le meuble chauffant est déjà programmé pour ne pas dépasser la température d’environ 45°C. LA TEMPÉRATURE MAXIMUM DU MEUBLE CHAUFFANT/ SÉCHOIR EST DE 70 °C. La première température visualisée visualisée sur l’afficheur est celle qui se trouve dans le meuble au moment de l’allumage ; ensuite s’affiche la température maximum programmée qui peut être atteinte. Pour changer cette température appuyer sur le bouton SET (C) pendant environ 3 secondes et ensuite appuyer sur le bouton qui porte la flèche tournée vers le haut (A) pour augmenter les degrés ou sur celui qui porte la flèche tournée vers le bas (B) pour les diminuer. Ne pas dépasser la température de 40 – 45 °C Attention : il est conseillé de mettre l’appareil neuf en marche, vide, pendant quelques heures, de sorte que les éventuelles mauvaises odeurs ne puissent pas, lors de la première utilisation, contaminer le contenu. 11. MODE D’EMPLOI – Séchoir (art. 8230) Le séchoir à pollen contient 10 plateaux extractibles, avec cadre et tôle perforée en inox. Ces plateaux présentent un passage d’air d’un côté pour favoriser la circulation forcée de l’air chaud entre les différents plateaux, de bas en haut, jusqu'à l’évacuation à travers le panneau supérieur. Les plateaux contenant le pollen doivent être positionnés dans les glissières, en veillant à avoir alternativement un passage d’air vers le panneau arrière et un sur le devant, afin d’obliger l’air à monter en zigzaguant et en passant sur tous les plateaux de la même manière. Étaler le pollen uniformément sur les 10 plateaux puis positionner ces derniers dans les glissières. Allumer l’interrupteur placé en haut sur le panneau de commande (fig. 3 - point 2) Le séchoir à pollen est déjà programmé pour ne ne pas dépasser la température d’environ 45°C. LA TEMPÉRATURE MAXIMUM DU MEUBLE CHAUFFANT/ SÉCHOIR EST DE 70 °C. La première température visualisée sur l’afficheur est celle qui se trouve dans le meuble au moment de l’allumage ; ensuite s’affiche la température température maximum programmée qui peut être atteinte. Pour changer cette température appuyer sur le bouton SET (C) pendant environ 3 secondes et ensuite appuyer sur le bouton qui porte la flèche tournée vers le haut (A) pour augmenter les degrés ou sur celui qui porte la flèche tournée vers le bas (B) pour les diminuer. Ne pas dépasser la température de 40 - 45 °C Attention : il est conseillé de mettre l’appareil neuf en marche, vide, pendant quelques heures, de sorte que les éventuelles mauvaises odeurs ne puissent pas, lors de la première utilisation, contaminer le contenu. LEGA srl Costruzioni Apistiche – via Maestri del Lavoro 23 – 48018 Faenza www.legaitaly.com - Tel 054626834 054626834 – Fax 054628279 – P.iva 00043230390 26 / 56 12. INSTRUCTIONS POUR L’ENTRETIEN Avant d’effectuer toute opération de nettoyage ou d’entretien, toujours débrancher l’alimentation électrique. Pour l’entretien des parties des appareils construites en acier inoxydable, suivre les instructions suivantes : • nettoyer soigneusement les surfaces en utilisant un chiffon humide ; il est possible d’utiliser de l’eau et du savon ou des nettoyants ordinaires à condition qu’ils ne contiennent pas de substances abrasives, substances colorées ( ?) ou du chlore ; • frotter uniquement dans le sens du satinage ; • rincer ensuite avec de l’eau pure et essuyer soigneusement. Le nettoyage est important pour maintenir les caractéristiques de l’appareil intactes. Attention : lors du nettoyage des appareils, ne jamais utiliser de jets d’eau directs pour ne pas provoquer d’infiltrations et de dommages dans les parties internes de l’appareil ; utiliser uniquement un chiffon humide. Pour ce qui concerne la partie électrique du meuble chauffant, il faut vérifier régulièrement l’intégrité du câble électrique d’alimentation. S’il présente des signes d’usure, le remplacer et soumettre l’appareil régulièrement à un contrôle général (au moins une fois par an). LEGA srl Costruzioni Apistiche – via Maestri del Lavoro 23 – 48018 Faenza www.legaitaly.com - Tel 054626834 054626834 – Fax 054628279 – P.iva 00043230390 27 / 56 13. RÉSOLUTION DE DE PROBLÈMES ÉVENTUELS Certains problèmes de fonctionnement qui peuvent se produire durant l’utilisation des meubles chauffants sont décrits ci-dessous. PROBLÈMES Le meuble chauffant ne chauffe pas. Le chauffage des compartiments est trop élevé. Le chauffage des compartiments est insuffisant. Le ventilateur ne tourne pas. LEGA srl CAUSES POSSIBLES REMÈDES Vérifier que l’appareil est Alimentation électrique interrompue correctement branché sur la prise. Vérifier que l’interrupteur est en position «ΙΙ». Vérifier que la ligne d’alimentation fournit la tension à la prise utilisée. Débrancher l’appareil Résistances en panne immédiatement et s’adresser à un technicien spécialisé. Débrancher l’appareil Thermostat en panne immédiatement et s’adresser à un technicien spécialisé. Sonde du thermostat sale Nettoyer la sonde du thermostat. Débrancher l’appareil Ventilateur en panne immédiatement et s’adresser à un technicien spécialisé. Grilles de ventilation obstruées Nettoyer soigneusement les grilles Débrancher l’appareil Résistance en panne immédiatement et s’adresser à un technicien spécialisé. Débrancher l’appareil Ventilateur en panne immédiatement et s’adresser à un technicien spécialisé. Retirer d’éventuels obstacles qui pourraient empêcher le Ventilateur bloqué fonctionnement correct du ventilateur. Costruzioni Apistiche – via Maestri del Lavoro 23 – 48018 Faenza www.legaitaly.com - Tel 054626834 054626834 – Fax 054628279 – P.iva 00043230390 28 / 56 14. SCHÉMA ÉLECTRIQUE HTAC Thermomètre Interrupteur général Deuxième résistance Thermostat Moteur Résistances Boîte à bornes Figure 8 – Schéma électrique LEGA srl Costruzioni Apistiche – via Maestri del Lavoro 23 – 48018 Faenza www.legaitaly.com - Tel 054626834 054626834 – Fax 054628279 – P.iva 00043230390 29 / 56 15. PIÈCES DE RECHANGE Pour obtenir des pièces de rechange ou des composants électriques, contacter LEGA S.r.l. et fournir les données d’identification de l’appareil reportées sur la plaquette (Fig. 1), ou les données des composants : VERRE TREMPÉ ÉPAISSEUR 6 MM : MOTEUR FFR 180/20-1RSN HT BBBLV : PIEDS EN PLASTIQUE : RÉSISTANCE 500 + 500W REMISE EN MARCHE AUT. 90°: SUPPORTS PLATEAU INOX : CHARNIÈRES PORTE BATTANTE : POIGNÉE INOX : AMPOULE TÉMOIN 220V VERT FLV: INTERRUPTEUR BIPOLAIRE LUMINEUX ROUGE AVEC CAPUCHON : INTERRUPTEUR BIPOLAIRE LUMINEUX VERT AVEC CAPUCHON : THERMOSTAT TR86 : BAGUE THERMOSTAT: BOITIER À BORNES 220 V : THERMOMÈTRE : POIGNÉE NOIRE : 4D3830000 4D3890000 4D3920000 4D3930000 843014001 847005013 850007100 857002000 857006030 857006050 857007020 857008000 857009110 857027000 858000000 Pour démonter le groupe chauffant du meuble, il faut suivre attentivement les instructions suivantes : Démonter la porte. LEGA srl Retirer les plateaux. Démonter le canal inférieur. Costruzioni Apistiche – via Maestri del Lavoro 23 – 48018 Faenza www.legaitaly.com - Tel 054626834 054626834 – Fax 054628279 – P.iva 00043230390 30 / 56 Desserrer l’arrêt arrière. LEGA srl Tirer vers l’extérieur le panneau de commande en utilisant la poignée. Costruzioni Apistiche – via Maestri del Lavoro 23 – 48018 Faenza www.legaitaly.com - Tel 054626834 054626834 – Fax 054628279 – P.iva 00043230390 31 / 56 1. EINLEITUNG Die Bedienungsanleitung hat das Ziel folgende Angaben zu liefern: • • • • • • Benutzung des Honig-Auftauschranks und des Trockenschranks. Technische Merkmale. Anleitung für Handling, Installation und Montage. Informationen für das Personal. Wartungsarbeiten. Abhilfe bei möglichen Problemen. Die Bedienungsanleitung ist Bestandteil des HonigHonig-Auftauschranks – Trockenschranks und muss daher für zukünftiges Nachschlagen während der gesamten Lebensdauer des Gerätes sorgfältig aufbewahrt werden. werden. In folgenden Fällen haftet der Hersteller nicht: • Unsachgemäßer Gebrauch des Honig-Auftauschranks – Trockenschranks. • Falsch oder nicht entsprechend der Beschreibung ausgeführte Installation. • Mängel bei der Stromversorgung. • Schwere Mängel bei der vorgesehenen Wartung. • Nicht genehmigte Änderungen oder Eingriffe. • Verwendung nicht originaler oder nicht modellspezifischer Ersatzteile. • Teilweise oder vollständige Nichtbeachtung der Anleitungen. nstallation und der Verwendung dieser Elektrische Geräte können gesundheitsschädlich sein. Bei der IInstallation Geräte müssen die geltenden Normen und Gesetze beachtet werden. 2. IDENTIFIZIERUNG - KENNZEICHNUNG Für ein richtiges Nachschlagen in dieser Bedienungsanleitung muss das in Ihrem Besitz befindliche Modell anhand der Angaben auf dem Typenschild identifiziert werden. (1) (3) (2) (5) (5) (4) (6) 1 - Modell 2 - Kennziffer 3 - Seriennummer 4 - Herstellungsdatum 5 - Wechselstromversorgung für Betrieb 6 - Netzfrequenz 7 - Maximale Leistungsaufnahme (7) Fig. 1 – Beispiel für Typenschild 3. IDENTIFIZIERUNG - PRODUKTBESCHREIBUNG LEGA srl Costruzioni Apistiche – via Maestri del Lavoro 23 – 48018 Faenza www.legaitaly.com - Tel 054626834 054626834 – Fax 054628279 – P.iva 00043230390 32 / 56 A) Zusammen mit dem Honig-Auftauschrank (Art. 6705) werden zwei Roste mit einer Tragfähigkeit von 72 Honiggläsern mit jeweils 1 kg oder zwei Kübel mit je 25 kg mitgeliefert. B) Zum Lieferumfang des Trockenschranks (Art. 8230) gehören außer den 2 o. g. Rosten, weitere 10 Kästchen zur Aufnahme der Pollen. 4. SACHGEMÄSSER GEBRAUCH DES SCHRANKS Die Schränke sind für die Aufnahme und das Erwärmen von Honig oder das Trocknen von Pollen entwickelt worden. Jede andere Verwendung ist unsachgemäß und daher gefährlich. Der Schrank ist bereits so eingestellt, dass eine Temperatur von ungefähr 45 °C nicht überschritten wird. DIE ERREICHBARE HÖCHSTTEMPERATUR HÖCHSTTEMPERATUR DES SCHRANKS BETRÄGT 70 °C. 5. TECHNISCHE BESCHREIBUNG Die vom Unternehmen LEGA hergestellten Schränke sind aus Stahl. Alle anderen Materialien, die für die Konstruktion eingesetzt werden, sind für Lebensmittel garantiert. Betrieb Die Heizung des Innenraums erfolgt durch einen, von außen durch den Bediener einstellbaren, thermostatgeregelten, elektrischen Heizwiderstand und ein Gebläse, mit dem die Warmluft im Schrank durch entsprechend entwickelte Leitungen umgewälzt wird, die eine gleichmäßige Temperatur im gesamten Gerät garantieren. 6. IDENTIFIZIERUNG DER TEILE 1 - Abnehmbarer Deckel (bei Einsatz als Version "Trockenschrank") 2 - Schalttafel 3 - Beheizte Fächer (1) (2) (3) Fig. 2 – Honig-Auftauschrank 7. SCHALTTAFEL LEGA srl Costruzioni Apistiche – via Maestri del Lavoro 23 – 48018 Faenza www.legaitaly.com - Tel 054626834 054626834 – Fax 054628279 – P.iva 00043230390 33 / 56 Es gibt folgende Vorrichtungen an der Schalttafel (Fig. 3): 1 - Digitalthermometer. 2 - Zweipoliger Schalter grün. Bei Betätigung des Schalters (Position „”, wird durch das Einschalten der grünen Kontrolllampe im Schalter angezeigt), werden die Heizwiderstände und das Gebläse mit Strom versorgt. Das Gebläse bleibt solange in Betrieb, solange sich der Schalter in dieser Position befindet. 1 2 Fig. 3 – Schalttafel HTAC 7.1 DIGITALTHERMOMETER A B C Fig. 4 – Digitalthermometer 8. POSITIONIERUNG LEGA srl Costruzioni Apistiche – via Maestri del Lavoro 23 – 48018 Faenza www.legaitaly.com - Tel 054626834 054626834 – Fax 054628279 – P.iva 00043230390 34 / 56 Nachdem das Gerät aus der Verpackung genommen und auf einem festen, ebenen und stabilen Boden aufgestellt worden ist, kann der Schutzfilm aus weißem Kunststoff langsam abgenommen werden. Anschließend muss der Schrank mit Hilfe der Stellfüße und einer Wasserwaage sorgfältig ausgerichtet werden. Die Höhenverstellung der Stellfüße erfolgt durch Drehen. Beim Aufstellen des Schranks muss darauf geachtet werden, dass die vorne, unterhalb der Schalttafel angebrachten Lüftungsschlitze nicht verstopft werden. 9. EINSCHALTEN Alle Modelle der Linie HTAC sind für einen Betrieb mit einer Stromversorgung mit 230 V AC - 50/60Hz vorgesehen. Die in der Bedienungsanleitung beschriebenen Schränke werden bereits mit einem Stecker für den Anschluss an das Stromnetz geliefert. Vorm Anschließen folgendes prüfen: • Entspricht die Netzspannung den Angaben auf dem Typenschild (Fig. 1) des Gerätes. Um einen richtigen Betrieb sicherzustellen, muss die Versorgungsspannung innerhalb von ±6% des Nennwertes liegen. • Ist die elektrische Anlage, an die der Schrank angeschlossen werden soll, richtig für die zu installierende Nennleistung bemessen. • Ist die elektrische Anlage, an die der Schrank angeschlossen werden soll, entsprechend der geltenden Normen hergestellt. Alle in dieser Bedienungsanleitung beschriebenen Modelle sind mit einer Äquipotenzialklemme ausgestattet, die entwickelt wurde, damit mehrere Schränke einer Batterie untereinander mit einem gemeinsamen Massekabel verbunden werden können (Fig. 4). Das Klemmenbrett und die Äquipotenzialklemme befinden sich auf der Rückseite des Honig-Auftauschranks. ACHTUNG !!!! Der Hersteller übernimmt keine Haftung bei Schäden, die durch eine fehlende oder nicht funktionierende Erdung, durch falsche Installation, Änderungen, schlechte Wartung oder Unerfahrenheit bei der Bedienung Bedienung verursacht worden sind. 10. BEDIENUNGSANLEITUNG – HonigHonig-Auftauschrank (Art.6705) LEGA srl Costruzioni Apistiche – via Maestri del Lavoro 23 – 48018 Faenza www.legaitaly.com - Tel 054626834 054626834 – Fax 054628279 – P.iva 00043230390 35 / 56 Die beiden Einlegroste anbringen, einen auf dem Boden und den anderen auf halber Höhe. Die Gläser so im Schrank aufstellen, dass der größte Teil Kontakt mit der umliegenden Luft hat. Vermeiden, dass die Gläser zu eng gestapelt werden. Alternativ können auch zwei Kübel mit jeweils 25 kg positioniert werden. Den Schalter oben den der Schalttafel einschalten (Abb. 3 - Punkt 2). Der Schrank ist bereits so eingestellt, eingestellt, dass eine Temperatur von ungefähr 45 °C nicht überschritten wird. DIE ERREICHBARE HÖCHSTTEMPERATUR DES SCHRANKS BETRÄGT 70 °C. Als erstes wird die Temperatur am Display angezeigt, die beim Einschalten im Schrankinneren besteht; in der Folge wird die eingestellte erreichbare Höchsttemperatur angezeigt. Zur Änderung dieser Temperatur die Taste SET (C) ungefähr 3 Sekunden lang drücken und danach die Temperatur über die Pfeiltaste nach oben (A) erhöhen oder über die Pfeiltaste nach unten (B) verringern. Die Temperatur von ungefähr 4040-45°C Achtung: Das neue Gerät sollte zunächst für einige Stunden eingeschaltet werden, damit eventuelle unangenehme Gerüche, die für das erstmalige Einschalten typisch sind, den Inhalt nicht verunreinigen. 11. BEDIENUNGSANLEITUNG BEDIENUNGSANLEITUNG – Trockenschrank (Art.8230) Der Pollen-Trockenschrank ist mit 10 Schubkästchen, mit Rahmen und Edelstahl-Netz ausgestattet. Diese Kästchen haben auf einer Seite einen Luftdurchlass, der die Umwälzung der Warmluft zwischen den Kästchen unterstützt. Die Warmluft wird von unten nach oben durchgeleitet, bis sie durch die obere Wand austritt. Die Kästchen mit den Pollen werden in die Führungen eingesetzt. Dabei muss darauf geachtet werden, dass abwechselnd ein Luftdurchlass in Richtung Rückwand und ein Luftdurchlass nach vorne ausgerichtet wird. Damit wird dann die Luft zickzackförmig durch alle Kästchen gleichmäßig durchgeleitet. Die Pollen gleichmäßig in den 10 Kästchen verteilen und die Kästchen in die entsprechenden Führungen einsetzen. Den Schalter oben den der Schalttafel einschalten (Abb. 3 - Punkt 2). Der Schrank ist bereits so eingestellt, dass eine Temperatur von ungefähr 45 °C nicht überschritten wird. DIE ERREICHBARE HÖCHSTTEMPERATUR DES SCHRANKS BETRÄGT 70 °C. Als erstes wird die Temperatur am Display angezeigt, die beim Einschalten im Schrankinneren besteht; in der Folge wird die eingestellte erreichbare Höchsttemperatur angezeigt. Zur Änderung dieser Temperatur die Taste SET (C) ungefähr 3 Sekunden lang drücken und danach die Temperatur über die Pfeiltaste nach oben (A) erhöhen oder über die Pfeiltaste nach unten (B) verringern. Die Temperatur von ungefähr 4040-45°C Achtung: Das neue Gerät sollte zunächst für einige Stunden eingeschaltet werden, damit eventuelle unangenehme Gerüche, die für das erstmalige Einschalten typisch sind, den Inhalt nicht verunreinigen. LEGA srl Costruzioni Apistiche – via Maestri del Lavoro 23 – 48018 Faenza www.legaitaly.com - Tel 054626834 054626834 – Fax 054628279 – P.iva 00043230390 36 / 56 12. WARTUNGSANLEITUNG Vor allen Reinigungs- oder Wartungsarbeiten muss immer die Stromversorgung getrennt werden. Für die Wartung der Geräteteile aus rostfreiem Stahl folgende Regeln beachten: • Die Oberflächen sorgfältig mit einem feuchten Lappen reinigen. Es können Wasser und Seife oder normale Reinigungsmittel verwendet werden. Die Reinigungsmittel dürfen keine Scheuermittel, Farbmittel oder Chlor enthalten. • Ausschließlich in Richtung der Satinierung scheuern. • Anschließend mit sauberem Wasser abspülen und sorgfältig trocknen. Die Reinigung ist wichtig, um die Merkmale des Gerätes unverändert zu halten. Achtung: Bei der Reinigung des Gerätes niemals einen direkten Wasserstrahl verwenden, damit kein Wasser eindringen und inneren Gerätebauteile beschädigen kann: Ausschließlich einen feuchten Lappen verwenden. Am elektrischen Teils des Schranks sollte regelmäßig das Stromversorgungskabel auf Schäden überprüft werden. Bei Verschleißspuren muss das Kabel muss ausgewechselt werden. Am Gerät regelmäßig (mindestens einmal pro Jahr) eine allgemeine Kontrolle vornehmen. LEGA srl Costruzioni Apistiche – via Maestri del Lavoro 23 – 48018 Faenza www.legaitaly.com - Tel 054626834 054626834 – Fax 054628279 – P.iva 00043230390 37 / 56 13. ABHILFE BEI MÖGLICHEN PROBLEMEN Nachstehend sind einige Störungen aufgeführt, die bei der Verwendung der Honig-Auftauschränke auftreten können. SYMPTOME Der Schrank wird nicht warm. MÖGLICHE URSACHEN Stromversorgung unterbrochen. Heizwiderstände defekt. Die Heiztemperatur in Schränken ist zu hoch. Die Heiztemperatur in Schränken ist zu niedrig. den Defekt am Thermostaten. Thermostatsonde verschmutzt. den Defekt am Gebläse. Lüftungsroste verstopft. Heizwiderstand defekt. Das Gebläse dreht nicht. Defekt am Gebläse. Gebläse blockiert. LEGA srl ABHILFE Kontrollieren, ob der Stecker richtig eingesetzt ist. Kontrollieren, ob der Schalter auf Position “Ι” steht. Kontrollieren, ob Spannung an der benutzten Steckdose anliegt. Das Gerät sofort von der Stromversorgung trennen und einen Fachtechniker benachrichtigen. Das Gerät sofort von der Stromversorgung trennen und einen Fachtechniker benachrichtigen. Die Thermostatsonde reinigen. Das Gerät sofort von der Stromversorgung trennen und einen Fachtechniker benachrichtigen. Die Lüftungsroste sorgfältig reinigen. Das Gerät sofort von der Stromversorgung trennen und einen Fachtechniker benachrichtigen. Das Gerät sofort von der Stromversorgung trennen und einen Fachtechniker benachrichtigen. Eventuelle Hindernisse, die den richtigen Betrieb des Gebläses behindern, entfernen. Costruzioni Apistiche – via Maestri del Lavoro 23 – 48018 Faenza www.legaitaly.com - Tel 054626834 054626834 – Fax 054628279 – P.iva 00043230390 38 / 56 14. SCHALTPLAN HTAC Thermometer Hauptschalter Zweiter Heizwiderstand Thermostat Motor Heizwiderständ e Klemmenbrett Fig. 8 – Elektrischer Schaltplan LEGA srl Costruzioni Apistiche – via Maestri del Lavoro 23 – 48018 Faenza www.legaitaly.com - Tel 054626834 054626834 – Fax 054628279 – P.iva 00043230390 39 / 56 15. ERSATZTEILE ERSATZTEILE Um eventuelle Ersatzteile für elektrische Bauteile zu erhalten, die LEGA S.r.l. kontaktieren und die auf dem Typenschild (Fig. 1) angegebenen Kenndaten, oder die Daten der möglichen Bauteile, wie folgt angeben: SICHERHEITSGLAS STÄRKE 60MM: MOTOR FFR 180/20-1RSN HT BBBLV: KUNSTSTOFF-STELLFÜSSE: HEIZWIDERSTAND 500 + 500W AUT. RÜCKSTELLUNG 90°: HALTERUNGEN INOX-ROSTE: SCHARNIERE FLÜGELTÜR: INOX-GRIFF: KONTROLLLAMPE 220V GRÜN FLV: ZWEIPOLIGER LEUCHTSCHALTER ROT MIT KAPPE: ZWEIPOLIGER LEUCHTSCHALTER GRÜN MIT KAPPE: THERMOSTAT TR86: THERMOSTAT-GEWINDERING: KLEMMENBRETT 220V: THERMOMETER: SCHWARZER REGLERKNOPF: 4D3830000 4D3890000 4D3920000 4D3930000 843014001 847005013 850007100 857002000 857006030 857006050 857007020 857008000 857009110 857027000 858000000 Beim Ausbau der Heizeinheit aus dem Schrank müssen die folgenden Anleitungen sorgfältig beachtet werden: Die Tür aushängen. LEGA srl Die Roste entnehmen. Den unteren Kanal ausbauen. Costruzioni Apistiche – via Maestri del Lavoro 23 – 48018 Faenza www.legaitaly.com - Tel 054626834 054626834 – Fax 054628279 – P.iva 00043230390 40 / 56 Die hintere Befestigung abschrauben. LEGA srl Am Griff anfassen und die Schalttafel nach außen ziehen. Costruzioni Apistiche – via Maestri del Lavoro 23 – 48018 Faenza www.legaitaly.com - Tel 054626834 054626834 – Fax 054628279 – P.iva 00043230390 41 / 56 1 INTRODUCTION The purpose of this manual is to supply information regarding: • • • • • • Use of the Honey Liquifier Cabinet and of the Drier Cabinet; Technical specifications; Handling, installation and assembly instructions; Information for the machine operators; Maintenance operations; Solutions for possible problems. This manual should be intended intended as forming an integral part of the Honey Liquifier Cabinet - Drier Cabinet and as such, it should be kept with care for future reference throughout the machine life. The manufacturer shall not be held responsible in the following cases: • not recommended use of the Honey Liquifier cabinet – Drier Cabinet; • incorrect installation or installation not in accordance with the procedures described in this manual; • power supply faults; • major failure to comply with maintenance requirements; • unauthorised changes or operations; • use of non-original spare parts or spare parts that are not model-specific; • failure to comply with the supplied instructions, either wholly or in part; Electric appliances can be dangerous for human health. The applicable laws and regulations regulations in force must be observed during the equipment installation and use. 2. IDENTIFICATION - MARKING In order to make the best use of this manual, the machine model in your possession must be identified according to the indications provided on the machine data plate. (1) (3) (2) (5) (4) (6) (7) 1 – Model 2 – Code 3 – Serial number 4 – Date of manufacturing 5 – Alternate voltage supply 6 – Line frequency 7 – Max absorbed power Figure 1 – Example of machine data plate LEGA srl Costruzioni Apistiche – via Maestri del Lavoro 23 – 48018 Faenza www.legaitaly.com - Tel 054626834 054626834 – Fax 054628279 – P.iva 00043230390 42 / 56 15. IDENTIFICATION – PRODUCT DEFINITION A) The Honey Liquifier Cabinet (item no. 6705) comes equipped with two shelves to support up to 72 1 kg honey jars or alternatively, two 25 kg cans. B) The Drier Cabinet (item no. 8230) comes equipped with the above-mentioned 2 shelves and with 10 additional drawers for pollen containment. 16. RECOMMENDED CABINET USE The Cabinets have been designed for honey containment and heating and for pollen drying. Any other use should be considered an improper - and therefore dangerous - use. The cabinet is factoryfactory-set not to exceed a temperature of approximately 45°C. THE MAXIMUM TEMPERATURE WHICH CAN BE REACHED BY THE CABINET IS 70°C. 17. TECHNICAL DESCRIPTION The LEGA Cabinets are made from steel; any other material used for equipment construction is guaranteed as food-safe. Operation The inside of the cabinet is heated via a thermostat-equipped electric resistor, which can be adjusted by the user from the outside, while a fan is used to circulate hot air inside the cabinet through specially designed ducts to guarantee uniform temperature distribution in all the equipment areas. 18. PART IDENTIFICATION 1 - Removable cover (if used in "drier" version) 2 - Control panel 3 - Heated interior (1) (2) (3) Figure 2 - Honey Liquifier Cabinet LEGA srl Costruzioni Apistiche – via Maestri del Lavoro 23 – 48018 Faenza www.legaitaly.com - Tel 054626834 054626834 – Fax 054628279 – P.iva 00043230390 43 / 56 19. CONTROL PANEL The instruments on the control panel (Fig. 3) are: 1 – Digital thermostat. 2 – Green Green bipolar switch. switch When the switch is operated (position “”, indicated by the switch green light lighting up), the electric resistors and fan are powered. The fan remains on throughout the switch operation time. 1 2 Fig. 3 - CONTROL PANEL HTAC 7.1 DIGITAL THERMOSTAT A B C Figura 4 - DIGITAL THERMOSTAT LEGA srl Costruzioni Apistiche – via Maestri del Lavoro 23 – 48018 Faenza www.legaitaly.com - Tel 054626834 054626834 – Fax 054628279 – P.iva 00043230390 44 / 56 20. POSITIONING After removing the equipment from its packaging, place it on a firm, flat and stable floor and proceed by slowly peeling off the white protective plastic film. The cabinet must then be precision-levelled by adjusting its feet using a spirit level. The support feet can be height-adjusted by turning. Position the cabinet making sure that the cooling slots located on the front side, below the control panel, are not covered. 21. STARTSTART-UP All the HTAC line models are pre-set for 120 V AC - 50/60Hz power input. The Cabinets described in this manual come equipped with a plug suitable for power line connection. Before starting up, check that: the line voltage matches the voltage specified on the equipment data plate (Fig. 1); in order to guarantee smooth operation, the input voltage must be within a range of ±6% of the rated value; • the electrical system to which the cabinet must be connected is suitably sized according to the rated electric power to install; • the electrical system to which the cabinet must be connected is built to comply with the applicable standards in force; • All the models described in this manual are equipped with an equipotential terminal designed to allow several cabinets belonging to one bank to be connected together, using a standard grounding wire (Fig. 4). The terminal strip is located in the rear part of the Honey Liquifier, as is the equipotential terminal. CAUTION! The manufacturer may not be held responsible responsible for any damages caused by poor or inefficient grounding, wrong installation, tampering, poor maintenance or inexperienced use of the system. 22. OPERATION INSTRUCTIONS – Honey Liquifier Cabinet (item (item 6705) LEGA srl Costruzioni Apistiche – via Maestri del Lavoro 23 – 48018 Faenza www.legaitaly.com - Tel 054626834 054626834 – Fax 054628279 – P.iva 00043230390 45 / 56 Install the two shelves (one at the bottom and one mid-height) and fill the cabinet with jars so that most of them is in contact with the surrounding air. For this reason, avoid stacking jars too close together. Alternatively, it is possible to place two 25 kg cans inside the cabinet. Power on via the main switch located on the control panel (fig. 3 - item 2). The cabinet is factoryfactory-set not to exceed a temperature of approximately 45°C. 70℃ ℃. THE MAXIMUM TEMPERATURE WHICH CAN BE REACHED BY THE CABINET IS 70 The first displayed temperature temperature value shows the temperature inside the cabinet upon powerpower-on; subsequently, the prepre-set value of the maximum temperature which can be reached is displayed. To change this temperature setting, press the SET (C) control and hold it for about 3 seconds; then press the button with the arrow pointing up (A) to increase the temperature degrees or the button with the arrow pointing down (B) to decrease them. Never exceed a temperature of approximately 4040-45°C 45°C Caution: Caution It is advisable to allow your new equipment to run empty for a few hours, to prevent any first-use smells from contaminating the product. 23. OPERATION INSTRUCTIONS – Drier Cabinet (item (item 8230) The pollen drier cabinet comes equipped with 10 extractable drawers with stainless steel mesh and frame. These drawers have an air intake on one side to help hot air forced circulation through the various drawers, starting from the bottom all the way to the top and leaving through the top wall. The drawers containing the pollen to dry must be introduced in their special guides, checking that there are alternately one air intake on the rear wall and one on the front wall, to ensure that air flows to the top in a crisscross pattern going homogenously through all the drawers. Lay pollen homogeneously in the 10 drawers and insert the drawers in their special guides. Power on via the main switch located on the control panel ((fig. 3 - item 2) The cabinet is factoryfactory-set not to exceed a temperature of approximately 45°C. THE MAXIMUM TEMPERATURE WHICH CAN BE REACHED BY THE CABINET IS 70°C. The first displayed temperature value shows the temperature inside the cabinet upon powerpower-on; subsequently, the prepre-set value of the maximum temperature which can be reached is displayed. To change this temperature setting, press the SET (C) control and hold it for about 3 seconds; then press the button with the arrow pointing up (A) to increase the temperature degrees or the button with the arrow pointing down (B) to decrease them. Never exceed a temperature temperature of approximately 4040-45°C. 45°C. Caution: Caution It is advisable to allow your new equipment to run empty for a few hours, to prevent any first-use smells from contaminating the product. 24. MAINTENANCE INSTRUCTIONS LEGA srl Costruzioni Apistiche – via Maestri del Lavoro 23 – 48018 Faenza www.legaitaly.com - Tel 054626834 054626834 – Fax 054628279 – P.iva 00043230390 46 / 56 Before carrying out any cleaning or maintenance operations, always unplug the machine from the power line. Carry out any stainless steel equipment part maintenance by complying with the following instructions: • clean the surfaces thoroughly with a damp cloth; water and soap or common detergents can be used as long as they do not contain any abrasives, staining agents or chlorine; • only wipe in the satin finish direction; • rinse with water only and wipe perfectly dry; Cleaning is important to ensure that the equipment characteristics are preserved. Caution: When cleaning the equipment, never use direct pressurised water jets which could cause infiltrations and damage the internal parts of the equipment. Exclusively use a damp cloth. Maintain the electrical parts of the cabinet by regularly checking that the electric input cable is intact; replace the cable if it shows signs of wear-and-tear. Arrange for general equipment overhauling at least once a year. LEGA srl Costruzioni Apistiche – via Maestri del Lavoro 23 – 48018 Faenza www.legaitaly.com - Tel 054626834 054626834 – Fax 054628279 – P.iva 00043230390 47 / 56 25. SOLUTIONS FOR POSSIBLE PROBLEMS The following are instances of malfunctioning that can be observed when Honey Liquifier Cabinets are used. FAULTS The cabinet will not heat up POSSIBLE CAUSES No power from line REMEDIES Check that the cabinet has been correctly plugged in. Check that switch is set to “Ι”. Check for line power supply to the socket used. Faulty resistors Cabinet interior overheating Cabinet heating interior Faulty thermostat. Dirty thermostat probe. insufficient Faulty fan Clogged ventilation grids Faulty resistor Fan not working Faulty fan Jammed fan LEGA srl Unplug the and contact sales centre. Unplug the and contact sales centre. device immediately a specialised afterdevice immediately a specialised after- Clean the thermostat probe. Unplug the device immediately and contact a specialised aftersales centre. Clean the grids thoroughly. Unplug the device immediately and contact a specialised aftersales centre. Unplug the device immediately and contact a specialised aftersales centre. Remove any objects that prevent correct fan operation. Costruzioni Apistiche – via Maestri del Lavoro 23 – 48018 Faenza www.legaitaly.com - Tel 054626834 054626834 – Fax 054628279 – P.iva 00043230390 48 / 56 26. HTAC WIRING DIAGRAM Thermometer Main switch Second resisttor Thermostat Motor Resistors Terminal strip Figure 8 – Wiring diagram LEGA srl Costruzioni Apistiche – via Maestri del Lavoro 23 – 48018 Faenza www.legaitaly.com - Tel 054626834 054626834 – Fax 054628279 – P.iva 00043230390 49 / 56 2 SPARE PARTS To purchase electrical spare parts, contact LEGA S.r.l. and quote your equipment's identification details contained in the data plate (Fig. 1) or the details of the required components listed here below: HARDENED INSULATION GLASS, THICKNESS 6 MM: MOTOR FFR 180/20-1RSN HT BBBLV: PLASTIC FEET: RESISTOR 500 + 500W AUT. RESET 90°: STAINLESS STEEL SHELF SUPPORTS: DOOR HINGES: S. STEEL HANDLE: GREEN INDICATOR LIGHT 220V FLV: BIPOLAR RED LIGHT SWITCH WITH COVER: BIPOLAR GREEN LIGHT SWITCH WITH COVER: THERMOSTAT TR86: THERMOSTAT RING NUT: TERMINAL STRIP 120V: THERMOMETER: BLACK CONTROL: 4D3830000 4D3890000 4D3920000 4D3930000 843014001 847005013 850007100 857002000 857006030 857006050 857007020 857008000 857009110 857027000 858000000 To remove the heating unit from the cabinet, strictly comply with the following instructions: Unhinge the door LEGA srl Remove the shelves Remove the bottom Costruzioni Apistiche – via Maestri del Lavoro 23 – 48018 Faenza www.legaitaly.com - Tel 054626834 054626834 – Fax 054628279 – P.iva 00043230390 50 / 56 Screw out the rear stop LEGA srl Pull out the control panel using the handle Costruzioni Apistiche – via Maestri del Lavoro 23 – 48018 Faenza www.legaitaly.com - Tel 054626834 054626834 – Fax 054628279 – P.iva 00043230390 51 / 56 DICHIARAZIONE DI CONFORMITA’ DECLARATION OF CONFORMITY / DÉCLARATION DE CONFORMITÉ / KONFORMITÄTSERKLÄRUNG Numero di matricola La ditta LEGA srl - Costruzioni Apistiche con sede in Faenza, Via Maestri del Lavoro 23, fornitrice della seguente macchina: art. 6705/8230 Armadietto Fondimiele / Essiccatoio Scaldamiele dichiara che essa è conforme a quanto prescritto dalle Direttive 2006/42/CE. LEGA srl - Costruzioni Apistiche with registered office in Faenza, Via Maestri del Lavoro 23, supplier of the machine: item 6705 / 8230 Honey liquifier cabinet Drier cabinet, declares that the above machinery is in compliance with the provisions of the Directive 2006/42/CE. L’entreprise LEGA srl - Costruzioni Apistiche, ayant son siège à Faenza, Via Maestri del Lavoro 23, productrice de la machine : art. 6705/8230 meuble chauffant séchoir déclare qu’elle est conforme aux prescriptions des directives 2006/42/CE. Das Unternehmen LEGA srl - Maschinen für den Imkerbedarf - mit Sitz in Italien, Faenza, Via Maestri del Lavoro 23, erklärt als Lieferbetrieb der folgenden Maschine: Art. 6705 / 8230 Honig-Auftauschrank Trockenschrank , dass diese Maschine konform zur Richtlinie 2006/45/CE ist. Faenza LEGA srl GARANZIA 24 MESI / 24 MONTHS WARRANTY / GARANTIE DE 24 MOIS / 2424-MONATIG GARANTIE La macchina ha garanzia 24 MESI dalla data di vendita. La garanzia è valida solo se al momento del ritiro della macchina da parte del nostro centro assistenza o di un tecnico autorizzato, autorizzato, si presenta la ricevuta fiscale o fattura, a testimonianza dell’avvenuto acquisto. The machinery is guaranteed 24 MONTHS starting from the date of sale. The guarantee is only valid if, when the machine is collected by our customer care or technical service service staff, the owner can produce proof of purchase in the form of a fiscal receipt or invoice. La machine est garantie pendant 24 MOIS à compter de la date de vente. La garantie n’est valable que si, lors du retrait de la machine par notre service après après-vente ou un technicien agréé, le reçu fiscal ou la facture est présenté comme preuve d’achat. Das Gerät ist 24 MONATE ab Verkaufsdatum durch Garantie gedeckt. Die Garantie ist nur dann gültig, wenn bei Abholung des Geräts durch unsere Servicestelle oder einen befugten Techniker der Zahlungsbeleg oder die Rechnung vorgelegt wird. LEGA srl Costruzioni Apistiche – via Maestri del Lavoro 23 – 48018 Faenza www.legaitaly.com - Tel 054626834 054626834 – Fax 054628279 – P.iva 00043230390 52 / 56 La garanzia comprende la riparazione o la sostituzione gratuita dei componenti della macchina riconosciuti difettosi di fabbricazione o nel materiale, dalla ditta Lega o da una persona espressamente autorizzata. La garanzia decade per i danni provocati da incuria, uso errato o non conforme alle avvertenze riportate nel manuale d’istruzioni, per incidenti, manomissioni, riparazioni errate o effettuate con ricambi non originali Lega, riparazioni effettuate da persone non autorizzate dalla ditta Lega srl, danni intervenuti durante il trasporto da e per il cliente. Sono escluse dalla garanzia tutti i componenti elettrici (motori elettrici, comandi ecc.), tutte quelle parti soggette ad un normale logorio e le parti estetiche. Tutte le spese di manodopera, d’imballo, spedizione e trasporto sono a carico del cliente. Qualsiasi pezzo difettoso sostituito, diverrà di nostra proprietà. Un eventuale guasto o difetto avvenuto nel periodo di garanzia o dopo lo scadere dello stesso, non dà in nessun caso diritto al cliente di sospendere il pagamento o a qualsiasi sconto sul prezzo della macchina. In ogni caso la ditta Lega srl non si assume alcuna responsabilità per danni derivanti dall’uso improprio della macchina. The guarantee includes free-of-charge repairing and replacement of any part of the machinery that is found to have manufacturing or material defects by the manufacturer or the manufacturer’s authorised person. This guarantee shall not apply to damages caused by negligence, misuse or use not in compliance with the directions contained in the instruction manual, as well as in case of accidents, alteration, tampering, wrong repairing or repairing with non-original parts, repairing by persons not authorised by Lega s.r.l. and damages during transport to/from the purchaser’s. All electric parts (electric motors, controls etc.) and parts exposed to normal wear and tear as well as aesthetic parts are also not covered by the guarantee. All labour, packing, forwarding and transport charges shall be borne by the purchaser. Any defective parts which have been replaced shall be retained by and become the property of LEGA S.R.L. Any breakdown or defect which should occur during the guarantee period or after its last date shall not in any case entitle the purchaser to suspend the payments nor to any discount off the price of the machine. In any case, Lega s.r.l. shall not be held responsible for any damages resulting from the incorrect use of the machinery. La garantie comprend la réparation ou le remplacement gratuit des composants de la machine reconnus comme défectueux (défauts de fabrication ou du matériau) par l’entreprise Lega ou par une personne expressément agréée. La garantie est annulée si les dommages ont été causés par la négligence, une utilisation incorrecte ou non conforme aux recommandations fournies dans le guide d’utilisation, des accidents, des modifications, des réparations incorrectes ou effectuées par des personnes non autorisées par Lega srl, dommages intervenus durant le transport en provenance et vers le client. Sont exclus de la garantie tous les composants électriques (moteurs électriques, commandes etc.), toutes les parties sujettes à une usure normale et les parties esthétiques. Tous les frais de main-d’œuvre, d’emballage, d’expédition et de transport sont à la charge du client. Toute pièce défectueuse remplacée devient notre propriété. Aucune panne éventuelle ni défaut se produisant durant ou après la période de garantie ne donne le droit au client d'interrompre le paiement ni de prétendre une quelconque remise sur le prix de la machine. Dans tous les cas, l’entreprise Lega srl décline toute responsabilité en cas de dommages dérivant d’une utilisation impropre de la machine. Die Garantie umfasst die Reparatur oder den kostenlosen Austausch der Geräteteile, deren Herstellungs- oder Materialmängel von der Firma Lega oder einer von ihr ausdrücklich befugten Person anerkannt wurden. Die Garantie verfällt bei Schäden, die durch Nachlässigkeit, falschen oder nicht den im Handbuch angeführten Anweisungen entsprechenden Gebrauch, durch Unfälle, mutwillige Änderungen, falsche Reparaturen oder Einsatz von Nicht-OriginalErsatzteilen von Lega, durch Reparaturen, die nicht von durch Lega srl befugtem Personal vorgenommen wurden bzw. beim Transport sowohl bei der Fahrt zum als auch vom Kunden entstehen. Ausgeschlossen von der Garantie sind alle Elektroteile (Elektromotoren, Steuerteile usw.), alle Verschleißteile und Ästhetikteile. Alle Kosten für Arbeitskräfte, Verpackung, Spedition und Transport gehen zulasten des Kunden. Alle ausgetauschten defekten Teile gehen in unser Eigentum über. Eventuelle Störungen oder Defekte, die während der Garantielaufzeit oder nach deren Ablauf auftreten, geben dem Kunden keinesfalls das Recht, die Zahlung aufzuheben bzw. irgendwelche Rabatte auf das Gerät zu erzielen. Die Firma Lega srl übernimmt auf jeden Fall keine Verantwortung für Schäden, die aus einem sachwidrigen Gebrauch des Geräts entstehe. LEGA srl Costruzioni Apistiche – via Maestri del Lavoro 23 – 48018 Faenza www.legaitaly.com - Tel 054626834 054626834 – Fax 054628279 – P.iva 00043230390 53 / 56 LEGA srl Costruzioni Apistiche – via Maestri del Lavoro 23 – 48018 Faenza www.legaitaly.com - Tel 054626834 054626834 – Fax 054628279 – P.iva 00043230390 54 / 56 LEGA srl Costruzioni Apistiche – via Maestri del Lavoro 23 – 48018 Faenza www.legaitaly.com - Tel 054626834 054626834 – Fax 054628279 – P.iva 00043230390 55 / 56 LEGA srl Costruzioni Apistiche – via Maestri del Lavoro 23 – 48018 Faenza www.legaitaly.com - Tel 054626834 054626834 – Fax 054628279 – P.iva 00043230390 56 / 56