1
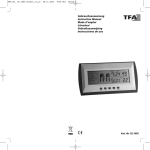
INTERRUPTOR HORARIO ASTRONÓMICO
ASTRO UNO
INSTRUCCIONES DE EMPLEO
Indicador de canal C1
permanente
Programa de vacaciones o festivos
Estado circuito C1
Formato de horas
12 horas
Indicador día
de la semana
Horario Invierno
Hora actual
SELECCIÓN DE IDIOMA
Pulsando “OK” entramos en MENU y con las teclas ∆ y ∇ seleccionamos
IDIOMA y pulsamos OK. Con las teclas ∆ y ∇ elegimos el idioma deseado y
validamos con la tecla “OK“ y volvemos a la pantalla principal.
ASIGNACIÓN DE ZONA
Pulsando la tecla OK entramos en MENU ZONA, pulsando otra vez OK entramos
en la lista de ciudades, y con las teclas ∆ y ∇ seleccionamos la ciudad más
próxima a la zona de instalación. Validamos con OK y la pantalla nos muestra
CORR. NO, y la hora de orto y ocaso alternativamente. Si deseamos variar el
horario de ocaso (encendido) y/o el horario de orto (apagado) que aparece en
pantalla seleccionamos SI con las teclas ∆ y ∇ y pulsando OK entramos en la
corrección de orto y aparece en pantalla CORR. ORTO, la hora del orto y en la
parte inferior 0:00, que nos indica el tiempo de corrección. Con las teclas ∆ y ∇
modificamos el dato aumentando o disminuyendo hasta 3 horas. Validamos con
OK y aparece CORR. OCAS y la hora de ocaso, repetimos la operación,
validamos con OK y pasamos a la pantalla principal.
Horario Verano
Escala de tiempo
Pantalla
0
3
6
9 12 15 18 21 24
ON
OFF
Incrementar o ascender
por el menú.
Accionamiento manual C1
Decrementar o descender
por el menú.
PARAMETROS PREDEFINIDOS
El interruptor sale de fábrica programado en el idioma del país, puesto en fecha y
hora oficial, seleccionada la primera ciudad de la lista alfabéticamente ordenada, y
con 2 programas preestablecidos.
Programa 01: C1 ON OCS (ocaso) todos los días de la semana
Programa 02: C1 OFF ORT (orto) todos los días de la semana
Periodo nocturno
on
OCASO
off
Validar opción de pantalla.
Acceder al menú
Retroceder
Visualización de:
hora orto / hora ocaso
cronograma
DESCRIPCIÓN
El ASTRO UNO es un interruptor horario diseñado para controlar cargas
luminosas en función de las horas de ortos (amanecer) y ocasos (anochecer).
Dispone de un programa que ajusta automáticamente el horario de encendido
(ocaso) y apagado (orto), sin necesidad de mantenimiento. La localización de la
posición geográfica se realiza seleccionando la ciudad más cercana a su
población de una lista de las ciudades más importantes de su país.
Su pequeño tamaño de tan solo 2 módulos, lo hacen ideal para su instalación en
cuadros con poco espacio disponible. El aparato dispone de 22 espacios de
memoria para un solo circuito que puede ser programado de forma astronómica o
con horarios fijos.
INSTALACIÓN
ATENCIÓN: La instalación y el montaje de los aparatos eléctricos debe ser
realizada por un instalador autorizado.
ANTES DE PROCEDER A LA INSTALACIÓN DESCONECTAR LA ALIMENTACIÓN.
El aparato está internamente protegido contra las interferencias por un circuito de
seguridad. No obstante, algunos campos especialmente fuertes pueden llegar a
alterar su funcionamiento. Las interferencias pueden evitarse si se tienen en
cuenta las siguientes reglas de instalación:
- El aparato no debe instalarse próximo a cargas inductivas
(motores, transformadores, contactores, etc. )
- Conviene prever una línea separada para la alimentación
(si es preciso provista de un filtro de red).
- Las cargas inductivas tienen que estar provistas de supresores de
interferencias (varistor, filtro RC).
Si el interruptor horario se usa en combinación con otros dispositivos en una
instalación, es necesario comprobar que el conjunto así constituido no genera
perturbaciones parásitas.
MONTAJE: Dispositivo de control electrónico de montaje Independiente en
armario de distribución, provisto de perfil simétrico de 35 mm, de acuerdo a la
norma EN 60715 (Rail DIN)
CONEXIÓN: Según esquema de conexiones
L
C1
1
2
3
N
PUESTA EN SERVICIO E INSTALACIÓN
En todos los apartados de programación se cumplen las siguientes reglas:
- Los datos a modificar se identifican porque parpadean.
- Cada pulsación de las teclas ∆ y ∇ incrementa o decrementa el dato que
parpadea. Si se mantiene pulsada la velocidad de incremento/decremento
pasa a ser de 5 unidades por segundo.
- Después que el último dato se confirma con OK o si no se pulsa ninguna tecla
durante más de 1 minuto el aparato vuelve al funcionamiento normal: la
pantalla muestra la hora actual, la fecha y el estado del circuito C1.
La hora de orto y ocaso puede ser visualizada desde el modo normal pulsando
“C”, mostrando la pantalla AST y la hora de orto y ocaso del día actual.
Para instalar el ASTRO UNO como interruptor horario astronómico, solo es
necesario entrar en MENU ZONA pulsando la tecla OK y seleccionar la
ciudad más próxima al lugar de instalación y validar con OK. Aparece en
pantalla CORR: NO y la hora de orto y ocaso (cambia automáticamente de
una a otra cada 5 segundos) correspondiente a la zona seleccionada. Si no
deseamos realizar ninguna corrección validamos con OK y ya tenemos el
interruptor programado con el circuito C1 en funcionamiento astronómico.
C1
P1
MANIOBRAS
PREDEFINIDAS
ORTO
P2
Estos programas permanecen en memoria aunque se realice un Reset.
Si alguno de estos programas no se ajustan a sus necesidades los puede
modificar o borrar, para ello pulsamos la tecla OK y entramos en MENU, con las
teclas ∆ y ∇ seleccionamos MENU PROGRAMA y pulsando de nuevo la tecla OK
aparece en pantalla PROG 01. Con las teclas ∆ y ∇ seleccionamos el número del
programa que queremos modificar o borrar y pulsamos OK. Aparece en pantalla el
número de programa y ENTRAR (ejemplo: PROG:02 ENTRAR). Nuevamente con
las teclas ∆ y ∇ seleccionamos ENTRAR si queremos modificar o BORRAR si
queremos eliminar ese programa. Si hemos elegido ENTRAR aparece en pantalla
el programa a modificar. Con las teclas ∆ y ∇ modificamos y validamos con OK. Si
elegimos BORRAR una vez que ha aparecido el programa en pantalla pulsamos
OK y eliminamos ese programa.
PUESTA EN HORA
Pulsando “OK “entramos en MENU, con las teclas ∆ y ∇ seleccionamos MENU
FECHA, validando con “OK“ entramos en FECHA AÑO, en pantalla aparecen
parpadeando los dígitos del año, con las teclas ∆ y ∇ se cambia el valor del año,
con la tecla “OK “ validamos el dato. De igual modo introducimos los datos de
MES, DÍA, DÍA DE LA SEMANA, HORA Y MINUTOS, al validar con la tecla “OK“
entramos en MENU ZONA.
CAMBIO DE ZONA GEOGRÁFICA
Si una vez programado el aparato deseamos cambiar la zona o la hora de orto y
ocaso entramos de nuevo en MENU ZONA y procedemos a cambiar los
parámetros necesarios de igual modo que en el apartado Asignación de Zona.
PROGRAMACIÓN
En modo normal pulsar la tecla OK y se accede a MENU, con las teclas ∆ y ∇
seleccionamos MENU PROGRAMA, Pulsamos OK y se muestra en pantalla
PROGRAMA PROG 01, si deseamos programar una maniobra en este programa
pulsamos OK y aparece en pantalla PROG 01 ENTRAR, volvemos a pulsar OK y
elegimos la maniobra que deseamos realizar entre: C1 ON, C1 OFF.
Validamos la selección con OK y seleccionamos el tipo de la maniobra, que puede
ser: Hora fija, Astronómica a la hora del Orto (ORT) o Astronómica a la hora del
ocaso (OCS).
MANIOBRA DE HORA FIJA
Si hemos seleccionado hora fija pulsamos OK e introducimos los datos de hora y
minutos, día o días de la semana en los que deseamos, aceptando o no, día a día,
en los que deseamos que se realice la maniobra y validamos con OK.
Si al validar el último día de la semana con la tecla OK mantenemos esta pulsada
seleccionamos esta maniobra como festivo, aparece en pantalla la palabra
FESTIVOS y el símbolo “ “
Al validar cualquier programa con OK, la pantalla nos muestra el siguiente
PROGRAMA.
MANIOBRA ASTRONÓMICA
Una vez elegida la maniobra entre C1 ON, C1 OFF, nos aparece el tipo de
maniobra a escoger. Seleccionamos la maniobra astronómica de orto (ORT) u
ocaso (OCS) que queremos realizar y nos aparece en pantalla la posibilidad de
corregir la hora de orto u ocaso seleccionada. Si estamos de acuerdo en que se
realice en la indicada en pantalla, dejamos la corrección a cero y validamos hora y
minutos con OK. Si deseamos corregirla en más o en menos, introducimos el
tiempo de corrección en hora y minutos (hasta ± 9 horas 59 minutos),
mostrándose en pantalla automáticamente la hora en la que se realizará la
maniobra., validamos con OK y a continuación seleccionamos el día o días de la
semana que deseamos que se realice esta maniobra.
Si al validar el último día de la semana con la tecla OK mantenemos esta tecla
pulsada seleccionamos esta maniobra como festivo, aparece en pantalla la
palabra FESTIVOS y el símbolo “
“.
ATENCIÓN: Si programamos alguna maniobra en FESTIVO, el programa
VACACIONES no puede utilizarse y es eliminado del menú quedando como
periodo FESTIVO.
Si programamos maniobras astronómicas (orto – ocaso) y de hora fija tenemos
que tener en cuenta que pueden solaparse ya que las maniobras astronómicas se
adelantan o atrasan durante el año, pudiéndose producir maniobras inadecuadas.
Por ejemplo: Queremos encender un escaparate al anochecer (maniobra
Astronómica) y que se apague a las 21:30 horas (maniobra Hora fija). Como la
maniobra astronómica de encendido se va adelantando durante el verano, llegará
un momento que anochece más tarde de las 21:30 horas y, por tanto, el
encendido se hace después de la hora programada como apagado, no
realizándose ningún apagado y permaneciendo encendido hasta una nueva orden
contraria.
Esta situación se puede solucionar programando otra maniobra más de apagado
de seguridad posterior a la hora del ocaso.
PRIORIDAD
En caso de que 2 maniobras contrarias coincidan en el mismo momento el
ASTRO UNO, siempre realizará la maniobra de OFF.
VISUALIZACIÓN DE LAS MANIOBRAS PROGRAMADAS
Pulsamos OK para entrar en MENU PROGRAMA, pulsamos nuevamente OK y la
pantalla cambia a PROGRAMA ENTRAR y al pulsar de nuevo OK entramos en
PROGRAMA PROG 01, pulsando sucesivamente las teclas ∆ y ∇ podemos ir
viendo todos los programas del 1 al 22.
CRONOGRAMA
Desde el modo normal pulsando 2 veces “C” aparece en pantalla C1, su estado
actual y el cronograma diario de las maniobras programadas para el circuito.
RESET. PUESTA A CERO
Al pulsar las cuatro teclas simultáneamente durante más de 3 segundos se borra
toda la programación existente, aparece la versión del equipo, y entra en el menú
IDIOMA. En memoria permanecen los 2 programas preestablecidos de fábrica.
MODIFICAR O BORRAR MANIOBRAS
Pulsamos OK para entrar en el MENU y con las teclas ∆ y ∇ seleccionamos
MENU PROGRAMA, nuevamente pulsamos OK y la pantalla cambia a
PROGRAMA PROG 01, con las teclas ∆ y ∇ seleccionamos el programa a
modificar o borrar y validamos con OK, apareciendo en pantalla el programa
seleccionado y PROG X ENTRAR, si deseamos modificarlo aceptamos con OK y
procedemos como en el apartado Programación. Si lo que queremos es borrar la
maniobra, con ∆ y ∇ seleccionamos BORRAR y validamos con OK.
ACCIONAMIENTO MANUAL
Se puede activar o desactivar temporalmente el circuito C1 desde el modo normal
pulsando la tecla ∆.
ACCIONAMIENTO MANUAL PERMANENTE
Entramos en MENU PERMANENT. Validando con OK, aparece en pantalla
PERMANENT C1: SI, con ∆ y ∇ seleccionamos: C1: SI ó C1: NO.
Para activar el modo permanente seleccionar la opción SI y validar con OK.
Para desactivar el modo permanente seleccionar la opción NO y validar con OK.
En modo permanente, el circuito C1 queda constantemente en la posición en la
que se encuentre, hasta que se desactive el modo permanente.
Estando activado el accionamiento permanente es posible cambiar su estado (de
ON a OFF o viceversa) con la tecla de accionamiento manual (
C1) sin
desactivar por ello el estado permanente.
En estado permanente no se realiza ninguna de las maniobras programadas.
Cuando el circuito está en estado permanente aparece en pantalla el símbolo
correspondiente (
).
PROGRAMACIÓN AVANZADA (FUNCIONES ESPECIALES) EXTRAS
CAMBIO DE HORARIO (ESTACIÓN) (ADELANTO RETRASO DE HORA)
Para entrar al MENU pulsar la tecla “OK “, con las teclas ∆ y ∇ buscamos la
opción EXTRAS. Validamos con “OK “y aparece en pantalla EXTRAS ESTACION,
pulsamos de nuevo “OK “y la pantalla muestra ESTACION: AUTO, con las teclas
∆ y ∇ seleccionamos entre las tres opciones posibles: AUTO, MANUAL y
DESACT. y validamos la opción escogida con “ OK “ .
(Si existiese una o varias maniobras programadas coincidentes en el periodo de
cambio horario estas se duplicaran o no se realizaran dependiendo del cual sea el
cambio horario).
AUTO (realiza automáticamente el cambio de horario el último domingo de marzo
y el último domingo de octubre a las 2:00 h y a las 3:00 h respectivamente).
Esta opción no permite cambios. Al elegir esta opción aparece en pantalla MENU
EXTRAS.
MANUAL (Permite elegir el día y hora para realizar el cambio de horario)
Al elegir esta opción aparece en pantalla EST I - V, el mes y la fecha del cambio
de invierno a verano, parpadeando la fecha correspondiente al mes, con las teclas
∆ y ∇ programamos el mes en el que deseamos que se realice el cambio.
Validamos con “OK “y parpadea la cifra correspondiente al día, seleccionamos del
mismo modo el día, la hora y los minutos y volvemos a validar con OK. Aparece
en pantalla EST V–I (verano – invierno) y del mismo modo programamos la fecha
y hora del cambio.
DESACTIVADO (DESACT) (no realiza el cambio de horario)
Si seleccionamos esta opción y validamos con “OK “no se realizará el cambio
horario y volvemos al MENU EXTRAS.
PROGRAMACIÓN DEL PERIODO FESTIVOS
Este menú solo aparece en pantalla si hemos programado alguna maniobra en
MENU PROGRAMACIÓN como FESTIVOS.
En este periodo el aparato solo realizará las maniobras programadas como
Festivos, ver apartado PROGRAMACIÓN: MANIOBRA HORA FIJA o MANIOBRA
ASTRONÓMICA. Durante el periodo FESTIVO aparecerá el símbolo (
).
Solo puede ser programado un periodo FESTIVOS. Entramos en MENU EXTRAS
FESTIVOS y la pantalla nos muestra FESTIVOS DESACT, esta opción nos
permite desactivar el programa de FESTIVOS.
Si deseamos introducir un programa de festivos pulsamos ∆ y ∇ y aparece en
pantalla FESTIVOS EDITAR, validamos con OK y programamos el INICIO por
el siguiente orden: mes, día, hora y minuto. A continuación programamos el FIN
del periodo de festivos de la misma forma y en el mismo orden.
PROGRAMA DE VACACIONES
En este periodo el aparato no realizará ninguna maniobra y aparece en pantalla el
símbolo (
).
Entramos en MENU EXTRAS VACACIONES y la pantalla nos muestra
VACACIONES DESACT, esta opción nos permite desactivar el programa de
vacaciones.
Si deseamos introducir un programa de vacaciones pulsamos ∆ y ∇ y aparece en
pantalla VACACIONES EDITAR, validamos con OK y programamos el INICIO por
el siguiente orden: mes, día, hora y minuto.
A continuación programamos el FIN del periodo de vacaciones de la misma forma
y en el mismo orden.
ATENCIÓN: Si programamos alguna maniobra como FESTIVO, el programa
VACACIONES no puede utilizarse y es eliminado del menú quedando como
periodo FESTIVO.
CONTADOR
Entramos en MENU EXTRAS CONTADOR nos aparece en pantalla CONTADOR
C1 y las horas en las que el canal C1 ha estado activado (Posición ON).
El contador sólo incrementará horas cuando el equipo tenga alimentación.
Para poner a cero la lectura del contador basta con situarnos en CONTADOR C1
y pulsar OK, nos aparece en pantalla BORRAR C1: y seleccionamos “SI” con las
teclas ∆ y ∇ validando con OK.
MODO 12H – 24H
Entramos en MENU EXTRAS 12H – 24H pulsamos OK y con las teclas ∆ y ∇
seleccionamos el modo en el que queremos visualizar la hora. Validamos la
selección con OK.
CONTRASTE
Entramos en el MENU EXTRAS CONTRASTE, pulsamos OK y aparece en
pantalla CONTRASTE y un número del 0 al 9 (6 por defecto) correspondientes al
contraste de la pantalla. Con las teclas ∆ y ∇ seleccionamos el grado de contraste
deseado y validamos con OK.
CARACTERISTICAS TECNICAS
Alimentación
Según indicación en el
aparato.
16 (10) A/250 V~
Poder de ruptura:
Cargas máximas recomendadas:
Lámparas incandescentes
Fluorescentes compensados
Halógenas baja tensión
Halógenas (230 V.)
Lámparas bajo consumo CFL
Lámparas bajo consumo DOWNLIGHTS
Leds
3000 W
1200 VA
2000 VA
3000 W
600 VA
400 VA
600 VA
AgSnO2 conmutado
6 VA (1 W aprox)
Tipo 1B, 1S, 1T y 1U.
22
ON, OFF, ASTRONÓMICA
Al segundo
≤ ± 1s/ día a 23 ºC
4 años sin alimentación (Pila
de Litio)
De –10 ºC a +45 ºC
IP 20 según EN 60529
II en montaje correcto
2
Software clase A
+ 100 ºC
2,5 kV
Contacto:
Consumo propio:
Tipo de acción:
Espacios de Memoria:
Tipos de maniobras.
Precisión de maniobra:
Precisión de marcha:
Reserva de marcha:
Temperatura de funcionamiento:
Tipo de protección:
Clase de protección:
Situación de contaminación:
Clase y estructura del soporte lógico:
Temperatura para el ensayo de la bola:
Tensión de impulso asignada
Tapa precintable
DIMENSIONES
65
35
88
02/12.2011
60
45
A016.26.55240
ORBIS TECNOLOGÍA ELÉCTRICA S.A.
Lérida, 61
E-28020 MADRID
Tel.: + 34 91 567 22 77
Fax + 34 91 571 40 06
E-mail: [email protected]
http://www.orbis.es
ASTRONOMIC TIME SWITCH
ASTRO UNO
INSTRUCTIONS FOR USE
Permanet
channel indicator
Vacations or
holiday program
C2 circuit status
C1 circuit status
Day of the week
indicator
12-hour
time format
Current time
Summer time
Winter time
Time scale
Screen
3
6
9 12 15 18 21 24
Decrease or move up menu /
C1 manual operation
Decrease or move down menu
Go back /Cronogram
Viewing dawn
and dusk times
Confirm screen option /
Access menu
DESCRIPTION
The ASTRO NOVA CITY is a time switch designed to control luminous loads in
function of dawn and dusk times. It includes a program that automatically adjusts
the dawn lighting-up and dusk switching-off times, without any need for
maintenance. The geographic position location is made by selecting the closest
city to your location from a list of the most important cities in your country.
Its small size of only two modules makes it ideal for installation on boards with little
available space. The unit incorporates 22 memory spaces for a single circuit that
can be programmed astronomically or with fixed times.
INSTALLATION
WARNING: The assembly and installation of the electric apparatus must be
carried out by an authorised installer.
THE ELECTRIC POWER MUST BE SWITCHED OFF BEFORE COMMENCING
INSTALLATION.
The unit is internally protected against interference by a security circuit. However,
certain especially strong fields could affect correct operation. Interference can be
avoided if the following installation rules are followed:
- The unit must not be installed close to inductive loads
(motors, transformers and contactors etc )
- It is recommended that a separate power line be employed
(fitted with a mains filter if necessary).
- Inductive loads must be fitted with interference suppressors (MOVs, RC filters).
If the time switch is used with other devices in an installation, it will be necessary
to verify that the overall assembly does not generate any parasitic interference.
INSTALLATION: Electronic control device, independently installed in a distribution
cabinet, fitted with 35-mm symmetric profile in accordance with EN 60715 (DIN
rail).
CONNECTION: In accordance with the wiring drawing
L
2
Program 02: C1 OFF RISE for all days of the week
Night period
3
SUNSET
off
C1
ON
OFF
1
Program 01: C1 ON SUNSET for all days of the week
on
0
C1
SELECTING LANGUAGE
Pressing OK enters MENU and with the ∆ and ∇ keys select LANGUAGE,
confirming with OK. The ∆ and ∇ keys are used to select the desired language,
confirming with OK and returning to the main screen.
ZONE ASSIGNMENT
Pressing OK enters the MENU ZONE, pressing it again enters the city list, the ∆
and ∇ keys are used to select the closest city to the installation zone. Confirm with
OK and the screen displays CORR. NO and the dawn and dusk rimes
alternatively. If the displayed dusk (switch-on) and/or dawn (switch-off) times are to
be modified, "YES” is selected with the ∆ and ∇ keys, pressing OK to confirm,
dawn correction is entered and the screen displays CORR. RISE the dawn time
and 0:00 in the lower section, which indicates the correction time. Using the ∆ and
∇ keys the value is modified increasing or decreasing it up to three hours. Confirm
with OK to display CORR. SUNSET and the dusk time, the operation is repeated,
confirmed with OK and returning to the main screen.
PREDEFINED PARAMETERS
The time switch leaves the factory programmed in the country language, set to the
official country date and time, with the zone set to the first alphabetical city to the
list, and 2 pre-established programs.
N
PUTTING INTO SERVICE AND INSTALLATION
All programming sections comply with the following rules:
- The data to be modified is identified by flashing.
- Each press of the ∆ and ∇ keys increases or decreases the flashing data. If it is
maintained pressed, the increase/decrease speed becomes five units per second.
- When the last data item has been confirmed with OK or, if no keys are pressed
for at least one minute, the unit will return to normal operation, with the current
time and date shown on the screen, together with circuit C1 status.
The dawn and dusk times can be displayed in normal mode by pressing “C”, which
shows AST screen, together with current dawn and dusk times.
To install the ASTRO UNO as an astronomic time switch, it is only necessary to
enter the ZONE MENU, pressing the OK key and selecting the city closest to the
installation and confirm with OK: The screen displays CORR: NO and the RISE
and SUNSET times (automatically changes from one to another every five
seconds) corresponding to the selected zone. if no corrections are to be
performed, confirm with OK and the switch is programmed with circuit C1 in
astronomic operation
.
P1
PREDEFINED
OPERATIONS
RISE
P2
These programs remain in memory even if a reset is performed.
If any of these programs is not suitable, it can be modified or deleted by pressing
OK and entering the MENU ZONE, selecting PROGRAM MENU with the ∆ and ∇
keys and pressing OK again to display PROG 01. The program to be modified or
deleted in selected with the ∆ and ∇ keys and OK is pressed. The program
number is displayed on the screen with ENTER (example: PROG:02 ENTER).
Again with the ∆ and ∇ keys ENTER is selected if the program is to be modified or
DELETE if it is to be eliminated. If ENTER has been selected, the program to be
modified will be displayed. The ∆ and ∇ keys are used to modify and OK to
confirm. If DELETE is selected, once the program has appeared on the screen,
OK is pressed and the program is deleted.
SETTING THE TIME
Pressing OK enters the MENU ZONE and the ∆ and ∇ keys are used to select D
MENU DATE, confirmed with OK to enter YEAR DATE with the year digits flashing
on the screen and the ∆ and ∇ keys are used to change the year value with OK
confirming the entered digits. The MONTH, DAY, DAY OF THE WEEK, TIME and
MINUTES are similarly entered, confirming with OK to enter in ZONE.
CHANGING THE GEOGRAPHIC ZONE
If, once the unit is programmed we wish to change the zone, the dawn or dusk
times, MENU ZONE is entered again and the necessary parameters are changed
in the same way as in the Zone Assignment section.
PROGRAMMING
In normal mode press the OK key to access the MENU ZONE and select MENU
PROGRAM with the ∆ and ∇ keys. OK is pressed and PROGRAM
PROG 01 ENTER is displayed onscreen, press OK again and select the operation
to be performed either C1 ON or C1 OFF. Confirm the selection with OK and
select the operation type, which may be: Fixed time, Dawn (RISE) astronomic time
or Dusk (SUNSET) astronomic time.
FIXED TIME OPERATION
If fixed time is selected, press OK and enter the hour and minutes, day or days of
the week information in those desired accepting or not, day by day, in those for
which the operation is to be performed, confirming with OK. If, when confirming the
day of the week with the OK key, this is maintained pressed, the operation will be
selected as a holiday, the word FESTIVE is displayed on the screen, together with
the symbol “ ···· ” and confirm with OK, the screen will display PROGRAM PROG
02.
ASTRONOMIC OPERATION
When the operation is selected either C1 ON or C1 OFF, the type of operation to
choose appears the type of operation to choose is displayed. The dawn (RISE) or
dusk (SUNSET) operation that is to be performed is selected and the screen
displays the possibility to correct the time for the displayed dawn or dusk time. If
we agree with the screen display the correction is left at zero and the hours and
minutes are confirmed with OK. If it is to corrected by more or less, the correction
time is entered in hours and minutes (up to ± 9 hours and 59 minutes),
automatically displaying the time at which the operation is to be performed, confirm
with OK then select the day or days of the week on which this operation is to be
carried out.
If, on confirming the last day of the week with the OK key, this is maintained
pressed, the operation will be selected as a holiday, the word FESTIVE is
displayed on the screen, together with the symbol “
”.
WARNING: If an operation is programmed on a FESTIVE, the HOLIDAYS
program cannot be used and is removed from the menu remaining as a
FESTIVE period.
If astronomic (dawn - dusk) operations are programmed in the same circuit and
fixed time, they could overlap since astronomic operations move forward and
backward during the year and could lead to incorrect operations.
For example: A shop window lights are to be switched on at nightfall (astronomic
operation) and are to be switched off again at 21:30 (fixed time operation). Since
the astronomic switch-on operation is moved forward during summer, there will be
a time when dusk will fall after 21:30 and the switch-on will occur after the
programmed switch-off time so that no actual switch-off will occur and the lights
will remain on until another switch-off command.
This situation can be resolved by putting the two circuits in series or by
programming another switch-off operation after the time of dusk.
MODIFYING OR DELETING OPERATIONS
Press OK to enter the MENU ZONE and use the ∆ and ∇ keys to select MENU
PROGRAM, press OK again and the screen changes to PROGRAM
PROG 01, use the ∆ and ∇ keys to select the program to be modified or deleted
and confirm with OK, which will display the selected program on the screen,
together with PROG X ENTER confirm with OK it is to be modified than proceed
as in section Programming. If the operation is to be deleted, use the ∆ and ∇ keys
to select DELETE and confirm with OK.
The counter will only increase hours when the equipment is powered up.
In order to reset the counter with COUNTER C1 displayed, simply pressing OK
will display DELETE C1, select YES with the ∆ and ∇ keys and confirm with OK.
12H - 24H MODES
Enter the 12H – 24H MENU EXTRAS, press OK and select the desired time
display mode with the ∆ and ∇ keys. Confirm the selection with OK.
CONTRAST
Enter the MENU EXTRAS CONTRAST, press OK, which displays the CONTRAST
screen, together with a number between 0 and 9 (default 6) corresponding to
screen contrast. The ∆ and ∇ keys are used to select the desired level of contrast
and confirm with OK.
TECHNICAL SPECIFICATIONS
Power supply
Switching power:
Maximum recommended loads:
Incandescent lamps:
Fluorescent lamps
Low voltage halogen lamps
Halogens (230 V)
Low-consumption lamps
Downlights
Leds
MANUAL OPERATION
Channel 1 can be temporarily enabled or disabled from normal mode. Press ∆.
3000 W
1200 VA
2000 VA
3000 W
600 VA
400 VA
600 VA
Contact:
Own consumption:
Assigned pulse voltage
Type of action:
Memory spaces:
Types of operation
Operation precision:
Operation precision:
Ball test temperature:
Operation battery backup:
Operating temperature:
Protection type:
Protection class:
AgSnO2 switched
6 VA (1 W approx)
2.5 kV
Type 1B, 1S, 1T and 1U.
22
ON OFF ASTRONOMIC
One second
≤ ± 1sec/ day at 23ºC
+100ºC.
Four years without power (lithium battery)
From -10ºC to +45ºC
IP 20 in accordance with EN 60529
II in accordance with EN 60335 correctly
installed
Contamination situation:
Normal
Logic support class and structure:
Software class A
Sealable cover
PERMANENT MANUAL OPERATION
Enter PERMANENT MENU. Confirm with OK and PERMANENT C1: YES appears
onscreen, ∆ and ∇ are used to select C1: SI or C1: NO.
In order to activate permanent mode select the YES option and confirm with OK.
In order to deactivate permanent mode select the NO option and confirm with OK.
In permanent mode, circuit C1 remains constantly in the current position until this
permanent mode is deactivated.
When permanent mode is activated, it is possible to change its state (from ON to
OFF or vice versa) with the manual operation key (
C1) without deactivating
permanent mode.
No programmed operations are executed in permanent mode. The corresponding
symbol is displayed when the circuit is in permanent mode ( )
DIMENSIONS
35
88
ADVANCED PROGRAMMING (SPECIAL FUNCTIONS) EXTRAS
TIMING CHANGE (SEASON) (PUTTING CLOCKS FORWARDS/BACKWARDS)
Press OK to enter the MENU and use the ∆ and ∇ keys to select the EXTRAS
option. Confirm with OK and EXTRAS SEASON will appear on the screen, press
OK again and the screen displays SEASON: AUTO and the ∆ and ∇ keys are
used to select one of the three options. AUTO, STOP and MANUAL and confirm
the selected option with OK.
(If there is one or more programmed operations coinciding with the time change
period, these will be duplicated or are not performed depending on the time
change).
AUTO (the time change is automatically carried out on the last Sundays in March
and October at 02:00 and 03:00 respectively.
This option does not permit changes. When this option is chosen MENU EXTRAS
is displayed.
MANUAL (allows day and time to be chosen for the time change).
When this option is chosen EST WÆS is displayed, together with the month and
change date from winter to summer, with the date corresponding to the month
flashing and the ∆ and ∇ keys are used to program the month in which the time
change is to occur. Confirm with OK and the day figure flashes and the day, hour
and minutes are selected in the same manner, confirming with OK. EST SÆW
(summer – winter)is displayed and the date and time are programmed in the same
fashion.
STOP (no time change is made).
If this option is selected and confirmed with OK, no time change is performed and
MENU EXTRAS is entered.
As indicated on unit
16 (10) A/250 Vac
65
60
45
PRIORITY
In a situation in which two operations coincide at the same time, the ASTRO UNO
will always perform the OFF operation.
DISPLAYING THE PREOGRAMMED OPERATIONS
Press OK to enter the MENU PROGRAM, press OK again and the careen
changes to ENTER PROGRAM and again pressing OK the PROGRAM PROG 01
is entered and all programs from 1 to 22 can be displayed using the ∆ and ∇ keys.
TIMING DIAGRAM
Pressing “C” twice in normal mode C1 is displayed on the screen, together with its
status and timing diagram for the operations programmed in this circuit.
RESET ZEROING
When all four keys are pressed at the same time for more than three seconds, the
current programming is deleted, the equipment version is shown and the
LANGUAGE menu is entered. The two factory set programmes remain in memory.
PROGRAMMING THE FESTIVE PERIOD
In this period, the unit only performs the operations programmed as FESTIVES,
see the PROGRAMMING section.
FIXED TIME OR ASTRONOMIC OPERATION The (
) symbol is displayed
during the FESTIVE period.
This menu only appears on the screen if operations have been programmed in the
PROGRAMMING MENU as FESTIVE.
Only one FESTIVE period can be programmed. The MENU EXTRAS FESTIVE is
entered and the screen displays FESTIVE STOP, which enables the FESTIVE
program to be disabled.
If a holiday program is to be entered, press ∆ and ∇ and FESTIVE EDIT is
displayed, confirm with OK and the INITIAL is programmed in the following order:
month, day, hour and minutes.
Then the holiday period END is programmed is the same way and in the same
order.
HOLIDAYS PROGRAM
No operations are performed in this period and the (
) symbol is displayed.
The MENU EXTRAS HOLIDAYS is entered and the screen displays HOLIDAYS
NOT USE, which enables the holidays program to be disabled.
If a holidays program is to be entered, press ∆ and ∇ and HOLIDAYS EDIT is
displayed, confirm with OK and the INITIAL is programmed in the following order:
month, day, hour and minutes.
Then the vacations period END is programmed is the same way and in the same
order.
WARNING: If an operation is programmed on a FESTIVE, the HOLIDAYS
program cannot be used and is removed from the menu remaining as a
FESTIVE period.
COUNTER
Entering in MENU EXTRAS COUNTER will show COUNTER C1 onscreen,
together with the hours that the C1 channel has been activated (ON position).
02/12.201
A016.26.55240
ORBIS TECNOLOGÍA ELÉCTRICA S.A.
Lérida, 61
E-28020 MADRID
Tel.: + 34 91 567 22 77
Fax + 34 91 571 40 06
E-mail: [email protected]
http://www.orbis.es
ASSIGNATION DE ZONE
INTERRUPTEUR HORAIRE ASTRONOMIQUE
ASTRO UNO
MODE D’EMPLOI
Indicateur de canal C1
permanent
En appuyant sur la touche OK nous entrons dans MENU ZONE, en appuyant à nouveau sur OK
nous entrons dans la liste de villes, avec les touches ∆ et ∇ nous sélectionnons la ville la plus
proche de la zone d'installation. Nous validons avec OK et l'écran nous montre CORR. NON, et
l'heure de lever et de coucher alternativement. Si nous souhaitons varier l'horaire de coucher
(allumé) et/ou l'horaire de lever (éteint) qui apparaît à l’écran nous sélectionnons OUI avec les
touches ∆ et ∇ et en appuyant sur OK nous entrons dans la correction de lever et il apparaît
dans l’écran CORR. LEVER, l'heure du lever et dans la partie inférieure 0:00 qui nous indique le
temps de correction. Avec les touches ∆ et ∇ nous modifions la donnée en augmentant ou en
diminuant jusqu'à 3 heures. Nous validons avec OK et CORR.COUCH. et l'heure de coucher
apparaissent, nous répétons l'opération, nous validons avec OK et nous passons à l'écran
principal.
Programme de vacances ou fériés
PARAMETRES PREDEFINIS
Etat circuit C1
Format d'heure
12 heures
Indicateur jour
de la semaine
Heure hiver
L'interrupteur horaire est programmé d'usine en langue du pays, mis à la date et à heure
officielle, sélectionnée la première ville de la liste par ordre alphabétique, et avec 2 programmes
préétablis.
Programme 01: C1 ON OCS (coucher) tous les jours de la semaine
Programme 02: C1 OFF ORT (lever)
tous les jours de la semaine
Heure actuelle
Heure été
Période nocturne
on
COUCHER
off
C1
Echelle de temps
Ecran
0
3
6
9 12 15 18 21 24
ON
OFF
Augmenter ou monter
par le menu
Actionnement manuel C1
1
2
3
4
5
6
7
Diminuer ou descendre
par le menu
C1
C
Aller en arrière
OK
MENU
Valider option d'écran
Accéder au menu
Visualisation de :
Heure lever/ heure coucher
chronogramme
P1
MANŒUVRES
PREDEFINIES
LEVER
P2
Ces programmes restent en mémoire bien qu'un Reset soit réalisé.
Si un de ces programmes ne s'adapte pas à vos nécessités vous pouvez le modifier ou l’effacer,
pour cela nous appuyons sur la touche OK et nous entrons dans MENU ZONE, avec les touches
∆ et ∇ nous sélectionnons MENU PROGRAMME et en appuyant à nouveau sur la touche OK,
PROG 01 apparaît à écran. Avec les touches ∆ et ∇ nous sélectionnons le numéro du
programme que nous souhaitons modifier ou effacer et nous appuyons sur OK. Le numéro du
programme et ENTRER apparaissent à l’écran (exemple : PROG:02 ENTRER). A nouveau avec
les touches ∆ et ∇ nous sélectionnons ENTRER si nous souhaitons modifier ou EFFACER si
nous souhaitons éliminer ce programme. Si nous avons choisi ENTRER le programme à
modifier apparaît à écran. Avec les touches ∆ et ∇ nous modifions et nous validons avec OK. Si
nous choisissons EFFACER une fois que le programme est apparu à l’écran nous appuyons sur
OK et nous éliminons ce programme.
MISE A L’HEURE
DESCRIPTION
L’ASTRO UNO est un interrupteur horaire conçu pour contrôler les charges lumineuses en
fonction des heures de levers (aube) et de couchers (crépuscule). Il dispose d'un programme
qui ajuste automatiquement l'horaire d'allumage (coucher) et d’extinction (lever), sans nécessité
de maintenance. La localisation de la position géographique se réalise en sélectionnant la ville la
plus proche à la votre d’une liste des villes plus importantes de votre pays.
Sa petite taille de seulement 2 modules, le rend idéal pour son installation dans des tableaux
avec peu d’espace disponible. L'appareil dispose de 22 espaces de mémoire dans un seul
circuit qui peut être programmé de façon astronomique ou avec des horaires fixes.
En appuyant sur “OK“ nous entrons dans MENU ZONE et avec les touches ∆ et ∇, nous
sélectionnons MENU DATE, en validant avec “OK“ nous entrons dans DATE ANNEE, dans
l’écran les nombres simples de l'année apparaissent en clignotant, avec les touches ∆ et ∇ nous
changeons la valeur de l'année, avec la touche “OK“ nous validons la donnée. De la même façon
nous introduisons les données de MOIS, JOUR, JOUR DE LA SEMAINE, HEURE ET
MINUTES, en validant avec la touche “OK“ nous entrons dans MENU ZONE.
CHANGEMENT DE ZONE GEOGRAPHIQUE
Si une fois l'appareil programmé nous souhaitons changer la zone, l'heure de lever ou de
coucher nous entrons à nouveau dans MENU ZONE et nous procédons à changer les
paramètres nécessaires de la même façon que dans l’aparté Assignation de Zone.
PROGRAMMATION
INSTALLATION
ATTENTION : L'installation et le montage des appareils électriques doivent être réalisés par un
installateur autorisé.
AVANT DE PROCEDER A L’INSTALLATION DECONNECTER L’ALIMENTATION.
L'appareil est internement protégé contre les interférences par un circuit de sécurité. Cependant,
certains champs particulièrement forts peuvent arriver à altérer son fonctionnement. Les
interférences peuvent être évitées si les règles d'installation suivantes sont tenues en compte:
- L'appareil ne doit pas s'installer à proximité de charges inductives
(moteurs, transformateurs, contacteurs, etc. )
- Il convient de prévoir une ligne séparée pour l'alimentation
(si cela est nécessaire pourvue d'un filtre de réseau).
- Les charges inductives doivent être pourvues de suppresseurs d’interférences
(varistor, filtre RC).
Si l'interrupteur horaire s'emploie en combinaison avec d'autres dispositifs dans une installation,
il est nécessaire de vérifier que l’ensemble ainsi constitué ne génère pas de perturbations
parasites.
MONTAGE : Dispositif de contrôle électronique de montage Indépendant dans une armoire de
distribution, pourvue de profil symétrique de 35 mm, conformément à la norme EN 60715 (Rail
DIN)
CONNEXION : Selon schéma de connexions
L
C1
1
2
3
N
MISE EN SERVICE ET INSTALLATION
Dans tous les apartés de programmation, les règles suivantes s'accomplissent:
- Les données à modifier s’identifient parce qu’elles clignotent.
- Chaque pulsation des touches ∆ et ∇ augmente ou diminue la donnée qui clignote. Si la
vitesse d’augmentation / diminution se maintient appuyée, elle passe à être de 5 unités par
seconde.
- - Après la confirmation de la dernière donnée avec OK ou si aucune touche n'est appuyée
pendant plus de 1 minute, l'appareil revient au fonctionnement normal : l'écran montre
l’heure actuelle, la date et l'état du circuit C1.
L'heure de lever et de coucher peut être visualisée depuis le mode normal en appuyant sur “C”,
l'écran montrant ainsi AST et l'heure de lever et le coucher du jour actuel.
Pour installer ASTRO UNO comme interrupteur horaire astronomique, il suffit d'entrer
dans le MENU ZONE en appuyant sur la touche OK et sélectionner la ville la plus proche
du lieu d'installation et valider avec OK. Il apparaît à l’écran CORR : NON et l'heure de
lever et de coucher (il change automatiquement de l'une à l'autre toutes les 5 secondes)
correspondant à la zone sélectionnée. Si nous ne souhaitons réaliser aucune correction,
nous validons avec OK et nous avons sans plus l'interrupteur programmé avec le circuit
C1 en fonctionnement astronomique.
SELLECTION DE LANGUE
En appuyant sur “OK“ nous entrons dans MENU et avec les touches ∆ et ∇ nous sélectionnons
LANGUE et nous appuyons sur OK. Avec les touches ∆ et ∇ nous choisissons la langue
souhaitée et nous validons avec la touche “OK“ et nous revenons à l'écran principal.
En mode normal appuyer sur la touche OK pour accéder au MENU, avec les touches ∆ et ∇
nous sélectionnons MENU PROGRAMME. Nous appuyons sur OK et PROGRAMME PROG 01
apparaît à l’écran, si nous souhaitons programmer une manœuvre dans ce programme nous
appuyons sur OK et l’écran PROG 01 ENTRER apparaît à l’écran, nous appuyons à nouveau
sur OK et nous choisissons la manœuvre que nous souhaitons réaliser entre: C1 ON, C1 OFF.
Nous validons la sélection avec OK et nous sélectionnons le type de la manœuvre, qui peut être
:Heure fixe, Astronomique à l'heure du Lever (LEV) ou Astronomique à l'heure du Coucher
(COUCH).
MANOUVRE D’HEURE FIXE
Si nous avons sélectionné heure fixe nous appuyons sur OK et nous introduisons les données
d'heure et minutes, jour ou jours de la semaine que nous souhaitons, en acceptant ou non, jour
à jour, pour ceux que nous souhaitons que la manœuvre soit réalisée et nous validons avec OK.
Si en validant le dernier jour de la semaine avec la touche OK nous maintenons celle-ci
appuyée, nous sélectionnons cette manœuvre comme férié, le mot FERIES et le symbole “
“
En validant n’importe quel programme avec OK, l l'écran nous montre le PROGRAMME suivant.
MANOEUVRE ASTRONOMIQUE
Une fois choisie la manœuvre entre C1 ON, C1 OFF, le type de manœuvre à
choisir apparaît. Nous sélectionnons la manœuvre astronomique de lever (LEV) ou
de coucher (COUCH) que nous souhaitons réaliser et la possibilité de corriger
l'heure de lever ou de coucher sélectionnée apparaît à l’écran,. Si nous sommes
d'accord pour qu’elle se réalise avec celle indiquée à l’écran, nous laissons la
correction à zéro et nous validons heure et minutes avec OK. Si nous souhaitons
la corriger en plus ou moins, nous introduisons le temps de correction en heure et
minutes (jusqu'à ± 9 heures 59 minutes), l’écran montrant alors automatiquement
l'heure à laquelle la manœuvre sera réalisée, nous validons avec OK et ensuite
nous sélectionnons le jour ou les jours de la semaine pour lesquels nous
souhaitons que cette manœuvre soit réalisée.
Si en validant dernier jour de la semaine avec la touche OK nous maintenons
cette touche appuyée, nous sélectionnons cette manœuvre comme de férié, le mot
FERIE et le symbole “
“ apparaissent à l’écran.
ATTENTION : Si nous programmons une manœuvre en FERIE, le programme
VACANCES ne peut pas s’utiliser et il est éliminé du menu en restant comme
période FERIE.
Si nous programmons des manœuvres, dans un même circuit, astronomiques
(lever – coucher) et d'heure fixe nous devons tenir en compte qu'elles peuvent se
chevaucher étant donné que les manœuvres astronomiques s'avancent ou se
retardent pendant l'année, des manœuvres inadéquates pouvant se produire.
Par exemple : Nous voulons allumer l’éclairage dune vitrine au crépuscule
(manœuvre Astronomique) et qui s'éteigne à 21:30 heures (manœuvre Heure
fixe). Comme la manœuvre astronomique d'allumage s'avance pendant l'été, il
arrivera un moment où il commencera à faire nuit plus tard de 21:30 heures et, par
conséquent, l'allumage se fait après l'heure programmée comme éteindre, aucune
extinction n'étant réalisée et en restant allumé jusqu'à un nouvel ordre contraire.
Cette situation peut se résoudre en programmant une autre manœuvre de plus
d’extinction de sécurité postérieure à l'heure du coucher.
PRIORITE
Au cas où 2 manœuvres contraires coïncident au même moment ASTRO UNO,
réalisera toujours la manœuvre d'OFF.
VISUALISATION DES MANOEUVRES PROGRAMMEES
Nous appuyons sur OK pour entrer dans MENU PROGRAMME, nous appuyons à
nouveau sur OK et l'écran change à PROGRAMME ENTRER et en appuyant à
nouveau sur OK, nous entrons dans PROGRAMME PROG 01, en appuyant
successivement sur les touches ∆ et ∇ nous pouvons voir tous les programmes du
1 au 22.
CHRONOGRAMME
Depuis le mode normal en appuyant 2 fois sur “C”, apparaît à l’écran C1, son état
actuel et le chronogramme quotidien des manœuvres programmées dans ce
circuit.
RESET. MISE A ZERO
En appuyant sur les quatre touches simultanément pendant plus de 3 secondes
toute la programmation existante s'efface, la version de l’appareil apparait, et nous
entrons dans le menu LANGUE. Les 2 programmes préétablis d’usine restent dans
la mémoire.
MODIFIER OU EFFACER DES MANOEUVRES
Nous appuyons sur OK pour entrer dans le MENU ZONE et avec les touches ∆ et
∇ nous sélectionnons MENU PROGRAMME, nous appuyons à nouveau sur OK et
l'écran change à PROGRAMME PROG 01, avec les touches ∆ et ∇ nous
sélectionnons le programme à modifier ou à effacer et nous validons avec OK,
apparaissant alors à l’écran le programme sélectionné et PROG X ENTRER, si
nous souhaitons le modifier, nous acceptons avec OK et nous procédons comme
dans l’aparté Programmation. Si ce que nous souhaitons est effacer la manœuvre,
avec ∆ et ∇ nous sélectionnons EFFACER et nous validons avec OK.
ACTIONNEMENT MANUEL
Nous pouvons activer ou désactiver temporairement le circuit C1 depuis le mode
normal appuyant sur la touche ∆.
ACTIONNEMENT MANUEL PERMANENT
Nous entrons dans MENU PERMANENT. En validant avec OK, PERMANENT C1 :
OUI apparaît à l’écran, avec ∆ et ∇ nous sélectionnons: C1: SI ou C1: NO.
Pour activer le mode permanent sélectionner l’option SI et valider avec OK.
Pour désactiver le mode permanent sélectionner l’option NO et valider avec OK.
En mode permanent, le circuit C1 reste toujours dans la position dans laquelle il se
trouve, jusqu’à la désactivation du mode permanent.
Avec l'actionnement permanent activé il est possible de changer son état (de ON à
OFF ou vice versa) avec la touche d'actionnement manuel ( C1) sans désactiver
pour cela l'état permanent.
Dans l’état permanent aucune des manœuvres programmées ne se réalise.
Quand un circuit est en état permanent le symbole correspondant (
) apparaît à
l’écran.
PROGRAMMATION AVANCEE (FONCTIONS SPECIALES) EXTRAS
CHANGEMENT D'HORAIRE (STATION) (AVANCEMENT RETARDEMENT
D’HEURE)
Pour entrer dans le MENU appuyer sur la touche “OK“, avec les touches ∆ et ∇
nous cherchons l'option EXTRAS. Nous validons avec “OK“ et EXTRAS
STATION apparaît à l’écran, nous appuyons à nouveau sur “OK“ et l'écran montre
STATION : AUTO, avec les touches ∆ et ∇ nous sélectionnons entre les trois
options possibles : AUTO, MANUEL et DESACT. et nous validons l'option choisie
avec "OK".
(S’il existait une ou plusieurs manœuvres programmées coïncidentes dans la
période de changement horaire celles-ci se doubleront ou ne se réaliseront pas en
dépendant de quel sera le changement horaire).
AUTO (réalise automatiquement le changement d'horaire le dernier dimanche de
mars et dernier dimanche d'octobre à 2:00 h et à 3:00 h respectivement).
Cette option ne permet pas de changements. En choisissant cette option, MENU
EXTRAS apparaît à l’écran.
MANUEL (Permet de choisir le jour et l’heure pour réaliser le changement d'horaire)
En choisissant cette option, apparaît à l’écran EST I - V, le mois et la date du
changement de l'hiver à l’été, avec la date correspondant au mois en train de
clignoter, avec les touches ∆ et ∇ nous programmons le mois dans lequel nous
souhaitons que le changement soit réalisé. Nous validons avec “OK“ et le chiffre
correspondant au jour clignote, nous sélectionnons de la même façon le jour,
l'heure et les minutes et nous validons à nouveau avec OK. EST V–I (été – hiver)
apparaît à l’écran et de la même façon nous programmons la date et l’heure du
changement.
DESACTIVE (DESACT) (ne réalise pas le changement d'horaire)
Si nous sélectionnons cette option et la validons avec “OK“ le changement horaire
ne se réalisera pas et nous revenons au MENU EXTRAS.
PROGRAMMATION DE LA PERIODE FERIES
Ce menu apparaît seulement à l’écran si nous avons programmé une manœuvre
dans le MENU PROGRAMMATION comme FERIES.
Dans cette période l’appareil réalisera uniquement les manœuvres programmées
comme Fériés, voir aparté PROGRAMMATION : MANŒUVRE HEURE FIXE ou
MANŒUVRE ASTRONOMIQUE. Pendant la période FERIE apparaît le symbole
(
).
Seule une période FERIES peut être programmée. Nous entrons dans MENU
EXTRAS FERIES et l'écran nous montre FERIES DESACT, cette option nous
permet de désactiver le programme de FERIES.
Si nous souhaitons introduire un programme de fériés, nous appuyons sur ∆ et ∇
et FERIES EDITER apparaît à l’écran, nous validons avec OK et nous
programmons le DEMARRAGE par l’ordre suivant : mois, jour, heure et minute.
Ensuite nous programmons la FIN de la période de fériés de la même façon et
dans le même ordre.
PROGRAMME DE VACANCES
Dans cette période l’appareil ne réalise aucune manœuvre et le symbole (
)
apparaît à l’écran.
Nous entrons dans MENU EXTRAS VACANCES et l'écran nous montre
VACANCES DESACT, cette option nous permet de désactiver le programme de
vacances.
Si nous désirons introduire un programme de vacances nous appuyons sur ∆ et ∇
et VACANCES EDITER apparaît à l’écran, nous validons avec OK et nous
programmons le démarrage dans l’ordre suivant : mois, jour et minutes.
Ensuite nous programmons la FIN de la période de vacances de la même façon et
dans le même ordre.
ATTENTION : Si nous programmons une manœuvre dans FERIE, le
programme VACANCES ne peut pas s’utiliser et il est éliminé du menu en
restant comme période FERIE.
COMPTEUR
Nous entrons dans MENU EXTRAS COMPTEUR, et COMPTEUR C1 et les
heures auxquelles le canal C1 a été activé (Position ON) apparaissent à l’écran.
Le compteur augmentera des heures uniquement quand l'équipement aura de
l’alimentation.
Pour mettre à zéro la lecture de compteur il suffit de nous mettre sur le
COMPTEUR C1 et appuyer sur OK, EFFACER C1 apparaît à l’écran et nous
sélectionnons “OUI” avec les touches ∆ et ∇ en validant avec OK.
MODE 12H – 24H
Nous entrons dans MENU EXTRAS 12H – 24H nous appuyons sur OK et avec les
touches ∆ et ∇ nous sélectionnons le mode dans lequel nous souhaitons visualiser
l'heure. Nous validons la sélection avec OK.
CONTRASTE
Nous entrons dans le MENU EXTRAS CONTRASTE, nous appuyons sur OK et
apparaissent à l’écran CONTRASTE et un numéro du 0 au 9 (6 par défaut)
correspondants au contraste de l'écran. Avec les touches ∆ et ∇ nous
sélectionnons le degré de contraste souhaité et nous validons avec OK.
CARACTERISTIQUES TECNIQUES
Alimentation
Selon indication dans
l’appareil.
16 (10) A/250 V~
Pouvoir de rupture:
Charges maximales recommandées:
Lampes incandescentes
Fluorescents compensés
Halogènes basse tension
Halogènes (230 V.)
Lampes basse consommation CFL
Lampes basse consommation DOWNLIGHTS
Lampes LED
Contact:
Consommation propre:
Type d’action:
Espaces de Mémoire:
Types de manœuvres :
Précision de manœuvre:
Précision de marche:
Réserve de marche:
3000 W
1200 VA
2000 VA
3000 W
600 VA
400 VA
600 VA
AgSnO2 commuté
6 VA (1 W approx)
Type 1B, 1S, 1T et 1U.
22
ON, OFF, ASTRONOMIQUE
A la seconde
≤ ± 1s/ jour à 23 ºC
4 années sans alimentation
(Pile de Lithium)
De –10 ºC à +45 ºC
IP 20 selon EN 60529
II selon EN 60335 en
montage correct
Normale
Software classe A
+ 100 ºC
2,5 kV
Température de fonctionnement:
Type de protection:
Classe de protection:
Situation de contamination:
Classe et structure du support logique:
Température pour l’essai à bille:
Tension d’impulse assignée
Couvercle scellable
DIMENSIONS
65
35
88
02/12.2011
60
45
A016.26.55240
ORBIS TECNOLOGÍA ELÉCTRICA S.A.
Lérida, 61
E-28020 MADRID
Tel.: + 34 91 567 22 77
Fax + 34 91 571 40 06
E-mail: [email protected]
http://www.orbis.es