1
cc*41*yg
E-*lr,""
f '-.2
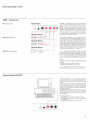
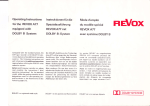
Bedienungsanleitung
REVOX 8203' Timer Controller
Nutzen Sie diese Bedienungsanleitung als Leitfaden bei der lnbetriebnahme des Gerätes.
Sie erhalten dadurch einen schnellen und vollständigen Überblick über die verschiedenen Anwendungsmöglichkeiten.
WICHTIG
Schützen Sie lhr Gerät vor übermässiger Hitze und Feuchtigkeit.
Stellen Sie es so auf, dass die Minimalabstände zum Rack oder
zu den anderen Geräten eingehalten werden.
GARANTIE
Den Geräten, welche in der Bundesrepublik Deutschland verkauft werden, liegt eine spezielle Garantieanforderungskarte
bei. Entweder befindet sich diese Karte in derVerpackung oder
in einer Plastiktasche an der Verpackungsaussenseite. Sollte
diese Karte fehlen, wenden Sie sich an lhr REVOX-Fachgeschäft oder an lhre REVOX-Landesvertretung.
Für die in der Schweiz und Österreich gekauften Geräte gibt
der Fachhändler die Garantiebescheinigung ab.
Bei den in Frankreich gekauften Geräten finden Sie die Garantiekarte in der Verpackung Diese Karte muss von lhrem autorisierten REVOX-Fachhändler vollständig ausgefüllt und unterschrieben werden.
Bitte beachten Sie, dass die Garantie nur im Verkaufsland gültig
ist. Ausserdem machen wir Sie darauf aufmerksam, dass die
Garantie erlischt, wenn am Gerät unsachgemässe Eingriffe
oder nichtfachmännische Reparaturen vorgenommen worden
sind.
VERPACKUNG
Bewahren Sie die Originalverpackung auf . Bei einem Transport
ist diese Spezialverpackung der beste Schutz fur lhr wertvolles
Gerät.
Subject to change.
Printed in Switzerland by WILLI STUDER AG
Order Number 10.30.0540 (Ed 11BO)
Copyright by WILLI STUDER AG
CH-8105 Regensdorf-Zürich
REVOX is a registered trade mark of
WILLI STUDER AG Regensdorf.
lnhaltsverzeichnis
Seite
Übersicht
mit kurzer Beschreibung der Bedienungselemente
3. .5
Aufstellen,Anschliessen
Aufstellungsort
Anschliessen
lnbetriebnahme
7
Gerät einschalten
B
Allgemeines zur Bedienung
EXIT-MODE
Betriebsart
Betriebsbedingungen festlegen SELECT-MODE
11
Datum und Uhrzeit
Schaltereignis programmieren EVENT-MODE 12
14
Schaltereignis
6
o
I
abbrechen
I
setzen TIME-MODE
TEST-MODE
testen
Easy Control
Weitere
Betriebsarten
Technischer
Anhang
Tasten mit EASY-Funktion
EASY REM OTE
EASY REM + LOC
EASY OFF
15
16
16
16
8206' Transceiver
Serielle Schnittstelle RS 232
17
17
Batterien ersetzen
Brückenstecker J 51 umstecken
Technische Daten
1B
1B
19
a
ON
7
6
5
4
3
2
1
BTT|BVA
0
e
r:l
@
t14l t12l t111
INFRAROT_
FERNSTEUERUNG
REVOX B2O5
tlol tel t81 t7l t6t tsl t4t t3t t2l
tll
[13]
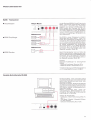
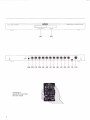
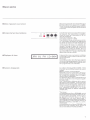
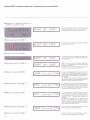
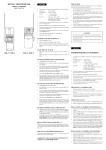
Übersicht Frontseite
Element
Funktion
tAl
Anzei genfeld
tBl
lnf ra rot-E m pfä ngerfenste r
(1
6-stel I ige Flüssi
g
kristal l-Anzei ge)
Ubersicht Rückseite
Element
Funktion
t1l
SERIAL L|NK-Verbindungskabel furdas erste Gerät sowie
Speisespannungs-Anschl uss des 8203.
t2l bis
t8l
SERIAL LINK-Buchsen. Für den Anschluss von weiteren Revox
HiFi-Geräten mit SERIAL LINK.
tgl bis
t11l
Buchsen für den Anschluss von 8206 'Transceiver, als zusätzliche lR-Empfänger in Nebenräumen.
Buchse A auch als lR-Sender schaltbar.
l12l
t13l
l14l
Serielle Schnittstelle RS 232.
PARALLEL REMOTE-Buchse, zum Anschluss eines Revox
Tonbandgerätes 877 oder B710 MKll.
Ein- Ausschalter für die Puffer-Batterien.
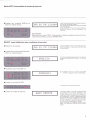
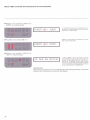
Aufstellen, Ansch liessen
o Aufstellungsort
,/"
Revox 8291
I
Revox B28b
Der Revox 8203 ' Timer Controller wird in
lhre Revox HiFi-Anlage integriert. Er bezieht
seine Versorgungsspannung von einem der
Geräte lhrer Anlage.
Hinweis:
Die Abmessungen des 8203 erlauben seine
Revox B203
Revox 8226
Revox B215
Unterbringung zusammen mit einem Revox
Compact Disc Spieler 8225 oderB226 in einem Normalgehäuse des Revox DiscoRacks 200 sowie einem Standard U-Board.
Revox 8215
lnstallieren 'Sie vorgängig lhre Revox HiFiAnlage und überprüfen Sie deren einwandfreies Funktionieren, bevor Sie den 8203 '
Timer Controller anschliessen.
o Anschliessen
"./
/
a Netzstecker ziehen!
Alle Geräte der HiFi-Anlage sind vom Netz
zu trennen.
n
c
:IJ::"
@
o Kabel [1] anschliessen
"
O
@@,@@@@@
oo
Das Kabel
l'11
o
0
o
ist an der Buchse SERIAL LINK
eines Gerätes (8215, 8225, 8226, 8285,
8286.8291) einzustecken. Über dieses Kabel bezieht der 8203 seine Betriebsspannung (+ 5 V) und steuert das angeschlossene Gerät. Eine zusätzliche Steuerleitung ist
nicht erforderlich.
a Geräte anschliessen
Die übrigen Geräte der Anlage. welche über
einen SERIAL LINK Anschluss verfügen.
sind, unter Verwendung der beigepackten
Kabel. mit den Buchsen l2l bis [B] des B2O3
' Timer Controller zu verbinden.
o Netzstecker
ei
nstecken
Die gesamte Revox HiFi-Anlage kann nun
wieder mit dem Netz verbunden werden.
lnbetriebnahme
o Gerät einschalten
Sobald das Gerät lhrer HiFi-Anlage, welches
als Gerät ['1] am 8203 ' Timer Controller angeschlossen wurde, mit dem Netz verbunden ist. wird auch der B203 'Timer Controller mit Spannung versorgt und ist eingescha ltet.
o Batterien einschalten
Die im Gerät enthaltenen Pufferbatterien
::Jtr"
O
@@
sind mit dem Schalter S1 (an der Geräterückseite) ein- und ausschaltbar.
Schalter gedrückt : eingeschaltet
Schalter gelöst : ausgeschaltet
Zum Schutz gegen unbeabsichtigtes Betätigen ist der Batterieschalter leicht im Gehäuse versenkt. Mit einem Bleistift oder Schraubendreher ist er problemlos zu betätigen.
Bei einem Netzspannungs-Unterbruch versorgen die Batterien die Ouarzuhr und den
Ereignisspeicher mit Spannung, damit die
Uhrzeit und das Schaltprogramm nicht ver-
loren gehen. Um den Batterieverbrauch
möglichst gering zu halten, ist die Anlage im
Stand-by zu belassen.
o Grundeinstellung
Beim ersten Einschalten zeigt das Anzeige-
feld das Software-Entstehungsdatum und
eine Uhrzeit.
Hinweis:
ln der letzten Position der Anzeige ist
ein
blinkender Stern sichtbar. Er weist darauf
hin, dass derTimer eingeschaltet ist (TIMER
ON) und die programmierten Schaltfunktionen ausgeführt werden.
o Geräte-Versionen
Es sind zweiVersionen des Revox 8203 ' Timer Controller verfügbar die sich lediglich
durch die integrierte Software unterschei-
den.
B
203-C
(
Co nsum er-Ve
rsion-)
8203-lND (lndustrie-Version.), diese Software ist. anstelle des B2B5 Geräte-Moduls,
mit dem Modulf ür den Betrieb mit einerTonbandmaschine Revox PB99 MKll. ausgerüstet.
Die Geräte der lndustrie-Version sind auf der
Rückseite mit einem zusätzlichen Kleber
(lND) gekennzeichnet.
Zur nachträglichen ldentifikation der Software-Version ist der Revox 8203 ' Timer
Controller aus und wieder einzuschalten
(Batterien ausschalten und Kabel [1] aus und
wieder einstecken). Bei der lndustrieversion
(8203-lND) ist im Anzeigefeld kein blinkender Stern sichtbar (TIMER OFF).
-Hinweis:
Die Tonbandmaschine Revox PR99 MKll
darf keinesfalls im Originalzustand am Anschluss ['1] des 8203 angeschlossen werden. Muss der Revox 8203 Timer Controller aus irgendeinem Grund von einer Revox
PR99 N/Kll gespiesen werden, so ist die in
der Serviceanleitung Revox lR REMOTE
CONTROL SYSTEIV .. (Bestell Nr.
10.30.0430) angegebene Anderung zwin'
gend.
Der Anschluss einer PR99 MKI ist in jedem
Fall nur am Anschluss
9
steuer-Anschiuss) zulässig.
(Parallel-Fern-
Allgemeines zur Bedienung
Der Revox 8203. Timer Controller ist die Fernbedienungs-Zentraleinheit lhrer Revox HiFi-Anlage. Er verknüpft die einzelnen Geräte der Serie 8200 sinnvoll miteinander und vereinfacht die
Bedienung der Hörfunktionen in seinen Betriebsarten EASY REMOTE und EASY REM + LOC
wesentlich. (Eine genaue Definition der EASY-Funktionen finden Sie im Kapitel <EASY-Control>).
lm Weiteren ist er als TIMER in der Lage, programmierte Ereignisse zur gewünschten Zeit selbständig auszuführen.
Der Revox 8203. Timer Controller weist keine Bedienungselemente auf . Er wird generell über
die lR-Fernbedienung Revox 8205 bedient und programmiert. (Ausnahme: der 8203 verfügt
über eine serielle Schnittstelle RS 232 und kann somit auch über einen Home- oder PersonalComputer bedient und programmiert werden. Siehe lR-Serviceanleitung, Order
Nr.10.30 0430).
Bedienung und Programmierung sind menugeführt und somit äusserst einfach in der Handhabung.
Die einzelnen Menus sind unterhalb der Laufwerk-Funktionstasten des lR-Handsenders B2O5
aufgeführt und werden zusammen mit der EASY/. (Punkt)-Taste aufgerufen. (EASY/.-Taste
drücken und halten, Taste TIME gleichzeitig drücken der Revox 8203 ' Timer Controller schaltet in den TIME-Mode).
-
:
:
EVEN}Mode
SELECT-Mode :
TEST-Mode :
EXIT-Mode :
TIME-Mode
Datum und Uhrzeit setzen.
Schaltereignis programmieren oder testen.
Betriebsbedingungen des 8203' Timer Controller festlegen
Programmiertes Schaltereignis testen.
Befehl zum sofortigen Abbruch des aufgerufenen Mode.
(Mode-* Betriebsart)
Mit den Tasten VOLUME +/- kann die ganze Auswahl in auf- oder absteigender Richtung durchgeblättert und/oder mit der Taste ENTER quittiert werden Alle anderen Tasten behalten ihre
Funktionen bei.
Diese Steuerungsart erlaubt es auch. zu Kontrollzwecken, ein Menu oder ein Schaltereignis
(EVENT) mit der Taste ENTER, schnell durchzublättern und gegebenenfalls zu korrigieren.
Hinweis:
Befindet sich der 8203' Timer Controller in einem der Eingabe-Modi, so bricht er diesen Mode
ab, wenn während ca. 60 Sekunden keine Eingabe mehr gemacht wurde.
ln einem solchen Fall wird der Mode wieder aufgerufen und durch mehrmaliges Betätigen der
Taste ENTER bis zu der Stelle gesprungen. an welcher der Mode abgebrochen wurde.
Wenn Sie den Revox 8203 ' Timer Controller zum ersten Mal in Betrieb nehmen, empfiehlt es
sich, nachstehende Bedienungsanleitung Punkt für Punkt durchzugehen und die aufgeführten
Beispiele auszufüh ren.
VORSICHT:
U m eine Ü bersteuerung des lR-Empfängers zu vermeiden, sollte mit dem lR-Sender n icht aus zu
kurzer Distanz direkt in den Empfänger gestrahlt werden. Ubersteuerung äussert sich dadurch,
dass Befehle nicht ausgeführt werden, obwohl die rote Lampe (LED) im Empfängerfenster aufleuchtet.
o
U
EXIT-Mode ( Betriebsart abbrechen)
Diese Eingabe erlaubt zu jeder Zeit den Abbruch des aufgerufenen Mode.
Bereits mit ENTER abgeschlossene Eingaben bleiben erhalten.
Der Revox 8203 ' Timer Controller kehrt in
den normalen Betriebsmode (Zeitanzeige)
zu rück.
oTasten EASY/. und EXIT zusammen drücken
AUSNAHME:
Unwirksam im TEST-Mode, Abbruch nur mit Funktions-Tasten oder mit
POWER OFF möglich.
SELECT-Mode ( Betriebsbeding u ngen definieren)
Der Revox 8203 'Timer Controller ist in der
Lage. Datum und Uhrzeit in der von lhnen
gewohnten Art anzuzeigen.
o Sprache wählen
oTasten EASY/. und SELECT zusammen drÜcken
Das Anzeigefeld bietet eine der drei Sprachen ENGLISH. DEUTSCH oder FRANCAIS
zur Auswahl an.
o Blättern mit VOLUME
+lDurch Blättern mit den Tasten VOLUME +/die gewünschte Sprache in die Anzeige
b ri ng en.
.Taste ENTER drücken
Die qewählte Sprache wird abqespeichert
o Betriebsart wählen
Die Funktion EASY (: einfach. leicht) vereinfacht die Bedienung der Hörfunktionen Auf
einen elnzigen Tastendruck hin wird die ge-
samte Anlage für die gewählte Programmquelle richtig eingestellt, unabhängig vom
früheren Zustand der Anlage. Nicht weiter
benötigte Geräte werden ausgeschaltet
(Ausnahme: Geräte. die zu einem aktivierten
Aufnahmezweig gehören).
Eine qenaue Definition der EASY-Funktion
finden Sie im Kapitel rEASY CONTROL>.
o Blättern mit VOLUME
+lEASY OFF
:
Funktion ausgeschaltet.
EASY REN/OTE: Die EASY-Funktionen
werden nur durch die Fernsteuerung ausgelöst, die Bedienung an den Geräten bleibt
u
nverä nd ert.
EASY
REM+LOC: Die EASY-Funktionen
werden durch die Fernsteuerung sowie
durch die Tasten an den Geräten selbst ausgelöst (gilt nur bei Geräten mit Rückmel-
dung, wie 8215, 8226, 8285, 8286 und
8291 ).
.Taste ENTER drücken
Die gewählte Betriebsart wird abgespeichert.
oTIMER ein- und ausschalten
o Blättern mit VOLUN/E
Die programmierten Schaltfunktionen kön
nen hiermit generellein- und ausgeschaltet
werden. beispielsweise bei Ferienabwesen
heit Die Ouarzuhr läuft selbstverständlich
weiter und die programmierten Schaltereignisse bleiben gespeichert
+lTIMER ON : Schaltfunktionen werden ausgeführt. (Anzeige durch blinkenden Stern)
TIMER OFF
:
Schaltfunktionen werden
nicht ausgeführt
oTaste ENTER drücken
Der gewählte TIMER Status wird abgespeichert.
An dieser Stelle kann die Lautsprecher
o Einschaltbedingung
Gruppe definiertwerden, die beim Einschal-
ten der Anlage aktiviert werden soll. (Nur
möglich mit dem Receiver 8285. frühere
Modelle müssen manuell bedient werden).
o Blättern mit VOLUME
+lPWR UP: SPKR A : Lautsprechergruppe A
PWR UP: SPKR B : Lautsprechergruppe B
PWR UP. SPKR A+B : Lautsprechergrup
pen A und B
PWR UP: PREV SPKR - zuletzT aktivrerte
La utsp reche rg ru ppe
PWR UP SPKR OFF : keine Lautsprechergruppe aktiviert (Kopfhörer)
oTaste ENTER drücken
Die gewählte Einschaltbedingung wird ab
gespeichert. Der Revox 8203 ' Timer Controller beendet den SELECT-Mode und kehrt
in die normale Betriebsartzurück (Zeitanzei
se)
10
TIME-Mode (Datum und Uhrzeit setzen)
oTasten EASY/. und TIME zusammen drücken
ln dieser Betriebsart kann das Datum und
die Uhrzeit verändert werden. Der programmierte Kalender reicht vom Jahr 1985 bis
zum Jahr 2035. Monatswechsel und Schalt-
jahre sind dem Programm bekannt und
müssen nicht eingegeben werden.
o Blättern mit VOLUME
+lDurch Drücken der Taste VOLUIVE + kann
die Jahrzahl erhöht und mit derTaste VOLUME
- verringert
werden.
oTaste ENTER drücken
Die Jahrzahl wird abgespeichert und der
Cursor (Positions-Anzeiger) springt zur Monats-Anzeige, die nächste Grösse, welche
eingegeben werden soll.
o Blättern mit VOLUME
+l-
+l-
oTaste ENTER drücken
o Blättern mit VOLUME
-
Der Monat wird abgespeichert und der Cursor springt zrr Datums-Anzeige.
oTaste ENTER drücken
o Blättern mit VOLUME
Mit den Tasten VOLUME * und VOLUME
zum betreffenden Monat blättern.
Mit den Tasten VOLUME * und VOLUN/E
das aktuelle Datum einstellen.
-
Das Datum wird abgespeichert und die Anzeige wechsellzur Zeilanzeige. Der Cursor
markiert die Stunden.
+l-
Durch Drücken deTVOLUME Tasten. die ak-
tuelle Stunde einstellen.
Die Stunden Angabe wird abgespeichert
oTaste ENTER drücken
un.d der Cursor
springt auf die Minuten-An-
zerge.
o Blättern mit VOLUME
oTaste ENTER drÜcken
+l-
Durch Drücken deTVOLUME Tasten, die ak-
tuelle Uhrzeit einstellen. Ein Überfahren der
Stundengrenze (59 Min.) ändert die Stunden-Anzeige nicht. lediglich die MinutenAnzeige wechselt au[ 00.
Das aktuelle Datum und die gültige Uhrzeit
sind von der Ouarzuhr übernommen worden. Das Anzeigefeld zeigt wieder den normalen Betriebsstatus: Datum und Uhrzeit.
11
EVENT-Mode (Schaltereignis prog rammieren)
oTasten EASY/o und EVENT
zu-
sammen drücken
ln dieser Betriebsart können bis zu fünf
Schaltereignisse programmiert und batte
rieqepuffert gespeichert werden.
o Blättern mit VOLUME
+lDurch Drücken der VOLUME Tasten. das
gewünschte Ereignis einstellen.
oTaste ENTER drücken.
Das Schaltereignis ist ausgewählt und der
Cursor springt zur Anzeige LEER, DATUIVI
oder TAG
o Blättern mit VOLUME
+l-
LEER
:
Schaltereignls wird nicht ausge
führt
DATUN/ : Schaltereignis ist an einem bestimmten Datum auszuführen.
TAG : Schaltereignis istwöchentlich. an be
stimmten Tagen auszuführen.
oTaste ENTER drücken
Wurde DATUM ausgesucht, so kann mit den
Tasten VOLUME +/- und ENTER ein Ereignisdatum in der gleichen Weise eingege-
ben werden. wie unter TIME-Mode be-
schrieben. (Siehe Seite i1. TIME-Mode).
Bei der AuswahlTAG wechselt die Anzeige
in eine symbolisierte Wochendarstellung.
Der Cursor markiert das Wort ENDE.
o Blättern mit VOLUME
+l-
.Taste ENTER drücken
Durch Drücken der VOLUME Tasten kann
der Cursor innerhalb der Wochentag-Symbole bewegt werden. Links neben den Sym
bolen erscheint die Abkürzung jenes Wochentages, der durch die Cursor-Position
markiert ist.
Drücken der Taste ENTER speichert den mit
dem Cursor markierten Wochentag ab (Anfangsbuchstabe ist slchtbar). nochmaliges
Drücken der ENTER Taste löscht die Eingabe wieder.
Durch wiederholtes Drücken derTasten VOLUN/E +/- und ENTER sind alle Wochenta
ge zu bezeichnen, an denen das Schalterei
gnis durchgeführt werden soll (es können
auch alle Wochentage bezeichnet werden).
o Blättern mit VOLUME
oTaste ENTER drücken
12
+l-
Um die Tag-Auswahl abzuschliessen. ist der
Cursor auf den Schriftzug ENDE zu bringen.
Die ausgewählten Wochentage werden ab
gespeichert. In der Anzeige erscheint die
Ouellenwahl.
o Blättern mit VOLUME + l!
r,,.r:
-i:....4
r,
lir
|
:
:
:
.!. 1-'!
:
.i-.'...'
:
TUNER STATION O0 Abhören des Tuners"
CD SPUR 0O Abhören der CD"
IAPE 1
TAPE 2
:
:
:
Play-Betrieb ab Tonbandgerät 1
Play-Betrieb ab Tonbandgerät 2
" BeiTUNER und CD springtderCursornach
Betätigen der ENTER Taste zur STATIONSbzw.zur SPUR-Anzeige. Mit den Tasten VO-
LUN/E +/- kann hier die gewünschte Stations- bzw Track-Nummer eingegeben werden.
Die angewählte Ouelle wird abgespeichert.
In der Anzeige erscheint die Ausgangswahl.
oTaste ENTER drücken
o Blättern mit VOLUN/E
+l-
ZU TAPE 1
ZU TAPE 2
:
:
Aufnahme mitTonbandgerät
Aufnahme mit Tonbandgerät 2
Abhören über Lautsprechergrup1
ZU LS A :
pe A"
ZU LS B: Abhören über Lautsprechergrup-
pe B-
* nur mit Receiver Revox 8285.
Der ausgewählte Ausgang wird abgespei-
oTaste ENTER drücken
o Blättern mit VOLUME
chert In der Anzeige erscheint die Startzeit.
+l--;
.l .!.,, " '..."...'
Durch Drücken der VOLUME Tasten kann
vorerst nur die Stünden-Anzeige verändert
werden.
Die gewählte Stunde wird abgespeichert,
oTaste ENTER drücken
o Blättern mit VOLUME
i : :t 1 r
der Cursor springt auf die Minuten-Anzeige.
+l-
M it den Tasten VOLU M E */- kann d ie M inuten-Anzeige verändert werden. Ein überfah
ren der Stundengrenze (59 Min.) ändert die
Stunden-Anzeige nicht, lediglich die Minuten-Anzeige wechselt auf 00
oTaste ENTER drücken
o Blättern mit VOLUME
Die Startzeit wird abgespeichert, die Anzeige wechselt zur Stoppzeit.
+l-
Um kein langes Blättern zu verursachen.
wird die bereits programmierte Sartzeit automatisch in die Stoppzeit-Anzeige übernommen. Sie muss lediglich um die Dauer
des Schaltereignisses verändert werden.
Zuerst die Stunde verändern oder bestätigen.
.Taste ENTER drücken
o Blättern mit VOLUME
oTaste ENTER drücken
Die gewählte Stunde wird abgespeichert,
der Cursor springt auf die Minuten-Anzeige.
+l-
Gleich wie bei der Eingabe der Startzeit sind
die Minuten zu verändern.
Das Schaltereignis ist vollständig programmiert und abgespeichert. Der Revox 8203 '
Timer Controller beendet den EVENT-Mode
und kehrt in die normale Betriebsart zurück
(Zeitanzeige).
13
TEST-Mode (Schaltergebnis testen)
oTasten EASY/r und EVENT zusammen drücken
Der TEST-M ode eriaubt die
r- ! !r-
!'.!
!
Ü
berprüfung der
programmierten Schaltereignisse. muss
aber über den EVENT-Mode aufgerufen
werden.
o Blätrern mir voLUME
+lM
it
H
ilfe der VOLU M E Tasten, das zu testen-
de Ereignis einstellen.
oTasten EASY/. und TEST zusammen drücken
Der Revox 8203 ' Timer Controller bricht
den EVENT-Mode ab und führt das angezeigte Schaltereignis unabhängig von der
programmierten Zeit aus. lm Anzeigefeld erscheint die Zeitanzeige.
Der TEST-Mode schaltet das Ereignis nur
ein, ausgeschaltet werden muss es über die
Tasten STOP oder POWER OFF.
HINWEIS:
Nach einer Test-Simulation müssen eventuell beteiligte Tonbandgeräte
wieder in ihre Ausgangsposition zurückgespult werden.
14
EASY-Control
Die EASY-Funktion vereinfacht die Bedienung lhrer Revox HiFi-Anlage wesentlich. Sie schaltet
den Receiver(Preceiver) und diegewünschteSignalquelleauf eineneinzigenTastendruckhin in
die richtige Wiedergabe-Funktion. Dabei werden die benötigten Geräte ein-, nicht mehr benötigte Geräte ausgeschaltet. (Bei einer aktivierten Aufnahme-Funktion werden die Geräte nicht
ausgeschaltet).
Die gewünschte Ausführungsart der EASY-Funktionen ist im SELECT-Mode einzustellen.
Tasten mit EASY-Funktion
oTaste
PHONO
Bei eingeschwenktem Tonarm wird der Tonabnehmer am Plattenanfang
abgesenkt und die Schallplatte abgespielt; der Receiver auf PHONO geschaltet und die im SELECT-Mode def rnierte Lautsprechergruppe aktiviert.
VA
oTaste DISC
Gleiche Auswirkung wie die Taste PHONO.
o Taste
oTaste
BeierngelegterCDwirddieCompactDiscabTracklabgespielt.DerReceiver wird entsprechend ein- oder umgeschaltet.
PLAY/NEXT
o Tasten TAPE 1 oder TAPE
oTasten PLAY oder
o Taste
Gleiche Auswirkung wie die Taste DISC.
2
*-PLAY
ENTER
Ber eingelegtem Band oder Kassette wird das gewählte Gerät auf Wiedergabe geschaltet. Der Receiver wird entsprechend ein- oder umgeschaltet.
Bei den Kassetten-Tonbandgeräten B215 und B710.wird zusätzlich die MONITOR-Funktion auf TAPE geschaltet.
Gleiche Auswirkungen wie die Tasten TAPEl oder TAPE 2.
Die zuletzt angehörte Station des TUNER wird aktiviert. Der Receiver wird
entsprechend ein- oder umgeschaltet.
oTasten SPEAKERS A und
EASY/o zusammen drücken
Die Lautsprechergruppe A wird exklusiv eingeschaltet, unabhängig vom
bestehenden Schaltzustand.
oTasten SPEAKERS B und
EASY/. zusarnmen drücken
Die Lautsprechergruppe B wird exklusiv eingeschaltet, unabhängig vom
bestehenden Schaltzustand.
o Tasten REC und
PLAY
oder REC und PAUSE
zusammen drücken
Bei den Kassetten-Tonbandgeräten 8215 und 8710, wird bei Auf nahme
d ie
MONIOR-Funktion entsprechend geschaltet:
TAPE
bei REC und PLAY
SOURCE bei REC und PAUSE
15
EASY-Remote
o EASY-Funktion
eingeschaltet
Die EASY-Funktionen werden nur durch die Tasten der lR-Fernsteuerung
ausgeführt. Die Bedienung der Anlage über die lokalen Geräte-Tasten
bleibt unbeeinflusst.
EASY REM+LOC
o EASY-Funktion
eingeschaltet
Die EASY-Funktionen werden durch Betätigung der EASY-Tasten der lRFernbed ienung sowie derjeni gen der lokalen Geräte-Tasten ausgeführt.
(Lokale Funktion nur möglich bei den Geräten mit Status-Rückmeldung wie
Revox 8215,8226, 8285, 8286 und 8291).
ausgeschaltet
Auch bei ausgeschalteter EASY-Funktion ist eine vereinfachte Bedienung
der Hörfunktionen zu erreichen; durch gleichzeitiges Drücken der EASY/.
und einer Ouellenwahl-Taste (PHONO, TAPE 1, TAPE2 oder DISC).
lm Übrige-n bleibt die Bedienung der Geräte unbeeinflusst. Eine unbeabsichtigte Anderung des Betriebszustandes der Anlage wird dadurch weitgehend vermieden.
EASY OFF
o EASY-Funktion
to
Weitere Betriebsarten
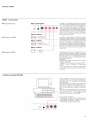
8206 .Transceiver
o Anschliessen
An den Buchsen 8206 A, B und C kann je ein
8206 ' Transceiver angeschlossen werden
(Transceiver : Kunstwort aus Transmitter
[Sender] und Receiver [Empfänger]). Der
Haupt-Raum
8206 erlaubt den Empfang von lR-Fernsteuersi gnalen (auch von Fremdfabrikaten*)
aus einem Nebenraum oder die lR-Steue-
rung von Geräten (auch Fremdfabrikate*, je-
doch nur mit zugehörigem lR-Sender) in einem Nebenraum.
Nebenraum
Der 8206 in einem Nebenraum installiert,
irbermittelt dem Revox 8203 ' Timer Controller alle empfangenen lR-Signale in un-
o 8206 Empfänger
veränderter Form über Kabel. Diese werden
von ihm weiterverarbeitet und/oder übereinen eventuell vorhandenen lR-Sende-Adapter wieder ausgegeben. Bei Verwendung
des Anschlusses A, ist im 8203 der Brükkenstecker JS'1 in die Stellung R (Receiver)
zu bringen. Öffnen des Gerätes siehe unter
<Batterien ersetzen) (Seite '18).
o 8206 Sender
Der lR-Sende-Adapter kann an Stelle des
8206 an der Buchse A angeschlossen wer-
(Transmifter)
den. Für diese Funktion ist im B2O3 der Brükkenstecker JS1 in die Stellung T (Transmitter) zu bringen. Öff nen des Geätes siehe unter (Batterien ersetzen) (Seite 1B).
Hinweis:
Maximale Kabellängen für störungsfreien
Betrieb:
-8206 als Empfänger (Receiver) 30 m.
- 8206
als Sender (Transmitter) 2,5 m.
" Die Ubermittlung von lR-Fremdsignalen ist
nur für ungeträgerte Systeme möglich.
Serielle Schnittstelle RS 232
Der Revox 8203 ' Timer Controller verfügt
an der Buchse [12] über eine serielle Schnitt-
stelle für den Betrieb an einem Home- oder
o
o
Persona l-Com puter.
Damit ist es möglich, sämtliche Funktionen
des 8203 sowie der angeschlossenen Geräte zu steuern. Darüber hinaus können bei der
IND-Version weitere Schaltereignisse programmiert werden.
Weitere Einzelheiten dazu, sowie Anschlussbelegung. Befehlsverzeichnis etc..
entnehmen Sie bitte der lR-Serviceanlei-
tung, Order Nr. '10.30.0430.
Aufbau der Schnittstelle:
- Vollduplex. 3-Draht-Verbindung (GND. Tx,
Rx)
- 1200 Baud, 1 Startbit. 1 Stoppbit,
B Daten-
bit, kein Paritybit.
- Software Handshaking (Xon, Xoff).
=*ä0 @@
17
Technischer Anhang
Batterien ersetzen
o Pufferbatterien
Der 8203 Timer Controller verfügt über
Pufferbatterien. welche die Ouarzuhr und
den Ereignisspeicher bei einem Netzausfall
vor Datenverlust bewahren. Falls die Anlage
komplett vom Netz getrennt ist. reichen die
Batterien für eine Versorgungsdauervon ca.
3 Monaten.
o Deckblech entfernen
An der Geräterückseite die beiden durch einen Pfeil markierten Schrauben mit einem
Kreuzschlitz Schraubendreher Nr. 1 entfer-
u
e)
.s@sooooo
o Batterien ersetzen
@ @@
o
I
o
nen. Deckblech nach hinten oben wegziehen. Das Deckblech wurde werkseitig leicht
vo rgespa
n
nt.
Die alten Batterien durch leichten Zug aus
dem Batteriehalter ziehen und durch drei
neue Batterien (Typ: Alkali-Mangan. Grösse:
IEC LR6 tAN/31 1.5V) ersetzen. Auf richtige
Polarität achten!
Hinweis:
Die Batterien werden vom Gerät nicht aufgeladen. Um ein Auslaufen und Schäden
am 8203 ' Timer Controller zu verhindern.
sind verbrauchte Batterien auszuwechseln.
o Deckblech montieren
Das Deckblech vorsichtig in die Nut am
Frontblech einführen und hinten nach unten
drücken. Schrauben festdrehen.
Brückenstecker J31 umstecken
o Brückenstecker JS1
Durch Umstecken dieses Brückensteckers
wircj der Anschluss A [9] des B203 ' Timer
Controller für den Betrieb mit einem 8206 .
Transceiver als Empfänger (Receiver) oder
Sender (Transmitter) umgeschaltet.
o Deckblech entfernen
An der Geräterückseite die beiden durch ei
nen Pfeil markierten Schrauben mit einem
Kreuzschlitz-Schraubendreher Nr. 1 entfernen. Deckblech nach hinten oben wegziehen. Das Deckblech wurde werkseitig leicht
vo rg espa
n
nt.
o Empfänger
Soll ein 8206 ' Transceiver als lR-Empfänger
angeschlossen werden, so ist der Brücken
stecker in die Stellung "R" zu bringen.
o Sender
Soll nur der Sender-Adapter des B2OG '
Transceiver als lR-Sender angeschlossen
werden. so ist der Brückenstecker in die
Stellung "T" zu bringen.
o Deckblech montieren
Das Deckblech vorsichtig ln die Nut am
1B
Frontblech einführen und hinten nach unten
drücken. Schrauben festdrehen.
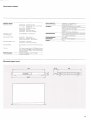
Technische Daten
Steuerbare Geräter
Anschlüsse 1 brs 8:
Revox 8215
Revox 8225
'
Cassette Tape Deck
D sc Player m t pP'Karte
1..1 69.327 .04
' Compact
Revox 8226
Revox 8285
Revox 8286
Revox B291 .
1 Parallel Remote'Anschluss
Grösse: IEC LR6 (A[43)
Revox
Tape Recorder
Revox 8710 Cassette Tape Deck
Revox PR99 MKI/lVKll Tape Recorder
Tape Recorder'
877
/Bll0)
1
füh11 die
Stromversorgung für den 8203).
3 lR-EmpfängerAnschlüsse (8206), einerals Sender
schaltbar.
1 RS232 Schniitstelle (1200 Baud).
Direct Drrve Turntable
PR99lVKll
(Bl1
8 Serielle Link l/O-Anschlüsse (Anschluss
Turer Preanpli'ier
Anschluss 317 /3110:
Anschluss RS232
Anschlüsse:
Rece ver
Revox
A/ B/-C
3 Batterien: 1,5V Alkali-lVangan
Compact Disc Player
Anschlüsse 2 bis 8:
(nur IND-Version)
Anschlüsse 8206
Batterie-Pufferung:
lR-Emplindlichkeit:
bis 15 m, bei Sichtverbindung mit dem Handsender
Uberden 8206 Transceiverauchauseinem Neben
raum (max. 30 m Kabellänge).
Leislungsaufnahme:
ca.0,5Watt
Abmessungen:
BxHxT:450x39x332mm
Gewicht:
3,5 ke
Revox 8206 Transceiver
(Anschluss A: auch lR-Sende Adapter)
Schnittstelle tür einen Home-oder Personal Compu
ter.
' H nweis:
Stromversorgung:
Die Tonbandmaschrne Revox PR99 l/Kl darf kelnes'alls, d e Revox PR99 l/K' rur nacn-MooiI kaLior an'
Anschluss1 des Revox8203 TimerControllerangeschlossen werden.
von einem beliebigen Gerät der Anlage
*5
VDC, max.150 mA.
Abmessungen (mm)
19
ENGLISH
Operating lnstructions
REVOX 8203' Timer Controller
Use these operating instructions as a guideline for putting your
equipment into service
ln this way you get a quick and complete overview of its application potential.
IMPORTANT
Protect your equipment from exposure to excessive heat and
moisture.
lnstall it in such a position that the minimum clearence to the
rack or other equipment is maintained.
WARRANTY
A specialwaaranty request card is baypacked to all equipment
sold within the Federal Republic of Germany. This card is located either inside the packing or in a plastic pouch attached to
outside of the packing. Should this card be missing, please
consult your REVOX dealer or your national REVOX distributor.
Warranty cards f rom equipment sold in Switzerland or Austria
are issued directly by the authorized dealer.
Warranty cards for equipment sold in France are located inside
the packing. This card must ba completelyfilled outand signed
by your authorized REVOX dealer.
Please note that the warranty is only valid within the country in
which the equipment has been sold. The warranty becomes
null and void if unauthorized modifications or unprofessional
repairs are made,
PACKING MATERIAL
'-
Please save,the original packing material because its special
design provides optimum protection for your valuable equipment in case of reshipment.
Table of contents
Page
Overview
I
nstal lation, connection
Start-up procedure
with a quick-reference description
of the controls
3. .5
lnstallation location
Connection
6
6
Power on
General operating instruction
EXIT-MODE
SELECT-MODE
TIME-MODE
EVENT-MODE
7
B
9
9
11
TEST-M OD E
12
14
Easy Control
Keys with EASY function
EASY REM OTE
EASY REM + LOC
EASY OFF
15
16
16
16
Other modes
8206' Transceiver
Serial lnterface RS 232
17
17
Technical appendix
Replacing the batteries
Changing the setting of jumper JS1
Technical data
1B
1B
19
.oN
5
4
3
2
1
B1ltBT1a
ll
0
@
@
trll tlol tel t8l t7t t6l t5t t4t t3l
INFRARED
REMOTE CONTROL
REVOX B205
121
Overview front panel
Control
Function
tAl
Display field (16-position LC display)
tBl
lnfrared receiver window
Overview rear panel
Control
Function
t1l
SERIAL LINK connection for the first component as well
as supply voltage terminal of 8203.
[2] to
[B]
SERIAL LINK sockets. For connecting additional Revox
hi-fi components with SERIAL LINK.
[9] to
[11]
Sockets for connection 8206 ' Transceivers, as supplementary
lR receivers in ancillary rooms.
Socket A is also switch-selectable as an lR transmitter.
l12l
t13l
l14l
Serial interface RS 232.
PARALLEL REMOTE socket for connecting a Revox
tape record er 877 or 8710 MKll.
On/Off switch for the buffer batteries.
I
nstallation, connection
o Place of installation
Revox 8291
Revox B2B5
The Revox 8203 ' Timer Controller is integrated into your Revox hi-fi system. lt draws
its supply voltage f rom one of the components of your hi fi system.
ote:
Because of its small size the 8203 can be
N
Revox 8203
Revox 8226
Revox B215
installed together with a Revox compact
disc player 8225 or 8226 in a normal housing of the Revox Disco Rack 200 or a standard IJ-board
Revox B2'15
First install your Revox hi fi system and
check that it functions correctly before you
connect the 8203 ' Timer Controller.
o Connection
o
/
/.
Disconnect all components of your hi-f i system from the AC power source.
o Disconnect power plugl
t
::trff"
o
o Connect cable
c
o
@
The cable [1] is to be plugged into the SERIAL LINK socket of one of the hi-fi compo
nents (8215, 8225, 8226, 8285, 8286,
8291). The 8203 draws its operating voltage
(+ 5V) through this cable and controls the
connected unit. No separate control line is
required.
o Connect
components
o Connect power plug
6
With the aid of the bypacked cables, inter
connect the remaining components of your
hi-fi system equipped with a SERIAL LINK
terminalto the sockets [2] to [B] of the B203
' Timer Controller.
The complete hi fi system can now be reconnected to the AC power source.
Start-up procedure
As soon as power available to that compon-
o Switch unit on
ent of your hi{i system that has been con-
nected to the 8203 'Timer Controller as unit
['1], power is also supplied to the B203 'Timer Controller and the latter is switched on.
o Battery ON
::trff" (D
@@
The buffer batteries installed in the unit can
be switched on or off with rear-panel switch
s1.
Switch engaged
Switch released
:-
switched on
switched ofj
protect it from being actuated unintentionally, this switch is slightly recessed but it
can still be actuated by means of a pencil or
a screwdriver. In the event of a powerfailure
the batteries continue to supply the quartz
To
clock so that the timer and the switching
program keep running. To reduce battery
consumption as much as possible, your hiJi
system should remain in standby mode if
not in use.
o Basic settings
When the unit is powered on for the first
time, the display f ield indicates the software
creation date and a time of day.
Note:
A flashing star is visible in the Ieast significant position of the display. This star signals
that the timer is switched on (TIMER ON)
and that the programmed switching functions are being executed.
o Equipment version
' Timer
Controller are available, the only difference
being in the software.
8203-C (consumer version*)
8203-lND (industry version*), this software
features a module for operation with a tape
recorder Revox PR99 MKll" rather than the
Two versions of the Revox 8203
B2B5 equipmenL module.
The industry versions of the 8203 are identified on the rear panel with an additional adhesive label (lND).
For subsequent identification of the software veTsion. the Revox 8203 . Timer Controller is to be switched off and on again
(switch batteries off, detach and reconnect
cable ['1]). No flashing star is visible (TlN/ER
OFF) on the industry version (8203-lND)
*N
ote:
The Revox PR99MKll tape recorder must
not be connected to socket [1] of the 8203
wothout prior mod if ication. lf f or any reason
the Revox 8203 ' Timer Controller needs to
be supplied by a Revox PR99 N/Kll. lt is essential to make the modification described
in the maintenance instructions of the Revox
lR REMOTE CONTROL SYSTEM (part No.
10.30.0430).
In any event the Revox PR99 MKI may only
be connected to terminal 9 (parallel remote
control).
General information concerning the operation
The Revox 8203 ' Timer Controller is the central remote control unit of your Revox hi-fi system. lt
interconnects the individual components of the series 8200 and in its operating modes EASY
REMOTE and EASY REM + LOC it greatly simplif ies the operation of the listening functions (A
detailed description of the EASY function can be found in the Section "EASY CONTROL-') As a
TIMER it is also able to automatically execute programmed events at the desired time.
The Revox 8203. Timer Controller itself does not have any operator controls. lt is always operated and programmed via the Revox 8205 lR remote control. (Exception: the 8203 is equipped
with a serial interface R5232 and can consequently be operated and programmed also by
means of a home or personal computer. Refer to lR maintenance instructions, part No.
10 30 0430)
The operation and programming are supported by menus and are thus very simple to perform.
The individual menus are listed below the tape transport control keys of the hand-held lR transmitter 8205. They are called in conjunction with the EASY/. (dot) key.
(Press and hold the EASY/. key and simultaneously press the TIME key-'the Revox 8203 'Timer
Controller switches to TIME mode).
:
EVENT-Mode :
SELECT-Mode :
TEST-Mode :
EXIT-Mode :
TIME-Mode
Set date and time.
Program or test switching event.
Define operating conditions of the 8203 ' Timer Controller.
Test programmed switching event.
Command for immediate cancellation of the called mode.
The available functions can be accesssed in ascending or descending order by means of the
keys VOLUME +l- andlor be acknowledge with the ENTER key. All other keys retain their normal functions.
ln this control mode ENTER key can also be used to review for checking purposes and if necessarry to correct a menu or a switching event.
Note:
When the 8203 . Timer Controller is in one of the input modes, the corresponding mode is automatically terminated if no entry is made for approximately 60 seconds.
lf this happens, the mode can be reactivated by pressing the ENTER key as many times as required for jumping to the point where the mode has been terminated.
When you start up your Revox 8203' Timer Controller f or the f irst time it is advisable to read the
following operating instructions step by step and to perform the specified examples.
CAUTION !
To prevent overdriving of the lR receiver, do not beam against the receiver with the hand-held
transmitter f rom too short a distance. lf overdriving occurs, the commands will not be executed
even through the red LED in the receiver window turns on.
EXIT mode (Cancel operating mode)
The currently active mode can be cancelled
at any time with this entry.
Entiries that have already been acknowledged with ENTER are preserved.
The Revox B203 ' Timer Controller returns
o Press EASY/. and EXIT concurrently
to the normal operating mode (time indica
tion).
EXCEPTION:
lneffective in TEST mode, cancellation only possible with function keys or
with POWER OFF
SELECT mode (define operating conditions)
The Revox 8203 'Timer Controller is able to
display the date and time in the format you
are accustorned to.
o Select language
o Press EASY/. and SELECT concurrently
The display f ield offers one of the three lan
guages ENGLISH, DEUTSCH or FRANQAIS
for slection.
o Page with VOLUME
+/The desired language can be called on the
display by paging with the keys VOLUME
+l-
o Press ENTER key
The selected language is saved
I"!..!!.!!!-..I-i
o Select operating mode
The EASY function simplifies operation of
the listening functions Regardless of its previous state, the entire system is set correctly
for the selected program source with the
push of a single button. Components that
are no longer needed are switched off (exception: components that belong to an activated recording branch).
A detailed definition of the EASY function
can be found in the Section "EASY CON-
TROt'.
o Page with VOLUME
+/:
Function disabled
: The functions are only init ated by the remote control, the operation
on the system components is disabled.
EASY REN/ + LOC : The EASY f unctions are
initiated by the remote control as well as the
buttons on the systern components (applies
only to components with feedback such as
8215, 8226, 8285, 8286, and 8291 ).
EASY OFF
EASY REN/OTE
o Press ENTER key
The selected mode is stored
O
For enabling/disabling the programmed
switching functions, for example while you
are absent on vacation.
Of course. the quartz clock continues to run
and the programmed switching events re
main stored.
TIMER ON/OFF
o Page with VOLUME
+l: The switching functions are
executed. (acknowledge by the flashing
TIN/ER ON
sta r)
TINIER OFF
:
The switching functions are
not executed.
o Press ENTER key
The selected TIMER status is stored
The group of speakers to be enabled when
power is applied can be defined (only pos
sible with Revox B285 receiver, earlier moduls must be operated manually).
o Power ON condition
.
Page with VOLUN/lE
+/PWR UP: SPKR A : speaker group A
PWR UP: SPKR B - speaker group B
PWR UP: SPKR A+B : speaker groups A
and
B
: previously activated
speaker group
PWR UP: SPKR OFF = no speaker group
enabled (headphones)
PWR UP: PREV SPKR
o Press ENTER key
The selected power ON condition is stored.
The Revox 8203 ' Timer Controller exits the
SELECT mode and returns to the normal
operating mode (time indication).
10
TIME mode (Set date and time)
o Press EASY/. and TIME concurrently.
'!'i": i. i
...: i.-i
i'i
:"i:
i:1.:
'i
.i.
.i
r"'r r"': iiii'
.i. ii:!,lll: '...i
ln this mode the date and the time can be
The programmed calendar
changed.
ranges f rom the year'1985 to 2035. The pro
gram automatically detects the end of each
month and the occurence
of leap
years
which means that they do not have to be defined.
o Page with VOLUME
+/_i ....! ....'
!...
The number of the year can be increased by
pressing VOLUIVE * or decreased by pressing VOLUME -.
o Press ENTER key
The number of the year is stored and the cursor jumps to the month indication. the next
variable to be entered.
o Page with VOLUME
+/-
LUN/E
to desired month by
+
pressing VO-
or VOLUME -.
The month is sLored and the cursor jumps to
o Press ENTER key
o Page with VOLUME
Page
day indication.
+/-
o Press ENTER key
Set the desired day by pressing VOLUME
+
or VOLUME -.
The day is stored and the display changes to
time indication. The cursor is in the hours
pos ition.
o Page with VOLUME
+/-
The hours are stored and the cursor jumps
to the minutes position.
o Press ENTER key
o Page with VOLUME
o Press ENTER key
Set the desired hours by pressing VOLUME
keys.
+/-
Set the desired clock time by pressing the
VOLUN/E keys. When you overshoot the 59
minutes limit, the hours are not incremented
but the minutes indication returns to 00.
The current date and the valid time are accepted by the quartz clock. The display f ield
returns to the normal operating state: date
and time indication.
11
EVENT mode (programming of switching events)
.
Press EASY/. and EVENT concur-
rently
In
this mode up to five switching events can
be programmed and stored with
b
o Page with VOLUME
battery
ufferi ng.
+/Set the desired event by pressing the VOLUME keys
.
Press ENTER key
The switching event is selected and the cur
sor jumps to the indication EMPTY DATE, or
DAY
o Page with VOLUME
+/-
:
EN/PTY
switching event is not executed
DATE switching event is to be executed on
:
a specific date.
DAY - switching event is to be executed on
a specific day.
.
lf DATE has been selected, an event date
can be enetered in the same way as described in TIME MODE. (Refer to page 11,
Press ENTER key
TIME N/ODE)
lf DAY is selected the display changes to a
symbolic week representation. The cursor
jumps to the word END.
o Page with VOLUIVE
+l-
o Press ENTER key
o Page with VOLUME
o Press ENTER key
12
The cursor can be moved within the day-ofweek symbols with the aid of the VOLUME
key. The abbreviation of the day of the week
appears to the left of the symbol to which the
cursor points.
Pressing the ENTER key stores the day ofthe
week marked by the cursor (f irst letter is visible). lf ENTER is pressed a second time, the
entry will be deleted.
All days of the week on which the switching
event is to be executed are to be defined by
repetively pressing the VOLUME +/- and
ENTER keys (all seven days of the week can
be specified).
+/-
To
terminate the DAY selection position the
cursoT on the
word END.
The selected days of the week are stored.
The source selection appears on the display.
o Page with VOLUME
+/-
TUNER STATION
00:
Tuner* is selected for
listening
: CD- is selected for listening
: Play mode from recorder
TAPE 2: Play mode from recorder 2
. ln the case of TUNER and CD the cursor
CD TRACK 00
IAPE 1
'1
jumps to the STATION or TRACK indication
after the ENTER key is pressed. The desired
station ortrack number can be entered here.
The selected source is stored. The output
selection appears on the display.
o Press ENTER key
o Page with VOLUME
+/-
TO
TO
TO
TO
: Recording with machine No.
: Recording with machine No.2
SPKR A : Listening via speaker group A"
SPKR B : Listening via speaker group B.
TAPE 1
TAPE 2
1
- only with Revox B285 receiver.
The selected output is stored. The starting
time appears on the display.
o Press ENTER key
o Page with VOLUME
+/-
lnitially only the hours indication can
The hours are stored and the cursor jumps
to the minutes position.
o Press ENTER key
o Page with VOLUME
be
changed by pressing the VOLUME keys.
+/-
Set the minutes indication by pressing the
VOLUME +/- keys. When you overshoot
the 59 minutes limit, the hours are not incremented butthe minutes indication returnsto
00.
o Press ENTER key
o Page with VOLUME
The start time is stored. the display changes
to the stop time.
+/-
To save unnecessary paging time, the previously programmed start time is automatically taken as the stop time. This means that
it only needs to be changed by the duration
of the switching event.
First change or acknowledge the hours.
o Press ENTER key
o Page with VOLUME
.
Press ENTER key
The selected hours are stored. the cursor
jumps to the minutes indication.
+/-
Change the minutes in the same way as
when entering the start time.
i"'i
i": illl'illl' r':! i:l:
i-! i-- l':, .:i.. ...,: i"i
i.ii
:...r' !'
!! '!.i. tllli:.i.:
!:..r ...' ii
i i il:t'llli
The switching event is now completely pro-
grammed and stored. The Revox 8203 '
Timer Controller exits the EVENT mode and
returns to the normal operating mode (time
indication).
13
TEST mode (test switching event)
o Press EASY/o and EVENT concurrently
The programmed switching event can be
checked out in TEST mode. however, the event must be retrieved in the EVENT mode.
o Page with VOLUME
+lPress the VOLUME keys to set the event to
be tested.
o Press EASY/. and TEST concurrently.
The Revox 8203 'Timer Controller exits the
EVENT mode and executes the programmed switching event irrespective of
the programmed time. The time indication
appears in the display field. The test mode
only enables the event, the latter must be
switched off with STOP or POWER OFF.
NOTE:
lf any recorder has been involved in a test simulation, the tape must be rewound to the starting position.
14
EASY control
The EASY f unction greatly simplif ies the operation of your Revox hiJi system. With a single push
of a button it switches the receiver (preceiver) and the desired signal source to the correct play
function. The required system components are automatically switched on, those that are not
needed are switched off. (The components are not switched off when a recording is in prog ress).
The desired implementation of the EASY function is to be defined in SELECT MODE.
Keys
with
o PHONO
EASY
function
key
When the tone arm is swung over the platter, the cartridge is lowered atthe
start of the record and the record is played; the receiver is switched to
PHONO and the speaker group defined ln SELECT MODE is enabled.
oVA key
oDISC
Same effect as PHONO key.
key
o PLAY/NEXT
WhenaCDisinserted,theCDisplayedstartingwithtrackl.Thereceiveris
correspondingly switched on or over.
key
Same effect as DISC key.
aTAPEI or TAPE 2
key
When a tape or cassette is mounted, the selected unit is switched to play
mode. The receiver is correspondigly switched on or over.
ln the case of the cassette recorders B215 and B710, the MONITOR function
is switched to TAPE.
o PLAY or *-PLAY
key
Same effect as TAPE 1 or TAPE 2.
o ENTER
key
The previously selected station of the TUNER is activated. The receiver
correspondingly switched on or over.
rs
o Press SPEAKERS A and
EASY/. keys concurrently
Only the speaker group A is switched on, regardless of the existing switch-
o Press SPEAKERS B and
EASY/o keys concurrently
Only the speaker group B is switched on, regardless of the existing switch-
oPress REC and PLAY
or REC and PAUSE
concurrently
ing state.
ing state.
lf the cassette recorders 8215 and B71O are in record mode, the MONITOR function rs switched as follows:
TAPE if REC and PLAY are enabled
SOURCE if REC and PAUSE are enabled
15
EASY remote
a EASY function switched
on
The EASY functions are only executed via the buttons of the lR remote control. The operatron of the system vis the local equipment controls is disabled.
on
The EASY functions are executed by actuating the EASY buttons of the lR
remote control as well as the local equipment controls. (Localfunction only
possible on equipment with status feedback such as Revox 8215,8226,
EASY REM+LOC
o EASY function switched
8285,8286, and 8291).
EASY off
.
EASY function switched
16
off
Even when the EASY function is switched off. the operation of a listening
function is simplified, by simultaneously pressing EASY/. and a source selection key (PHONO, TAPE 1, TAPE 2 or DISC).
otherwise the operation of the system components remains unchanged.
An unintentional change of the operating state of the system isthus largely
prevented.
Other operating modes
B2OO ' Transceiver
o Connection
A 8206 ' Transceiver can be connected to
Main Room
:xtrtr"
(
o
E
Remote Room
.8206
Recelver
@@-
F
Remote Room
Remote Room
o 8206 Transmitter
.JSPl
:
"R"
each ofthe sockets 8206 A. B. and C. (Transceiver : short for transmitter/receiver). The
B206 is able to receive lR remote control
signals (also generated by controls of other
makes-) originating from an ancillary room
and to control other hi{i components (also
of other makes*, however. only in conjunction with the corresponding lR transmitter)
located in an ancillary room.
The B206, installed in an aclillary room.
transmits all received lR signals via cable in
unchanged form to the Revox 8203 ' Timer
Controller. The latter processes these signals and/or retransmits these via an lR transmitter adapter, if available. lf terminal A is
used, jumper JS'1 on the 8203 must be set to
the R (Receiver) position. How the unit is
opened for this purpose refer to the Section
"Replacing the batteries", (page 1B).
The lR transmitter adapter can be connected to socket A in place of the 8206. For this
f unction the jumper JS'1 in the 8203 must be
set to the T (Transmitter) position. How the
unit is opened for this purpose refer to the
Section "Replacing the batteries, page 1B).
Note:
Maximum cable length for undisturbed operatio n:
-8206 as receiver 30 m (100ft).
-B2OO as transmitter 2,5 m (Bft).
" The transmission of external lR signals is
onlV possible for svstems without carrier.
Serial interface RS 232
The Revox 8203 ' Timer Controller features
a serial interface on socket [12] which can
be used for linking a home or personal comp
ute
r.
ln this way all functions of the B203 as well
as the connected system components can
be controlled from the computer. In the IND
version it is possible to program additional
switching events.
Additional information as well as the pin assignment, command list. etc. can be found
in the lR Maintenance Instructions. part No.
10.30 0430.
lR configuration:
Full duplex, 3-wired link (GND, Tx, Rx).
- '1200
Baud, '1 start bit, '1 stop bit. B data bits,
no parity bit.
- Software handshaking (Xon, Xoff).
17
Technical appendix
Replacing the batteries
The B2O3 Timer Controller is equipped
o Buffer batteries
with batteries which supply the quartz clock
and prevent loss of data in the event of a
power failure.
lf the system is separated from the mains
completely, the battery charge is sufficient
for about 3 months.
With a Phillips screwdriver No.1 unfasten
o Remove cover plate
J
o
goGGoooo _ $el
,,ää@l@@@ö@@@@@@,t
o Replace batteries
the two screws marked with an arrow on the
rear panel. Remove the cover by sliding it
J
@
ba c kwa rd.
The cover plate has been lightly pretensioned by the factory
Remove the discharged batterles by lightly
pulling them out to their holder. Replace
them with three new batteries (type: alkalimanganese. size: IEC LRO [AN/3] '1,5V) En
sure that the polarity is correct!
Note:
The batteries are not charged by the unit.
Empty batteries are to be replaced in order
to avoid leakage and demages to the 8203 '
Timer Controller.
a Reinstall cover plate
Caref ully insert the cover plate into the f rontpanel groove and press the back down. Fas-
ten th screws.
Changing the setting of jumper JSl
o J umper JS1
By changing the setting of this jumper. terminal ä [9] of the B2O3 ' Timer Controller can
be changed overas a receiverortransmitter
for operation with a B206 ' Transceiver.
o Remove cover plate
With a Phillips screwdriver No.1 unfasten
the two screws marked with an arrow on the
rear panel. Remove the cover by sliding it
backward.
The cover plate has been Iightly pretensioned by the factory.
o Receiver
lf a 8206 ' Transceiver is to be connected as
the lR receiver, the jumper must be setto the
"R" position
o Transmitter
lf only the transmitter adapter of the 8206 '
Transceiver is to be connected as the lR
transm itter, the jumper m ust be set to the "T"
positio n.
o Reinstall cover plate
1B
refu ly i nsert the cover plate into the fro ntpanel groove and press the back down. Fasten the screws.
Ca
I
Technical data
Batteriy bullering:
Gontrollable devices:
Terminals 1to 8:
Revox 8215
Revox 8225
Revox
Revox
Revox
Revox
Cassette Tape Deck
Compact Disc Player mit
p
P board
Terminals:
Rece ver
Tuner Preampl fier
Direct Drive Turntable
B286
8291
MKi
Tape Recorder'
Termrnals 2 to 8:
(lND version only)
Revox PR99
Iermna Bll /Bl1A.
Revox
Tape Recorder
Revox 8710 Cassette Tape Deck
Revox PR99 MKI/1VKll Tape Recorder
Terminals 3206-A/ -B/
Size:
1769.327-40
Compact Disc Player
8226
8285
Revox
8206
Transceiver
ltC
1,5 V alkali-manganese
LR6 (A[43)
1 Parallel remote termlnal (811 /8710)
8 Serlal link l/0 terminals (terminal l provrdes
the power to the 8203).
3 lR receiver terminals (8206), one connectible
as a transmitter
1 RS 232 interlace (1200 baud).
IR sensitivity:
877
-C
3 Batteries:
Up to 15 m, with unobstructed llne of sight to the
hand-held tra nsm itter.
Via a 8206 Transceiver also from an ancillary
room (max.30 m cable length).
Power consumption:
approx. 0,5 watt
Dimensions:
WxHxD:450x39x332mm
Weight:
3.5 kg
(Terminal A: also lR transmitter adapter)
Terminal RS232
interface for a home or personal computer.
'Note::
The tape recorder Revox PR99lVKl must never,
and the Revox PR99 lt4Kll on y after modification,
be
connectedtoterminal1ofthe RevoxB203 Timer
Controller.
Power supply:
From any component of the system
*5VDC,
max.150mA.
Dimensions (mm)
19
FRANCAIS
Mode d'emploi
REVOX 8203 ' Timer Controller
Servez-vous de ce mode d'emploi pour vous guider lors de la
mise en service de votre appareil. Vous aurez ainsi rapidment
une vue d'ensemble complöte des diff6rentes possibilit6s d'utilisation.
AVIS IMPORTANT
Protlgezvotre appareil contre I'humidit6 et la chaleur excessive.
Placez-le de maniöre que les 6carts minimaux vers le bäti ou
d'autres appareils soient respect6s.
GARANTIE
Une carte de garantie sp6ciale est jointe aux appareils vendus
en Allemagne F6d6rale. Cette carte se trouve, soit dans l'emballage de I'appareil, soit dans une enveloppe en plastique placöe
sur un cöt6 de cet emballage. En I'absence d'une telle carte,
veuillez vous adresser ä votre revendeur REVOX ou ä votre
agence 169ionale REVOX
Le bon de garantie des appareils vendus en Suisse ou en Autriche est d6livr6 par le revendeur.
Le bon de garantie des appareils vendus en France se trouve
dans leur emballage. ll doit ötre convenablement rempli et sign6 par votre revendeur agr66 REVOX.
Veuillez observer que les garanties ne sont valables que dans le
pays d'achat. Nous attirons en outre votre attention sur la perte
de validit6 de la garantie qu'entraine toute manipulation ou 16paration effectu6e par un personnel non qualifi6.
EMBALLAGE
Conserver I'emballage d'origine. En cas de transport, cet emballage sp6cial constitue la meilleure protection de votre p16cieux appareil.
Table des matiöres
Page
G6n6ralit6s
lnstallation
et raccordement
avec bröve description des 6l6ments
de commande
End roit d'installation
Raccordement
Mise en service
Mise sous tension
G6n6ralit6s concernant la commande
lnterruption du mode de service
EXIT-MODE
D6termination des conditions de service
SELECT-MODE
R6glage de la date et de l'heure
TIME-MODE
3 ..5
6
6
7
B
I
9
11
Programmation de commutation
EVENT-MODE
Test de commutation
TEST-MO D E
12
Easy control
Touches ä fonction EASY
EASY REMOTE
EASY REM + LOC
EASY OFF
15
16
16
16
Autres modes
8206'
17
17
I
Annexe technique
Transceiver
nterface s6rielle RS 232
Replacement des batteries
D6placement du cavalier J51
Ca ract6ristiq ue tech n iques
14
1B
1B
19
0
ü
o
@
l14t t12l
TELECOMMANDE
INFRAROUGE
REVOX B2O5
tlll llot tel
t81
l7l t6t tsl t4t t3t tzl tll
[13]
Vue avant
El6ment
Fonction
tAl
Tableau d'affichage (16 chiffres ä cristaux liquides)
tBl
Fenötre du r6cepteur infrarouge
4
Vue arriöre
El6ment
Fonction
t1l
Cäble de liaison SERIAL LINK pour le premier appareil et raccordement
d'alimentation du 8203.
t2l ä t8l
Prises SERIAL LINK. Pour le raccordement d'autres appareils Hi-Fi Revox
avec SERIAL LINK.
fgl ä t11l
Prises de raccordement du
l12l
t13l
lnterface s6rielle RS232.
l14l
lnterrupteur pricipal pour les batteries-tampons.
8206 ' Transceiver comme r6cepteur lR suppl6mentaire dans d'autres piÖces.
La prise A est 6galement commutable comme 6metteur lR.
Prise PARALLEL REMOTE pour raccordement d'un magn6tophone Revox
877 ou 8710 MKll.
I
nstal lation, raccordement
o Endroit
/
Revox 8291
./'
Revox B285
Revox 8203
Revox 8226
Le Revox
8203 'Timer Controller s'intÖgre
ä
votre chaine Hi-Fi Revox. ll s'alimente ä partir d'un des appareils de votre chaine.
Remarque:
Les dimensions du 8203 permettent de le
placer avec un lecteur CD Revox 8225 ou
8226 dans une unit6 normale du bäti Revox
Disco 200 ou un U-Board standard.
Revox B215
Revox 8215
lnstallez d'abord votre chaine Hi-Fi Revox et
o Raccordement
contrölez qu'elle fonctionne parfaitement
vant de raccorder le 8203 ' Timer Contrrol-
"r/
//'
Tous les appareils de la chaine Hi-Fi doivent
ötre coup6s du r6seau.
a Retirer la fiche du r6seau!
c
@
lä
::#1"
/
le r.
o @
o Raccorder le cäble l1l
o @@@@@
0
@
Le cäble [1] doit ötre enfich6 dans la prise
SERIAL LINK d'un appareil 18215, 8225,
8226,8285,8286,8291). Par ce cäble, le
8203 regoit sa tension d'alimentation (*5 V)
et commande I'appareil raccord6. ll n'y a
pas besoin de ligne de commande suppl6menta ire.
o Raccordement des apppareils
Les autres appareils de la chaine disposant
d'un raccord SERIAL LINK doivent ötre raccord6s avec les cäbles joints aux prises [2] ä
[B] du 8203 ' Timer Controller.
o Raccorder la fiche au r6seau
Toute la chaine Hi-Fi Revox peut d6sormais
ötre raccordöe au r6seau
6
Mise en service
Dös que l'appareildevotre chaine Hi-Fi quia
6t6 raccord6 comme appareil [1] au B203 '
Timer Controller, est reli6 au 16seau, le 8203
' Timer Controller est 6galement aliment6 et
o Metre l'appareil sous tension
enc I ench6.
o Enclenchement des battteries
Les
:xffi"
o R6glages de base
batteries-tampons incorpo16es
ä
l'appa-
reil peuvent ötre enclench6es et d6clen-
o @
ch6es au moyen de l'interrupteur S1 (ä l'ar
riöre de l'appareil).
lnterrupteur enfonc6 : EN
lnterrupteur reläch6 : HORS
Pour empÖcher toute manoeuvre involontai
re, l'interrupteur de batterie est l6gÖrement
en retrait. On peut l'actionner facilement au
moyen d'un crayon ou d'un tournevis. En
cas de panne de r6seau, les batteries alimentent l'horloge ä quartz et la m6moire
d'6v6nements de maniöre que l'heure et le
programme ne soient par perdus. Pour un
temps d'usage des batteries maximal, ilfaut
que votre chaine Hi-Fi reste en 6tat Standby
quand elle n'est pas utilis6e.
A la premiöre mise sous tension, le tableau
d'affichage montre la date d'origine du logiciel et une heure.
Remarque:
La derniöre position de l'aff ichage p16sente
ne eto ile clig nota nte s ig na la nt q ue le Tim er
u
est enclench6 (TIMER ON) et que les fonc-
tion programm6s sont ex6cut6es.
o Versions d'appareils
ll y a deux versions du Revox 8203 ' Timer
Controller qui ne difförent que par le logiciel
int6g
16.
8203-C (version consommateur")
8203-lND (version industrielle-) dont le logiciel est 6quip6, ä la place du module 8285,
du module pour utilisation avec un magn6tophone Revox PR99 MKll".
Les appareils de la version industrielle sont
pourvus ä l'arriÖre d'une 6tiquette suppl6mentaire (lND).
Pour l'identification ult6rieure de la version
de logiciel. le Revox 8203 .Timer Controller
doit ötre mis hors tension et ä nouveau sous
tension (couper les batteries. retirer et raccorder ä nouveau le cäble f1l). Dans la ver
sion industrielle (8203-lND)
il n'y a pas
d'6toile clignotante au tableau d'affichage
(TIMER OFF)
*Remarque:
Le magn6tophone Revox PR99 MKll ne doit
jamais ötre branch6 ä l'6tat d'origine au raccord [1] du 8203 Si le B203 'Timer Control-
ler doit ötre alimentö depuis un
Revox
PR99MKll pour une raison quelconque,
il
faut imp6rativement proc6der ä la modif ication indiqu6e au mode d'emplol Revox lR
REMOTE CONTROL SYSTEN/ (no. comm.
10 30 0430).
Le branchement ä un Revox PR99 MKI n'est
permis de toute maniöre qu'au raccord 9
(raccord de t6l6commande parallöle).
7
G6n6ralit6s concernant la commande
Le Revox 8203 . Timer Controller est I'unit6 centrale de t6l6commande de votre chaine Hi-Fi Revox ll combine intelligemment les diff6rents appareils de la s6rie 8200 etsimplifie consid6rablement la commande des fonctions auditives dans les modes EASY REMOTE et EASY REM +
LOC. (Vous trouverez au chapitre "EASY CONTRO[' une d6finition pr6cise des fonctions EASY)
En outre, il s'agit d'un TIMER qui permet d'effectuer automatiquement ä I'heure voulue les 6v6-
nements programm6s.
Le Revox 8203. Timer Controller ne comporte pas d'6l6ments de commande. ll est command6
et programme d'une maniöre g6n6rale par la t6l6commande lR Revox 8205 (Exception: Le 8203
est 6qüip6 d'une interface s6rielle RS 232 et peut donc ötre command6 et programm6depuis un
ordinäteur domestique ou personnel. Voir mode d'emploi lR, no. comm. 10.30.0430).
La commande et la programation se font par menus et sont donc d'utilisation extrÖmement simple.
Les diff6rents menus sont indiqu6s sous lestouchesfonctionelles de l'6metteur lR 8205 etappel6s avec la touche EASY/. (point). (Presser et maintenir la touche EASY/., presser en mÖme
temps la touche TIME-* le Revox 8203 ' Timer Controller commute en mode TIME.
Mode
Mode
TIME:
EVENT:
Mode SELECT:
Mode
Mode
TEST:
EXIT:
169lage de la date et de I'heure.
programmation ou test de l'6v6nement de commutation.
d6termination des conditions de service du 8203 ' Timer Controller.
test de l'6v6nement de commutation programm6.
instruction d'arröt imm6diat du mode appel6.
(Mode - mode de service)
Au moyen des touches VOLUME +/-, on peut feuilleter tout le choix en avant ou en arriöre et/ou
quittancer au moyen de la touche ENTER. Toutes les autres touches conservent leurs fonctions
sans changement.
Ce mode de commande permet 69alement de feuilleter rapidement pour contröle et 6ventuellement de corriger un menu ou un 6v6nement (EVENT) avec la touche ENTER.
Remarquer:
Si le 8203 . Timer Controller est dans I'un des modes d'introduction, il interrompt ce mode s'il
n'y a plus eu d'introduction pendant 60 secondes environ.
Dans ce cas, le mode est appel6 ä nouveau et on saute. en actionnant plusieurs fois la touche EN TER, jusqu'au point oü le mode a 616 interrompu.
Si vous mettez le Revox 8203' Timer Controller en service pour la premiöre fois, il est recommand6 de suivre le mode d'emploi ci-dessous point par point et d'ex6cuter les exemples quiy
sont d6crits.
ATTENTI O N:
Pour 6viter une surmodulation du r6cepteur lR, ne pas tenir l'6metteur lR ä distance trop courte
directement devant le r6cepteur. La surmodulation se remarque ä ce que les instructions ne sont
pas effectu6es bien que la lampe rouge (LED) de la fenötre du recepteur s'allume.
Mode EXIT (interruption du mode de service)
c Presser les touches EASY/r et
Cette introduction permet d'interrompre en
tout temps le MODE appel6.
Les introductions d6jä termin6es par ENTER
sont maintenues.
Le Revox 8203 ' Timer Controller revient en
EXIT en möme temps
mode de service normal (indication
de
l'-heure).
EXCEPTION:
Sans effet en mode TEST, l'interruption n'6tant possible qu'avec les touches fonctionelles ou avec POWER OFF
SELECT mode (d6finition des conditions de service)
Le Revox B2O3 ' Timer Controller peut p16senter la date et l'heure sous la forme que
vous pr6f6rez.
o S6lection de langue
o Presser les touches EASY/. et SELECT en möme temps
Le
tableau d'affichage ä choix l'une des trois
langues ENGLISH, DEUTSCH ou FRANCAIS
o Feuilleter avec VOLUME
+/En feuilletant avec les touches VOLUME
, mettre la langue voulue ä l'affichage.
+/
o Presser la touche ENTER
La langue choisie est memonsee.
o Choisir le mode de service
La fonction EASY (: simple,facile)facilite la
commande des fonctions auditives. Une
simple pression sur une touche rögle cor-
rectement toute l'installation pour la source
de programme choisie. ind6pendamment
de l'6tat ont6rieur de l'installation. Les appareils qui ne sont plus utilis6s sont mis hors
tension (exception: appareils faisant partie
d'un circuit d'enregistrement activ6).
Vous trouverez au chapitre "EASY CONTROL'une d6finition pröcise des fonctions
EASY
o Feuilleter avec VOLUN/E
+/OFF: Fonction coup6e.
EASY REN/OTE : Les fonctions EASY ne
sont d6clanch6es que par la t6l6comman
de, la commande aux appareils eux-mömes
EASY
est inchang6e.
EASY
REM+LOC: Les fonctions
EASY
sont d6clench6es par la t6l6commande ainsi que par les touches d'appareils (n'est valable que pour les appareils avec signal en
retouT comme 8215,8226.8285, B2BG er
B291
)
o Presser la touche ENTER
Le mode s6l6ctionn6 est m6moris6
Les fonctions programm6es peuvent etre
enclench6es et d6clench6es d'une maniÖre
q6n6rale. par example pendant les vacances. llhorloge ä quartz continue bien entendu de fonctionner et les commutations programm6es restent m6moris6es.
o Enclencher et d6clencher TIMER
o Feuilleter avec VOLUME
+/TIN/ER ON : Les fonctions de commutations sont effectu6es (ce qui est indiqu6 par
l'6toile cllonotante).
TIN/ ER O FF : Les fonctions de commutation
ne sont pas effectu6es.
o Presser la touche ENTER
t6tat choisi du TIMER est memoris6
l-- !: ! nr
o Condition d'enclenchement
! ! I_
..
-'. r- l.
II
L-!
lci, on peut d6finir le groupe de haut-parleurs devant ötre activ6 ä l'enclenchement
de l'installetion (n'est possible qu'avec le 16cepteur Revox 8285, les modöles antörieurs
doivent ötre commandös ä la main).
o Feuilleter avec VOLUME
+/- groupe de haut-parleurs
^
PWR
UP SPKR B: groupe de haut-parleurs
B
PWR UP. SPKR A+B : groupe de haut-par
PWR UP: SPKR A
o Presser la touche ENTER
leurs A et B
PWR UP: PREV SPKR - dernier groupe de
haut parleurs activ6s
PWR UP: SPKR OFF : pas de groupe de
haut-parleurs activ6s (casque)
La condition d'enclenchement choisie est
m6moris6e. Le Revox 8203 'Timer Controller termine le mode SELECT et revient en
mode normal (indication de l'heure).
10
Mode TIME (r6glage de la date et de I'heure)
c
Presser les touches EASY/r et Tl-
ME en möme temps
Dans ce mode, on peut modifier la date et
l'heure. Le calendrier programm6 va de
1985 ä 2035. Le changement de mois et
l'ann6e bissextile sont connus du program-
me et n'ont pas besoin d'ötre indiqu6s.
o Feuilleter avec VOLUME
+/En pressant le touche VOLUN/E +, on peut
augmenter le mill6sime et le diminuer avec
la touche VOLUME -.
o Presser la touche ENTER
Lann6e est m6moris6e et le curseur (indica-
teur de position) passe ä l'indication
du
mois, la prochaine grandeur ä introduire.
o Feuilleter avec VOLUME
+/-
o Presser la touche ENTER
o Feuilleter avec VOLUME
Au moyen des touches VOLUME + et VO
LUME
, passer au mois en question.
Le mois est m6moris6 et le curseur passe
l'aff ichage de la date.
+/-
o Presser la touche ENTER
ä
Au moyen des touches VOLUME + et VOLUN/E
-,
169ler la date.
La date est m6moris6e et l'aff ichage passe ä
l'indication de l'heure. Le curseur marque
les heures.
o feuilleter avec VOLUME
+/-
En pressant les touches VOLUME, 169ler
I'h
o Presser la touche ENTER
o Feuilleter avec VOLUME
o Presser la touche ENTER
e u
re.
Lindication des heures est m6moris6e et le
curseur passe ä l'indication des minutes.
+/-
R6gler I'heure en pressant les touches VOLUME En d6passant les 59 minutes, l'heure
ne change pas mais Ies minutes passent ä
00
La date et l'heure ont 616 enregistr6es par
I'horloge ä quartz Iaffichage indique ä nou
veau l'6tat normal: date et heure.
11
Mode EVENT (programmation de l'6v6nement de commutation)
a Presser les touches EASY/r et
EVENT en möme temps
Dans ce mode de service, il est possible de
programmer jusqu'ä cinq commutations et
oe les enregistrer avec batlerie-tampon.
o Feuilleter avec VOLUME
+/En pressant les touches VOLUME, 169ler la
commutation voulue.
o Presser la touche ENTER
L 6v6nement de commutation est s6lection
n6 et le cuseur passe ä l'affichage VIDE, DATE ou JOUR.
o Feuilleter avec VOLUME
: La commutation n'est pas effectu6e.
: La commutation doit 6tre effectu6e
ä une date donn6e.
JOUR : La commutation doit ötre effectu6e
+/-
VIDE
DATE
certains jours Loules les semaines.
o Presser la touche ENTER
o Feuilleter avec VOLUIVE
ii
+/-
o Presser la touche ENTER
ii ii...!
i... ::..:
Si l'on a s6lectionn6 DATE, les touches VOLUN/E +/- et ENTER permettent d'introduire une date ä commutation de la möme ma
n iöre que sous TIM E MODE (voir paqe 11. TlME MODE)
En s6lectionnant JOUR, l'affichage passe ä
une repr6sentation hebdomadaire symbolique. Le curseur marque le mot FlN.
En pressant les touches VOLUME, le cur
seur peut ötre d6plac6 parmi les symboles
des jours de semaine. A gauche des symboles, on a l'abr6viation du jour de la semaine
marqu6e par la position curseur.
touche ENTER enregistre le lour de la semaine marquö du curseur (la premiöre lettre
est visible) en pressant une seconde fois la
La
touche ENTER. l'introduction disparait
ä
nouveau.
En pressant plusieurs fois les touches VOLUN/E +/- et ENTER. on peut d6signer tous
les jours de la semaine auxquels la commutation doit ötre effectu6e (on peut 6galement indiquer tous les jours).
o Feuilleter avec VOLUME
o Presser la touche ENTER
12
+/-
Pourterminer la s6löction du jour, ilfaut mettre le curseur sur l'indication FlN.
Les
jours choisis sont m6moris6s. La s6lec-
tion de source apparait ä l'aff ichage.
o Feuilleter avec VOLUME
TUNER STATION 00 : 6coute de tuner*
CD TRACE 00 : 6coute du CD"
TAPE 1 : mode reproduction du magn6to-
+/-
phone
1
fAPE2:
mode reproduction du magn6to-
phone 2
.
Pour TUNER et CD. le curseur passe, aprÖs
actionnement de la touche ENTER, ä l'indication de STATION ou de TRACE. Avec les
touches VOLUN/E +/-, on peut introduire le
num6ro de station ou de trace d6si16.
La source s6lectionn6e est enregistr6e. Lafflchage indique la s6lection de sortie.
o Presser la touche ENTER
o Feuilleter avec VOLUME
: enregistrement avec mag
VERS TAPE 2 : enregistrement avec magn6tophone 2
VERS HP A : 6coute par groupe de HP A.
VERS HP B : 6coute par groupe de HP B"
+/-
VERS TAPE 1
n6tophone
'1
" seulement avec r6cepteur Revox 8285.
o Presser la touche ENTER
o Feuilleter avec VOLUME
La sortie s6lectionn6e est m6moris6e. Lheure de d6part apparait ä I'aff ichage.
+/-
En pressant les touches VOLUME, on ne
peut modifier d'abord que l'indication de
l'heu re.
o Presser la touche ENTER
o Feuilleter avec VOLUME
Lheure choisie est m6moris6e. le curseur
passe ä l'indication des minutes.
+/ii
o Presser la touche ENTER
o Feuilleter avec VOLUME
Uheure de d6part est m6moris6e, l'aff ichage
passe ä I'heure stop.
+/-
o Presser la touche ENTER
o Feuilleter avec VOLUME
o Presser la touche ENTER
Les touches VOLUME +/- permettent de
modifier les minutes. En d6passant les 59
minutes, l'indication de l'heure ne change
pas mais les minutes passent ä 00.
Pour ne pas feuilleter trop Iongtemps, l'heu-
re de d6part d6jä programm6e est reprise
automatiquement ä l'indication de I'heure
stop. Elle doit uniquement ötre modifi6e de
la dur6e de la commuLation.
Modifier d'abord l'heure, et confirmer.
f heure choisie est m6moris6e, le curseur
passe ä l'indication des minutes.
+/-
Modif ier les minutes comme ä I'introduction
de l'heure de d6part.
L6v6nement de commutation est int6grale-
ment programm6 et m6moris6. Le Revox
8203 ' Timer Controller termine le mode
EVENT et revient en mode normal (indication de l'heure).
13
Mode TEST (contröle de l'6v6nement de commutation)
o Presser les touches EASY/o et
EVENT en möme temps.
Le mode TEST permet le contrÖle des commutations programmÖes mais doit Ötre ap
pel6 par le mode EVENT.
o Feuilleter avec VOLUN/E
+/-
R6gler la commutation ä tester au moyen
des touches VOLUME.
i::::!.ii::::i'i-i-
i:i;::;,:
:: i..:':.::i-t*"
o Presser les touches EASY/o et
TEST en möme temps.
Le Revox B203 ' Timer Controller coupe le
'n
mode FVFNT er eltectue la conmuLation
diqu6e ind6pendamment de l'heure programm6e. Le tableau d'affichage indique
l'heure. Le mode TEST ne fait qu'enclencher
la commutation qui doitÖtre dÖclench6e par
les touches STOP ou POWER OFF.
REMAROUE:
Aprös une simulation test, les magn6tophones 6ventuellement concern6s
doivent ötre rebobin6s en position de d6part.
14
EASY control
La fonction EASY simplifie consid6rablement l'utilisation de votre chaine Hi-Fi Revox. Par simple
pression sur un boutton, elle commute le r6cepteur et la source voulue ä la fonction de reproduction correcte. Les appareils necessaires sont mis sous tension, les autres hors tension (lorsqu'une fonction d'enregistrement est activ6e, les appareils ne sont pas mis hors tension).
Le mode d'ex6cution voulu des fonctions EASY doit ötre 16916 en mode SELECT.
Touches ä fonction EASY
.Touche PHONO
o Touche
VA
Lorsque le bras est pivot6 vers le d isque, il est abaiss6 au d6but d u d isque el
la reproduction commence; le r6cepteur est commut6 sur PHONO et le
groupe de haut-parleurs d6fini en mode SELECT est activ6.
Mömes effets que la touche PHONO.
o Touche DISC
U ne fois le d isque compact install6, la reprod uction se fa it ä partir de la piste 1. Le r6cepteur est enclench6 ou commut6 en cons6quence.
oTouche PLAY/NEXT
Möme effets que Ia touche DISC.
oTouches TAPE 1 ou TAPE 2
Lorsqu'une bande ou une cassette est install6e, l'appareil s6lectionnd est
commut6 sur reproduction. Le r6cepteur est enclench6 ou commut6 en
cons6quence.
Avec les magn6tophone ä cassettes 8215 et 8710, la fonction MONITOR
est en outre commut6e sur TAPE.
oTouches PLAY ou *-PLAY
Mömes effets que les touches TAPE 1 ou TAPE 2.
oTouche ENTER
La derniöre station 6cout6e du TUNER est activ6e. Le r6cepteur est enclenchd ou commut6 en cons6quence.
o Presser les touches SPEAKERS
A et EASY/. en m6me temps
Le groupe de haut-parleurs A est enclench6 exclusivement, ind6pendamment de l'6tat actuel de commutatron
o Presser les touches SPEAKERS
B et EASY/. en mÖme temps
Le groupe de haut-parleurs B est enclench6 exclusivement. ind6pendamment de l'6tat actuel de commutation.
o Presser les touches REC et PLAY
ou REC et PAUSE
en möme temps
Avec les magn6tophones ä cassettes 8215 eI8710,la fonction MONITOR
est commut6e en cons6quence pendant l'enregistrement:
TAPE pour REC et PLAY
SOURCE pour REC et PAUSE
15
EASY remote
o Fonction EASY
enclench6e
Les fonctions EASY ne sont ex6cut6es que par les touches de la t6l6com-
mande lR. La commande de l'installation par les touches locales d'appareils n'est pas influenc6e.
EASY REM+LOC
o Fonctron EASY
enclench6e
Les fonctions EASY sont ex6cut6es par les touches EASY de la t6l6commande lR ainsi que celles des touches locales d'appareils.
(La fonction locale n'est possrble qu'avec les appareils ä signal d'6tat en retour comme Revox 8215,8226,8285, B2BO et 8291).
d6clench6e
Möme lorsque la fonction EASY estd6clench6e, une commande simplifi6e
de fonctions auditrves est possible; en pressant simultanement la touche
EASY/o et une touche de s6lection de source (PHONO, TAPE 1, TAPE 2 ou
EASY OFF
o Fonction EASY
DISC)
Ce mode d'exploitation n'influence pas la commande des appareils et 6vite
dans une large mesure une modrfication involontaire de l'6tat de fonction-
nement de l'installation.
16
Autres modes
B2OO
.Transceiver
Un 8206 ' Transceiver peut ötre raccord6 ä
chacune des prises 8206 A, B et C (Tranceiver : mot c166 ä pa rtir de Transmitter [6metteurl et Receiver I16cepteur]). Le 8206 permet la 16ception des signaux de t6l6commande lR (möme autres marques*) depuis
une piöce voisine ou la commande lR d'appareils (möme d'autres marques* mais seulement avec l'6metteur lR correspondant)
dans une piöce voisine.
Piöce principale
o Raccordement
tä
::üff
o @
RS232
Piöce votstne
@
@-
o R6cepteur 8206
E
Le 8206 install6 dans une piÖce voisine
transmet au Revox 8203 ' Timer Controller
tous les signaux lR regus sous forme inchang6e par cäble. Ceux-ci sont trait6s eI/ou t6ömis par un adaptateur d'6mission lR 6ventuellement p16sent (en utilisant la prise A, il
faut mettre le cavalier JS'1 dans le B203 en
position "R" IReceiver]. Pour ouvrir l'appareil, voir sous "remplacement des batteries"
Ipage 1B]).
Piöce voisine
.rsP1: "R"
Piöce voisine
lladaptateur d'6mission lR peut se Taccor-
o Emetteur 8206
der ä la prise A ä la place d u 8206. Pour cette
fonction, il faut mettre le cavalierJS'l dans le
8203 en position "T" (Transmitter). Pour ouvrir l'appareil, voir sous "remplacement des
batteries" (page '18).
Remarque:
Longueur du cäble maximale pour op6ration non perturb6e:
- 8206 comme r6cepteur (Receiver) 30 m.
- B206 comme 6metteur
(Transmitter)
2,5m.
"
La transmission de signaux lR 6trangers
n'est possible que pour les systÖmes sans
po rteuse.
lnterface s6rielle
RS
232
Le Revox 8203 'Timer Controller est pourvu
ä la prise [12] d'une interface s6rielle pour
utilisation avec un ordinateur domestique
o
o
ou personnel.
Cela permet la commande de toutes les
fonctions du B203 et des appareils raccord6s. En outre, avec la version lND, il est pos-
sible de programmer d'autres commutati
ons.
Pour de plus amples d6tails ä ce sujet ainsi
que sur l'occupation des raccords. la liste
ffi
des instructions, etc., voir l'instruction de
service lR. no. comm. 10.30 0430
Structure de l'interface:
Full duplex, connexion 3{ils (GND, Tx, Rx).
-1200 Baud,'1 bit start, 1 bit stop, B bits de
-
donn6es, pas de bit
de
parit6,
- "Handshake" logiciel (Xon, Xoff).
17
Annexe technique
Replacement des batteries
' Timer Controller est 6quip6 de
batteries-tampons alimentant l'horloge ä
quartz et la m6moire ä 6v6nements en cas
Le 8203
o Batteries-tampons
de panne de röseau.
Si la chaine est s6paree complÖtement du
r6seau, la charge des batteries suffit pour
une duröe de 3 rrois env.
A l'arriöre de l'appareil, Öter les deux vis
o D6montage du couvercle
r.l
o
ll
o Replacement des batteries
s
u
@
marqu6es d'une flöche au moyen d'un tour
nevis cruciforme no.1. Retirer le couvercle
vers l'arriöre en soulevant (le couvercle est
l69örement pr6tendu d'usine).
Retirer les batteries us6es du support par
une l6göre traction et les remplacer par trois
batteries neuves (type alcalin au manganÖse. grandeur CEI LR6 [AN/3] 1.5 V) Attention
ä la polarit6l
Remarque:
Les batteries ne sont pas recharg6es par
l'appareil. Afin d'6viter des fuites et des domages au B2O3 'Timer Controller les batteries vides doivent ötre remplac6es.
o Montage du couvercle
Introduire le couvercle avec p16caution
dans la rainure de la plaque f rontale et presser derriöre vers le bas. Serrer les vis.
D6placement du cavalier JSl
o Cavalier J51
En
d6placant ce cavalier, le raccord A [9] du
8203 ' Timer Controller est commut6, pour
Ie service avec ün 8206 Tranceiver, comme
16cepteur (Receiver) ou 6metteur (Transmitter).
o D6montage du couvercle
A I'arriöre de I'appareil. öter les deux vis
o R6cepteur
S'il faut raccorder un
o Emetteur
Si seul l'adaptateur d'6mission du 8206 '
Transceiver doit ötre raccord6 comme
marqu6es d'une flöche au moyen d'un tour
nevis cruciforme no. 1. Retirer le couvercle
vers l'arriöre en soulevant (le couvercle est
l69örement pr6tendu d'usine).
B206
Transceiver
comme 16cepteur lR, le cavalier doit ötre m is
en position "R".
6metteur lR. le cavalier doit Ötre mis en posi
tion "T".
a Montage du
1B
COUVETCIC
lntroduire le couvercle avec p16caution
dans la rainure de la plaque frontale et presser derriöre vers le bas. Serrer les vis.
Caractöristiq ues tech niques
Appareils pouvant ötre command6s:
Raccords 1 ä B:
Revox
Revox
Revox
Revox
Revox
Revox
Raccords 2 ä 8:
(version I ND seulement)
Raccord B7l
/BIIA.
Raccords 8206-A/-3/'C
8215
8225
8226
B2B5
8286
B291
Revox PR99
Cassette Tape Deck
Compact Disc Player avec carte pP
1.169.327-40
Compact Disc Player
Rece ver
Tuner Preamplrfier
Direct Drive Turniable
M Kl
I
Tape Recorder"
877
Mlll4Kll
Revox
Iape Recorder
Revox 8710 Cassette Tape Deck
Tape Recorder
Revox PR99
Revox
8206
Batteries-tampons:
3 batteries alcalines au manganöse 1,5V
Grandeur: CEi LR6 (AM3)
Raccords:
1 raccord parallöle töl6commande
(871/8710)
8 raccords s6riels Link l/O (raccord 1 pour I'alimen
iaiion du 8203).
3 raccords pour r6cepteurs lR (8206), 'un 6tant
commutab e comme 6metteur.
1 interface RS232 (1200Baud).
n avec önetteur ä ra n. en vue d recle
Egalernerl depuis une piäce voisine pa' le 8206
Transceiver (longueur max. de cäbles 30 m).
Sensibilit6 lR:
jusqu ä 15
Consommation:
env,0,5W
Dimensions:
LxHxP:450x39x332mm
Poids:
3,5 kg
Transceiver
(raccord Ar adaptateur d'ömission lR öga ement)
Raccord RS232
'Remarque:
nterface pour ordinateur domestique ou personnel
Le magnötophone Revox PR99 MKI ne doit jamais
1 du Revox 8203 Timer
Controller, le Revox PR99 M Kl I uniquement aprös
mod fication.
depuis un appareil quelconque de 'installation
öire branchö au raccord
Alimentationl
*5VDC,
max.15OmA.
Dimensions (mm)
'19
RS
232
ASC ll Strings
lR-Sender
Display for
switching event
--:-,/-'-->
(
__L _
-----,/_--->
l.r.
1,,
lL-fr
L-t-l
\l
l
Up to 3 units
Max. Distance 30 m
--ilt
I
JLIL-IL-IL-
lR code
serial
!.Rrvox gzSs
8203
TIMER
CONTROLLER
Up to
8 units
t
(
;-1r;t
lezoril
lszorcol
i
'r':* J)
Direct lnput
if not
connected to 8203
Main room
" B285
ist steuerbar mit der Version 8203-C
PR99 MKII ist steuerbar mit der Version 8203-lND
"
B2B5
controllable with version 8203-C
PR99 MKII controllable with version B203-lND
" B285
est commandable avec la version 8203-C
PR99 MKII est commandable avec la version 8203-lND
t
+
I
I
ffi
ffi
Remote
Remote