1
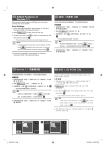
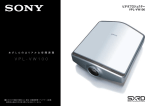
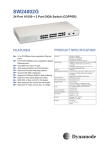
AN-L10T
AN-L10T
取扱説明書
OPERATION MANUAL
MODE D’EMPLOI
BEDIENUNGSANLEITUNG
MANUAL DE OPERACION
For Customers in the U.S.A.
THIS DEVICE COMPLIES WITH PART 15 OF THE FCC
RULES.
OPERATION IS SUBJECT TO THE FOLLOWING TWO
CONDITIONS:
(1) THIS DEVICE MAY NOT CAUSE HARMFUL
INTERFERENCE, AND
(2) THIS DEVICE MUST ACCEPT ANY INTERFERENCE
RECEIVED, INCLUDING INTERFERENCE THAT MAY
CAUSE UNDESIRED OPERATION.
TINS-7267CEZZ
1P01-JKG
警告
10BASE-T ボード
10BASE-T BOARD
CARTE 10BASE-T
10BASE-T-BOARD
TARJETA 10BASE-T
10BASE-T
10BASE-Tボードの取り付けおよび取り外しは必ずサービス
マンが行うようにしてください。
誤って装着すると、火災や感電、けがの原因となります。
この装置を家庭環境で使用すると電波妨害を引き起こすことがありま
す。この場合には使用者が適切な対策を講ずるよう要求されることが
あります。
10BASE-TボードAN-L10Tは、シャープのプロジェクターに装着す
ることで10BASE-Tインターフェースによるプロジェクターの制御を
可能にします。
10BASE-Tボードの装着およびご使用の前に、プロジェクター本体お
よびSharp Advanced Presentation Software Professional
Edition の取扱説明書を必ずお読みください。
付属品
Included Items
各部のなまえとはたらき
10BASE-T ボード 1枚
1 10BASE-T BOARD
WARNING:
化粧板 1枚
1 Plotter
INFORMATION
This equipment has been tested and found to comply with
the limits for a Class A digital device, pursuant to Part 15 of
the FCC Rules. These limits are designed to provide
reasonable protection against harmful interference when the
equipment is operated in a commercial environment. This
equipment generates, uses, and can radiate radio frequency
energy and, if not installed and used in accordance with the
operation manual, may cause harmful interference to radio
communications. Operation of this equipment in a residential
area is likely to cause harmful interference, in which case the
user will be required to correct the interference at his own
expense.
ネジ 7本
7 Screws
各部のなまえ
Part Names
10BASE-T CONTROL
10BASE-T
This equipment complies with the requirements of Directives
89/336/EEC and 73/23/EEC as amended by 93/68/EEC.
Ce matériel répond aux exigences contenues dans les
directives 89/336/CEE et 73/23/CEE modifiées par la directive
93/68/CEE.
Dieses Gerät entspricht den Anforderungen der EGRichtlinien 89/336/EWG und 73/23/EWG mit Änderung 93/68/
EWG.
Este aparato satisface las exigencias de las Directivas 89/
336/CEE y 73/23/CEE, modificadas por medio de la 93/68/
CEE.
Printed in Japan
Imprimé au Japon
In Japan gedruckt
Impreso en Japón
A.プロジェクター本体の設定
1. 10BASE-Tボードを装着したプロジェクターのメニュー画面から
「オプション」を選ぶ。
2. 「LANボード」を選ぶ。
設定用のサブメニューが表示されます。
3. 「IPアドレス設定」を選び、このボード用として割り当てるIPアド
レスを入力する。
4. 同様にゲートウェイ設定とサブネットマスクを入力する。
ENGLISH
Warning:
10BASE-T Board installation/uninstallation must be performed
by authorized service personnel only.
Warning
This is a class A product. In a domestic environment this
product may cause radio interference in which case the user
may be required to take adequate measures.
The AN-L10T 10BASE-T board can be installed in an expansion slot on a Sharp projector to control the projector by
10BASE-T interface.
Before installing and using this board, be sure to thoroughly
read the operation manuals accompanying the projector and
Sharp Advanced Presentation Software Professional Edition.
Part Names
1 10BASE-T
port
Use UTP cables for 10BASE-T/100BASE-TX (category5).
When connecting a PC to this board, use a cross type
cable; and when connecting a Hub to this board, use a
straight type cable.
2 LED indicator ( LINK )
Lights up when this board is linked.
3 Status LED ( TX/RX )
Lights up when data is transmitted or received.
Set up
A. “Setting Up” the Projector
1. Select “Options” from the menu screen of the projector which
the 10BASE-T board is installed.
2. Select “LAN board”.
Sub menu screen for set up appears.
3. Select “IP Address Set” and enter the address assigned for
this board.
4. Enter the Gateway address and Subnet mask.
注意
THIS CLASS A DIGITAL APPARATUS COMPLIES WITH
CANADIAN ICES-003.
CET APPAREIL NUMÉRIQUE DE LA CLASSE A EST
CONFORME À LA NORME NMB-003 DU CANADA.
110BASE-Tポート
ケーブルは10BASE-T/100BASE-TX用UTPケーブル(カテゴリ
5)を使用してください。
PCと本ボードを接続する場合には、クロスタイプのケーブルを使
用、Hubと本ボードを接続する場合には、ストレートタイプのケー
ブルを使用してください。
2インジケータLED(LINK)
リンク時に点灯します。
3ステータスLED(TX/RX)
データ送受信時に点灯します。
設定方法
FCC Regulations state that any unauthorized changes or
modifications to this equipment not expressly approved by
the manufacturer could void the user’s authority to operate
this equipment.
For Customers in Canada
日本語
LINK
1
TX/RX
3
2
IPアドレス、ゲートウェイ設定、サブネットマスクが不明な場合は、
ネットワーク管理者へ問い合わせてください。
B. Sharp Advanced Presentation Software Professional
Editionの設定
• 「プロジェクター1台操作」モードで使用する場合
「ファイル」メニューの「操作台数設定」をクリックし、「プロジェ
クター1台操作」を選択する。
次に、「ファイル」メニューの「プロジェクター設定」をクリック
し、A-3項で入力したIPアドレスを入力する。
• 「プロジェクター複数台操作」モードで使用する場合
「ファイル」メニューの「操作台数設定」をクリックし、「プロジェ
クター複数台操作」を選択する。
次に、「ファイル」メニューの「スキャン設定」をクリックし、A-3
項で入力したIPアドレスを入力する。
詳しくは、Sharp Advanced Presentation Software Professional Editionの取扱説明書をお読みください。
故障かな?と思ったら
正常に動作しない場合は、IPアドレス、ゲートウェイ設定、サブネッ
トマスク等の各種設定、およびケーブルなどの接続を確認してくださ
い。
また、Sharp Advanced Presentation Software Professional
EditionはVersion 1.3以降のものを使用してください。
(下記弊社ホームページにて最新版を入手できます。)
http://www.sharp-world.com/projector/
おもな仕様(インターフェース)
規格:IEEE802.3準拠(10BASE-T)
・コネクタ:RJ-45
・最大伝送速度:10 Mbps*
・最大伝送距離:100メートル*
*ハブおよび本ボード間
本製品の仕様および外観は改良のため予告なく変更となることがあり
ます。
• If the IP address, Gateway address or Subnet mask is
unknown, refer to a network administrator.
B. Setting Up the Sharp Advanced Presentation Software
Professional Edition
Enter the IP address as in step A-3.
When setting the “Operation Mode” to the “Single Projector
Operation Mode”, enter the address in the “Projector Setting”
menu, and to the “Multiple Projector Operation Mode”, enter it
in the “Scan Setting” menu.
Troubleshooting
If it does not operate correctly, check cable connection and
each setting related to IP address, Gateway address, Subnet
mask, etc.
Use the Sharp Advanced Presentation Software Professional
Edition Version 1.3 or higher.
Download
the latest version from our website using the
FRANÇAIS
following URL:
http://www.sharp-world.com/projector/
Major Specifications (Interface)
Standard: Conforms to IEEE802.3
• Connector: RJ-45
• Max. transmission speed: 10 Mbps*
• Max. transmission range: 330 ft. (Approx. 100m)*
*Between the hub and this board
• Note that the specifications and the appearance of this
board are subject to change without prior notice for the
purpose of design improvements.
AN-L10T
Matériel compris / Mitgelieferte Gegenstände / Accesorios incluidos / 所包括的物品
1 CARTE 10BASE-T
1 10BASE-T-BOARD
1 TARJETA 10BASE-T
1块10BASE-T栏目
FRANÇAIS
1 plaque
1 Plotter
1 trazador
1块安装板
7 vis
7 Schrauben
7 tornillos
7个螺钉
DEUTSH
Nomenclature des organes
Lage der Bedienelemente
Nomenclatura
部件名称
10BASE-T CONTROL
10BASE-T
LINK
1
TX/RX
3
2
ESPAÑOL
Avertissement:
Warnung:
Advertencia:
警告:
L’installation/désinstallation de la carte 10BASE-T ne doit être réalisée
que par un personnel de service autorisé.
Die Installation bzw. Entfernung des 10BASE-T-Boards darf nur durch
autorisiertes Wartungspersonal vorgenommen werden.
La instalación/desinstalación de la tarjeta 10BASE-T deberá ser
realizada por personal de servicio autorizado solamente.
10BASE-T栏目的安装与拆卸必须由经授权的专业人员来进行。
Avertissement
Warnung
Advertencia
Cet appareil est un produit de classe A. Dans un environnement
domestique, il peut causer des interférences radio contre lesquelles
l’utilisateur est requis de prendre les mesures appropriées.
Dieses ist ein Computer-Produkt der Klasse A. In einem
Wohnbereich kann dieses Produkt zu Interferenzen beim Radio- und
Fernsehempfang führen, die durch den Benutzer dieses Produktes
durch entsprechende Maßnahmen behoben werden sollten.
Éste es un producto de la clase A. En un ambiente doméstico, este
producto puede causar interferencias de radio, en cuyo caso, el
usuario tal vez tenga que tomar las medidas adecuadas.
La carte AN-L10T 10BASE-T peut être installée dans une des fentes
d’extension d’un projecteur Sharp afin de commander le projecteur par
l’interface 10BASE-T. Avant d’installer et d’utiliser cette carte, lisez
attentivement les modes d’emploi fournis avec le projecteur et le Sharp
Advanced Presentation Software Professional Edition.
Nomenclature des organes
1 Port 10Base-T
Utilisez des câbles UTP (paire de câbles torsadés non blindés)
pour 10BASE-T/100BASE-TX (catégorie 5).
Pour connecter cette carte à un ordinateur, utilisez un câble de
type croisé; et utilisez un câble simple pour la connecter à un
nœud de raccordement.
2 Témoin de liaison (LINK)
S’allume quand cette carte est connectée.
3 Témoin d’état (TX/RX)
S’allume quand des données sont transmises ou reçues.
Configuration
A. «Configuration» du projecteur
1. Choisissez «Options» à partir de l’écran de menu du projecteur
sur lequel la carte 10BASE-T est installée.
2. Choisissez la «Carte réseau».
L’écran du menu auxiliaire apparaît.
3. Choisissez «Adresse IP» et entrez l’adresse affectée à cette carte.
4. Entrez l’adresse de passerelle et le masque de sous-réseau.
• Si vous ne connaissez pas l’adresse IP, l’adresse de passerelle ou le
masque de sous-réseau, consulter l’administrateur réseau.
B. Configuration du Sharp Advanced Presentation Software
Professional Edition
Entrez l’adresse IP de la façon décrite à l’étape A-3.
Si vous réglez «Operation Mode» sur «Single Projector Operation
Mode», entrez l’adresse à partir du menu «Projector Setting»; ou à
partir du menu «Scan Setting» si vous le réglez sur «Multiple
Projector Operation Mode».
Guide de dépannage
Si quelque chose ne fonctionne pas correctement, vérifiez la
connexion du câble et chaque réglage relatif à l’adresse IP, l’adresse
de passerelle, le masque de sous-réseau, etc.
Utilisez le Sharp Advanced Presentation Software Professional
Edition, version 1.3 ou supérieur.
Téléchargez la dernière version à partir de notre site Internet à
l’adresse suivante:
http://www.sharp-world.com/projector/
Spécifications principales (Interface)
Standard: Conforme à IEEE802.3
• Connecteur: RJ-45
• Vitesse de transmission max.: 10 Mbps*
• Plage de transmission max.: 330 pieds (environ 100 m)*
*Entre le nœud de raccordement et cette carte
• Notez que les spécifications et l’apparence de cette carte sont
sujettes à modification sans notification préalable dans un but
d’amélioration de ses performances.
Das AN-L10T 10BASE-T-Board kann in deinem Erweiterungssteckplatz
eines Projektors von Sharp zur Steuerung des Projektors mit dem
10BASE-T-Interface installiert werden. Lesen Sie vor der Installation
und Verwendung des Boards die Bedienungsanleitung des Projektors
und der Sharp Advanced Presentation Software Professional Edition
gründlich durch.
Lage der Bedienelemente
1 10BASE-T-Port
UTP-Kabel für 10BASE-T/100BASE-TX (Kategorie 5)verwenden.
Beim Anschluß eines PCs an dieses Board ein gekreuztes Kabel
verwenden und bei Anschluß einer Hub-Buchse an dieses Board
ein normales Kabel verwenden.
2 LED-Anzeige (LINK)
Leuchtet bei Verbindung mit diesem Board auf.
3 Status-LED (TX/RX)
Leuchtet beim Senden und Empfangen von Daten auf.
Einstellung
A. „Einstellung“ des Projektors
1. „Optionen“ aus der Menü-Anzeige des Projektors wählen, in dem
das 10BASE-T-Board installiert ist.
2. Das „LAN-Board“ wählen.
Das Untermenü für die Einstellung wird angezeigt.
3. „IP Adresse Set“ wählen und die diesem Board zugewiesene
Adresse eingeben.
4. Die Gateway-Adresse und die Subnet Mask eingeben.
• Wenn die IP-Adresse, Gateway-Adresse oder Subnet Mask nicht bekannt ist,
wenden Sie sich bitte an einen Netzwerk-Administrator.
B. Einstellung der Sharp Advanced Presentation Software
Professional Edition.
Die IP-Adresse wie in Schritt A-3 beschrieben eingeben.
Bei Einstellung des „Operation Mode“ auf „Single Projector Operation
Mode“ die Adresse im Menü für „Projector Setting“ eingeben und im
„Multiple Projector Operation Mode“ die Adresse im Menü für „Scan
Setting“ eingeben.
Fehlersuche
Wenn diese Einstellung nicht richtig funktioniert, prüfen Sie die
Kabel-Anschlüsse und die einzelnen Einstellungen der IP-Adresse,
Gateway-Adresse, Subnet Mask usw.
Die Sharp Advanced Presentation Software Professional Edition
Version 1.3 oder höher verwenden. Die letzte Version kann von
unserer Web-Seite unter Verwendung des folgenden URL
heruntergeladen werden:
http://www.sharp-world.com/projector/
Technische Daten (Interface)
Standard: Übereinstimmung mit IEEE802.3
• Anschluß: RJ-45
• Max. Übertragungsgeschwindigkeit: 10 Mbps*
• Max. Übertragungsbereich: 330 feet (ca. 100 m)*
*Zwischen der Hub-Buchse und diesem Board
• Änderungen der technischen Daten und der Gestaltung dieses
Boards ohne vorherige Ankündigung für Verbesserungen
vorbehalten.
La tarjeta AN-L10T 10BASE-T puede instalarse en una ranura de
expansión de un proyector Sharp para controlar el proyector mediante
la interfaz 10BASE-T. Antes de instalar y utilizar esta tarjeta, asegúrese
de leer completamente los manuales suministrados con el proyector y
también el Sharp Advanced Presentation Software Professional Edition.
Nomenclatura
1 Puerto 10BASE-T
Utilice cables UTP para 10BASE-T/100BASE-TX (categoría 5).
Cuando conecte un PC a esta tarjeta, utilice un cable tipo
cruzado; y cuando conecte un nodo central a esta tarjeta, utilice
un cable tipo recto.
2 Indicador LED (LINK)
Se enciende cuando esta tarjeta está conectada.
3 LED de estado (TX/RX)
Se enciende cuando se transmiten o se reciben datos.
Preparación
A. “Preparación” del proyector
1. Seleccione “Opciónes” desde la pantalla de menús del proyector
que tiene instalada la tarjeta 10BASE-T.
2. Seleccione la “Tarjeta LAN”.
Aparece la pantalla de submenú para hacer la preparación.
3. Seleccione “Ajus. de IP” e introduzca la dirección asignada para
esta tarjeta.
4. Introduzca la dirección Gateway y la máscara de subred.
• Si no se conoce la dirección de IP, la dirección de Gateway o la máscara de
subred, consulte al administrador de la red.
B. Ajuste del Sharp Advanced Presentation Software
Professional Edition
Introduzca la dirección de IP como en el paso A-3.
Cuando ajuste el “Operation Mode” en el “Single Projector Operation
Mode”, introduzca la dirección en el menú “Projector Setting”, y en el
“Multiple Projector Operation Mode, introdúzcalo en el menú “Scan
Setting”.
Solución de problemas
Si no funciona correctamente, compruebe la conexión del cable y
cada uno de los ajustes relacionados con la dirección de IP, la
dirección de Gateway, la máscara de subred, etc.
Utilice el Sharp Advanced Presentation Software Professional Edition
versión 1.3 o superior.
Descargue la versión más reciente de nuestro sitio Web utilizando la
URL siguiente:
http://www.sharp-world.com/projector/
Especificaciones principales (Interfaz)
Norma: Cumple con la norma IEEE802.3
• Conector: RJ-45
• Velocidad de transmisión máxima: 10 Mbps*
• Alcance de transmisión máximo: 330 pies (100 m aprox.)*
*Entre el nodo central y esta tarjeta.
• Tenga en cuenta que las especificaciones y la apariencia de esta
tarjeta están sujetas a cambios sin previo aviso por motivos de
mejora en el diseño.
警告
本产品是A级产品。在与其他设备共同使用的环境中,本产品
可能会产生无线电干扰,此时,用户可能要采取适当的措施。
AN-L10T 10BASE-T栏目能够安装在SHARP投影机的扩展槽中
,用10BASE-T接口来控制投影机。在安装和使用该栏目之前,
请务必仔细阅读随投影机提供的使用说明书和Sharp Advanced
Presentation Software Professional Edition。
部件名称
1 10BASE-T 端口
对于 10BASE-T/10BASE-TX(类别 5),使用 UTP 电缆。
将电脑连接到本栏目时,要使用交叉型电缆。将集线器(Hub)
连接到本栏目时,要使用直接型电缆。
)
2 LED 指示灯
(LINK)
指示灯(
当本栏目已连接时,本指示灯点亮。
)指示灯
3 状态 LED(
(TX/RX)
在发送或接收数据时点亮。
设置
A.
“设置”投影机
.“设置”
投影机
1.当安装了 10BASE-T 栏目时,从投影机的菜单画面上选择“选
项”。
2.选择“局域网 LAN 栏目”。
显示出用于设置的子菜单画面。
3.选择“IP 地址设置”,然后输入指定给本栏目的地址。
4.输入 Gateway 地址和 Subnet 掩码。
• 如果不知道 IP 地址、Gateway 地址或 Subnet 掩码,请向网络管理人员咨
询。
B.
.设置 Sharp Advanced Presentation Software Professional
Edition
如 A-3 步骤所述输入 IP 地址。
当“运行模式”
(Operation Mode)设置为“单投影机运行模式”
(Single Projector Operation Mode)时,请在“投影机设置”
(Projector Setting)菜单上输入地址。对于“多投影机模式”
(Multiple Projector Operation Mode),请在“扫描设置”
(Scan
Setting)菜单上输入地址。
故障排除
如果不能正确运行,请检查电缆连接、以及与 IP 地址、Gateway 地
址和 Subnet 掩码有关的每个项目的设置。
请使用 Sharp Advanced Presentation Software Professional
Edition1.3 版或更高版本。
请用如下 URL 从我们的网站上下载最新的版本:
http://www.sharp-world.com/projector/
主要规格(接口)
标准:符合 IEEE802.3
• 插头座:RJ-45
• 最大传输速率:10 Mbps*
• 最大传输距离:330 英尺(约 100 米)*
*
在集线器与本栏目之间。
• 请注意,为改进设计,本栏目之规格与外观若有变更,恕不另行
通知。