1
Precautions
THE FCC REGULATION WARNING (for USA)
NOTE: This equipment has been tested and found to comply
with the limits for a Class B digital device, pursuant to Part 15
of the FCC Rules. These limits are designed to provide reasonable protection against harmful interference in a residential installation. This equipment generates, uses, and can radiate
radio frequency energy and, if not installed and used in accordance with the instructions, may cause harmful interference to
radio communications. However, there is no guarantee that interference will not occur in a particular installation. If this equipment does cause harmful interference to radio or television reception, which can be determined by turning the equipment off
and on, the user is encouraged to try to correct the interference
by one or more of the following measures:
• Reorient or relocate the receiving antenna.
• Increase the separation between the equipment and receiver.
• Connect the equipment into an outlet on a circuit different
from that to which the receiver is connected.
• Consult the dealer or an experienced radio/TV technician
for help.
Location
Using the unit in the following locations can result in a malfunction.
• In direct sunlight
• Locations of extreme temperature or humidity
• Excessively dusty or dirty locations
• Locations of excessive vibration
• Close to magnetic fields
Power supply
Please connect the designated AC adapter to an AC outlet of the
correct voltage. Do not connect it to an AC outlet of voltage other
than that for which your unit is intended.
Interference with other electrical devices
Radios and televisions placed nearby may experience reception
interference. Operate this unit at a suitable distance from radios
and televisions.
Handling
To avoid breakage, do not apply excessive force to the switches or
controls.
If items such as cables are included with this equipment, you
must use those included items.
Unauthorized changes or modification to this system can void
the user’s authority to operate this equipment.
Care
If the exterior becomes dirty, wipe it with a clean, dry cloth. Do not
use liquid cleaners such as benzene or thinner, or cleaning compounds or flammable polishes.
DECLARATION OF CONFORMITY (for USA)
Keep this manual
Responsible Party : KORG USA INC.
316 SOUTH SERVICE ROAD, MELVILLE, NY
Address :
Telephone :
1-631-390-6500
Equipment Type : MONOPHONIC SYNTHESIZER
Model :
MS-20 mini
This device complies with Part 15 of FCC Rules. Operation is
subject to the following two conditions:
(1) This device may not cause harmful interference,and (2) this
device must accept any interference received, including interference that may cause undesired operation.
After reading this manual, please keep it for later reference.
Keeping foreign matter out of your equipment
Never set any container with liquid in it near this equipment. If
liquid gets into the equipment, it could cause a breakdown, fire, or
electrical shock.
Be careful not to let metal objects get into the equipment. If something does slip into the equipment, unplug the AC adapter from the
wall outlet. Then contact your nearest Korg dealer or the store
where the equipment was purchased.
Notice regarding disposal (for EU)
When this “crossed-out wheeled bin” symbol is displayed on the product, owner’s manual, battery, or
battery package, it signifies that when you wish to
dispose of this product, manual, package or battery
you must do so in an approved manner. Do not discard this product, manual, package or battery along
with ordinary household waste. Disposing in the
correct manner will prevent harm to human health
and potential damage to the environment. Since the
correct method of disposal will depend on the applicable laws
and regulations in your locality, please contact your local administrative body for details. If the battery contains heavy metals in excess of the regulated amount, a chemical symbol is
displayed below the “crossed-out wheeled bin” symbol on the
battery or battery package.
IMPORTANT NOTICE TO CONSUMERS
This product has been manufactured according to strict specifications and voltage requirements that are applicable in the
country in which it is intended that this product should be used.
If you have purchased this product via the internet, through
mail order, and/or via a telephone sale, you must verify that this
product is intended to be used in the country in which you reside.
WARNING: Use of this product in any country other than that
for which it is intended could be dangerous and could invalidate
the manufacturer’s or distributor’s warranty.
Please also retain your receipt as proof of purchase otherwise
your product may be disqualified from the manufacturer’s or
distributor’s warranty.
2
保証規定(必ずお読みください)
本保証書は、保証期間中に本製品を保証するもので、
付属品類(ヘッドホンなど)は保証の対象になりません。
保証期間内に本製品が故障した場合は、保証規定によっ
て無償修理いたします。
1. 本保証書の有効期間はお買い上げ日より 1 か年で
す。
2. 次の修理等は保証期間内であっても有償修理となり
ます。
・消耗部品(電池、スピーカー、真空管、フェーダー
など)の交換。
・お取扱い方法が不適当のために生じた故障。
・天災(火災、浸水等)によって生じた故障。
・故障の原因が本製品以外の他の機器にある場合。
・不当な改造、調整、部品交換などにより生じた故
障または損傷。
・保証書にお買い上げ日、販売店名が未記入の場合、
または字句が書き替えられている場合。
・本保証書の提示がない場合。
尚、当社が修理した部分が再度故障した場合は、保
証期間外であっても、修理した日より 3 か月以内に
限り無償修理いたします。
3. 本保証書は日本国内においてのみ有効です。
This warranty is valid only in Japan.
4. お客様が保証期間中に移転された場合でも、保証は
引き続きお使いいただけます。詳しくは、お客様相
談窓口までお問い合わせください。
5. 修理、運送費用が製品の価格より高くなることがあ
りますので、あらかじめお客様相談窓口へご相談く
ださい。発送にかかる費用は、お客様の負担とさせ
ていただきます。
6. 修理中の代替品、商品の貸し出し等は、いかなる場
合においても一切行っておりません。
以下の指示を守ってください
年
月
日
販売店名
アフターサービス
修理、商品のお取り扱いについてのご質問、ご相談は、お客様相談窓口へお問い合わせください。
お客様相談窓口 PHS 等一部の電話ではご利用できません。固定電話または携帯電話からおかけください。
受付時間 月曜~金曜 10:00 ~ 17:00(祝祭日、窓口休業日を除く)
● サービス・センター : 〒 168-0073 東京都杉並区下高井戸 1-15-12
4015-2 Yanokuchi, Inagi-city, Tokyo 206-0812 Japan
© 2012 KORG INC.
警告
本保証書は、保証規定により無償修理をお約束するものです。
お買い上げ日
注意
この注意事項を無視した取り扱いをすると、傷害を負う可能性
または物理的損害が発生する可能性があります。
この注意事項を無視した取り扱いをすると、
死亡や重傷を負う可能性があります。
保証書
コルグ MS-20 mini
火災・感電・人身障害の危険を防止するには
■お願い
1. 保証書に販売年月日等の記入がない場合は無効とな
ります。記入できないときは、お買い上げ年月日を
証明できる領収書等と一緒に保管してください。
2. 保証書は再発行致しませんので、紛失しないように
大切に保管してください。
・ 風呂場、シャワー室で使用や保管はしない。
・ 雨天時の野外のように、湿気の多い場所や水滴のかか
る場所で、使用や保管はしない。
・ 本製品の上に、花瓶のような液体が入ったものを置
かない。
・ 本製品に液体をこぼさない。
・ 濡れた手で本製品を使用しない。
ご使用になる前に必ずお読みください
本製品の故障、または使用上生じたお客様の直接、間接
の損害につきましては、弊社は一切の責任を負いかねま
すのでご了承ください。
本保証書は、保証規定により無償修理をお約束するための
もので、これよりお客様の法律上の権利を制限するもので
はありません。
・ AC アダプターのプラグは、必ず AC100V の電源
コンセントに差し込む。
・ AC アダプターのプラグにほこりが付着している場
合は、ほこりを拭き取る。
感電やショートの恐れがあります。
・ 本製品はコンセントの近くに設置し、AC アダプター
のプラグへ容易に手が届くようにする。
・ 次のような場合には、直ちに電源を切って AC アダ
プターのプラグをコンセントから抜く。
○ AC アダプターが破損したとき
○ 異物が内部に入ったとき
○ 製品に異常や故障が生じたとき
修理が必要なときは、お客様相談窓口へ依頼してく
ださい。
・ 本製品を分解したり改造したりしない。
・ 修理、部品の交換などで、取扱説明書に書かれてい
ること以外は絶対にしない。
・ AC アダプターのコードを無理に曲げたり、発熱す
る機器に近づけない。また、AC アダプターのコー
ドの上に重いものをのせない。
コードが破損し、感電や火災の原因になります。
・ 大音量や不快な程度の音量で長時間使用しない。
大音量で長時間使用すると、難聴になる可能性があ
ります。万一、聴力低下や耳鳴りを感じたら、専門
の医師に相談してください。
・ 本製品に異物(燃えやすいもの、硬貨、針金など)
を入れない。
・ 温度が極端に高い場所(直射日光の当たる場所、暖
房機器の近く、発熱する機器の上など)で使用や保
管はしない。
・ 振動の多い場所で使用や保管はしない。
・ ホコリの多い場所で使用や保管はしない。
Emplacement
L’utilisation de cet instrument dans les endroits suivants peut en entraîner le mauvais fonctionnement.
• En plein soleil
• Endroits très chauds ou très humides
• Endroits sales ou fort poussiéreux
• Endroits soumis à de fortes vibrations
• A proximité de champs magnétiques
Alimentation
Branchez l’adaptateur secteur mentionné à une prise
secteur de tension appropriée. Evitez de brancher
l’adaptateur à une prise de courant dont la tension ne
correspond pas à celle pour laquelle l’appareil est
conçu.
Interférences avec d’autres appareils
Note concernant les dispositions (Seulement EU)
Quand un symbole avec une poubelle barrée d’une croix apparait sur le produit, le
mode d’emploi, les piles ou le pack de
piles, cela signifie que ce produit, manuel
ou piles doit être déposé chez un représentant compétent, et non pas dans une poubelle ou toute autre déchetterie conventionnelle. Disposer de cette manière, de
prévenir les dommages pour la santé humaine et les
dommages potentiels pour l’environnement. La
bonne méthode d’élimination dépendra des lois et
règlements applicables dans votre localité, s’il vous
plaît, contactez votre organisme administratif pour
plus de détails. Si la pile contient des métaux lourds
au-delà du seuil réglementé, un symbole chimique
est affiché en dessous du symbole de la poubelle
barrée d’une croix sur la pile ou le pack de piles.
électriques
Les postes de radio et de télévision situés à proximité
peuvent par conséquent souffrir d’interférences à la
réception. Veuillez dès lors faire fonctionner cet appareil à une distance raisonnable de postes de radio et de
télévision.
Maniement
Pour éviter de les endommager, manipulez les commandes et les boutons de cet instrument avec soin.
Entretien
Lorsque l’instrument se salit, nettoyez-le avec un chiffon propre et sec. Ne vous servez pas d’agents de
nettoyage liquides tels que du benzène ou du diluant,
voire des produits inflammables.
Conservez ce manuel
Après avoir lu ce manuel, veuillez le conserver soigneusement pour toute référence ultérieure.
Evitez toute intrusion d’objets ou de liquide
REMARQUE IMPORTANTE POUR LES CLIENTS
Ce produit a été fabriqué suivant des spécifications
sévères et des besoins en tension applicables dans
le pays où ce produit doit être utilisé. Si vous avez
acheté ce produit via l’internet, par vente par correspondance ou/et vente par téléphone, vous devez
vérifier que ce produit est bien utilisable dans le pays
où vous résidez.
ATTENTION: L’utilisation de ce produit dans un pays
autre que celui pour lequel il a été conçu peut être
dangereuse et annulera la garantie du fabricant ou
du distributeur. Conservez bien votre récépissé qui
est la preuve de votre achat, faute de quoi votre
produit ne risque de ne plus être couvert par la garantie du fabricant ou du distributeur.
* Tous les noms de produits et de sociétés sont
des marques commerciales ou déposées de
leur détenteur respectif.
Ne placez jamais de récipient contenant du liquide près
de l’instrument. Si le liquide se renverse ou coule, il
risque de provoquer des dommages, un court-circuit
ou une électrocution.
Veillez à ne pas laisser tomber des objets métalliques
dans le boîtier (trombones, par ex.). Si cela se produit,
débranchez l’alimentation de la prise de courant et
contactez votre revendeur korg le plus proche ou la
surface où vous avez acheté l’instrument.
Vorsichtsmaßnahmen
Aufstellungsort
Vermeiden Sie das Aufstellen des Geräts an Orten, an denen.
• es direkter Sonneneinstrahlung ausgesetzt ist;
• hohe Feuchtigkeit oder Extremtemperaturen auftreten
können;
• Staub oder Schmutz in großen Mengen vorhanden sind;
• das Gerät Erschütterungen ausgesetzt sein kann.
• in der Nähe eines Magnetfeldes.
Stromversorgung
Schließen Sie das optionale Netzteil nur an eine geeignete
Steckdose an. Verbinden Sie es niemals mit einer Steckdose einer anderen Spannung.
Störeinflüsse auf andere Elektrogeräte
Dieser kann bei in der Nähe aufgestellten Rund-funkempfängern oder Fernsehgeräten Empfangsstörungen hervorrufen. Betreiben Sie solche Geräte nur in einem geeigneten
Abstand von diesem Erzeugnis.
Bedienung
Vermeiden Sie bei der Bedienung von Schaltern und Reglern unangemessenen Kraftaufwand.
Reinigung
Bei auftretender Verschmutzung können Sie das Gehäuse
mit einem trockenen, sauberen Tuch abwischen. Verwenden Sie keinerlei Flüssigreiniger wie beispielsweise Reinigungsbenzin, Verdünnungs- oder Spülmittel. Verwenden
Sie niemals brennbare Reiniger.
Bedienungsanleitung
Bewahren Sie diese Bedienungsanleitung gut auf, falls Sie
sie später noch einmal benötigen.
Flüssigkeiten und Fremdkörper
Stellen Sie niemals Behältnisse mit Flüssigkeiten in der
Nähe des Geräts auf. Wenn Flüssigkeit in das Gerät gelangt, können Beschädigung des Geräts, Feuer oder ein
elek-trischer Schlag die Folge sein.
Beachten Sie, daß keinerlei Fremdkörper in das Gerät gelangen. Sollte ein Fremdkörper in das Gerät gelangt sein, so
trennen Sie es sofort vom Netz. Wenden Sie sich dann an
Ihren KORG-Fachhändler.
・ 正常な通気が妨げられない所に設置して使用する。
・ ラジオ、テレビ、電子機器などから十分に離して使
用する。
ラジオやテレビ等に接近して使用すると、本製品が
雑音を受けて誤動作する場合があります。また、ラ
ジオ、テレビ等に雑音が入ることがあります。
・ 外装のお手入れは、乾いた柔らかい布を使って軽く
拭く。
・ AC アダプターをコンセントから抜き差しするとき
は、必ずプラグを持つ。
・ 長時間使用しないときは、電池の液漏れを防ぐため
に電池を抜く。
・ 電池は幼児の手の届かないところへ保管する。
・ 長時間使用しないときは、AC アダプターをコンセ
ントから抜く。
・ 付属の AC アダプターは、他の電気機器で使用しない。
付属の AC アダプターは本製品専用です。他の機器
では使用できません。
・ 他の電気機器の電源コードと一緒にタコ足配線をし
ない。
本製品の定格消費電力に合ったコンセントに接続し
てください。
・ 電池を過度の熱源(日光、火など)にさらさない。
・ スイッチやツマミなどに必要以上の力を加えない。
故障の原因になります。
・ 外装のお手入れに、ベンジンやシンナー系の液体、
コンパウンド質、強燃性のポリッシャーは使用しな
い。
・ 不安定な場所に置かない。
本製品が落下してお客様がけがをしたり、本製品が
破損する恐れがあります。
・ 本製品の上に乗ったり、重いものをのせたりしない。
本製品が落下または損傷してお客様がけがをした
り、本製品が破損する恐れがあります。
※ すべての製品名および会社名は、各社の商標
または登録商標です。
Hinweis zur Entsorgung (Nur EU)
Wenn Sie das Symbol mit der „durchgekreuzten Mülltonne“ auf Ihrem Produkt, der dazugehörigen Bedienungsanleitung, der Batterie
oder dem Batteriefach sehen, müssen Sie das
Produkt in der vorgeschriebenen Art und Weise
entsorgen. Dies bedeutet, dass dieses Produkt
mit elektrischen und elektronischen Komponenten nicht mit dem normalen Hausmüll entsorgt werden darf. Für Produkte dieser Art existiert ein
separates, gesetzlich festgelegtes Entsorgungssystem.
Gebrauchte elektrische und elektronische Geräte müssen separat entsorgt werden, um ein umweltgerechtes
Recycling sicherzustellen. Diese Produkte müssen bei
benannten Sammelstellen abgegeben werden. Die Entsorgung ist für den Endverbraucher kostenfrei! Bitte erkundigen sie sich bei ihrer zuständigen Behörde, wo sie
diese Produkte zur fachgerechten Entsorgung abgeben
können. Falls ihr Produkt mit Batterien oder Akkumulatoren ausgerüstet ist, müssen sie diese vor Abgabe des
Produktes entfernen und separat entsorgen (siehe oben).
Die Abgabe dieses Produktes bei einer zuständigen Stelle hilft ihnen, dass das Produkt umweltgerecht entsorgt
wird. Damit leisten sie persönlich einen nicht unerheblichen Beitrag zum Schutz der Umwelt und der menschlichen Gesundheit vor möglichen negativen Effekten durch
unsachgemäße Entsorgung von Müll. Batterien oder Akkus, die Schadstoffe enthalten, sind auch mit dem Symbol einer durchgekreuzten Mülltonne gekennzeichnet. In
der Nähe zum Mülltonnensymbol befindet sich die chemische Bezeichnung des Schadstoffes. Cd oder NiCd steht
für Cadmium, Pb für Blei und Hg für Quecksilber.
WICHTIGER HINWEIS FÜR KUNDEN
Dieses Produkt wurde unter strenger Beachtung von
Spezifikationen und Spannungsanforderungen hergestellt, die im Bestimmungsland gelten. Wenn Sie dieses
Produkt über das Internet, per Postversand und/oder mit
telefonischer Bestellung gekauft haben, müssen Sie bestätigen, dass dieses Produkt für Ihr Wohngebiet ausgelegt ist.
WARNUNG: Verwendung dieses Produkts in einem anderen Land als dem, für das es bestimmt ist, verwendet
wird, kann gefährlich sein und die Garantie des Herstellers oder Importeurs hinfällig lassen werden. Bitte bewahren Sie diese Quittung als Kaufbeleg auf, da andernfalls
das Produkt von der Garantie des Herstellers oder Importeurs ausgeschlossen werden kann.
* Alle Produkt- und Firmennamen sind Warenzeichen
oder eingetragene Warenzeichen der betreffenden Eigentümer.
* All product names and company names are the
trademarks or registered trademarks of their respective owners.
安全上のご注意
ここに記載した注意事項は、製品を安全に正しくご使用いた
だき、あなたや他の方々への危害や損害を未然に防ぐための
ものです。
注意事項は誤った取り扱いで生じる危害や損害の大きさ、ま
たは切迫の程度によって、内容を「警告」、「注意」の 2 つ
に分けています。これらは、あなたや他の方々の安全や機器
の保全に関わる重要な内容ですので、よく理解した上で必ず
お守りください。
Précautions
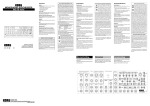
Normal Setting
These settings are the Normal Setting for the
MS-20 mini.
These basic settings are the starting point for
creating sounds.
Etat normal
Ces réglages correspondent à ce que nous
appelons “l’Etat normal” sur le MS-20 mini.
Utilisez ces réglages comme point de départ
pour créer vos propres sons.
Normaleinstellung
Diese Einstellungen entsprechen der Normaleinstellung des MS-20 mini.
Diese Grundeinstellungen stellen den Ausgangspunkt zum Erstellen von Sounds dar.
ノーマル・セッティング
このセッティングは、MS-20 mini の
ノーマル・セッティングの状態です。
このノーマル・セッティングは音を作
る上での基本セッティングであり、音
作りの出発点となるセッティングです。
Introduction
Thank you for purchasing the Korg MS-20 mini monophonic synthesizer.
To ensure trouble-free enjoyment, please carefully read this manual and use the product
correctly. In addition, be sure to store this manual in a safe place for future reference.
The MS-20 mini is a reincarnation of the original MS-20, which was released in 1978.
The MS-20 mini uses analog circuitry to faithfully recreate the sound and characteristics of
this legendary instrument. We recommend reading the reprint of the original Owner’s Manual for in depth descriptions of the various controls and their functions.
Since this manual contains additional information and details on new functions, carefully
read this manual together with the original Owner’s Manual.
* The original Owner’s Manual contains terms and phrases used at the time of the original product release in 1978. The manual may also contain information that differs from the MS-20 mini
or may mention products that are no longer available. In addition, the specifications contain
details and measurement standards from the time of the original MS-20 release, which differ
from those of the MS-20 mini.
About the MS-20 mini
The MS-20 mini and the original MS-20 differ in the following ways.
• Compact size: It is now a more accessible size. The patch cables are equipped with mini
plugs.
• Equipped with MIDI IN connector and USB port: By connecting the MS-20 mini to a
computer, you can perform with it while using a sequencer.
• Improved S/N with newly designed VCA: The circuits of the MS-20 mini are nearly all
reproductions of the original MS-20. However, while the VCA retains the basic design of
the original MS-20, its circuits have been changed to improve the S/N. Of course, the
VCO and VCF, which are fundamental to the tone, are faithful reproductions of the original
ones.
• AC adapter specifications: Although the power supply has been changed to an AC
adapter, the internal voltage specifications are identical to the original design.
* For details on the basic operations of the MS-20 mini, refer to the back of this manual.
Avant-propos
Nous vous remercions d’avoir choisi le synthétiseur monophonique MS-20 mini de Korg.
Pour garantir une utilisation sans problème de l’instrument, veuillez lire attentivement ce manuel
et manipuler le produit de façon correcte. Veillez en outre à conserver ce manuel en lieu sûr pour
pouvoir le consulter à tout moment.
Le MS-20 mini est la réincarnation du MS-20 original, dévoilé au public en 1978.
Le MS-20 mini est doté de circuits analogiques qui permettent de recréer fidèlement le son et les
caractéristiques de cet instrument légendaire. Nous vous conseillons vivement de lire la reproduction du Mode d’emploi de l’instrument original; vous y trouverez une description complète
des diverses commandes et de leurs fonctions.
Vu que le présent manuel contient des informations complémentaires et des détails au sujet des
nouvelles fonctions, lisez-le attentivement en plus du mode d’emploi original.
* Le mode d’emploi original contient des termes et tournures utilisés au moment de la sortie
de l’instrument original en 1978. Ce manuel pourrait en outre contenir des informations qui
ne correspondent pas au MS-20 mini ou mentionner des produ its qui ne sont plus disponibles. Notez encore que les détails et normes de mesure figurant dans les caractéristiques
techniques de l’instrument sont ceux employés à la sortie du MS-20 original, et qu’ils diffèrent de ceux du MS-20 mini.
A propos du MS-20 mini
Voici les différences entre le MS-20 mini et le MS-20 original.
•Taille compacte: L’instrument a maintenant des dimensions plus modestes. Les câbles de
liaison sont dotés de minifiches.
•Comporte une prise MIDI IN et un port USB: Vous pouvez brancher le MS-20 mini à un
ordinateur et jouer sur l’instrument accompagné d’un séquenceur.
•VCA de conception neuve améliorant le rapport S/N: Les circuits du MS-20 mini sont pratiquement tous des reproductions de ceux équipant le MS-20 original. Toutefois, bien que le
VCA conserve le design de base du MS-20 original, ses circuits ont été modifiés pour améliorer le rapport signal/bruit. Naturellement, le VCO et le VCF, éléments essentiels du son, sont
des reproductions fidèles de ceux de l’instrument original.
•Caractéristiques de l’adaptateur secteur: Bien que l’alimentation soit passée à un adaptateur secteur, les caractéristiques de tension interne sont identiques à celles de l’instrument
original.
MIDI Implementation Chart
[MONOPHONIC SYNTHESIZER]
Model: MS-20 mini
Function...
Transmitted
Received
Basic
Channel
Default
Change
1
X
1
X
Mode
Default
Messages
Altered
X
X
*************
3
X
X
True Voice
48-84
*************
0-127
12-91
Note
Number
Velocity
Note On
Note Off
X 9n, v=64
X 8n, v=64
X
X
After
Touch
Key’s
Channel
X
X
X
X
X
X
X
O
X
X
*************
*************
X
X
Pitch Bend
120
Date: Oct. 25. 2012
Version: 1.0
Remarks
*1
n=0
n=0
All sound off
*2
Control
Change
* Pour en savoir plus sur les manipulations de base du MS-20 mini, voyez le dos de ce manuel.
Program
Change
Einleitung
Vielen Dank für Ihre Wahl eines Korg MS-20 mini monophonischen Synthesizer.
Für einen reibungslosen und sachgemäßen Einsatz dieses Geräts, lesen Sie zunächst vorliegende
Anleitung sorgfältig durch. Bewahren Sie die Anleitung danach für spätere Bezugnahme an einem sicheren Ort auf.
Der MS-20 mini ist eine Reinkarnation des ursprünglichen, 1978 erschienen MS-20.
Der MS-20 mini setzt analoge Schaltkreise ein, um Sound und Charakteristika dieses legendären Instruments getreu nachzubilden. Für eine ausführliche Beschreibung der einzelnen Bedienelemente und
deren Funktion lesen Sie bitte die Neuausgabe der ursprünglichen Anleitung.
Die in der vorliegenden Anleitung enthaltenen Zusatzinformationen und Einzelheiten über neue Funktionen ergänzen die ursprüngliche Anleitung.
* Begriffe und Ausdrücke in der ursprüngliche Anleitung stammen aus der Zeit der ursprünglichen Produktfreigabe in
1978. Jene Anleitung enthält möglicherweise Informationen, die nicht mit dem MS-20 mini übereinstimmen, oder erwähnt Produkte, die nicht mehr verfügbar sind. Außerdem enthalten die technischen Daten Einzelheiten und Messwerte aus der Zeit der Freigabe des ursprünglichen MS-20, die von denjenigen des MS-20 mini abweichen.
Über den MS-20 mini
Der MS-20 mini und der ursprüngliche MS-20 unterscheiden sich folgendermaßen.
• Kompaktes Format: Die neuen Ausmaße sind etwas zugänglicher. Die neuen Patchkabel weisen
Ministecker auf.
• MIDI IN-Buchse und USB-Schnittstelle: Wird der MS-20 mini mit einem Computer verbunden, ist
der gemeinsame Einsatz mit einem Sequenzer möglich.
• Verbessertes SRV dank neuwertigem VCA: Die Mehrheit der Schaltkreise des MS-20 mini sind
Reproduktionen des ursprünglichen MS-20. Während der neue VCA die Grundausführung des MS20 übernimmt, sind dessen Schaltkreise allerdings auf ein optimiertes SRV ausgelegt. Die Soundfundamente VCO und VCF sind natürlich getreue Reproduktionen des Originals.
• Netzgerät: Obwohl die Spannungsversorgung nun über ein externes Netzgerät erfolgt, entsprechen die internen Betriebsspannungen exakt dem Original.
* Für Einzelheiten zur Grundbedienung des MS-20 mini siehe die Rückseite dieser Anleitung.
はじめに
このたびは、コルグ・モノフォニック・シンセサイザー MS-20 mini をお買い上げいただき、
誠にありがとうございます。
本機を末永くご愛用いただくためにも、取扱説明書をよくお読みになって正しい方法でご使用
ください。また、取扱説明書は大切に保管してください。
本機は 1978 年発売の MS-20 を再現しております。ほぼ同じ回路設計の基板に現在入手でき
る同等スペック部品を使用しコンパクトなサイズに組み込みました。MS-20 mini から発する
音は、オリジナルの MS-20 の部品劣化の無い発売当時の音を聞くことができます。
各ノブの説明や動作については復刻版のオリジナル取扱説明書をお読みいただき、発売当時の
表現を楽しみながら操作していただくことをお薦めします。
また、新機能や追加の情報については、本書に記載されておりますので、オリジナルの取扱説
明書と併せて、本書をよくお読みになってください。
※オリジナル取扱説明書で使われている用語や表現は、製品発売当時のものです。本機とは異
なる箇所や、すでに販売中止の製品についての記載があります。また仕様については、本機
とは異なりオリジナルの MS-20 発売当時の内容および測定基準で表記されております。
True Number
System Exclusive
System
Common
Song Position
Song Select
Tune Request
X
X
X
X
X
X
System
Real Time
Clock
Commands
X
X
X
X
Aux
Meassages
Local On/Off
All Notes Off
Active Sense
System Reset
X
X
X
X
X
O 123-127
O
X
Notes
*1: Transmitted only with a USB connection.
*2: Treated as All Notes Off.
本機について
MS-20 mini とオリジナル MS-20 は、下記の点が異なります。
• サイズがコンパクトに:より身近に使える大きさになりました。パッチ・ケーブルはミニプ
ラグを採用しました。
• MIDI IN 端子と USB 端子を搭載:本機とコンピュータを接続使用することで、シーケンサ
を使用した演奏をすることができます。
• 新設計の VCA で S/N を改善:MS-20 mini の回路は、ほぼすべてオリジナル MS-20 をそ
のままに再現しています。ただし、VCA については、オリジナル MS-20 の基本設計を保ち
つつ、S/N を改善した回路に変更しています。もちろん、音色の基本となる VCO、VCF に
ついてはオリジナルを忠実に再現しています。
• AC アダプター仕様:電源を AC アダプターに変更しましたが、内部で使用されている電圧
仕様は、オリジナルと同様の設計になっています。
※ MS-20 mini の基本的な操作については、本書の裏面をお読みください。
Mode 1: Omni On, Poly
Mode 3: Omni Off, Poly
Mode 2: Omni On, Mono
Mode 4: Omni Off, Mono
Consult your local Korg distributor for more information on MIDI IMPLEMENTATION.
Veuillez vous adresser votre revendeur Korg pour en savoir davantage sur l’équipement MIDI.
Bitte erkundigen Sie sich bei Ihrem Korg-Händler nach der MIDI-Implementierung.
MIDI インプリメンテーションの配布については、コルグ・ホームページを確認してください。
O: Yes
X: No
Basic Operation
Patching to add variations to timbre
Refer to the following illustration and connect the patch cables.
1. Connections
Make sure each device is turned off before connecting any additional equipment. If an operation is inadvertently performed, the speaker system and other devices may be damaged or
malfunction.
1.Connecting the AC adapter
Connect the included AC adapter to the DC9V jack.
Only use the included AC adapter.
2.Connecting the amp
Connect the powered monitor speaker or mixer to the SIGNAL OUT jack.
3.Connecting headphones
When using headphones, insert the headphone plug into the PHONES jack.
4.Connecting guitars and microphones to the SIGNAL IN jack
When using an external signal processor, connect the guitar or microphone to the SIGNAL IN jack.
For details, refer to “Using the External Signal Processor (ESP)” in the original Owner’s
Manual.
1.Turn the VOLUME knob clockwise.
2.After a click, the STANDBY ON LED lights up and the device is turned on.
TIP If the auto power off function is disabled, the LED blinks a few times.
3.To turn off the device, turn the VOLUME knob counterclockwise until it clicks and the LED
turns off.
TIP If the AC adapter is disconnected while the MS-20 mini is turned on or if the auto power off
function has been enabled, the device may have turned off without the VOLUME knob in the off
position. Before turning on the MS-20 mini again, you’ll have to turn the VOLUME knob counterclockwise to turn it off.
Auto power off function
1.The MS-20 mini is automatically turned off if none of the following operations are performed for 4 hours.
Sound is produced with the keyboard; Note On via MIDI IN or USB MIDI; input to TRIG IN
2.When turning on the MS-20 mini again, turn the VOLUME knob counterclockwise to turn it off, and
then turn on the device.
TIP The auto power off function is enabled as a factory setting (default.)
To disable the auto power off function
While holding down C1, D1 and E1 on the keyboard, turn on the MS-20 mini.
After the STANDBY ON LED blinks a few times, it remains lit, and then the device returns to
normal operation.
TIP The setting for the auto power off function is saved, even if the MS-20 mini is turned off.
TIP When changing the setting, do not turn off the device before the STANDBY ON LED lights up.
Otherwise, data may be corrupted or the device may be damaged.
To enable the auto power off function again
While holding down C1, D1 and F1 on the keyboard, turn on the MS-20 mini.
The STANDBY ON LED lights up, without blinking, and then the device returns to normal
operation.
3. Producing sounds
Basic setting
Refer to “Normal Setting” and adjust the knobs.
Producing sounds by playing the keyboard
Press a keyboard key to hear the tone.
To adjust the volume, turn the VOLUME knob.
TIP Even if multiple keyboard keys are pressed, only one tone will be produced. When two or more
keys are pressed, the highest tone played will be produced.
powered monitor
speaker, mixer
Adjusting the knobs
Turn the CUTOFF FREQUENCY knob of the LOWPASS FILTER counterclockwise to round
off the sound. In addition, adjust the timbre by using the OSCILLATOR 1 knob to change the
waveform to the triangle wave.
Connectez les câbles de liaison comme illustré ci-dessous.
1. Connexions
Veillez à ce que chaque dispositif soit hors tension avant de brancher tout équipement
supplémentaire. Si vous effectuez une opération par mégarde, les enceintes et
d'autres appareils pourraient être endommagés ou fonctionner de façon erratique.
1.Branchement de l'adaptateur secteur
Branchez l'adaptateur secteur fourni à la prise DC9V.
Utilisez uniquement l'adaptateur secteur fourni.
2.Connexion d'un ampli
Banchez une enceinte active ou une console de mixage à la prise SIGNAL OUT.
3.Connexion d'un casque
Pour utiliser un casque d'écoute, branchez sa fiche à la prise PHONES.
4.Connexion d'une guitare ou d'un microphone à la prise SIGNAL IN
Lorsque vous utilisez un processeur de signal externe, branchez la guitare ou le micro à la
prise SIGNAL IN.
Pour plus de détails, lisez la section “Utilisation du processeur de signal extérieur (ESP)” du
mode d'emploi de l'instrument original.
The control wheel and momentary switch can be used. Adjust the control wheel and momentary
switchs, and listen to the variations in the timbre.
Refer to the original Owner’s Manual and the setting chart to create various sounds.
4. About MIDI
2. Turning on the device
Varier le timbre avec les câbles de liaison
Opérations élémentaires
The MIDI IN connector and USB port on the MS-20 mini are one of the main differences between
it and the original MS-20.
By connecting the MS-20 mini to a computer, you can perform with it while using a sequencer.
Connecting MIDI devices
In order to transmit/receive MIDI information, you can use commercially available MIDI cables.
Connect the MIDI connector of the MS-20 mini to the MIDI connector of the external MIDI device
where information will be exchanged.
MIDI IN connector: This receives MIDI messages from other MIDI devices. Connect this connector to the MIDI OUT connector of the other device.
The only MIDI messages that can be received at the MIDI IN connector are note messages
(Velocity is disabled) on MIDI channel 1 (fixed).
TIP If a Note On message with a note number of 92 or more is received, the message will become invalid, and the sound being produced will stop. It will also be invalid if a note number is 11 or less;
however, the sound will continue to be produced.
Connecting a computer
Use a USB cable to directly connect the MS-20 mini to a computer equipped with a USB port in
order to receive MIDI messages in the same way as with the MIDI connectors.
The only MIDI messages that can be transmitted and received at the USB port are note messages (Velocity is transmitted fixed at 64 and reception is disabled) on MIDI channel 1 (fixed).
TIP The only MIDI messages that are transmitted are note messages transmitted when the keyboard is
played. Messages, for example, for pitch bend and modulation, will not be transmitted.
TIP When connecting via USB, the KORG USB-MIDI driver must be installed. Download the KORG
USB-MIDI driver from the Korg Web site ( http://www.korg.co.jp/English/Distributors/ or http://www.
korg.com/ ), and then install it according to the instructions in the document included with the driver.
About the MIDI implementation chart
The MIDI implementation chart lists the MIDI messages that can be transmitted and received.
When using a MIDI device, compare the MIDI implementation charts to check that the MIDI messages are compatible.
TIP Detailed MIDI specifications are provided under MIDI implementation. For more information on MIDI
implementation, visit the Korg Web site ( http://www.korg.co.jp/English/Distributors/ or http://www.
korg.com/ ).
Specifications
Keyboard:
Controllers:
Connectors:
Power supply:
Dimensions:
Weight:
Included items:
37Keys (3 octaves), Mini keyboard designed specifically for the MS-20 mini
Control wheel (center click), Momentary switch (
)
SIGNAL IN jack (mono 1/8” mini phone jack), SIGNAL OUT jack (mono 1/8"
mini phone jack, 2Vp-p output impedance 3.5kΩ)
PHONES jack (Stereo 1/8" mini phone jack, 33Ω 48mW), DC9V jack, MIDI
IN, USB typeB
DC9V
493 mm (W) x 257 mm (D) x 208 mm (H) / 19.41" (W) x 10.12" (D) x 8.19" (H)
4.8 kg / 10.58 lbs.
10x Patch cord, AC adapter (
, 9V)
2. Mise sous tension de l'instrument
1.Tournez la commande VOLUME vers la droite.
2.Après un déclic, la diode STANDBY ON s'allume et l'instrument est sous tension.
ASTUCE Si la fonction de coupure automatique d'alimentation est désactivée, la diode clignote
plusieurs fois.
3.Pour mettre l'instrument hors tension, tournez sa commande VOLUME vers la gauche jusqu'à
ce que vous entendiez un déclic et que la diode s'éteigne.
ASTUCE Si l'adaptateur secteur est débranché quand le MS-20 mini est sous tension ou si sa
fonction de coupure automatique d'alimentation est activée, il se pourrait que l'instrument soit mis hors tension sans que sa commande VOLUME soit en position "OFF'".
Dans ce cas, pour pouvoir remettre le MS-20 mini à nouveau sous tension, vous devrez d'abord tourner sa commande VOLUME à fond à gauche.
Fonction de coupure automatique d'alimentation
1.L’alimentation du MS-20 mini est automatiquement coupée si aucune des opérations suivantes n’est effectuée dans un délai de 4 heures.
Production de son sur le clavier, réception de message d’activation de note via MIDI IN ou
USB MIDI; envoi d’un signal à l’entrée TRIG IN
2.Pour remettre le MS-20 mini sous tension après sa mise hors tension automatique, tournez
sa commande VOLUME à fond à gauche puis remettez l'instrument sous tension.
ASTUCE La fonction de coupure automatique d'alimentation est activée à la sortie d'usine (réglage par défaut).
Pour désactiver la fonction de coupure automatique d'alimentation
Enfoncez les touches Do1, Ré1 et Mi1 du clavier tout en mettant le MS-20 mini sous tension.
La diode STANDBY ON clignote plusieurs fois puis reste allumée et l'instrument passe en mode
de fonctionnement normal.
ASTUCE Le réglage de la fonction de coupure automatique d'alimentation est mémorisé même
après la mise hors tension de l'instrument.
ASTUCE Quand vous changez le réglage, ne mettez pas l’instrument hors tension avant que la
diode STANDBY ON ne se soit allumée. Sans cela, vous risquez de rendre les données inutilisables ou d’endommager l’instrument.
Pour activer à nouveau la fonction de coupure automatique d'alimentation
Enfoncez les touches Do1, Ré1 et Fa1 du clavier tout en mettant le MS-20 mini sous tension.
La diode STANDBY ON s'allume, sans clignoter, puis l'instrument retourne au mode de fonctionnement normal.
3. Production de sons
Réglage de base
Voyez la section “Etat normal” et réglez les commandes.
Production de sons via le clavier
Enfoncez une touche du clavier pour écouter le son.
Pour régler le volume, tournez la commande VOLUME.
ASTUCE Quand vous enfoncez simultanément plusieurs touches du clavier, l’instrument produit
un seul son. Dans le cas de plusieurs touches enfoncées simultanément, la priorité est
donnée à la note la plus haute.
enceinte active,
console de mixage
* Specifications and appearance are subject to change without notice for improvement.
Réglages des commandes
Tournez la commande CUTOFF FREQUENCY du filtre LOWPASS FILTER vers la gauche pour
arrondir le son. Vous pouvez en outre régler le timbre avec la commande OSCILLATOR 1 en
changeant de forme d'onde et en choisissant une onde triangulaire.
Vous pouvez utiliser la molette de jeu Molette de commande et les interrupteur de type momentané. Réglez la variation de jeu Molette de commande et les interrupteur de type momentané, et
écoutez les changements produits sur le timbre.
Pour savoir comment créer divers sons, lisez le mode d'emploi et les schémas de réglage de
l'instrument original.
4. A propos de MIDI
La prise MIDI IN et le port USB du MS-20 mini constituent l'une des principales différences entre
cette nouvelle version et le MS-20 original.
Vous pouvez brancher le MS-20 mini à un ordinateur et jouer sur l'instrument accompagné d'un
séquenceur.
Connexion de dispositifs MIDI
Pour pouvoir transmettre/recevoir des données MIDI, munissez-vous de câbles MIDI disponibles dans le commerce. Reliez le connecteur MIDI du MS-20 mini au connecteur MIDI du
dispositif MIDI externe avec lequel vous souhaitez échanger des données.
Connecteur MIDI IN: Il reçoit les messages MIDI provenant d'autres dispositifs MIDI. Reliez ce
connecteur au connecteur MIDI OUT de l'autre dispositif.
Les seuls messages MIDI que l’instrument peut recevoir via sa prise MIDI IN sont les messages
de note (la dynamique est désactivée) sur le canal MIDI 1 (fixe).
ASTUCE Si l’instrument reçoit un message de note active pour la note 92 ou plus, il considère
ce message comme non valide et coupe le son en cours. Ce type de message est
aussi ignoré si le numéro de la note est de 11 ou moins; toutefois, dans ce cas, l’instrument continue de produire le son.
Connexion à un ordinateur
La connexion directe du MS-20 mini à un ordinateur doté d'un port USB avec un câble USB
permet la réception de messages MIDI (comme pour les connecteurs MIDI).
Les seuls messages MIDI qui peuvent être transmis et reçus via le port USB sont les messages
de note (la dynamique est fixée à 64 et la réception est désactivée) via le canal MIDI 1 (fixe).
ASTUCE Les seuls messages MIDI transmis sont les messages de note produits quand vous
jouez sur le clavier. Les messages de pitch bend et de modulation, par exemple, ne
sont pas transmis.
ASTUCE Pour pouvoir exploiter la connexion USB, vous devez installer le pilote USB-MIDI de
KORG. Téléchargez le pilote USB-MIDI de KORG depuis le site internet de Korg
(http://www.korg.co.jp/English/Distributors/ or http://www.korg.com/ ) et installez-le
conformément aux instructions de la documentation accompagnant le pilote.
A propos du tableau d’implémentation MIDI
Le tableau d’implémentation MIDI dresse la liste des messages MIDI qui peuvent être transmis
et reçus. Si vous comptez utiliser un dispositif MIDI, comparez les tableaux d’implémentation
MIDI des deux dispositifs pour vous assurer que les messages MIDI sont compatibles.
ASTUCE L’implémentation MIDI offre une description détaillée des caractéristiques MIDI de
l’instrument. Pour en savoir plus sur l’implémentation MIDI, surfez sur le site internet
de Korg ( http://www.korg.co.jp/English/Distributors/ or http://www.korg.com/ ).
Fiche technique
Clavier:
37 touches (3 octaves), Mini clavier conçu spécialement pour le MS-20
mini
Fonctions:
de jeu Molette de commande (clic central), interrupteur de type momentané (
)
Connecteurs:
Prise SIGNAL IN (fiche minijack mono de 1/8"), Prise SIGNAL OUT
(fiche minijack mono de 1/8", impédance de sortie de 2Vp-p, 3,5kΩ)
Prise PHONES (fiche minijack stéréo de 1/8", 33Ω 48mW), prises
DC9V, MIDI IN, USB typeB.
Alimentation:
DC9V
Dimensions:
493 mm (L) x 257 mm (P) x 208 mm (H)
Poids:
4,8 kg
Accessoires fournis: 10x câble de liaison, adaptateur secteur (
, 9V)
* Les spécifications et l’apparence du pro duit sont susceptibles d’être modifiées sans avis
préalable en vue d’améliorations.
Patchen zum Variieren der Klangfarbe
Grundbedienung
1. Geräte verbinden
パッチングして音色に変化を加える
下記の図を参照して、各ノブを設定しパッチコードを接続してください。
基本操作
Verbinden Sie Patchkabel entsprechend folgender Abbildung.
接続する
Bevor Geräte miteinander verbunden werden, sollten sie alle ausgeschaltet werden. Andernfalls könnten Lautsprecher oder andere Geräte durch versehentliche Bedienvorgänge beschädigt werden.
1.Netzgerät anschließen
Schließen Sie das Netzteil an die DC9V-Buchse an.
Benutzen Sie nur das im Lieferumfang enthaltene Netzteil.
2.Verstärker anschließen
Schließen Sie einen aktiven Monitorlautsprecher oder Mixer an die SIGNAL OUT-Buchse an.
3.Kopfhörer anschließen
Schließen Sie Kopfhörer gegebenenfalls an der PHONES-Buchse an.
4.Gitarre oder Mikrofon an die SIGNAL IN-Buchse anschließen
Schließen Sie beim Einsatz eines externen Signalprozessors eine Gitarre oder ein Mikrofon an die
SIGNAL IN-Buchse an.
Einzelheiten hierzu unter „Verwendung des externen Signalprozessors (E.S.P)“ in der ursprünglichen Anleitung.
2. Gerät einschalten
1.Den VOLUME-Regler im Uhrzeigersinn drehen.
2.Nach dem Klick leuchtet die STANDBY ON-LED, und das Gerät wird eingeschaltet.
TIPP Wenn die automatische Ausschaltfunktion deaktiviert ist, blinkt die LED einige Mal.
3.Zum Ausschalten des Geräts drehen Sie den VOLUME-Regler im Gegenuhrzeigersinn, bis er klickt
und die LED erlischt.
TIPP Falls das Netzteil bei eingeschaltetem MS-20 mini getrennt wird oder die automatische Ausschaltfunktion aktiviert wurde, kann es vorkommen, dass das Gerät ausgeschaltet wird, obwohl
der VOLUME-Regler sich nicht in der Aus-Stellung befindet. In solchem Fall muss vor dem
Wiedereinschalten des MS-20 mini der VOLUME-Regler zunächst durch Drehen im Gegenuhrzeigersinn in die Aus-Stellung gebracht werden.
Automatische Ausschaltfunktion
1.Der MS-20 mini wird automatisch ausgeschaltet, wenn vier Stunden lang keiner der folgenden Bedienvorgänge erfolgt.
Mit dem Keyboard wird ein Sound erstellt; Note On über MIDI IN bzw. USB MIDI; Eingabe an TRIG
IN.
2.Zum Wiedereinschalten des MS-20 mini den VOLUME-Regler zunächst durch Drehen im Gegenuhrzeigersinn in die Aus-Stellung bringen, dann das Gerät einschalten.
TIPP Die automatische Ausschaltfunktion ist ab Werk aktiviert (Grundeinstellung).
Automatische Ausschaltfunktion deaktivieren
Schalten Sie den MS-20 mini bei gedrückt gehaltenen Keyboard-Tasten C1, D1 und E1 ein.
Die STANDBY ON-LED blinkt einige Mal, bevor sie leuchtet; daraufhin kehrt das Gerät zurück in den
Normalbetrieb.
TIPP Die Einstellung der automatischen Ausschaltfunktion bleibt bei ausgeschaltetem MS-20 mini
erhalten.
TIPP Beim Ändern der Einstellung darf das Gerät nicht ausgeschaltet werden, bevor die STANDBY
ON-LED leuchtet. Andernfalls könnten Daten oder das Gerät beschädigt werden.
Automatische Ausschaltfunktion aktivieren
Schalten Sie den MS-20 mini bei gedrückt gehaltenen Keyboard-Tasten C1, D1 und F1 ein.
Die STANDBY ON-LED leuchtet (ohne Blinken); daraufhin kehrt das Gerät zurück in den Normalbetrieb.
3. Sounds erzeugen
Ausgnagseinstellung
Stellen Sie die Bedienelemente entsprechend dem Abschnitt „Normaleinstellung“ ein.
各接続は、
必ず電源を切った状態で行ってください。不注意な操作を行うと、
スピーカー・
システムなどを破損したり、誤動作を起こしたりする原因となりますので、十分に注意
してください。
1. AC アダプターを接続します。
付属の AC アダプターを DC9V 端子に接続します。
AC アダプターは必ず付属のも のをお使いください。
2. アンプを接続します。
SIGNAL OUT 端子にパワード・モニター・スピーカーやミキサーなどを接続します。
3. ヘッドホンを接続します。
ヘッドホンを使う場合は、PHONES 端子にヘッドホンのプラグを差し込んでください。
Sie können ebenfalls das Rad und den Taster benutzen. Beachten Sie, wie das Rad und der Taster die
Klangfarbe ändern.
Beziehen Sie sich beim Erstellen von Sounds auf die Erläuterungen und Einstelldiagramme der ursprünglichen Anleitung.
4. Über MIDI
Durch seine MIDI IN-Buchse und USB-Schnittstelle unterscheidet der MS-20 mini sich grundlegend vom
ursprünglichen MS-20.
Wird der MS-20 mini mit einem Computer verbunden, ist der gemeinsame Einsatz mit einem Sequenzer
möglich.
MIDI-Geräte anschließen
Für die Übertragung von MIDI-Informationen können Sie ein im Fachhandel erhältliches MIDI-Kabel verwenden. Verbinden Sie die MIDI-Buchse des MS-20 mini mit der MIDI-Buchse des externen MIDI-Geräts,
mit dem kommuniziert werden soll.
MIDI IN-Buchse: Hier werden MIDI-Befehle von anderen MIDI-Geräten empfangen. Verbinden Sie diese
Buchse mit der MIDI OUT-Buchse des anderen Geräts.
An der MIDI IN-Buchse können festgelegt auf MIDI-Kanal 1 lediglich MIDI-Notenbefehle erhalten werden
(Velocity ist deaktiviert).
TIPP Ein erhaltener Note On-Befehl mit einer Notennummer von mindestens 92 ist ungültig, und der erstellte Sound wird abgebrochen. Notennummern von maximal 11 sind ebenfalls ungültig, allerdings
wird der erstellte Sound nicht abgebrochen.
Computer anschließen
Verwenden Sie ein USB-Kabel, um eine direkte Verbindung zwischen dem MS-20 mini und einem Computer mit USB-Schnittstelle herzustellen; dadurch können MIDI-Befehle auf dieselbe Weise wie über die MIDI-Buchsen empfangen werden.
An der USB-Schnittstelle können festgelegt auf MIDI-Kanal 1 lediglich MIDI-Notenbefehle gesendet und
erhalten werden (Velocity wird auf 64 festgelegt gesendet, Empfang ist deaktiviert).
TIPP Es können lediglich mit dem Keyboard erstellte MIDI-Notenbefehle gesendet werden. Pitchbendoder Modulations-Befehle beispielsweise werden nicht gesendet.
TIPP Eine USB-Verbindung erfordert die Installation des KORG USB-MIDI-Treibers. Laden Sie den
KORG USB-MIDI-Treiber von der Korg Website ( http://www.korg.co.jp/English/Distributors/ or
http://www.korg.com/ ) herunter und installieren Sie diesen laut den dem Treiber beigefügten Anweisungen.
Über die MIDI-Implementationstabelle
Die MIDI-Implementationstabelle führt die MIDI- Befehle auf, die gesendet und empfangen werden können. Bevor Sie ein MIDI-Gerät einsetzen, vergleichen Sie die MIDI-Implementationstabellen, um in Erfahrung zu bringen, welche MIDI- Befehle unterstützt werden.
TIPP Für Einzelheiten zur MIDI-Norm siehe MIDI-Implementation. Für Einzelheiten zur MIDI-Implementation besuchen Sie die Korg Website ( http://www.korg.co.jp/English/Distributors/ or http://www.
korg.com/ ).
Sounds mit dem Keyboard erzeugen
Drücken Sie eine Keyboard-Taste, um einen Ton zu erzuegen.
Stellen Sie die Lautstärke mit dem VOLUME-Regler ein.
Monitorlautsprecher, Mixer
Technische Daten
Keyboard:
Controller:
Anschlussbuchsen:
Regler einstellen
Drehen Sie den LOWPASS FILTER CUTOFF FREQUENCY-Regler im Gegenuhrzeigersinn, um den
Klang abzurunden. Stellen Sie den OSCILLATOR 1-Regler auf die Wellenfrom Dreieck, um die Klangfarbe zu ändern.
Stromversorgung:
Abmessungen:
Gewicht:
Lieferumfang:
37 Noten (3 Oktaven), Eigens für das MS-20 mini entwickelte Minitastatur
Rad (Mittelklick), Taster (
)
SIGNAL IN-Buchse (1/8-Zoll Mono-Miniklinke), SIGNAL OUT-Buchse (1/8-Zoll
Mono-Miniklinke, Ausgangsspannung 2 Vp-p, Ausgangswiderstand 3,5 kΩ)
PHONES-Buchse (1/8-Zoll Stereo-Miniklinke, 33 Ω 48 mW), DC9V-Buchse,
MIDI IN, USB (Typ B)
9 V DC
493 mm (B) x 257 mm (T) x 208 mm (H)
4,8 kg
10x Patchkabel, Netzteil (
, 9 V)
* Änderungen der technischen Daten und Ausführung zwecks Produktverbesserung vorbehalten.
4. SIGNAL IN 端子にギターやマイクを接続します。
EXTERNAL SIGNAL PROCESSOR を使った演奏を行うときには、SIGNAL IN 端子にギ
ターやマイクを接続します。
詳しくは、
オリジナル取扱説明書の「EXTERNAL SIGNAL PROCESSOR(ESP)の使い方」
を参照してください。
電源を入れる
1. VOLUME ノブを右に回します。
2. カチッと音がして STANDBY ON LED が点灯し、電源が入ります。
TIP このとき、オートパワーオフ機能が無効になっているときは、LED が数回点滅します。
3. 電源を切るときは VOLUME ノブを左に回しカチッと音がして LED が消灯すると電源が切
れます。
TIP 電源を入れたまま AC アダプターを抜いてしまったときやオートパワーオフ機能が働
いたときなど、VOLUME ノブがオフの位置以外で電源が切れてしまった場合は、一度
VOLUME ノブを左に回しきってオフの状態にしてから再度電源を入れてください。
オートパワーオフ機能
1. 約 4 時間、下記の操作を行わないと自動的に電源が切れます。
鍵盤による発音、MIDI IN または USB MIDI によるノートオン、TRIG IN への入力
2. 再度電源を入れるときは、一度 VOLUME ノブを左に回しきってオフの状態にしてから再度
電源を入れてください。
TIP 工場出荷時(初期値)は、オートパワーオフ機能が有効になっています。
オートパワーオフ機能を「無効」にするには
鍵盤の C1、D1、E1 を押しながら電源を入れます。
STANDBY ON LED が数回点滅後に点灯し、通常動作に戻ります。
TIP オートパワーオフ機能の設定は、電源を切っても記憶されます。
TIP 設定変更時に STANDBY ON LED が点灯する前に電源を切らないでください。デー
タが破損し故障することがあります。
再度、オートパワーオフ機能を「有効」にするには
鍵盤の C1、D1、F1 を押しながら電源を入れます。
STANDBY ON LED が点滅しないで点灯し、通常動作に戻ります。
音を出してみよう
基本的なセッティングを行う
「ノーマル・セッティング」を参照して、各ノブを設定します。
鍵盤を弾いて音を鳴らしてみる
鍵盤を弾いて音色を確かめてください。
音量を調節するには、VOLUME ノブで行います。
TIP 本機は複数の鍵盤を弾いても単音しか発音しません。二つ以上の鍵盤を弾いたときは、
弾いている一番上の音だけ発音します。
パワード・アンプ
ミキサーなど
コントロール・ホイールとモーメンタリ-・スイッチが使えるようになりました。コントロー
ル・ホイールとモーメンタリ-・スイッチを触って、音色の変化を聞いてみてください。
オリジナルの取扱説明書やセッティング・チャートなどを参考にいろいろな音を作って演
奏してください。
MIDI について
本機がオリジナルの MS-20 と大きく異なる点に、MIDI IN 端子と USB 端子を搭載してい
ることがあります。
本機とコンピューターを接続使用することで、シーケンサを使用した演奏に本機を使用す
ることができます。
MIDI 機器の接続
MIDI 情報を受信するには、市販の MIDI ケーブルを使います。本機の MIDI IN 端子と、情
報をやりとりする外部 MIDI 機器の MIDI OUT 端子を接続してください。
MIDI IN 端子 : 他の MIDI 機器から MIDI メッセージを受け取ります。外部機器の MIDI
OUT 端子と接続します。
MIDI IN 端子で受信することができる MIDI メッセージは、MIDI チャンネルは1に固定で、
ノート・メッセージ(ベロシティは無効)のみ受信が可能です。
TIP ノート・ナンバーが 92 以上のノート・オン・メッセージを受信したときは無効と
なり、発音中の音は停止します。またノート・ナンバーが 11 以下のときも無効と
なりますが発音中の音はそのまま発音し続けます。
コンピューターとの接続
USB 端子のあるコンピューターと直接 USB ケーブルで接続します。
USB 端子で送受信することができる MIDI メッセージは、MIDI チャンネルは1に固定で、
ノート・メッセージ(ベロシティは送信が 64 固定、受信が無効)を送受信することができ
ます。
TIP 送信される MIDI メッセージは、鍵盤を弾いたときに送信されるノート・メッセー
ジだけです。ベンドやモジュレーションなどのメッセージは送信しません。
TIP USB 接続するときは、コンピューターに KORG USB-MIDI ドライバをインストー
ルする必要があります。コルグ・ホームページ(http://www.korg.co.jp/)より
KORG USB-MIDI ドライバをダウンロードし、ドライバに付属のドキュメントに
従ってインストールしてください。
MIDI インプリメンテーション・チャートについて
MIDI インプリメンテーション・チャートは、送受信できる MIDI メッセージについて確認
できるようになっています。MIDI 機器を使うときには、それぞれの MIDI インプリメンテー
ション・チャートを比較し、対応している MIDI メッセージを確認してください。
TIP 詳細な MIDI の仕様については、MIDI インプリメンテーションに記載されています。
MIDI インプリメンテーションについては、コルグ・ホームページ(http://www.
korg.co.jp/)をご覧ください。
おもな仕様
鍵盤
37 鍵(3 オクターブ)
、MS-20 mini 専用ミニ鍵盤
おもなコントローラー コントロール・ホイール ( センター・クリック )、モーメンタリ-・
スイッチ(
接続端子
)
SIGNAL IN 端 子 ( モ ノ ラ ル・ ミ ニ・ フ ォ ー ン・ ジ ャ ッ ク )、
SIGNAL OUT 端子 ( モノラル・ミニ・フォーン・ジャック、2Vpp output、3.5k Ω )、PHONES 端子 ( ステレオ・ミニ・フォーン・
ジャック、33 Ω 48mW)
、DC9V 端子、MIDI IN 端子、USB(タ
ノブを触ってみる
LOWPASSS FILTER の CUTOFF FREQUENCY ノブを左にまわすと、音が丸く変化します。
また、OSCILLATOR 1 ノブで波形を三角波に変更することで音色が変わります。
イプ B)端子
電源
DC9V
寸法・質量
493(W)× 257(D)× 208(H)mm、4.8kg
使用温度条件
0 ~ +40℃(結露させないこと)
付属品
AC アダプター (9V/1.7A)、パッチ・コード 10 本
※製品の外観および仕様は、予告無く変更することがあります。