Download Notebook-Docking- Station Notebook-Docking
Transcript
CONRAD IM INTERNET http://www.conrad.de
BEDIENUNGSANLEITUNG OPERATING INSTRUCTIONS
MODE D’EMPLOI
Version
12/02
Diese Bedienungsanleitung gehört zu diesem Produkt. Sie ent-
hält wichtige Hinweise zur Inbetriebnahme und Handhabung. Achten Sie hierauf, auch wenn Sie dieses Produkt an Dritte weitergeben.
Heben Sie deshalb diese Bedienungsanleitung zum Nachlesen auf!
Eine Auflistung der Inhalte finden Sie in dem Inhaltsverzeichnis mit Angabe der entsprechenden Seitenzahlen auf Seite 4.
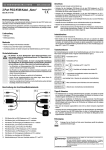
Notebook-DockingStation
Impressum
100 %
RecyclingPapier.
Chlorfrei
gebleicht.
Diese Bedienungsanleitung ist eine Publikation der Conrad Electronic GmbH.
Alle Rechte einschließlich Übersetzung vorbehalten. Reproduktionen jeder Art, z. B. Fotokopie, Mikroverfilmung, oder die Erfassung in elektronischen Datenverarbeitungsanlagen,
bedürfen der schriftlichen Genehmigung des Herausgebers.
Nachdruck, auch auszugsweise, verboten.
Diese Bedienungsanleitung entspricht dem technischen Stand bei Drucklegung. Änderung
in Technik und Ausstattung vorbehalten.
© Copyright 2002 by Conrad Electronic GmbH. Printed in Germany.
Imprint
100 %
recycling
paper.
Bleached
without
chlorine.
These operating instructions are published by Conrad Electronic GmbH, Klaus-ConradStraße 1, 92240 Hirschau/Germany
No reproduction (including translation) is permitted in whole or part e.g. photocopy,
microfilming or storage in electronic data processing equipment, without the express written consent of the publisher.
The operating instructions reflect the current technical specifications at time of print. We
reserve the right to change the technical or physical specifications.
© Copyright 2002 by Conrad Electronic GmbH. Printed in Germany.
Note de l´éditeur
100%
papier
recyclé.
Blanchi
sans
chlore.
Seite 4 - 17
Keep these operating instructions for future reference.
Notebook-DockingStation
A list of contents together with the corresponding page number can be
found in the table of contents on page 20.
Page 18 - 33
Station d’accueil pour
ordinateur portable
Le mode d'emploi suivant correspond au produit mentionné cidessus. Il comporte des instructions importantes relatives à sa mise
en service et à son maniement. Il faut respecter ces instructions,
même si ce produit est transmis à une tierce personne.
Gardez donc ce mode d'emploi pour toute consultation ultérieure!
Page 34- 48
Best.-Nr. / Item-No. / No de commande:
The present operating instructions form part of this product. It
contains important information on how to put the product into operation and how to handle it. Please take this into consideration
when you pass it on to third parties.
Vous trouverez une liste du contenu avec le numéro de la page correspondante dans l'index à la page 35.
99 96 29
Cette notice est une publication de la société Conrad Electronic GmbH, Klaus-ConradStraße 1, 92240 Hirschau/Allemagne.
Tous droits réservés, y compris traduction. Toute reproduction, quel que soit le type, par
exemple photocopies, microfilms ou saisie dans des traitements de texte electronique est
soumise à une autorisation préalable écrite de l`éditeur.
Impression, même partielle, interdite.
Cette notice est conforme à la règlementation en vigueur lors de l´impression. Données
techniques et conditionnement soumis à modifications sans aucun préalable.
*888-12-02/01-MG
© Copyright 2002 par Conrad Electronic GmbH. Imprimé en Allemagne.
2
Einführung
Sehr geehrter Kunde,
wir bedanken uns für den Kauf dieses Produkts.
Das Produkt ist EMV-geprüft und erfüllt die Richtlinie
89/336/EWG. Dieses Produkt erfüllt somit die Anforderungen
der geltenden europäischen und nationalen Richtlinien. Die CEKonformität wurde nachgewiesen, die entsprechenden
Erklärungen sind beim Hersteller hinterlegt.
Um diesen Zustand zu erhalten und einen gefahrlosen Betrieb
sicherzustellen, müssen Sie als Anwender diese Bedienungsanleitung beachten!
Alle enthaltenen Firmennamen und Produktbezeichnungen sind
Warenzeichen der jeweiligen Inhaber. Alle Rechte vorbehalten.
Bei Fragen wenden Sie sich an unsere
Technische Beratung
Deutschland: Tel. 0180/5 31 21 16 oder 09604/40 88 47
Fax 09604/40 88 44
e-mail: [email protected]
Mo. - Fr. 8.00 bis 18.00 Uhr
Österreich: Tel. 0 72 42/20 30 60 · Fax 0 72 42/20 30 66
e-mail: [email protected]
Mo. - Do. 8.00 bis 17.00 Uhr
Fr. 8.00 bis 14.00 Uhr
Schweiz: Tel. 0848/80 12 88 · Fax 0848/80 12 89
e-mail: [email protected]
Mo. - Fr. 8.00 bis 12.00 Uhr, 13.00 bis 17.00 Uhr
3
4
49
b) Généralités
• Au cas où un périphérique ne fonctionnerait pas sur la station
d’accueil pour portable, cela pourrait être dû au pilote qui par ex.
accède directement à une interface (comme par ex. le logiciel de
pilotage d’un scanner à port parallèle).
Connectez de tels périphériques directement à votre micro ordinateur et non à la station d’accueil pour portable.
• Les périphériques qui sont connectés à la station d’accueil pour
portable se partagent le débit de transmission du port USB1.1.
Quand vous imprimez par ex. par l’intermédiaire de la station
d’accueil pour portable et accédez en même temps au réseau,
l’opération d’impression ainsi que les accès au réseau prendront
plus de temps.
Dans de rares cas (en fonction des pilotes), il pourrait y avoir un
effet mutuel, par ex. une opération d’impression pourrait être
interrompue ou similaire.
• Il est préférable d’éviter la déconnexion à chaud de la station
d’accueil pour portable de l’ordinateur.
Les fichiers ouverts via le réseau risquent d’être endommagés.
• Le connecteur d’interconnexion USB sert à la transmission de
données entre deux PC. Il ne permet pas l’établissement d’un
petit réseau (par ex. pour l’impression, pour le partage de
fichiers/de dossiers ou pour les jeux). Pour cela, utilisez le
connecteur réseau.
Pour pouvoir transférer des données, le programme "PCLinq"
doit être démarré sur les deux ordinateurs; l’installation de ce
programme est décrit dans le point 8.
48
Bestimmungsgemäße Verwendung
Das Produkt ist zum Anschluss an eine USB-Schnittstelle eines
PCs/Notebooks vorgesehen.
Es stellt dort mehrere Schnittstellen zur Verfügung (1*serielle
RS232-Schnittstelle, 1*Parallelport, 1*PS/2-Mausport, 1*PS/2Tastaturport, 1*Netzwerk 10/100MBit) und hat einen USB-Hub mit 2
Ports eingebaut.
Ausserdem ist ein USB-Link-Anschluss vorhanden, mit dem sehr
einfach Daten zu einem zweiten PC übertragen werden können.
Eine andere Verwendung als zuvor beschrieben führt zu Beschädigungen dieses Produkts, ausserdem ist dies mit Gefahren wie z.B.
Kurzschluss, Brand, elektrischer Schlag etc. verbunden. Das
gesamte Produkt darf nicht geändert bzw. umgebaut werden. Das
Gehäuse darf nicht geöffnet werden. Die auf dem Produkt befindlichen Aufkleber dürfen nicht beschädigt oder entfernt werden.
Zum Betrieb darf nur das mitgelieferte Steckernetzteil verwendet
werden.
Inhaltsverzeichnis
Seite
1. Merkmale ...................................................................................6
2. Systemvoraussetzungen ...........................................................7
3. Lieferumfang..............................................................................7
4. Sicherheitshinweise ...................................................................7
5. Anschlüsse & LEDs....................................................................8
Netzwerkanschluss 10/100MBit, RJ45-Buchse ........................8
USB-Link-Port, USB-Typ B-Buchse .........................................8
Parallelport, 25pol. SubD-Buchse .............................................9
Serielle RS232-Schnittstelle, 9pol. SubD-Stecker ....................9
PS/2-Mausport ..........................................................................9
5
PS/2-Tastaturport....................................................................10
USB-Hub mit zwei USB-Ports, USB-Typ-A-Buchsen.............10
USB-Anschluss an den PC/Notebook ....................................10
Strombuchse ...........................................................................10
Leuchtdioden auf der Notebook-Docking-Station ..................10
6. Anschluss an den PC ..............................................................11
7. Treiber-Installation...................................................................11
8. Link-Betrieb .............................................................................11
• Afin de partager les lecteurs et dossiers avec d’autres ordinateurs, l’option "Partage de fichiers/d’imprimantes" doit être sélectionnée. Vous la trouvez par ex. dans le panneau de configuration
dans le volet "Identification réseau". Comme l’option le décrit
déjà, vous pouvez également partager votre imprimante avec les
autres ordinateurs du réseau, à savoir il ne vous est plus nécessaire de raccorder à chaque ordinateur une imprimante ou de
transférer les fichiers via disquette d’un ordinateur à l’autre pour
pouvoir les imprimer.
9. Handhabung ............................................................................12
10. Wartung und Reinigung...........................................................13
11. Behebung von Störungen........................................................15
12. Entsorgung ..............................................................................16
13. Tipps & Hinweise .....................................................................16
1. Merkmale
• Anschluss an USB-Port Ihres PCs/Notebooks
• Zum Betrieb ist das mitgelieferte Steckernetzteil erforderlich
• Eine RS232-Schnittstelle (9pol. SubD-Stecker) für serielle Geräte
• Eine Parallelport-Schnittstelle (25pol. SubD-Buchse) für Drucker
mit Centronics-kompatiblem Parallelport
• Ein PS/2-Mausport zum Anschluss einer PS/2-Maus
• Ein PS/2-Tastaturport zum Anschluss einer PS/2-Tastatur (für
den Anschluss einer 5pol. DIN-Tastatur ist ein Adapter erforderlich, nicht im Lieferumfang)
• Netzwerkanschluss (RJ45-Buchse); unterstützt 10MBit und
100MBit
• USB-Hub mit 2 Ports eingebaut
• Dans la version Windows 98/ME, le protocole réseau simple et si
aimé IPX n’est pas installé. Les jeux plus anciens qui requièrent
un protocole IPX, ne fonctionnent donc pas ! Pour les faire fonctionner, vous devez d’abord cliquer manuellement sur le bouton
"Ajouter" dans le volet Panneau de configuration/Identification
réseau et puis sélectionner et installer "Protocole" et "Réseau
IPX" dans le volet "Fabricant Microsoft".
• Si le démarrage de l’ordinateur sous Windows 98 (cela ne concerne pas Windows 98SE et ME) prend maintenant beaucoup plus
de temps, c’est dû au protocole TCP/IP installé par défaut par
Windows 98.
L’option sélectionnée par défaut est "Attribuer automatiquement
l’adresse IP". Elle se trouve dans le volet "Panneau de configuration"/"Identification réseau" et puis dans le volet "Les composants réseau suivants sont installés :". Sélectionnez ici la station
d’accueil (par ex. "TCP/IP -> UH520" ou similaire). Cliquez sur
l’option "Déterminer l’adresse IP" et entrez par ex. une adresse IP
fictive, par ex. 192.168.1.1, sélectionnez 192.168.1.2 pour le deuxième PC, etc. Les trois premiers chiffres doivent être identiques
sur tous les ordinateurs. Réglez l’option "Subnet-Mask" sur la
valeur 255.255.255.0 pour tous les ordinateurs.
• USB-Link-Anschluss eingebaut für einfache Datenübertragung
zwischen zwei PCs über USB
6
47
12. Elimination des déchets
2. Systemvoraussetzungen
Jetez l'appareil devenu inutilisable conformément aux lois en
vigueur.
• PC mit freier USB-Schnittstelle
• Windows 98/98SE/ME oder höher
13. Trucs & astuces
3. Lieferumfang
a) Fonctions réseau
• Si votre réseau est placé sous l’autorité d’un administrateur de
réseau ou système (par ex. dans une entreprise assez grande),
faites-le effectuer la connexion et le câblage, ne connectez pas
vous-même la station d’accueil pour portable en réseau.
•
•
•
•
•
• Au cas où vous n’auriez pas de connaissances techniques pour
l’installation d’un réseau, consultez un spécialiste ou laissez une
entreprise spécialisée se charger du raccordement/câblage.
• La station d’accueil pour portable peut être raccordée à un
réseau à 10Mbits ou 100Mbits.
Due à la limite du débit de transmission par le bus USB1.1 (débit
de transmission effectif d’env. 1Mo/s maxi) une différence de
vitesse n’est pourtant presque pas mesurable. Ne comparez
donc pas le débit de transmission de 100Mbits de la station d’accueil pour portable à une carte de réseau normale à 100Mbits!
• Si vous travaillez avec 98/ME, cela peut durer un certain temps
jusqu’à ce que les ordinateurs soient visibles dans le réseau. Si
vous avez allumé les ordinateurs et que Windows est prêt au bout
de quelques secondes sur tous les ordinateurs, vous pouvez, en
règle générale, ne pas accéder tout de suite à un autre ordinateur.
Un double-clic sur l’icône "Identification réseau" entraîne l’affichage du message "...Impossible de parcourir le réseau...".
Attendez un instant et essayez de nouveau.
46
Notebook-Docking-Station
Steckernetzteil
USB-Kabel (mit Stecker Typ A auf Stecker Typ B)
Treiber-CD
Bedienungsanleitung
4. Sicherheitshinweise
Bei Schäden, die durch Nichtbeachtung dieser
Bedienungsanleitung verursacht werden, erlischt
der Garantieanspruch.
Für Folgeschäden übernehmen wir keine Haftung!
Aus Sicherheits- und Zulassungsgründen (CE) ist das eigenmächtige Umbauen und/oder Verändern des Produkts nicht gestattet.
Der Aufbau des Produkts entspricht der Schutzklasse 2. Als Spannungsquelle für das mitgelieferte Netzteil darf nur eine ordnungsgemäße Netzsteckdose (230V~/50Hz) des öffentlichen Versorgungsnetzes verwendet werden.
Geräte, die an Netzspannung betrieben werden, gehören nicht in
Kinderhände. Lassen Sie deshalb in Anwesenheit von Kindern
besondere Vorsicht walten.
7
In gewerblichen Einrichtungen sind die Unfallverhütungsvorschriften
des Verbandes der gewerblichen Berufsgenossenschaft für elektrische Anlagen und Betriebsmittel zu beachten.
In Schulen, Ausbildungseinrichtungen, Hobby- und Selbsthilfewerkstätten ist das Betreiben des Produkts durch geschultes Personal
verantwortlich zu überwachen.
Gehen Sie vorsichtig mit dem Produkt um - durch Stöße, Schläge
oder dem Fall aus bereits geringer Höhe wird es beschädigt.
5. Anschlüsse und LEDs
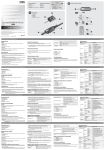
(Abb. siehe Ausklappseite)
Netzwerkanschluss "LAN" (RJ45-Buchse)
Verbinden Sie diese Buchse über ein 1:1-verbundenes TwistedPair-Kabel mit Ihrem Netzwerk-Hub/-Switch (10MBit, 100MBit
oder 10/100MBit). Aufgrund der maximalen Übertragungsrate
des USB1.1-Ports (praktischer Wert liegt etwa bei 1MByte/s) sind
natürlich keine so hohen Datenübertragungs-Geschwindigkeiten
wie bei normalen 100MBit-Netzwerken erreichbar.
USB-Link-Port "TRANSFER", USB-Typ-B-Buchse
Die Notebook-Docking-Station bietet Ihnen hier die Möglichkeit,
einen zweiten PC anzustecken. Mit der mitgelieferten Software
können so sehr einfach Daten zwischen den beiden PCs hin und
her kopiert werden (z.B. wenn der zweite PC nicht über einen
Netzwerkanschluss verfügt oder wenn Sie dessen Netzwerkkonfiguration nicht ändern wollen).
Verwechseln Sie den USB-Link-Port nicht mit der gleich aussehenden Anschlussbuchse, über die die Notebook-Docking-Station mit dem PC/Notebook verbunden wird.
8
11. Guide de dépannage
Pour cela, tenez compte de toutes les consignes de
sécurité du présent mode d'emploi!
Problème
La station d’accueil
pour ordinateur
portable n’est pas
identifiée.
Solution
• L’appareil est-il raccordé à l’aide de l’ad
aptateur secteur livré à une prise d'ali
mentation normée (230V~/50Hz) du sec
teur public ?
Les périphériques
qui sont connectés
à la station d’accueil
pour portable ne
fonctionnent pas
• Certains pilotes accèdent directement
aux interfaces, par ex. en cas d’un scan
ner à port parallèle. Son pilote interroge
directement le port parallèle afin de pilo
ter le scanner et de lire l’image.
Cela ne fonctionne évidemment pas par
l’intermédiaire du port USB.
• Il en est de même pour les souris PS/2 ou
les claviers PS/2 avec des fonctions spéciales via le pilote (par ex. des souris
avec beaucoup de touches, des claviers
avec des touches multimédia supplémentaires ou similaires).
Le logiciel de telles souris ou claviers ne
fonctionne éventuellement pas si la souris ou le clavier n’est pas alimenté(e) via
la station d’accueil pour portable.
Connectez de tels périphériques directement à votre micro ordinateur/portable et
non à la station d’accueil pour portable.
• Raccordez la station d’accueil pour portable via l’adaptateur secteur livré à une
prise de courant normée.
45
Une utilisation sans danger n'est plus possible si:
- l'appareil présente des dommages visibles,
- l'appareil ne fonctionne plus et
- l'appareil a été stocké pendant longtemps dans des conditions
défavorables ou
- l'appareil a été transporté dans des conditions défavorables.
Avant de procéder au nettoyage ou à l'entretien de l'appareil,
tenez impérativement compte des précautions d'emploi suivantes:
Aucune pièce nécessitant un entretien ne se trouve à
l'intérieur du produit.
Ouvrir des couvercles ou ôter des pièces peut avoir
pour conséquence que des éléments sous tension ne
soient plus protégés.
Avant un nettoyage, un entretien ou une remise en état,
il faut déconnecter l'appareil de toute source de tension, retirez l’adaptateur secteur de la prise de courant !.
Les condensateurs dans l'appareil peuvent conserver
des charges, même si l'appareil a été déconnecté de
toute source de tension.
Toute réparation ne doit être effectuée que par du personnel qualifié connaissant les dangers éventuels et les
prescriptions correspondantes.
Nettoyez le produit au moyen d'un chiffon propre, sec et non-pelucheux.
44
Nach dem Anstecken des zweiten PCs erkennt dieser neue
Hardware. Installieren Sie die benötigten Treiber von der mitgelieferten Treiber-CD.
Beachten Sie: Der Link-Betrieb dient nur zum Datei-Austausch!
Spiele mit Netzwerkfunktion oder die Ordner-/Druckerfreigabe
unter Windows sind damit nicht möglich!
Falls Sie auf dies angewiesen sind, nutzen Sie dazu den Netzwerkanschluss und eine entsprechende Konfiguration.
Parallelport "P.P.", 25pol. SubD-Buchse
An dieser parallelen Schnittstelle lässt sich ein entsprechender
Drucker betreiben. Beachten Sie, dass andere Geräte mit Parallelport ( z.B. ZIP-Drive, Scanner usw.) an dieser Schnittstelle
wahrscheinlich nicht funktionieren, da deren Treiber direkt auf
den Parallelport des PCs/Notebooks zugreift.
Stecken Sie solche Geräte dann direkt an einen Parallelport des
PCs/Notebooks an.
Serielle RS232-Schnittstelle "S.P.", 9pol. SubD-Stecker
Hier lässt sich z.B. ein Modem anstecken. Auch viele andere serielle Geräte können an dieser Schnittstelle betrieben werden.
Allerdings ist es denkbar, dass manche Geräte nicht über die
Notebook-Docking-Station angesprochen werden können, da
die Treibersoftware des Geräts die RS232-Schnittstelle (z.B.
COM1 oder COM2) direkt anspricht, was durch den Umweg über
den USB-Port nicht funktionieren kann.
Stecken Sie solche Geräte direkt an einer RS232-Schnittstelle
Ihres PCs/Notebooks an.
PS/2-Mausport
Schließen Sie hier eine PS/2-Maus an.
Spezielle Treibersoftware, die Ihrer Maus beiliegt, funktioniert
möglicherweise nicht, da die Software nur direkt an der PS/2Schnittstelle des PCs/Notebooks angeschlossene Mäuse unterstützt.
9
PS/2-Tastaturport
Hier lässt sich eine herkömmliche Tastatur mit PS/2-Stecker
anstecken (für Tastaturen mit 5pol. DIN-Stecker ist ein Adapter
nötig).
Wenn Sie für Ihre Tastatur spezielle Treibersoftware einsetzen
(z.B. bei Tastaturen mit Multimedia-Tasten), so funktioniert diese
Software möglicherweise nicht. Die Tastatur wird ja nun über
USB betrieben und nicht an einer PS/2-Schnittstelle des
PCs/Notebooks.
USB-Hub mit 2 USB-Ports, USB-Typ-A-Buchsen
In der Notebook-Docking-Station ist ein USB-Hub mit zwei USBPorts integriert, schließen Sie an die beiden USB-Typ-A-Buchsen
Ihre USB-Geräte an.
USB-Anschluss an den PC/Notebook
Verbinden Sie die USB-Typ-B-Buchse über das mitgelieferte
USB-Kabel mit einem freien USB-Port Ihres PCs/Notebooks.
Verwechseln Sie diesen Anschluss nicht mit dem
Uplink-Port !
Laissez donc le produit éteint prendre la température ambiante.
Cela peut durer plusieurs heures.
Ne touchez pas l’adaptateur secteur les mains mouillées!
Veillez à ce que l'isolation de l'ensemble du produit ne soit ni
endommagée ni détruite.
Avant chaque mise en service, vérifiez que le produit ne présente
pas de dommages!
Au cas où vous constateriez un endommagement,
ne branchez EN AUCUN CAS le produit Danger de
mort!
Si vous n'utilisez pas le produit durant longtemps, déconnectez-le
de la tension du secteur et retirez la fiche d’alimentation de la prise
de courant.
Conditions environnantes défavorables à éviter sur le lieu d'emplacement ou lors du transport:
- l'humidité ou un taux d'hygrométrie trop élevé
- des températures extrêmes (chaleur et froid extrêmes)
- de la poussière ou des gaz, vapeurs ou solutions inflammables
Strombuchse
Verbinden Sie sie über das mitgelieferte Steckernetzteil mit einer
ordnungsgemäßen Netzsteckdose (230V~/50Hz).
- de fortes vibrations
Leuchtdioden auf der Notebook-Docking-Station
• Power-LED
Anzeige für die Stromversorgung durch das mitgelieferte Netzteil
• USB-LED
Je 1 LED pro USB-Port des USB-Hubs
• 10/100-LED
LED leuchtet bei 100MBit-Übertragungsrate
• LINK-LED
LED leuchet bei korrekter Netzwerkverkabelung
Lors de la pose du produit, veillez à ne ni plier ni coincer les câbles.
10
- de forts champs électromagnétiques, comme il en existe près de
machines ou de haut-parleurs.
10. Entretien et nettoyage
Contrôlez périodiquement la sûreté technique de l'appareil, par ex.
si le boîtier ou l’adaptateur secteur sont endommagés.
Si une utilisation sans danger n'est plus possible, le produit doit être
mis hors service et protégé contre toute utilisation involontaire. Retirez l’adaptateur secteur de la prise de courant !
43
• Raccordez la station d’accueil pour portable à votre
ordinateur/portable et à la tension du secteur, comme décrit dans
le point 6 (installez les pilotes comme décrit sous le point 7).
6. Anschluss an den PC
• Connectez le deuxième PC à l’aide d’un câble USB au connecteur Link.
• Verbinden Sie die Strombuchse auf der Notebook-Docking-Station über das mitgelieferte Steckernetzteil mit der Netzspannung.
Windows identifie le nouveau matériel sur l’ordinateur. Insérez le
cédérom de pilotage de la station d’accueil et suivez toutes les
instructions de Windows (seul le pilote nécessaire au fonctionnement d’interconnexion va être installé, l’accès aux interfaces de la
station d’accueil pour portable n’est pas possible !).
• Verbinden Sie den USB-Anschluss (siehe "5. Konfiguration",
Punkt ) über das mitgelieferte USB-Kabel mit einem USB-Port
Ihres PCs/Notebooks.
Zum Betrieb ist mindestens Windows 98/98SE/ME oder XP nötig!
• Au cas où l’icône supplémentaire "PCLinq" ne serait pas affichée
à l’écran, démarrez le programme "Setup.exe" dans le dossier
"Windows" du CD de pilotage.
Ce programme installe le programme de transfert de données
permettant d’échanger des données entre les PC en les copiant.
7. Treiber-Installation
9. Maniement
Folgen Sie allen Anweisungen von Windows.
Tenez compte des points suivants: Seuls les périphériques USB doivent être connectés lorsque l’ordinateur est en service. Connecter ou déconnecter à
chaud d’autres périphériques risque de les endommager.
Pour cette raison et pour ne prendre aucun risque,
déconnectez la station d’accueil pour portable du
micro ordinateur et de la tension du réseau avant de
connecter des périphériques au port RS232/imprimante et au port clavier/souris PS/2!
Nach dem Anschluss der Notebook-Docking-Station an Ihren
PC/Notebook sollte Windows das Gerät automatisch erkennen.
Legen Sie die mitgelieferte CD in das CD-ROM-Laufwerk Ihres PCs
ein.
Die benötigten Treiber waren zum Zeitpunkt der Erstellung dieser
Bedienunganleitung im Verzeichnis "Windows" der Treiber-CD
abgelegt.
8. Link-Funktion
Über den "Link"-Anschluss () der Notebook-Docking-Station können sehr einfach Daten übertragen werden.
Gehen Sie dazu wie folgt vor:
Le produit n’est autorisé que pour l’utilisation dans des locaux secs
à l’intérieur.
N’utilisez jamais le produit juste après l'avoir transféré d'une pièce
froide dans une pièce chaude. L'eau de condensation qui en résulte
pourrait dans des conditions défavorables détruire l'appareil.
42
• Verbinden Sie die Notebook-Docking-Station mit Ihrem PC/Notebook und der Netzspannung, wie unter Punkt 6 beschrieben (ggf.
Treiber installieren, wie unter Punkt 7 beschrieben).
• Schließen Sie den zweiten PC über ein USB-Kabel an den LinkAnschluss an.
11
Windows erkennt auf dem PC neue Hardware. Legen Sie die Treiber-CD der Notebook-Docking-Station ein und folgen Sie allen
Anweisungen von Windows (es wird nur der Treiber für den LinkBetrieb installiert, der Zugriff auf die Schnittstellen der NotebookDocking-Station ist nicht möglich!).
• Wenn nach der Treiber-Installation kein zusätzliches Icon "PCLinq" auf dem Desktop erscheint, so starten Sie das Programm
"Setup.exe" im Verzeichnis "Windows" der Treiber-CD.
Dies installiert das Datenübertragungsprogramm, mit dem Daten
zwischen den PCs hin- und herkopiert werden können.
9. Handhabung
Beachten Sie: Nur USB-Geräte dürfen während dem
Betrieb des PCs ein- oder ausgesteckt werden.
Bei anderen Geräten besteht beim Ein- oder Ausstecken bei laufendem Betrieb die Gefahr, dass sie
beschädigt werden.
Vor dem Anstecken von Geräten an RS232-/
Druckerport und PS/2-Tastatur-/Mausport ist deshalb die Notebook-Docking-Station sicherheitshalber von PC und Netzspannung zu trennen!
Das Produkt darf nur in trockenen Innenräumen betrieben werden.
Verwenden Sie das Produkt niemals gleich dann, wenn es von
einem kalten in einen warmen Raum gebracht wird. Das dabei entstehende Kondenswasser kann unter Umständen das Produkt zerstören!
Lassen Sie das Produkt zuerst uneingeschaltet auf Zimmertemperatur kommen. Dies kann u.U. mehrere Stunden dauern.
Fassen Sie das Steckernetzteil nicht mit feuchten oder nassen Händen an!
12
• Led USB
une diode électroluminescente par port USB du hub USB
• Led 10/100
Ce voyant lumineux brille à un débit de transmission de
100Mbits
• Led Link
Ce voyant lumineux brille par un câblage réseau correct
6. Connexion à l’ordinateur
Le bon fonctionnement requiert au moins Windows 98/98SE/ME ou
XP!
• Raccordez la douille d’alimentation de la station d’accueil pour
portable via l’adaptateur secteur livré à la tension du secteur.
• Reliez la prise femelle USB (voir « 5. Configuration », point ) à
l’aide du câble USB livré à un port USB libre de votre ordinateur/portable.
7. Installation des pilotes
Après avoir raccordé la station d’accueil pour portable à votre ordinateur/portable, Windows devrait identifier automatiquement l’appareil. Insérez le CD joint dans le lecteur de cédéroms de votre
micro ordinateur.
Suivez toutes les instructions de Windows.
Au moment de la rédaction du présent mode d’emploi, les pilotes
requis étaient sauvegardés dans le dossier "Windows" du CD de
pilotage.
8. Fonction d’interconnexion
Le connecteur "Link" () de la station d’accueil pour portable permet une transmission très simple de données. Pour cela, procédez
comme suit:
41
Port souris PS/2
Connectez ici une souris PS/2.
Il est possible que le logiciel de pilotage joint à votre souris ne
fonctionne pas, car ce logiciel ne prend en charge que les souris
connectées directement à l’interface PS/2 du micro ordinateur/
portable.
Port clavier PS/2
Connectez ici un clavier ordinaire avec fiche PS/2 (pour les claviers avec fiche DIN à 5 broches, un adaptateur est requis).
Si vous utilisez un logiciel de pilotage spécifique pour votre clavier (par ex. pour les claviers avec des touches multimédia), il se
peut que ce logiciel ne fonctionne pas. Le clavier est connecté à
un port USB et non à une interface PS/2 de l’ordinateur/portable.
Hub USB avec deux ports USB, prises femelles USB de type A
La station d’accueil pour portable comporte un hub USB avec
deux ports USB; connectez vos périphériques USB aux deux prises femelles USB de type A.
Raccordement à l’ordinateur/portable via prise USB
Reliez la prise femelle USB de type B à l’aide du câble USB livré
à un port USB libre de votre ordinateur/portable.
Ne confondez pas ce port avec le port uplink!
Douille d’alimentation
Raccordez la douille d’alimentation à l’aide de l’adaptateur secteur livré à une prise d'alimentation normée (230V~/50Hz) du
secteur public.
Leds sur la station d’accueil pour portable
• Diode électroluminescente d’alimentation
Affichage confirmant l’alimentation en courant via l’adaptateur
secteur livré
40
Achten Sie darauf, dass die Isolierung des gesamten Produkts
weder beschädigt noch zerstört wird.
Überprüfen Sie vor jedem Gebrauch das Produkt auf Beschädigungen!
Falls Sie Beschädigungen feststellen, so darf das
Produkt NICHT an die Netzspannung angeschlossen werden! Es besteht Lebensgefahr!
Wenn das Produkt längere Zeit nicht in Betrieb genommen wird, so
trennen sie es von der Netzspannung, ziehen Sie das Steckernetzteil aus der Netzsteckdose.
Vermeiden Sie folgende widrige Umgebungsbedingungen am Aufstellungsort oder beim Transport:
- Nässe oder zu hohe Luftfeuchtigkeit
- Extreme Kälte oder Hitze
- Staub oder brennbare Gase, Dämpfe oder Lösungsmittel
- starke Vibrationen
- starke Magnetfelder, wie in der Nähe von Maschinen oder Lautsprechern
Achten Sie beim Aufstellen des Produkts darauf, dass die Kabel
nicht geknickt oder gequetscht werden.
10. Wartung und Reinigung
Überprüfen Sie regelmäßig die technische Sicherheit des Produkts,
z.B. Beschädigung des Gehäuses oder des Netzteils.
Wenn anzunehmen ist, dass ein gefahrloser Betrieb nicht mehr
möglich ist, so ist das Produkt ausser Betrieb zu setzen und gegen
13
unbeabsichtigten Betrieb zu sichern. Ziehen Sie das Steckernetzteil
aus der Netzsteckdose!
Es ist anzunehmen, dass ein gefahrloser Betrieb nicht mehr möglich
ist, wenn
- das Gerät sichtbare Beschädigungen aufweist,
- das Gerät nicht mehr funktioniert und
- nach längerer Lagerung unter ungünstigen Verhältnissen oder
- nach schweren Transportbeanspruchungen.
Bevor Sie das Gerät reinigen oder warten, beachten Sie unbedingt folgende Sicherheitshinweise:
Es sind keinerlei vom Anwender zu wartende Teile im
Inneren des Produkts.
Beim Öffnen von Abdeckungen oder Entfernen von Teilen können spannungsführende Teile freigelegt werden.
Vor einer Reinigung, Wartung oder Instandsetzung
muss das Gerät von allen Spannungsquellen getrennt
werden, ziehen Sie das Steckernetzteil aus der Netzsteckdose!
Kondensatoren im Gerät können noch geladen sein,
selbst wenn das Gerät von allen Spannungsquellen
getrennt wurde.
Eine Reparatur darf nur durch eine Fachkraft erfolgen,
die mit den damit verbundenen Gefahren bzw. einschlägigen Vorschriften vertraut ist.
Zur Reinigung des Produkts reicht ein sauberes, trockenes, fusselfreies Tuch.
14
Veiller à ne pas confondre le port d’interconnexion USB et la prise de raccordement d’aspect identique servant à connecter la
station d’accueil pour portable au micro ordinateur/portable.
la connexion du deuxième PC, celui-ci détecte un nouveau
matériel. Installez les pilotes requis en les copiant du CD de pilotage livré.
Tenez compte des points suivants: Le fonctionnement d’interconnexion ne sert qu’à l’échange de données! Des jeux à fonctionnement réseau ou le partage de fichiers/d’imprimantes sous
Windows ne sont pourtant pas possibles!
Si vous en avez besoin, utilisez le connecteur réseau et la configuration correspondante.
Port parallèle "P.P." connecteur femelle SubD à 25 broches
Cette interface peut être utilisée pour exploiter une imprimante
appropriée. Tenez compte du fait que d’autres périphériques
munis d’un port parallèle (par ex. un lecteur ZIP, un scanner, etc.)
ne fonctionnent probablement pas sur cette interface, car leur
pilote accède directement au port parallèle du micro ordinateur/portable.
Si c’est le cas, connectez de tels périphériques directement au
port parallèle du micro ordinateur/portable.
Interface sérielle RS232 "S.P.", connecteur mâle SubD à 9
broches
Il est possible de connecter ici un modem, par ex. Beaucoup
d’autres périphériques sériels se connectent également à cette
interface.
Il est pourtant possible que certains périphériques ne puissent
pas être accédés par l’intermédiaire de la station d’accueil pour
portable, car le logiciel de pilotage du périphérique accède
directement à l’interface RS232 (par ex. COM1 ou COM2) ce qui
peut ne pas fonctionner faisant le détour par le port USB.
Connectez de tels périphériques directement à une interface
RS232 de votre micro ordinateur/portable.
39
Les appareils qui fonctionnent à la tension du secteur doivent être
maintenus hors de la portée des enfants. Soyez donc très vigilants
en présence d'enfants.
Dans les locaux professionnels, il faut observer les instructions relatives à la prévention des accidents émises par les caisses de
prévoyance professionnelles contre les accidents exerçant dans le
domaine des installations électriques et de l'outillage industriel.
Dans les écoles, les centres de formation professionnelle, les ateliers pour handicapés ou dans les ateliers d'amateurs, l'utilisation
du produit doit être responsabilisée par du personnel qualifié.
Soyez prudent lors du maniement du produit - chocs, coups et chutes mêmes de faible hauteur l’endommageraient.
5. Connecteurs et leds
(voir l’illustration du rabat)
Connecteur réseau "LAN" (prise femelle RJ45)
Raccordez cette prise femelle via un câble multipaire torsadé 1:1
à votre concentrateur/boîtier switch réseau (10Mbits, 100Mbits
ou 10/100Mbits). Dû au débit de transmission maximal du port
USB1.1 (valeur empirique est d’env. 1Mo/s), une vitesse de
transmission très élevée comme elle est offerte par ex. par un
réseau normal 100Mbits n’est évidemment pas possible.
Port d’interconnexion USB "TRANSFER", connecteur femelle USB de typeB
La station d’accueil pour portable offre la possibilité de connecter un deuxième micro ordinateur. Grâce au logiciel livré, il est
possible de copier facilement les données entre les deux PCs
(par ex. si un PC ne dispose pas d’un connecteur réseau ou si
vous ne souhaitez pas modifier sa configuration réseau).
38
11. Behebung von Störungen
Beachten Sie alle Sicherheitshinweise dieser Bedienungsanleitung!
Problem
Lösungshilfe
NotebookDocking-Station
wird nicht erkannt
• Ist das Produkt über das Steckernetzteil
mit einer ordnungsgemäßen Netzsteckdose verbunden?
Geräte, die an der
NotebookDocking-Station
angesteckt sind,
funktionieren nicht
• Manche Treiber greifen direkt auf die
Schnittstellen zu, z.B. bei einem Parallelport-Scanner. Dessen Treiber fragt direkt
den Parallelport ab, um den Scanner zu
steuern und das Bild auszulesen.
Dies funktioniert natürlich über den
USB-Port nicht.
• Ähnliches gilt für PS/2-Mäuse oder
PS/2-Tastaturen mit Sonderfunktionen
über den Treiber (z.B. Mäuse mit vielen
Tasten, Tastaturen mit zusätzlichen Multimediatasten o.ä.).
Die Software solcher Mäuse oder Tastaturen funktioniert evtl. nicht, wenn die
Maus oder Tastatur über die NotebookDocking-Station betrieben wird. Schliessen Sie solche Geräte direkt an Ihren
PC/Notebook an und nicht an die Notebook-Docking-Station.
• Verbinden Sie die Notebook-DockingStation über das mitgelieferte Steckernetzteil mit einer ordnungsgemäßen
Netzsteckdose.
15
12. Entsorgung
Entsorgen Sie das unbrauchbar gewordene Produkt gemäß den
geltenden gesetzlichen Vorschriften.
13. Tipps & Hinweise
a) Netzwerkfunktionen
• Wenn Sie für Ihr Netzwerk einen eigenen Netzwerk- oder Systemadministrator haben (etwa in einer größeren Firma), so lassen
Sie IHN Anschluss und Verkabelung übernehmen, verbinden Sie
die Notebook-Docking-Station nicht selbst mit dem Netzwerk.
• Falls Sie keine Fachkenntnisse bei der Installation eines Netzwerks haben, so fragen Sie einen Fachmann oder lassen Sie
Anschluss/Verkabelung von einer Fachwerkstatt durchführen.
• Die Notebook-Docking-Station kann an ein 10MBit- oder
100MBit-Netzwerk angeschlossen werden.
Durch die begrenzte Datenübertragungsrate über den USB1.1Bus (praktische Übertragungsrate ca. max. 1MByte/s) ist jedoch
kaum ein Geschwindigkeitsunterschied messbar.
Vergleichen Sie die 100MBit-Datenübertragungsrate der Notebook-Docking-Station deshalb nicht mit der einer normalen
100Mbit-Netzwerkkarte!
• Bei Windows98/ME kann es etwas dauern, bis die Rechner im
Netzwerk sichtbar werden. Wenn Sie die Rechner eingeschaltet
haben und Windows auf allen Rechnern nach ein paar Sekunden
geladen ist, können Sie in der Regel nicht sofort einen anderen
Rechner zugreifen. Beim Doppelklick auf "Netzwerkumgebung"
16
• connecteur réseau (prise femelles RJ45); prenant en charge
10Mbits et 100Mbits
• hub USB incorporé avec deux ports
• connecteur d’interconnexion USB incorporé pour la transmission
simple entre deux PC ou via port USB
2. Conditions logicielles et matérielles
minimales requises
• PC avec interface USB libre
• Windows 98/98SE/ME ou ultérieur
3. Contenu de l'emballage
•
•
•
•
•
station d’accueil pour ordinateur portable
adaptateur secteur
câble USB (avec connecteur de type A sur connecteur de type B)
CD de logiciel de pilotage
mode d'emploi
4. Consignes de sécurité
En cas de dommages dus à la non-observation de
ce mode d'emploi, la validité de la garantie est
annulée! Nous déclinons toute responsabilité pour
les éventuels dommages consécutifs!
Pour des raisons de sécurité et d'homologation (CE), il est interdit
de modifier la construction et/ou de transformer le produit soimême!
La construction du produit est conforme à la classe de protection 2.
La source de tension doit être impérativement une prise d’alimentation normée (230V~/50Hz) du secteur public.
37
Hub USB avec deux ports USB, prises femelles
USB de type A. ......................................................................40
Prise pour raccordement USB à l’ordinateur/portable .........40
Douille d’alimentation ............................................................40
Diodes électroluminescentes sur la station d’accueil pour
portable..................................................................................40
6.
Connexion à l’ordinateur .......................................................41
7.
Installation des pilotes ...........................................................41
8.
Fonctionnement d’interconnexion ........................................41
9.
Maniement .............................................................................42
kann z.B. die Meldung kommen "...Das Netzwerk kann nicht
durchsucht werden...".
Warten Sie etwas und versuchen Sie es erneut.
• Um Laufwerke und Verzeichnisse für andere Rechner freizugeben, muss die "Datei- und Druckerfreigabe" aktiviert sein. Sie finden Sie z.B. in der Systemsteuerung unter "Netzwerk". Wie die
Option schon sagt, können Sie auch Ihren Drucker für die anderen Rechner auf dem Netzwerk freigeben, d.h. Sie brauchen nicht
mehr an jedem PC einen Drucker anschliessen oder gar die
Dateien per Diskette zwischen den Rechnern umkopieren, um sie
ausdrucken zu können.
10. Entretien et nettoyage............................................................43
11. Guide de dépannage .............................................................45
12. Elimination des déchets.........................................................46
13. Trucs & astuces .....................................................................46
1. Caractéristiques
• raccordement au port USB de votre ordinateur/portable
• l’adaptateur secteur livré est nécessaire pour le fonctionnement
• une interface sérielle RS232 (connecteur SubD à 9 broches) pour
les périphériques sériels
• une interface pour port parallèle (connecteur femelle SubD à 25
broches) pour l’imprimante avec port parallèle compatible Centronics
• un port souris PS/2 permettant le raccordement d’une souris
PS/2
• un port clavier PS/2 permettant le raccordement d’un clavier
PS/2 (pour le raccordement d’un clavier DIN à 5 broches, un
adaptateur (non livré) est nécessaire).
36
• Bei Windows 98/ME wird das so beliebte und einfache IPX-Netzwerkprotokoll nicht installiert. Ältere Spiele, die ein IPX-Protokoll
benötigen, laufen also nicht! Sie müssen erst von Hand in der
Systemsteuerung/Netzwerk "Hinzufügen" anklicken, dann "Protokoll" und beim "Hersteller: Microsoft" das "IPX-Netzwerk" auswählen und installieren.
• Wenn der Rechnerstart bei Windows 98 (bei Windows 98SE und
ME trifft dies nicht zu) nun auf einmal viel länger dauert, so liegt
das daran, dass Windows 98 standardmäßig das "TCP/IP"-Protokoll installiert.
Dabei ist als Grundeinstellung die Option eingestellt "IP-Adresse
automatisch beziehen". Sie finden diese unter "Systemsteuerung"/"Netzwerk" und dann im Fenster "Die folgenden Netzwerkkomponenten sind installiert:". Wählen Sie hier die Docking-Station aus (könnte z.B. "TCP/IP -> UH520" o.ä. heissen).
Klicken Sie auf "IP-Adresse festlegen" und geben Sie z.B. eine
fiktive IP-Adresse ein, z.B. 192.168.1.1, den zweiten PC stellen
Sie auf 192.168.1.2 ein, usw. Die ersten drei Zahlen müssen auf
allen Rechnern gleich sein. Die "Subnet-Mask" stellen Sie bei
allen PCs auf 255.255.255.0 ein.
17
b) Allgemein
• Falls ein Gerät an der Notebook-Docking-Station nicht funktionert, so könnte es am Treiber liegen, der z.B. direkt auf eine
Schnittstelle zugreifen will (etwa die Treibersoftware eines Parallelport-Scanners).
Schliessen Sie solche Geräte direkt an Ihrem PC an und nicht an
der Notebook-Docking-Station.
• Die an der Notebook-Docking-Station angeschlossenen Geräte
teilen sich die Datenrate des USB1.1-Ports.
Wenn Sie also z.B. über die Notebook-Docking-Station ausdrucken und gleichzeitig Netzwerkzugriffe durchführen, so wird
sowohl der Druckvorgang langsamer als auch die Netzwerkzugriffe.
In seltenen Fällen (treiberabhängig) könnte es zur gegenseitigen
Beeinflussung kommen, z.B. könnte ein Druckvorgang abbrechen
o.ä.
• Das Abstecken der Notebook-Docking-Station während dem
Betrieb des PCs sollte vermieden werden.
Über das Netzwerk geöffnete Dateien könnten beschädigt werden.
• Der USB-Link-Anschluss dient nur zur Datenübertragung zwischen zwei PCs. Sie können darüber kein kleines Netzwerk aufbauen (z.B. zum Drucken, für Datei-/Ordner-Freigaben oder für
Spiele). Nutzen Sie dazu den Netzwerkanschluss.
Zur Datenübertragung muss auf beiden PCs das Programm "PCLinq" gestartet werden, das Sie wie unter Punkt 8 beschrieben
installieren können.
18
Utilisation prévue
Le produit est prévu pour être branché à un port USB d’un micro
ordinateur/ordinateur portable.
Il y met à disposition plusieurs interfaces supplémentaires (1*interface RS232 sérielle, 1*port parallèle, 1*port souris PS/2, 1*port clavier
PS/2, 1*réseau 10/100Mbits) et comprend un hub USB incorporé
avec 2 ports.
En outre, la station d’accueil dispose d’un connecteur d’interconnexion USB permettant la transmission simple de données vers un
deuxième PC.
Toute utilisation autre que celle stipulée ci-dessus provoque l'endommagement du présent produit, ainsi que des risques de courtscircuits, d'incendie, de décharge électrique, etc. Le produit ne doit
être ni modifié ni transformé! Il est interdit d'ouvrir le boîtier. Ne pas
endommager ou retirer les étiquettes se trouvant sur le produit. Utilisez uniquement l’adaptateur secteur livré.
Index
1.
Page
Caractéristiques .....................................................................36
2.
Conditions logicielles et matérielles minimales requises. ......37
3.
Contenu de l'emballage .........................................................37
4.
Consignes de sécurité ...........................................................37
5.
Connecteurs et leds...............................................................38
Connecteur réseau 10/100Mbits, prise femelle RJ45............38
Port d’interconnexion USB, prise femelle USB de type B ....38
Port parallèle, prise femelle SubD à 25 broches....................39
Interface sérielle RS232, prise mâle SubD à 9 broches ........39
Port pour souris PS/2 ............................................................40
Port pour clavier PS/2............................................................40
35
Introduction
Introduction
Cher client,
Dear customer,
Thank you for purchasing this product.
Nous vous remercions d'avoir choisi ce produit.
La compatibilité électronique du présent produit a été contrôlée. Il est conforme aux exigences de la directive
89/336/CEE. Le présent produit est donc conforme aux exigences des directives européennes et nationales en vigueur. La
conformité CE a été établie, les actes déclaratifs ont été consignés auprès du fabricant.
Afin de maintenir le produit en bon état et d'en assurer une exploitation sans risques, l'utilisateur doit absolument tenir compte de ce
mode d'emploi et le respecter!
Tous les noms d'entreprises et appellations de produits contenus dans cette notice sont des marques déposées des propriétaires correspondants. Tous droits réservés.
Pour toutes questions, adressez vous à notre service
conseil technique
34
The product is tested for electromagnetic compatibility and
complies with regulation 89/336/EEC. The product therefore
complies with the requirements of the current European and
national guidelines. CE conformity has been established and
the relevant statements and documents have been deposited at
the manufacturer.
We kindly request the user to follow the operating instructions to
preserve this condition and to ensure safe operation
All company names and names of products contained are trademarks of the respective owners. All rights reserved.
In case of questions, consult our technical
information service
Germany: Tel. 0180/5 31 21 16 or 09604/40 88 47
Fax 09604/40 88 44
e-mail: [email protected]
Mon - Fri 8.00 to 18.00
France: Tél. 0 826 827 000 · Fax 0 826 826 002
e-mail: [email protected]
du lundi au vendredi de 9h00 à 19h00
samedi de 9h00 à 18h00
Austria: Tel. 0 72 42/20 30 60 · Fax 0 72 42/20 30 66
e-mail: [email protected]
Mon - Thu 8.00 to 17.00
Fri. 8.00 to 14.00
Suisse: Tél. 0848/80 12 88 · Fax 0848/80 12 89
e-mail: [email protected]
du lundi au vendredi de 8h00 à 12h00, 13h00 à 17h00
Switzerland: Tel. 0848/80 12 88 · Fax 0848/80 12 89
e-mail: [email protected]
Mon - Fri 8.00 to 12.00, 13.00 to 17.00
19
Prescribed Use
The product is designed to be connected to a USB interface of a
PC/Notebook.
It provides several interfaces (1*serial RS232 interface, 1*parallel
port, 1*PS/2 mouse port, 1*PS/2 keyboard port, 1*network10/
100MBit) and it has a USB hub with 2 ports built-in.
Furthermore there is a USB link connection, with which data can be
transferred easily to a second PC.
Any use other than the one described above damages the product.
Moreover, this involves dangers, such as e.g., short-circuit, fire,
electric shock, etc. No part of the product may be modified or
rebuilt. The housing must not be opened. The stickers which are
attached on the product must not be damaged or removed. Only the
enclosed plug-in power supply unit may be used for the operation.
• The devices connected to the notebook docking station share the
data rate of the USB1.1 port.
This means that when you e.g., print via the notebook docking
station and carry out a network access at the same time, the printing as well as the network access will be slower.
In rare cases (depending on the driver) this can lead to mutual
interference e.g., printing might stop or similar.
• It should be avoided to disconnect the notebook docking station
while the PC is running. Data which is opened via the network
might get damaged.
• The USB link connection is only designed for data transfer between two PCs. You cannot set up a little network (e.g., for printing, for data/file enabling or for games). For this you should use
the network connection.
To transfer data the program "PCLinq" needs to be started on
both PCs, you can install it as described under number 8.
Table of Contents
1.
Page
Characteristics. ......................................................................21
2.
System Requirements............................................................22
3.
Included in Delivery................................................................22
4.
Safety Instructions .................................................................22
5.
Connections & LEDs ..............................................................23
Network Connection 10/100MBit, RJ45 Socket....................23
USB Link Port, USB Type B Socket ......................................23
Parallel Port, 25 pin SubD Socket..........................................24
Serial RS232 Interface, 9 pin SubD Plug ...............................24
PS/2 Mouse Port ...................................................................24
PS/2 Keyboard Port ...............................................................25
USB Hub with two USB Ports, USB Type A Sockets............25
USB Connection to the PC/Notebook ...................................25
20
33
• To enable drives and directories for other computer, "File and
printer enabling" needs to be activated. This can be found in e.g.,
system control under "Network". As the option already indicates,
you can also enable your printer for the other computers in the
network i.e., you do not to need to connect a printer to each PC
or even copy files via floppies between computers, to be able to
print them out.
• With Windows 98/ME the very popular and simple IPX network
protocol is not installed. Older games which need a IPX protocol
will therefore not work. First of all you manually need to click on
system control/network "Add", then "Protocol" and at "Manufacturer: Microsoft" select and install "IPX Network".
• If the start of Windows 98 (this is not the case with Windows 98SE
and ME) now takes much longer, then this is due to the fact that
Windows 98 installs the "TCP/IP" protocol as standard version.
This means that the option "get IP address automatically" is set in
the basic setting. This can be found under "System control"/"Network" and then in the window "The following network components are installed:" This is where you select the docking station
(it might e.g., be called "TCP/IP -> UH520" or similar). Click onto
"fix IP address" and enter a fictitious IP address e.g., 192.168.1.1,
set the second PC onto 192.168.1, etc. The first three numbers
have to be the same on all computers. The "Subnet mask" should
be set to 255.255.255.0 on all computers.
b) General
• If a device does not work on the notebook docking station, this
might be due to the driver, which might want to access an interface directly (for example the driver software of a parallel port scanner).
Connect such devices directly on your PC and not with the notebook docking station.
32
Power Socket.........................................................................25
Light Diodes on the Notebook Docking Station ....................25
6.
Connection to the PC ............................................................26
7.
Driver Installation ...................................................................26
8.
Link Operation........................................................................26
9.
Handling.................................................................................27
10. Maintenance and Cleaning ....................................................28
11. Troubleshooting .....................................................................30
12. Disposal .................................................................................31
13. Tips & Notes...........................................................................31
1. Characteristics
• Connection to USB port of your PC/Notebook
• The included plug-in power supply unit is necessary for operation
• A RS232 interface (9 pin SubD plug) for serial devices
• A parallel port interface (25 pin SubD socket) for printer with Centronics compatible parallel port
• A PS/2 mouse port to connect a PS/2 mouse
• A PS/2 keyboard port to connect a PS/2 keyboard (to connect a 5
pin DIN keyboard, an adapter is necessary, not included in delivery)
• Network connection (RJ45 socket); supports 10MBit and
100MBit
• USB hub with 2 built-in ports
• USB link connection built-in for simple data transfer between two
PCs via USB
21
2. System Requirements
12. Disposal
• PC with free USB interface
• Windows 98/98SE/ME or higher
Dispose of the product which does no longer work in accordance
with the legal valid regulations.
3. Included in Delivery
13. Tips & Notes
a) Network functions
•
•
•
•
•
Notebook Docking Station
Plug-in power supply unit
USB cable (with plug type A to plug type B)
Driver CD
Operating instructions
4. Safety Instructions
In the case of any damages which are caused due to
failure to observe these operating instructions, the
guarantee will expire. We do not assume liability for
resulting damages.
The unauthorised conversion and/or modification of the product is
inadmissible because of safety and approval reasons (CE).
The structure of the product complies with safety class 2. As voltage source for the included power supply only a regular mains socket
(230V~/50Hz) of the public supply grid may be used.
Devices which are operated on mains voltage, should be kept out of
reach of children. This is why you should be extra careful if children
are around.
22
• If you have your own network or system administrator for your
network (for example in a larger firm), then let HIM take over
connection and cabling, no not connect the notebook docking
station yourself with the network.
• If you have no expert knowledge on the installation of a network,
ask a specialist or let the connection/cabling be carried out by a
specialist workshop.
• The notebook docking station can be connected to a 10MBit or
100MBit network.
Because of the limited data transfer rate via the USB1.1 bus
(practical transfer rate approx. max. 1MByte/s), there is hardy a
measurable difference in speed. This is why you should not compare the 100MBit date transfer rate of the notebook docking station with a normal 100MBit network card.
• With Windows98/ME it can take a little until the computers are
visible on the network. If you have the computers switched on
and Windows is loaded on all computers after a couple of
seconds, normally you can not access another computer straight
away. When double clicking "Network environment"
e.g., the following message might appear "...The network can not
be searched...".
Wait a little bit and then try again.
31
11. Troubleshooting
Please observe all safety instructions of these operating instructions.
In commercial and industrial facilities the regulations for the prevention of accidents as laid down by the professional trade association
for electrical equipment and devices need to be observed.
Problem
Solution
In schools, training facilities, do-it-yourself and hobby workshops
the product should not be handled unless supervised by trained,
responsible personnel.
Notebook docking
station not
recognised
• Is the product properly connected via the
plug-in power supply unit with a proper
mains socket?
Be careful with the product, shocks, blows or even falls from a low
height will damage it.
Devices which are • Some drivers directly access the interfaces
connected with the
e.g., parallel port scanners. Their drivers
notebook docking
directly scan the parallel port, to control the
station do not work
scanner and to read the picture. Of course
this does not work via the USB port.
• Similar is the case for PS/2 mice or PS/2
keyboards with special functions via the
driver (e.g., mice with several keys, keyboards with additional multimedia keys or
similar).
The software of such mice or keyboards
might not work if the mouse or keyboard is
operated via the notebook docking station.
Never connect such devices directly with
your PC/Notebook and not with the notebook docking station.
• Connect the notebook docking station via
the enclosed plug-in power supply unit
with a regular mains socket.
5. Connections and LEDs
(Illus. see fold-out page)
Network connection "LAN" (RJ45 socket)
Connect this socket via a 1:1 connected twisted pair cable with
your network hub/switch (10MBit, 100Mbit or 10/100MBit). Due
to the maximum transfer rate of the USB1.1 ports (practical value
at around 1MByte/s), of course high data transfer speeds as with
normal 100MBit networks can not be achieved.
USB link port "TRANSFER", USB type B socket
Here, the notebook docking station offers you the possibility to
connect a second PC. With the software included you can very
easily copy data backwards and forwards between the two PCs
(e.g., when the second PC does not have a network connection
or if you do not want to change its network configuration).
Do not mix up the USB link port with the connecting socket
which looks similar and via which the notebook docking station
is connected with the PC/Notebook.
30
23
After having connected the second PC, it will recognise the new
hardware. Install the necessary driver from the driver CD included.
Please note: the link operation is only designed for the exchange
of data. Games with network functions or the enabling of
files/printer under Windows is not possible.
If you need this function, use the network connection and a corresponding configuration.
Parallel port "P.P.", 25 pin SubD socket
On this parallel interface, a corresponding printer can be operated. Please note, that other devices with parallel port (e.g., ZIP
drive, scanner etc.) probably do not work on this interface, since
their drivers directly accesses the parallel port of the PC/Notebook.
Connect such devices directly with a parallel port of the
PC/Notebook.
Serial RS232 interface "S.P.", 9 pin SubD plug
Here, for example a modem can be connected. Many other serial devices can also be operated on this interface.
However, it is possible that some devices can not respond via
the notebook docking station, since the driver software of the
device directly has an effect on the RS232 interface (e.g., COM1
or COM2), which can not work via the deviation of the USB port.
Connect such devices directly with a RS232 interface of your
PC/Notebook.
PS/2 mouse port
Here, you connect a PS/2 mouse.
Special driver software which is enclosed with your mouse might
not work, since the software only directly supports mice connected with the PS/2 interface of the PC/Notebook.
24
Safe operation must be presumed to be no longer possible, if
- the device exhibits visible damage
- the device does not operate any longer
- the device was stored under unfavourable conditions for a long
period of time.
or
- the device was exposed to extraordinary stress caused by transport.
Before cleaning the device or performing maintenance, please
observe the following safety instructions:
IThere are no serviceable parts which need maintenance by the user inside the product.
When opening covers or removing parts you may expose live parts.
The device needs to be separated from all voltage sources before cleaning it, performing maintenance work or
repairs, pull the plug-in power supply unit form the
mains socket.
Capacitors inside the device may still carry voltage even
though they have been disconnected from all voltage
sources.
Repairs may only be carried out by qualified personnel
who are familiar with the hazards involved and the relevant regulations.
To clean the product a clean, dry, lint-free cloth is sufficient.
29
If you do notice any damages, the product must NOT
be connected to the mains voltage. There is lethal
danger.
If the product is not to be used for a longer period of time, separate
it from the mains voltage, pull the plug-in power supply unit from the
mains socket.
Avoid the following adverse ambient conditions on the set-up site or
during transport:
- wetness or too high air humidity
- extreme cold or heat
- dust or flammable gasses, vapours or solvents
- strong vibrations
- strong magnetic fields, such as near machines or loud speakers
When setting up the product, make sure that the cables are not folded or crushed.
10. Maintenance and Cleaning
Check the technical safety of the product regularly e.g., for damages on the housing or on the power supply unit.
If there is reason to believe that safe operation has become impossible put the product out of operation and secure it against
any unintended operation. Pull the plug-in power supply unit from
the mains socket.
28
PS/2 keyboard port
Here, a conventional keyboard with PS/2 plug can be connected
(an adapter is necessary for keyboards with 5 pin DIN plugs).
If you use special driver software for your keyboard (e.g., with
keyboards that have multimedia keys) then this software might
not work. The keyboard is now operated via USB and not a PS/2
interface of the PC/Notebook.
USB hub with 2 USB port, USB type A sockets
In the notebook docking station there is a USB hub with two integrated USB ports, connect your USB devices to the USB type A
sockets.
USB connection to the PC/Notebook
Connect the USB type B socket via the enclosed USB cable with
a free USB port of your PC/Notebook.
Do not mistake this connection with the uplink port .
Power socket
Connect it via the enclosed plug-in power supply unit with a
regular mains socket (230V~/50Hz).
Light diodes on the notebook docking station
• Power LED
Display for power supply via the enclosed plug-in power supply
unit
• USB LED
1 LED each per USB port of the USB hub
• 10/100 LED
LED lights up at 100MBit transfer rate
• LINK LED
LED lights up at correct network cabling
25
6. Connection to the PC
access to the interfaces of the notebook docking station is not
possible).
Minimum system requirement is Windows 98/98SE/ME or XP.
• Connect the USB connection (see "5. Configuration", number ia
the enclosed USB cable with a USB port of your PC/Notebook.
• If no additional icon "PCLinq" appears on the desktop after
having installed the driver, start the program "Setup.exe" in the
directory "Windows" of the driver CD.
This will install the data transfer program with which data between the PCs can be copied backward and forward.
7. Driver Installation
9. Handling
• Connect the power socket on the notebook docking station via
the enclosed plug-in power supply unit with the mains voltage.
After the connection of the notebook docking station to your
PC/Notebook, Windows should automatically recognise the device.
Insert the enclosed CD into the CD ROM drive of your PC.
Follow all instructions of Windows.
At the time of drawing up these operating instructions the necessary
driver was filed in the directory "Windows" of the driver CD.
8. Link Function
Via the "Link" connection () of the notebook docking station, data
can be transferred very easily.
You proceed as follows:
• Connect the notebook docking station with your PC/Notebook
and the mains voltage as describe under number 6 (if necessary
install the driver as described under number 7).
• Connect the second PC via a USB cable to the link connection.
Windows recognises the new hardware on the PC. Insert the driver CD of the notebook docking station and follow all instructions
of Windows (only the driver for the link operation will be installed,
26
Please note: only USB devices can be connected or
disconnected while the computer is running (they
are hot-swappable). With other devices there is danger of the device getting damaged when they are
connected or disconnected while the computer is
running.
This is why you should disconnect notebook
docking station from the PC and the mains voltage
before you connect devices to the RS232/printer
port and PS/2 keyboard/mouse port to be on the
safe side.
The product may only be used in dry interiors.
Never use the device immediately after it has been brought from a
cold into a warm room. Condensation water that forms might destroy the device.
Leave the device switched off and wait until it has reached
room temperature. This might take several hours.
Never touch the plug-in power supply unit with damp or wet hands.
Make sure that the insulation of the entire product is neither damaged nor destroyed.
Check the product for damages before each use.
27


