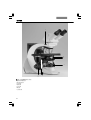
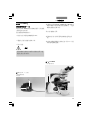
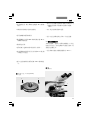
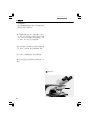
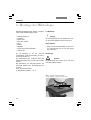
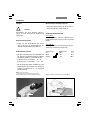
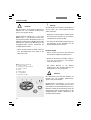
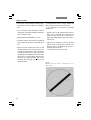
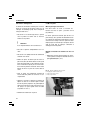
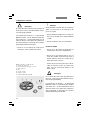
1
Leica DM2000 Leica DM2500 Leica DM3000 操作手册 2005五月由: Leica微系统wetzlar有限公司 ErnstLeitzStraβe D35578 Wetzlar(德国) 出版发行。 编撰负责人: Jasna Röth Peter Schmitt 博士 (临床显微镜检查、产品管理) Holger Grasse ( MPG§ 30安全员) 如有疑问,请致热线: 电话: +49(0 )6441 292286 传真: +49 (0 )6441 292255 电子邮件: MQMHotline@_leicamicrosystems. com Leica DM2000 Leica DM2500 Leica DM3000 操作手册 版权 版权 此文献的所有权利归 leica 微系统 wetzlar 有限公司 所有。在未经Leica微系统Wetzlar有限公司明确的书 面允许情况下,不允许通过打印,影印,显微胶片或其 他方法(包括电子系统)对正文或插图进行拷贝。 在以下文献中的说明体现了最新的技术和学科标 准。我们尽可能精确地编撰了正文和插图。尽管如 此,我们对手册内容的准确性不负任何种类的责任。 但是,我们仍然感激有关此文献中潜在错误的评论 和建议。 此手册中的信息可能会随时并且在没有通知的情况下 有所修改。 目录 目录 1.有关手册的重要注解 ... ... ......... ...... ... ... ... ... 6 2.显微镜的目标用途 ... ... ... ... ... ...... ...... ...... ...7 3.安全备忘录 ... ... ... ... ... ... . .. ..... ...... ...... ... ... 8 3.1 一般安全备忘录 .............................................. 8 3.2 用电安全 ........................................................ 8 4. 仪器概观... .... .... .... .... .... .... .... .... .... .... .. ... 10 5. 启封显微镜.. ... ... .. .. .. .. .. .. .. .... ........ ... ... ... 18 6.组装显微镜............ ... .... .... .... .... .... .... .... ... ... 20 6.1 载物台............................................................ 20 6.2 聚光器 ... ................................................... ..22 6.3 镜筒和目镜 .................................................... 23 6.4物镜 ... .............................................................23 6.5光源透射光轴....................................................24 6.6用于荧光的组件 操作... ... ... ... ... ... ... ... ... ... ... ... ... ........ 26 6.6.1荧光发光器... ........................................ 26 6.6.2 106 z灯室... ... ... ................................. 26 6.6.3 组装 荧光旋转台转盘... .................... . .. . 29 6.7分析器和偏光器................................................ 30 6.8 λ平台补偿器... .......................................... ... 31 6.9 DIC棱镜... ... ... .................................................31 6.10 可选附件... ..................................................... 31 6.11 供给电源连接... ..............................................33 7.启动.................................................................... 34 7.1 开启显微镜...................................................... 34 7.2 Köhler照明... ... .............................................. 34 7.3 检查位相衬光圈................................................36 7.4 聚光器棱镜调节................................................37 7.5 调节光源...........................................................38 8.操作... ... ..... ..... ..... ..... ..... ..... ..... ..... ...... ... ..43 8.1 开启... ............................................................. 43 8.2 载物台和物体易位............................................43 8.3聚焦... ............................................................ 44 8.4镜筒...................................................................46 8.5目镜... ........................................... ... ... .. ... ... 47 8.6物镜 .................................................................48 8.7 Leica DM3000功能键 ............................. ... ... 49 8.8 光源 ... ............................................................52 8.9 孔径光圈 ... .....................................................53 8.10 视野光圈 ... ....................................................54 9.相衬法 ... ... ...... ... ..... ... ..... ... ..... ... ..... ... .... 55 9.1 透射光 ... ... .................................................. . 55 9.1.1明视野 ... ...............................................56 9.1.2 位相衬度 ... ........................................ 57 9.1.3 暗视场 ... ............................................ 57 9.1.4倾斜照明.................................................58 9.1.5偏光........................................................58 9.1.6 差别 干涉相 衬........................................................59 9.2 荧光 ... ............................................................ 61 10. 显微镜度量 .. ........ ... ..... ... ..... ... ..... ... . .. .. 66 10.1 线性测量... ................................................... 62 10.2 厚度测量........................................................63 10.3 痛风/假行痛风的区别...... ..... ..... ..... ..... ..... ..64 11.故障检修... ... ...... .............................................66 12.显微镜护理......................................................... 70 12.1防尘罩..............................................................70 12.2清洁... ...............................................................70 12.3 酸碱操持 ........................................................71 12.4更换保险丝... ....................................................71 13.主要的损耗和备件 ............................................. 72 14.加载组件... ..........................................................73 14.1安装过滤器盒 (透射光) ... ................................................... 73 14.2 装备聚光器盘... ..............................................73 15索引......................................................................76 16. EU合格声明... ... .............................................. 78 5 ⒈有关手册的重要注解 ⒈有关手册的重要注解 注意! 此操作手册是显微镜至关重要的组成部分,在 显微镜组装好,开始操作或者使用以前必须仔 细地阅读。 此操作手册包含了有关显微镜及其附件操作安全和 维护方面的重要说明和信息。因此,该手册必须保 存好并妥善保管。 正文中的符号,象形图和它们的寓意: (1.2) ® p. 括号中的数字,比如" (1.2 )" 与插图相对应(在该 例子,对应于图1、条款2)。 带有指示箭头的数字(例如 ® p. 20 ),表示在此手册的某一页。 注意! 手册中的特别安全说明用如这里所显示的三 角形符号表示,且有灰色背景。 注意!操作不正确可能损坏显微镜及其附件。 ! 解释性说明。 * 6 并非为全部配置的条款。 ⒉显微镜的目标用途 ⒉显微镜的目标用途 此用户手册适用于被设计用于生物学常规和研究应 用的Leica DM2000、DM2500和DM3000显微镜。其 中包括对从人体取下的样本进行检查以便提供有关 生理或病理状态或先天异常的信息,或测定潜在受 体的安全性和兼容性,或监控治疗方法。 上述提到的所有显微镜遵照关于活体外诊断的委 员会指示98/79/EEC。它们同时也符合用于工业环 境的有关电子仪器的委员会指令 73 / 23 / EEC 和 有关电磁兼容性的委员会指令89/336/EEC 。 注意! 厂家对由于使用显微镜用于它们的目标用途以 外的其他用途或者没有在 Leica 微系统 Wetzlar 有限公司 GmbH 的技术规范下使用它们而造成 的损坏不负任何责任。 在上述情况出现时,合格声明将不再有效。 注意! 这 些 (IVD) 仪 器 不 适 合 用 于 由 DIN VDE0100710 定义的病人情况。它也不适合用 于根据 EN 606011 与医疗器械联使用合 . 如果 根据EN 606011 ,显微镜与医疗器械相连电, EN 6060111中的要求应该满足。 7 ⒊安全备忘录 ⒊安全备忘录 3.1一般性安全备忘录 安全级别为1 的仪器根据 EN 610102101:2002, EN 610101:2001, IEC 10101:2001 电学量器、调节装置和实验装置的安全规则进行设 计和校对 注意! 为了保持此状态并且确保安全操作,用户须遵 守此操作手册的指导和警告。 注意! 在此操作手册描述的仪器和附件都已经通过安 全和潜在危险测试。 无论何时当仪器被改变、修正或与在此手册范 围之外的非Leica 组件相连接时,必须咨询负责 的Leica 分支机构或在德国Wetzlar的总厂。 未经批准的对仪器的变更或非顺从使用,将使 全部有关保证声明的权利作废! 8 3.2用电安全 总体说明 显微镜 仅限室内使用。 电源电压: 频率: 输入功率: DM200 0 DM2500 DM3000 保险丝: 周围温度: 相对湿度: 过电压种类: 污染级别: 90250 V~ 5060 Hz 最大值: 40 W (90 VA) 最 大值: 160 W (220 VA) 最 48 W (110 VA) F 3,15 大值: A 250 V 1535°C 最大值:80% to 30 °C II 2 注意! 电源插头只能插入到有接地触头的插座。 不要由于使用没有接地线的延长电线而妨碍接 地功能。仪器内部或外部任何接地线的断开, 或接地线接头脱扣,都可能导致仪器出现危 险。不许故意断开接地线! ⒊安全备忘录 注意! 通过把它们自身的和/或额外的供给电源连接到 接地连接附属设备(在基座的背后的接地螺 丝),仪器会具有相同的接地线功效。要进行没 有接地接头的连接,必须事先向Leica 服务部门 咨询。 注意! 保护显微镜避免过大的温度波动。大的温度波 动可能导致冷凝物的积聚,这可能损坏电子和 光学部件。 周围温度:15 -35℃。 注意! 注意! 除这里所列的类型和额定电流的保险丝外,决 不能使用其他任何保险丝作为替代物。不许使 用由小段连接成的保险丝或桥接保险丝夹持 器。保险丝使用不正确可能导致火灾。 在更换保险丝或灯炮之前,要百分之百地确定 已经关掉主电源开关并且拔掉电力电缆。 注意! 显微镜的电子附属部件是不防水的。水可能导 致触电。 9 4.仪器概观 4.仪器概观 规格 Leica DM2000 Leica DM2500 对照方法 • 透射光:明视野、暗视场、位相衬度、偏光、差别干涉相衬 • 入射光:荧光 透射光轴 综合卤素照明 人工调节: • 光线强度 • 孔径光圈 • 视野光圈 入射光轴 入射的光荧光发光器,用于符合目镜视野值22带有: • 具有5个过滤器的旋转台转盘 • 可中心定位的光圈和视野光圈 • 用于外部光线抑制的挡光装置 • N4中性密度滤光片和快门,可切换 镜筒 选择性地带有: • 固定或可变观察角 • 多达3个的切换位置 • 一个或两个照相端口 • 带有高度可调节的视平线和照相端口的Ergotube 放大倍数变换器 (可选择) • 手动 • 放大倍数节距:1x;1.5x;2x 灯室 人工调节: • 光线强度 • 孔径光圈 • 视野光圈 物镜旋转台 • 手动 • 用于带有M25螺丝的物镜的6个位置或7个位置 • 物镜棱镜滑座 X/ Y载物 台 • 带有聚光器座 • 同轴小齿轮,可选:望远镜载物台控制器 • 在左侧或右侧可安装的控制器 10 4.仪器概观 规格 聚光器 聚焦 Leica DM2000 Leica DM2500 • 聚光器 CL/PH 0.90/1.25, 油,带有彩色编码 (所带物镜<10x 的DM2500 需要扩散器滑动器) •聚光器CLP/PH 0.85用于偏光 (所带物镜<10x 的DM2500 需要扩散器滑动器) •聚光器achr.apl. A 0.9 ( P)带有彩色编码和可旋转的聚光器头部 •UCL 0.90/1.25油性通用聚光器(UCLP 0.85用于带有5位光圈转 盘的偏光) (所带物镜<10x 的DM2500 需要附加(适配)透镜) (扩散器) •UCL/P pol,带有可互换聚光器头部的通用聚光器和带有6个位置的 聚光器转盘 • • • • 用于粗略和精确调焦的聚焦操纵轮 高度调节 快速切换(可选择) 聚焦制动和转矩调节 11 4.仪器概观 规格 Leica DM3000 对照方法 • 透射光:明视野、暗视场、位相衬度、偏光、差别干涉相衬 • 入射光:荧光 透射光轴 内置卤素照明 人工调节: • 孔径光圈 • 视野光圈 • 随着对象改变的光线强度的自动调节 入射光轴 入射的光荧光发光器,用于符合目镜视野值22带有: • 具有5个过滤器的旋转台转盘 • 可中心定位的光圈和视野光圈 • 用于外部光线抑制的挡光装置 • N4中性密度滤光片和快门,可切换 镜筒 选择性地带有: • 固定或可变观察角 • 多达3个的切换位置 • 一个或两个照相端口 • 带有高度可调节的视平线和照相端口的Ergotube 放大倍数变换器 (可选择) • 手动 • 放大倍数节距:1x;1.5x;2x 物镜旋转台 •机动化的 借助于功能键或(选择性地)借助于脚踏开 关进行物镜选择 •用于带有M25螺丝的物镜的6个位置 •物镜棱镜滑座 X/ Y载物 台 •带有聚光器座 •同轴小齿轮,可选:望远镜载物台控制器 •在左侧或右侧可安装的控制器 12 4.仪器概观 规格 聚光器 Leica DM3000 • 聚光器 CL/PH 0.90/1.25油,带有彩色编码 • 聚光器CLP/PH 0.85用于偏光 • 聚光器achr.apl。 A 0.9 ( P)带有可旋转聚光器头部 • UCL/P pol,带有可互换聚光器头部的通用聚光器和带有6个位置 的聚光器转盘。 •机动化聚光器achr.apl.A0.9(p),自动 物镜更换时,聚光器头部自动旋转 聚焦 • • • • 用于粗略和精确调焦的聚焦操纵轮 高度调节 快速切换(可选择) 聚焦制动和转矩调节 界面 USB2 软件 适合于WindowsTM 2000, XP 的leica 应用套装(LAS )用于 物镜和功能键配置的测试 13 4.仪器概观 7 6 5 4 1 3 图 . 1a Leica DM2000基座左侧面 1 粗略调焦和精确调焦 2聚光器高度调节 3亮度控制 4视野光圈 5孔径光圈 6聚光器 7分析器长眼 14 2 4.仪器概观 1 2 3 4 5 6 7 8 9 10 11 图 . 1b Leica DM2000 基座的右侧面 1目镜 2目镜筒 3镜筒 4用于物镜棱镜滑座的长眼 5带有物镜的物镜旋转台 6带有样品夹的样品载物台 7内置照明 8“开/关”开关 9聚光器高度调节 10 粗略调焦和精确调焦 11 用于X/ y 载物台运动的同轴小齿轮 15 4.仪器概观 17 16 15 18 14 13 12 11 10 9 8 1 图 . 2 Leica DM2500基座的左侧面 1 灯室 2 粗略调焦和精确调焦 3 亮度控制 4 聚光器高度调节 5 视野光圈调节 6 “开/关”开关 7 视野光圈 8 用于X/ Y 载物台运动的同轴小齿轮 9 孔径光圈 16 2 3 4 5 6 7 10 聚光器转盘 11 聚光器 12 带有样品夹的样品载物台 13 带有物镜的物镜旋转台 14 物镜棱镜滑座 15 镜筒 16 目镜筒 17 目镜 18 分析器 4.仪器概观 1 2 3 4 5 6 13 8 12 图 . 3 Leica DM3000基座的右侧面 1目镜 2目镜筒 3镜筒 4用于物镜棱镜滑动器的长眼 5带有物镜的物镜旋转台 6带有样品夹的样品载物台 7内置照明 8 “开/关”开关(基座的背部) 9聚光器高度调节 10粗略调焦和精确调焦 7 9 10 11 11用于X/Y载物台运动的同轴小齿轮 12 带有物镜转换键和切换键前控制面板 13 用于在两个物镜放大倍数之间转换或用于切换放大倍数 ( 大 的/较小)的侧功能键 基座analog的左侧 有关其他的控制器,见图. 1b Leica DM2000 17 ⒌启封显微镜 ⒌启封显微镜 首先,小心的从运输和包装物中取出所有组件。 注意: 尽一切可能避免触及物镜的透镜表面。如果玻璃杯 表面有了手印,用软革或亚麻布清除它们。即使是 一点手汗也会在很短时间内损坏表面。参见章节“显 微镜护理” ® p. 70,以获得补充说明。 安装位置 使用显微镜的工作应在无尘的房间内进行,且该房间 无油蒸汽及其他化学制剂蒸汽,另外不处于极端的湿 度。在工作地点,应该避免大的温度变化、阳光 直接和振动。以上情况出现可能导致度量不准和显微 图像失真。 允许的周围条件 1535℃ 温度: 相对湿度: 30℃ 以下最大值为80% 在温暖的和温湿的气候带的显微镜需要额外的照料 以免真菌的滋生。 见章节“显微镜护理”® p. 70,以获得补充说明。 注意! 在此时还不能把显微镜和外部设备连接到供给 电源上! 注意! 电器部件必须放置在距离墙壁至少10 厘米远的 地方且远离可燃物质。 18 ⒌启封显微镜 搬运 载运或搬运显微镜及其附件时,应该使用其原包装。 作为预防由于振动而导致损坏的措施,以下组件应 该进行拆卸并分别地包装: • 拆卸下物镜。 • 取下聚光器。 • 取下同轴小齿轮。 • 取下灯室。 • 卸下106 z灯室的灯头。 • 取下所有移动或松动部件。 19 ⒍组装显微镜 ⒍组装显微镜 显微镜组件是按以下次序逻辑地组装的: • • • • • • • • • 载物台 聚光器 荧光* 中间系统* 镜筒 目镜 物镜 带有光源的灯室 偏光* 只需要一个通常使用的螺丝刀就可以完成组装,且 所递送物中包含有这种螺丝刀。 此螺丝刀保存在载物台下侧右边的磁性固定器上。 当使用中间系统和光学附件时,此次序可能有所变 化 在这种情况下,阅读章节 "6.10 可选择附件"•® p. 31。 6.1载物台 ! 注意: 在安装好载物台之前,一定不要安装任何物镜! 样品夹 • 把样品夹放置到载物台上并用两个螺丝钉 (4.1)把它拴紧。 同轴小齿轮 注意: 同轴小齿轮可以固定在左侧也可固定在右侧 图 . 4 带有样品夹的样品载物台 1 样品夹锁紧螺丝 1 20 ⒍组装显微镜 •首先,把细调焦操纵轮放到你打算在其上固定同 轴小齿轮的一侧。 操纵轮由于磁性吸引而固定 住。要确保按钮发出劈啪声表示就位。把另一个 调焦旋钮缚到对侧。 • 松开载物台前面左手边的锁紧螺钉(6.1)。 • 尽可能远地向后滑动载物台。 • 用螺丝钉(7.1)固定同轴小齿轮。 • 向前拉载物台并重新固定锁定螺钉。 图 . 6 载物台下侧 1 锁定螺钉 1 图 . 5 聚焦操纵轮 1 用于细调焦操纵轮的磁性吸座 图 . 7 同轴小齿轮的安装 1 同轴小齿轮固定螺钉 1 1 21 ⒍组装显微镜 6.2聚光器 • 如果有聚光器,就把聚光器头部旋入聚光器 中。 注意: • 利用聚光器高度调整装置(10.3)完全地向下 旋转聚光器座(图. 9 )。 • 旋开用于固定聚光器的固定螺钉到能够从前 面插入聚光器。 在使用显微镜之前,必须对聚光器进行中心定位。 • 照明 3 4。 图 . 9 聚光器座 1导向凹口 • 从前面,把聚光器插入到聚光器座里直到极限 点。在聚光器下侧有一方位销( 8.1),该销必须位 于导向凹口(9.1 )处。 • 拉聚光器的固定螺钉(10.2)锁定聚光器。 1 • 仅用于leica dm3000: 当使用机动化聚光器时,连接聚光器电缆。 图 . 10聚光器座 1聚光器中心定位 2聚光器固定螺钉 3聚光器高度调整装置 图 . 8 聚光器下侧(例如CL/PH) 1方向销 2辅助聚光透镜LS (用于Leica DM2000/3000) 1 1 3 3 1 2 1 2 22 ⒍组装显微镜 6.4物镜 6.3镜筒和目镜 始终使用镜筒等长(刻度值)的Leica 物镜。标准螺 丝是M25 。物镜部属应该满足当物镜镜鼻顺时针方 向旋转时放大倍数增大。 注意: 若用于荧光操作,先安装荧光发光器® p. 6。 镜筒要么直接地固定到基座上要么 借助于中间模块。它由旁侧的固定螺钉固定 (11.1 )。 • 松开基座上的固定螺钉(11.1)。 • 将镜筒插入圆形塞孔中 (楔形榫头塞环)。 • 重新固定固定螺钉(11.1)。 • 目镜要插入到镜筒上的目镜筒中。 ! 注意: 在安装物镜以前尽可能的降低载物台。用防尘盖盖 住镜鼻上的空螺丝孔! 仅用于Leica DM3000: 依照你的设备,各个物镜在工厂中就已经给定特定 的位置。 物镜精确位置列表作为设备的一部分(鉴定单)提 供。前控制面板(图. 12)的特征是有用于物镜操 作的六个黑色键。标有相应物镜放大倍数的黏性标 签贴在物镜键的下面。 (还提供有额外的黏性标签) 推荐在与供给电源接通后再插入物镜 ® p 33)。 图 . 11拴紧镜筒 1固定螺钉 图 . 12 Leica DM3000的前控制面板 1 选择物镜 反复切换 带有物镜放大倍数的黏性标签 23 ⒍组装显微镜 • 取下衬垫(13.2). 6.5用于透射光轴的光源 注意! 注意! 确保灯室与供给电源断开。在组装期间拔下电源 插头和供给电源。 灯泡可能仍然很热! • 取下灯泡。 注意! 注意! 光源有潜在的辐射危险(耀光、紫外射线、红 外线辐射)。因此,灯泡应在密闭的灯室内使 用。 在你安装好灯泡以前不要撕下灯泡防尘罩。避 免在灯泡上留下指纹。 •把带有防尘罩的新灯泡竖直地插入插座中直到 不能再向里面移动。 一定要确保灯泡是竖直插 入的。 仅用于Leica DM2000/3000: 更换内置照明的灯泡 带有低压卤钨灯的透射光照明(图. 13)内置于显 微镜的底部且从右手侧容易接近。 •取下灯泡的防尘罩。 •更换衬垫(13.2). 图 . 13 显微镜座的透射光照明 1 卤钨灯 2衬垫 图 . 14a 灯室 107/2 松开固定螺钉 1 24 2 6. 组装显微镜 仅用于Leica DM2500: 更换灯室中的灯泡107/2 此灯室与12V 100W 的卤光灯泡配套使用,且灯泡是 已经固定在灯室中的。 在灯泡需要拆卸的情况下: •把带有防尘罩的新12V 100W灯泡( 14b.1)竖直 地插入插座中直到不能再向里面移动。一定要 确保灯泡是竖直插入的。 •取下灯泡的防尘罩。 • 除去灯室上的固定器螺丝(图. 14a)。 •重新安装上灯室并利用固定螺钉把它固定到 位。 • 通过向上拉灯室把灯室卸下来。 •把灯室安装到透射光灯室塞孔里(图. 1 5)并在 外面用固定螺钉拴紧。 • 取下灯泡。 注意! 在你安装好灯泡以前不要撕下灯泡防尘罩。避 免在灯泡上留下指纹。 图 . 15 Leica DM2500 1 用于透射光的灯室 图 . 14b 灯室107 /2,打开图 1 带有卤素灯的底座 2 换向器 1 1 2 25 6. 组装显微镜 6.6用于荧光操作的组件 6.6.1荧光发光器 荧光发光器安装在镜筒的前部。它由旁侧的固定螺 钉固定。 把气体放电灯(汞和氙) 嵌入106z灯室中 汞和氙灯泡由单独的供电装置供电。 请阅读与供电设备一同提供的单独的使用说明书。 6.6.2 106z灯室 注意! 光源有潜在的辐射危险(耀光、紫外射线、红 外线辐射)。因此,灯泡应在密闭的灯室内使 用。 图 . 16 荧光发光器的组装 在组装期间,一定要从其插座中拔下106z 灯室供 电设备的供电插头。 当使用氙灯头作业时,一定要佩带提供的防护手套 和面罩(图. 17)(有爆炸的危险)。 决不要裸手触及灯头的玻璃部分。 决不要直视光路(有失明的危险)。 此106 z灯室适用于各种气体放电灯。 注意! 务必遵循灯泡供应商的说明指导和安全指示。 在更换灯泡之前至少要用30分钟的时间来冷却灯 泡! 26 图 . 17 防护手套和面具 6. 组装显微镜 以下气体放电灯在操作中可能会用到。它们需要不 同的供电设备和灯泡底座(图. 19 ): 类型 标准灯泡寿命* 50W高压水银灯头(交流电) 100小时 100 W高压水银灯头(直流电) 200小时 100W高压水银灯头(直流电,类型103 W/2) 300小时 75 高压氙灯灯头(直流) 400 小时 * 请参考灯头的数据记录表。 •要打开106 z灯室,需旋下盖子( 18.8)上的紧固螺 钉。 •取下灯泡底座上的搬运锚具(用于代替灯头的 红色塑料棒)。 要做到这一点,需取下下方的夹 持器(19.1)。向上拉起冷却片(19.3)并把它到 转到一边。卸下下面的夹持器系统(19.2 )并取 下搬运锚具。 • 安装相反的顺序安装灯头。 注意! 图 . 18 106z灯室(侧面、打开) 1 升起的盖子 2换向器 3 在座里的气体放电灯 4反射镜(镜子) 5、6、7用于 XY 反射镜的调节螺丝 8用于灯泡座的固定螺钉 9用于接触插塞的插座 Hg50灯头: 在安装完成以后,标签必须是竖直的。如果有熔 融玻璃套管(19a.4 ),通过旋转灯头定位它使 得套管不在后来的光路上,但不要斜着就位。 1 4 2 氙75灯头: 在你安装好灯头之后撕下灯头防尘罩( 19b.5)。 5 3 6 7 8 9 8 27 6. 组装显微镜 •把已经安装有灯头的灯泡底座嵌入到灯室中并 用螺丝钉(18.8)固定。 图 . 20 固定106z 灯室 1 灯室塞孔 •关闭灯室并重新固定螺丝钉。 •把灯室安装到入射光灯室塞孔中并用固定螺钉 拴紧。 •把灯室与外部供给电源相连接。 图. 19 a c 用于气体放电灯的灯泡座 1 上部夹件系统 2下部夹件系统 3冷却片 4水银50灯头套管 5氙75灯头防尘罩 Hg 50 a 3 1 4 2 Xe 75 1 b Hg 100 3 1 5 2 2 28 c 3 6. 组装显微镜 6.6.3 装备荧光旋转台转盘 按照以下方式嵌入过滤器和反射镜筒: 1 2 •取下分析器(图. 23.1)。 3 •通过向前拉取下前盖(图. 23.2)。 •把过滤器或反射镜筒嵌入你前面的座中。 要做到这一点,应该把滤器或反射镜放在右侧并 向左推进座中。 图 . 23 荧光轴 1分析器 2前盖 3标签 注意: 编码就在座的正下方。 •根据安装的零件把黏性标签(图.23.3 )贴到荧光 发光器的前面。 •当所有过滤器和反射镜筒已经嵌入时,再次关 上前盖。要确保盖子发出劈啪声表示就位。 图 . 21过滤器筒, 正面图 图 . 24 没有前盖的荧光轴 图 . 22 过滤器筒、 背面图 图 . 25 固定过滤器筒 29 6. 组装显微镜 6.7分析器和偏光器 偏光器 分析器 •利用左侧的夹紧螺丝( 26.2)把偏光器座固定到 聚光器的下面。如果需要,取下活动蓝色滤光片。 • 除去在基座左侧的插塞头。 • 将分析器插入塞孔直到它闩锁就位(26.1)。 当使用Pol 中间镜筒*或TL 分析器长眼*时: •带标签侧面向上的把偏光器推进较靠下的孔中 。 仅用于Leica DM2000/3000的其他方法: • 除去在左侧的插塞头。 • 升高聚光器到它较高的止动位置。 • 将分析器插入塞孔直到它闩锁就位。 • 如果有DLF过滤器盒,需把该盒从基座中取出。 • 把偏光器座压到位(图. 2 7)。 • 带标签侧面向上的把偏光器推进较靠下的孔 中。 图 . 26偏光器座的组装 1分析器长眼 2固定螺钉 1 2 30 图 . 27 带有2个位置的滤光片架 ,用于 Leica DM2000/3000 6. 组装显微镜 6.8 λ平台补偿器* 6.10可选附件 •升高聚光器到其较高的止动位置。 照相机 •如果有DLF过滤器盒,需把该盒从基座中取出。 可借助于适配器连接照相机。 •把适配器固定在镜筒的顶端舱门并用旁边的固 定螺钉拴紧。 •把λ平台补偿器固定在底座上。 •旋上照相机。 6.9 DIC棱镜 注意: 聚光器棱镜在工厂中就已经安装。 在使用期间要调节聚光器棱镜 ®. 37。 要改装DIC棱镜,见® p. 75页。 照相机芯片和连接设备(B 型镜头座、C 型镜头座、 等等.)的尺寸必须考虑在内,当选用适配器时。 见表。 以毫米为单位的最高图像对角线 1英寸 2/3英寸 1/2英寸 照相机 照相机 照相机 1/3英寸 照相机 没有变焦放大、仅用于1个芯片照相机: C 型镜头座适配器1XHC 16 11 8 6 C 型镜头座适配器0.63 XHC 7.5 12.7 9.5 C 型镜头座适配器0.5 XHC 16 12 C 型镜头座适配器0.35 XHC 17.1 带有变焦放大(vario TV适配器)用于13芯片照相机: C型镜头座、0.321.6 XHC B型镜头座(ENG )、0.52.4 XHC (1/2 英寸) ) 19 + 5 163.3 183.8 +)仅用于根据变焦因子0.42 x! 没有变焦放大、仅用于1 3个芯片照相机: C 型镜头座适配器1X B型镜头座适配器1X B型镜头座适配器1.25X F型镜头座适配器1 X F型镜头座适配器1.25X 还有(最重要的要求):TV光学器件0.5XHC 17.5 17.5 16 12 16 12 16 12 31 6. 组装显微镜 计算监视器上放大倍数的计算 放大倍数变换器 放大倍数MTV 在监视器上的 选择性地,可以选用一个放大倍数变换器(图。 2 可以由以下公式进行计算或用分级测微计和一个 8),该变换器是人工操作的。在有纹的圈上,可 厘米刻度测量: 设置以下放大因子: M TV = 物镜放大倍数X 放大倍数变换器因子*XTV适配器 放大倍数X监视器直径 照相机芯片直径 1x; 1.5x; 2x 观察附属装置 观察附加功能部件特色照明指示学可以用于多达20人一组 的观察者。 Ergomodule 要升高镜筒孔的视平线, 可以使用30毫米或60ergomodule毫米。 它由旁侧的固定螺钉固定就位。 支座(29.3 )必须进行精密的校准。 通过旋转拉杆,淡入箭头可以在X和Y 方向(垂直地 移动拉杆或拉出/推入) 移动( 29.1),箭头的颜色 也会发生改变(红色/黄色)。使用亮度控制(29.2 ) 来调节箭头的亮度。 Ergolift 基座托座特征是有用于调节托座高度和倾斜角的 调节器操纵轮,有了它就可以确保最理想的工作位 置。 图 . 29 观察附属装置(这里是用于Leica DM1000的) 1 光指示器在X和Y 方向的移动, 和彩色滤光片的转换 2亮度控制 3臂架的调节 外部电源(照亮的箭头)没有被照亮。 图 . 28放大倍数变换器 1 2 3 32 6. 组装显微镜 描绘装置 6.11 与供给电源的连接 描绘装置L3/20(图.30 )使得大物体能够在显微镜 图像上成光学图像。它通过描绘它们的轮廓或叠加 刻度使得描画标本更加容易。 •在完成装配作业之后,用仪器提供的电源电缆把 基座连接到供给电源(图. 31a,b.1)。 •当使用灯室或其他外部供电设备时,也同样连 接它们供给电源。 Leica DM3000的脚踏开关 一个双脚踏开关可以连接到Leica DM3000基座上 作为一种旋转物镜的方法。 连接位置在基座的背部(31b.2 )。 用于Leica DM3000: 必要时,在开启显微镜之后再嵌入物镜。 带有相应物镜放大倍数的黏性标签附贴在前控制 面板上的黑色物镜键的下面。按下相应键,物镜转 到相应的位置。 图 . 30描绘装置 1 快门 注意: Leica DM3000与PC 的连接(31b.3 )仅用于如果有 新的物镜要测试或要执行侧面功能键的重新分配 时。此操作只有借助于Leica DM 控制软件才能完成。 1 图 . 31b Leica DM3000 基座的 1b 后侧 1 供给电源连接 2脚踏开关连接 3 PC连接 图 . 31a Leica DM2000/DM2500基座的后侧 1 供给电源连接 1 2 3 1 33 7. 启动 7. 启动 7.27.2 Köhler照明 聚光器在工厂中已经过预调。 除非另作说明,否则 Leica DM3000 显微镜操作与 然而,有时可能还必需重新调节聚光器。因此,检 查聚光器的中心定位。 Leica DM2000 显微镜的操作相同。 注意: 以下程序用于透射光亮视野照明。 7.1 接通显微镜 •利用“on/off”开关接通显微镜(32.1、33.5)。 注意! •如果有聚光器转盘:定位聚光器转盘到 BF位。 • 如果光圈滑座:把它从聚光器中拉出。 在接通煤气放电灯以后,必须立即校准灯头。 因此在此时,不要接通电源供电设备。首先, 利用透射光工作以使自己熟悉显微镜的控制 器。 图 . 32 Leica DM2000 1“On/Off ”开关 2聚焦操纵轮 3载物台就位 1 34 2 3 7. 启动 •选择一个中等放大倍数的物镜(10x20x)。 针对带有可活动聚光器头部的聚光器: 把聚光器顶端旋进去。 (用于小于10x 的物镜放大倍数,聚光器转出) 用于Leica DM3000: 按前控制面板上相应的物镜键,旋入物镜。如果 显微镜安装有机动化聚光器,聚光器头部会根据 物镜放大倍数会自动地旋入或旋出。 •将标本插入到载物台样品夹中。 •利用亮度控制器设置光线强度(33.2、34.2)。 •关小视野光圈(33.4、34.3)直到光圈边缘出现 以特殊平面出现(34a)。 •利用聚光器高度调整装置(33.3、34.1 )、 调节聚光器直视野光圈边缘清晰地出现。 •如果图像没有出现在视野中央(35c),必须借 助于两个调正螺栓( 34.4)把聚光器移动到视野 的中央。达到此目的所需的工具磁性地附着于载 物台的下面。 •利用调焦操纵轮聚焦样品。 (32.2 )。 图 . 33 Leica DM2500 1 调焦轮 2亮度控制 3 聚光器高度调整装置 4 视野光圈控制器 5“On/off”开关 6聚光器中心定位 7载物台就位 图 . 34 Leica DM2500 1聚光器高度调整装置 2亮度控制 3视野光圈 4聚光器中心定位 4 7 1 2 3 5 4 6 1 2 3 35 7. 启动 • 放大视野光圈到它从视野中消失(35d)。 7.3 检查位相衬度光圈 如果你的显微镜能使用位相衬度,则适合物镜的光 圈镶嵌在聚光器内。 在工厂中光圈已经中心定位。但是,中心定位仍应 该进行复查。 注意: 聚光器高度调节取决于标本的厚度。针对不同的标 本它可能要再次进行调节。 注意: 被插入聚光器侧面的光圈滑座用于没有聚光器转 盘的聚光器。在这种情况下不需要进行中心定位。 图 Fig. 35 Köhler照明 a 视野光圈未聚焦,未中心定位 b 视野光圈经过调焦,但没有中心定位 c 视野光圈经过调焦和中心定位 显示在这里的直径太小 d 视野直径(光) = 视野直径(观察) (Köhler照明 ) 注意: a 当旋入一个合适的用于位相衬度的物镜时,必须选 取相应的光圈。 物镜的铭记(例如:PH 1)表示相应的光圈(例如: 1)。 b c d 图 . 36 聚焦节距镜 1可调节接目镜 2用于固定调焦位置的压圈 1 图 . 37位相衬度中心定位过程 PH =位相衬环, LR =光圈 a 在明视野( BF)位置的聚光器 b 在位相衬 ( PH) 位置的聚光器 光圈(LR)未中心定位 c 中心定位的光圈和相位圈 a b 2 PH 36 LR c 7. 启动 •在目镜的位置,嵌入聚焦望远镜(图. 36 )到观察 筒中。 • 转动中心定位螺丝直到暗圈(物镜中的相位环)与 稍微狭窄的亮圈(聚光器中的光圈)相连接 (37c)。 •以最低放大倍数旋入位相衬度物镜。 • 对于其它的光圈重复该进程。 •利用调焦操纵轮聚焦样品。 • 在中心定位步骤完成之后卸下中心定位键。 •通过稍微松开压圈(36.2)和移动接目镜(36.1) 来聚焦环状结构。 7.4 聚光器棱镜的调节 •重新固定压圈。 •在聚光器上选择相应的环状光圈(光圈)。 •如过光圈和相位圈并非显示为如图.37.c ,则灯圈 必须进行中心定位。 如果设备是统一递送的,则聚光器棱镜在工厂就已 经经过中心定位,但还是推荐不时地进行检查,特 别是在进行搬运后。 • 完全或部分地拉出物镜棱镜滑座(39.1)。 •把中心定位螺丝嵌入到聚光器(38.1)背部的孔 中。 图 . 39 1物镜棱镜滑座 图 . 38 光圈中心定位(即:聚光器UCA/P) 1中心定位键 1 1 1 37 7. 启动 • 旋入一个合适的物镜并聚焦标本。 黑色条纹应该在较亮圆形区域的中心。如果不在, 按照如下进行: •必要时,把聚光器头部旋入。 对于物镜放大倍数小于10x 的,聚光器顶端处于 旋出状态。 •确保用于光圈的右手中心定位螺丝没有向内 旋转过度或它可能妨碍通过左手键移动 棱 镜。 •设置Köhler照明(® p. 34)。 •向内推位于聚光器背部的左手中心定位键直到 它发出咔哒声表示就位,并旋转它直到条纹处 于圆圈的中心。 右手键不需要该步骤。 •在目镜的位置,嵌入聚焦望远镜(图. 36 )到观 察筒中。 •通过稍微松开压圈(36.2)和移动接目镜(36.1), 一个接一个地启用聚光器侧棱镜并聚焦望远镜 在黑色对角线补偿条纹(40) 。必须禁用补偿器, 换言之, 铭记必须在分析器的下面或l 和l/4 补偿 器必须卸下。 图 . 40 带有恰当地中心定位补偿条纹的物镜瞳孔。 38 7. 启动 7.5调节光源 只有当使用106z 灯室时才需要进行中心定位。 •放一张纸在载物台上并用低到中等放大倍数的 干物镜粗糙地聚焦纸表面。 •当使用供电设备时,供电设备应先开启。 •粗略地设置视野和孔径光圈在中间位置。 注意! 决不要直视光路! 注意! •用触尖或原子笔在纸的任何位置作一个标记, 然后把标记滑到小的照亮视野中。 •把一个空的镜鼻位置旋入光路或卸下物镜。 于是光源将在报纸上成像。在一边注意光源的同时, 安装如下步骤调节灯泡: 光源有潜在的辐射危险(耀光、紫外射线、红 外线辐射)。 针对106 z灯室,弧的原像(用于气体放电灯)和它的镜 像是各别地聚焦并且彼此调节的。 • 把过滤系统或反射镜移入光路中。 • 打开快门并从光路中卸下任何漫射屏。 图 . 41 106z灯室 1灯泡高度调节 2,4 镜像高度和边线调整 3聚焦反射镜 5灯泡边线调整 6换向器(汇聚灯泡图像) 5 1 6 2 3 4 39 7. 启动 中心定位Hg50W水银灯 •在调节窗口中,你会看到弧的原相和镜像,这 两者在大多数情况下是不对称的。 图 . 42 原像,聚焦但偏离中心 (实际上,图像未完全聚焦) •用换向器聚焦原像 (41.6 )。 •使用灯室(41.2、41.4)背部的调节按钮把弧的 镜像旋转到一边或从光路中完全地旋出。灯丝 的聚焦图像仍可以看到(图. 42)。 •使用调节按钮(41.1)和(41.5)把弧的原像调 到中心面(图.4 3)的想象的中心线的右侧或左 侧。 。 图 . 43 在目标位置的弧的原像 (实际上,图像未完全聚焦) •然后用调节按钮(41.2和4)旋转弧的镜像并通 过反射镜( 41.3)对其进行聚焦。 •使用调节钮(41.2和4)使镜像与原像相对称(图. 44 )。 •利用换向器旋钮(41.6)散焦图像直到弧的图像 和镜像不再可以辨认且图像均匀地照亮。 图 . 44 在目标位置的弧的原像和镜像(实际上, 图像未完全聚焦) 40 7.启动 中心定位Hg100 W和Xe75 W汞灯 图 . 45 弧的原图,聚焦但未中心定位 (实际上,图像未完全聚焦) •在纸上,你会看到弧的原相和镜像,这两者在 大多数情况下是不对称的。 •通过换向器聚焦原像 (41.6 )。 •使用灯室(41.2、41.4)背部的调节按钮把弧的 镜像旋转到一边或从光路中完全地旋出。弧的 聚焦图象仍然可见(图 . 45)。 •使用调节按钮(41.1和5)把弧的原像调到中心 定位板的中间,此时弧的明亮的顶端、焦斑应 稍微偏离中心定位(图. 46)。 图 . 46 在目标位置的弧的原像 (实际上,图像未完全聚焦) •然后,用调节旋钮(41.2)和(41.4)旋转弧的 镜像并通过反射镜(41.3)对其进行聚焦。 •使用调节按钮(41.2和41.4)使镜像与原像相对 称(图. 47)。 弧的V 字形辐射原像和镜像可能有叠加。 图 . 47在目标位置的弧的原像和镜像(实际上, 图像未完全聚焦) 注意! 弧的光亮的顶端、焦斑,绝对不能相互照射,因为 过热会导致爆炸的危险。 41 7.启动 注意: 在用了很久的灯泡中,弧的结构不再能清晰地 辨认。这时的像更像是HG 50 灯泡的像。原像 和镜像不再能完全地重叠。此时,需要对这两个 图像都进行校准。 • 使用换向器,利用其上的旋钮(41.6)散焦图 像直到弧的图像和镜像不再可辨认且图像均匀 地照亮。 42 8. 操作 8. 操作 8.1 开启 8.2载物台和物体易位 当使用气体放电灯时、外用的供电设备必须各别地 接通。 延长同轴小齿轮 利用" on/off"开关接通显微镜 (48.1 、针对Leica DM2500在相对的基座侧面)。 •要延长,需向下的拉较低的手柄(49b.1)。 用 上方的手柄(49b.2)重复拉。 转矩调节 用于X和Y 的转矩可通过两个有纹的圈(49b.2 、 49b.4 )分别地进行调节。 图 . 48 1“ On/Off ”开关 2粗略聚焦 3精确调焦 4载物台就位 5载物台锁定螺钉 6同轴小齿轮固定螺钉 图 . 49a 标准同轴小齿轮、b 带有高度和转矩调节的同轴小齿轮 1 物体易位(Y 方向) 2转矩调节器(X 方向) 3 物体易位(X 方向) 4转矩调节器(Y 方向) 6 a b 4 5 3 1 1 2 3 3 2 1 4 43 8. 操作 右手/左手操作 8.3聚焦 同轴小齿轮可固定在两边载物台的任意一边上。 粗略调焦和精确调焦 (参见组装、p. 20)。要更改其所在的位置(具体哪 粗略的和精确调焦操纵轮位于基座的两侧(图. 50 一边),按照下列步骤: 和51)。 •松开载物台前面左手边的锁紧螺钉(48.5)。必 要的工具固定在载物台右手侧底部。 ! 扁平的细调焦操纵轮平坦的特殊设计(图. 51.3 )使 得用户在用一个手指操作精确调焦时,能把同轴小 齿轮含在手中。因此该扁平轮应该固定在合适的侧 面。参见“载物台右手/左手操作” 注意: 必须降低聚光器! 聚焦操纵轮的高度调节 •尽可能远地向后滑座载物台。 •松开在同轴小齿轮上的螺钉(50.6)并把小齿轮 拔出。 • 通过粗略调焦操纵轮全幅转动移动载物台来 散焦图像 (50.2、51.2)。 •把细调焦操纵轮放到你打算在其上固定同轴小 齿轮的一侧。操纵轮由于磁性吸引而固定住。要 确保按钮发出劈啪声表示就位。把另一个调焦旋钮 缚到对侧。 •通过重新固定适当的螺丝钉,把同轴小齿轮紧 固到载物台的另外一侧。 •返回载物台到起动位置并重新固定锁定螺钉。在 载物台控制器安装后,把物体导向装置一直移动 到仪器的左侧。在导向装置达到尽头时,继续旋 转直到听到“喀呖”声。 图 . 50 带有刻度放入调焦旋钮 1 调节转矩 2粗略聚焦 3精确调焦 • 重新调整聚光器。 3 44 2 1 8. 操作 •同时抓住右手和左手调焦旋钮并向上或向下平 缓的推进旋钮到想要的位置。 •重新聚焦图像。 设置聚焦制动 可以通过锁定右手侧调焦旋钮的滚花轮,把当前位 置设置为聚焦制动。随后进行调焦就不会再超过该 位置。 快速开关(可选) 设置转矩 精确调焦可以两个不同速度进行调节。要改变速度, 聚焦驱动的转矩可以使用左侧调焦旋钮上的滚花轮 把左侧的调焦操纵轮向右推进或右侧的向左推进。 (50.1 )进行调节。 ! 注意: 确保动作不要太轻。否则,载物台可能意外地向下 滑动。 ! 注意: 当调节DM3000上的调焦旋钮(高度调节、转矩和 聚焦制动调节)时,请不要把手指放在调焦旋钮和 侧面按钮座之间(有挤伤手指的危险)。 图 . 51带有扁平调焦旋钮的聚焦操纵轮 1 聚焦制动 2粗略聚焦 3精确调焦 1 2 3 45 8. 操作 按照臂长调节目镜部件 8.4镜筒 • 在AET22镜筒上,目镜可以延长直到30毫米 (图. 53)。 提示: 关闭任何不用的镜筒开口,否则漫射光会妨碍观测。 光电管中的光束分离 调节观察距离 •调节目镜的观察距离以能看到一个合谐的全部 图像(图. 52)。 EDT22 镜筒: 在观察和记录输出之间的光束分离有一个固定的预 置 (50%:50%)。 BDT25+镜筒: 光束分离是拉一个控制条手动地设置的。 调节观察角 •针对HC LVB 0/4/4和HC/0/4人类工程学镜筒, 观察角可以通过倾斜双筒观测镜来调节。 Ergotube (长的、可旋转): 0 °35 ° Ergotube (短的、可旋转): 7.5 °32.5 ° 控制条 VIS 50/50 50% PHOTO 观察 100% 50% 0% •针对AET22和EDT22 ergotubes,观察角可以通 过倾斜双目镜观察器在 5° 32 °范围内进行 调节(图. 53)。 图 . 52镜筒设置 个人眼基线调节 1 刻度(毫米),2中间模块*、照明:Ergomodule 图 . 53 带有 AET22镜筒单独调整 1 Ç 2 46 相片 0% 100% 8. 操作 HC L 2TU镜筒: 光束分离是拉一个控制条手动地设置的。 控制条 观察 VIS PHOTO 100% 0% 8.5目镜 提示: 相片 0% 100% 当佩带镜片进行显微镜使用时,目镜光圈保护装置 必须去掉或者向后折叠。 当使用显微镜工作时,我们建议用户带有双焦点或增 益透镜的玻璃镜。 •针对带有记录输出的可调节的镜筒,选取100% VIS位置。 带有镶嵌标线的目镜 • 通过调节接目镜焦距标线。 • 穿过目镜聚焦物体。 图 . 54 镜筒范围HC L 1 双目观测镜筒HC LB 0/3/4 2人类工程学镜筒 HC LVB 0/4/4,双筒、 观察角 035° 额外的ergotube(短的) HC/0/4 可旋转 7.5° 32.5° 3 三筒镜筒H L1T 4/5/7,带有固定分束镜 (50%/ 50% ) 4 HC L1VT 0/4/4类似3, 但可调视角范围为: 035 ° 5 三筒镜筒HC L3TP 4/5/7,带有3个切换位置 6 Photo适配器,带有2出口(50%/50%) 7 Photo TV 安全出口 1 3 • 然后,闭上一只眼并通过只调节第二个目镜聚 焦物体。 视力问题矫正 •用右眼,通过右目镜对标本进行清晰聚焦。 • 然后,用左眼观察同一个标本并抬升左目镜筒 2 4 5 直到物体能清晰聚焦。不要使用聚焦刻度盘。 6 7 47 8. 操作 8.6物镜 更换物镜 Leica DM2000 和DM2500 的物镜是手动地旋入光路 的。确保镜鼻旋转台锁定就位。 对于Leica DM3000 ,该操作借助于前控制面板和借 助于侧面功能键进行 ® p.49. 当你旋转物镜到位时,以下设定 • 保险丝®p. 54 • 孔径光圈®p. 53 • 光线强度® p. 52 应该进行检查。 • 油浸物镜要用适当的油浸介质。 OIL:根据DIN/ISO标准仅使用光学浸油。 C → p . 70)。 W:水浸。 IMM:水、甘油、油浸通用物镜。 注意! 遵循浸油安全说明! 提示: 提示: 对于Leica DM3000 ,光线强度在物镜更换以后会自 动调节的。 图 . 55a油浸物镜(旋下的) 48 针对可锁定油浸物镜,通过向上推前面部分直到它 停止来锁定 (大约. 2 毫米)。随后,在平稳地向右 转动之后,物镜就锁定了。 ( 图 . 55b)。 对于带有矫正座的物镜,旋转圆形按钮来调节物镜 到玻璃盖片的厚度。 图 . 55b油浸物镜(锁定) 8. 操作 8.7 Leica DM3000功能键 前控制面板的特征是有六个用于直接选择物镜的黑 色键。带有相应物镜放大倍数的黏性标签贴在物镜 键的下面。用于物镜1 的物镜键,通常也是带有最 低的放大倍数的物镜,它位于最左侧。物镜键的功 能指派在工厂中就已经进行且取决于显微镜设备。 最右侧的灰色切换键用于切换模式。 在反复切换模式,按下侧面功能键可以在先前识 记 的 放 大 倍 数 间 反 复 切 换 。 工 厂 设 置 物 镜 在 teachin模式可以很容易地按规格改制。绿色或黄 色二级管指示电流模式和 / 或当前位于光路中的物 镜。 选择物镜 反复切换 带有物镜放大倍数的黏性标签 在标准模式,在基座右侧面或左侧面上的两个功 能键(图. 56.2)连续地顺次得到不同的物镜放大倍 数。按压上面或下面的键可以顺时针方向或反时针 方向旋转物镜旋转台。在基座右侧和左侧的键的功 能与标准配置完全一致。 (见侧面功能键的特殊功能®p. 51.) 图 . 56 Leica DM3000 1前控制面板 2侧面功能键 1 2 49 8. 操作 标准模式 反复切换模式 切换键关闭。 当前的物镜指示键显示绿色。侧面功能键可用于连 续地旋入物镜。如果连续两次按下侧面功能键,一 个物镜转走同时另外一个物镜接着转进来。该物镜 的指示键此时会显示绿色。 在标准模式的基础上,简短的按以下切换键就可以 切换到反复切换模式。反复切换键此时显示绿色。 预先记住的放大倍数中较低的会被选中且相应的 键显示绿色。第二记住的物镜的键显示淡黄。 反复切换 标准模式启用且物镜 1 旋入 反复切换 反复切换模式启用,可以在物镜 2和 4 之间更换,物镜2 旋入 现在可以使用侧面功能键来在两个物镜之间反复切 换。在种情况下,按侧面功能键中的哪个都有同样 作用。 当转换为另一个物镜时,色彩显示也会变化使得当 前使用的物镜始终显示绿色且另外一个物镜显示 淡黄色。 再次按下切换键可以返回标准模式。 如果物镜键中的一个被按下,标准模式也会启用。 相应的物镜随后会旋入且记住的用于反复切换模式 的物镜保存下来。 50 8. 操作 Techin 模式 当前设置被保留下来直到teachin模式再次被起 动。 按住切换键(“toggle key”)不放。 所有的键都不亮了。 按住切换键不放 反复切换 反复切换 Teachin模式完成 toggle模式启用,物镜1旋入 Teachin模式启动 当按住切换键不放时,通过按下要用于 toggle 模式 的两个物镜相应的键来选定想要用于该模式的物 镜。这两个键就会显示黄色。 借助于脚踏开关选择物镜 一个双脚踏开关可以连接到基座作为另外的一种 旋入物镜方法。连接位置在基座的背部。 左侧脚踏开关与较低的侧面功能键有相同的功能, 右侧脚踏开关相当于较靠上的侧面功能键。 按住切换键不放 Toggle 侧面功能键的特殊功能 如果是机动化聚光器,则物镜放大倍数< 10x 时聚光 器头部自动地旋出,放大倍数> 10x时自动地旋入。 特殊操作,聚光器头部的旋入和旋出可以分配给左 Teachin模式启动,物镜1和3被选中用于toggle模式 侧或右侧功能键,使得聚光器头部的位置可以由用 再次松开切换键。Toggle 模式就被启动了。 户设定。 带有低级放大倍数的物镜旋入且相应键显示绿色。 功能键的重新分配必需借助于Leica DMControl 软 第二个物镜相应的键接着显示淡黄色。 件而且需要连接到PC 。 51 8. 操作 8.8光源 透射光 针对Leica DM2000 提示: • 利用刻度盘(57.1)调节亮度。 针对Leica DM2500: HI PLAN xx SL 和 HI PLAN CY xx SL (同时发生光)物镜品系可以在不调节光线强度的情况 下更换物镜。 • 利用刻度盘(58.1)调节亮度。 针对Leica DM3000: 荧光 •对于不同物镜,光线强度在工厂已经预置。该值 • 打开外电源设备上的灯。 可以通过手轮(与DM2000 57.1相似)进行更改。 新值针对各个物镜存储下来,当物镜被选中时该 值会再次自动地设置成存储的值。 注意! 刻度盘上的数字不是绝对值,但可以用来做可重复 的设置。最大值大约为12V ,色温的标志点大约为 3200 K。 至少保持灯室距离墙壁、窗帘、壁纸、书及其他 易燃物体10厘米! 火灾! 请阅读关于供电设备的单独文献。 图 . 58 Leica DM2500 1亮度控制 2视野光圈控制器 图 . 57Leica DM2000 1亮度控制 1 52 1 2 8. 操作 8.9孔径光圈 孔径光圈( 59.3)决定显微镜图像的分辩率、视野深 度和对照。当物镜光圈和聚光器光圈大致相同时能 得到最好的分辩率。 在偏振光显微镜检术中,孔径光圈的缩小通常导致 更多高密度着色。 图 . 59 CL/PH聚光器 1 用于光圈等的长眼。 2彩色编码 3孔径光圈 4滤色镜夹 5 视野光圈调节 颜色分类聚光器 孔径光圈根据观察者对图像的主观感觉进行设置, 当孔径光圈缩小到小于物镜孔径时,分辨力减低但 刻度盘上的刻度只是用于可重复设置并且不代表绝 对比加强。当光圈孔径缩小到小于物镜孔径的0.6x 对的光圈值。 时,分辨率的显著降低。应尽可能避免这种情况发 生。 聚光器( 59.2)上的色斑相应于物镜的彩色环。当更 换物镜时,通过设置孔径光圈以相配色斑可以得到 一个合适的孔径光圈( 相当于物镜侧光圈的2/3)。 请注意: 在照明灯路径上的孔径光圈不是用于设置图像亮度 的。只有旋转亮度调整旋钮或中性密度滤光片才能 用于此目的。 1 2 3 4 物镜中的孔径光圈通常是完全地打开的 . 由于关小 光圈引起的图像亮度减小会导致: 更大的视野深度; 较小的盖片灵敏度, 暗视野适应性, 对照变化。 5 53 8. 操作 8.10视野光圈 视野光圈(58.2、 59.5 )保护标本免受不必要的加热, 并使所有成象不需要的光远离物体以得到更好的相 衬。因此,该光圈只打开到足以照亮要观察或摄影 的物体视野。放大倍数的变化要始终必需与视野光 圈相配。 54 9. 对照方法 9. 对照方法 9.1透射光 物镜放大倍数2.5x* CL/PH和CLP/PH聚光器可以从4x放大倍数起单独使 用。 当使用扩散器滑动器*时、2.5x放大倍数也可以使 用,但使用偏光时不能使用。 提示: 带有物镜小于10x的Leica DM2500 需要扩散器滑动 器。 UCL和UCLP聚光器也可以单独从4x放大倍数起用。 带有物镜小于10x的Leica DM2500需要附加适配透 镜(扩散器)。 当使用附加适配透镜*(在聚光器转盘里)时,2.5 X放大倍数也可以使用。 在使用附加适配透镜之前,利用设置Köhler照明 ®p. 34) 4x或10x物镜。转到2.5x 物镜,启用透镜, 打开孔径光圈到最大并缩小视野光圈。 如果弧形晕映,需中心定位透镜:从背面成一定角 度把两个中心定位键嵌入聚光器并进行调节直到 不平衡的晕映消失。取下中心定位键并打开视野光 圈。 透镜最多用于20x 的物镜放大倍数。精确的Köhler 照明不再能获得! Achr.Apl.0.9 ( P)聚光器也能单独从4x放大倍数启 用。 聚光器头部转出时,2.5x 物镜放大倍数在没有扩散 器情况下也可以用;当头部旋入时,必需有扩散器 (最大的物镜视场直径22 )。 Leica DM2500物镜放大倍数1.25x *和 1.6x UCA/P和Achr.Apl.0.9(P)聚光器也能单独从1.25x放 大倍数启用。物镜放大倍数1.25x到5x时聚光器头 部旋下且10x以上时旋上。 使用106z 灯室改善照明。执行下列步骤以中心定位 灯泡: (有关控制器的信息,请参见p. 39 ): •旋入聚光器头部并变换到1.25x物镜。 •通过聚焦换向器在视野中显示灯丝为一个正方 形。 •根据物镜中心定位图像。 55 9. 对照方法 1.6x和 2.5x放大倍数 在CL/PH或CLP/PH, UCL或UCLP聚光器下也可用, 只是聚光器需完全地移到一边。随后视野光圈取代孔 径光圈的功能。 图 .60 滤色镜夹 仅用于Leica DM2000/3000:用 于附着到显微镜底部的 DLF 过 滤器盒 提示: 如果显微镜装备有偏光,当使用其它的相衬法时, 分析器和偏光器以及λ平台补偿器都必须卸下或 旋到一边。 仅 用 于 Leica DM2000/3000 :带有2个 位置或 1 个位置用于附着到 显微镜底部的滤色镜夹 9.1.1明视野 •如果有聚光器转盘:定位聚光器转盘到 BF 位并且要听到“滴答”的响声。 •如果有光圈滑座:把它从聚光器中拉出。 •如果有荧光发光器,把它切换到空位置或过滤 系统A。 可用螺丝钉附着在聚光器 上的滤色镜夹 •插入一个透射光标本。 •把一适当物镜旋转入位。 • 可活动聚光器头部: 对于物镜放大倍数小于10x 的,聚光器头部处 于旋出状态。 •使用聚焦刻度盘聚焦图像并设置亮度。 •检查Köhler照明以得到最理想的视野光圈设置 (® p. 34)。 •使用可用的合适的透射光过滤器(图. 60)。 56 仅用于 Leica DM2500 : 在基座和 LH 107/2 之间 的带有滤色镜夹的适配 器 9. 对照方法 9.1.2位相衬度 9.1.3暗视野 • 插入一个透射光标本。 •插入一个透射光标本。 • 把一适当物镜旋转入位。适合位相衬的物镜铭 记有PH 。 •把一适当物镜旋转入位。 • 使用聚焦刻度盘聚焦图像并设置亮度。 • 检查Köhler照明以得到最理想的视野光圈设 置 (®p. 34)。 • 完全地打开孔径光圈(PH位置)。 •聚光器UCL/UCLP和UCA/P:: 根据聚光器转盘上的物镜设置光圈。 例如:光圈1 属用于铭记有PH 1 的物镜。 聚光器CL/PH ,CLP/PH 和APL 。 ACHR.0.9(P): 使用光圈滑座。 提示: 聚光器UCL/UCLP和UCA/P:光圈必须在中心 (®p. 36)。 •使用聚焦刻度盘聚焦图像并设置亮度。 •聚光器UCA/P和UCL: 把聚光器转盘转到BF 位置并使其发出咔哒声表 示就位。 聚光器CL/PH ,CLP/PH 和APL 。 ACHR.0.9(P): 向外拉DF 光圈滑座直到不能再拉动。 •检查Köhler照明(®p. 34)。 •完全地打开孔径光圈(PH位置)。 •聚光器UCA/P和UCL: 把聚光器转盘转到DF 位置并使其发出咔哒声表 示就位。 聚光器CL/PH ,CLP/PH 和APL 。 ACHR.0.9(P): 向内嵌入DF光圈滑座直到不能再推进。 提示: 聚光器UCL/UCLP和UCA/P:DF光环必须在中心 (®p. 36)。 57 9. 对照方法 9.1.5偏光 DM2000、DM2500和DM3000还有特殊的暗视野 聚光器(图. 61 )。 •必要时把λ平台补偿器的λ平台旋出。 DF 聚光器的应用可能性取决于使用的物镜的光圈。 对于带有内置可变光圈的物镜,该光圈可以采用。 •嵌入一个标本并旋转合适的物镜入位。 DF聚光器 D 0.80 0.95 D 1.20 1.44 OIL 最大物镜光圈 0.75 1.10 •聚焦图像并设置Köhler照明(®p. 31)。 •把分析器插入基座的左侧面直到它发出咔哒声 入位(图. 64)。 T 铭记 l 必须在基座底面. 当使用Pol 中间镜筒*时:接通分析器 9.1.4倾斜照明 • 带标签侧面向上的把偏光器推进较靠下的孔 中。 •首先调节透射光暗视野。 •要获得一个浮雕样相衬: 聚光器UCA/P: 稍微地把聚光器转盘从DF 位置旋出。 聚光器CL/PH ,CLP/PH 和APL 。 ACHR.0.9(P): 把DF滑座一部分推入到DF位置。 图 . 63 分析器/偏光器 1分析器长眼 2偏光器座 图 . 61暗视野聚光器 1上半部(DRY ) 2下半部 3方向销 4上半部(油浸) 1 a b 1 4 2 3 2 58 9. 对照方法 ! 注意! Attention! 使用偏光器时,带有标签的侧面要始终面向上, 否则内置防热过滤器就起不到作用且特殊的偏 光器也不起作用(脱色!)。 •使偏光器和分析器成交叉位直到它们达到最大 量暗度。 • 卸下物体或找到标本的一个空区。 • 把分析器推入基座直到发出第二个响声或接 通模块。 • 从光路中移出补偿器。 • 旋转偏光器直到在目镜观察到极限消光位 (图. 6 3)。 • 用固定螺钉固定该交叉位置。 •必要时: 把长l 或 l/4 补偿器嵌入内置于聚光器座的滤 色镜夹中,并向左旋转大致到停止位置。 CLP/PH 聚光器: 把l 或 l/4补偿器嵌入到聚光器侧面的长眼中。 聚光器UCLP和UCA/P: 旋转聚光器转盘到 l 或 l/4位置。 其他方法: 4x20 毫米补偿器可以推进补偿器长眼中。 9.1.6差别干涉相衬 • 嵌入一个标本,旋转合适的物镜入位并聚焦 图像。 •旋转UCA/P聚光器中的转盘到明视野位置。 •如果有荧光发光器,把它切换到空位置或过滤 系统A。 •把物镜棱镜滑座从镜筒槽中拉出。 •精确设置Köhler照明 (®p. 34)。 •卸下物体或在标本上找到一个空区。 •使偏光器和分析器成交叉位直到它们达到最大 暗度,如在9.1.5偏光中所述。 图 . 63 当通过聚焦望远镜或勃氏镜,大孔径 Pol 物镜观察时交叉偏光器 a 精确地交叉, b非精确地交叉 Pos. a 如果在聚光器或物镜中有变形不能设置, Pos. b 适用于DIC和偏光相衬。 59 9. 对照方法 偏光器ICT/P *: 把位于聚光器底面的偏光器旋入光路中。确保在偏光器前 面的红色指标点与0 相对应。 •插入物镜棱镜滑座(图. 6 4)到镜筒槽中。代码字 母,例如:D,必须与铭记在物镜上的代码字母相 对应。代码字母后面的数字只不过是叙述一个变 量,例如: D1 = 也适用于光瞳位置D 。 •选 择与 物 镜放 大 倍数 相 对应 的 聚光 器 侧面 棱 镜,例如: pos. 20/40用于20x和40x 物镜。 •使用(64.1)物镜棱镜滑座上的滚花轮细调。 •相衬可以通过孔径光圈或l /4 补偿器更进一步 优化。 图 . 64物镜棱镜滑座 1细调 1 60 9. 对照方法 9.2荧光 •嵌入合适的标本并旋转适当的物镜到位。 •如果合适,在透射光下从头聚焦图像。 •打开外部过度设备的入射光源。 •打开快门。 •选择合适的荧光过滤器筒。 •如果有放大倍数变换器,切换它到因子1x 。 •如果没有红色干扰背景,分离BG 38过滤器。但 是,始终要启用过滤器用于摄影。 •打开孔径光圈。 •打开视野光圈直到整个视野正好被照亮。 必要时中心定位视野光圈。 图 . 65 带有过滤块变换器、快门、BG38 、视野和孔径光圈的荧光发光器 61 10. 显微镜度量 10. 显微镜度量 10.1线性测量 长度测量需要以下工具: 在目镜中带有刻度的刻度板或带有幻灯片覆 盖仪器的HC FSA 25 PE镜筒或一个数码线 性测量目镜 用于校准的分级测微计。 测微器分划值 在度量之前,必须知道物镜目镜联合的测微器分划 值,即:标本中的距离相当于使用的刻度板上的标 度的长度。 校准: •通过旋转目镜并调节两个刻度放入零刻度到相 同高度,校对载物台测微计和刻度板相互平行。 •读出载物台测微计上的多少刻度相当于显微镜 刻度(刻度板)上的多少刻度。 •这两个价值相除。结果就是刚才使用的测微计的 值。 例如: 如果载物台测微计的 1.220 毫米相当于度量刻度的 50 标度, 测微器分划值就是 1.220:50毫米 = 0.0244毫米 =24.4微米。极 低物镜放大倍数,度量刻度中可能只有一部分能进行校准。 62 提示: 记住要把额外的放大倍数值考虑在内 ! 我们强烈推 进单独地校准各个物镜,而不是通过另一个物镜的 测微器分划值来推断一个物镜的校准。 如果目镜完全推进镜筒中,可能出现测量误差。 特别大物体设备也用游标( 0.1毫米)在载物台上 测量;要测量的距离可以由x和y度量值来计算。 10. 显微镜度量 10.2厚度测量 物体标记物 原则上,如果物体的上下边缘都可以清晰地聚焦就 物体标记物代替物镜旋入。当旋转时,一个菱形降 可以进行厚度测量。载物台高度调节的差别(细调 低到盖片或物体表面,在这里可变半径的圆圈可以 焦旋钮:两个标度之间的距离= ca.1 mm )针对透 划痕下来以标记物体。 射光物体给出一个值,该值由于物体或浸油的折射 率(被变焦了)而被扭曲。在透射光祥细测量的物体 的真实厚度可以由载物台竖直方向的移动 d' 给出 (聚焦差别),物体的折射率n 0 和在盖玻片和物镜 之间的介质的折射率n i (空气= 1 ). d = d' xn0/ni 例如: 一个薄磨光标本的上下表面已经同一个干型物镜聚 焦(n=1.0),机动精调驱动(标度间隔= 1 毫米)的 标度读数:9.0 和27.0 由此d' = 18 x1 =18 毫米。 物体细节的折射率是: 假设n=1.5。 厚度d =18 X1 X1.5 = 27 微米. 图 . 66 在目镜中的刻度板的刻度(左侧) 和载物台测微计的图像(右侧) 63 10. 显微镜度量 10.3 痛风/假性痛风的辨别 使用λ平台补偿器是进行此检测的一个先决条件。 组装→ p . 31。 定向λ平台补偿器 •把λ平台补偿器从光路中旋出(图. 67)。 •使λ平台补偿器和分析器成交叉位置知道它们 达到最大的暗度(偏光® p. 59)。 •固定该交叉位置,固定由在侧面的固定螺钉完 成( 67.2)。 以下部分解释痛风 / 假性痛风辨别的基本程序。 该检测利用尿酸盐的负双折射和焦磷酸盐的正 双折射才能进行。无论是痛风(尿酸一钠),还是 假性痛风(焦磷酸钙)结晶都趋向是针状的。尽 管如此,许多结晶可能是破碎的和/或无规律的。 要做此检测,必须找到至少一个定向在与方向操 持同一轴的完好的结晶和一个与轴垂直的。 步骤 为保证测试正确地进行,应该使用已知尿酸一钠 结晶载玻片。 •推荐使用40x物镜。 •再次旋入λ平台。 图 . 67 λ平台补偿器转出 1方向操持 2固定螺钉 • 把λ平台中光路上旋出。 (图. 67 )。 •放 置载 玻 片在 载 物台 上 并对 结 晶进 行 清晰 聚 焦。不管方位如何,针状的结晶会出现白色。 •旋入λ平台并使方向操持(67.1)在其最左的位 置。在操持方向较长的结晶将出现黄色,且与操持 方向垂直的将出现蓝色(图. 68 )。 2 90 ° 64 1 10. 显微镜度量 •把方向操持移动到其最右侧位置。此时,水平 结晶应该是蓝色,且垂线的为黄色(图. 68)。 •一定在各个位置同方向操持测试结晶以保证阳 性鉴定。 图 . 68 痛风的鉴定 以下步骤用于鉴定假性痛风: 假性痛风检测与痛风检测相同。但是,颜色变化 与痛风的相反。也就是:操持在最左边时,水平 结晶是蓝色且垂直方向是黄色 , 而且反过来右侧 面的指标也如此(图. 69)。 图。 69 假性痛风的鉴定 假性痛风测试 痛风测试 结晶 黄色 结晶蓝 结晶 蓝色 结晶黄色 色 操持左 侧 左侧 结晶蓝 色 结晶黄 色 操持右 侧 结晶 黄色 结晶 蓝色 操持右 侧 65 11. 故障检修 11. 故障检修 问题 原因/补救 基座 显微镜无应答。 确定电压符合要求。 确保基座连接到供给电源。 检查电缆联接。 检查保险丝是否损坏的,必要时更换保险丝(→ p. 71)。 照明 图像完全黑暗。 透射光: 确保在内置透射光照明或 107/2 灯室 ( DM2500) 中的灯泡没有缺陷。 灯泡更换→p. 24 荧光: 打开快门(→p. 61)。 确保灯泡连接到供给电源而且它们没有缺陷。 灯泡更换→p. 26 通知服务人员并让服务人员检查供电设备的保险 丝。 图像光照不均衡或非均匀。 把所有不需要过滤器从光路移开。 中心定位灯泡(106z灯室) (→p. 39ff)。更换旧 灯泡(→p. 24ff)。 照明“闪烁”。 确保供给电源没有松动连接。 更换旧灯泡(→p. 24ff)。 66 11. 故障检修 问题 荧光:在刚接通时灯泡没有立即照亮。 原因/补救 外部电源必须重复地接通。 热的汞灯泡应该冷却下来后再开启。 明视野 标本不能聚集。 使用正确的浸油。 盖玻片向上放置标本。 确保盖玻片厚度正确且适宜于物镜上的指示。 暗视野 没有明确的DF 相衬可用。 确保有DF物镜在使用。 物镜孔径设置太高 (最大值0.75/1.10).必要时,利用物镜上的可变 光圈减低物镜孔径。 检查聚光器的中心定位。 完全打开孔径光圈。 图像光照不均衡或非均匀。 放大倍数太小。使用一个较高的放大倍数。 讨厌的漫射光。 清洁标本和相邻透镜 (→p 71)。 67 11. 故障检修 问题 原因/补救 位相衬度 没有位相衬度可用。 标本太厚,太薄或着色过重。 载体介质和标本的屈折度吻合,结果没有相位突 变。 盖玻片未水平地放置。检查右侧光圈 (→p. 57)。检查光圈的中心定位 →p . 36f)。 检查聚光器的中心定位。 完全打开孔径光圈。 偏光 没有偏光相衬可用。 • 使偏光器和分析器成交叉位直到它们达到最大 暗度。 (没有标本) (→p. 59)。 透射光干涉相衬 没有透射光干涉相衬可用 68 标本太厚或太薄。 包埋介质或标本是双重折射物。 转动标本。标本 和包埋介质的折射率差别不是很大。 盖玻片太厚。 检查右侧聚光器棱镜 (→p. 59)。 检查聚光器 棱镜的中心定位 (→ p . 37)。 • 设置 Köhler照明 (→ p. 34)。 • 使偏光器和分析器成交叉位直到它们达到最大 暗度。 (没有标本) (→p. 59)。 11. 故障检修 问题 原因/补救 荧光 图像完全黑暗(没有荧光)。 打开快门(→p. 61)。 检查抗原抗体联合。 I嵌入新灯泡(→p. 26ff)。 荧光太弱。 中心定位灯泡(→p. 39ff)嵌入新 灯泡(→p. 26ff)。 69 12. 显微镜护理 12. 显微镜护理 12.2清洁 注意! 在执行清洁和维护工作之前拔下供给电源! 保护电器部件免遭湿气! ! 注意: 残余纤维和灰尘可能产生有害的背景荧光。 在温暖和温湿气候带的显微镜需要特别的护理以 免真菌污染。 在每次使用之后显微镜都应进行整洁,并且显微镜 光学器件应该绝对保持清洁。 清洁带外套部分 可用软刷或不起毛的棉布清除灰尘和松散杂质。 粘附污垢可以利用市场上常见的水溶液、汽油或酒精 进行清洁。关于清洁带外套部分,可以使用一块浸 润有以上物质之一的亚麻布或油布。 12.1防尘罩 提示: 为防止灰尘,在每次使用之后用防尘罩盖上显微镜和 附件。 注意! 灯泡冷却后再把防尘罩盖在基座上。防尘罩不 耐热。此外,还可能出现冷凝水。 70 ! 注意: 丙酮、二甲苯或含硝基稀释物可能损坏显微镜, 因此不能使用。 首先在设备不易看到区域测试未明组成的清洁液。 确保带外套或塑性表面不被褪色或腐蚀。 ⒓显微镜护理 清洁玻璃表面 除去浸油 用纤细的、干燥且不起毛的刷,通过用吹风袋或真 空抽吸吹气,清除玻璃表面的灰尘。 注意! 用蒸馏水湿润过的干净布小心的除去玻璃表面的顽 固污垢。如果污垢仍然不能除去,使用纯酒精、氯 仿或汽油进行清除。 遵循浸油安全说明! 首先,用清洁棉布擦去浸油 , 然后再沾上乙醇擦拭多次。 清洁物镜 12.3 操持酸和碱 注意! 在清洁期间,物镜不能进行拆卸。如果内表面出 现损坏,该物镜必须送到你当地的Leica 经销商进 行修理。我同时建议不要清洁目镜的内表面。 使用酸或其它活性化学制剂进行的检验,一定要特 别小心。 ! 注意: 绝对不允许光学器件和机械部件与化学制剂相 接触。 物镜的前透镜应按照“清洁玻璃表面”所描写的进 行清洁。上方的透镜可用一个抽气泵吹洗进行清洁。 12.4更换保险丝 在基座背部的保险丝模块(图. 7 )可以用尖锐物体 卸下。 保险丝资料®p. 8 订购编 ®P72)。 注意! 图 . 70 保险丝模块 除这里所列的类型和额定电流的保险丝外,决 不能使用其他任何保险丝作为替代物。不许使 用由小段连接成的保险丝或桥接保险丝夹持 器。保险丝使用不正确可能导致火灾。 71 ⒔最重要的损耗和备件 ⒔最重要的损耗和备件 订购编号. 产品编号. 更换用灯泡 11 500 319 11 500 974 11 500 137 11 1000 138 11 500 321 11 500 139 名称 卤素灯泡12V 30W 内置照明 卤素灯泡12V 100W 107/2 灯室 高压水银灯头 50W 106z 灯室 高压水银灯头 100W 106z 灯室 高压水银灯头 100W 106z 灯室 (103 W/2) 高压氙灯灯头 75W 106 z 灯室 用于未使用物镜塞孔的螺帽 020422.570000 螺帽M25 用于HC PLAN目镜的更换用目镜环(保护光圈) 021500.017005 HC PLAN目镜环 021264.520018 HC PLAN目镜环 021264.52001 HC PLAN目镜环 符合 DIN/ISO国际标准的浸油 ,无荧光 11 513 787 10 毫升 11 513 522 100 毫升 11 513 788 500 毫升 保险丝 11 826 365 F3,15A 250V 72 用途 物镜旋转台 10x/25目镜 10x/22目镜 10x/20 目镜 油性和 IMM 物镜 带有油性聚光器头部 用于显微镜基座的保险丝 ⒕加载组件 ⒕加载组件 14.1安装过滤器盒 (透射光) 14.2装备聚光器转盘 •向上旋转载物台并降低聚光器。 •取下镜筒和中间系统。 •取下聚光器。因此要松开聚光器固定螺钉。 •将镜座倒置,松开底部的固定螺钉并卸下底板。 •把过滤器嵌入到半圆的座中。这些不必按照某个 固定次序做。 •把过滤器盒向后放进去。 聚光器UCL/UCLP •完全地取下螺丝钉(72.1). •向后旋转中心定位螺丝直到光圈、l和 l/4 补偿器* 和透镜*2.5x可嵌入。 最大的孔用于明视野观察 ( =BF),稍微较小的 用于光圈或 l和 l/4 补偿器或透镜* 2.5x。 图 . 72 聚光器UCL 1用于聚光器转盘的固定螺丝 图. 71 用于Leica DM2500的过滤器盒(透射光) 1 73 ⒕加载组件 注意: 如果你使用一个较小孔用于明视野,不能使用最大 的照明光圈。 ! 请注意: 在把转盘安装到聚光器里以前,一定要确保没有任 何中心定位螺丝在侧面突出来。 •用轴螺丝钉拴紧聚光器转盘,检查转盘能适当 字母(例如: DF、 PH 1... , l )必须面向上l和 l/4 补偿 地旋转360°。 器必须以准确的方向嵌入:凹口必须对准转盘的中 心! 组件的字母应该与相反的位置(界转盘的外缘) •用聚光器固定螺钉固定聚光器。 的标记相对应。 • 固定中心定位螺丝直到组件基本在孔的中心。 聚光器UCA/P •旋开转盘的固定螺钉。固定螺丝位于聚光器的下 方,且要完全地旋出。 •向后旋转中心定位螺丝直到光圈、l和 l/4 补偿器* 和透镜*2.5x可嵌入。 图 . 73UCL聚光器转盘 1聚光器转盘 2光圈或l或l/4 补偿器 3中心定位螺丝 4轴 5 中心定位键 6 l或 l/4 platte 72.5X...20附加镜头 最大的孔用于明视野观察 ( =BF),稍微较小的 用于光圈或 l和 l/4 补偿器或透镜* 2.5x。 注意: 如果你使用一个较小孔用于明视野,就不能使用最 大的照明光圈。 字母(例如: DF、PH 1... , l )必须面向上,l或 l/4 补 偿器必须以准确的方向嵌入:凹口必须对准转盘的 中心! 组件的字母应该与相反位置(转盘的外缘) 的标记相对应。 74 ⒕加载组件 嵌入DIC 聚光器棱镜: 安装以下所述嵌入棱镜K 2 , K 3 等到大孔中: ! 请注意: 在把转盘安装到聚光器里以前,一定要确保没有任 何中心定位螺丝在侧面突出来。 • 稍微向后旋转中心定位螺丝。 • 棱镜标签向上,名字K 2 ,... m 必须靠近标记在 2 孔边缘的点。 注意: •用螺丝钉拴紧聚光器转盘,检查转盘是否能 正确地旋转360 °。 • 用聚光器固定螺钉固定聚光器。 如果嵌入的棱镜旋转180°,则ICT(透射光干涉 相衬)就不能启用! •在棱镜下面的2个凸起锁必须刚好进入导向槽 并发出咔哒声表示就位。 •稍微旋入中心定位螺丝,检查所有棱镜可在操作 下正确地移动且接近孔的下边缘。 •根据光圈或棱镜在对侧光滑区(也就是旋转轴的 另外一侧)粘上自粘标签。 图 . 74 UCA/P 聚光器转盘 1 光圈“small、PH” 2用于大孔的光圈“large” 3 a, b DIC 聚光器棱镜 4用于DIC聚光器棱镜组装的标志 5棱镜座上的标记“K ” 6用于棱镜的导向槽 7黏性标签 8中心定位螺丝 9可旋转轴 10 l或l/4 补偿器 75 ⒖索引 ⒖索引 附加适配透镜49 调节光源36 聚光器棱镜的调节34 周围条件15 分析器 27、 52 孔径光圈47 辅助聚光透镜 LS19 暗视场51 暗视野聚光器52 DIC 棱镜 28 差别干涉相衬 53 扩散器滑动器55 DLF 过滤器盒 50 防尘罩 64 光束分离43 BG38 55 明视野50 亮度 46 电学方面安全8 Ergolift 29 Ergomodule 29 目镜部件 43 目镜 20、 44 照相机 28 护理70 更换保险丝 65 更换物镜 45 检查位相衬度光圈33 清洁 64 粗略调焦 44 粗略聚焦 41 同轴小齿轮 17、 40 颜色分类聚光器 47 补偿器 53 聚光器 11、 19 聚光器中心定位 32 聚光器转盘 67 聚光器头部 31、 50 聚光器高度调整装置 19、 32 聚光器座 19 聚光器棱镜 28 连接到供给电源30 相衬法 10 矫正座 45 交叉位 53 76 视野光圈 47、 48 过滤器筒 26, 55 滤色镜夹 27、 47、 50 过滤器盒 67 细调焦 44 精确调焦 41 荧光 55 荧光发光器23 荧光旋转台转盘26 聚焦手轮 44 聚焦制动 42 聚焦 41 聚焦望远镜 33 聚焦操纵轮 41 脚踏开关 33、 51 前控制面板 17、 23、 49 功能键 17、33、 49、 51 保险丝 66 气体放电灯23、24、25 痛风/假性痛风 58 聚焦操纵轮的高度调节41 Hg100W和Xe75W水银灯泡38 Hg50灯头 24 Hg50 W 水银灯 37 ICT/P偏光器54 鉴定单23 油浸物镜 45、 48 浸油 45、 65、 66 镶嵌标线 44 安装位置 15 内置照明 21 界面 13 Köhler照明31 λ平台 52、 53 λ平台补偿器 28、 58 灯室 21 LAS13 Leica应用套装13 光线强度 46 光圈 51 光圈中心定位34 光圈滑座 33、 51 光源 46 线性测量 56 放大倍数变换器29 测微器分划值 56 物体易位40 刻号器 57 物镜更换键 17、 49 物镜放大倍数1.25x2.5x 49 物镜棱镜滑座 34、 53、 54 物镜旋转台10 物镜 20、 45 倾斜照明 52 ⒖索引 PC连接 33 位相衬度 51 位相衬度光圈33 Pol 中间镜筒 27、 52 偏光 52 偏光器 27、 52 偏光器ICT / P60 偏光器座 27 观察角 43 观察附属装置29 观察距离43 视力问题44 Xe75灯头 24 更换用灯泡 66 更换灯泡 21 右手/左手操作 41 安全备忘录8 快门 55 软件 13、33、 51 规格8 样品夹 17 转速开关42 载物台 17、 40 标准模式 49、 50 供电设备 23、 40 测试模式 49、 51 厚度测量 57 TL 分析器长眼 27 切换键 17、 49 反复切换模式 49、 50 转矩 40、 42 描绘装置 30 透射光 49 透射光过滤器 50 透射光照明 21 搬运 16 镜筒效率 46 镜筒范围 44 镜筒 20、 43 77 ⒗ EU合格声明 ⒗ EU合格声明 下载地址: DM2000: http://www.lightmicroscopy.com/down_cedeclaration_dm2000 DM2500: http://www.lightmicroscopy.com/down_cedeclaration_dm2500 DM3000: http://www.lightmicroscopy.com/down_cedeclaration_dm3000 78 Leica DM2000 Leica DM2500 Leica DM3000 Operating Manual Bedienungsanleitung Mode d’emploi Published May 2005 by: Herausgegeben Mai 2005 von: Publié en mai 2005 par: Leica Microsystems Wetzlar GmbH Ernst-Leitz-Straße D-35578 Wetzlar (Germany) Responsible for contents: Verantwortlich für den Inhalt: Responsable du contenu rédactionnel: Dr. Jasna Röth, Peter Schmitt (Clinical Microscopy, Product Management) (Clinical Microscopy, Produktmanagement) (Clinical Microscopy, Product Management) Holger Grasse (Safety Officer according to MPG §30) (Sicherheitsbeauftragter nach MPG §30) (responsable de la sécurité conformément à la loi relative aux dispositifs médicaux, § 30) In case of questions, please contact the hotline: Bei Fragen wenden Sie sich bitte an die Hotline: Pour toute question, contacter notre service d’assistance téléphonique : Phone +49(0)6441-292286 Fax +49(0)6441-292255 E-mail: [email protected] Leica DM2000 Leica DM2500 Leica DM3000 Operating Manual Copyrights Copyrights All rights to this documentation are held by Leica Microsystems Wetzlar GmbH. Reproduction of text or illustrations (in whole or in part) by print, photocopy, microfilm or other method (including electronic systems) is not allowed without express written permission from Leica Microsystems Wetzlar GmbH. The instructions contained in the following documentation reflect state-of-the-art technology and knowledge standards. We have compiled the texts and illustrations as accurately as possible. Nevertheless, no liability of any kind may be assumed for the accuracy of this manual’s contents. Still, we are always grateful for comments and suggestions regarding potential mistakes within this documentation. The information in this manual is subject to modification at any time and without notification. 4 Contents Contents 1. Important Notes about this Manual ...... 6 2. Intended Purpose of Microscopes ........ 7 3. Safety Notes ............................................... 3.1 General Safety Notes ............................... 3.2 Electrical Safety ........................................ 8 8 8 4. Overview of the Instrument .................... 10 5. Unpacking the Microscope .................... 18 6. 6.1 6.2 6.3 6.4 6.5 6.6 20 20 22 23 23 24 6.7 6.8 6.9 6.10 6.11 Assembling the Microscope .................. Stage ............................................................ Condenser ................................................... Tube and Eyepieces .................................. Objectives ................................................... Light Source - Transmitted Light Axis ... Components for Fluorescence Applications ................................................ 6.6.1 Fluorescence Illuminator .............. 6.6.2 106 z Lamp Housing ........................ 6.6.3 Equipping the Fluorescence Turret Disk .............. Analyzer and Polarizer ............................ Lambda Plate Compensator .................... DIC Prisms .................................................. Optional Accessories ............................... Connection to the Power Supply ............ 7. 7.1 7.2 7.3 7.4 7.5 Start-up ........................................................ Switching on the Microscope ................. Köhler Illumination .................................... Checking Phase Contrast Rings ............. Adjustment of Condenser Prisms ........... Adjusting the Light Sources .................... 34 34 34 36 37 38 8. 8.1 8.2 8.3 8.4 Operation .................................................... Switching on ............................................... Stages and Object Displacement ........... Focusing ...................................................... Tubes ............................................................ 43 43 43 44 46 26 26 26 29 30 31 31 31 33 8.5 8.6 8.7 8.8 8.9 8.10 Eyepieces .................................................... Objectives ................................................... The function keys for Leica DM3000 ..... Light Sources ............................................. Aperture Diaphragm ................................. Field Diaphragm ......................................... 47 48 49 52 53 54 9. Contrasting Methods ................................ 9.1 Transmitted Light ....................................... 9.1.1 Brightfield ......................................... 9.1.2 Phase Contrast ................................ 9.1.3 Darkfield ........................................... 9.1.4 Oblique Illumination ....................... 9.1.5 Polarization ...................................... 9.1.6 Differential Interference Contrast .................... 9.2 Fluorescence .............................................. 55 55 56 57 57 58 58 59 61 10. 10.1 10.2 10.3 62 62 63 64 Measurements with the Microscope ... Linear Measurements .............................. Thickness Measurements ....................... Differentiation of Gout / Pseudo Gout ... 11. Troubleshooting ......................................... 66 12. 12.1 12.2 12.3 12.4 Care of the Microscope ........................... Dust Cover .................................................. Cleaning ....................................................... Handling Acids and Bases ...................... Changing Fuses .......................................... 70 70 70 71 71 13. Essential Wear and Spare Parts ............ 72 14. Retrofitting Components .......................... 73 14.1 Fitting the Filter Magazine (Transmitted Light) .................................... 73 14.2 Equipping the Condenser Disc ................ 73 15. Index ............................................................ 76 16. EU Declaration of Conformity ................. 78 5 1. Important Notes about this Manual 1. Important Notes about this Manual Caution! This operating manual is an essential component of the microscope, and must be read carefully before the microscope is assembled, put into operation or used. This operating manual contains important instructions and information for the operational safety and maintenance of the microscope and accessories. Therefore, it must be kept and taken care of. Text symbols, pictograms and their meanings: (1.2) Numbers in parentheses, such as "(1.2)", correspond to illustrations (in the example, Figure 1, Item 2). → p. 20 Numbers with pointer arrows (for example → p. 20), point to a certain page of this manual. Caution! Special safety instructions within this manual are indicated with the triangle symbol shown here, and have a gray background. ! Caution! The microscope and accessories can be damaged when operated incorrectly. Explanatory note. * 6 Item not contained in all configurations. 2. Intended Purpose of Microscopes 2. Intended Purpose of Microscopes The Leica DM2000, DM2500 and DM3000 microscopes, to which this user manual belongs, are designed for biological routine and research applications. This includes the examination of samples taken from the human body with a view to provide information on physiological or pathological states or congenital abnormalities, or to determine the safety and compatibility with potential recipients, or to monitor therapeutic measures. All the above-named microscopes comply with the Council Directive 98/79/EEC concerning in vitro diagnostics. They also conform to the Council Directives 73/23/EEC concerning electrical apparatus and 89/336/EEC concerning electromagnetic compatibility for use in an industrial environment. Caution! The manufacturer assumes no liability for damage caused by, or any risks arising from using the microscopes for other purposes than those for which they are intended or not using them within the specifications of Leica Microsystems Wetzlar GmbH. In such cases the conformity declaration shall cease to be valid. Caution! These (IVD) devices are not intended for use in the patient environment defined by DIN VDE 0100-710. Neither are they intended for combining with medical devices according to EN 60601-1. If a microscope is electrically connected to a medical device according to EN 60601-1, the requirements defined in EN 60601-1-1 shall apply. 7 3. Safety Notes 3. Safety Notes 3.1 General Safety Notes 3.2 Electrical Safety This safety class 1 device is constructed and tested in accordance with EN 61010-2-101:2002, EN 61010-1:2001, IEC 1010-1:2001, safety regulations for electrical measuring, control, and laboratory devices. General Specifications Caution! In order to maintain this condition and to ensure safe operation, the user must follow the instructions and warnings contained in this operating manual. Caution! The devices and accessories described in this operating manual have been tested for safety and potential hazards. The responsible Leica affiliate or the main plant in Wetzlar, Germany must be consulted whenever the device is altered, modified or used in conjunction with non-Leica components that are outside of the scope of this manual. Unauthorized alterations to the device or noncompliant use shall void all rights to any warranty claims! 8 Microscope For indoor use only. Supply voltage: Frequency: Power input: DM2000 DM2500 DM3000 Fuses: Ambient temperature: Relative humidity: Overvoltage category: Pollution degree: 90-250 V~ 50-60 Hz max. 40 W (90 VA) max. 160 W (220 VA) max. 48 W (110 VA) F 3,15 A 250 V 15-35°C max. 80% to 30°C II 2 Caution! The power plug may only be plugged into an outlet equipped with a grounding contact. Do not interfere with the grounding function by using an extension cord without a ground wire. Any interruption of the ground wire inside or outside of the device, or release of the ground wire connection, can cause the device to become hazardous. Intentional ground interruption is not permitted! 3. Safety Notes Caution! Through activating to the grounding connection (earth screw at the back of the stand) ancillary equipment with its own and/or extra power supply may be brought to the same ground wire potential. For connections without a ground connector, Leica Service must be consulted. Caution! Protect the microscope from excessive temperature fluctuations. Such fluctuations can lead to the accumulation of condensation, which can damage the electrical and optical components. Ambient temperature: 15-35°C. Caution! Caution! Never use any fuses as replacements other than those of the types and the current ratings listed here. Using patched fuses or bridging the fuse holder is not permitted. The use of incorrect fuses may result in a fire hazard. Before exchanging the fuses or lamps, be absolutely certain to switch off the main power switch and remove the power cable. Caution! The microscope’s electrical accessory components are not protected against water. Water can cause electric shock. 9 4. Overview of the Instrument 4. Overview of the Instrument Specification Leica DM2000 Leica DM2500 Contrast Method • Transmitted Light: Brightfield, Darkfield, Phase Contrast, Polarization, Differential Interference Contrast • Incident Light: Fluorescence Transmitted Light Axis Integrated halogen illumination manual adjustment of • Light intensity • Aperture diaphragm • Field diaphragm Incident Light Axis Incident-light fluorescence illuminator for up to eyepiece field number 22 with • 5-filter turret disk • Centerable aperture and field diaphragm • Light trap for the suppression of extraneous light • N4 neutral density filter and shutter, switchable Tube optionally with • Fixed or variable viewing angle • Up to 3 switching positions • One or two camera ports • Ergotube with height-adjustable eye level and camera port Magnification Changer (optional) • Manual • Magnification steps: 1x; 1.5x; 2x Lamp Housing Manual adjustment of • Light intensity • Aperture diaphragm • Field diaphragm Objective Turret • Manual • 6-fold or 7-fold for objectives with M25 thread • Objective prism slide X/Y Stage • With condenser holder • Coaxial pinion, optional: telescoping stage controls • Controls mountable on left or right 10 4. Overview of the Instrument Leica DM2000 Specification Condenser Focusing Leica DM2500 • Condenser CL/PH 0.90/1.25 OIL with color coding (DM2500 with objectives < 10x require the diffuser slider) • Condenser CLP/PH 0.85 for polarization (DM2500 with objectives < 10x require the diffuser slider) • Condenser achr.apl. A 0.9 (P) with color coding and swivelable condenser head • UCL 0.90/1.25 OIL universal condenser (UCLP 0.85 for polarization with 5-position light ring disk) (DM2500 with objectives < 10x require the adapter lens (diffuser)) • UCL/P pol. universal condenser with interchangeable condenser head and condenser disk with 6 positions • • • • Focus wheel for coarse and fine focusing Height adjustment Speed switch (optional) Focus stop and torque adjustment 11 4. Overview of the Instrument Specification Leica DM3000 Contrast Method • Transmitted Light: Brightfield, Darkfield, Phase Contrast, Polarization, Differential Interference Contrast • Incident Light: Fluorescence Transmitted Light Axis Integrated halogen illumination manual adjustment of • Aperture diaphragm • Field diaphragm • Automatic adjustment of light intensity with objective change Incident Light Axis Incident-light fluorescence illuminator for up to eyepiece field number 22 with • 5-filter turret disk • Centerable aperture and field diaphragm • Light trap for the suppression of extraneous light • N4 neutral density filter and shutter, switchable Tube optionally with • Fixed or variable viewing angle • Up to 3 switching positions • One or two camera ports • Ergotube with height-adjustable eye level and camera port Magnification Changer (optional) • Manual • Magnification steps: 1x; 1.5x; 2x Objective Turret • motorized Selection of objectives via function keys or (optionally) via foot switch • 6-fold for objectives with M25 thread • Objective prism slide X/Y Stage • With condenser holder • Coaxial pinion, optional: telescoping stage controls • Controls mountable on left or right 12 4. Overview of the Instrument Leica DM3000 Specification Condenser • • • • Condenser CL/PH 0.90/1.25 OIL with color coding Condenser CLP/PH 0.85 for polarization Condenser achr.apl. A 0.9 (P) with swivelable condenser head UCL 0.90/1.25 OIL universal condenser (UCLP 0.85 for polarization with 5-position light ring disk) • UCL/P pol. universal condenser with interchangeable condenser head and condenser disk with 6 positions • motorized condenser achr. apl. A 0.9 (P), auto Automatic swiveling of condenser head for objective change Focusing • • • • Focus wheel for coarse and fine focusing Height adjustment Speed switch (optional) Focus stop and torque adjustment Interfaces USB2 Software Leica Application Suite (LAS) for WindowsTM 2000, XP for teach-in of objectives and configuration of function keys 13 4. Overview of the Instrument 7 6 5 4 1 Fig. 1a Left side of the stand Leica DM2000 1 Coarse and fine focusing 2 Condenser height adjustment 3 Brightness control 4 Field diaphragm 5 Aperture diaphragm 6 Condenser 7 Analyzer slot 14 2 3 4. Overview of the Instrument 1 2 3 4 5 6 7 8 9 10 11 Fig. 1b Right side of the stand Leica DM2000 1 Eyepiece 2 Eyepiece tube 3 Tube 4 Slot for objective prism slide 5 Objective turret with objectives 6 Specimen stage with specimen holder 7 Integrated illumination 8 On/Off switch 9 Condenser height adjustment 10 Coarse and fine focusing 11 Coaxial pinion for x/y stage movement 15 4. Overview of the Instrument 17 16 15 18 14 13 12 11 10 9 8 1 Fig. 2 Left side of the stand Leica DM2500 1 Lamp housing 2 Coarse and fine focusing 3 Brightness control 4 Condenser height adjustment 5 Field diaphragm adjustment 6 On/Off switch 7 Field diaphragm 8 Coaxial pinion for x/y stage movement 9 Aperture diaphragm 16 2 3 4 5 6 10 11 12 13 14 15 16 17 18 7 Condenser disk Condenser Specimen stage with specimen holder Objective turret with objectives Objective prism slide Tube Eyepiece tube Eyepiece Analyzer 4. Overview of the Instrument 1 2 3 4 5 6 13 8 12 Fig. 3 Right side of Leica DM3000 stand 1 Eyepiece 2 Eyepiece tube 3 Tube 4 Slot for objective prism slider 5 Objective turret with objectives 6 Specimen stage with specimen holder 7 Integrated illumination 8 On/off switch (Backside of Stand) 9 Condenser height adjustment 10 Coarse and fine focusing 7 9 10 11 11 Coaxial pinion for x/y-stage movement 12 Front control panel with objective change keys and toggle key 13 Lateral function keys to change between two objective magnifications or for switching magnifications (larger/ smaller) Left side of stand analog For additional controls see Fig. 1b Leica DM2000. 17 5. Unpacking the Microscope 5. Unpacking the Microscope First, carefully remove all components from the transportation and packaging materials. Note: If at all possible, avoid touching the lens surfaces of the objectives. If fingerprints do appear on the glass surfaces, remove them with a soft leather or linen cloth. Even small traces of finger perspiration can damage the surfaces in a short time. See the chapter "Care of the Microscope" → p. 70, for additional instructions. Caution! Installation Location Work with the microscope should be performed in a dust-free room, which is free of oil vapors and other chemical vapors, as well as extreme humidity. At the workplace, large temperature fluctuations, direct sunlight and vibrations should be avoided. These conditions can distort measurements and micrographic images. Allowable ambient conditions Temperature 15-35°C Relative humidity maximum 80% up to 30°C Microscopes in warm and warm-damp climatic zones require special care in order to prevent the build up of fungus. See the chapter "Care of the Microscope" → p. 70, for additional instructions. Do not yet connect the microscope and peripherals to the power supply at this point! Caution! Electrical components must be placed at least 10 cm away from the wall and away from flammable substances. 18 5. Unpacking the Microscope Transport For shipping or transporting the microscope and its accessory components, the original packaging should be used. As a precaution to prevent damage from vibrations, the following components should be disassembled and packaged separately: • Unscrew the objectives. • Remove the condenser. • Remove the coaxial pinion. • Remove the lamp housings. • Disassemble the burner of 106 z lamp housing. • Remove all moving or loose parts. 19 6. Assembling the Microscope 6. Assembling the Microscope The microscope components are logically assembled in this order: • • • • • • • • • Stage Condenser Fluorescence* Intermediate systems* Tube Eyepieces Objectives Lamp housings with light sources Polarization* Only one commonly used screwdriver is necessary for assembly, which is included in the delivery package. The tool can be stored on a magnetic retainer on the underside of the stage at the right. When using intermediate systems and optical accessories, the sequence may vary. In this case, read Chapter "6.10 Optional Accessories" → p. 31. 6.1 Stage ! Caution: Before completing the stage, make sure no objectives are installed! Specimen Holder • Place the specimen holder on the stage and fasten it with the two screws (4.1). Coaxial Pinion Note: The coaxial pinion can be mounted on the leftor right-hand side. Fig. 4 Specimen stage with specimen holder 1 Lock screws for specimen holder 1 20 6. Assembling the Microscope • First, place the fine focus wheel on the side to which you intend to mount the coaxial pinion. The wheel is held in place magnetically (5.1). Ensure that the button snaps into place. Attach the other focus knob on the opposite side. • Loosen the lock screw (6.1) at the front lefthand side of the stage. • Slide the stage as far back as possible. • Attach the coaxial pinion with the screw (7.1). • Pull the stage forward and retighten the lock screw. Fig. 6 Underside of stage 1 Lock screw 1 Fig. 5 Focus wheel 1 Magnetic retainer for fine focus wheel Fig. 7 Coaxial pinion installation 1 Mounting screw for coaxial pinion 1 1 21 6. Assembling the Microscope 6.2 Condenser • If present, screw the condenser head into the condenser. • Using the condenser height adjuster (10.3), turn the condenser holder (fig. 9) completely downward. • Unscrew the clamping screw for the condenser (10.2) far enough so that the condenser can be inserted from the front. Note: The condenser must be centered before using the microscope. → Köhler illumination p. 34. Fig. 9 Condenser holder 1 Guiding notch • From the front, insert the condenser into the condenser holder as far as it will go. On the underside of the condenser, there is an orientation pin (8.1), which must be located in the guiding notch (9.1). • Pull the condenser’s clamping screw (10.2) so that the condenser is locked in place. • For Leica DM3000 only: Connect the condenser cable when using the motorized condenser. 1 Fig. 10 Condenser holder 1 Condenser centering 2 Clamping screw for condenser 3 Condenser height adjuster Fig. 8 Underside of condenser (example CL/PH) 1 Orientation pin 2 Auxiliary condenser lens LS (for Leica DM2000/3000) 1 1 3 3 1 2 1 2 22 6. Assembling the Microscope 6.3 Tube and Eyepieces 6.4 Objectives Note: For fluorescence applications, install the fluorescence illuminator first → p. 26. The tube is mounted to the stand either directly or with the use of intermediate modules. It is fastened in place with the side clamping screw (11.1). • Loosen the clamping screw (11.1) on the stand. • Insert the tube in the circular receptacle (dovetail ring). • Retighten the clamping screw (11.1). • The eyepieces are inserted into the eyepiece tubes on the tube. Fig. 11 Fastening the tube 1 Clamping screw Always only use Leica objectives of tube length × (infinity)! The standard thread is M25. The objectives should be arranged so that the magnification increases when the objective nosepiece is rotated clockwise. ! Attention: Lower the specimen stage as far as possible before assembling the objectives. Close vacant threads in the nosepiece with dust protection caps! For Leica DM3000 only: According to your equipment, the individual objectives have already been assigned certain positions at the factory. A listing of the exact positioning of the objectives is part of your supply (identification sheet). The front control panel (Fig. 12) features six black keys for direct selection of an objective. Adhesive labels with the corresponding objective magnification are attached below the objective keys. (Additional adhesive labels are supplied.) It is recommended to insert the objectives only after the connection to the power supply is established → p. 33. Fig. 12 Front control panel of Leica DM3000 1 Selecting an objective Toggle Adhesive labels with objective magnification 23 6. Assembling the Microscope 6.5 Light Source for the Transmitted Light Axis Caution! Caution! Be sure that the lamp housing is disconnected from the power supply. Unplug the power plug and the power supply during assembly. The lamp may still be hot! • Remove the lamp. Caution! Caution! Light sources pose a potential irradiation risk (glare, UV-radiation, IR-radiation). Therefore, lamps have to be operated in closed housings. Leica DM2000/3000 only: Replacing the Lamp of the Iintegrated Illumination The transmitted-light illumination with a lowvoltage tungsten halogen lamp (Fig. 13) is integrated in the base of the microscope and is accessible from the right-hand side. Fig. 13 Transmittedlight illumination in microscope base 1 Tungsten halogen lamp 2 Insert 1 24 • Remove the insert (13.2). 2 Do not remove the new lamp’s dust cover until you have installed the lamp. Avoid fingerprints on the lamp. • Insert the new lamp with the dust cover straight into the socket until it stops. Be sure that the lamp is inserted straight. • Remove the lamp’s dust cover. • Replace the insert (13.2). Fig. 14a Lamp housing 107/2 Releasing the fastening screw 6. Assembling the Microscope Leica DM2500 only: Replacing the Lamp in Lamp Housing 107/2 This lamp housing is used with a 12V 100W halogen lamp, which is already mounted. In case the lamp has to be removed: • Insert the new 12V 100W lamp (14b.1) with the dust cover straight into the socket until it stops. Be sure that the lamp is inserted straight. • Remove the lamp’s dust cover. • Remove the fastener screw on the housing (Fig. 14a). • Replace the housing and fasten it in place using the fastening screw. • Remove the housing by pulling it upward. • Place the lamp housing in the transmitted light lamp housing receptacle (Fig. 15) and fasten it with the clamping screw on the side. • Remove the lamp. Caution! Do not remove the new lamp’s dust cover until you have installed the lamp. Avoid fingerprints on the lamp. Fig. 15 Leica DM2500 1 Lamp housing for transmitted light Fig. 14b Lamp housing 107/2, opened 1 Mount with halogen lamp 2 Collector 1 1 2 25 6. Assembling the Microscope 6.6 Components for Fluorescence Applications 6.6.1 Fluorescence Illuminator The fluorescence illuminator is mounted in front of the tube. It is fastened in place with the side clamping screw. Inserting the Gas Discharge Lamps (Hg and Xe) into the 106 z Lamp Housing Hg and Xe lamps are powered by separate supply units. Read the separate instruction manual provided with these supply units. 6.6.2 106 z Lamp Housing Caution! Light sources pose a potential irradiation risk (glare, UV-radiation, IR-radiation). Therefore, lamps have to be operated in closed housings. Fig. 16 Assembly of fluorescence illuminator During assembly, always unplug the power supply unit of the 106 z lamp housing from its socket. During assembly work on xenon burners, always wear the supplied protective gloves and face protection (Fig. 17) (risk of explosion). Never touch the glass parts of the burner with bare hands. Never look directly into the beam path (blinding hazard). Fig. 17 Protective gloves and mask This 106 z lamp housing is used with various gas discharge lamps. Caution! Make sure to follow the instructions and safety notes of the lamp supplier. Before changing lamps allow at least 30 minutes for cooling down! 26 6. Assembling the Microscope The following gas discharge lamps may be used and require different supply units and lamp mounts (Fig. 19): Type Typical Bulb Life* 50 W high-pressure mercury burner (alternating current) 100 W high-pressure mercury burner (direct current) 100 W high-pressure mercury burner (direct current, type 103 W/2) 75 W High-pressure xenon burner (direct current) 100 hours 200 hours 300 hours 400 hours * Please regard the data sheets for the burners. • To open the 106 z lamp housing, unscrew the fastening screws (18.8) on the cover. • Remove the transport anchorage (red plastic rod in place of the burner) in the lamp mount. To do so, remove the lower clamp (19.1). Pull up the cooling element (19.3) and turn it to the side. Detach the lower clamp system (19.2) and remove the transport anchorage. • Install the burner in reverse order. Caution! Fig. 18 106 z lamp housing (on the side, open) 1 Cover raised 2 Collector 3 Gas discharge lamp in mount 4 Reflector (mirror) 5, 6, 7 Adjusting screw for x-y reflector 8 Fastening screw for lamp mount 9 Socket for contact plug 1 Hg 50 Burner: After installation, the labeling must be upright. If a glass melt nipple is present (19a.4), position it by turning the burner so that the nipple does not come in the way of the beam path later, but instead is positioned sideways. 4 2 5 Xe 75 Burner: Remove the burner’s dust cover (19b.5) after you have installed the burner. 3 6 7 8 9 8 27 6. Assembling the Microscope • Insert the lamp mount, with the burner installed, into the lamp housing and tighten it with the screws (18.8). Fig. 20 Mounting the 106 z lamp housing 1 Lamp housing receptacle • Close the lamp housing and retighten the screws. • Place the lamp housing in the incident light lamp housing receptacle (20.1) and fasten it with the clamping screw on the side. • Connect the lamp housing to the external power supply. Fig. 19 a-c Lamp mounts for gas discharge lamps 1 Upper clamping system 2 Lower clamping system 3 Cooling element 4 Nipple of the mercury 50 burner 5 Dust cover of the xenon 75 burner Hg 50 a 3 1 4 2 Xe 75 b 1 Hg 100 3 1 5 2 2 28 c 3 6. Assembling the Microscope 6.6.3 Equipping the Fluorescence Turret Disk Insert the filter and reflector cubes in the following manner: 1 2 3 • Remove the Analyzer (Fig. 23.1). • Remove the front cover (Fig. 23.2) by pulling it toward the front. • Insert the filter or reflector cube into the mounting in front of you. To do so, place the filter or reflector cube on the right side and press it to the left into the mounting. Fig. 23 Fluorescence Axis 1 Analyzer 2 Front Cover 3 Labels Note: The numbering is located directly below the holder. • Apply the included adhesive labels (Fig. 23.3) corresponding to the installed parts to the front of the fluorescence illuminator. • When all filters and reflector cubes have been inserted, close the front cover plate again. Ensure that the cover snaps into place. Fig. 21 Filter cube front side Fig. 22 Fig. 24 Fluorescence Axis without Front Cover Fig. 25 Mounting the Filter cube Filter cube back side 29 6. Assembling the Microscope 6.7 Analyzer and Polarizer Polarizer Analyzer • Attach the polarizer holder to the underside of the condenser holder with the left clamp screw (26.2). Remove the flip-out blue filter if required. • Remove the plug cap on the left side of the stand. • Insert the analyzer into the receptacle until it latches in place (26.1). When using the Pol intermediate tube* or the TL analyzer slot*: • Push the polarizer with the labelled side facing upward into the lower opening. Alternatively for Leica DM2000/3000: • Remove the plug cap on the left side. • Raise the condenser to its upper stop position. • Insert the analyzer into the receptacle until it latches in place. • Remove the DLF filter magazine from the base if present. • Press the polarizer holder in place (Fig. 27). • Push the polarizer with the labelled side facing upward into the lower opening. Fig. 26 Assembly of polarizer holder 1 Analyzer slot 2 Clamping screw 1 2 30 Fig. 27 Filter holder with 2 positions for Leica DM2000/3000 6. Assembling the Microscope 6.8 Lambda Plate Compensator* 6.10 Optional Accessories • Raise the condenser to it’s upper stop position. Camera • Remove the DLF filter magazine from the base if present. • Attach the lambda plate compensator to the base. A camera can be connected via an adapter. • Attach the adapter to the top port of the tube and fasten it tightly with the side clamping screw. • Screw on the camera. 6.9 DIC Prisms The condenser prisms have already been mounted at the factory. To adjust the condenser prisms during first use → p. 37. To retrofit DIC prisms, see → p. 75. Note: The size of the camera chip and the mounting system (B-mount, C-mount, etc.) must be considered when choosing an adapter. See table. Recorded picture diagonal in mm for 1 inch 2/3 inch 1/2 inch 1/3 inch camera camera camera camera Without zoom magnification, for 1-chip cameras only: C-mount adapter 1 x HC 16 C-mount adapter 0.63 x HC C-mount adapter 0.5 x HC C-mount adapter 0.35 x HC - 8 12.7 16 - 6 9.5 12 17.1 With zoom magnification (vario TV adapter) for 1-3 chip cameras: C-mount, 0.32-1.6 x HC B-mount (ENG), 0.5-2.4 x HC (1/2-inch) +) from zoom factor 0.42 x only! 19+)-5 16-3.3 18-3.8 - Without zoom magnification, for 1-3 chip cameras: C-mount adapter 1 x B-mount adapter 1 x B-mount adapter 1.25 x F-mount adapter 1 x F-mount adapter 1.25 x Plus (Essential Requirement): TV optics 0.5 x HC 16 16 16 - 12 12 12 - - 11 17.5 - 17.5 17.5 31 6. Assembling the Microscope Calculation of the magnification on the monitor The magnification MTV on the monitor can be calculated with the following formula or measured with a stage micrometer and a cm scale: MTV = Objective magnification x factor of magnification changer*x TV adapter magnification x monitor diameter chip diameter of camera Ergomodule For raising the eye level of the tube opening, the 30 mm or 60 ergomodule mm may be used. It is fastened in place with the side clamping screw. Ergolift A base for the stand featuring adjuster wheels for the base’s height and angle is available to ensure an optimal working position. Fig. 28 Magnification Changer Optionally, a magnification changer (fig. 28) can be used, which is manually operated. On the knurled ring, the following magnification factors can be set: 1x; 1.5x; 2x Viewing Attachments Viewing attachments featuring illuminated pointers are available for groups of up to 20 viewers. The support (29.3) must be aligned precisely. The fade-in arrow can be moved in x and y direction (move the lever vertically or pull out/ push in) (29.1) If this lever is rotated, the color of the arrow can be changed (red/yellow). Use the brightness control (29.2) to adjust the brightness of the arrow. Fig. 29 Viewing attachment (here with Leica DM1000) 1 Movement of light pointer in x and y direction, and switchover of color filter 2 Brightness control 3 Adjustment of arm support The external power supply (illuminated arrow) is not illustrated. Magnification changer 1 2 3 32 6. Assembling the Microscope Tracing device 6.11 Connection to the Power Supply The tracing device L3/20 (fig. 30) allows an optical overlay of large objects (next to the microscope) on the microscope image. This makes it easy to draw specimens by tracing their outlines or superimposing scales. • After completing the assembly work, connect the stand to the power supply using the power cable supplied (Fig. 31a,b.1). Foot switch for Leica DM3000 A double foot switch can be connected to the Leica DM3000 stand as an option to swivel in the objectives. The connection is located on the rear side of the stand (31b.2). • When using the lamp housing or the external power supply unit, connect them to the power supply, too. For Leica DM3000: If necessary, insert the objectives after switching on the microscope. Adhesive labels with the corresponding objective magnification are attached below the black objective keys on the front control panel. Pressing the corresponding key approaches the respective objective position. Fig. 30 Tracing device 1 Shutter Note: 1 Fig. 31a Rear side of the Leica DM2000/DM2500 stand 1 Power supply connection The connection of a PC to the Leica DM3000 (31b.3) is only required if new objectives must be taught in or a reassignment of the lateral function keys must be performed. This is only possible using the Leica DMControl software. Fig. 31b Rear side of Leica DM3000 stand 1 Power supply connection 2 Foot switch connection 3 PC connection 1 2 3 1 33 7. Start-up 7. Start-up 7.2 Köhler Illumination Note: Unless otherwise specified, the Leica DM3000 microscope is subject to the same operating instructions as the Leica DM2000 microscope. 7.1 Switching on the Microscope • Switch on the microscope with the on/off switch (32.1, 33.5). Caution! After turning on the gas discharge lamp, the burner must be immediately adjusted. Therefore, do not turn on the power supply unit yet. First, work in transmitted light in order to familiarize yourself with the microscope’s controls. The condenser is also pre-adjusted in the factory. However, in some cases it may be necessary to re-adjust the condenser. Therefore, check the condenser centering. The following procedure is provided for transmitted light-bright field illumination. • If present: click the condenser disk* into the BF position. • If present: pull the light ring slide* out of the condenser. Fig. 32 Leica DM2000 1 On/Off switch 2 Focus wheel 3 Stage positioning 1 34 2 3 7. Start-up • Select an objective with moderate magnification (10x-20x). For condensers with movable condenser heads: Swing in the condenser top. (The condenser top is swung out for objective magnifications < 10x.) For Leica DM3000: To swing in the objective, press the corresponding objective key on the front control panel. If the microscope is equipped with a motorized condenser, the condenser head is automatically swung in or out depending upon the objective magnification. • Insert the specimen in the stage’s specimen holder. • Set the light intensity using the brightness control (33.2, 34.2). • Close the field diaphragm (33.4, 34.3) until the edge of the diaphragm appears in the specimen plane (34a). • Using the condenser height adjuster (33.3, 34.1), adjust the condenser until the edge of the field diaphragm appears in sharp relief. • If the image does not appear in the middle of the field of view (35c), the condenser must be moved into the middle of the field of view with the help of the two centering bolts (34.4). The tool required for this purpose is magnetically attached to the underside of the stage. • Focus on the specimen using the focus wheel (32.2). Fig. 33 Leica DM2500 1 Focus wheel 2 Brightness control 3 Condenser height adjuster 4 Field diaphragm control 5 On/off switch 6 Condenser centering 7 Stage positioning Fig. 34 Leica DM2500 1 Condenser height adjuster 2 Brightness control 3 Field diaphragm 4 Condenser centering 4 7 1 2 3 4 5 6 12 3 35 7. Start-up • Open the field diaphragm just enough for it to disappear from the field of view (35d). Note: The condenser height adjustment depends on the thickness of the specimen. It may be adjusted for different specimens. 7.3 Checking Phase Contrast Rings If your microscope is equipped for the use of phase contrast, the light rings that fit the objectives are built into the condenser. The light rings are already centered in the factory. However, the centering should be rechecked. Note: A light ring slide which is inserted into the side of the condenser is used for condensers without condenser disks. Centering is not required in this case. Fig. 35 Köhler Illumination a Field diaphragm not focused, not centered b Field diaphragm focused, but not centered c Field diaphragm focused and centered Diameter shown here is too small d Field diameter (light) = Field diameter (view) (Köhler Illumination) Note: a b c d Fig. 36 Focusing Telescope 1 Adjustable eye lens 2 Clamping ring for fixing the focus position 1 When swiveling in a suitable objective for phase contrast, the corresponding light ring must be chosen. The objective engraving (e.g. PH 1) indicates the corresponding light ring (e.g. 1). Fig. 37 Phase Contrast Centering Procedure PH=phase contrast ring, LR=light ring a Condenser in brightfield (BF) position b Condenser in phase contrast (PH) position Light ring (LR) not centered c Light ring and phase ring centered a b c 2 PH 36 LR 7. Start-up • In the place of an eyepiece, insert the focusing telescope (Fig. 36) into the observation tube. • Swivel in the phase contrast objective with the lowest magnification. • Focus on the specimen with the focus wheel. • Focus the ring structure (37.a) by slightly loosening the clamping ring (36.2) and moving the eye lens (36.1). • Retighten the clamping ring. • Select the corresponding ring diaphragm (light ring) in the condenser. • If the light ring and the phase ring are not shown as arranged in Fig. 37.c, the light ring must be centered. • Turn the centering screws until the dark ring (phase ring in the objective) is congruent with the slightly narrower bright ring (light ring in condenser) (37c). • Repeat the process for all other light rings. • Remove the centering centering procedure. keys after the 7.4 Adjustment of Condenser Prisms If the equipment was delivered together, the condenser prisms will already have been adjusted at the factory, but it advisable to check the adjustment from time to time, especially after transport. • Pull out the objective prism slide (39.1) fully or partway. • Insert the centering screws into the openings provided at the rear of the condenser (38.1). Fig. 39 1 Objective prism slide Fig. 38 Light ring centering (i.e.: condenser UCA/P) 1 Centering keys 1 1 1 37 7. Start-up • Swivel in a suitable objective and focus on the specimen. The dark stripe should be in the center of the brighter circular area. If not, proceed as follows: • If necessary, swing in the condenser top. The condenser top is swung out for objective magnifications < 10x. • Make sure that the right-hand centering screw for the light rings is not turned too far inward or it may obstruct the movement of the prism with the left-hand key. • Set the Köhler illumination (→ p. 34). • In place of an eyepiece, insert the focusing telescope (Fig. 36) into the observation tube. • Engage the condenser-side prisms one after the other and focus the telescope on the dark diagonal compensation stripe (40). by slightly loosening the clamping ring (36.2) and moving the eye lens (36.1). The compensator must be inactive, i.e. the engraving λ must be on the lower side of the analyzer or the λ and λ/4 compensator must be removed. • Push in the left-hand centering key on the back of the condenser until it clicks into position and rotate it until the stripe is in the center of the circle. The right-hand key is not required. Fig. 40 Objective pupil with correctly centered compensation stripe. 38 7. Start-up 7.5 Adjusting the Light Sources Centering is only required when using the 106 z lamp housing. • When a supply unit is used, it is turned on first. Caution! Never look directly into the beam path! Caution! Light sources pose a potential irradiation risk (glare, UV-radiation, IR-radiation). • Put a piece of paper on the specimen stage and roughly focus the surface with a dry objective of low to medium magnification. • Set the field and aperture diaphragms roughly at the center position. • With a felt tip or ballpoint pen, make a marking at any position on the paper and slide it into the small illuminated field. • Turn a vacant nosepiece position into the light path or remove the objective. The light source will then be imaged onto the paper. While observing the light source, the lamp is adjusted as follows. For the 106 z lamp housing, the direct arc image (for gas discharge lamps) and its mirror image are focused separately and adjusted to each other. • Move the filter system or reflector into the light path. • Open the shutter and remove any diffusing screens* from the light path. Fig. 41 106 z lamp housing 1 Lamp height adjustment 2,4 Mirror image height and side adjustment 3 Focusing the reflector 5 Lamp side adjustment 6 Collector (focusing of the lamp image) 5 1 6 2 3 4 39 7. Start-up Centering the Hg 50 W Mercury Lamp Fig. 42 Direct arc image focused but decentered (in reality, the image is less focused) Fig. 43 Direct arc image in target position (in reality, the image is less focused) Fig. 44 Direct arc image and mirror image in target position (in reality, the image is less focused) • In the adjustment window, you see the direct arc image and the mirror image, which in most cases are not aligned. • Focus the direct image with the collector (41.6). • Use the adjusting buttons on the rear side of the lamp housing (41.2, 41.4) to pivot the arc’s mirror image to the side or completely out of the beam path. The lamp filament’s focused image remains visible (Fig. 42). • Use the adjusting buttons (41.1) and (41.5) to place the direct arc image into right or left on an imaginary center line of the centering plane (Fig. 43). • Then pivot the arc’s mirror image with the adjusting knobs (41.2 and 4) and focus it using the reflector (41.3). • Use the adjusting knobs (41.2 and 4) to orient the mirror image symmetrically to the direct image (Fig. 44). • Defocus the image with the collector knob (41.6) until the arc image and mirror image are no longer recognizable and the image is homogeneously illuminated. 40 7. Start-up Centering the Hg 100 W and Xe 75 W Mercury Lamps Fig. 45 Direct arc image focused but not centered (in reality, the image is less focused) Fig. 46 Direct arc image in target position (in reality, the image is less focused) Fig. 47 Direct arc image and mirror image in target position (in reality, the image is less focused) • On the paper, you see the direct arc image and the mirror image, which in most cases are not aligned. • Focus the direct image with the collector (41.6). • Use the adjusting buttons to pivot the arc’s mirror image on the rear side of the lamp housing (41.2,41.4) to the side or completely out of the beam path. The arc’s focused image remains visible (Fig. 45). • Use the adjusting buttons (41.1 and 5) to place the direct arc image in the middle of the centering plane, whereby the bright tip of the arc, the focal spot, should lie slightly outside the center (Fig. 46). • Then pivot the arc’s mirror image with the adjusting knobs (41.2) and (41.4) and focus it using the reflector (41.3). • Use the adjusting knobs (41.2 and 41.4) to orient the mirror image symmetrically to the direct image (Fig. 47). The V-shaped irradiation of the direct image and mirror image arcs can be superimposed. Caution! The bright tips of the arcs, the focal spots, must never be projected onto each other, as this results in a danger of explosion by overheating. 41 7. Start-up Caution: In older lamps, the structure of the arc is no longer clearly recognizable. The image is then more like that of a HG 50 lamp. The image and mirror image can no longer be superimposed exactly. In this case, align both images. • Using the collector, defocus the image with the knob (41.6) until the arc image and mirror image are no longer recognizable and the image is homogeneously illuminated. 42 8. Operation 8. Operation 8.1 Switching On 8.2 Stages and Object Displacement When using a gas discharge lamp, the external supply unit must be turned on separately. Lengthening the Coaxial Pinion Switch on the microscope with the on/off switch (48.1, for Leica DM2500 at the opposite stand side). • For lengthening, pull the lower grip (49b.1) downward. Repeat with the upper grip (49b.2). Torque Adjustment The torque for x and y can be individually adjusted using two knurled rings (49b.2, 49b.4). Fig. 48 1 On/off switch 2 Coarse focusing 3 Fine focusing 4 Stage positioning 5 Stage lock screw 6 Coaxial pinion mounting screw Fig. 49a Standard coaxial pinion, b coaxial pinion with height and torque adjustment 1 Object displacement (Y-direction) 2 Torque adjuster (X-direction) 3 Object displacement (X-direction) 4 Torque adjuster (Y-direction) 6 a b 4 5 3 1 1 2 3 3 2 1 4 43 8. Operation Right-/Left-hand Operation 8.3 Focusing The coaxial pinion can be attached to either side of the stage. (Also see Assembly, p. 20). To change the side, follow these steps: Coarse and Fine Focusing • Loosen the lock screw (48.5) at the bottom left-hand side of the stage. The necessary tool is attached to the bottom of the stage on the right-hand side. ! Caution: Coarse and fine focusing wheels are located on either side of the stand (Fig. 50 and 51). The special design of the flat fine focus wheel (Fig. 51.3) allows users to enclose the coaxial pinion in their hands while operating the fine focus with one finger. The flat wheel should therefore be mounted on the appropriate side. See right-/left-hand operation of the stage. The condenser must be lowered! Height Adjustment of the Focusing Wheels • Slide the stage all the way back. • Release the screw (50.6) on the coaxial pinion and pull the pinion out. • Defocus the image by moving the stage down with a full turn of the coarse focus wheel (50.2, 51.2). • Place the fine focus wheel on the side to which you intend to mount the coaxial pinion. The wheel is held in place magnetically. Ensure that the button snaps into place. Attach the other focus knob on the opposite side. • Fasten the coaxial pinion to the other side of the stage by retightening the appropriate screw. • Return the stage to the starting position and retighten the lock screw. After installation of the stage control, move object guide all the way to the left side of the instrument. Keep turning when guide has reached the end of travel until a click noise is heard. Fig. 50 Focus knob with scale 1 Adjusting the torque 2 Coarse focusing 3 Fine focusing • Readjust the condenser. 3 44 2 1 8. Operation • Grasp the right-hand and left-hand focus knobs at the same time and press the knobs gently upward or downward into the desired position. • Refocus the image. Setting the Focus Stop The current position can be set as the focus stop by locking the knurled wheel (51.1) at the right-hand focus knob. It will then no longer be possible to travel past that position. To set the stop, turn the knurled wheel clockwise. Turning it in the opposite direction releases the wheel. Speed Switch (optional) Fine focusing can be adjusted in two speeds. To switch speeds, press the left focus wheel to the right or vice versa. Setting the Torque The torque of the focus drive can be adjusted using the knurled wheel (50.1) at the left focus knob. ! Caution: Ensure that the action is not too light. Otherwise, the stage can slip downward unintentionally. ! When adjusting the focus knobs on DM3000 (height adjustment, torque and focus stop adjustment), please do not put the finger between the focus knobs and the side button mount (danger of squeezing the fingers). Fig. 51 Focus wheel with flat focus knob 1 Focus stop 2 Coarse focusing 3 Fine focusing 1 2 Caution: 3 45 8. Operation 8.4 Tubes Adjusting the Eyepiece Section to the Arm Length • On the AET22 tube, the eyepieces can be extended up to 30 mm (Fig. 53). Note: Close any unused tube openings, as otherwise stray light can interfere with observation. Adjusting the Viewing Distance • Adjust the viewing distances of the eyepieces so that a congruent total image is seen (Fig. 52). Adjusting the Viewing Angle • For the HC LVB 0/4/4 and HC -/0/4 ergonomy tubes, the viewing angle can be adjusted by tilting the binocular viewer. Ergotube (long, swivelable): 0° - 35° Ergotube (short, swivelable): 7.5° - 32.5° Beam Splitting in Photo Tubes EDT22 tube: The beam splitting between the observation and documentation outputs has a definite presetting (50%:50%). BDT25+ tube: The beam splitting is set manually by pulling out a control bar. Control Bar VIS 50/50 PHOTO Observation 100% 50% 0% • For the AET22 and EDT22 ergotubes, the viewing angle can be adjusted by tilting the binocular viewer in the range of 5° - 32° (Fig. 53). Fig. 52 Tube setting ∩ Personal eyebase settings 1 Scale (mm), 2 Intermediate module*, in illustration: Ergo module 1 ∩ 2 46 Fig. 53 With AET22 tube individual adjustments Photo 0% 50% 100% 8. Operation HC L 2TU tube: The beam splitting is set manually by pulling out a control bar. Control Bar VIS PHOTO Observation 100% 0% Photo 0% 100% 8.5 Eyepieces Note: The eyepiece’s aperture protector must be removed or folded back, during microscopy while wearing eyeglasses. We recommend that users take off glasses with bifocal or progressive-addition lenses when working with the microscope. • For the adjustable tubes with documentation output, choose the 100% VIS position. Eyepieces with Inlaid Reticle • Focus the reticle by adjusting the eye lens. • Focus on the object through this eyepiece. Fig. 54 Tube range HC L 1 Binocular observation tube HC LB 0/3/4 2 Ergonomy tube HC LVB 0/4/4, binocular, viewing angle 0-35° additional ergotube (short) HC -/0/4, swivelable 7.5°-32.5° 3 Trinocular tube H L1T 4/5/7, with fixed beamsplitter (50% / 50%) 4 HC L1VT 0/4/4 like 3, but with adjustable viewing angle of 0-35° 5 Trinocular tube HC L3TP 4/5/7 with 3 switching positions 6 Photo adapter, with 2 exits (50% / 50%) 7 Photo TV exit 1 3 2 4 5 6 • Then, close that eye and focus on the object by adjusting only the second ocular. Correction for Vision Problems • With your right eye, look through the right eyepiece and bring the specimen into sharp focus. • Then, with your left eye, view the same specimen and rotate the left eyepiece tube until the object is brought into sharp focus. Do not use the focus dial. 7 47 8. Operation 8.6 Objectives Changing Objectives For Leica DM2000 and DM2500, the objectives are manually swung into the beam path. Be sure that the nosepiece turret locks into place. For Leica DM3000, the operation is carried out via the front control panel and via the lateral function keys → p. 49. • For immersion objectives use the appropriate immersion medium. OIL: only use optical immersion oil according to DIN/ISO standards. Cleaning → p. 70. W: Water immersion. IMM: Universal objective for water, glycerol, oil immersion. Caution! Note: For Leica DM3000, the light intensity is automatically adjusted after the objective change. ↔ Fig. 55a Immersion objective (released) 48 Follow safety instructions for immersion oil! Note: For lockable immersion objectives, lock these by pushing the front part upward until it stops (approx. 2 mm). Then, after a gentle turning motion to the right, the objective is locked (Fig. 55b). For objectives with corrective mounts, turn the knurl to adjust the objective to the thickness of the cover glass. Fig. 55b Immersion objective (locked) ↔ When you rotate the objective into position, the settings for • field diaphragm → p. 54 • aperture diaphragm → p. 53 • light intensity → p. 52 should be checked. 8. Operation 8.7 The function keys for Leica DM3000 The front control panel features six black keys for direct selection of an objective. Adhesive labels with the corresponding objective magnification can be attached below the objective keys. The objective key for objective 1, which is generally the objective with the lowest magnification, is located on the far left. The assignment of the keys to the objective is carried out at the factory and is dependent upon the microscope equipment. The gray toggle key on the far right side is used to switch modes. In toggle mode, pressing one of the lateral function keys switches back and forth between previously learned magnifications. The factory-set objectives can easily be customized in the teach-in mode. Green or yellow diodes indicate the current mode and/or the objective currently located in the beam path. Selecting an objective Toggle Adhesive labels with objective magnification In standard mode, the two function keys on the right or the left side of the stand (Fig. 56.2) are used to sequentially approach the objective magnifications. Pressing the upper or lower keys causes the objective turret to turn clockwise or counterclockwise. The key assignment on the right and left side of the stand is identical in the standard configuration. (See the special function of the lateral function keys → p. 51.) Fig. 56 Leica DM3000 1 Front control panel 2 Lateral function keys 1 2 49 8. Operation Standard mode Toggle mode The toggle key is off. The key for the current objective lights green. The lateral function keys can be used to sequentially swing in the objectives. If the lateral function key is pressed twice in succession, one objective is skipped and the subsequent objective is approached. The key belonging to this objective now lights green. Based on the standard mode, a brief push of the toggle key switches to the toggle mode. The toggle key now lights green. The lower of the previously learned magnifications is selected and the corresponding key also lights green. The key of the second learned objective lights yellow. Toggle Standard mode active and objective 1 swung in Toggle Toggle mode active, change between objective 2 and 4 possible, objective 2 swung in The lateral function keys can now be used to toggle between these two objectives. In this case, it does not matter which one of the lateral function keys is pressed. When changing to the other objective, the color display also changes so that the key of the current objective always lights green and the other objective key lights yellow. Pressing the toggle key again switches back to the standard mode. The standard mode is also activated if one of the objective keys is pressed. The corresponding objective is then approached and the objectives learned for the toggle mode are retained. 50 8. Operation Teach-in mode The current settings are retained until the teach-in mode is activated again. Hold the toggle key pressed. All keys go out. Hold the toggle key pressed Toggle Toggle Teach-in mode finished, toggle mode active, objective 1 swung in Teach-in mode active While holding the toggle key pressed, select the two objectives desired for the toggle mode by pressing the corresponding keys. These two keys now light up yellow. Hold the toggle key pressed Objective selection via foot switch A double foot switch can be connected to the stand as an option to swing in the objectives. The connection is located on the rear side of the stand. The left foot switch has the same function as the lower lateral function key, the right foot switch corresponds to the upper lateral function key. Toggle Teach-in mode active, objective 1 and 3 selected for the toggle mode Release the toggle key again. The toggle mode is now active. The objective with the lower magnification is approached and the corresponding key lights green. The key of the second objective continues to light yellow. Special function of the lateral function keys For the motorized condenser, the condenser head is automatically swung out for objective magnifications < 10x and swung in for magnifications > 10x. For special applications, the swing-out and swing-in of the condenser head can be assigned to the right or left lateral function keys so that the position of the condenser head can be set by the user. Reassignment of the function keys is only possible via Leica DMControl software and requires the connection of a PC. 51 8. Operation 8.8 Light Sources Note: Transmitted Light The For Leica DM2000: • Adjust the brightness with the dial (58.1). HI PLAN xx SL and HI PLAN CY xx SL (Synchronized Light) objective lines permit objectives to be changed without adjusting the light intensity. For Leica DM3000: Fluorescence • For each objective, the light intensity is preset at the factory. This value can be changed by using the handwheel (parallel to 57.1 for the DM2000). The new value is stored for the respective objective and automatically set again if this objective is selected. • Switch on the lamp at the external power unit. • Adjust the brightness with the dial (57.1). For Leica DM2500: Caution! Keep the lamp housing at least 10 cm away from the wall, curtains, wallpaper, books and other combustible objects! Fire Hazard! The numbers on the dial are not absolute values, but are intended to enable reproducible settings. The maximum value is about 12 V, the marking point of a color temperature of approx. 3200 K. Please read the separate documentation for the supply unit. Fig. 57 Leica DM2000 1 Brightness control Fig. 58 Leica DM2500 1 Brightness control 2 Field diaphragm control 1 52 1 2 8. Operation 8.9 Aperture Diaphragm The aperture diaphragm (59.3) determines the resolution, depth of field and contast of the microscope image. The best resolution is obtained when the apertures of the objective and the condenser are roughly the same. When the aperture diaphragm is stopped down to be smaller than the objective aperture, resolving power is reduced, but the contrast is enhanced. A noticeable reduction in the resolving power is observed when the aperture diaphragm is stopped down to less than 0.6x of the objective aperture and should be avoided where possible. In polarization microscopy, stopping down the aperture diaphragm generally results in more intense colors. The aperture diaphragm is set according to the viewer’s subjective impression of the image, the scale on the dial just serves to allow reproducible settings and does not represent absolute aperture values. Color-coded Condenser Fig. 59 CL/PH condenser 1 Slot for light rings, etc. 2 Color coding 3 Aperture diaphragm 4 Filter holder 5 Field diaphragm The color markings on the condenser (59.2) correspond to the color rings of the objectives. When changing objectives, a suitable aperture diaphragm setting can be found by setting it to the matching color marking (corresponds to 2/3 of the objective-side aperture). Attention: 1 2 3 4 The aperture diaphragm in the illumination light path is not for setting the image brightness. Only the rotary brightness adjustment knob or the neutral density filter should be used for this. An aperture diaphragm in the objective is normally fully opened. The reduction in image brightness caused by stopping down results in: Greater depth of field Less coverglass sensitivity Suitability for darkfield Change in contrast 5 53 8. Operation 8.10 Field Diaphragm The field diaphragm (58.2, 59.5) protects the specimen from unnecessary warming and keeps all light not required for image formation away from the object to enable greater contrast. It is therefore only opened just wide enough to illuminate the viewed or photographed object field. A change in magnification therefore always necessitates matching of the field diaphragm. 54 9. Contrast Methods 9. Contrast Methods 9.1 Transmitted Light Objective Magnification 2.5x* The CL/PH and CLP/PH condensers can be used alone starting at 4x magnification. When using a diffuser slider*, 2.5x magnification is also possible; not when using polarization, however. The lens can only be used up to an objective magnification of max. 20x. Exact Köhler illumination can no longer be obtained! The Achr.Apl.0.9 (P) condenser can be used alone starting at 4x magnification. With the condenser head swung out, 2.5x objective magnification is possible without a diffuse, with the head swung in, the diffuser must be in place (max. eyepiece field number 22). Note: The Leica DM2500 with objectives < 10x requires the diffuser slider. Objective Magnifications 1.25x* and 1.6x for Leica DM2500 The UCL and UCLP condensers can also be used alone starting at 4x magnification. The Leica DM2500 with objectives < 10x requires the adapter lens (diffuser). When using an adapter lens* (in the condenser disk), 2.5 x magnification is also possible. Before using the adapter lens, set Köhler illumination (→ p. 34) with the 4x or 10x objective. Switch over to objective 2.5x, engage the lens, open the aperture diaphragm as far as the stop and narrow the field diaphragm. In case of arc-shaped vignetting, center the lens: Insert both centering keys into the condenser at an angle from the back and adjust until the asymmetrical vignetting disappears. Remove the centering keys and open the field diaphragm. The UCA/P and Achr.Apl.0.9 (P) condensers can be used alone starting at 1.25x magnification. The condenser head is switched off for objective magnifications from 1.25x to 5x and switched on from 10x upward. Use the 106z lamp housing to improve the illumination. To center the lamp, follow these steps: (for information on the controls, see p. 39) • Swing the condenser head in and switch over to the 1.25x objective. • Display the lamp filament as a square in the visual field by focusing the collector. • Center the image in relation to the objective. 55 9. Contrast Methods Magnifications of 1.6x and 2.5x Fig. 60 are also possible with the CL/PH or CLP/PH, UCL or UCLP condensers if the condenser is removed completely. The field diaphragm then takes over the function of the aperture diaphragm. Leica DM2000/3000 only: DLF filter magazine for attachment to microscope base Filter holders Note: If the microscope is equipped for polarization, the analyzer and polarizer as well as the lambda plate compensator must be removed or swung out when using other contrast methods. Leica DM2000/3000 only: Filter holder with 2 positions or 1 position for attachment to microscope base 9.1.1 Brightfield • If present: click the condenser disk* into the BF position. • If present: pull the light ring slide* out of the condenser. • If present: switch the fluorescence illuminator into an empty position or filter system A. Filter holder for screw attachment on condenser • Insert a transmitted light specimen. • Rotate an appropriate objective into place. • Movable condenser heads: The condenser top is swung out for objective magnifications < 10x. • Bring the image into focus using the focus dial and set the brightness. • For an optimal field diaphragm setting, check the Köhler illumination (→ p. 34). • Use suitable transmitted light filters as applicable (Fig. 60). 56 Leica DM2500 only: Adapter with filter holders between stand and LH 107/2 9. Contrast Methods 9.1.2 Phase Contrast 9.1.3 Darkfield • Insert a transmitted light specimen. • Insert a transmitted light specimen. • Rotate an appropriate objective into place. Objectives that are suitable for phase contrast are engraved with PH. • Rotate an appropriate objective into place. • Bring the image into focus using the focus dial and set the brightness. • For an optimal field diaphragm setting, check the Köhler illumination (→ p. 34). • Open the aperture diaphragm completely (position PH). • Condensers UCL/UCLP and UCA/P: Set the light ring corresponding to the objective on the condenser disk. Example: Light ring 1 belongs to the objective with the engraving PH 1. Condensers CL/PH, CLP/PH and APL. ACHR.0.9 (P): Use the light ring slide. Note: Condensers UCL/UCLP and UCA/P: Light rings must be centered (→ p. 36). • Bring the image into focus using the focus dial and set the brightness. • Condenser UCA/P and UCL: Click the condenser disk into the BF position. Condensers CL/PH, CLP/PH und APL. ACHR.0.9 (P): Pull out the DF light ring slide as far as the stop. Check the Köhler illumination (→ p. 34). • Open the aperture diaphragm completely (position PH). • Condenser UCA/P and UCL: Click the condenser disk into the DF position. Condensers CL/PH, CLP/PH und APL. ACHR.0.9 (P): Insert the DF light ring slide as far as the stop. Note: Condensers UCL and UCA/P: The DF light ring must be centered (→ p. 36). 57 9. Contrast Methods Special darkfield condensers are available for the DM2000, DM2500 and DM3000 (Fig. 61). The application potential of the DF condensers depends on the aperture of the objective in use. For objectives with a built-in iris diaphragm, the aperture can be adapted. DF Condenser D 0.80 - 0.95 D 1.20 - 1.44 OIL Max. Objective Aperture 0.75 1.10 9.1.4 Oblique Illumination • First adjust transmitted light darkfield. • To obtain a relief-like contrast: Condenser UCA/P: Rotate condenser disk slightly out of the DF position. Condensers CL/PH, CLP/PH und APL. ACHR.0.9 (P): Push DF slide in part way out of the DF position. • Swing the lambda plate of the lambda plate compensator out if necessary. • Insert a specimen and rotate an appropriate objective into place. • Bring the image into focus and set the Köhler illumination (→ p. 31). • Insert the analyzer as far as the clickstop into the left side of the stand (fig. 64). The engraving λ must be on the underside of the stand. When using the Pol intermediate tube*: Switch on the analyzer. • Push the polarizer with the labelled side facing upward into the lower opening. Fig. 62 Analyzer/polarizer 1 Analyzer slot 2 Polarizer mount Fig. 61 Darkfield condensers 1 Upper part (dry) 2 Lower part 3 Orientation pin 4 Upper part (oil immersion) 1 9.1.5 Polarization a b 1 4 2 3 2 58 9. Contrast Methods ! 9.1.6 Differential Interference Contrast Attention! Always use the polarizer with the labeled side facing upward, as otherwise the integrated heat protection filter is ineffective and the special polarizer will become useless (discolouring!). • Bring the polarizer and analyzer into cross position until they reach maximum darkness. • Remove the object or find an empty area of the specimen. • Push the analyzer into the stand as far as the 2nd clickstop or switch on the module. • Remove compensators from the light path. • Rotate the polarizer until you observe the maximum extinction position in the eyepiece (Fig. 63). • Fix the cross position thus determined with the clamping screw. • If necessary: Insert the λ or λ/4 compensator into the filter holder integrated in the condenser holder and rotate to the left, roughly as far as the stop. CLP/PH condenser: Insert the λ or λ/4 compensator in the slot on the side of the condenser. Condensers UCLP and UCA/P: Rotate the condenser disk into position λ or λ/4. Alternative: 4x20 mm compensators can be pushed into the compensator slot. • Insert a specimen, rotate a suitable objective into place and bring the image into focus. • Turn the disk in the UCA/P condenser to the brightfield position. • If present: switch the fluorescence illuminator into an empty position or filter system A. • Pull the objective prism slide out of the tube slit. • Set the Köhler illumination exactly (→⊇ p. 34). • Remove the specimen or find an empty area of the specimen. • Bring the polarizer and analyzer into cross position until they reach maximum darkness, as described at 9.1.5 Polarization. Fig. 63 Crossing the polarizers when observing through a focusing telescope or Bertrand lens, high-aperture Pol objective a exactly crossed, b not exactly crossed Pos. a cannot be set if there is strain in the condenser or objective, Pos. b is adequate for DIC and polarization contrast. 59 9. Contrast Methods For polarizer ICT/P*: Turn the polarizer on the underside of the condenser in the light path. Make sure that the red index point on the front of the polarizer is aligned with 0. • Insert the objective prism slide (fig. 64) into the tube slit. The code letter, e.g. D, must coincide with the code letter in the objective engraving. The number after the code letter only specifies one variant, e.g. D1 = also applies for pupil position D. • Select the condenser side prism that corresponds to the magnification of the objective used, e.g. pos. 20/40 for 20x and 40x objectives. • For fine adjustment use the knurled wheel (64.1) at the objective prism slide. • The contrast can be optimized further with the aperture diaphragm or a λ/4 compensator. Fig. 64 Objective prism slide 1 Fine adjustment 1 60 9. Contrast Methods 9.2 Fluorescence • Insert a suitable specimen and rotate an appropriate objective into place. • Focus the image initially in transmitted light if appropriate. • Switch on the incident light source at the external power unit. • Open the shutter. • Select an appropriate fluorescence filter cube. • Switch magnification changer, if present, to factor 1x. • Disengage the BG 38 filter if there is no disturbing red background. Always engage the filter for photography, however. • Open the aperture diaphragm. • Open the field diaphragm until the whole field of view is just illuminated. If necessary center the field diaphragm. Fig. 65 Fluorescence illuminator with filter block changer, shutter, BG38, field and aperture diaphragm 61 10. Measurements with the Microscope 10. Measurements with the Microscope 10.1 Linear Measurements The following are required for linear measurements: - Graticule with scale division in eyepiece or HC FSA 25 PE tube with diapositive overlay device or a digital linear measuring eyepiece - Stage micrometer for calibration. Micrometer Value The micrometer value of the objective-eyepiece combination used must be known before the measurement, i.e. the distance in the specimen that corresponds to the length of a division on the graticule used. Calibration: • Align the stage micrometer and the graticule parallel to each other by rotating the eyepiece and adjust the zero marks of both scales to exactly the same height. • Read how many scale divisions of the stage micrometer correpond to how many on the microscope scale (graticule). • Divide the two values. The result is the micrometer value for the total magnification that has just been used. Example: If 1.220 mm of the stage micrometer corresponds to 50 divisions of the measurement scale, the micrometer value is 1.220:50 = 0.0244 mm = 24.4 µm. For extremely low objective magnifications it may be that only part of the measurement scale can be used for calibration. 62 Notes: Remember to take the additional magnification value into consideration! We strongly recommend you calibrate each objective separately instead of extrapolating the micrometer values of the other objectives from the calibration of one objective. Measurement errors may occur if the eyepiece is not pushed into the tube as far as the stop. Particularly large object structures can also be measured on the stage with the verniers (0.1 mm); the distance to be measured can be calculated from a combined x and y measurement. 10. Measurements with the Microscope 10.2 Thickness Measurements Object Marker In principle, thickness measurements can be carried out if both the upper and the lower surface of the object can be clearly focused. The difference in stage height setting (fine focus knob: distance between two divisions = ca. 1 µm) gives a value for transmitted light objects that is falsified by the refractive index of the object (which has been "transfocused") and perhaps immersion oil. The true thickness of the object detail measured in transmitted light is given by the vertical stage movement (focusing difference) d' and the refractive indices no of the object and ni of the medium between the coverglass and the objective (air = 1). The object marker is screwed in instead of an objective. When rotated, a diamond is lowered onto the coverglass or object surface, where circles of variable radii can be scribed to mark objects. d = d' n0 ni Example: The upper and lower surfaces of a thin polished specimen have been focused with a dry objective (ni = 1.0), scale readings of the mechanical fine drive (division spacing = 1 µm): 9.0 and 27.0. Therefore d' = 18 x 1 = 18 µm. The refractive index of the object detail was taken to be no = 1.5. Thickness d = 18 x 1 x 1.5 = 27 µm. Fig. 66 Scale division of the graticule in the eyepiece (left) and image of the stage micrometer (right) 63 10. Measurements with the Microscope 10.3 Differentiation of Gout / Pseudo Gout The use of the lambda plate compensator is a prerequisite for this test. Assembly → p. 31. Orienting the Lambda Plate Compensator • Rotate the lambda plate compensator out of the light path (Fig. 67). • Bring the lambda plate compensator and analyzer into cross position until they reach maximum darkness (polarization → p. 59). The following section explains the basic procedure for gout/pseudo gout differentiation. This test is made possible due to the negative birefringence of urates and positive birefringence of pyrophosphates. Both gout (monosodium urate) and pseudo gout (calcium pyrophosphate) crystals tend to be needle shaped. However, many crystals may be broken and/or irregular. To do the test, it is necessary to find at least one intact crystal orientated on same axis as orientation handle and one perpendicular to axis. Procedure • Fix the cross position thus determined with the clamping screw at the side (67.2). • Swing in the lambda plate again. To insure the test is being done correctly, a slide of known monosodium urate crystals should be used initially. • Use of a 40x objective is recommended. Fig. 67 Lambda plate compensator swung out 1 Orientation handle 2 Clamping screw • Swing the lambda plate out of the path of light (fig. 67). • Place the slide on the stage and bring the crystals into sharp focus. The needle shaped crystals will appear white regardless of orientation. 2 90° 64 1 • Swing in the lambda plate and put the orientation handle (67.1) in its extreme left position. Crystals with a long dimension in the handle direction should appear yellow, and perpendicular to handle direction should appear blue (fig. 68). 10. Measurements with the Microscope • Move the orientation handle to its extreme right position. Now the aligned crystals should be blue, and perpendicular yellow (Fig. 68). • Be sure to test crystals with the orientation handle in each position to insure positive identification. Fig. 68 Identification of gout Crystals blue Handle left Crystals blue The test for pseudo gout is done identically to the test for gout. However, the color change is opposite that of Gout. That is, with the handle at the left extreme, aligned crystals are blue and perpendicular crystals are yellow, and vice versa with the level at the right side (Fig. 69). Fig. 69 Test for Gout Crystals yellow The following is the procedure for identification of pseudo gout: Identification of pseudo gout Test for Pseudo Gout Crystals Crystals blue yellow Handle left Crystals yellow Handle right Crystals yellow Crystals blue Handle right 65 11. Trouble Shooting 11. Trouble Shooting Problem Cause/Remedy Stand The microscope does not respond. Make sure that voltage is available. Make sure that the stand is connected to the power supply. Check the cable connections. Check whether the fuse is defective and re- place it if necessary (→ p. 71). Illumination The image is completely dark. Transmitted light: Ensure that the lamp in the integrated trans- mitted light illumination or in the 107/2 lamp housing (DM2500) is not defective. Lamp replacement → p. 24f Fluorescence: Open the shutter (→ p. 61). Make sure that the lamps are connected to the power supply and that they are not defective. Lamp replacement → p. 26ff Inform Leica Service and have the supply unit fuse checked. The image is unevenly or not uniformly illuminated. Remove all unneeded filters from the light path. Center the lamp (106 z lamp housing) (→ p. 39ff). Replace the old lamp (→ p. 24ff). The illumination "flickers." Be sure that there is no loose connection at the power supply. Replace the old lamp (→ p. 24ff). 66 11. Trouble Shooting Problem Fluorescence: The lamp does not illuminate immediately upon being switched on. Cause/Remedy The external power supply must be switched on repeatedly. Hot Hg lamps should cool down before switching on again. Brightfield The specimen can not be brought into focus. Use the correct immersion medium. Lay the specimen with the cover glass toward the top. Make sure that the cover glass thickness is correct and that it suits the indication on the objective. Darkfield No definite DF contrast is possible. Be sure that a DF objective is being used. The objective aperture setting is too high (maximum 0.75/1.10). If necessary, reduce the objective aperture using the iris diaphragm on the objective. Check the condenser centering. Open the aperture diaphragm completely. The image is unevenly or not uniformly illuminated. The magnification is too weak. Use a higher Undesirable stray light. Clean the specimen and neighboring lenses magnification. (→ p 71). 67 11. Trouble Shooting Problem Cause/Remedy Phase Contrast No phase contrast is possible. The specimen is too thick, too thin or too brightly stained. Refractive indiceses of the mounting medium and specimen are identical, so that there is no phase jump. The cover glass is not placed planar. Check the right light ring (→ p. 57). Check the centering of the light rings (→ p. 36f). Check the condenser centering. Open the aperture diaphragm completely. Polarization No polarization contrast is possible. Bring the polarizer and analyzer into cross po- sition until they reach maximum darkness (without specimen) (→ p. 59). Transmitted Light Interference Contrast No transmitted light interference contrast is possible. The specimen is too thick or too thin. The embedding medium or specimen are of birefringent material. Rotate the specimen. The difference in the refractive indices of the specimen and the embedding medium is too small. The cover glass is too thick. Check the right condenser prism (→ p. 59). Check the centering of the condenser prisms (→ p. 37). Check the Köhler illumination (→ p. 34). Bring the polarizer and analyzer into cross position until they reach maximum darkness (without specimen) (→ p. 59). 68 11. Trouble Shooting Problem Cause/Remedy Fluorescence The image is completely dark (no fluorescence). Open the shutter (→ p. 61). Check the antigen-antibody combination. Insert a new lamp (→ p. 26ff). The fluorescence is too weak. Center the lamp (→ p. 39ff) Insert a new lamp (→ p. 26ff). 69 12. Care of the Microscope 12. Care of the Microscope 12.2 Cleaning Caution! Unplug the power supply before performing cleaning and maintenance work! Protect electrical components from moisture! Microscopes in warm and warm-damp climatic zones require special care in order to prevent fungus contamination. The microscope should be cleaned after each use, and the microscope optics should be kept extremely clean. 12.1 Dust Cover Note: To protect against dust, cover the microscope and accessories with the dust cover after each use. Caution! Let lamps cool down before covering the stand with a dust cover. The dust cover is not heat-resistant. In addition, condensation may occur. 70 ! Caution: Residual fiber and dust can create unwanted background fluorescence. Cleaning Coated Parts Dust and loose dirt particles can be removed with a soft brush or lint-free cotton cloth. Clinging dirt can be cleaned with all commercially available water solutions, benzine or alcohol. For cleaning coated parts, use a linen or leather cloth that is moistened with one of these substances. ! Caution: Acetone, xylene or nitro-containing thinner can harm the microscope and thus may not be used. Test clean solutions of unknown composition first on a less visible area of the unit. Be sure that coated or plastic surfaces do not become matted or etched. 12. Care of the Microscope Cleaning Glass Surfaces Removing Immersion Oil Remove dust on glass surfaces with a fine, dry and lint-free brush, or by blowing with a blow bag or vacuum suction. Caution! Follow safety instructions for immersion oil! Carefully remove stubborn dirt on glass surfaces with a clean cloth moistened with distilled water. If the dirt still can not be removed, use pure alcohol, chloroform or benzine. First, wipe off the immersion oil with a clean cotton cloth, and then re-wipe the surface several times with ethyl alcohol. Cleaning Objectives 12.3 Handling Acids and Bases Caution! The objective may not be unscrewed during cleaning. If damage appears on inner surfaces, the objectives must be sent to your local Leica dealer for repair. We also advise against cleaning the inside surfaces of the eyepieces. The front lenses of the objectives are cleaned as described under "Cleaning Glass Surfaces". The upper lens is cleaned by blowing with a pneumatic pump. For examinations using acids or other aggressive chemicals, particular caution must be taken. ! Caution: Never allow the optics and mechanical parts to come into contact with these chemicals. 12.4 Changing Fuses The fuse module (fig. 70) at the back of the stand can be removed with a sharp object. Fuse data → p. 8. Order no. → p. 72. Caution! Fig. 70 Fuse module Never use any fuses as replacements other than those of the types and the current ratings listed here. Using patched fuses or bridging the fuse holder is not permitted. The use of incorrect fuses may result in a fire hazard. 71 13. Essential Wear and Spare Parts 13. Essential Wear and Spare Parts Order No. Material No. Replacement Lamp 11 500 319 11 500 974 11 500 137 11 500 138 11 500 321 11 500 139 Name Used for Halogen lamp 12 V 30 W Halogen lamp 12 V 100 W High-pressure mercury burner 50 W High-pressure mercury burner 100 W High-pressure mercury burner 100 W (103 W/2) High-pressure xenon burner 75 W Integrated illumination 107/2 lamp housing 106 z lamp housing 106 z lamp housing 106 z lamp housing 106 z lamp housing Screw cap for unused objective receptacles 020-422.570-000 Screw cap M 25 Objective turret Replacement eyecup (diaphragm protection) for HC PLAN eyepiece 021-500.017-005 HC PLAN eyecup 021-264.520-018 HC PLAN eyecup 021-264.520-018 HC PLAN eyecup 10x/25 eyepiece 10x/22 eyepiece 10x/20 eyepiece Immersion Oil conforming to DIN/ISO standards, fluorescence-free 11 513 787 110 ml 11 513 522 100 ml 11 513 788 500 ml Fuses 11 826 365 72 F 3,15 A 250 V OIL and IMM objectives and oil condenser heads Fuse for microscope stand 14. Retrofitting Components 14. Retrofitting Components 14.1 Fitting the Filter Magazine (Transmitted Light) • Remove the tube and intermediate systems where applicable. • Turn the microscope stand upside down, loosen the fastening screws at the bottom and lift off the base plate. 14.2 Equipping the Condenser Disk • Turn the stage upward and lower the condenser. • Remove the condenser. Therefore loosen the condenser’s clamping screw. Condenser UCL/UCLP • Insert the filters into the semicircular mounts. This does not have to be done in any particular order. • Put the filter magazine back in position. • Remove the screw (72.1) completely. • Turn back the centering screws until the light rings, λ- and λ/4-compensator* and lens* 2.5x can be inserted. The largest hole is for brightfield observation (= BF), the slightly smaller ones for light rings or λ- and λ/4-compensator or lens* 2.5x. Fig. 72 Condenser UCL 1 Fixing screw for condenser disk Fig. 71 Filter magazine (transmitted light) for Leica DM2500 1 73 14. Retrofitting Components Notes: If you use a smaller hole for brightfield, the maximum illumination aperture cannot be used. The lettering (e.g. DF, PH 1 ....., λ) must point upward, the λ or λ/4 compensators must be inserted with the correct orientation: The notch must point towards the center of the disk! The lettering of the components should correspond the marking at the opposite position (outer edge of the disk). • Tighten the centering screws until the components are roughly in the center of the holes. ! Attention: Before fitting the disk into the condenser, make sure that neither of the centering screws is sticking out at the side. • Fasten the condenser disk with the axis screw, check that the disk rotates properly through 360°. • Affix the condenser with the condenser’s clamping screw. Condenser UCA/P • Unscrew the fastening screw of the disk. This is to be found on the underside of the condenser and must be fully screwed out. • Turn back the centering screws until the light rings, λ- and λ/4-compensator* and lens* 2.5x can be inserted. Fig. 73 UCL condenser disk 1 Condenser disk 2 Light ring or λ- or λ/4-compensator 3 Centering screws 4 Axis 5 Centering keys 6 λ- oderλ/4-Platte 7 2.5 x...20 auxiliary lens The largest hole is for brightfield observation (= BF), the slightly smaller ones for light rings or λ- and λ/4-compensator or lens* 2.5x. Notes: If you use a smaller hole for brightfield, the maximum illumination aperture cannot be used. The lettering (e.g. DF, PH 1 ....., λ) must point upward, the λ or λ/4 compensators must be inserted with the correct orientation: The notch must point towards the center of the disk! The lettering of the components should correspont the marking at the opposite position (outer edge of the disk). 74 14. Retrofitting Components Inserting DIC condenser prisms: Insert prisms K2, K3, etc into the large holes as follows: ! Attention: • Turn back the centering screws slightly. Before fitting the disk into the condenser, make sure that neither of the centering screws is sticking out at the side. • Prism labeling upward, the name K2 ,... must be near the dot marking on the edge of the hole. • Fasten the condenser disk with the axis screw, check that the disk rotates properly through 360°. Note: • Affix the condenser with the condenser’s clamping screw. ICT (transmitted light interference contrast) will not be possible if the prism is inserted rotated by 180°! • The 2 catches on the underside of the prism must click exactly into the guide slit. • Screw in the centering screws slightly, checking that all prisms can be moved properly in direction and are close to the lower edge of the hole. • Stick self-adhesive labels on to the smooth areas on the opposite side (i.e. on the other side of the axis of rotation) from the light ring or prism. Fig. 74 UCA/P condenser disk 1 Light ring "small, PH" 2 Light ring "large" for large holes 3 a, b DIC condenser prism 4 Marking for assembly of DIC condenser prisms 5 Marking K on the prism mount 6 Guide groove for prism 7 Adhesive label 8 Centering screws 9 Rotatable axis 10 λ or λ/4 compensator 75 15. Index 15. Index Adapter lens 49 Adjusting the light sources 36 Adjustment of condenser prisms 34 Ambient conditions 15 Analyzer 27, 52 Aperture diaphragm 47 Auxiliary condenser lens LS 19 Beam splitting 43 BG 38 55 Brightfield 50 Brightness 46 Camera 28 Care 70 Changing fuses 65 Changing objectives 45 Checking phase contrast rings 33 Cleaning 64 Coarse focus 44 Coarse focusing 41 Coaxial pinion 17, 40 Color-coded condenser 47 Compensators 53 Condenser 11, 19 Condenser centering 32 Condenser disk 67 Condenser head 31, 50 Condenser height adjuster 19, 32 Condenser holder 19 Condenser prisms 28 Connection to the power supply 30 Contrast method 10 Corrective mounts 45 Cross position 53 76 Darkfield 51 Darkfield condensers 52 DIC prisms 28 Differential interference contrast 53 Diffuser slider 55 DLF filter magazine 50 Dust cover 64 Electrical safety 8 Ergolift 29 Ergomodule 29 Eyepiece section 43 Eyepieces 20, 44 Field diaphragm 47, 48 Filter cube 26, 55 Filter holder 27, 47, 50 Filter magazine 67 Fine focus 44 Fine focusing 41 Fluorescence 55 Fluorescence illuminator 23 Fluorescence turret disk 26 Focus handwheels 44 Focus stop 42 Focusing 41 Focusing telescope 33 Focusing wheels 41 Foot switch 33, 51 Front control panel 17, 23, 49 Function keys 17, 33, 49, 51 Fuse 66 Gas discharge lamps 23, 24, 25 Gout / Pseudo gout 58 Height adjustment of the focusing wheels 41 Hg 100 W and Xe 75 W mercury lamps 38 Hg 50 burner 24 Hg 50 W mercury lamp 37 ICT/P polarizer 54 Identification Sheet 23 Immersion objective 45, 48 Immersion oil 45, 65, 66 Inlaid reticle 44 Installation location 15 Integrated illumination 21 Interfaces 13 Köhler Illumination 31 Lambda plate 52, 53 Lambda plate compensator 28, 58 Lamp housing 21 LAS 13 Leica Application Suite 13 Light intensity 46 Light ring 51 Light ring centering 34 Light ring slide 33, 51 Light sources 46 Linear measurements 56 Magnification changer 29 Micrometer value 56 Object displacement 40 Object marker 57 Objective change keys 17, 49 Objective magnification 1.25x-2.5x 49 Objective prism slide 34, 53, 54 Objective turret 10 Objectives 20, 45 Oblique illumination 52 15. Index PC connection 33 Phase contrast 51 Phase contrast rings 33 Pol intermediate tube 27, 52 Polarization 52 Polarizer 27, 52 Polarizer ICT/P 60 Polarizer holder 27 Viewing angle 43 Viewing attachments 29 Viewing distance 43 Vision problems 44 Xe 75 burner 24 Replacement lamp 66 Replacing the lamp 21 Right-/left-hand operation 41 Safety notes 8 Shutter 55 Software 13, 33, 51 Specifications 8 Specimen holder 17 Speed switch 42 Stages 17, 40 Standard mode 49, 50 Supply unit 23, 40 Teach-in mode 49, 51 Thickness measurements 57 TL analyzer slot 27 Toggle key 17, 49 Toggle mode 49, 50 Torque 40, 42 Tracing device 30 Transmitted light 49 Transmitted light filter 50 Transmitted light illumination 21 Transport 16 Tube outputs 46 Tube range 44 Tubes 20, 43 77 16. EU Declaration of Conformity 16. EU Declaration of Conformity Download: DM2000: http://www.light-microscopy.com/down_ce-declaration_dm2000 DM2500: http://www.light-microscopy.com/down_ce-declaration_dm2500 DM3000: http://www.light-microscopy.com/down_ce-declaration_dm3000 78 Leica DM2000 Leica DM2500 Leica DM3000 Bedienungsanleitung 3 Copyrights Copyrights Alle Rechte an dieser Dokumentation liegen bei der Leica Microsystems Wetzlar GmbH. Eine Vervielfältigung von Text und Abbildungen auch von Teilen daraus - durch Druck, Fotokopie, Mikrofilm oder andere Verfahren, inklusive elektronischer Systeme, ist nur mit ausdrücklicher schriftlicher Genehmigung der Leica Microsystems Wetzlar GmbH gestattet. Die in der folgenden Dokumentation enthaltenen Hinweise stellen den derzeit aktuellen Stand der Technik sowie den derzeit aktuellen Wissensstand dar. Die Zusammenstellung von Texten und Abbildungen haben wir mit größter Sorgfalt durchgeführt. Trotzdem kann für die Richtigkeit des Inhaltes dieses Handbuches keine Haftung irgendwelcher Art übernommen werden. Wir sind jedoch für Hinweise auf eventuell vorhandene Fehler jederzeit dankbar. Die in diesem Handbuch enthaltenen Informationen können ohne vorherige Ankündigung geändert werden. 4 Inhalt Inhalt 1. Wichtige Hinweise zur Anleitung ......... 6 2. Zweckbestimmung der Mikroskope ..... 7 3. Sicherheitshinweise ................................ 3.1 Allgemeine Sicherheitshinweise ............ 3.2 Elektrische Sicherheit .............................. 8 8 8 4. Geräteübersicht ........................................ 10 5. Auspacken .................................................. 18 6. 6.1 6.2 6.3 6.4 6.5 6.6 6.7 6.8 6.9 6.10 6.11 Montage des Mikroskops ....................... Objekttisch .................................................. Kondensor ................................................... Tubus und Okulare .................................... Objektive ..................................................... Lichtquelle für die Durchlichtachse ...... Komponenten für Fluoanwendungen .... 6.6.1 Fluoreszenzilluminator ................... 6.6.2 Lampenhaus 106z ........................... 6.6.3 Bestückung der Fluoreszenz-Revolverscheibe ...... Analysator und Polarisator ..................... Lambda-Plattenkompensator.................. DIC-Prismen ............................................... Optionales Zubehör ................................... Anschluss an die Stromversorgung ...... 29 30 31 31 31 33 7. 7.1 7.2 7.3 7.4 7.5 Inbetriebnahme ......................................... Einschalten ................................................. Köhlersche Beleuchtung ......................... Phasenkontrastringe überprüfen ........... Justieren der Kondensor-Prismen ......... Justieren der Lichtquellen ....................... 34 34 34 36 37 39 8. 8.1 8.2 8.3 8.4 8.5 Bedienung .................................................. Einschalten ................................................. Tische und Objektverschiebung ............. Fokussierung .............................................. Tuben ........................................................... Okulare ........................................................ 43 43 43 44 46 47 20 20 22 23 23 24 26 26 26 8.6 Objektive ..................................................... 8.7 Die Funktionstasten beim Leica DM3000 ................................... 8.8 Lichtquellen ................................................ 8.9 Aperturblende ............................................ 8.10 Leuchtfeldblende ....................................... 48 9. Kontrastverfahren ..................................... 9.1 Durchlicht ................................................... 9.1.1 Hellfeld .............................................. 9.1.2 Phasenkontrast ............................... 9.1.3 Dunkelfeld ........................................ 9.1.4 Schiefe Beleuchtung ..................... 9.1.5 Polarisation ...................................... 9.1.6 Differentieller Interferenzkontrast ........................ 9.2 Fluoreszenz ................................................. 55 55 56 57 57 58 58 10. 10.1 10.2 10.3 Messungen mit dem Mikroskop ............ Längenmessungen .................................... Dickenmessungen ..................................... Differenzierung von Gicht/Pseudogicht ............................. 49 52 53 54 59 61 62 62 63 64 11. Trouble Shooting ....................................... 66 12. 12.1 12.2 12.3 12.4 Pflege des Mikroskops ............................ Staubschutz ................................................ Reinigung .................................................... Umgang mit Säuren und Basen .............. Sicherungswechsel .................................. 70 70 70 71 71 13. Verschleiß- und Ersatzteile .................... 72 14. Nachrüstungen .......................................... 73 14.1 Bestücken des Durchlichtfiltermagazins .......................... 73 14.2 Bestücken der Kondensorscheibe ........ 73 15. Index ............................................................ 76 16. EU-Konformitätserklärung ...................... 78 5 1. Wichtige Hinweise zur Anleitung 1. Wichtige Hinweise zur Anleitung Achtung! Diese Bedienungsanleitung ist ein wesentlicher Bestandteil des Mikroskops und muss vor Montage, Inbetriebnahme und Gebrauch sorgfältig gelesen werden. Diese Bedienungsanleitung enthält wichtige Anweisungen und Informationen für die Betriebssicherheit und Instandhaltung des Mikroskops und der Zubehörteile. Sie muss daher sorgfältig aufbewahrt werden. Textsymbole, Piktogramme und ihre Bedeutung: (1.2) Ziffern in Klammern, z.B. (1.2), beziehen sich auf Abbildungen, im Beispiel Abb. 1, Pos. 2. → S.20 Ziffern mit Hinweispfeil, z.B. → S.20, weisen auf eine bestimmte Seite dieser Anleitung hin. Achtung! Besondere Sicherheitshinweise in dieser Anleitung sind durch das nebenstehende Dreieckssymbol gekennzeichnet und grau unterlegt. ! Achtung! Bei einer Fehlbedienung können Mikroskop bzw. Zubehörteile beschädigt werden. Erklärender Hinweis. * 6 nicht in allen Ausrüstungen enthaltene Position. 2. Zweckbestimmung der Mikroskope 2. Zweckbestimmung der Mikroskope Die Mikroskope Leica DM2000, DM2500 und DM3000, zu denen diese Bedienungsanleitung gehört, sind für biologische Routine- und Forschungsanwendungen vorgesehen. Dies schließt die Untersuchung von aus dem menschlichen Körper stammenden Proben zum Zwecke der Informationsgewinnung über physiologische oder pathologische Zustände oder angeborene Anomalien oder zur Prüfung auf Unbedenklichkeit und Verträglichkeit bei potenziellen Empfängern oder zur Überwachung therapeutischer Maßnahmen ein. Alle oben genannten Mikroskope entsprechen der EG-Richtlinie 98/79/EG über In-vitroDiagnostika. Gleichzeitig erfüllen die Geräte die EG-Richtlinien 73/23/EWG betreffend elektrische Betriebsmittel und 89/336/EWG über die elektromagnetische Verträglichkeit für den Einsatz in industrieller Umgebung. Achtung! Für jegliche nicht-bestimmungsgemäße Verwendung und bei Verwendung außerhalb der Spezifikationen von Leica Microsystems Wetzlar GmbH, sowie gegebenenfalls daraus entstehender Risiken übernimmt der Hersteller keine Haftung. In solchen Fällen verliert die Konformitätserklärung ihre Gültigkeit. Achtung! Diese (IVD-) Geräte sind nicht zur Verwendung in der nach DIN VDE 0100-710 definierten Patientenumgebung vorgesehen. Sie sind auch nicht zur Kombination mit Medizingeräten nach der EN 60601-1 vorgesehen. Wird ein Mikroskop mit einem Medizingerät nach EN 60601-1 elektrisch leitend verbunden, so gelten die Anforderungen nach EN 60601-1-1. 7 3. Sicherheitshinweise 3. Sicherheitshinweise 3.1 Allgemeine Sicherheitshinweise 3.2 Elektrische Sicherheit Dieses Gerät der Schutzklasse 1 ist gemäß EN 61010-2-101:2002, EN 61010-1:2001, IEC 1010-1:2001, Sicherheitsbestimmungen für elektrische Mess-, Steuer-, Regel- und Laborgeräte gebaut und geprüft. Allgemeine technische Daten Achtung! Um diesen Auslieferungszustand zu erhalten und einen gefahrlosen Betrieb sicherzustellen, muss der Anwender die Hinweise und Warnvermerke beachten, die in dieser Bedienungsanleitung enthalten sind. Achtung! Die in der Bedienungsanleitung beschriebenen Geräte bzw. Zubehörkomponenten sind hinsichtlich Sicherheit oder möglicher Gefahren überprüft worden. Bei jedem Eingriff in das Gerät, bei Modifikationen oder der Kombination mit NichtLeica-Komponenten, die über den Umfang dieser Anleitung hinausgehen, muss die zuständige Leica-Vertretung oder das Stammwerk in Wetzlar konsultiert werden! Bei einem nicht autorisierten Eingriff in das Gerät oder bei nicht bestimmungsgemäßem Gebrauch erlischt jeglicher Gewährleistungsanspruch! 8 Mikroskop Verwendung nur in Innenräumen. Versorgungsspannung: 90–250 V~ Frequenz: 50–60 Hz Leistungsaufnahme: DM2000 max. 40 W (90 VA) DM2500 max. 160 W (220 VA) DM3000 max. 48 W (110 VA) Sicherungen: F 3,15 A 250 V Umgebungstemperatur: 15–35°C Relative Luftfeuchtigkeit: max. 80% bis 30°C Überspannungskategorie: II Verschmutzungsgrad: 2 Achtung! Der Netzstecker darf nur in eine Steckdose mit Schutzkontakt eingeführt werden. Die Schutzwirkung darf nicht durch eine Verlängerungsleitung ohne Schutzleiter aufgehoben werden. Jegliche Unterbrechung des Schutzleiters innerhalb oder außerhalb des Gerätes oder Lösen des Schutzleiteranschlusses kann dazu führen, dass das Gerät gefahrbringend wird. Absichtliche Unterbrechung ist nicht zulässig! 3. Sicherheitshinweise Achtung! Durch Anschluss an die Erdung (Erdungsschraube an der Rückseite des Stativs) können an das Mikroskop angeschlossene Zusatzgeräte mit eigener und/oder extra Netzversorgung auf gleiches Schutzleiterpotenzial gebracht werden. Bei Netzen ohne Schutzleiter ist der Leica-Service zu fragen. Achtung! Schützen Sie das Mikroskop vor zu hohen Temperaturschwankungen. Es kann zur Kondensatbildung und Beschädigung elektrischer und optischer Komponenten kommen. Betriebstemperatur: 15-35°C. Achtung! Achtung! Es ist sicherzustellen, dass nur Sicherungen vom angegebenen Typ und der angegebenen Nennstromstärke als Ersatz verwendet werden. Die Verwendung anderer Sicherungen oder Überbrückung des Sicherungshalters ist unzulässig. Es besteht Feuergefahr bei Verwendung anderer Sicherungen. Schalten Sie vor dem Austausch der Sicherungen oder der Lampen unbedingt den Netzschalter aus und entfernen Sie das Netzkabel. Achtung! Die elektrischen Zubehörkomponenten des Mikroskops sind nicht gegen Wassereintritt geschützt. Wassereintritt kann zu einem Stromschlag führen. 9 4. Geräteübersicht 4. Geräteübersicht Spezifikation Leica DM2000 Leica DM2500 Kontrastverfahren • Durchlicht: Hellfeld, Dunkelfeld, Phasenkontrast, Polarisation Differentieller Interferenzkontrast • Auflicht: Fluoreszenz Durchlichtachse Halogeneinbaubeleuchtung manuelle Einstellung von • Helligkeit • Aperturblende • Leuchtfeldblende Auflichtachse Auflichtfluoreszenzilluminator bis Okularsehfeldzahl 22 mit • 5-fach Filterrevolverscheibe • zentrierbarer Apertur- und Leuchtfeldblende • Lichtfalle zur Unterdrückung von Fremdlicht • Neutralfilter N4 und Shutter, schaltbar Tubus wahlweise mit • festem oder variablem Einblickwinkel • bis zu 3 Schaltstellungen • einem oder zwei Kameraausgängen • Ergotubus mit höhenverstellbarem Einblick und Kameraausgang Lampenhaus manuelle Einstellung von • Helligkeit • Aperturblende • Leuchtfeldblende Vergrößerungswechsler (optional) • manuell • Vergrößerungsstufen: 1x; 1,5x; 2x Objektivrevolver • manuell • 6-fach oder 7-fach für Objektive mit M25-Gewinde • Objektivprismenschieber XY Tisch • mit Kondensorhalter • Koaxialtrieb, optional: teleskopierbar • Rechts-/Linksbedienung wechselbar 10 4. Geräteübersicht Leica DM2000 Spezifikation Kondensor Fokussierung Leica DM2500 • Kondensor CL/PH 0.90/1.25 OIL mit Farbkodierung (für DM2500 mit Objektiven < 10x ist der Streuscheibenschieber notwendig) • Kondensor CLP/PH 0.85 für Polarisation (für DM2500 mit Objektiven < 10x ist der Streuscheibenschieber notwendig) • Kondensor Achr.apl. A 0.9 (P) mit Farbkodierung und ein-/ausschwenkbarem Kondensorkopf • Universalkondensor UCL 0.90/1.25 OIL (UCLP 0.85 für Polarisation mit Lichtringscheibe mit 5 Positionen (für DM2500 mit Objektiven < 10x ist die Anpassungslinse (Streuscheibe) notwendig) • Pol-Universalkondensor UCL/P mit wechselbarem Kondensorkopf und Kondensorscheibe mit 6 Positionen • • • • Fokushandrad für Grob- und Feinfokussierung Höhenverstellung Geschwindigkeitsumschaltung (optional) Einstellung von Fokusschwelle und Gängigkeit 11 4. Geräteübersicht Spezifikation Kontrastverfahren Durchlichtachse Leica DM3000 • Durchlicht: Hellfeld, Dunkelfeld, Phasenkontrast, Polarisation Differentieller Interferenzkontrast • Auflicht: Fluoreszenz Halogeneinbaubeleuchtung manuelle Einstellung von • Aperturblende • Leuchtfeldblende • automatische Helligkeitsregelung bei Objektivwechsel Auflichtachse Auflichtfluoreszenzilluminator bis Okularsehfeldzahl 22 mit • 5-fach Filterrevolverscheibe • zentrierbarer Apertur- und Leuchtfeldblende • Lichtfalle zur Unterdrückung von Fremdlicht • Neutralfilter N4 und Shutter, schaltbar Tubus wahlweise mit • festem oder variablem Einblickwinkel • bis zu 3 Schaltstellungen • einem oder zwei Kameraausgängen • Ergotubus mit höhenverstellbarem Einblick und Kameraausgang Vergrößerungswechsler (optional) • manuell • Vergrößerungsstufen: 1x; 1,5x; 2x Objektivrevolver • motorisiert Anwahl der Objektive über Funktionstasten oder (optional) Fußschalter • 6-fach für Objektive mit M25-Gewinde • Objektivprismenschieber XY Tisch • mit Kondensorhalter • Koaxialtrieb, optional: teleskopierbar • Rechts-/Linksbedienung wechselbar 12 4. Geräteübersicht Leica DM3000 Spezifikation Kondensor • Kondensor CL/PH 0.90/1.25 OIL mit Farbkodierung • Kondensor CLP/PH 0.85 für Polarisation • Kondensor Achr.apl. A 0.9 (P) mit ein-/ausschwenkbarem Kondensorkopf • Universalkondensor UCL 0.90/1.25 OIL (UCLP 0.85 für Polarisation mit Lichtringscheibe mit 5 Positionen • Pol-Universalkondensor UCL/P mit wechselbarem Kondensorkopf und Kondensorscheibe mit 6 Positionen • motorisierter Kondenser Achr. apl. A 0.9 (P), auto automatisches Ein/Ausschwenken des Kondensorkopfes bei Objektivwechsel Fokussierung • • • • Schnittstellen USB2 Software Leica Application Suite (LAS) für WindowsTM 2000, XP zum Einlernen der Objektive und zur Konfiguration der Funktionstasten Fokushandrad für Grob- und Feinfokussierung Höhenverstellung Geschwindigkeitsumschaltung (optional) Einstellung von Fokusschwelle und Gängigkeit 13 4. Geräteübersicht 7 6 5 4 1 Abb. 1a Linke Stativseite Leica DM2000 1 Grob- und Feinfokussierung 2 Kondensorhöhenverstellung 3 Helligkeitseinstellung 4 Leuchtfeldblende 5 Aperturblende 6 Kondensor 7 Analysatoraufnahme 14 2 3 4. Geräteübersicht 1 2 3 4 5 6 7 8 9 10 11 Abb. 1b Rechte Stativseite Leica DM2000 1 Okulare 2 Okularstutzen 3 Tubus 4 Aufnahme für Objektivprismenschieber 5 Objektivrevolver mit Objektiven 6 Objekttisch mit Präparatehalter 7 Einbaubeleuchtung 8 Ein-/Ausschalter 9 Kondensorhöhenverstellung 10 Grob- und Feinfokussierung 11 Koaxialtrieb zur x-, y-Tischverschiebung 15 4. Geräteübersicht 17 16 15 18 14 13 12 11 10 9 8 1 Abb. 2 Linke Stativseite Leica DM2500 1 Lampenhaus 2 Grob- und Feinfokussierung 3 Helligkeitseinstellung 4 Kondensorhöhenverstellung 5 Einstellung Leuchtfeldblende 6 Ein-/Ausschalter 7 Leuchtfeldblende 8 Koaxialtrieb zur x-, y-Tischverschiebung 9 Aperturblende 16 2 3 4 5 6 10 11 12 13 14 15 16 17 18 7 Kondensorscheibe Kondensor Objekttisch mit Präparatehalter Objektivrevolver mit Objektiven Objektivprismenschieber Tubus Okularstutzen Okulare Analysator 4. Geräteübersicht 1 2 3 4 5 6 13 8 12 Abb. 3 Rechte Stativseite Leica DM3000 1 Okulare 2 Okularstutzen 3 Tubus 4 Aufnahme für Objektivprismenschieber 5 Objektivrevolver mit Objektiven 6 Objekttisch mit Präparatehalter 7 Einbaubeleuchtung 8 Ein-/Ausschalter 9 Kondensorhöhenverstellung 10 Grob- und Feinfokussierung 11 Koaxialtrieb zur x-, y-Tischverschiebung 7 9 10 11 12 Frontbedienfeld mit Objektivwechseltasten und Toggle-Taste 13 Seitliche Funktionstasten zum Wechsel zwischen zwei Objektivvergrößerungen oder zum Durchschalten der Vergrößerungen (größer/kleiner) analog linke Stativseite Weitere Bedienelemente siehe Abb. 1b Leica DM2000. 17 5. Auspacken 5. Auspacken Entnehmen Sie zunächst vorsichtig alle Komponenten dem Transport- und Verpackungsmaterial. Hinweis: Das Berühren der Linsenoberfläche der Objektive ist möglichst zu vermeiden. Entstehen dennoch Fingerabdrücke auf den Glasflächen, so sind diese mit einem weichen Leder- oder Leinenlappen zu entfernen. Schon geringe Spuren von Fingerschweiß können die Oberflächen in kurzer Zeit angreifen. Weitere Hinweise im Kapitel „Pflege des Mikroskops” → S. 70. Achtung! Mikroskop und Peripheriegeräte auf keinen Fall bereits jetzt an die Steckdose anschließen! Aufstellungsort Das Arbeiten mit dem Mikroskop sollte in einem staubfreien Raum erfolgen, der frei von Öl- und anderen chemischen Dämpfen und extremer Luftfeuchtigkeit ist. Am Arbeitsplatz sollen außerdem große Temperaturschwankungen, direkt einfallendes Sonnenlicht und Erschütterungen vermieden werden. Hierdurch können Messungen bzw. mikrografische Aufnahmen gestört werden. Zulässige Umgebungsbedingungen: Temperatur 15–35°C Relative Luftfeuchtigkeit max. 80% bis 30°C Mikroskope in warmen und feucht-warmen Klimazonen brauchen besondere Pflege, um einer Fungusbildung vorzubeugen. Weitere Hinweise in den Kapiteln „Pflege des Mikroskops“ → S. 70. Achtung! Elektrische Komponenten müssen mindestens 10 cm von der Wand und von brennbaren Gegenständen entfernt aufgestellt werden. 18 5. Auspacken Transport Für den Versand oder Transport des Mikroskops und seiner Zubehörkomponenten sollte die Originalverpackung verwendet werden. Um Beschädigungen durch Erschütterungen zu vermeiden, sollten vorsorglich folgende Komponenten demontiert und gesondert verpackt werden: • Schrauben Sie die Objektive heraus. • Entfernen Sie den Kondensor. • Entfernen Sie den Koaxialtrieb. • Nehmen Sie die Lampenhäuser ab. • Demontieren Sie den Brenner im Lampenhaus 106 z. • Entfernen Sie alle beweglichen bzw. losen Teile. 19 6. Montage 6. Montage des Mikroskops Die Mikroskopkomponenten werden sinnvollerweise in dieser Reihenfolge montiert: • • • • • • • • • Zubehör Objekttisch Kondensor Fluoreszenz* Zwischensysteme* Tubus Okulare Objektive Lampenhäuser mit Lichtquellen Polarisation* Für die Montage ist nur ein universell verwendbarer Schlüssel notwendig, der im Lieferumfang enthalten ist. Zur Aufbewahrung des Schlüssels dient eine Magnetvorrichtung rechts an der Unterseite des Tisches. Bei Verwendung von Zwischensystemen und optischem Zubehör kann die Reihenfolge abweichen. Lesen Sie dazu das Kapitel „6.10 Optionales Zubehör“ → S. 31. 6.1 Objekttisch ! Achtung: Vor der Komplettierung des Objekttisches dürfen noch keine Objektive eingeschraubt sein! Präparatehalter • Setzen Sie den Präparatehalter auf den Tisch auf und befestigen Sie ihn mit den beiden Schrauben (4.1). Koaxialtrieb Hinweis: Der Koaxialtrieb kann sowohl rechts- wie auch linksseitig montiert werden. Abb. 4 Objekttisch mit Präparatehalter 1 Befestigungsschrauben für Präparatehalter 1 20 6. Montage • Stecken Sie zunächst den flachen FokusFeintriebknopf auf der Seite auf, an der Sie den Koaxialtrieb befestigen wollen. Der Knopf wird magnetisch gehalten (5.1). Achten Sie darauf, dass der Knopf einrastet. Der andere Fokusknopf wird entsprechend auf der gegenüberliegenden Seite befestigt. • Lockern Sie die Arretierungsschraube (6.1) links vorne am Tisch. • Schieben Sie den Tisch so weit wie möglich nach hinten. • Befestigen Sie den Koaxialtrieb mit der Schraube (7.1). • Ziehen Sie den Tisch nach vorne und drehen Sie die Arretierungsschraube wieder fest. Abb. 6 Unterseite Objekttisch 1 Arretierungsschraube 1 Abb. 5 Fokushandrad 1 Magnethalterung für Fokus-Feintriebknopf Abb. 7 Montage Koaxialtrieb 1 Befestigungsschraube für Koaxialtrieb 1 1 21 6. Montage 6.2 Kondensor • Schrauben Sie gegebenenfalls den Kondensorkopf in den Kondensor ein. • Drehen Sie den Kondensorhalter (Abb. 9) mittels der Kondensorhöhenverstellung (10.3) ganz nach unten. • Drehen Sie die Klemmschraube für den Kondensor (10.2) soweit heraus, dass der Kondensor von vorne eingesetzt werden kann. Hinweis: Vor dem Mikroskopieren muss der Kondensor zentriert werden. → Köhlersche Beleuchtung S. 34. Abb. 9 Kondensorhalter 1 Führungsnut • Schieben Sie den Kondensor von vorne bis zum Anschlag in den Kondensorhalter ein. Auf der Unterseite des Kondensors befindet sich ein Orientierungsstift (8.1), der in die Führungsnut (9.1) einrasten muss. • Ziehen Sie die Klemmschraube (10.2) für den Kondensor an, so dass der Kondensor arretiert wird. • Nur für Leica DM3000: Bei Verwendung des motorisierten Kondensors Kondensorkabel anschließen. 1 Abb. 10 Kondensorhalter 1 Kondensorzentrierung 2 Klemmschraube für Kondensor 3 Kondensorhöhenverstellung Abb. 8 Kondensorunterseite (Beispiel CL/PH) 1 Orientierungsstift 2 Zusatzlinse LS (für Leica DM2000/3000) 1 1 3 3 1 2 1 2 22 6. Montage 6.3 Tubus und Okulare 6.4 Objektive Hinweis: Für Fluoreszenzanwendungen muss zuerst der Fluoreszenzilluminator montiert werden → S. 26. Der Tubus wird direkt oder über Zwischenmodule am Stativ montiert. Die Befestigung erfolgt durch die seitliche Klemmschraube (11.1). • Drehen Sie die Klemmschraube (11.1) am Stativ etwas heraus. • Setzen Sie den Tubus in die kreisförmige Aufnahme (Ringschwalbe) ein. • Ziehen Sie die Klemmschraube (11.1) wieder fest. • Die Okulare werden in die Okularstutzen am Tubus eingesetzt. Abb. 11 Befestigen des Tubus 1 Klemmschraube Grundsätzlich nur Leica Objektive der Tubuslänge × (unendlich) verwenden! Standardgewindemaß ist M25. Es wird empfohlen, die Objektive so anzuordnen, dass die Vergrößerung ansteigt, wenn der Objektivrevolver im Uhrzeigersinn gedreht wird. ! Achtung: Zur Montage der Objektive den Tisch möglichst weit absenken. Nicht besetzte Gewinde im Revolver mit Staub-Schutzkappen verschließen! Nur für Leica DM3000: Entsprechend Ihrer Ausrüstung sind den einzelnen Objektiven bereits werkseitig bestimmte Positionen zugeordnet. Eine Aufstellung der genauen Positionierung der Objektive liegt Ihrer Lieferung bei (Identification Sheet). Auf dem Frontbedienfeld (Abb. 12) befinden sich sechs schwarze Tasten zur direkten Anwahl eines Objektivs. Unterhalb der Objektivtasten sind Klebeschildchen mit der zugehörigen Objektivvergrößerung angebracht. (Weitere Klebeschildchen werden mitgeliefert). Es wird empfohlen, die Objektive erst nach dem Anschluss an die Stromversorgung einzuschrauben → S. 33. Abb. 12 Frontbedienfeld Leica DM3000 1 Anwahl eines Objektivs Toggle Klebeschildchen mit Objektivvergrößerung 23 6. Montage 6.5 Lichtquelle für die Durchlichtachse Achtung! • Ziehen Sie den Einschub (13.2) heraus. Achtung! Achten Sie darauf, dass das Lampenhaus bzw. das Mikroskop von der Stromversorgung getrennt ist. Netzstecker und Stromversorgung während der Montage vom Netz trennen. Die Glühlampe kann noch heiß sein! • Ziehen Sie die Glühlampe heraus. Achtung! Achtung! Es besteht generell bei den Lichtquellen eine Gefährdung durch Strahlung (Blendung, UVStrahlung, IR-Strahlung). Lampen müssen daher in geschlossenen Gehäusen betrieben werden. Nur für Leica DM2000/3000: Lampenwechsel bei der Einbaubeleuchtung Die Durchlichtbeleuchtung mit NiedervoltHalogenglühlampe (Abb. 13) ist im Mikroskopfuß eingebaut und von der rechten Mikroskopseite zugänglich. Abb. 13 Durchlichtbeleuchtung im Mikroskopfuß 1 Halogenglühlampe 2 Einschub 1 24 2 Schutzhülle der neuen Lampe erst nach dem Einsetzen entfernen. Fingerabdrücke unbedingt vermeiden. • Stecken Sie die neue Lampe mit der Schutzhülle bis gegen den Anschlag gerade in den Sockel. Achten Sie darauf, dass die Lampe gerade sitzt. • Entfernen Sie die Schutzhülle der Lampe. • Stecken Sie den Einschub (13.2) wieder ein. Abb. 14a Lampenhaus 107/2 Lösen der Befestigungsschraube 6. Montage Nur für Leica DM2500: Lampenwechsel beim Lampenhaus 107/2 Dieses Lampenhaus wird mit einer 12V 100W Halogenglühlampe verwendet, die bereits eingebaut ist. Soll die Lampe ausgewechselt werden, gehen Sie folgendermaßen vor: • Lösen Sie die Befestigungsschraube am Gehäuse (Abb. 14a). • Gehäuse nach oben abnehmen. • Stecken Sie die neue Lampe 12V 100W (14b.1) mit der Schutzhülle bis gegen den Anschlag gerade in den Sockel. Achten Sie darauf, dass die Lampe gerade sitzt. • Entfernen Sie die Schutzhülle der Lampe. • Setzen Sie das Gehäuse wieder auf und arretieren Sie es mit der Befestigungsschraube. • Setzen Sie das Lampenhaus an die Durchlicht-Lampenhausaufnahme (Abb. 15) an und befestigen Sie es mit der seitlichen Klemmschraube. • Entfernen Sie die Lampe. Achtung! Schutzhülle der neuen Lampe erst nach dem Einsetzen entfernen. Fingerabdrücke unbedingt vermeiden. Abb. 15 Leica DM2500 1 Durchlichtlampenhaus Abb. 14b Lampenhaus 107/2, geöffnet 1 Fassung mit Halogenglühlampe 2 Kollektor 1 1 2 25 6. Montage 6.6 Komponenten für Fluoreszenzanwendungen 6.6.1 Fluoreszenzilluminator Der Fluoreszenzilluminator wird vor dem Tubus montiert. Die Befestigung erfolgt über die seitliche Klemmschraube. Einsetzen der Gasentladungslampen (Hg und Xe) in das Lampenhaus 106z Hg- und Xe-Lampen werden mit separaten Vorschaltgeräten betrieben. Bitte unbedingt die gesonderte Anleitung dieser Vorschaltgeräte beachten. 6.6.2 Lampenhaus 106z Achtung! Es besteht generell bei den Lichtquellen eine Gefährdung durch Strahlung (Blendung, UVStrahlung, IR-Strahlung). Lampen müssen daher in geschlossenen Gehäusen betrieben werden. Abb. 16 Montage Fluoreszenzilluminator Achten Sie darauf, dass das Lampenhaus von der Stromversorgung getrennt ist. Netzstecker und Stromversorgung während der Montage vom Netz trennen. Bei Montagearbeiten an Xe-Brennern immer mitgelieferte Schutzhandschuhe und Gesichtsschutz (Abb. 17) tragen (Explosionsgefahr). Glasteile des Brenners nie mit bloßen Händen anfassen. Nie in den direkten Strahlengang blicken (Blendgefahr). Das Lampenhaus 106 z wird mit verschiedenen Gasentladungslampen verwendet. Achtung! Beachten Sie unbedingt die Gebrauchsanweisung und Sicherheitshinweise der Lampenhersteller! Vor dem Wechseln von Lampen diese mindestens 30 min abkühlen lassen! 26 Abb. 17 Schutzhandschuhe und Gesichtsschutz 6. Montage Folgende Gasentladungslampen sind einsetzbar und erfordern unterschiedliche Stromversorgungsgeräte und Lampenfassungen (Abb. 19): Typ Typische Lebensdauer* Hg-Höchstdrucklampe 50 W (Wechselstrom) Hg-Höchstdrucklampe 100 W (Gleichstrom) Hg-Höchstdrucklampe 100 W (Gleichstrom Typ 103 W/2) Xe-Hochdrucklampe 75 W (Gleichstrom) 100 h 200 h 300 h 400 h * Bitte beachten Sie die Datenblätter der Lampenhersteller. • Zum Öffnen des Lampenhauses 106 z lösen Sie die Befestigungsschrauben (18.8) am Verschlussdeckel. • Entfernen Sie die Transportsicherung (roter Kunststoffstab anstelle des Brenners) der Lampenfassung. Lösen Sie dazu die obere Klemmung (19.1). Ziehen Sie das Kühlelement (19.3) nach oben und drehen Sie es zur Seite. Lösen Sie die untere Klemmung (19.2) und entfernen Sie die Transportsicherung. • Setzen Sie den Brenner in umgekehrter Reihenfolge ein. Abb. 18 Lampenhaus 106 z (seitlich, geöffnet) 1 Deckel hochgestellt 2 Kollektor 3 Gasentladungslampe in Fassung 4 Reflektor (Spiegel) 5, 6, 7 Justierschraube x-y Reflektor 8 Befestigungsschrauben für Lampenfassung 9 Buchse für Kontaktstecker Achtung! Hg 50-Brenner: Die Beschriftung muss nach dem Einbau aufrecht stehen. Ein evtl. vorhandener Glas-Abschmelznippel (19a.4) wird durch Drehen des Brenners so ausgerichtet, dass der Nippel später nicht im Strahlengang, sondern seitlich orientiert ist. 1 4 2 5 3 6 7 Xe 75-Brenner: Schutzhülle des Brenners (19b.5) nach dem Einbau entfernen. 8 9 8 27 6. Montage • Setzen Sie die Lampenfassung wieder ein und ziehen Sie die Befestigungsschrauben (18.8) wieder an. Abb. 20 Anschluss Lampenhaus 106z 1 Lampenhausaufnahme • Schließen Sie das Lampenhaus und ziehen Sie die Befestigungsschrauben wieder an. • Setzen Sie das Lampenhaus an die AuflichtLampenhausaufnahme (20.1) an und befestigen Sie es mit der seitlichen Klemmschraube. • Schließen Sie das Lampenhaus am Vorschaltgerät an. Abb. 19 a-c Lampenfassungen für Gasentladungslampen 1 Obere Klemmung 2 Untere Klemmung 3 Kühlelement 4 Abschmelznippel des Hg 50-Brenners 5 Schutzhülle des Xe 75-Brenners Hg 50 a 3 1 4 2 Xe 75 b 1 Hg 100 3 1 5 2 2 28 c 3 6. Montage 6.6.3 Bestückung der Fluoreszenz-Revolverscheibe Zum Einsetzen der Filter- bzw. Reflektorwürfel gehen Sie folgendermaßen vor: 1 2 3 • Entfernen Sie den Analysator (Abb. 23.1). • Ziehen Sie die Frontabdeckung (Abb. 23.2) nach vorne ab. • Setzen Sie einen Filterwürfel bzw. Reflektorwürfel in die Ihnen frontal zugewandte Halterung ein. Dazu setzen Sie den Filter- bzw. Reflektorwürfel an der rechten Seite an und rasten ihn nach links in die Halterung ein. Abb. 23 Fluoreszenzachse 1 Analysator 2 Frontabdeckung 3 Klebeschild Hinweis: Die Nummerierung befindet sich direkt unterhalb der Halterung. • Bringen Sie die mitgelieferten Klebeschildchen (Abb. 23.3) entsprechend der Bestückung an der Frontseite des Fluoreszenzilluminators an. Abb. 24 Fluoreszenzachse ohne Frontabdeckung • Sind alle Filter- bzw. Reflektorwürfel eingesetzt, schließen Sie die Frontabdeckung wieder. Achten Sie darauf, dass die Abdeckung einrastet. Abb. 21 Filterwürfel, Vorderseite Abb. 22 Filterwürfel, Rückseite Abb. 25 Einsetzen des Filterwürfels 29 6. Montage 6.7 Analysator und Polarisator Polarisator Analysator • Befestigen Sie den Polarisatorhalter mit der linken Klemmschraube (26.2) an der Unterseite des Kondensorhalters. Entfernen Sie gegebenenfalls den Flipout-Blue-Filter. • Entfernen Sie die Steckkappe auf der linken Seite des Stativs. • Schieben Sie den Analysator bis zur Rastung in die Aufnahme (26.1). Bei Verwendung des Zwischentubus-Pol* bzw. der Analysatoraufnahme TL*: • Entfernen Sie die Steckkappe auf der linken Seite. • Schieben Sie den Analysator bis zur Rastung in die Aufnahme. • Stecken Sie den Polarisator mit der beschrifteten Seite nach oben in die untere Öffnung. Alternativ für Leica DM2000/3000: • Drehen Sie den Kondensor bis zum oberen Anschlag hoch. • Entfernen Sie gegebenenfalls das Filtermagazin DLF auf dem Stativfuß. • Stecken Sie stattdessen den Polarisatorhalter (Abb. 27) auf. • Stecken Sie den Polarisator mit der beschrifteten Seite nach oben in die untere Öffnung. Abb. 26 Montage des Polarisatorhalters 1 Analysatoraufnahme 2 Klemmschraube 1 Abb. 27 Filterhalter mit 2 Positionen für Leica DM2000/3000 2 30 6. Montage 6.8 Lambda-Plattenkompensator* 6.10 Optionales Zubehör • Drehen Sie den Kondensator bis zum oberen Anschlag hoch. Kamera • Entfernen Sie gegebenenfalls das Filtermagazin DLF auf dem Stativfuß. • Stecken Sie den Lambda-Plattenkompensator auf den Mikroskopfuß auf. Über einen Adapter kann eine Kamera kann angeschlossen werden. • Setzen Sie den Adapter auf den oberen Abgang des Tubus auf und befestigen Sie ihn mit der seitlichen Klemmschraube. • Schrauben Sie die Kamera auf. 6.9 DIC-Prismen Die Kondensor-Prismen sind bereits werkseitig eingesetzt. Die Justierung der Kondensor-Prismen erfolgt während der Inbetriebnahme → S. 37. Für die Nachrüstung von DIC-Prismen siehe → S. 75. Hinweis: Bei der Wahl des Adapters sind die Größe des Kamera-Chips und das Wechselsystem (cmount, B-mount, usw.) zu beachten. Siehe Tabelle. Aufgenommene Bilddiagonale in mm bei 1-Zoll2/3-Zoll- 1/2-Zoll- 1/3-ZollKamera Kamera Kamera Kamera Ohne variable Vergrößerung, nur für 1-Chip-Kameras: c-mount-Adapter 1 x HC 16 c-mount-Adapter 0.63 x HC c-mount-Adapter 0.5 x HC c-mount-Adapter 0.35 x HC - 11 17.5 - 8 12.7 16 - 6 9.5 12 17.1 Mit variabler Vergrößerung (Vario TV-Adapter) für 1-3 Chip-Kameras: c-mount, 0.32-1.6 x HC B-mount (ENG), 0.5-2.4 x HC (1/2-Zoll) +) erst ab Vario Faktor 0.42 x! 19+)-5 16-3.3 18-3.8 - Ohne variable Vergrößerung, für 1-3 Chip-Kameras: c-mount-Adapter 1 x B-mount-Adapter 1 x B-mount-Adapter 1.25 x F-mount-Adapter 1 x F-mount-Adapter 1.25 x Dazu jeweils erforderlich: TV-Optik 0.5 x HC 16 16 16 - 12 12 12 - 17.5 17.5 31 6. Montage Berechnung der Vergrößerung auf dem Monitor Die Vergrößerung VTV auf dem Monitor kann nach folgender Formel berechnet werden oder mittels eines Objektmikrometers und eines cmMaßstabs gemessen werden. VTV = Objektivvergrößerung x Faktor-Vergrößerungswechsler* x TV-Adaptervergrößerung x Bildschirmdurchmesser Chipdurchm. der Kamera Ergomodul Zur Erhöhung des Tubuseinblicks kann zwischen Tubus und Tubusaufnahme das Ergomodul 30 mm bzw. 60 mm eingesetzt werden. Die Befestigung erfolgt durch die seitliche Klemmschraube. Vergrößerungswechsler Optional kann ein Vergrößerungswechsler (Abb. 28) eingesetzt werden, der manuell bedient wird. An einem Rändelrad können die folgenden Vergrößerungsfaktoren eingestellt werden: 1x; 1,5x; 2x Diskussionseinrichtungen Diskussionseinrichtungen mit beleuchtetem Zeiger stehen für maximal 20 Beobachter zur Verfügung. Die Abstützung (29.3) muss exakt gerade gestellt werden. Der einblendbare Pfeil kann in x- und y-Rchtung verstellt werden (vertikal bewegen bzw. herausziehen und einstecken) (29.1) Durch Drehen des gleichen Hebels kann die Farbe geändert werden (rot/gelb). Die Helligkeit des Pfeils wird über (29.2) eingestellt. Ergolift Für das Stativ steht ein Stativuntersatz zur Verfügung, der in der Höhe und Neigung über Stellräder verstellt werden kann, um eine optimale Arbeitsposition zu erhalten. Abb. 29 Diskussionseinrichtung (hier mit Leica DM1000) 1 Bewegung des Leuchtzeigers in x- und y-Richtung und Umschaltung des Farbfilters 2 Helligkeitsregelung 3 Verstellung der Stütze Die externe Stromversorgung (Leuchtzeiger) ist nicht abgebildet. Abb. 28 Vergrößerungswechsler 1 2 3 32 6. Montage Zeicheneinrichtung 6.11 Anschluss an die Stromversorgung Die Zeicheneinrichtung L3/20 (Abb. 30) ermöglicht die Einspiegelung größerer Objekte neben dem Mikroskop in das mikroskopische Bild. Damit lassen sich u.a. sehr leicht Zeichnungen des Präparates durch Nachfahren der Objektkonturen erstellen oder Skalen einblenden. • Nach Abschluss der Montagearbeiten wird das Mikroskop mit dem mitgelieferten Netzkabel an die Spannungsversorgung angeschlossen (Abb. 31a,b.1) . Fußschalter für Leica DM3000 Zum Einschwenken der Objektive kann optional ein Doppel-Fußschalter ans Stativ Leica DM3000 angeschlossen werden. Der Anschluss befindet sich an der Stativrückseite (31b.2). Abb. 30 Zeicheneinrichtung 1 Verschlussklappe • Gegebenenfalls auch das Lampenhaus oder das externe Vorschaltgerät an die Stromversorgung anschließen. Für Leica DM3000: Gegebenenfalls nach dem Einschalten des Mikroskops die Objektive einschrauben. Unterhalb der schwarzen Objektivtasten auf dem Frontbedienfeld sind Klebeschildchen mit der zugehörigen Objektivvergrößerung angebracht. Durch Drücken der entsprechenden Taste wird die jeweilige Objektivposition angefahren. Hinweis: 1 Abb. 31a Stativrückseite Leica DM2000/DM2500 1 Anschluss Spannungsversorgung Der Anschluss eines PCs am Leica DM3000 (31b.3) ist nur notwendig, wenn neue Objektive eingelernt werden oder eine Umbelegung der seitlichen Funktionstasten durchgeführt werden soll. Dies ist nur über die Software Leica DMControl möglich. Abb. 31b Stativrückseite Leica DM3000 1 Anschluss Spannungsversorgung 2 Anschluss Fußschalter 3 Anschluss PC 1 33 7. Inbetriebnahme 7. Inbetriebnahme 7.2 Köhlersche Beleuchtung Hinweis: Sofern nichts anderes angegeben ist, gelten für das Mikroskop Leica DM3000 die gleichen Bedienungshinweise wie für das Mikroskop Leica DM2000. 7.1 Einschalten • Schalten Sie das Mikroskop am Ein-/Ausschalter (32.1, 33.5) ein. Achtung: Nach dem Einschalten der Gasentladungslampe muss der Brenner sofort justiert werden. Schalten Sie deshalb das Vorschaltgerät noch nicht ein. Arbeiten Sie zunächst im Durchlicht, um die Bedienelemente des Mikroskops kennenzulernen. Der Kondensor ist bereits werkseitig zentriert. Bedingt durch den Aus- und Wiedereinbau des Kondensors kann jedoch in einigen Fällen eine Nachzentrierung des Kondensors nötig sein. Überprüfen Sie deshalb die Kondensorzentrierung. Die folgenden Schritte werden für die Durchlicht-Hellfeldbeleuchtung erklärt. • Schalten Sie ggf. die Position BF der Kondensorscheibe* ein. • Ziehen Sie ggf. den Lichtringschieber* aus dem Kondensor heraus. Abb. 32 Leica DM2000 1 Ein-/Ausschalter 2 Fokushandrad 3 Tischpositionierung 1 34 2 3 7. Inbetriebnahme • Schwenken Sie ein Objektiv mit mittlerer Vergrößerung (10x-20x) ein. Für Kondensoren mit schwenkbarem Kondensorkopf: Schwenken Sie den Kondensorkopf ein. (Der Kondensorkopf wird für Objektive <10x ausgeschwenkt.) Für Leica DM3000: Zum Einschwenken des Objektivs drücken Sie die entsprechende Objektivtaste am Frontbedienfeld. Ist das Mikroskop mit einem motorisierten Kondensor ausgerüstet, wird der Kondensorkopf abhängig von der Objektivvergrößerung automatisch aus- oder eingeschwenkt. • Legen Sie nun ein Präparat in den Präparatehalter des Tisches ein. • Stellen Sie die Lichtintensität am Helligkeitsregler (33.2, 34.2) ein. • Schließen Sie die Leuchtfeldblende (33.4, 34.3) bis der Rand der Blende in der Präparateebene erscheint. • Mit der Kondensorhöhenverstellung (33.3, 34.1) verstellen Sie den Kondensor bis der Rand der Leuchtfeldblende scharf abgebildet ist. • Liegt das Bild nicht in der Sehfeldmitte (35c), muss der Kondensor mit Hilfe der beiden Zentrierschrauben (34.4) in die Mitte des Sehfeldes bewegt werden. Der dafür notwendige Schlüssel ist magnetisch an der Unterseite des Tisches befestigt. • Fokussieren Sie auf das Präparat mit dem Fokushandrad (32.2). Abb. 33 Leica DM2500 1 Fokushandrad 2 Helligkeitseinstellung 3 Kondensorhöhenverstellung 4 Leuchtfeldblendeneinstellung 5 Ein-/Ausschalter 6 Kondensorzentrierung 7 Tischpositionierung Abb. 34 Leica DM2000 1 Kondensorhöhenverstellung 2 Helligkeitseinstellung 3 Leuchtfeldblende 4 Kondensorzentrierung 4 7 1 2 3 4 5 6 12 3 35 7. Inbetriebnahme • Öffnen Sie die Leuchtfeldblende so weit, dass sie gerade aus dem Sehfeld verschwindet (35d). Achtung: Die Kondensorhöheneinstellung ist abhängig von der Präparatdicke und muss ggf. für unterschiedliche Präparate neu eingestellt werden. 7.3 Phasenkontrastringe überprüfen Ist Ihr Mikroskop für die Verwendung von Phasenkontrast ausgerüstet, ist die Kondensorscheibe bereits mit den zu den Objektiven passenden Lichtringen bestückt Die Lichtringe sind bereits werkseitig zentriert. Die Zentrierung sollte jedoch noch einmal überprüft werden. Hinweis: Abb. 35 Köhlersche Beleuchtung a Leuchtfeldblende nicht fokussiert, nicht zentriert, b Leuchtfeldblende fokussiert, jedoch nicht zentriert, c Leuchtfeldblende fokussiert und zentriert, Durchmesser jedoch zu klein, d Leuchtfelddurchmesser = Sehfelddurchmesser (Köhlersche Beleuchtung) Bei Kondensoren ohne Kondensorscheibe wird ein Lichtringschieber verwendet, der seitlich in den Kondensor eingeschoben wird. Hierbei entfällt die Zentrierung. Hinweis: a b c d Abb. 36 Einstellfernrohr 1 Verstellbare Augenlinse 2 Klemmring zur Fixierung der Fokuslage 1 Beim Einschwenken eines für Phasenkontrast geeigneten Objektivs muss der entsprechende Lichtring eingestellt werden. Die Objektivgravur (z.B. PH 1) gibt den korrespondierenden Lichtring (z.B. 1) an. Abb. 37 Zentriervorgang Phasenkontrast PH=Phasenkontrastring, LR=Lichtring a Kondensor in Position Hellfeld (BF) b Kondensor in Position Phasenkontrast (PH), Lichtring LR nicht zentriert c Lichtring und Phasenring zentriert a b c 2 PH 36 LR 7. Inbetriebnahme • Setzen Sie anstelle eines Okulars das Einstellfernrohr (Abb. 36) in den Beobachtungstubus ein. • Schwenken Sie das Phasenkontrastobjektiv mit der kleinsten Vergrößerung ein. • Fokussieren Sie das Präparat mit dem Fokushandrad. • Stellen Sie die Ringstruktur (37a) scharf, indem Sie den Klemmring (36.2) etwas lockern und die Augenlinse (36.1) verschieben. • Ziehen Sie den Klemmring wieder an. • Wählen Sie die korrespondierende Ringblende (Lichtring) im Kondensor. • Sind Lichtring und Phasenring nicht, wie in Abb. 37c gezeigt, deckungsgleich, muss der Lichtring zentriert werden. • Stecken Sie an der Rückseite des Kondensors die Zentrierschlüssel durch die dafür vorgesehenen Öffnungen (38.1). • Drehen Sie die Zentrierschlüssel, bis der dunkle Ring (Phasenring im Objektiv) deckungsgleich mit dem geringfügig schmaleren hellen Ring (Lichtring im Kondensor) ist (37c). • Wiederholen Sie den Vorgang für alle weiteren Lichtringe. • Nach dem Zentrieren den Zentrierschlüssel wieder herausnehmen. 7.4 Justieren der Kondensor-Prismen Bei kompletter Lieferung wird diese Justierung auf Bestellung bereits vor der Auslieferung vorgenommen, es empfiehlt sich aber eine Überprüfung von Zeit zu Zeit, insbesondere nach Transporten. • Ziehen Sie den Objektiv-Prismenschieber (39.1) ganz oder teilweise heraus. Abb. 39 1 Objektiv-Prismenschieber Abb. 38 Zentrierung Lichtringe (z.B: Kondensor UCA/P) 1 Zentrierschlüssel 1 1 1 37 7. Inbetriebnahme • Schwenken Sie ein geeignetes Objektiv ein und stellen Sie das Präparat scharf. • Schwenken Sie gegebenenfalls den Kondensorkopf ein. Für Objektive < 10x wird der Kondensorkopf ausgeschwenkt. • Stellen Sie die Köhlersche Beleuchtung ein (→ S. 34). • Setzen Sie anstelle eines Okulars das Einstellfernrohr (Abb. 36) in den Beobachtungstubus ein. • Schalten Sie nacheinander die kondensorseitigen Prismen ein und stellen Sie den diagonalen dunklen Kompensationsstreifen (40) scharf, indem Sie den Klemmring (36.2) etwas lockern und die Augenlinse (36.1) verschieben. Die Lamdaplatte muss dabei außer Funktion sein, d.h., die Gravur λ muss an der Unterseite des Analysators sein bzw. λ- und λ/4-Platte müssen entfernt sein. 38 Bei richtiger Justierung muss der dunkle Streifen in der Mitte des aufgehellten kreisförmigen Feldes liegen. Ist eine Justierung notwendig, gehen Sie folgendermaßen vor: • Stellen Sie sicher, dass die rechte Zentrierschraube, die für die Zentrierung der Lichtringe benötigt wird, nicht zu weit nach innen gedreht ist, da sonst die Verschiebung des Prismas mit dem linken Schlüssel behindert werden kann. • Drücken Sie den linken Zentrierschlüssel an der Rückseite des Kondensors nach innen bis er einrastet und justieren Sie den Streifen durch Drehen des Schlüssels. Der rechte Schlüssel wird dazu nicht benötigt. Abb. 40 Objektivpupille mit richtig zentriertem Kompensationsstreifen 7. Inbetriebnahme 7.5 Justieren der Lichtquellen Eine Zentrierung ist nur bei Verwendung des Lampenhauses 106z notwendig. • Bei Verwendung eines Vorschaltgerätes wird dieses zuerst eingeschaltet. Achtung! Nie in den direkten Strahlengang blicken! Achtung! Es besteht generell bei den Lichtquellen eine Gefährdung durch Strahlung (Blendung, UVStrahlung, IR-Strahlung). Beim Lampenhaus 106 z werden direktes Bild des Lichtbogens (bei Gasentladungslampen) und dessen Spiegelbild getrennt fokussiert und zueinander justiert. • Bringen Sie das Filtersystem bzw. den Reflektor in den Strahlengang. • Legen Sie ein Blatt Papier auf den Objekttisch und fokussieren Sie die Oberfläche mit einem Trockenobjektiv schwacher bis mittlerer Vergrößerung. • Stellen Sie die Leuchtfeld- und Aperturblende in eine mittlere Position. • Machen Sie mit einem Stift eine Markierung auf das Papier und verschieben Sie die Markierung in die Mitte des beleuchteten Feldes. • Entfernen Sie das Objektiv oder schwenken Sie eine nicht besetzte Position ein. Die Lichtquelle wird jetzt auf dem Papier abgebildet. Unter Beobachtung der Lichtquelle wird die Lampe wie folgt justiert. Abb. 41 Lampenhaus 106 z 1 Höhenjustierung der Lampe 2,4 Höhen- und Seitenjustierung des Spiegelbildes 3 Fokussierung des Reflektors 5 Seitenjustierung der Lampe 6 Kollektor (Fokussierung des Lampenbildes) 5 • Öffnen Sie ggf. den Shutter und entfernen Sie ggf. Streuscheiben* aus dem Strahlengang. 1 6 2 3 4 39 7. Inbetriebnahme Zentrieren der Quecksilberlampe Hg 50 W Abb. 42 Direktes Bild des Lichtbogens fokussiert, aber dezentriert (in Wirklichkeit ist das Bild unschärfer) • Auf dem Papier sehen Sie das direkte Bild des Lichtbogens und das Spiegelbild, die in der Regel gegeneinander verschoben sind. • Stellen Sie das direkte Bild mit dem Kollektor scharf (41.6). • Schwenken Sie das Spiegelbild des Lichtbogens mit den Justierknöpfen an der Rückseite des Lampenhauses (41.2,41.4) zur Seite oder ganz aus dem Strahlengang. Es bleibt das fokussierte Bild des Lichtbogens sichtbar (Abb. 42). • Platzieren Sie das direkte Bild des Lichtbogens mit den Justierknöpfen (41.1) und (41.5) rechts oder links an einer gedachten Mittellinie der Zentrierfläche (Abb. 43). Abb. 43 Direktes Bild des Lichtbogens in Sollposition (in Wirklichkeit ist das Bild unschärfer) • Schwenken Sie nun das Spiegelbild des Lichtbogens mit den Justierknöpfen (41.2) und (41.4) wieder ein und stellen Sie es mit Hilfe des Reflektors scharf (41.3). • Richten Sie das Spiegelbild symmetrisch zu dem direkten Bild aus (Abb.44). Benutzen Sie dazu wieder die Justierknöpfe (41.2) und (41.4). • Defokussieren Sie das Bild nun über den Kollektor mit dem Kollektorknopf (41.6) bis das Bild des Lichtbogens und das Spiegelbild nicht mehr zu erkennen sind und das Bild homogen ausgeleuchtet ist. 40 Abb. 44 Direktes Bild des Lichtbogens und Spiegelbild in Sollposition (in Wirklichkeit ist das Bild unschärfer) 7. Inbetriebnahme Zentrieren der Quecksilberlampen Hg 100 W und Xe 75 W Abb. 45 Direktes Bild des Lichtbogens fokussiert, aber dezentriert (in Wirklichkeit ist das Bild unschärfer) • Auf dem Papier sehen Sie das direkte Bild des Lichtbogens und das Spiegelbild, die in der Regel gegeneinander verschoben sind. • Stellen Sie das direkte Bild mit dem Kollektor scharf (41.6). • Schwenken Sie das Spiegelbild des Lichtbogens mit den Justierknöpfen an der Rückseite des Lampenhauses (41.2,41.4) zur Seite oder ganz aus dem Strahlengang. Es bleibt das fokussierte Bild des Lichtbogens sichtbar (Abb. 45). • Platzieren Sie das direkte Bild des Lichtbogens mit den Justierknöpfen (41.1) und (41.5) in der Mitte der Zentrierfläche, wobei die helle Spitze des Lichtbogens, der Kathodenbrenn-fleck, etwas außerhalb der Mitte liegen soll (Abb. 46). Abb. 46 Direktes Bild des Lichtbogens in Sollposition (in Wirklichkeit ist das Bild unschärfer) • Schwenken Sie nun das Spiegelbild des Lichtbogens mit den Justierknöpfen (41.2) und (41.4) wieder ein und stellen Sie es mit Hilfe des Reflektors scharf (41.3). • Richten Sie das Spiegelbild symmetrisch zu dem direkten Bild aus (Abb. 47). Benutzen Sie dazu wieder die Justierknöpfe (41.2) und (41.4). Die V-förmige Abstrahlung der Lichtbögen von direktem Bild und Spiegelbild können überlagert werden. Abb. 47 Direktes Bild des Lichtbogens und Spiegelbild in Sollposition (in Wirklichkeit ist das Bild unschärfer) Achtung! Die hellen Spitzen der Lichtbögen, die Kathodenbrennflecke, dürfen jedoch keinesfalls übereinander projeziert werden, weil dann durch Überhitzung Explosionsgefahr besteht. 41 7. Inbetriebnahme Achtung! Bei älteren Lampen ist die Struktur des Lichtbogens nicht mehr klar erkennbar. Das Bild ähnelt dann mehr dem einer HG 50-Lampe. Bild und Spiegelbild können daher nicht mehr exakt übereinander plaziert werden. Bringen Sie in diesem Fall beide Bilder zur Deckung. • Defokussieren Sie das Bild nun über den Kollektor mittels des Knopfes (41.6) bis das Bild des Lichtbogens und das Spiegelbild nicht mehr zu erkennen sind und das Bild homogen ausgeleuchtet ist. 42 8. Bedienung 8. Bedienung 8.1 Einschalten Bei Verwendung einer Gasentladungslampe muss das Vorschaltgerät zunächst separat eingeschaltet werden. Schalten Sie das Mikroskop am Ein/Aus-Schalter (48.1, bei Leica DM2500 auf der anderen Stativseite) ein. 8.2 Tische und Objektverschiebung Verlängern des Koaxialtriebs • Zum Verlängern ziehen Sie den unteren Griff (49b.1) nach unten. Dann führen Sie den oberen Griff (49b.2) entsprechend nach. Einstellen der Gängigkeit (Drehmoment) Das Drehmoment kann individuell durch zwei Rändel (49b.2, 49b.4) für X und Y angepasst werden. Abb. 48 1 Ein-/Ausschalter 2 Feinfokussierung 3 Grobfokussierung 4 Tischpositionierung 5 Arretierungsschraube des Tisches 6 Befestigungsschraube des Koaxialtriebs Abb. 49a Standard-Koaxialtrieb, b Koaxialtrieb mit Höhenund Drehmomenteinstellung 1 Objektverschiebung (Y-Richtung) 2 Einstellen der Gängigkeit (X-Richtung) 3 Objektverschiebung (X-Richtung) 4 Einstellen der Gängigkeit (Y-Richtung) 6 a b 4 5 3 1 1 2 3 3 2 1 4 43 8. Bedienung Rechts-/Linksbedienung 8.3 Fokussierung Der Koaxialtrieb lässt sich sowohl rechts wie auch links am Tisch befestigen. (Siehe auch Montage S. 20). Zum Wechseln der Seite gehen Sie folgendermaßen vor: Grob- und Feinfokussierung • Lockern Sie die Arretierungsschraube (48.5) links unten am Tisch. Den Schlüssel dafür finden Sie rechts an der Unterseite des Tisches. ! Achtung! Der Kondensor muss unbedingt abgesenkt werden! • Schieben Sie dann den Tisch ganz nach hinten. • Lösen Sie die Schraube (50.6) am Koaxialtrieb und ziehen Sie ihn heraus. • Stecken Sie den flachen Fokus-Feintriebknopf (48.3) auf der Seite auf, an der Sie den Koaxialtrieb befestigen wollen. Der Knopf wird magnetisch gehalten. Achten Sie darauf, dass der Knopf einrastet. Der andere Fokusknopf wird entsprechend auf der anderen Stativseite befestigt. • Befestigen Sie den Koaxialtrieb auf der anderen Tischseite, indem Sie die entsprechende Schraube wieder festziehen. Auf beiden Stativseiten befinden sich Fokushandräder zur Grob- und Feinfokussierung (Abb. 50 und 51). Die spezielle Form des flachen Fokus-Feintriebknopfs (Abb. 51.3) ermöglicht es, gleichzeitg den Koaxialtrieb mit der Hand zu umfassen und mit einem Finger den Feintrieb zu bedienen. Deshalb sollte der flache Knopf auf der entsprechenden Seite aufgesteckt werden. Siehe Rechts-/Linksbedienung des Tisches. Höhenverstellung der Fokusknöpfe • Defokussieren Sie das mikroskopische Bild, indem Sie den Tisch mit einer Umdrehung des Grob-Fokushandrads (50.2 , 51.2) nach unten verstellen. Abb. 50 Fokusknopf mit Skalierung 1 Einstellen der Gängigkeit 2 Grobfokussierung 3 Feinfokussierung • Bringen Sie den Tisch wieder in die Ausgangsposition und ziehen Sie die Arretierungsschraube wieder fest. Nach Installation den Objekthalter ganz nach links drehen und Trieb weiterdrehen bis man ein Klicken hört. • Stellen Sie den Kondensor wieder ein. 3 44 2 1 8. Bedienung • Umfassen Sie den rechten und linken Fokusknopf gleichzeitig und und schieben Sie die Knöpfe mit leichtem Druck nach oben bzw. nach unten in die gewünschte Position. • Fokussieren Sie das Bild wieder. Geschwindigkeitsumschaltung (optional) Für die Feinfokussierung stehen zwei Geschwindigkeitsstufen zur Verfügung. Die Umschaltung erfolgt durch Drücken des linken Fokuskopfes nach rechts bzw. des rechten Fokusknopfes nach links. Fokusschwelle einstellen Die aktuelle Position kann durch Feststellen des Rändelrades (51.1) am rechten Fokusknopf als Fokusschwelle gesetzt werden. Diese Position kann dann nicht mehr überfahren werden. Drehen Sie dazu das Rändelrad im Uhrzeigersinn. Drehen in entgegengesetzter Richtung löst das Rad wieder. Gängigkeit einstellen Die Gängigkeit des Fokustriebs kann an dem Rändelrad (50.1) am linken Fokusknopf verändert werden. ! Achtung! Achten Sie darauf, dass die Einstellung nicht zu leichtgängig ist. Andernfalls kann der Tisch unbeabsichtigt nach unten rutschen. Abb. 51 Fokushandrad mit flachem Fokusknopf 1 Setzen der Fokusschwelle 2 Grobfokussierung 3 Feinfokussierung 1 2 3 45 8. Bedienung 8.4 Tuben Okularauszug an Armlänge anpassen • Am Tubus AET22 können die Okulare bis zu 30 mm ausgezogen werden (Abb. 53). Hinweis: Verschließen Sie nicht benutzte Tubusausgänge, da sonst Streulicht die Beobachtung stören kann. Augenabstand einstellen • Stellen Sie den Augenabstand der Okularrohre so ein, dass ein deckungsgleiches Gesamtbild wahrgenommen wird (Abb. 52). Einblickwinkel einstellen • Bei den Ergonomietuben HC LVB 0/4/4 und HC -/0/4 kann der Einblickwinkel durch Kippen des Binokulareinblicks eingestellt werden. Ergotubus (lang, schwenkbar): 0° - 35° Ergotubus (kurz, schwenkbar): 7,5° - 32,5° Strahlenteilung bei Fototuben Tubus EDT22: Die Lichtaufteilung zwischen Beobachtungsund Dokumentationsausgang ist fest eingestellt (50:50). Tubus BDT25+: Die Lichtaufteilung wird manuell durch Herausziehen einer Schaltstange eingestellt. Schaltstange VIS 50/50 PHOTO Beobachtung 100 % 150 % 110 % • Bei den Ergotuben AET22 und EDT22 kann der Einblickwinkel durch Kippen des Binokulareinblicks im Bereich von 5° - 32° eingestellt werden (Abb. 53). Abb. 52 Tubuseinstellung ∩ Einstellung des persönlichen Augenabstandes 1 Skala (mm), 2 Zwischenmodul*, im Bild: Ergomodul 1 ∩ 2 46 Abb. 53 Individuelle Einstellungen am Tubus AET22 Foto 0% 50 % 100 % 8. Bedienung Tubus HC L 2TU: Die Lichtaufteilung wird manuell durch Herausziehen einer Schaltstange eingestellt. Schaltstange VIS PHOTO Beobachtung 100 % 110 % Foto 0% 100 % 8.5 Okulare Hinweis: Der Blendschutz der Okulare muss beim Mikroskopieren mit Brille abgenommen bzw. zurückgestülpt werden. Brillen mit Mehrbereichgläsern (Bifocal- und Gleitsichtgläser) müssen beim Mikroskopieren abgesetzt werden. • Wählen Sie bei den schaltbaren Tuben mit Dokumentationsausgang die Stellung 100% VIS. Okulare mit eingelegter Strichplatte • Stellen Sie die Strichplatte durch Verstellen der Augenlinse im Okular scharf ein. Abb. 54 Tubusprogramm HC L 1 Binokularer Beobachtungstubus HC LB 0/3/4 2 Ergonomietubus HC LVB 0/4/4, binokular, Einblickwinkel 0-35° zusätzlich Ergotubus (kurz) HC -/0/4, schwenkbar 7,5°-32,5° 3 Trinokularer Tubus H L1T 4/5/7, mit festem Strahlenteiler (50% / 50%) 4 HC L1VT 0/4/4 wie 3, jedoch mit verstellbarem Einblickwinkel 0-35° 5 Trinokularer Tubus mit 3 Schaltstellungen HC L3TP 4/5/7 6 Photostutzen, mit 2 Ausgängen (50% / 50%) 7 Photo-TV-Ausgang 1 3 2 4 5 • Fokussieren Sie das Objekt durch dieses Okular. • Schließen Sie dann das Auge und fokussieren Sie das Objekt jetzt nur durch Verstellen des zweiten Okulars. Korrektur bei Fehlsichtigkeit • Blicken Sie mit dem rechten Auge durch das rechte Okular und stellen Sie das Präparat scharf ein. • Sehen Sie danach mit dem linken Auge auf die gleiche Präparatstelle und drehen Sie den linken Okularstutzen so lange, bis die Objektstelle scharf abgebildet wird. Hierbei das Fokushandrad nicht betätigen! 6 7 47 8. Bedienung Objektivwechsel Die Objektive werden beim Leica DM2000 und DM2500 manuell in den Strahlengang eingeschwenkt. Achten Sie darauf, dass der Revolver einrastet. Beim Leica DM3000 erfolgt die Bedienung über das Frontbedienfeld und über die seitlichen Funktionstasten → S. 49. Beim Objektivwechsel sollten die Einstellungen für die • Leuchtfeldblende → S. 54 • Aperturblende → S. 53 • Lichtintensität → S. 52 überprüft werden. Hinweis: Beim Leica DM3000 wird nach dem Objektivwechsel die Lichtintensität automatisch angepasst. ↔ Abb. 55a Immersionsobjektiv, entriegelt 48 • Verwenden Sie bei Immersionsobjektiven das entsprechende Immersionsmedium. OIL: nur optisches Immersionsöl nach DIN/ ISO verwenden. Reinigung → S. 70 W: Wasserimmersion. IMM: Universalobjektiv für Wasser, Glyzerin, Ölimmersion. Achtung! Sicherheitsdatenblatt zum Immersionsöl beachten! Hinweis: Bei verriegelbaren Immersionsobjektiven drücken Sie zum Verriegeln die Frontpartie bis zum Anschlag nach oben (ca. 2 mm). Nach einer leichten Drehbewegung nach rechts ist das Objektiv verriegelt (Abb. 55b). Bei Objektiven mit Korrektionsfassung passen Sie das Objektiv durch Drehen des Rändels an die Dicke des Deckglases an. Abb. 55b Immersionsobjektiv, verriegelt ↔ 8.6 Objektive 8. Bedienung 8.7 Die Funktionstasten beim Leica DM3000 Auf dem Frontbedienfeld befinden sich sechs schwarze Tasten zur direkten Anwahl eines Objektivs. Unterhalb der Objektivtasten können Klebeschildchen mit der zugehörigen Objektivvergrößerung angebracht werden. Die Objektivtaste für das Objektiv 1, in der Regel das Objektiv mit der kleinsten Vergrößerung, befindet sich ganz links. Die Zuordnung der Tasten zum Objektiv erfolgt werkseitig und ist abhängig von der Mikroskopausrüstung. Die graue Toggle-Taste rechts außen dient zum Umschalten des Modus. Im Togglemodus wird beim Drücken einer der seitlichen Funktionstasten zwischen zwei zuvor eingelernten Vergrößerungen hin- und hergeschaltet. Die werkseitig vordefinierten Objektive können im Lernmodus leicht benutzerspezifisch verändert werden. Mit grünen bzw. gelben Dioden wird der aktuelle Modus und/oder das sich im Strahlengang befindliche Objektiv angezeigt. Anwahl eines Objektivs Toggle Klebeschildchen mit Objektivvergrößerung Im Standardmodus werden mit den beiden Funktionstasten an der rechten bzw. linken Stativseite (Abb. 56.2) nacheinander die Objektivvergrößerungen angefahren. Drücken der oberen bzw. der unteren Taste bewirkt das Drehen des Objektivrevolvers im Uhrzeigersinn bzw. entgegen dem Uhrzeigersinn. Die Tastenbelegung auf der rechten und linken Stativseite ist in der Standardkonfiguration identisch. (Siehe Sonderfunktion der seitlichen Funktionstasten → S. 51.) Abb. 56 Leica DM3000 1 Frontbedienfeld 2 Seitliche Funktionstasten 49 8. Bedienung Standardmodus Togglemodus Die Toggle-Taste ist aus. Die Taste für das aktuelle Objektiv leuchtet grün. Mit den seitlichen Funktionstasten können nacheinander die Objektive eingeschwenkt werden. Wird die seitliche Funktionstaste zweimal hintereinander gedrückt, wird ein Objektiv übersprungen und direkt das darauffolgende Objektiv angefahren. Die zu diesem Objektiv gehörende Taste leuchtet nun grün. Ausgehend vom Standardmodus wird durch einen kurzen Druck auf die Toggle-Taste zum Togglemodus umgeschaltet. Die Toggle-Taste leuchtet nun grün. Die kleinere der zuvor eingelernten Vergrößerungen wird eingestellt und die zugehörige Taste leuchtet ebenfalls grün. Die Taste des zweiten eingelernten Objektivs leuchtet gelb. Toggle Standardmodus aktiv und Objektiv 1 eingeschwenkt Toggle Togglemodus aktiv, Wechsel zwischen Objektiv 2 und 4 möglich, Objektiv 2 eingeschwenkt Mit den seitlichen Funktionstasten kann nun zwischen diesen beiden Objektiven hin- und hergeschaltet werden. Dabei ist es gleich, welche der seitlichen Funktionstasten gedrückt wird. Beim Wechsel zum anderen Objektiv wechselt auch die Farbanzeige, sodass immer die Taste des aktuellen Objektivs grün und die andere Objektivtaste gelb leuchtet. Erneutes Drücken der Toggle-Taste wechselt wieder in den Standardmodus. Ebenso wird in den Standardmodus gewechselt, wenn eine der Objektivtasten gedrückt wird. Das entsprechende Objektiv wird dann angefahren, die für den Togglemodus eingelernten Objektive bleiben erhalten. 50 8. Bedienung Lernmodus Die aktuellen Einstellungen bleiben solange erhalten, bis der Lernmodus erneut aktiviert wird. Halten Sie die Toggle-Taste gedrückt. Alle Tasten erlöschen. Toggle-Taste gedrückt halten Toggle Toggle Lernmodus beendet, Togglemodus aktiv, Objektiv 1 eingeschwenkt Lernmodus aktiv Wählen Sie nun bei gedrückter Toggle-Taste die für den Togglemodus gewünschten zwei Objektive durch Drücken der zugehörigen Tasten. Diese beiden Tasten leuchten nun gelb. Toggle-Taste gedrückt halten Toggle Lernmodus aktiv, Objektiv 1 und 3 für den Togglemodus ausgewählt Lassen Sie die Toggle-Taste wieder los. Der Togglemodus ist nun aktiv. Das Objektiv mit der kleineren Vergrößerung wird angefahren und die zugehörige Taste leuchtet grün. Die Taste des zweiten Objektivs leuchtet weiterhin gelb. Objektivwahl über Fußschalter Zum Einschwenken der Objektive kann optional ein Doppel-Fußschalter ans Stativ angeschlossen werden. Der Anschluss befindet sich an der Stativrückseite. Der linke Fußschalter hat die gleiche Funktion wie die untere seitliche Funktionstaste, der rechte Fußschalter entspricht der oberen seitlichen Funktionstaste. Sonderfunktion der seitlichen Funktionstasten Beim motorisierten Kondensor wird bei Objektivvergrößerungen < 10x der Kondensorkopf automatisch ausgeschwenkt, bei Vergrößerungen > 10x eingeschwenkt. Für spezielle Applikationen kann das Aus- und Einschwenken des Kondensorkopfes auf die rechten oder linken seitlichen Funktionstasten gelegt werden, sodass die Position des Kondensorkopfes vom Benutzer eingestellt werden kann. Umbelegung der Funktionstasten ist nur über Software Leica DMControl möglich und erfordert den Anschluss eines PCs. 51 8. Bedienung 8.8 Lichtquellen Durchlicht Hinweis: Für Leica DM2000: • Regeln Sie die Helligkeit am Stellrad (57.1) . Für Leica DM2500: • Regeln Sie die Helligkeit am Stellrad (58.1) . Die Objektivreihen HI PLAN xx SL und HI PLAN CY xx SL (Synchronized Light) ermöglichen den Objektivwechsel ohne Anpassung der Lichtintensität. Fluoreszenz Für Leica DM3000: • Für jedes Objektiv ist bereits werkseitig die Lichtintensität voreingestellt. Über das Stellrad (analog zu 57.1 beim DM2000) kann dieser Wert verändert werden. Der neue Wert wird für das jeweilige Objektiv gespeichert und automatisch wieder eingestellt, wenn dieses Objektiv angewählt wird. • Schalten Sie die Lampe am Vorschaltgerät ein. Achtung! Mindestabstand des Lampenhauses von der Wand, von Vorhängen, Tapeten, Büchern u.a. brennbaren Gegenständen 10 cm! Brandgefahr! Die Zahlenwerte am Stellrad sind keine Absolutwerte, sie dienen nur einer reproduzierbaren Einstellung. Der Maximalwert entspricht etwa 12 V, der Markierungspunkt einer Farbtemperatur von ca. 3200 K. Beachten Sie die gesonderte Anleitung zum Vorschaltgerät! Abb. 57 Leica DM2000 1 Helligkeitseinstellung Abb. 58 Leica DM2500 1 Helligkeitseinstellung 2 Leuchtfeldblendeneinstellung 1 52 1 2 8. Bedienung 8.9 Aperturblende Die Aperturblende (59.3) im Kondensor bestimmt Auflösung, Tiefenschärfe und Kontrast des mikroskopischen Bildes. Die beste Auflösung erreicht man, wenn die Aperturen von Objektiv und Kondensor etwa gleich sind. Bei Einengen der Aperturblende unter die Objektivapertur nimmt das Auflösungsvermögen ab, der Kontrast wird dagegen angehoben. Eine für das Auge merkliche Verminderung des Auflösungsvermögens tritt bei Schließen der Aperturblende unter ca. 0.6x des Objektivs ein und sollte möglichst vermieden werden. Bei der Polarisationsmikroskopie ergibt ein Einengen der Aperturblende meist kräftigere Farben. Die Aperturblende wird subjektiv nach Bildeindruck eingestellt, die Skala dient zur reproduzierbaren Einstellung ohne Zuordnung absoluter Aperturwerte. Farbkodierter Kondensor Die Farbmarkierungen am Kondensor (59.2) korrespondieren mit den Farbringen der Objektive. Beim Objektivwechsel kann eine geeignete Aperturblendeneinstellung dadurch gefunden werden, dass die Aperturblende auf die entsprechende Farbmarkierung (entspricht 2/3 der objektivseitigen Apertur) gestellt wird. Abb. 59 Kondensor CL/PH 1 Aufnahmeschlitz für Lichtringe u.ä. 2 Farbkodierung 3 Aperturblende 4 Filterhalter 5 Leuchtfeldblende Achtung: 1 2 3 4 Die Aperturblende im Beleuchtungsstrahlengang dient nicht zur Einstellung der Bildhelligkeit. Hierfür sind ausschließlich der Drehknopf zur Helligkeitsregulierung bzw. neutrale Lichtdämpfungfilter zu benutzen. Eine Aperturblende im Objektiv wird im Normalfall voll geöffnet. Ein Einengen ergibt bei geringerer Bildhelligkeit: Höhere Tiefenschärfe Geringere Deckglasempfindlichkeit Dunkelfeldeignung Kontrastveränderung 5 53 8. Bedienung 8.10 Leuchtfeldblende Die Leuchtfeldblende (58.2, 59.5) schützt das Präparat vor unnötiger Erwärmung und hält alles nicht zur Abbildung benötigte Licht vom Objekt fern, so dass der Kontrast gesteigert werden kann. Deshalb öffnet man sie immer nur so weit, dass das beobachtete oder fotographierte Objektfeld gerade ausgeleuchtet wird. Ein Vergrößerungswechsel bedingt immer eine Anpassung der Leuchtfeldblende. 54 9. Kontrastverfahren 9. Kontrastverfahren 9.1 Durchlicht Objektivvergrößerung 2.5x* Die Kondensoren CL/PH bzw. CLP/PH sind ohne Zusatz ab einer Vergrößerung 4x verwendbar. Bei Verwendung eines Streulichtschiebers* ist auch die Vergrößerung 2.5x möglich, nicht jedoch bei Polarisation. Hinweis: Für das Leica DM2500 mit Objektiven < 10x ist der Streuscheibenschieber notwendig. Die Kondensoren UCL bzw. UCLP sind ohne Zusatz ebenfalls ab einer Vergrößerung 4x verwendbar. Für das Leica DM2500 mit Objektiven < 10x ist die Anpassungslinse (Streuscheibe) notwendig. Bei Verwendung einer Anpassungslinse* (in der Kondensorscheibe) ist auch die Vergrößerung 2.5 x möglich. Vor dem Einschalten der Anpassungslinse muss die Köhlersche Beleuchtung (→ S. 34) mit dem Objektiv 4x oder 10x eingestellt werden. Wechseln Sie danach zum Objektiv 2.5x, schwenken Sie die Linse ein, öffnen Sie die Aperturblende ganz und engen Sie die Leuchtfeldblende ein. Sind sichelförmige Abschattungen sichtbar, muss die Linse zentriert werden. Stecken Sie dazu beide Zentrierschlüssel von schräg hinten in den Kondensor ein und verstellen Sie solange bis die asmmetrischen Abschattungen verschwinden. Entfernen Sie die Zentrierschlüssel und öffnen Sie die Leuchtfeldblende wieder. Die Linse kann nur bis max. Objektivvergrößerung 20 x benutzt werden. Köhlersche Beleuchtung ist grundsätzlich nicht mehr exakt möglich! Der Kondensor Achr.Apl.0.9 (P) ist ohne Zusatz ab einer Vergrößerung 4x verwendbar. Bei ausgeklapptem Kondensorkopf ist die Objektivvergrößerung 2.5x ohne Streuscheibe möglich, bei eingeklapptem Kondensorkopf muss die einsteckbare Streuscheibe verwendet werden (max. Okularsehfeldzahl 22). Objektivvergrößerungen 1.25x* und 1.6x für Leica DM2500 Die Kondensoren UCA/P und Achr.Apl.0.9 (P) können ohne Zusatz ab einer Vergrößerung von 1.25x eingesetzt werden. Der Kondensorkopf wird bei Objektivvergrößerungen 1.25x bis 5x ausgeschaltet, ab 10x eingeschaltet. Zur Verbesserung der Ausleuchtung wird das Lampenhaus 106z verwendet. Zum Zentrieren der Lampe gehen Sie folgendermaßen vor: (Zur Bedienung der Einstellknöpfe siehe S. 39) • Klappen Sie den Kondensorkopf ein und schwenken Sie das Objektiv 1.25x in den Strahlengang ein. • Bilden Sie das Lampenwendel durch Fokussieren des Kollektors als Quadrat in das Sehfeld ab. • Zentrieren Sie das Bild mittig zum Objektiv. 55 9. Kontrastverfahren Objektivvergrößerungen 1.6x und 2.5x* Abb. 60 Filteraufnahmen Mit den Kondensoren CL/PH bzw. CLP/PH, UCL bzw. UCLP sind Vergrößerungen 1.6x und 2.5x ebenfalls möglich, wenn der Kondensor komplett entfernt wird. Die Leuchtfeldblende wird dann funktionell zur Aperturblende. Nur Leica DM2000/3000: Filtermagazin DLF zum Aufsetzen auf den Mikroskopfuß Hinweis: Ist das Mikroskop für Polarisation ausgerüstet, müssen zur Durchführung der anderen Kontrastverfahren zunächst Analysator und Polarisator, sowie ggf. der Lambda-Plattenkompensator entfernt bzw. ausgeschwenkt werden. Nur Leica DM2000/3000: Filterhalter mit 2 Positionen bzw. 1 Position zum Aufsetzen auf den Mikroskopfuß 9.1.1 Hellfeld • Kondensorscheibe* ggf. auf Position BF schalten. • Lichtringschieber* ggf. herausziehen. • Fluoreszenzilluminator* ggf. auf Leerposition oder Filtersystem A schalten. Filterhalter zum Anschrauben unten an den Kondensor • Legen Sie ein Durchlichtpräparat auf. • Schwenken Sie ein geeignetes Objektiv ein. • Bei schwenkbaren Kondensorköpfen: Kondensorkopf für Objektivvergrößerungen < 10x ausschwenken. • Fokussieren Sie das Bild mit dem Fokushandrad und stellen Sie die Helligkeit ein. • Für eine optimale Einstellung von Apertur- und Leuchtfeldblende überprüfen Sie die Köhlersche Beleuchtung (→ S. 34). • Verwenden Sie bei Bedarf geeignete Durchlichtfilter (Abb. 60). 56 Nur Leica DM2500: Zwischenstück mit Filteraufnahmen zwischen Stativ und LH 107/2 9. Kontrastverfahren 9.1.2 Phasenkontrast 9.1.3 Dunkelfeld • Legen Sie ein Durchlichtpräparat auf. • Legen Sie ein Durchlichtpräparat auf. • Schwenken Sie ein geeignetes Objektiv ein. Objektive, die für Phasenkontrast geeignet sind, tragen die Gravur PH. • Schwenken Sie ein geeignetes Objektiv ein. • Fokussieren Sie das Bild mit dem Fokushandrad und stellen Sie die Helligkeit ein. • Für eine optimale Einstellung Leuchtfeldblende überprüfen Sie Köhlersche Beleuchtung (→ S. 34). der die • Öffnen Sie die Aperturblende ganz (Position PH). • Kondensoren UCL/UCLP und UCA/P: Stellen Sie den zum Objektiv gehörenden Lichtring an der Revolverscheibe des Kondensors ein. Beispiel: Zum Objektiv mit der Gravur PH 1 gehört der Lichtring 1. Kondensoren CL/PH, CLP/PH und APL. ACHR.0.9 (P): Verwenden Sie den Lichtringschieber. • Fokussieren Sie das Bild mit dem Fokushandrad und stellen Sie die Helligkeit ein. • Kondensor UCA/P und UCL: Stellen Sie die Position BF an der Revolverscheibe des Kondensors ein. Kondensoren CL/PH, CLP/PH und APL. ACHR.0.9 (P): Ziehen Sie den Lichtringschieber DF bis zum Anschlag heraus. Überprüfen Sie die Köhlersche Beleuchtung (→ S. 34). • Öffnen Sie die Aperturblende ganz (Position PH). • Kondensor UCA/P und UCL: Stellen Sie die Position DF an der Revolverscheibe des Kondensors ein. Kondensoren CL/PH, CLP/PH und APL. ACHR.0.9 (P): Schieben Sie den Lichtringschieber DF bis zum Anschlag ein. Hinweis: Bei Verwendung der Kondensoren UCL/UCLP und UCA/P müssen die Lichtringe zentriert sein. (→ S. 36). Hinweise: Bei Verwendung des Kondensors UCA/P und UCL muss der DF-Lichtring zentriert sein. (→ S. 36). 57 9. Kontrastverfahren Für das Leica DM2000, DM2500 und DM3000 stehen Spezial-Dunkelfeld-Kondensoren zur Verfügung (Abb. 61). Die Verwendbarkeit der DF-Kondensoren hängt von der Apertur der benutzten Objektive ab. Bei Objektiven mit eingebauter Irisblende kann die Apertur angepaßt werden. DF Kondensor D 0.80 - 0.95 D 1.20 - 1.44 OIL max. Objektivapertur 0.75 1.10 9.1.4 Schiefe Beleuchtung • Stellen Sie zunächst Durchlicht-Dunkelfeld ein. • Zum Erreichen eines reliefartigen Kontrastes: Kondensor UCA/P: Drehen Sie die Kondensorscheibe geringfügig aus der Position DF. Kondensoren CL/PH, CLP/PH und APL. ACHR.0.9 (P): Schieben Sie den Lichtringschieber DF nicht vollständig ein. • Schwenken Sie ggf. die Lambda-Platte des Lambda-Plattenkompensators aus. • Legen Sie ein Präparat auf und schwenken Sie ein geeignetes Objektiv ein. • Fokussieren Sie das Präparat und stellen Sie die Köhlersche Beleuchtung ein. • Schieben Sie den Analysator bis zur Rastung auf der linken Seite des Stativs ein (Abb.64). Die Gravur λ muss auf der Unterseite sein. Bei Verwendung des Zwischentubus Pol*: Schalten Sie den Analysator ein. • Stecken Sie den Polarisator mit der beschrifteten Seite nach oben in die untere Öffnung des Filterhalters. Abb. 62 Analysator/Polarisator 1 Analysatoraufnahme 2 Polarisatoraufnahme Abb. 61 Dunkelfeldkondensoren 1 Oberteil (trocken) 2 Unterteil 3 Orientierungsstift 4 Oberteil (Ölimmersion) 1 9.1.5 Polarisation a b 1 4 2 3 2 58 9. Kontrastverfahren ! 9.1.6 Differentieller Interferenzkontrast Achtung! Polarisator unbedingt mit der beschrifteten Seite nach oben benutzen, da sonst das integrierte Wärmeschutzfilter unwirksam ist und der Polarisator unbrauchbar wird (Verfärbung!) • Bringen Sie Polarisator und Analysator bis zur maximalen Dunkelheit in Kreuzstellung: • Entfernen Sie das Objekt oder suchen Sie eine Leerstelle im Präparat. • Schieben Sie den Analysator bis zur 2. Rastung ins Stativ ein bzw. schalten Sie das Modul ein. • Entfernen Sie die Kompensatoren aus dem Strahlengang. • Drehen Sie den Polarisator, bis die maximale Dunkelstellung (Abb. 63) im Okular beobachtbar ist. • Fixieren Sie die gefundene Kreuzstellung mittels der Klemmschraube. • Bei Bedarf: Stecken Sie die λ−Platte oder λ/4-Platte in die im Kondensorhalter integrierte Filteraufnahme und drehen Sie sie nach links, bis etwa zum Anschlag. Kondensor CLP/PH: Stecken Sie die λ−Platte oder λ /4-Platte in den seitlichen Schlitz des Kondensors. Kondensoren UCLP und UCA/P: Bringen Sie die Revolverscheibe in die Position λ oder λ /4. Alternativ: Es können Kompensatoren 4x20 mm in den Kompensatorschlitz eingesteckt werden. • Legen Sie ein Präparat auf, schwenken Sie ein geeignetes Objektiv ein und fokussieren Sie das Präparat. • Stellen Sie ggf. die Hellfeldposition im Kondensor UCA/P ein. • Fluoreszenzilluminator* ggf. auf Leerposition oder Filtersystem A schalten. • Ziehen Sie den Objektivprismenschieber aus dem Tubusschlitz. • Stellen Sie die Köhlersche Beleuchtung exakt ein (→ S. 34). • Entfernen Sie das Präparat oder suchen Sie Sie eine Leerstelle im Präparat. • Bringen Sie Polarisator und Analysator bis zur maximalen Dunkelheit in Kreuzstellung, wie unter 9.1.5 Polarisation beschrieben. Abb. 63 Kreuzen der Polarisatoren bei Beobachtung mit Einstellfernrohr oder Betrandlinse, Pol-Objektiv hoher Apertur a exakt gekreuzt, b nicht exakt gekreuzt Bei Spannungen im Kondensor oder im Objektiv ist Pos. a nicht einstellbar, Pos. b ist für DIC und Polarisationskontrast ausreichend. 59 9. Kontrastverfahren Für Polarisator ICT/P*: Schwenken Sie den Polarisator an der Unterseite des Kondensors in den Strahlengang ein. Stellen Sie sicher, dass der rote Indexpunkt an der Frontseite des Polarisators auf 0 steht. • Stecken Sie den Objektiv-Prismenschieber in den Tubusschlitz (Abb. 64) Der Kennbuchstabe, z.B. D, muss mit dem Kennbuchstaben der Objektivgravur (oberste Zeile) übereinstimmen. Die Zahl hinter dem Kennbuchstaben gibt nur eine Variante an, z.B. D1 = gilt auch für Pupillenlage D. • Wählen Sie das kondensorseitige Prisma an, das der Vergrößerung des benutzten Objektivs entspricht, z.B. Pos. 20/40 bei Objektiven 20x und 40x. • Die Feinjustierung erfolgt über die Justierschraube (64.1) oberhalb des Objektivrevolvers. • Der Kontrast kann zusätzlich mit der Aperturblende oder einer λ/4-Platte optimiert werden. Abb. 64 Objektivprismenschieber 1 Feinjustierung 1 60 9. Kontrastverfahren 9.2 Fluoreszenz • Legen Sie ein geeignetes Präparat auf und fahren Sie ein entsprechendes Objektiv an. • Fokussieren Sie das Bild eventuell zunächst im Durchlicht. • Schalten Sie die Auflichtquelle am externen Vorschaltgerät ein. • Öffnen Sie den Shutter. • Wählen Sie einen geeigneten FluoreszenzFilterwürfel aus. • Vergrößerungswechsler ggf. auf Faktor 1x stellen. • Filter BG38 (notwendig für Fotografie) ausschalten, falls kein störender Rotuntergrund wahrnehmbar ist. • Öffnen Sie die Aperturblende. • Stellen Sie die Leuchtfeldblende auf den Sehfelddurchmesser ein. Gegebenenfalls Leuchtfeldblende zentrieren. Abb. 65 Fluoreszenzilluminator mit Filterblockwechsel, Shutter, BG38, Leuchtfeld- und Aperturblende 61 10. Messungen mit dem Mikroskop 10. Messungen mit dem Mikroskop 10.1 Längenmessungen Für Längenmessungen sind erforderlich: - Strichplatte mit Teilung im Okular oder Tubus HC FSA 25 PE mit Diaeinspiegelung oder ein digitales Längenmessokular. - Objektmikrometer zur Eichung. Mikrometerwert Vor der Messung muss der Mikrometerwert der benutzten Objektiv-Okular-Kombination bekannt sein, d.h., die Strecke im Präparat, die einem Teilstrichabstand der benutzten Strichplatte entspricht. Zur Ermittlung des Wertes gehen Sie folgendermaßen vor: • Richten Sie Objektmikrometer und Strichplatte durch Drehen des Okulars parallel zueinander aus und bringen Sie die Nullstriche beider Skalen auf exakt gleiche Höhenposition. • Lesen Sie ab, wieviel Skalenteile des Objektmikrometers wieviel Skalenteilen der Mikroskopskala (Strichplatte) entsprechen. • Dividieren Sie beide Werte. Das Ergebnis ergibt den Mikrometerwert für die eben benutzte Gesamtvergrößerung. Beispiel: Treffen 1.220 mm des Objektmikrometers auf 50 Skalenteile der Messskala, so ist der Mikrometerwert = 1.220:50 = 0.0244 mm = 24.4 µm. Bei sehr schwach vergrößernden Objektiven kann zur Eichung u.U. nur ein Teil der Messskala benutzt werden. 62 Hinweise: Bei Verwendung eines Vergrößerungswechslers muss der Vergrößerungsfaktor berücksichtigt werden! Es empfiehlt sich unbedingt, die Eichung für jedes Objektiv und jeden Faktor des Vergrößerungswechslers individuell durchzuführen und nicht aus der Eichung mit einem Objektiv die Mikrometerwerte der übrigen Objektive bzw. Vergrößerungsstufen rechnerisch zu extrapolieren. Messfehler können entstehen, wenn das Okular nicht bis zum Anschlag in den Tubus eingesteckt ist. Besonders große Objektstrukturen können auch unter Verwendung der Nonien (0.1mm) auf dem Objekttisch bestimmt werden; dabei ist die zu messende Strecke evtl. aus einer kombinierten x- und y-Messung rechnerisch zu bestimmen. 10. Messungen mit dem Mikroskop 10.2 Dickenmessungen Objektmarkierer Dickenmessungen sind im Prinzip durchführbar, wenn sowohl die Objektunterseite als auch die Objektoberseite eindeutig fokussierbar ist. Aus der Differenz der Tischhöheneinstellung (Fokusfeintriebknopf: Abstand zweier Teilstriche ca. 1 µm) ergibt sich bei Durchlichtobjekten zunächst ein Wert, der durch den Brechungsindex des Objekts (durch welches "hindurchfokussiert" wurde) und ggf. des Immersionsöls verfälscht ist. Die wahre Dicke der im Durchlicht gemessenen Objektstelle ergibt sich aus der vertikalen Tischbewegung (Fokussierungsdifferenz) d' und den Brechungs-indices n0 des Objektes und ni des Mediums zwischen Deckglas und Objektiv (Luft = 1). Er wird statt eines Objektivs eingeschraubt. Durch Drehen eines absenkbaren Ritzdiamanten können zur Objektmarkierung Kreise von variablem Radius ins Deckglas bzw. in die Objektoberfläche graviert werden. d = d' n0 ni Beispiel: Ober- und Unterseite eines Dünnschliffes wurden mit einem Trockenobjektiv (ni = 1.0) fokussiert, Teilstrichanzeigen des mechanischen Feintriebes (Teilstrichabstand = 1 µm): 9.0 und 27.0. Also ist d' = 18 x 1 = 18 µm. Die Brechzahl der Objektstelle wurde mit n0 = 1.5 angenommen. Dicke d = 18 x 1 x 1.5 = 27 µm. Abb. 66 Teilung der Strichplatte im Okular (links) und Bild des Objektmikrometers (rechts) 63 10. Messungen mit dem Mikroskop 10.3 Differenzierung von Gicht/Pseudogicht Die Durchführung dieses Test setzt die Verwendung des Lambda-Plattenkompensators voraus. Montage → S. 31. Ausrichten des Lambda-Plattenkompensators • Drehen Sie die Lambda-Platte aus dem Strahlengang heraus (Abb. 67). • Bringen Sie Lambda-Plattenkompensator und Analysator bis zur maximalen Dunkelheit in Kreuzstellung (Polarisation → S. 59). • Fixieren Sie die gefundene Kreuzstellung mittels der seitlichen Klemmschraube (67.2). Im folgenden Abschnitt wird das grundlegende Verfahren zur Differenzierung von Gicht/ Pseudogicht erklärt. Dieser Test beruht auf der negativen Doppelbrechung von Uraten und der positiven Doppelbrechung von Pyrophosphaten. Sowohl Gichtkristalle (Mononatriumurat) als auch Pseudogichtkristalle (Calciumpyrophosphat) sind normalerweise nadelförmig. Viele Kristalle können jedoch in gebrochener oder unregelmäßiger Form vorliegen. Zur Durchführung des Tests ist es notwendig, mindestens einen intakten Kristall zu finden, der im Sehfeld parallel zum Ausrichtungshebel ist und einen, der senkrecht zum Ausrichtungshebel steht. Verfahrensweise • Schwenken Sie den Lambda-Plattenkompensator wieder ein. Um zu gewährleisten, dass der Test korrekt ausgeführt wird, sollte ein Objektträger aus bekannten Mononatriumuratkristallen verwendet werden. Abb. 67 Lambda-Platte ausgeschwenkt 1 Ausrichtungshebel 2 Klemmschraube • Es wird empfohlen, ein Objektiv 40x zu verwenden. • Schwenken Sie die Lambda-Platte aus dem Strahlengang heraus (Abb. 67). • Platzieren Sie den Objektträger auf dem Objekttisch, und fokussieren Sie die Kristalle, bis sie scharf zu sehen sind. Die nadelförmigen Kristalle werden, ungeachtet ihrer Ausrichtung, weiß dargestellt. 2 90° 64 1 • Schwenken Sie die Lambda-Platte und kippen Sie den Ausrichtungshebel (67.1) bis zum linken Anschlag. Kristalle mit langen Abmessungen, die parallel zum Ausrichtungshebel stehen werden gelb und Kristalle, die senkrecht zum Hebel stehen werden blau dargestellt (Abb. 68). 10. Messungen mit dem Mikroskop • Kippen Sie den Ausrichtungshebel (68.1) bis zum rechten Anschlag. Nun werden die parallelen Kristalle blau und die senkrechten Kristalle gelb dargestellt (Abb. 68). • Testen Sie die Kristalle mit dem Ausrichtungshebel in beiden möglichen Positionen, um eine eindeutige Bestimmung zu sicherzustellen. Abb. 68 Bestimmung von Gicht Verfahren zur Bestimmung von Pseudogicht: Der Pseudogicht-Test wird genauso durchgeführt wie der Gicht-Test. Die Farbveränderung ist jedoch genau umgekehrt wie im Falle von Gicht. Das heißt, wenn sich der Hebel (67.1) ganz links befindet, werden die parallelen Kristalle blau und die senkrechten Kristalle gelb dargestellt und umgekehrt, wenn sich der Hebel auf der rechten Seite befindet (Abb. 69). Abb. 69 Bestimmung von Pseudogicht Gicht-Test Kristalle gelb Pseudogicht-Test Kristalle blau Hebel nach links Kristalle blau Kristalle blau Kristalle gelb Hebel nach links Kristalle gelb Hebel nach rechts Kristalle gelb Kristalle blau Hebel nach rechts 65 11. Trouble Shooting 11. Trouble Shooting Problem Ursache/Abhilfe Stativ Das Mikroskop reagiert nicht. Stellen Sie sicher, dass Spannung auf der Steckdose liegt. Stellen Sie sicher, dass das Stativ an das Netz angeschlossen ist. Überprüfen Sie die Kabelverbindungen. Überprüfen Sie, ob die Sicherung defekt ist und wechseln Sie sie ggf. aus (→ S. 71). Beleuchtung Das Bild ist absolut dunkel. Durchlicht: Stellen Sie sicher, dass die Lampe in der Durchlichteinbaubeleuchtung bzw. im Lampenhaus 107/2 (DM 2500) nicht defekt ist. Lampenwechsel → S. 24f Fluoreszenz: Öffnen Sie den Shutter (→ S. 61). Stellen Sie sicher, dass das Lampenhaus an das Netz angeschlossen und nicht defekt ist. Lampenwechsel → S. 26ff Informieren Sie den Service und lassen Sie überprüfen, ob die Sicherung am Vorschaltgerät defekt ist. Das Bild ist inhomogen/ungleichmäßig ausgeleuchtet. Entfernen Sie alle nicht benötigten Filter aus dem Strahlengang. Zentrieren Sie die Lampe (Lampenhaus 106z) (→ S. 39ff). Wechseln Sie die alte Lampe aus (→ S. 24ff). Die Beleuchtung „flackert“. Stellen Sie sicher, dass kein Wackelkontakt vorliegt. Wechseln Sie die alte Lampe aus (→ S. 24ff). 66 11. Trouble Shooting Problem Fluoreszenz: Die Lampe zündet nicht sofort nach dem Einschalten. Ursache/Abhilfe Schalten Sie das Vorschaltgerät mehrmals an und aus. Lassen Sie Hg-Lampen vor dem erneuten An- schalten erst abkühlen. Hellfeld Das Präparat ist nicht zu fokussieren. Verwenden Sie das korrekte Immersions- medium. Legen Sie das Präparat mit dem Deckglas nach oben. Stellen Sie sicher, dass die Deckglasdicke korrekt ist und mit den Angaben am Objektiv übereinstimmt. Dunkelfeld Es lässt sich kein eindeutiger DF-Kontrast einstellen. Stellen Sie sicher, dass ein DF-Objektiv ver- wendet wird. Die Objektiv-Apertur ist zu hoch (maximal 0,75/ 1.10). Objektiv-Apertur eventuell durch Irisblende am Objektiv reduzieren. Überprüfen Sie die Kondensorzentrierung. Öffnen Sie die Aperturblende ganz. Das Bild ist inhomogen/ungleichmäßig ausgeleuchtet. Die Objektivvergrößerung ist zu schwach. Unerwünschte Lichtstreuung. Säubern Sie das Präparat und die angrenzen- Wählen Sie eine höhere Vergrößerung. den Linsenflächen (→ S. 71) . 67 11. Trouble Shooting Problem Ursache/Abhilfe Phasenkontrast Es lässt sich kein Phasenkontrast einstellen. Das Präparat ist zu dick, zu dünn oder zu stark gefärbt. Brechzahl von Einschlussmittel und Objekt ist identisch, sodass kein Phasensprung entsteht. Das Deckglas ist nicht gleichmäßig aufgelegt. Überprüfen Sie, ob der richtige Lichtring eingestellt ist (→ S. 57). Überprüfen Sie die Zentrierung der Lichtringe (→ S. 36f). Überprüfen Sie die Kondensorzentrierung. Öffnen Sie die Aperturblende ganz. Polarisation Es lässt sich kein Polarisationskontrast einstellen. Kreuzen Sie Polarisator und Analysator bis zur maximalen Dunkelheit (ohne Präparat) (→ S. 59). Durchlicht-Interferenzkontrast Es lässt sich kein Durchlicht-Interferenzkontrast einstellen. Das Präparat ist zu dick oder zu dünn. Einschlussmittel oder Objekt ist aus doppel- brechendem Material. Drehen Sie das Objekt. Brechzahlunterschiedzwischen Einschlussmittel und Objekt ist zu gering. Das Deckglas ist ist zu dick. Überprüfen Sie, ob das richtige Kondensorprisma eingestellt ist (→ S. 59). Überprüfen Sie die Zentrierung der Kondensorprismen (→ S. 37). Überprüfen Sie die Köhlersche Beleuchtung (→ S. 34). Kreuzen Sie Polarisator und Analysator bis zur maximalen Dunkelheit (ohne Präparat) (→ S. 59). Der 68 11. Trouble Shooting Problem Ursache/Abhilfe Fluoreszenz Das Bild ist absolut dunkel (keine Fluoreszenz). Öffnen Sie den Shutter (→ S. 61). Überprüfen Sie die Antigen-Antikörper-Kombi- nation. Setzen Sie eine neue Lampe ein (→ S. 26ff). Die Fluoreszenz ist zu schwach. Zentrieren Sie die Lampe (→ S. 39ff) Setzen Sie eine neue Lampe ein (→ S. 26ff). 69 12. Pflege des Mikroskops 12.Pflege des Mikroskops 12.2 Reinigung Achtung! Vor Reinigungs- und Wartungsarbeiten Netzstecker ziehen! Elektrische Komponenten vor Feuchtigkeit schützen! Mikroskope in warmen und feucht-warmen Klimaten brauchen besondere Pflege, um einer Fungusbildung vorzubeugen. Das Mikroskop sollte nach jedem Gebrauch gereinigt werden und die Mikroskop-Optik peinlich sauber gehalten werden. 12.1 Staubschutz Hinweis: Zum Schutz gegen Verstaubung sollten Sie das Mikroskop und die Zubehörkomponenten nach jedem Gebrauch mit der Schutzhülle abdecken. ! Achtung: Faser- und Staubreste können bei der Fluoreszenzmikroskopie störende Untergrundfluoreszenz erzeugen. Reinigen lackierter Teile Staub und lose Schmutzpartikel können mit einem weichen Pinsel oder fusselfreien Baumwolltuch entfernt werden. Festsitzender Schmutz kann je nach Bedarf mit allen handelsüblichen wässrigen Lösungen, Waschbenzin oder Alkohol beseitigt werden. Verwenden Sie für die Reinigung der lackierten Teile einen Leinen- oder Lederlappen, der mit einer dieser Substanzen befeuchtet ist. ! Achtung: Aceton, Xylol oder nitrohaltige Verdünnungen können das Mikroskop beschädigen und dürfen deshalb nicht verwendet werden. Achtung! Mikroskop und Lampenhäuser zunächst abkühlen lassen. Die Schutzhülle ist nicht temperaturbeständig. Außerdem kann sich Kondenswasser bilden. 70 Pflegemittel unbekannter Zusammensetzung sind an einer wenig sichtbaren Stelle zu prüfen. Lack- oder Kunststoffoberflächen dürfen nicht mattiert oder angelöst werden. 12. Pflege des Mikroskops Reinigen von Glasflächen Entfernen Sie Staub auf Glasflächen mit einem feinen, trockenen und fettfreien Haarpinsel, durch Abblasen mit einem Blaseball oder durch Absaugen mittels Vakuum. Entfernen Sie hartnäckigen Schmutz auf Glasflächen vorsichtig mit einem sauberen, mit destilliertem Wasser angefeuchteten Tuch. Lässt sich der Schmutz nicht entfernen, können anstelle von Wasser auch reiner Alkohol, Chloroform oder Waschbenzin verwendet werden. Entfernen von Immersionsöl Achtung! Sicherheitshinweise zum Immersionsöl beachten! Wischen Sie zunächst das Immersionsöl mit einem sauberen Baumwollappen ab, und wischen Sie anschließend mit Ethylalkohol mehrmals nach. 12.3 Umgang mit Säuren und Basen Reinigen von Objektiven Achtung! Die Objektive dürfen beim Reinigen nicht auseinandergeschraubt werden. Zeigen sich Schäden auf innenliegenden Flächen, so sind die Objektive zur Instandsetzung an Ihre Leica-Niederlassung zu schicken. Auch von einer Reinigung der Innenflächen der Okulare wird abgeraten. Bei Untersuchungen unter Verwendung von Säuren oder anderen aggressiven Chemikalien ist besondere Vorsicht geboten. ! Vermeiden Sie unter allen Umständen die direkte Berührung von Optik und mechanischen Teilen mit diesen Chemikalien. 12.4 Bei Objektiven wird die Frontlinse wie bei „Reinigen von Glasflächen“ beschrieben gesäubert. Die obere Linse wird durch Abblasen mit einem Blasebalg gereinigt. Achtung: Sicherungswechsel Der Sicherungseinschub (Abb. 70) an der Rückseite des Stativs kann mittels eines spitzen Gegenstandes herausgezogen werden. Sicherungsdaten → S. 8. Bestellnummer → S. 72. Achtung! Abb. 70 Sicherungseinschub Es ist sicherzustellen, dass nur Sicherungen vom angegebenen Typ und der angegebenen Nennstromstärke als Ersatz verwendet werden. Die Verwendung anderer Sicherungen oder Überbrückung des Sicherungshalters ist unzulässig. Es besteht Feuergefahr bei Verwendung anderer Sicherungen. 71 13. Wichtigste Verschleiß- und Ersatzteile 13.Wichtigste Verschleiß- und Ersatzteile Bestell-Nummer Sach-Nummer Ersatzlampen 11 500 319 11 500 974 11 500 137 11 500 138 11 500 321 11 500 139 Bezeichnung Verwendung für Halogenglühlampe 12 V 30 W Halogenglühlampe 12 V 100 W Hg-Höchstdrucklampe 50 W Hg-Höchstdrucklampe 100 W Hg-Höchstdrucklampe 100 W (103 W/2) Xenon-Hochdrucklampe 75 W Einbaubeleuchtung Lampenhaus 107/2 Lampenhaus 106 z Lampenhaus 106 z Lampenhaus 106 z Schraubdeckel für unbesetzte Objektivaufnahmen 020-422.570-000 Schraubdeckel M 25 Objektivrevolver Ersatzaugenmuschel (Blendschutz) für Okular HC PLAN 021-500.017-005 Augenmuschel HC PLAN 021-264.520-018 Augenmuschel HC PLAN 021-264.520-018 Augenmuschel HC PLAN Okular 10x/25 Okular 10x/22 Okular 10x/20 Immersionsöl nach DIN/ISO, fluoreszenzfrei 11 513 787 110 ml 11 513 522 100 ml 11 513 788 500 ml Sicherungen 11 826 365 72 Lampenhaus 106 z F 3,15 A 250 V Objektive OIL und IMM und Öl-Kondensorköpfe Sicherung für Mikroskopstativ 14. Nachrüstungen 14. Nachrüstungen 14.1 Bestücken des Durchlichtfiltermagazins 14.2 Bestücken der Kondensorscheibe • Demontieren Sie den Tubus und ggf. die Zwischensysteme. • Drehen Sie den Tisch nach oben und senken Sie den Kondensor ab. • Stellen Sie das Stativ mit dem Boden nach oben, lösen Sie die Befestigungsschrauben am Boden und heben Sie die Bodenplatte heraus. • Entfernen Sie den Kondensor. Lockern Sie dazu die Kondensorbefestigungsschraube. Kondensor UCL/UCLP • Stecken Sie die Filter in die halbkreisförmigen Aufnahmen. Eine bestimmte Reihenfolge ist nicht notwendig. • Bauen Sie das Filtermagazin wieder ein. • Drehen Sie die Schraube (72.1) vollständig heraus. • Drehen Sie die Zentrierschrauben soweit zurück, dass sich Lichtringe, λ- und λ/4-Plättchen* bzw. die Linse* 2.5x einsetzen lassen. Die größte Bohrung ist für Hellfeldbeobachtung (= BF), die etwas kleineren für Lichtringe bzw. λ- und λ/4-Plättchen oder die Anpassungslinse 2.5x. Abb. 72 Kondensor UCL 1 Befestigungsschraube für Kondensorscheibe Abb. 71 Durchlichtfiltermagazin für Leica DM2500 1 73 14. Nachrüstungen Hinweise: Bei Verwendung einer kleineren Bohrung für Hellfeld kann die maximale Beleuchtungsapertur nicht genutzt werden. Die Beschriftung ( z.B. DF, PH 1...,λ ) muss nach oben weisen, λ- und λ/4-Platte müssen orientiert eingebaut werden: Die Einkerbung muss zur Mitte der Scheibe weisen! Die Beschriftung der Komponenten sollte mit der Markierung an der entgegengesetzten Position (Außenrand der Scheibe) übereinstimmen. • Ziehen Sie die Zentrierschrauben soweit an, dass die Komponenten etwa mittig in den Bohrungen sitzen. ! Achtung: Vor dem Einbau der Scheibe in den Kondensor darauf achten, dass keine Zentrierschraube seitlich übersteht. • Befestigen Sie die Kondensorscheibe mittels der Steckachse und prüfen Sie das einwandfreie Drehen der Scheibe um 360° . • Schrauben Sie den Kondensorkopf wieder ein und befestigen Sie den Kondensor mit der Kondensorbefestigungsschraube. Kondensor UCA/P • Drehen Sie die Schraube an der Unterseite des Kondensors (Mitte) vollständig heraus. • Drehen Sie die Zentrierschrauben soweit zurück, dass sich Lichtringe, λ- und λ/4-Plättchen* einsetzen lassen. Abb. 73 Kondensorscheibe UCL 1 Kondensorscheibe 2 Lichtring oder λ- bzw. λ/4-Platte 3 Zentrierschrauben 4 Achse 5 Zentrierschlüssel 6 λ- oderλ/4-Platte 7 Zusatzlinse 2.5x...20x Die größte Bohrung ist für Hellfeldbeobachtung (= BF), die etwas kleineren für Lichtringe bzw. λ- und λ/4-Plättchen. Hinweise: Bei Verwendung einer kleineren Bohrung für Hellfeld kann die maximale Beleuchtungsapertur nicht genutzt werden. Die Beschriftung ( z.B. DF, PH 1...,λ ) muss nach oben weisen, λ- und λ/4-Platte müssen orientiert eingebaut werden: Die Einkerbung muss zur Mitte der Scheibe weisen! Die Beschriftung der Komponenten sollte mit der Markierung an der entgegengesetzten Position (Außenrand der Scheibe) übereinstimmen. 74 14. Nachrüstungen Einsetzen der DIC-Kondensor-Prismen: Mit K2, K3 usw. beschriftete Prismen in die großen Bohrungen wie folgt einsetzen: • Drehen Sie die Zentrierschrauben etwas zurück. • Die Prismen-Beschriftung muss nach oben zeigen. Die Bezeichnung K2 ,... muss unbedingt in der Nähe des Markierungspunktes am Rande der Bohrung liegen. ! Achtung: Vor dem Einbau der Scheibe in den Kondensor darauf achten, dass keine Zentrierschraube seitlich übersteht. • Befestigen Sie die Kondensorscheibe mittels der Steckachse und prüfen Sie das einwandfreie Drehen der Scheibe um 360° . • Schrauben Sie den Kondensorkopf wieder ein und befestigen Sie den Kondensor mit der Kondensorbefestigungsschraube. Hinweis: Bei um 180° gedrehtem Einbau ist kein Durchlicht-Interferenzkontrast möglich!. • Die 2 Rastnasen an der Prismenunterseite müssen exakt in den Führungsschlitz einrasten. ∩ • Zentrierschrauben etwas eindrehen und dabei darauf achten, ob sich alle Prismen in Richtung einwandfrei verschieben lassen und dicht am unteren Rand der Bohrung aufsitzen. • Kleben Sie die entsprechenden Selbstklebeschilder auf die Felder, die gegenüber (d.h. jenseits der Drehachse) des Lichtrings bzw. des Prismas angeordnet sind. Abb. 74 Kondensorscheibe UCA/P 1 Lichtring "klein,PH", 2 Lichtring "groß" für große Bohrungen, 3 a, b DIC-Kondensorprisma, 4 Markierung für Montage der DIC Kondensorprismen, 5 Markierung K auf der Prismenfassung, 6 Führungsnut für Prisma, 7 Klebeschild, 8 Zentrierschrauben, 9 Drehachse, 10 λ- bzw. λ/4-Platte 75 15. Index 15. Index Analysator 30, 58 Analysatoraufnahme TL 30 Anpassungslinse 55 Anschluss Stromversorgung 33 Anschluss PC 33 Aperturblende 53 Aufstellungsort 18 Augenabstand 46 Fluoreszenz 61 Fluoreszenz-Revolverscheibe 29 Fluoreszenzilluminator 26 Fokushandräder 44 Fokusschwelle 45 Fokussierung 44 Frontbedienfeld 17, 23, 49 Funktionstasten 17, 33, 49, 51 Fußschalter 33, 51 BG38 61 DIC-Prismen 31 Dickenmessungen 63 Differentieller Interferenzkontrast 59 Diskussionseinrichtungen 32 Drehmoment 43 Dunkelfeld 57 Dunkelfeldkondensoren 58 Durchlicht 55 Durchlichtbeleuchtung 24 Durchlichtfilter 56 Durchlichtfiltermagazin 73 Einbaubeleuchtung 24 Einblickwinkel 46 Einstellfernrohr 36 Elektrische Sicherheit 8 Ergolift 32 Ergomodul 32 Ersatzlampen 72 Farbkodierter Kondensor 53 Fehlsichtigkeit 47 Feinfokussierung 44 Filteraufnahmen 56 Filterhalter 30, 53, 56 Filtermagazin DLF 56 Filterwürfel 29, 61 76 Gängigkeit 43, 45 Gasentladungslampen 26, 27, 28 Geschwindigkeitsumschaltung 45 Gicht/Pseudogicht 64 Grobfokussierung 44 Hellfeld 56 Helligkeit 52 Hg 50-Brenner: 27 Höhenverstellung Fokusknöpfe 44 Kondensorzentrierung 35 Kontrastverfahren 10, 12 Korrektionsfassung 48 Kreuzstellung 59 Lambda-Platte 58, 59 Lambda-Plattenkompensator 31, 64 Lampenhaus 106z 26, 39 Lampenhaus 107/2 25 Lampenwechsel Durchlicht 24 Längenmessungen 62 LAS 13 Leica Application Suite 13 Lernmodus 49, 51 Leuchtfeldblende 52, 53, 54 Lichtintensität 52 Lichtquellen 52 Lichtring 57 Lichtringschieber 36, 57 Mikrometerwert 62 Identification Sheet 23 Immersionsobjektiv 48 Immersionsöl 48, 71, 72 Justieren der Kondensor-Prismen 37 Justieren der Lichtquellen 379 Kamera 31 Koaxialtrieb 20, 43 Köhlersche Beleuchtung 34 Kompensatoren 59 Kondensor 11, 13, 22 Kondensor-Prismen 31, 37 Kondensorhalter 22 Kondensorhöhenverstellung 22, 35 Kondensorkopf 35, 56 Kondensorscheibe 73 Objektiv-Prismenschieber 37, 59, 60 Objektive 23, 48 Objektivrevolver 10, 12 Objektivvergrößerung 1.25x-2.5x 55 Objektivwechsel 48 Objektivwechseltasten 17, 49 Objektmarkierer 63 Objekttisch 20 Objektverschiebung 43 Okularauszug 46 Okulare 23, 47 Pflege 70 Phasenkontrast 57 Phasenkontrastringe 36 Polarisation 58 15. Index Polarisator 30, 58 Polarisator ICT/P 60 Polarisatorhalter 30 Präparatehalter 20 Umgebungsbedingungen 18 Vergrößerungswechsler 32 Verlängern des Koaxialtriebs 43 Vorschaltgerät 26, 43 Quecksilberlampe Hg 50 W 40 Quecksilberlampe Hg 100 W/Xe 75 W 41 Xe 75-Brenner 27 Rechts-/Linksbedienung 44 Reinigung 70 Zeicheneinrichtung 33 Zentrierung Lichtringe 37 Zusatzlinse LS 22 Zwischentubus Pol 30, 58 Schiefe Beleuchtung 58 Schnittstellen 13 Shutter 61 Sicherheitshinweise 8 Sicherung 8, 72 Sicherungswechsel 71 Software 13, 33, 51 Standardmodus 49, 50 Staubschutz 70 Strahlenteilung 46 Streuscheibenschieber 55 Strichplatte 47 Technische Daten 8 Tische 43 Toggle-Taste 17, 49 Togglemodus 49, 50 Transport 19 Tuben 46 Tubus 23 Tubusausgänge 46 Tubusprogramm 47 77 16. EU-Konformitätserklärung 16. EU-Konformitätserklärung Download: DM2000: http://www.light-microscopy.com/down_ce-declaration_dm2000 DM2500: http://www.light-microscopy.com/down_ce-declaration_dm2500 DM3000: http://www.light-microscopy.com/down_ce-declaration_dm3000 78 Leica DM2000 Leica DM2500 Leica DM3000 Mode d’emploi Droits d’auteur Droits d’auteur Leica Microsystems Wetzlar GmbH est détenteur de tous les droits d’auteur de cette documentation. La reproduction du texte et des figures – même partielle – par impression, photocopie, microfilm ou autres procédures, dont celles impliquant des systèmes électroniques, n’est permise qu’avec l’autorisation expresse et écrite de Leica Microsystems Wetzlar GmbH. Les informations contenues dans le présent document représentent l’état actuel de la technique et de la science. Nous avons rédigé ce document (texte et figures) avec le plus grand soin. Toutefois, nous n’assumons aucune responsabilité, quelle qu’elle soit, pour l’exactitude du contenu de ce manuel. Nous vous serions toutefois reconnaissants de nous signaler toute erreur éventuelle. Les informations contenues dans ce manuel peuvent faire l’objet d’une modification sans préavis. 4 Sommaire Sommaire 1. Remarques importantes concernant ce mode d'emploi ........................................... 6 Fonction des microscopes ...................... 7 3. Consignes de sécurité ............................. 3.1 Consignes générales de sécurité .......... 3.2 Sécurité électrique ................................... 8 8 8 2. 4. Vue d'ensemble ......................................... 10 5. Déballage ................................................... 18 6. 6.1 6.2 6.3 6.4 6.5 Assemblage du microscope ................... Platine .......................................................... Condenseur ................................................ Tube et oculaires ....................................... Objectifs ...................................................... Source de lumière pour l'axe de diascopie ..................................................... Composants des applications en fluorescence .............................................. 6.6.1 Illuminateur à fluorescence ......... 6.6.2 Boîtier de lampe 106 Z ................... 6.6.3 Équipement de la tourelle de fluorescence .......... Analyseur et polariseur ............................ Compensateur à lame Lambda ............... Prismes CIT ................................................. Accessoires en option .............................. Connexion au bloc d'alimentation ......... 20 20 22 23 23 Mise en service ......................................... Mise sous tension ..................................... Éclairage de Koehler ................................ Vérification des anneaux de contraste de phase ...................................................... 7.4 Ajustement des prismes de condenseur ................................................. 7.5 Ajustement des sources de lumière ...... 34 34 34 6.6 6.7 6.8 6.9 6.10 6.11 7. 7.1 7.2 7.3 8. 8.1 8.2 8.3 Utilisation ................................................... Mise sous tension ..................................... Platines et déplacement d'objet............. Mise au point .............................................. 24 26 26 26 29 30 31 31 31 33 36 37 39 43 43 43 44 8.4 8.5 8.6 8.7 Tubes ............................................................ Oculaires ..................................................... Objectifs ...................................................... Le panneau de commandes du Leica DM3000 ....................................... 8.8 Sources de lumière ................................... 8.9 Diaphragme d’ouverture .......................... 8.10 Diaphragme de champ ............................. 46 47 48 9. Méthode de contraste .............................. 9.1 Lumière transmise ..................................... 9.1.1 Fond clair .......................................... 9.1.2 Contraste de phase ........................ 9.1.3 Fond noir ........................................... 9.1.4 Éclairage oblique ............................ 9.1.5 Polarisation ...................................... 9.1.6 Contraste interférentiel ................. 9.2 Fluorescence .............................................. 55 55 56 57 57 58 58 59 61 10. 10.1 10.2 10.3 62 62 63 Mesures avec le microscope ................. Mesures de longueur ............................... Mesures d'épaisseur ................................ Différenciation de la goutte et de la pseudo-goutte ...... 49 52 53 54 64 11. Dépannage ................................................. 65 12. 12.1 12.2 12.3 12.4 Entretien du microscope ......................... Pare-poussière .......................................... Nettoyage ................................................... Maniement des acides et bases ............ Changement de fusible ............................. 70 70 70 71 71 13. Principales pièces d’usure et de rechange ........................................... 72 14. Adaptations ultérieures ........................... 73 14.1 Équipement du magasin à filtres de diascopie ................ 73 14.2 Équipement de la tourelle de condenseur ................................................. 73 15. Index ............................................................ 76 16. Déclaration de conformité UE ................ 78 5 1. Remarques importantes concernant ce mode d’emploi 1. Remarques importantes concernant ce mode d’emploi Attention ! Ce mode d’emploi est un élément essentiel du microscope. Il convient de le lire attentivement avant l’assemblage, la mise en service et l’utilisation. Ce mode d’emploi contient des instructions et informations importantes pour la sécurité de fonctionnement et le maintien en bon état de marche du microscope et des accessoires. Il faut donc le conserver avec soin. Symboles, pictogrammes et leur signification : (1.2) Les chiffres entre parenthèses, par ex. (1.2), se réfèrent aux figures, par exemple la fig. 1, pos. 2. → p. 20 Les chiffres avec balise, par exemple → p. 20, indiquent une page précise de ce mode d’emploi. ATTENTION ! Les consignes de sécurité spécifiques sont sur fond gris ; elles sont identifiées par le triangle adjacent. ! ATTENTION ! Une fausse manœuvre peut endommager le microscope ou ses accessoires. Explication. * 6 Cette position ne fait pas partie de tous les équipements. 2. Fonction des microscopes 2. Fonction des microscopes Les microscopes Leica DM2000, DM2500 et DM3000 dont ce mode d’emploi est un élément, sont prévus pour les applications de routine et la recherche en biologie. Ces applications incluent l’examen d’échantillons provenant du corps humain aux fins d’information sur les états physiologiques ou pathologiques ou les anomalies congénitales ou aux fins de test de la fiabilité et de la tolérance chez les récepteurs potentiels ou aux fins de contrôle des mesures thérapeutiques. Tous les microscopes cités ci-dessus sont conformes à la directive CE 98/79/CE sur les diagnostics in vitro. Simultanément, ces appareils sont conformes aux directives CE 73/23/CE relative au matériel électrique et 89/336/CE sur la compatibilité électromagnétique pour l’utilisation dans un environnement industriel. Attention ! Le fabricant décline toute responsabilité pour toute utilisation non conforme et toute utilisation hors des spécifications de Leica Microsystems Wetzlar GmbH, ainsi que pour les éventuels risques qui peuvent en résulter. Dans ce cas, la déclaration de conformité perd toute validité. Attention ! Ces appareils (IVD) ne sont pas prévus pour une utilisation dans l’environnement du patient défini par la norme DIN VDE 0100-710. Ils ne sont pas non plus prévus pour une utilisation en liaison à des appareils électromédicaux régis par EN 60601-1. En cas de connexion d’un microscope et à un appareil électromédical selon EN 60601-1, les exigences de EN 60601-1-1 sont en vigueur. 7 3. Consignes de sécurité 3. Consignes de sécurité 3.1 Consignes générales de sécurité 3.2 Sécurité électrique Cet instrument de la classe de protection 1 a été construit et contrôlé conformément aux normes EN 61010-2-101:2002, EN 61010-1:2001, CEI 1010-1:2001, et aux dispositions relatives à la sécurité des appareils électriques de mesure, de commande, de réglage de laboratoires. Caractéristiques techniques générales Attention ! Il est indispensable que l’utilisateur tienne compte des remarques et mises en garde contenues dans ce mode d’emploi afin de préserver le bon état de fonctionnement que l’appareil avait à la livraison et garantir un fonctionnement sans danger. Microscope Utilisation uniquement à l’intérieur. 90-250 V~ Tension d’alimentation : 50-60 Hz Fréquence : Puissance consommée : max. 40 W (90 VA) DM2000 max. 160 W (220 VA) DM2500 max. 48 W (110 VA) DM3000 F 3,15 A 250 V Fusibles : Température ambiante : 15-35°C max. 80% to 30°C Hygrométrie relative : Catégorie de surtension : II Degré de contamination : 2 Attention ! Attention ! Les instruments et accessoires décrits dans ce mode d’emploi ont été contrôlés quant à la sécurité et aux risques possibles. Avant toute intervention sur l’instrument, en cas de modification ou d’utilisation en combinaison avec des composants d’un autre fabricant que Leica et sortant du cadre de ce mode d’emploi, il est impératif de se renseigner auprès du représentant Leica local ou de l’usine-mère à Wetzlar ! Toute intervention non autorisée sur l’instrument ou tout usage non conforme annule tout droit à garantie ! 8 Brancher la fiche du cordon d’alimentation exclusivement dans une prise de courant de sécurité. Ne pas interrompre la protection en utilisant une rallonge sans conducteur de protection. Toute interruption du conducteur de protection à l’intérieur ou à l’extérieur de l’instrument, ou toute suppression de la connexion au conducteur de protection peut rendre dangereuse l’utilisation de l’appareil. Une interruption intentionnelle n’est pas autorisée ! 3. Consignes de sécurité Attention ! La connexion à la prise de terre (vis de mise à la terre au dos du statif) permet de placer sur un potentiel de conducteur de protection identique les appareils supplémentaires qui sont connectés au microscope en ayant une alimentation secteur qui leur est propre ou qui s’ajoute à celle du microscope. Pour une mise en réseau sans conducteur de protection, demander conseil au SAV de Leica. Attention ! Ne pas exposer le microscope à de fortes variations de température. Elles pourraient créer une condensation qui risquerait d’endommager les composants électriques et optiques. Température d’utilisation : 15 à 35 °C Attention ! Attention ! Il faut contrôler que seuls des fusibles du type et de l’intensité nominale indiqués soient utilisés comme pièces de rechange. L’emploi d’autres fusibles ou le non emploi du porte-fusible est interdit. Il y a un risque d’incendie en cas d’utilisation d’autres fusibles. Avant de remplacer les fusibles ou les lampes, il est impératif de mettre le commutateur M/A en position Arrêt et de débrancher le cordon d’alimentation. Attention ! Les éléments électriques du microscope ne sont pas protégés de l’eau. Un apport d’eau peut provoquer un court-circuit. 9 4. Vue d’ensemble 4. Vue d’ensemble Spécification Leica DM2000 Leica DM2500 Méthode de contraste • diascopie : fond clair, fond noir, contraste de phase, polarisation Contraste interférentiel • épiscopie : fluorescence Entièrement automatisé Éclairage halogène intégré Réglage manuel de : • luminosité • diaphragme d’ouverture • diaphragme de champ Axe de lumière réfléchie lluminateur à fluorescence d’épiscopie (oculaires indice de champ maximum de : 22) avec • tourelle à filtres à 5 positions • diaphragmes d’ouverture et de champ centrables • piège à lumière pour l’élimination de la lumière parasite • filtre neutre N4 et obturateur, commutable Tube au choix avec • angle d’observation fixe ou variable • 3 répartitions de lumière possibles • une ou deux sorties caméra • tube ergonomique avec angle d’observation réglable et sortie caméra Module d’éclairage Réglage manuel de : • luminosité • diaphragme d’ouverture • diaphragme de champ Changeur de grossissement (en option) • manuel • niveaux de grossissement : 1x ; 1,5x ; 2x Revolver à objectifs • manuel • à 6 ou 7 positions pour objectifs à filetage M25 • coulisseau de prismes d’objectif Platine XY • avec porte-condenseur • levier de commande x-y de la platine réglable en hauteur • commande possible à droite ou à gauche 10 4. Vue d’ensemble Leica DM2000 Spécification Condenseur Mise au point Leica DM2500 • condenseur CL/PH 0.90/1.25 OIL avec repères en couleur (pour le DM2500 avec des objectifs < 10x, il faut utiliser le coulisseau pour lumière parasite) • condenseur CLP/PH 0.85 pour polarisation (pour le DM2500 avec des objectifs < 10x, il faut utiliser le coulisseau pour lumière parasite) • condenseur achr.apl. A 0.9 (P) avec repères en couleur et tête de condenseur escamotable • condenseur universel UCL 0.90/1.25 OIL (UCLP 0.85 pour polarisation avec tourelle à anneaux de lumière à 5 positions) (pour le DM2500 avec des objectifs < 10x , il faut utiliser la lentille additionnelle (diffuseur)) • condenseur universel Pol UCA/P avec tête de condenseur interchangeable et tourelle de condenseur à 6 positions • • • • bouton de mise au point pour mise au point grossière et fine réglable en hauteur commutation de la vitesse (en option) réglage du seuil de mise au point et de la direction du pas 11 4. Vue d’ensemble Spécification Leica DM3000 Méthode de contraste • diascopie : fond clair, fond noir, contraste de phase, polarisation Contraste interférentiel • épiscopie : fluorescence Entièrement automatisé Éclairage halogène intégré Réglage manuel de : • diaphragme d’ouverture • diaphragme de champ • réglage automatique de la luminosité lors du changement d’objectif Axe de lumière réfléchie lluminateur à fluorescence d’épiscopie (oculaires indice de champ maximum de : 22) avec • tourelle à filtres à 5 positions • diaphragmes d’ouverture et de champ centrables • piège à lumière pour l’élimination de la lumière parasite • filtre neutre N4 et obturateur, commutable Tube u choix avec • angle d’observation fixe ou variable • 3 répartitions de lumière possibles • une ou deux sorties caméra • tube ergonomique avec angle d’observation réglable et sortie caméra Changeur de grossissement (en option) • manuel • niveaux de grossissement : 1x ; 1,5x ; 2x Revolver à objectifs • motorisé Choix des objectifs à l’aide des touches de fonction ou (en option) du commutateur situé à la base du verso de l’appareil • à 6 positions pour objectifs à filetage M25 • coulisseau de prismes d’objectif Platine XY • avec porte-condenseur • levier de commande x-y de la platine réglable en hauteur • commande possible à droite ou à gauche 12 4. Vue d’ensemble Leica DM3000 Specification Condenseur • condenseur CL/PH 0.90/1.25 OIL avec repères en couleur • condenseur CLP/PH 0.85 pour polarisation • condenseur achr.apl. A 0.9 (P) avec tête de condenseur escamotable • condenseur universel UCL 0.90/1.25 OIL (UCLP 0.85 pour polarisation avec tourelle à anneaux de lumière à 5 positions) • condenseur universel Pol UCA/P avec tête de condenseur interchangeable et tourelle de condenseur à 6 positions • condenseur achr.apl. A 0.9 (P), auto La tête du condenseur pivote automatiquement au cours du changement d’objectif Mise au point • • • • bouton de mise au point pour mise au point grossière et fine réglable en hauteur commutation de la vitesse (en option) réglage du seuil de mise au point et de la direction du pas Interfaces USB2 Logiciel Leica Application Suite (LAS) pour WindowsTM 2000, XP pour l’apprentissage des objectifs et la configuration des touches de fonction 13 4. Vue d’ensemble 7 6 5 4 1 Fig. 1a Côté gauche du statif Leica DM2000 1 Mise au point grossière et fine 2 Changement de hauteur du condenseur 3 Réglage de la luminosité 4 Diaphragme de champ lumineux 5 Diaphragme d’ouverture 6 Condenseur 7 Logement de l’analyseur 14 2 3 4. Vue d’ensemble 1 2 3 4 5 6 7 8 9 10 11 Fig. 1b Côté droit du statif Leica DM2000 1 Oculaires 2 Tube oculaire 3 Tube 4 Logement du coulisseau de prismes d’objectif 5 Revolver à objectifs équipé 6 Platine porte-objet avec guide-objet 7 Éclairage intégré 8 Interrupteur 9 Changement de hauteur du condenseur 10 Mise au point grossière et fine 11 Levier de commande x, y de la platine 15 4. Vue d’ensemble 17 16 15 18 14 13 12 11 10 9 8 1 Fig. 2 Côté gauche du statif Leica DM2500 1 Module d’éclairage 2 Mise au point grossière et fine 3 Réglage de la luminosité 4 Changement de hauteur du condenseur 5 Réglage du diaphragme de champ 6 Interrupteur 7 Diaphragme de champ 8 Levier de commande x, y de la platine 9 Diaphragme d’ouverture 16 2 3 4 5 6 10 11 12 13 14 15 16 17 18 7 Tourelle de condenseur Condenseur Platine porte-objet avec guide-objet Revolver à objectifs équipé Coulisseau de prismes d’objectif Tube Tube oculaire Oculaires Analyseur 4. Vue d’ensemble Fig. 3 Côté droit du statif Leica DM3000 1 Oculaires 2 Tube oculaire 3 Tube 4 Logement du coulisseau de prismes d’objectif 5 Revolver à objectifs équipé 6 Platine porte-objet avec guide-objet 7 Éclairage intégré 8 Interrupteur 9 Changement de hauteur du condenseur 10 Mise au point grossière et fine 11 Levier de commande x, y de la platine 12 Panneau de commandes frontal avec touche changement d’objectif et touche Toggle 13 Commandes latérales de fonction pour changer de grossissement d’objectif ou pour basculer entre plus grand/plus petit Côté gauche analogue du statif Autres éléments de commande cf. fig. 1b Leica DM2000. 17 5. Déballage 5. Déballage Commencer par sortir avec précaution tous les composants du carton de transport et d’emballage. Remarque : Il faut éviter de toucher la lentille des objectifs. Toutefois, en cas de traces de doigts sur les surfaces en verre, il faut nettoyer les objectifs avec une peau de chamois ou un chiffon en lin souple. Même des traces infimes de transpiration déposée par les doigts de l’utilisateur peuvent rapidement attaquer les surfaces. Pour avoir un complément d’information, voir le chapitre « Entretien du microscope » → p. 70. Attention ! Lieu d'installation L’utilisation du microscope doit se faire dans une pièce exempte de poussière, d’huile et de vapeurs chimiques, et bénéficiant d’un taux d’hygrométrie modéré. Il convient en outre d’éviter les fortes variations de température, l’ensoleillement direct et les secousses. Elles pourraient en effet perturber les mesures et les prises de vue micrographiques. Conditions environnementales autorisées : Température 15–35 °C Hygrométrie relative 80 % max. jusqu’à 30 °C Sous un climat de type chaud ou chaud et humide, le microscope a besoin d’un entretien particulier afin de prévenir une contamination fongique. Pour avoir un complément d’information, voir le chapitre « Entretien du microscope » → p. 70. À cette étape, il ne faut en aucun cas brancher le microscope et les appareils périphériques. Attention ! Les composants électriques doivent être distants du mur d’au moins 10 cm et éloignés de tout objet inflammable. 18 5. Déballage Transport Il convient d’utiliser l’emballage d’origine pour expédier ou transporter le microscope et ses accessoires. Pour éviter des dommages dus aux secousses, démonter les composants suivants et les emballer à part : • dévisser les objectifs ; • enlever le condenseur ; • enlever le levier de commande x-y de la platine ; • retirer les boîtiers de lampe ; • démonter le brûleur du boîtier de lampe 106 z ; • enlever toutes les pièces mobiles ou non fixées. 19 6. Assemblage du microscope 6. Assemblage du microscope L’assemblage des composants du microscope doit s’effectuer logiquement dans l’ordre suivant : • • • • • • • • • platine porte-objet accessoire condenseur fluorescence* systèmes intermédiaires* tube oculaires objectifs boîtiers de lampe avec sources de lumière polarisation* 6.1 Platine ! Attention : Ne visser aucun objectif avant d’avoir fini de monter la platine porte-objet ! Support de préparation • Poser le guide-objet sur la platine et le fixer avec les deux vis (4.1). Levier de commande x-y de la platine Pour l’assemblage, il suffit d’utiliser la clef universelle livrée avec l’appareil. Un aimant situé à droite sous la platine permet de stocker la clef. L’ordre d’assemblage indiqué peut différer en cas d’utilisation de systèmes intermédiaires et d’accessoires optiques. Pour plus d’information, lire le chapitre « 6.10 Accessoires en option » → p. 31. Remarque : On peut le placer à droite ou à gauche de la platine. Fig. 4 Platine porte-objet avec support de préparation 1 Vis de fixation pour le support de préparation 1 20 6. Assemblage du microscope • Installer d’abord le bouton plat de la mise au point fine du même côté que le levier de commande x-y de la platine. Le bouton est maintenu en place par un aimant (5.1). Veiller à la bonne mise en place du bouton. Fixer l’autre bouton de mise au point sur l’autre face de l’instrument. • Serrer la vis de blocage (6.1) à gauche à l’avant de la platine. • Faire coulisser la platine le plus loin possible vers l’arrière. • Fixer le levier de commande x-y de la platine avec la vis (7.1). • Tirer la platine vers l’avant et serrer à nouveau la vis de blocage. Fig. 6 Bas de la platine porte-objet 1 Vis de blocage 1 Fig. 5 Bouton de mise au point 1 Fixation aimantée du bouton de mise au point fine Fig. 7 Montage du levier de commande x-y de la platine 1 Vis de fixation du levier de commande x-y de la platine 1 1 21 6. Assemblage du microscope 6.2 Condenseur • Le cas échéant, visser la tête de condenseur sur le condenseur. • En utilisant le dispositif de réglage de hauteur du condenseur (10.3), tourner le porte-condenseur (fig. 9) complètement vers le bas. • Dévisser la vis de serrage du condenseur (10.2) de façon à pouvoir installer le condenseur par l’avant. Remarque : Centrer le condenseur avant d’utiliser le microscope. → Éclairage de Koehler p. 34. Fig. 9 Porte-condenseur 1 Rainure de guidage • Faites glisser le condenseur dans le portecondenseur jusqu’en butée. Sous le condenseur, il y a une broche de guidage (8.1) qui doit s’insérer dans la rainure du porte condenseur (9.1). • Serrer la vis de blocage (10.2) du condenseur de façon à maintenir le condenseur. • Seulement pour le Leica DM3000: Brancher le câble du condenseur lors de l’utilisation du condenseur motorisé. 1 Fig. 10 Support du condenseur 1 Centrage du condenseur 2 Vis de serrage du condenseur 3 Bouton de réglage en hauteur du condenseur Fig. 8 Bas du condenseur (exemple CL/PH) 1 Broche d’orientation 2 Lentille additionnelle LS (pour Leica DM2000/3000) 1 1 3 3 1 2 1 2 22 6. Assemblage du microscope 6.3 Tube et oculaires 6.4 Objectifs Remarque : Pour les applications en fluorescence, il faut d’abord monter l’illuminateur de fluorescence → p. 26. Le tube se monte sur le statif directement ou au moyen de modules intermédiaires. La fixation s’effectue avec la vis latérale (11.1). • Tourner la vis (11.1) sur le statif pour la dégager légèrement. • Introduire le tube dans le logement en queue d’aronde. • Serrer à nouveau la vis (11.1). • Les oculaires s’installent dans les manchons porte oculaires du tube. Fig. 11 Fixation du tube 1 Vis de serrage N’utiliser en principe que des objectifs Leica de la longueur de tube × (à l’infini) ! Le filetage standard est M25. Il est recommandé de disposer les objectifs de sorte que le grandissement augmente quand le revolver à objectifs est tourné en dans le sens des aiguilles d’une montre. ! Attention : Pour monter les objectifs, abaisser la platine le plus possible. Visser des bouchons de protection aux emplacements vides ! Seulement pour le Leica DM3000 : Suivant votre équipement, certaines positions ont déjà été assignées en usine aux différents objectifs. Vous trouverez une liste des positionnements précis jointe à votre commande (Identification Sheet). Sur le panneau de commandes frontal (fig. 12) se trouvent six touches noires donnant accès au choix direct de l’objectif. Sous ces touches sont fixées de petites plaques qui indiquent la puissance de grossissement de l’objectif (d’autres petites plaques sont également livrées avec votre commande). Il est recommandé de visser les objectifs après avoir effectué le raccordement à l’alimentation → p. 33. Fig. 12 Panneau de commandes frontal du Leica DM3000 1 Choix de l’ objectif Toggle Plaques avec grossissement de l’objectif 23 6. Assemblage du microscope 6.5 Source de lumière pour l’axe de diascopie Attention ! • Sortir le réceptacle (13.2). Attention ! Vérifier que le boîtier de lampe n’est pas relié au bloc d’alimentation. Pendant le montage, débrancher du secteur la prise et le bloc d’alimentation. Attention ! La lampe à incandescence peut être encore chaude ! • Sortir la lampe. Attention ! Avec les sources de lumière, il y a en général un risque de rayonnements (éblouissement, rayonnement UV, rayonnement IR). Les lampes en fonctionnement doivent donc être placées dans des boîtiers fermés. Seulement pour le Leica DM2000/3000: Ne retirer l’enveloppe protectrice de la nouvelle lampe qu’après l’avoir installée. Éviter impérativement de laisser des empreintes. • Placer la nouvelle lampe avec son enveloppe protectrice dans le culot jusqu’à la butée. Veiller à ce que la lampe soit bien en place. Changement de lampe de l'éclairage incorporé L’éclairage diascopique avec la lampe halogène à basse tension (fig. 13) est intégré au pied du microscope et accessible du côté droit du microscope. Fig. 13 Éclairage diascopique au pied du microscope 1 Lampe halogène 2 Réceptacle 1 24 2 • Retirer l’enveloppe protectrice de la lampe. • Remettre le réceptacle (13.2) en place. Fig. 14a Module d’éclairage 107/2 Desserrage de la vis 6. Assemblage du microscope Seulement pour le Leica DM2500: Changement de lampe avec le boîtier de lampe 107/2 Ce boîtier de lampe s’utilise avec une lampe halogène 12 V 100 W qui est déjà en place. Pour changer la lampe, procéder comme suit : • desserrer la vis de fixation du boîtier (fig. 14a). • Sortir le boîtier en le soulevant. • Enlever la lampe. • Placer la nouvelle lampe 12 V 100 W (14b.1) et son enveloppe protectrice dans le culot jusqu’à la butée. Veiller à ce que la lampe soit bien en place. • Retirer l’enveloppe de protection de la lampe. • Remettre le boîtier en place et le bloquer avec la vis de fixation. • Installer le boîtier de lampe dans le logement de boîtier de lampe de la diascopie (fig. 15) et le fixer avec la vis latérale. Attention ! Ne retirer l’enveloppe protectrice de la nouvelle lampe qu’après l’avoir installée. Éviter impérativement de laisser des traces de doigts. Fig. 15 Leica DM2500 1 Boîtier de lampe de la diascopie Fig. 14b Boîtier de lampe 107/2, ouvert 1 Douille avec lampe halogène 2 Collecteur 1 1 2 25 6. Assemblage du microscope 6.6 Composants des applications en fluorescence 6.6.1 Illuminateur à fluorescence L’illuminateur à fluorescence se monte avant le tube. La fixation s’effectue avec la vis latérale. Installation des lampes à décharge (Hg et Xe) dans le boîtier de lampe 106z Les lampes Hg et Xe fonctionnent avec des régulateurs de puissance séparés. Il est impératif de se conformer au mode d'emploi spécifique de ces régulateurs de puissance. 6.6.2 Boîtier de lampe 106z Attention ! Avec les sources de lumière, il y a en général un risque de rayonnements (éblouissement, rayonnement UV, rayonnement IR). Les lampes en place doivent donc être dans des boîtiers fermés. Fig. 16 Assemblage de l’illuminateur à fluorescence Vérifier que le boîtier de lampe n’est pas relié au bloc d’alimentation. Pendant la mise en place, débrancher du secteur la prise et le bloc d’alimentation. Lors de la manipulation des brûleurs Xe, toujours porter les gants et le masque de protection fournis (fig. 17) (risque d’explosion). Ne jamais prendre les parties en verre du brûleur à mains nues. Ne jamais regarder le trajet optique directement (risque d’éblouissement). Le boîtier de lampe 106 z s’utilise avec diverses lampes à décharge. Attention ! Observer impérativement le mode d’emploi et les consignes de sécurité des fabricants des lampes ! Avant de changer les lampes, les laisser refroidir pendant 30 minutes au moins ! 26 Fig. 17 Gants et masque de protection 6. Assemblage du microscope Il est possible d'installer les lampes à décharge suivantes (ce qui impose des alimentations et des douilles de lampes différents) (fig. 19) : durée de vie moyenne* Type Lampe Hg 50 W, ultra-haute pression (courant alternatif) Lampe Hg 100 W, ultra-haute pression (courant continu) Lampe Hg 100 W, ultra-haute pression (courant continu de type 103 W/2) Lampe Xe 75 W, haute pression (courant continu) 100 h 200 h 300 h 400 h * Observer les fiches techniques des fabricants de lampe. • Pour ouvrir le boîtier de lampe 106 z, desserrer les vis de fixation (18.8) situées sur le couvercle. • Enlever le verrouillage transport (baguette en plastique rouge à la place du brûleur) de la douille de lampe. Desserrer pour cela l’élément du haut (19.1). Tirer l’élément de refroidissement (19.3) vers le haut et le tourner sur le côté. Desserrer l’élément du bas (19.2) et enlever le verrouillage transport. • Pour installer le brûleur, procéder dans l’ordre inverse. Fig. 18 Boîtier de lampe 106 z (ouvert, vue latérale) 1 Couvercle relevé 2 Collecteur 3 Lampe à décharge dans la douille 4 Réflecteur (miroir) 5, 6, 7 Vis de réglage du réflecteur x-y 8 Vis de fixation de la douille de lampe 9 Prise de la fiche de contact Attention ! Brûleur Hg 50 : Après la mise en place, l’inscription doit être verticale. Disposer le brûleur de telle sorte que le raccord de soudure soit sur le côté et non dans le trajet optique. 1 4 2 5 3 6 Brûleur XE 75 : Après l’installation, enlever l’enveloppe de protection du brûleur (19b.5). 7 8 9 8 27 6. Assemblage du microscope • Remettre en place la douille de lampe et serrer à nouveau les vis de fixation (18.8). Fig. 20 Connexion du boîtier de lampe 106z 1 Logement du boîtier de lampe • Fermer le boîtier de lampe et serrer à nouveau les vis de fixation. • Installer le boîtier de lampe dans le logement de boîtier de lampe de l’épiscopie (20.1) et le fixer avec la vis latérale. • Raccorder le boîtier de lampe au régulateur de puissance. Fig. 19 a-c Douilles de lampes à vapeurs de Hg ou Xe 1 Serrage supérieur 2 Serrage inférieur 3 Système de refroidissement 4 Raccord de soudure du brûleur Hg 50 5 Enveloppe de protection du brûleur Xe 75 Hg 50 a 3 1 4 2 Xe 75 b 1 Hg 100 3 1 5 2 2 28 c 3 6. Assemblage du microscope 6.6.3 Équipement de la roue de fluorescence Pour installer le bloc de filtre ou de réflecteur, procéder comme suit : • Tirer le couvercle frontal (fig. 23) vers l’avant. • Installer un bloc de filtre ou de réflecteur dans le support qui est de face. Placer le bloc de filtre ou de réflecteur du côté droit et l’enclencher vers la gauche dans le support (fig. 24). Remarque : Les numéros sont directement situés sous le support. • Poser les plaquettes adhésives fournies (fig. 25), correspondant au filtre ou réflecteur, sur la face avant de l’illuminateur de fluorescence. • Après avoir installé tous les blocs de filtres ou réflecteurs, refermer le couvercle frontal. Veiller à ce que le couvercle soit bien en place. Fig. 21 Bloc de filtres, face avant Fig. 22 Bloc de filtres, face arrière 29 6. Assemblage du microscope 6.7 Analyseur et polariseur Polariseur Analyseur • Fixer le porte-polariseur sous le porte-condenseur avec la vis gauche (26.2). Enlever le cas échéant le filtre Flipout. • Enlever le cache situé du côté gauche du statif. • Faire glisser l’analyseur dans le logement (26.1) jusqu’à l’encliquetage. En cas d'utilisation du tube intermédiaire Pol* ou du logement de l'analyseur TL* : • Placer le polariseur dans l’orifice du bas, linscription vers le haut. Autre méthode pour Leica DM2000/3000 : • Tourner le condenseur et l’orienter vers le haut jusqu’à la butée supérieure. • Enlever le cache situé du côté gauche. • Faire glisser l’analyseur dans le logement jusqu’à l’encliquetage. • Enlever le cas échéant le magasin à filtres DLF au pied du statif. • Monter le porte-polariseur (fig. 27). • Placer le polariseur à la position la plus basse du porte filtre, inscription vers le haut. Fig. 26 Montage du porte-polariseur 1 Logement de l’analyseur 2 Vis de serrage 1 2 30 Fig. 27 Porte-filtre à 2 positions pour Leica DM2000/3000 6. Assemblage du microscope 6.8 Compensateur à lame Lambda* 6.10 Accessoires en option • Tourner le condenseur et l’orienter vers le haut jusqu’à la butée supérieure. Caméra • Enlever le cas échéant le magasin à filtres DLF au pied du statif. • Placer le compensateur à lame Lambda au pied du microscope. Un adaptateur permet de connecter une caméra. • Placer l’adaptateur sur la sortie supérieure du tube et le fixer avec la vis latérale. • Visser la caméra. 6.9 Prismes CIT Les prismes de condenseur sont montés en usine. L’ajustement des prismes de condenseur s’effectue pendant la mise en service → p. 37. Pour l’adaptation ultérieure des prismes CIT, voir → p. 75. Diagonale d’image filmée (en mm) avec caméra 1 pouce 2/3 pouce 1/2 pouce 1/3 pouce caméra caméra caméra caméra Grossissement fixe, seulement pour caméra mono CCD : adaptateur c-mount 1 x HC 16 adaptateur c-mount 0.63 x HC adaptateur c-mount 0.5 x HC adaptateur c-mount 0.35 x HC - 11 17.5 - 8 12.7 16 - 6 9.5 12 17.1 A grossissement variable (adaptateur Vario TV), pour caméra mono ou tri CCD : c-mount, 0.32-1.6 x HC 19+)-5 B-mount (ENG), 0.5-2.4 x HC (1/2 pouce) 16-3.3 +) à partir du facteur Vario 0.42 x ! 18-3.8 - Grossissement fixe, pour caméra mono ou tri CCD : adaptateur c-mount 1 x adaptateur B-mount 1 x adaptateur B-mount 1.25 x adaptateur F-mount 1 x adaptateur F-mount 1.25 x Indispensable dans chacun des cas : optique TV 0.5 x HC 12 12 12 - 17.5 17.5 16 16 16 - 31 6. Assemblage du microscope Calcul du grossissement sur l’écran du moniteur Le grossissement VTV sur le moniteur peut être calculé selon la formule suivante ou au moyen d’un micromètre-objet et d’un centimètre. VTV = grossissement de l’objectif x Facteur-changeur de grossissement* x grossissement de l’adaptateur TV x diamètre de l’écran diamètre de puce de la caméra Lors du choix de l’adaptateur, tenir compte de la taille du capteur de la caméra et du système de rechange (adaptateur C-Mount, B-mount, etc.). Voir le tableau. Module ergonomique Pour faciliter l’observation en surélevant le tube, il est possible de placer entre le tube et le logement du tube un module ergonomique de 30 ou 60 mm. La fixation s’effectue avec la vis latérale. Dispositif de rehausse ergonomique Une base est disponible pour le statif ; des molettes permettent d’en régler la hauteur et l’inclinaison afin d’obtenir une position de travail optimale. Fig. 28 Changeur de grossissement Il est possible d’utiliser en option un changeur de grossissement (fig. 28) manuel. Une molette de réglage permet de régler les facteurs de grossissement suivants : 1x ; 1,5x ; 2x Dispositifs de discussion Des dispositifs de discussion avec pointeur lumineux sont disponibles pour 20 observateurs au maximum. Régler (29.3) la hauteur du pied support pour que le dispositif soit horizontal. La flèche en surimpression peut être déplacée en position x et y déplacement vertical ou horizontal (il est possible aussi de faire disparaître la flèche) (29.1). En tournant le même levier,on peut en changer la couleur (rouge/jaune). Le réglage de la luminosité de la flèche s’effectue avec (29.2). Fig. 29 Dispositif de discussion (ici avec Leica DM1000) 1 Déplacement du pointeur lumineux en direction x et y et commutation du filtre chromatique 2 Régulation de la luminosité 3 Déplacement du support Le bloc d’alimentation externe (pointeur lumineux) n’est pas représenté. Changeur de grossissement 1 2 3 32 6. Assemblage du microscope Chambre claire 6.11 Connexion au bloc d'alimentation La chambre claire L3/20 (fig. 30) permet de superposer de grands objets près du microscope dans l’image microscopique. Il est ainsi possible de faire très facilement un tracé de la préparation en suivant les contours de l’objet ou d’afficher des échelles. • Après le montage, connecter le microscope à l’alimentation électrique en utilisant le câble secteur fourni (fig. 31a,b.1) . • Le cas échéant, connecter également au bloc d’alimentation le boîtier de lampe ou le régulateur de puissance externe. Commutateur situé au verso du Leica DM3000 Pour basculer d’un objectif à un autre, il est optionnellement possible de brancher un double commutateur au verso du statif du Leica DM3000. La prise se trouve à l’arrière du statif (31b.2). Fig. 30 Traceur 1 Capuchon Pour le Leica DM3000 : Si utile, vissez les objectifs après la mise sous tension de microscope. De petites plaques indiquant le grossissement de chaque objectif, sont placées sous les touches noires du panneau de commandes frontal. Pour commander chaque position de l’objectif appuyez sur la touche correspondante. Remarque : 1 Fig. 31a Dos du statif du Leica DM2000/DM2500 1 Connexion de l’alimentation électrique Il n’est utile de raccorder un PC au Leica DM3000 (31b.3) que lorsque de nouveaux objectifs doivent être programmés ou lorsque un changement au niveau des commandes latérales de fonction doit être effectué. Cela n’est possible qu’à l’aide du logiciel Leica DMControl. Fig. 31b Dos du statif du Leica DM3000 1 Connexion de l’alimentation électrique 2 Prise commutateur 3 Prise PC 1 33 7. Mise en service 7. Mise en service 7.2 Éclairage de Koehler Remarque : Si rien n’est indiqué, la notice d’utilisation du Leica DM3000 est la même que celle du Leica DM2000. 7.1 Mise sous tension • Mettre le microscope sous tension avec l’interrupteur de marche/arrêt (32.1, 33.5). Attention : Après la mise sous tension de la lampe à décharge, centrer immédiatement le brûleur. Attendre avant de mettre sous tension le régulateur de puissance. Travailler d’abord en diascopie pour apprendre à connaître les éléments de commande du microscope. Le condenseur a déjà été centré en usine. Dans certains cas, un centrage complémentaire du condenseur est nécessaire (après montages et démontages successifs du condenseur). C’est pourquoi il convient de vérifier le centrage du condenseur. Les pas suivants du programme, pour l’éclairage, se rapportent à une application en transmission en fond clair. • Activer la position BF de la tourelle de condenseur*. • Sortir le cas échéant le coulisseau à anneaux de lumière* du condenseur. Fig. 32 Leica DM2000 1 Interrupteur 2 Volant de mise au point 3 Positionnement de la platine 1 34 2 3 7. Mise en service • Faire pivoter vers l’intérieur un objectif de grossissement moyen (10x-20x). Pour les condenseurs à tête de condenseur escamotable : faire pivoter la tête de condenseur vers l’intérieur. (La tête de condenseur pivote vers l’extérieur pour les objectifs <10x.) Pour le Leica DM3000 : Pour basculer l’objectif, appuyez sur la touche du panneau frontal de commandes correspondante. Si le microscope est équipé d’un condenseur motorisé, la tête du condenseur sera basculée ou escamotée de façon automatique en fonction du grossissement de l’objectif. • Régler l’intensité lumineuse avec le dispositif de réglage de la luminosité (33.2, 34.2). • Fermer le diaphragme de champ (33.4, 34.3) jusqu’à ce que le bord du diaphragme apparaisse dans le plan de la préparation. • Le réglage en hauteur du condenseur (33.3, 34.1) permet de régler le condenseur jusqu’à ce que le bord du diaphragme de champ soit net. • Si l’image n’est pas au milieu du champ de vision (35c), amener le condenseur au milieu du champ de vision à l’aide des deux vis de centrage (34.4). La bonne clef est fixée par un aimant sous la platine. • Mettre une préparation sur la platine porteobjet. • Faire une mise au point sur la préparation avec le bouton de mise au point (32.2). Fig. 33 Leica DM2500 1 Bouton rotatif de mise au point 2 Réglage de la luminosité 3 Changement de hauteur du condenseur 4 Réglage du diaphragme de champ 5 Interrupteur 6 Centrage du condenseur 7 Positionnement de la platine Fig. 34 Leica DM2000 1 Changement de hauteur du condenseur 2 Réglage de la luminosité 3 Diaphragme de champ lumineux 4 Centrage du condenseur 4 7 1 2 3 4 5 6 12 3 35 7. Mise en service • Ouvrir le diaphragme de champ jusqu’à ce qu’il disparaisse du champ de vision (35d). Attention : Le réglage en hauteur du condenseur dépend de l’épaisseur de la préparation ; il doit faire le cas échéant l’objet d’un nouveau réglage pour les différentes préparations. 7.3 Vérification des anneaux de contraste de phase Si le microscope est équipé en contraste de phase, la tourelle de condenseur est déjà équipée des anneaux de lumière adaptés aux objectifs. Les anneaux de lumière sont déjà centrés en usine. Le centrage peut-être vérifié une fois le microscope mis en place. Remarque : Fig. 35 Éclairage de Koehler a Diaphragme de champ non focalisé, non centré b Diaphragme de champ focalisé, mais non centré c Diaphragme de champ focalisé et centré, diamètre cependant trop petit d Diamètre du diaphragme de champ = diamètre de champ visuel (éclairage de Koehler) Pour les condenseurs sans tourelle, on utilise un coulisseau à anneaux de lumière qui se glisse latéralement dans le condenseur. Dans ce cas, il n’y a pas de centrage à faire. Remarque : a b c d Fig. 36 Lunette de mise au point 1 Lentille réglable supérieure 2 Bague de serrage pour maintenir la position de mise au point 1 Placer dans le trajet optique l’objectif approprié pour le contraste de phase, il faut sélectionner et centrer l’anneau de lumière correspondant. La gravure sur l’objectif (par ex. PH 1) renseigne sur l’anneau de lumière correspondant (par ex. 1). Fig. 37 Réglage du contraste de phase PH=anneau de contraste de phase, LR=anneau de lumière a Condenseur en position Fond clair (BF) b Condenseur en position Contraste de phase (PH) Anneau de lumière LR non centré c Anneau de lumière et anneau de phase centrés a b c 2 PH 36 LR 7. Mise en service • Installer à la place d’un oculaire la lunette de mise au point (fig. 36) dans le tube d’observation. • Placer dans le trajet optique l’objectif phaco ayant le grossissement le plus petit. • Mettre au point la préparation avec le bouton de mise au point. • Régler nettement la structure de l’anneau (37a) en desserrant un peu la bague de serrage (36.2) et en déplaçant la lentille supérieure de réglable (36.1). • Remettre en place l’anneau de serrage. • Sélectionner anneau de lumière correspondant dans le condenseur. • Si l’anneau de lumière et l’anneau de phase ne sont pas, comme le montre la fig. 37c, parfaitement superposés, centrer l’anneau de lumière. • Placer à l’arrière du condenseur les clefs de centrage dans les orifices prévus à cet effet (38.1). • Tourner les clefs de centrage jusqu’à ce que l’anneau sombre (anneau de phase dans l’objectif) soit superposé à l’anneau clair légèrement plus petit (anneau de lumière du condenseur) (37c). • Faire la même chose pour tous les autres anneaux de lumière. • Après le centrage, enlever la clef de centrage. 7.4 Réglage des prismes de condenseur En général, ce centrage est réalisé à l’usine ; il est recommandé de le vérifier de temps en temps, en particulier après des transports. • Sortir le coulisseau de prisme d’objectif (39.1) complètement ou partiellement. Fig. 39 1 Coulisseau de prisme d'objectif Fig. 38 1 Centrage des anneaux de lumière (par ex. : condenseur UCA/P) Clef de centrage 1 1 1 37 7. Mise en service • Placer dans le trajet optique l’objectif approprié et faire une mise au point sur la préparation. • Le cas échéant, faîtes basculer la tête du condenseur. Escamoter la tête de condenseur pour les objectifs <10x. • Régler l’éclairage de Koehler (→ p. 34). • Installer à la place d’un oculaire la lunette de mise au point (fig. 36) dans le tube d’observation. • Activer l’un après l’autre les prismes du côté du condenseur et faire une mise au point sur la ligne de compensation sombre en diagonale (40) en desserrant un peu l’anneau de serrage (36.2) et en déplaçant la lentille supérieure (36.1). La lame Lambda doit être hors fonction, c.-à-d. que la gravure λ doit se trouver au bas de l’analyseur ou la lame λ et λ/4 doit être enlevée. 38 Si l’ajustement est correct, la ligne sombre doit être au milieu du champ circulaire éclairé. Si un ajustement est nécessaire, procéder comme suit : • Vérifier que la vis de centrage droite que l’on utilise pour le centrage des anneaux de lumière n’est pas trop serrée car cela pourrait empêcher le déplacement du prisme avec la clef gauche. • Appuyer vers l’intérieur la clef de centrage gauche située sur le panneau arrière du condenseur jusqu’à l’encliquetage et ajuster la bande en tournant la clef. La clef droite n’est pas nécessaire. Fig. 40 Pupille d’objectif avec ligne de compensation correctement centrée 7. Mise en service 7.5 Ajustement des sources de lumière Un centrage est nécessaire uniquement en cas d’utilisation du boîtier de lampe 106z. • En cas d’utilisation d’un régulateur de puissance, il convient de le mettre sous tension en premier. Attention ! Ne jamais regarder directement dans le trajet optique ! Attention ! • Poser une feuille de papier sur la platine porte-objet et faire une mise au point de la surface avec un objectif à sec de grandissement faible ou moyen. • Régler le diaphragme de champ et d’ouverture en position médiane. • Avec un stylo, faire un repère sur le papier et placer le repère au milieu du champ éclairé. • Enlever l’objectif du trajet optique ou choisir une position libre du revolver. La source de lumière est maintenant reproduite sur le papier. En observant la source de lumière, régler la lampe comme suit. Avec les sources de lumière, il y a en général un risque de rayonnements (éblouissement, rayonnement UV, rayonnement IR). Avec le boîtier de lampe 106 z, la lumière directe de l'arc électrique (pour les lampes à décharge) et leur image miroir font l'objet d'une mise au point séparée et sont ensuite harmonisées. Fig. 41 Boîtier de lampe 106 z 1 Centrage vertical de la lampe 2,4 Centrage vertical et latéral de l’image miroir 3 Mise au point du réflecteur 5 Centrage latéral de la lampe 6 Collecteur (mise au point de l’image de la lampe) • Amener le système de filtres ou plus précisément le réflecteur dans le trajet optique. 5 1 6 • Ouvrir éventuellement l’obturateur et enlever les filtres diffuseurs* du trajet optique. 2 3 4 39 7. Mise en service Centrage de la lampe au mercure Hg 50 W Fig. 42 Image directe de l’arc électrique focalisée mais décentrée (en réalité, l’image est moins nette) Fig. 43 Image directe de l’arc électrique en position pres-crite (en réalité, l’image est moins nette) Fig. 44 Image directe de l’arc électrique et image miroir en position correcte (en réalité, l’image est moins nette) • Sur le papier, on voit l’image directe de l’arc électrique et l’image miroir qui sont généralement décalées. • Faire une mise au point de l’image directe avec le collecteur (41.6). • Déplacer sur le côté ou complètement hors du trajet optique l’image miroir de l’arc électrique en utilisant les boutons de réglage situés au dos du boîtier de lampe (41.2,41.4). L’image mise au point de l’arc électrique reste visible (fig. 42). • En utilisant les boutons de réglage (41.1) et (41.5), placer l’image directe de l’arc électrique à droite ou à gauche sur une ligne médiane supposée de la surface de centrage (fig. 43). • Déplacer à nouveau vers l’intérieur l’image miroir de l’arc électrique avec les boutons de réglage (41.2) et (41.4) et faire une mise au point à l’aide du réflecteur (41.3). • Orienter l’image miroir symétriquement par rapport à l’image directe (fig. 44). Utiliser pour cela les boutons de réglage (41.2) et (41.4). • Défocaliser alors l’image avec le bouton du collecteur (41.6) jusqu’à ce qu’on ne puisse plus distinguer l’image de l’arc électrique et l’image miroir et que l’éclairage de l’image soit homogène. 40 7. Mise en service Centrage des lampes au mercure Hg 100 W et Xe 75 W Fig. 45 Image directe de l’arc électrique focalisée mais décentrée (en réalité, l’image est moins nette) Fig. 46 Image directe de l’arc électrique en position correcte (en réalité, l’image est moins nette) Fig. 47 Image directe de l’arc électrique et image miroir en position correcte (en réalité, l’image est moins nette) • Sur le papier, on voit l’image directe de l’arc électrique et l’image miroir qui sont généralement décalées. • Faire une mise au point de l’image directe avec le collecteur (41.6). • Déplacer sur le côté ou complètement hors du trajet optique l’image miroir de l’arc électrique en utilisant les boutons de réglage situés au dos du boîtier de lampe (41.2,41.4). L’image focalisée de l’arc électrique reste visible (fig. 45). • Positionner l’image directe de l’arc électrique au milieu de la surface de centrage avec les boutons de réglage (41.1) et (41.5), la pointe claire de l’arc électrique - la tache focale cathodique - devant être légèrement décentrée (fig. 46). • Déplacer à nouveau vers l’intérieur l’image miroir de l’arc électrique avec les boutons de réglage (41.2) et (41.4) et faire une mise au point à l’aide du réflecteur (41.3). • Placer l’image miroir symétriquement à l’image directe (fig. 47). Utiliser à cet effet les boutons de réglage (41.2) et (41.4). Il est possible de superposer le rayonnement en forme de V des arcs électriques de l’image directe et de l’image miroir. Attention ! Les pointes claires des arcs électriques, les taches focales cathodiques ne doivent jamais être projetées l’une sur l’autre au risque de provoquer une explosion due à la surchauffe. 41 7. Mise en service Attention ! Avec des lampes usagées, la structure de l’arc électrique est diffuse. L’image ressemble plus à celle d’une lampe HG 50. Dans ce cas, il n’est plus possible de superposer exactement image directe et image miroir. Dans ce cas, faire coïncider les deux images. • Défocaliser alors l’image avec le bouton du collecteur (41.6) jusqu’à ce qu’on ne puisse plus distinguer l’image de l’arc électrique et l’image miroir et que l’éclairage de l’image soit homogène. 42 8. Utilisation 8. Utilisation 8.1 Mise sous tension 8.2 Platines et déplacement d'objet En cas d'utilisation d'une lampe à décharge, il faut d'abord mettre sous tension le régulateur de puissance séparément. Allongement levier de commande coaxiale Mettre sous tension le microscope avec l’interrupteur (48.1, pour le Leica DM2500, de l’autre côté du statif). • Pour allonger levier de commande coaxiale, abaisser la poignée du bas (49b.1). Asservir ensuite la poignée du haut (49b.2). Réglage de la direction du pas (couple de rotation) Le couple de rotation peut être réglé à façon pour X et Y au moyen de deux molettes (49b.2, 49b.4). Fig. 48 1 Interrupteur 2 Mise au point fine 3 Mise au point grossière 4 Positionnement de la platine 5 Vis de blocage de la platine 6 Vis de fixation du pignon coaxial Fig. 49a Levier de commande coaxial standard, b Levier de commande coaxial avec réglage de la hauteur et du couple de rotation 1 Déplacement de l’objet (direction Y) 2 Réglage de la direction du pas (direction X) 3 Déplacement de l’objet (direction X) 4 Réglage de la direction du pas (direction Y) 6 a b 4 5 3 1 1 2 3 3 2 1 4 43 8. Utilisation Utilisation à droite/gauche 8.3 Mise au point Le levier de commande coaxiale peut se fixer à droite ou à gauche de la platine. (Voir aussi la rubrigue : Assemblage p. 20). Pour changer de côté, procéder ainsi : Mise au point grossière et fine • Desserrer la vis de blocage (48.5) à gauche sous la platine. La bonne clef se trouve à droite sous la platine. ! Attention ! Il est impératif d’abaisser le condenseur ! • Basculer la platine complètement vers l’arrière. • Desserrer la vis (50.6) du levier de commande coaxiale et la retirer. • Mettre en place le bouton plat de mise au point fine (48.3) du même côté du statif que le levier de commande x-y de la platine. Le bouton est maintenu en place par un aimant. Vérifier la bonne position du bouton. Fixer l’autre bouton de mise au point de l’autre côté du statif. • Fixer le levier de commande coaxiale de l’autre côté de la platine en serrant la vis correspondante. Des deux côtés du statif se trouvent les boutons de mise au point : grossière et fine (fig. 50 et 51). La forme spéciale du bouton plat de mise au point fine (fig. 51.3) permet simultanément de tenir le levier de commande coaxiale dans la main et de faire d’un doigt la mise au point fine. Ceci implique que ce le bouton plat soit placé du bon côté du statif. Voir la rubrique : Utilisation à droite/gauche de la platine. Réglage en hauteur des boutons de mise au point • Défocaliser l’image microscopique en abaissant la platine au moyen du boutob de mise au point grossière (50.2 , 51.2). Fig. 50 Bouton gradué de mise au point 1 Réglage de la direction du pas 2 Mise au point grossière 3 Mise au point fine • Amener à nouveau la platine en position de départ et serrer la vis d’arrêt. Après installation de la platine, déplacer le guide-objet du côté gauche du microscope. Continuer à tourner jusqu’a ce que le guide arrive en butée (signalé d’un « clic »). • Remettre le condenseur en place. 3 44 2 1 8. Utilisation • Saisir simultanément les boutons droit et gauche de la mise au point et amener les boutons à la position souhaitée en appuyant légèrement vers le haut ou le bas. • Faire à nouveau une mise au point de l’image. Commutation de la vitesse (en option) Deux niveaux de vitesse sont proposés pour la mise au point fine. La commutation s’effectue en poussant vers la droite le bouton de gauche de mise au point et en poussant vers la gauche le bouton de droite. Réglage du seuil de mise au point Le réglage de la position actuelle s’effectue en bloquant la roue moletée (51.1) sur le bouton droit de mise au point en tant que seuil de mise au point. Cette position ne peut plus être dépassée. Tourner la roue moletée dans le sens des aiguilles d’une montre. La rotation dans le sens opposé a pour effet de desserrer la roue. Réglage de la direction du pas La direction du pas de la commande de mise au point peut être modifiée avec la roue moletée (50.1) du bouton gauche de mise au point. ! Attention ! Veiller à ce que le réglage ne soit pas trop souple. Sinon, la platine pourrait, de son propre poids, glisser vers le bas. ! Fig. 51 1 2 3 Volant de mise au point avec bouton plat de mise au point Détermination du seuil de mise au point Mise au point grossière Mise au point fine 1 2 Attention ! Lorsque vous utilisez le bouton de mise au point du DM 3000 (réglage en hauteur, de la dureté et de la butée du focus) SVP ne placez pas les doigts entre le bouton de mise au point et la monture latérale (vous risquez de vous coincer les doigts). 3 45 8. Utilisation Adapter la longueur du tube porte-oculaire à la longueur de bras 8.4 Tubes • Sur le tube AET22, il est possible d’allonger le tube porte-oculaire de 30 mm (fig. 53). Remarque : Obturer soigneusement les sorties libres du tube, pour éliminer toute lumière parasite. Réglage de la distance interoculaire • Régler la distance interoculaire des tubes oculaires pour observer une image globale homogène (fig. 52). Réglage de l'angle d'observation • Avec les tubes ergonomiques HC LVB 0/4/4 et HC -/0/4, on modifie l’angle d’observation en inclinant le tube porte-oculaire. Tube ergonomique (long, inclinable) : 0 à 35° Tube ergonomique (court, inclinable): 7,5 à 32,5° Répartition du faisceau lumineux sur les tubes photo Tube EDT22 : Le réglage de la répartition lumineuse entre les sorties d’observation et de documentation est fixe (50:50). Tube BDT25+ : Le réglage de la répartition lumineuse s’effectue manuellement avec une tirette de commande. Barre de commande VIS 50/50 PHOTO Observation 100 % 150 % 110 % • Avec les tubes ergonomiques AET22 et EDT22, on modifie l’angle d’observation en inclinant le tube porte-oculaire de 5 à 32° (fig. 53). Fig. 52 Réglage du tube ∩ Réglage de la distance interoculaire 1 Échelle (mm), 2 Module intermédiaire*, sur l’image : Module ergonomique 1 ∩ 2 46 Fig. 53 Réglages personnalisés sur le tube AET22 Photo 0% 50 % 100 % 8. Utilisation Tube HC L 2TU : Le réglage de la répartition lumineuse s’effectue manuellement avec une tirette de commande. Tirette de commande Observation VIS 100 % PHOTO 110 % Photo 0% 100 % 8.5 Oculaires Remarque : Les oeillères anti-éblouissement des oculaires doivent être enlevées et retournées pour les porteurs de lunettes. Pour l’observation microscopique, il ne faut pas porter de lunettes avec des verres à double foyer (verres bifocaux et progressifs). • Sélectionner sur les tubes à répartition variable, et sortie photo / vidéo, la position 100% VIS. Oculaires avec réticule • Régler la netteté du réticule en déplaçant la lentille frontale de l’oculaire. Fig. 54 Programme de tube HC L 1 Tube d’observation binoculaire HC LB 0/3/4 2 Tube ergonomique HC LVB 0/4/4, binoculaire, angle d’observation 0 à 35° Plus tube ergonomique (court) HC -/0/4, inclinable de 7,5 à 32,5° 3 Tube trinoculaire H L1T 4/5/7, avec répartiteur optique fixe (50 %/50 %) 4 HC L1VT 0/4/4 comme 3, mais avec angle d’observation réglable de 0 à 35° 5 Tube trinoculaire à 3 positions HC L3TP 4/5/7 6 Tube photo avec 2 sorties (50 %/50 %) 7 Sortie photo-TV 1 3 2 4 5 • Faire une mise au point de l’objet avec cet oculaire. • Puis fermer l‘œ il et effectuer la mise au point de l’objet en regardant seulement dans le second oculaire. Correction de vision déficiente • Regarder de l’œ il droit par l’oculaire droit et faire la mise au point de la préparation. • Observer ensuite avec l’œ il gauche la même portion de la préparation et faire tourner le manchon de l’oculaire gauche jusqu’à obtention d’une image nette de la section d’objet concernée ; Ne pas toucher au bouton de mise au point ! 6 7 47 8. Utilisation 8.6 Objectifs Changement d'objectif Pour le Leica DM2000 et le DM2500, les objectifs doivent être basculés manuellement. Pour le Leica DM3000, la commande se fait par le panneau de commandes frontal et les commandes latérales de fonction → p. 49. En cas de changement d’objectif, il convient de vérifier les réglages suivants : • diaphragme de champ → p. 54 • diaphragme d’ouverture → p.53 • intensité lumineuse → p. 52. • Avec les objectifs à immersion, utiliser le milieu d’immersion correspondant. OIL : n’utiliser que l’huile à immersion optique selon DIN/ISO. Nettoyage → p. 70 W: immersion d’eau. IMM : objectif universel pour immersion à eau, au glycérol, à huile. Attention ! Respecter la fiche de sécurité relative à l'huile à immersion ! Remarque : Pour le Leica DM3000, l’intensité lumineuse est automatiquement ajustée après le changement d’objectif. ↔ Fig. 55a Objectif à immersion, déverrouillé 48 Avec des objectifs à immersion verrouillables, pour les verrouiller appuyer sur l’avant vers le haut (de 2 mm environ) jusqu’à la butée. Après une légère rotation vers la droite, l’objectif est verrouillé (fig. 55b). Avec les objectifs à bague correctrice, régler l'objectif en fonction de l'épaisseur du couvreobjet en tournant la bague. Fig. 55b Objectif à immersion, verrouillé ↔ Remarque : 8. Utilisation 8.7 Le panneau de commandes du Leica DM3000 Sur le panneau de commandes frontal se trouvent six touches noires donnant accès au choix direct de l’objectif. Sous ces touches, de petites plaques qui indiquent la puissance de grossissement de l’objectif peuvent être fixées. La touche pour l’objectif n°1, en général l’objectif avec le plus petit grossissement, se trouve tout à gauche. La répartition touche-objectif est effectuée à l’usine et dépend de l’équipement du microscope. La touche Toggle grise à droite sert à changer de mode. En mode Toggle, vous pouvez passer d’un grossissement à un autre, en appuyant sur une des commandes latérales de fonction. Les objectifs pré-définis par le constructeur peuvent être légèrement adaptés par l’utilisateur dans le mode Apprentissage. Le mode en cours d’utilisation et/ou l’objectif se trouvant dans le trajet optique sont affichés à l’aide de diodes vertes ou jaunes. Choix de l’objectif Toggle Plaques avec grossissement de l’objectif Fig. 56 Leica DM3000 1 Panneau de commandes frontal 2 Commandes latérales de fonction En mode Standard, les grossissements de l’objectif sont commandés en suivant, par les deux touches de fonction à droite ou à gauche du statif (Fig. 56.2). Appuyez sur la touche en haut ou en bas pour faire tourner le revolver de l’objectif dans le sens des aiguilles d’une montre ou dans le sens inverse. La répartition des commandes sur le côté gauche ou le côté droit du statif est identique dans la configuration standard. (Cf. fonction particulière des commandes latérales de fonction → p. 51.) 49 8. Utilisation Mode Standard Mode Toggle La touche Toggle n’est pas en marche. La touche de l’objectif actuel est éclairée en vert. Les objectifs peuvent être basculés les uns après les autres avec les commandes latérales de fonction. Si vous appuyez deux fois à la suite sur la touche de fonction, l’objectif suivant est sauté et c’est donc celui qui vient après qui est utilisé. La touche de cet objectif est alors éclairée en vert. En partant du mode Standard, vous pouvez passez en mode Toggle en appuyant rapidement sur la touche Toggle. La touche Toggle est alors éclairée en vert. Le plus petit des grossissements réalisés auparavant est mis au point et la touche correspondante brille également en vert. La touche du deuxième objectif brille en jaune. Toggle Mode Standard actif et objectif 1 basculé Toggle Mode Toggle actif, changement entre objectif 2 et 4 possible, objectif 2 basculé Vous pouvez alors aller et venir entre les deux objectifs, en utilisant les commandes latérales de fonction. Peu importe alors laquelle des commandes est utilisée. En changeant d’objectif, la couleur des diodes change aussi, de façon à ce que la touche de l’objectif en cours d’utilisation soit toujours signalée en vert et la touche de l’autre objectif en jaune. Si vous appuyez encore une fois sur la touche Toggle, vous retournez en mode Standard. Dans le mode Standard, vous changez également en appuyant sur les touches des objectifs. L’objectif correspondant est alors mis en place. Les objectifs utilisés dans le mode Toggle sont maintenus. 50 8. Utilisation Mode Apprentissage Les réglages actuels sont maintenus jusqu’à ce que le mode Apprentissage soit de nouveau activé. Maintenez la touche Toggle enfoncée. Toutes les touches s’éteignent. Maintenir la touche Toggle enfoncée Toggle Toggle Mode Apprentissage terminé, mode Toggle actif, objectif 1 mis en place Mode Apprentissage actif Choisissez alors, en maintenant la touche Toggle enfoncée, les deux objectifs voulus pour le mode Toggle en appuyant sur les touches correspondantes. Les deux touches brillent alors en jaune. Maintenir la touche Toggle enfoncée Choix de l’objectif à l’aide du commutateur. Pour basculer d’un objectif à un autre, il est optionnellement possible de brancher un double commutateur au verso du statif. La prise se situe au verso du statif. Le commutateur gauche a la même fonction que la commande latérale de fonction du bas, le commutateur de droite correspond à la commande latérale de fonction du haut. Toggle Mode Apprentissage actif, objectifs 1 et 3 pour le mode Toggle choisis Relâchez la touche Toggle. Le mode Toggle est alors actif. L’objectif avec le plus petit grossissement est mis en place et la touche correspondante est éclairée en vert. La touche du deuxième objectif brille toujours en jaune. Fonction particulière des commandes latérales de fonction Avec un condenseur motorisé, la tête du condenseur est automatiquement retirée pour un grossissement < 10x, et mise en place pour un grossissement > 10x. Dans la cas d’applications spécifiques, la mise en place de la tête du condenseur peut être transférée à la commande latérale de fonction droite ou gauche, de manière à ce que la position de la tête du condenseur puisse être réglée par l’utilisateur. Le changement de fonction des touches n’est possible qu’à l’aide du logiciel Leica DMControl et demande que l’appareil soit relié à un PC. 51 8. Utilisation 8.8 Sources de lumière Remarque : Lumière transmise Pour le Leica DM2000 : • Régler la luminosité avec le bouton de réglage (57.1). Pour le Leica DM2500: • Régler la luminosité avec le bouton de réglage (58.1). Pour le Leica DM3000: • Le fabricant à déjà réglé une intensité lumineuse pour chaque objectif. Cette valeur peut être changée à l’aide de la manette (cf. 57.1 du DM2000). La nouvelle valeur est enregistrée pour l’objectif correspondant et sera automatiquement ajustée lorsque l’objectif sera choisi. Les nombres figurant sur le bouton de réglage ne sont pas des valeurs absolues ; ils ne servent qu’à faire des repères de reproductibilité. La valeur maximale correspond à 12 V, le repère correspond à une température de couleur d’environ 3200 K. Fluorescence • Mettre sous tension la lampe du régulateur de puissance. Attention ! La distance minimale entre le boîtier de lampe et le mur, les rideaux, les tapis, les livres et les objets inflammables est de 10 cm! Danger d’incendie ! Observer le mode d’emploi spécifique du régulateur de puissance ! Fig. 58 Leica DM2500 1 Réglage de la luminosité 2 Réglage du diaphragme de champ Fig. 57 Leica DM2000 1 Réglage de la luminosité 1 52 Les séries d’objectifs HI PLAN xx SL et HI PLAN CY xx SL (Synchronized Light) permettent de changer d'objectif sans modifier l'intensité lumineuse. 1 2 8. Utilisation 8.9 Diaphragme d’ouverture Le diaphragme d’ouverture (59.3) sur le condenseur détermine la résolution, la profondeur de champ et le contraste de l’image microscopique. On obtient la meilleure résolution lorsque les ouvertures de l’objectif et du condenseur sont approximativement identiques. Avec une ouverture du diaphragme inférieure à celle de l’objectif, le pouvoir de résolution diminue mais le contraste est plus élevé. Une diminution de l’intensité de résolution est visible à l’œil nu lorsqu’on ferme le diaphragme d’ouverture à moins de 0.6x de la valeur d’ouverture de l’objectif ; ceci est donc déconseillé. En polarisation, le fait de fermer le diaphragme d’ouverture intensifie les couleurs. Le diaphragme d’ouverture se règle subjectivement en fonction de l’aspect de l’image, l’échelle sert à faire des réglages reproductibles sans affectation des valeurs d’ouverture absolues. Condenseur aux repères en couleur Les repères en couleur sur le condenseur (59.2) correspondent aux anneaux de couleur des objectifs. Lors du changement d’objectif, trouver le réglage approprié du diaphragme d’ouverture en réglant le diaphragme d’ouverture sur le repère en couleur correspondant (correspond aux 2/3 de l’ouverture du côté de l’objectif). Fig. 59 Condenseur CL/PH 1 Logement pour anneaux de lumière, notamment 2 Codage couleur 3 Diaphragme d’ouverture 4 Porte-filtre 5 Diaphragme de champ Attention : 1 2 3 4 5 Le diaphragme d’ouverture ne sert pas à régler la luminosité de l’image. (Pour cela utiliser la molette de variation de lumière et des filtres gris neutres d’atténuation de la lumière.) En règle générale, le diaphragme de l’objectif est entièrement ouvert. Toute restriction, accompagnée d’une luminosité diminuée de l’image générera : une profondeur de champ accrue, une sensibilité réduite de la lamelle couvre-objet, une aptitude au fond noir, une modification du contraste 53 8. Utilisation 8.10 Diaphragme de champ Le diaphragme de champ (58.2, 59.5) protège la préparation d’un échauffement éventuel et aussi des lumières parasites en vidéo, ce qui augmente le contraste de la préparation. L’on se borne donc à l’ouvrir suffisamment pour que le champ objet observé ou photographié soit éclairé correctement. Un changement de grossissement impose toujours un réglage du diaphragme de champ. 54 9. Méthode de contraste 9. Méthode de contraste 9.1 Lumière transmise Grossissement de l'objectif 2.5x* Les condenseurs CL/PH ou CLP/PH sont utilisables, à partir d’un grandissement 4x. Avec un coulisseau pour lumière parasite*, un grandissement 2.5x est encore possible mais pas en la polarisation. Remarque : Pour le Leica DM2500 avec des objectifs < 10x, il faut utiliser le coulisseau pour lumière parasite. Les condenseurs UCL ou UCLP sont utilisables à partir d’un grandissement 4x. Pour le Leica DM2500 avec des objectifs < 10x , il faut utiliser la lentille additionnelle (diffuseur). En cas d'utilisation d'une lentille additionnelle* (dans la tourelle de condenseur), le grandissement 2.5 x est également possible. Avant de mettre en place la lentille additionnelle, il faut régler l’éclairage de Koehler (→ p. 34) à l’objectif 10x. Passer ensuite à l’objectif 2.5x, placer la lentille dans le trajet optique, ouvrir complètement le diaphragme d’ouverture et fermer le diaphragme de champ. Si des ombres en forme de faucille sont visibles, il faut centrer la lentille. Placer les deux clefs de centrage à l’oblique dans le condenseur et régler jusqu’à la disparition des ombres asymétriques. Enlever les clefs de centrage et rouvrir le diaphragme de champ. La lentille ne peut être utilisée qu’avec un grandissement d’objectif max. de 20 x. L’éclairage de Koehler n’est fondamentalement plus très précis ! Le condenseur Achr.Apl.0.9 (P) peut être utilisé avec des objectifs de grandissement minimum de 4x. Quand la tête de condenseur est escamotée, un objectif de grandissement 2.5x est possible sans verre diffuseur ; quand la tête de condenseur est en place, il faut utiliser un filtre diffuseur en glissière (champ de vision d’oculaire max. 22). Grossissements d'objectifs 1.25x* et 1.6x pour le Leica DM2500 Les condenseurs UCA/P et Achr.Apl.0.9 (P) peuvent s’utiliser à partir d’un grandissement de 1.25x. La tête de condenseur est escamotée avec des grandissements d’objectifs de 1.25x à 5x, en place avec des grandissements de 10x à 100x. Pour améliorer l’éclairage, on utilise un boîtier de lampe 106z. Pour centrer la lampe, procéder comme suit : (en ce qui concerne l’utilisation des boutons de réglage, voir la p. 39) • Escamoter la tête de condenseur et placer l’objectif 1.25x dans le trajet optique. • Reproduire le filament de la lampe en focalisant le collecteur en tant que carré dans le champ de vision. • Centrer l’image au milieu par rapport à l’objectif. 55 9. Méthode de contraste Grossissements d’objectifs 1.6x et 2.5x* Fig. 60 Avec les condenseurs CL/PH ou CLP/PH, UCL ou UCLP, des grandissements 1.6x et 2.5x sont également utilisables quand le condenseur est complètement enlevé. Le diaphragme de champ est fonctionnel par rapport au diaphragme d’ouverture. Seulement pour le Leica DM2000/3000 : magasin à filtres DLF à placer sur le pied du microscope Logements de filtres Remarque : Si le microscope est équipé en polarisation, pour utiliser les autres méthodes de contraste, il faut enlever du trajet optique, l’analyseur et le polariseur, ainsi qu’éventuellement le compensateur à lame Lambda. 9.1.1 Fond clair Seulement pour le Leica DM2000/3000 : porte-filtre à 2 positions ou 1 position à placer sur le pied du microscope • Commuter la tourelle de condenseur* en position BF. • Sortir le coulisseau à anneaux de lumière. • Commuter la tourelle de fluorescence* sur une position libre ou sur le système de filtres A. Porte-filtre à visser en bas sur le condenseur • Poser une préparation pour diascopie. • Placer dans le trajet optique l’objectif approprié. • Avec des condenseurs à tête escamotable, pour des objectifs <10x : basculer la tête de condenseur hors du trajet optique. • Faire une mise au point de l’image avec le bouton de mise au point et régler la luminosité. • Pour un réglage optimal du diaphragme d’ouverture et de champ, vérifier l’éclairage de Koehler (→ p. 34). • Utiliser si besoin est les filtres de diascopie appropriés (fig. 60). 56 Seulement pour le Leica DM2500 : pièce intercalaire avec logements de filtres entre le statif et LH 107/2 9. Méthode de contraste 9.1.2 Contraste de phase 9.1.3 Fond noir • Poser une préparation pour diascopie. • Poser une préparation pour diascopie. • Placer dans le trajet optique l’objectif approprié. Les objectifs pour le contraste de phase portent l’inscription PH. • Placer dans le trajet optique l’objectif approprié. • Faire une mise au point de l’image avec le bouton de mise au point et régler la luminosité. • Pour un réglage optimal du diaphragme de champ, vérifier l’éclairage de Koehler (→ p. 34). • Ouvrir complètement le diaphragme d’ouverture (position PH). • Condenseurs UCL/UCLP et UCA/P : Sélectionner l'anneau de lumière correspondant à l'objectif dans la tourelle du condenseur. Exemple : l’anneau de lumière 1 est associé à l’objectif portant l’inscription PH 1. Condenseurs CL/PH, CLP/PH et APL. ACHR.0.9 (P) : Utiliser un coulisseau à anneaux de lumière. Remarque : En cas d’utilisation des condenseurs UCL/UCLP et UCA/P, il faut centrer les anneaux de lumière. (→ p. 36). • Faire une mise au point de l’image avec le bouton de mise au point et régler la luminosité. • Condenseurs UCA/P et UCL : Sélectionner la position BF sur la tourelle du condenseur. Condenseurs CL/PH, CLP/PH et APL. ACHR.0.9 (P) : Tirer le coulisseau à anneaux de lumière DF jusqu’en butée. Vérifier l’éclairage de Koehler (→ p. 34). • Ouvrir complètement le diaphragme d’ouverture (position PH). • Condenseurs UCA/P et UCL : Sélectionner la position DF sur la tourelle du condenseur. Condenseurs CL/PH, CLP/PH et APL. ACHR.0.9 (P) : Insérer le coulisseau à anneaux de lumière DF jusqu’en butée. Remarques : Avec le condenseur UCA/P, il faut centrer l’anneau de lumière DF. (→ p. 36). 57 9. Méthode de contraste Pour le Leica DM2000, DM2500 et DM3000, des condenseurs spéciaux pour le fond noir sont disponibles (fig. 61). L’ouverture des objectifs utilisés détermine la possibilité d’utiliser des condenseurs DF. Avec des objectifs à diaphragme iris intégré, il est possible de moduler l’ouverture numérique. Condenseur DF D 0.80 - 0.95 D 1.20 - 1.44 OIL Ouverture d’objectif max. 0.75 1.10 9.1.4 Éclairage oblique • Régler la diascopie fond noir. • Pour obtenir un contraste en relief : Condenseur UCA/P : Tourner très légèrement la tourelle de condenseur pour lui faire quitter la position DF. Condenseurs CL/PH, CLP/PH et APL. ACHR.0.9 (P) : Ne pas faire coulisser complètement le coulisseau à anneaux de lumière DF. • Enlever du trajet optique la lame Lambda du compensateur. • Poser une préparation et placer dans le trajet optique l’objectif approprié. • Faire une mise au point de la préparation et régler l’éclairage de Koehler (→ p. 31). • Insérer l'analyseur jusqu’en butée sur le côté gauche du statif (fig. 64). L'inscription λ vers le bas. Tube intermédiaire Pol* : mettre l’analyseur en place. • Introduire le polariseur, (inscription vers le haut), dans le porte-filtre. Fig. 62 Analyseur/polariseur 1 Logement de l’analyseur 2 Logement du polariseur Fig. 61 Condenseurs fond noir 1 Partie supérieure (à sec) 2 Partie inférieure 3 Broche d’orientation 4 Partie supérieure (immersion à l’huile) 1 9.1.5 Polarisation a b 1 4 2 3 2 58 9. Méthode de contraste ! 9.1.6 Contraste interférentiel Attention ! Placer impérativement le polariseur de telle sorte que l’inscription soit vers le haut, sinon le filtre anti-calorique intégré serait inefficace et le polariseur, inutilisable (coloration !) • Croiser polariseur l'analyseur jusqu'à l’extinction : • Enlever l’objet ou chercher un endroit libre sur la préparation. • Faire coulisser l’analyseur dans le statif jusqu’au second encliquetage ou mettre le module en place. • Enlever les compensateurs du trajet optique. • Tourner le polariseur jusqu’à l’extinction (fig. 63). • Mémoriser la position croisée et bloquer avec la vis. • Si besoin est : Placer la lame λ ou λ/4 dans le logement de filtres intégré au porte-condenseur et la tourner ver la gauche jusqu’en butée. Condenseur CLP/PH : Introduire la lame λ ou λ /4 dans la fente latérale du condenseur. Condenseurs UCLP et UCA/P : Amener la tourelle en position λ ou λ /4. Autre méthode : Il est possible d’introduire dans la fente de compensateur des compensateurs 4x20 mm. • Poser une préparation, placer dans le trajet optique l’objectif approprié et faire la mise au point de la préparation. • Sélectionner la position fond clair du condenseur UCA/P. • Placer la tourelle de filtres fluo* sur une position vide ou sur la combinaison de filtres A. • Enlever le prisme d’objectif en coulisseau. • Régler l’éclairage de Koehler (→ p. 34). • Enlever la préparation ou chercher un endroit libre sur la préparation. • Croiser analyseur et polariseur jusqu’à l’extinction (comme décrit section 9.1.5 Polarisation). Fig. 63 Polariseurs croisés (d’observation avec lunette de mise au point ou lentille de Bertrand), objectif Pol à ouverture élevée a position correcte, b position incorrecte Si le condenseur et l’objectif ne sont pas sans tension la pos. a n’est pas réglable, la pos. b est suffisante pour le contraste interférentiel et le contraste de polarisation. 59 9. Méthode de contraste Pour le polariseur ICT/P* : Placer dans le trajet optique le polariseur situé en dessous du condenseur. Vérifier que le point indexé rouge sur le devant du polariseur est positionné sur 0. • Insérer le prisme en coulisseau d’objectif dans son logement (fig. 64). Le prisme et l’objectif doivent correspondre : la lettre gravée sur le coulisseau et sur l’objectif doit être la même : D par ex. sur le coulisseau, et D sur l’objectif. Le chiffre suivant la lettre d’identification indique uniquement une variante plus sélective : ainsi, D1 peut remplacer D. • Choisir le prisme de condenseur qui correspond à l’objectif utilisé, par ex. Pos. 20/40 avec des objectifs 20x et 40x. • Le réglage fin s’effectue au moyen de la vis (64.1) située au-dessus du revolver à objectifs. • Le contraste peut être encore optimisé par le réglage du diaphragme d’ouverture ou l’apport d’une lame λ/4. Fig. 64 Coulisseau de prismes d'objectif 1 Ajustement fin 1 60 9. Méthode de contraste 9.2 Fluorescence • Poser une préparation appropriée et placer dans le trajet optique l’objectif correspondant. • Faire une mise au point de l’image, éventuellement en diascopie. • Mettre sous tension la source d’épiscopie sur le régulateur de puissance externe. • Ouvrir l'obturateur. • Sélectionner la combinaison de filtres de fluorescence appropriée. • Positionner le cas échéant le changeur de grossissement sur le facteur 1x. • Désactiver le filtre BG38 (nécessaire pour la photographie) si aucun fond rouge gênant n'est perceptible. • Ouvrir le diaphragme d’ouverture du condenseur. • Ouvrir le diaphragme de champ pour couvrir le champ visuel. Centrer le cas échéant le diaphragme de champ. Fig. 65 Illuminateur de fluorescence avec changement de blocs de filtres, obturateur, BG38, diaphragme de champ et d’ouverture 61 10. Mesures avec le microscope 10. Mesures avec le microscope 10.1 Mesures de longueur Pour les mesures de longueur, il est nécessaire d’avoir : - réticule avec graduation dans l’oculaire ou tube HC FSA 25 PE avec réflexion de diapositives ou un oculaire de mesure de longueur ; - micromètre-objet pour le calibrage d’étalonnage. Valeur en micromètres Avant de procéder à la mesure, il faut connaître la valeur en micromètres de la combinaison objectif-oculaire utilisée, c’est-à-dire la distance dans la préparation qui correspond à une division du réticule utilisé. Pour calculer la valeur, procéder comme suit : • orienter le micromètre-objet et le réticule en tournant l’oculaire parallèlement et amener les traits du zéro des deux échelles à une hauteur identique. • Lire quel nombre de divisions d’échelle sur le micromètre-objet correspond au nombre de divisions d’échelle sur le microscope (réticule). • Diviser les deux valeurs. Le résultat donne la valeur en micromètres du grossissement total utilisé actuellement. Exemple : Si 1,220 mm du micromètre-objet correspond à 50 divisions d’échelle de mesure, la valeur en micromètres = 1,220:50 = 0,0244 mm = 24,4 µm. En cas d’objectifs à très faible grossissement, dans certaines circonstances, il n’est possible d’utiliser pour le calibrage d’étalonnage qu’une partie de l’échelle de mesure. 62 Remarques : En cas d’utilisation d’un changeur de grossissement, il faut tenir compte du facteur de grossissement ! Il est impératif de réaliser un calibrage d’étalonnage pour chaque objectif et chaque facteur du changeur de grossissement et non pas d’extrapoler à partir du calibrage d’étalonnage d’un objectif donné les valeurs en micromètres des autres objectifs ou les niveaux de grossissement. Il peut y avoir des erreurs de mesure si l’oculaire n’est pas parfaitement en place dans le tube porte oculaire. Les structures d’objets particulièrement grandes peuvent être déterminées sur la platine porte-objet avec des verniers (0,1 mm) ; il faut éventuellement calculer la distance à mesurer en combinant les mesures x et y. 10. Mesures avec le microscope 10.2 Mesures d'épaisseur Marqueur d'objet Les mesures d’épaisseur sont en principe réalisables à condition de pouvoir focaliser le dessous et le dessus de l’objet. À partir de la différence de réglage en hauteur de la platine (bouton de mise au point fine : distance des deux divisions env. 1 µm), on obtient pour les objets en diascopie une valeur qui est fonction de l’indice de réfraction de l’objet (au travers duquel la focalisation a eu lieu) et le cas échéant de l’huile à immersion. La véritable épaisseur de la partie d’objet mesurée en diascopie correspond au déplacement vertical de la platine (différence de mise au point) d’ et des indices de réfraction n0 de l’objet et ni du milieu entre le couvre-objet et l’objectif (air = 1). Il est vissé à la place d’un objectif. En tournant le diamant, qui est réglable en hauteur, on peut graver d’un diamant abaissable pour repères circulaires permet de graver sur l’objet des cercles concentriques, de rayon variable (sur le couvre-objet ou à la surface de l’objet). d = d’ n0 ni Exemple : Le dessus et le dessous d’une lame mince ont été mis au point avec un objectif à sec (ni = 1.0), divisions du mouvement fin mécanique (longueur de l’échelon = 1 µm) : 9,0 et 27,0. Donc d’ = 18 x 1 = 18 µm. L’indice de réfraction supposé de la partie d’objet est n0 = 1,5. Épaisseur d = 18 x 1 x 1,5 = 27 µm. Fig. 66 Graduation du réticule dans l’oculaire (à gauche) et image du micromètre-objet (à droite) 63 10. Mesures avec le microscope 10.3 Différenciation pseudo-goutte de la goutte et de la La réalisation de ce test présuppose l’utilisation du compensateur à lame Lambda. Assemblage → p. 31. Orientation du compensateur à lame Lambda • Sortir la lame Lambda du trajet optique (fig. 67). • Amener le compensateur à lame Lambda et l'analyseur en position en croix jusqu'à l’extinction (polarisation → p. 59). • Mémoriser la position en croix trouvée et bloquer la vis latérale (67.2). • Remettre en place le compensateur à lame Lambda. Fig. 67 Lame Lambda hors trajet optique 1 Levier d’orientation 2 Vis de serrage La chapitre suivant explique la procédure simple permettant de différencier la goutte et la pseudo-goutte. Ce test s’appuie sur la biréfringence négative des urates et la biréfringence positive des pyrophosphates. Dans les deux cas, les cristaux de goutte (urates de monosodium) et les cristaux de pseudo-goutte (pyrophosphates de calcium) tendent à être aciculiformes (en forme d’aiguille). Toutefois, de nombreux cristaux peuvent être cassés ou irréguliers. Pour réaliser le test, il est nécessaire de trouver dans le champ de vision au moins un cristal intact, orienté Nord-Sud (c’est-à-dire verticalement) et un cristal orienté Est-Ouest (horizontalement). Procédure Pour réaliser un test fiable, il convient d’utiliser un porte-objet en cristaux connus d’urate de monosodium. • Il est recommandé d’utiliser un objectif 40x. • Basculer la lame Lambda hors du trajet optique (fig. 67). • Placer le porte-objet sur la platine porte-objet et faire une mise au point très fine sur les cristaux. Les cristaux aciculiformes apparaîtront blancs quelque soit l’orientation. 2 90° 64 1 • Basculer la lame Lambda hors du trajet optique et basculer le levier d’orientation (67.1) jusqu’en butée vers la gauche. Les cristaux principalement orientés N/S sont représentés en jaune et les cristaux orientés E/O, en bleu (fig. 68). 10. Mesures avec le microscope • Basculer le levier d’orientation (68.1) jusqu’en butée vers la droite. Les cristaux N/S paraissent alors bleus et les cristaux E/O, jaunes (fig. 68). • Tester les cristaux avec le levier d’orientation dans les deux positions afin d’obtenir une identification catégorique. Fig. 68 Identification de la goutte Cristaux E/O bleus Levier vers la gauche Cristaux N/S bleus Le test de la pseudo-goutte s’effectue de manière identique à celui de la goutte. Toutefois, le changement de couleur est exactement inverse de celui de la goutte. Cela signifie que quand le levier (67.1) est à l’extrême gauche, les cristaux N/S sont bleus et les cristaux E/O sont jaunes et inversement, quand le levier est du côté droit (fig. 69). Fig. 69 Test de la goutte Cristaux N/S jaunes Procédure d’identification de la pseudo-goutte : Identification de la pseudo-goutte Test de la pseudo-goutte Cristaux N/S Cristaux E/O bleus jaunes Levier vers la gauche Cristaux E/O jaunes Levier vers la droite Cristaux N/S jaunes Cristaux E/O bleus Levier vers la droite 65 11. Dépannage 11. Dépannage Problème Cause/Solution Statif Le microscope ne s’allume pas. Vérifier que la prise secteur fonctionne. Vérifier que le statif est connecté au secteur. Vérifier les connexions des câbles. Vérifier que le fusible n’est pas défectueux et le remplacer si besoin est (→ p. 71). Éclairage L’image est complètement sombre. Lumière transmise : Vérifier que la lampe de l’éclairage de diasco- pie intégré ou du boîtier de lampe 107/2 (DM 2500) n’est pas défectueuse. Changement de lampe → p. 24 et suiv. Fluorescence : Ouvrir l’obturateur (→ p. 61). Vérifier que le boîtier de lampe est connecté au secteur et qu’il n’est pas défectueux. Changement de lampe → p. 26 et suiv. Informer le SAV et faire vérifier que le fusible du régulateur de puissance n’est pas défectueux. L’éclairage de l’image manque d’homogénéité/ de régularité. Enlever du trajet optique tous les filtres non utilisés. Centrer la lampe (boîtier de lampe 106z) (→ p. 39 et suiv.). Remplacer la lampe usagée (→ p. 23 et suiv.). L’éclairage « papillote ». 66 Vérifier qu’il n’y a pas de mauvais contact. Remplacer la lampe usagée (→ p. 24 et suiv.). 11. Dépannage Problème Fluorescence : la lampe ne s’allume pas immédiatement après la mise sous tension. Cause/Solution Allumer et éteindre plusieurs fois le régu- lateur de puissance. Laisser refroidir les lampes au mercure avant la remise en marche. Fond clair La mise au point de la préparation n’est pas possible. Utiliser le milieu d’immersion correct. Poser la préparation, le couvre-objet vers le haut. Vérifier que l’épaisseur du couvre-objet est correcte et qu’elle correspond à ce qui est indiqué sur l’objectif. Fond noir Il n’est pas possible d’établir un contraste DF net. Vérifier qu’un objectif DF est utilisé. L’ouverture de l’objectif est trop haute (au maximum 0,75/1.10). Réduire éventuellement l’ouverture de l’objectif avec le diaphragme iris sur l’objectif. Vérifier le centrage du condenseur. Ouvrir complètement le diaphragme d’ouverture. L’éclairage de l’image manque d’homogénéité/ de régularité. Le grandissement de l’objectif est trop faible. Dispersion de la lumière non souhaitée. Nettoyer la préparation et les lentilles d’ob- Sélectionner un grandissement plus élevé. jectifs (→ p. 71). 67 11. Dépannage Problème Cause/Solution Contraste de phase Il n’est pas possible de régler le contraste de phase. La préparation est trop épaisse, trop mince ou trop colorée. L’indice de réfraction du milieu d’inclusion et de l’objet sont identiques, de sorte qu’il n’y a aucune inversion de phase. Le couvre-objet n’est pas posé de façon uniforme. Vérifier que le réglage de l’anneau de lumière est correct (→ p. 57). Vérifier le centrage des anneaux de lumière (→ p. 36 et suiv.). Vérifier le centrage du condenseur. Ouvrir complètement le diaphragme d’ouverture. Polarisation Il n’est pas possible de régler le contraste de polarisation. Croiser le polariseur et l’analyseur jusqu’à l’extinction (sans préparation) (→ p. 59). Contraste interférentiel en lumière transmise Il n’est pas possible de régler le contraste interférentiel en lumière transmise. La préparation est trop épaisse ou trop mince. Le milieu d’inclusion ou l’objet est biréfrin- gent. Tourner l’objet. La différence d’indice de réfraction entre le milieu d’inclusion et l’objet est trop faible. Le couvre-objet est trop épais. Vérifier que le réglage du prisme de conden- seur est correct (→ p. 59). Vérifier le centrage des prismes de conden- seur (→ p. 37). Vérifier l’éclairage de Koehler (→ p. 34). Croiser le polariseur et l’analyseur jusqu’à l’extinction (sans préparation) (→ p. 59). 68 11. Dépannage Problème Cause/Solution Fluorescence L’image est complètement sombre (pas de fluorescence). Ouvrir l’obturateur (→ p. 61). Vérifier la combinaison antigène-anticorps. Installer une nouvelle lampe (→ p. 26 et suiv.). La fluorescence est trop faible. Centrer la lampe (→ p. 39 et suiv.) Installer une nouvelle lampe (→ p. 26 et suiv.). 69 12. Entretien du microscope 12.Entretien du microscope 12.2 Nettoyage Attention ! Débrancher le microscope avant les travaux de nettoyage et de maintenance ! Protéger les composants électriques de l’humidité ! Sous un climat de type chaud ou chaud et humide, le microscope a besoin d’un entretien particulier afin de prévenir une contamination fongique. Après chaque utilisation, il faut nettoyer le microscope ; il faut maintenir propre l’optique du microscope. 12.1 Pare-poussière Remarque : Pour le protéger de la poussière, recouvrir le microscope et ses accessoires de leur housse de protection après chaque utilisation. ! Attention : Les restes de fibres et de poussières peuvent altérer l’observation en formant un arrière-plan fluorescent parasite. Nettoyage des surfaces peintes Enlever la poussière et les particules de poussière avec un pinceau doux ou un chiffon qui ne peluche pas. Les salissures rebelles sont nettoyées avec des produits d’entretien classiques en solutions aqueuses, éther ou mélange alcool-éther. Pour nettoyer les surfaces peintes, utiliser un chiffon de lin ou une peau de chamois en l’imbibant d’une des substances susmentionnées. ! Attention : Il ne faut en aucun cas employer d’acétone, du xylol ou des solutions de nitrate. Cela risquerait d’endommager le microscope. Attention ! Laisser refroidir le microscope et les boîtiers de lampe. La housse de protection ne résiste pas à la chaleur. En outre, il peut y avoir de la condensation. 70 Essayer les produits de composition inconnue sur un coin caché du microscope. Il ne faut ni dépolir ni décaper les surfaces peintes ou en plastique. 12. Entretien du microscope Nettoyage des surfaces en verre Nettoyage de l’huile d’immersion On enlève la poussière des surfaces en verre avec un pinceau sec et non gras, à poils doux, avec une soufflette ou par aspiration sous vide. Pour éliminer les salissures rebelles des surfaces de verre, utiliser avec précaution un chiffon propre imbibé d’eau distillée. Si les salissures n’ont toujours pas disparu, remplacer l’eau par de l’alcool non dilué, de l’éther ou un mélange éther alcool. Attention ! Respecter les consignes de sécurité relatives à l’huile à immersion ! Nettoyer l’huile à immersion avec un chiffon doux et propre, puis à plusieurs reprises, avec de l’alcool éthylique. 12.3 Maniement des acides et bases Nettoyage des objectifs Attention ! Ne pas démonter les objectifs pour les nettoyer. S’ils présentent des dommages à la surface interne, il convient de les envoyer à votre point de vente Leica où ils seront réparés. Nous déconseillons également de procéder au nettoyage de la surface interne des oculaires. La lentille frontale des objectifs est nettoyée suivant les instructions figurant sous « Nettoyage des surfaces en verre ». La lentille supérieure se nettoie avec un soufflet. Il convient de se montrer particulièrement prudent pour des examens nécessitants l’emploi d’acides ou d’autres substances chimiques agressives. ! Attention : Il faut à tout prix éviter le contact direct de ces produits chimiques avec l’optique ou les composants mécaniques. 12.4 Changement de fusible Pour sortir le compartiment des fusibles (fig. 70) au dos du statif, utiliser un objet pointu. Caractéristiques des fusibles → p. 8. Numéro de commande → p. 72. Attention ! Fig. 70 Compartiment des fusibles Il faut contrôler que seuls des fusibles du type et de l’intensité nominale indiqués soient utilisés comme pièces de rechange. L’emploi d’autres fusibles ou la non utilisation du porte-fusible est interdit. Il y a un risque d’incendie en cas d’utilisation d’autres fusibles. 71 13. Principales pièces d’usure et de rechange 13. Principales pièces d’usure et de rechange N° de commande N° d’article Lampes de rechange 11 500 319 11 500 974 11 500 137 11 500 138 11 500 321 11 500 139 Désignation Utilisation Lampe halogène 12 V 30 W Lampe halogène 12 V 100 W Lampe Hg haute pression 50 W Lampe Hg haute pression 100 W Lampe Hg haute pression 100 W (103 W/2) Lampe Xe haute pression 75 W Éclairage intégré Boîtier de lampe 107/2 Boîtier de lampe 106 z Boîtier de lampe 106 z Boîtier de lampe 106 z Bouchon à visser pour logements d’objectif libres 020-422.570-000 Bouchon à visser M 25 Module d’éclairage 106 z Revolver à objectifs Bonnette de rechange (dispositif anti-éblouissant) pour oculaire HC PLAN 021-500.017-005 Bonnette HC PLAN Oculaire 10x/25 021-264.520-018 Bonnette HC PLAN Oculaire 10x/22 021-264.520-018 Bonnette HC PLAN Oculaire 10x/20 Huile d’immersion selon DIN/ISO, sans fluorescence 11 513 787 110 ml 11 513 522 100 ml 11 513 788 500 ml Objectifs OIL et IMM et têtes de condenseur à immersion dans l’huile Fusibles 11 826 365 Fusible pour statif de microscope 72 F 3,15 A 250 V 14. Adaptations ultérieures 14. Adaptations ultérieures 14.1 Équipement du magasin à filtres de diascopie 14.2 Équipement de la tourelle de condenseur • Démonter le tube et les systèmes intermédiaires le cas échéant. • Tourner la platine vers le haut et abaisser le condenseur. • Poser le statif à l’envers (le socle en haut), desserrer les vis du fond et soulever la plaque de base. • Enlever le condenseur. Desserrer la vis de fixation du condenseur. • Introduire les filtres dans les logements en demi-cercle. Il n’est pas nécessaire de suivre un ordre précis. Condenseur UCL/UCLP • Remettre le magasin à filtres en place. • Tourner la vis (72.1) pour la sortir complètement. • Tourner les vis de centrage dans le sens inverse des aiguilles d’une montre de façon à pouvoir mettre en place les anneaux de lumière, les lames λ et λ/4* ou la lentille* 2.5x. L’orifice le plus grand est prévu pour l’observation en fond clair (= BF) ; les orifices plus petits pour les anneaux de lumière ou les plaques λ et λ/4 ou la lentille de mise au point 2.5x. Fig. 72 Condenseur UCL 1 Vis de fixation de la tourelle de condenseur Fig. 71 Magasin à filtres de diascopie pour Leica DM2500 1 73 14. Adaptations ultérieures Remarques : En cas d’utilisation d’un orifice plus petit pour le fond-clair, il n’est pas possible d’obtenir l’ouverture d’éclairage maximale. L’inscription (par ex. DF, PH 1..., λ) doit être en haut et les lames λ et λ/4 doivent être montées dans le bon sens : la rainure doit pointer vers le milieu du disque ! L’inscription des composants doit correspondre au marquage de la position opposée (bord externe du disque). • Serrer les vis de centrage de sorte que les composants soient au milieu des orifices. ! Attention : Avant de monter la tourelle dans le condenseur, veiller à ce qu’aucune vis de centrage ne dépasse sur le côté. • Fixer la tourelle de condenseur sur l’axe et vérifier que la tourelle tourne impeccablement sur 360°. • Fixer le condenseur avec la vis de fixation. Condenseur UCA/P • Tourner la vis de la base du condenseur (au centre) pour la faire sortir complètement. • Tourner les vis de centrage dans le sens inverse des aiguilles d’une montre de façon à pouvoir mettre an place les anneaux de lumière et les lames λ et λ/4*. Fig. 73 Tourelle de condenseur UCL 1 Tourelle de condenseur 2 Anneau de lumière ou plaque λ ou λ/4 3 Vis de centrage 4 Axe 5 Clef de centrage 6 Plaque λ ou λ/4 7 Lentille additionnelle 2.5x...20x L’orifice le plus grand est prévu pour l’observation en fond clair (= BF) ; les orifices plus petits pour les anneaux de lumière ou les lames λ et λ/4. Remarques : En cas d’utilisation d’un orifice plus petit pour le fond-clair, il n’est pas possible d’obtenir l’ouverture d’éclairage maximale. L’inscription (par ex. DF, PH 1..., λ) doit être en haut et les lames λ et λ/4 doivent être montées dans le bon sens : la rainure doit pointer vers le milieu du disque ! L’inscription des composants doit correspondre au marquage de la position opposée (bord externe du disque). 74 14. Adaptations ultérieures Mise en place des prismes de condenseur CIT : Monter comme suit les prismes marqués K2, K3 etc. dans les grands orifices : • Tourner légèrement les vis de centrage dans le sens inverse des aiguilles d’une montre. • L’inscription des prismes doit être en haut. L’inscription K2... doit impérativement se trouver à proximité du repère situé au bord de l’orifice. ! Attention : Avant de monter la tourelle dans le condenseur, veiller à ce qu’aucune vis de centrage ne dépasse sur le côté. • Fixer la tourelle de condenseur sur l’axe et vérifier que la tourelle tourne impeccablement sur 360°. • Fixer le condenseur avec la vis de fixation. Remarque : Avec une rotation de 180°, aucun contraste interférentiel en lumière transmise n’est possible ! • Les 2 butées d’arrêt sous le prisme doivent s’enclencher exactement dans la fente de guidage. ∩ • Tourner légèrement les vis de centrage et veiller à ce que tous les prismes se déplacent impeccablement en direction et soient placés profondément au bord inférieur de l’orifice. • Coller les plaquettes autocollantes correspondantes sur les champs qui sont disposés à l’opposé (c’est-à-dire de l’autre côté de l’axe de rotation) de l’anneau de lumière ou du prisme. Fig. 74 1 2 3 a, b 4 5 K 6 7 8 9 10 Tourelle de condenseur UCA/P Anneau de lumière « petit, PH », anneau de lumière « grand » pour grands orifices, prisme de condenseur CIT, repère pour assemblage des prismes de condenseur CIT, repère sur la monture de prisme, rainure de guidage du prisme, plaquette adhésive, vis de centrage, axe de rotation, lame λ ou λ/4 75 15. Index 15. Index Ajustement des sources de lumière 39 Allongement du pignon coaxial 43 Analyseur 30, 58 Angle d'observation 46 Anneau de lumière 57 BG38 61 Bloc de filtres 29, 61 Boîtier de lampe 106z 26, 39 Brûleur Hg 50 27 Caméra 31 Caractéristiques techniques 8 Centrage anneaux de lumière 37 Centrage du condenseur 35 Changement de hauteur du condenseur 22, 35 Changement de lampe 24 Changement d'objectif 48 Commutateur 33, 51 Commutation de vitesse 45 Compensateur à plaque Lambda 31, 64 Compensateurs 59 Condenseur 11, 22 Condenseur au codage en couleur 53 Condenseurs de fond noir 58 Conditions environnantes 18 Connexion au bloc d'alimentation 33 Consignes de sécurité 8 Contraste de phase 57 Contraste d'interférence différentiel 59 Coulisseau à anneaux de lumière 36, 57 Coulisseau de prisme d'objectif 37, 60 76 Coulisseau pour lumière parasite 55 Couple de rotation 43 Déplacement d'objet 43 Diaphragme de champ 52, 53, 54 Diaphragme d’ouverture 53 Diascopie 55 Direction du pas 43, 45 Dispositif de relevage ergonomique 32 Dispositifs de discussion 32 Division du faisceau lumineux 46 du moteur 72 Écartement pupillaire 46 Éclairage diascopique 24 Éclairage oblique 58 Entretien 70 Ergomodule 31 Extension d'oculaire 46 Filtre de diascopie 56 Fluorescence 61 Fond clair 56 Lampes de rechange 72 l'éclairage de Koehler 34 Leica Application Suite 13 Lentille additionnelle LS 22 Lentille d'accomodation 55 Lieu d'installation 18 Logement de l'analyseur TL 30 Logements de filtres 56 Logiciel 13, 33, 51 Lunette de mise au point 36 Magasin à filtres de diascopie 73 Magasin à filtres DLF 56 Marqueur d'objet 63 Mesures de longueur 62 Mesures d'épaisseur 63 Méthode de contraste 10, 12 Mise au point 44 Mise au point fine 44 Mise au point grossière 44 Mode Apprentissage 49, 51 Mode Standard 49, 50 Mode Toggle 49, 50 Module d'éclairage 107/2 25 Molettes de mise au point 44 Goutte/Pseudo-goutte 64 Grossissements d'objectif 1.25x-2.5x 55 Nettoyage 70 Huile d'immersion 48, 71, 72 Objectif à immersion 48 Objectifs 23, 48 Oculaires 23, 47 Identification Sheet 23 Illuminateur de fluorescence 26 Intensité lumineuse 52 Interfaces 13 LAS 13 Lampe au mercure Hg 50 W 40 Lampes à décharge 26, 27 Lampes au mercure Hg 100 W et Xe 75 W 41 Panneau de commandes frontal 17, 23, 49 Pare-poussière 70 Pignon coaxial 20, 43 Plaque λ 59 Plaque Lambda 58 Platine porte-objet 20 Platines 43 Polarisation 58 15. Index Polariseur 30, 58 Polariseur ICT/P 60 Porte-condenseur 22 Porte-filtre 30, 53, 56 Porte-polariseur 30 Prise PC 33 Prismes de condenseur 31, 37 Prismes CIT 31 Programme de tube 47 Réglage en hauteur des boutons de mise au point 44 Régulateurs de puissance 26, 43 Remplacement de fusibles 71 Réticule 47 Revolver à objectifs 10, 12 Roue de fluorescence 29 Sécurité électrique 8 Seuil de mise au point 45 Shutter 61 Software 13 Sorties du tube 46 Support de préparation 20 Tête de condenseur 35 Touche de changement d'objectif 17, 49 Touche Toggle 17, 49 Touches de fonction 17, 33, 49, 51 Tourelle de condenseur 73 Transport 19 Tube 23 Tube intermédiaire Pol 30 Tubes 46 Utilisation à droite/gauche 44 Valeur en micromètres 62 Vision déficiente 47 Volants de mise au point 44 77 16. Déclaration de conformité UE 16. Déclaration de conformité UE Download : DM2000 : http://www.light-microscopy.com/down_ce-declaration_dm2000 DM2500 : http://www.light-microscopy.com/down_ce-declaration_dm2500 DM3000 : http://www.light-microscopy.com/down_ce-declaration_dm3000 78 @ Copyright © Leica Microsystems Wetzlar GmbH · Ernst-Leitz-Straße · 35578 Wetzlar · Germany 2005 · Tel. (0 64 41) 29-0 · Fax (0 64 41) 29-25 99 LEICA and the Leica logos are registered trademarks of Leica IR GmbH. Order nos. of the editions in: English/German/Frensch 933 916 · Spanish 933 917 · Italien 933 918 · Part-No. 501-249 Printed on chlorine-free bleached paper. V/05/M.H. www.leica-microsystems.com MICROSYSTEMS 版 权 归 属 : 2005 年 德 国 35578 Wetzlar , Er nst-Leitz-Str aße, Leica 微 系 统 Wetzlar 有 限 公 司 GmbH。 电 话 : (0 64 41) 29-0 · 传 真 : (0 64 41) 29-25 99。 LE ICA 和 Lei ca 表 示 是 Leica IR Gm bH 的 注 册 商 标。 版 本 的 Order nos : 英语 / 德 语 / 法 语 933 000 · 西 班牙 语 933 000 · 意 大 利 语 933 000 · Part -No.