1
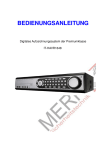
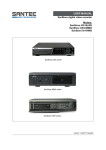
BEDIENUNGSANLEITUNG / USER MANUAL Bedienpult mit Joystick für SANTEC Dome-Kameras und SanStore Rekorder Control keyboard with joystick for SANTEc dome cameras and SanStore recorders Modell / Model: KSC-3505 Version 1.4sfi/0914/dt-engl/A5 Sehr geehrter Kunde, vielen Dank, dass Sie sich für ein SANTEC Qualitätsprodukt entschieden haben. Bitte lesen Sie vor der ersten Inbetriebnahme diese Bedienungsanleitung sorgfältig durch und halten Sie sich unbedingt an alle hier beschriebenen Anweisungen. Bei eventuell auftretenden Fragen zur Inbetriebnahme oder falls Sie eine Gewährleistung oder Serviceleistung in Anspruch nehmen möchten, wenden Sie sich bitte an Ihren Fachhändler oder an uns. Weitere Informationen zu unseren Service-Leistungen finden Sie auf unserer Webseite: www.santec-video.com Impressum: Das Copyright dieser Bedienungsanleitung liegt ausschließlich bei der SANTEC BW AG. Jegliche Vervielfältigung auch auf elektronischen Datenträgern bedarf der schriftlichen Genehmigung der SANTEC BW AG. Der Nachdruck – auch auszugsweise – ist verboten. Irrtum und technische Änderungen vorbehalten. SANTEC ist ein eingetragenes Warenzeichen der SANTEC BW AG. Übrige evtl. genannte Firmenund Produktnamen sind Warenzeichen oder eingetragene Warenzeichen bzw. Marken der jeweiligen Inhaber. © Copyright by SANTEC BW AG AG, Ahrensburg(Germany) Bedienungsanleitung / User manual KSC-3505 Dear customer, Thank you for purchasing a high quality SANTEC device. We recommend that you read this manual thoroughly before operating your new system for the first time. Please follow all instructions and observe the warnings contained in this manual. Please contact your local dealer or us if you have any questions or if you wish to claim for a service or warranty. You will find further information on our website: www.santec-video.com All rights reserved. This publication may not be reproduced, stored in a retrieval system or transmitted, in any form or by any means (electronic, mechanical, photocopying, recording or otherwise), without the written prior permission of SANTEC BW AG. No reproduction of any part or excerpts thereof are permitted. Errors excepted. Specifications are subject to change without notice for quality improvement. SANTEC is a registered trademark of SANTEC BW AG. All other companies or products mentioned in this publication are trademarks, registered trademarks or brands of the respective company. © Copyright by SANTEC BW AG, Ahrensburg (Germany) _________________________________________________________________________________ -3- Bedienungsanleitung / User manual KSC-3505 DEUTSCH Inhaltsverzeichnis Allgemeine Vorsichtsmaßnahmen Allgemeine Sicherheitshinweise Lieferumfang 5 6 7 1. Anschluss-Diagramme 2. Abschlusswiderstände und DIP-Schalter 3. Grundeinstellungen 4. Einstellungen des Bedienpults 5. Steuerung über das Bedienpult 5.1 Steuerung der SANTEC Dome-Kameras 5.2 Steuerung der SANTEC Rekorder der SanStore-Serie 8 12 14 16 21 21 22 6. Technische Daten 25 ENGLISH Table of contents Safety precautions Safety instructions Items included in the delivery 27 28 29 1. Connection diagrams 2. Termination and DIP-switch settings 3. Basic operation 4. Keyboard configuration 5. Keyboard control 5.1 SANTEC dome camera control 5.2 SANTEC SanStore recorder control 30 34 36 38 43 43 44 6. Technical specifications 47 _________________________________________________________________________________ -4- Bedienungsanleitung / User manual KSC-3505 Allgemeine Vorsichtsmaßnahmen Vorsicht VORSICHT LEBENSGEFAHR NICHT ÖFFNEN VORSICHT: SETZEN SIE SICH NICHT DER GEFAHR EINES ELEKTRISCHEN SCHLAGES AUS UND ÖFFNEN SIE NICHT DIE GEHÄUSEABDECKUNG ODER DIE GERÄTERÜCKSEITE. IM GERÄTEINNERN BEFINDEN SICH KEINE KOMPONENTEN, DIEGEWARTET WERDEN MÜSSEN. ÜBERLASSEN SIE WARTUNGSARBEITEN QUALIFIZIERTEM PERSONAL. Erläuterung der verwendeten Symbole Gefahr: Das Gefahrensymbol weist auf lebensgefährliche Spannung hin. Öffnen Sie niemals das Gerätegehäuse, Sie könnten einen lebensgefährlichen elektrischen Schlag erleiden. Achtung: Das Achtungssymbol weist auf unbedingt zu beachtende Betriebsund Wartungsanweisungen hin. CE-Richtlinien Vorsicht: Änderungen und Modifizierungen, die nicht ausdrücklich durch die zuständige Genehmigungsbehörde genehmigt worden sind, können zum Entzug der Genehmigung zum Betreiben des Gerätes führen. Dieses Gerät entspricht den CE-Richtlinien. _________________________________________________________________________________ -5- Bedienungsanleitung / User manual KSC-3505 Allgemeine Sicherheitshinweise Vor Inbetriebnahme des Gerätes sollte dieses Handbuch sorgfältig gelesen und als Nachschlagewerk verwahrt werden. Vor jeder Reinigung muss das Gerät ausgeschaltet und von der Betriebsspannung getrennt werden. Benutzen Sie für die Reinigung ein feuchtes Tuch. Benutzen Sie keine scharfen Reinigungsmittel oder Sprühdosen. Das Typenschild darf nicht ersetzt werden. Benutzen Sie keine Zusatzgeräte, die nicht vom Hersteller des Gerätes empfohlen wurden. Diese können die Funktionalität des Gerätes beeinflussen und schlimmstenfalls Verletzungen und einen elektrischen Schlag herbeiführen oder sogar Feuer auslösen. Das Gerät sollte an einem sicheren Ort und auf fester Unterlage gemäß den Angaben des Herstellers installiert werden. Schweres Gerät sollte mit großer Sorgfalt transportiert werden. Schnelle Halts, übermäßige Krafteinwirkungen und unebener Boden können die Ursache sein, dass das Gerät zu Boden fällt und schweren Schaden an Personen und anderen Objekten verursacht. Eventuell am Gerät befindliche Öffnungen dienen der Entlüftung und schützen das Gerät vor Überhitzung. Diese Öffnungen dürfen niemals zugedeckt oder zugestellt werden. Sorgen Sie dafür, dass das Gerät nicht überhitzt wird. Verwenden Sie nur die empfohlene Betriebsspannungsversorgung. Wenn Sie nicht sicher sind, ob die am Installationsort vorhandene Stromversorgung verwendet werden kann, fragen Sie Ihren Händler. Ein Gerät, das von einer polarisierten Stromversorgung versorgt wird, hat meistens als Sicherheitsvorkehrung einen Netzanschlussstecker mit unterschiedlichen Klinken, welche nur auf eine Art und Weise mit der Netzsteckdose verbunden werden können. Versuchen Sie niemals, diese Sicherheitsvorkehrung eines polarisierten Steckers außer Betrieb zu setzen. Wenn das Gerät eine Stromversorgung mit Erdungsanschluss erfordert, dann sollte es auch nur an eine entsprechende Netzsteckdose mit Erdungsanschluss angeschlossen werden. Steht eine solche Schukosteckdose nicht zur Verfügung, dann sollte sie von einem Elektriker installiert werden. Anschlusskabel sollten so verlegt werden, dass man nicht darauf treten kann oder dass sie durch herab fallende Gegenstände beschädigt werden können. Bei einem Gewitter oder bei längerer Nutzungspause sollte das Gerät immer von der Betriebsspannung getrennt werden. Lösen Sie auch andere Kabelverbindungen. Auf diese Weise schützen Sie das Gerät vor Blitzschäden oder Stromstößen. Setzen Sie Netzsteckdose und Netzkabel niemals einer Überbelastung aus. Feuer und elektrische Schläge können die Folge sein. Stecken Sie niemals Gegenstände durch die Öffnungen des Geräts. Sie können Spannungsführende Teile berühren und einen elektrischen Schlag erhalten. Vergießen Sie auch niemals Flüssigkeiten über das Gerät. _________________________________________________________________________________ -6- Bedienungsanleitung / User manual KSC-3505 Bei Betriebsstörungen oder einem vollständigen Betriebsausfall schalten Sie das Gerät aus und trennen es von der Versorgungsspannung. Versuchen Sie niemals, selbst Wartungs- oder Reparaturarbeiten bei geöffnetem Gehäuse durchzuführen, da Sie sich gefährlichen Spannungen aussetzen. Überlassen Sie Wartungs- oder Reparaturarbeiten ausschließlich qualifizierten Fachwerkstätten. Als Ersatzteile dürfen nur Teile verwendet werden, die vom Hersteller zugelassen wurden oder solche, die identische Leistungsdaten aufweisen. Nicht genehmigte Ersatzteile können zu Schäden an Personen (elektrischer Schlag) und Gerät (Feuer) führen. Nach jeder Wartung oder Reparatur des Geräts muss das Gerät auf einwandfreien Betrieb überprüft werden. Die Installation des Geräts sollte nur von qualifiziertem Wartungspersonal ausgeführt werden und muss den örtlichen Spezifikationen und Vorschriften entsprechen. Bitte beachten Sie im Fall der Entsorgung unbrauchbarer Geräte die geltenden gesetzlichen Vorschriften. Dieses Symbol bedeutet, dass elektrische und elektronische Geräte am Ende ihrer Nutzungsdauer vom Hausmüll getrennt entsorgt werden müssen. Bitte entsorgen Sie das Gerät bei Ihrer örtlichen kommunalen Sammelstelle. Über dieses Handbuch Dieses Handbuch dient zur Unterstützung bei der Verwendung des Bedienpults KSC-3505 für die Steuerung von Domen und SanStore Videorekordern. Diese Bedienungsanleitung unterliegt einer strikten Qualitätskontrolle. Dennoch kann keine Garantie dafür gegeben werden, dass keine Fehler enthalten sind. Es können Änderungen zu der Bedienungsanleitung vorgenommen werden ohne vorherige Ankündigung. Bevor Sie das Gerät in Gebrauch nehmen, lesen Sie diese Anleitung sorgfältig durch. Bewahren Sie diese Anleitung für die künftige Verwendung gut auf. Überprüfen Sie, ob alle Komponenten des Geräts mitgeliefert wurden. Sollten Komponenten fehlen, so nehmen Sie das Gerät nicht in Betrieb und wenden sich an Ihren Fachhändler. Versuchen Sie nicht, ein defektes Gerät selbst zu reparieren, sondern lassen Sie die Reparaturen ausschließlich von qualifiziertem Fachpersonal ausführen! Bei unsachgemäßer Handhabung des Geräts entfällt jeglicher Garantieanspruch. Lieferumfang 1 x Bedienpult KSC-3505 1 x Junction-Box 2 x 8-Pin Kabel 4 x Blechschrauben 1 x Netzteil 1 x Handbuch _________________________________________________________________________________ -7- Bedienungsanleitung / User manual KSC-3505 1. Anschluss-Diagramme Beispiel 1: Ein Bedienpult mit Junction-Box, ein SanStore Rekorder und eine SANTEC Dome-Kamera: _________________________________________________________________________________ -8- Bedienungsanleitung / User manual KSC-3505 Beispiel 2: Ein Bedienpult mit Junction-Box, ein SanStore Rekorder und mehrere SANTEC DomeKameras: _________________________________________________________________________________ -9- Bedienungsanleitung / User manual KSC-3505 Beispiel 3: Ein Bedienpult mit Junction-Box, mehrere SanStore Rekorder und mehrere SANTEC DomeKameras: _________________________________________________________________________________ - 10 - Bedienungsanleitung / User manual KSC-3505 Beispiel 4: Mehrere Bedienpulte mit Junction-Boxen, mehrere SanStore Rekorder und mehrere SANTEC Dome-Kameras: _________________________________________________________________________________ - 11 - Bedienungsanleitung / User manual KSC-3505 Abschlusswiderstände und DIP-Schalter Die Dome-Kamera und das Bedienpult, die als letzte Geräte bei der Installation angeschlossen werden, müssen mit einem Abschlusswiderstand abgeschlossen werden. Ohne korrekten Abschluss kann es zu Signalfehlern kommen. Die Gesamtlänge des Kommunikationskabels sollte 1,2 km nicht überschreiten. Abschlusswiderstände: _________________________________________________________________________________ - 12 - Bedienungsanleitung / User manual KSC-3505 DIP-Schalter für mehrere Bedienpulte: Rückseite des Bedienpultes: DIP-Schalter des Bedienpults: _________________________________________________________________________________ - 13 - Bedienungsanleitung / User manual KSC-3505 Grundeinstellungen Wenn das Bedienpult eingeschaltet wird, werden Sie aufgefordert, Ihr Passwort einzugeben. CONTROLLER SYS V x.x Password :_ Als Werkseinstellung ist als Admin Passwort 9999 + Enter und als Benutzer Passwort 1111+ Enter hinterlegt. Falls Sie Ihr eigenes Passwort vergessen haben sollten, kontaktieren Sie bitte Ihren Service- oder Fachhändler. Drücken Sie hintereinander und dann ( 9999 + ENTER ). Es erscheint die folgende Ansicht (bereit für Kamera-Steuerung). Durch Drücken der „SYS“ Taste kehren Sie in den System-Modus des Bedienpultes zurück. Camera ID Cam : 0001E PM 09 : 34 : 04 Datum und Uhrzeit LCD-Anzeige im System-Modus _________________________________________________________________________________ - 14 - Bedienungsanleitung / User manual KSC-3505 Wenn Sie den SanStore-Videorekorder steuern möchten, drücken Sie die folgende Rekorder-Modus wird angezeigt: DVR Taste. Der LCD-Anzeige im Rekorder-Modus: Seite 1 Drücken Sie die F Taste, um auf die Seite 2 des Rekorder-Modus zu gelangen: LCD-Anzeige im Rekorder-Modus: Seite 2 Drücken Sie die F Taste erneut, um auf die Seite 3 des Rekorder-Modus zu gelangen. LCD-Anzeige im Rekorder-Modus: Seite 3 Durch Drücken der „SYS“ Taste kehren Sie in den System-Modus des Bedienpultes zurück. _________________________________________________________________________________ - 15 - Bedienungsanleitung / User manual KSC-3505 4. Einstellungen des Bedienpults Wenn Sie Einstellungen vornehmen wollen, halten Sie die die Taste gedrückt und drücken Taste (Shift + Menu). Das folgende Menü erscheint. MAIN MENU Configuration Port Camera TIME/DATE Alarm Alias Preset Schedule Data Slave Controller SetUp Exit Durch Hoch- und Runterbewegung des Joysticks gelangen Sie von einem Menü-Punkt zum nächsten und mit einer Rechtsbewegung des Joysticks gelangen Sie in das jeweilige Untermenü. Hauptmenü: + (entspricht Shift + Menu) Beschreibung der Steuerelemente: hoch/runter Bewegung des Joysticks; Navigation zwischen Menü-Punkten Rechts-Bewegung des Joysticks; Aufrufen des Untermenüs Drehung des Joysticks rechts herum oder links herum; Werte erhöhen oder verringern Konfiguration: (Shift + Menu Configuration) CONFIGURATION Key Beep : ON / OFF Log_Out : NO /1Min ~30Min User Password Admin Password Save and Exit Key Beep: o ON: Tastentöne des Bedienpults sind eingeschaltet. o OFF: Tastentöne des Bedienpults sind ausgeschaltet. _________________________________________________________________________________ - 16 - Bedienungsanleitung / User manual KSC-3505 Log_Out: o OFF – 30Min: Die Tastensperre setzt automatisch nach der eingestellten Zeit ein. Durch Eingabe des Login-Passworts wird die Sperre wieder aufgehoben. o OFF: Die automatische Tastensperre ist ausgeschaltet. User Password: o Password: o New Password: o Confirm Password: Admin Password: o Password: o New Password: o Confirm Password: Geben Sie das 4-stellige Benutzer-Passwort ein. Geben Sie ein neues 4-stelliges Passwort ein. Geben Sie das neue 4-stellige Passwort zur Bestätigung erneut ein. Geben Sie das 4-stellige Benutzer-Passwort ein. Geben Sie ein neues 4-stelliges Passwort ein. Geben Sie das neue 4-stellige Passwort zur Bestätigung erneut ein. Hinweis: Als Werkseinstellung ist als Admin Passwort 9999+Enter und als Benutzer Passwort 1111+Enter hinterlegt. Falls Sie Ihr eigenes Passwort vergessen haben sollten, kontaktieren Sie bitte Ihren Service- oder Fachhändler. Save and Exit: Speicherung der programmierten Daten und Rückkehr zum vorherigen Menü. (Falls Sie die Änderungen nicht speichern wollen, drücken Sie die ESC Taste.) PORT: (Shift + Menu Port Setup Menu) PORT SETUP MENU Cam1 Cam2 Slave KBD DVR Alarm Exit Cam1: (Shift + Menu Port Setup Menu Cam1) CAM1 PORT SETUP MENU Port Type : RS-485 / RS-422 Device : Camera / DVR / None Baud Rate : 9600 / 2400~230K Save and Exit _________________________________________________________________________________ - 17 - Bedienungsanleitung / User manual KSC-3505 Port Type: Stellen Sie das Interface auf RS-485 ein. Device: Wählen Sie das zu steuernde Gerät (Kamera / Rekorder / Kein) Baud Rate: Stellen Sie die notwendige Geschwindigkeit ein: 2400/ 4800/ 9600/19200/ 38400/ 57600/ 11,5K /230K Save and Exit: Drücken Sie die verlassen. ESC Taste, um das Menü ohne Speicherung der Daten zu Cam2: (Shift + Menu Port Setup Menu Cam2) CAM2 PORT SETUP MENU Device : Camera / None Baud Rate : 9600 / 2400~230K Save and Exit Device: Wählen Sie das zu steuernde Gerät (Kamera / Kein ) Baud Rate: Stellen Sie die Geschwindigkeit ein: 2400/ 4800/ 9600/19200/ 38400/ 57600/ 11,5K /230K Save and Exit: Drücken Sie die verlassen. ESC Taste, um das Menü ohne Speicherung der Daten zu SLAVE: (Shift + Menu Port Setup Menu Slave KBD) SLAVE SETUP MENU Device : Controller / None Baud Rate : 9600 / 2400~230K Save and Exit Device: Wählen Sie das zu steuernde Gerät (Bedienpult / Kein ) Baud Rate: Stellen Sie die notwendige Geschwindigkeit ein: 2400/ 4800/ 9600/19200/ 38400/ 57600/ 11,5K /230K Save and Exit: Drücken Sie die verlassen. ESC Taste, um das Menü ohne Speicherung der Daten zu _________________________________________________________________________________ - 18 - Bedienungsanleitung / User manual KSC-3505 DVR Setup Menu: (Shift + Menu Port Setup Menu DVR) DVR SETUP MENU Device : DVR / Alarm / AUX IN/ IO /None Baud Rate : 9600 / 2400 – 230K Save and Exit Device: Wählen Sie das zu steuernde Gerät (Rekorder / Alarm / AUX IN / AUX IO / KEIN) Baud Rate: Stellen Sie die notwendige Geschwindigkeit ein: 2400/ 4800/ 9600/19200/ 38400/ 57600/ 11,5K /230K Save and Exit: Drücken Sie die verlassen. ESC Taste, um das Menü ohne Speicherung der Daten zu Camera: (Shift + Menu Port Setup Menu Camera) CAMERA SETUP PAGE : 001 Cam Protocol Port B_rate Alarm 0001 RVT PORT 1 9600 OFF 0002 RVT PORT 1 9600 OFF 0009 - - 9600 OFF ---- - - 9600 OFF 3999 RVT PORT 1 9600 OFF OFF :del SHIFT : save & exit ESC : cancel Drücken Sie die No. Taste oder drehen Sie den Joystick, so dass Sie in die erste Spalte des Setup Menüs gelangen. Durch Eingabe der Zahlentasten oder durch Drehen des Joysticks können Sie die IDNummer verringern oder erhöhen. Bewegen Sie den Joystick nach links/rechts, um das nächste/vorherige Element aufzurufen und wählen Sie durch Drehen des Joysticks das zu benutzende Protokoll aus. Drücken Sie den Joystick nach rechts und stellen Sie die Baud-Rate durch eine JoystickDrehung ein. Stellen Sie den Alarm ein (falls erforderlich). Alarm off: simplex, Alarm on: half-duplex Drücken Sie die OFF Taste, um die Kamera-ID zu löschen. Drücken Sie die SHIFT Taste für Speicherung der Eingaben und Verlassen des Menüs. Drücken Sie die ESC Taste, um das Menü ohne Speicherung der Daten zu verlassen. _________________________________________________________________________________ - 19 - Bedienungsanleitung / User manual KSC-3505 Time/Date: (Shift + Menu Time/Date) TIME / DATE Setup Display : ON / OFF Date Format : Asia / US/ EURO 2005/JAN /18 Time Format : 12 / 24 08: 59 : 04 Day Light Saving : ON/ OFF Day Light Saving Save and Exit Slave Controller Setup: ( Shift + Menu V, V, V Data) Slave Controller Setup No. of Controller DVR Control Camera Menu Access Clear saved Data Exit : 0 /1~8 : Enable / Disable : Enable / Disable No. of controller: 0 / 1-8. Gesamtanzahl der Slave-Bedienpulte DVR Control: Videorekorder-Steuerung erfolgt über Slave-Bedienpult. Camera Menu Access: Kamera-Menü-Steuerung erfolgt über Slave-Bedienpult. Clear Saved Data: Alle gespeicherten Daten im Slave-Bedienpult werden gelöscht. _________________________________________________________________________________ - 20 - Bedienungsanleitung / User manual KSC-3505 5. Steuerung über das Bedienpult 5.1 Steuerung der SANTEC Dome-Kameras HINWEIS: Die SANTEC Dome-Kameras müssen nach dem PELCO D Protokoll über RS-485 angeschlossen werden. Mit dem Bedienpult KSC-3505 können folgende SANTEC Dome-Kameras bedient werden: VDC-280ID VDC-310ID VDC-420ID VDC-285ID VDC-315ID VDC-425ID VDC-535ID VDC-290AIOD VDC-430AIOD VDC-610ID Funktion ID Selection Taste Nummer der Kamera + Beschreibung Auswahl einer PTZ-Kamera zur Steuerung HINWEIS: Diese Auswahlmöglichkeit gilt nur für den Fall, wenn die Kamera direkt an die Tastatur bzw. an die Junction-Box angeschlossen ist. Die eingegebene Nummer muss der ID der Kamera entsprechen. Joystick Pan, Tilt, Zoom Steuerung im normalen Modus. Zwischen den einzelnen Menü-Punkten kann gewechselt werden und im Programmierungs-Modus können Werte verringert oder erhöht werden. Manual Focus Manuelle Focus-Einstellung. Durch Bewegung des Joysticks erfolgt Rückkehr zum Auto-Focus. Manual Iris Manuelle Blendeneinstellung. Durch Bewegung des Joysticks wird der Auto-Iris-Modus wieder aktiviert. Menü Preset speichern Preset aufrufen Tour-Menü Tour starten Aufrufen des Hauptmenüs der Kamera 95+ Nummer + Nummer + 70+ 71 … 78 + Pattern Menü 80+ Pattern starten 81 … 84 + + Speichert die momentane Ansicht direkt als Preset Aufrufen einer Preset-Position Aufrufen des Kamera-Tour-Menüs VDC-610ID: Auf das Tourmenü wird über das Hauptmenü zugegriffen. Aufrufen einer von 8 verfügbaren Touren. Aufrufen des Kamera-Pattern-Menüs VDC-610ID: Auf das Pattern-Menü wird über das Hauptmenü zugegriffen. Aufrufen eines von 4 verfügbaren Patterns. VDC-610ID: Die Kamera verfügt über 8 Patterns (81 … 88). _________________________________________________________________________________ - 21 - Bedienungsanleitung / User manual KSC-3505 Autoscan Menü 60+ Autoscan starten 61 … 68 + StoppBefehl 96 + Aufrufen des Kamera-Autoscan-Menüs VDC-610ID: Auf das Autoscan-Menü wird über das Hauptmenü zugegriffen. Aufrufen eines von 8 verfügbaren Autoscans. VDC-610ID: Die Kamera verfügt über 1 Autoscan (66). (außer VDC-610ID) Stoppen der Touren, Patterns und Autoscans. 0+ (VDC-610ID) 5.2 Steuerung der SANTEC Rekorder der SanStore-Serie Mit dem Bedienpult KSC-3505 können folgende SANTEC Rekorder bedient werden: SanStore-LCM SanStore-EM SanStore-MM SanStore-HM Funktion ID Selection Taste Rekorder Nummer + Beschreibung Auswahl der Rekorder Wiedergabe der aufgezeichneten Daten / Wiedergabe wird angehalten. Play/Pause Schnelles Zurückspulen des Videos. Durch erneutes Drücken der Taste kann zwischen den Wiedergabe-Geschwindigkeiten gewechselt werden: , und Schnelles Vorspulen des Videos. Durch erneutes Drücken der Taste kann zwischen den Wiedergabe-Geschwindigkeiten gewechselt werden: , und Während der Wiedergabe kehrt der Videorekorder zum LiveBild zurück. Rewind Fast Forward Stop Starten/Stoppen der Aufnahme Aufnahme Aufrufen des Rekorder-Menüs. Hierzu müssen Sie das Admin Passwort eingeben. Durch Drücken dieser Taste wird das momentane Menü geschlossen oder eine Dialog-Box wird aufgerufen. Menü des Rekorders Display Mode Eingabe von Ziffern Umschalten zwischen den verschiedenen Ansichtsformaten. + Ziffer z.B. um das Admin-Passwort einzugeben. Die SHIFT Taste muss gehalten werden. _________________________________________________________________________________ - 22 - Bedienungsanleitung / User manual KSC-3505 Vollbild Kanalnummer + Cancel Steuerung der DomeKameras Nummer des Kanals + Vollbilddarstellung eines Kanals (außer SanStore-MM) Abbruch der Eingabe Die Funktion oder das Menü oder der Fehlerstatus usw. werden verlassen. OSD-Anzeige auf dem Hauptmonitor ein/aus Auswahl einer Dome-Kamera zur Steuerung HINWEIS: Diese Auswahlmöglichkeit gilt nur für den Fall, wenn die Kamera an den Rekorder angeschlossen wird. Es muss die Nummer des Kanals eingegeben werden, an dem die gewünschte Kamera angeschlossen ist. Die Steuerung der Kamera erfolgt laut der Tabelle 1. Die Beschreibung der Dome-Einstellungen, die im SanStoreRekorder vorgenommen werden müssen, finden Sie im Handbuch für die SanStore-Rekorder. Time Search Aufruf des Menüs zum Wiedergeben der Aufzeichnungen. Die entsprechende Beschreibung des Menüs ist im Handbuch des Rekorders zu finden. Logbuch Aufruf der Log-Liste (Protokolle) zum darstellen auf dem Hauptmonitor. Sperren Drücken Sie diese Taste, um alle Tasten am Rekorder sowie alle Tasten auf der Fernbedienung zu sperren. Um die Tastensperre aufzuheben, drücken Sie die Taste erneut und geben Sie das „Admin“-Passwort ein. Information Aufruf der Rekorder-Informationen auf dem Hauptmonitor. Mit dem Joystick gelangen Sie zur nächsten Seite. _________________________________________________________________________________ - 23 - Bedienungsanleitung / User manual KSC-3505 Steuerung des digitalen Zooms. Um den digitalen Zoom zu aktivieren: wählen Sie zuerst die Vollbilddarstellung des entsprechenden Videokanals. Drücken Sie dann die [ZOOM]Taste. Verschieben Sie den Bereich in die gewünschte Position, indem Sie den Joystick verwenden. Drehen Sie den Joystick, um den Zoom-Bereich zu vergrößern/verkleinern. Drücken Sie die [ENTER]-Taste, um das vergrößerte Bild anzuzeigen. Drücken Sie die [ENTER]-Taste, um in den normalen Ansichtsmodus zurück zu gelangen. Drücken Sie die [CANCEL]-Taste, um das Zoom-Modus zu verlassen. Zoom Aufruf des Menüs zum Durchführen des Backups. Die entsprechende Beschreibung des Menüs ist im Handbuch des Rekorders zu finden. Backup HINWEIS: Die Funktion ist nur für die Rekorder der SanStore-MM Serie verfügbar. Drücken Sie die [SPOT]-Taste. Auf dem Hauptmonitor oben links wird das Symbol angezeigt. Drehen Sie den Joystick, um einen Spot-Monitor auszuwählen. Geben Sie die Nummer des Kanals, den Sie als Vollbild auf dem ausgewählten Spot-Monitor darstellen möchten. Um die Nummer des Kanals einzugeben, halten Sie die SHIFT Taste und drücken die entsprechende Zifferntaste. Steuerung der Spotmonitore _________________________________________________________________________________ - 24 - Bedienungsanleitung / User manual KSC-3505 6. Technische Daten Modell Betriebsspannung Anschlüsse Baud Rate Betriebstemperatur Umgebungstemperatur Abmessungen Gewicht Kommunikation KSC-3505 12 V DC, 0,5 A über das mitgelieferte Netzteil RS-485 2400 – 230K Baud 0°C – 50°C -20°C – 60°C 390 x 190 x 95 mm 1,2 kg Dome-Kameras: max. 64 (Simplex 256) SanStore-Videorekorder: max. 100 Slave-Bedienpulte: max. 8 Irrtum und technische Änderungen vorbehalten. _________________________________________________________________________________ - 25 - Bedienungsanleitung / User manual KSC-3505 _________________________________________________________________________________ - 26 - Bedienungsanleitung / User manual KSC-3505 Safety precautions Caution Description of symbols Danger: This symbol is intended to alert the user to the presence of un-insulated "dangerous voltage" within the product’s enclosure that may be of sufficient magnitude to constitute a risk of electric shock to a person. Warning: This symbol is intended to alert the user to the presence of important operating and maintenance (servicing) instructions in the literature accompanying the appliance. CE compliance Attention: Any changes or modifications to this appliance which have not been explicitly approved of by the respective regulatory authority, may lead to a prohibition of usage of this appliance. This appliance complies with the CE guidelines. _________________________________________________________________________________ - 27 - Bedienungsanleitung / User manual KSC-3505 Safety instructions Before operating the appliance, please read this manual carefully and retain it for further reference. Before cleaning the appliance, it has to be switched off and unplugged from the power outlet. Wipe the appliance with a soft damp cloth. Do not use harsh cleansers or aerosols for cleaning. The type label may not be replaced. Do not use attachments unless recommended by the manufacturer as they may affect the functionality of the appliance and result in the risk of fire, electric shock or injury. Never install the appliance in areas exposed to water or other liquids. The appliance has to be installed in a safe and stable location which is able to carry the weight of the appliance. Quick stops, excessive force, and uneven surfaces may cause the appliance to fall causing serious injury to persons and damage to objects. Openings in the appliance, if any, are provided for ventilation to ensure reliable operation of the appliance and to protect if from overheating. These openings must not be covered or blocked. Please make sure that the appliance does not overheat. The appliance should only be operated from the type of power source indicated on the marking label. If you are not sure of the type of power supplied at the installation location, please contact your local dealer. An appliance which is powered through a polarized plug (a plug with one blade wider than the other) will fit into the power outlet only one way. This is a safety feature. If you are unable to insert the plug into the outlet, try reversing the plug. Do not defeat the safety purpose of the polarized plug. If the appliance is powered through a grounding-type plug, the plug will only fit into a groundingtype power outlet. This is a safety feature. If your outlet does not have the grounding plug receptacle, contact your local electrician. Route power cords and cables in a manner to protect them from damage by being walked on or pinched by items places upon or against them. For protection of the appliance during a lightning storm or when it is left unattended and unused for a longer period, unplug the appliance from the wall outlet. Disconnect any antennas or cable systems that may be connected to the appliance. This will prevent damage to the appliance due to lightning or power-line surges. Do not overload wall outlets and extension cords as this can result in a risk of fire or electric shock. Never insert items into the openings of the appliance. They may touch parts under electric current which may cause an electric shock. Never pour any liquids over the appliance. _________________________________________________________________________________ - 28 - Bedienungsanleitung / User manual KSC-3505 In case of any operating interruption or a complete operating failure please switch off the appliance and disconnect it from the wall outlet. Never attempt to service or repair the appliance yourself, as opening or removing covers may expose you to dangerous voltage or other hazards. Refer all servicing to qualified service personnel. When replacement parts are required, be sure that the service technician uses replacements parts specified by the manufacturer or that have the same characteristics as the original part. Unauthorized substitutions may result in fire, electric shock or other hazards. Upon completion of any service or repairs to the appliance, ask the service technician to perform safety checks to verify that the appliance is in proper operating condition. The appliance should only be installed by qualified service personnel and has to comply with local specifications and regulations. At the installation site, the camera has to be adjusted to the given light conditions. Please respect the local legal regulations on waste if you need to dispose of discarded appliances. This symbol means that electrical appliances need to be disposed of properly and not simply with unsorted household refuse. Please respect local regulations on waste disposal. About this user manual This manual aims at assisting the user on how to operate the keyboard KSC-3505. This manual is subject to rigid quality control. However, no guarantee can be given that mistakes are not present. We reserve the right to make changes to the manual without prior notice. Before operating the appliance, please read this manual carefully and retain it for further reference. Verify that all appliance items are included in the delivery. Should items be missing, do not operate the appliance and contact your local dealer. Never attempt to repair the appliance yourself. This should only be done by qualified service personnel. Improper handling of the appliance will invalidate the warranty. Items included in the delivery 1 x Keyboard KSC-3505 1 x Junction box 2 x 8-pin cable 4 x Screws 1 x Power adapter 1 x User manual _________________________________________________________________________________ - 29 - Bedienungsanleitung / User manual KSC-3505 1. Connection diagrams Example 1: One keyboard with junction box, one SanStore recorder and one SANTEC dome camera: _________________________________________________________________________________ - 30 - Bedienungsanleitung / User manual KSC-3505 Example 2: One keyboard with junction box, one SanStore recorder and several SANTEC dome cameras: _________________________________________________________________________________ - 31 - Bedienungsanleitung / User manual KSC-3505 Example 3: One keyboard with junction box, several SanStore recorders and several SANTEC dome cameras: _________________________________________________________________________________ - 32 - Bedienungsanleitung / User manual KSC-3505 Example 4: Several keyboards with junction boxes, several SanStore recorders and several SANTEC dome cameras: _________________________________________________________________________________ - 33 - Bedienungsanleitung / User manual KSC-3505 2. Termination and DIP switch settings The first and last devices in an installation (dome and keyboard controller) must have the data line terminated by setting the DIP switch. Without proper termination, there is potential control signal errors. The total length of the cable for communication should not exceed 1.2 km Terminations: _________________________________________________________________________________ - 34 - Bedienungsanleitung / User manual KSC-3505 DIP switch for several keyboards: Keyboard rear view: Keyboard’s DIP switches: _________________________________________________________________________________ - 35 - Bedienungsanleitung / User manual KSC-3505 3. Basic operation Once the keyboard is powered on, you are requested to enter your password. CONTROLLER SYS V x.x Password :_ By default, the Admin Password is 9999 + Enter and the user password is 1111+ Enter. If you have forgotten your password, please contact your local distributor or service personnel. One after the other, press and then ( 9999 + ENTER ). The following screen will appear (ready to control the camera). Press the „SYS“ button to return to the system mode of the keyboard. LCD display in system mode: Camera ID Cam : 0001E PM 09 : 34 : 04 Date and time _________________________________________________________________________________ - 36 - Bedienungsanleitung / User manual KSC-3505 If you wish to control a SanStore recorder, press the mode is displayed: DVR button. The following recorder LCD display in recorder mode: Page 1 Press the F button to go to page 2 of the recorder mode. LCD display in recorder mode: Page 2 Press the F button to go to page 3 of the recorder mode. LCD display in recorder mode: Page 3 Press the „SYS“ button to return to the system mode of the keyboard. _________________________________________________________________________________ - 37 - Bedienungsanleitung / User manual KSC-3505 4. Keyboard configuration If you wish to configure the keyboard, please press and hold the the button and then press button (Shift + Menu). The following menu appears. MAIN MENU Configuration Port Camera TIME/DATE Alarm Alias Preset Schedule Data Slave Controller SetUp Exit Push the joystick up/down to navigate through the menu. Push the joystick to the right to enter the respective sub-menu. Main menu: + (equals Shift + Menu) Control functions: Joystick up/down; menu navigation Joystick right; call-up sub-menu Twist joystick handle left or right; increase/decrease values Configuration: (Shift + Menu Configuration) CONFIGURATION Key Beep : ON / OFF Log_Out : NO /1Min ~30Min User Password Admin Password Save and Exit Key Beep: o ON: Enable key beep sound. o OFF: Disable key beep sound. _________________________________________________________________________________ - 38 - Bedienungsanleitung / User manual KSC-3505 Log Out: o OFF – 30Min: Once the setup time has elapsed, the key lock is automatically activated. Enter your login password to unlock again. o OFF: The automatic key lock is disabled. User Password: o Password: o New Password: o Confirm Password: Enter your 4-digit password. Enter a new 4-digit password. Re-enter the new 4-digitl password to confirm. Admin Password: o Password: o New Password: o Confirm Password: Enter your 4-digit password. Enter a new 4-digit password Re-enter the new 4-digitl password to confirm Note: By default, the Admin Passwort is 9999+Enter and the User Password is 1111+Enter. If you have forgotten your password, please contact our local dealer. Save and Exit: Save the programmed data and return to the previous menu. (If you don’t wish to save the changes, please press ESC ) PORT: (Shift + Menu Port Setup Menu) PORT SETUP MENU Cam1 Cam2 Slave KBD DVR Alarm Exit Cam1: (Shift + Menu Port Setup Menu Cam1) CAM1 PORT SETUP MENU Port Type : RS-485 / RS-422 Device : Camera / DVR / None Baud Rate : 9600 / 2400~230K Save and Exit _________________________________________________________________________________ - 39 - Bedienungsanleitung / User manual KSC-3505 Port Type: Configure the port to RS-485. Device: Select the device to be controlled (camera / recorder / none) Baud Rate: Select the Baud rate: 2400 / 4800 / 9600 / 19200 / 38400 / 57600 / 11.5K / 230K Save and Exit: Press ESC to exit the menu without saving. Cam2: (Shift + Menu Port Setup Menu Cam2) CAM2 PORT SETUP MENU Device : Camera / None Baud Rate : 9600 / 2400~230K Save and Exit Device: Select the device to be controlled (camera / none ) Baud Rate: Select the Baud rate: 2400 / 4800 / 9600 / 19200 / 38400 / 57600 / 11.5K / 230K Save and Exit: Press ESC to exit the menu without saving. SLAVE: (Shift + Menu Port Setup Menu Slave Keyboard) SLAVE SETUP MENU Device : Controller / None Baud Rate : 9600 / 2400~230K Save and Exit Device: Select the device to be controlled (keyborad / none) Baud Rate: Select the Baud rate: 2400 / 4800 / 9600 / 19200 / 38400 / 57600 / 11.5K / 230K Save and Exit: Press ESC to exit the menu without saving. _________________________________________________________________________________ - 40 - Bedienungsanleitung / User manual KSC-3505 DVR Setup Menu: (Shift + Menu Port Setup Menu DVR) DVR SETUP MENU Device : DVR / Alarm / AUX IN/ IO /None Baud Rate : 9600 / 2400 – 230K Save and Exit Device: Select the device to be controlled (recorder / alarm / AUX IN / AUX IO / none) Baud Rate: Select the Baud rate: 2400 / 4800 / 9600 / 19200 / 38400 / 57600 / 11.5K / 230K Save and Exit: Press ESC to exit the menu without saving. Camera: (Shift + Menu Port Setup Menu Camera) CAMERA SETUP PAGE : 001 Cam Protocol Port B_rate Alarm 0001 RVT PORT 1 9600 OFF 0002 RVT PORT 1 9600 OFF 0009 - - 9600 OFF ---- - - 9600 OFF 3999 RVT PORT 1 9600 OFF OFF :del SHIFT : save & exit ESC : cancel Press the No. button or twist the joystick to go to the first column of the setup menu. Increas/decrease the ID by using the numeric buttons or by twisting the joystick. Move the joystick left/right to go to the next/previous item. Twist the joystick to select the respective protocol. Push the joystick right and set the Baud ratde by twisting the joystick. Set the alarm (if required). Alarm off: simplex, Alarm on: half-duplex Press the OFF button to delete the camera ID. Press the SHIFT button to save and exit the menu. Press the ESC button to exit without saving. _________________________________________________________________________________ - 41 - Bedienungsanleitung / User manual KSC-3505 Time/Date: (Shift + Menu Time/Date) TIME / DATE Setup Display : ON / OFF Date Format : Asia / US/ EURO 2005/JAN /18 Time Format : 12 / 24 08: 59 : 04 Day Light Saving : ON/ OFF Day Light Saving Save and Exit Slave Controller Setup: ( Shift + Menu V, V, V Data) Slave Controller Setup No. of Controller DVR Control Camera Menu Access Clear saved Data Exit : 0 /1~8 : Enable / Disable : Enable / Disable No. of controller: 0 / 1-8. Total number of slave keyboards. DVR Control: Video recorder control via slave keyboard. Camera Menu Access: Camera menu control via slave keyboard. Clear Saved Data: All saved data of the slave keyboard are deleted. _________________________________________________________________________________ - 42 - Bedienungsanleitung / User manual KSC-3505 5. Keyboard control 5.1 SANTEC dome camera control Note: The SANTEC dome cameras have to be connected according to the PELCO D protocol via RS-485. With KSC-3505, you can control the following SANTEC dome cameras: VDC-280ID VDC-310ID VDC-420ID VDC-285ID VDC-315ID VDC-425ID VDC-535ID VDC-290AIOD VDC-430AIOD VDC-610ID Function ID Selection Button Camera number + Description PTZ camera control selection. NOTE: The selection can only be made if the camera is directly connected to the keyboard or the junction box. The entered number has to be identical to the camera ID number. Joystick Pan, Tilt, Zoom control in normal mode. You can toggle between the menus. In program mode, you can increase or decrease the values. Manual Focus Manual focus setting. Move the joystick to return to auto-focus. Manual Iris Manual iris setting. Move the joystick to enable the auto-iris mode. Menu Save Preset Number + Call-up Preset Number + Tour Menu Tour start Pattern Menu Call-up the camera main menu. 95+ 70+ 71 … 78 + 80+ + Saves the current view directly as preset Call-up a preset position Call-up the camera tour menu. VDC-610ID: The tour menu is accessed via the main menu. Call-up one of 8 available tours. Call-up a camera pattern menu. VDC-610ID: The pattern menu is accessed via the main menu.. _________________________________________________________________________________ - 43 - Bedienungsanleitung / User manual KSC-3505 Pattern start 81 … 84 + Autoscan Menu 60+ Autoscan start 61 … 68 + Stop commanc 96 + Call-up one of 4 available patterns. VDC-610ID: The camera has 8 patterns (81 … 88). Call-up the camera auto-scan menu. VDC-610ID: Access the auto-scan menu via the main menu. Call-up one of 8 available auto-scans.. VDC-610ID: The camera has 1 auto-scan (66). (except VDC-610ID) Stops the tours, patterns and auto-scans. 0+ (VDC-610ID) 5.2 SANTEC SanStore recorder control With keyboard KSC-3505, you can control the following SANTEC SanStore recorder series: SanStore LCM series SanStore EM series SanStore MM series SanStore HM series Function ID Selection Button Recorder Number + Description Selection of recorder Playback of recorded data / Playback is paused. Play/Pause Fast rewind of video. Press the button again to toggle between speeds: , and Fast forward of video. Press the button again to toggle between speeds: , and When pushed during playback, the recorder goes back to liveview. Rewind Fast Forward Stop Record Start/stop a recording. Recorder menu Call-up the recorder menu. Enter the Admin password. By pressing this button, the current menu is closed or a dialog box is opened. Display Mode Enter numbers Full screen Switch between different view formats. + number Channel number + Used to enter e.g. the Admin password. The SHIFT button has to be pushed. Full screen of a channel (except SanStore-MM) _________________________________________________________________________________ - 44 - Bedienungsanleitung / User manual KSC-3505 Cancel Dome camera control Channel number + Cancel the entry. Cancel the function, the menu or the error status. OSD display on main monitor on/off. Dome camera control selection. NOTE: The selection can only be made if the camera is directly connected to the recorder. The entered number has to be identical to the camera ID number. Explanations regarding dome settings for the SanStore recorders can be found in the respective SanStore user manual. Time Search Call-up the menu to playbackt he recording. Please also see the respective recorder user manual. Log Call-up the log-lists (protocols) tob e displayed on the main monitor. Lock Press this button to lock all keys on the recorder and on the remote control. To disable the key lock, press this button again and enter the Admin password. Information Call-up the recorder information on the main monitor. Use the joystick to go to the next page. _________________________________________________________________________________ - 45 - Bedienungsanleitung / User manual KSC-3505 Digital zoom control. Follow these steps to activate the zoom: First, select the full screen view of the respective video channel. Press the [ZOOM] button. Move the area in the desired position by using the joystick. Twist the joystcik to increase/decrease the zoom area. Press the [ENTER] button to display the enlarged picture. Press the [ENTER] button to return to the normal view. Press the [CANCEL] button to exit the zoom mode. Zoom Call-up the backup menu. The corresponding menu description can be found in the respective recorder user manual. Backup NOTE: This function is only available for SanStore MM series models. Press the [SPOT] button. On the main monitor in the upper left corner, the following symbol is Spot monitor control displayed: Twist the joystick to select a spot monitor. Enter the channel number which you wish to display in full screen on the selected spot monitor. To enter the channel number, press and hold the SHIFT button and the respective numeric key. _________________________________________________________________________________ - 46 - Bedienungsanleitung / User manual KSC-3505 6. Technical specifications Model Voltage Connections Baud rate Operating temperature Environment temperature Dimensions Weight Communikation KSC-3505 12 V DC, 0.5 A via power adapter (included) RS-485 2400 – 230K Baud 0°C to 50°C -20°C to 60°C 390 x 190 x 95 mm 1.2 kg Dome cameras: max. 64 (Simplex 256) SanStore recorder: max. 100 Slave keyboard; max. 8 Subject to technical changes. Errors excepted. _________________________________________________________________________________ - 47 - Ihr Fachhändler / Your local distributor: __________________________________________________________________________ www.santec-video.com