1
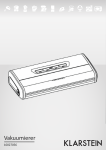
Retro Plattenspieler
1002709010027091 10027092
http://www.auna-multimedia.com
Sehr geehrter Kunde,
zunächst möchten wir Ihnen zum Erwerb Ihres Gerätes gratulieren.
Bitte lesen Sie die folgenden Anschluss- und Anwendungshinweise sorgfältig durch und befolgen Sie diese
um möglichen technischen Schäden vorzubeugen.
Warnung
Zur Reduzierung der Gefahr von Brand, elektrischem Schlag und Beschädigung:
•
•
•
•
•
•
•
•
•
Setzen Sie dieses Gerät nicht dem Regen aus.
Stellen Sie keine mit Flüssigkeiten gefüllten Gefäße, wie Vasen, auf dieses Gerät.
Ausschließlich das empfohlene Zubehör verwenden.
Reparieren Sie dieses Gerät nicht selbst.
Wenden Sie sich zur Wartung an qualifiziertes Kundendienstpersonal.
Lassen Sie keine Gegenstände aus Metall in dieses Gerät fallen.
Stellen Sie keine schweren Gegenstände auf dieses Gerät.
Reinigen Sie das Gerät nur mit einem trockenen Tuch.
Blockieren Sie nicht die Belüftungsöffnungen.
Installieren Sie die Geräte nicht in unmittelbarer Nähe von Hitzequellen wie Heizungen, Herden,
Öfen oder anderen heiß werdenden Geräten (wie z.B. Verstärkern o.a.)
Netzkabel/Netzteil
Zur Reduzierung der Gefahr von Brand, elektrischem Schlag und Beschädigung:
•
•
•
•
•
•
•
Gewährleisten Sie, dass die Spannung der Stromversorgung dem auf diesem Gerät angegebenen
Wert entspricht.
Stecken Sie den Netzstecker vollständig in die Steckdose ein.
Ziehen Sie nicht am Kabel, knicken Sie es nicht und stellen Sie keine schweren Gegenstände darauf.
Fassen Sie den Stecker nicht mit nassen Händen an.
Fassen Sie den Stecker beim Herausziehen an seinem Korpus an.
Verwenden Sie keinen beschädigten Netzstecker oder eine beschädigte Steckdose.
Installieren Sie dieses Gerät so, dass das Netzkabel sofort aus der Steckdose gezogen werden
kann, wenn Störungen auftreten.
Netzadapter
• Der Netzadapter kann mit Wechselstrom von 220 - 240 V betrieben werden.
• Verwenden Sie einen geeigneten Steckeradapter, wenn der Stecker nicht in die Netzsteckdose
passt.
Kleine Objekte/Verpackungsteile
(Plastikbeutel, Karton, etc.)
• Bewahren Sie kleine Objekte (z.B. Schrauben und anderes Montagematerial, Speicherkarten) und
Verpackungsteile außerhalb der Reichweite von Kindern auf, damit sie nicht von diesen verschluckt
werden können. Lassen Sie kleine Kinder nicht mit Folie spielen. Es besteht Erstickungsgefahr!
Achtung
•Gerät
Stellen Sie keine Quellen offener Flammen, z.B. brennende Kerzen, auf das Gerät.
2
Aufstellung
•
•
•
•
•
•
Stellen Sie das Gerät auf eine trockene, ebene, wasserfeste und hitzebeständige Oberfläche.
Suchen Sie einen Aufstellort, an dem Kinder nicht an das Gerät gelangen können.
Die Steckdose muss leicht zugänglich sein, um im Notfall das Gerät schnell vom Stromkreis trennen
zu können.
Installieren oder positionieren Sie dieses Gerät nicht in einem Bücherregal, Einbauschrank oder
einem sonstigen engen Raum. Stellen Sie eine gute Belüftung des Gerätes sicher.
Stellen Sie das Gerät nicht auf Verstärker oder andere Geräte, die heiß werden können. Diese
Hitze könnte das Gerät beschädigen.
Setzen Sie dieses Gerät keinem direkten Sonnenlicht, hohen Temperaturen, starker Feuchtigkeit
und übermäßigen Erschütterungen aus.
Transport des Gerätes
Bitte bewahren Sie die Originalverpackung auf. Um einen ausreichender Schutz beim Transport des
Gerätes zu erreichen, verpacken Sie das Gerät in der Originalverpackung.
Reinigung der äußeren Oberfläche
Verwenden Sie keine flüchtigen Flüssigkeiten, wie Insektensprays. Durch zu starken Druck beim
Abwischen können die Oberflächen beschädigt werden. Gummi- oder Plastikteile sollten nicht über einen
längeren Zeitraum mit dem Gerät in Kontakt sein. Nutzen Sie ein trockenes Tuch.
Bedienelemente & Nutzung
3
Abspielen von Schallplatten
• Drehen Sie den VOLUME-Regler auf der Front des Plattenspielers im Uhrzeigersinn. Mit diesem
Regler schalten Sie das Gerät ein und aus und regulieren gleichsam die Lauutstärke.
• Lösen Sie den Verschluss des Tonarms und legen Sie den Tonarm auf die Tonarm-Halterung.
Achtung: Der Verschluss ist höher als der Plattenteller und muss daher zusammengeklappt
werden, wenn Sie größere Schallplatten abspielen möchten.
• Stellen Sie den RPM-Schalter („Speed Control Switch“) in die gewünschte Position (33 1/3, 45
oder 78 rpm).
• Platzieren Sie eine Schallplatte auf dem Plattenteller.
• Heben Sie den Tonarm leicht an und führen Sie ihn über die ersten Rillen der Schallplatte. Der
Spieler beginnt nun automatisch die Platte zu drehen.
• Senken Sie nun den Tonarm vorsichtig, so dass die Nadel sanft auf der Platte aufsetzt.
• Genießen Sie Ihre Musikauswahl!
• Heben Sie den Tonarm und legen Sie diesen auf die vorgesehene Halterung, wenn eine Schallplatte
zu ihrem Ende kommt.
• Schützen Sie die Nadel mit der mitgelieferten Schutzkappe, wenn der Plattenspieler nicht in
Gebrauch ist.
• Haben Sie Schallplatten, die mit 45rpm abgespielt werden müssen, nehmen Sie den Adapter
(Puck) aus seiner Halterung auf der Oberseite des Plattenspielers und platzieren ihn auf der
Spindel, bevor Sie die Platte auflegen.
Wechseln der Nadel
Ihr Auna Plattenspieler ist bereits mit Universal-Nadel und Tonabnehmer ausgestattet, die sich für 331/3-,
45- und 78-rpm-Schallplatten eignen. Um die Nadel zu ersetzen, verfahren Sie bitte wie folgt:
Entfernen des Tonabnehmers
• Ziehen Sie die Spitze des Tonabnehmers vorsichtig nach unten (1).
• Ziehen Sie das Modul nach vorn (2) und lösen Sie es vom Tonabnehmer (3).
Einsetzen einer neuen Nadel
• Positionieren Sie den roten Nadel-Halter so unter dem Kopf des Tonarms, dass die Nadelspitze
nach unten zeigt (1).
• Richten Sie den Nadel-Halter an der Lasche an der Rückseite des Tonabnehmers aus (2) und
stecken Sie ihn erst hinten auf den Tonabnehmer bis er einrastet (3).
Informationen zur Nadel
•
•
•
Das mitgelieferte (rote) System hat eine sehr kleine Nadelspitze, die kaum zu sehen ist. Stellen
Sie sicher, dass Sie Ersatznadeln benutzen, die dieselben Spezifikationen aufweisen wie das
mitgelieferte Modell.
Die mitgelieferter Nadel ist universell einsetzbar. Dennoch wird empfohlen, dass Sie eine spezielle
Nadel besorgen, für den Fall dass Sie besonders viele 78-rpm-Schallplatten abspielen.
Wann Sie die Nadel austauschen hängt von der Häufigkeit der Benutzung ab als auch vom
Zustand der Schallplatten, die mit ihr abgespielt werden. Die durchschnittliche Lebensdauer der
mitgelieferten Nadel beträgt ca. 1000 Stunden (Spielzeit).
Anschlüsse
4
Line Out:
• Verbinden Sie ein Klinke-Kabel (3,5mm, nicht im Lieferumfang enthalten) mit der Line-Out-Buchse
auf der Rückseite des Plattenspielers und mit dem AUX-Eingang einer externen HiFi-Komponente
Line Out:
• Verbinden Sie ein Klinke-Kabel (3,5mm, nicht im Lieferumfang enthalten) mit der Line-Out-Buchse
auf der Rückseite des Plattenspielers und mit dem AUX-Eingang einer externen HiFi-Komponente
wie zum Beispiel einem Verstärker.
• Eventuell müssen Sie den Eingangspegel des anderen Geräts überprüfen.
Subwoofer-Ausgang:
• Der Subwoofer-Ausgang erlaubt Ihnen den Anschluss eines aktiven Subwoofers (nicht im Liefer
umfang enthalten).
Line-In
Jede Audio-Komponente mit einem Audio-Ausgang (z.B. DAB-Radios, CD- oder MP3-Player) können mittels des mitgelieferten 3,5mm-Klinke-Kabel mit dem Line-In-Eingang des Plattenspielers verbunden werden und über den Plattenspieler abgespielt werden:
• Verbinden Sie das mitgelieferte 3,5mm-Klinke-Kabel mit dem Line-In des Plattenspielers und dem
Line-Out oder dem Kopfhörer-Anschluß Ihres externen Audio-Geräts.
• Schalten Sie beide Geräte ein. Spielen Sie die Musik ab und regulieren Sie die Lautstärke wie
gewohnt.
Speaker-Out:
• Schließen Sie hier den Lautsprecher mit dem mitgelieferten Klinkenkabel an.
Sicherheitshinweise und Gewährleistung
• Diese Bedienungsanleitung dient dazu, Sie mit der Funktionsweise dieses Produktes vertraut zu
machen. Bewahren Sie diese Anleitung daher stets gut auf, damit Sie jederzeit darauf zugreifen
können.
• Sie erhalten bei Kauf dieses Produktes zwei Jahre Gewährleistung auf Defekt bei sachgemäßem
Gebrauch.
• Bitte verwenden Sie das Produkt nur in seiner bestimmungsgemäßen Art und Weise. Eine
anderweitige Verwendung führt eventuell zu Beschädigungen am Produkt oder in der Umgebung
des Produktes.
• Ein Umbauen oder Verändern des Produktes beeinträchtigt die Produktsicherheit.
Achtung Verletzungsgefahr!
• Öffnen Sie das Produkt niemals eigenmächtig und führen Sie Reparaturen nie selber aus!
• Behandeln Sie das Produkt sorgfältig. Es kann durch Stöße, Schläge oder den Fall aus bereits
geringer Höhe beschädigt werden.
• Halten Sie das Produkt fern von Feuchtigkeit und extremer Hitze.
ACHTUNG:
Es wird keine Haftung für Folgeschäden übernommen. Technische Änderungen und Irrtümer vorbehalten!
Wichtige Hinweise zur Entsorgung
Dieses Elektrogerät gehört NICHT in den Hausmüll. Für die fachgerechte Entsorgung wenden Sie sich bitte an die öffentlichen Sammelstellen in Ihrer Gemeinde.
Einzelheiten zum Standort einer solchen Sammelstelle und über ggf. vorhandene Mengenbeschränkungen
pro Tag/ Monat/ Jahr sowie über etwa anfallende Kosten bei Abholung entnehmen Sie bitte den Informationen
der jeweiligen Gemeinde.
Warnhinweise
• Reparaturen am Gerät sollten nur von einer autorisierten Fachwerkstatt durchgeführt werden.
• Öffnen Sie in keinem Fall das Gerät.
• Falscher Zusammenbau führt möglicherweise zu Fehlfunktionen oder dem Totalausfall.
• Das Gerät sollte vor jeglichen Feuchtigkeit und direkter Sonneneinstrahlung geschützt werden.
• Das Gerät bitte nicht mit Reinigungsmitteln reinigen.
5
Technische Eigenschaften
Stromversorgung: 220-240V 50/60Hz (mit Netzadapter) bzw USB, 5V
Der Hersteller dieses Produktes ist die CHAL-TEC Vertriebs- + Handels GmbH, Wallstraße 16, 10179 Berlin.
Konformitätserklärung
Dieses Produkt entspricht den folgenden Europäischen Richtlinien:
2004/108/EG (EMV)
2011/65/EG (RoHS)
Elektroaltgeräte
Befindet sich die obige Abbildung (durchgestrichene Mülltonne auf Rädern) auf dem Produkt, gilt die
Europäische Richtlinie 2002/96/EG. Diese Produkte dürfen nicht mit dem normalen Hausmüll entsorgt
werden. Informieren Sie sich über die örtlichen Regelungen zur getrennten Sammlung elektrischer
und elektronischer Gerätschaften. Richten Sie sich nach den örtlichen Regelungen und entsorgen Sie
Altgeräte nicht über den Hausmüll. Durch die regelkonforme Entsorgung der Altgeräte werden Umwelt und die Gesundheit ihrer Mitmenschen vor möglichen negativen Konsequenzen geschützt. Materialrecycling hilft, den Verbrauch von Rohstoffen zu verringern.
CHAL-TEC Vertriebs- + Handels GmbH; Wallstraße 16; 10179 Berlin, Germany
6
Precautions for use
• Unpack all parts and remove protective material.
• Do not connect the unit to the mains before checking the main voltage and before all other
connections have been made.
• Do not cover any vents and make sure that there is a space of several centimeters around the unit
for ventilation.
Safety instructions
1. Read these instructions.
2. Keep these instructions.
3. Heed all warnings.
4. Follow all instructions.
5. Do not use this aparatus near water.
6. Clean only with dry cloth.
7. Do not block any ventilation openings. Install in accordance with manufacturer‘s instructions.
8. Do not install near any heat sources such as radiators, heat registers, stoves, or other apparatus
(including amplifiers) that produce heat.
9. This product is equipped with a 3 wire grounding type plug having a third(grounding) pin.
10. Do not defeat the safety purpose of the polarized or grounding-type plug.
11. A polarized plug has two blades with one wider than the other.
12. A grounding type plug has two blades and third grounding prong.
13. The wide blade or the third prong are provided for your safety. If the provided plug does not fit
into your outlet, consult an electrician for replacement of the obsolete outlet.
14. Protect the power cord from being walked on or pinched particularly at plugs, convenience
receptacles, and the point where they exit from the apparatus.
15. Only use attachments/accessories specified by the manufacturer.
16. Use only with the cart, stand, tripod, bracket, or table specified by the manufacturer, or sold
with the apparatus.When a cart is used, use caution when moving the cart/apparatus combination
to avoid injury from tip-over.
17. Unplug this apparatus during lightning storms or when unused for long periods of time.
18. Refer all servicing to qualified service personnel. Servicing is required when the apparatus has
been damaged in anyway, such as power-supply cord or plug is damaged, liquid has been spilled
or objects have fallen into the apparatus, the apparatus has been exposed to rain or moisture,
does not operate normally, or has been dropped.
19. The apparatus shall not be exposed to dripping or splashing and that no objects filled with
liquids, such as vases,shall be placed on the apparatus.
20. Minimum distances(e.q. 10cm) around the apparatus for sufficient ventillation.
21. „WARNING - To reduce the risk of fire or electric shock, do not expose the apparatus to
rain or moisture.“
22. The apparatus shall not be exposed to dripping or splashing and no objects filled with
liquids, such as vaces, shall be placed on the apparatus.
23. Do not place this product on an unstable cart, stand or table. The product may fall, causing
serious damage to the product.
24. Slots and openings in the cabinet and the back are provided for ventilation: to ensure reliable
operation of the product, these openings must not be blocked by placing the product on a bed,
sofa, rug or other similar surface. This product should never be placed near or over a heat register.
This product should not be placed in a built-in installation unless proper ventilation is provided.
25. This product should be operated from the type of power source indicated on the marking label.
If you are not sure of the type of power available, consult your dealer or local power company.
This is a safety feature. If you are unable to insert the plug into the outlet, contact your electrician
to replace your obsolete outlet. Do not defeat the purpose of the grounding-type plug.
7
26. Do not allow anything to rest on the power cord. Do not locate this product where persons will
walk on the cord.
27. If an extension cord is used with this product, make sure that the total of the ampere ratings on
the products plugged into the extension cord do not exceed the extension cord ampere rating.
Also, make sure that the total of all products plugged into the wall outlet does not exceed 10
amperes.
28. Never push objects of any kind into this product through cabinet slots as they may touch dangerous
voltage points or short out parts that could result in a risk of fire or electric shock.
29. Never spill any kind of liquid on the product.
30. Do not attempt to service this product yourself, as opening or removing covers may expose you
to dangerous voltage points or other risks. Refer all servicing to service personnel.
31. Unplug this product from the wall outlet and refer servicing to qualified service personnel under
the following conditions:
●
●
●
●
When the power cord or plug is damaged or frayed.
If liquid has been spilled into the product.
If the product has been exposed to rain or water.
If the Product does not operate normally when the operating instructions are followed.
Adjust only those controls that are covered by the operating instructions since improper adjustment of
other controls may result in damage and will often require extensive work by a qualified technician to
restore normal operation.
● If the product has been dropped or the cabinet has been damaged.
● If the product exhibits a distinct change in performance, indicating a need for service.
Caution
NEVER REMOVE THE BACK COVER
Removal of the back cover should be carried out only by qualified personnel.
DO NOT USE IN HOSTILE ENVIRONMENTS
To prevent shock or fire hazard, do not expose the unit to rain or moisture. This unit is designed to be
used in the office or home. Do not subject the unit to vibrations, dust of corrosive gases.
KEEP IN A WELL VENTILATED PLACE
Ventilation holes are provided on the cabinet to prevent the temperature from rising.
Do not cover the unit or place anything on the top of unit.
AVOID HEAT
Avoid placing the unit in direct sunshine or near a heating appliance.
8
Description & Operation
Operation
1. Rotate the ON-OFF VOLUME SWITCH located on the front panel to switch the unit ON.
2. Release the TONE ARM from the ARM LOCK and place it on the ARM REST.
Important: The ARM LOCK is taller than the turntable and needs to be folded down to allow
larger records to be played.
3. Set the SPEED CONTROL SWITCH to the desired speed (331/3, 45 or 78rpm).
4. Place the record on the turntable.
5. Lift the TONE ARM and move it by hand to the record and slowly lower it onto the desired starting
point. The turntable will start turning automatically.
Note: At the end of the record, the turntable will still be rotating. You must lift the TONE ARM
and return it back to the ARM REST manually.
6.Re-adjust the ON-OFF VOLUME SWITCH to the desired sound level and rotate the TONE
CONTROL SWITCH as required.
Note: After use and removing the record, always push the ARM LOCK upwards again before
placing the TONE ARM back on it – then lock it and close the cover.
Accessory: Spindle adaptor for 45rpm records
Note: The spindle adaptor disc is stored on the turntable deck and should only be used if the centre clip
on the 45rpm record is missing!
1. Place the 45rpm adaptor on the spindle before placing the record on the turntable.
2. Place your 45rpm record onto the turntable.
3. Follow the steps under TURNTABLE OPERATION to play your record.
9
Needle removal & installation
The record player is already fitted with a universal needle (or stylus) suitable for playing 331/3, 45 or 78rpm records. The procedure for removing and re-fitting the needle is as follows:
Removing the needle holder
Gently pull down the tip of the stylus holder (1). Pull the cartridge forward (2). Pull it out and remove it from the tone
arm head (3).
Fitting a stylus cartridge
After following the “Removing the Needle Holder” instructions on the previous page, follow steps 1 to 4 below to refit
it:
1.
2.
3.
4.
Position the red stylus holder with the Sapphire stylus facing down.
Line up the tab at the back of the stylus holder with the tone arm cartridge (see picture 1).
Insert the stylus holder with its front end at a downward angle (see picture 2 below).
Lift the front end of stylus holder upward until it snaps into place.
Additional Stylus Information
•
•
•
•
The red stylus holder has a very small Sapphire stylus tip that is barely visible. Make sure the
replacement needle you purchased is the same as the needle already on the tone arm.
This universal needle is safe to use for all three (331/3, 45 & 78rpm) speed records.
Note: We do recommend that a needle specifically for use with 78rpm records is used if you are
going to play a lot of 78rpm records.
When to replace the needle depends on how often you use your turntable and the condition of
the records played.
The Sapphire stylus will give an average of 1000 hours playing time.
Connections
Line out
1. Connect the Auxiliary cable (not supplied) to the LINE OUT JACK on the rear of the record player
and the other end of the cable to the auxiliary inputs of the external component, e.g. another
Hi-Fi unit, Amplifier, PC, etc.
2. Check the volume level of your external component and adjust it if necessary.
3. Refer to the instruction manual of the external component for its correct operation.
Subwoofer out
The subwoofer output jack enables you to attach an active subwoofer (not supplied) which will
enhance bass response. Please contact your retailer for suitable subwoofer models.
10
Line in
Any component with an audio output, such as for instance a DAB Radio Module, CD/Cassette Player, MP3 Player, can
be connected by using a cable with a 3.5mm dia. jack plug (a 3.5mm to 3.5mm Line In cord is supplied).
1. Turn the unit on and adjust the volume.
2. Plug the supplied Line In cord into the LINE-IN JACK on the rear of the unit.
3.Insert the plug at the other end of the Auxiliary cable into the Output Jack or 3.5mm dia.
Headphone Jack of the external Audio Player.
4. Switch the other Audio Player on, play the music and adjust its volume if required
CHAL-TEC Vertriebs- + Handels GmbH, Wallstraße 16, 10179 Berlin.
2004/108/EG (EMV)
2011/65/EG (RoHS)
Electric and electronic equipment and included batteries contains materials, componentsans substances that can be
hazardous to your health and the enviroment, if the waste material (discarded electric and electronic equipment and
batteries) is not handled correctly.
Electric and electronic equipment and batteries is marked with the crossed ou trash
can symbol, seen here. This symbol signifies that electric and electronic equipment and
batteries should not be disposed of with other household waste, but should be disposed of separately.
As the end user it is important that you submit your used batteries to the appropriate and designated facility. In this
manner you make sure that the batteries are recycled in accordance with legislature and will not harm the enviroment.
All cities have established collection points, where electric and electronic equipment and batteries can either be submitted free of charge at recycling stations and other collection sites, or be collected from the households. Additional
information is available at the technical department of your city.
11