1
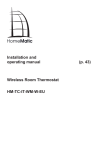
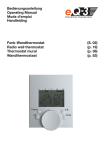
Bedienungsanleitung
Operating Manual
EVN SmartHome
Wandthermostat+
Funk-Wandthermostat EVN SmartHome
Wireless wall thermostat (S. 2)
(p. 30)
1
Inhaltsverzeichnis
1. Bestimmungsgemäßer Einsatz............................................. 3
2. Übersicht................................................................................ 4
3. Bedienung und Display.......................................................... 5
4. Sicherheitshinweise............................................................... 6
5. Entsorgungshinweise............................................................. 6
6. Batterien einlegen (wechseln)............................................... 6
7. Datum und Uhrzeit einstellen (dAt)........................................ 7
8. Montage.................................................................................. 9
9. Montage in bestehende Schalterserien...............................11
10. Anlernen an EVN SmartHome Komponenten..................11
11. Ablernen von EVN SmartHome Komponenten (UnL)...... 14
12. Display-Inhalt im Normalbetrieb........................................ 14
13. Betriebs-Modi (Auto / Manu / Urlaubsfunktion)................ 15
14. Kindersicherung / Bediensperre ( )................................ 15
15. Heizungspause einstellen (ON)........................................ 16
16. Frostschutzbetrieb einstellen (OFF)................................. 16
17. Konfigurationsmenü (Menu)
(Betrieb ohne EVN SmartHome Cube).............................. 16
17.1 Wochenprogramm einstellen (Pro)............................. 18
17.2 Anzeige Uhrzeit/Datum einstellen (t-d)...................... 20
17.3 Umschalten von Soll- und Ist-Temperatur (S-A)........ 21
17.4 Komfort- und Absenktemperatur einstellen............... 21
17.5 Boost-Funktion ( BOOST , bOS) einstellen..................... 22
17.6 Die Urlaubsfunktion einstellen ( )........................... 23
17.7 Entkalkungsfahrt einstellen (dEC).............................. 24
17.8 Fenster-auf-Funktion / Lüften ( , AEr) einstellen... 25
17.9 Offset-Temperatur einstellen (tOF)............................ 25
18. Zurücksetzen in den Auslieferungszustand/Reset (rES)... 26
19. Hinweise zum Funkbetrieb................................................ 27
20. Fehlerbehebung................................................................. 28
21. Technische Daten.............................................................. 29
Lesen Sie diese Anleitung sorgfältig, bevor Sie das Gerät in Betrieb
nehmen. Bewahren Sie die Anleitung zum späteren Nachschlagen auf.
1. Ausgabe Deutsch 07/2012
Dokumentation © 2012 eQ-3 Ltd., Hong Kong.
Alle Rechte vorbehalten.
BC-TC-C-WM-2, V1.0, 105685
2
1. Bestimmungsgemäßer Einsatz
Mit dem EVN SmartHome Wandthermostat+ können bis zu
8 EVN SmartHome Heizkörperthermostate in einem Raum
komfortabel reguliert werden.
Für den Einsatz des EVN SmartHome Heizungssteuerungssystems gibt es zwei Alternativen: Die EVN SmartHome
Einzelraumlösung und die EVN SmartHome Hauslösung.
Eine EVN SmartHome Einzelraumlösung besteht aus einem
EVN SmartHome Wandthermostat+, mit dem bis zu 8 EVN
SmartHome Heizkörperthermostate und 8 EVN SmartHome
Fensterkontakte in einem Raum komfortabel reguliert werden können. Der EVN SmartHome Wandthermostat+ verfügt
über einen internen Sensor, der die Temperatur im Raum
misst und zyklisch an die Heizkörperthermostate übermittelt.
Diese Lösung kann ohne den EVN SmartHome Cube betrieben werden. Die Geräte werden alle direkt an dem EVN
SmartHome Wandthermostaten+ angelernt.
Mit einem EVN SmartHome Cube können mehrere EVN
SmartHome Einzelraumlösungen in einer neuen Installation miteinander verbunden werden. In dieser Installation
kann auch der EVN SmartHome Eco Taster als raumübergreifende Funktion optional in die EVN SmartHome Hauslösung integriert werden.
Betreiben Sie das Gerät nur in Innenräumen und vermeiden Sie den Einfluss von Feuchtigkeit, Staub sowie
Sonnen- oder Wärmebestrahlung. Jeder andere Einsatz als der in dieser Bedienungsanleitung beschriebene ist nicht bestimmungsgemäß und führt zu Garantie- und Haftungsausschluss. Dies gilt auch für
Umbauten und Veränderungen. Die Geräte sind ausschließlich für den privaten Gebrauch gedacht.
3
2. Übersicht
(A) Montageplatte
(B) Wechselrahmen
(C) Wandthermostat
3. Bedienung und Display
A
A
B
C
D
E
B
J
I
H
C
4
F
G
(A)
Automatikbetrieb (Auto), Manueller Betrieb (Manu), Urlaubsfunktion
(
), Boost-Funktion ( BOOST ), Fenster-auf-Symbol (
), Bediensperre-Symbol ( )
(B)
), Funksynchronität (
Wochentag, Batterie-leer-Symbol (
), Uhrzeit/Datum
fort-/Absenktemperatur (
(C)
Eingestellte Zeiträume im Wochenprogramm
), Kom-
(D)
Komfort-Taste (
(E)
Absenk-Taste (
(F)
Mode-/Menu-Taste: Zum Wechseln des Betriebsmodus und zum Öffnen
des Konfigurationsmenüs; Verlassen/Zurück im Menü
(G)
BOOST-/OK-Taste: zum Bestätigen von Einstellungen und Aktivieren
der Boost-Funktion
(H)
(-) Taste: zum Senken der Solltemperatur, Blättern im Menü
(I)
(+) Taste: zum Erhöhen der Solltemperatur, Blättern im Menü
(J)
Soll-/Ist-Temperatur
): zum Wechseln auf die Komforttemperatur
): zum Wechseln auf die Absenktemperatur
4. Si-
5
cherheitshinweise
Das Gerät ist kein Spielzeug, erlauben Sie Kindern nicht
damit zu spielen. Verpackungsmaterial bitte nicht achtlos
liegen lassen, dies kann für Kinder zu einem gefährlichen
Spielzeug werden. Öffnen Sie das Gerät nicht, es enthält
keine durch den Anwender zu wartenden Teile. Im Fehlerfall schicken Sie das Gerät an den Service.
5. Entsorgungshinweise
Gerät nicht im Hausmüll entsorgen!
Elektronische Geräte sind entsprechend der Richtlinie über Elektro- und Elektronik-Altgeräte über die
örtlichen Sammelstellen für Elektronik-Altgeräte zu
entsorgen!
Das CE-Zeichen ist ein Freiverkehrszeichen, das
sich ausschließlich an die Behörden wendet und keine Zusicherung von Eigenschaften beinhaltet.
Verbrauchte Batterien gehören nicht in den Hausmüll! Entsorgen Sie diese in Ihrer örtlichen Batteriesammelstelle!
6. Batterien einlegen (wechseln)
1. Auslieferungszustand
Wenn Sie das Gerät zum ersten Mal in Betrieb nehmen, entfernen Sie zunächst die Montageplatte (A) auf der Rückseite
des EVN SmartHome Wandthermostats+.
• Halten Sie dazu den EVN SmartHome Wandthermostat+
6
in einer Hand fest und ziehen Sie die Montageplatte an
einer Ecke ab.
2. Montierter Zustand
Im montierten Zustand lässt sich der Wandthermostat
(C) einfach aus dem Rahmen und von der Montageplatte ziehen.
• Ziehen Sie den Wandthermostat (C) samt Rahmen (B)
von der Wand ab, indem Sie seitlich am Rahmen ziehen.
Batterien wechseln
• Drehen Sie den Wandthermostat (C) auf
die Rückseite, um die Batterien einzulegen bzw. zu entfernen. Nach Entnahme
der Batterien sollte ca. 60 Sekunden
gewartet werden.
• Legen Sie 2 LR03 Batterien (Micro/
AAA) polungsrichtig gemäß Markierung in die Batteriefächer ein.
• Setzen Sie den Wandthermostat (C) wieder in den Rahmen (B).
Das Batterie-leer-Symbol ( ) weist daraufhin, dass
die Batterien auszutauschen sind. Wird zusätzlich
ein V oder ein S angezeigt, müssen die Batterien eines angelernten Heizkörperthermostats (V) oder
Fensterkontakts (S) ausgetauscht werden.
Normale Batterien dürfen niemals aufgeladen werden. Es besteht Explosionsgefahr. Batterien nicht ins
Feuer werfen! Batterien nicht kurzschließen!
7. Datum und Uhrzeit einstellen (dAt)
Wenn Batterien eingelegt oder ausgetauscht werden, wird
nach kurzer Anzeige der Firmware-Versionsnummer auto7
matisch Datum und Uhrzeit abgefragt. Mit Hilfe der (+) und
(-) Tasten können die Eingaben geändert und mit der OKTaste bestätigt werden.
• Stellen Sie Jahr, Monat und Tag ein und bestätigen Sie
die Eingaben mit der OK-Taste.
Jahr:
Monat und Tag:
• Stellen Sie nun die Uhrzeit ein und bestätigen Sie die Eingaben mit der OK-Taste.
Stunden:
8. Montage
Sie können den EVN SmartHome Wandthermostat+ entweder im beiliegenden Rahmen an eine Wand schrauben/
kleben oder in eine bestehende Schalterserie integrieren
(Näheres zur Kompatibilität finden Sie in Kapitel 9).
Klebestreifen-Montage:
• Wählen Sie einen beliebigen Ort zur Befestigung aus.
Der Untergrund muss sauber, trocken und fettfrei sein.
• Bringen Sie den EVN SmartHome Wandthermostat+ im
zusammengebauten Zustand an. Hierzu befestigen Sie
die Klebestreifen auf der Rückseite der Montageplatte
(A). Achten Sie darauf, dass die Schrift auf der Rückseite für Sie lesbar ist.
Minuten:
Nach abgeschlossener Zeit- und Datumseingabe wechselt
der EVN SmartHome Wandthermostat+ in den Normalbetrieb.
8
Wurde der EVN SmartHome Wandthermostat+ an den
EVN SmartHome Cube angelernt, so erhält er anschließend von diesem das Datum und die Uhrzeit.
• Entfernen Sie die Folie von den Klebestreifen.
• Drücken Sie jetzt den zusammengebauten Wandtthermostat mit der Rückseite an die gewünschte Position
an die Wand.
Beim Betrieb ohne EVN SmartHome Cube können
Datum und Uhrzeit jederzeit über „dAt“ im Konfigurationsmenü geändert werden. (siehe Kapitel 17).
Schraub-Montage:
• Wählen Sie einen geeigneten Montageort aus.
Stellen Sie sicher, dass in der Wand keine Leitungen
verlaufen.
9
• Halten Sie die Montageplatte an die gewünschte Montageposition. Achten Sie darauf, dass der Pfeil auf der Vorderseite der Montageplatte nach oben zeigt.
• Zeichnen Sie zwei der Bohrlöcher A anhand der Montageplatte (diagonal gegenüberliegend) mit einem Stift an
der Wand an. Die Bohrlöcher B können für die Montage
auf einer Unterputzdose verwendet werden.
B
A
A
B
• Bohren Sie die vorgezeichneten Löcher. Bei Steinwänden
verwenden Sie einen 5 mm Bohrer für die Dübel. (Bei Holzwänden können Sie einen 1,5 mm Bohrer verwenden, um
das Eindrehen der Schrauben zu erleichtern.)
• Montieren Sie die Montageplatte durch Eindrehen der mitgelieferten Schrauben und Dübel.
• Setzen Sie nun den Wandthermostat im Rahmen auf die
Montageplatte. Achten Sie dar auf, dass die Pfeile auf der
Rückseite des Wandthermostats
nach oben zeigen und die Klammern der Montageplatte in die
Öffnungen des Wandthermostats rasten.
10
9. Montage in bestehende Schalterserien
Sie können den EVN SmartHome Wandthermostat+ sowohl mit dem mitgelieferten Rahmen, als auch mit Rahmen
anderer Hersteller verwenden oder den Wandthermostat
in einen Mehrfachrahmen integrieren. In beiden Fällen ist
sowohl eine Klebestreifen-, als auch eine Schraub-Montage möglich. Bei der Montage in Mehrfachkombinationen ist darauf zu achten, dass die Montageplatte des EVN
SmartHome Wandthermostats+ bündig neben bereits befestigten Montageplatten/Tragringen angebracht und daran ausgerichtet wird.
Der EVN SmartHome Wandthermostat+ passt grundsätzlich in die Rahmen folgender Hersteller:
Hersteller
Rahmen
Berker
S.1, B.1, B.3, B.7 Glas
ELSO
Joy
GIRA
System 55, Standard 55, E2, E22, Event, Espirit
merten
1-M, Atelier-M, M-Smart, M-Arc, M-Star, M-Plan
JUNG
A 500, AS 500, A plus, A creation
10. Anlernen an EVN SmartHome Komponenten
Um den EVN SmartHome Wandthermostaten+ in Ihrer
Installation nutzen zu können, müssen Sie ihn an das
EVN SmartHome System anlernen. Sie können den EVN
SmartHome Wandthermostat sowohl in Verbindung mit
dem EVN SmartHome Cube als auch ohne Einsatz des
EVN SmartHome Cubes nutzen. In den nachfolgenden
Abschnitten sind die zwei möglichen Anwendungsfälle
beschrieben.
11
10.1 Anlernen an das EVN SmartHome System
mit dem EVN SmartHome Cube
In Verbindung mit dem EVN SmartHome Cube wird der
EVN SmartHome Wandthermostat+ über die lokale EVN
SmartHome Software angelernt und konfiguriert. Die in Kapitel 17. beschriebenen Funktionen sind dann durch die EVN
SmartHome Software verfügbar. Das Konfigurationsmenü
des EVN SmartHome Wandthermostats+ („Menu/Mode“Taste) ist in diesem Fall deaktiviert. Zum Anlernen an den
EVN SmartHome Cube gehen Sie folgendermaßen vor:
• Starten Sie die lokale EVN SmartHome Software und klicken Sie auf „Neues Gerät“.
• Aktivieren Sie den Anlernmodus am EVN SmartHome
Wandthermostat+ mit einem langen Tastendruck der
OK-Taste.
• Das Antennensymbol erscheint im Display und der EVN
SmartHome Wandthermostat+ erscheint in der EVN
SmartHome Software.
• Gehen Sie in der Software auf „Weiter“, um dem Gerät
einen Namen zu geben und es einem Raum zuzuordnen.
• Der EVN SmartHome Wandthermostat+ ist nun im System
integriert und kann in der Software im jeweiligen Raum
konfiguriert werden.
12
Sobald der EVN SmartHome Wandthermostat+
an den EVN SmartHome Cube angelernt ist, erhält er
Datum, Uhrzeit und Wochenprogramm vom
EVN SmartHome Cube.
Sollten Sie Ihr System nachträglich um einen EVN
SmartHome Cube erweitern, so müssen Sie vor dem
Anlernen an den EVN SmartHome Cube alle Geräte
inkl. EVN SmartHome Wandthermostat+ in den Aus-
lieferungszustand zurücksetzen. Dabei gehen alle Einstellungen inkl. Ihrer Wochenprofile verloren.
10.2 Anlernen von EVN SmartHome Komponenten
an den EVN SmartHome Wandthermostaten (ohne EVN SmartHome Cube)
Mit dem EVN SmartHome Wandthermostat+ können Sie
eine Einzelraumlösung mit bis zu 8 EVN SmartHome Heizkörperthermostaten und bis zu 8 Fensterkontakten aufbauen. Diese Lösung kann ohne den EVN SmartHome Cube
betrieben werden. Hierfür lernen Sie die Geräte direkt an
den EVN SmartHome Wandthermostaten+ an.Diese übernehmen dann die Einstellungen des EVN SmartHome Wandthermostaten (z.B. Modus, Temperatur, Wochenprogramm).
Diese Einzelraumlösungen können nur über einen
EVN SmartHome Cube zusammengeschaltet werden
(siehe oben).
Der EVN SmartHome Eco Taster kann nicht in eine
Einzelraumlösung eingebunden werden. Für die
Einbindung dieses Tasters ist ein EVN SmartHome Cube notwendig.
Zum Anlernen gehen Sie wie folgt vor:
• Versetzen Sie zunächst den Anlernpartner (z.B. den EVN
SmartHome Heizkörperthermostaten) gemäß der entsprechenden Bedienungsanleitung in den Anlernmodus.
• Aktivieren Sie den Anlernmodus am EVN SmartHome
Wandthermostat+ mit einem langen Tastendruck der
OK-Taste.
• Im Display erscheint das Antennensymbol ( ) und die
verbleibende Anlernzeit (30 Sekunden).
• Der EVN SmartHome Wandthermostat+ wechselt nach
erfolgreichem Anlernen zurück in den normalen Be13
triebsmodus.
11. Ablernen von EVN SmartHome Komponenten (UnL)
Beim Betrieb mit dem EVN SmartHome Cube erfolgt das
Ablernen des EVN SmartHome Wandthermostats+ und
der anderen Geräte über die EVN SmartHome Software
im jeweiligen Raum.
Beim Betrieb ohne EVN Smar tHome Cube nutzen
Sie die Funktion „UnL“ im Menü, um an den EVN
SmartHome Wandthermostat+ angelernte Geräte (z.B.
EVN SmartHome Heizkörperthermostat) abzulernen. Dabei werden alle Funkkomponenten gleichzeitig abgelernt.
Gehen Sie zum Ablernen folgendermaßen vor:
• Halten Sie die Mode-Taste für länger als 3 Sekunden
gedrückt.
• Wählen Sie mit den (+) und (-) Tasten den Menüpunkt
UnL (Unlearn).
• Bestätigen Sie Ihre Auswahl mit der OK-Taste.
• Im Display erscheint ACC (Accept). Bestätigen Sie den
Ablern-Vorgang mit der OK-Taste.
Nach der Funktion UnL sind alle Verknüpfungspartner
aus dem EVN SmartHome Wandthermostat+ gelöscht,
eine Werkseinstellung ist nicht zwingend notwendig.
12. Display-Inhalt im Normalbetrieb
Im Normalbetrieb werden Betriebsmodus, Wochentag,
Soll-Temperatur, Uhrzeit, Funksynchronität und Schaltzeiträume angezeigt.
Die Balken für Schaltzeiträume des Wochenprogramms
werden für jedes Zeitintervall angezeigt, bei dem die Temperatur über der Absenktemperatur liegt. Ein Beispiel ist
im Abschnitt 17.1.1 zu finden.
14
13. Betriebs-Modi
(Auto / Manu / Urlaubsfunktion / Boost)
Sie haben die Möglichkeit, zwischen den Betriebs-Modi Auto, Manu, Urlaubsfunktion und Boost zu wechseln:
Auto: Wochenprogramm - automatische Temperaturregelung gemäß hinterlegtem Wochenprogramm.
Manu: Manueller Betrieb - die Temperatur wird manuell
über die (+) und (-) Tasten eingestellt.
Urlaubsfunktion ( ): Einstellen einer Temperatur, die bis
zu einem fixen Zeitpunkt gehalten werden soll.
Boost ( BOOST ): Einstellen der Boost-Funktion
Die Einstellungen hierfür können Sie im Betrieb mit EVN
SmartHome Cube bequem in der Software vornehmen.
Beim Betrieb ohne EVN SmartHome Cube, können Sie
die Funktionen über einen kurzen Druck der Mode-Taste
wechseln.
Wird der Betriebsmodus oder die Temperatur an einem Gerät im Raum geändert, übernehmen alle angelernten Heizkörperthermostate diese Änderung.
14. Kindersicherung / Bediensperre ( )
Die Bedienung des EVN SmartHome Wandthermostats+
kann gesperrt werden, um das ungewollte Verändern von
Einstellungen, z.B. durch versehentliches Berühren, zu
verhindern.
• Um die Bediensperre zu aktivieren/deaktivieren, sind die
Mode- und die OK-Taste gleichzeitig kurz zu drücken.
• Nach der Aktivierung erscheint das Bediensperre-Symbol ( ) im Display.
15
15. Heizungspause einstellen (ON)
Ist die Heizung im Sommer abgeschaltet, können die Batterien der EVN SmartHome Heizkörperthermostate geschont
werden. Dazu werden die Ventile ganz geöffnet. Der Verkalkungsschutz wird weiter durchgeführt.
• Betätigen Sie die (+) Taste im manuellen Betrieb (Manu)
so lange, bis im Display „ON“ erscheint.
• Zum Beenden verlassen Sie den manuellen Betrieb
(Manu) oder drücken Sie die (-) Taste.
16. Frostschutzbetrieb einstellen (OFF)
Wenn der Raum nicht geheizt werden soll, können die Ventile der Heizkörper geschlossen werden. Nur bei Frostgefahr werden sie geöffnet. Der Verkalkungsschutz wird dabei
weiter durchgeführt. Zum Aktivieren gehen Sie wie folgt vor:
• Betätigen Sie die (-) Taste im manuellen Betrieb (Manu)
so lange, bis im Display „OFF“ erscheint.
• Zum Beenden verlassen Sie den manuellen Betrieb
(Manu) oder drücken Sie die (+) Taste.
17. Konfigurationsmenü (Menu)
(Betrieb ohne EVN SmartHome Cube)
Wenn Sie Ihr EVN SmartHome System mit einem
EVN SmartHome Cube betreiben, können Sie die
in den folgenden Kapiteln beschriebenen Funktionen bequem in der EVN SmartHome Software
in jedem Raum einstellen.
16
Die nachfolgenden Schritte erläutern, wie das
Einstellen dieser Funktionen im Betrieb ohne
EVN SmartHome Cube durchgeführt wird. In Verbindung mit dem EVN SmartHome Cube sind diese Funktionen am EVN SmartHome Wandther-
mostat+ deaktiviert.
Im Konfigurationsmenü lassen sich Einstellungen beim
Einsatz ohne EVN SmartHome Cube ändern. Das Menü
lässt sich über einen langen Tastendruck (länger als 3 Sekunden) der Mode-Taste aufrufen.
Menüpunkte werden mit der (+) und (-) Taste ausgewählt
und mit OK bestätigt. Ein erneuter Druck der Mode-Taste
führt zur vorherigen Ebene zurück. Nach 60 Sekunden Inaktivität schließt sich das Menü automatisch.
dAt:
Ändern von Uhrzeit und Datum (Abschnitt 7.)
UnL:
Ablernen von Funkkomponenten (UnL)
(Abschnitt 11.)
Pro:
Einstellen des Wochenprogramms (Ab schnitt 17.1)
Anzeige von Uhrzeit und Datum umschalten
(Abschnitt 17.2)
t-d:
S-A:
Ändern der Displayanzeige von Soll- und IstTemperatur (Abschnitt 17.3)
bOS:
Einstellen der Ventilöffnung und der Dauer der
Boost-Funktion (Abschnitt 17.5)
Urlaubsfunktion einstellen (Abschnitt 17.6)
dEC:
Einstellen der Entkalkungsfahrt (Abschnitt
17.7)
17
AEr:
Einstellen der Fenster-auf-Temperatur für die
automatische Temperaturabsenkung beim Lüften (Abschnitt 17.8)
tOF:
Einstellen des Temperatur-Offsets (Abschnitt
17.9)
rES:
Werkseinstellungen wieder herstellen
(Abschnitt 18.)
17.1 Wochenprogramm einstellen (Pro)
Im Wochenprogramm lassen sich für jeden Wochentag separat bis zu 6 Heizphasen (13 Schaltzeitpunkte) einstellen.
Die Programmierung erfolgt für die ausgewählten Tage,
wobei für einen Zeitraum von 00:00 bis 23:59 Temperaturen hinterlegt werden müssen.
• Drücken Sie die Mode-Taste länger als 3 Sekunden. Im
Display erscheint „Pro“.
• Bestätigen Sie mit der OK-Taste. Im Display erscheint
„dAy“.
• Wählen Sie mit den (+) und (-) Tasten einen einzelnen
Wochentag, alle Werktage, das Wochenende oder die
gesamte Woche aus (Bsp. Werktage).
• Bestätigen Sie Ihre Auswahl mit der OK-Taste.
• Stellen Sie nun die Endzeit mit den (+) und (-) Tasten des
ersten Zeitabschnitts ein (Bsp. 6:00 Uhr, für den Zeitraum
von 0:00 – 6:00 Uhr).
• Bestätigen Sie die Auswahl mit der OK-Taste.
• Wählen Sie mit den (+) und (-) Tasten die gewünschte
Temperatur für den zuvor gewählten Zeitabschnitt aus (Bsp. 17.0°C).
• Bestätigen Sie Ihre Auswahl mit
der OK-Taste.
18
• Wiederholen Sie diesen Vorgang, bis für den Zeitraum
von 0:00 bis 23:59 Temperaturen hinterlegt sind.
Im Auto-Modus kann das eingestellte Wochenprogramm
automatisch von angelernten EVN SmartHome Heizkörperthermostaten übernommen und die Temperatur über
die (+) - und (-) -Taste bzw. Komfort ( )- und Absenktaste
( ) jederzeit verändert werden. Die geänderte Temperatur
bleibt dann bis zum nächsten Programmwechsel erhalten.
Die Programmierung am Gerät ist nur dann möglich,
wenn dieses nicht an den EVN SmartHome Cube
angelernt ist.
17.1.1 Wochenprogramm: Beispiele
Mit dem EVN SmartHome Wandthermostat+ können für
jeden Wochentag bis zu 6 Heizzeiten (13 Schaltzeitpunkte) mit individueller Temperaturvorgabe hinterlegt werden.
Werkseitig ist folgendes Wochenprogramm hinterlegt:
Montag-Freitag:
ab 00:00 bis 06:00
ab 06:00 bis 09:00
ab 09:00 bis 17:00
ab 17:00 bis 23:00
ab 23:00 bis 23:59
17.0°C
21.0°C
17.0°C
21.0°C
17.0°C
Samstag und Sonntag:
ab 00:00 bis 06:00
17.0°C
ab 06:00 bis 22:00
21.0°C
ab 22:00 bis 24:00
17.0°C
19
Im Display werden Balken für Heizphasen immer dann
angezeigt, wenn die eingestellte Temperatur für den
Zeitraum größer als die eingestellte Absenktemperatur ist.
Soll ein Raum (z.B. Badezimmer) auch zur Mittagszeit
beheizt werden, kann eine Programmierung wie folgt
aussehen:
Montag bis Sonntag:
ab 00:00 bis 06:00
15.0°C
ab 06:00 bis 09:00
23.0°C
ab 09:00 bis 12:00
17.0°C
ab 12:00 bis 14:00
19.0°C
ab 14:00 bis 18:00
17.0°C
ab 18:00 bis 22:00
21.0°C
ab 22:00 bis 23:59
15.0°C
17.2 Anzeige Uhrzeit/Datum einstellen (t-d)
Werkseitig wird im Display die Uhrzeit angezeigt. Über
das Menü können Sie statt der Uhrzeit das Datum anzeigen lassen.
• Öffnen Sie durch langen Tastendruck (länger als 3 Sek.)
der Mode-Taste das Konfigurationsmenü.
• Wählen Sie den Menüpunkt „t-d“ mit den (+) und (-) Tasten aus und bestätigen Sie mit der OK-Taste.
• Stellen Sie mit den (+) und (-) Tasten das anzuzeigende Format im Display ein (Datum und Uhrzeit wechseln
in der Anzeige).
• Bestätigen Sie Ihre Auswahl mit der OK-Taste.
20
17.3 Umschalten von Soll- und Ist-Temperatur (S-A)
Werkseitig wird im Display die Soll-Temperatur angezeigt.
Über das Menü können Sie sich anstatt der Soll- die IstTemperatur anzeigen lassen.
• Öffnen Sie durch langen Tastendruck der Mode-Taste
das Konfigurationsmenü.
• Wählen Sie den Menüpunkt „S-A“ mit den (+) und (-) Tasten aus und bestätigen Sie mit der OK-Taste.
• Wählen Sie mit den (+) und (-) Tasten „SEt“ für die SollTemperatur und „ACt“ für die Ist-Temperatur.
• Bestätigen Sie mit der OK-Taste.
Wenn die Ist-Temperaturanzeige ausgewählt ist, wird beim
Ändern der Soll-Temperatur (sowie
bei einem Modus-Wechsel) diese für
5 Sekunden mit „SEt“ im Display angezeigt. Danach erfolgt automatisch
ein Wechsel zurück zur Ist-Temperatur.
17.4 Komfort- und Absenktemperatur einstellen
Die Komfort ( )- und die Absenk-Taste ( ) dienen zum
komfortablen und einfachen Umschalten zwischen Komfort- und Absenktemperatur. Werkseitig liegen diese bei
21.0°C und 17.0°C.
Beim Einsatz ohne EVN SmartHome Cube passen Sie die
Werte über die jeweilige Taste (Komfort- bzw. Absenktemperatur) wie folgt am Gerät an:
• Halten Sie die Komfort( )-Taste lange gedrückt, um die
Komfort-Temperatur anzupassen bzw. die Absenk-Taste
( ), um die Absenktemperatur anzupassen.
21
• Im Display erscheint das jeweilige Symbol und die entsprechende Komfort-/ bzw. Absenktemperatur.
• Verändern Sie die Temperatur mit den (+) und (-) Tasten.
• Bestätigen Sie mit der OK-Taste.
Auch im Auto-Modus kann die Temperatur über die Tasten
jederzeit geändert werden. Diese Änderung bleibt dann bis
zum nächsten Schaltzeitpunkt des Programms erhalten.
17.5 Boost-Funktion ( BOOST , bOS) einstellen
Die Boost-Funktion nutzt das menschliche Wärmeempfinden aus. Die Erwärmung eines Raumes dauert in der Regel länger als 5 Minuten, die vom Heizkörper abgegebene Strahlungswärme kann jedoch sofort wahrgenommen
werden. Bei Aktivierung wird das Heizungsventil sofort für
5 Minuten auf 80% geöffnet (Werkseinstellung).
• Drücken Sie kurz die OK-Taste zum Aktivieren der
Boost-Funktion.
• Nach Ablauf der Boost-Zeit wechselt der Heizkörperthermostat wieder in den vorher aktiven Modus (Auto/Manu)
mit der vorher eingestellten Temperatur.
• Die Boost-Funktion lässt sich jederzeit vorzeitig durch
nochmaliges Betätigen der OK-Taste deaktivieren.
Die verbleibende Funktionsdauer wird im Sekundentakt
heruntergezählt (z.B. „300“ bis „000“) und BOOST wird im
Display dargestellt.
Die Dauer und Ventilöffnung der Boost-Funktion lassen
sich individuell anpassen:
• Drücken Sie die Mode-Taste länger als 3 Sekunden.
22
• Wählen Sie mit den (+) und (-) Tasten den Menüpunkt
„bOS“ aus.
• Bestätigen Sie die Auswahl mit der OK-Taste.
• Stellen Sie mit den (+) und (-) Tasten die Boost-Dauer
von 0 bis 60 Min ein (0, 5, 10, 15, 20, 25, 30, 60 Min). Die
Auswahl 0 deaktiviert die Funktion.
• Bestätigen Sie die Auswahl mit der OK-Taste.
• Stellen Sie anschließend die Ventilöffnung mithilfe der
(+) und (-) Tasten von 0 bis 100% in 5% Schritten ein. Je
höher die Ventilöffnung, desto größer die Erwärmung
des Heizkörpers.
• Bestätigen Sie die Auswahl mit der OK-Taste.
Bei einer langen Boost-Dauer und einer hohen Ventil-Öffnung kann der Heizkörper sehr heiß werden.
Testen Sie nach Veränderung der Werkseinstellung,
ob sich der Heizkörper nicht zu stark erwärmt.
Die abgegeben Wärme hat keinen unmittelbaren Effekt, wenn der Heizkörper verdeckt ist (z.B. durch ein
Sofa).
Ist die Dauer der Boost-Funktion (z.B. über den EVN
SmartHome Cube) so eingestellt, dass die Anzeige
im Display eine Anzeige von 999 Sek. überschreitet,
wird sie in Minuten dargestellt.
17.6 Die Urlaubsfunktion einstellen (
)
Die Urlaubsfunktion kann genutzt werden, wenn während
eines Urlaubs oder einer Party für einen bestimmten Zeitraum eine feste Temperatur gehalten werden soll.
• Drücken Sie die Mode-Taste so oft kurz, bis im Display
das Koffersymbol ( ) erscheint.
23
• Stellen Sie die Uhrzeit ein, bis zu der die Temperatur gehalten werden soll.
• Bestätigen Sie die Auswahl mit der OK-Taste.
• Stellen Sie das Datum ein, bis zu dem die Urlaubsfunktion aktiv sein soll.
• Bestätigen Sie die Auswahl mit der OK-Taste.
• Stellen Sie die Temperatur ein und drücken Sie die OKTaste. Die Anzeige blinkt zur Bestätigung.
Die eingestellte Temperatur bleibt bis zum vorgegebenen
Zeitpunkt bestehen. Danach wechselt der Heizkörperthermostat in den Auto-Modus. Funkbefehle von z.B. einem
Fensterkontakt oder die wöchentliche Entkalkungsfahrt
werden weiterhin ausgeführt.
17.7 Entkalkungsfahrt einstellen (dEC)
Zum Schutz vor Ventilverkalkung wird einmal wöchentlich
eine Entkalkungsfahrt bei den Heizkörperthermostaten
durchgeführt. Der Zeitpunkt dieser Funktion kann verändert werden (werkseitig Samstag, 12:00 Uhr).
• Drücken Sie die Mode-Taste länger als 3 Sekunden.
• Wählen Sie mit den (+) und (-) Tasten den Menüpunkt
„dEC“ aus.
• Bestätigen Sie die Auswahl mit der OK-Taste.
• Wählen Sie mit den (+) und (-) Tasten den Wochentag aus.
• Bestätigen Sie die Auswahl mit der OK-Taste.
• Wählen Sie mit den (+) und (-) Tasten die Uhrzeit aus.
• Bestätigen Sie die Auswahl mit der OK-Taste.
Während die Entkalkungsfahrt ausgeführt wird, erscheint
im Display „CAL“.
24
17.8 Fenster-auf-Funktion / Lüften (
, AEr) einstellen
Der EVN SmartHome Wandthermostat+ regelt beim Lüften im Raum die Temperatur automatisch herunter, um
Heizkosten zu sparen. Dabei wird im Display des Wandthermostats und aller angelernten Geräte das Fenster-aufSymbol ( ) angezeigt.
In Verbindung mit einem EVN SmartHome Fensterkontakt
wird das Öffnen und Schließen eines Fensters zeitgenau
erkannt. Die Temperatur wird während der Fensteröffnung
auf die werkseitig eingestellten 12° C heruntergeregelt. Registriert der EVN SmartHome Fensterkontakt das Schließen des Fensters, werden alle im Raum installierten EVN
SmartHome Heizkörperthermostate in ihren ursprünglichen
Modus zurückversetzt.
• Drücken Sie die Mode-Taste länger als 3 Sekunden.
• Wählen Sie mit den (+) und (-) Tasten den Menüpunkt
„AEr“ aus.
• Bestätigen Sie die Auswahl mit der OK-Taste.
• Stellen Sie die Temperatur mit den (+) und (-) Tasten ein.
• Bestätigen Sie die Auswahl mit der OK-Taste.
17.9 Offset-Temperatur einstellen (tOF)
Die Temperatur wird am EVN SmartHome Wandthermostat+ gemessen, deshalb kann es woanders im Raum kälter
oder wärmer sein. Um dies anzugleichen, kann ein Temperatur-Offset von ±3.5°C eingestellt werden. Werden z.B.
18°C anstatt eingestellter 20°C gemessen, ist ein Offset
von -2.0°C einzustellen.
• Drücken Sie die Menu-Taste länger als 3 Sekunden.
• Wählen Sie mit den (+) und (-) Tasten den Menüpunkt
„tOF“ aus.
25
• Bestätigen Sie die Auswahl mit der OK-Taste.
• Stellen Sie die Temperatur mit den (+) und (-) Tasten ein.
• Bestätigen Sie die Auswahl mit der OK-Taste.
18. Zurücksetzen in den Auslieferungszustand/
Reset (rES)
Der Auslieferungszustand des EVN SmartHome Wandthermostats+ kann manuell wieder hergestellt werden, um z.
B. eine Einzelraumlösung an einen EVN SmartHome Cube
anzulernen oder ein fehlerhaft arbeitendes System neu zu
installieren. Dabei gehen alle Einstellungen und Informationen über angelernte Geräte verloren.
Bevor Sie den EVN SmartHome Wandthermostat+
auf Werkzustand zurücksetzen, löschen Sie das Gerät beim Betrieb mit EVN SmartHome Cube zuerst
aus der EVN SmartHome Software.
Bevor Sie eine Einzelraumlösung mit einem EVN
SmartHome Wandthermostaten+ an einen EVN
SmartHome Cube anlernen, müssen Sie alle Geräte in den Auslieferungszustand zurücksetzen.
• Drücken Sie die Mode-Taste länger als 3 Sekunden.
• Wählen Sie mit den (+) und (-) Tasten den Menüpunkt
„rES“ aus.
• Bestätigen Sie die Auswahl mit der OK-Taste.
• Es erscheint „ACC“ im Display, bestätigen Sie den Werksreset mit der OK-Taste.
26
Ist der EVN SmartHome Wandthermostat+ an einen
EVN SmartHome Cube angelernt, ist das Konfigurationsmenü am Gerät gesperrt.
Sie können trotzdem ein Reset wie nachfolgend beschrieben ausführen:
• Entfernen Sie eine Batterie und warten Sie 60 Sekunden.
• Halten Sie die Absenk ( ), OK und - Taste gleichzeitig
gedrückt und legen sie gleichzeitig die Batterie wieder ein
• Sobald im Display rES erscheint wurde der Reset durchgeführt und die Taster können losgelassen werden.
• Sie können jetzt mit dem Einstellen beginnen.
19. Hinweise zum Funkbetrieb
Die Funk-Übertragung wird auf einem nicht exklusiven
Übertragungsweg realisiert, weshalb Störungen nicht ausgeschlossen werden können. Störeinflüsse können u. a.
durch Schaltvorgänge, Elektromotoren oder auch defekte Elektrogeräte hervorgerufen werden. Die Reichweite in
Gebäuden kann stark von der im Freifeld abweichen. Außer der Sendeleistung und den Empfangseigenschaften
der Empfänger spielen Umwelteinflüsse wie Luftfeuchtigkeit neben baulichen Gegebenheiten eine wichtige Rolle.
Hiermit erklärt die eQ-3 Entwicklung GmbH, dass sich
dieses Gerät in Übereinstimmung mit den grundlegenden
Anforder-ungen und den anderen relevanten Vorschriften
der Richtlinie 1999/5/EG befindet. Die vollständige Konformitätserklärung finden Sie unter www.eQ-3.de.
27
20. Fehlerbehebung
Fehlercode
im Display
Problem
Behebung
Batteriesymbol
( )
Batteriespannung zu gering
Batterien austauschen
F4
Bereits
ein EVN
SmartHome
Cube angelernt
Stellen Sie sicher,
dass das Gerät nicht
mehr am Cube (in der
Software) angelernt ist
und führen Sie einen
Reset durch. Anschließend können Sie das
Gerät erneut anlernen.
21. Technische Daten
Technische Änderungen, die zur Verbesserung dienen, sind vorbehalten.
Versorgungsspannung:
3V
EVN SmartHome. Stromaufnahme:
30 mA
Batterien:
2 x LR03 (Micro/AAA)
Batterielebensdauer:
ca. 2 Jahre
Display:
LC-Display
Funkfrequenz:
868,3 MHz
Reichweite im Freifeld:
100 m
Empfängerklasse:
SRD Class 2
Typ 1
F5
Temperatursensor defekt
Gerät ersetzen
Wirkungsweise:
Langsam
blinkendes
Antennen
Symbol
Verbindung
zu angelernten EVN
SmartHome
Komponenten
ist verloren gegangen
Überprüfen Sie die
Spannungsversorgung und die Batterien angelernter EVN
SmartHome Komponenten
Gehäuseabmessung:
86 x 86 x 21,5 mm
(B x H x T)
DutyCycle
Limit erreicht
Nach ca. einer Stunde
Wartezeit kann das
Gerät die Funkkommunikation wieder
Aufnehmen
Umgebungstemperatur:
(+)5°C bis (+)55°C
Schnell
blinkendes
Antennen
Symbol
28
Anlernbare Komponenten:
1 EVN SmartHome
(über EVN SmartHome Cube) Cube,
8 EVN SmartHome
Heizkörper-thermostate
8 EVN SmartHome
Fensterkontakte
29
Table of contents
1. Intended use
1. Intended use......................................................................31
2. Overview............................................................................32
3. Operation and display.......................................................33
4. Safety instructions.............................................................34
5. Instructions for disposal....................................................34
6. Inserting (replacing) batteries...........................................34
7. Setting date and time (dAt)................................................35
8. Mounting............................................................................36
9. Installation in multiple combinations.................................39
10. Teaching-in of EVN SmartHome components...............40
11. Teaching-out of wireless components (UnL)..................42
12. Display content during normal operation........................42
13. Operating modes (Auto / Manu / Holiday function)........43
14. Child-proof lock / operating lock ( )..............................43
15. Setting heat pause (ON)..................................................44
16. Setting frost protection (OFF).........................................44
17. Configuration menu (Menu)
(Operation without the EVN SmartHome Cube)..............45
17.1 Setting the week programmes(Pro)..........................46
17.2 Switching time/day (t-d) display................................48
17.3 Switching nominal/actual temperature (S-A)...........48
17.4 Comfort and reduced temperature ( )..................49
17.5 Set boost function ( BOOST , bOS)................................50
17.6 Setting the holiday function ( )..............................51
17.7 Setting valve protection function (dEC)....................52
17.8 Open window function / airing ( , AEr).................52
17.9 Setting the offset temperature (tOF)........................53
18. Teach-out / Reset (rES)...................................................53
19. Information about radio operation...................................55
20. Remedy............................................................................56
21. Technical data..................................................................57
With the EVN SmartHome wall thermostat up to 8 EVN
SmartHome radiator thermostats can be conveniently regulated in a room.
Read this manual carefully before starting to use the device.
Keep the manual so you can refer to it at a later date should you
need to.
1st English edition 07/2012
Documentation © 2012 eQ-3 Ltd., Hong Kong.
All rights reserved.
BC-TC-C-WM-2, V1.0, 105685
30
There are two alternative ways to use the EVN SmartHome
heating control system: the EVN SmartHome single room
solution and the EVN SmartHome house solution.
A EVN SmartHome single room solution consists of a EVN
SmartHome Wall Thermostat+ which enables convenient
regulation of up to 8 EVN SmartHome Radiator Thermostats and 8 EVN SmartHome Window Sensors in one room.
The EVN SmartHome Wall Thermostat+ has an internal
sensor that measures the temperature in the room and cyclically transmits it to the radiator thermostats.
This solution can be operated without the EVN SmartHome
Cube. The devices are all taught-in directly to the EVN
SmartHome Wall Thermostat+.
With one EVN SmartHome Cube several EVN SmartHome
single room solutions can be connected to one another in
a new installation. In this installation the EVN SmartHome
Eco Switch can also be integrated optionally as a crossroom function in the EVN SmartHome house solution.
The device may only be operated indoors and must
be protected from the effects of damp and dust, as
well as solar or heat radiation. Using this device for
any purpose other than that described in this operating manual does not fall within the scope of intended
use and shall invalidate any warranty or liability. This
also applies to any conversion or modification work.
This device is intended for private use only.
31
2. Overview
(A) Mounting plate
(B) Attachment frame
(C) Wall Thermostat
3. Operation and display
A
A
B
C
D
E
B
I
H
F
C
32
J
G
(A)
Automatic operation (Auto), Manual operation (Manu), Holiday function
(
), Boost function ( BOOST ), Open Window symbol (
), Operating lock symbol ( )
(B)
Weekday, Empty battery symbol (
), Radio activity (
reduced temperature (
), time/date
), comfort/
(C)
Bar chart of the programmed heating phases of the current day
(D)
Comfort temperature button (
): for switching to comfort temperature
(E)
Reduced temperature button (
): for switching to reduced temperature
(F)
Mode/Menu button: to change the operating mode and open the configuration menu; exit/back in the menu
(G)
BOOST/OK button: to confirm settings and activate the Boost function
(H)
(-) button: to lower the nominal temperature, browse in the menu
(I)
(+) button: to increase the nominal temperature, browse in the menu
(J)
Nominal/ actual temperature
33
4. Safety instructions
This device is not a toy; do not allow children to play with
it. Do not leave packaging material lying around, as it can
be dangerous in the hands of a child. Do not open the device: it does not contain any components that need to be
serviced by the user. In the event of an error, please return
the device to our service department.
5. Instructions for disposal
Do not dispose of the device with regular domestic
waste!
Electronic equipment must be disposed of at local
collection points for waste electronic equipment in
compliance with the Waste Electrical and Electronic
Equipment Directive.
The CE Marking is simply an official symbol relating
to the free movement of a product; it does not warrant a product’s characteristics.
Used batteries should not be disposed of with
regular domestic waste! Instead, take them to
your local battery disposal point.
2. Installed condition
Once mounted, the EVN SmartHome
wall thermostat can easily be pulled out
of the frame.
• Pull the wall thermostat (C) off the wall
together with the frame by pulling sideways at the frame.
Change batteries
• Turn the wall thermostat (C) over to remove or insert the
batteries according to the illustration. After removing the
old batteries, please wait approx. 60 seconds before inserting the new ones.
• You can now enter two LR03 batteries (Micro/AAA) into
the battery compartment, making sure they are the right
way round according to the drawings
• Put the EVN SmartHome wall thermostat (C) back into
the frame (B).
An empty battery symbol ( ) indicates that the batteries need to be replaced. If, in addition, a V or S are
displayed, the batteries of a taught-in Heating Thermostat (V) or Window Sensor (S) have to be replaced.
Never recharge standard batteries. Doing so will present a risk of explosion. Do not throw the batteries
into a fire. Do not short-circuit batteries.
6. Inserting (replacing) batteries
1. As-delivered condition
When you are starting up the device for the first time, first
remove the mounting plate (A) on the rear of the wall thermostat (C).
• To do this, hold the EVN SmartHome wall thermostat firmly
in one hand and pull off the installation plate at one corner.
34
7. Setting date and time (dAt)
After inserting or replacing batteries the firmware version
number will be shown briefly. Accordingly, date and time will
be requested automatically. Settings can be changed with
the (+) and (-) buttons and confirmed with the OK button.
35
• Set the year, month and date and confirm each setting
with the OK button.
Year:
Month and day:
Adhesive strip mounting:
• Choose a site for installation. The surface on which you
are mounting the EVN SmartHome Wall Thermostat+
must be clean, dry and greaseless.
• For mounting of the assembled EVN SmartHome Wall
Thermostat+, attach the adhesive strips to the back side
of the mounting plate. You should be able to read the letters on the back side (according to figure).
• Now set the time and confirm settings with the OK button.
Hours: Minutes:
Once the time and date were entered, the EVN SmartHome
wall thermostat switches to normal operation.
If the EVN SmartHome wall thermostat was taughtin to the EVN SmartHome cube, the current date and
time will be transferred to the EVN SmartHome wall
thermostat automatically.
During operation without the EVN SmartHome Cube
date and time can be changed at any time via „dAt“
in the configuration menu (see section 17).
8. Mounting
You can either use screws or adhesive strips to mount the
EVN SmartHome wall thermostat to a wall in the frame
supplied or integrate it into an existing switch (please refer to sec. 9).
36
• Remove the protective film from the adhesive strip.
• Press the assembled EVN SmartHome Wall Thermostat+ with the back side to the wall in the position where
it should subsequently be attached.
Screw mounting:
• Choose a site for installation.
Make sure that electrical lines in the wall will not be
damaged.
• Position the mounting plate on the desired site on the
wall. Make sure that the arrow on the mounting plate is
pointing upwards.
37
• Use a pen to mark the positions of 2 bore holes A (diagonally opposite) in the mounting plate on the wall. The
bore holes B can be used for installation with a flushmounting box.
B
A
A
B
• If you are working with a stone wall, drill the marked two
5 mm holes and insert the plugs supplied. If you are working with a wooden wall, you can pre-drill 1.5 mm holes
to make screws easier to insert.
• Use the screws and plugs supplied to fasten the mounting plate to the wall.
• Attach the wall thermostat with the frame on the mounting plate. Make sure that the arrows
on the back side of the wall thermostat point upwards and that the clips
on the mounting plate latch into the
openings on the wall thermostat.
38
9. Installation in multiple combinations
You can mount the EVN SmartHome Wall Thermostat+
with the attachment frame provided or use it with frames
of other manufacturers as well as integrate the electronic
unit into a multi-gang frame. In both cases, mounting with
adhesive strips and screws is possible. For mounting with
multiple combinations, make sure that the mounting plate of the EVN SmartHome wall thermostat is seamlessly
aligned to the already fixed mounting plate/retaining ring.
The EVN SmartHome Wall Thermostat+ is designed to
fit into frames supplied by the following manufacturers:
Manufacturer
Frame
Berker
S.1, B.1, B.3, B.7 Glas
ELSO
Joy
GIRA
System 55, Standard 55, E2, E22, Event, Espirit
merten
1-M, Atelier-M, M-Smart, M-Arc, M-Star, M-Plan
JUNG
A 500, AS 500, A plus, A creation
39
10. Teaching-in of EVN SmartHome components
In order to use the EVN SmartHome Wall Thermostat+ in
your installation, you must teach it in to the EVN SmartHome
system. You can use the EVN SmartHome Wall Thermostat+ both in conjunction with the EVN SmartHome Cube or
without using the EVN SmartHome Cube. The two possible usage cases are described in the following sections.
10.1 Teaching in at the EVN SmartHome System
with the EVN SmartHome Cube
The EVN SmartHome Wall Thermostat+ is taught in and
configured in combination with the EVN SmartHome Cube
via the local EVN SmartHome Software. The functions described in chapter 17 are then available via the local EVN
SmartHome Software. The configuration menu of the EVN
SmartHome Wall Thermostat+ („Menu/Mode“) button is
deactivated in this case. In order to teach in at the EVN
SmartHome Cube, proceed as follows:
• Start the local EVN SmartHome Software and click on
„New device“.
• Perform a long press of the „OK“ key on the EVN
SmartHome Wall Thermostat+.
• The antenna symbol appears in the display and the
EVN SmartHome Wall Thermostat+ appears in the EVN
SmartHome Software.
• In to software, go to „Next“ to give the device a name and
assign it to a room.
• The EVN SmartHome Wall Thermostat+ is now integrated in the system and can be configured in the software
of the respective room.
As soon as the EVN SmartHome Wall Thermostat+
has been taught in on a gateway like the EVN
SmartHome Cube, all data such as date, time or week
programme are transmitted to it via the radio
connection.
40
If you add a EVN SmartHome Cube to your system later,
you must reset all devices including the EVN SmartHome
Wall Thermostat+ to the initial state prior to teach-in to
the EVN SmartHome cube. All settings including your
weekly profiles are deleted in this process.
10.2.Teaching-in EVN SmartHome components at
theEVN SmartHome Wall Thermostat+
(without EVN SmartHome Cube)
With the EVN SmartHome Wall Thermostat+ you can set up
a single room solution with up to 8 EVN SmartHome Radiator Thermostats and up to 8 window Sensors. This solution
can be operated without the EVN SmartHome Cube. For this
purpose teach-in the devices directly to the EVN SmartHome
Wall Thermostats+. These then take over the settings of the
EVN SmartHome Wall Thermostat+ (e.g. mode, temperature, weekly program).
These single room solutions can be connected only
via a EVN SmartHome Cube (see above).
The EVN SmartHome Eco Switch cannot be integrated in a single room solution. A EVN SmartHome Cube
is necessary for the integration of this button.
To teach-in your components proceed as follows:
• First switch the teach-in partner (e.g. the EVN SmartHome
Radiator Thermostat) according to teach-in mode.
• Now enable the teach-in mode on the EVN SmartHome Wall
Thermostat+ by pressing and holding down the OK button.
• The antenna symboll ( ) is displayed, along with the
teach-in time remaining in seconds. The teach-in time
is 30 seconds.
• After teaching-in was successfull, the EVN SmartHome
Wall Thermostat+ switches into the standard opera41
ting mode.
11. Teaching-out of wireless components (UnL)
During operation with the EVN SmartHome Cube, the
EVN SmartHome Wall Thermostat end the other devices
are taught out via the local EVN SmartHome Software in
the respective room.
During operation without the EVN SmartHome Cube you
use the „UnL“ function in the menu in order to unteach devices that have been taught in at the EVN SmartHome Wall
Thermostat+ (e.g. EVN SmartHome Radiator Thermostat).
All radio components are untaught simultaneously.
To unteach, proceed as follows:
• Select the “UnL” menu item with the (+) and (-) buttons.
• Confirm the setting with the OK button.
• “ACC” will show on the display.
• Confirm with the OK button.
After the „UnL“ function all connection partners are deleted from the EVN SmartHome Wall Whermostat+ ; factory setting is not mandatory.
12. Display content during normal operation
During normal operation, the operating mode, weekday,
nominal temperature, time, radio synchronicity and switching periods are displayed.
The bars for switching periods of the week programme are
displayed for each time interval for which the nominal temperature is above the reduced temperature. An example
can be found in sec. 17.1.1.
42
13. Operating modes
(Auto / Manu / Holiday function / Boost)
You can choose between the operating modes auto, manu
and holiday function:
Auto: Week programme – automatic temperature control
according to stored week programme.
Manu: Manual operation – the temperature is set manually with the (+) and (-) buttons.
Holiday function ( ): Setting a temperature that
should be held until a fixed end time.
Boost ( BOOST ): Set boost funkction (sec. 17.5)
You can configure the settings for the operating modes
comfortly via the local EVN SmartHome Software, when
operating the system with EVN SmartHome Cube.
During operation without EVN SmartHome Cube, you
can change between the funtions by pressing the mode
button shortly.
If the operating mode or the temperature on one device in the room is changed, all taught-in radiator
thermostats will adjust to this setting.
14. Child-proof lock / operating lock ( )
Operation of the device can be locked to avoid unintended
changes through involuntary touch. To (de)activate the
operating lock proceed as follows:
• Briefly press the Mode and the OK button simultaneously.
• Once activated, the operating lock symbol ( ) is shown
on the display.
43
15. Setting heat pause (ON)
Battery life can be prolonged by switching the heating off
in summer. To achieve this, the valve is opened fully and the
calcification protection function continues to run.
If you operate your EVN SmartHome system with
a EVN SmartHome Cube, you can conveniently set the functions described in the following
chapters in the EVN SmartHome Software in
each room.
The following steps explain how these functions
are set when operating without EVN SmartHome
Cube. In combination with the EVN SmartHome
Cube these functions are deactivated at the EVN
SmartHome Wall Thermostat +.
To activate proceed as follows:
• In manual operation (Manu) press the (+) button
until “ON” is shown on the display.
To end proceed as follows:
• Exit manual operation (Manu) or press the (-) button until the desired temperature is set.
16. Setting frost protection (OFF)
If the room does not need to be heated, the valve can be
closed. The valve is only opened if there is a risk of frost.
The calcification protection function continues to run. To
activate this, proceed as follows:
• In manual operation (Manu) press the (-) button until
“OFF” is shown on the display.
• To finish, exit manual operation (Manu) or press the (+)
button until the desired temperature is set.
17. Configuration menu (Menu)
(Operation without the EVN SmartHome Cube)
44
Settings can be changed in the Configuration menu when
using EVN SmartHome without Cube. The menu can be
accessed by pressing the Mode button for more than 3
seconds.
The menu items are selected with the (+) and (-) button and
confirmed with the OK button. A subsequent pressing of the
Mode button reverts to the previous level. The menu closes
automatically after 60 seconds of inactivity.
dAt:
Change time and date (sec. 7.)
UnL:
Teach-out wireless components (UnL) (sec.
11.)
Pro:
Set the week programme (sec. 17.1)
t-d:
Switch time and date display (sec. 17.2)
S-A:
Change display of nominal and actual value
(sec. 17.3)
45
bOS:
Set valve opening and length of “Boost” function (sec. 17.5)
Set holiday function (sec. 17.6)
dEC:
Set valve protection function (sec. 17.7)
AEr:
Set “Open window temperature” for automatic
temperature decrease during airing (sec. 17.8)
tOF:
Set temperature offset (sec. 17.9)
rES:
Reset factory settings (sec. 18.)
17.1 Setting the week programmes(Pro)
In the week programme, for each weekday up to 6 heating
phases (13 change settings) can be set separately. The
programming is carried out for the days chosen, whereby
temperature settings have to be set for the entire period
between 00:00 and 23:59.
• Press the Mode button for more than 3 seconds.
The display will show “Pro”.
• Confirm the setting with the OK button. The display
will show “dAy”.
• Select an individual weekday, all weekdays, the
weekend or the entire week with the (+) and (-) buttons (i.e. weekdays).
• Confirm setting with the OK button.
• Now set the end time of the first time period (i.e.
6:00 am for the period 0:00 – 6:00 am).
• Confirm setting with the OK button.
• With the (+) and (-) buttons select the chosen temperature for the previously chosen time period (i.e.
17.0°C).
• Confirm setting with the OK
button.
46
• Repeat this procedure until temperatures are stored
for the entire period between 0:00 and 23:59.
In Auto mode the selected week programme will be automatically adopted by all taught-in EVN SmartHome Radiator Thermostats.
In Auto mode the temperature can be changed at any
time with the (+) and (-) buttons or comfort ( ) and reduced temperature ( ) buttons. The adjusted temperature
will be maintained until the next phase in the timer programme starts.
Programming directly on the device is only possible,
if the device is not taught-in to the EVN SmartHome
Cube.
17.1.1 Week programmes: Examples
For each day of the week up to 6 heating phases (13
change settings) with individual temperature settings can
be saved with the Wall Thermostat. The factory settings
are as follows:
Monday - Friday:
from 00:00 to 06:00 from 06:00 to 09:00 from 09:00 to 17:00 from 17:00 to 23:00 from 23:00 to 23:59 17.0°C
21.0°C
17.0°C
21.0°C
17.0°C
Saturday and Sunday:
from 00:00 to 06:00 17.0°C
from 06:00 to 22:00 21.0°C
from 22:00 to 24:00 17.0°C
47
In the display, bars for heating phases are displayed
whenever the set temperature for the period is higher than the set reduction temperature.
If you want a room (e.g. the bathroom) to also be heated
during lunchtime the programming could look as follows:
Monday - Sunday:
from 00:00 to 06:00 from 06:00 to 09:00 from 09:00 to 12:00 from 12:00 to 14:00 from 14:00 to 18:00 from 18:00 to 22:00 from 22:00 to 23:59 15.0°C
23.0°C
17.0°C
19.0°C
17.0°C
21.0°C
15.0°C
17.2 Switching time/day (t-d) display
The factory setting will show the time on the display. In the
menu the display can be switched to the date.
• Open the configuration menu by pressing the menu button for more than 3 seconds.
• Select the “t-d” menu item with the (+) and (-) buttons and
confirm with the OK button.
• Now set the format you want to show on the display
(date and time will switch on the display) with the (+)
and (-) buttons.
• Confirm setting with the OK button.
•
•
17.3 Switching nominal/actual temperature (S-A)
In the factory settings, the display will show the nominal
temperature. In the configuration menu, you can change
48
the display setting from nominal to acutal temperature.
• Open the configuration menu by pressing the menu button.
• Select the (S-A) menu item with the (+) and (-) buttons
and confirm with the OK button.
• Now set the format you want to show on the display („SEt“
for the nominal temperature and „ACt“ for the actual temperature) with the (+) and (-) buttons.
• Confirm setting with the OK button.
If the actual temperature is selected,
the display will disbplay „SEt“ for 5
seconds on change of the nominal
temperature (or on change of mode).
Afterwards, the display automatically
changes back to actual temperature.
17.4 Comfort and reduced temperature (
)
The comfort ( ) and reduced ( ) temperature buttons
make switching between comfort and reduced temperature
simple and user friendly. The factory setting for the comfort
temperature is 21.0°C and the reduced temperature 17.0°C.
When using EVN SmartHome without Cube, the comfort
and reduced temperature can be changed via corresponding buttons as follows:
• Press the comfort ( ) / reduced ( ) temperature button
for a few seconds.
• The display shows the respective symbol and the corresponding comfort or reduced temperature.
• Change the temperature with the (+) and (-) buttons.
• Confirm setting with the OK button.
49
Even in Auto mode the temperature can be changed with
this button at any time. However, the change will only be
maintained until the next phase the timer programme starts.
17.5 Set boost function ( BOOST , bOS)
The Boost function can create the sensation of a rise in
room temperature to the human body. When activated the
radiator valve will immediately be adjusted to 80% valve
opening for 5 minutes (factory setting). The heating of a
room takes longer than 5 minutes but the radiated heat
from a radiator can be sensed immediately.
• To activate the Boost function press the OK button. Once
the Boost time has completed the Wall Thermostat will
switch back to the previously active mode (Auto/Manu)
and the previously set temperature.
• The Boost function can be deactivated at any time by a
renewed press of the OK button.
The count-down in second intervals of the remaining functioning time (e.g “300” to “000”) and BOOST will be shown
on the display.
The length and valve opening of the Boost function can be
individually adjusted as follows:
• Press the Menu button for more than 3 seconds.
• Select the “bOS” menu item with the (+) and (-) buttons.
• Confirm the setting with the OK button.
• Use the (+) and (-) buttons to set the duration of the Boost
from 0 to 30 minutes (0, 5, 10, 15, 20, 25, 30 mins.). Choosing 0 will deactivate this function.
50
• Confirm the setting with the OK button.
• Subsequently set the valve opening between 0 and 100%
in 5% increments with the (+) and (-) buttons. The larger
the valve opening, the higher will be the heat emitted
by the radiator.
• Confirm the setting with the OK button.
If a long “Boost period” and a large valve opening
have been set the radiator can get very hot. After
changing the factory setting check that the radiator
is not heated excessively.
The radiant heat will have no immediate effect if the
radiator is covered up (e.g. by a settee).
If the duration of the “Boost function” is set so that 999
seconds are exceeded (e.g. via the EVN SmartHome
Cube) the display will show the duration in minutes.
17.6 Setting the holiday function (
)
If you want to maintain a fixed temperature during your holidays or a party the holiday function can be used.
• Briefly press the Mode button repeatedly until the suitcase symbol ( ) appears on the display.
• Set the end time until which you want the temperature
to be held.
• Confirm the setting with the OK button.
• Set the end date until which you want the holiday function to be set.
• Confirm the setting with the OK button.
• Set the temperature and press OK. The display will flash
to confirm.
51
The set temperature will remain until the set end time. Afterwards the EVN SmartHome wall thermostat will switch to Auto
mode. Radio control commands like those from a window
contact or the weekly de-scaling run will still be performed.
17.7 Setting valve protection function (dEC)
To prevent the build-up of lime scale in the valve a so called
“de-scaling run” will be performed weekly for the radiator
thermostats. You can change the set time for this function
(factory setting: Saturday, 12:00 p.m.) as follows:
• Press the Menu button for more than 3 seconds.
• Select the “dEC” menu item with the (+) and (-) buttons.
• Confirm the setting with the OK button.
• Select the weekday with the (+) and (-) buttons.
• Confirm the setting with the OK button.
• Select the time with the (+) and (-) buttons.
• Confirm the setting with the OK button.
While the “de-scaling run” is performed the display will
show “CAL”.
17.8 Open window function / airing (
, AEr)
During the airing of a room the EVN SmartHome Wall Thermostat+ will automatically reduce the room temperature to
save heating costs. Meanwhile, in this phase the display of
the EVN SmartHome Wall Thermostat+ and all taught-in
devices will show the open window symbol ( ).
Combined with a EVN SmartHome Window Sensor the
opening and closing of a window will be detected time-accurate. The temperature will only be reduced to the factory setting of 12° C while the window is opened. Once the
52
EVN SmartHome Window Sensor registers the closing of
the window, all components installed in the room will be
reset to the previous mode.
To change the reduced temperature setting proceed as
follows:
• Press the Mode button for more than 3 seconds.
• Select the “AEr” menu item with the (+) and (-) buttons.
• Confirm the setting with the OK button.
• Set the temperature with the (+) and (-) buttons.
• Confirm the setting with the OK button.
17.9 Setting the offset temperature (tOF)
As the temperature is measured on the room control unit the
temperature distribution can vary throughout a room. To
adjust this, a temperature offset of ±3.5°C can be set. If a
nominal temperature of e.g. 20°C is set at the room control unit but the room presents with only 18°C an offset of
-2.0°C needs to be set.
• Press the Menu button for more than 3 seconds.
• Select the “tOF” menu item with the (+) and (-) buttons.
• Confirm the setting with the OK button.
• Set the offset temperature with the (+) and (-) buttons.
• Confirm the setting with the OK button.
18. Teach-out / Reset (rES)
The initial state of the EVN SmartHome Wall Thermostat+
can be restored manually, e.g. to teach-in a single room
solution to a EVN SmartHome Cube or to re-install an incorrectly operating system. Restoring the initial state deletes all settings and information about taught-in devices.
53
Before you reset the EVN SmartHome wall thermostat to the factory settings, first delete the device from
the EVN SmartHome software when operating with
the EVN SmartHome Cube.
Before you teach-in a single room solution with a
EVN SmartHome Wall Thermostat + to a EVN
SmartHome Cube, you must reset all devices to the
initial state.
• Press the Menu button for more than 3 seconds.
• Select the “rES” menu item with the (+) and (-) buttons.
• Confirm the setting with the OK button.
• The display will show “ACC”, confirm restored factory
settings with the OK button.
19. Information about radio operation
Radio transmission is performed on a non-exclusive transmission path, which means that there is a possibility of interference occurring. Interference can also be caused by
switching operations, electrical motors or defective electrical devices. The range of transmission within buildings can
differ greatly from that available in the open air. Besides the
transmitting power and the reception characteristics of the
receiver, environmental factors such as humidity in the vicinity have an important role to play, as do on-site structural/
screening conditions. eQ-3 Entwicklung GmbH hereby declares that this device complies with the essential requirements
and other relevant regulations of Directive 1999/5/EC. You
can find the full declaration of conformity at www.eQ-3.de.
If a room control unit is taught-in to the EVN
SmartHome LAN Gateway the configuration menu
on the device will be locked. You can still restore the
factory settings:
• Remove a battery and wait for 60 seconds.
• Press and hold down reduce ( ), OK and the - button
simultaneously and insert the battery at the same time
• When „rES“ appears on the display, the reset was performed and the buttons can be released.
• You can now start to make the setting.
54
55
20. Remedy
21. Technical data
Error code
on the display
Problem
Solution
Supply voltage:
3V
EVN SmartHome. current consumption:
100 mA
Battery
symbol
( )
Battery voltage
too low
Replace batteries
Batteries:
2x LR6 batteries
Battery life:
2 years approx.
Display:
LCD
F4
EVN
SmartHome
Cube already
taught-in
Receiver frequency:
868.3 MHz
Typical open air range:
100 m
Receiver class:
SRD Class 2
Method of operation:
Type 1
Degree of protection:
IP20
Components that can
be taught-in:
1 EVN SmartHome Cube,
8 EVN SmartHome Radiator
Thermostats;
8 EVN SmartHome Window
Sensors
Housing dimensions:
86 x 86 x 21.5 mm
(W x H x D)
Ambient temperature
(+)5 to (+)55°C
Make sure the device
is no longer taughtin to the Cube (in the
software) and perform
a reset. Then you can
teach-in the device
again.
F5
Temperature
sensor defective
Replace device
Slowly flashing antenna symbol
Connection to
taught-in EVN
SmartHome
components
lost
Check the power supply and the batteries
of taught-in EVN
SmartHome components
Quickly
flashing
antenna
symbol
Duty cycle limit
reached
The device can resume radio communication after a waiting
time of approx. one
hour
56
Subject to technical changes.
57
58
59
60