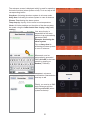
1
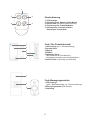
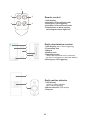
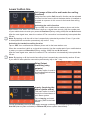
Important note: Set the ON/OFF switch to ON! (In this way, the integrated Li-ion battery pack is charged and the emergency supply function is activated, which automatically switches over from mains to battery operation in case of a power failure.) In this way, the sabotage protection is activated as well, i.e. the siren of the alarm system will sound now! Place the base station on the wall support and make sure that the spring of the sabotage button is pressed down such the siren is switched off! Now, carefully pull the base station downwards. The base station is now operable: The GSM signal indication flashes and the symbol Base station deactivated lights up. Sensors The two remote controls, the door/window contact and the radio motion detector included in the scope of delivery are already coupled to the alarm system and are thus immediately operable. (If you wish to use additional (optional) sensors, these must first be registered in the base station (refer to page 38)). Remote control Thanks to the remote control, the following functions can be switched: Press the key for activating the alarm system (off-site mode). Press the key for activating the alarm system (at-home mode). Press the key for deactivating the alarm system or for switching off the alarm signal. Press the key for initiating an emergency call. Emergency call function: By pressing the emergency key, the siren sounds and an automatic notification is transmitted via phone call (transmission of the siren signal) or SMS (predefined text: (0001) Alarm System:00 Zone Help Alarming) to a previously programmed receiver phone number (max. 5 numbers). The emergency call function is permanently activated and cannot be switched off: The alarm is immediately activated (a delay time cannot be set) and is also triggered when the system is deactivated! Installation of the door/window contact The door/window contact consists of two components the magnet and the transmitter unit. The transmitter unit is attached to the door or window frame using the double-sided adhesive tape or the 2 screws included in the scope of delivery, the magnet is attached with adhesive tape to the door/window (refer to drawing). Note: Please consider that the transmitter unit is equipped with a magnetic sensor on the righthand side (reed contact). For this reason, the magnet can only be mounted on the right-hand side of the transmitter unit. Make sure that the magnet is precisely aligned (parallel to the transmitter unit, refer to drawing), the maximum distance between magnet and transmitter unit amounts to 10 mm. 28